1
SERVICE MANUAL
AHAH-1212-01.03
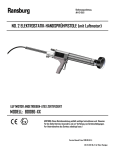
NO. 2 PROCESS HANDGUN UNIT
AIR MOTOR DRIVENDRIVEN-ATEX APPROVED
MODEL: 8008680086-XX
IMPORTANT: Before using this equipment, carefully read
SAFETY PRECAUTIONS, starting on page 1, and all instructions
in this manual. Keep this Service Manual for future reference.
Service Manual Price: $30.00 (U.S.)
AHAH-1212-01.03 No. 2 Air Motor Handgun
NOTE: This is a release with some changes of this manual. Any future revisions will be listed in the rear
appendix of this manual.
AHAH-1212-01.03 No. 2 Air Motor Handgun
2
CONTENTS
PAGE
SAFETY:
4-7
SAFETY PRECAUTIONS ...........................................................................................................4
HAZARDS / SAFEGUARDS........................................................................................................5-7
INTRODUCTION:
7-12
THE PROCESS ........................................................................................................................ 8
EUROPEAN ATEX DIRECTIVE 94/9/EC ……………………………………………………………………..9……………………………………………………………………..9-10
SPECIFICATIONS .................................................................................................................... 11
GUN FEATURES...................................................................................................................... 12
INSTALLATION:
9-14
PREPRE-INSTALLATION REQUIREMENTS.......................................................................................13
SAFEGUARDS..........................................................................................................................13
EQUIPMENT INSTALLATION .....................................................................................................1313-20
OPERATION:
2121-27
PROCEDURES ........................................................................................................................ 2121-26
GUN ELECTRICAL OUTPUT ..................................................................................................... 2626-27
MAINTENANCE:
2828-48
EFFECTS OF SOLVENTS ..........................................................................................................2828-29
SCHEDULES ............................................................................................................................30
TEST PROCEDURES ................................................................................................................3030-31
FILTER CLEANING……………………………………………………………………………………………… 32
REPAIR PROCEDURES ............................................................................................................3232-34
CABLE / MOTOR ASSEMBLY ....................................................................................................3434-35
HANDLE ASSEMBLY.................................................................................................................3535-39
BARREL ASSEMBLY.................................................................................................................4040-43
TROUBLESHOOTING GUIDE ....................................................................................................4545-48
PARTS IDENTIFICATION:
4949-60
No. 2 APPLICATOR PARTS .......................................................................................................49
CABLE/MOTOR PARTS LIST…………………………………………………………………………………. 50
HANDLE ASSEMBLY ................................................................................................................51
NEEDLE VALVE ASSEMBLY PARTS………………………………………………………………..……… 52
BARREL ASSEMBLY ................................................................................................................53
FLUID HOSE/AIR HOSE PARTS ................................................................................................5454-55
FEED TUBE/BRUSH PARTS......................................................................................................56
FLUID FILTER SPARE PARTS ...................................................................................................57
BELL PARTS AND ASSEMBLIES ...............................................................................................58
9050 SPARE PARTS LIST .........................................................................................................59
RECOMMENDED SPARE PARTS ..............................................................................................52
WARRANTY POLICIES:
61
LIMITED WARRANTY .............................................................................................................. 61
3
AHAH-1212-01.03 No. 2 Air Motor Handgun
SAFETY PRECAUTIONS
Before operating, maintaining or servicing any
Ransburg coating system, read and understand all of
the technical and safety literature for your Ransburg
products. This manual contains information that is important for you to know and understand. This information relates to USER SAFETY and PREVENTING
EQUIPMENT PROBLEMS. To help you recognize this
information, we use the following symbols. Please pay
particular attention to these sections.
A WARNING! states information to alert you to a situation
that might cause serious injury if instructions are not followed.
A CAUTION! states information that tells how to prevent
damage to equipment or how to avoid a situation that
might cause minor injury.
A NOTE is information relevant to the procedure in progress.
While this manual lists standard specifications and
service procedures, some minor deviations may be
found between this literature and your equipment. Differences in local codes and plant requirements, material delivery requirements, etc., make such variations
inevitable. Compare this manual with your system installation drawings and appropriate Ransburg equipment manuals to reconcile such differences.
!
Warning
This manual MUST be read and thoroughly understood by ALL personnel who operate, clean
or maintain this equipment! Special care should
be taken to ensure that the WARNINGS and
safety requirements for operating and servicing
the equipment are followed. The user should be
aware of and adhere to ALL local building and
fire codes and ordinances as well as NFPANFPA-33 ,
EN 50 176 SAFETY STANDARDS, prior to installing, operating, and/or servicing this equipment.
WARNING
!
Warning
The hazards shown on th
the following page may
occur during the normal use of this equipment.
Please read the hazard chart beginning on page
5.
Careful study and continued use of this manual will provide a better understanding of the equipment and process, resulting in more efficient operation, longer troubletroublefree service and faster, easier troubleshooting. If you do
not have the manuals and safety literature for your
Ransburg system, contact your local Ransburg representative or Ransburg.
The user MUST read and be familiar
with the Safety Section in this manual and the Ransburg
safety literature therein identified.
AHAH-1212-01.03 No. 2 Air Motor Handgun
4
SAFETY PRECAUTIONS
AREA
HAZARD
SAFEGUARDS
Tells where hazards
Tells what the hazard is.
Tells how to avoid the hazard.
may occur.
Spray Area
Electrostatic Arcing
Never operate the spray gun without properly
grounding the following.
A. Operators
Operators must be grounded. Rubber soled
insulating shoes should not be worn.
Grounding leg straps may be used.
Operators must maintain contact with the
handle of the gun. If work gloves are used, the
palm section should be cut out.
Operators must remove from themselves all
metal objects that are not grounded.
NOTE: REFER TO NFPANFPA-33/EN 50 176 REGARDING OPERATOR GROUNDING.
B. Parts being sprayed. Resistance between the
part and a grounded conveyor must not exceed
1 megohm.
C. Every metal and conductive object in the spray
area. This includes the booth, parts hangers,
fire extinguishers, conductive flooring, etc.
Grounded conductive flooring must be provided in
the spray area.
Turn off voltage at the power supply before flushing
out, cleaning, or removing any parts from the gun.
Provide proper protection for waterborne supply
systems.
Never install a spray gun into a fluid system using an
isolated solvent supply.
Always discharge Waterborne system capacitance
prior to servicing.
Do not touch gun electrode while gun is energized.
5
AHAH-1212-01.03 No. 2 Air Motor Handgun
SAFETY PRECAUTIONS
AREA
HAZARD
SAFEGUARDS
Tells where
Tells what the hazard is.
Tells how to avoid the hazard.
Fire Hazard
Fire extinguishing equipment must be present in the
hazards may occur.
Spray Area
spray area and tested periodically.
Improper or inadequate operation
and maintenance procedures will Spray areas must be kept clean to prevent the
cause a fire hazard.
accumulation of combustible residues.
Protection against inadvertent
arcing that is capable of causing
fire or explosion is lost if any safety
interlocks are disabled during
operation. Frequent power supply
shutdown indicates a problem in
the system requiring correction.
Smoking must never be allowed in the spray area.
The high voltage supplied to the atomizer must be
turned off prior to cleaning, flushing, or maintenance.
When using solvents for cleaning:
Those used for equipment flushing should have flash
points equal to or higher than those of the coating
material.
Those used for general cleaning must have flash
points at least 5°
5 C (9°
(9 F.) above ambient temperature. It is the end users responsibility to insure this
condition is met.
Spray booth ventilation must be kept at the rates
required by local codes and national codes. In
addition, ventilation must be maintained during
cleaning operations using flammable or combustible
solvents.
Electrostatic arcing must be prevented.
Test only in areas free of combustible material.
Testing may require high voltage to be on, but only as
instructed.
NonNon-factory replacement parts or unauthorized
equipment modifications may cause fire or injury.
If used, the key switch bypass is intended for use only
during setup operations. Production should never be
done with safety interlocks disabled.
Never use equipment intended for use in waterborne
installations to spray solvent based materials.
The paint process and equipment should be set up
and operated in accordance with NFPANFPA-33, NEC, and
EN Health and Safety requirements.
AHAH-1212-01.03 No. 2 Air Motor Handgun
6
SAFETY PRECAUTIONS
AREA
HAZARD
SAFEGUARDS
Tells where hazards
Tells what the hazard is.
Tells how to avoid the hazard.
Improper operation or maintenance
may create a hazard.
Personnel must be given training in accordance with
the requirements of NFPANFPA-33/EN 50 176.
may occur.
General Use and
Maintenance
Personnel must be properly trained Instructions and safety precautions must be read and
understood prior to using this equipment.
in the use of this equipment.
Comply with appropriate local, state, and national
codes governing ventilation, fire protection, operation
maintenance, and housekeeping.
General Use and
Maintenance
Use of hand tools may cause
cumulative trauma disorders
(CTD's). CTD's or musculoskeletal
disorders, involve damage to the
hands, wrists, elbows, shoulders,
neck and back. Carpal tunnel
Risk is reduced by avoiding or lessening the listed
hazards.
CTD's can also be caused by such activities as
sewing, golf, tennis and bowling, to name a few.
syndrome and tendinitis (such as Pain, tingling, or numbness in the shoulder, forearm,
wrists, hands, or fingers, especially during the night,
tennis elbow or rotator cuff
syndrome) are examples of CTD's. may be early symptoms of a CTD. Do not ignore
them. Should you experience any such symptoms,
CTD's when using hand tools,
tend
see a physician immediately. Other early symptoms
to affect the upper extremities.
may include vague discomfort in the hand, loss of
Factors which may increase the manual dexterity, and nonnon-specific pain in the arm.
risk of developing a CTD include: Ignoring early symptoms and continued repetitive
use of the arm, wrist and hand can lead to serious
1. High frequency of the activity. disability.
2. Excessive force, such as
gripping, pinching or pressing
with the hands and fingers.
3. Extreme or awkward finger,
wrist or arm positions.
4. Excessive duration of the
activity.
5. Tool vibration.
6. Repeated pressure on a
body part.
7. Working in cold temperatures.
7
AHAH-1212-01.03 No. 2 Air Motor Handgun
INTRODUCTION
This is a method of applying electrostatically atomized coating material. The No. 2 Process
Handgun system applies a high voltage, DC
negative charge to the applicator bell, creating
an electrostatic field between the bell and the
target object. The target is electrically grounded
through its support (which may be stationary or
moving) or through an electrical connection to a
known earth ground.
A regulated pressure fluid system delivers coating material to the air motor driven bell when the
gun is triggered. There, the fluid travels across
the face of the rotating bell and is charged. The
fluid is atomized at the edge of the bell forming
a fine mist, which under the influence of the
electrostatic field is attracted to and deposited
on the target object. The forces between the
charged particles and the grounded target are
sufficient to turn most normal overspray around
and deposit it on the rear surface of the target.
Therefore, most of the spray is deposited and
overspray is controlled. This process makes the
No. 2 Process Handgun one of the most efficient electrostatic spray products on the market.
The No. 2 Process Handgun applies a DC negative charge to the coating materials at the point
of atomization. The electrostatic charge allows a
more efficient, uniform application of coating
material to the front, edges, sides, and back of
products, making it highly suitable for applying
coatings to a variety of surface configurations;
large targets, tubular products, small parts,
fencing, etc. Because it is a grounded fluid system, it is highly suitable for applying a wide
AHAH-1212-01.03 No. 2 Air Motor Handgun
range of solvent reduced coatings such as
enamels, epoxies, etc.
One of the many features of the No. 2 Process
Handgun is that the electrical discharge, which
is available from the resistive charging brush, is
limited to the optimum combination of safety
and efficiency. This discharge energy is confirmed by Atex type testing found to be below
the .24 mJ energy level thus may be used safely
in Zone 1 and Zone 2 applications.
The No. 2 Process Handgun system includes
the Hand Gun, the High Voltage Power Supply,
the High Voltage Cable, Air Hose and Fluid
Hose.
This unit contains the 2098720987-XX No. 2 handgun
air motor version and the 8010280102-31X 9060 power supply along with several required accessories. Below illustrates the ordering matrix available .
8008680086-AB No. 2 air motor unit
A is
-1 for users with plug style 1
-2 for users with plug style 2
-3 for users with plug style 3
B is
-1 for 25’ (7.6 m) high voltage cable
-2 for 36’ (11 m) high voltage cable
-3 for 50’ (15.2 m) high voltage cable
-1
-2
-3
USA
EUROPE
CHINA
8
INTRODUCTION
EUROPEAN ATEX DIRECTIVE 94/9/EC, ANNEX II, 1.0.6
The following instructions apply to equipment covered placement parts of the equipment shall be fitted by
by certificate number Sira 12ATEX5006X:
suitably trained personnel in accordance with the
manufacturer's documentation.
The equipment may be used with flammable gases
and vapors with apparatus groups II and with temperature class T6.
The certification of this equipment relies upon the following materials used in its construction:
The equipment is only certified for use in ambient
temperatures in the range 0 °C to +40°
+40 C and should
If the equipment is likely to come into contact with
not be used outside this range.
aggressive substances, then it is the responsibility of
Installation shall be carried out by suitably trained the user to take suitable precautions that prevent it
personnel in accordance with the applicable code of from being adversely affected, thus ensuring that the
type of protection provided by the equipment is not
practice e.g. EN 6007960079-14:1997.
compromised.
Special conditions of the certificate require the power
supply to be located a minimum of 6.1 m (20’) out- Aggressive substances: e.g. acidic liquids or gases
side or away from the target being sprayed. It is the that may attack metals, or solvents that may affect
end users’ responsibility to insure this products spe- polymeric materials.
cial condition are met when equipment is installed
and used.
Suitable precautions: e.g. regular checks as part of
routine inspections or establishing from the material's
Inspection and maintenance of this equipment shall data sheets that it is resistant to specific chemicals.
be carried out by suitably trained personnel in accordance with the applicable code of practice e.g. EN Refer to "Specifications" in the "Introduction" section:
6007960079-17.
Repair of this equipment shall be carried out by suitable trained personnel in accordance with the applicable code of practice e.g. EN 6007960079-19.
•
•
All fluid passages contain stainless steel
or nylon fittings.
High voltage cascade is encapsulated with
a didi-electric oil.
Putting into service, use, assembling, and adjustment A recapitulation of the certification marking is detailed
of the equipment shall be fitted by suitably trained in the "Atex" section, on the next page, drawing numpersonnel in accordance with the manufacturer's doc- bers: 80108, 80082, 80083 and 80088.
umentation.
The characteristics of the equipment shall be detailed
Refer to the "Table of Contents" of this service manu- e.g. electrical, pressure, and voltage parameters.
al:
Installation
Operation
Maintenance
Parts Identification
The manufacturer should note that, on being put into
service, the equipment must be accompanied by a
translation of the instructions in the language or languages of the country in which the equipment is to be
used and by the instructions in the original language.
Components to be incorporated into or used as re9
AHAH-1212-01.03 No. 2 Air Motor Handgun
INTRODUCTION
No. 2 Air Motor Handgun with
9050 Control Unit —80086-80086--XX
--XX
Marking Definitions
Ex Certificate Number: Sira 12ATEX5006X
Sira = Notified Body performing ECEC-type examination
12 = Year of certification
ATEX = Reference to ATEX Directive
5 = Protection Concept Code (code 5 is titled Encapsulation)
006= Document serial number
X = Special conditions for safe use apply
8008380083-00 No. 2 Air Motor Label
Ex = Specific marking of explosive protection
II = Equipment Group hazardous area characteristics
2 = Equipment Category
Note: (2) indicates that the equipment can be
connected to Group 2 equipment although only
to be used/installed in a safe area only
G = Type of explosive atmosphere (gases, vapors, or mists)
8008280082-00 9060 Supply Label
EEx 0.24mJ.–
0.24mJ.–- The No. 2 air motor handgun is
suitable for use in electrostatic spraying installations complying with EN 50 176 as they are a
Type A class with a discharge energy limit of
0.24mJ. The special conditions on the certificate
as noted by the “X” requires the end user locate
the 9060 Control unit outside the hazardous area
for safe usage.
8008880088-00 9060 Supply Label
8010880108-00 9060 Supply Label
AHAH-1212-01.03 No. 2 Air Motor Handgun
10
SPECIFICATIONS
Environmental
Length:
Weight:
/ Physical
Mechanical
Fluid
Input Pressure :
3.45 bar (50 psig)
(maximum)
Air
Input Pressure:
6.90 bar (100 psig
(maximum)
Fluid
Delivery
(maximum)
508 cm (20 inches)
1588 g (56 ounces)
2-3/4" Bell
Electrical
Input Voltage:
Rate:
Size: 75 cc/minute
(2.5 fl oz/minute)
110 or 220 VAC
4" Bell:
(4 fl oz/minute)
50/60 Hertz
Output Voltage:
90 kV DC (negative)
Current:
3030-50 microamperes
(operating)
120 cc/minute
Application Rate: (maximum)
2-3/4" Bell:
5-7 ft2/minute
(.46(.46-.65 m2/minute)
SCI:(From Brush)
115 microamperes
(maximum)
Paint Resistance:* .1 to 1 MΩ
M
*Measured with Ransburg 7665276652-03 paint Meter
11
4" Bell:
1010-12 ft2/minute
(.93(.93-1.11 m2 /minute)
Note: conversion 29.5 cc (ml) = 1 fluid oz
AHAH-1212-01.03 No. 2 Air Motor Handgun
UNIT FEATURES
ITEM
DESCRIPTION
ITEM
DESCRIPTION
DRIVE SHAFT AND SEAL
1
HANDLE ASS'Y.
7
2
TRIGGER
8
BARREL
3
TRIGGER ADJUSTMENT
9
AIR ONON-OFF SLIDE VALVE (9/16(9/16-18 TH’D.)
4
RESISTOR HOUSING
10
CABLE/AIR MOTOR ASS'Y.
5
CONTACT BRUSH
11
HV CABLE ASS'Y.
6
RIM ASS'Y.
12
FLUID INLET FITTING (9/16(9/16-18 L.H. TH’D.)
FIGURE 1 GUN FEATURES / MODEL 2098720987-XX
ITEM
DESCRIPTION
ITEM
DESCRIPTION
1
kV METER
8
kV SETPOINT/ADJUST BUTTONS
2
HIGH VOLTAGE ON INDICATOR
9
AIR FLOW SWITCH CONNECTIONS
3
RESET BUTTON
10
HIGH VOLTAGE CABLE CONNECTOR
4
mA METER
11
FUSES
5
FAULT INDICATOR
12
GROUNDING LUG
6
ONON-OFF SWITCH
13
AC INLET RECEPTACLE
14
DOOR KEY LOCK
7
“ONE TOUCH” kV SETPOINT BUTTON
FIGURE 2 9060 POWER SUPPLY FEATURES / MODEL 8010280102-31X
AHAH-1212-01.03 No. 2 Air Motor Handgun
12
INSTALLATION
PREPRE-INSTALLATION
REQUIREMENTS
The following guidelines can be used:
•
1. Provide approved electrical wiring to the power
supply. The 9060 power supply must be located a
minimum of 6.1m (20’) outside of the hazardous
spray area.
2. Make sure the operating location has adequate
grounding facilities, such as electrical conduit, steel •
building columns, metal water pipes, or other earth
grounded objects.
3. Furnish a paint pressure pot with air regulator (or
other accepted pressure system). The regulator
MUST have a reliable control, with a recommended •
gauge range of 00-2.1 bar (0(0-30 psig).
4. Provide proper ventilation. (See "Safety" section of
this manual.)
5. Ensure that the target object to be coated and all
surrounding objects are grounded to a known, earth
ground by a separate ground wire attachment.
CAUTION
Do not use the power supply ground wire to ground
target objects. The targets objects must have separate
true earth ground for best efficiency.
SAFEGUARDS
When operating this equipment in the vicinity of
computers, word processors, and/or other electronic equipment, special care MUST be taken to
ensure that damage does not occur from electrical
energy discharges. (See Ransburg "Safety Literature" for further information regarding application.)
13
It is highly recommended, whenever possible, that ALL electronic components or
equipment be removed from the spray
area. This includes computer software
such as tapes, disks, diskettes, etc., located inside and/or around the spray area.
If the static shielding of a unit is NOT
KNOWN, all electronic components (such
as terminals, screens, and cables) should
be completely wrapped in aluminum foil
and grounded to a true earth ground.
When painting electrical control panels
or consoles, wrap all pushpush-buttons,
switches, meters, or pilot lights with
aluminum foil and ground to the panel
or other earth ground.
EQUIPMENT
INSTALLATION
WARNING
NEVER wrap the applicator, associated
valves and tubing, and supporting hardware in plastic to keep it clean. A surface charge may build up on the plastic
surface and discharge to the nearest
grounded object. Efficiency of the applicator will also be reduced and damage
or failure of the applicator's components
may occur.
WRAPPING THESE COMPONENTS IN
PLASTIC WILL VOID WARRANTY.
AHAH-1212-01.03 No. 2 Air Motor Handgun
INSTALLATION
Before attempting to install the equipment, ensure that all the necessary components are
available (see "Parts Identification" section of
this manual). In addition, read all the technical
and safety literature that is provided. If the literature is not available, contact your local
Ransburg Distributor where the equipment was
purchased.
WARNING
• The power source wiring and the power
supply connections to it MUST meet all local
fire and electrical code standards and comply
with all appropriate local and national health
and safety codes.
•
All power supplies MUST be grounded
to a known true earth ground before any
other connections are made or functions
performed. DO NOT use the power supply ground wire to ground the target objects (use LSME4000LSME4000-00 clamp assembly)!
Power Supply
(Refer to Figure 2)
3. After the power supply is grounded to a
suitable earth ground, the high voltage cable
may be connected. Prior to connection of the
high voltage cable 15 to 30 ml of 36143614-00
(supplied with applicator ) didi-electric oil
needs to be added to the power supply. Refer to figure 3 for illustration of where the oil
should be inserted.
4. Attach the female nut of the high voltage
cable to the male threads of the connection
of the power supply.
WARNING
•
Where the applicator is to be used
without a booth, the power supply
must located a minimum of 6.1 m
(20 feet) from the target being
sprayed.
•
The target Earth Ground and
Power Supply earth ground must
be separate earth ground connections.
•
Any hoses either air or fluid that
are user supplied must be rated
for the maximum pressures used
for this applicator.
1. The high voltage power supply MUST be located at least 6.1 m (20 feet) from the spraying operation. If a spray booth is used, the power supply
may be located 1.5 m (5 feet) from the nearest
opening and outside the booth .
(Refer to Figure 4)
2. If a line cord is used instead of a permanent
conduit connection, ensure the ground lead is
present on the plug. Ensure that the electrical outlet is properly wired by using the circuit tester
(20868(20868-00). Attach the green ground wire to a
proven, true earth ground (i.e., water pipe or electrical conduit).
Install the fluid filter (Item 6) to the applicator,
then to the fluid delivery hose. Attach one
end of the fluid hose to the adapter (Item 8)
(Refer to figure 4). This adapter has a 3/83/8-18
NPSM (F) for attachment to a suitable fluid
source. To meet various length requirements,
the hose fitting on one end has not been attached.
Fluid Hose
Figure 5 illustrates the assembly procedure
for attaching the loose fitting.
AHAH-1212-01.03 No. 2 Air Motor Handgun
14
INSTALLATION
Figure 3: DiDi-Electric Oil Installation
1
9060 Power Supply 8010280102-31X Connected to True Earth Ground
2
3
4
5
6
7
8
9
10
High Voltage Cable Connection to Power Supply
8008980089-25 Air Hose Connected to Air Flow Switch “OUT”
2098720987-XX #2 Air Motor Applicator
Earth grounded regulated paint supply
7693876938-02 Inline Fluid Filter
83408340-25 Fluid Hose
72447244-00 Adapter 9/169/16-18 LH (M) to 3/83/8-18 NPSM(F)
Regulated Air Source to Air Flow Switch “IN”
Earth Grounded Target
Figure 4: Equipment Installation Diagram
15
AHAH-1212-01.03 No. 2 Air Motor Handgun
INSTALLATION
NOTE
Ransburg supplies standard the 8008980089-25
(7.6 m, 25 ft.) air hose and 83408340-25 (7.6 m,
25 ft.) fluid hose standard with the 8008680086XX unit. Other hose lengths up to 30.5 m
(100 ft.) are also available as optional
lengths.
Air Hose
(Refer to Figure 6)
1. Connect the 9/169/16-18 thread to the applicator air inlet.
2. Connect the 3/8 NPS(F) fitting to the “out”
port of the flow switch of the poser supply.
Item # Description
4.5 mm (3/16”) Hex Key
1
2
Stem
3
Ferrule
4
Hose (Fluid or Air)
Figure 5: Air or Fluid Fitting Assembly Procedure
Air/Fluid Fitting Installation Procedure
1. Lubricate all fittings with dielectric grease.
2. Screw ferrule (item 3) counterclockwise onto
hose (item 4) until it bottoms, then back it off
approximately 3.2 mm (1/8”).
Item # Description
3/8 NPS(F) -To Flow Switch
1
2
9/169/16-18 to Applicator
Figure 6: Air Fitting Assembly Procedure
Installation Feed Tube, Bell,
Brush
1. Install the proper feed tube into the opening
in the applicator. See figure 7. Position the
tube at approximately as shown in the figure.
2. Insert the 8008480084-00 brush into the barrel.
Position it as shown in figure 7.
3. Install nut over union stem and start the stem
into the hose.
4. Using a 4.5 mm hex key (3/16(3/16-inch ), screw
the union stem into the hose until it bottoms
against the ferrule.
AHAH-1212-01.03 No. 2 Air Motor Handgun
16
INSTALLATION
Item # Description
Feed Tube 37003700-00 for 4” Bell
1
2
Feed Tube 63356335-00 for 2 3/4”
Bell
8008580085-00 Brush
Figure 7: Initial Position of Feed Tube and Brush
3. Install the bell over the shaft. Hold the shaft
of the applicator and rotate the bell onto the
shaft until the bell is completely seated. Align
the set screw and the flat on the shaft. Tighten
the set screw at the bell hub hand tight. (Refer
to Figure 8)
Item # Description
No. 2 Motor Shaft
1
2
Shaft Locating Flat
3
Bell Set Screw
4
Bell
Figure 8: Installing Bell on Shaft
4. ReRe-position the feed tube in the bell cavity
at approximately the 4 to 5 o’clock position.
The feed tube should NOT rub on the bell. Adjust the feed tube if necessary, by rotating it or
sliding it forward or backward in the barrel.
WARNING
Replacing the plastic set screw with one of
conductive material (metal) will cause a
hazardous condition to exist, capable of
producing an electrical discharge possible
of sparking a fire. In all cases use the plastic screw provided or provided as a spare
part.
17
AHAH-1212-01.03 No. 2 Air Motor Handgun
INSTALLATION
NOTE
The bell and feed tube MUST be
matched to ensure proper fluid feed into
the bell cavity. The following chart will
assist in selecting the proper bell and
feed tube combination:
Bell Size Feed Tube # Position of Tube
2 3/4 “
63356335-00
@2 o’clock
4”
37003700-00
@4@4-5 o’clock
WARNING
To meet the Atex type test standards, the
brush required design changes. It is the end
users’ responsibility to use only the 8008580085-00
brush that has the identification groove in the
shaft of the brush. Use of the 36953695-00 brush
will invalidate all approvals of this product.
Figure 9 illustrates the proper brush that must
be used.
Item # Description
36951
3695-00 Old Brush —No Groove
2
8008580085-00 Brush
3
Identification Groove
Figure 9: Atex Approved Brush Identification
AHAH-1212-01.03 No. 2 Air Motor Handgun
18
INSTALLATION
No. 2 Handgun Brush
Positioning and Wear
(Refer to Figure 10)
When installing the electrical contact brush (80085(8008500), it is important that it is properly positioned to provide LIGHT CONTACT with the bell conductive coating. Excessive contact pressure from the contact
brush will wear away the conductive coating or the
brush tip, causing poor electrical contact. The small
plastic pad at the tip of the brush arm should lightly
contact the black bell coating, not the wire. The wire
should never contact the coating. The tip of the brush
should not extend past the edge of the bell cup or into
the radius at the edge (see Figure 10).
The brush should normally have a slight curve to the
arm. The more pressure applied the lesser the curve
(see Figure 4). The tip of the brush assembly must
be inspected prior to each use for wear. When oneone-half
(1/2) of the plastic tip is worn away the brush assembly
should be replaced (see Figure 10).
Figure 1010-3: Brush and Feed Tube Positioning
Figure 1010-1: UnUn-Installed Brush Shape
Figure 1010-2: Brush Contact Position
19
Figure 1010-4: Brush Contact Area
AHAH-1212-01.03 No. 2 Air Motor Handgun
INSTALLATION
NOTE
When the radius portion of the brush
plastic tip is gone, the brush will need
to be replaced soon.
WARNING
When the gun switch is ON, the bell will
be rotating and high voltage will be activated. Steps MUST be taken to ensure grounding of personnel and
equipment for safety. Electrical shock
may occur if the equipment is NOT
grounded.
Item # Description
New Brush Tip
1
2
Worn Brush Tip
Figure 11: Brush Tip New and Worn
Paint
A proper paint mixture is essential to the
electrostatic operation. Due to the method of
electrostatic atomization the viscosity and
conductivity levels of the paint are important
to ensure proper application. Paint test equipment such as the test assembly (76652(76652-03)
for testing paint electrical resistivity, may be
purchased through your Ransburg distributor.
(See "Paint and Solvent Specifications" in the
"Appendix" section of this service manual.)
Most paint suppliers may be of assistance in
prepre-adjusting the paint for proper electrostatic
sprayability.
AHAH-1212-01.03 No. 2 Air Motor Handgun
20
OPERATION
PROCEDURES
Prior to operating the No. 2 Handgun, ensure
that the equipment is installed properly (see
"Installation" section of this service manual).
Observe and follow the safety requirements at
ALL times.
4. Turn the 9060 power “ON“ON-OFF” switch on
the front panel to the “ON” position as shown
in Figure 13. The unit will power up, but high
voltage will not be on at this point. because
the voltage is interlocked with the air flow to
the air motor through the air flow switch located in the power supply.
1. Inspect the rotating bell assembly to ensure
that it is clean and is not chipped. Replace or
clean the bell assembly when necessary.
2. Set the paint fluid pressure at 0.2 to 0.3 bar
(3 to 4 psi ). Adjust the pressure up or down for
the desired fluid delivery. Higher fluid pressure
may be needed with higher viscosity material,
longer hoses, or higher fluid deliveries.
Item #
1
2
3
Description
Power ‘ON - OFF” Switch
Flow Switch Fitting
HV on Indicator
Figure 13: 9060 Power “ON“ON-OFF” Switch
3. Set the slide valve switch on the applicator to
the “OFF” position as shown in Figure 12. The
Slide Valve will be pulled back against the inlet
air fitting.
5. Push the slide valve switch on the applicator
forward toward the applicator barrel. The air motor
will begin turning and voltage will be present at the
bell. The HV On indicator on the 9060 will illuminate when voltage is on. Figure 14 shows the
speed versus inlet air pressure with the applicator
triggered. This chart may be used to assist with
initial pressure settings .
6. Hold the No. 2 handgun perpendicular to, and
13 to 18 cm (4 to 7 inches ) from the part being
coated. Trigger the handgun and observe the atomization of the coating material.
CAUTION
Item # Description
Slide Valve1
Valve-”OFF” Position
2
Air Inlet Fitting
Figure 12: Slide Valve “Off” Position
21
The application process works best when the
bell is positioned perpendicular to the grounded target. Following this method avoids paint
wrapback onto the operator or nearby objects.
AHAH-1212-01.03 No. 2 Air Motor Handgun
OPERATION
Dynamic Pressure vs. Turbine Speed
Rotational Speed (RPM)
1000
900
800
700
600
500
400
300
200
0.30
0.40
0.50
0.60
0.70
0.80
0.90
1.00
Dynamic Pressure (bar)
Figure 14: Rotational Bell Speed Versus Dynamic Pressure
NOTE
The quality of atomization can be tested by
shooting a “donut” test pattern on a grounded
flat surface at approximately a 15.2 cm (6(6-inch)
target distance. Coarse atomization may be
caused by excessive fluid delivery (high fluid
pressure or wrong bell size) or improper electrical resistance of the coating material. Adjust parameters according to atomization quality and
results.
7. Pulling the applicator trigger to obtain material
flow, move the No. 2 handgun in a smooth horizontal or vertical line or in a smooth circular motion, maintaining a constant distance between
the target and the bell surface. (See Ransburg
manual "No. 2 Handgun Spray Techniques".)
AHAH-1212-01.03 No. 2 Air Motor Handgun
NOTE
For an accurate measurement of paint delivery with any paint being used, turn the
handgun motor OFF, and remove the bell.
Using a graduated cylinder or beaker and a
stopwatch, trigger the gun and collect the
fluid for one minute. Measure the paint volume collected to get fluid flow rate per minute. See maximum "Fluid Delivery Rate"
under "Specifications" in the "Introduction"
section of this manual.
8. Adjust the air pressure to the air motor to
achieve the desired atomization.
9. When complete, move the slide valve switch
to the off position. (Reference Figure 12)
10. Turn the power switch to the “Off” position
on the power supply.
22
OPERATION
Operations Near Computers or
Other Electronic Devices
For over 50 years, the No. 2 Process Handgun
has been the most widely used tool by the ononsite painting industry for the refinishing of office
furniture, office panels, lockers, school furniture,
and dozens of other items.
Quite often we are asked about the dangers
and possible damage to computers, phone systems, word processors, and electronically keyed
security systems when electrostatic painting is
done nearby.
Concerning those types of applications or any
microprocessor base equipment, the following
facts should be noted:
1. The No. 2 Process Handgun is not electroelectromagnetic. It is electrostatic (much like the static
from carpets or wool and synthetic clothing),
and works at an output of 90 kilovolts at 3030-50
microamperes current draw. (115 microamperes maximum short circuit current).
WARNING
All conductive objects in the area of
spray must be grounded to earth
ground. (Ref. EN 50 176, NFPANFPA-33)
2. Unlike xx-rays, electrostatic does not go
"through" objects.
If this is not feasible, they should be completely
wrapped in aluminum foil that is grounded to an
earth ground. This will create a "Faraday cage"
around the computerized device.
5. Electrical sparks of all types create an R.F.
energy (radio frequency) that may radiate
through the air and enter into electronic circuits.
The resulting damage is unpredictable.
6. Computer software such as tapes, disks,
diskettes, etc., should be removed from inside
of and from the immediately surrounding area
of any enclosures that are to be painted.
7. Lightning or electrostatic voltage sparking
into an A.C. circuit can create "spikes" or electrotro-magnetic pulse (EMP) that can cause unpredictable damage to electronic hardware.
8. Surge suppressors are available that may
help protect appliances from "spikes" of current
if the suppressor is in the AC line supplying the
appliance.
9. When painting any type of electrical control
panel or console it is generally not known if all
pushpush-button, switches, meters, or pilot lights
are properly grounded. In view of this, it is desirable to cover all of these items with aluminum foil which is grounded to the panel or another earth ground.
3. Some computers, phone systems, or word
processors are now shielded by the manufacturer against outside static.
10. All onon-site painting companies should have
adequate liability insurance to protect them in
the event of any real or perceived damage as a
result of their operations.
4. If the static shielding of a unit is unknown,
the keyboard, CPU (central processing unit),
monitor, or phone and its cable preferably
should be removed from the immediate painting area for protection of the device.
In view of the above unknown and possible uncontrolled conditions, Ransburg does not recommend the electrostatic spray painting of
computer cabinets, consoles, or painting in
close proximity to these devices.
23
AHAH-1212-01.03 No. 2 Air Motor Handgun
OPERATION
Shutdown
These steps are to be followed during a
shutdown for short periods such as breaks,
WARNING
BEFORE attempting any cleaning or
color change procedures, the high voltage
and the AC power to the power supply
MUST be turned OFF!
CAUTION
DO NOT soak the bell in solvent as this
may deteriorate its black conductive
coating. See Service Instruction
"Solvent Effects on #2 Handgun Bell /
Brush Wear" and "Paint and Solvent
Specifications" in the "Appendix" section of this manual.
CAUTION
The bell MUST be cleaned if the gun
will not be operated again within a
few minutes. If two component catalyzed paint is used, frequent bell
cleaning and flushing may be required. (See "Color Change" in the
"Operation" section.)
1. Release the trigger. Allow two to five seconds for the paint to quit flowing off the bell
then turn OFF the gun motor. Turn the power supply OFF (at the booth wall switch for
permanent installations or at the master
switch on the power supply for mobile operations).
2. Place the feed tube in the one o’clock position. Loosen the set screw on the bell hub.
Then hold the shaft collar with one hand and
turn the bell on the shaft with the other hand
as you pull it forward off the shaft.
3. Clean the bell with a soft brush
(nonmetallic) or cloth and a suitable solvent.
The bell MUST be cleaned if the spraying is
to be interrupted for more than a few
minutes.
AHAH-1212-01.03 No. 2 Air Motor Handgun
4. Dry the bell and reinstall it on the shaft. Re
-position the feed tube and contact brush.
End of Shift
These steps are to be followed during a shutdown for extended periods of time exceeding
one hour. Time may vary according to the
applications and material being used.
1. Release the trigger and allow the bell to
rotate until it is clear of paint. Then turn the
gun motor OFF.
2. Turn the power supply OFF. The power supply must be “OFF” to perform any cleaning or
maintenance.
3. Remove and clean the bell (follow the
steps under "Shutdown" in the "Operation"
section).
4. Place the gun (bell angled down) on the
gun support rack to prevent solvent and paint
from getting into the unit.
5. Flush the paint hose, gun, and feed tube
with solvent.
24
OPERATION
WARNING
BEFORE attempting any cleaning or
color change procedures, the high voltage
and the AC power to the power supply
MUST be turned OFF!
NOTE
The frequency of flushing depends
upon:
• Paint type
• Paint viscosity
• Whether the system is circulating or nonnon-circulating
•
Whether the paint system is
heated or not
•
Hours of use, etc.
1. Turn the gun motor to the “OFF” position by
moving the slide valve to the rearward position
(Ref. Figure 12). Release the paint pressure at
the pressure regulator and mount the gun on its
stand.
NOTE
Check the equipment frequently after the initial installation and establish flushing schedules based on the observed requirements.
Normally, the system should be flushed at
least once each day or per an eighteight-hour
shift. (See the paint supplier for recommendations regarding catalyzed paints).
6. Wipe the gun, cable, and the hose with a
rag and suitable mild solvent for the coating
being sprayed.
•
If your equipment has an individual
pressurized container and hose for each
paint and solvent, or individual hoses for
use with a pump, disconnect the gun.
•
When one pressure pot and a single
hose is used, replace the paint container with a solvent container.
•
If the hose is used with a pump, remove
the pump pickpick-up tube from the paint and
place it in a solventsolvent-filled container.
CAUTION
Never soak or submerge the assembled applicator is solvent of any kind.
Color Change
If the gun is to be flushed with solvent between colors (as when switching between two
incompatible colors or paints), turn ALL electrical power OFF and carefully follow the gun
cleaning and color change procedures as
outlined in the following steps.
25
2. Regulate the pressure to normal operating
setting (or high for faster cleaning) and use one
or two quarts of any suitable cleaning solvent
that is compatible with the paint being used.
3. Remove the gun from its stand and be sure
that the electric power is turned OFF. Position
the feed tube and the contact brush upward
and remove the bell from the gun by following
the steps outlined under "Shutdown" in the
"Operation" section.
AHAH-1212-01.03 No. 2 Air Motor Handgun
OPERATION
WARNING
Paints and solvents MUST ONLY be
flushed into earth grounded metal safety
containers.
4. Reposition the feed tube to the five o’clock
position and trigger the gun into a grounded
container until there is no evidence of paint in
the stream.
5. Release the trigger and remove the feed
tube. Wipe the feed tube thoroughly. Pull trigger to flush material trapped by feed tube ooring.
NOTE
•
Keep the barrel of the applicator angled
downward until the solvent is completely
drained out of it.
6. Release the trigger, replace the gun on the
stand, and release the fluid pressure. Reinstall the feed tube. Feed tube oo-ring may
swell from solvent and need regular replacement.
7. Connect the gun to the new paint supply,
set for normal operation, and apply pressure.
GUN ELECTRICAL
OUTPUT
Because the high voltage output of the No. 2
handgun affects the coating material atomization and the efficiency of the application, it is
important to ensure that the electrical portion of
the system is operating correctly. This can be
accomplished by performing a Short Circuit
Current Test (SCI). The normal SCI reading
should be between 80 to 115 microamperes
(.08 to .115 milliamperes). See "Gun Output
Test" in the "Maintenance" section.
Power Supply Microampmeter
The power supply, used with the 2098720987-XX No.
2 Handgun, is equipped with a microampmeter,
that can be used to indicate the total collective
current demand for the system (i.e., power supply, handgun, fluid line, and paint and target
distance). Under normal operating conditions
the meter should indicate between 5 and 50 microamperes (.005 to .05 milliamperes). Readings outside the range may indicate a possible
paint resistance and/or target distance problem,
or component failure. See the "Troubleshooting
Guide", the "Gun Output Test", or the "Gun
Short Circuit Current Test" in the "Maintenance"
section for troubleshooting procedures.
8. Trigger the gun for a few seconds to remove all of the solvent from it and the hose
(until paint flows from feed tube). Replace the
bell and reposition the feed tube (Item 12)
and the contact brush (Item 41).
9. Turn the gun motor and high voltage switch
ON and resume normal operation.
AHAH-1212-01.03 No. 2 Air Motor Handgun
Figure 15: 9060 Micro Amp Meter
26
OPERATION
Gun Short Circuit Current
(SCI) Test
1. Connect wire at contact brush to ground via
microampere meter.
WARNING
All paints and solvents must be purged
from the applicator prior to performing
these tests.
2. Activate applicator slide valve switch to spin
the air motor and initiate high voltage.
3. Read SCI on remote microampere meter:
SCI = 90 to 115 microamperes.
4. If SCI is low or high, see "Paint, High Voltage
& SCI Test Equipment" manual for SCI test procedure using test probe TETE-9898-01 Part number
76652.
Item # Description
1
9060 Digital µA Meter Readout
2
2098820988-XX High Voltage Cable
3
2098720987-XX No. 2 Handgun
4
Earth Ground Connection to Brush
5
Microamp Meter or 76652 to Earth Ground
Figure 16: No. 2 Handgun Short Circuit Current Test Diagram
27
AHAH-1212-01.03 No. 2 Air Motor Handgun
MAINTENANCE
EFFECTS OF SOLVENTS
•
No. 2 Handgun Bells
Do Not Soak the No. 2 Handgun Bells in any
solvent. Soaking will deteriorate the bell’s performance and void warranty.
Comprehensive testing conducted on the No. 2
Handgun bells has determined the effect of
cleaning bells in different solvents. The following will serve as a guideline for solvents selected for cleaning No. 2 Handgun bells.
•
No. 2 Handgun bells should never be
soaked in any solvent. Soaking will effect
the electrical properties of the bell and produce poor spray performance. Soaking will
also void any warranty of the bell.
Cleaning of the No. 2 Handgun bell with any of
the following solvents will have a harmful
effect on the bell's conductivity.
∗
∗
∗
∗
∗
Methyl Ethyl Ketone [MEK] (141(141-7878-6)
Acetone (67(67-6464-1)
Methylene Chloride (75(75-0909-2)
“Lacquer Thinner”
“Epoxy Reducers” that contain Ketones
Some solvent blends containing Glycol
Ether will not effect the electrical conductivity of the No. 2 Handgun bell, but do cause a
problem with pattern size, Glycol Ethers
leaves a conductive residue on the insulating hub of the bell, which leaks voltage from
the rim across the probe of the bell. This results in an enlarged center hole pattern and
decreased atomization. Some of the solvents are:
∗
∗
∗
•
Butyl Cellosolve (111(111-7676-2)
Methyl Cellosolve (109(109-8686-4)
Ethyl Cellosolve (110(110-8080-5)
To avoid problems with atomization and
achieve the maximum length of life for
the bells, the solvents suggested for
cleaning (not soaking) are:
∗
∗
∗
∗
∗
Toluene (108(108-8888-3)
Xylene (1330(1330-0202-07)
Mineral Spirits
SolvessoSolvesso-100
SolvessoSolvesso-150
NOTE
Acetone has become a very popular
solvent of use because of it's EPA status. This solvent should be avoided
when working with the No. 2 Handgun.
It not only effects the bell performance,
but also has a very low flash point ((-20o
C, -4° F). No. 2 Handgun bells should
NOT be cleaned in it and the use of
coatings containing Acetone should be
avoided.
AHAH-1212-01.03 No. 2 Air Motor Handgun
28
MAINTENANCE
No. 2 Handgun
NOTES
It is not advisable to soak the No. 2 Handgun in
solvent at any time. Most of the components of
the gun are designed to withstand exposure to
many different solvents. There are components
within the gun that will not withstand solvent exposure and will be destroyed by such exposure.
This manual will advise when it is safe to clean
components with solvent.
WARNING
When working with any solvent, do it in a
well ventilated area away from any ignition
sources. All heath and safety guidelines
recommended by the solvent manufacturer must be followed.
WARNING
The gun assembly should never be soaked in
solvent. If the gun is soaked in solvent, internal
components will be damaged. This could cause
injury to personnel and damage to equipment.
SOAKING THE GUN ASSEMBLY IN SOLVENT
WILL VOID WARRANTY.
Paint residue can be cleaned from the external
surfaces of the gun with nonpolar solvents and
solvents that do not leave a conductive residue
on the surfaces. Solvents safe for cleaning the
gun surface are the same as those listed in this
manual under "Effects of Solvents - No. 2 Handgun Bells". If other solvents are required for
cleaning, then that cleaning should be followed
with the listed solvents.
29
AHAH-1212-01.03 No. 2 Air Motor Handgun
MAINTENANCE
SCHEDULES
Periodic
To assure continuous, efficient, trouble free
operation of the No. 2 Handgun, periodic inspection of the components is required.
Clean, repair and/ or replace any defective
components as required.
3. Ensure the equipment is installed properly.
See the "Installation" section.
4. Clean the fluid line filter. See "Filter Cleaning or Replacement" in the "Maintenance"
section of this manual.
Weekly
1. Inspect all equipment for damage, leaks, or
paint buildup.
NOTE
Prior to gun disassembly, flush line and gun
with a suitable solvent. Loosen the set screw on
the bell hub, remove, and clean the bell with a
soft brush (nonmetallic) or cloth and a suitable
solvent. The bell MUST be cleaned if spraying
is to be interrupted for more than a few minutes.
2. Measure the electrical output of the gun. The
short circuit current should be 80 to 115 microamperes (.08 to .115 milliamperes on some meter scales). Refer to the "Gun Output Test
(SCI)" in the "Maintenance" section for procedure.
Check ALL oo-rings for fit and deterioration.
TEST PROCEDURES
Fluid Testing
WARNING
NEVER wrap the applicator, associated valves
and tubing, and supporting hardware in plastic
to keep it clean. A surface charge may build up
on the plastic surface and discharge to the
nearest grounded object. Efficiency of the applicator will also be reduced and damage or failure
of the applicator's components may occur.
WRAPPING THESE COMPONENTS IN PLASTIC WILL VOID WARRANTY.
Daily
1. Prior to startstart-up, inspect all components of
the system for defective or broken parts and
repair or replace.
2. Inspect the bell for chips or cracks and replace as needed.
AHAH-1212-01.03 No. 2 Air Motor Handgun
Needle Locknut Adjustment
When the paint does not shutshut-off after the trigger has been released, adjust the knurled nuts
(in front of trigger). If this does not correct the
problem, refer to the "Troubleshooting Guide" in
the "Maintenance" section.
1. Turn the outer locknut a few times countercounterclockwise. DO NOT thread it off the needle.
2. Adjust the inner locknut countercounter-clockwise, to
allow the needle to completely seat, and hold
the trigger firmly.
3. Make further adjustments of the outer and
inner locknuts as needed for fine adjustment of
fluid delivery with thin viscosity paints.
NOTE
Primary fluid pressure control is from the paint
pot regulator.
30
MAINTENANCE
NOTE
•
If a proper reading is not obtained, perperform the same test on a spare gun (if
one is available). If the spare gun test
reading is normal, refer to the
"Troubleshooting Guide" in the
"Maintenance" section. If no spare gun
is available, perform a short circuit curcurrent test of the power supply.
•
When the motor circuit is activated the
shaft will be rotating and the HIGH
VOLTVOLT-AGE WILL BE ON.
Electrical Testing
If an electrical malfunction should occur in the
system, check the hand gun, high voltage cable, supply fuses, and the power source according to the prescribed test procedures for
each. After these electrical tests have been
completed and it is determined that a fault
may exist in the power supply, make the high
voltage short circuit current test as indicated
in the power supply service manual.
NOTE
These tests should be made as advised under
the “Maintenance” section of the manual.
Tools Required
7665276652-02 or
Testers Kit
7665276652-04
Ransburg
Gun Voltage Output (SCI)
The Short Circuit Current (SCI) will determine
if the high voltage portion of the system is operating correctly by shorting the maximum
current flow to ground. The SCI reading on
either the power supply current meter and/or
the externally connected meter at the contact
brush should be between 80 and 115 microamperes (.08 and .115 milliamperes). Readings outside this range indicate possible component failure and indicate the need for further testing and/or repair. There are two procedures that can be used to perform an SCI
Test.
External Meter Test
1. This method uses the test assembly
(76652--02 or 76652(76652
76652-04). It must be used if
the power supply DOES NOT have a microampmeter.
2. Remove the bell from the gun. Connect
one of the alligator clamps of the test meter
to the contact brush and the other to ground.
3. Set the switch on the test meter to µA
(microamperes).
4. Turn the power supply ON.
4. Activate the motor circuit at the gun. The
test meter reading should be approximately
80 to 115 microamperes.
Power Supply Meter Test
1. This method uses the microampmeter located on the power supply.
2. Remove the bell from the gun. Rotate the
contact brush outwards and touch the contact
brush to ground.
3. Turn the power supply ON.
4. Activate the motor circuit at the gun. The meter of the power supply should read approximately 80 to 115 microamperes.
31
AHAH-1212-01.03 No. 2 Air Motor Handgun
MAINTENANCE
REPAIR PROCEDURES
Read each procedure entirely before beginning.
NOTE
High voltage components, such as cable and
high voltage resistor, are not field serviceable.
For repair or replacement of such items, contact
your Ransburg distributor.
2. Flush the fluid line and gun with a suitable
solvent.
3. Loosen the set screw on the bell hub, remove and clean the bell. Refer to "Effects of
Solvents" in the "Maintenance" section for a
list of cleaning solvents.
4. Turn fluid pressure OFF. Bleed all pressure
from the line.
5. Disconnect the fluid at the rear of the gun.
Tools Required
14.5 mm 9/169/16-inch Open End Wrench
5/85/8-inch Open End Wrench
3/43/4-inch Open End Wrench
3.5 mm or 9/649/64-inch Hex Wrench
6 inch Adjustable Wrench
1/41/4-inch Open End Wrench (Ignition
Type)
Bench Vise, Flat Jawed
Spare Parts Kit (9096(9096-00)
Pliers
Screwdriver (short and long shaft)
3mm (1/8(1/8-inch) Straight Punch
8 mm (5/16(5/16-inch) Drill Bit
Preliminary Disassembly
Prior to performing any service on the gun the
following procedures should be followed:
1. Turn the high voltage “OFF” and disconnect
the AC power to the power supply.
6. Disconnect the high voltage cable from the
power supply.
Filter Cleaning or Replacement
(Refer to Figure 17)
Disconnect the fluid hose assembly from the
filter assembly . Hold the filter assembly rear
housing with a 3/43/4-inch open end wrench and
with a 5/85/8-inch open end wrench turn the fluid
hose nut in a clockwise direction (left hand
threads) to remove the fluid hose.
Disconnect the filter assembly from the gun
assembly. Secure the hose connector assembly with a 5/85/8-inch open end wrench and with
a 3/43/4-inch open end wrench connected to the
filter assembly nut , turn the nut clockwise and
remove the filter assembly.
WARNING
BEFORE attempting any cleaning or
color change procedures the high voltage
and the AC power to the power supply
MUST be turned OFF!
AHAH-1212-01.03 No. 2 Air Motor Handgun
32
MAINTENANCE
3. Secure the rear housing of the filter assembly in a vise and with a 3/43/4-inch wrench connected to the front housing, remove the front
housing (right hand threads).
4. Remove the paint filter element from the rear
housing .
5. If a new paint filter is to be installed, clean
the front housing and rear housing using the
appropriate solvent .
Item # Description
1
Fluid Hose
2
Fluid Filter
3
Fluid Inlet Fitting
Figure 17: Fluid Filter Removal
6. If the same paint filter is to used, wash the
paint filter, front housing, and rear housing in
solvent. Use a bristle brush to clean paint from
the metal disk of the paint filter.
7.Secure the rear housing in a vise. Place the
paint filter element into the rear housing metal
disk first.
8. Turn the front housing onto the rear housing). With a 3/43/4-inch open end wrench, tighten
the front housing to the rear housing.
9. Connect the filter assembly to the applicator
assembly and the fluid hose to the filter assembly.
NOTE
•
When spraying plural component materials,
the filter assembly should be cleaned as
soon as possible after spraying has been
completed.
•
Ransburg advises keeping extra paint filter
elements on hand. While one is being used,
soak the other in the appropriate solvent and
change the filters out between jobs.
Item # Description
1
Filter Front Housing
2
Filter Rear Housing
3
Paint Filter Element
Figure 18: Fluid Filter Replacement
33
AHAH-1212-01.03 No. 2 Air Motor Handgun
MAINTENANCE
Item # Description
1
(4) Socket Head Screws
2
(2) Slotted Head Screws
3
High Voltage Cable Assembly
4
Air Inlet Slide Valve Assembly
5
Gasket
6
Spacer
7
Air Motor Assembly
Figure 19: High Voltage Cable and Air Motor Removal Diagram
CABLE/ AIR MOTOR
ASSEMBLY
1. Remove the (4) socket head screws from
the rear of the applicator using a 9/64” hex
key wrench.
2. Remove the two slot headed screws from
the assembly.
3. Remove the air inlet slide valve assembly
by turning the hex on the assembly in a counter clockwise direction.
5. Inspect gasket for any damage. Replace if
required.
6. Check the applicator end of the cable assembly to ensure the spring is attached to the cable.
Apply a generous coating of didi-electric lubricant
(LSCH0009(LSCH0009-00) to the applicator end of the
high voltage cable.
7. Attach the motor to the cable assembly using
the (2) slotted screws and the air inlet slide
valve assembly
8. Slide the entire assembly into the barrel insuring the cable end and all other parts are
properly positioned. Insert the (4) socket head
screws and tighten only by hand.
4. Pull the high voltage cable assembly
straight out of the assembly. The spacer, the
gasket and the air motor will also pull out of
the barrel.
AHAH-1212-01.03 No. 2 Air Motor Handgun
34
MAINTENANCE
HANDLE ASSEMBLY
WARNING
Ensure the power is “OFF” to the 9050 power
supply prior to rotating the bell in step 9.
1. Invert the applicator and remove the (4)
socket head cap screws and lock washers
from the underside of the handle assembly with
a 9/649/64-inch hex key wrench. Refer to Figure 20.
9. Mount the applicator in a padded vise and
turn the motor on by sliding the air inlet slide
valve forward. Listen to the audible pitch of the
motor.
10. Alternately tighten (4) socket head screws
until snug. If motor shaft begins to slow (audible
pitch changes), loosen screws slightly to relieve
binding. DO NOT over tighten screws so that
gasket is squeezed outward beyond the outer
dimension of the barrel.
CAUTION
Over tightening of the (4) socket head
screws can break threaded inserts out of
plastic barrel.
Motor Assembly Replacement
1. Follow instructions for removing the cable assembly and motor assembly from the barrel (see
"Cable Assembly Replacement" in the
"Maintenance" section).
2. Replace the motor as required.
3. Follow the assembly instructions for replacing the high voltage cable (see "Cable Assembly Replacement" in the "Maintenance" section).
Item # Description
1
(2) Socket Head Screws
2
O-Ring
3
Bushing, Paint
4
(4) Lock Washers
5
(2) Socket Head Screws
6
Handle Assembly
Figure 20: Handle Assembly Removal
35
AHAH-1212-01.03 No. 2 Air Motor Handgun
MAINTENANCE
2. Remove the two bottom socket head screws
from the cable/motor assembly and remove the
handle assembly from the applicator assembly,
taking care not to lose the paint tube and ooring .
3. Remove paint tube and oo-ring from the barrel and clean the exposed barrel surface and
paint tube of any paint residue. Refer to "Effects
of Solvents" in the "Maintenance" section.
4. Insert paint tube into the barrel opening until
it bottoms.
5. Place a new oo-ring over the exposed paint
tube .
7. Align the screw holes of the handle assembly
with the threaded holes of the barrel. Insert the
(4) lock washers and (4) socket head screws .
Tighten screws with a 9/649/64-inch hex wrench.
7. Insert and tighten the (2) socket head screws
of the cable/motor assembly.
8. Replace the bell and connect the paint and
air hoses.
Trigger Replacement
1. Complete steps 1, 2 and 3 of "Handle Assembly Replacement" in the "Maintenance" section.
2. Lay the handle assembly on its side marked
“X” (See figure 21) and support the area under
the trigger tangs, leaving the roll pin clear.
NOTE
NOTE
If necessary, apply a small amount of
petroleum jelly to the oo-ring before sliding it
on the tube. DO NOT use any silicone
base lubricants.
6. Position the barrel upside down on a table
and place the new or rebuilt handle assembly
on the barrel, aligning the paint tube with the
hole in the handle assembly. Also make sure
that the trigger latch spring is aligned with the
top edge of the handle.
NOTE
When positioning the handle assembly, make
certain that the trigger latch spring is flat against
the barrel surface to provide proper trigger latch
tension.
AHAH-1212-01.03 No. 2 Air Motor Handgun
Protect the handle from scratches or mars by
using a cloth over a metal support or vise teeth.
Support the underside of the handle in the area
of the roll pin, leaving the hole free.
CAUTION
When removing trigger roll pin, striking
handle tangs with a hammer may result in
casting breakage.
3. With the handle tang supported, use a 3 mm
(1/8”) punch and a small hammer to gently drive
the roll pin through the upper tang and trigger .
The roll pin should clear the second tang and be
removed from the assembly.
4. Remove the trigger.
36
MAINTENANCE
ITEM
DESCRIPTION
ITEM
DESCRIPTION
1
HANDLE, MACHINED NO. 2
9
BUSHING
2
ASS'Y. NEEDLE
10
BUSHING
3
TRIGGER #2 MACHINED
11
CONNECTOR ASS'Y., HOSE
4
PIN,ROLL
12
BUSHING SPACER
5
HOSE RETAINER
13
SCREW, RD HD, #6
6
PACKING
14
LATCH,TRIGGER
7
BUSHING, SOLVENT RESISTANT
15
SPRING,LATCH,TRIGGER
8
SEAT,NEEDLE
16
WASHER, THRUST
Figure 21: Handle Assembly Diagram
37
AHAH-1212-01.03 No. 2 Air Motor Handgun
MAINTENANCE
5. Reverse the handle assembly so that the
side marked “X” is up (Reference Figure 21).
Insert trigger, making sure that the curved lower
tip of the trigger is pointed away from the handle and the thrust washer is to the front of trigger.
6. Insert the roll pin through the hole and into
the trigger pivot hole.
7. With a small hammer, gently drive the roll pin
into the bottom tang, stopping when the roll pin
is about 2.3 mm (3/32”) from the face of the
tang.
3. Unscrew spring retainer from spring housing
with a 1/41/4-inch open end wrench. Remove the
spring retainer from the spring housing.
4. Remove the spring, eyelet, and needle from
the spring housing.
5. Wash all parts in solvent and inspect all components for damage and wear. Examine the
needle carefully and replace if worn, pitting,
bent, or broken. Replace any questionable
parts.
Needle Assembly Replacement
1. Complete steps 1 through 4 of "Trigger Replacement" in the "Maintenance" section.
2. Remove the spring retainer with a 1/ 44-inch
open end wrench and slide the needle assembly out of the handle. It is not necessary to remove the two lock nuts and the thrust washer .
3. If the needle packing is to be replaced, refer
to "Needle Packing Replacement" in the
"Maintenance" section.
4. Insert new or
the handle and
wrench turn the
turns.
rebuilt needle assembly
with the 1/41/4-inch open
spring retainer in about
into
end
four
5. Reinstall all removed parts per instructions in
the “Maintenance Section”.
Needle Assembly Rebuild
1. Complete steps 1 through 3 of "Needle Assembly Replacement" in the "Maintenance"
section.
2. Remove lock nuts and thrust washer.
AHAH-1212-01.03 No. 2 Air Motor Handgun
ITEM
1
2
3
4
5
6
7
8
DESCRIPTION
HOUSING, SPRING
NEEDLE, No.2 HAND GUN
EXTERNAL RETAINING RING
EYELET, #5
RETAINER, SPRING
NUT,LOCK
WASHER, PLASTIC THRUST
SPRING,COMPRESSION
Figure 22: Needle Assembly Diagram
6. Install snap ring onto needle. Slide eyelet,
large diameter first, onto threaded end of
needle. Install spring over threaded end of
needle and down over small diameter of eyelet.
38
7. Insert needle, with previously installed
components, into spring housing (tapered
end first). Push needle into the spring housing until snap ring bottoms out.
8. Install spring retainer, small threaded diameter first, onto needle. Holding the spring
housing in one hand, compress spring until
spring retainer contacts the spring housing .
While compressing the spring, screw spring
retainer into the spring housing. Screw the
spring retainer into the spring housing until
it bottoms.
9. To install the needle assembly, refer to
steps 3 through 6 of "Needle Assembly Replacement" in the "Maintenance" section.
Item # Description
HANDLE ASSEMBLY
1
2
NEEDLE ASSEMBLY
Needle Packing Replacement
3
NEEDLE PACKING
1. Complete steps 1 and 2 under "Needle
Ass em b ly
Re pla cem en t"
in
th e
"Maintenance" section.
Figure 23: Needle Packing Assembly
2. Mount an 8 mm (5/16(5/16-inch) drill bit vertically in a vise.
3. Place the handle opening over the drill bit
tip and insert until the bit tip contacts packing.
5. Place the new packing (Item 52) on the
needle assembly (see Figure 23).
6. To install the needle assembly, with needle packing, refer to steps 4 through 6 under
"Needle Assembly Replacement" in the
"Maintenance" section.
CAUTION
Scoring or chewing of the metal packing
seat in handle may cause permanent
damdam-age, requiring handle replacement.
4. Rotate the handle assembly until the drill
bit bites into the packing. Lift the handle assembly (to withdraw the packing). Make
sure all bits of old packing are removed.
Wash housing with solvent.
39
AHAH-1212-01.03 No. 2 Air Motor Handgun
ITEM
DESCRIPTION
ITEM
DESCRIPTION
1
8008580085-00 Brush
5
Resistor Housing
2
O-Ring
6
Barrel
3
Resistor Seal
7
Washer
4
HV Resistor 525 MΩ
MΩ
8
Screw
Figure 24: HV Resistor Removal
BARREL ASSEMBLY
High Voltage Resistor Replacement
(Refer to Figure 24)
CAUTION
Resistor is made of ceramic material. Resistor
will break if dropped, mishandled, or exposed to
solvents.
1. Remove the cable/motor assembly per
steps 1 and 2 of "Cable Assembly Replacement" in the "Maintenance" section. Remove
the brush (Item 1) from the resistor housing
(Item 5).
2. Insert a long shaft standard screwdriver
into the lower opening at the rear of the barrel assembly and remove screw (Item 8) and
washer (Item 7).
AHAH-1212-01.03 No. 2 Air Motor Handgun
3. Cover the front of the barrel (Item 6) with a
rag. With an air gun (set at a maximum of 3
bar/50 psig) at the rear of the resistor housing,
blow the resistor seal (Item 3), oo-ring (Item 2),
and resistor (Item 4) out the front of the barrel.
NOTE
If resistor is not pushed out by the air, insert a
rigid wire into the rear of the resistor housing
and push the resistor out. Be careful not to
scratch or scar the inside of resistor housing.
4 Clean the resistor housing (Item 5) with a
nonconductive solvent and dry thoroughly.
(Refer to "Effects of Solvents" in the
"Maintenance" section.) Inspect the ID of
each end of the resistor tube for any signs of
high voltage tracking or arcing.
40
MAINTENANCE
CAUTION
If any such damage is found the resistor housing (Item 5) needs to be replaced. Contact an
authorized Ransburg representative to replace
the resistor housing if damaged.
NOTE
After two to four resistors failing, the
resistor housing may be permanently
contaminated and require replacement.
5. Measure the resistance of the resistor (Item
4) using a MegOhm meter with leads placed
end to end. The resistance should be between
550 to 500 MΩ. If the resistor is outside of this
range, it must be replaced.
6. Fill the inside diameter of a new resistor
(Item 4) with dielectric grease. Hold the nozzle of the grease tube to the hole on one
end of the resistor and slowly squeeze the
grease into the resistor until it protrudes
from the opposite end of resistor. Coat the
outside surface of the resistor lightly with the
dielectric grease .
DO NOT OVERTIGHTEN the screw when securing the resistor. The ceramic resistor will be
damaged.
9. Place a new OO-ring (Item 2) onto resistor
seal (Item 3). Apply a thin coating of petroleum jelly to the OO-ring and insert the resistor
seal (side with hole first) into the front end of
resistor housing (Item 5). Push the resistor
seal (Item 3) into resistor housing until it contacts the resistor (Item 4). Insert the contact
brush (Item 1).
10. Install cable assembly and motor assembly onto the rear of the barrel. See "Cable Assembly Replacement" procedures in the
"Maintenance" section.
Ground Resistor Replacement
(Refer to Figure 25)
1. Remove the cable/motor assembly per steps
1 and 2 of "Cable Assembly Replacement" in
the "Maintenance" section.
7. Insert the resistor (Item 4) into the front of
the resistor housing (Item 5) with the inked
end (black) of the resistor toward the front of
the barrel (Item 6).
8. At the front end of the barrel (Item 6) use
a screwdriver to hold the resistor (Item 4). At
the back of the barrel insert the washer
(Item 7) and screw (Item 8) into the resistor
housing (Item 5). With a long screwdriver
screw the screw into the resistor.
Item # Description
Spring
1
2
Ground Resistor 10,000 MΩ
MΩ
3
Barrel
Figure 25: Ground Resistor Removal
41
AHAH-1212-01.03 No. 2 Air Motor Handgun
MAINTENANCE
2. Tilt the Barrel (Item 3) so the rear opening is
down. The resistor (Item 1) and the spring
(Item 2) should fall out of the drive shaft.
3. Measure the resistance of the resistor (Item
2) using a MegOhm meter with leads placed
end to end. The resistance should be between
11,000 to 9,000 MΩ. If the resistor is outside of
this range, it must be replaced, or there is a
large hole in the center of the spray pattern.
4. Install the ground resistor (Item 2) and spring
(Item 1) back into the drive shaft. Install the cable/motor assembly per "Cable Assembly Replacement" in the "Maintenance" section.
CAUTION
DO NOT Apply Dielectric Grease to the
Resistor (Item 2), Spring (Item 1), or Inside and Outside Diameters of the Drive
Shaft .
The application of dielectric grease or
any other lubricant to these components can cause premature failure of
the motor.
Ceramic Seal Replacement
(Refer to Figure 26)
1. Unscrew nut (Item 3) and pull the drive shaft
(Item 7) with all ceramic seal components attached out of the barrel.
2. Remove the OO-rings (Item 6) from the drive
shaft, taking care not to damage the drive shaft.
3. Using a screwdriver, loosen the two set
screws (Item 2) (about two turns counterclockwise) of the collar (Item 1) and remove the collar and nut (Item 3) from the drive shaft.
AHAH-1212-01.03 No. 2 Air Motor Handgun
Item # Description
Collar
1
2
Set Screw (2) required
3
Nut
4
O-ring
5
Seal, Outer Ceramic
6
O-ring (2) required
7
Shaft , Drive
8
Seal, Inner, PTFE
9
O-ring
Figure 26: Ceramic Seal Replacement
4.Slide outer ceramic seal (Item 5) and inner
PTFE seal (Item 6) off the drive shaft .
5. Remove the remaining two OO-rings (Items 4
and 9) from the drive shaft .
6. Discard the ceramic seal (Item 5), PTFE
seal (Item 8), OO-rings (Items 4,6 and 9). Examine the drive shaft and replace if damaged.
7. Slide OO-ring (Item 10) over drive shaft until it
bottoms on shoulder. Install OO-ring (Item 6)
into second OO-ring groove of drive shaft.
NOTE
Lightly lubricate the OO-rings only with petroleum
jelly. DO NOT USE SILICONE LUBRICANTS!
42
MAINTENANCE
8. Place PTFE seal (Item 8), with shoulder facing toward front end of drive shaft, onto the
drive shaft and slide it back until it contacts OOring (Item 9).
CAUTION
Clean the inner and outer faces of the
new seals and the front portion of the
shaft carefully with solvent before replacing them. Oil or dirt deposit from
the hands could cause an improper
contact of seal faces. This is a DRY
seal and DOES NOT require grease or
oil.
12. Install the outer OO-ring (Item 6) on the
drive shaft.
13. Install the resistor (black ink end first) and
spring into the rear of the drive shaft (Item 7).
Spring must be long enough to contact end of
resistor and motor shaft.
14. Holding the gun assembly with the front of
the barrel angled slightly downward, slide the
drive shaft (Item 7) into the front of the barrel
until it bottoms. Rotate the drive shaft by hand
until you feel the slot engage the motor shaft
pin. Tighten nut (Item 3) to secure the drive
shaft to the gun assembly.
CAUTION
CAUTION
DO NOT apply dielectric grease or
any other lubricant to the PTFE seal
(Item 8), ceramic seal (Item 5), drive
shaft (Item 7), or collar (Item 1). The application of dielectric grease or any other lubricant to these components can
cause premature failure of the motor.
9.Install OO-ring (Item 4) on ceramic seal
(Item 5) and slide the ceramic seal onto
drive shaft (Item 7) until it contacts PTFE
seal (Item 8).
If the nut will not thread fully, the shaft is not
engaged. Unscrew and repeat Step 13.
9060 Fuse Replacement
WARNING
When ever the 9060 power supply is serviced,
insure that the power is off to the unit.
10. Place the nut (Item 3) onto drive shaft
(Item 7) side with threads toward ceramic
seal (Item 5). Slide it back on drive shaft as
far as it will go.
11. Slip the collar (Item 1) onto the drive
shaft (Item 7), align the two set screws with
the two flats in drive shaft. Secure the collar
to the drive shaft by tightening the two set
screws (Item 2).
43
AHAH-1212-01.03 No. 2 Air Motor Handgun
MAINTENANCE
Use of LSCH0009 Dielectric Grease in No. 2 Handgun
Misuse of the LSCH0009 dielectric grease inside the No. 2 Handgun can cause premature
failure of the electric motor. Dielectric grease
should only be used as a filler (displacement of
air) to suppress high voltage corona. Dielectric
grease should only be applied to the following
parts:
Exposed high voltage cable of the gun end of
the 1937019370-xx high voltage cable end
Inside the white 62046204-00 high voltage resistor
housing
On the inside and outside of the 28422842-01 (525
megohms) high voltage resistor
1. Insure the power is turned off on the front
panel switch. If possible disconnect the line
cord to the unit.
2. Insert a flat bladed screwdriver into the slot
of the fuse holder. Push the end of the fuse
holder in and turn countercounter-clock wise to remove
the fuse.
3. Inspect the fuse, insure it is the proper fuse
to give the proper protection. If faulty, replace
as required.
4. Insert the end of the fuse holder back with
the fuse in the center and push down while
turning the holder 1/4 turn clockclock-wise to lock
back in place.
AHAH-1212-01.03 No. 2 Air Motor Handgun
The use of LSCH0009 dielectric grease or any
other lubricants on any components associative
with the electric motor, drive shaft assembly,
and ground circuit is forbidden. Due to these
areas direct contact to the D.C. motor, lubricants can migrate into the motor and cause it to
fail. Dielectric grease SHOULD NOT be applied
to the following areas of the No. 2 Handgun:
7225 drive shaft assembly
41754175-01 shaft (ground) resistor (10
G Ohms)
Components of the shaft seal/ bearing
assembly at the front end of the drive
shaft
Special care is and has always been taken during manufacturing of the gun to apply the dielectric grease only to those areas noted. Gun failure associated with misuse of dielectric grease
will not be covered under warranty.
44
TROUBLESHOOTING GUIDE
General Problem
Possible Causes
Solution
Mechanical
Poor Atomization (See Electrical 1. Dirty Bell
troubleshooting)
Insufficient Paint Flow or No
Flow
45
1. Clean the bell (see service instruction
‘Solvent Effects on No. 2 Handgun Bell /
Brush Wear”)
2. Feed tube improperly positioned
2. Position as indicated in the “Installation “
section
3. Contact brush worn or improperly
positioned or broken
3. ReRe-position or replace
4. Chipped bell edge
4. Replace
5. Bell rotation too slow
5. Check the seal is clean ( clean or replace
the outer or PTFE seal. Motor shaft warped
(replace the motor shaft)
6. Paint input exceeds gun atomization capacity
6. Reduce the paint delivery and/or use larger
bell.
7. Improper paint mixture
7. Test paint resistance (conductivity). See
solvent section.
8. Bell coating deteriorated, worn,
chipped or dead electrically
8. Replace bell
9. Paint too dry
9. Contact your Ransburg distributor
1. Defective pump or inadequate air
pressure at the paint pressure pot
1. Repair pump or increase pressure
2. Feed tube clogged
2. Follow “Color Change” procedure in te
“Operation “ section.
3. Paint hose clogged
3. Clean with solvent/or air pressure. Replace
worn hose when required.
4. High Viscosity Paint
4. Increase fluid pressure or reduce viscosity.
Cold paint will have higher viscosity.
5. Needle valve clogged
5. Follow “Color Change” procedure in te
“Operation “ section and/or repair valve.
6. Solvent filter clogged
6. Clean ore replace filter. (See “Filter Cleaning or Replacement” in “Maintenance” section
7. Applicator fluid passage clogged
7. Follow “Color Change” procedure in te
“Operation “ section or contact you Ransburg
distributor.
AHAH-1212-01.03 No. 2 Air Motor Handgun
TROUBLESHOOTING
General Problem
Possible Causes
Solution
Mechanical
Poor Attraction
Paint Wraps Back Onto Operator
1. Parts not properly grounded to true 1. Strip workholders and ground wires of built
earth ground
up paint.
2. Improper technique
2. Refer to “No. 2 Handgun Spray Techniques” or see the “Operations” section.
3. Excessive flow rate
3. Reduce the fluid volume to the applicator
or use a larger bell.
4. Paint too conductive
4. See “Solvent Section” (1.0 to .1 megohm
paint resistance range)
5. Excessive air flow around applicator
5. Reduce the air flow to below 18 m/min. If
spraying outside, wait until winds have reduced in velocity.
6. Product is not conductive
6. Contact your Ransburg distributor
1. Improper applicator technique
1. The bell must be closer to the target than
the operator.
2. Applicator is too far away from target
2. Hold applicator 10 to 18 cm from the target
3. Improper paint mix (too conductive) 3. See “Solvent Selection”
Paint Drips Off Bell Rim When
Applicator is Operating
4. Parts not properly grounded
4. Strip workholders and ground wires of built
up paint.
5. Improper exhaust or windy conditions
5. Check and adjust. Excessive winds overrides electrostatic attraction.
1. Feed tube improperly positioned
1. Position correctly see figure 1010-3.
2. Feed tube defective
2. Replace.
3. Paint delivery too high
3. Reduce.
4. Bell rotation too slow
4. Check seal. Increase air pressure to air
motor. If OK, contact your Ransburg Distributor.
5. Delivery too low. Paint runs back
on feed tube when applicator is in an
“elevated up” position
5. Increase delivery. ReRe-position feed tube.
Paint Drips From Rim After Trig- 1. Trigger lock nuts positioned imger is Released
properly
1. ReRe-adjust.
2. Needle seat dislocated or needle
and/or seat worn
2. Reseat or replace.
3. Dirt in needle mechanism
3. Follow “Color Change “ procedures in the
“Operation” section or rebuild if required.
AHAH-1212-01.03 No. 2 Air Motor Handgun
46
TROUBLESHOOTING
General Problem
Possible Causes
Solution
1. Hose fittings not tight
1. Fluid hose fittings are all Left Handed
threads. Insure each connection is properly
secured.
2. Hose broken or worn
2. Order replacement or remove fitting, cut
off defective area and replace fitting.
Paint Leaks from Inside Hand
Grip or trigger Mechanism
1. Needle packing worn
1. Adjust packing nut or rebuild handle and
replace packing.
Paint Leaks From Barrel and
Handle Assembly Connections
1. OO-ring worn or missing
1. Replace OO-ring
2. Paint bushing missing
2. Insure paint busing is properly installed.
1. Bell probe electrically dead
1. Replace.
2. Spring missing in back of bell
2. Replace.
3. Spring not contacting end of shaft
3. Clean or replace.
4. Ground resistor damaged or not
contacting
4. Replace.
Mechanical
Paint Drips From Paint Hose
Connection or Rear of Applicator
Large Hole in the Center of the
Pattern
5. Spring in ground resistor missing or 5. Replace.
not contacting
6. Contaminated hub leaking high
voltage to the probe
6. Clean or replace hub assembly.
Electrical
Poor Attraction
Poor Atomization (See First
“Mechanical Troubleshooting”)
47
1. Target parts not properly grounded 1. Strip workholders and ground wires of built
to earth ground
up paint to ensure proper earth ground or
check ground wires to parts.
2. Bell outer coating damaged
2. Replace bell.
3. Paint too conductive
3. See “solvent Selection”.
4. Low short circuit current
4. Perform SCI tests.
1. Atomizing voltage too low
1. Perform tests: See “Electrical Testing”
Contact your Ransburg Distributor
AHAH-1212-01.03 No. 2 Air Motor Handgun
TROUBLESHOOTING
General Problem
Possible Causes
Solution
1. Power line unplugged
1. Plug in and verify available voltage.
2. Fuse(s) blown
2. See “Maintenance” section to replace
Electrical
No High Voltage Output
fuse(s).
Mild Shock When Picking Up
Applicator by the Handle
3. High voltage cable failure; cable
crackles when system is on.
3. Verify cable braid continuity from the connector end to the opposite end with ohm meter. Replace as required.
1. Operator holding applicator by the
barrel
1. Keep one bare had on the handle at all
times to ensure ground to the operator.
2. Gun and power supply not ground- 2. Ground power supply to true earth ground.
ed
3. Operator wearing gloves; operator
wearing rubber soled shoes
3. Remove rubber gloves or cut holes in the
palm of the glove where handle contact can
be achieved. Add grounding straps to shoes if
required.
4. Operator is charged before picking
up the applicator
4. Ensure operator has proper ground.
5. Metal shiel on high voltage cable is 5. Verify cable braid continuity from the conbroken
nector end to the opposite end with ohm meter. Replace as required.
AHAH-1212-01.03 No. 2 Air Motor Handgun
48
PARTS IDENTIFICATION
Item #
Description
ASS'Y. HANDLE #2
1
Part Number
7233--00
7233
2
O-RING, SOLVENT RESISTANT
75547554-07
3
BUSHING, PAINT
28032803-00
4
ASS'Y., BARREL #2 AIR
1097210972-00
5
ASS'Y., BELL 4"
1148811488-00
6
WASHER, SPLIT LOCK S.S.(4) REQUIRED
77347734-03
7
ASSEMBLY, FILTER
72447244-00
8
ASS'Y, AIR HOSE NO. 2
8008980089-XX
9
FLUID FILTER ASSEMBLY
7693876938-02
10
ASS'Y, FLUID HOSE NO. 2
83408340-XX
11
SCREW, SHCS #8 (4) REQUIRED
83018301-16C
Figure 28: 2098720987-XX Parts Breakout
49
AHAH-1212-01.03 No. 2 Air Motor Handgun
PARTS IDENTIFICATION
Item #
Description
SPRING PIN
1
Part Number
4359--01
4359
2
SPRING
84918491-00
3
ADAPTOR, DRIVE
7575775757-00
4
ASS'Y. AIR MOTOR NO. 2
8006980069-00
5
GASKET, NO. 2 HANDGUN
39683968-00
6
SCREW, SHCS #8 (4) Required
ASS'Y., CABLE NO. 2 AIR MOTOR
83018301-16C
7.6 m (25’) length
2098820988-25
11 m (36’) length
2098820988-36
7
8
15.2 m (50’) length
AIR VALVE ASSEMBLY
2098820988-50
10975--00
10975
9
SCREW, FLAT HD. #10
91579157-24F
10
SPACER
1096210962-00
Figure 29: Cable /Motor Parts List
AHAH-1212-01.03 No. 2 Air Motor Handgun
50
PARTS IDENTIFICATION
Item #
Description
HANDLE, MACHINED NO. 2
1
Part Number
7234--00
7234
2
ASS'Y. NEEDLE
36553655-00
3
TRIGGER #2 MACHINED
36493649-00
4
PIN,ROLL
25942594-8
5
HOSE RETAINER
71357135-00
6
PACKING
28452845-00
7
SLEEVE
36533653-00
8
SEAT,NEEDLE
36543654-00
9
BUSHING
68036803-2
10
BUSHING
68036803-1
11
CONNECTOR ASSEMBLE, HOSE
1735617356-00
12
BUSHING SPACER
39783978-00
13
SCREW, RD HD, #6
77477747-20C
14
LATCH,TRIGGER
39793979-00
15
SPRING,LATCH,TRIGGER
39773977-00
Figure 30: 72337233-00 Handle Parts List
51
AHAH-1212-01.03 No. 2 Air Motor Handgun
PARTS IDENTIFICATION
Item #
Description
HOUSING, SPRING
1
Part Number
3659--00
3659
2
NEEDLE, No.2 HAND GUN
36573657-00
3
EXTERNAL RETAINING RING
36883688-1
4
EYELET, #5
38033803-01
5
RETAINER, SPRING
36583658-00
6
NUT,LOCK
34413441-00
7
WASHER, PLASTIC THRUST
50085008-00
8
SPRING,COMPRESSION
28462846-00
Figure 31: Needle Valve Assembly Parts
AHAH-1212-01.03 No. 2 Air Motor Handgun
52
PARTS IDENTIFICATION
Item
Description
#
1 O-RING, SOLVENT RESISTANT
Part Number
75547554-20
2 O-RING, SOLVENT RESISTANT
75547554-08
3 O-RING, SOLVENT RESISTANT
75547554-13
4 O-RING, SOLVENT RESISTANT
75547554-06
5 SPRING
1400314003-00
6 RESISTOR, 535 MΩ
M
41754175-01
7 COLLAR
67146714-00
8 FLAT POINT SET SCREW
84888488-12F
9 SEAL, OUTER
67106710-00
10 NUT, MACHINED
67136713-00
11 SEAL, INNER
67116711-00
12 SHAFT SUBSUB-ASSEMBLY
72257225-00
13 RESISTOR, 10,000MΩ
10,000M
28422842-01
14 WASHER
74867486-06
15 SCREW,RD HD. #6
77477747-16C
16 SEAL RESISTOR, MACHINED
39593959-00
17 TUBE FEED, 4"
ASS'Y., BARREL HOUSING AND
18
BUSHING
37003700-00
1097210972-00
Figure 32: Barrel Parts List
53
AHAH-1212-01.03 No. 2 Air Motor Handgun
PARTS IDENTIFICATION
Item #
HOSE, FLUID
1
Description
Part Number
77031--XX
77031
2
FITTING, HOSE, FERRULE (2) REQUIRED
76177617-00
3
STEM, UNION (2) REQUIRED
74747474-00
4
NUT, LH (2) REQUIRED
FLUID HOSE ASSEMBLIES
65036503-00
—25 (7.6 m)
83408340-25
-36 ( 11 m)
83408340-36
-50 (15.2m)
83408340-50
-75 (22.8 m)
83408340-75
-100 (30.5 m)
83408340-100
Figure 33: 83408340-XX Fluid Hose Parts and Assemblies
AHAH-1212-01.03 No. 2 Air Motor Handgun
54
PARTS IDENTIFICATION
Item #
HOSE, AIR
1
Description
Part Number
6919--XX
6919
2
FITTING, HOSE, FERRULE
76177617-00
3
STEM, UNION
74747474-00
4
NUT, FITTING 9/169/16-18
65026502-00
5
HOSE FITTING, REUSABLE
AIR HOSE ASSEMBLIES
LSFI0027LSFI0027-00
—25 (7.6 m)
8008980089-25
-36 ( 11 m)
8008980089-36
-50 (15.2m)
8008980089-50
-75 (22.8 m)
8008980089-75
-100 (30.5 m)
8008980089-100
Figure 33: 8008980089-XX Air Hose Parts and Assemblies
55
AHAH-1212-01.03 No. 2 Air Motor Handgun
PARTS IDENTIFICATION
Item # Description
FEED TUBE FOR 2 3/4” BELL
1
FEED TUBE FOR 4” BELL
2
O-RING, SOLVENT RESISTANT
Part Number
63356335-00
37003700-K3
75547554-05
Figure 35: Feed Tube Parts
Item # Description
BRUSH ASSEMBLY (ATEX)
1
BRUSH ASSEMBLY KIT OF 3
2
O-RING, SOLVENT RESISTANT
Part Number
8008580085-00
8008580085-K3
75547554-06
Figure 36: Brush Assembly Parts
AHAH-1212-01.03 No. 2 Air Motor Handgun
56
PARTS IDENTIFICATION
Item #
Description
Part Number
1
REAR HOUSING, PAINT FILTER
7694176941-00
2
FRONT HOUSING, PAINT FILTER
7694076940-00
3
ADAPTER, STEM
7693976939-00
4
FITTING, NUT LH
65036503-00
FILTER, PAINT (100 MESH , FINE)
77207720-01
FILTER, PAINT (60 MESH , COARSE)
FILTER ASSEMBLY (FINE MESH)
77207720-02
5
FILTER ASSEMBLY (COARSE MESH)
STD.
7693876938-01
7693876938-02
Figure 37: Fluid Filter Parts
57
AHAH-1212-01.03 No. 2 Air Motor Handgun
PARTS IDENTIFICATION
Item #
Description
HUB AND PROBE 2 3/4”
Part Number
97779777-00
1
HUB AND PROBE 4”
2
SET SCREW
46284628-00
84888488-08C
RIM 2 3/4”
97729772-00
RIM 4”
46274627-00
SPRING, CONTACT
61266126-00
2 3/4 “ BELL ASSEMBLY
1149111491-00
4 “ BELL ASSEMBLY STD. WITH UNIT
1148811488-00
3
4
Figure 38: Bell Spare Parts and Assemblies
AHAH-1212-01.03 No. 2 Air Motor Handgun
58
8010280102-311 -110 SERVICE
(PLUG STYLE 1)
8010280102-312 220220-240V SERVICE
(PLUG STYLE 2)
8010280102-313 220220-240 SERVICE
(PLUG STYLE 3)
-311
-312
-313
USA
EUROPE
CHINA
Item #
Description
Part Number
1
POWER SUPPLY, 24 V
7942879428-00
2
MAIN PC BAORD, 90 kV CLASSIC
8011680116-28
3
AC LINE FILTER
7941279412-00
4
FLOW SWITCH
1374213742-02
5
NUT, FLOW SWITCH
6
ASS’Y. , HIGH VOLTAGE CONNECTOR
1582415824-01
7
WASHER, CONDUIT
1476214762-02
8
NUT, CONDUIT
53075307-04
9
HV MULTIPLIER ASSEMBLY, NO. 2 ATEX
7935079350-01
10
GROUNDING ASSEMBLY
70539-70539--00
--00
11
AC POWER SWITCH
7643476434-01
12
RUBBER FOOT
56275627-00
FUSES
LSFA0008LSFA0008-00
FOR ALL UNIT STYLES
7277172771-06
Figure 39: 9060 Spare Parts List
59
AHAH-1212-01.03 No. 2 Air Motor Handgun
PARTS IDENTIFICATION
Parts included with the unit but not shown;
•
LSCH0009LSCH0009-00 didi-electric lubricant
•
36143614-00 didi-electric oil
•
LSMELSME-40004000-00 parts grounding clamp assembly
•
7644976449-01 Plug Style 1 (USA) , 7644976449-02 Plug Style 2 (European), 7644976449-03 Plug Style 3 (China)
RECOMMENDED SPARE PARTS
Description
Part Number
Fuse
7277172771-06
Needle
36573657-00
Snap Ring
36883688-01
Eyelet
38033803-01
Needle Seat
36543654-00
Sleeve (2 Required)
Packing
36533653-00
28452845-00
Brush Assembly
8008580085-00
Loctite
79697969-031
O-Ring (6 Required)
75547554-20
O-Ring (6 Required)
75547554-05
O-Ring (2 Required)
O-Ring (2 Required)
75547554-06
7554--07
7554
O-Ring (12 Required)
75547554-08
O-Ring (6 Required)
75547554-13
Set Screw (2 Required)
84888488-12F
Seal, Outer, Ceramic
67106710-00
Seal, Inner, PTFE
67116711-00
Grease, 1 oz
LSCH0009
Gun Covers (Kit of 5)*
7255872558-0202-K5
AHAH-1212-01.03 No. 2 Air Motor Handgun
60
WARRANTY POLICIES
LIMITED WARRANTY
Ransburg will replace or repair without charge
any part and/or equipment that falls within the
specified time (see below) because of faulty
workmanship or material, provided that the
equipment has been used and maintained in
accordance with Ransburg's written safety and
operating instructions, and has been used under normal operating conditions. Normal wear
items are excluded.
THE USE OF OTHER THAN RANSBURG
APPROVED PARTS, VOID ALL WARRANWARRANTIES AND SAFETY APPROVALS.
SPARE PARTS: One hundred and eighty
(180) days from date of purchase, except for
rebuilt parts (any part number ending in "R")
for which the warranty period is ninety (90)
days.
EQUIPMENT: When purchased as a complete
unit, (i.e., guns, power supplies, control units,
etc.), is one (1) year from date of purchase.
WRAPPING THE APPLICATOR, ASSOASSOCIATED VALVES AND TUBING, AND SUPPORTING
HARDWARE IN PLASTIC,
SHRINKSHRINK-WRAP, OR ANY OTHER NONNONAPPROVED COVERING, WILL VOID THIS
WARRANTY.
61
RANSBURG'S ONLY OBLIGATION UNDER
THIS WARRANTY IS TO REPLACE PARTS
THAT HAVE FAILED BECAUSE OF FAULTY
WORKMANSHIP OR MATERMATER-IALS. THERE
ARE NO IMPLIED WARRANWARRAN-TIES NOR WARRANTIES OF EITHER MERCHANTABILITY
OR FITNESS FOR A PARTICULAR PURPOSE. RANSBURG ASSUMES NO LIABILITY FOR INJURY, DAMAGE TO PROPERTY
OR FOR CONSEQUENTIAL DAMAGES FOR
LOSS OF GOODWILL OR PRODUCTION OR
INCOME, WHICH RESULT FROM USE OR
MISUSE OF THE EQUIPMENT BY PURCHASER OR OTHERS.
EXCLUSIONS:
If, in Ransburg's opinion the warranty item in
question, or other items damaged by this part
was improperly installed, operated or maintained, Ransburg will assume no responsibility
for repair or replacement of the item or items.
The purchaser, therefore will assume all responsibility for any cost of repair or replacement and service related costs if applicable.
AHAH-1212-01.03 No. 2 Air Motor Handgun
MANUAL CHANGE SUMMARY
01 Revisions
Changes were made to the manual for the
model upgrade change from the 9050 Power
Supply to the 9060 Power Supply.
02 Revisions
Corrected 80084 to be 80085 in (2) places
03 Revisions
Revised Company names
AHAH-1212-01.03 No. 2 Air Motor Handgun
62
Manufactured By;
Finishing Brands Holdings Inc.
Toledo, Ohio 43612
www.Ransburg.com
Manufacturing Facility
1910 North Wayne Street
Angola, Indiana 4670346703-9100
Telephone: 260/665260/665-8800
Technical/Service Assistance
Ransburg Guns
Telephone: 800/ 233233-3366
Fax: 419/ 470470-2071
Technical Support Representative will direct you to the appropriate telephone number for ordering Spare Parts.
Ransburg European Sales and Service Listing: www.Finishingbrands.com
Ransburg has authorized distributors throughout the world. For technical assistance or the distributor nearest
you, see listing below.
United Kingdom
Ringwood Road, Bournemouth
BH11 9LH England
Tel: +44(0) 1202 571111
Fax: +44(0) 1202 573488
Germany
JustusJustus-vonvon-LiebigLiebig-Straße 31
D-63128 Dietzenbach Germany
Tel: +49 (0) 60746074-403403-1
Fax: +49 (0) 60746074-403403-300
France
163163-171 Av des Auréals
26014 Valence cedex France
Tel: +33 4 75 75 27 00
Fax: +33 4 75 75 27 59
Form No. AHAH-1212- 01
© 2013 Finishing Brands Holdings Inc.. All rights reserved.
Models and specifications subject to change without notice.
63
Litho in U.S.A.
AHAH-1212-01.03 No. 2 Air Motor Handgun