1
SERVICE MANUAL
SOKIII & SUMMIT
SIDE-OUT COVER
RV
SOKIII, SOKIII XL
SUMMIT, SUMMIT XL
SUMMIT FI, AND SUMMIT FIXL
M
an
N u
or al
th C
ht
w om
es
tp
pl
:// P
t
R im
w rin
V e
w te
n
w
S
.n d F
up ts
w r
o
p
rv om
ly f
su
pp
ly
.c
om
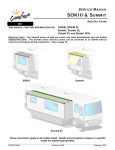
THIS MANUAL CONTAINS INFORMATION FOR:
Summit w/ Peaked Contour
These instructions apply to all models listed. Details and procedures unique to a specific
model are labeled appropriately
052520-301r1
Printed in USA
January, 2008
Table of Contents
PROPRIETARY STATEMENT
The SOKIII and Summit series of Side-Out Room Covers is a product of Carefree of Colorado, located in
Broomfield, Colorado, USA. The information contained in or disclosed in this document is considered
proprietary to Carefree of Colorado. Every effort has been made to ensure that the information presented
in the document is accurate and complete. However, Carefree of Colorado assumes no liability for errors
or for any damages that result from the use of this document.
M
an
N u
or al
th C
ht
w om
es
tp
pl
:// P
t
R im
w rin
V e
w te
n
w
S
.n d F
up ts
w r
o
p
rv om
ly f
su
pp
ly
.c
om
The information contained in this manual pertains to the current configuration of the models listed on the
title page. Earlier model configurations may differ from the information given. Carefree of Colorado
reserves the right to cancel, change, alter or add any parts and assemblies, described in this manual,
without prior notice.
Carefree of Colorado agrees to allow the reproduction of this document for use with Carefree of Colorado
products only. Any other reproduction or translation of this document in whole or part is strictly prohibited
without prior written approval from Carefree of Colorado.
SAFETY INFORMATION
WARNING
A WARNING INDICATES A POTENTIALLY HAZARDOUS SITUATION WHICH, IF NOT AVOIDED, COULD RESULT IN
DEATH OR SERIOUS INJURY AND/OR MAJOR PROPERTY DAMAGE.
CAUTION
A CAUTION INDICATES A POTENTIALLY HAZARDOUS SITUATION THAT MAY CAUSE MINOR TO MODERATE
PERSONAL INJURY AND/OR PROPERTY DAMAGE. IT MAY ALSO BE USED TO ALERT AGAINST UNSAFE PRACTICES.
NOTE: A note indicates further information about a product, part, or step.
Tip:
A tip provides helpful suggestions.
Safety Notes:
•
•
•
•
Always disconnect battery or power source before working on or around the electrical system.
Always wear appropriate safety equipment (i.e. goggles).
Always use appropriate lifting devices and/or helpers when lifting or holding heavy objects.
When using fasteners, use care to not over tighten. Soft materials such as fiberglass and aluminum
can be "stripped out" and lose the ability to grip and hold.
Reference Publications located @ www.carefreeofcolorado.com:
052557-001
SOK III Installation Manual
052557-011
SOK III XL Installation Manual
052520-001
Summit Installation Manual
052543-001
Summit XL Installation Manual
052541-001
Summit FI Installation Manual
052543-101
Summit XL w/ FI Hardware Installation Manual
052530-001
Summit Upgrade for SOK II (Discontinued)
052520-301
SOKIII & Summit Service Manual
Carefree of Colorado
a Scott Fetzer company
2145 W. 6th Avenue Broomfield, CO 80020
303-469-3324 ♦ www.carefreeofcolorado.com
Table of Contents
Carefree of Colorado
Service Manual
SOKIII & SUMMIT
TABLE OF CONTENTS
Product Overview .......................................................................................................................... 2
Summit Arm Application Criteria.............................................................................................................3
The Front Cover............................................................................................................................. 4
M
an
N u
or al
th C
ht
w om
es
tp
pl
:// P
t
R im
w rin
V e
w te
n
w
S
.n d F
up ts
w r
o
p
rv om
ly f
su
pp
ly
.c
om
For Rooms Under 191"...........................................................................................................................4
To Open the Cover..............................................................................................................................4
To Remove the Cover .........................................................................................................................4
Attaching the Front Cover ...................................................................................................................4
For XL Models ........................................................................................................................................6
Removing the Cover ...........................................................................................................................6
Attaching the Front Cover ...................................................................................................................7
Cover Bumpers.......................................................................................................................................8
End Cap Replacement................................................................................................................... 9
Notes on Using an Existing Cover ......................................................................................................9
Canopy Replacement .................................................................................................................. 10
Removing the Old Fabric ..................................................................................................................10
Installing the New Fabric...................................................................................................................10
Standard Spring/Roll Bar Replacement..................................................................................... 11
Removing the Roll Bar Assembly .........................................................................................................11
Rebuilding the Roll Bar Assembly ........................................................................................................12
Installing the Roll Bar............................................................................................................................12
Replacing the XL Roll Bar........................................................................................................... 13
Replacing the Lift Bar Components........................................................................................... 15
To Replace the Lift Arms ......................................................................................................................15
To Replace the Lift Bar .........................................................................................................................16
Setting the Stop Bolts ...........................................................................................................................16
Standard Maintenance ................................................................................................................ 17
Fabric Care ...........................................................................................................................................17
Mildew ...............................................................................................................................................17
Pooling ..............................................................................................................................................17
Hardware Maintenance.........................................................................................................................17
Part Number Listing .................................................................................................................... 18
Part Number/Serial Number Location...................................................................................................18
SOK III Illustrated Parts List..................................................................................................................19
Summit FI Illustrated Parts List.............................................................................................................20
Basic Summit Illustrated Parts List .......................................................................................................22
052520-301r1
1
SOKIII & SUMMIT
Service Manual
Carefree of Colorado
PRODUCT OVERVIEW
M
an
N u
or al
th C
ht
w om
es
tp
pl
:// P
t
R im
w rin
V e
w te
n
w
S
.n d F
up ts
w r
o
p
rv om
ly f
su
pp
ly
.c
om
Carefree's SOKIII & Summit side-out cover is available in 5 basic versions:
SOKIII: Provides a side-out cover with clean, stylized appearance with a standard integrated deflector. No locks
or anti-billow hardware is required. This style is available for standard and XL widths.
Lift Arm
Basic Summit: Building on the SOKIII, The Summit employs a unique
Mounting Pad
lift bar system to provide a peaked contour to the fabric when
the room is open; yet stores beneath the fabric when the room
is closed. This is excellent for shedding water and to prevent Wall Bracket
pooling on the canopy. This version is commonly used for
OEM installations.
Summit FI (Flexible Install): Using the same lift bar system of the
Basic Summit
basic Summit, the mounting hardware is designed to Wall Bracket
Lift Arm
provide greater flexibility for installations. The FI uses a
lower profile wall mounting bracket that can adapt to a
variety of mounting surface conditions. The wall mounting
brackets and lift arms are not interchangeable with the
basic Summit. Because of the versatility, this is the popular
Mounting Pad
Summit FI
SOK3049
version used for aftermarket applications.
Figure 1. Identifying Lift Hardware.
Summit XL: Designed for rooms 192" to 390" wide, the unit uses the same hardware as the basic Summit.
The major extrusions (deflector, roll bar and cover) are made in two pieces and spliced together
during installation. Used for custom OEM applications.
Summit FIXL: Same as the XL above except with the FI lift bar hardware.
Options:
Deflector Mounting Brackets. For Summit applications, two standard bracket styles are available to
mount the defector/roll bar to the room face. A short bracket and a tall bracket. The brackets can
be mounted into the room structure for stability while accommodating a variety of flange heights.
Front Cover (Case): The cover is available for all versions of the SOKIII & Summit. When installed,
it provides a closed case for the roll bar and fabric. The cover can be easily opened and/or
removed for cleaning and service.
Awning Rail Extension/Gutter: For FI installations, an optional rail extension is available. This
allows the installer to use an existing rail while providing clearance for the lift bar and arms. A
unique V-rail is standard equipment for the XL versions w/ lift bars.
6.2"
Width = Room Width + 8" (approx.)
Deflector Width
1.25”
(typ)
5.3”
7.2”
SOKIII & Summit
w/ Short Deflector Bracket
Standard
Width = Room Width + 8" (approx.)
Deflector Width
Deflector Half Width
6.67"
1.25”
(typ)
5.3”
9”
XL
Dimensions are approximate, actual dimensions may vary based on the side-out configuration and options installed.
Summit & Summit FI
w/ Tall Deflector Bracket
SOK3048
Figure 2. General Dimensions.
2
052520-301r1
Table of Contents
Carefree of Colorado
Service Manual
SOKIII & SUMMIT
SUMMIT ARM APPLICATION CRITERIA
42” – 191”
BASIC & FI
192" – 390"
XL & FIXL
AVAILABLE LIFT ARM APPLICATIONS (ROOM WIDTH VS ROOM EXTENSION)
AVAILABLE ROOM WIDTHS:
42
43
44
46
47
48
49
50
51
52
53
ROOM WIDTH
54 55 56
57
58
59
60
61
62
63
12" – 42”
64
65
66 67-390
Uses Short Lift Bar Arm Set
ROOM EXTENSION
M
an
N u
or al
th C
ht
w om
es
tp
pl
:// P
t
R im
w rin
V e
w te
n
w
S
.n d F
up ts
w r
o
p
rv om
ly f
su
pp
ly
.c
om
12
13
14
15
16
17
18
19
20
21
22
23
24
25
26
27
28
29
30
31
32
33
34
35
36
37
38
39
40
41
42
45
AVAILABLE EXTENSIONS:
RESTRICTIONS:
Uses Mid-Length Lift Bar Arm Set
Uses Long Lift Bar Arm Set
Lift Bar Option Not
Available For These
Combinations
The Lift Bar Option is not suitable under any of the following conditions.
1. Flat Drop Rooms and rooms where the room face drops more than the ranges given below
2.
3.
4.
5.
12"-19"
20"-25"
26"-31"
32"-37"
38"-42"
ROOM EXTENSION
.5"
.75"
1"
1.25"
1.5"
ALLOWABLE DROP
The value is determined by measuring the height of the flange when the room is closed then opening the room
completely and measuring the height of the flange again. If the difference exceeds the ranges above, the lift
bar option is not suitable.
Rooms with an awning mounted over the top of the slide-out room.
Rooms with an awning mounted on the face of the room where the top of the roll bar is less than 1/2" below the
roof line of the room when the room is closed.
Recessed rooms. The lift bars store between the coach wall and the awning; when the room is closed there is
not enough clearance for the lift bar assembly.
Measurement from the roof line of the room to the top of the flange cannot exceed 4 7/8 inches (long bracket).
052520-301r1
3
Table of Contents
SOKIII & SUMMIT
Service Manual
Carefree of Colorado
THE FRONT COVER
FOR ROOMS UNDER 191"
To Open the Cover
For ease of cleaning, the front cover can be rotated out of the way. Two methods are used to attach the front
cover. Early Summits use spring-loaded pins that project from the cover and into the end cap. SOK III's and
current Summits use screws that are threaded through the end cap and project into the cover.
M
an
N u
or al
th C
ht
w om
es
tp
pl
:// P
t
R im
w rin
V e
w te
n
w
S
.n d F
up ts
w r
o
p
rv om
ly f
su
pp
ly
.c
om
Spring Loaded
Attach Pin
Latch Lever
Center Latch Pin
12’ or Longer Covers Only
Access Hole
Pin
Spring Loaded Pin Attach
Back Out Lower Cover Screws
until End of Screw Clears Cover (2 plcs)
Threaded Screw Attach
Figure 3. Opening the Front Cover.
SOK3005b
1. For covers 12 feet and longer: Locate the latch lever at the center of the cover. Using a screw driver or
similar tool, push the lever to the left and hold; carefully pull the center of the cover out until the pin
clears the latch.
2. For spring-loaded pins: Using a small pin through the lower access hole in one end cover, press in the
lower attach pin then pivot the cover until the pin clears the hole. Repeat for the other end then rotate
the cover out of the way.
3. For threaded screws: Unscrew the lower allen head screw until the end of the screw clears the cover.
Repeat for other side then rotate the cover out of the way.
To Remove the Cover
1. For covers 12 feet and longer: Locate the latch lever at the center of the cover. Using a screw driver or
similar tool, push the lever to the left and hold; carefully pull the center of the cover out until the pin
clears the latch.
2. For spring-loaded pins: Using a small pin through the lower access hole in one end cover, press in the
lower attach pin then carefully pull the cover until the pin clears the hole. Then do the same for the
upper pin. Repeat the process of the other end and set the cover aside.
3. For threaded screws: Unscrew the allens head screws in both end caps until the end of the screws
clears the cover, it is not necessary to remove the screws from the end caps. Repeat for other side
then lift the cover up and set aside.
Attaching the Front Cover
Two methods are used to attach the cover. The first method uses spring-loaded pins that project from the cover
and into the end cap. This design has been discontinued in 2007. The second method uses screws that thread
through the end cap and project into the cover.
Mounting
Holes
Spring-Loaded
Attach Pins
Method 1 - Spring-Loaded Pin Attach
Cover Retaining Screw
(4 plcs)
Method 2 - Screw Attach
Latch Lever
Center Latch Pin
12’ or Longer Covers Only
SOK3046
Figure 4. Attaching the Front Cover.
4
052520-301r1
Table of Contents
Carefree of Colorado
Service Manual
SOKIII & SUMMIT
Method 1 Spring-Loaded Pin Attach:
1. Place the top pin of one end of the cover into the mounting hole of the end cap.
2.
On the other end of the cover, press the top pin into the cover and set the cover into position. Adjust
the position until the pin springs out and into the mounting hole of the second end cap.
3.
Repeat the procedure for the bottom pins.
For covers 12 feet and longer: Locate the latch lever at the center of the cover. Using a screw driver
or similar tool, push the lever to the left and hold; press the cover into position then release the latch
lever. The latching pin is spring loaded and will slide into the locking channel.
Method 2 Screw Attach:
1. If removed, thread the 1/4-20 x 1 1/2 socket head screws into the end caps. On one side thread the
screws until flush with the inside of the end cap. On the other side, thread the screws until they
project out of the end cap approximately 1/2".
NOTE: If replacing the end caps: the bottom screw holes are threaded at the factory. It will be
necessary to force-thread the top holes in the end cap using the supplied screws.
2. Lift the cover up and place one end over the screws that project out of the end cap. The screws fit
into the slots of the cover.
3. Align the cover with the other end cap and thread in all the attach screws thru the end caps and into
the cover. Hand-tighten only.
4. For covers 12 feet and longer: Locate the latch lever at the center of the cover. Using a screw driver
or similar tool, push the lever to the left and hold; press the cover into position then release the latch
lever. The latching pin is spring loaded and will slide into the locking channel.
M
an
N u
or al
th C
ht
w om
es
tp
pl
:// P
t
R im
w rin
V e
w te
n
w
S
.n d F
up ts
w r
o
p
rv om
ly f
su
pp
ly
.c
om
4.
052520-301r1
5
Table of Contents
SOKIII & SUMMIT
Service Manual
Carefree of Colorado
FOR XL MODELS
Removing the Cover
Mounting Holes
Mounting Holes
M
an
N u
or al
th C
ht
w om
es
tp
pl
:// P
t
R im
w rin
V e
w te
n
w
S
.n d F
up ts
w r
o
p
rv om
ly f
su
pp
ly
.c
om
Spring-Loaded
Attach Pins
Spring-Loaded Pin Attach
Spring-Loaded
Attach Pins
C
A
Cover Retaining Screws
Threaded Screw Attach
Detail A
Center Cover
Mount
B
Latch Lever
Center Latch Pin
Detail B
Cotter Pin
Detail C
SOK3025f
1. Remove the LH half of the front cover.
1.1 Locate the latch lever at the center of the cover. Using a screw driver or similar tool, push the
lever to the left and hold; carefully pull the center of the cover out until the latch pin cannot engage
the locking channel.
1.2 For spring-loaded pins: Using a small pin through the access holes in the LH end cover, press in
the lower attach pin then carefully pull the cover until the pin clears the hole. Repeat for top hole.
Lift the cover up and away from the center cover mount. Set cover aside.
1.3 For threaded screws: Unscrew the allens head screws in the LH end cap until the end of the
screws clears the cover, it is not necessary to remove the screws from the end caps. Pull the
cover up and away from the center cover mount. Set cover aside.
2. Remove the RH half of the front cover.
2.1 Locate the latch lever at the center of the cover. Using a screw driver or similar tool, push the
lever to the left and hold; carefully pull the center of the cover out until the latch pin cannot engage
the locking channel.
2.2 For spring-loaded pins: Press in the attach pins in the center cover mount and lift the cover up
until the pins clear the holes. Pull the cover from the RH end cap. Set cover aside.
2.3 For threaded screws: Unscrew the allens head screws in the RH end cap until the end of the
screws clears the cover, it is not necessary to remove the screws from the end caps. Pull the
cover up and away from the center cover mount. Set cover aside.
3. For fabric replacement or roll bar service, remove the cotter pin and center cover mount. Set parts aside.
6
052520-301r1
Table of Contents
Carefree of Colorado
Service Manual
SOKIII & SUMMIT
Attaching the Front Cover
Mounting Holes
Mounting Holes
Spring-Loaded
Attach Pins
Spring-Loaded Pin Attach
M
an
N u
or al
th C
ht
w om
es
tp
pl
:// P
t
R im
w rin
V e
w te
n
w
S
.n d F
up ts
w r
o
p
rv om
ly f
su
pp
ly
.c
om
Spring-Loaded
Attach Pins
C
A
Cover Retaining Screws
Threaded Screw Attach
Detail A
Center Cover
Mount
B
Latch Lever
Center Latch Pin
Detail B
Figure 5. Attaching the Front Cover.
Cotter Pin
Detail C
SOK3025f
1. If removed, insert the center cover mount into the deflector splice and around the rolled fabric. Secure with the
cotter pin removed earlier.
For Spring-Loaded Pin Mounts:
2. Examine the two cover halves. The RH half has spring loaded attachment pins on both ends; the second half
has pins on one end only.
3. Lift the RH cover up and set the pins into the mounting holes of the RH end cap.
4. In the center, press the pins into the cover and set into position. Adjust the position until the pins pop out
through the mounting holes of the center support.
5. Lift the second cover half up and slide the inside end onto the protruding attach pins of the first cover.
6. At the LH end cap, press the pins into the cover and set cover into position. Adjust the position until the pins
pop out into the mounting holes of the end cap.
7. Locate the latch lever at the center of the covers. Using a screw driver or similar tool, push the lever to
the left and hold; press the cover into position then release the latch lever. The latching pin is spring
loaded and will slide into the locking channel.
For Threaded Screw Mounts:
2. Examine the two cover halves. One half has spring loaded attachment pins on one end, the second
has none. Lift the first cover half with the pins and insert the pins through the mounting holes of the
center cover support.
3. Align the cover with the RH end cap and screw the cover retaining 1/4-20 x 1 1/2 socket head screws
through the end cap and into the cover. Hand-tighten only.
NOTE: If replacing the end caps: the bottom screw holes in the end caps are threaded at the
factory. It will be necessary to force-thread the top holes in the end cap using the
supplied screws.
4. Lift the second cover half up and slide the inside end onto the protruding attach pins of the first cover.
5. Align the second cover with the end cap and screw the cover retaining screws through the end cap and
into the cover. Hand-tighten only.
6. Locate the latch lever at the center of the covers. Using a screw driver or similar tool, push the lever to
the left and hold; press the cover into position then release the latch lever. The latching pin is spring
loaded and will slide into the locking channel.
052520-301r1
7
Table of Contents
SOKIII & SUMMIT
Service Manual
Carefree of Colorado
COVER BUMPERS
The cover is shipped with bumpers to prevent rattling. Quantities are two (2) for units under 10"; three (3)
for units 10' to 14' and five (5) for units 14' and longer.
To replace missing or damaged bumpers:
1. In the positions shown, fully press the first round section into the inner slot. This is the same slot that
the latch springs or cover attach screws mount in. Please note the orientation of the bumper.
M
an
N u
or al
th C
ht
w om
es
tp
pl
:// P
t
R im
w rin
V e
w te
n
w
S
.n d F
up ts
w r
o
p
rv om
ly f
su
pp
ly
.c
om
Tip: Press one end of the bumper into the slot. While holding the bumper in place, gently stretch the
bumper. This will temporarily make the diameter smaller and easier to press into the slot.
2. Stretch the bumper around and press the second round section into the outer slot.
0” - 3/4”
Outer Slot
Inner Slot
1/4 Deflector Length
(typ)
4”
(typ)
Covers 12’ and Longer and XL Cover Halves
Center Bumper Used On
10’ - 14’ Lengths Only
4”
(typ)
Bumper
Covers Under 12’
(Cover Shown in Raised Position)
SOK3039
8
052520-301r1
Table of Contents
Carefree of Colorado
Service Manual
SOKIII & SUMMIT
END CAP REPLACEMENT
M
an
N u
or al
th C
ht
w om
es
tp
pl
:// P
t
R im
w rin
V e
w te
n
w
S
.n d F
up ts
w r
o
p
rv om
ly f
su
pp
ly
.c
om
NOTES:
a) All replacement end caps use the threaded screw mounts for the cover. All replacement covers
are attached using the threaded screw mounts. Refer to the illustration on page 4.
b) For first time replacement of end caps used with the spring-loaded pin cover attach, it will be
necessary to replace both end caps.
c) The original cover with spring-loaded pins is no longer available as a replacement part. If it is
necessary to replace the cover, it will also be necessary to replace the end caps (both).
Mounting screws are included with the end caps.
d) If replacing a cover with the spring-loaded pins, it will be necessary to replace the end caps for
the threaded screw mount style.
Spring
Locking Pin
Latch
Retainer
Ratchet
Latch
1/4-20 x 3/4
Screw (ref)
10-32 x 1 Screw
(3 per End Cap)
C
To
Roll Bar Assy (ref)
DETAIL A
oac
h
SOK3054
1. Remove the front cover if installed (refer to page 4 or page 6 for XL models).
2. Insert a 3 inch cotter pin through the roll bar and spring on the right end of the roll bar. It may be necessary to
twist the roll bar to align the holes. Bend the ends over to ensure the pin does not accidentally come out.
3. For older units with the ratchet latch (Detail A): Remove the latch retainer and latch. These will not be reused.
4. Remove the 1/4-20 x 3/4 socket head cap screw from the left end cap. Lift the left end of the roll bar and
pull the roll bar out of the right end cap. Set the roll bar and fabric out of the way (i.e. on the roof). It is
not necessary to remove from the coach.
5. Remove the attaching screws and end caps and set aside.
6. Install the new end caps.
7. Roll up any slack material onto the roll bar and install the roll bar into the new end caps.
8. Attach the front cover (refer to page 4 or page 7 for XL models).
NOTE: For first time installation with the replacement end caps: The bottom screw holes are
threaded at the factory. It will be necessary to force-thread the top holes in the end cap
using the supplied screws. The screws do not thread into the cover.
Notes on Using an Existing Cover
Existing covers with the spring-loaded pins can be used with the thread style end caps by pulling the
spring-pins out of the cover; most pins can be removed with a pair of pliers.
1 Piece Spring Assy
Some later models in 2007 uses a 1-piece spring assy. This
assembly is staked into the cover and will not pull out.
• To remove these pins, set the cover onto a padded surface (to
avoid scratches).
Drill Out the
• Using a 1/4" drill, carefully drill out the stake. The pin assembly
Stake
Dimple
can then be removed.
1/4” Drill
• Be sure to deburr and clean the drilled area and remove all
debris and sharp projections that could damage the canopy
when the room is closed.
052520-301r1
9
Table of Contents
SOKIII & SUMMIT
Service Manual
Carefree of Colorado
CANOPY REPLACEMENT
Screw Used w/
Rail Adapter
Awning Rail
Rail Adapter
Fabric Retaining
Screws
1”
Fabric
M
an
N u
or al
th C
ht
w om
es
tp
pl
:// P
t
R im
w rin
V e
w te
n
w
S
.n d F
up ts
w r
o
p
rv om
ly f
su
pp
ly
.c
om
Awning Rail
Awning Rail (ref)
or Rail Adaptor (ref)
Roll Bar
Detail A
1/4-20 x 3/4
Screw
SOK3050
Figure 6. Canopy Replacement.
Removing the Old Fabric
1.
2.
3.
4.
Remove the fabric retaining screws from the awning rail or rail adapter. Do not discard.
Remove the front cover if installed.
For XL Models: Remove the cotter pin and center cover mount. Set parts aside.
Insert a 3 inch cotter pin through the roll bar and spring on the right end of the roll bar. It may be necessary to
twist the roll bar to align the holes. Bend the ends over to ensure the pin does not accidentally come out.
5. Remove the 1/4-20 x 3/4 socket head cap screw from the left end cap. Lift the left end of the roll bar and
pull the roll bar out of the right end cap.
6. Hold the rollbar and slide the fabric out of the awning rail or rail adaptor.
CAUTION
WHEN UNROLLING AND ROLLING FABRIC ON THE ROLL BAR, DO NOT LET THE SPRING LOCK COTTER PIN COME OUT.
7. On a suitable work surface, unroll the fabric from the roll bar
8. Remove the fabric retaining screws in the roll bar then slide the fabric out of the groove. Make note of
which end is left and right and the orientation of the fabric when it was rolled.
Installing the New Fabric
1. Unfold the new fabric and slide the edge of the fabric (edge with black polycord) into the rollbar. The
fabric can only be inserted from the left side of the rollbar.
NOTE: The black polycord should only extend past the fabric approximate 1/2" to 1". Trim any
excess polyrod off before sliding the fabric into the rollbar.
2. Center the fabric on the rollbar then reinstall the fabric retaining screws. The screws should go through
the polycord and into the roll bar. Do not put the screws through the fabric. (Refer to Detail A).
3. Roll the fabric onto the rollbar. Make sure that the fabric rolls up straight.
4. Slide the white polyrod and fabric into the awning rail. Center the fabric and rollbar over the room.
5. Roll up any slack material onto the roll bar.
6. Slide the right end of the roll bar into the right end cap then set the left end of the roll bar into the left
end cap. Attach with one (1) 1/4-20 x 3/4 socket head screw (removed earlier) through the left end cap.
NOTE: The roll bar cogs engage a protrusion in the right end cap.
7. For XL Models: Insert the center cover mount into the deflector splice and around the rolled fabric.
Secure with a new cotter pin (included with replacement fabric).
8. Firmly grasp the rollbar and fabric then remove the spring lock cotter pin inserted on the spring end of
the rollbar. Allow the spring to tension the fabric slowly while releasing the rollbar.
9. Open and close the room to verify the fabric is rolling up straight. Adjust as required.
10. Reinstall the fabric retaining screws in the awning rail or adapter. The screws should go through the
rail, fabric and polycord approximately 1" in from the edge of the fabric. (Refer to Detail A).
11. Install the front cover:
10
052520-301r1
Table of Contents
Carefree of Colorado
Service Manual
SOKIII & SUMMIT
STANDARD SPRING/ROLL BAR REPLACEMENT
The following procedure is used to replace the roll bar or spring or both.
WARNING
THESE PROCEDURES DEAL DIRECTLY WITH THE PRE-WOUND SPRING TENSION IN THE ROLL BAR. FAILURE TO
EXCERCISE CARE AND/OR FAILURE TO FOLLOW THE INSTRUCTIONS CAN RESULT IN PERSONAL INJURY AND/OR
PROPERTY DAMAGE. IF THE SPRING IS PREMATURELY RELEASED, THE ROLL BAR CAN SPIN OUT OF CONTROL AND
CAUSE PERSONAL INJURY AND/OR PROPERTY DAMAGE.
RH Bearing and
Spring Assy
M
an
N u
or al
th C
ht
w om
es
tp
pl
:// P
t
R im
w rin
V e
w te
n
w
S
.n d F
up ts
w r
o
p
rv om
ly f
su
pp
ly
.c
om
Spring
Locking Pin
Twist to Add
Spring Winds
Pop Rivet
(qty: 4)
Polyrod
LH Bearing
Roll Bar
Awning Rail (ref)
or Rail Adaptor (ref)
1/4-20 x 3/4
Screw
SOK3051
REMOVING THE ROLL BAR ASSEMBLY
1. Close the room if open.
2. Remove the front cover if installed.
3. Insert a 3 inch cotter pin through the roll bar and spring on the right end of the roll bar. It may be necessary to
twist the roll bar to align the holes. Bend the ends over to ensure the pin does not accidentally come out.
4. Remove the 1/4-20 socket head screw from the left end cap and set aside. Do not discard.
5. Lift the roll bar up and out of the deflector case. To lift the roll bar, lift the left end first then slide the roll
bar out of the right end cap.
6. Unroll the fabric from the roll bar.
7. Remove the fabric retaining screws in the roll bar then slide the roll bar to the right and off of the fabric.
Fabric can only be removed from the left end of the roll bar.
8. If replacing only the roll bar and/or spring only:
• Fold the fabric on top of the coach and out of the way.
9. If replacing the fabric and roll bar and/or spring:
• Remove the fabric screws in the awing rail or rail adaptor and set aside.
• Slide fabric out of the awning rail or rail adaptor and remove from the coach.
10. Remove the old spring tension.
• Reinstall the roll bar in the deflector assy.
• While firmly holding the roll bar, have a second person pull the spring locking pin. Allow the roll bar
to slowly unwind completely.
CAUTION
USE A PAIR OF GOOD QUALITY WORK GLOVES TO PROTECT THE HANDS WHILE HOLDING ONTO THE ROLL BAR.
INSULATED RUBBER GLOVES PROVIDE A SOLID GRIP. DO NOT ALLOW THE ROLL BAR TO SPIN FREELY.
11. Remove the roll bar from the deflector after the spring is completely unwound.
052520-301r1
11
Table of Contents
SOKIII & SUMMIT
Service Manual
Carefree of Colorado
REBUILDING THE ROLL BAR ASSEMBLY
1. Drill out the rivets holding the LH bearing and RH bearing and spring assy. Remove and set aside the
parts to be replaced.
2. Fully insert the LH bearing assembly into the roll bar and rivet in place using 3/16" pop rivets.
3. Fully insert the RH bearing and spring assembly into the roll bar and rivet in place.
M
an
N u
or al
th C
ht
w om
es
tp
pl
:// P
t
R im
w rin
V e
w te
n
w
S
.n d F
up ts
w r
o
p
rv om
ly f
su
pp
ly
.c
om
4. Lift the assembled roll bar (no fabric) up and install into the deflector assembly. Slide the right end of
the roll bar into the right end cap then set the left end of the roll bar into the left end cap. Attach with
one (1) 1/4-20 x 3/4 socket head screw through the left end cap.
CAUTION
THE NEXT STEPS ARE ADDING TENSION TO THE SPRING. IT IS STRONGLY RECOMMENDED THAT TWO PEOPLE
PERFORM THE OPERATION. USE EXTREME CARE, IF THE SPRING IS PREMATURELY RELEASED, THE ROLL BAR
CAN SPIN OUT OF CONTROL AND CAUSE PERSONAL INJURY AND/OR PROPERTY DAMAGE. SEE THE CAUTION
ABOVE ABOUT THE USE OF GLOVES.
5. Firmly grasp the roll bar and twist toward the coach. Each full rotation of the roll bar is equal to one wind of the
spring. Continue to rotate the roll bar until the appropriate number of spring winds is achieved.
for lengths 96" and under = 13 winds
for lengths 97" - 191"
= 20 winds (not including XL models)
for lengths 192" and longer = 15 winds (XL models only)
6. On the right end of the roll bar insert a cotter pin through the roll bar and spring. It may be necessary to
rotate the roll bar to align the holes. Bend the ends over to ensure the pin does not accidentally come out.
7. Remove the roll bar from the deflector.
INSTALLING THE ROLL BAR
1. If the fabric was left on the coach:
• Slide the roll bar on to the fabric. The fabric can only be inserted from the LEFT end of the roll bar.
• Center the fabric and roll bar and secure using two (2) #6 x 3/8 phillips head screws through the
polycord and rollbar. Do not put the screws through the fabric. (refer to Detail A on page 10)
• Roll the fabric onto the roll bar. The fabric goes over the top of the roll bar toward the coach.
2. If the fabric was removed from the coach:
• Slide the fabric (black polycord) on to roll bar. The fabric can only be inserted from the LEFT end of
the roll bar.
• Center the fabric and roll bar and secure using two (2) #6 x 3/8 phillips head screws through the
polycord and rollbar. Do not put the screws through the fabric.
• Roll the fabric onto the roll bar. The fabric goes over the top of the roll bar toward the coach.
• Slide the white polyrod and fabric into the awning rail. Center the fabric over the room.
• Roll up the slack material onto the roll bar.
3. Slide the right end of the roll bar into the right end cap then set the left end of the roll bar into the left
end cap. Attach with one (1) 1/4-20 x 3/4 socket head screw through the left end cap.
4. Remove the spring locking pin from the roll bar.
5. Open and close the room to ensure that the fabric is rolling up straight on the rollbar. For existing
canopies it may be necessary to remove the retaining screws from the rail, Straighten the fabric as
required.
6. Secure the fabric to the rail with two (2) #6 x 3/8 hex head screws.
12
052520-301r1
Table of Contents
Carefree of Colorado
Service Manual
SOKIII & SUMMIT
REPLACING THE XL ROLL BAR
If the roll bar exhibits recognizable bowing then it is recommended that it be replaced with an updated roll
bar assembly. Part number for the complete roll bar assembly is 33xxx. The replacement assembly
includes the roll bar halves, rivets, end caps and pre-wound spring.
NOTE: Because of the length of the XL roll bar, the process requires 2-3 people.
Roll Bar Splice
3/16 Pop Rivet
(qty: 4)
Right Side
M
an
N u
or al
th C
ht
w om
es
tp
pl
:// P
t
R im
w rin
V e
w te
n
w
S
.n d F
up ts
w r
o
p
rv om
ly f
su
pp
ly
.c
om
(With Sprocket)
Spring Locking Pin
Remove After Mounting
Roll Bar
A
Fabric
Black
Polycord
Left Side
Detail A
(With Threaded Insert)
Roll Up Slack
Before Mounting
Roll Bar in Deflector
Center
Cover Mount
1/4-20 x 3/4
Screw
Rail Adaptor
(ref)
Detail B
SOK3044
Figure 7. Replacing the XL Roll Bar.
1. Assemble the new roll bar:
• (Detail A) Slide the roll bar halves together. The splice is a tension fit. It may be necessary to tap one
end of the roll bar to press the two halves together. Align the predrilled rivet holes in the roll bar and the
splice.
CAUTION
USE CARE TO NOT BEND OR DISTORT THE ROLLBAR. IF IT IS NECESSARY TO TAP THE END OF THE ROLL BAR, USE
CARE TO NOT DAMAGE THE ENDCAP.
• Attach the roll bar half to the splice using four (4) 3/16" pop rivets.
NOTE: If the rivets holes are slightly misaligned, use a #10 drill bit and ream the holes to
allow the pop rivet to be pushed in.
2. Close the room if open.
3. Remove the front covers.
4. Insert a cotter pin through the old roll bar and spring on the right end. It may be necessary to twist the
roll bar back and forth to align the holes. Bend the ends over to ensure the pin does not accidentally
come out.
5. Remove the center cover mount from the deflector. Save the bracket and cotter pin.
6. Remove the 1/4-20 socket head screw from the left end cap and set aside. Do not discard.
7. Lift the roll bar up and out of the deflector case. To lift the roll bar, lift the left end first then slide the
roll bar out of the right end cap.
8. If replacing the fabric and roll bar:
• Remove the fabric screws in the awing rail adaptor and set aside.
• Slide the roll bar and fabric out of the rail adaptor and remove from the coach.
•
•
Unfold the new fabric and slide the edge of the fabric (edge with black polycord) into the
replacement rollbar. The fabric can only be inserted from the left side of the rollbar.
Center the fabric on the roll bar and secure using two (2) #6 x 3/8 phillips head screws through the
polycord and rollbar. Do not put the screws through the fabric. (Refer to Detail A on page )
052520-301r1
13
Table of Contents
SOKIII & SUMMIT
Service Manual
Carefree of Colorado
•
•
Roll the fabric onto the rollbar. The fabric must be oriented around the roll bar as shown.
(Detail B) Slide the white polyrod and fabric into the awning rail adaptor. Ensure that the two
halves of the adaptor are pushed together (no gaps). Center the fabric over the room.
9. If replacing only the roll bar:
• Unroll the fabric from the roll bar.
• Remove the fabric screws in the roll bar and set aside.
• Slide the roll bar to the right while holding the fabric. The fabric can only be removed through the
left end of the roll bar. Set the roll bar aside. The fabric can hang down the side of the coach.
Lift the new roll bar up and slide onto the edge of the fabric (edge with black polycord). The fabric
can only be inserted into the left side of the rollbar.
(Detail B) Center the fabric and roll bar and secure using two (2) #6 x 3/8 phillips head screws
through the polycord and rollbar. Do not put the screws through the fabric. (Refer to Figure 8)
M
an
N u
or al
th C
ht
w om
es
tp
pl
:// P
t
R im
w rin
V e
w te
n
w
S
.n d F
up ts
w r
o
p
rv om
ly f
su
pp
ly
.c
om
•
•
10. Roll up the slack material onto the roll bar.
11. Slide the right end of the roll bar into the right end cap then set the left end of the roll bar into the left
end cap. Attach with one (1) 1/4-20 x 3/4 socket head screw through the left end cap.
12. Remove the spring locking pin from the roll bar.
Awning Rail
13. Open and close the room to ensure that the fabric is rolling up
straight on the rollbar. For existing canopies it may be #6 x 3/8
necessary to remove the retaining screws from the rail adaptor,
Screw
Straighten the fabric as required.
14. If not previously done, secure the fabric to the rail adaptor with
two (2) #6 x 3/8 hex head screws.
15. Reattach the center cover mount.
Rail Adaptor
1”
Fabric
SOK3034
Figure 8. Securing the Fabric.
16. Reattach the covers.
14
052520-301r1
Table of Contents
Carefree of Colorado
Service Manual
SOKIII & SUMMIT
REPLACING THE LIFT BAR COMPONENTS
These instructions apply to the basic Summit and Summit FI.
Lift Bar
Inner Stop Bolt
Outer Stop Bolt
Carrier (ref)
Lift Arm Attaching Screws
M
an
N u
or al
th C
ht
w om
es
tp
pl
:// P
t
R im
w rin
V e
w te
n
w
S
.n d F
up ts
w r
o
p
rv om
ly f
su
pp
ly
.c
om
Lift Arm Assy
Wall
Bracket
Mounting Pad (ref)
Deflector
Summit Lift Bar Assembly
Lift Bar
Inner Stop Bolt
Wall Bracket
Summit
#10 x 3/4
Thread Type A
Summit FI #12 x 1 1/4
Self-Drilling
Deflector
Style 1
Style 2
#10 x 3/4
#10 x 1
Thread Type A Self-Drilling
#10 x 2
#10 x 2 1/2
Thread Type A Self-Drilling
Outer Stop Bolt
Carrier (ref)
Wall
Bracket
Lift Arm Assy
SOK3052
Mounting Pad (ref)
Deflector
Summit FI Lift Bar Assembly
1. Close the room if open.
2. Remove the front cover (refer to page 4).
3. For XL Models: Remove the cotter pin and center cover mount. Set parts aside.
4. Insert a 3 inch cotter pin through the roll bar and spring on the right end of the roll bar. It may be necessary to
twist the roll bar to align the holes. Bend the ends over to ensure the pin does not accidentally come out.
5. Remove the 1/4-20 socket head screw from the left end cap and set aside. Do not discard.
6. Lift the roll bar up and out of the deflector case. To lift the roll bar, lift the left end first then slide the roll
bar out of the right end cap. Set the roll bar and fabric on the roof out of the way.
TO REPLACE THE LIFT ARMS
1. Loosen the outer stop bolt and slide out of the channel and save.
2. Remove the screws from the inner and outer mounting pads and save.
3. Slide the arm set off of the lift bar.
NOTE: If replacing an inner arm set on an XL model, it will be necessary to repeat steps 1 - 3
until the affected arm set is removed from the coach.
4. Slide the new arm set onto the lift bar and attach to the wall bracket and deflector in the same location
as the old arm set.
NOTE: Refer to the descriptive chart in the illustration for the correct screws used to attach the
pads. In 2007 the deflector profile was modified and requires different screws than the
previous profile. Examine the deflector to determine if it is style 1 or style 2.
5. Slide the outer stop bolt into the lift bar channel. Go to "Setting the Stop Bolts" on page 16.
052520-301r1
15
Table of Contents
SOKIII & SUMMIT
Service Manual
Carefree of Colorado
TO REPLACE THE LIFT BAR
1. Loosen and remove the outer stop bolts. Set bolts aside.
2. Loosen the inner stop bolts.
3. Begin sliding the lift bar out of the carriers. When the bar clears the first carrier, remove the inner stop
bolts from the channel and set aside. Continue sliding the lift bar out of the remaining carrier.
4. Begin sliding the new lift bar into the carriers. When the bar is through the first carrier, slide the inner
stop bolts (qty: 2) into the channel. Continue sliding the lift bar into the remaining carrier.
M
an
N u
or al
th C
ht
w om
es
tp
pl
:// P
t
R im
w rin
V e
w te
n
w
S
.n d F
up ts
w r
o
p
rv om
ly f
su
pp
ly
.c
om
5. Slide the outer stop bolts into the lift bar channel. Go to "Setting the Stop Bolts" on page 16.
SETTING THE STOP BOLTS
1.
2.
6.
Extend the room out completely.
Center the lift bar over the room. Tighten the two OUTER stop bolts. These should be placed next to
the outer face of the carriers but with adequate clearance for a socket or closed end wrench to fit over
the bolt head.
Close the room.
Center the lift bar over the room. Tighten the two INNER stop bolts. These should be placed next to
the inner face of the carriers but with adequate clearance for a socket or closed end wrench to fit over
the bolt head.
Install the roll bar:
• Roll up any slack material onto the roll bar.
• Slide the right end of the roll bar into the right end cap then set the left end of the roll bar into the
left end cap. Attach with one (1) 1/4-20 x 3/4 socket head screw (removed earlier) through the left
end cap.
NOTE: The roll bar cogs engage a protrusion in the right end cap.
• For XL Models: Insert the center cover mount into the deflector splice and around the rolled fabric.
Secure with a new cotter pin (included with replacement fabric).
• Firmly grasp the rollbar and fabric then remove the spring lock cotter pin inserted on the spring end
of the rollbar. Allow the spring to tension the fabric slowly while releasing the rollbar.
Install the front cover:
16
052520-301r1
3.
4.
5.
Table of Contents
Carefree of Colorado
Service Manual
SOKIII & SUMMIT
STANDARD MAINTENANCE
Maintaining a Carefree SOKIII or Summit side-out cover is easy. Just follow these basic steps:
• Periodically check that the fasteners are tight. Tighten if necessary.
• Keep the awning fabric and lift arms clean.
FABRIC CARE
CAUTION
M
an
N u
or al
th C
ht
w om
es
tp
pl
:// P
t
R im
w rin
V e
w te
n
w
S
.n d F
up ts
w r
o
p
rv om
ly f
su
pp
ly
.c
om
DO NOT USE OIL BASED CLEANERS OR ANY CAUSTIC, GRANULATED, OR ABRASIVE TYPE CLEANERS ON YOUR
CAREFREE PRODUCT.
1. One of the best ways to keep the fabric looking good and to delay the need for deep or vigorous
cleanings is to hose fabrics off on a monthly basis with clear water. This practice will help prevent dirt
from becoming deeply imbedded in the fabric. In most environments, a thorough cleaning will be
needed every two to three years.
2. When it’s time for a thorough cleaning, the fabric can be cleaned while still on the awning frame.
• For Vinyl Fabric – Use a soft brush and warm water with soap.
• For Acrylic Fabric – Use a stiff brush and warm water with soap.
3. When cleaning the fabric, it is important to observe the following:
• Always use a natural soap, never detergent.
• Water should be cold to lukewarm, never more than 100°F.
• Air-dry only. Never apply heat to the fabric.
• Always allow the fabric to dry thoroughly before rolling up the awning.
Mildew
Mildew is a fungus growth that looks like dirt. Vinyl coated polyester fabrics are mildew resistant because
of a chemical biocide in the vinyl coating. Under ordinary conditions, mildew will not appear. However, in
areas where high temperature and humidity are common, mildew can be a problem and required the
material to be washed more frequently. Thoroughly rinse the fabric with clean water and allow to air dry
completely before rolling up the awning.
Pooling
When water collects on the top of the fabric, this is known as "pooling". This can occur during inclement
weather or if a running air conditioner discharges over the awning. The water is dumped when the awning
is retracted. It is recommended that if water accumulates on the top; retract the awning in steps (8"-12") to dump
the water. This will help prevent the fabric from stretching or distorting.
IMPORTANT NOTE: If the room must be closed during wet weather (rain), close the room in
increments (approximately 6-8"). This is to allow water to run off while the room is closing and
prevent sudden pooling.
HARDWARE MAINTENANCE
•
•
Replace any parts that become damaged.
Periodically check all mounting hardware, screws, lags, etc., and re-tighten when necessary.
052520-301r1
17
Table of Contents
SOKIII & SUMMIT
Service Manual
Carefree of Colorado
PART NUMBER LISTING
M
an
N u
or al
th C
ht
w om
es
tp
pl
:// P
t
R im
w rin
V e
w te
n
w
S
.n d F
up ts
w r
o
p
rv om
ly f
su
pp
ly
.c
om
PART NUMBER/SERIAL NUMBER LOCATION
Deflector (ref)
SOK3047
The part number/ serial number tag for the SOKIII & Summit is located on the deflector toward the back.
This is under the canopy.
18
052520-301r1
Table of Contents
Carefree of Colorado
Service Manual
SOKIII & SUMMIT
SOK III ILLUSTRATED PARTS LIST
11
14
M
an
N u
or al
th C
ht
w om
es
tp
pl
:// P
t
R im
w rin
V e
w te
n
w
S
.n d F
up ts
w r
o
p
rv om
ly f
su
pp
ly
.c
om
10
9
15
12
6
4
2 1
3
5
7
7
13
8
DETAIL C
(Center Cover Support XL Only)
Item
1
2
3
4
SOK3503
Part Number
R001150XXX
Description
Notes
Bracket, Deflector Mount, Short
Spacer, 1/4", Deflector Bracket
R001151XXX
Cover, Deflector Mount Bracket
R001153XXX-xxx Deflector Assy
R001338XXX-xxx Deflector Assy, LH
XL Only
R001339XXX-xxx Deflector Assy, RH
XL Only
R001520XXX
End Cap, LH
Screw Cover Attach
5
R001521XXX
End Cap, RH
Screw Cover Attach
6
R001156
Roller Support
7
R036428-001
Center Support Plate
XL Only
8
610400-xxx
Roller Tube
9
33xxx
Roller Tube Assy
XL Only
2
R001164
End Cap Assy, Roll Bar, LH
10
R001165
Spring Assy
11
R001165XL
Spring Assy
XL Only
R001169XXX-xxx Front Cover Assy
12
R001337XXX-xxx Front Cover Assy
XL Only
3
R001364
Bumper, Deflector, Rubber
pkg of 4
13
Canopy Only
Refer to Canopy Order Form
14
0157xxx
Awning Rail
15
Notes: 1. XXX = Color; xxx = Length in Inches
2. The XL replacement Roller Tube Assy includes the roll bar halves, splice, rivets, end caps and
pre-wound spring.
3. XL replacement cover includes both the LH and RH halves.
052520-301r1
19
Table of Contents
SOKIII & SUMMIT
Service Manual
Carefree of Colorado
SUMMIT FI ILLUSTRATED PARTS LIST
19
18
17
26
14
13
M
an
N u
or al
th C
ht
w om
es
tp
pl
:// P
t
R im
w rin
V e
w te
n
w
S
.n d F
up ts
w r
o
p
rv om
ly f
su
pp
ly
.c
om
D
9
4
1
16
15
20, 21
5
A
10
3
C
25
7
20
2a
21
6, 8
2
7, 9
Obsolete
3
Detail A
Spring-Loaded Pin Attach
DETAIL B
10
22
23
Awning Rail
Rail Adaptor
Screw Attach
24
11
DETAIL C
(Center Support Summit XL Only)
DETAIL D
20
V-Rail
(Used With XL Only)
SOK3502sm
052520-301r1
Table of Contents
M
an
N u
or al
th C
ht
w om
es
tp
pl
:// P
t
R im
w rin
V e
w te
n
w
S
.n d F
up ts
w r
o
p
rv om
ly f
su
pp
ly
.c
om
Carefree of Colorado
Service Manual
SOKIII & SUMMIT
Item
Part Number
Description
Notes
R001150XXX-T
Bracket, Deflector Mount, Tall
1
R001150XXX
Bracket, Deflector Mount, Short
2
Spacer, 1/4", Deflector Bracket
2a
R001151XXX
Cover, Deflector Mount Bracket
3
R001250
Bracket, Lift Bar Assy Mount
4
R001153XXX-xxx Deflector Assy
5
R001338XXX-xxx Deflector Assy, LH
XL Only
3
R001339XXX-xxx Deflector Assy, RH
XL Only
3
Obsolete
End Cap, LH
Spring Pin Cover Attach
6
R001520XXX
End Cap, LH
Screw Cover Attach
7
Obsolete
End Cap, RH
Spring Pin Cover Attach
8
R001521XXX
End Cap, RH
Screw Cover Attach
9
R001156
Roller Support
10
R036428-001
Center Support Plate
XL Only
11
GEXXX17
Lift Bar Assy
12”-16.9” Room Extension
2
12
GEXXX26
Lift Bar Assy
17”-26” Room Extension
2
GEXXX42
Lift Bar Assy
26.1”-42” Room Extension
2
R001160-xxx
Lift Bar
13
R001346XXX-xxx Lift Bar
XL Only
3
R001161
End Cap, Lift Bar
14
R001162-17FI
Extension Arm Assy
12”-16.9” Room Extension
15
R001162-26FI
Extension Arm Assy
17”-26” Room Extension
R001162-42FI
Extension Arm Assy
26.1”-42” Room Extension
R001361-xx
Set Arm Assy, FI
XL Only
R001176
Stop Bolt
16
610400-xxx
Roller Tube
17
33xxx
Roller Tube Assy
XL Only
3
R001164
End Cap Assy, Roll Bar, LH
18
R001165
Spring Assy
19
R001165XL
Spring Assy
XL Only
R001169XXX-xxx Front Cover Assy, Spring Pin Attach
6
20
R001337XXX-xxx Front Cover Assy, Spring Pin Attach
XL Only
6,7
21
0157xxx
Awning Rail
22
R001193-xxx
Awning Rail Adaptor
Optional used w/ FI
23
R038130-xxx
V- Rail
XL Only
24
R001364
Bumper, Deflector, Rubber
pkg of 4
25
Canopy Only
Refer to Canopy Order Form
26
Notes: 1. XXX = Color; xxx = Length in Inches
2. Items 12 includes items 13, 14, 15, 16
3. The XL replacement Roller Tube Assy includes the roll bar halves, splice, rivets, end caps and
pre-wound spring.
4. XL replacement extrusions and extrusion assemblies are sent out in two pieces and assembled
during installation.
5. End caps (Items 6, 8) are obsolete. If replacing end caps, it will be necessary to use items 7 & 9;
remove the spring pins from the ends of the cover and attach the cover to the new end caps with
screws. Use the product installation manual for detailed attachment instructions.
6. For older assemblies with the spring pin attachment: If replacing the cover assembly, it will also
be necessary to replace the end caps for the screw mount style (items 6, 8). New covers are
mounted with screws. Also refer to note 5.
7. XL replacement cover includes both the LH and RH halves.
052520-301r1
21
Table of Contents
SOKIII & SUMMIT
Service Manual
Carefree of Colorado
BASIC SUMMIT ILLUSTRATED PARTS LIST
19
17
14
M
an
N u
or al
th C
ht
w om
es
tp
pl
:// P
t
R im
w rin
V e
w te
n
w
S
.n d F
up ts
w r
o
p
rv om
ly f
su
pp
ly
.c
om
18
25
13
A
D
3
15
15
16
1a
20, 21
8
4
1
2
10
6
C
22
B
21
9
Coa
To
ch
21
5, 7
6, 8
Obsolete
DETAIL A
(Roll Bar Latch - See Notes)
Spring-Loaded Pin Attach
Screw Attach
DETAIL B
10
23
24
11
DETAIL C
(Center Support Summit XL Only)
Awning Rail
V-Rail
(Used With XL Only)
DETAIL D
SOK3501sm
22
052520-301r1
Table of Contents
M
an
N u
or al
th C
ht
w om
es
tp
pl
:// P
t
R im
w rin
V e
w te
n
w
S
.n d F
up ts
w r
o
p
rv om
ly f
su
pp
ly
.c
om
Carefree of Colorado
Service Manual
SOKIII & SUMMIT
Item
Part Number
Description
Notes
R001150XXX
Bracket, Deflector Mount, Short
1
Spacer, 1/4", Defector Bracket
1a
R001151XXX
Cover, Deflector Mount Bracket
2
R001152
Bracket, Lift Bar Assy Mount
3
R001153XXX-xxx Deflector Assy
4
R001338XXX-xxx Deflector Assy, LH
XL Only
4
R001339XXX-xxx Deflector Assy, RH
XL Only
4
Obsolete
End Cap, LH
Spring Pin Cover Attach
6
5
R001520XXX
End Cap, LH
Screw Cover Attach
6
6
Obsolete
End Cap, RH
Spring Pin Cover Attach
6
7
R001521XXX
End Cap, RH
Screw Cover Attach
6
8
Obsolete
Roll Bar Latch
3
9
R001156
Roller Support
10
R036428-001
Center Support Plate
XL Only
11
ZEXXX17
Lift Bar Assy
12”-16.9” Room Extension
2
12
ZEXXX26
Lift Bar Assy
17”-26” Room Extension
2
ZEXXX42
Lift Bar Assy
26.1”-42” Room Extension
2
R001160-xxx
Lift Bar
13
R001346XXX-xxx Lift Bar
XL Only
4
R001161
End Cap, Lift Bar
14
R001162-17
Extension Arm Assy
12”-16.9” Room Extension
15
R001162-26
Extension Arm Assy
17”-26” Room Extension
R001162-42
Extension Arm Assy
26.1”-42” Room Extension
R001347-xx
Set Arm Assy,
XL Only
R001176
Stop Bolt
16
610400-xxx
Roller Tube
17
33xxx
Roller Tube Assy
XL Only
4
R001164
End Cap Assy, Roll Bar, LH
18
R001165
Spring Assy
19
R001165XL
XL Spring Assy
XL Only
R001169XXX-xxx Front Cover Assy
7
20
R001337XXX-xxx Front Cover Assy
XL Only
7,8
21
R001364
Bumper, Deflector, Rubber
22
0157xxx
Awning Rail
23
R038130-xxx
V- Rail
XL Only
24
Canopy Only
Refer to Canopy Order Form
25
Notes: 1. XXX = Color; xxx = Length in Inches
2. Items 12 includes items 13, 14, 15, 16
3. The roll bar latch has been discontinued. For spares order RH end cap (item 8). Also refer to note 6.
4. The XL replacement Roller Tube Assy includes the roll bar halves, splice, rivets, end caps and
pre-wound spring.
5. XL replacement extrusions and extrusion assemblies are sent out in two pieces and assembled
during installation.
6. End caps (Items 5, 7) are obsolete. If replacing end caps, it will be necessary to use items 6 & 8;
remove the spring pins from the ends of the cover and attach the cover to the new end caps with
screws. Use the product installation manual for detailed attachment instructions.
7. For older assemblies with the spring pin attachment: If replacing the cover assembly, it will also
be necessary to replace the end caps for the screw mount style (items 6, 8). New covers are
mounted with screws. Also refer to note 6.
8. XL replacement cover includes both the LH and RH halves.
052520-301r1
23
Table of Contents
M
an
N u
or al
th C
ht
w om
es
tp
pl
:// P
t
R im
w rin
V e
w te
n
w
S
.n d F
up ts
w r
o
p
rv om
ly f
su
pp
ly
.c
om
SOKIII & SUMMIT
24
Service Manual
Carefree of Colorado
NOTES:
052520-301r1
Table of Contents
This Manual is Compliments of
Northwest RV Supply
86325 College View Road
Eugene, OR 97405
Local: 541-746-9092
Toll-Free: 866-678-7467
Fax: 541-736-5573
http://www.nwrvsupply.com
[email protected]
Northwest RV Supply carries a large spectrum of surplus, used, and new
RV parts and components. Please feel free to visit our website for
additional information.