1
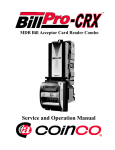
OPERATION & SERVICE
MANUAL
1
2
TABLE OF CONTENTS
SECTION 1: GENERAL INFORMATION
Introduction
Naming Convention
Bezel Types
Vantage Components
4
5
6
7
SECTION 2: INSTALLATION & SETUP
Unpacking/Installing the Validator
Configuring Options
Adding/Removing Coupons
8
9
11
SECTION 3: GENERAL ACCEPTOR OPERATION
System Operation
12
SECTION 4: MAINTENANCE
Cleaning and Maintenance
SECTION 5: PARTS LIST
Mainframe Assembly, Cashboxes, & Masks
Mainframe & Main Logic Boards
Upper Sensor Board & Upper Housing
Assembly
Lower Housing Assembly
Chassis Gear Case Assembly & Detail Parts
PC Boards & Harnesses
Optional Kits
Mask Inlet Decals
Other Decals
SECTION 6: TECHNICAL INFORMATION
Input Power, Interfaces, Specifications
Dimensional Drawings
Block Diagram Schematic
30 Pin Mating Connector
Harness Connectors
Standard Cashboxes & Inlet Decals
Factory Default Settings
13
14
16
17
18
19
21
22
23
25
26
27
29
30
31
32
33
3
SECTION 1: GENERAL INFORMATION
number and serial number whenever you call
your Coinco Service Center for information or
service.
The first four digits of the bill acceptor serial
number indicate when the unit was built, which is
also the beginning of the warranty period:
•
First two digits indicate week of
manufacture.
•
Third and fourth digits indicate the year.
Introduction
This manual contains information on installing,
operating and maintaining Coinco Vantage™
Series bill acceptors. This manual is intended for
owners, route operators and shop-level
technicians as a primary source of information.
Taking time to read this manual and become
familiar with the information will help you obtain
the best performance from your Vantage bill
acceptor.
For example, Serial number 1508000123 indicates the unit was manufactured in the 15th week
of 2008.
Product Overview and Features
The Vantage bill acceptor incorporates a wide
range of benefits, including:
•
Quick-Release bezel speeds installation
and removal.
•
Optional FlexStack™ bill box expands
from 200 bills to hold up to 500 bills. Fixed
note bill boxes are available with between
300 and 1100 note capacities.
•
Illuminated bezel and status indicators
simplify setup and troubleshooting.
•
Patented note path lockout provides high
security Level Three stringing and fishing
protection.
•
Smart Bezel™ (optional) actively
communicates ability to accept $5 bills.
Icons
The following icons will guide you throughout the
manual. Each icon highlights an area you may
want to pay closer attention to.
Indicates a checklist type of process that
you can readily “check” as you proceed to
the next step.
Indicates a warning that you should
adhere to. It is often accompanied by
the words “DO NOT…”
Indicates a helpful hint or shortcut to
simplify the task.
Basic operational features include:
•
Bill widths accepted: 66mm (for Vantage
Vx6 models) or 72mm (for Vx7 models).
•
Operating voltages: 110VAC, 24VAC,
34VDC.
•
Communication Interface: MDB, Pulse,
Parallel, Vend Serial
•
Mounting: Upstack or Downstack.
•
Bezels: Basic, Slimline, or Downstack.
All versions feature standard Impulse
lighting. Smart Bezel™ option is available
for Basic and Slimline versions.
•
Acceptance orientation: four ways.
•
Coupons: Teach-n-Go field teach
capability.
Indicates where you can find additional
information regarding this specific topic.
For Your Records
A label indicating the bill acceptors model number
and serial number can be found on the left side
of the Vantage bill acceptor. Refer to the model
4
SECTION 1: GENERAL INFORMATION
Naming Convention
VX X X X X X XX XX
S p a cin g
is fo r
illustration
p u rp oses
o n ly.
Type
A = A m usem ent (P ulse, V end S erial)
L = Legac y (P u lse , P a rallel, V e n d S e rial, M D B )
X = MDB
Bill Width
6 = 66m m
7 = 72m m
Input Voltage
1 =110V A C
2 = 24V A C
3 = 34V D C
Bezel
B = B asic
S = S lim line
D = D o w nstack *
M = B asic M etal*
* : 66m m m odels only
Bill Types Accepted
2
3
4
5
6
=
=
=
=
=
US
CA
US
CA
US
$1,
$5,
$1,
$5,
$1,
5
10, 20
5, 10, 20
10, 20, 50, 100
5, 10, 20, 50, 100
Cashbox Capacity
3 = 300 B ills 4 = 400 B ills
5 = F lexS tack ™ (200-500 B ills)*
7 = 700 B ills* 9 = 900 B ills*
1 = 1100 B ills* 0 = N o C as hbox*
*: 66m m m odels only
Country Code
U S = U nited S tates
C A = C anada
A dditiona l country
codes available
Build
00 = S tandard
5
SECTION 1: GENERAL INFORMATION
Vantage Bezel Types
Basic
Slimline
(S ta nda rd o r M e ta l)
Downstack
Bill Acceptance
Model
Bill
Width
V x 6xx 2xUS
V x 6xx 4xUS
66mm
V x 6xx 6xUS
V x 7xx 3xC A
V x 7xx 5xC A
72mm
$1
$5 $10 $20 $50 $100
x x
x x x
x x x
x x
x x
x
x
x
x
x
x
x
x
N ote: U S $2 bill ac c eptanc e is available. P leas e c ontac t y our C oinc o
S ales R epres entative for additional inform ation.
6
SECTION 1: GENERAL INFORMATION
Vantage™ Components
Cash
Access
Lid
Cashbox
Release
Option
Switches
Cashbox
Front
Cover
Inlet
Mask
Harness
Connection
(non-M D B )
Impulse
Lighting /
Smart
Bezel™
Lights
Harness
Connection
(M D B )
Quick
Release
Bezel Tab
Bill Inlet LEDs
Quick
Release
Bezel Tab
Diagnostic
Indicator LED
Data
Port
Data Port
Cover
7
Service Mode
Button
SECTION 2: INSTALLATION & SETUP
Unpacking the Validator
Quick Release
Bezel Operation
After removing the bill acceptor from the shipping
carton, inspect it for possible damage. If the unit
is damaged, notify the shipping company
immediately. The consignee (person or company
receiving the unit) can file a claim against the
carrier for shipping damage. We recommend you
keep the original carton and packaging materials
to reuse if you need to transport or ship the bill
acceptor in the future.
If the bill acceptor is being stored or used as a
spare, always keep it in its shipping carton when
not in use. This will keep it clean and offer the
best protection for the unit.
Option Switch Configuration
Push Firmly to
Release Bezel
See Figure 1. Note this step is not necessary for
MDB only models.
1. P ush firm ly on Q uick R ele ase T abs using a
scre w driver tip. T abs w ill m ove to w a rds
bezel a nd latch .
2. O nce both tabs are latched, th e bill
acceptor w ill separate from th e bezel.
3. T o reattach, push bill acceptor bod y firm ly
onto beze l until it locks.
Figure 2
Option / Dip Switch Settings
Note: There are no switches on MDB only models.
ON
12345678
Installing the Bill Acceptor
1.
OFF
Pulse Timing
50 / 50mS
150 / 150mS
Custom
Parallel (Credit Line)
Switch 3
Switch 4
Switch 5
Switches 6 - 8
2.
Switch 1
Switch 2
ON
ON
OFF
OFF
ON
OFF
ON
OFF
3.
ON
OFF
4.
5.
4 P ulse / $ 1 P ulse / $
A lw ays
H ost
E nabled
E nabled
S erial
P ulse
Reserved
6.
N otes: "C ustom " has a default setting of 200 / 200m S but
Note:
1. R ecycle
po w er for sw itch
s to take
can
be reconfigured
for asetting
different
timeffect.
ing. P lease contact
2. “C ustom ” has a default setting of 200 / 200m S but can be
your
C
oinco
S
ales
R
ep
for
m
ore
inform
ation.
reconfig ured for different tim ing. P lease contact your C oinco S ales
R ep for m ore inform ation.
Figure 1
8
Remove power from the host machine.
DO NOT connect the bill validator harness
to the machine with power connected.
Install the bill validator into the host
machine using the mounting studs and
hardware in the machine. To simplify
installation, see Figure 2.
Install / connect the proper interface
harness to the host machine.
Restore power to the machine.
The illuminated bill inlet will begin to flash
and the stacker motor will cycle upon
power-up. If this does not occur, check
the wiring harness connections and make
sure power is applied.
Check the Vantage diagnostic LED to
verify it is green and ON continuously. If
it is not, you can troubleshoot based on
the status shown on the cashbox decal or
see Figure 3.
SECTION 2: INSTALLATION & SETUP
7.
8.
9.
Several of the configuration setting options bear
further definition:
With the vend price set below one dollar,
insert a one dollar bill.
Verify credit has been established.
Check the bill box to see that the one
dollar bill was properly stacked.
Diagnostic
Flash Codes
Out of Service Warning
Operational
Flash Code
Coupon Acceptance: Enables or disables
acceptance of all user-loaded coupons. If this
is set to “OFF”, no coupons will be accepted.
•
Smart Bezel™ (default setting for VLxxx2
and VXxxx2 models): enables the ability to
communicate in real time which bills are being
accepted by the bill acceptor. If the user
wants to use Impulse lighting instead, they will
need to order the decal set as shown in
the Parts List. If a user of the VA, VLxxx4, or
VXxxx4 should wish to use this feature, they
will also need the same decal.
•
Impulse Lighting (default setting for all
VA,VLxxx4 and VXxxx4 models): illuminates
the upper blinking lights on the bezel. Turning off this option leaves only the lower
inlet lights illuminated.
•
High Security vs. Standard Security Bill
Acceptance: the default Standard Security
setting (OFF) accepts 95+% of genuine streetgrade bills. High Security mode is
recommended for locations with a higher risk
of frauds. In High Security mode, the bill
acceptor will still accept the same percentage
of normal genuine street-grade bills, but it
will become more restrictive in accepting
“borderline” notes – those seen as having
defects or at the broader fringes of being
acceptable.
•
1-Way / 2-Way / 4-Way: Defines the number
of bill orientation directions that the bill
acceptor will accept. The first two are face-up
only, the last is all 4 possible orientations
(default).
•
Level 3 Security: Recommended for higher
risk environments. Provides additional level
of security against stringing and fishing
attempts. With Level 3 Security, the rest
position of the bill stack pushplate blocks
access to the bill path.
Validator Status
GRN
(solid)
S a les M ode / O K
GRN
x1
C o u p o n T e a ch
GRN
x2
S ervice M ode
YEL
x1
C le an U n it
YEL
x2
S ervice U n it
RED
x1
C ash b o x F ull
RED
x2
C le ar B ill P a th
RED
x3
O ut of S ervice
Figure 3
•
Diagnostic
Indicator LED
Configuring Bill Acceptance and
Other Acceptor Options
See Figure 4 for how to enter, navigate, and set
bill acceptance and other options in Configuration mode. Figure 6 shows the four “pages” of
bill acceptance options and Figure 7 shows two
examples.
9
SECTION 2: INSTALLATION & SETUP
Why doesn’t the $50 and $100 bill
acceptance option show up in options
Mode 3 for my validator?
Not all options are available on all bill
acceptors. If a model does not offer a
certain option, it won’t appear as an
enabled option while scrolling through the
option settings.
Lower Housing
Removal
To Configure Options
#
Action
1.
H old button until
SERV D iagnostic LE D
flashes.
2.
R e m o ve L o w e r H o u sing
3.
S e t O p tio n s A s D e sire d
4.
(see Options Navigation and
Configuration Settings figures)
R e -in sta ll L o w e r
H o u sin g . In le t L E D s
fla sh 5 tim e s co nfirm in g
o p tio ns a re sa ve d .
5.
1.1. Depress
Depress
Button
Button
Firmly
Firmlyto
to
Release
Release
Diagnostic
Light
Mode
S ervice
GRN
x2
C onfig
OFF
C onfig
OFF
S a le s o r
R eady
GRN
Figure 5
Configuration Settings
T e st u n it to e n su re p ro p e r se tu p .
ON
SERV
Page 2
S cro lls to next Page o f o p tio n s.
Service Mode Button
Page 3
H old for
SERV
next P age
S cro lls to next set o f o p tio n s
w ith in cu rre n t P a g e . E a ch o p tio n
sh o u ld b e co n figu re d p ro p e rly
b e fo re m o vin g to th e n e xt P a g e .
Diagnostic
Indicator LED
Figure 4
Inlet LED On:
O p tio n Enabled
10
OFF
Inlet LED Off:
O p tio n Disabled
Bill Acceptance
Bill Inlet LEDs
$1
$5
$10
$20
Page 1
(Flash x1)
Coupons / Security / Bezel Lights
Bill Inlet LEDs
Coupons High Impulse Smart Page 2
Security
Bezel™ (Flash x2)
Bill Acceptance / Orientation
Bill Inlet LEDs
1-Way
2-Way
4-Way (both on)
Page 4
P ress
once
Page 1
Options Navigation
SERV
2.
2. Push
Push
Depressed
Depressed
Button
Buttonto
to
Back
Backto
to
Remove
Remove
Lower
Lower
Housing.
Housing.
$50
$100
Page 3
(Flash x3)
Level 3 Security
Bill Inlet LEDs
Level 3
Security
Reserved
Page 4
(Flash x4)
Figure 6
SECTION 2: INSTALLATION & SETUP
Configuration Examples
Add / Remove Coupons
Example 1
P a g e 1 : $1s and $5s Enabled
Bill Inlet LEDs
ON
ON
O FF
O FF
$1
$5
$10
$20
#
Action
1.
SERV H o ld u n til D ia gno stic
L E D fla she s.
2.
SERV
3.
ON
Page 1
4a.
(Flash x1)
5a.
P a g e 2 : Coupons & Impulse
Lighting Enabled
Co
o
up
ns
Bill Inlet LEDs
ON
O FF
LED
LEDs
S e rvice
GRN x 2
OFF
Coupon
T e a ch
GRN
GRN
(flash)
(flash)
In se rt C o u p o n to b e Added or Removed.
Removed
C o u p o n accep te d
a n d re tu rn ed .
Coupon
T e a ch
A utom atically returns to
S ales M ode. C oupon
addition com plete.
S a les
GRN
GRN
(fast rate)
(fast rate)
GRN
(solid)
GRN
(cycle)
REMOVE Coupon
4b.
O FF
H o ld b u tton un til
In le t L E D s fla sh .
Diagnostic Bill Inlet
ADD Coupon
Example 2
ON
Mode
ON
5b.
h
a r t Page 2
H i g r i t y p u l s e S m e l ™ (Flash x2)
z
cu
Im
Be
Se
C o u p o n d isa b le d
a n d re tu rn ed .
Coupon
T e a ch
A utom atically returns to
S ales M ode. C oupon
rem oval com plete.
S a les
GRN
GRN
(fast rate)
(fast rate)
GRN
GRN
(cycle)
C oup on NOT R ecog nize d
4c.
ON : O ption E n ab le d OFF : D isab le d
C o u p o n re turn e d.
In let L E D s flash a t
o rig in a l rate .
Coupon
T e a ch
GRN
GRN
(flash)
(flash)
In se rt an o th e r coup o n (see S te p 2 ab o ve )
Figure 7
5c.
Returning to the Default
Configuration Settings
- OR -
SERV
H o ld b u tto n to retu rn to S a le s M o d e (note unit
returns autom atically after 40 secs of inactivity).
Figure 8
The bill acceptor can be returned to the original
factory default configuration by powering the unit
on while the mode button is depressed. When
this is done, all user-set configuration changes
will be lost. Factory default settings can be found
in Section 6 of this manual
Adding / Removing Coupons
Coupons can be added or removed on site
without the use of a Field Programmer.
See Figure 8.
I’ve successfully added a coupon, but
the bill acceptor still will not accept it.
Why?
The Coupon acceptance option must be
set to “ON” in Page 2 of the
configuration settings. This “global” setting
allows (ON) or disallows (OFF)
acceptance of all user-loaded coupons.
11
SECTION 3: OPERATION
System Operation
Bill Recognition
Sensors detect when a bill is inserted into the
acceptor. These signal the transport motor to
activate to pull the bill into the bill acceptor.
Bill Validation
From the time the transport motor begins to run
until the trailing edge of the bill passes over them,
the bill validation sensors scan the bill. This
information is forwarded to the microprocessor to
determine the validity of the bill.
level of security aganst stringing and fishing
attempts.
Water Removal Cycling Feature
Vantage employs a patented water removal
cycling technique. When certain sensors are
blocked prior to a valid bill being inserted, the
bill will then be cycled back-and-forth to wick off
the water in the bill path. After the bill is quickly
cycled several times, the bill is pulled in for
validation and the system returns to normal
operation.
Smart Bezel™
Communicates to Customer Which
Bill Stacking and Credit
If the bill is determined to be authentic, it is transported to the stack position. Once the bill is in
the stacking position, the stacker motor runs and
credit is given.
Bills Are Accepted
F e a tu re n o t a va ila b le o n a ll m o d e ls.
Denotes acceptance of both $1 and $5 bills
Bill Rejection
If the bill is determined to be invalid, the wrong
denomination, or if some cheating method is
sensed, the bill transport motor will reverse to
return the bill to the customer.
Smart Bezel™
The Smart Bezel option is used to communicate
in real time, the bill acceptors real-time
acceptance of US $5 bills ($10 bills for Canada)
to the customer. Under the default condition, the
$1 & $5 light ($5 & $10 for Canada) will show
acceptance of $5 bills as long as there is enough
change in the changer to make change for the
$5. See Figure 9.
•
•
Is Lit When: Both bills
accepted and change made for either.
Is Lit When: Change can only
be made for $1 bills.
Note: For correct operation, make sure $1 and $5
bills are enabled (see Configuration Settings).
Anti-Stringing / Anti-Fishing
Figure 9
Sensors detect when objects are inserted into the
bill validator. If something is inserted and it is not
seen as a bill, it will be rejected. If something is
still seen in the path after a valid bill is
transported and stacked, the stacker plate will
extend as a means of keeping the valid bill from
being withdrawn. With Level 3 Security, the rest
position of the bill stacker pushplate completely
blocks access to the bill path. Once a valid bill is
inserted, the pushplate withdraws and the bill is
pulled in. Level 3 Security provides an additional
12
SECTION 4: MAINTENANCE
Vantage™ Cleaning and Maintenance
Note: Electrical power must be disconnected from the bill acceptor before performing any
cleaning operations.
Recommended Cleaning Material
A mild solution of detergent can be used for cleaning the belts, bill path and sensor lenses, as well as
for general cleaning of the bill acceptor. Beverages or other water-soluble liquids which have been
spilled on or into the bill acceptor can usually be removed with warm soapy water. External surfaces
can be cleaned with a damp cloth.
Note: Petroleum-based cleaners and freon-based propellants can damage plastic and some electronic components. Scouring pads and stiff brushes may harm circuit boards and can mar the plastic.
These items should never be used to clean the bill acceptor.
Cleaning the Vantage
The Vantage should be cleaned every 20,000 bills or every two years (or as needed, depending on
the environmental conditions of the location). Dust can be removed with a soft brush or cloth or it can
be blown out using compressed air.
13
SECTION 5: PARTS LIST
MAINFRAME ASSEMBLY, CASHBOXES, & MASKS
5
6
7,8,9,10
1
2
3
4
11
12
13
14
14
SECTION 5: PARTS LIST
ITEM #
1
PART #
US
CAN
410182
410182-1
410483
410183-1
2
3
4
410035
410083
410159
345-4R6
5
6
7
8
9
10
410160
410161
410162
410163
410164
410165
NA
410816
410815
NA
NA
NA
11
12
13
14
410166
410167
410168
410169
410179
NA
410181
NA
DESCRIPTION
QTY
NOTES
Mainframe Assembly - MDB
Mainframe Assembly - Amusement
1
1
Includes 409400
Includes 409400-1
& 409406-1
Lower Housing Assembly
Front Cover - Mainframe
Screw
Cashbox Assembly
FlexStack™ (200 - 500 Note)
300 Note
400 Note
700 Note
900 Note
1100 Note
Inlet Bezel Assembly
Basic
Basic - Metal
Slimline
Downstack
1
1
2
1
15
1
SECTION 5: PARTS LIST
MAINFRAME & MAIN LOGIC BOARDS
4
3
1
8
2
6
7
9
5
ITEM #
PART #
US
CAN
926325
927494
409400
409400-1
410042
410085
DESCRIPTION
QTY
Main Logic Board Insulator - 110VAC
Main Logic Board Insulator - All Others
Main Logic Board - MDB
Main Logic Board Amusement
Mainframe
1
1
1
1
MDB Only
Use with 409406-1
Includes Item #5
4
409405
409406
409406-1
24VAC Logic Board - Legacy
110VAC Logic Board - Legacy
110VAC Amusement Logic Board
1
1
1
Use with 409400
Use with 409400
Use with 409400-1
5
6
7
8
9
927905
345-4R6
928032
928031
928038
Quick Release Finger
Screw
30 Pin Cover
Dip Switch Cover
MDB Cover
2
2
1
1
1
MDB Only
MDB Only
Amusement Only
1
2
3
16
NOTES
SECTION 5: PARTS LIST
UPPER SENSOR BOARD & UPPER HOUSING ASSEMBLY
7
1
8
9
2
4
3
5
6
ITEM #
PART #
US
1
2
3
4
5
6
7
8
9
DESCRIPTION
QTY
Upper Sensor Board Assembly
Upper Enclosure
Inlet Gear, 18 tooth
Inlet Gear, 13 tooth
Inlet Roller Assembly
Upper Housing
Upper Sensor Harness
Harness Grommet
Validation Shroud
17
1
1
1
2
1
1
1
1
1
CAN
409401
927230
927011
927012
410036
927229
928000
409413
927924
927511
NOTES
SECTION 5: PARTS LIST
LOWER HOUSING ASSEMBLY
3
5
1
2
6
4
7
10
8
9
11
12
13
14
17
15
16
ITEM #
1
2
3
4
5
6
7
8
9
10
11
12
13
14
15
16
17
PART #
US
927916
CAN
927998
927236
925594
171730
927045
927995
927238
927933
927239
927237
927235
927046
927996
927511
409402
409434
409414
927234
927997
345-4R6
927272
DESCRIPTION
QTY
Lower Housing Back Cover
Flat Pinch Spring
Light Pipe
Pinch Roller
Lower Housing
Inlet Roller
Roller Housing
Inlet Roller Retainer
Inlet Coil Spring
Coil Spring
Lower Enclosure
Validation Shroud
Lower Sensor Board Assembly
Lower Sensor Harness
Bottom Cover
Screw
Mode Button
18
1
2
1
4
1
1
2
1
1
2
1
1
1
1
1
4
1
NOTES
SECTION 5: PARTS LIST
CHASSIS GEAR CASE ASSEMBLY - 410170
1
DETAIL PARTS
17
18
12
8
3
4
5
2
9
6
7
16
15
14
11
13
19
10
19
ITEM #
PART #
US
1
2
3
4
5
6
7
8
9
10
11
12
13
14
15
16
17
18
19
20
DESCRIPTION
QTY
Chassis Gear Case Assembly
Chassis Board Assembly
Motor Assembly
Belt
Right Scissors Assembly
Left Scissors Assembly
Push Plate Assembly
Top Push Plate Shaft
Bottom Push Plate Shaft
Transport Drive Roller
Pulley, Gear Assembly
Drive Pulley Assembly
Pinch Roller
Belt Tensioner
Belt Tension Spring
Pulley Shaft
E-Ring
E-Ring
Screw
Chassis Gear Case Assembly
1
1
2
2
1
1
1
1
1
2
2
2
4
2
2
6
2
4
6
1
NOTES
CAN
410170
410003
410026
927205
410031
410031-1
410055
927043
927044
927023
410029
410028
171730
927202
927038
927245
927223
927222
345-2R6
TBD
20
Entire Assembly
as Shown
SECTION 5: PARTS LIST
21
SECTION 5: PARTS LIST
Vantage Series - Optional Kits & Accessories
D escription
P art N o.
Includes
T ypical A pplication
110V Adapter
410061
B rack et, labels, hardw are, and
110V harness w ith plug
F or m ounting in w ooden
am usem ent cabinets
Amusement Adapter
410063
B rack et
A dds outer low er side
m ounting attach points
Mounting Adapter
406575
P ainted m etal fram e w ith m ounting
studs, nuts
F or m ounting in specialized
applications
Mounting Adapter
408752-1
P ainted m etal fram e w ith couplers
and extension studs
F or m ounting 72m m B asic
versions in snack m odels
Metal Bezel
410167
M etal bezel, upper decal, m ounting
plate + hardw are, S m art B ezel™ &
$1-$20 inlet decals
F or higher risk locations
Tamper Evident
Locking Hasp
410002
T w o piece, snap-on assem bly
Lock ing flanges restrict
access for 300, 400, 700,
900, and 1100 cashboxes
Amusement Adapter
K it #41 0063
110V Adapter
K it #41 0061
Mounting Adapter
K it #40 6575
Adapter Bracket
K it #40 8752 -1
Metal Bezel
K it #41 0167
Tamper Evident
Locking Hasp
(lock not included)
K it #41 0002
22
SECTION 5: PARTS LIST
Vantage Mask Inlet Decals - US
Basic / Downstack
Legacy 110VAC
Slimline
Part # 928507
Part # 928508 Basic
Part # 928508-1 Downstack
Part # 928511
Part # 928509 Basic
Part # 928509-1 Downstack
Part # 928512
Part # 928510 Basic
Part # 928510-1 Downstack
23
Vantage Mask Inlet Decals - Canada
Basic Legacy 110VAC
Slimline
Part # 928520
Part # 928518
Part # 928514
Part # 928513
Part # 928516
Part # 928515
Part # 928509
Part # 928517
24
SECTION 5: PARTS LIST
Vantage Decals - Other
#927503
#928027
#927505
Vantage Decals – Upper Mask
Basic / Downstack
Legacy 110VAC Slimline
#928024
#928023
25
SECTION 6: TECHNICAL INFORMATION
Input Power and Interfaces
Nominal
Model # Voltage
V Ax 1
110V A C
Minimum
Requirement
90-135V A C ; 47-63H z
V Lx 1
V Lx 2
24V A C
18-30V A C ; 47-63H z
V Xx 3
34V D C
20-45V D C
Amps
Interface
12W / 0.1A rm s (avg.) Idle;
25W / 0.4A rm s (avg.) O perating;
40W / 0.7A rm s (m ax) S tall / F ull
A m usem ent P ulse,
V end S erial
P ulse, P arallel, V end
S erial
4W / 0.3A rm s (avg.) Idle;
25W / 1.8A rm s (avg.) O perating;
40W / 2.5A rm s (m ax) S tall / F ull
4W / 0.2A (avg.) Idle;
25W / 1.2A (avg.) O perating;
40W / 1.8A (m ax) S tall / F ull
Specifications
Operating Temperature
0°F to 150°F
-18°C to 65°C
Storage Temperature
-22°F to 160°F
-30°C to 72°C
Relative Humidity
20% to 95% non-condensing
Shipping Weight in Carton
Approximately 4 lbs. or 1.81 kilograms
26
P ulse, P arallel, V end
S erial
MDB
SECTION 6: TECHNICAL INFORMATION
Dimensional Drawings
Basic & Downstack Bezels
m m (in ch e s)
27
SECTION 6: TECHNICAL INFORMATION
Slimline Bezel
m m (in ch e s)
28
SECTION 6: TECHNICAL INFORMATION
Block Diagram Schematic
409400
Logic Board
P1
P2
P3
P5
P4
409413 H arness
409401
Upper Sensor
Board
409403
Chassis
Board
409416 H arness
409414 H arness
409402
Lower Sensor
Board
409415 H arness
Expansion Board
(4 0 9 4 0 5 / 4 0 9 4 0 6 /
409407 / TBD)
29
To
VMC
E xpansion
H arness
SECTION 6: TECHNICAL INFORMATION
30 Pin Mating Connector
Pin 15
Pin30
Pin 1
Pin16
R e cep ta cle H ou sin g: A M P 1 -1044 82 -3
R e cep ta cle P in s: A M P 10 4479 -2
R e cep ta cle P o la rizin g P in s: A M P 870 77 -2
30 18
Pin Pin
#
#
1
2
3
4
5
6
7
1
8
2
9
3
10
11
12
13
14
15
16
17
18
19
20
21
22
23
24
4
5
6
7
8
9
10
11
12
25
13
26
27
28
29
30
14
15
16
17
18
M o d e ls
VLx1 (110V A C )
VLx2 (24V A C )
VAx1 (110V A C )
C R E D IT _R E LA Y _C O M
Not Used
C R E D IT _R E LA Y _C O M
C R E D IT _R E LA Y _H O T
24V A C _H O T
H O T _E N A B LE
KEY
Not Used
C R E D IT _R E LA Y _C O M
Not Used
Not Used
S am e
Not Used
S am e
IN T E R R U P T
C R E D IT _5D O LLA R &
S E R IA L/P U LS E
S IG N A L_G R O U N D
D A T A & S E R IA L_T XD
E S C R O W _H IG H
E N A B LE _5D O LLA R _H IG H
E N A B LE _2D O LLA R _H IG H
E N A B LE _1D O LLA R _H IG H
S am e
S am e
S am e
S am e
S am e
S am e
S am e
S am e
S am e
S am e
Not Used
Not Used
Not Used
Not Used
C R E D IT _R E LA Y _N O
Not Used
D C _R E T U R N
N E U T R A L_IN H IB IT
N E U T R A L_E N A B LE
Not Used
C R E D IT _R E LA Y _N O
Not Used
Not Used
N E U T R A L_E N A B LE
110V A C _N E U T R A L
N E U T R A L_IN H IB IT
KEY
C R E D IT _1D O LLA R &
C R E D IT _P U LS E
IN T E R R U P T
H O T _E N A B LE
KEY
110V A C _H O T
E A R T H _G R O U N D
24V A C _N E U T R A L
KEY
O U T _O F _S E R V IC E
Not Used
S am e
S am e
S am e
A C C E P T _E N A B LE
C R E D IT _2D O LLA R &
O U T _O F _S E R V _P O W E R
S E N D & S E R IA L_R XD
E N A B LE _1D O LLA R _LO W
E N A B LE _2D O LLA R _LO W
E N A B LE _5D O LLA R _LO W
E S C R O W _LO W
30
110V A C _N E U T R A L
Not Used
KEY
KEY
110V A C _H O T
E A R T H _G R O U N D
Not Used
Not Used
S am e
S am e
Not Used
S am e
S am e
S am e
S am e
S am e
S am e
Not Used
Not Used
Not Used
Not Used
SECTION 6: TECHNICAL INFORMATION
Harness Connectors
6 Pin – 34VDC MDB
4 Pin –110VAC Single Price
Molex 39-01-2060
Molex 19-09-2049
Pin #
MDB 6 Pin
110VAC Single
Price 4pin
Pin #
1
M D B _34V D C
2
D C _R E T U R N
3
-
4
M D B _M A S T E R _R X
5
M D B _M A S T E R _T X
6
M D B _S IG N A L_C O M
1
4
2
5
3
6
1
110V A C _H O T
2
110V A C _N E U T R A L
3
H O T _E N A B LE
4
N E U T R A L_IN H IB IT
4 3 2 1
9 Pin – 24VAC / 110VAC High
Level Pulse
AMP / Tyco 172169-1
6 Pin – Single Price Pulse Credit
AMP 1-480704-0
Single Price Pulse
Credit 6pin
Pin #
4
5
6
1
2
3
24VAC Isolated High
Level Pulse 9 Pin
Pin #
C R E D IT _R E LA Y _N O
1
3
6
9
1
4
7
110VAC Isolated High
Level Pulse 9 Pin
1
N E U T R A L_IN H IB IT
N E U T R A L_IN H IB IT
2
N E U T R A L_E N A B LE
N E U T R A L_E N A B LE
3
H O T _E N A B LE
H O T _E N A B LE
4
-
110V A C _H O T
2
C R E D IT _R E LA Y _C O M
3
-
4
-
5
24V A C _H O T
-
5
-
6
24V A C _N E U T R A L
110V A C _N E U T R A L
6
-
7
C R E D IT _R E LA Y _N O
C R E D IT _R E LA Y _N O
8
C R E D IT _R E LA Y _C O M
C R E D IT _R E LA Y _C O M
9
-
-
12 Pin –110VAC Low Level Pulse
Single Price Jones Plug
AMP 172162-1
Coinco #920327-1LF
Pin #
4 3 2 1
1
110V A C _H O T
2
110V A C _N E U T R A L
3
E N A B LE _5D O LLA R _H IG H
4
C R E D IT _R E LA Y _N O
5
C R E D IT _R E LA Y _C O M
6
E S C R O W _LO W
Pin #
110VAC Single
Price Jones Plug
1
110V A C _H O T
2
110V A C _N E U T R A L
3
-
4
-
5
N E U T R A L_IN H IB IT
E N A B LE _1D O LLA R _LO W
6
H O T _E N A B LE
E S C R O W _H IG H
7
-
10
E N A B LE _2D O LLA R _H IG H
8
-
11
E N A B LE _2D O LLA R _LO W
12
E N A B LE _5D O LLA R _LO W
7
8
9
12 11 10 9
110VAC Isolated Low Level
Pulse 12pin
L8 L6 L4 L2
E N A B LE _1D O LLA R _H IG H
L7 L5 L3 L1
31
32
Other decals available
as Service Parts
No Decal Applied
Service Part
• Impulse Lighting enabled
• 400 note cashbox
• Decals in bag assembly
V A6xx 6 ($1 -$100)
No Decal Applied
Note: Smart Bezel™ decal available as Service Part for all models
Decal in bag assembly
Defaults to enabled
bills for non-vending
applications.
• Smart Bezel ™ enabled / decal
• 400 note cashbox
V X7xx 3xCA ($5 -$20)
No Decal Applied
V X6xx 4xUS ($1 -$20)
• Impulse Lighting enabled
• FlexStack ™ cashbox
Decal in bag assembly
Defaults to enabled
bills for non-vending
applications.
• Smart Bezel ™ enabled / decal
• FlexStack ™ cashbox
No Decal Applied
• Impulse Lighting enabled
• 400 note cashbox
V L7xx 3xCA ($5 -$20)
No Decal Applied
V L6xx 4xUS ($1 -$20)
• Impulse Lighting enabled
• FlexStack ™ cashbox
Decal in bag assembly
Defaults to enabled
bills for non-vending
applications.
• Smart Bezel ™ enabled / decal
• FlexStack ™ cashbox
V L6xx 2xUS ($1 -$5)
V X6xx 2xUS ($1 -$5)
V A6xx 4 ($1 -$20)
• Impulse Lighting enabled
• 400 note cashbox
• Decals in bag assembly
Legacy
MDB
Amusement
Standard Cashboxes & Inlet Decals
SECTION 6: TECHNICAL INFORMATION
SECTION 6: TECHNICAL INFORMATION
Factory Default Settings
Amusement 110VAC
V A61 x4xU S ($1-$20)
V A61 x6xU S ($1-$100)
Configuration
Configuration
$1
ON
Coupons
ON
$5
ON
$10
ON
1 Way
ON
O FF
ON
2 Way
ON
Lvl 3
Security
O FF
$20
ON
High
Impulse Smart
Security Lighting Bezel™
Acceptance:4 Way
O FF
$50
$100
NA
NA
Reserved
O FF
O FF
Same for both
O FF
$1
ON
1
2
$5
ON
Coupons
$10
ON
High
Impulse Smart
Security Lighting Bezel™
O FF
ON
Acceptance:4 Way
3
4
$20
ON
1 Way
2 Way
ON
ON
Lvl 3
Security
ON
O FF
$50
$100
ON
ON
Reserved
O FF
O FF
O FF
O FF
Dip Switch Setting
S w itch
1
2
1
2
3
3
ON
ON
ON
OFF
50 / 50 mS
4 P ulse/$ 1 P ulse/$
A lw ays
H ost
E nabled E nabled
S erial
P ulse
4
4
5
6-8
Reserved
Legacy 110VAC
V L61x2xU S ($1-$5)
V L61x4xU S ($1-$20)
Configuration
Configuration
$1
ON
Coupons
ON
$5
O FF
$10
NA
Acceptance:4 Way
1 Way
2 Way
ON
ON
Lvl 3
Security
O FF
$20
NA
High
Impulse Smart
Security Lighting Bezel™
O FF
O FF
ON
$50
$100
NA
NA
Reserved
O FF
O FF
V L71x3xC A ($5-$20)
O FF
1
2
$1
ON
$5
O FF
Coupons
$10
O FF
Configuration
$20
O FF
1
High
Impulse Smart
Security Lighting Bezel™
O FF
ON
Acceptance:4 Way
3
1 Way
2 Way
ON
ON
4
Lvl 3
Security
O FF
ON
O FF
$50
$100
NA
NA
Reserved
O FF
O FF
O FF
$1
O FF
$5
ON
$10
O FF
$20
O FF
High
Impulse Smart
Coupons
Security Lighting Bezel™
2
ON
O FF
Acceptance:4 Way
3
1 Way
2 Way
ON
ON
Lvl 3
Security
4
O FF
ON
O FF
$50
$100
NA
NA
Reserved
O FF
O FF
1
2
3
4
O FF
Note: Dip switch settings same as Legacy 24VAC (show below).
Legacy 24VAC
V L62x2xU S ($1-$5)
V L62x4xU S ($1-$20)
Configuration
$1
ON
Coupons
ON
$5
O FF
$10
NA
High
Impulse Smart
Security Lighting Bezel™
O FF
Acceptance:4 Way
1 Way
2 Way
ON
ON
Lvl 3
Security
O FF
Configuration
$20
NA
O FF
ON
$50
$100
NA
NA
Reserved
O FF
O FF
O FF
1
2
$1
ON
Coupons
ON
$5
O FF
$10
O FF
High
Impulse Smart
Security Lighting Bezel™
O FF
Acceptance:4 Way
3
4
1 Way
2 Way
ON
ON
Lvl 3
Security
O FF
$20
O FF
ON
O FF
$50
$100
NA
NA
Reserved
O FF
33
O FF
O FF
Same for both
Dip Switch Setting
1
S w itch
2
1
2
3
3
OFF
50 / 50 mS
4
4
ON
ON
ON
5
6-8
4 P ulse/$ 1 P ulse/$
A lw ays
H ost
E nabled E nabled
S erial
P ulse
Reserved
SECTION 6: TECHNICAL INFORMATION
Factory Default Settings
MDB 34VDC
Legacy
110VAC
V X6 3 x2xU S ($ 1 -$ 5 )
V X6 3 x4xU S ($ 1 -$ 2 0 )
Configuration
$1
ON
Coupons
ON
$5
O FF
$10
NA
High
Impulse Smart
Security Lighting Bezel™
O FF
Acceptance:4 Way
1 Way
2 Way
ON
ON
Lvl 3
Security
O FF
Configuration
$20
NA
O FF
ON
$50
$100
NA
NA
Reserved
O FF
O FF
O FF
$1
ON
1
Coupons
2
ON
Coupons
ON
$10
O FF
2 Way
ON
ON
4
Lvl 3
Security
Acceptance:4 Way
1 Way
2 Way
ON
ON
Lvl 3
Security
O FF
$20
O FF
O FF
ON
$50
$100
NA
NA
Reserved
O FF
O FF
ON
O FF
$50
$100
NA
NA
Reserved
O FF
O FF
O FF
1
2
3
4
V X7 3 x5xC A ($ 5 -$ 1 0 0 )
Configuration
High
Impulse Smart
Security Lighting Bezel™
O FF
O FF
1 Way
O FF
$20
O FF
High
Impulse Smart
Security Lighting Bezel™
3
Configuration
$5
ON
$10
O FF
Acceptance:4 Way
V X7 3 x3xC A ($ 5 -$ 2 0 )
$1
NA
$5
O FF
O FF
1
$1
NA
2
Coupons
ON
$5
ON
$10
ON
O FF
1 Way
2 Way
ON
ON
Lvl 3
Security
4
O FF
ON
O FF
$50
$100
ON
ON
Reserved
O FF
O FF
N ote: MDB versions do not have dip switches.
34
ON
High
Impulse Smart
Security Lighting Bezel™
Acceptance:4 Way
3
$20
O FF
1
2
3
4
For United States:
Coin Acceptors, Inc.
World Headquarters
300 Hunter Avenue
St. Louis, MO 63124-2013
(314) 725-0100 or 1-800-325-2646
For Canada:
Coin Acceptors, Inc.
Canadian Headquarters
1-435 Four Valley Drive
Concord (Toronto), Ontario
LK4 5X5 Canada
(905) 738-5777 or 1-800-387-9300
email: [email protected]
www.coinco.com
Coinco Publication No. 928998 Rev.3
05/08 Printed in the U.S.A.
35