1
Owners Manual
Installation Instructions
For Models
• PTUF-5600-10
• PTUF-5600-13
Table of Contents
Page 2
Subject
Page
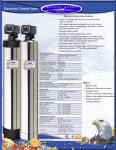
PURE TECH 2200 Diagram
4
Job Specification Sheet
5
System Overview
6
Pre Installation
7
Installation
8
Installing Drain line
10
Brine Tank Connection
11
Turning Water Back On
13
Post Installation
14
Maintaining Your System
14
Information Notes
15
Start up Procedure
16
Control Valve Drive Assembly
17
Control Valve Drive Parts List
18
Control Valve Drive Assembly for Clock or Meter
19
Control Valve Drive Parts List for Clock or Meter
20
P.O. Box 730486
Ormond Beach, FL 32173-0486
1-888-989-(PURE) 7873 Office • 1-877-219-(PURE) 7873 Fax
Copyright© 2003 all rights reserved
Tech Support: 1-888-989-7873
PURE WATER TREATMENT, INC.
Table of Contents
Subject
Page 3
Page
Meter Start-up
22
Metered Control Valve Drive Assembly
23
Metered Control Valve Drive Parts Lists
24
Bypass Valve Assembly, Plastic
26
Meter Assembly
27
Bypass Valve Assembly, Brass
28
Service Assembly Parts List
29
Troubleshooting
30
Service Instructions
32
Warranty
36
Notes
37
P.O. Box 730486
Ormond Beach, FL 32173-0486
1-888-989-(PURE) 7873 Office • 1-877-219-(PURE) 7873 Fax
Copyright© 2003 all rights reserved
Tech Support: 1-888-989-7873
PURE WATER TREATMENT, INC.
PURE TECH 2200 FLOW DIAGRAM
Page 4
PURE TECH 2200
TO DRAIN
RAW WATER
CLEAN WATER
Figure A
Tech Support: 1-888-989-7873
PURE WATER TREATMENT, INC.
Job Specification Sheet
Page 5
•
JOB NO. _________________________________________________________
•
MODEL NO. ______________________________________________________
•
WATER TEST _____________________________________________________
•
CAPACITY PER UNIT ____________ MAX. __________ PER REGENERATION
•
MINERAL TANK SIZE DIA. _______ HEIGHT ________
•
BRINE TANK SIZE & SALT SETTING PER REGENERATION:
•
CONTROL VALVE SPECIFICATIONS:
Type of Timer
A) Std
C) 7 Day
E) Meter, Std.
B) *L*
D) 12 Day
F) Meter, Ext.
Day/Time of Regeneration
Drain Line Flow Control _____________
gpm
Brine Refill Rate ___________________
gpm
Injector Size _______________________
Meter Gallon Setting ________________
gal.
TYPICAL CONTROL VALVE INFORMATION
Tank
Dia.
Injector
Inj.
Color
Draw/Slow Rinse Rate
(gpm)*
BLFC
**
DLFC
***
6”
#0
Red
.28 gpm/ .31 gpm
.5 gpm
1.2 gpm
7”
#0
Red
.28 gpm/ .31 gpm
.5 gpm
1.2 gpm
8”
#1
White
.38 gpm/ .45 gpm
.5 gpm
1.5 gpm
9”
#1
White
.38 gpm/ .45 gpm
.5 gpm
2.0 gpm
10”
#1
White
.38 gpm/ .45 gpm
.5 gpm
2.4 gpm
12”
#2
Blue
.56 gpm/ .84 gpm
1.0 gpm
3.5 gpm
13”
#2
Blue
.56 gpm/ .84 gpm
1.0 gpm
4.0 gpm
14”
#3
Yellow
.63 gpm/ 1.0 gpm
1.0 gpm
5.0 gpm
16”
#3
Yellow
.63/ gpm/ 1.0 gpm
1.0 gpm
7.0 gpm
Due to varying water conditions, tank sizes and water pressures, the above settings
should be used only as a guideline.
**
B.L.F.C. (Brine Line Flow Control). Refill Rate for Filling Brine Tank.
*** D.L.F.C. (Drain Line Flow Control). Backwash and Rapid Rinse Flow Rates.
Tech Support: 1-888-989-7873
PURE WATER TREATMENT, INC.
System Overview
Page 6
•
This installation guide gives a step by step, start to finish procedure for installing
PURE TECH 2200 systems using Fleck valves. All of these systems will regenerate
with softener Solar Salt or Potassium Chloride.
•
Your new system from the PURE WATER TREATMENT, INC. comes with an
owner/service manual, which, is enclosed along with these instructions, and will help
explain all necessary details required for successful installation and operation of your
system. Please refer to these instructions and the service manual supplied with your
system during installation and programming.
•
All steps provided herein are for typical installations only. If you require additional
plumbing to install your system, simply contact a person who is knowledgeable in
residential plumbing or have a local plumbing company help you install, or install the
system for you.
•
There is a bit of "over-kill" in our instructions, but please bear with us as we want to
ensure that you, our customer, fully understand the instructions and are completely
satisfied with your installation!
•
We recommend that you take a few minutes and look at the service/parts manual for
your particular model, to help you better understand your new water system. Take
your time and carefully read the instructions.
•
Get all of your plumbing parts together before you start, and have an assistant help
you, if possible. Typical installation should take no more than a few of hours.
•
If you are going to turn the water off to your house while installing the system, we
recommend that you turn off the electricity to your electric water heater during installation. After the system is installed with water running through it, turn on a few hot
and cold-water faucets, and let them run until there is no more air in your lines, then
turn the electricity back on to your water heater.
•
Our systems can safely handle a pressure range of 35-95 psi. However, as with most
residential plumbing and for best operation causing the least wear on critical parts, we
recommend an operating range of 40-65psi. Now all you have to do is plumb in the
system, plug it in and set the current time of day!
Tech Support: 1-888-989-7873
PURE WATER TREATMENT, INC.
Pre Installation
Page 7
•
Your system should be located in a protected, dry, level and non-freezing area. The
brine tank and resin tank can have as much as 20 feet of 3/8" brine tubing connecting
them. So, the brine tank can set several feet from the resin tank. The brine tank will
hold 240lbs of softener Solar Salt or Potassium Chloride, so be sure to make it accessible for filling the tank when needed.
•
We recommend a ½" drain for the regeneration/backwashing cycles. If possible, the
house drain should be no farther than 20 feet from the system. You will also need to
purchase some flexible ½" inside diameter, plastic tubing from a local hardware or
building supply store. This same size tubing will be used for both the valve drain fitting, and on your brine tank safety overflow fitting. (Always follow local plumbing
codes).
•
You will need a standard 3-prong, 120V, grounded outlet that is not controlled by a
switch. Our Fleck valves have a 5' power cord, but you can use an extension cord if
an outlet is not nearby. Please follow any local building/safety codes if you need to
use an extension cord.
•
IMPORTANT NOTE ! IF you decide to set the brine tank in your garage, remember
that the water inside the brine tank will not freeze, but the water in the small 3/8"
plastic water line running from the system valve to the brine tank will. Make certain
the garage is warm enough to prevent this line from freezing!
•
Make a list of all the plumbing fittings you will need to completely install the system
to make it ready for operation.
•
Assemble all tools needed to install the system, and start your installation!
Tools and Materials needed
1) Pipe Cutters
2) PVC Glue
3) PVC, copper or CPVC pipe
4) Two 1” or ¾” male adapters—Depending on which bypass is ordered.
Tech Support: 1-888-989-7873
PURE WATER TREATMENT, INC.
Installation
Page 8
1.
Turn off the main water shutoff valve.
2.
Next, open all plumbing fixtures in the house including all outside faucets in order to
drain the lines of all water possible.
3.
Cut and remove a section of the main incoming water line near where the system is to
be installed. Allowing this line to drain thoroughly.
4.
Remove the yoke (or optional bypass valve) from the back of the tank valve by loosening the two small stainless steel clamps on either side of the rear valve assembly,
that holds it in place. Then simply pull it off the back of the valve. Now that you have
the yoke or bypass valve removed, follow the directions below to make them ready to
install on the valve.
5.
INSTRUCTIONS FOR USING A YOKE. If you have a standard Noryl Plastic yoke,
it will have two ¾" or 1" male thread nipples, (one inlet & one outlet). You will need
to buy two ¾" or 1" Female thread adapters to whatever type and size of piping you
are plumbing the system to.
6.
INSTRUCTIONS FOR USING A BYPASS. If you are using our optional ¾" or 1"
brass bypass valve, you will need to purchase two ¾" or 1" Male thread adapters to
whatever type and size pipe you are plumbing to.
7.
If you are going to use copper piping and be soldering joints, we do not recommend
applying intense heat, to your new valve/meter assembly. We always recommend that
you remove the yoke or bypass from the valve assembly, and attach your plumbing
adapters to the yoke or bypass away from the valve. This simple step will ensure that
you are not applying any heat as you solder or pressure as you tighten the adapters
onto the yoke/bypass, while they are mounted on the valve body itself.
8.
Another tip if you are using copper adapters. Always solder a 3" to 5" piece of copper
pipe into each of the two pipe adapters away from the valve, then let them cool off
before threading each one onto the yoke or bypass valve.
9.
After they cool off, apply Teflon tape to the male threads of the Noryl yoke, (or onto
the male adapters for the brass bypass valve), and securely tighten them to the yoke or
bypass valve. Again, doing this before you re-attach them back onto the rear of the
valve/meter body assembly.
Tech Support: 1-888-989-7873
PURE WATER TREATMENT, INC.
Installation Cont.
Page 9
11.
Important!! WE DO NOT recommend connecting adapters to either the yoke or bypass valve, while the yoke or bypass valve is connected to the Valve/Meter assembly!
You may exert too much pressure on the valve while securing the adapters, causing
damage to the valve housing!)
12.
After all soldering is finished and the adapters are securely threaded onto either the
yoke or the brass bypass valve assembly, then attach the yoke or bypass valve back
onto the valve/meter assembly and secure it with the two small stainless steel clamps.
13.
Now position your conditioning system in place for the final water line installation.
14.
Remember; if you are using our optional brass bypass valve, make certain the bypass
valve is set in the "Service" position, while soldering the pipes to the system. Then
return it to the "Bypass" position before turning your water back on to the house.
15.
Measure and cut the lengths of pipe you need to plumb the main hard water line into
your system. Then do the same for the conditioned water line that will exit from the
system, back out into the house.
16.
*NOTE* As you look directly into the two holes in your Fleck valve, the hard water
line will always enter the hole on the LEFT SIDE of the yoke or bypass valve assembly. The valve body also has an arrow stamped into each side, showing the direction
of flow.
17.
If you use our optional bypass valve, arrows indicating water flow direction are
printed on the top of the bypass valve assembly.
18.
Just remember, that as you are looking directly into the two holes where the water
enters and exits the valve, the hard water line from your house always enters the hole
on the LEFT. The conditioned water flowing out from the system, back into your
house is always the hole on the RIGHT.
19.
If you purchased a Meter On Demand Water Softener, you will need to make sure the
gold-tipped black cable protruding from the valve is securely plugged into the domed
shaped portion of the rear of the valve.
Tech Support: 1-888-989-7873
PURE WATER TREATMENT, INC.
Installing the Drain Line to the Valve
Page 10
1.
(All of our Fleck valves have a drain hose barb, generally located on the lower, backside or side of the valve. First, check to make certain this drain hose barb is securely
threaded into the valve body and that the threads have been sealed with Teflon tape.
2.
Once you know the drain hose barb is installed properly, carefully push the 1/2" ID
plastic drain hose completely over the barbed end of the fitting, and then attach a
small hose clamp to the end of the line so it cannot work loose over time. Run the opposite end of this drain hose to the drain you are going to use for your system. Remember to leave a small air gap at the end of the hose going to the house drain.
(Follow local plumbing codes), and secure it there.
3.
When the system is in the backwash/regeneration mode, water will flow out of this
drain line with a fair amount of pressure, especially during the "rapid rinse phases" of
the process, and the line may sometimes "jump" a little when changing cycles.
Tech Support: 1-888-989-7873
PURE WATER TREATMENT, INC.
Brine Tank Connection
Page 11
1.
Next, connect your brine tank to your system. One end of the supplied 3/8" brine line
tubing will be connected to your brine tank and the opposite end needs to be connected to your Fleck valve.
2.
Look inside your brine tank and you will see a 4" diameter "Brine Well" tube. Remove the lid off the top of the brine well and look inside this tube. Here you will find
the "Brine Float" assembly. The brine float assembly works like a toilet tank float,
shutting the water off inside the brine tank should the level of water get too high.
3.
Check to see if the brine float assembly is loose inside the brine well tube. If it is,
simply pull it up out of the brine well and look about 2" down from the top of the
brine float assembly where you will see the metal end of a small threaded screw sticking out about ½". There will be a small black plastic nut threaded on it. Remove the
black nut and then put the brine float back into the brine well. Notice there is a small
hole drilled in the brine well, that you can insert this small section of screw through.
4.
Hold the brine float with the section of screw in the hole as you put the small black
nut back on. This is what holds the brine float in place.
5.
On top of the brine float, you will see a larger black elbow with a black plastic nut.
Carefully remove the black nut and you will find two small compression rings inside
the nut, one black and one white. These small pieces help seal the end of the 3/8" tube
that connects the brine tank with the valve on top of the system.
6.
Each one of these small rings has a flat side. Hold the two small rings together with
the flat sides touching. This is the way they fit together when they go inside the black
nut, white piece first.
7.
Next, insert one end of the 3/8" tubing though the hole in the side of the brine tank
and brine well, and slide the black nut onto the tube with the threads facing the end of
the tube. Then, slide the two small compression rings onto the tube, white piece first,
then the black piece making sure the flat edges of both rings are together.
8.
Now insert the end of the tube into the black elbow as far as it will go. Hold it there as
you thread the black nut onto the black elbow, tightening it finger tight which compresses the two rings inside the nut onto the tubing.
9.
Replace the lid on the top of the brine well! Your brine tank is now ready to be connected to the Fleck valve.
10.
Take the other end of the 3/8" brine tube and find the 3/8" brass nut located on the
valve body of your system. Remove this brass nut and you will find a small plastic
compression ring inside.
Tech Support: 1-888-989-7873
PURE WATER TREATMENT, INC.
Brine Tank Connection Cont.
Page 12
11.
Slide the brass nut over the end of the tube, threads facing the end of the tube. Then
slide the compression ring on with the narrow side facing the end of the tube.
12.
Insert the end of the tube fully into the opening on the valve where the brass nut was
located, then slide the compression ring and brass nut up the tube, finally threading
the brass nut back onto the threads. Tighten the brass nut gently with a small wrench.
13.
Notice the plastic elbow that is located on the side of your brine tank. This is a
"Safety Overflow", and will use the same size drain line that is used on the valve
drain (1/2" ID flexible plastic line). This drain line will not be under pressure, so it
must be directed to a drain that is physically lower than it is. DO NOT connect this
drain line into the drain line coming from the Fleck valve! It must be run separately to
the drain.
14.
Fill the brine tank with 9 gallons of water.
15.
Add 240 lbs of "Solar Salt" or "Potassium Chloride" to the brine tank, and you are
now ready to turn the water back on!
Tech Support: 1-888-989-7873
PURE WATER TREATMENT, INC.
Turning the Water Back On
Page 13
1. INSTRUCTIONS FOR USING A BYPASS VALVE. If you are using a bypass valve,
make sure your bypass valve is now in the "BYPASS" position.
2. Turn your water on slowly, leaving all your faucets in the house open until water
starts coming out of them. After they are all running steady and the air is out of the
water lines, turn them off one by one. The raw water will be bypassing your system at
this time.
3. Slowly open your bypass valve to the “SERVICE” position and begin filling the softener resin tank with water. In a few minutes the sound of water entering the system
will stop.
4. Next, open one faucet, (preferably an outside faucet, a laundry sink or bathtub), letting the water run through it slowly for a few minutes. This allows the water to rinse
the inside of your resin tank out and settle the media.
5. Sometimes you may experience some light/medium brown color rinsing off the new
resin beads..... This is normal...and should only last a few minutes.
6. This is why we suggest running the water through only one faucet, to clear the softener of this colored water.
7. After a few minutes, and the water is running clear.....turn the faucet off.
8. You now have soft water on your cold water side.... The hot water will take a couple
of days to become soft, as your hot water tank is full of hard water.
9. Finally, if you are using a demand valve firmly insert the small brass end of the black
Meter Cable, into the small hole located on top of the dome shaped Meter housing.
The end of the cable will only insert about 1/8" - 3/16" into the meter housing hole.
Tech Support: 1-888-989-7873
PURE WATER TREATMENT, INC.
Post Installation
Page 14
1.
We will have already pre-set the meter on the system to regenerate, according to your
water test results. You will only need to set the time of day on the front of the valve.
If you are not sure what the meter is supposed to be set on, please give us a call with
information on your water test results, and we will help you determine what setting to
place your meter on.
2.
Look in your service manual, for your particular model Fleck valve, and manually run
your valve through a regeneration cycle. To do this, simply turn the manual "Regen"
dial clockwise just a few "clicks" at a time, stopping at each setting for a minute, to
clear the air out of the resin tank and valve. Once you have completed turning the
"Regen" knob one complete revolution and it is set back to the "Service" position, the
system is now ready for use!
3.
Finally, plug the valve in the electrical outlet and set the current time of day. Our systems will regenerate around 2:00am.
4.
Check all connections for leaks.
5.
You are now ready to experience PURE WATER!
Don’t forget to tell your friends, family and neighbors about how excellent the
PURE TECH 2200 works for you.
Maintaining Your System
The system is set to use about 9-lbs. of salt or potassium per regeneration cycle. For the
next few months, monitor the brine tank to establish how often to add salt or potassium.
If your system has a timed valve, you should have to fill the brine tank about every 5 to 6
weeks. If your system is metered, it may be less often based on water usage and the meter
setting for your water.
The system will manually regenerate itself clean. If you find that the system is not producing enough clean water, then set the ‘regen’ pins to regenerate more often.
If the system doesn’t seen to be pulling any brine solution in, check the screen in the
brine line at the base of the valve. It may be clogged and need cleaning.
Tech Support: 1-888-989-7873
PURE WATER TREATMENT, INC.
Information Notes
Page 15
•
Even though you now have PURE WATER in your cold water lines, your water
heater is still full of raw water. Through normal use, this water will be replaced with
soft water in about 2 to 3 days.
•
You may experience cloudy water in the mornings. This is caused by the clean water
sitting in your pipes over night and stripping the build up off. Run your water for 2 to
3 minutes every morning until it clears. This should last no longer than 1 to 2 weeks.
•
We supply a toll free number (888-989-7873), to all of our customers to use, in case
they don't understand something contained in our installation instructions.
•
Be sure to cut back on your detergent, soap and shampoo usage! Generally, you
should be able to cut your soap use in half!
•
Hard copper pipe generally comes in two types. Use the thicker "L" type copper pipe
rather than thinner "M" type copper pipe.
•
Follow your local plumbing and building codes when installing our systems.
•
Please Email us a picture of your installed system!! Let us see how good of a job you
did on the installation. [email protected]
Tech Support: 1-888-989-7873
PURE WATER TREATMENT, INC.
Start-up Procedure
Page 16
The water softener should be installed with the inlet, outlet and drain connections
made in accordance with manufacturer’s recommendations and to meet applicable
plumbing codes.
1. Manually index the softener
control into the service
position and let water flow
into the resin tank. When
the water flow stops, open a
softened water tap until all
air is released from the
lines, then close the
tap.Note: t he various
regeneration positions may
be dialed manually by
turning the knob on the
front of the control until the indicator shows that the Aoftener is in the desired
position.
2. Manually index the control to the backwash position and allow water to flow at the
drain for 3 or 4 minutes.
3. Remove back cover plate.
4. Make sure that the salt dosage is set as recommended by the manufacturer. If
necessary, set salt in accordance with the setting instruction sheet. Manually index the
control to the brine fill position and allow the brine tank to fill to the top of the air
check.
5. Manually index the control to the brine draw position and allow the control to draw
water from the brine tank until it stops.
6. Plug in the electrical cord and look in the sight hole in the back of the motor to see
that it is running. Set the days that regeneration is to occur by sliding tabs on skipper
wheel outward to expose trip fingers. Each tab is one day. Finger at red pointer is
tonight. Moving clockwise from red pointer, extend or retract fingers to obtain the
desired regeneration schedule.
7. Manually advance the control to the beginning of the brine fill position; and allow the
control to return to the service position automatically.
8. Fill the brine tank with salt.
9. Replace back cover on the control.
10. Make sure that any by-pass valving is left in the normal service position.
Tech Support: 1-888-989-7873
PURE WATER TREATMENT, INC.
Control Valve Drive Assembly
Page 17
Part List
Item No.
No. Req’d
Part No.
Description
1. . . . . . . . . . 1 . . . . . . . . . 14448-010 . . . . . . . Housing - w/Pin
1 . . . . . . . . . 14448-011 . . . . . . . Housing - w/Pin Drilled for Screw
1 . . . . . . . . . 14448-012 . . . . . . . Housing - w/Pin Drilled for Thumb Screw
1A . . . . . . . . . 1 . . . . . . . . . 15494-01 . . . . . . . . “L” Housing - w/Pin
1 . . . . . . . . . 15494-03 . . . . . . . . “L” Housing - w/Pin Drilled for Designer
2. . . . . . . . . . . 1 . . . . . . . . . 13175. . . . . . . . . . . Motor Mounting Plate
3. . . . . . . . . . . 1 . . . . . . . . . 18743. . . . . . . . . . . Motor - 120V., 60 Hz.
1 . . . . . . . . . 19659. . . . . . . . . . . Motor - 24V., 60 Hz.
4. . . . . . . . . . . (2-3) . . . . . . 11384. . . . . . . . . . . Screw - Motor Mtg. & Ground Wire
5. . . . . . . . . . . (3-5) . . . . . . 13296. . . . . . . . . . . Screw - Component Mounting
Tech Support: 1-888-989-7873
PURE WATER TREATMENT, INC.
Control Valve Drive Part List Cont.
Item No.
No. Req’d
Part No.
Page 18
Description
6. . . . . . . . . . . 1 . . . . . . . . . 13017. . . . . . . . . . . Idler Gear
7. . . . . . . . . . . 1 . . . . . . . . . 13018. . . . . . . . . . . Idler Pinion
8. . . . . . . . . . . 1 . . . . . . . . . 13312. . . . . . . . . . . Spring - Idler
9. . . . . . . . . . . 1 . . . . . . . . . 13164. . . . . . . . . . . Drive Gear
11 . . . . . . . . . 1 . . . . . . . . . 13170. . . . . . . . . . . Main Gear & Shaft
12 . . . . . . . . . 1 . . . . . . . . . 19205. . . . . . . . . . . 24 Hour Gear Assembly, Silver
1 . . . . . . . . . 19205-01 . . . . . . . . 24 Hour Gear Assy, Tan
13 . . . . . . . . . 1 . . . . . . . . . 13011. . . . . . . . . . . Cycle Actuator Gear
14 . . . . . . . . . 1 . . . . . . . . . 14177. . . . . . . . . . . Knob - Manual Regeneration
15 . . . . . . . . . 4 . . . . . . . . . 13300. . . . . . . . . . . Ball - 1/4″ Dia.
16 . . . . . . . . . 2 . . . . . . . . . 13311. . . . . . . . . . . Spring - Detent - Skipper Wheel
19 . . . . . . . . . 1 . . . . . . . . . 14381. . . . . . . . . . . Skipper Wheel Assembly - 12 Day
1 . . . . . . . . . 14860. . . . . . . . . . . Skipper Wheel Assembly - 7 Day
20 . . . . . . . . . 1 . . . . . . . . . 13864. . . . . . . . . . . Skipper Wheel Ring
21 . . . . . . . . . 2 . . . . . . . . . 14457. . . . . . . . . . . Spring - Detent - Main Gear
22 . . . . . . . . . 1 . . . . . . . . . 13014. . . . . . . . . . . Regeneration Pointer
23 . . . . . . . . . 1 . . . . . . . . . 11842. . . . . . . . . . . Electrical Cord - Standard
24 . . . . . . . . . 2 . . . . . . . . . 12681. . . . . . . . . . . Wire Connector (Not Shown)
25. . . . . . . . . . 1 . . . . . . . . . 13547. . . . . . . . . . . Strain Relief
26. . . . . . . . . . 1 . . . . . . . . . 13229. . . . . . . . . . . Back Cover
27. . . . . . . . . . 1 . . . . . . . . . 13309. . . . . . . . . . . Front Label - Brown on Beige
1 . . . . . . . . . 13437. . . . . . . . . . . Front Label - Blue/Silver on Black
28. . . . . . . . . . 1 . . . . . . . . . 13310. . . . . . . . . . . Rear Label - Softener
1 . . . . . . . . . 18520. . . . . . . . . . . Rear Label - Filter
29. . . . . . . . . . 1 . . . . . . . . . 13348. . . . . . . . . . . Tape Stripe - Brown on Beige
1 . . . . . . . . . 13436. . . . . . . . . . . Tape Stripe - Blue on Silver
30 . . . . . . . . . 1 . . . . . . . . . 60514. . . . . . . . . . . Brine Cam Assy., 3-18
1 . . . . . . . . . 60514-0 . . . . . . . . . Brine Cam Assy., 6-36
1 . . . . . . . . . 60514-0 . . . . . . . . . Brine Cam Assy. - Minutes
34 . . . . . . . . . 2 . . . . . . . . . 12473. . . . . . . . . . . Screw-Drive Mounting
35 . . . . . . . . . 1 . . . . . . . . . 12037. . . . . . . . . . . Washer
37 . . . . . . . . . 1 . . . . . . . . . 15151. . . . . . . . . . . Screw - Knob
38 . . . . . . . . . 1 . . . . . . . . . 14176. . . . . . . . . . . Valve Position Dial - Standard
1 . . . . . . . . . 14278. . . . . . . . . . . Valve Position Dial - Low Water
1 . . . . . . . . . 15478. . . . . . . . . . . Valve Position Dial - Chemical Filter
1 . . . . . . . . . 16715. . . . . . . . . . . Valve Position Dial - Filter
39. . . . . . . . . . 1 . . . . . . . . . 14175. . . . . . . . . . . Knob Label - Beige
1 . . . . . . . . . 14207. . . . . . . . . . . Knob Label - Silvers
40 . . . . . . . . . 1 . . . . . . . . . 40214. . . . . . . . . . . Screw, Brine Cam
Tech Support: 1-888-989-7873
PURE WATER TREATMENT, INC.
Control Valve Drive Assembly For (Clock Or Meter)
Tech Support: 1-888-989-7873
Page 19
PURE WATER TREATMENT, INC.
Control Valve Drive Part List For (Clock Or Meter)
Item No.
No. Req’d
Part No.
Page 20
Description
1 . . . . . . . . . 2-4 . . . . . . . .13255 . . . . . . . . . . . Adapter Clip (clock or meter)
2 . . . . . . . . . 5 . . . . . . . . .13242 . . . . . . . . . . . Seal
5 . . . . . . . . .17772 . . . . . . . . . . . Silicone Seal
3 . . . . . . . . . 1 . . . . . . . . .61400-12 . . . . . . . .Valve Body Assembly - 1″ Dist.
1 . . . . . . . . . 61400-11 . . . . . . . . Valve Body Assembly - 3/4″ Dist.
4. . . . . . . . . 1 . . . . . . . . .13304 . . . . . . . . . . . O-Ring - Distributor Tube - 1″
1. . . . . . . . . .10244 . . . . . . . . . . . O-Ring - Distributor Tube - 13/16″
5 . . . . . . . . . 1 . . . . . . . . .12281 . . . . . . . . . . . O-Ring - Top of Tank
6 . . . . . . . . . . . . . . . . . . . . . . . . . . . . . . . . . . . . Not Assigned
7 . . . . . . . . 4 . . . . . . . . . .14241 . . . . . . . . . . . Spacer
8. . . . . . . . . 1 . . . . . . . . . .13247 . . . . . . . . . . . Piston - Standard
1 . . . . . . . . . .13781 . . . . . . . . . . . Piston - Low Water
1 . . . . . . . . . .13852 . . . . . . . . . . . Piston - Filter
9. . . . . . . . . 1 . . . . . . . . . .10696 . . . . . . . . . . . Piston Pin
10. . . . . . . . 1 . . . . . . . . . .13001 . . . . . . . . . . . Piston Rod Assembly
11. . . . . . . . 1 . . . . . . . . . .12953 . . . . . . . . . . . Piston Retainer
12. . . . . . . . 1 . . . . . . . . . .13446 . . . . . . . . . . . End Plug Assembly Std. - White
1 . . . . . . . . . .13446-10 . . . . . . . . End Plug Assembly Filter - Black
1 . . . . . . . . . .13446-20 . . . . . . . . End Plug Assembly Low Water - Gray
14. . . . . . . . 2 . . . . . . . . . .13315 . . . . . . . . . . . Screw- Injector Mounting
*15 . . . . . . 2 . . . . . . . . . .19228 . . . . . . . . . . . Adapter Coupling
*16. . . . . . . 4 . . . . . . . . . .13305 . . . . . . . . . . . O-Ring- Adapter Coupling
*17. . . . . . . 2-4. . . . . . . . .13314 . . . . . . . . . . . Screw- Adapter Coupling (clock or meter)
18 . . . . . . . 1 . . . . . . . . . .12638 . . . . . . . . . . . O-Ring - Drain
19. . . . . . . . 2 . . . . . . . . . .13301 . . . . . . . . . . . O-Ring - Injector
20. . . . . . . . 2 . . . . . . . . . .13302 . . . . . . . . . . . O-Ring - Brine Spacer
21. . . . . . . . 1 . . . . . . . . . .13303 . . . . . . . . . . . O-Ring - Injector Cover
22. . . . . . . . 1 . . . . . . . . . .13163. . . . . . . . . . . . Injector Body
23. . . . . . . . 1 . . . . . . . . . .10913U . . . . . . . . . . Injector Nozzle - Undrilled
24. . . . . . . . 1 . . . . . . . . . .10914. . . . . . . . . . . . Injector Throat - Specify Size
25. . . . . . . . 1 . . . . . . . . . .10227. . . . . . . . . . . . Injector Screen
26. . . . . . . . 1 . . . . . . . . . .13166. . . . . . . . . . . . Injector Cover
27. . . . . . . . 1 . . . . . . . . . .13172. . . . . . . . . . . . Brine Valve Stem
28. . . . . . . . 1 . . . . . . . . . .12626. . . . . . . . . . . . Brine Valve Seat
29. . . . . . . . 1 . . . . . . . . . .13165. . . . . . . . . . . . Brine Valve Cap
30. . . . . . . . 1 . . . . . . . . . .13167. . . . . . . . . . . . Brine Valve Spacer
31. . . . . . . . 1 . . . . . . . . . .12550. . . . . . . . . . . . Quad Ring
32. . . . . . . . 1 . . . . . . . . . .11973. . . . . . . . . . . . Spring - Brine Valve
33. . . . . . . . 1 . . . . . . . . . .16098. . . . . . . . . . . . Washer - Brine Valve
34. . . . . . . . 1 . . . . . . . . . .11981-01 . . . . . . . . . Retaining Ring
35. . . . . . . . 1 . . . . . . . . . .10329 . . . . . . . . . . . B.L.F.C. Fitting Nut
36. . . . . . . . 1 . . . . . . . . . .10330 . . . . . . . . . . . B.L.F.C. Ferrule
37. . . . . . . . 1 . . . . . . . . . .10332 . . . . . . . . . . . B.L.F.C. Tube Insert
Tech Support: 1-888-989-7873
PURE WATER TREATMENT, INC.
Control Valve Drive Part List For (Clock Or Meter)
Item No.
No. Req’d
Part No.
Page 21
Description
38. . . . . . . . 1 . . . . . . . . . .12094 . . . . . . . . . . . B.L.F.C. Button - .25 GPM
1 . . . . . . . . . .12095 . . . . . . . . . . . B.L.F.C. Button - .5 GPM
1 . . . . . . . . . .12097 . . . . . . . . . . . B.L.F.C. Button - 1.0 GPM
39. . . . . . . . 1 . . . . . . . . . .12977 . . . . . . . . . . . O-Ring - B.L.F.C.
40. . . . . . . . 1 . . . . . . . . . .13245 . . . . . . . . . . . B.L.F.C. Button Retainer
41. . . . . . . . 1 . . . . . . . . . .13244 . . . . . . . . . . . B.L.F.C. Fitting, 3/8″
42. . . . . . . . 1 . . . . . . . . . . . . . . . . . . . . . . . . . . D.L.F.C. Button - Specify Size
43. . . . . . . . 1 . . . . . . . . . .13173 . . . . . . . . . . . D.L.F.C. Button Retainer
44. . . . . . . . 1 . . . . . . . . . .12767 . . . . . . . . . . . Screen - Brine Line
45. . . . . . . . 1 . . . . . . . . . .15348 . . . . . . . . . . . O-Ring - D.L.F.C. (not shown)
46. . . . . . . . 1 . . . . . . . . . .13497 . . . . . . . . . . . Air Disperser
47 . . . . . . . 1 . . . . . . . . . .13546. . . . . . . . . . . . End Plug Retainer
48. . . . . . . . 3 . . . . . . . . . .12112 . . . . . . . . . . . Screw
49. . . . . . . . 1 . . . . . . . . . .13363. . . . . . . . . . . . Washer
50. . . . . . . . 1 . . . . . . . . . .13296 . . . . . . . . . . . . Screw
51A . . . . . . 1 . . . . . . . . . .13398 . . . . . . . . . . . . Yoke, Brass, 1″ NPT
1. . . . . . . . . . .13708 . . . . . . . . . . . Yoke, Brass, 3/4″ NPT
51B . . . . . . 1 . . . . . . . . . . . . . . .18706 . . . . . . . . . . . . . . . . . . . . . Yoke, Plastic, 1″ NPT
1 . . . . . . . . . . . . . . .18706-02 . . . . . . . . . . . . . . . . . . Yoke, Plastic 3/4″ NPT
52 . . . . . . . 1 . . . . . . . . . . . . . . .13308 . . . . . . . . . . . . . . . . . . . . . Drain Hose Barb
* Not used with meter controls
Tech Support: 1-888-989-7873
PURE WATER TREATMENT, INC.
Metered Start-up
Page 22
The water softener should be installed with the inlet, outlet and drain connections made in
accordance with manufacturer’s recommendations and to meet applicable plumbing codes.
1. Manually index the softener control into the service position and let water flow into the
resin tank. When the water flow stops, open a softened water tap until all air is released
from the lines, then close the tap. NOTE: The various regeneration positions may be
dialed manually by turning the knob on the front of the control until the indicator shows
that the softener is in the desired position.
2. Set water usage program wheel using any one of the following procedures:
Typical Residential Application
To program, just set the time, set the hardness and it automatically monitors system needs
and regenerates only when necessary. To set time of day press red time set button and turn
24 hour gear until present time of day is at “time of day”. Set program wheel by lifting the
“people” dial and rotating it so that the number of people in the household is aligned with
the household grains per gallon water hardness. Release the dial and check for firm engagement at setting. (This method will provide reserve capacity based on 75 gallons per person.)
Optional Programming Procedures
Calculate the gallon capacity of the system, subtract the necessary reserve requirement and
set the gallons available at the small white dot on program wheel gear. Note, drawing shows
850 gallon setting. The capacity (gallons) arrow denotes remaining gallons exclusive of
fixed reserve.
3. Rotate the program wheel counterclockwise until it stops at regeneration position.
4. Manually index the control to the back-wash position and allow water to flow at the
drain for 3 or 4 minutes.
5. Remove back cover plate. Make sure than the salt dosage is set as recommended by the
manufacturer. Manually index the control to the brine fill position and allow the brine
tank to fill to the top of the air check.
6. Manualy index the control to the brine rinse position and allow the control to draw water
from the brine tank until it stops.
7. Plug in the electrical cord and look in the sight hole in the back of the montor to see that
it is running.
8. Manually advance the control to the beginning of the brine fill position and allow the
control to return to the service position automatically.
9. Fill the brine tank with salt. Replace back cover on the control. Be sure cable is not
pinched between cover and housing.
10. Make sure that any by-pass valving is left in the normal service position.
Tech Support: 1-888-989-7873
PURE WATER TREATMENT, INC.
Metered Control Valve Drive Assembly
Tech Support: 1-888-989-7873
Page 23
PURE WATER TREATMENT, INC.
Metered Control Valve Drive Part List
Item No.
No. Req’d
Part No.
Page 24
Description
1 . . . . . . . . . 1 . . . . . . . 14448-000 . . . . . . Housing - with Roll Pin
1 . . . . . . . 14488-001 . . . . . . Housing - w/Pin Drilled for Screw
1 . . . . . . . 14448-0 . . . . . . . . . Housing - w/Pin Drilled for Thumb Screw
1A . . . . . . . 1 . . . . . . . 15494-01 . . . . . . . . “L” Housing - w/Pin
1 . . . . . . . 15494-03 . . . . . . . . “L” Housing - w/Pin Drilled for Designer
2 . . . . . . . . . 1 . . . . . . . 13175. . . . . . . . . . . . Motor Mounting Plate
3 . . . . . . . . . 1 . . . . . . . 18743. . . . . . . . . . . . Motor - 120V., 60 Hz.
1. . . . . . . . 13494. . . . . . . . . . . . Motor - 24V., 60 Hz.
4 . . . . . . . . . 2-3 . . . . . . 11384. . . . . . . . . . . . Screw - Motor Mtg. & Ground Wire
5 . . . . . . . . . 2-4 . . . . . . 13296. . . . . . . . . . . . Screw - Component Mounting
6 . . . . . . . . . 1. . . . . . . . 13017. . . . . . . . . . . . Idler Gear
7 . . . . . . . . . 1. . . . . . . . 13018. . . . . . . . . . . . Idler Pinion
8 . . . . . . . . . 1. . . . . . . . 13312. . . . . . . . . . . . Spring - Idler
9 . . . . . . . . . 1. . . . . . . . 13164. . . . . . . . . . . . Drive Gear
11. . . . . . . . 1. . . . . . . . 13170. . . . . . . . . . . . Main Gear & Shaft
12. . . . . . . . 1. . . . . . . . 19205. . . . . . . . . . . . 24 Hour Gear Assembly, Silver
1. . . . . . . . 19205-01. . . . . . . . . 24 Hour Gear Assy, Tan
13. . . . . . . . 1. . . . . . . . 13802 . . . . . . . . . . . Cycle Actuator Gear
14. . . . . . . . 1. . . . . . . . 14177 . . . . . . . . . . . Knob - Manual Regeneration
15. . . . . . . . 2. . . . . . . . 13300 . . . . . . . . . . . Ball - 1/4″ Dia.
16. . . . . . . . 2. . . . . . . . 14457 . . . . . . . . . . . Spring - Detent
18. . . . . . . . 1. . . . . . . . 13748 . . . . . . . . . . . Screw - Program Wheel
19. . . . . . . . 1. . . . . . . . 60405-15 . . . . . . . . Program Skipper Wheel Assy. - Specify
Hardness Capacity
20. . . . . . . . 1. . . . . . . . 13806 . . . . . . . . . . . Program Wheel Retainer
21. . . . . . . . 1. . . . . . . . 13953. . . . . . . . . . . Cover Label - Program Wheel
22. . . . . . . . 1. . . . . . . . 11842. . . . . . . . . . . Electrical Cord
23. . . . . . . . 2. . . . . . . . 12681. . . . . . . . . . . Wire Connector
24. . . . . . . . 1. . . . . . . . 13547. . . . . . . . . . . Strain Relief
25. . . . . . . . 1. . . . . . . . 13229. . . . . . . . . . . Back Cover
26. . . . . . . . . . . . . . . . . . . . . . . . . . . . . . . . . . . Not Assigned
27. . . . . . . . 1. . . . . . . . 13955. . . . . . . . . . . Front Label - Beige
1. . . . . . . . 13958. . . . . . . . . . . Front Label - Silver
28. . . . . . . . 1. . . . . . . . 13310. . . . . . . . . . . Rear Label - Softener
1. . . . . . . . 18520. . . . . . . . . . . Rear Label - Filter
29. . . . . . . . 1. . . . . . . . 13957. . . . . . . . . . . Tape Stripe - Beige
1. . . . . . . . 13960. . . . . . . . . . . Tape Stripe - Silver
30. . . . . . . . 1. . . . . . . . 60514. . . . . . . . . . . Brine Cam Assembly, 3-18
1. . . . . . . . 60514-01. . . . . . . . Brine Cam Assembly, 6-36
1. . . . . . . . 60514-02 . . . . . . . Brine Cam Assembly - Minutes
34. . . . . . . . 2. . . . . . . . 12473 . . . . . . . . . . Screw-Drive Mounting
35. . . . . . . . 1 . . . . . . . 12037. . . . . . . . . . . Washer
37. . . . . . . . 1. . . . . . . . 13830. . . . . . . . . . . Drive Pinion - Program Wheel
38. . . . . . . . 1. . . . . . . . 13831. . . . . . . . . . . Clutch - Drive Pinion
39. . . . . . . . 1. . . . . . . . 14253. . . . . . . . . . . Spring Retainer
Tech Support: 1-888-989-7873
PURE WATER TREATMENT, INC.
Metered Control Valve Drive Part List Cont.
Item No.
No. Req’d
Part No.
Page 25
Description
40 . . . . . . . . 1. . . . . . . . 14276 . . . . . . . . . . . Spring
41 . . . . . . . . 1. . . . . . . . 14043 . . . . . . . . . . . Cable Assembly, Std
1. . . . . . . . 14910 . . . . . . . . . . . Cable Assembly, Ext, Rt Angle
42. . . . . . . . . 1. . . . . . . . 14176 . . . . . . . . . . . Valve Position Dial - Standard
1. . . . . . . . 14278 . . . . . . . . . . . Valve Position Dial - Low Water
1. . . . . . . . 15478 . . . . . . . . . . . Valve position Dial - Filter
43 . . . . . . . . 1. . . . . . . . 1417. . . . . . . . . . . . Knob Label - Beige
1. . . . . . . . 14207. . . . . . . . . . . Knob Label - Silver
44 . . . . . . . . 1. . . . . . . . 15151. . . . . . . . . . . Screw - Knob
45 . . . . . . . . 1. . . . . . . . 40214. . . . . . . . . . . Screw, Brine Cam
Tech Support: 1-888-989-7873
PURE WATER TREATMENT, INC.
Bypass Valve Assembly, Plastic
Item No.
No. Req’d
Part No.
Page 26
Description
1 . . . . . . . . 1 . . . . . . . . . .19723. . . . . . . . . . . . . By-Pass Valve Body, Plastic
2 . . . . . . . . 1 . . . . . . . . . .11183 . . . . . . . . . . . . .O-Ring, -015
3 . . . . . . . . 1 . . . . . . . . . .19724. . . . . . . . . . . . . Cap, By-Pass
4 . . . . . . . . 2 . . . . . . . . . .17512. . . . . . . . . . . . . Screw, Hex Washer Head, #6-24 x 3
5A. . . . . . . 1 . . . . . . . . . .17820. . . . . . . . . . . . . Plug, By-Pass, Inlet
5B. . . . . . . 1 . . . . . . . . . .17820-01 . . . . . . . . . . Plug, By-Pass, Outlet (White)
6 . . . . . . . 4 . . . . . . . . . . 18661 . . . . . . . . . . . . .O-Ring, -218
7 . . . . . . . 2 . . . . . . . . . . 18662. . . . . . . . . . . . . Retaining Ring
8 . . . . . . . 2 . . . . . . . . . . 18660 . . . . . . . . . . . . .O-Ring
9 . . . . . . . 2 . . . . . . . . . . 13305 . . . . . . . . . . . . .O-Ring, -119
10 . . . . . . 2 . . . . . . . . . . 13255. . . . . . . . . . . . . Clip, Mounting
11 . . . . . . 2 . . . . . . . . . . 13314. . . . . . . . . . . . . Screw, Hex Washer Head, 8-18 x 5/8
12A. . . . . 1 . . . . . . . . . . 18706. . . . . . . . . . . . . Yoke, Plastic, 1″ NPT
18706-02 . . . . . . . . . . Yoke, Plastic 3/4″
12B. . . . . . 1. . . . . . . . . . 13708 . . . . . . . . . . . . . Yoke, 3/4″
1. . . . . . . . . . 13708NP . . . . . . . . . . Yoke, 3/4″ Nickel Plated
1. . . . . . . . . . 13398. . . . . . . . . . . . . Yoke, 1″
1. . . . . . . . . . 13398NP . . . . . . . . . . Yoke, 1″ Nickel Plated
Tech Support: 1-888-989-7873
PURE WATER TREATMENT, INC.
Meter Assembly
Item No.
No. Req’d
Part No.
Page 27
Description
1 . . . . . . . . . . 4 . . . . . . . 12473 . . . . . . . . . . . . Screw - Meter Cover Assembly
2A. . . . . . . . . 1 . . . . . . . 14038. . . . . . . . . . . . .Meter Cover Assembly - Standard
2B . . . . . . . . . 1 . . . . . . . 15659. . . . . . . . . . . . .Meter Cover Assembly - Extended
Range, Rt. Angle
3. . . . . . . . . . . 1 . . . . . . . 13847 . . . . . . . . . . . .O-Ring - Meter Cover Assembly
4. . . . . . . . . . . 1 . . . . . . . 13509 . . . . . . . . . . . .Impeller
5. . . . . . . . . . . 4 . . . . . . . 13314 . . . . . . . . . . . .Screw - Adapter Clip
6. . . . . . . . . . . 4 . . . . . . . 13255 . . . . . . . . . . . .Adapter Clip
7. . . . . . . . . . . 1 . . . . . . . 13821 . . . . . . . . . . . .Meter Body
8. . . . . . . . . . . 4 . . . . . . . 13305 . . . . . . . . . . . .O-Ring - Meter Body
9. . . . . . . . . . . 1 . . . . . . . 14613 . . . . . . . . . . . .Flow Straightener
Tech Support: 1-888-989-7873
PURE WATER TREATMENT, INC.
Bypass Valve Assembly, Brass
Page 28
Item No.
No. Req’d
Part No.
Description
1 . . . . . . . . 1 . . . . . . . . . .19723 . . . . . . . . . . . By-Pass Valve Body, Plastic
1 . . . . . . . . 1 . . . . . . . . . .17290 . . . . . . . . . . . By-Pass Valve Body, 3/4″
1 . . . . . . . . . .17290NP. . . . . . . . . By-Pass Valve Body, 3/4″ Nickel Plate
1 . . . . . . . . . .13399 . . . . . . . . . . . By-Pass Valve Body, 1″
1 . . . . . . . . . .13399NP. . . . . . . . . By-Pass Valve Body, 1″ , Nickel Plate
2 . . . . . . . . 1 . . . . . . . . . .11726 . . . . . . . . . . . Seal, By-Pass
3 . . . . . . . . 1 . . . . . . . . . .11972 . . . . . . . . . . . Plug, By-Pass
4 . . . . . . . . 1 . . . . . . . . . .11978. . . . . . . . . . . Side Cover
5 . . . . . . . . 1 . . . . . . . . . .13604-01 . . . . . . . . Label
6 . . . . . . . . 8 . . . . . . . . . .15727. . . . . . . . . . . Screw
7 . . . . . . . . 1 . . . . . . . . . .11986. . . . . . . . . . . Side Cover
8 . . . . . . . . 1 . . . . . . . . . .11979. . . . . . . . . . . Lever, By-Pass
9 . . . . . . . . 1 . . . . . . . . . .11989. . . . . . . . . . . Screw, Hex Head, 1/4-14
Tech Support: 1-888-989-7873
PURE WATER TREATMENT, INC.
Service Assembly Parts List
Page 29
Part No.
Description
60102-00 . . . . . . . Piston - Softener
60102-10 . . . . . . . Piston - Filter
60102-20 . . . . . . . Piston - Low Water
60125 . . . . . . . . . . Seal Kit
60084-XX . . . . . . . Injector
60032 . . . . . . . . . . Brine Valve
60514 . . . . . . . . . . Brine Cam, 3-18
60514-01 . . . . . . . Brine Cam, 6-36
60514-02 . . . . . . . Brine Cam, Minutes
60510 . . . . . . . . . . Coupling with Clip & Screws
60040 . . . . . . . . . . Bypass, Brass 3/4″ NPT
60041 . . . . . . . . . . Bypass, Brass 1″ NPT
60049 . . . . . . . . . . Bypass, Brass, Plastic
60086 . . . . . . . . . . Meter, Std.
60087 . . . . . . . . . . Meter, Ext.
60136-5600 . . . . . Service Kit, Meter
60135-5600 . . . . . Service Kit, Clock
14860 . . . . . . . . . . Skipper Wheel 7 Day
14381 . . . . . . . . . . Skipper Wheel 12 Day
60405-10 . . . . . . . Meter Program Wheel, Std.
60405-20 . . . . . . . Meter Program Wheel, Ext.
Tech Support: 1-888-989-7873
PURE WATER TREATMENT, INC.
Troubleshooting
PROBLEM
1. Softener Fails to Regenerate
2. Softener delivers Hard water
3. Unit Uses too much salt.
4. Loss of Water Pressure
CAUSE
Page 30
CORRECTION
A. Electrical Service To Unit Has Been
Interrupted.
A. Assure Permanent Electrical Service.
(Check Fuse, Plug, Pull chain or Switch)
B. Timer is Defective
B. Replace Timer.
C. Power Failure
C. Reset Time of Day.
A. Bypass Valve is open.
A. Close Bypass Valve.
B. No Salt in Brine Tank.
B. Add Salt to Brine Tank and maintain
Salt Level above water level.
C. Injectors or Screen Plugged.
C. Clean Injector Screen.
D. Insufficient Water Flowing Into Brine
Tank.
D. Check Brine Tank Fill Time and Clean
Brine Line Flow Control if Plugged.
E. Hot Water Tank Hardness.
E. Repeat Flushings of the Hot Water Tank is
Required.
F. Leak At Distributor Tube.
F. Make Sure Distributor Tube is Not
Cracked. Check “O” Ring and Tube Pilot.
G. Internal Valve Leak.
G. Replace Seals and Spacers and/or Piston.
A. Improper Salt Setting.
A. Check Salt Usage and Salt Setting.
B. Excessive Water in Brine Tank.
B. See Problem No. 7.
A. Iron Buildup in Line to Water
Conditioner.
A. Clean Line to Water Conditioner
B. Iron Buildup in Water Conditioner
B. Clean Control and Add Mineral Cleaner
to Mineral Bed. Increase Frequency of
Regeneration.
C. Inlet of Control Plugged Due to Foreign C. Remove Piston and Clean Control.
Material Broken Loose From Pipes by
Recent Work Done on Plumbing System.
5. Loss of Mineral Through Drain A. Air in Water System.
Line.
A. Assure that Well System has Proper Air
Eliminator Control. Check for Dry Well
Condition.
6. Iron in Conditioned Water.
A. Check Backwash, Brine Draw and Brine
Tank Fill. Increase Frequency of
Regeneration. Increase Backwash Time.
A. Fouled Mineral Bed.
7. Excessive Water in Brine Tank. A. Plugged Drain Line Flow Control.
A. Clean Flow Control.
8. Salt water in service line
A. Plugged Injector System.
A. Clean Injector and Screen.
B. Timer Not Cycling.
B. Replace timer.
C. Foreign Material in Brine Valve
C. Replace Brine Valve Seat and Clean Valve.
D. Foreign Material in Brine Line Flow
Control.
D. Clean Brine Line Flow Control.
A. Drain Line Flow Control is Plugged.
A. Clean Drain Line Flow Control.
B. Injector is Plugged.
B. Clean Injector.
C. Injector Screen Plugged.
C. Clean Screen.
D. Line Pressure is too Low.
D. Increase Line Pressure to 20 P.S.I.
E. Internal Control Leak.
E. Change Seals, Spacers and Piston Assembly.
9. Softener Fails to Draw brine.
Tech Support: 1-888-989-7873
PURE WATER TREATMENT, INC.
Troubleshooting cont.
PROBLEM
CAUSE
Page 31
CORRECTION
10. Control Cycles Continuously.
A. Broken or Shortened Switch.
A. Determine if Switch or Timer is Faulty and
replace it, or Replace Complete Power Head.
11. Drain Flows Continuously.
A. Internal Control Leak.
A. Replace seals and/or piston assembly.
B. Foreign Material in Control.
B. Remove piston assembly and inspect
bore. Remove Foreign Material and Check
Control in Various Regeneration Positions.
C. Control valve jammed in brine or backwash position
C. Replace Seals and/or Piston Assembly.
D. Timer motor stopped or jammed.
D. Replace timer.
GENERAL SERVICE HINTS FOR METER CONTROL
Problem: Softener Delivers Hard Water
Cause could be that . . . Reserve capacity has been exceeded.
Correction: Check salt dosage requirements and reset program wheel to provide additional
reserve.
Cause could be that . . . Program wheel is not rotating with meter output.
Correction: Pull cable out of meter cover and rotate manually. Program wheel must move
without binding and clutch must give positive “clicks” when program wheel strikes regeneration stop. If it does not, replace timer.
Cause could be that . . . Meter is not measuring flow.
Correction: Check output by observing rotation of small gear on front of timer (Note - program wheel must not be against regeneration stop for this check).
Each tooth to tooth is approximately 30 gallons. If not performing properly, replace meter.
Tech Support: 1-888-989-7873
PURE WATER TREATMENT, INC.
Service Instructions
Page 32
A. TO REMOVE TIME BRINE VALVE, INJECTORS, AND SCREEN
1. Unplug electrical cord from outlet.
2. Turn off water supply to conditioner:
a. If the conditioner installation has a “three valve” by-pass system, first open the
valve in the by pass line, then close the valves at the conditioner inlet and outlet.
b. If the conditioner has an integral by-pass valve, put it in the by-pass position.
c. If there is only a shut-off valve near the conditioner inlet, close it.
3. Relieve water pressure in the conditioner by putting the control in the backwash
position momentarily. Return the control to the service position.
4. Disconnect brine tube and drain line connections at the injector body.
5. Remove the two injector body mounting screws. The injector and brine module can
now be removed from the control valve. Remove and discard valve body Orings
6. To Replace Brine Valve
1. Pull brine valve from injector body, also remove & discard O-ring at bottom of
brine valve hole.
0. Apply silicone lubricant to new O-ring and reinstall at bottom of brine valve hole.
0. Apply silicone lubricant to O- ring on new valve assembly and press into brine
valve hole, shoulder on bushing should be flush with injector body.
7. To replace injectors and screen.
1. Remove injector cap and screen, discard O-ring. Unscrew injector nozzle and
throat from injector body.
0. Screw in new injector throat and nozzle, be sure they are seated tightly. Install a
new screen.
0. Apply silicone lubricant to new “O” ring and install around oval extension on
injector cap.
8. Apply silicone lubricant to three new O-rings and install over three bosses on injector
body.
9. Insert screws with washers thru injector cap and injector. Place this assembly thru
hole in timer housing and into mating holes in the valve body. Tighten screws. (Be
sure to reinstall brass spacers with injector on model 4600 valve.)
10. Reconnect brine tube and drain line.
11. Return by-pass or inlef valving to normal service position. Water pressure should now
be applied to the conditioner, and any by-pass line shut off.
12. Check for leaks at all seal areas. Check drain seal with the control in the backwash
position.
13. Plug electrical cord into outlet.
14. Set time of day and cycle the control valve manually to assure proper function. Make
sure the control valve is returned to the service position.
15. Make sure there is enough brine in the brine tank.
16. Rotate program wheel counter-clockwise until it stops at regeneration position
17. Start regeneration cycle manually if water is hard.
Tech Support: 1-888-989-7873
PURE WATER TREATMENT, INC.
Service Instructions Cont.
Page 33
B. TO REPLACE TIMER
1. Unplug electrical cord from outlet.
2. Turn off water supply to conditioner:
a. If the conditioner installation has a “three valve” by-pass system, first open the
valve in the bypass line, then close the valves at the conditioner inlet and outlet.
b. If the conditioner has an integral by-pass valve, put it in the by-pass position.
c. If there is only a shut-off valve near the conditioner inlet, close it.
3. Relieve water pressure in the conditioner by putting the control in the backwash
position momentarily. Return the control to the service position.
4. Pull cable out of meter cover. Remove the control valve back cover.
5. Remove screw and washer at drive yoke. Remove timer mounting screws. The entire
timer assembly will now lift off easily.
6. Put new timer on top of valve. Be sure drive pin on main gear engages slot in drive
yoke (rotate control knob if necessary).
7. Replace timer mounting screws. Replace screw and washer at drive yoke.
8. Return by-pass or inlet valving to normal service position. Water pressure should now
be applied to the conditioner, and any by-pass line shut off.
9. Plug electrical cord into outlet.
10. Set time of day, program wheel, and salt usage. Cycle the control valve manually to
assure proper function. Make sure the control valve is returned to the service position.
11. Replace the control valve back cover. Be sure grommet at cable hole is in place.
12. Make sure there is enough brine in the brine tank.
13. Rotate program wheel counter-clockwise until it stops at regeneration position.
14. Start regeneration cycle manually if water is hard.
15. Plug cable into meter cover, rotate cable to align drive flat if necessary.
C. TO REPLACE PISTON ASSEMBLY
1. Unplug electrical cord from outlet.
2. Turn off water supply to conditioner:
a. If the conditioner installation has a “three valve” by-pass system, first open the
valve in the bypass line, then close the valves at the conditioner inlet and outlet.
b. If the conditioner has an integral by-pass valve, put it in the by-pass position.
c. If there is only a shut-off valve near the conditioner inlet, close it.
3. Relieve water pressure in the conditioner by putting the control in the backwash
position momentarily. Return the control to the service position.
4. Pull cable out of meter cover. Remove the control valve back cover.
5. Remove screw and washer at drive yoke. Remove timer mounting screws. The entire
timer assembly will now lift off easily. Remove end plug retainer plate.
6. Pull upward on end of piston yoke until assembly is out of valve.
7. Inspect the inside of the valve to make sure that all spacers and seals are in place, and
that there is no foreign matter that would interfere with the valve operation.
8. Take new piston assembly as furnished and push piston into valve by means of the
end plug. Twist yoke carefully in a clockwise direction to properly align it with drive
gear. Replace end plug retainer plate.
9. Place timer on top of valve. Be sure drive pin on main gear engages slot in drive yoke
(rotate control knob if necessary).
Tech Support: 1-888-989-7873
PURE WATER TREATMENT, INC.
Service Instructions Cont.
Page 34
C. TO REPLACE PISTON ASSEMBLY cont.
10. Replace timer mounting screws. Replace screw and washer at drive yoke.
11. Return by-pass or inlet valving to normal service position. Water pressure should now
be applied to the conditioner, and any by-pass line shut off.
12. Plug electrical cord into outlet.
13. Set time of day. Cycle the control valve manually to assure proper function. Make
sure the control valve is returned to the service position.
14. Replace the control valve back cover. Be sure grommet at cable hole is in place.
15. Make sure there is enough brine in the brine tank.
16. Rotate program wheel counter-clockwise until it stops at regeneration position.
17. Start regeneration cycle manually if water is hard.
18. Plug cable into meter cover. Rotate cable to align drive flat if necessary.
D. TO REPLACE SEALS AND SPACERS
1. Unplug electrical cord from outlet.
2. Turn off water supply to conditioner:
a. If the conditioner installation has a “three valve” by-pass system, first open the
valve in the bypass line, then close the valves at the conditioner inlet and outlet.
b. If the conditioner has an integral by-pass valve, put it in the by-pass position.
c. If there as only a shut-off valve near the conditioner inlet, close it.
3. Relieve water pressure in the conditioner by putting the control in the backwash
position momentarily. Return the control to the service position.
4. Pull cable out of meter cover. Remove the control valve back cover.
5. Remove screw and washer at drive yoke. Remove timer mounting screws. The entire
timer assembly will now lift off easily. Remove end plug retainer plate.
6. Pull upward on end of piston rod yoke until assembly is out of valve. Remove and
replace seats and spacers with fingers.
E. TO REPLACE METER
1. Unplug electrical cord from outlet.
2. Turn off water supply to conditioner:
a. If the conditioner installation has a “three valve” by-pass system, first open the
valve in the bypass line, then close the valves at the conditioner inlet and outlet.
b. If the conditioner has an integral by-pass valve, put it in the by-pass position.
c. If there is only a shut-off valve near the conditioner inlet, close it.
3. Relieve water pressure in the conditioner by putting the control in the backwash
position momentarily. Return the control to the service position.
4. Pull cable out of meter cover.
5. Remove two screws and clips at by-pass valve or yoke. Pull resin tank away from
plumbing Connections.
6. Remove two screws and clips at control valve. Pull meter module out of control
valve.
7. Apply silicone lubricant to four new O-rings and assemble to four ports on new meter
module.
8. Assemble meter to control valve. Note, meter portion of module must be assembled at
valve outlet.
9. Attach two clips and screws at control valve. Be sure clip legs are firmly engaged
with lugs.
Tech Support: 1-888-989-7873
PURE WATER TREATMENT, INC.
Service Instructions Cont.
Page 35
E. TO REPLACE METER cont.
10. Push resin tank back to the plumbing connections and engage meter ports with bypass valve or yoke.
11. Attach two clips and screws at by-pass valve or yoke. Be sure clip legs are firmly
engaged with lugs.
12. Return by-pass or inlet valving to normal service position. Water pressure should now
be applied to the conditioner, and any by-pass line shut off.
13. Check for leaks at all seal areas.
14. Plug electrical cord into outlet.
15. Set time of day. Make sure the control valve is in the service position.
16. Rotate program wheel counter-clockwise until it stops at regeneration position.
17. Start regeneration cycle manually if water is hard.
18. Plug cable into meter cover. Rotate cable to align drive flat if necessary.
F. TO REPLACE METER COVER AND/OR IMPELLER
1. Unplug electrical cord from outlet.
2. Turn off water supply to conditioner:
a. If the conditioner installation has a “three valve” by-pass system, first open the
valve in the bypass line, then close the valves at the conditioner inlet and outlet.
b. If the conditioner has an integral by-pass valve, put it in the by-pass position.
c. If there is only a shut-off valve near the conditioner inlet, close it.
3. Relieve water pressure in the conditioner by putting the control in the backwash
position momentarily. Return the control to the service position.
4. Pull cable out of meter cover.
5. Remove four screws on cover
6. Lift cover off of meter module, discard O-ring.
7. Remove and inspect impeller for gear or spindle damage, replace if necessary.
8. Apply silicone lubricant to new O-ring and assemble to the smallest diameter on
meter cover.
9. Assemble cover to meter module. Be sure impeller spindle enters freely into cover.
Press firmly on cover and rotate if necessary to assist in assembly.
10. Replace four screws and tighten.
11. Return by-pass or inlet valving to normal service position. Water pressure should now
be applied to the conditioner, and any by-pass line shut off.
12. Check for leaks at all seal areas.
13. Plug electrical cord into outlet.
14. Set time of day. Make sure the control valve is in the service position.
15. Rotate program wheel counter-clockwise until it stops at regeneration position.
16. Start regeneration cycle manually if water is hard.
17. Plug cable into meter cover. Rotate cable to align drive flat if necessary.
Tech Support: 1-888-989-7873
PURE WATER TREATMENT, INC.
Warranty
Page 36
10 YEAR WARRANTY
FOR RESIDENTIAL APPLICATIONS
Congratulations on the purchase of your PURE TECH Water System.
PURE
WATER TREATMENT, INC. warrants its products to be free from defects in
material and workmanship according to the following terms and conditions:
What is Covered?
I.
The PURE TECH 2200 series.
10 YEARS ON PARTS
II.
The PURE TECH 1000 R.O. System
A.
Installed following a PURE TECH 2200.
10 YEARS PARTS
5 YEARS ON THE REVERSE OSMOSIS
MEMBRANE
B.
Installed separately.
10 YEARS PARTS
3 YEARS REVERSE OSMOSIS
MEMEBRANE
______________________________________________________________________________________
Who is Covered?
This product warranty is transferable to a subsequent
owner. The only requirement is that the system must remain at the site of original installation.
______________________________________________________________________________________
Extension of Warranty to a Subsequent Installation
The ORIGINAL OWNER may move the system to another
location. The influent water quality at the subsequent location MUST, however, be within your system’s operating
specifications. Please contact a local authorized PURE
TECH dealer prior to installation at another location.
______________________________________________________________________________________
Registration and Service
To place your system under warranty, your authorized
PURE TECH dealer should complete the owner’s registration form and return one copy to: PURE WATER TREATMENT, INC., P.O. Box 730486, Ormond Bch, FL 321730486, within 30 days of the installation date. For service
under this warranty, you should contact the dealer. Retain a
copy of this warranty for reference if service is necessary.
Limits on this Warranty
Your system must be sold to you by an authorized PURE
TECH dealer in order to receive coverage under this warranty. Additionally, this warranty does not cover products
installed for commercial, industrial, institutional or multifamily applications.
The design of the overall treatment system and performance
of your system is related to the chemistry of the water being
treated; therefore, This warranty is limited to the equipment
manufactured and distributed by PURE WATER TREATMENT,
INC.
This Warranty does not include damage to your system due to:
• Abuse, misuse or neglect
•
•
•
•
Excessive pressure (over 100 psi for a PURE TECH 1000
R.O. system, or 125 psi for all other PURE TECH systems)
Excessive water temperature (over 100° for a PURE TECH
1000 R.O. system, or 120° for all other PURE TECH
systems)
Freezing, alterations or misapplication
A change in the influent water characteristics
Your equipment must be installed and operated in
accordance with your owners manual’s recommendations
and applicable state and local codes.
______________________________________________________________________________________
No Other Warranties
There is no other express warranty. Implied warranties
including any warranty of merchantability or fitness for a particular purpose, are limited to the duration of this warranty and
are excluded to the extent permitted by law. There are no warranties other than those contained herein. In no event shall the company be liable for indirect, special or consequential damages in
connection with the use of the system.
______________________________________________________________________________________
Modification of the Warranty
PURE WATER TREATMENT, INC. does not authorize any other person to assume for PURE WATER
TREATMENT, INC. any other liability in connection with
this product.
The dealer has no authority to make any representations on behalf of PURE WATER TREATMENT, INC. or
to modify the terms of this warranty in any way.
P.O. Box 730486
Ormond Beach, FL 32173-0486
OFFICE 1-888-989-PURE · FAX 1-877-219-PURE
“Our Reputation Is Worth More Than Money”
Tech Support: 1-888-989-7873
PURE WATER TREATMENT, INC.
Notes
Page 37
________________________________________________________________________
________________________________________________________________________
________________________________________________________________________
________________________________________________________________________
________________________________________________________________________
________________________________________________________________________
________________________________________________________________________
________________________________________________________________________
________________________________________________________________________
________________________________________________________________________
________________________________________________________________________
________________________________________________________________________
________________________________________________________________________
________________________________________________________________________
________________________________________________________________________
________________________________________________________________________
________________________________________________________________________
________________________________________________________________________
________________________________________________________________________
________________________________________________________________________
________________________________________________________________________
________________________________________________________________________
________________________________________________________________________
________________________________________________________________________
Tech Support: 1-888-989-7873
PURE WATER TREATMENT, INC.