1
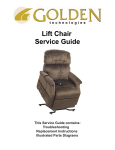
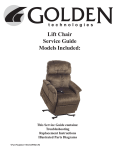
SERVICE GUIDE
REVA_040412
Table of Contents
About the Lift Chair Service Guide…………………………………………………………….2
Lift Chair Components………………………………………………………………………..2-4
General Trouble Shooting...................................................................................................5
Tools Required....................................................................................................................5
Models Quick Reference………………………………………………………………………..6
Replacement Instructions...………………………………………………………………7-14
Smart Tek Hand Control………………………………………………………………………..7
Hand Control Extension Wire............................................................................................7
Back Assembly…………………………………………………………………………………..8
Control Box……………………………………………………………………………………….8
Lift Motor………………………………………………………………………………………….8
Lift Frame…………………………………………………………………………………………9
Arm Assembly……………………………………………………………………………......9-10
Scissor Mechanism………………………………………………………………………...11-12
Recline Bar..…………………………………………………………………………………....12
Seat Assembly……………………………………………………………………………...13-14
Recline Straps………………………………………………………………………………….14
Scissor Mechanism Parts……………………………………………………………………..15
Electrical Systems………………………………………………………………………...16-20
Single Motor……………………………………………………………………………………..16
Dual Motor……………………………………………………………………………………….17
Heat and Massage……………………………………………………………………………...18
Stellar Comfort………………………………………………………………………………......19
UC480 Heat and Massage………………………………………………………………….....20
Trouble Shooting with SMART TEK…………………………………………………………..21
LIFT FRAMES………………………………………………………………………………23-37
LM5000C…………………………………………………………………………………….23-25
LM5100………………………………………………………………………………………26-28
LM5120………………………………………………………………………………………29-31
LM6111………………………………………………………………………………………32-34
LM5200M-RO……………………………………………………………………………….35-37
Stellar Comfort Recline Mechanism……………………………………………………….38
Power Connections……………………………………………………………………….........39
Back Installation………………………………………………………………………………...39
Hand Controls……………………………………………………………………………….40-43
Grease Points…………………………………………………………………………………...44
Lift Chair Cut Away……………………………………………………………………………..45
Lift Chair Boxing Instructions………………………………………………………………46-47
UC540M-26 Boxing Instructions...................................................................................48-49
1
REVA_040412
About the Lift Chair Service Guide
This service guide provides you with the information necessary to repair the UltraComfort 3-position,
2-position, and Stellar recline lift chairs. The troubleshooting scenarios in this manual consist of
procedures that enable you to systematically trace and correct faults in the system, replacement
procedures, and exploded views of available parts. Most replacement instructions apply to all the lift
chairs in this service manual, but some of them are specific to individual chairs.
Before troubleshooting, check the following:
• Make sure that the lift chair is plugged into a working wall outlet.
• Check the wall outlet circuit breaker.
• Visually check terminals for corrosion.
• Check wires for missing insulation.
• Check connectors for unseated pins.
• Ensure LED lights are on. (Refer to “Trouble Shooting with SMART TEK” on page 19).
Information required prior to making a service call:
• Serial Number
• Date of Purchase
• Description of the problem with the lift chair
Lift Chair Components
Lift chairs are powered by 24V DC transformers that plug into standard wall outlets and operate on
standard 120V AC electricity. The lift chair control system is made up of the following components:
• Motor(s)
• Hand Control
• Extension Wire
*Only on selected models
• Transformer
• Battery Backup Wire*
• Heat Unit*
• Massage Unit*
• Control Unit*
• Junction Box*
Component: Motor
Location: Between the lift frame and the seat.
Function: Provides lift and recline.
Connections: Each motor is physically connected to the chair through the lift frame and the recline
straps. Each motor is electrically connected to either a control unit or directly to the hand control.
Failure Signs: Chair will not lift and/or recline. Motor may become noisy just before failure.
Tests: See “Trouble Shooting with SMART TEK” on page 19.
Expected Readings: See “Trouble Shooting with SMART TEK” on page 19.
Serviceable: Must be replaced.
Component: Hand Control (Lift/Recline or Recline Only)
Location: On the arm of the chair.
Function: Provides user interface for lift/recline or recline only.
Connections: Connected to either the control unit or the motor.
Failure Signs: Chair will not lift and/or recline.
Tests: See “Trouble Shooting with SMART TEK” on page 19.
Expected Readings: See “Trouble Shooting with SMART TEK” on page 19.
Serviceable: Must be replaced.
2
REVA_040412
Component: Extension Wire
Location: Between the lift frame and the chair frame.
Function: Provides connection from the hand control to the motor or control box.
Connections: From the quick disconnect in the pocket to the motor or control box.
Failure Signs: Chair will not lift/recline.
Tests: Test continuity.
Expected Readings: Open Circuit
Serviceable: Must be replaced.
Component: Transformer
Location: Next to chair.
Function: Converts AC to DC. Also provides power during a power failure.
Note: Power during a power failure only applies to the lift/recline or recline only functions.
Connections: Wall outlet and either control box or motor.
Failure Signs: Chair will not operate.
Tests: Test for voltage at connection to chair.
Expected Readings: Approximately 27VDC.
Serviceable: Must be replaced.
Component: Control Box (500-lb. chair only)
Location: On the lift frame.
Function: Provides connectivity for motors, hand control, and
transformer.
Connections: Connected to the motor(s), hand control, and
transformer.
Failure Signs: Chair will not lift and/or recline.
Clicking noise. Motors out of sync.
Tests: AC Voltage
Expected Readings: 27 - 32 VAC. See figure 1.
Serviceable: Must be replaced.
Figure 1. Control Box
Component: Heat Pad
Location: On the chair seat.
Function: Provides heat.
Connections: Connected to the control box.
Failure Signs: No heat.
Tests: Resistance.
Expected Readings: (Far Infrared Heat only, 1 - 6 ohms across the two connector pins).
Serviceable: Must be replaced.
Component: Massage Unit
Location: On the seatback or the seat.
Function: Vibrates to provide massage.
Connections: Connected to the junction box.
Failure Signs: Massage will not work when selected.
Tests: Check for DC voltage
Expected Readings: Approximately 13.8 DC Volts
Serviceable: Must be replaced.
3
REVA_040412
Component: Hand Control (Heat/Massage or Infrared Heat Only)
Location: On the arm of the chair.
Function: Provides user interface for heat/massage or Infrared heat only.
Note: Model UC480 uses the “All in one” hand control, which controls heat, massage, and lift/recline.
Connections: Connected to the control box.
Failure Signs: Heat/Massage or Infrared Heat Only will not work.
Note: Model UC480, Chair will not lift and/or recline or Heat/Massage will not work.
Tests: See “Hand Controls” on pages 38-39. For a more complete guide, refer to manufacturer’s
owner’s manual.
Expected Readings: See “Hand Controls” on pages 38-39. For a more complete guide, refer to
manufacturer’s owner’s manual.
Serviceable: Must be replaced.
Battery Back Up System
1. Batteries should be replaced after one use.
2. Batteries should be changed yearly.
For a complete explanation of the battery back up system, refer to the UltraComfort owner’s manual.
4
REVA_040412
General Trouble Shooting
Problem: 1
Chair is in the lift position and will not descend, or chair is in the recline position and will not lift.
Solution:
If the chair is stuck in the lift position, press the down button; if the chair is stuck in the recline
position, press the up button. While pressing the appropriate button, listen to hear if the motor is
running.
Ensure LED lights are on. (Refer to “Trouble Shooting with SMART TEK” on page 19).
Problem 2
If you don’t hear the motor running, follow these steps.
A) Check to see if the chair is securely plugged in.
B) See if the outlet is activated by a wall switch.
C) Try plugging the chair into a different outlet. (Sometimes the socket is worn and will not
handle the amps needed for operation.)
D) Check wiring on both power cord for motor and switch cord for breakage or fraying.
E) Plug the new hand control into motor or into extension and try for chair response.
F) If still no response, see “Trouble Shooting with SMART TEK” on page 19.
Problem 3
If you hear the motor running, but the chair won’t move or partially moves, check for the following:
A) Inspect lift frame for possible breakage.
B) Inspect push tube or gear casing for breakage.
C) Gears may be stripped in gear casing in motor assembly.
D) Push tube may be stripped or the fork head may be broken.
Tools Required:
The following tools are needed to service Ultra Comfort lift chairs.
• # 8, 9 or 10 flat head screw driver
• P2 & P3 Phillips head screw driver
• T30 torx bit
• Wired or wireless drill Note: Driver bits can be used to speed up the repair process.
• Chair stand
• Spare hair pins
• Zip ties
• 7/16 box head wrench
• 3/8 box head wrench
• 1/2 box head wrench
• Needle nose pliers
• Volt meter
• Clippers or scissors
• Retracto knife
• Spare rags
• Large vice grip
• White lithium grease and Zep 2000
If servicing a lift chair with the StellarComfort mechanism, you will also need:
• 7/16 & 3/8 ratchet wrench
• 5/32 Allen wrench
5
REVA_040412
Models Quick Reference
Model
Series
Size
Lift
Frame
Motor
Transformer
Hand
Control
Recline
Mechanism
UC211
Leisure
Medium
LM5000C
Single
Standard US
UC 2 Button
2 way
UC320
Leisure
Medium
LM5100
Single
Standard US
UC 2 Button
3 way
UC330
Leisure
Large
LM5120
Single
Standard US
UC 2 Button
3 way
UC540-SAA
Montage
Small
LM5100
Single
Standard US
UC 2 Button
3 way
UC540-M
Montage
Medium
LM5100
Single
Standard US
UC 2 Button
3 way
UC540-L
Montage
Large
LM5120
Single
Standard US
UC 2 Button
3 way
UC540M-26
Montage
Wide
LM6111
Dual
Standard US
UC 2 Button
3 way HD
UC480
Tranquility
Medium
LM5100
Single
Standard US
All in one
3 way
UC660
Tranquility
Medium
LM5100
Single
Standard US
UC 2 Button
3 way
UC770
Tranquility
Medium
LM5120
Single
Standard US
UC 2 Button
3 way
UC550-S
Stellar Comfort
Small
LM5100
Stellar
Standard US
UC550-M
Stellar Comfort
Medium
LM5100
Stellar
Standard US
UC550-L
Stellar Comfort
Large
LM5120
Stellar
Standard US
UC552
Stellar Comfort
Medium
LM5100
Stellar
Standard US
*Auto Drive
Stellar
UC556
Stellar Comfort
Medium
LM5120
Stellar
Standard US
*Auto Drive
Stellar
UC551-S
Power Recline
Small
LM5200M-RO
Stellar
Standard US
UC551-M
Power Recline
Medium
LM5200M-RO
Stellar
Standard US
UC551-L
Power Recline
Large
LM5200M-RO
Stellar
Standard US
UC553
Power Recline
Medium
LM5200M-RO
Stellar
Standard US
UC557
Power Recline
Medium
LM5200M-RO
Stellar
Standard US
* Hand Control models currently being used.
6
*Auto Drive
6 Button
*Auto Drive
6 Button
*Auto Drive
6 Button
*Auto Drive
6 Button
*Auto Drive
6 Button
*Auto Drive
6 Button
*Auto Drive
6 Button
Auto Drive
Stellar
Stellar
Stellar
Stellar
Stellar
Stellar
Stellar
Stellar
REVA_040412
Replacement Instructions
Smart Tek Hand Control Replacement
Tools Needed: None
1.
Unplug the transformer from the wall outlet.
2. Unplug the motor power cable.
3. Reach down into the pocket until you feel the disconnect latch on the extension cable.
4. Pull back on the disconnect latch.
5. Put one hand on the back of the extension wire plug base and one on the hand control plug base
and pull the two pieces apart.
6. Plug in the new Smart Tek hand control to the extension cable.
7. Push forward on the disconnect latch. Make sure it engages fully with the hand control plug base.
8. Reconnect the motor power cable.
9. Plug the transformer into the wall outlet and test the hand control.
Hand Control Extension Wire Replacement
Tools Needed: Phillips head screwdriver, wire cutter, staple remover, stapler, zip ties, and a chair
stand.
Unplug the transformer from the wall outlet.
1.
2. Unplug the transformer from the battery backup cable.
3. Reach down into the chair’s side pocket until you feel the disconnect latch on the hand control
extension.
4. Pull back on the disconnecting latch.
5. Put one hand on the back of the extension wire plug base and one on the hand control plug base
and pull the two pieces apart.
6. Gently push the chair over onto the footrest, turn it upside down or, gently push it over onto its
side, opposite of the hand control.
7. Use a Phillips screwdriver to remove the wire clamp used to secure the extension cable to the
bottom of the armrests. Make sure you save the clamp and screw.
8. Remove a few staples on the arm assembly to allow the extension wire to be pulled out through
the fabric pocket.
9. Pull the extension cable through the fabric pocket.
10. Locate the zip ties that hold the extension wire to the lift frame. Note their location.
11. Cut these ties.
12. Unplug the extension cable from the control box.
13. Plug the new extension cable into the control box.
14. Secure it to the lift frame with zip ties. Use the same locations as the old extension cable.
15. Insert the extension cable into the fabric pocket.
16. Reinstall the staples that were removed in step 8.
17. Reinstall the wire clamp.
18. Turn the chair back over onto its legs.
19. Plug in the Smart Tek hand control to the extension cable.
20. Push forward on the disconnecting latch. Make sure it engages fully with the hand control plug
base.
21. Clip the Smart Tek hand control to the black plastic hook on the side of the chair arm.
22. Plug the battery backup back into the transformer.
23. Plug the transformer back into the wall outlet and test.
7
REVA_040412
Back Assembly Replacement (500-lb. and 3-position)
Tools needed: 7/16 inch socket wrench
1. Press the Up Button on the hand control until the footrest is about parallel to the floor.
2.
Unplug the transformer from the wall outlet.
3. Using the 7/16 inch socket wrench, remove the two (2) flange lock nuts located on both sides of
the back.
4. Pull the back flap away from the Velcro.
5. Work the back assembly out one side at a time pulling the threaded studs out of the scissor
mechanisms.
6. Install new back.
Control Box Replacement (500-lb. only)
Tools needed: wire cutters, replacement zip ties, and a chair stand.
Unplug the transformer from the wall outlet.
1.
2. Unplug the battery backup cable from the transformer.
3. Gently push the chair over onto the footrest, turn it upside down or, gently push it over onto its
side, opposite of the hand control.
4. Unplug the motor(s), hand control extension, and battery backup from the control box.
5. Cut the wire ties that fasten the control box and the motor(s) to the lift frame and remove it.
6. Use wire ties to fasten a new control box onto the lift frame.
7. Plug the motor(s), hand control extension, and battery backup into the new control box.
8. Gently turn the chair back over.
9. Plug the battery backup cable into the transformer.
10. Plug the transformer into the wall outlet and test.
Lift Motor Replacement
Tools needed: needle nose pliers, zip ties, and a chair stand.
1.
Unplug the transformer from the wall outlet.
2. Unplug the battery backup cable from the transformer.
3. Gently push the chair over onto the footrest, turn it upside down or, gently push it over onto its
side, opposite of the hand control.
4. Unplug the motor(s) from the control unit (540M26) or from the hand control extension and the
transformer.
5. Remove the hitch pin and the clevis pin that fastens the bottom of the motor(s) to the lift frame.
6. Remove the hitch pin, the clevis pin, washers, and spacers that fasten the top of the motor(s) to
the recline straps.
7. Use the hitch pin and clevis pin to fasten the bottom of the new motor to the lift frame.
8. Use the hitch pin, clevis pin, washers, and spacers to fasten the top of the lift motor to the recline
straps.
9. Connect the new motor(s) to the control unit.
10. Turn the chair over onto the lift frame.
11. Plug the battery backup cable into the transformer.
12. Plug the transformer into the wall outlet and test.
8
REVA_040412
Lift Frame Replacement
Tools needed: Needle nose pliers, T30 Torx screw bit, wire cutters, replacement zip ties, and a
chair stand.
1.
Unplug the transformer from the wall outlet.
2. Unplug the battery backup cable from the transformer.
3. Gently push the chair over onto the footrest, turn it upside down or, gently push it over onto its
side, opposite of the hand control.
4. Unplug the motor(s), hand control extension, and battery backup from the control box.
5. Cut the wire ties that fasten the control box to the lift frame and remove it (500-lb. only.)
6. Remove the eight (8) T30 lag screws that hold the lift frame to the arm assembly.
7. Cut the wire ties that hold the hand control extension wire to the frame and place the wire to the
side.
8. Remove the hitch pin(s), the clevis pin(s), and the washers that fasten the recline strap(s) to the
recline bar.
9. Lift the lift frame out of the chair shell.
Note: When installing the new lift frame the footboard must be completely closed when you fasten
the lift frame to the armrest assembly or the footboard will not close properly.
10. Cut the wire ties that fasten the motor cables to the lift frame.
11. Remove the hitch pin(s) and the clevis pin(s) that fasten the bottom of the motor(s) to the lift
frame.
12. Remove the hitch pin(s), the clevis pin(s), spacers, and washers that fasten the recline straps(s)
to the lift frame.
13. Use the hitch pin(s), the clevis pin(s), spacers, and washers to fasten the recline strap(s) to the
new lift frame.
14. Use the hitch pin(s) and the clevis pin(s) to fasten the bottom of the motor(s) to the new lift frame.
15. Place the new lift frame onto the chair shell.
16. Use the hitch pin(s), the clevis pin(s), and the washers to fasten the recline strap(s) to the recline
bar.
17. Use the eight (8) T30 lag screws to fasten the lift frame to the arm assembly.
18. Use two wire ties to fasten the hand control extension to the lift frame.
19. Use wire ties to fasten the control box to the lift frame.
20. Plug the motor(s), hand control extension, and battery backup into the control box.
21. Gently push the chair back over.
22. Plug the battery backup cable into the transformer.
23. Plug the transformer into a wall outlet and test.
Arm Assembly Replacement
Tools needed: Needle nose pliers, P2 Phillips screwdriver, T30 screw bit, wire cutters, zip ties, 3/8
inch socket, a stool or stand for placing the chair upside down.
Unplug the transformer from the wall outlet.
1.
2. Unplug the battery backup cable from the control box.
3. Reach down into the chair’s side pocket until you feel the disconnect latch on the hand control
extension.
4. Pull back on the disconnecting latch.
5. Put one hand on the back of the extension wire plug base and one on the hand control plug base
and pull the two pieces apart.
6. Gently push the chair over onto the footrest, turn it upside down or, gently push it over onto its
side, opposite of the hand control.
9
REVA_040412
7. Use a Phillips screwdriver to remove the wire clamp used to secure the extension cable to the
bottom of the armrests. Make sure you save the clamp and screw.
8. Remove a few staples on the arm assembly to allow the extension wire to be pulled out through
the fabric pocket.
9. Pull the extension cable through the fabric pocket.
10. Remove the eight (8) T30 lag screws that hold the lift frame to the arm assembly.
11. Remove the hitch pin(s), the clevis pin(s), and the washers that fasten the recline strap(s) to the
recline bar.
12. Lift the lift frame out of the chair shell and place it off to the side.
13. Use the 3/8 inch socket to remove the four (4) bolts that fasten each scissor mechanism to the
arm assembly.
While this next step can be done alone, it does require extra attention. You
must remove the arm assembly without twisting the frame. Excessive twisting will cause the
board holding the arms together to snap.
14. Stand behind the chair and pull the arms away from the chair being careful not to get the material
snagged in the scissor mechanisms.
15. Place the arm assembly to the side.
16. Place the new arm assembly in place so that the bolt holes in the scissor mechanisms line up
with the bolt holes in the armrest.
17. Install the four (4) bolts that fasten each scissor mechanisms to the new arm assembly.
18. Make sure the footboard is completely closed.
Note: When installing the lift frame the footboard must be completely closed when you fasten the lift
frame to the armrest assembly or the footboard will not close properly.
19. Place the lift frame onto the chair shell.
20. Use the hitch pin(s), the clevis pin(s), and the washers to fasten the recline strap(s) to the recline
bar.
21. Use the eight (8) T30 lag screws to fasten the lift frame to the arm assembly.
22. Reinstall the staples that were removed in step 8.
23. Reinstall the wire clamp.
24. Gently turn the chair back over onto its legs.
25. Plug in the Smart Tek hand control to the extension cable.
26. Push forward on the disconnecting latch. Make sure it engages fully with the hand control plug
base.
27. Clip the Smart Tek hand control to the black plastic hook on the side of the chair arm.
28. Plug the battery backup back into the control box.
29. Plug the transformer back into the wall outlet and test.
Scissor Mechanism Replacement
Tools needed: Needle nose pliers, P2 Phillips screwdriver, T30 screw bit, wire cutters, zip ties, 3/8
inch socket, a stool or stand for placing the chair upside down.
Unplug the transformer from the wall outlet.
1.
2. Unplug the battery backup cable from the transformer.
3. Reach down into the chair’s side pocket until you feel the disconnect latch on the hand control
extension.
4. Pull back on the disconnecting latch.
10
REVA_040412
5. Put one hand on the back of the extension wire plug base and one on the hand control plug base
and pull the two pieces apart.
6. Gently push the chair over onto the footrest, turn it upside down or, gently push it over onto its
side, opposite of the hand control.
7. Unplug the transformer and the hand control extension from the motor or control box.
8. Remove the eight (8) T30 lag screws that hold the lift frame to the arm assembly.
9. Remove the hitch pin(s), the clevis pin(s), and the washers that fasten the recline strap(s) to the
recline bar.
10. Remove the hand control extension wire clamp.
11. Lift the lift frame out of the chair shell and place it off to the side.
12. Use the 3/8 inch socket to remove the four (4) bolts that fasten each scissor mechanism to the
arm assembly.
While this next step can be done alone, it does require extra attention. You
must remove the arm assembly without twisting the frame. Excessive twisting will cause the
board holding the arms together to snap.
13. Stand behind the chair and pull the arms away from the chair being careful not to get the material
snagged in the scissor mechanisms.
14. Place the arm assembly to the side.
15. Use the Phillips screwdriver to remove the screws that fasten the scissor mechanism to the
footboard.
16. Use the 3/8 inch socket to remove the bolts that fasten the scissor mechanism to the seat and to
the footboard.
17. Use the 3/8 inch socket to install the bolts that fasten the new scissor mechanism to the seat and
the footboard.
18. Use the Phillips screwdriver to install the screws that fasten the new scissor mechanism to the
footboard.
19. Place the arm assembly in place so that the bolt holes in the scissor mechanisms line up with the
bolt holes in the armrest.
20. Install the four (4) bolts that fasten each scissor mechanisms to the arm assembly.
21. Make sure the footboard is completely closed.
Note: When installing the lift frame the footboard must be completely closed when you fasten the lift
frame to the armrest assembly or the footboard will not close properly.
22. Place the lift frame onto the chair shell.
23. Use the hitch pin(s), the clevis pin(s), and the washers to fasten the recline strap(s) to the recline
bar.
24. Use the eight (8) T30 lag screws to fasten the lift frame to the arm assembly.
25. Reinstall the hand control extension wire clamp.
26. Plug the transformer and hand control extension into the motor or control box.
27. Plug the battery backup back into the transformer.
28. Plug the transformer back into the wall outlet and test.
29. Reinstall the seatback if removed.
11
REVA_040412
Recline Bar Replacement
Tools needed: Needle nose pliers, P2 Phillips screwdriver, T30 screw bit, wire cutters, zip ties, 3/8
inch socket, a stool or stand for placing the chair upside down.
1.
Unplug the transformer from the wall outlet.
2. Unplug the battery backup cable from the transformer.
3. Reach down into the chair’s side pocket until you feel the disconnect latch on the hand control
extension.
4. Pull back on the disconnecting latch.
5. Put one hand on the back of the extension wire plug base and one on the hand control plug base
and pull the two pieces apart.
6. Gently push the chair over onto the footrest, turn it upside down or, gently push it over onto its
side, opposite of the hand control.
7. Remove the eight (8) T30 lag screws that hold the lift frame to the arm assembly.
8. Remove the hitch pin(s), the clevis pin(s), and the washers that fasten the recline strap(s) to the
recline bar.
9. Remove the hand control extension wire clamp.
10. Lift the lift frame out of the chair shell and place it off to the side.
11. Use the 3/8 inch socket to remove the four (4) bolts that fasten each scissor mechanism to the
arm assembly.
While this next step can be done alone, it does require extra attention. You
must remove the arm assembly without twisting the frame. Excessive twisting will cause the
board holding the arms together to snap.
12. Stand behind the chair and pull the arms away from the chair being careful not to get the material
snagged in the scissor mechanisms.
13. Place the arm assembly to the side.
14. Use the 1/2 inch socket to remove the bolts that fasten the recline bar to the seat.
15. Use the 1/2 inch socket to install the bolts that fasten the new recline bar to the seat.
16. Place the arm assembly in place so that the bolt holes in the scissor mechanisms line up with the
bolt holes in the armrest.
17. Install the four (4) bolts that fasten each scissor mechanisms to the arm assembly.
18. Make sure the footboard is completely closed.
Note: When installing the lift frame the footboard must be completely closed when you fasten the lift
frame to the armrest assembly or the footboard will not close properly.
19. Place the lift frame onto the chair shell.
20. Use the hitch pin(s), the clevis pin(s), and the washers to fasten the recline strap(s) to the recline
bar.
21. Use the eight (8) T30 lag screws to fasten the lift frame to the arm assembly.
22. Reinstall the hand control extension wire clamp.
23. Plug the battery backup back into the transformer.
24. Plug the transformer back into the wall outlet and test.
12
REVA_040412
Seat Assembly Replacement
Tools needed: Needle nose pliers, P2 Phillips screwdriver, T30 screw bit, wire cutters, zip ties, 3/8
inch socket, a stool or stand for placing the chair upside down.
1.
Unplug the transformer from the wall outlet.
2. Unplug the battery backup cable from the transformer.
3. Reach down into the chair’s side pocket until you feel the disconnect latch on the hand control
extension.
4. Pull back on the disconnecting latch.
5. Put one hand on the back of the extension wire plug base and one on the hand control plug base
and pull the two pieces apart.
6. Gently push the chair over onto the footrest, turn it upside down or, gently push it over onto its
side, opposite of the hand control. You can also remove the seat back.
7. Remove the eight (8) T30 lag screws that hold the lift frame to the arm assembly.
8. Remove the hitch pin(s), the clevis pin(s), and the washers that fasten the recline strap(s) to the
recline bar.
9. Remove the hand control extension wire clamp.
10. Lift the lift frame out of the chair shell and place it off to the side.
11. Use the 3/8 inch socket to remove the four (4) bolts that fasten each scissor mechanism to the
arm assembly.
While this next step can be done alone, it does require extra attention. You
must remove the arm assembly without twisting the frame. Excessive twisting will cause the
board holding the arms together to snap.
12. Stand behind the chair and pull the arms away from the chair being careful not to get the material
snagged in the scissor mechanisms.
13. Place the arm assembly to the side.
14. Use the Phillips screwdriver to remove the screws that fasten the scissor mechanism to the
footboard.
15. Use the 3/8 inch socket to remove the bolts that fasten the scissor mechanism to the seat and to
the footboard.
16. Use the 1/2 inch socket to remove the bolts that fasten the recline bar to the seat.
17. Use the 1/2 inch socket to install the bolts that fasten the recline bar to the new seat.
18. Use the 3/8 inch socket to install the bolts that fasten the scissor mechanism to the new seat and
the footboard.
19. Use the Phillips screwdriver to install the screws that fasten the new scissor mechanism to the
footboard.
20. Place the arm assembly in place so that the bolt holes in the scissor mechanisms line up with the
bolt holes in the armrest.
21. Install the four (4) bolts that fasten each scissor mechanisms to the arm assembly.
22. Make sure the footboard is completely closed.
Note: When installing the lift frame the footboard must be completely closed when you fasten the lift
frame to the armrest assembly or the footboard will not close properly.
23. Place the lift frame onto the chair shell.
24. Use the hitch pin(s), the clevis pin(s), and the washers to fasten the recline strap(s) to the lift
frame.
25. Use the eight (8) T30 lag screws to fasten the lift frame to the arm assembly.
26. Reinstall the hand control wire clamp.
13
REVA_040412
27. Plug the motor(s), hand control extension, and battery backup into the control box.
28. Plug the battery backup back into the transformer.
29. Plug the transformer back into the wall outlet and test.
Recline Straps
Tools needed: Needle nose pliers, zip ties, and a chair stand.
Unplug the transformer from the wall outlet.
1.
2. Unplug the battery backup cable from the transformer.
3. Gently push the chair over onto the footrest, turn it upside down or, gently push it over onto its
side, opposite of the hand control.
4. Remove the hitch pin, clevis pin(s), and washers that fasten the recline straps to the lift frame.
5. Remove the hitch pin(s), clevis pin(s), and washers that fasten the recline straps to the recline bar.
6. Use the hitch pin(s), clevis pin(s), and washers to fasten the new recline straps to the recline bar.
7. Use the hitch pin(s), clevis pin(s), and washers to fasten the new recline straps to the lift frame.
8. Use hitch pin(s), clevis pin(s), washers, and spacers to fasten the top of the motor to the new
recline straps.
9. Turn the chair over onto the lift frame.
10. Plug the battery backup cable into the transformer.
11. Plug the transformer into the wall outlet and test.
12. Reinstall the seatback if removed.
14
REVA_040412
SCISSOR MECHANISM PARTS
Component
Description
RM621
3-Way Recliner Mechs
RM8300
2-Way Recliner Mechs
RM620
Stellar Comfort Mechs
We do recommend both sides be replaced.
RM8300
RM621
RM620
15
REVA_040412
SINGLE MOTOR ELECTRICAL SETUP
5
LED Light
DC Power
REF #
1*
1
2*
2
3
4
5
PART NUMBER
ZKUC-20
ZKUC-10
ZKUC-20-EXT
ZKUC-10-EXT
GM1500-LM
GM1501-A
GM1501-APUS
DESCRIPTION
Hand Wand, Standard 2 Button Ultra Comfort
Hand Wand, Standard 2 Button Ultra Comfort
Hand Control Extension 62” Long
Hand Control Extension 62” Long
Motor Chair Led Non Transformer
Motor Chair Transformer
Transformer Cord
QTY.
1
1
1
1
1
1
1
Smart Tek System
Models: UC211, UC320, UC330, UC540-SAA, UC540-M, UC540-L, UC660, and UC770
Note: UC480 uses the “All in one” hand control when configured with heat and massage.
* Asterisk designates the current style.
16
REVA_040412
DUAL MOTOR ELECTRICAL SETUP
4
5
7
6
REF #
1*
1
2*
2
3
4
5
6
7
PART NUMBER
ZKUC-20
ZKUC-10
ZKUC-20-EXT
ZKUC-10-EXT
GMOKI-28W
GMOKI-CB
GM1502L
GM1501-A
GM1501-APUS
LED Light
DC Power
DESCRIPTION
Hand Wand, Standard 2 Button Ultra Comfort
Hand Wand, Standard 2 Button Ultra Comfort
Hand Control Extension 62” Long
Hand Control Extension 62” Long
Okin 26-28 Wide Motor
Motor Chair Okin 26-28Wide Control Box 4/2003
Motor Chair Battery Back Up Wire with LED
Motor Chair Transformer
Transformer Cord
Smart Tek System
Model: UC540M-26
* Asterisk designates the current style.
17
QTY.
1
1
1
1
2
2
1
1
1
REVA_040412
HEAT and MASSAGE ELECTRICAL SETUP
In-Seat
behind
knee
Lower-back
Upper-back in middle
HV3000 COMPLETE
RELAXOR DHV SYSTEM
8
7
9
11
10
6
LED Light
DC Power
REF #
1*
1
2*
2
3
4
5
6
7
8
9
10
11
PART NUMBER
ZKUC-20
ZKUC-10
ZKUC-20-EXT
ZKUC-10-EXT
GM1500-LM
GM1501-A
GM1501-APUS
HV3001
HV3003
HV3004
HV3004B
HV3002-2
HV3005
5
DESCRIPTION
Hand Wand, Standard 2 Button Ultra Comfort
Hand Wand, Standard 2 Button Ultra Comfort
Hand Control Extension 62” Long
Hand Control Extension 62” Long
Motor Chair Led Non Transformer
Motor Chair Transformer
Transformer Cord
DHV Hand Control
Heat Unit
Massage Seat
Massage Back
Transformer
DHV Control Box
QTY.
1
1
1
1
1
1
1
1
1
1
3
1
1
Smart Tek System
Models: UC211, UC320, UC330, UC540-SAA, UC540-M, UC540-L, UC540-26, UC660, UC770
* Asterisk designates the current style.
18
REVA_040412
STELLAR COMFORT ELECTRICAL SETUP
In-Seat
behind
knee
Lower-back
Upper-back in middle
HV3000 COMPLETE
RELAXOR DHV SYSTEM
12
LED Light
DC Power
REF #
1
2
3
4
5
6
7
8
9
10
11
12
PART NUMBER
HV3004
HV3004B
HV3003
ZKAD-1
HV3005
HV3001-UC
GM1500-LM
GM756R
ZK1100-EXT
HV3002-2
GM1501-A
GM1501-APUS
DESCRIPTION
Massage Unit Assembly, Seat
Massage Unit Assembly, Back
Heat Pad
Hand Wand Auto Drive for Lift Chairs
Control Box
Heat Massage Deluxe Hand Control Ultra Comfort Line
Motor Chair Okin Maxi Lift Motor
Motor Chair Okin Maxi Recline Motor
Hand Control Extension
Box Transformer 3 x 3 1/2 x 10
Motor Chair Transformer
Transformer Cord
QTY.
1
3
1
1
1
1
1
1
1
1
1
1
Smart Tek System
Models: UC550-S, UC550-M, UC550-L, UC552, UC556, UC551-S, UC551-M, UC551-L, UC553, UC557
19
REVA_040412
HEAT and MASSAGE ELECTRICAL SETUP
HV4101-HC
HV4101-VIB
Phono Plug
Phono Plug
HV4101-PAD
Middle
Lower-back
Quick Disconnect
HV4101JBOX
HV4101-EXT
9-Pin Plug w/lock
5-Pin Plug
REF #
1*
2*
3*
4*
5*
6
7
8
PART NUMBER
HV4101-HC
HV4101-VIB
HV4101-PAD
HV4101-JBOX
HV4101-EXT
GM1500-LM
GM1501-A
GM1501-APUS
DESCRIPTION
Hand Wand, Heat and Massage and Lift
Massage Back
Heat Unit
Junction Box
Extension
Motor Chair Led Non Transformer
Motor Chair Transformer
Transformer Cord
QTY.
1
2
1
1
1
1
1
1
Smart Tek System
Model: UC480 only.
Note: The above drawing is for units manufactured after May 2012.
* Asterisk designates the current style.
20
REVA_040412
HEAT and MASSAGE ELECTRICAL SETUP
Lower-back
Middle
Lower-back
5-Pin Plug
REF #
1
2
3
4
5
6
PART NUMBER
HV4001
HV4004B
HV4003
GM1500-LM
GM1501-A
GM1501-APUS
DESCRIPTION
Hand Wand, Heat and Massage and Lift
Massage Back
Heat Unit
Motor Chair Led Non Transformer
Motor Chair Transformer
Transformer Cord
QTY.
1
2
1
1
1
1
Smart Tek System
Model: UC480 only.
Note: The above drawing is for units manufactured prior to May 2012.
21
REVA_040412
Trouble Shooting with Smart Tek
Models: UC211, UC320, UC330, UC540-SAA, UC540-M, UC540-L, UC480, UC660, UC770,
UC550-S, UC550-M, UC550-L, UC552, UC556, UC551-S, UC551-M, UC551-L, UC553, UC557
Problem:
Chair doesn't work, both LED lights are off.
Solution:
1. Check right angle plug is connected to the transformer.
2. Check the plug end of the transformer is plugged into the
wall outlet.
3. Check the fuse or breaker to the wall outlet the chair is
plugged into. If all above are ok, defective transformer
replace it.
Chair doesn't work, both LED lights are on.
1. Defective motor replace it.
Chair motor runs in one direction, both lights
on.
1. Defective hand control replace it.
Chair doesn't work; LED on hand control is
off.
1. Check the quick release connector is plugged in and
locked in the chair pocket.
2. Check the extension from the pocket is connected to
the motor.
If all above are ok, defective hand control or
extension wire, extension wire rarely goes bad,
replace hand control.
Models: UC540M-26
Problem:
Chair doesn't work, both LED lights are off.
Chair doesn't work, both LED lights are on.
Solution:
1. Check right angle plug is connected to the
transformer.
2. Check the plug end of the transformer is plugged into
the wall outlet.
3. Check the fuse or breaker to the wall outlet the chair
is plugged into. If all above are ok, defective
transformer, replace it.
1. Check motors are plugged into the control box.
If all above are ok, defective control box or motors,
both motors rarely go bad, replace control box.
Chair motor runs in one direction, both lights are on. 1. Defective hand control, replace it.
Chair doesn’t work; LED on hand control is off.
1. Check the quick release connector is plugged in and
locked in the chair pocket.
2. Check the extension from the pocket is connected to
the control box.
If all above are ok, defective hand control or extension
wire or control box, extension wire rarely goes bad,
replace control box and hand control, replace hand
control first to see if problem is resolved.
22
REVA_040412
LM5000C LIFT FRAME
ASSEMBLY
LM-RS5100
LM5000C
Used for Models: UC211
See parts list for specific parts by model.
23
REVA_040412
LM5000C LIFT MOTOR
LM-RS5100
See parts list for specific h a n d
control part number.
GM1500-LM
24
REVA_040412
LM5000C LIFT FRAME PARTS LIST
Part Number
BB5003
BB5512
BB5514
BB5515
BB5518
BB5530
BB5531
BB5535
BB5549
BB5566
BB5567
BB5579
GM1500-LM
LM5000C
LM-RS5100
ZKUC-10
Description
Washer, 380 x 750 x 062 Nylon
Pin, 3/8 x 1 5/8 Zinc Clevis
Pin, Hitch
Cap, 1" Square End Chair
Tywrap, 8" Black
Leg Leveler 5/16 X 1
Pin, 3/8 x 2 1/2 Zinc Clevis
Washer, 750 x 394 x 125 Nylon
Washer, 400 x 750 x 312 Nylon
Pin, 3/8 x 3 1/2 Zinc Clevis
Pin, 3/8 x 2 5/8 Zinc Clevis
Pin, 3/8 x 2 7/8 Zinc Clevis
DC INLINE MOTOR
5000C LIFT FRAME
RECLINE STRAP 5100 / 6111 SERIES LIFT FRAME
Hand Wand, 2 Button LED
Qty. Per
Unit
2
1
11
8
2
4
1
6
2
4
1
4
1
1
2
1
RECLINE BAR FOR 5000C LIFT FRAME
RB4000-CB
RECLINE BAR CAPRI
1
RECLINE MECHANISMS FOR 5100 LIFT FRAME
RM8300L
2 WAY MECHANISM LEFT SIDE
1
RM8300R
2 WAY MECHANISM RIGHT SIDE
1
LEFT AND RIGHT IS DETERMINED BY SITTING IN CHAIR
TRANSFORMER FOR 5100 LIFT FRAME
GM1501-A
GM1501-APUS
Motor Chair Transformer
Transformer Cord
1
1
CALL TECHNICAL SERVICE FOR FABRIC, FOAM, SPRING AND WOOD PART NUMBERS AND PRICING
25
REVA_040412
LM-RS5100
RB5100-M-1
LM5100
For use in models U C 3 2 0 , U C 5 4 0 - S A A , U C 5 4 0 - M , U C 4 8 0 , U C 6 6 0 , U C 5 5 0 - S ,
UC550-M, UC552
See parts list for specific parts by model.
26
REVA_040412
LM5100 LIFT MOTOR
LM-RS5100
See parts list for specific h a n d
control part number.
GM1500-LM
27
REVA_040412
LM5100 LIFT FRAME PARTS LIST
Part Number
BB5003
BB5512
BB5514
BB5515
BB5518
BB5530
BB5531
BB5535
BB5549
BB5566
BB5567
BB5579
GM1500-LM
LM5100
LM-RS5100
ZKUC-10
ZKAD-1
Description
Washer, 380 x 750 x 062 Nylon
Pin, 3/8 x 1 5/8 Zinc Clevis
Pin, Hitch
Cap, 1" Square End Chair
Tywrap, 8" Black
Leg Leveler 5/16 X 1
Pin, 3/8 x 2 1/2 Zinc Clevis
Washer, 750 x 394 x 125 Nylon
Washer, 400 x 750 x 312 Nylon
Pin, 3/8 X 1 ¾ Zinc Clevis
Pin, 3/8 X 2 5/8 Zinc Clevis
Pin, 3/8 X 2 7/8 Zinc Clevis
DC INLINE MOTOR
5100 LIFT FRAME
RECLINE STRAP 5100 / 6111 SERIES LIFT FRAME
Hand Wand, 2 Button LED
Hand Wand Auto Drive for Lift Chairs
Qty. Per
Unit
2
1
11
8
2
4
1
6
2
4
1
4
1
1
2
1
1
RECLINE BARS FOR 5100 LIFT FRAME
RB5100-M-1 RECLINE BAR MEDIUM / SMALL
1
RECLINE MECHANISMS FOR 5100 LIFT FRAME
RM621L
3 WAY MECHANISM LEFT SIDE
1
RM621R
3 WAY MECHANISM RIGHT SIDE
1
RM8300L
2 WAY MECHANISM LEFT SIDE
1
RM8300R
2 WAY MECHANISM RIGHT SIDE
1
LEFT AND RIGHT IS DETERMINED BY SITTING IN CHAIR
TRANSFORMER FOR 5100 LIFT FRAME
GM1501-A Motor Chair Transformer
GM1501-APUS Transformer Cord
1
1
CALL TECHNICAL SERVICE FOR FABRIC, FOAM, SPRING AND WOOD PART NUMBERS AND PRICING
28
REVA_040412
LM-RS5100
RB5100-L-1
For use in models U C 3 3 0 , U C 5 4 0 - L , U C 7 7 0 , U C 5 5 0 - L , U C 5 5 6
See parts list for specific parts by model.
29
REVA_040412
LM-RS5100
See parts list for specific h a n d
control part number.
GM1500-LM
30
REVA_040412
LM5120 LIFT FRAME PARTS LIST
Part Number
BB5003
BB5512
BB5514
BB5515
BB5518
BB5530
BB5531
BB5535
BB5549
BB5566
BB5567
BB5579
GM1500-LM
LM5120
LM-RS5100
ZKAD-1
ZKUC-10
Description
Washer, 380 x 750 x 062 Nylon
Pin, 3/8 x 1 5/8 Zinc Clevis
Pin, Hitch
Cap, 1" Square End Chair
Tywrap, 8" Black
Leg Leveler 5/16 X 1
Pin, 3/8 x 2 1/2 Zinc Clevis
Washer, 750 x 394 x 125 Nylon
Washer, 400 x 750 x 312 Nylon
Pin, 3/8 X 1 ¾ Zinc Clevis
Pin, 3/8 X 2 5/8 Zinc Clevis
Pin, 3/8 X 2 7/8 Zinc Clevis
DC INLINE MOTOR
5120 LIFT FRAME
RECLINE STRAP 5100 / 6111 SERIES LIFT FRAME
Hand Wand Auto Drive for Lift Chairs
Hand Wand, 2 Button LED
Qty. Per
Unit
2
1
11
8
2
4
1
6
2
4
1
4
1
1
2
1
1
RECLINE BARS FOR 5120 LIFT FRAME
RB5100-M-1 RECLINE BAR MEDIUM / SMALL
1
RB5100-L-1 RECLINE BAR LARGE / 754
1
RECLINE MECHANISMS FOR 5120 LIFT FRAME
RM621L
3 WAY MECHANISM LEFT SIDE
1
RM621R
3 WAY MECHANISM RIGHT SIDE
1
LEFT AND RIGHT IS DETERMINED BY SITTING IN CHAIR
TRANSFORMER FOR 5120 LIFT FRAME
GM1501-A Motor Chair Transformer
GM1501-APUS Transformer Cord
1
1
CALL TECHNICAL SERVICE FOR FABRIC, FOAM, SPRING AND WOOD PART NUMBERS AND PRICING
31
REVA_040412
RB6111-1
LM-RS5100
For use in models U C 5 4 0 M - 2 6
See parts list for specific parts by model.
32
REVA_040412
See parts list for specific h a n d
control part number.
LM-RS5100
Transformer
GM1502-L
33
GM1501-A
GM1501-APUS
REVA_040412
LM6111 LIFT FRAME PARTS LIST
Part Number
BB5003
BB5512
BB5514
BB5515
BB5518
BB5530
BB5531
BB5535
BB5549
BB5566
BB5567
BB5582
GMOKI-28W
GMOKI-CB
GM1502L
LM6111
LM-RS5100
ZKUC-10
Description
Washer, 380 x 750 x 062 Nylon
Pin, 3/8 x 1 5/8 Zinc Clevis
Pin, Hitch
Cap, 1" Square End Chair
Tywrap, 8" Black
Leg Leveler 5/16 X 1
Pin, 3/8 x 2 1/2 Zinc Clevis
Washer, 750 x 394 x 125 Nylon
Washer, 400 x 750 x 312 Nylon
Pin, 3/8 X 1 ¾ Zinc Clevis
Pin, 3/8 X 2 5/8 Zinc Clevis
Pin, 3/8 X 3 Zinc Clevis
Motor Chair Okin 26-28 Wide Motor
Motor Chair Okin 26-28Wide Control Box 4/2003
LOW VOLTAGE POWER CORD (Extension wire low voltage )
Dual Motor Lift Frame
RECLINE STRAP 5100 / 6111 SERIES LIFT FRAME
Hand Wand, 2 Button LED
Qty. Per
Unit
4
2
13
8
2
6
2
4
4
4
2
4
2
1
1
1
2
1
RECLINE BARS FOR 6111 LIFT FRAME
RB6111-1
DUAL MOTOR RECLINE BAR
1
RECLINE MECHANISMS FOR 6111 LIFT FRAME
RM621L
3 WAY MECHANISM LEFT SIDE HEAVY DUTY
1
RM621R
3 WAY MECHANISM RIGHT SIDE HEAVY DUTY
1
LEFT AND RIGHT IS DETERMINED BY SITTING IN CHAIR
TRANSFORMER FOR 6111 LIFT FRAME
GM1501-A Motor Chair Transformer
GM1501-APUS Transformer Cord
1
1
CALL TECHNICAL SERVICE FOR FABRIC, FOAM, SPRING AND WOOD PART NUMBERS AND PRICING
34
REVA_040412
LM5200M-RO (Recline Only) FRAME
BB5514
LM-RS5100
RO51001- ASSY
BB5567
BB5515
For use in models U C 5 5 1 - S , U C 5 5 1 - M , U C 5 5 1 - L , U C 5 5 3 , U C 5 5 7
See parts list for specific parts by model.
35
REVA_040412
LM5200M-RO (Recline Only) MOTOR
ZKAD-RC
ZK1100-EXT
LM-RS5100
BB5514
BB5514
GM1500-RM
BB5531
BB5512
LM5200M-RO
Whole Frame
36
REVA_040412
LM5200M-RO FRAME PARTS LIST
Part Number
BB5003
BB5512
BB5514
BB5515
BB5518
BB5530
BB5531
BB5549
BB5567
GM1500-RM
GM1500ASSY
Description
Washer, 380 x 750 x 062 Nylon
Pin, 3/8 x 1 5/8 Zinc Clevis
Pin, Hitch
Cap, 1" Square End Chair
Tywrap, 8" Black
Leg Leveler 5/16 X 1
Pin, 3/8 x 2 1/2 Zinc Clevis
Washer, 400 x 750 x 312 Nylon
Pin, 3/8 X 2 5/8 Zinc Clevis
RECLINE ONLY MOTOR
DC MOTOR COMPLETE
1
RO51001COMPLETE 5200 RECLINE ONLY FRAME ASSEMBLY
ASSY
LM-RS5100 RECLINE STRAP 5100 / 6111 SERIES LIFT FRAME
ZK1100-EXT Hand Control Extension
ZKAD-RC
Qty. Per
Unit
2
1
5
4
2
4
1
2
1
1
Hand Wand Auto Drive for Lift Chairs
1
2
1
1
RECLINE BARS
RB5100-M-1 RECLINE BAR MEDIUM / SMALL
RB5100-L-1 RECLINE BAR LARGE / 754
1
1
RECLINE MECHANISMS
RM620L
Left Side Stellar Comfort Mechanism
1
RM620R
Right Side Stellar Comfort Mechanism
1
LEFT AND RIGHT IS DETERMINED BY SITTING IN CHAIR
TRANSFORMER
GM1501-A Motor Chair Transformer
GM1501-APUS Transformer Cord
1
1
CALL TECHNICAL SERVICE FOR FABRIC, FOAM, SPRING AND WOOD PART NUMBERS AND PRICING
37
REVA_040412
Stellar Comfort Recline Mechanism
BB5613
BB5613
BB5505
BB5603
For use in models U C 5 5 0 - S , U C 5 5 0 - M , U C 5 5 0 - L , U C 5 5 2 , U C 5 5 6 , U C 5 5 1 - S ,
UC551-M, UC551-L, UC553, UC557
See parts list for specific parts by model.
38
REVA_040412
Power Connections
Models: UC211, UC320, UC330, UC540-SAA, UC540-M, UC540-L, UC540M-26, UC480,
UC550-S, UC550-M, UC550-L, UC552, UC660, UC770, UC551-S, UC551-M, UC551-L,
UC553, UC557
Model: UC540-XL
Back Installation:
1. Plug the lift chair into a standard (115-120VAC) wall outlet.
2. Press the down arrow on the hand control until the footrest is about parallel to the floor. This will
expose the back brackets at the rear of chair.
3. Slide the back down between the brackets until the threaded studs on the back slip thru the holes
in the brackets as shown.
4. Thread the flange lock nuts onto the studs and tighten securely using the supplied wrench or a
7/16" box wrench. Return the chair to the seated upright position by pressing the up arrow on the
hand control.
5. Attach the bottom of the outside back to the Velcro on the arm cross rail.
39
REVA_040412
Hand Controls
Lift & Recline and Recline Only
*Models: UC211, UC320, UC330,
UC540-SAA, UC540-M, UC540-L,
UC540M-26, UC480, UC660,
UC770
*Models: UC552, UC556, UC550-S,
UC550-M, UC550-L, UC552,
**UC551-S, **UC551-M, **UC551-L,
**UC553, **UC557
* Hand Control models currently being used.
** Recline only models. Switch S10 the lift function does not apply to recline only chairs. The chair will only
open or close when switch S10 is pressed.
Models: UC211, UC320, UC330,
UC540-SAA, UC540-M, UC540-L,
UC540M-26, UC480, UC660, UC770
Models: UC550-S, UC550-M, UC550-L,
UC552, UC551-S, UC551-M, UC551-L, UC553
Note: For individual switch functions on each hand control, refer to the owner’s manuals.
40
REVA_040412
Lift & Recline and Heat & Massage
To Operate Lift
Press Up key to raise chair. Press DOWN key to lower chair.
To Lock/Lift
Press and hold LOCK/UNLOCK key for approximately 3 seconds until red
lock icon is lit.
To Unlock Lift
Press and hold LOCK/UNLOCK key for approximately 5 seconds until
green unlock icon is lit.
To Operate Heat
Press HEAT key to turn on. Press HEAT key again to turn off.
To Operate Massage
Press MASSAGE key to turn on massage. Press again to change from
WAVE/STEADY/PULSE modes (colored LEDs indicate selection).
To Turn Massage Off
Press and hold MASSAGE key.
*Models: UC340, UC480
Massage Intensity
Press INTENSITY key to choose from LO/MED/HI (colored LEDs indicate
selection).
NOTE: The heat and massage is controlled by a 20 minute timer.
Input Power: +27Vdc Switching Power Supply
PWR Button Operation:
Red = Intensity High
Amber = Intensity Medium
Green = Intensity Low
No Color = Turns off All Wand Functions.
MSG Button Operation:
Changing Colors = Wave Mode
Steady Amber = Steady Mode
Pulsing Amber = Pulse Mode
HEAT Button Operation:
Red = Heat High
Green = Heat Low
Arrow Key Operation:
Arrow Up = Recline Position
Arrow Down = Seated Position
Models: UC340, UC480
Timer Functions: There are two separate timer functions, One for Heat,
and the other for Massage functions.
Heat Timer – Heat timer is activated when the heat button is depressed.
Timer is factory set for 20 minutes.
Massage Timer- Massage timer is activated when the PWR button is
depressed. Timer is factory set for 20 minutes.
* Hand Control models currently being used.
41
REVA_040412
Heat & Massage Only - Hand Control
Press PWR to turn On or Off.
15 Minute Timer: Single Press (GREEN)
30 Minute Timer: Press & Hold (ORANGE)
Press LO or HI to turn HEAT ON or OFF.
Independent 30 Minute Timer.
Press any or all ZONE keys to turn any ZONE On or Off.
Press SELECT, WAVE, or PULSE for desired operating mode.
Press – (Left) to decrease or + (Right) to increase INTENSITY and SPEED.
*Models: All with standard heat & massage.
* Hand Control models currently being used.
42
REVA_040412
Infrared Heat Only – Hand Control
• Press ON and the temperature light will turn on. Controller is pre-set to a low/medium
heat level and a 60 minute session.
• Once turned ON, it will display the session time and will count down from the pre-set
60 minutes.
• The temperature level can be adjusted by pressing the up or down arrows, up for more
heat, down for less heat.
• The time can only be adjusted when the Controller is OFF.
• Use the MODE button to set the time setting.
• Adjust your time by using the up and down arrows press while the time light is on, up
to increase time and down to set less time. Adjustments are in 15 minute increments.
• By pressing the MODE button a second time, the display will return to the temperature
setting for any future adjustments.
*Models: All with
Far Infrared Heat.
• After setting the desired time and temperature, the system will be ready to use when
you press the ON/OFF button. A heater light will indicate that the system is on and
working. When your session is complete the light will go off and the controller will
display your heat level.
• For your convenience, the controller will default to the previous setting upon your next
use. While it is suggested that the preset temperature, the second grade, and 60
minutes’ working time is the best choice, you can set the temperature and time in
accordance with your own personal demands.
• Finally, the electrical power should be turned off after use.
* Hand Control models currently being used.
43
REVA_040412
Grease Points
Appling any type of lubricant as a routine maintenance procedure is not
necessary. If lubricating the lift chair to alleviate excessive noise, only apply the specified
lubricant at the locations shown below. Do not apply excessive lubricant. Excessive lubricant
could leak onto the chair or the floor causing damage.
USE WHITE LITHIUM GREASE
SCISSOR MECHANISM
USE ZEP2000
44
REVA_040412
Lift Chair Cut Away
Bottom View
Note: The above illustrations are intended as general information. They do not represent the models in this manual.
45
REVA_040412
46
REVA_040412
47
REVA_040412
UC540M-26 Model Only
Lift Chair Boxing Instructions
48
REVA_040412
UC540M-26 Model Only
Lift Chair Boxing Instructions
49
REVA_040412
50
REVA_040412
51