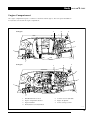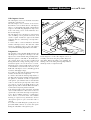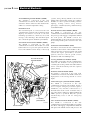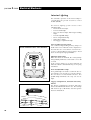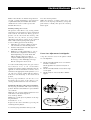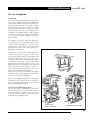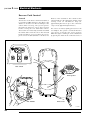
1
Technical Guide
Jaguar S-TYPE
Sports Sedan
Introduction
Published by Service Communications Jaguar Cars Limited
Publication Part No JJM 10 15 16/92 February 1999
Technical Guide
Jaguar S-TYPE
Sports Sedan
Introduction
Published by Service Communications Jaguar Cars Limited
Publication Part No JJM 10 15 16/92 February 1999
JAGUAR
S -TYPE Preface
This Technical Guide introduces the Jaguar S-TYPE sports sedan which is a new addition to the Jaguar
range. It is intended to give Jaguar Dealer workshop personnel an overview of their construction and
operation, and is for information purposes only. The contents of this Technical Guide must not be used
as a reference source for servicing procedures; all servicing procedures must be in accordance with the
appropriate Service Manual.
This Technical Guide will not be updated. While every effort is made to ensure accuracy, changes may
occur between going to press and the equipment being introduced to the market. Once the equipment is
in service, details of changes can be obtained from Service Bulletins and revisions to the Service
Manuals.
All rights reserved. No part of this publication may be reproduced, stored in a retrieval system or
transmitted, in any form, electronic, mechanical, photocopying, recording or other means without prior
written permission from the Service Division of Jaguar Cars Limited.
Contents
Subject
JAGUAR
S -TYPE
Page
Glossary
Abbreviations
3
Introduction
Vehicle Weights
Dimensions
Vehicle Features
4
5
5
6
Body
Body Structure
Engine Compartment
Trunk
Jacking and Towing
Glazing
Doors and Door Mirrors
Windshield Wipers and Washers
Exterior and Interior Trim
Seats
Interior Features
10
15
16
18
19
21
23
24
26
30
Occupant Protection
Seat Belts
Airbags
SRS Operation
32
33
35
Fuel System
Introduction
Evaporative Emissions System
38
42
Exhaust System
Introduction
44
Transmission
Introduction
45
Chassis
Introduction
Front Suspension
Rear Suspension
Wheels and Tyres
Driveline
Final Drive (differential)
Brakes
Power Assisted Steering
Steering Column
46
47
49
52
53
54
55
58
59
Climate Control
System Overview
63
continued:
1
JAGUAR
S -TYPE Contents
Electrical/Electronic
Power Distribution
Control Modules
Fuses and Relays
Exterior Lighting
Interior Lighting
Instrumentation and Controls
Security and Locking Systems
Audio and Communications System
In-car Telephone
Navigation
Voice Activation
Reverse Park Control
2
69
74
78
86
94
95
108
116
119
122
124
126
Glossary
JAGUAR
S -TYPE
The following abbreviations are used in this document:
Abbreviation
Description
Abbreviation
Description
ABS
anti-lock braking system
LH(D)
left-hand (drive)
ABS/TCCM
anti-lock braking system/
traction control system control
module
mile/h
mile per hour
A/C
air conditioning
A/CCM
air conditioning control
module
ADCM
adaptive damping control
module
ADRC
mm
millimeter
ms
millisecond
NAS
North American specification
NCM
navigation control module
Nm
Newton meter
OBD
on-board diagnostics
adaptive damper ride control
PAS
power assisted steering
ALR
automatic locking retractor
PATS
passive anti-theft system
BIW
body-in-white
PCM
powertrain control module
˚C
degree Celsius
PDU
portable diagnostic unit
CAN
controller area network
PSHCM
CATS
computer active technology
suspension
passenger seat heater control
module
RECM
rear electronic control module
CD
compact disc
RCM
restraints control module
CTCM
cellular telephone control
module
RH(D)
right-hand (drive)
RPC(M)
reverse park control (module)
dual automatic temperature
control
RTTI
real time traffic information
SAE
Society of Automotive Engineers
DDCM
driver door control module
SCLM
steering column lock module
DSC(CM)
dynamic stability control
(control module)
SCP
standard corporate protocol
SRCM
sliding roof control module
SRS
supplementary restraints
system
TACM
throttle actuator control
module
UK
United Kingdom
USA
United States of America
V
volt
VACM
voice-activated control module
VECM
vehicle emergency control
module
VEMS
vehicle emergency messaging
system
VICM
vehicle information control
module
VICS
vehicle information and
communication system
VIN
vehicle identification number
DATC
DSCM
driver seat control module
DSHCM
driver seat heater control
module
ECM
electronic control module
EFT
engine fuel temperature
(sensor)
EVAP
evaporative emission
FTP
fuel tank pressure (sensor)
GDO
garage door opener
GECM
general electronic control
module
GPS
global positioning system
HO2S
heated oxygen sensor
in
inch
IP
injection pressure (sensor)
IVD
interactive vehicle dynamics
kg
kilogram
km/h
kilometer per hour
kW
kilowatt
lb
pound
m
meter
3
JAGUAR
S -TYPE Introduction
The Jaguar S-TYPE is an all-new, luxury sports sedan with a distinctive style, refined power, agile
handling, supple ride and luxurious comfort.
Powertrains are a V8 (AJ28) petrol engine, derived from the engines currently used in XJ and XK Series
vehicles, with a new five-speed automatic transmission or alternatively, a V6 (AJ-V6) petrol engine
coupled with either a five-speed automatic transmission or a five-speed manual transmission. The new
V6 engine and transmission units and the updated variations to the V8 engine are described in the
‘Jaguar S-TYPE Powertrain Introduction’ Technical Guide, which compliments this Guide.
As with current vehicles, variable rate steering control is fitted and all vehicles have ABS brakes with
traction control as standard. A new, optional feature with the Jaguar S-TYPE is Dynamic Stability Control
(DSC), yaw control, which assists the driver in maintaining directional control of the vehicle.
Unlike current vehicles, the hood is hinged at its rear with a safety catch provided at the front of the
hood. A tilt and slide sliding roof with a sunshade is an optional feature.
Both front seats have electrically operated 8-way adjustments as standard and memory equipment is
available as an option. To allow a greater load to be carried in the luggage compartment, the rear seats
can be folded forwards and are split in a 60/40 configuration.
Automatic climate control, with dual temperature control for the driver and front passenger, is a
standard feature on all vehicles. Another new item is reverse park control, a system giving the driver
audible warning of obstructions which could damage the vehicle during reversing.
A standard fit radio/cassette unit provides in-car entertainment with a CD autochanger also being
offered. Other options include a phone, navigation system, vehicle emergency monitoring system and
certain voice activated systems. Optional cruise control and audio switches are fitted to the steering
wheel. All vehicles have a trip computer system and a message center.
Security features are immobiliser and alarm. Optional features include intruder sensor and inclination
sensor. The 3 or 4 button key-ring transmitter has radio frequency operation with an encrypted rolling
code to help prevent theft of the vehicle.
Standard Corporate Protocol (SCP) is the only computer system highway for all the vehicle electronic
controls, CAN is not used.
4
Introduction
JAGUAR
S -TYPE
Vehicle Weights
Vehicles with
3.0 litre V6 engines
Vehicles with
4.0 litre V8 engines
Kerb weight
Front axle kerb weight
Rear axle kerb weight
Unladen weight
Kgs (lbs)
1635 (3604)
850 (1874)
785 (1730)
1705 (3759)
Kgs (lbs)
1725 (3803)
915 (2017)
810 (1786)
1795 (3957)
Gross vehicle weight
Gross front axle
Gross rear axle
Gross combination weight
2175 (4795)
998 (2200)
1177 (2595)
4025 (8873)
2195 (4839)
1018 (2244)
1177 (2595)
4045 (8918)
Dimensions
EXTERNAL DIMENSIONS
2909 (114.5)
4861 (191.4)
1819 (71.6)
2040 (80.3)
*
1537 (60.51)
All dimensions in mm (in)
1544 (60.78)
D.501.1476
*Height, with Comfort suspension 1401 (55.2) with Sports suspension 1411 (55.5)
Turning circle curb to curb 11.40 m (37 ft 9 in)
D.501.1476
5
JAGUAR
S -TYPE Introduction
Vehicle Features
Items detailed below include features of the Jaguar S-TYPE.
N/A = Not Available; O = Optional; X = Standard
A = Accessory
Middle East* includes: Abu Dhabi (GCC), Bahrain (GCC), Dubai (GCC), Kuwait (GCC), Lebanon, Oman
(GCC), Qatar (GCC), Saudi Arabia (GCC), Syria and Turkey.
GCC = Gulf Coast Countries
Russia* includes:
Moscow, Belarus, Kazakhstan, Ukraine, Uzbekistan, St. Petersburg, Lithuania,
Estonia and Latvia
DYNAMICS
Feature
Applicability
Traction control
X in all markets
Power steering
X in all markets
ABS
X in all markets
Manual transmission
NA in USA, Canada and Mexico or 4.0 litre vehicles
X for entry level 3.0 litre
O for high specification 3.0 litre
Automatic transmission
X in all 4.0 litre vehicles, all markets
X for high specification 3.0 litre (but can be exchanged for
manual)
O for entry level 3.0 litre
DSC
X in Canada (V8 only) and Mexico; O in USA
O in all other markets
Wheels
16 inch alloy
6
X in USA, Canada and Mexico, V8, O for V6
X all other markets for entry level 3.0 litre
16 inch dynamic
X in USA, Canada and Mexico, V6, O for V8
X all other markets for high level 3.0 litre and 4.0 litre
17 inch alloy
NA in USA, Canada and Mexico
X for Japan only
O in all other markets
Full size spare wheel
X in USA, Canada and Mexico
X in Taiwan, South Africa, Spain, Portugal (not all models)
O in all other markets
CATS (includes 17 inch alloy wheels)
O in all markets
Sports pack
O in USA, Canada and Mexico
NA in all other markets
Locking wheel nuts
X in Mexico; A in USA and Canada
Introduction
JAGUAR
S -TYPE
TECHNOLOGY/COMMUNICATIONS and ENTERTAINMENT
Feature
Applicability
Trip computer
X in all markets
Jaguar sound system
X in all markets
Premium sound (including CD)
O in USA; NA in Canada; X for V8, O for V6 in Mexico
CD player
A for USA and Mexico; X for Canada
Portable cellular phone
O in USA; A in Canada and Mexico
Factory fit phone
Voice activated control
O in USA; NA in Canada and Mexico
Jaguar assist (VEMS)
O in USA; NA in Canada and Mexico
Navigation system
O in USA, NA in Canada and Mexico
COMFORT/CONVENIENCE and SAFETY
Feature
Applicability
Climate control
X in all markets
Locking system (key and remote)
X in all markets
Security system (immobiliser,
alarm incl. intrusion sensing)
X in USA, Canada and Mexico (no intrusion sensing)
X in Europe
Side airbags
X in all markets
Illuminated sunvisors
X in all markets
Memory pack
X in USA, Canada and Mexico for V8 only; O for V6
O for entry 3.0 litre in all other markets
X for all other models/markets
NA in Japan
Headlamp levelling
NA in USA, Canada, Mexico and Japan
X in all other markets
Auto headlamps
X in all markets (except Denmark, Norway and Sweden with
Daytime Running Lamps)
Daylight running lamps
X in Denmark, Norway, Sweden and Canada
Front fog lamps
X in USA, Canada and Mexico
O for 3.0 litre entry spec vehicles in UK, Ireland, Malta,
X for all other models/markets
Cruise control
NA in Japan
O for all entry level 3.0 litre
X for all other models/markets
7
JAGUAR
8
S -TYPE Introduction
Feature
Applicability
Sliding roof - electric
X in USA, Canada and Mexico for V8 only; O for V6
O in Japan and all entry level 3.0 litre
X for all other models/markets
Heated front screen
X in Canada; NA in USA and Mexico
O for entry level 3.0 litre (except X in Denmark, Finland,
Sweden, Norway, Russia, Austria)
NA in Japan
X for all other models/markets
Headlamp wash
NA in USA; X in Canada and Mexico
O for all other models/markets (except X in Denmark, Finland,
Sweden, Norway, Russia, Austria)
Winter pack
NA in USA and Mexico; Weather pack for Canada
X in Finland, Sweden, Norway, Russia, Austria
NA in Japan
Reverse park control
O in USA and Mexico; NA in Canada
X for Japan (V8 only)
O for all other models/markets
Fold-back mirrors - electric
NA in USA, Canada and Mexico
X for Japan
O for all other models/markets
Rear sunblind - electric
NA in USA and Japan; X in Canada and Mexico for V8 only
O for all other models/markets
Electrochromic rear view mirror
O on V6, X on V8 for USA, Canada and Mexico
X in Australia, Czechoslovakia and Hungary
O for all other models/markets
Rain sensitive wipers
(must have electrochromic mirror)
X in Canada and Mexico; O in USA
O in all other models/markets
Ski hatch
NA in USA, Canada and Mexico
O in all other models/markets
Engine block heater - electric
X in Canada; NA in USA and Mexico
A in Austria, Denmark, Switzerland
X in Finland, Norway, Russia, Sweden
NA in other markets
First aid kit
NA in USA, Canada and Mexico
X in Germany, Czechoslovakia, Hungary, Bulgaria, Poland
O in all other markets
Warning triangle
NA in USA and Canada; X in Mexico
X in South Africa, Austria, Belgium, Bulgaria, Czechoslovakia,
Finland, Germany, Greece, Hungary, Spain, Italy, Luxembourg,
Norway, Poland, Portugal, Russia, Sweden, Switzerland.
O in all other markets
Tool kit
A in all markets
Introduction
JAGUAR
S -TYPE
SEATING
Feature
Applicability
8-way electrical adjustment
X in all markets
Fold down rear seat (60/40)
X in all markets
Electric lumbar adjust
O for all entry level 3.0 litre in all markets
X for all other models/markets
Heated front seats
X in Canada and Mexico; O in USA
NA entry level 3.0 litre in Japan, X for all other models in
Japan
X in Finland, Norway, Russia, Sweden
O for all other models/markets
Sports seats (leather only)
NA in USA, Canada and Mexico
O for all other models/markets
COLOR and TRIM
Feature
Seat material
cloth
leather
Applicability
NA in USA, Canada and Mexico
X entry level 3.0 litre (or no cost option all other markets)
X in USA, Canada and Mexico
NA in Japan
X in all high specification 3.0 litre and all 4.0 litre markets.
O in entry level 3.0 litre markets except: X in entry level
3.0 litre Taiwan, Australia, New Zealand, Singapore, Hong
Kong, Thailand, China, South Korea, Malaysia, Vietnam,
Sri Lanka
Leather wheel & gear knob
NA in USA, Canada and Mexico
X in all entry level 3.0 litre all markets
Wood/leather steering wheel and
wood gear knob
X in USA, Canada and Mexico
X in all high level 3.0 litre and 4.0 litre, all markets
Full wood steering wheel
X in USA, Canada and Mexico
NA all other markets
Floor mats
X in USA, Canada and Mexico
O for all other markets
Metallic paint
O in all markets
9
JAGUAR
S -TYPE Body
Body Structure
A single, all-new body style, with or without a
sliding roof, is manufactured for all markets.
Body-in-white
The BIW has anti-corrosion, double sided zinc
coated steel panels. The complete body has 90%
zinc coated steel including 25% high strength
steel, percentages by weight.
In keeping with current Jaguar ecology policy, the
paint is water-based, not oil based.
There are no visible exposed screws or fasteners
on the exterior body panels. Body side, door
openings and rear quarter inner panel are all
single panels.
The door lower cavities are wax injected.
Underbody sealant is applied to the main floor
and trunk floor areas.
The body structure subsystem meets EEC barrier
crash standards and occupant zone requirements.
BODY-IN-WHITE
J.501.1771
J.501.1771
10
Body
Identification Plates and Labels
JAGUAR
S -TYPE
VIN LOCATIONS
The Vehicle Identification Number (VIN) is
displayed, from outside the vehicle, on a plate
visible in the lower left edge of the windshield.
There is also a certification label attached to the
LH front door hinge pillar which gives details of
vehicle weights, paint code, trim, date of
manufacture and VIN.
1M9XG000484
SAJDA
AIRBAG
VIN Plate
VIN DESCRIPTION
Key to illustration
1. World manufacturer identifier
2. Market, air bag specification
3. Transmission and steering code
4. Body code
5. Emission control system
6. Check digit
7. Model year
8. Assembly plant, model line
9. Production sequence number
Certification Label
J.501.1772
J.501.1772
VIN DESCRIPTION
1
2
3
4
5
6
7
8
9
J.501.1774
J.501.1774
CERTIFICATION LABELS
JAGUAR CARS LTD
MFD BY JAGUAR CARS LTD
COVENTRY ENGLAND
MFD DATE
GVWR
GAWR F
R
JAGUAR CARS LTD
GVWR
/PNBV
MFD DATE
GAWR
/PNBE F/AV
JAGUAR CARS LTD
COVENTRY ENGLAND
R/AR
THIS VEHICLE CONFORMS TO ALL APPLICABLE FEDERAL MOTOR
1
2
PAINT
Kg
Kg
Kg
Kg
TRIM
Europe and ROW
VEH IDENT NO.
VEHICLE SAFETY BUMPER AND THEFT PREVENTION STANDARDS
IN EFFECT ON THE DATE OF MANUFACTURE SHOWN BELOW
VEH IDENT NO.
TYPE
PC/VT
PAINT
969
TYPE PASSENGER CAR
PAINT
TRIM
North America
TRIM
PAINT
Canada
TRIM
Saudi Arabia and
Gulf StatesJ.501.1773
J.501.1773
11
JAGUAR
S -TYPE Body
Front and Centre Floor Pan
The floor pan is a three-piece construction with
handed dash panels, welded front suspension
housing, an integral centre bearing panel for the
driveshaft and a large under-tunnel heatshield.
Rear Floor Pan
Multi-piece floor pan design, the rear tub is
designed to accept either a full size or space saver
spare wheel and the luggage compartment has
four tie-down luggage loops. Two plastic covers
are located under the rear seat and these give
easy access to the fuel tank mounted components.
A plastic battery tray is located below the luggage
load floor.
Body Side and Quarter
Provision has been made for roof rack fixings and
the roof has reinforcement for vehicles fitted with
a the sliding roof.
The vehicle has one piece body sides and one
piece door opening panels, with full height ‘A’
post and ‘B-C’ post reinforcement. The jacking
reinforcement joins the door opening panel to
rear quarter inner reinforcement panel. Large
vacuum-formed wheel arch liners are fitted front
and rear. A sill appliqué protects the BIW
sheetmetal from stone damage and an anti-chip
coating is applied to the sills
Sliding Roof
Closures
Roof
The sliding roof has an exterior encapsulated glass
roof panel, with sliding sunshade, and has tilt and
slide operation. The sunshade is available in two
colours to match the headlining. Note that the
sunshade cannot be closed if the sliding roof is in
the fully open position or has been partly closed
from the fully open position; this is because the
SLIDING ROOF MOTOR ASSEMBLY
Sliding Roof Control
Module (SRCM)
J.501.1775
12
pull-cup is hidden. To allow access to the
sunshade pull-cup, the sliding roof must be fully
closed. Special screws are used in some locations.
When replacements are required these screws are
supplied in packs, do not use any other screws
than those supplied. Low battery voltage may
prevent operation of the sliding roof although the
relays may be heard operating. The sliding roof
cannot be fitted as a retrofit item.
One piece door inner and outer pressing with side
impact beams. One piece front and rear door
hinge reinforcement panels.
Door sealing is a triple seal system:
• primary seals - single sponge profile with part
dense rubber foot, ‘C’-channel mounted on
the upper door and peg mounted below the
waist.
• secondary seals - body side flange mounted
carrier with sponge and dense rubber,
colour-keyed trim flap
• margin sealing - flange mounted roof
rail/gutter seal which closes off the upper
door opening line above the waist and
terminates with a shaped moulding at each
end.
A variety of different profiles are peg mounted to
the ‘A’ and ‘C’ pillar periphery below the waist
and also door bottoms. A separate ‘B’ pillar seal is
riveted as part of the ‘B’ pillar appliqué.
Body
Front Fenders and Bumpers
Rear Fenders and Bumpers
Unique fenders with one style to all markets
incorporating side markers/repeaters.
Front bumper covers are single piece, body
coloured, flexible, low speed impact resistance
(5 mph/8km/h) with a steel beam, attached to the
cross rails and integral grille assembly. The front
bumper has an energy absorbing foam core and
includes provision for air ducts for brake cooling
and telescopic nozzles for headlamp power wash.
Chromed bumper blades and provision for front
fog lamps (or blanking plates), are included. All
vehicles have a removable front splitter vane.
Care is required when refitting the bumper to
ensure correct alignment.
The bumper beam is an aluminium extrusion,
mounted to rear rail brackets (5mph (8km/h)
bumper system).
As with the front bumper it has compression
moulded polypropylene foam and is colour keyed
with chromed inserts.
Reverse Park Control system, assisting the driver in
reversing manoeuvres, operates through four
sensors, bumper mounted, at the rear of the
vehicle. The system provides audible warnings to
indicate the distance to an object behind the
vehicle (see Electrical/Electronic section).
JAGUAR
S -TYPE
FRONT AND REAR BUMPER ASSEMBLIES
Reverse Park
Control sensors
J.501.1781
13
JAGUAR
S -TYPE Body
Hood
HOOD RELEASE AND OPENING
Unlike current Jaguar cars, the hood is hinged at
the rear with single pivot hinges and gas struts. It
has two primary and one secondary latch for
security. The primary latches are joined with an
intermediate cable and release of the primary
latches is by a single cable from the hood release
lever on the driver side of the vehicle. The two
primary latches are handed for LHD and RHD
vehicles. The secondary latch, mounted on the LH
side of the hood between the grille and inner
headlight, is provided for added safety and must
be hand released before the hood can be fully
opened. Hood sealing comprises front and rear
lengths of sponge bulb, pegged to the hood inner.
JOL.091
JOL.091
HOOD RELEASE LATCH
Fuel Filler Flap
D.501.1787
The fuel filler flap/cap is located on the rear upper
part of the right fender. Fuel filler flap operation is
via an illuminated switch on the fascia or
emergency manual release by tag and wire in the
RH side of the luggage compartment. The cap,
when removed from the filler neck, is held by a
retaining strap which can be passed over the hook
on the flap to allow easy access for filling the tank
and to prevent scratching of the surrounding
paintwork.
FUEL FILLER FLAP
FUEL FILLER FLAP MANUAL RELEASE
JOL.031
JOL.030
14
Body
JAGUAR
S -TYPE
Engine Compartment
The engine compartment layout is common for both V6 and V8 engines. The front power distribution
box (fusebox) is located in the engine compartment.
UNDERBONNET LAYOUTS
V8 Engine
5
4
3
6
7
2
JOL.118
1
V6 Engine
4
3
5
6
7
2
JOL.082
1
1.
2.
3.
4.
Windshield wash reservoir
Engine compartment fusebox
Engine Oil Filler
Brake/clutch reservoir (handed)
5.
6.
7.
Coolant reservoir (handed)
Engine oil dipstick
Power steering reservoir
J.303.1282
15
JAGUAR
S -TYPE Body
Cool Air Inlet
COOL AIR INLET COVER/LEAF SCREEN
The climate control air intake is through a plastic
moulding attached to the engine compartment
bulkhead. This moulding contains the air/pollen
filter and is provided with water drains. It is
covered by a leaf screen. The air intake cover is
held on with a two piece plastic fastener (see
illustration).
D.501.1788
Trunk
TRUNK RELEASE
The steel trunk lid has two hinges with one
damper and covered springs to assist lid lift. The
lid can be released using the switch on the fascia,
using the key-ring transmitter, or, if the vehicle is
unlocked, by a release button on the lid. An
emergency lock, key operated, is provided for
access to the trunk if, for instance, the battery is
disconnected. The trunk lock barrel is mounted to
the trunk lid with two flange nuts. Drive to the
trunk latch is via a cable which is a snap fit to the
rear of the barrel. Trunk sealing is a simple flange
mounted bulb section with a single moulded joint.
JOL.154
Release Button
Emergency Lock
16
Body
JAGUAR
S -TYPE
SPARE WHEEL AND JACKING EQUIPMENT
Towing Eye
JOL.080
JOL.080
Spare Wheel and Jacking Equipment
The spare wheel and jacking equipment are
located in the luggage compartment floor pan.
The floor carpet folds forwards to access the
spare wheel, towing eye and jack.
17
JAGUAR
S -TYPE Body
Jacking and Towing
The body has four jacking points located in
notches in the sill structure.
JACK AND JACKING POINT
Caution: Extreme care must be taken when
positioning jacks or other lifting equipment that
the sills and sill panels are not damaged as the
vehicle is lifted.
For emergency short distance towing, or for
mounting the vehicle on a recovery trailer, LH
thread screw-in eye positions are located at both
the front and rear of the vehicle. The towing eye is
stowed with the vehicle jack in the luggage
compartment floor pan. To secure the vehicle
during road and ship transportation, tie-down
brackets are located under the floor pan. As with
current vehicles, the front vane must be removed
before attaching the towing cable.
JOL.111
JOL.111
REAR TOWING EYE
JOL.113
JOL.113
18
Body
JAGUAR
S -TYPE
Glazing
Windshield
The windshield is laminated bonded glass with
solar control tint and black obscuration band,
having one style for both LHD and RHD markets.
The windshield is direct glazed to body. Upper
area trim in the form of a rubber capping is
supplied as an assembly with a new windshield.
Windshields have either a heated wiper park area
or, optionally fitted, a fine-wire heater over the
whole area of glass. The windshield heater
remains timed on for 4 minutes and the heated
wiper park area is timed on for 10 minutes. At low
temperatures the heated wiper park area is
automatically switched on. The windshield is fitted
with mounting brackets for the moisture
sensitive/manual dip/electrochromic mirror wiper
FRONT AND REAR DOOR GLAZING ARRANGEMENTS
J.501.1780
303-066
19
JAGUAR
S -TYPE Body
system mirrors. A clear patch in the darkened
area at the bottom left of the windshield gives
external visible access to the VIN.
There are three types of windshield variants:
• Rain sensing, with electrochromic mirror
(NAS markets have the option of a compass
fitted to the mirror head).
• Non-rain sensing with electrochromic mirror
(NAS markets have the option of a compass
fitted to the mirror head).
• Non-rain sensing with prismatic mirror.
Windshields are available as heated or nonheated and the rain sensing versions have a
unique mirror mounting system.
Backlight
The backlight is direct glazed to body. All
backlights are heated and have solar control tint,
integral radio and telephone antenna. The
backlight heater is timed on for 10 minutes.
Door glass
Each front door window is single curvature glass,
5mm thick, and operated by a twin guide cable
and drum assembly with five stud fixing points.
The glass is clamped to the regulator slide blocks.
Access holes are provided in the inner door when
the glass is raised. There are no adjustable end of
travel stops.
Rear door glass is also a single curvature glass,
4mm thick, with a single guide cable and drum
assembly and three stud fixing points. The glass
drops fully to the door roll. The glass is located to
the slider blocks by pins and has no adjustable
end of travel stops.
Each front and rear cable and drum mechanisms
must be replaced as individual complete units,
they have no serviceable parts.
Quarter lights
Quarter lights are 4mm thick with three fixings,
one is a lower bracket to the door inner.
Perimeter foam and butyl rubber seals are fitted
to the door outer.
20
Body
JAGUAR
S -TYPE
Doors and Door Mirrors
Door exterior handles are body coloured and
have semi flush door handles. The driver’s door
only has a door key lock barrel, barrel shield,
door latch shield and lock barrel operating
linkage. To replace/service the door key lock
barrel requires removal of the exterior handle.
Door mirrors have body coloured caps and
common 70 degree head angle, with three point
fixings to the door outer panel. Various
alternatives include power fold-back,
electrochromic, aspheric, memory and heated.
Side impact beams are mounted in the doors.
EXTERIOR DRIVER’S DOOR HANDLE
JOL.138
FRONT AND REAR DOORS
Driver Door Control
Module Bracket
J.501.1789
21
JAGUAR
S -TYPE Body
The only door module, the driver door control
module (DDCM) is mounted in the driver’s side
door adjacent to the door speaker unit.
The interior door handle has a release cable to the
door latch.
DRIVER DOOR CONTROL MODULE
J.418.429
INTERIOR DOOR HANDLE
Lock Lever
JOL.070
22
Body
JAGUAR
S -TYPE
Windshield Wipers and Washers
The windshield wiper linkages and motor are a
combined unit with the operating logic integrated
into the GECM. The wiper system has two wiper
arms/blades which are handed for LHD or RHD.
Wipers are twin speed with variable six speed
intermittent operation and, optionally, moisture
sensitive operation.
Wiper arms do not lock away from the glass, they
must be held away from the windshield when
cleaning the glass. A special tool (501065) is
required to remove the wiper arms from the body.
Windshield washer jets are hood mounted. Two
sizes of washer reservoir are available, one for
windshield wash only, 4.4 litres, and one for
windshield wash and headlamp power wash,
6.6 litres. The reservoir is mounted forward of the
RH front wheel.
Headlamp power wash jets extend by water
pressure and retract by spring pressure.
A spoiler is fitted to the driver’s wiper blade for
UK and European markets only.
WINDSHIELD WIPER ASSEMBLY
D.501.1778
23
JAGUAR
S -TYPE Body
Exterior and Interior Trim
No coach line will be applied. The optional
equipment headlamp power washers are body
coloured as are the door handles and body side
protective mouldings. The vehicle has a chromed
radiator grille surround with gunmetal vertical
grille vanes.
Front license plate plinth when required is
mounted to the front bumper and the rear license
plate is mounted directly to the trunk drop panel
The A, B/C upper and D/E post trim are structural
parts designed to absorb energy during occupant
head impact. These parts must be replaced
following accident damage if impacted. Damage
may not be evident unless the parts are removed
and examined for damage such as cracking, stress
whitening or rib crushing. The headlining also
contains energy absorbing elements which need to
be replaced in the event of accident damage. The
headlining must be removed to inspect the foam
parts and if any have come loose or been
damaged through cracking or crushing then the
complete headlining must be replaced.
within the mirror head. The mirror mounting is
supplied bonded to the windshield.
Carpets
The interior carpet is a complete, one-piece design
Trunk carpeting comprises
• A folding floor panel.
• Two styles of trunk LH carpet, one for
Navigation CD with 4 fixings and one without
CD with 3 fixings. When the Navigation CD
player is fitted it has a separate carpet trim
cover.
• A RH side trim carpet with 3 fixings.
• A single piece trunk lid liner with 11 fixings.
When a space saver wheel is stowed in the trunk,
an under floor stowage tray is provided under the
folding floor carpet.
Mirrors
The standard fit manual dip mirror has a double
ball joint for adjustment. Electrochromic and rain
sensing versions may be fitted. North American
vehicles can also have an optional compass fitted
INTERIOR CARPET
J.501.1784
J.501.1784
24
Body
JAGUAR
S -TYPE
FASCIA
J.501.1790
Fascia
The fascia has 5 mounting points, left and right
side of the tunnel, left and right side of the fascia
and a point above the steering column. A steel
structure supports the fascia pad and the upper
steering column. The glovebox is used as the
mounting for the CD autochanger when this
option is fitted and also storage for the owners
literature pack. For base models a cassette storage
tray is fitted to the centre of the fascia but this is
deleted when the optional phone presenter or
navigation system is fitted. Unlike current models,
the ignition switch is set in the fascia, not on the
steering column.
25
JAGUAR
S -TYPE Body
Seats
All seats are completely new to Jaguar with no
commonality to previous models.
Front Seats
The drivers seat and front passenger seat are
electrically adjustable for front and rear seat
height, fore and aft movement and squab tilt with
optional lumbar adjustment. Optional heated
cushions and squabs may be fitted with the heater
switches located on the centre console. The head
restraints are manually adjustable for height (four
positions) and tilt. The drivers seat also has an
optional two position memory facility. Side airbags
are fitted to both front seat squabs (see Occupant
Protection section).
Seat Construction
The seat track assembly consists of two slider
rails, cross mounted drive mechanisms and an
electrical harness sub-assembly. The seat cushion
pan is supported on four brackets attached to the
height adjustment drive actuators. Two separate
drive motors and screw actuator mechanisms
provide raise/lower movements respectively for
the front and rear of the cushion. The seat fore
and aft motor and drive shaft are located across
the front of the track assembly: note the drive
shaft must not be used to lift the seat assembly
when fitting or removing a seat. Each drive has a
potentiometer to register the selected position for
memory storage.
The track assembly wiring harness and driver seat
control module (DSCM) (driver’s side only) are
fixed to a plastic tray which clips onto the frame.
The squab frame is a welded steel construction
which bolts to the track assembly and carries the
recline drive, lumbar support mechanism and a
SEAT DRIVES
Fore/Aft Drive
Motor
Rear Height
Drive Motor
Cushion Pan
Support Bracket
Potentiometer
(when fitted)
Front Height
Drive Motor
Driver or
Passenger Seat
Heater Module
D.501.1782
26
Body
JAGUAR
S -TYPE
FRONT SEAT FRAME
Recline Motor
Lumbar Support
Lumbar Support
Motor
Harness Sub-assembly
Driver Seat Control Module
27
JAGUAR
S -TYPE Body
bracket for the airbag. The recline motor is located
in the lower left side of the frame and drives both
sides of the squab. The position potentiometer is
mounted on the long drive shaft on the RH side.
Lumbar support comprises a flexible steel lumbar
plate, motor, drive cable and return spring. The
top of the plate has vertical slots, fitted to a cross
bar, which allows the plate to be pulled down and
deformed by the drive cable to provide increased
lumbar support. If powered lumbar support is not
fitted, the lumbar plate is used without the drive
system.
When seat heaters are fitted each front seat has a
driver or passenger seat heater control module
fitted (DSHCM/PSHCM).
FRONT SEATS
Seat Covers
The cushion and squab cover are made of dual
density foam and have optional heater pad inserts.
The cushion and cushion pan have an antisubmarining profile for increased safety.
J.501.1786
FRONT SEAT ADJUSTMENT SWITCHPACK
A
B
C
JOL.017
28
Front Seat Adjustment
The front seats are adjusted by three switches on
the seat cushion side panel. The key does not have
to be in the ignition switch for seat adjustment.
Referring to the diagram:
A. Switch forward/rearward: moves seat cushion
forward or rearward
Switch up/down: raises/lowers front/rear of
cushion
B. Switch forward/rearward: raises/reclines angle
of seat squab
C. Switch front/rear: increases/reduces lumbar
support.
Body
JAGUAR
S -TYPE
REAR SEAT FOLD DOWN
JOL.123
Rear Seats
Bench style seats are fitted at the rear with a
60/40 split folding squab. Release handles for
each seat back are in the luggage compartment
under the parcel shelf.
SEAT FOLD DOWN LATCH
D.501.1779
REAR SEAT CENTER ARMREST
JOL.133
29
JAGUAR
S -TYPE Body
Interior Features
Centre Console
CENTRE CONSOLE STOWAGE AND CUP HOLDER
The centre console carries the ashtray and cigar
lighter, the cupholder and the armrest/stowage
compartment.
Lift the front of the hinged armrest to gain access
to the stowage compartment. A telephone can
also be fitted into the centre stowage
compartment as an option.
Raise the lid to gain access to the cigar lighter and
ashtray.
JOL.130
ASHTRAY AND CIGAR LIGHTER
Coin Holder
A coin holder is located beneath the audio system
control panel.
Glove Compartment
JOL.105
GLOVE COMPARTMENT
A glove compartment is located below the
passenger’s airbag. Stowage is provided for the
Driver’s Literature Pack. A CD autochanger can be
fitted within the glovebox as an option. The
glovebox lid, when opened, has a pen holder and
a location for a cup. A hook for holding small
items forms part of the handle.
COIN HOLDER
Hook
JOL.094
30
JOL.106
Body
Cassette Tape Stowage (when fitted)
A cassette tape stowage tray is located beside the
audio system control panel.
JAGUAR
S -TYPE
CASSETTE TAPE STOWAGE
JOL.174
JOL.174
Sun Visor and Vanity Mirror
The sun visors can be swung downwards or
unclipped and swung sideways.
Both sun visors are fitted with illuminated vanity
mirrors, behind a hinged flap. The light comes on
when the flap is lifted. Lamp brightness can be
adjusted using the slider switch adjacent to the
mirror.
SUN VISOR
JOL.096
JOL.096
31
JAGUAR
S -TYPE Occupant Protection
Seatbelts
Front Seatbelts and Pre-tensioners
FRONT SEAT BELT PRE-TENSIONER
D.501.1465
D.501.1465
REAR SEAT BELT RETRACTOR ASSEMBLIES
The front seatbelts are of the inertia reel type with
integral pre-tensioners and torsion bar load
limiters fitted to the reel assemblies. The lower
anchorage and buckle strap are mounted on the
moving seat slides to maintain optimum belt
geometry. The shoulder anchorage is fixed to the B
post via a four position height adjuster. An
automatic locking retractor (ALR) is incorporated
in the passenger belt reel assembly to provide
child seat security.
A compact type of pre-tensioner is fitted to the
front seatbelt reel assemblies. The reduced size is
achieved by the use of rack and pinion gearing to
retract the seatbelt reel when the unit is fired.
The initiator is a conventional pyrotechnic device
which is electrically triggered from the Restraints
Control Module (RCM).
Fault diagnosis of the pre-tensioner firing circuits
is carried out by the RCM and the presence of a
fault is indicated by the airbag warning lamp (see
Diagnostics).
The pre-tensioner is an integral part of the seatbelt
assembly and is not serviceable. Normal safety
procedures applicable to the handling of
pyrotechnic devices must be followed.
Note that plastic belt guides are fitted to the B
posts: if the pre-tensioners are fired, these guides
will fracture.
Rear Seatbelts
All three rear seatbelts are of the inertia reel type
with child seat automatic locking retractors.
The two outboard retractor assemblies are
mounted on the rear quarter panels. The centre
retractor is reverse wound and mounted in a
recess on the rear parcel shelf.
D.501.1777
32
Occupant Protection
JAGUAR
S -TYPE
CENTER REAR SEAT BELT RETRACTOR ASSEMBLIES
D.501.1776
Airbags
PASSENGER AIRBAG
Driver Airbag
The driver airbag module is fitted in the centre of
the steering wheel and is of conventional design.
A reduced charge propellant (‘de-powered’) is
used to minimise impact effects where the driver
is seated close to the wheel.
The module is secured by two side screws on the
left and right underside of the steering wheel.
Passenger Airbag
WARNING:
Do not place objects on the passenger airbag
deployment panel. Injury could occur if the
airbag contacts an object during inflation.
The passenger airbag uses a heated gas inflator
(HGI) system instead of a solid propellant. This
system is inherently ‘clean’ since the inflation gas
is a lean hydrogen/air mixture and the byproducts are water vapour and air. Although the
gas is not classified as an explosive, the possible
effects of accidental deployment when handling
or working close to the unit are similar to those of
other types of airbag. It is recommended that
current safety procedures are also followed when
handling the HGI modules.
The HGI airbag module has fewer components
than previous types, consisting of:
• 140 litre bag
J.501.1785
•
Aluminium pressure vessel containing a
mixture of 12% hydrogen/88% air at a
pressure of 180 bar.
• Pressure vessel end plug with burst disc.
• Pyrotechnic igniter assembly fitted to
pressure vessel end plug.
The igniter is electrically triggered from the
Restraints Control Module (RCM). When triggered,
the igniter fires a high speed ‘dart’ along the
length of the pressurised cylinder, producing a
heated trail (due to friction) which causes rapid
and even combustion of the gas throughout the
cylinder. The igniter also ruptures the burst disc in
the end plug, allowing the expanding gases from
33
JAGUAR
S -TYPE Occupant Protection
the pressure vessel to inflate the airbag. The
airbag is a top mounted assembly and deploys in
an upwards direction, climbing the windshield
before folding downwards. After deployment, the
bag deflates through two vents.
The airbag deployment door is an integral part of
the top fascia moulding. The airbag module is
bolted to the underside of the fascia via a steel
deployment chute and is also bolted to two
brackets on the tubular cross car beam which
supports the fascia assembly.
Note: The module is not handed. To access the
airbag module, the complete fascia assembly must
be removed.
If a damaged seat cover is to be replaced, the side
airbag module must be removed and re-located in
the deployment pocket of the new seat cover.
The complete seat must be replaced if the airbag
has been deployed.
Side Airbag
Side airbags are incorporated into the driver and
front passenger seat squabs and are similar to
those fitted to the XJ Series, using compressed
argon to provide the inflation gas. The bag has a
capacity of 19 litres and provides protection to
both the head and chest regions.
The side airbag module is fixed to the outer seat
frame and is located within a fabric deployment
pocket. The pocket is stitched to the seat cover
seam and when the module is triggered, this
length of seam bursts to provide the deployment
exit for the airbag.
SIDE AIRBAGS
D.501.1474
D.501.1474
34
Occupant Protection
JAGUAR
S -TYPE
SRS Operation
The Supplementary Restraints System (SRS)
provides impact sensing, control of deployment
and fault diagnosis of the control module, airbags,
pretensioners and associated circuits. Most of
these functions are carried out by the Restraints
Control Module (RCM).
A front impact triggers the driver and passenger
airbags and both pre-tensioners provided the
impact is above a set threshold as detected by the
two longitudinal sensors in the RCM.
When a side impact occurs, the lateral safing
sensor in the RCM must also agree with an impact
AIRBAG SYSTEM (LHD)
Instrument Pack
Data Link
Connector
PCM
Airbag
Warning
Lamp
Back-up
Warning
Sounder
VEMS
Driver
Airbag
Side Impact
Sensor
Passenger
Airbag
RCM
Side Impact
Sensor
Driver
Side Airbag
Passenger
Side Airbag
Front
Seat Belt
Pre-tensioner
Front
Seat Belt
Pre-tensioner
J.501.940
J.501.940
35
JAGUAR
S -TYPE Occupant Protection
detection signal received from either the LH or RH
Side Impact Sensor in order to deploy the
corresponding airbag.
Note: An impact at an oblique angle may cause
both frontal and side airbags to deploy, depending
on how much lateral acceleration is sensed.
RESTRAINTS CONTROL MODULE
Restraints Control Module (RCM)
The RCM:
• Houses the electro-mechanical safing sensor
and electronic discrimination sensor which
detect a frontal impact.
• Houses the electronic safing sensor to detect
a side impact.
• Identifies severity and direction of impact
and makes decision on deployment of airbags
and pre-tensioners.
• Provides firing signals to all airbags and pretensioners.
• Performs on board testing of the airbag and
pretensioner firing circuits, warning indicator
circuits and module status (Side Impact
Sensor performs its own internal checks).
• Stores fault codes in non-volatile memory.
• Drives the airbag warning lamp on the
instrument pack: if the warning lamp is
faulty (fault code recorded) an audible
warning tone is sounded.
• In the event of an impact, sends a signal to
the vehicle emergency message system
(VEMS) and the PCM to indicate that a crash
has occurred.
• Is connected to the data link connector via
the SCP data bus to enable communication
with an external PDU or scan tool.
• Provides temporary back-up power to operate
the airbags in the event of loss of battery
supply in an impact.
• In the event of an impact, records certain
data for subsequent access via the data link
connector. This data includes deceleration
information, firing delay and fault codes.
The RCM is bolted to the top of the driveshaft
tunnel below the center stack. Due to the
importance of the module being securely fixed to
the vehicle body, the ground connection is made
via the fixing bolts and is monitored by the
diagnostic system. A bad connection causes a fault
code to be generated.
Note: The torque settings are safety critical and
the figures given in the JTIS Service instructions
must be adhered to.
D.418.233
D.418.233
36
Occupant Protection
Side Impact Sensor
The side impact sensors are mounted on brackets
attached to each inner sill.
The side impact sensor contains an electronic
discriminator sensor which detects side impacts
above a set threshold and signals a deployment
request to the RCM. Bag deployment only occurs
if the side safing sensor in the RCM has also
detected an impact.
The side impact sensor monitors its own internal
state, including correct ground connection, and
sends a regular ‘heartbeat’ signal to the RCM
indicating that it is functioning correctly and is
available.
A 2 wire cable is connected between the RCM
and the side impact sensor. The cable has a dual
function, supplying power to the side impact
sensor and transmitting digital data to the RCM.
S -TYPE
SIDE IMPACT SENSOR
Diagnostics
The restraints control module (RCM) performs all
SRS diagnostics except those relating to the side
impact sensor internal faults and grounding faults.
When the ignition is switched on, the RCM carries
out a system ‘prove out’ over an 8 second period
during which the airbag warning lamp on the
instrument pack is lit for the first 6 seconds.
During the prove out period all circuits connected
to the RCM are tested and also the state of the
RCM and side impact sensors (including ground
resistance and supply voltage).
If no faults are detected, the airbag warning lamp
remains off after the 8 second period.
If a fault is detected the warning lamp flashes a
two digit code five times and then remains lit until
the ignition is switched off. This is repeated on
each ignition cycle until the fault is cleared. Fault
codes are allocated a priority and if more than
one fault is stored in the RCM memory, the
highest priority fault is flashed. When this fault is
rectified, the next priority fault is indicated.
If the warning lamp itself is inoperative, the RCM
stores a fault code but no other action occurs. If a
system fault occurs when the lamp is inoperative,
a five ‘bleep’ audible warning is sounded five
times with 5 second intervals. The audible
warning is repeated every 30 minutes and on
subsequent ignition cycles until the fault is
cleared.
If no faults are found during the system prove out
period the RCM continues to test the SRS system
during the remainder of the ignition cycle.
JAGUAR
D.418.445
Fault diagnosis of the side impact sensor is
normally carried out using the portable diagnostic
unit (PDU). Where the PDU is not available, the
flashing code on the airbag warning lamp indicates
the likely circuit or component fault.
37
JAGUAR
S -TYPE Fuel System
Introduction
The fuel tank components, operation and layout
are new to Jaguar and have no commonality with
previous systems. The major features of the fuel
delivery system are the use of a saddle type tank
and a returnless fuel system. The evaporative loss
management system is similar in operation to that
fitted to the XJ and XK Series vehicles and onboard refuelling vapour recovery (ORVR) is a
standard feature. For NAS markets only, leak test
diagnostics are performed.
Returnless Fuel System
The returnless fuel system delivers the correct
amount of fuel to the engine under all conditions
and at a constant pressure differential with
respect to manifold pressure. This is without the
need for a return line to the tank or a fuel rail
pressure regulator. The use of a return line and
the pressure drop across a regulator contribute to
vapour formation which can affect fuelling
calibration and requires a complex vapour
management system to meet legislative
requirements. Elimination of these components,
together with closed loop control of the variable
speed fuel pump, causes a reduction in the vapour
generated, lower fuel temperatures and better fuel
pressure control. Additional advantages include a
reduced load on the electrical system and
improved fuel economy.
Fuel Tank
The fuel tank is of the ‘saddle’ type shape with LH
and RH fuel compartments and is constructed of
high density polyethylene (HDPE), a plastic blow
moulded material. The tank is located below the
rear passenger seat with the drive shaft and
exhaust running through the arch of the tank. The
underside of the tank is protected by a fitted heat
shield and the tank assembly is retained by two
metal straps which are fixed to the underbody at
the front by removeable hinge pins and at the rear
by bolts.
Refuelling is via a separate filler pipe and
connecting hose to a stub pipe on the RH fuel
compartment.
A fuel pump module is located in the RH
UNDERFLOOR FUEL TANK AND CARBON CAN SYSTEM LAYOUT
Carbon Can Assembly
Fuel Filler (pipe removed)
Fuel Tank Assembly
D.310.047
38
Fuel System
compartment and a transfer module in the LH
compartment with external cross-over pipes for
fuel transfer between the compartments. Both
module assemblies have integral top plates for
external pipework and electrical connectors.
These are secured in the tank using screw on
plastic closure rings. The closure rings are
accessible from inside the vehicle via two access
holes in the floor panel below the rear seat. Due
to the confined working space and the possibility
JAGUAR
S -TYPE
of fuel spillage within the vehicle, it is advisable to
remove the tank completely before attempting to
remove the internal assemblies.
FUEL TANK
Grade Vent Valve
Fuel Pump
Connectors
Float Level
Vent Valve
RH Compartment
Pressure
Relief Valve
Tank Retaining
Strap
To Carbon
Canister
Heat Shield
Fuel Transfer Pipes
LH Compartment
Fuel to Engine
Vapour to EVAP Valve
D.303.1242
39
JAGUAR
S -TYPE Fuel System
Fuel Flow
The variable speed fuel pump is contained in a
fuel reservoir in the RH module assembly. Fuel is
pumped from the reservoir through an external
cross-over pipe to the LH compartment where it
flows via a T junction to the parallel pressure
relief valve and then out to the engine fuel rail.
The reservoir is maintained by fuel supplied by jet
pumps in the LH and RH compartments.
Pressurised fuel from the variable speed pump is
forced through the small jet nozzles (diameter
0.5mm) creating a suction which draws fuel up
from the tank. From the LH tank, this fuel is
pumped through an external cross-over pipe and
then into the reservoir. In the RH tank, the jet
pump is located in the base of the reservoir.
The parallel pressure relief valve assembly
contains two spring loaded valves which operate
in opposite directions, a fuel rail feed valve which
opens at approximately 2 psi during normal
operation and a second valve which opens at
approximately 45-70 psi to relieve excessive rail
pressure.
The main functions of the valves are:
• To help engine starting by retaining fuel in the
supply lines and rail.
• To limit rail pressure due to temporary vapour
increase during hot soak conditions
(temperature and thus pressure drop after
approximately 20 minutes).
• To limit rail pressure caused by sudden load
changes such as a full to closed throttle
transition.
• To prevent siphoning from the tank in the
event of the fuel line being severed with the
pump inactive.
Each side of the tank has an independently
FUEL FLOW
Fuel Injectors
Fuel Filter
Fuel Rail
Pump and Sender
Electrical Connector
Fuel Injectors
Sender Electrical Connector
Fuel Level
Senders
Parallel Pressure
Relief Valve
RH Compartment
Jet Pump
Fuel Pump
Jet Pump
LH Compartment
Fuel Reservoir
40
J.310.046
Fuel System
operating fuel level sender assembly mounted on
the respective module assembly.
JAGUAR
S -TYPE
INERTIA SWITCH
Control and Operation
The speed of the fuel pump is varied under closed
loop control so as to deliver the required fuel rail
injection pressure in accordance with factors such
as driver demand, manifold pressure and
temperature changes. The control loop sensors,
providing feedback information to the powertrain
control module (PCM), are the engine fuel
temperature (EFT) sensor and the injection
pressure (IP) sensor which are both mounted
directly on the engine fuel rail (see
S-TYPE Powertrain Technical Guide). The IP sensor
also has a vacuum feed from the intake manifold
so as to measure the pressure differential.
The required fuel flow is determined by the PCM
and sent to the rear electronic control module
(RECM) which is the power driver for the fuel
pump. The PCM demand to the RECM is a pulse
width modulated (PWM) signal over a single line
at a frequency of approximately 256 Hz and a
duty cycle of 0-50%. The RECM effecively
amplifies this signal by increasing the frequency
by 64 and doubling the duty cycle, thus providing
the necessary high current drive for the fuel
pump. The fuel pump relay, located in the rear
power distribution box, is energised by the PCM
relay and provides a dedicated fused supply to the
RECM for the pump drive.
When the ignition switch is turned from OFF to
RUN or START, the PCM primes the system by
running the pump for 1 second at full speed. The
pump is switched off 1 second after the engine is
stopped. During hot starts, fuel pressure is
increased to prevent vapour lock.
Fuel pump drive status is monitored by the RECM
and communicated to the PCM via the SCP
network.
Outputs from the fuel senders are connected by
independent wires to the RECM which sends the
data to the instrument pack and the PCM.
JOL.062
Inertia Switch
The inertia switch is located behind the trim on
the left side of the vehicle, forward of the front
door post and below the fascia. A finger access
hole in the trim allows the switch to be reset.
41
JAGUAR
S -TYPE Fuel System
Evaporative Emissions System
The function and operation of the on-board
refueling vapor recovery (ORVR) evaporative
emissions system are similar to the system fitted
to the XJ and XK Series vehicles in NAS markets
but use different components. For the S-TYPE the
system is fitted as standard for all markets.
Fuel Tank Components
To meet ORVR evaporative emission
requirements, the tank and associated
components are designed to minimise vapour
losses. During re-fuelling, the narrowed fuel filler
tube below the nozzle region provides a liquid
FUEL TANK CONNECTIONS
Fuel Transfer
Pipes
Fuel Pump
Connectors
Jet Pump Assembly
Connectors
To Carbon
Canister
Fuel Tank
Pressure Valve
(NAS markets only)
Fuel to Engine
Vapour to EVAP Valve
42
D.310.049
seal against the escape of vapour and a check
valve in the tank inlet pipe opens to incoming fuel
only to prevent splashback. As the tank fills,
vapour escapes through the open float level vent
valve, at the top of the tank, and passes through
the adsorption canisters to atmosphere. When the
rising fuel level closes the float valve, the resulting
back pressure causes refuelling cut-off. While the
float valve is closed, any further rise in vapour
pressure is relieved by the grade vent valve which
connects to the canisters via the outlet of the float
valve. At less than full tank level, the float valve is
always open, providing an unrestricted vapour
outlet to the canisters.
If the tank is over filled (eg a fault in the delivery
system) an integral pressure relief valve in the float
valve assembly opens to provide a direct vent to
atmosphere.
The float level vent valve/pressure relief valve
assembly and the grade valve are welded to the
tank top and are non-serviceable. Note that both
valve assemblies incorporate roll-over protection.
The fuel filler cap uses a 1/8 turn action and is
tethered to the body. The filler cap assembly
incorporates both pressure relief and vacuum
relief valves (the latter is a new feature to Jaguar).
Fuel System
JAGUAR
S -TYPE
CARBON CANISTER ASSEMBLY
Carbon Canisters
Canister Close
Valve (CCV)
CCV Connector
Mounting
Bracket
D.310.048
Carbon Canister Assembly
Three series connected carbon canisters are used
for vapour storage and are mounted on a plastic
bracket fixed to the underbody above the rear
axle. For Federal markets only, where there is a
requirement for leak test diagnostics, a canister
vent valve (CC valve) is also mounted on the
canister bracket and a fuel tank pressure (FTP)
sensor is fitted to the vapour pipe.
EVAP VALVE
Solenoid Connector
Manifold
Control
Vacuum
Evaporative Purge Valve
The EVAP valve is mounted on the rear lefthand
side of the engine bay. The valve is different to
XK/XJ Series types but is controlled in a similar
way by a PWM signal and manifold vacuum.
D.303.1279
43
JAGUAR
S -TYPE Exhaust System
Introduction
The exhaust systems for the V6 and V8 engines
are similar, with minor tuning differences to allow
for the particular flow resistance requirements
and engine characteristics. The complete system is
constructed of 409 stainless steel and consists of
five main components, the two downpipe catalyst
assemblies, the resonator and pipework assembly
and the two mufflers. Brushed stainless steel end
pipes are fitted.
Downpipe Assembly
Different catalysts are fitted to the two engines:
• the V8 engine has two 44in3 bricks in each
downpipe assembly, each with 470 cells per
square inch
• the V6 engine has two 44in3 bricks in each
downpipe assembly, the front brick having
350 cells and the rear brick 470 cells per
square inch.
Resonator Assembly
The resonator assembly is common to both
engines.
Rear Mufflers
The internal parts of the rear mufflers are different
between the two engines and are designed to
produce different quality sounds.
Support and Couplings
The downpipe catalyst assemblies mate to the
exhaust manifold via a two bolt self sealing flange.
The resonator assembly connects to the
downpipes and rear mufflers by Torca clamps.
The system is supported by two isolator rubbers
between the resonator boxes and the rear
subframe and two isolators at the tailpipe end of
the mufflers.
EXHAUST SYSTEM
Down Pipe Catalysts
Mufflers
Resonators
D.309.080
D.309.080
44
Transmission
JAGUAR
S -TYPE
Introduction
The automatic and manual transmission units are
described in the ‘S-TYPE Sports Sedan Powertrain
Introduction’ Technical Guide.
J-Gate
The J-gate assembly is mounted on the
transmission tunnel by four bolts and has a
similar operating mechanism to the XJ/XK Series
vehicles. The selector gate positions are, P-R-N-D
on one side of the ‘J’ and manual gear positions
4-3-2 on the other side. Movement of the gear
selector lever up and down these positions is
transmitted mechanically to a cable assembly
which then rotates the digital range switch on the
side of the automatic transmission housing (see
‘S-TYPE Powertrain Introduction’ Technical
Guide). Movement across the gate between D and
4 operates an electrical switch (without cable
movement).
In the P position with the ignition off, the gear
selector lever is locked by a solenoid plunger
which inhibits a lock plate fixed to the selector
mechanism. When the ignition is switched on,
pressing the brake pedal energises the solenoid
and releases the lock plate, allowing the selector
lever to be moved from the P position.
For NAS markets only, the J-gate slider actuator is
linked to the ignition switch barrel to provide a
mechanical interlock. The interlock lever and
cable are driven by the J-gate slider to operate a
locking plunger in the ignition barrel. If the gear
selector lever is in any position other than P, the
ignition key cannot be removed. Note when
servicing, that the interlock cable adjustment is
critical and the JTIS service instructions must be
followed. Where the interlock function is not
fitted, the interlock lever is retained without the
operating cable.
J-GATE
Ignition Switch
Interlock Cable
(NAS markets only)
Interlock Lever
(NAS markets only)
D.307.324
D.307.324
45
JAGUAR
S -TYPE Chassis
Introduction
The Jaguar S-TYPE has an all-new suspension,
designed with traditional Jaguar refinement but
with an added sporty feel for the driver. Both
front and rear suspensions have double wishbone
construction with the front having a high balljoint.
Jaguar’s Computer Active Technology Suspension
(CATS), is offered as an optional fit to further
enhance the vehicle ride and handling quality.
The suspension arrangement offers a standard setup for most markets. The front and rear control
arms are set at angles to counteract dive when
braking and squat when accelerating, giving a
stable platform under most conditions. It is vitally
important that before removing either of the front
cross members or the rear axle cross members,
the vehicle body and the component being
removed are marked to ensure correct
realignment during assembly. The Jaguar S-TYPE
body-in-white fixings have a greater clearance
than previous Jaguar cars so require this extra
special care with alignment on re-assembly.
Vibration and ride and handling concerns may
arise if alignment is not maintained.
FRONT SUSPENSION
Number 2
Cross Member
Number 1
Cross Member
J.204.369
J.204.369
46
Chassis
JAGUAR
S -TYPE
Front Suspension
The independent front wheel suspension is a
double wishbone axle arrangement with
aluminium control arms. The two arms are of
different lengths, which minimises the changes in
track and camber. Inclination of the upper control
arm axis provides anti-dive front suspension
action. There are two front cross members,
known as Number 1 and Number 2.
Number 1, the forward cross member, is a steel
fabrication, non-isolated, which locates the lower
control arm front mounting, the anti-roll bar and
the cooling module.
The rear cross member, Number 2, is an
aluminium casting, non-isolated and it locates the
lower control arm rear mounting, the power
steering rack and the engine hydro-mounts.
reduce brake vibration.
Service adjustments for caster and camber can be
made to the lower control arm geometry with the
addition of cam bolts (not supplied with the
vehicle).
WARNING: No attempt must be made to
weld or repair the aluminium cross
member. If it is damaged, a new one must
be installed.
Lower Control Arm
The lower control arm is an aluminium forging
and has locations for the damper and the anti-roll
bar drop link. It is mounted with one hydro-bush,
the front lower bush, and one rubber bush, both
serviceable. This is the first time that a hydraulic
bush has been fitted to a Jaguar wishbone. The
hydro-bush is tuned for refinement and helps to
LOWER CONTROL ARM
Lower
Control Arm
Anti-roll Bar
Anti-roll Bar
Drop Link
J.204.402
J.204.402
47
JAGUAR
S -TYPE Chassis
Upper Control Arm
The upper control arm is also an aluminium
forging, mounted with two rubber bushes and has
an integral, non-serviceable ball joint.
UPPER CONTROL ARM
D.204.400
D.204.400
Vertical Front Knuckle
The vertical front knuckle is an aluminium casting
with integral steering arm, installed between the
upper and lower control arms. The lower ball joint
is serviceable and is a press fit. The knuckle
locates the upper balljoint, riveted disk shield and
brake calliper and wheel bearing/hub. The wheel
bearing is a new type and contains the integral
ABS rotor and sensor. The bearing is not
serviceable and must be replaced as a complete
unit. A service kit is available for the ABS sensor.
VERTICAL FRONT KNUCKLE
Vertical Front Knuckle
Disc Shield
Wheel
Bearing/Hub
D.204.440
D.204.440
48
Chassis
JAGUAR
S -TYPE
Rear Suspension
REAR SUSPENSION
D.204.370
D.204.370
The rear suspension is a double wishbone
arrangement with aluminium control arms. The
rear crossbeam is steel fabricated and isolated to
the body with four bushes. The crossbeam locates
the upper and lower control arms and the antiroll bar.
REAR KNUCKLE
Rear Knuckle
Disc Shield
Control arms are aluminium castings and heavily
inclined in plan view. The lower control arm
locates the damper and anti-roll bar drop link.
The damper fixing is tapped into the aluminium
casting.
The upper control arm has one cross axis bush
and one rubber bush. It contains an integral
balljoint.
The rear knuckle is an aluminium casting and has
a press fit cartridge bearing.
The independent rear suspension upper and
lower front bushes are conventional rubber
bonded bushes. The upper and lower rear bushes
contain no rubber and are essentially pressed in
‘rose’ bearings for superior suspension geometry
control. These are common components between
all vehicle variants and are a similar concept to
Wheel
Bearing/Hub
D.204.441
D.204.441
49
JAGUAR
S -TYPE Chassis
the A-frame bush on current sports and saloon
vehicles. The bushes are not bonded in place but
require a special lubricant when assembling. Care
must be taken to ensure that the replacement
bushes are pushed fully home, the angular
orientation of the bushes is important and it is
essential to mark the position of the subframe
before removing from the vehicle or else driveline
alignment will be lost.
FRONT SPRING AND DAMPER
Wheel Alignment
Camber caster and toe are adjustable on the front
suspension only. Toe is the only adjustment on the
rear suspension. Camber and caster are adjusted
by means of eccentric cams on the lower control
arm mounting bolts. The front toe is adjusted by
use of the front tie rod. The rear toe is adjusted by
the use of toe link assemblies connecting the
knuckles to the rear sub-frame.
Anti-roll Bars
D.204.399
D.204.399
REAR SPRING AND DAMPER
There are two types of front anti-roll bars, one for
all V6 and base V8 engined vehicles and one for
V8 sport. There are two types of rear anti-roll
bars, one for all V6 and base V8 engined vehicles
and one for V8 sport.
All anti-roll bars are similar to current saloon
except that the front bushes have moulded insert
for tuning.
Springs and Dampers
D.204.401
D.204.401
50
There are numerous variants to suit both
‘standard’ and ‘sport’ derivatives of the V6 and V8
engined vehicles. Both front and rear springs and
dampers are similar to current sports vehicles.
With a strut type assembly, integrated top mount
and two-position lower spring pan. The front and
rear co-axial strut and spring assemblies are
installed between the lower control arms and the
vehicle body.
Sports dampers are CATS only, as XK series.
The CATS suspension is similar to the system
introduced on the XK8. It is a two-stage adaptive
damping ride control. The control module is
located in the rear left-hand corner of the spare
wheel well. Three accelerometers are fitted. The
front vertical and lateral accelerometers are
mounted as an assembly to the vapour
management valve bracket. The lateral
Chassis
JAGUAR
S -TYPE
accelerometer is used for Dynamic Stability
control (yaw control). The rear vertical
accelerometer is fixed to the rear electronic
control module (RECM) bracket on the rear righthand side of the luggage compartment between
the rear wheel arch and the rear lamp pack.
Suspension Alignment
A special tool has been designed to enable correct
alignment of the suspension to the body.
Connected to a personal computer, a transducer
with a wire measuring device is fitted to a plate
attached to the Number 2 cross member.
Alignment pins are fitted to the body front and
rear to the left-hand side chassis rail and to the
rear suspension beam. Measurements are taken
from one point on the Number 2 beam. Then the
transducer is transferred to the other point on the
beam and a second set of measurements taken.
The PC then calculates if there is any
misalignment and by how much, and displays the
information on the screen. The beam(s) are then
adjusted to bring the alignment back within limits
and a further series of measurements are taken.
This process is repeated until the alignment is
correct and the beams are then tightened. A
print-out of the measurements is to be attached to
the job card as a permanent record of alignment.
Note that camber, caster and toe may be required
if any of the beams have been adjusted.
51
JAGUAR
S -TYPE Chassis
Wheels and Tyres
Wheels
S-TYPE WHEELS
All wheels are alloy except for the space saver
wheel which is steel. The space saver wheel is not
available for USA, Canada or Mexico.
There are three wheel styles:
• 7 x 16 Classic
• 7.5 x 16 Dynamic
• 7.5 x 17 Sport (option)
Classic
Each wheel has five exposed wheel nuts which are
smaller than current cars at 19mm A/F
Locking wheel nut policy is the same as current
sedan vehicles.
D.501.1477
Tyres
Two sizes - three types:
• 225/55R16
All season (NAS markets)
Summer (European/Rest of World)
Winter (accessory)
• 235/50R17
Summer (European/Rest of World)
Winter (accessory)
Dynamic
D.501.1478
Tyre pressures are:
• 26/28 psi comfort
• 32/34 high speed or fully laden.
Sport
D.501.1479
D.501.1477,1478 & 1479
52
Tyres for the European and Rest of World markets
Summer/Winter, are Pirelli.
The all season tyres are Bridgestone and for the
NAS markets only.
Chassis
JAGUAR
S -TYPE
Driveline
Introduction
The driveline is a standard type with the engine
position at the front and driven rear axle. This will
be the first time that Jaguar has used in-plant
driveline balancing to improve noise, vibration
and handling. The driveline is finely balanced at
the rear driveshaft joint. The centre bearing is
laser aligned during initial factory build.
The alloy rear engine mountings have two
variants, one for automatic transmission and one
for manual transmission. They are both
serviceable items. The V6 auto is the same as the
V8 but rotated in plan by 180 degrees. The rubber
mountings are carry over concept from the
current XJ and XK Series vehicles but are not
interchangeable with them. Both automatic
transmission rubber mountings are common but
with a softer unique mount for the manual V6
transmission.
In service if they are replaced, ensure that there
are buffer gaps and that they are approximately
equal. Neither will be contaminated by lubricant
or automatic transmission fluid.
Driveshaft
The S-TYPE has a two-piece welded steel tube
driveshaft with a splined centre slip joint and
locking collar, the whole being aligned with the
body centreline. The driveshaft has rubber flex
couplings and a rubber, body-mounted, centre
bearing. For safety, the front tube is collapsible.
DRIVELINE ARRANGEMENT
D.307.322
53
JAGUAR
S -TYPE Chassis
Final Drive (differential)
The centre joint is a conventional hookes joint
with staked lugs and the rubber flex couplings
have spigoted sleeves to the transmission and rear
axle final drive unit (three bolt fixings)
All driveshafts are balanced. If undercoating the
vehicle, protect the driveshaft, universal joints
and the axleshafts to prevent overspray of the
undercoating material.
Driveshaft weight is:
• V6 auto 12.7 kg
• V8 auto 13.4 kg
• V6 manual 14.1 kg
Serviceable parts are the centre bearing, flex
coupling, rubber boot, alignment bearing and
fasteners. Lubrication of the driveshaft
components is unnecessary. The universal joint is
equipped with nylon thrust washers, located at
the base of the bearing cup.
Balancing of the driveshaft is achieved using a
PDU with the new vibration analyser. This gives
details of where the shaft is out of balance and by
how much and where to place the balance nuts.
The final drive, differential, has a steel case and
rear cover, no drain plug and has a sealed for life
lubricant. Differential weight is 27 kilograms and
oil capacity 1.5 litres of synthetic oil (M2C192A).
The hypoid gearset is mounted in taper roller
bearings. It has a two point differential assembly
retained by bearing straps. The central pinion is
on the body centreline. Pinion and output oil
seals, the companion flange and nut and the
needle roller output bearing are the only
serviceable items.
Final drive ratios are:
3.31:1 (V6 and V8 auto)
2.87:1 (V6 manual)
Differential Mountings
The crossbeam forms the mounting points for the
three differential mounting bushes. All three
bushes are conventional rubber bushes, common
to all S-TYPE vehicles and are serviceable items.
They control the driveline and isolate differential
noise and vibration. Avoid disturbing the subframe
mounts when servicing differential bushes. The
front differential bush is a two-part bush and the
RH and LH rear bushes are handed and colour
coded to differentiate them
Half-shafts
DIFFERENTIAL MOUNTING POINTS
Half-shafts are unequal lengths and are therefore
handed, left and right. Constant velocity joints are
fitted to both ends, the outer is fixed and the
inner is sliding. They are sealed for life and
retained in the differential side gear with a spring
clip.
Weights are approximately
V6 size - 100 8.89kg (LH)
8.76kg (RH)
V8 size - 104 9.43kg (LH)
9.3kg (RH)
Rear Mountings
Serviceable parts are:
• the pinion and output oil seals
• companion flange and nut
• output bearing (needle roller)
Note: It is possible that the replacement or repair
of gears, bearings or shafts may be introduced at a
later date.
D.307.317
Front Mounting
D.307.317
54
Chassis
JAGUAR
S -TYPE
Brakes
Brake Control Module
Brakes are controlled with a Teeves Mk 20E brake
modulator.
The anti-lock brake/traction control, control
module (ABS/TCCM) contains the integral software
for ABS and traction control, similar to current XJ
and XK Series vehicles. It is supplied as a 10 valve,
4-channel module and calibration is the same to
all powertrains. It is connected to the SCP bus for
traction control, warnings and vehicle speed.
Dynamic Stability Control
Dynamic stability control (DSC) is a new Jaguar
safety feature, which uses ABS and traction
control to control yaw movements of the vehicle.
Yaw is the rotary motion of the vehicle on its
vertical axis, a force that would cause oversteer or
oversteer or sideslip. The dynamic stability
control module (DSCM) contains the same
software as described but with the addition of IVD
software. The modulator is supplied as a 12 valve,
4-channel module calibrated for base suspension
only. The connectors differ between the two; the
10 valve unit has a 25-way with sliding cam, as
BRAKE CONTROL MODULE
D.206.175
BRAKE SYSTEM LAYOUT
D.206.254
55
JAGUAR
S -TYPE Chassis
current vehicles and the 12 valve unit has a 47way connector with lever cam. DSC calculates the
real vehicle motion (forward and gearing) and
compares it to the direction initially chosen by the
driver. A steering rate sensor is located on the
steering column and is used to calculate steering
angle. A yaw rate sensor and lateral accelerometer
are located on a bracket behind the hand brake
lever and are used to calculate the vehicle under
or over steer and any side slip.
As soon as DSC recognises that the driver is not
reacting sufficiently to compensate a deviation,
DSC intervenes by applying brake force to each of
the four wheels individually to control yaw
FRONT WHEEL SENSOR
Front Wheel Sensor
The front wheel active ABS speed sensors are
incorporated into the wheel bearings, connected
via a flying lead routed along the brake hose.
D.206.177
D.206.177
REAR WHEEL SENSOR
Rear Wheel Sensor
The rear sensors are mounted on the hub carrier
and connected by a flying lead routed along the
control arm. None of the sensors are adjustable.
Wheel speed sensors are new active sensors,
which are more sensitive at lower speeds that the
current saloon and sports wheel speed sensors.
Front and Rear Callipers
Front callipers are twin piston aluminium
construction. The ventilated disc sizes are 300 mm
x 32 mm. The rear brakes have cast iron callipers.
This is because of the hand brake operation using
the rear callipers. The ventilated disc sizes are 288
mm x 20 mm. Each rear calliper has a ball and
ramp park brake mechanism, operating on the
main calliper pads.
D.206.178
D.206.178
56
Chassis
Brake Booster
The brake booster is a Lucas unit mounted on the
engine bay bulkhead with a 25.4mm diameter
master cylinder and integral brake fluid reservoir.
NOTE: The reservoir is also a combined
brake/clutch reservoir for manual transmission
vehicles.
Twin vacuum boosters of 8 inch and 9 inch sizes
are fitted.
The DSC booster is different having integral
pressure transducers and solenoids with air
control valves for the booster. The transducers are
located on the brake master cylinder and are used
for pressure feedback, brake application and fail
safe operation. The booster is used to supply
brake pressure without driver input.
ABS operation is no different to current Jaguar
vehicles.
JAGUAR
S -TYPE
BRAKE BOOSTER
D.206.176
Parking Brake
The parking brake lever is mounted on the RH
side of the centre console for all models, with
conventional button operation as current XJ
sedan. It is a self-adjusting system operating on
the rear brake callipers. All models have a leather
grip.
PARKING BRAKE
D.206.158
57
JAGUAR
S -TYPE Chassis
Power Assisted Steering
Introduction
Servicing
The Jaguar S-TYPE has a variable assist rack and
pinion steering gear and variable rack ratio. The
variable steering rack ratio reduces the number of
turns from lock to lock (2.8) to enhance parking
manoeuvrability whilst maintaining the on-centre
steering precision required at high speed. Full
power assistance is provided for parking. Steering
assistance decreases smoothly at a calibrated rate
to raise driver steering efforts as vehicle speed
increases.
There are no carry over parts from XK or XJ Series
vehicles.
The rack is mounted to the rear of cross member
Number 2. The PAS pump is belt driven. A PAS
cooler matrix is located within the radiator
package.
Low PAS pump speeds problems are prevented by
increasing engine speed. A power steering
pressure (PSP) switch senses the demand on the
pump at low engine speeds and increases the
speed to a pre-set minimum.
Hose connections to the pump and the steering
gear are quickfit connectors. The quick connect
tube must be pushed into the existing tube nut
port, along the centreline. The assembly is
complete when the tube end bottoms out in the
port with an audible click/snap. Correct assembly
should be verified by pulling the quickfit tube end.
Servicing of the PAS line involves removal of the
quickfit nut. Replacement PAS lines are supplied
complete with quickfit nut and sealing washer. If
the joint is disturbed it is compulsory to replace
the PTFE sealing ring otherwise leaks are
inevitable. Replacement sealing washers may be
installed with the use of Service tool
D90P-3517-A.
Care must be taken when removing the quickfit
nut from the V6 engine pump as the pulley is
PHENOLIC and is susceptible to damage. The V8
pump installation provides a short jumper tube
from the pump to improve accessibility to the
high-pressure hose connection. The PAS pulley
POWER STEERING PRESSURE SWITCH
D.211.258
PAS RACK
D.211.247
58
Chassis
requires a Service tool to assist removal. Lowpressure hose connections are made using
Constant Tension (CT) clamps. Pinion hydraulic
connections are orientated with the bottom
connector low pressure with the longer nut, as
current vehicles.
The PAS fluid is for PAS only; it is not to be used
for transmissions. After manual filling, the system
must be bled using a vacuum pump to remove all
the air from the system to prevent system noises.
Fluid level is checked through a sight window on
the reservoir.
Components replaceable are complete pump,
steering rack, reservoir or hose assembly.
A non-serviceable 10-micron filter is located
within the reservoir to maintain fluid cleanliness
throughout the life of the vehicle. It is essential as
with all Jaguars that the system does not become
contaminated. Cap all ports on disassembly to
prevent contamination ingress. As with current
vehicles, the fluid and reservoir must be renewed
if any major component is replaced i.e. Rack,
pump or cooler.
The road wheels should be set straight ahead and
the steering wheel locked (using service tool
F7LC-3F732-BF) when removal and assembly of
the steering gear or intermediate shaft is required.
This is necessary to prevent damage to the air bag
clock spring within the steering upper column
assembly. The intermediate shaft can only be
assembled to its mating components in one
location. Steering wheel alignment can only be
achieved by adjustment at the tie-rods. A
dimensional check of the steering rack position
may be necessary to verify rack centre.
JAGUAR
S -TYPE
FRONT STEERING ARM
D.211.248
Steering Column
The steering column assembly is completely new
and uses no parts from previous Jaguar
assemblies:
• Construction of the upper column assembly is
based on the use of aluminium extrusions and
castings.
• A two shaft lower column assembly is used.
• The electronically controlled steering lock, the
steering column lock module (SCLM), is a
physically separate component from the
ignition switch which is fascia mounted.
• The dynamic stability control (DSC) steering
wheel position sensor is fitted to the upper
column assembly.
Steering Wheel
The steering wheel consists of a magnesium
armature with a central steel insert. The steering
column and wheel insert are splined with a flat so
that the wheel can only be fitted in one position.
Any misalignment of the steering wheel is
corrected by adjusting the tie rods. The splined
fitting also has a locking taper which requires the
use of a 2 legged puller to remove the wheel.
The steering wheel incorporates the the airbag
module, horn mechanism and the optional cruise
control and audio/phone switches.
59
JAGUAR
S -TYPE Chassis
Adjustable Column Assembly
•
The electrically powered upper steering column
assembly provides adjustment for 16˚ of steering
wheel tilt and 50mm of reach (telescoping
movement) and also features automatic wheel tilt
on entry and exit. A combined joystick and on/off
switch on the side of the column shroud controls
the the tilt and reach movements (see page 106).
Where fitted, the two position memory system
stores settings for steering wheel tilt and reach
together with seat and mirror positions.
The upper column assembly comprises the
following :
• The fixed sub-assembly forms a supporting
outer enclosure for the column and consists
of two aluminium extrusions and a steel
stiffening plate bolted together with the lower
extrusion bolted to a lower casting. The
steering column runs in a bearing in the
lower casting which also carries the tilt and
reach drive motors. The complete column
assembly is fixed to the car cross beam via
four bolts to the lower extrusion.
•
•
•
•
The moving section consists of an aluminium
inner housing running on top and bottom ball
bearings within the fixed enclosure and
supporting the tilt head casting. The
telescoping upper section of the steering
column passes through this inner housing and
connects to the steering wheel shaft via a
universal joint located in the tilt head casting.
The tilt and reach motors have integral
gearboxes which directly drive screw
actuators via flexible shafts.
The tilt and reach position measuring
potentiometers, for the driver memorised
positions, are combined in a single
component with linear sliders which are
directly driven by the moving actuators.
Connection to the lower steering column
assembly is via a rag joint (rubber ‘do-nut’
type coupling).
The dynamic stability control (DSC) sensor
ring is located on the column with the sensor
unit fixed to the drive motors (see section on
DSC).
ELECTRICALLY ADJUSTABLE STEERING COLUMN
Tilt Coupling
SCLM
Tilt Pivot
DSC Sensor
Tilt Motor
Rag Joint
Reach Motor
D.211.255
DSC Sensor Ring
60
Chassis
JAGUAR
S -TYPE
LOWER STEERING COLUMN
Bearing and Seal
Gaiter
Slider
D.211.253
•
•
Steering column lock module (SCLM) with
splined locking collar on the column.
The retractor box, mounted on the underside
of the lower extrusion, houses the column
wiring harness and connectors with sufficient
cable to allow for column telescopic
movement.
Lower Steering Column Assembly
The adjustable column assembly is connected to
the steering rack via a lower assembly consisting
of two shafts linked by a universal joint. The lower
shaft incorporates a sliding section which is
secured by a pinch bolt on installation. To stabilise
the shaft to shaft joint, the upper of the two shafts
is supported by a bearing assembly where it passes
through the bulkhead.
61
JAGUAR
S -TYPE Chassis
Steering Column Lock (where fitted)
Lock Operation
The steering column lock module (SCLM) and
ignition key switch are separate assemblies and
activation of the lock is remotely controlled by the
instrument pack, GECM and RECM. The column is
unlocked on insertion of the ignition key and is
locked when the key is withdrawn.
The SCLM is mounted on top of the lower casting,
on the upper column assembly, by two shear
bolts. A locking bolt projects down from the SCLM
through a hole in the lower casting to engage into
a splined collar on the steering column. The SCLM
is an integrated non-serviceable assembly, housing
STEERING COLUMN LOCK MODULE
SCLM
a motor and worm drive for the locking bolt and
also an electronic printed circuit board. When
activated, the locking bolt is driven positively in
both the lock (down) and unlock (up) directions
and has a spring to help locate it into the trough
of the splined collar. When disengaging, the
locking bolt is driven upwards until it operates a
microswitch (within the SCLM) which causes the
motor to stop and also signals via the SCP bus that
the steering lock is off. To engage the lock, the
motor is energised for 350ms to lower the bolt.
System Control
The lock motor is powered by a switched 12V line
from the RECM and switched ground line from the
GECM, with both supplies being applied only
during lock operation. Initiation of motor drive
and direction and power supply switching is
controlled by the instrument pack via the SCP bus
when ignition key insertion or withdrawal is
detected. Identification is checked between the
SCLM and the other modules and the system will
not operate if, for example, a module has been
replaced and not re-programmed. System
diagnostics include defective modules and
incorrect module identification and also certain
SCLM faults, ie unconfimed lock or unlock
conditions and failed microswitch.
Steering Column Shrouds
J.211.257
62
The upper part of the column assembly is
enclosed by two plastic shrouds, upper and lower.
The steering column adjust switch, controlling tilt
and reach for the electrically powered steering
column assembly, is mounted on the side of the
lower shroud.
Climate Control
JAGUAR
S -TYPE
System Overview
optimum comfort under most driving conditions.
Manual controls are provided to allow the driver
to override the automatic operation for air
conditioning (A/C), fresh/recirculated air, fan
speed (7 levels), and air distribution.
The climate control system provides filtered air to
the cabin from a fully automatic, dual zone,
temperature controlled system. Driver and front
passenger have independent control of the
temperature of the air for their individual
comfort. The system regulates the volume of
airflow from the vents of the instrument panel,
rear seat panel, front and rear floor ducts, front
screen defroster and side windows. It will
automatically select between fresh and
recirculated air to assist rapid cooling of the
interior.
Operation of the heated front screen or heated
wiper park area and rear window heater is
controlled from the climate control panel. Door
mirror heaters are automatically switched on
when the heated rear window is switched on. As
with current vehicles, the outside air temperature
can be displayed in either Celsius or Fahrenheit.
The system can be switched ON by pressing any
button, except OFF.
When ‘AUTO’ is selected, the driver’s and front
passenger’s air temperature, fan speed and air
distribution are automatically controlled to give
CLIMATE CONTROL PANEL
1
2
14
1.
2.
3.
4.
5.
6.
7.
8.
3
4
13
Left side temperature control
Fan speed
External air temperature
Celsius/Fahrenheit selector
Display panel
Defrost
Air conditioning
Recirculation/fresh air
5
12
6
7
11
8
9
10
J.412. 216
9. Right side temperature control
10. Heated rear screen
11. Heated wiper park or (where fitted)
heated front screen
12. Manual air distribution
13. Climate control OFF
14. Automatic operation
63
JAGUAR
S -TYPE Climate Control
Control Panel
The control panel is a combined unit
incorporating the air conditioning control module
(A/CCM).
Heater/Evaporator and Blower
A single blower, heater and evaporator are fitted
to the passenger side of the vehicle behind the
fascia. Air intake is from the passenger side via
leaf screen slots (see page 16). A particle filter is
mounted forward of the bulkhead in a rain/water
collector box. Mounting of the heater/evaporator
unit and blower assembly is by three bulkhead
fixings and one locator pin.
Condensate drainage is integral with the
heater/evaporator unit and therefore has no
separate drain tubes. The heater matrix is a dual
heater unit with three heater pipes, two inlets of
16mm diameter and one outlet of 19mm
diameter.
Underbonnet Components
Both V6 and V8 engine configurations include a
water valve controlled heating (dual) system and
the valve is mounted behind the right-hand side
headlamp. The V8 engine system, as with current
cars, has a water pump to supplement idle water
flow through the heater and this is mounted on
the right-hand side of the cooling pack. The pump
is held in a mounting rubber, which is pushed
over two pillars on the rear of the fan shroud and
held with two screws.
Condenser
The black-painted aluminium condenser is located
to the front of the combi-cooler and mounts to its
end tanks. The condenser end tubes push into two
grommets, which are in turn held in two steel
brackets, screwed to the radiator end tanks. The
bottom of the condenser is screwed directly into
the radiator tanks. A radiator cooling duct clips
onto the condenser end tanks and also pushes
onto the lower radiator channel. The duct ensures
that all available airflow is directed through the
cooling module.
HEATER/EVAPORATOR AND BLOWER
Blower
Heater/Evaporator
D.412.217
64
Climate Control
JAGUAR
S -TYPE
A/C COOLANT SUPPLY
Receiver/Drier Bottle
Water Pump
Condenser
Water Valve
J.412. 212
Receiver/Drier Bottle
A receiver/drier bottle is mounted on the rear top
of the fan shroud and held with a single clamp
bracket and screw.
65
JAGUAR
S -TYPE Climate Control
REFRIGERANT COMPONENT LAYOUT
Receiver/Drier Bottle
Liquid Line
High Side
Charge Port
Suction Hose
Condenser
Compressor
Low Side Charge Port
Heater/Evaporator
Discharge Hose
Pressure Transducer
J.412.218
UNDERBONNET PIPEWORK
J.412.213
66
Climate Control
Pipework
The suction hose and liquid line are a one-piece
assembly. A single screw connects them to the air
conditioning unit manifold at the bulkhead. A
further screw fixing and push-in clip secures them
at the side of the engine bay. The liquid line fixed
to the cooling module then joins with a block
fitting and the suction hose connects with a quick
connect fitting and routes across the underneath
of the cooling module to the compressor. The
compressor suction and discharge hoses are also a
one piece assembly.
A pressure transducer is fitted to the discharge
hose as it connects to the rear of the condenser.
The high side charge port is situated on the
manifold connecting to the receiver drier whilst
the low side is adjacent to the compressor behind
the LH front wheel.
The compressor is a 9Occ scroll, which is variable
from 100% to 30%. Compressor is standard
specification to all vehicles although package
makes them unique to V6 and V8.
Air Distribution
Air distribution is as follows:
• Defrost duct integral with the fascia.
• Face vents, plenum, manifold, centre face
duct, side face duct, side window demist duct
are all sub-assembled into the fascia.
• Driver and front seat passenger foot ducts are
installed in the fascia after it has been fitted
to the vehicle.
• Rear foot ducts are fitted to the underframe.
• Rear face duct fitted to transmission tunnel.
• Rear face vent fitted to console.
• Extractor boxes fitted in rear quarter panels.
All flaps are electric servo controlled and
comprise:
• Fresh/recirculation - heater/evaporator unit.
• Cold air bypass - heater/evaporator unit.
• Foot flap - mounted on plenum.
• Defrost flap - mounted on plenum.
• Face flap - mounted on plenum.
Sensors, for operation of the system, are:
• Ambient temperature sensor - located behind
the lower front grille.
• Solar sensor - fitted to the top centre of the
fascia at the defrost grille
• In-car sensor - aspirated from the plenum
venturi sensor mounted inboard of the
steering column.
JAGUAR
S -TYPE
• Two heater air outlet sensors
• One evaporator air outlet sensor
Servicing
Routine servicing consists of particle filter
replacement.
Replaceable items on the climate control system
are:
• Servo complete with linkages
• Sensors
• Evaporator and seals
• Heater core and seals
• Blower motor
• Impeller/blower motor wheel
• Hoses
• Registers/vents
• Ducts, except the defrost
• Defrost and side window demist grilles
• Control unit
• Compressor
• Water pump
• Water valve
• Receiver/drier
• Condenser
There are no panel diagnostics but PDU facility is
available with extensive capability, similar to
current XJ and XK Series.
System refrigerant is R134a. Vehicle charge weight
is 800 gms and charging is through the high side
charge port only.
Oil type is WSH-MIC231-B and refill quantity is
180 cc -220 cc.
Special tools are hose clamp pliers and airconditioning hoses spring lock de-coupler.
General information
Ensure that the grille at the base of the windshield
is kept clear of leaves, snow or other obstructions.
A solar sensor is mounted on top of the fascia, in
the centre of the defrost grille, and this should not
be covered.
The air conditioning system should be run briefly
at least once each week with a cold setting to
prevent the seals from drying out with subsequent
refrigerant leaks.
When the engine and vehicle interior are cold the
fan speed may be low until the engine has warmed
up, this avoids excessively cold air being blown
into the cabin.
67
JAGUAR
S -TYPE Climate Control
Heated wiper park or (where optionally fitted)
heated front screen.
With the engine running, due to the high current
draw, press to switch on the heated wiper park to
defrost the wiper park area, or where fitted, press
to switch on the heated front screen for rapid
defrost/demist.
Heated wiper park automatically operates in cold
weather, and may stay on continuously. It is
automatically switched on when ‘DEFROST’ is
selected. If manually selected, the heated wiper
park will automatically switch off after 10
minutes.
Heated front screen is automatically switched on
when ‘DEFROST’ is selected. It will automatically
switch off after 4 minutes. The heaters will switch
off, or not operate, if low battery voltage is
detected.
Heated Rear Screen
With the engine running due to the high current
draw, press to switch on the heated rear screen
for rapid defrost/demist. The rear screen heater
will be automatically switched off after 10
minutes.
In cold conditions, the heated rear screen
operates automatically. Selecting ‘DEFROST’ will
also turn the heated rear screen ON. The heaters
will switch off, or not operate, if low battery
voltage is detected.
Air Distribution
Air distribution is automatically controlled when
‘AUTO’ is selected. Manual control can be
achieved using the air distribution buttons.
Heat at Rest Feature (V8 engine vehicles
only)
Interior heating may be continued after the
engine has been switched off by turning the
ignition to position ‘II’. The climate control system
will continue to provide heat to the vehicle
interior until the engine cools down. Excessive use
will cause a low battery voltage, which may
prevent the vehicle from being started.
Voice Activated Control
Some functions of the climate control system can
be operated with the Voice Activation System
(when fitted).
A full operating description is given in the Voice
Activation Handbook included with the vehicle
literature pack.
68
Electrical/Electronic
JAGUAR
S -TYPE
Power Distribution
Distribution cables supply battery power through
to the starter motor and to three power
distribution/fuse boxes. Harnesses distribute
battery, auxiliary and ignition power from the fuse
boxes to all the user components. The front
power distribution/fusebox clean power is fed via
a clean power 175 ampere fuse (megafuse) which
is located next to the rear power distribution
box/fusebox.
The secondary junction box is located on the
bulkhead in the LH side of the cabin near the ‘A’
post. It acts as a splice header to avoid having
numerous splices in the harness.
CLEAN POWER FUSE
Rear Power
Distribution
Box/Fuse Box
Clean Power
Fuse
J.418.446
SECONDARY JUNCTION BOX
Battery
The low maintenance DIN 88, 90 ampere hour
battery is installed on the RH side of the luggage
compartment floor below the trim.
BATTERY
J.418.444
JOL.110
69
JAGUAR
S -TYPE Electrical/Electronic
BATTERY AND FUSE BOX POWER DISTRIBUTION
1
2
3
4
5
6
7
13
8
12
11
10
1.
2.
3.
4.
5.
6.
7.
70
Front power distribution box (fusebox)
Primary junction box (fusebox)
Power stud
Battery Positive cable
Rear power distribution box (fusebox)
Battery Negative cable
Battery
9
8.
9.
10.
11.
12.
13.
Clean power fuse (Megafuse)
Clean power feed
Secondary junction box.
Starter motor
Alternator/starter positive cable
Alternator
Power Distribution Cables
Harnesses
Heavy duty power distribution cables connect the
battery to the body and to the engine starter and
the vehicle fuse boxes. The distribution cable from
the clean power fuse to the front fusebox is
routed on the LH side of the vehicle and along
part of the main body wiring harness.
The vehicle harnesses plug directly into
components or component flying leads using
locking connectors. The main harness layout is
shown in the illustration on the following page.
Electrical/Electronic
JAGUAR
S -TYPE
HARNESS LAYOUT
Front Harness
Engine Management
Harness
Instrument Pack/Fascia
Harness
Main Body Harness
Roof Harness
J.418.426
71
JAGUAR
S -TYPE Electrical/Electronic
Module Communications Network
The multiplexed electrical architecture is used for
the exchange of information between control
modules, the instrument pack and the data link
connector.
Multiplexing allows more than one piece of
information to be carried along a wire. In this
way, the electronic control modules can
communicate with each other quickly and share
information. With multiplexing, just two
intertwined wires carry information to any control
module on the network. On the SCP system
hundreds of messages a second can be
transmitted; the maximum waiting time is only a
few hundred milliseconds. An additional benefit is
that the modules ‘sleep’ when not in use,
reducing battery drain.
Principles of Operation
The vehicle has two module communication
networks. The first is the Standard Corporate
Protocol (SCP - J1850 SAE standard)), which is an
unshielded twisted pair cable: data bus plus and
data bus minus. The second is the International
Standard Organization (ISO) 9141 communication
network, which is a single wire network. Both
networks can be connected to the PDU tester by
one connector: the data link connector. The data
link connector is located under the instrument
panel, between the steering column and the audio
unit.
The ISO 9141 communications network does not
permit inter-module communications. When the
PDU tester communicates to modules on the ISO
9141 communication network , the PDU must ask
for all information; the modules initiate
communications.
ISO9141 DIAGNOSTICS LINK
PCM Flash Programming Link
Powertrain
Control Module
ABS/TC
Control Module
Dynamic Stability
Control Module
Serial Data Link
Restraint
Control Module
Data Link
Connector
Adaptive Damping
Control Module
Park Aid
Control Module
72
Electrical/Electronic
JAGUAR
S -TYPE
STANDARD CORPORATE PROTOCOL (SCP) NETWORK
Powertrain
Control Module
Air Conditioning
Control Module
Throttle Actuator
Control Module
Instrument
Pack
General Electronic
Control Module
Audio Unit
Rear Electronic
Control Module
Steering Column
Lock Module
Vehicle Emergency
Control Module
Data Link
Connector
Navigation
Control Module
Dynamic Stability
Control Module
Adaptive Damping
Control Module
ABS/TC
Control Module
Voice Activation
Control Module
Driver Door
Control Module
Secondary
Junction Box
Driver Seat
Control Module
73
JAGUAR
S -TYPE Electrical/Electronic
The SCP communication network will remain
operational even with severing of one of the bus
wires. Communications will also continue if one
of the bus wires is shorted to ground or battery
positive voltage (B+), or if some , but not all,
termination resistors are lost.
Unlike the SCP communication network, the
ISO 9141 communication network will not
function if the wire is shorted to ground or battery
positive voltage (B+). Also, if one of the modules
on the ISO 9141 network loses power or shorts
internally, communication to that module will fail.
Control Modules
The vehicle control module functions are
described briefly below (for further information
refer to the relevant sections throughout the
Guide).
Anti Lock Brake/Traction Control and
Dynamic Stability Control, Control Modules
The anti-lock brake control module is connected
to the SCP communication network. The module
comes in two forms. The first type is the standard
equipped anti-lock brake system (ABS) with
traction control (TC). It controls the brake
pressure to the four wheels to keep the vehicle
under control while braking.
The second type of ABS is optional and is called
dynamic stability control (DSC). This control
module adds yaw sensors to the package to help
in sensing a loss of vehicle control.
Audio Control Unit
The audio control unit is connected to the SCP
communication network and also to the audio
control protocol (ACP) communication network.
The audio control unit communicates with the
compact disc and the cellular phone transceiver.
Driver Door Control Module (DDCM)
DDCM is connected to the SCP communication
network. The module controls many functions
including power windows, driver mirror, power
locks, and keyless remote entry.
74
Driver Seat Control Module (DSCM)
The DSCM is connected to the SCP
communication network. The DSCM is located
under the driver seat and controls the seat
positions. The module also communicates with the
DDCM to control the driver seat memory
functions.
Control Module Locations
Key to illustration on following page:
1. Anti-lock brake system/Traction control
system or Dynamic stability control
(ABS/TCCM or DSCCM)
(non-handed)
2. Throttle actuator control module (TACM)
(non-handed)
3. Powertrain control module (PCM) (handed)
4. Air conditioning control module (A/CCM)
(non-handed)
5. Restraint control module (RCM) (non-handed)
6. Sliding roof control module (SRCM)
(non-handed)
7. Passenger seat heater control module
(PSHCM) (non-handed)
8. Rear electronic control module (RECM)
(non-handed)
9. Vehicle information control module (VICM)
(Japan only)
10. Adaptive damping control module (ADCM)
(non-handed)
11. Parking aid control module (PACM)
(non-handed)
12. Navigation control module (NCM)
(non-handed)
13. Vehicle emergency control module (VECM)
(non-handed)
14. Voice-activated control module (VACM)
(non-handed)
15. Cellular telephone control module (CTCM)
(non-handed)
16. Driver seat heater control module (DSHCM)
(non-handed)
17. Driver seat control module (DSCM) (handed)
18. Driver door control module (DDCM)
(handed)
19. Instrument pack (handed)
20. General electronics control module (GECM)
(non-handed)
21. Steering column lock module (SCLM) (handed)
Electrical/Electronic
JAGUAR
S -TYPE
CONTROL MODULES LOCATIONS (LHD)
1
2
21
20
3
19
4
5
18
6
17
16
7
15
14
8
13
9
12
J.418.424
11 10
75
JAGUAR
S -TYPE Electrical/Electronic
Air Conditioning Control Module (A/CCM)
The A/CCM is connected to the SCP
communication network. The A/CCM controls
automatic climate functions that maintain the
vehicle at a constant temperature setting.
Instrument Pack
The instrument pack is connected to the SCP
communication network. The instrument pack
displays information received on the SCP
including speedometer, odometer, fuel, and
message center warnings. The instrument pack
also controls the passive anti-theft system (PATS).
General Electronic Control Module (GECM)
The GECM is connected to the SCP
communication network. This module is located
behind the LH ‘A’ post trim panel below the
fascia. The GECM controls many of the body
GENERAL ELECTRONIC CONTROL MODULE (GECM)
General Electronic
Control Module
systems, being directly linked to the interior
lighting, wiper and security systems. It is a support
module for other systems including exterior
lighting, locking, remote entry, mirrors
(passenger), seat/mirror/steering column memory
recall and windows.
Rear Electronic Control Module (RECM)
The RECM is connected to the SCP
communication network. This module is located in
the passenger side luggage compartment behind
the trim panel. The RECM controls the
locking/unlocking of the front passenger and rear
doors and provides power control of the fuel
pump.
Powertrain Control Module (PCM)
The PCM is connected to the SCP communication
network. For the location of this module see the STYPE Powertrain Technical Guide The PCM
controls the engine performance, electronic
ignition, emission controls, speed control,
transmission and on board diagnostics.
Steering Column Lock Module (SCLM)
The SCLM is connected to the SCP communication
network. The module is an integrated unit
containing the steering column lock and lock drive
and is controlled remotely from the separate
ignition barrel.
Restraints Control Module (RCM)
The RCM is connected to the ISO 9141
communication network. The RCM controls the
deployment of the air bags based on sensor
inputs.
Vehicle Emergency Control Module (VECM)
The VECM is connected to the SCP
communication network. The module allows a
user to request emergency assistance (police,
ambulance, fire, wrecker) or directions to a
desired location at the touch of a button. Also, if
any of the vehicle’s airbags are deployed while the
VEMS system is powered ON, the system
automatically issues a call for emergency
assistance.
Secondary
Junction Box
D.418.229
Inertia Switch
76
Voice Activation Control Module (VACM)
The VACM is connected to the SCP
communication network. This module is located in
the driver side luggage compartment behind the
trim panel. The VACM controls and processes all
Electrical/Electronic
JAGUAR
S -TYPE
the voice commands given by the driver. It
delivers this information to the audio unit, GSM
or AMPS cellular phones and the A/CCM which
then carry out these commands.
77
JAGUAR
S -TYPE Electrical/Electronic
Fuses and Relays
Fuses
FUSES
Fuse failure is identified by an inoperative circuit.
Two types of fuses are fitted in the fuseboxes, a
mini-type and a cartridge-type.
A special tool for removing and replacing the
mini-fuse is provided in the passenger
compartment fusebox, together with spare fuses.
If a spare fuse is used, replace it with a Jaguar
approved fuse of the same amperage rating.
Checking and Renewing a Blown Fuse
Make sure the new fuse is the correct rating
(amperage). Fuses are colour coded according to
the amperage and the rating is also marked on
each fuse.
Mini-fuses
Cartridge Fuse
WARNING:
Do not fit a fuse of a different amperage from
that removed. The electrical circuits may
become overloaded with the subsequent
possibility of a fire.
No attempt should be made to repair a fuse
that has blown. This may cause a fire hazard
or serious damage elsewhere in the
electrical circuit.
JOL.114
Fuse Boxes
There are three separate fuse boxes fitted to the
vehicle, each one containing fuses protecting a
different group of circuits.
They are located in:
• The engine compartment
(front power distribution box/fusebox)
• The passenger compartment
(primary junction box/fusebox)
• The luggage compartment
(rear power distribution box/fusebox)
PASSENGER COMPARTMENT FUSEBOX
Engine Compartment Fusebox
The fusebox is located in the engine compartment
on the RH side adjacent to the windshield wash
reservoir.
Caution:
When a fusebox lid is removed, take care to
protect the box from moisture, and refit the lid at
the earliest opportunity.
10
10
D.418.423
78
Remove the fusebox lid by pressing the retaining
lugs and lifting.
When refitting, press the fusebox lid in the area of
the retaining lugs until the lid engages.
Electrical/Electronic
JAGUAR
S -TYPE
FUSEBOX LOCATIONS
Engine Compartment Fusebox
Passenger Compartment Fusebox
Luggage Compartment Fusebox
JOL.115
Passenger Compartment Fusebox
The passenger compartment fusebox is located on
the right-hand side trim panel in the footwell.
Remove the fusebox lid by pressing the retaining
lugs and lifting.
When refitting, press the fusebox lid in the area of
the retaining lugs until the lid engages.
Luggage Compartment Fusebox
A fusebox is located in the luggage compartment,
situated forward of the battery.
Fold the luggage compartment floor panel to gain
access to the fusebox.
Remove the fusebox lid by pulling the retaining
clips and pulling the lid upwards.
Reposition the lid and press down until the
retaining clips engage.
79
JAGUAR
S -TYPE Electrical/Electronic
FUSES
Engine Compartment Fusebox
1
18
4 13
Passenger Compartment Fusebox
19
9
24
12
1
7
8
21
22
35
25
Diode
Luggage Compartment Fusebox
9
19
25
1
10
32
18 26
Diode 01
Diode 02
Spare Fuses
J.418.430
Fuse Locations and Details
80
Engine Compartment Fusebox
No
Type
Rating (amps)
Colour
Circuit
1
mini
10
Red
Air conditioning clutch
2
mini
10
Red
Windshield washer pump
3
mini
15
Blue
Fog lamp
4
mini
15
Blue
Horns
5
mini
20
Yellow
Fuel Injector
6
mini
15
Blue
Transmission solenoid
7
-
-
-
Not used
8
-
-
-
Not used
9
-
-
-
Not used
Electrical/Electronic
No
Type
Rating (amps)
Colour
Circuit
10
-
-
-
Not used
11
mini
15
Blue
HO2 sensor (catalyst)
12
mini
10
Red
Coil on plug
13
cartridge
40 or 30
14
-
-
-
Not used
15
cartridge
40
Green
LH heated windshield
16
cartridge
30
Pink
Blower motor
17
-
-
-
Not used
18
cartridge
40
Green
Powertrain control module (PCM)
19
-
-
-
Not used
20
-
-
-
Not used
21
cartridge
30
Pink
Starter solenoid
22
cartridge
30
Pink
ABS motor
23
cartridge
20
Blue
Wiper motor
24
cartridge
30
Pink
Head lamp washer pump
25
cartridge
80
-
Cooling fan motor
Diode
Green or Pink
1
JAGUAR
S -TYPE
RH heated windshield or heated wiper
park (where fitted)
PCM
Passenger Compartment Fusebox
No
Type
Rating (amps)
Colour
Circuit
1
mini
5
Brown
Starter relay coil via Park/Neutral switch
2
mini
5
Brown
Radio
3
mini
5
Brown
ABS/DSC module
4
mini
5
Brown
PCM relay coil, instrument pack, RECM,
fuel pump relay, transit relay
5
mini
5
Brown
Autolamp sensor, heated seat module
switch & overdrive cancel switch RSM, BSI
6
mini
10
Red
OBDII
7
mini
5
Brown
DDCM, DSCM, PCM, Anti-theft LED,
security horn, power mirror
8
mini
5
Brown
Right-front direction indicators, side
repeaters, side markers, park lights
9
mini
10
Red
Right-front low beam headlamp
10
mini
5
Brown
Left-front direction indicators side
repeaters, side markers, park lamps
11
mini
10
Red
Left-front main beam lamp
12
mini
10
Red
Headlamp levelling, ABS/DSC module
13
mini
5
Brown
Instrument pack
14
mini
10
Red
RCM, Dual Automatic Temperature
Control (DATC) module
81
JAGUAR
82
S -TYPE Electrical/Electronic
No
Type
Rating (amps)
Colour
Circuit
15
mini
5
Brown
Adaptive damping module (ADRC)
16
mini
5
Brown
Heated seat switch module,
electrochromic mirror, rain sensor
17
mini
5
Brown
RCM, Generator warning lamp
18
mini
20
Yellow
Radio, cellular phone, navigation unit
19
mini
15
Blue
Steering column motors
20
mini
10
Red
GECM, DATC, RECM, Instrument Pack,
brake shift interlock
21
mini
10
Red
Power folding mirrors, electric sunblind
22
mini
10
Red
Driver’s door mirror, driver’s door lock
motor
23
mini
10
Red
Right-front high beam
24
mini
5
Brown
Passive Anti-Theft System (PATS)
25
mini
10
Red
Left-front low beam headlamp
26
-
-
-
Not used
27
mini
10
Red
Navigation display, radio, phone,
navigation module, Traffic Master
28
mini
5
Brown
Battery-backed security sounder
29
mini
5
Brown
Voice control, reversing aid, GECM,
Trailer tow ignition sense, VEMS
30
mini
5
Brown
GECM
31
-
-
-
Not used
32
mini
20
Yellow
Accessory socket, cigar lighter
33
mini
10
Red
GECM illumination power
34
-
-
-
Not used
35
mini
5
Brown
Stop lamp switch
Trunk Fusebox
No
Type
Rating (amps)
Colour
Circuit
1
mini
15
Blue
Luggage compartment release solenoid
2
mini
10
Red
Right rear direction indicators, back up,
fog lamps, side markers
3
mini
10
Red
Left stop lamp
4
mini
10
Red
Fuel door release solenoid
5
mini
10
Red
Courtesy and map lamps
6
mini
10
Red
Left rear direction indicators, back up,
fog lamps, side markers
7
mini
10
Red
Right stop lamp
8
mini
10
Red
Center high mounted stop lamp
9
mini
5
Brown
Heated mirror
10
mini
5
Brown
Traffic Master
11
mini
15
Blue
Heated seats
Electrical/Electronic
No
Type
Rating (amps)
Colour
Circuit
12
mini
5
Brown
RECM - logic, Transit relay
13
mini
15
Blue
Adaptive damper ride control (ADRC)
14
mini
5
Brown
Phone, CD, Vehicle emergency message
system (VEMS)
15
mini
5
Brown
Alternator sense
16
mini
20
Yellow
Sliding roof
17
mini
15
Blue
Fuel pump
18
mini
20
Yellow
Subwoofer amplifier
19
cartridge
20
Blue
RECM, left rear window
20
cartridge
30
Pink
Driver door module - Driver window
21
cartridge
30
Pink
Driver lumbar
22
cartridge
20
Blue
Ignition
23
cartridge
30
Pink
Switched system power 4
24
cartridge
30
Pink
Switched system power 3
25
cartridge
40
Green
Primary junction box
26
cartridge
30
Pink
GECM Passenger window
(30amp early cars)
27
cartridge
30
Pink
RECM, right rear window
28
cartridge
30
Pink
Passenger lumbar
29
cartridge
30
Pink
Rear defroster
30
cartridge
20
Blue
Switched system power 1
31
cartridge
30
Pink
Switched system power 2
32
-
-
-
Unused
Diode 01
Diode 02
JAGUAR
S -TYPE
Unused
1
Fuel pump motor
83
JAGUAR
S -TYPE Electrical/Electronic
RELAYS
Engine Compartment Fusebox
Passenger Compartment Fusebox
3
2
1
1
10
4
5
11
12
14
15
6
13
7
8
Luggage Compartment Fusebox
7
1
2
3
4
5
6
J.418.431
Relays
The relays are located in the three fuse boxes.
Some are a smaller: half the standard ISO size.
Key to illustration:
Engine Compartment Fusebox
1. Wiper fast/slow relay
2. Wiper park relay
3. Coils on plugs & HO2 sensor (catalyst) relay
4. Windshield washer relay
5. Auxiliary coolant pump relay (V8 only)
6. Horns relay
7. Fog lamp relay
8. Air conditioning clutch relay
9. Unused
84
10. Blower motor relay
11. LH heated windshield relay and heated wiper
relay
12. RH heated windshield relay
13. Headlamp washer pump relay
14. Powertrain control module relay
15. Starter motor relay
Passenger Compartment Fusebox
1. Cigar lighter/Accessory socket
Luggage Compartment Fusebox
1. Switched system power 1 relay
2. Switched system power 2 relay
3. Rear defroster
4. Switched system power 3 relay
Electrical/Electronic
5.
6.
7.
Switched system power 4 relay
Fuel pump relay
Brake shift interlock relay
JAGUAR
S -TYPE
TRANSIT RELAY
Transit Relay
The purpose of the Transit Relay is to prevent the
battery from being discharged during transit and
Dealer storage. It automatically isolates the
battery following ignition off.
D.418.417
The transit relay is installed on the Negative line
through a spur from the trunk lighting harness
and is located on the battery Negative post.
TRANSIT RELAY FITTED
If the vehicle is to be handed over to a customer
within a period of 24 hours of completion of the
PDI, the Transit Relay MUST be removed.
If the vehicle is NOT to be handed over to a
customer within a period of 24 hours of
completion of the PDI, a Transit Relay Test Lead
must be fitted to allow the PDI to proceed.
Under no circumstances should any means other
than the test lead be used to bridge the Transit
Relay.
The Transit Relay Test Lead MUST be removed
after the completion of the PDI and stored for
further use. Under no circumstances should the
vehicle be transported with the Transit Relay Test
Lead fitted.
The procedure to fit the Transit Relay Test Lead
and remove the Transit Relay is given in the PDI
Manual.
D.418.418
85
JAGUAR
S -TYPE Electrical/Electronic
Exterior Lighting
The exterior lighting switch located on the fascia,
operates the headlamps, sidelights, fog lamps and
the delay variable timer switch. Each headlamp
assembly consists of two headlamp units, the
main beam lamp unit is the inner and the dipped
beam, front parking (side) lamp and the direction
indicator lamp unit is the outer.
Each rear lamp assembly incorporates a tail/stop
lamp and an auxiliary tail lamp, a fog lamp, a
reversing lamp and a direction indicator lamp.
Access for bulb replacement is from the luggage
compartment. The high mounted stop lamp is
powered via the stoplamp switch, it is clipped to
the rear screen and is replaceable as a unit.
Fog lamps are located in recesses in the front
bumper. The two retaining screws are located
behind the anti-theft cover and splitter vane.
The side repeater lamps (where fitted) are located
within the front fender. The sidemarker lamps are
located with the rear and front bumper and are
EXTERIOR LAMPS
Rear Lamp Assembly
High Mounted Stop Lamp
Number Plate Lamps
Outer Headlamp
Unit
Inner Headlamp
Unit
J.418.442
Side Marker Lamp
Side Repeater Lamp
(where fitted)
Side Marker Lamp
Front Fog Lamp
J.418.441 & 442
86
Electrical/Electronic
JAGUAR
S -TYPE
TOP COVER
JOL.073
supplied as part of a high level bumper assembly
(the side markers are located in the bumper by
tangs on one side of the unit and held in position
by a spring clip on the other side).
Bulb renewal
It is important that only Jaguar bulbs of the type
specified are used when renewing bulbs.
Before renewing bulbs, switch off the ignition and
light switches.
Top cover
To gain access to the headlamp units, the top
cover must be removed.
Turn the four fasteners a quarter turn anticlockwise and then remove the top cover.
After changing the defective bulb, refit the cover
and turn the fasteners clockwise to retain the
cover.
87
JAGUAR
S -TYPE Electrical/Electronic
HEADLAMP - DIPPED BEAM
C
A
B
Headlamp - Bulb Renewal
The bulbs are halogen type and will be damaged if
touched by hand or contaminated with oil or
grease. It is important to use clean gloves or cloth
when handling a bulb which is to be used again. A
contaminated bulb may be cleaned with
methylated spirit before refitting.
Dipped Beam (outer) Headlamp
Open the bonnet.
Remove the top cover.
Turn the circular cover (A) anti-clockwise and
remove.
Press the spring clip (B) towards the bulb and
downwards to release the bulb. Remove the
bulb/connector (C) from the headlamp assembly.
Pull the connector from the bulb.
Attach the connector to the new bulb, type H7 for
dipped beam, and fit to the headlamp. The bulb
will only correctly fit in one position.
Engage the spring clips to retain the bulb and then
fit the circular cover.
Refit the top cover and close the bonnet.
Have the headlamp aim checked after bulb
replacement.
Main Beam (inner) Headlamp
Open the bonnet.
Remove the top cover.
Turn the bulb holder a quarter turn anti-clockwise
and remove the bulb and holder from the lamp
unit.
Fit a new bulb to the holder, type HB3 for main
beam.
Fit the holder to the lamp unit, the bulb will only
correctly fit in one position.
Refit the top cover and close the bonnet.
HEADLAMP - MAIN BEAM
JOL.116
88
JOL.074
Electrical/Electronic
Front Direction Indicator - Bulb Renewal
Remove the top cover.
The bulb is contained within the outer headlamp.
Turn the holder a quarter turn anti-clockwise and
remove the bulb and holder.
Remove the bulb and fit a new one of the correct
type, PY21W.
Fit the holder to the lamp unit, it will only fit in
one position.
Refit the top cover and close the bonnet.
Front Parking (side) Lamp - Bulb Renewal
Open the bonnet.
Remove the top cover.
The front parking lamps are contained within the
outer headlamp units.
Rotate the bulb holder anti-clockwise and remove
from the headlamp.
Pull the capless bulb from the holder and fit a
new one of the correct type, W5W.
Reposition the bulb holder in the headlamp unit
and turn clockwise.
Refit the top cover and close the bonnet.
JAGUAR
S -TYPE
FRONT DIRECTION INDICATOR AND PARKING LAMPS
Front Parking
Lamp
JOL.078
Front Direction
Indicator Lamp
JOL.079
JOL.078 & 079
Front Fog Lamp - Bulb Renewal
Remove bumper splitter vane and blackout panel.
Unscrew fixing; remove lamp from front.
Twist/remove bulb carrier.
Remove the bulb and fit a new one of the correct
type, H3.
Refit the bulb carrier, fixing, blackout panel and
splitter vane.
FRONT FOG LAMP
D.417.108
89
JAGUAR
S -TYPE Electrical/Electronic
Side Repeater Indicator - Bulb Renewal
Remove the lamp unit from the front wing panel
by pressing the unit forwards or rearwards to
compress the spring clip and remove the complete
unit.
Twist the bulb anti-clockwise and remove.
Fit a new bulb of the correct type, W5W.
Press the unit into the recess until it clicks into
place.
SIDE REPEATER INDICATOR
JOL.076
REAR LAMP ASSEMBLY
Reverse Lamp
Direction Indicator
Tail Lamp
Fog Lamp
Stop/Tail Lamp
JOL.075
90
Rear Lamp Assembly - Bulb Renewal
The rear lamp assembly has the following bulbs:
• Reverse lamp, type P21W.
• Stop/tail lamp, type P21/4W.
• Fog lamp, type P21W
• Tail lamp, type R5W.
• Direction indicator, type PY21W.
Ensure that the lamps and ignition switch are OFF
before removing any bulbs.
Open the luggage compartment, loosen the side
carpet and unclip the rear lamp bulb carrier.
Remove the faulty bulb and fit a new one of the
correct type, as illustrated on the bulb holder.
Fitment of the correct type is essential.
Refit the bulb carrier assembly, ensuring that the
clips are correctly secured.
Refit the carpet.
Electrical/Electronic
High Mounted Stop Lamp
Remove the rear parcel tray trim panel.
Depress clips to remove from pegs.
JAGUAR
S -TYPE
NUMBER PLATE LAMP
Number Plate Lamp - Bulb Renewal
Push the lens clip sideways and remove the lens
from the vehicle.
Remove the bulb and fit a new one of the correct
type, W5W.
Refit the lens by pressing it firmly into the recess
until it clicks into place.
JOL.077
EXTERIOR LIGHTING CONTROLS
Exterior Lighting
Switch
To
General Electronic
Control Module
Lighting Stalk
LH Column
Switchgear
Instrument
Pack
To
Rear Electronic
Control Module
Hazard Switch
Autolamp
Sensor
J.418.447
91
JAGUAR
S -TYPE Electrical/Electronic
FRONT EXTERIOR LIGHTING
LH Side Repeater
LH Side Marker
(NAS only)
From
Instrument Pack
Direction Indicator
Parking
Dip Beam
Main Beam
General
Electronic
Control
Module
LH Headlamp
RH Side Repeater
RH Side Marker
(NAS only)
Front Power
Distribution Box
Direction Indicator
Front Fog Lamp
Relay
Parking
Dip Beam
Main Beam
RH Headlamp
LH Front Fog
Lamp
RH Front Fog
Lamp
J.418.449
92
Electrical/Electronic
JAGUAR
S -TYPE
REAR EXTERIOR LIGHTING
Stop
High Mounted Stop
Lamp
Direction Indicator
Tail
Fog
From
Instrument Pack
Reverse
LH Rear Lamp Unit
Rear
Electronic
Control
Module
LH Side Marker
(NAS only)
Stop
Brake Switch
Direction Indicator
Tail
Fog
Reverse
Number Plate Lamp
RH Rear Lamp Unit
RH Side Marker
(NAS only)
Number Plate Lamp
J.418.448
93
JAGUAR
S -TYPE Electrical/Electronic
Interior Lighting
The automatic operation of the interior lamps is
controlled by the general electronics control
module (GECM).
The interior lighting system consists of the
following lamps:
• Two front interior lamps.
• Front footwell lamps
• Two rear interior lamps with integral reading
lamps.
• Front door/puddle lamps
• Glove compartment lamp.
• Vanity mirror lamps.
• Two luggage compartment lamp.
FRONT INTERIOR LAMPS AND SWITCHES
Front and Rear Interior Lamps
Two combined map/reading/courtesy lamps are
fitted in the front overhead console. Operation is
described in the ‘Instrument and Controls’
section. A map/reading/courtesy lamp is fitted
above each rear passenger grab handle.
Illuminated Entry/Exit
When the vehicle is unlocked, the courtesy lamps
will gradually illuminate and remain on for 20
seconds.
If the courtesy lamps are on they will fade off
when the vehicle is locked with a key or a key-ring
transmitter.
J.418.443
Luggage Compartment, Glovebox and Vanity
Mirrors
The luggage compartment, glovebox and vanity
mirrors are illuminated when in use. These lamps
will work for up to 40 minutes after the ignition
has been switched off.
REAR INTERIOR LAMP AND SWITCH
JOL.064
94
Door Guard/Puddle Lamps
Door guard lamps are fitted to each front door to
give warning of an open door to passing vehicles.
The rear doors are fitted with reflectors. The
puddle lamps illuminate the ‘step out’ area at
night.
Electrical/Electronic
JAGUAR
S -TYPE
Instrumentation and Controls
1
2
3
4
5
6
22
21
20
19
18
17
16
15
13
7
12
8
14
11
1.
2.
3.
4.
5.
6.
7.
8.
9.
10.
11.
12.
13.
Instruments pack
Wipers/washers and headlamp power
wash switches,
Trip computer switches,
Hazard warning switch,
Audio system control panel,
Cassette stowage, telephone presenter or
navigation display,
Climate control panel,
Ashtray and cigar lighter,
Traction control or dynamic stability
control switch,
Sports mode switch,
Front seat heater switches,
Coin tray,
Cruise control switches,
Instrument Pack
Vehicle instrumentation is installed on the
instrument pack on the fascia. The calibration of
the odometer and speedometer, the language of
the message center and the composition of the
indicator lamps are tailored to suit the destination
market. The instrument pack acts as a system
monitor for the audible and visual warnings.
10
14.
15.
16.
17.
18.
19.
20.
21.
22.
9
Horn and driver’s airbag,
Audio switches,
Dimmer switch,
Bonnet release lever,
Headlamp levelling switch,
Fuel filler flap release switch,
Luggage compartment release switch,
Exterior lighting switch,
Direction indicators and main beam
switches,
When the ignition switch is turned to position II,
the following visual warnings (telltales) are
illuminated for three seconds to provide a bulb
prove out function:
• ABS telltale
• Airbag telltale (six seconds prove out)
• Catalyst over temperature telltale (Japan only)
• Charging system telltale
95
JAGUAR
S -TYPE Electrical/Electronic
INSTRUMENT PACK
4
5
6
7
3
8
2
2
9
1
21
20
1.
2.
3.
4.
5.
6.
7.
8.
9.
10.
19 18
17
Engine temperature gauge
Direction indicators
Tachometer
Front fog lamps on
Traction control/DSC warning light
Main beam on
Rear fog lamps on
Speedometer
Fuel gauge
Overspeed Warning (Middle East markets
only)
11. Airbag system warning light
12. Seat belt warning light - driver’s seat belt not
fastened
•
•
•
16
15
13 12 11
10
JOL.002
13. Anti-lock braking system warning light
14. Brake warning light
15. Message center warning light - primary
warning
16. Message center display - displays odometer,
trip, status/warning messages
17. Message center amber warning light secondary warning
18. Check engine warning light
19. Charge indicator warning light - high or low
battery voltage or faulty generator
20. Low oil pressure warning light
21. High engine temperature warning light
Low brake fluid / Park brake telltale
Fail safe cooling / Engine overtemperature
telltale
Check engine telltale
The driver warning chime provides the driver with
an audible warning for the ignition on, key in
ignition, all doors open and the headlamps on,
hood open, trunk open, lamps on and safety belt
not engaged. A chime will sound every one
second when a fault in the air bag circuit is
detected.
The driver is also provided with a visual message
or warning displayed in the information message
center.
96
14
Electrical/Electronic
Message Center
Driver information, messages, and data are given
on the message center panel which is a vacuum
fluorescent dot matrix display.
Various languages can be selected for message
display.
For the message center to operate the ignition
must be switched ON (position ‘II’).
The message center displays:
The total distance covered by the vehicle.
Trip computer information.
Warning messages if system faults are detected.
Status messages to indicate changes in state of
certain vehicle functions.
Audio system information when steering wheel
switches are used (when fitted).
JAGUAR
S -TYPE
MESSAGE CENTER
JOL-035
Messages
Most messages, when displayed, have an
associated warning light, red or amber, at the side
of the display which will come on to indicate the
message priority.
If more than one message is active, each is
displayed in turn for two seconds in order of
priority.
Messages take priority over the odometer reading
or trip computer data and, if active, will be
displayed when the ignition is switched ON.
The driver interacts with the message center
through the buttons on the trip computer
switchpack
Ignition Switch
The ignition switch is described in the ‘Security
and Locking Systems’ section.
Trip Computer
The trip computer switchpack is mounted on the
instrument panel and messages are displayed on
the instrument pack display. The fitment is by a
clip fixing from the front. For removal it is
necessary to remove the center vent and push the
switchpack from the rear.
Trip computer functions are:
• Odometer
• Trip distance
• Range
• Average fuel consumption
• Current (INST) fuel usage
• Average speed
TRIP COMPUTER SWITCHPACK
JOL.010
97
JAGUAR
S -TYPE Electrical/Electronic
Reset/Clear - Two position rocker switch. Sets the selected trip to zero. Clear can be used to cycle
though: TRIP - ODOMETER - MESSAGES. Clear can hide messages on the message
center.
Mls/Km Selects metric or imperial data. Also selects languages Those available are:
English, US English, German, Spanish, Italian, French, Dutch, Finnish, Swedish,
Brazilian/Portuguese and Japanese
Trip/Cycle - Successive presses of the switch will display each of the trip data items and the
odometer reading , in turn.
A/B Selects either A or B trip memory.
Steering Wheel Switches
AUDIO AND PHONE CONTROLS
The multi-function controls on the steering wheel
comprise audio, phone and cruise control
switches.
A
B
D
C
Audio Controls
A. Audio mute and voice activation
B. Volume control
C. Radio waveband, cassette tape player and CD
tape player selection
D. Tuning/seek control:
Radio, steps through preset stations
Cassette, seeks tracks
CD, selects desired track
Note: Details on audio system usage is given in the
In-Car ‘Audio Systems Handbook’.
JOL.044
Phone Controls
A. Phone mode/mute - Mute audio, answer a
call, send/end a call and voice activation
(where fitted)
B. Volume control
C. Select number
D. Scrolling through memory
CRUISE CONTROL CONTROLS
A
Note: Details on phone usage is given in the InCar ‘Telephone Handbook’.
B
C
D
JOL.007
98
Cruise Control
A. Resume - To resume the set speed retained in
the memory
B. Set - Sets speed or increases/decreases speed
if held when speed has been set
C. Cancel - Cancels cruise control but retains set
speed in memory
D. On/Off Readies cruise control for use or turns
cruise control off
Electrical/Electronic
Steering Column Switchgear
JAGUAR
S -TYPE
LH SIDE STALK
LH Side Stalk
Direction indicator function:
Down indicates left, up indicates right.
Lamp function:
Main Beam - To select main beam when dipped
headlamps have been selected from the master
lighting switch, pull stalk backwards until a
click is felt.
Flash - To flash the headlamps, pull the stalk
back slightly.
RH Side Stalk
Wiper functions:
Functions:
Position A: Flick wipe
Position B: Off
Position C: Intermittent wipe. The rotary collar
F can be adjusted to vary the delay between
wipes.
Position D: Slow wiper operation.
Position E: High speed wiper operation.
JOL.014
RH SIDE STALK
F
E
D
C
B
A
Rain sensitive wipers (where fitted):
Turn the rotary collar F to auto. The wipers will
automatically operate when rain falls on the
windshield, or when moisture is present.
JOL.015
Trunk/Fuel Filler Flap Release and
Headlamp Levelling Switchpack
SWITCHPACK
Fuel Filler Flap Release
Trunk Release
The switchpack is located below the Main
Headlamp Switch.
Headlamp Levelling
‘0’ Normal setting - Driver only
‘1’ Driver and one front passenger
‘2’ All seats occupied and maximum luggage
‘3’ Fully loaded vehicle and towing a caravan
or trailer
Headlamp Levelling
JOL.066
99
JAGUAR
S -TYPE Electrical/Electronic
Exterior Lighting Switch
A.
B.
C.
D.
E.
F.
G.
Rear Fog Lamps (F)
Turn the switch to headlamps on, pull the switch
and then turn to position (F). Turning on the rear
fog lamps will also turn on the front headlamps.
Timer
Auto
Off
Side (parking lamps)
Headlamps
Rear fog lamps
Front fog lamps (where fitted)
Autolamps Delayed Exit (A)
This feature leaves the headlamps turned on after
the ignition has been switched off, allowing the
driver and passengers increased visability on
leaving the vehicle. The switch has seven positions
and varies the time from three seconds up to
three minutes. After adjustment, the newly set
delay time will be displayed on the message
center.
Auto (B)
A light sensor on top of the instrument panel,
monitors exterior light levels and automatically
switches the side lamps and dipped headlamps on
or off. When light fades to the non-adjustable
preset level, the sidelamps and headlamps switch
on automatically. As light increases to the preset
level, the sidelights and headlamps switch off
automatically.
C
D
E
A
F
G
100
Daylight Running Lamps
In certain countries it is a legal requirement for
the lamps to be on during the hours of daylight.
With the rotary switch in the off position (C),
dipped headlamps, sidelights and tail and number
plate lamps will switch on automatically when the
ignition is turned to position II, the vehicle is out
of park (automatic transmission only) and the
parking brake is released.
Battery Saver
If the dipped or main beam headlamps are
switched on and the ignition is turned to OFF or
the key is removed, the lamps will automatically
turn OFF after 10 minutes. The sidelights will
remain ON.
Bulb Failure Monitoring
The tail and brake lamp bulbs are monitored for
failure and a corresponding message is shown in
the message center, e.g ‘LEFT TAIL LAMP FAILED’.
There are two tail lamp bulbs in each tail lamp.
The message that a tail lamp has failed indicates
that both bulbs in that cluster have failed. The
message will be shown, even after a bulb is
replaced, until the next time the bulb is switched
on.
EXTERIOR LIGHTING SWITCH
B
Front Fog Lamps (G)
Pull the switch in positions (A), (B), (D) or (E) to
switch on the front fog lamps. Push to turn off. If
the rotary switch is turned off (C) the switch will
be retracted to its normal position and the fog
lamps will be turned off.
JOL.069
Electrical/Electronic
Dimmer Switch
Rotate the knob to adjust the illumination of the
instruments, door switch packs, audio system
panel and the climate control panel.
JAGUAR
S -TYPE
DIMMER SWITCH
JOL.012
Front Seat Heater Switches
The driver and front passenger have a heater. The
seat heater switches (when fitted) are located on
the center console directly below the climate
control unit. The heaters are in the seat squab
and the seat cushion. The heater will
automatically switch OFF after it has been on for
10 minutes. The heater will maintain a pre-set
temperature while it is switched on. Storage of
the vehicle in a heated garage, body heat, or
warm ambient temperatures may prevent
operation of the seat heater.
FRONT SEAT HEATER SWITCHES
JOL.063
Center Tunnel Switchpack
CENTER TUNNEL SWITCHPACK
Sport Mode (automatic transmission only)
The switch marked ‘S’ on the ‘J’ gate surround
enables the driver to select either normal or sport
mode. To select sport, press the switch. The
switch lights up to indicate that sport mode has
been selected.
Traction Control
Traction control is fitted to all vehicles. Traction
control is always switched on when the engine is
started. If the system is operating, the warning
light in the instrument pack will flash. The
traction control (and direction stability control,
when fitted) can be switched OFF by pressing the
switch on the gear selector surround. The warning
light in the instrument pack will remain on and a
message will be shown to indicate that the system
has been switched off. If the switch is pressed
again, the system will switch on.
A system malfunction is indicated by a message:
JOL.013
Sport Mode
Switch
Traction Control or
Dynamic Stability
Control Switch
JOL.013
101
JAGUAR
S -TYPE Electrical/Electronic
TRACTION CONTROL FAULT. Warning light
(adjacent to message) amber and the instrument
pack warning light will be lit.
Dynamic Stability Control (DSC) (when fitted)
DSC is operational whenever the engine is
running, unless it has been switched off. The DSC
system controls the anti-lock braking system,
traction control and yaw control of the vehicle.
Yaw control determines the vehicle’s direction
relative to the driver’s inputs (sideslip and
understeer/oversteer). It applies braking pressure
to individual wheels if excessive variation is
detected. This ensues that the vehicle follows the
driver’s intended direction of travel. The DSC can
be switched OFF by pressing the switch on the
gear selector surround. The warning light in the
instrument pack will remain on and a message
will be shown indicate that the system has been
switched off. If the switch is pressed again, the
system will switch on.
A system malfunction is indicated by a message:
DSC SYSTEM FAULT. Warning light (adjacent to
message) amber and the instrument pack warning
light will be lit.
DRIVER’S DOOR SWITCHPACK
2
1
3
4
6
5
Door Switchpacks, Front & Rear
Door Mirrors
Both door mirrors are adjusted from the driver’s
switchpack. The four-way adjustment button
moves the mirrors to the required position. The
selector switch selects the mirror to be moved, left
for the left side mirror and right for the right side
mirror. When the selector is in the center
position, adjustment to either mirror is inhibited.
Where power fold-back mirrors are fitted, the
switch is located in the driver’s door map pocket.
Note: Do not attempt to reposition power foldback mirrors manually. Always use the switch.
Should a door mirror be knocked out of position
the mirror head will be loose. To re-engage the
mechanism, power the mirror to the fold-back
position then outward to the driving position.
Door Windows
These switches normally operate when the
ignition switch is in position ‘I’ or ‘II’. If the key is
removed from the ignition switch and all doors
remain closed, the windows can be operated for
up to 10 minutes or until a front door is opened.
The rear windows isolation button when pressed
down immobilizes the rear door window switches.
A second press allows the button to raise and the
rear seat passengers can then operate the rear
door windows.
The switch for the driver’s window only has a ‘one
touch’ operation facility enabling the driver to
fully open the window in one quick movement.
Press the rear of the switch fully downwards and
release to open the window. Window travel can be
stopped by pressing the switch again.
FOLD-BACK MIRROR SWITCH
JOL.019
1.
2.
3.
Electric mirror adjustment
Left/right mirror selector
Electric windows
4.
5.
6.
Rear windows isolation
Memory store button
Memory settings
JOL.056
102
Electrical/Electronic
Note: If the switches are held for longer than six
seconds, e.g. when attempting to overcome frozen
or jammed windows, the window drive will be
switched off for a few seconds to protect the
window drive motors.
Memory Setting (where fitted)
The position of the driver’s seat, steering column
and exterior rear view mirrors can be memorized
and recalled. Two different driving position
profiles can be entered In the memory. The
switches for seat, mirror, steering column
adjustment and memory setting can be operated
with or without the key being in the ignition.
To store a driving position in the memory:
1. Adjust the seat, steering column an exterior
rear view mirrors to the desired position.
2. Push the memory button and the light in the
switch will illuminate
3. Within five seconds, push button ‘1’ or’2’ to
memorize the configuration. The memory
button light will go out and a chime will
indicate that the setting procedure is
complete. Additionally, if the ignition is on,
the message center will display a message
that the settings have been saved.
To recall a memorized position, the gear selector
lever must be in ‘P’ or ‘N’ on automatic
transmission vehicles and the park brake must be
applied on manual transmission vehicles. Press
and release the appropriate memory button (‘1’ or
‘2’). The seat, steering column and door mirrors
will move automatically to the memorized
position.
The key ring transmitter can also be set to
memorize the position of the driver’s seat,
steering column and exterior rear view mirrors.
Memory Recall Using a Key-ring Transmitter
The key-ring transmitter will recall a memory
position when the unlock button is pressed when
set as follows:
Adjust the seat, steering column and exterior rear
view mirrors to the desired position.
Press ‘memory’ button.
Within five seconds, press any button on the keyring transmitter.
Press button ‘1’ or ‘2’.
Repeat for the other transmitter, pressing the
remaining memory button.
To cancel key-ring transmitter memory recall:
JAGUAR
S -TYPE
Press the ‘memory’ button.
While the memory set light is ON, press any
button on the key-ring transmitter, (except the
panic button, if fitted), then press the ‘memory’
button again.
Front Seat Adjustment Switchpacks
A key does not have to be in the ignition switch
for seat adjustment
A. Switch forward/rearward: moves seat cushion
forward or rearward
Switch up/down: raises/lowers front/rear of
cushion
B. Switch forward/rearward: raises/reclines angle
of seat squab
C. Switch front/rear: increases/reduces lumbar
support.
FRONT SEAT ADJUSTMENT SWITCHPACK
A
B
C
JOL.017
103
JAGUAR
S -TYPE Electrical/Electronic
Overhead Console
Interior Lighting Switches
Two combined map/reading/courtesy lamps are
fitted in the front overhead console. A
map/reading/courtesy lamp is fitted above each
rear passenger grab handle. Press the master
interior light switch in the overhead console, i.e
the center switch, to turn all interior lamps from
automatic to on. When the switch is in the ON
position, if any doors are open, none of the
individual interior lamps can be turned OFF. In
the automatic position, when the interior lamps
have faded off, each lamp can be switched on or
off by pressing the associated individual switch.
Also in this position, if a door is open when the
vehicle is driven, the interior lighting will fade off
and then fade on again when the vehicle slows
down. The message center will alert the driver
that the door is open. When the ignition switch is
at position ‘0’ and the lamps are on, they will
remain on for 40 minutes.
Sliding Roof Switch
The ignition switch must be in position ‘I’ or ‘II’.
The switch allows slide or tilt adjustment of the
sliding roof.
OVERHEAD CONSOLE
1
3
2
1
1
4
1.
2.
3.
4.
Interior lighting switches
Reverse park control switch
Rear sun blind switch
Sliding roof switch
JOL.172
104
Reverse Park Control Switch (when fitted)
This parking aid, when reverse gear is selected and
ignition is on, automatically provides an audible
proximity warning when reversing the vehicle. If
an object is detected by one of the four sensors in
the rear bumper, a beep tone will be heard, which
increases in rate as the vehicle approaches the
object. At approximately 20 cm the beep will
become continuous for three seconds and is then
automatically turned off. If the object is not high
enough or close enough to cause damage to the
vehicle, the beep will not be heard.
Reverse park control can be switched off at any
time by pressing the switch in the overhead
console. A red indicator light in the switch
illuminates when the system is switched off. The
system will be reset every time the vehicle is
started.
Note: The audio system volume will be reduced
whilst reverse park control is sounding.
Rear Sun Blind Switch (where fitted)
The rear sun blind is fitted to the rear parcel shelf.
Push the switch to raise the sun blind. A second
push will lower the sun blind.
Electrical/Electronic
Interior Rear View Mirror
There are five derivatives of interior rear view
mirror.
1. Base, non-electric
2. Electrochromic
3. Electrochromic with rain sensing
4. Electrochromic with compass
5. Electrochromic with rain sensing and
compass
Electrochromic Interior Rear View Mirror (where fitted)
Push the switch in and the rear view mirror
darkens automatically to prevent glare from the
following vehicle’s headlamps. The mirror clears
when the light levels return to normal. The mirror
also clears when reverse gear is selected. Where
fitted, an LED is lit when mirror dimming is active.
Push the switch again and the glare-reducing
effect of the mirror is switched off so that a clear
reflection is given.
JAGUAR
S -TYPE
ELECTROCHROMIC MIRROR
JOL.059
ELECTROCHROMIC MIRROR WITH
COMPASS
Electrochromic Interior Rear View Mirror
with Rain Sensing - (where fitted)
The moisture sensor for the wipers is fitted to the
windshield and covered by the mirror pod.
Note: The auto headlamp sensor is not fitted to
the mirror as on the XJ8 but is fitted to the fascia
for the S-TYPE.
Ensure that the windshield in front of the mirror
pod and the autoheadlamp sensor is kept clean
since any dirt may affect the operation of these
sensors.
Electrochromic Interior Rear View Mirror
with Compass (USA market only)
The compass direction is given in a digital display
(eight compass points) in the corner of the mirror.
The brightness of the compass display dims as the
ambient light level falls. The compass must be
calibrated by the Dealer at PDI to compensate for
the difference between magnetic north and true
north in the part of the world where the car is
driven. For best results, the calibration procedure
should take place in an open area free from
overhead power lines or large metal structures.
On the underside of the mirror pod there are two
small holes. Insert a small screwdriver or other
pointed tool into the RH hole. Press the button in
JOL.150
COMPASS CALIBRATING AND ZONE SETTING
Calibrating Button
Zone Button
Calibrating
Button
Zone
Button
Rain Sensing
Mirror
D.418.435
105
JAGUAR
S -TYPE Electrical/Electronic
the hole until the word ‘ZONE’ appears in the
display. Continue to press to select a number
corresponding to the zone shown in the diagram
for the area in the world where the vehicle is
driven.
NAS COMPASS ZONES
Press the button in the LH hole until the ‘CAL’
indicator appears in the display. Slowly drive the
vehicle in a circle until the ‘CAL’ indicator
disappears. This should happen after two to three
revolutions. The compass is now adjusted to
compensate for the vehicle’s magnetic field.
Note: Using the vehicle in the vicinity of CB
radios or an airport may cause the display to
extinguish for a few seconds.
D.418.436
Steering Column Adjustment Switch
STEERING COLUMN ADJUSTMENT
SWITCH
The steering column can be adjusted for tilt and
reach by operating the four-way control switch on
the steering column. Moving the switch forwards
and backwards controls steering column reach.
Moving the switch up and down controls tilt. The
selected position is recorded by the memory
feature (where fitted).
Entry/Exit Mode (where fitted)
JOL.061
106
Entry/exit mode is selected by setting the steering
column adjustment switch to the ‘Auto’ position.
When the key is removed from the ignition switch,
the steering column will move to the tilt away
position, which is its uppermost tilt and innermost
reach position. The seat will move rearwards. This
gives the driver maximum room entering and
exiting the vehicle. The steering column position,
before ‘tilt away’, is memorized. When the
ignition key is next inserted in the ignition switch,
the steering column and seat will move back to
their programmed position.
Electrical/Electronic
Valet Switch (NAS markets only)
The valet switch is located in the glove box and
the owner should lock the glove box with the
black-headed key. The green-headed key should
the be handed to the parking attendant who can
then lock the car after parking, but will be unable
to open the glove box or the luggage
compartment.
JAGUAR
S -TYPE
VALET SWITCH
JOL.049
Garage Door Opener (GDO)
(NAS markets only)
GARAGE DOOR OPENER SWITCHES
The garage door opening electronic module is
fitted in the driver’s sunvisor. This module can be
programmed to transmit the radio frequencies of
up to three of the owner’s current hand-held
transmitters, for the operation of garage doors,
gates, lighting or security systems, and other radio
frequency operated services.
WARNING:
1. This GDO must not be used with
installations that do not have a sensor
that will automatically ‘stop’ and
‘reverse’ a closing garage door if an
object is detected in its path.
2. When programming a channel, the
system that you are programming will
be activated if it is within signal range,
therefore, make sure that people or
objects are clear of the garage doors or
gates being opened or closed.
JOL.172
JOL.172
The procedure for programming the GDO is given
in the Owner’s Handbook.
To operate: Simply press the appropriate button
on the sunvisor. The red light on the sunvisor
comes on when the signal is being transmitted.
107
JAGUAR
S -TYPE Electrical/Electronic
Security and Locking Systems
Introduction
The following security and locking features are
available but vary by market or options:
•
•
•
•
•
•
•
•
•
•
•
•
•
Key barrel on driver’s side only
Encrypted engine immobilization by ignition
key transponder
Radio frequency remote fob
Central locking by key and remote fob
Double locking (not in North America, Japan,
Taiwan)
Drive away door locking
Mechanical child locks on rear doors
Perimeter alarm of doors, bonnet, trunk
Intrusion sensing, ultrasonically sensed (not
in North America, Japan, Taiwan)
Inclination (tilt) sensing (Dealer fit accessory)
Panic alarm, fob operated (certain markets)
Trunk lock isolate (valet lockout, see page
107) - North America only
Electro/mechanical steering column lock
The following convenience features are included
either as standard or optional features:
•
•
•
•
•
•
•
Remote fob operated driver’s seat, door
mirrors and steering column memory recall
(two memories)
Remote fob operated trunk lid release
Key operated global close (sliding roof and all
windows)
Key and fob remote-operated global open
(sliding roof and all windows)
Trunk lid and fuel flap interior release buttons
Trunk release button in trunk plinth
Emergency key lock barrel under trunk plinth.
System Description
The security system is controlled by a driver door
control module (DDCM). When activated
unauthorized entry in to the vehicle is detected by
the courtesy lamp switches. When the alarm is
triggered, the system flashes the turn signal lamps
and sounds the alarm system horns.
The passive anti-theft system (PATS) is a feature to
prevent the vehicle being driven away by an
unauthorized person. The PATS system consists of
electronically coded keys, a transceiver and is
controlled by the Instrument Pack. When the
ignition is switched to position ‘II’, the transceiver
energises the ignition key to read its electronic
108
code that is transmitted back. If the read code
equals a stored code in the control module, the
steering column is unlocked and the powertrain
control module (PCM) will let the engine start.
Otherwise, starting of the engine is disabled
(through the starter disable relay and the PCM).
The security indicator LED provides the driver
with the status of the PATS or security system. If
the security system is armed the light will flash
when the ignition is switched OFF. The PATS light
will illuminate when the key is inserted into the
ignition lock and turned to position ‘II’. It will stay
illuminated until the system has carried out its test
on the key. If the system detects a fault, it will
flash the LED for 1 minute, and then flash out the
corresponding 2 digit fault code.
Security System Operating Components
Key to illustration on the following page:
1. Four button transmitter (North America/Rest
of the World)
2. Three button transmitter (Europe/Japan)
3. Trunk release switch
4. Trunk compartment actuator
5. Intrusion sensor
6. Door actuator
7. Driver door control module
8. Data link connector
9. General electronic control module
10. PATS transceiver module
11. Hood switch
12. Security LED
13. Horns
14. Security horn
15. Security sounder
16. Intrusion sensor
17. Rear electronic control module
Electrical/Electronic
JAGUAR
S -TYPE
SECURITY SYSTEM OPERATING COMPONENTS
1
2
3
4
17
5
16
6
15
7
14
13
8
12
11
10
9
J.418.453
109
JAGUAR
S -TYPE Electrical/Electronic
Vehicle Locking and Unlocking
Door locks and handles
Only the driver’s door has a key lock.
All doors and the luggage compartment can be
locked and unlocked using a key-ring transmitter.
Keys
Two black-headed keys (and one green-headed
key in the North American market) are supplied
with the vehicle. The key number is recorded on a
plastic tag which is attached to each key.
Each black-headed key will operate the ignition
switch and lock the doors, luggage compartment
and the glove box. The green-headed key is a valet
KEY-RING TRANSMITTERS
1
2
3
1
2
4
3
JOL.145
1.
2.
3.
4.
110
Locks/double-locks and arms the
vehicle.
Unlocks and disarms the vehicle.
Releases luggage compartment lock.
Sounds the Panic alarm (when fitted).
key which will not unlock a locked glove box or
locked trunk lid. The interior and exterior trunk
switches will not unlock the trunk lid when the
valet switch has been set.
An electronic device is fitted in the head of each
key which is programmed to the vehicle
electronics. When the key is placed in the ignition
switch the vehicle electronics recognize the
correct key and allow engine start. The engine
cannot be started with a key not programmed to
the vehicle electronic systems.
Up to eight keys can be used provided the Dealer
programs them all to the vehicle.
Key-ring transmitters
The security system is controlled remotely by a
radio frequency, battery-operated transmitter.
The transmitter is activated by pointing it towards
the vehicle and pressing one of the operating
buttons.
Key-ring transmitters will not operate if a key is in
the ignition switch.
Two transmitters are supplied with the vehicle, but
up to four can be used provided they are all
programmed to the vehicle by the Dealer.
Electrical/Electronic
Steering Column Lock
The steering column lock is remote from the
ignition switch and controlled electronically.
When the ignition key is removed from the
ignition switch the steering column lock is
engaged. The lock is disengaged when the key is
placed in the ignition switch.
The lock can be clearly heard as it engages and
disengages.
In rare circumstances it may be necessary to
gently turn the steering wheel from side to side to
release the steering column lock.
Ignition Switch
The fascia-mounted ignition switch, on the righthand side of the steering column, has four key
positions:
0 Ignition OFF, and the only position in which
the key can be inserted or removed. When
the key is removed the steering lock is
engaged.
I
Auxiliary position: this position allows use of
some electrical circuits, for example, window
operation.
The airbag system is activated when the
switch is turned to position ‘I’.
II Ignition ON: all electrical circuits except the
starter motor are activated. The key remains
in this position when driving.
III Start position: the starter motor is operated
for as long as the key is held in this position,
against spring pressure.
Smart Locking
This feature helps prevent locking the key in the
vehicle.
If the driver’s door is open and an attempt is
made to lock the doors using the driver’s door
interior locking lever, all doors will lock and the
driver’s door only, will then become unlocked.
If the front passenger door locking lever is used to
lock the doors then all doors will become locked
and then unlocked. The vehicle can then be
locked using the key in the driver’s door lock or a
key-ring transmitter.
JAGUAR
S -TYPE
IGNITION SWITCH
JOL.050
CHILD SAFETY LOCK
JOL.048
The door can then only be opened using the
exterior door handle.
Open the door and move the lever to its original
position to remove the child lock feature.
Child Safety Locks
Child safety locks are fitted to the rear doors. The
operating lever is fitted above the door lock
mechanism.
To operate: Open the door and move the lever a
quarter turn. This immobilises the interior handle.
111
JAGUAR
S -TYPE Electrical/Electronic
To Lock the Vehicle and Set Alarm
Press the lock button on the key-ring transmitter,
or put the key in the driver’s door lock, turn the
key towards the rear of the vehicle and release.
The direction indicators will flash once, the
security light on the top of the fascia will start
flashing and, after twenty seconds, the alarm will
be set.
To Unlock the Vehicle and Disarm the Alarm
System
Press the unlock button on the key-ring
transmitter, or put the key in the driver’s door
lock, turn the key towards the front of the vehicle
and release.
This unlocks all doors (and luggage compartment)
and turns on the interior lamps for twenty
seconds. The exterior direction indicators give
two flashes as unlocking takes place.
Global Closing
When using global closing, ensure that all
occupants are kept clear of the windows and
sliding roof aperture.
Using the key in the driver’s door, lock the vehicle
and hold in this position to close all the windows
(and sliding roof, if fitted).
Global Opening
Press and hold the key-ring transmitter unlock
button, or use the key to unlock the vehicle and
hold in this position to open all the windows (and
sliding roof, if fitted).
Internal Door Locking and Unlocking
To centrally lock all doors, press the lever on the
driver’s or front passenger’s door.
To lock a rear door, press the lock lever.
INTERNAL DOOR LOCK
JOL.070
112
To unlock any door, pull the release handle or the
lever. The driver’s or front passenger’s door lock
lever will unlock all doors.
Double-Locking
WARNING:
The door handles cannot be used to either
unlock or open the doors if the vehicle has
been double-locked. Therefore, doublelocking should not be used when persons
are inside the vehicle as they will not be able
to vacate, or be released, from the vehicle if
an emergency arises.
Note: It will not be possible to double-lock the
vehicle if any door is open.
When the vehicle is double-locked the doors
cannot be opened, either from inside or outside
the vehicle. Breaking a window will not allow a
thief access by opening a door. Only the correct
key or key-ring transmitter can be used to unlock
the doors.
With all doors closed, to double-lock the vehicle,
place the key in the driver’s door lock, turn the
key towards the front of the vehicle and then
towards the rear within three seconds.
Alternatively, press the lock button on the key-ring
transmitter twice within three seconds.
The exterior direction indicators will flash, once as
locking takes place and a longer, second flash as
double-locking takes place.
Drive-Away Door Locking
With the ignition ON, key at position ‘II’, and all
doors closed, moving the automatic transmission
gear selector lever from ‘P’ or ‘N’ will lock all
doors.
For manual transmission vehicles, with the ignition
ON and all doors closed, releasing the handbrake
will lock all doors. Also, if the handbrake is OFF
and a key is turned in the ignition switch to
position ‘II’, all doors will lock.
If a door is opened during a journey, the doors will
automatically lock again when the vehicle starts to
move.
All vehicles have the drive-away door locking
feature installed during manufacture. This feature
can be disabled, or reinstated, by a Jaguar Dealer,
if required.
Electrical/Electronic
JAGUAR
S -TYPE
LUGGAGE COMPARTMENT ‘OPENING’
A
C
B
D
Glove Compartment
The glove compartment can be locked with an
ignition key.
To open the glove compartment, lift the handle
and allow the lid to drop down. The compartment
will be illuminated when open.
Note: If the compartment is left open the lamp
will extinguish 40 minutes after the ignition has
been set to position ‘0’.
JOL.038
Luggage Compartment
To open the luggage compartment:
press the luggage compartment lid release switch
(A) on the fascia switchpack or,
press the luggage compartment button (B) on the
key-ring transmitter, or,
with the vehicle unlocked, press the release button
(D) on the compartment lid.
Note: An ignition key can be used to open the
luggage compartment lid release lock (C), (turn
clockwise to release), but opening with the key
when the vehicle is armed will cause the alarm to
sound.
Use a transmitter, or place the key in the ignition
and turn to position ‘II’, to turn the alarm off if it
sounds as a result of opening with a key.
If the vehicle alarm system is armed and the
luggage compartment is opened using the key-ring
transmitter the alarm will not sound. The system
will be rearmed when the lid is closed, provided
the vehicle has not been disarmed.
Neither the luggage compartment lid release
switch on the fascia switchpack nor the lid release
button will operate when the vehicle is armed.
Four tie-down loops, to enable luggage or heavy
goods to be secured, are provided in the luggage
compartment.
113
JAGUAR
S -TYPE Electrical/Electronic
Alarms and Audible Signals
Note: In certain markets, legislation prohibits the
use of audible confirmation signals. In such cases,
the sound source has been removed from the
system.
Audible Signals
An audible signal will sound when a door is
opened using a key if the vehicle has been armed
(Europe only). This mode can be cancelled within
15 seconds of opening the door, by disarming the
security system using the key-ring transmitter or
by switching the ignition to position ‘II’.
Error Signal
The direction indicators will flash five times
whenever one of the following conditions is
present:
• If any door is open when an attempt to ‘arm’
the security system is made.
• The luggage compartment or the bonnet is
not properly closed when an attempt to ‘arm’
the security system is made.
• If there is an electrical failure within the
intrusion sensing system, if fitted, and an
attempt to ‘disarm’ the security system is
made.
INTRUSION SENSOR
Full Alarm
Once armed, any of the following circumstances
will create a full alarm state and sound the horns
and flash the direction indicators:
• Opening a door, luggage compartment lid
(except with transmitter) or bonnet.
• Movement in the passenger area (if intrusion
sensors are fitted).
• Using a key in the ignition switch which is not
programmed to the vehicle.
• If the driver’s door is opened with a key
(European markets only) after a 15 second
delay.
• If the inclination sensor (if fitted) is activated.
Intrusion Sensing (when fitted)
A further enhancement to the security system is
the addition of intrusion sensing. When the
vehicle is armed and double-locked, movement
within the vehicle interior will activate the alarm.
When the security system is disarmed the
intrusion sensors are also disarmed.
Panic Alarm (when fitted)
When in or near the vehicle, the alarm can be set
off to deter a possible offender. For this feature to
operate, the key must not be in the ignition
switch.
Pressing the panic button on the key-ring
transmitter will activate the ‘Panic Alarm’.
The Panic Alarm will sound for the normal full
alarm period. The alarm is stopped by putting the
key into the ignition switch and turning to position
‘II’.
The key-ring transmitter can be used to cancel the
Panic Alarm by pressing either the panic button or
the unlock button.
Inclination (tilt) Sensing Protection (Dealer
fit option)
This feature protects against unauthorized towing
away or jacking up. When the vehicle is doublelocked and armed, any tilting of the vehicle, such
as jacking or lifting, will activate the alarm.
D.418.232
114
Note: If the vehicle is being transported by road,
rail or sea, the vehicle should not be doublelocked. This prevents the inclination system from
being armed and sounding the alarm as the
vehicle pitches and rolls.
When the security system is disarmed the
inclination sensor is also disarmed.
Electrical/Electronic
JAGUAR
S -TYPE
Battery Reconnection
If the battery is disconnected, the alarm system
will re-arm as the battery is re-connected.
Ensure that a key-ring transmitter or key is
available to disarm the alarm system when
reconnecting the battery.
Battery Back-up Sounder
In certain markets a separate, self-contained,
battery back-up sounder is fitted. This device will
sound the full alarm if the vehicle alarm is
activated or if the vehicle battery or the sounder
is disconnected when the security system is
armed.
115
JAGUAR
S -TYPE Electrical/Electronic
Audio and Communications System
General
The Jaguar sound system is available in two
versions: the Base System and the Premium
System. The audio head unit with integral
amplifier is located in the center stack. The audio
system has a phone interface to access stored
numbers. The antenna module is located on the
vertical panel under the rear parcel shelf
(accessed from the LHS of the trunk), FM and AM
antenna elements are in the rear screen. Four
twin cone 5in x 7in (127mm x 178mm) door
speakers are a modular cassette type for ease of
assembly/disassembly. The assembly consists of a
driver’s door module (driver’s door only), speaker,
and wiring and is mounted to the inner door
moulding. A special seal is kept under tension to
avoid water ingress.
The system is operated by the controls on the
fascia panel and the controls on the LH side of the
multi-function steering wheel (where fitted).
The radio has an alpha-numeric display which
shows information such as station frequency,
program service name, tape & track, CD and track,
phone mode and audio mute. Steering wheel
switch commands however, (when the steering
wheel switches are pressed) are shown on the
Instrument Pack message center.
The radio incorporates communication links with
Jaguar unique features: CD Autochanger, Cellular
Phone, Voice Activation and Navigation system.
Text messages relating to these features appear on
the display.
AUDIO SYSTEM CONTROL PANEL
3
1
4
5
6
7
16
15
8
2
9
14
18
1.
2.
3.
4.
5.
6.
7.
8.
9.
10.
116
17
13
12
11
On/Off button and rotary control
Treble, bass, balance and fade selection buttons
Cassette tape player button
Cassette tape slot
Cassette tape eject button
CD player button
Waveband (AM/FM) selection and Auto-store button
Menu function button
Seek/tuning control
Preset selection buttons (1 to 6)
10
11.
12.
13.
14.
15.
16.
JOL.040
Display
Program type button
Traffic Announcement button (RDS markets only)
Phone/Mute button
Dolby B button (base system only)
Digital signal processing (DSP) button
(Premium system only)
17. Shuffle button (non-RDS markets)
18. Compress button (non-RDS markets)
Electrical/Electronic
The radio volume is muted to a low level when:
the Reverse Park Control is enabled by engaging
reverse gear, the Cellular phone in hands-free
mode is used, the Navigation system delivers
audible route guidance instructions or the Voice
activation system requests listening or verbal
feedback.
JAGUAR
S -TYPE
AUDIO CONTROLS
A
B
Audio Steering Wheel Controls
A. Audio mute and voice activation
B. Volume control
C. Radio waveband, cassette tape player and CD
tape player selection
D. Tuning/seek control:
Radio, steps through preset stations
Cassette, seeks tracks
CD, selects desired track
D
C
JOL.044
Premium Sound System
The Premium Sound System components differ to
the base system as follows:
• The head unit has the additional feature of
Digital Sound Processing (DSP) to enhance
sound quality
• Four enclosed 5in x 7in (127mm x 178mm)
two way door speakers, modular cassette type
• Two active center fill speakers (with amplifier)
• Active sub-woofer enclosure mounted under
the rear parcel shelf containing two subwoofers 5in x 7in (127mm x 178mm) and a
sub-woofer amplifier
• CD Changer (six disc) in the glovebox (Dealer
fit trunk position is optional).
Phone/Mute Button
Where a Jaguar in-car phone is fitted, the
phone/mute button enables the user to enter/exit
the phone mode. The display shows ‘PHONE’ or
‘NO PORTABLE’ if the portable phone is not
available. Where a Jaguar in-car phone is not
fitted, the phone/mute button enables the user to
mute the sound systems output.
Digital Sound Processing (DSP Button)
The digital sound processing button has two
functions: change occupancy settings and select
special audio effects. The occupancy setting
feature provides optimum performance of the
system according to the number of vehicle
occupants.
The settings available are: Driver only, Front seats
and All seats. The audio effects, which include
Concert Hall and News Room, may be selected to
CD CHANGER
JOL.042
enhance the type of music or program being
played.
Compress Button
During CD operation, selecting Compress
compensates for ambient noise levels by
compressing the audio dynamic range to boost
quieter music and lower loud music. This can
avoid frequent adjustment of the volume control.
Shuffle Function
When the shuffle function s selected, the tracks of
the currently selected CD will be played in
random order.
117
JAGUAR
S -TYPE Electrical/Electronic
Menu
Press the menu button repeatedly to cycle through the first level menu functions; press the seek button
to enable / adjust the selected item. The extended menu features can be accessed by depressing and
holding the menu button for two seconds. Use the seek button to enable / adjust the selected item.
Some functions in the menu structure require the use of the volume control.
First Level Menu
Button Press
1.
2.
3.
4.
Radio
MAN - manual tune
AVC - automatic volume control
*NEWS ON / OFF
Tape
DOLBY ON / OFF
AVC
*NEWS ON / OFF
CD
SHUF - shuffle
COMP - compress
AVC
*NEWS ON / OFF
* The NEWS enable / disable function is only available in MENU when the radio is in FM mode.
Second Level (Extended Menu)
Button Press
1
2
3
4
5
6
7
8
9
Function
ADJUST CLOCK (hours) -adjust
ADJUST CLOCK (minutes) - adjust
12 / 24 HR CLOCK - adjust
TA LOCAL / TA DISTANT
ALT FREQ ON / OFF
RDS TIME ON / OFF
VOICETRAIN A (when fitted)
VOICETRAIN B (when fitted)
Vehicle identification number (VIN)
Security Code
The unit is protected by an anti-theft security code. Any power interruption will cause the display to
indicate ‘CODE’. At this point the unit will not operate until the correct security code has been entered.
The four digit security code is listed on the two security cards supplied with the vehicle. After three
unsuccessful attempts, the unit will not accept further entries until a delay of 30 minutes has elapsed.
Up to seven further attempts may be made, with a delay of 30 minutes between each, after which the
display will show ‘LOCKED’.
If the security code is lost or the display shows ‘LOCKED’ the owner will need to return the vehicle to
the Dealer. The Dealer must ask for proof of ownership and the serial number of the unit before
supplying a security code given by contacting Jaguar Cars Ltd. To display the serial number, press and
hold preset buttons two and six simultaneously.
The remaining controls are similar to those in previous Jaguar audio systems. For specific operation of all
the controls refer to the owner’s Audio Systems Handbook.
118
Electrical/Electronic
JAGUAR
S -TYPE
In-Car Telephone
Overview
For markets other than North America, the phone
system uses the Motorolar StarTAC 130 platform
on the GSM cellular transmission network. The
Motorola LCPC platform on the AMPS cellular
transmission network is used for the North
American market. The phone system is a cordless
portable and a hands-free installation. The
installation on the GSM cellular system is offered
as a factory fit option or Dealer fit aftermarket
accessory; on the AMPS cellular system it is
Dealer fit only.
For hands-free operation, the phone handset is
connected to the in-car installation. This provides
a directional microphone located on the
headlining (see page 124), an external aerial
mounted on the rear screen and connection to
the vehicle sound system.
CENTER STACK PHONE PRESENTER
The phone is operated by audio head unit
controls, the controls on the LH side of the
steering wheel (where fitted) or the handset. The
system includes an interface to the Voice
activation Control, where fitted. Messages relating
to the phone are shown on the sound system
display when the phone system is active. The
phone and ringer sound output can be adjusted
using the sound system volume control. For
specific operation of all the controls refer to the
Owner’s In-Car Telephone Handbook.
Unless the vehicle is fitted with the Jaguar
Navigation System, the portable is installed in the
center console storage compartment.
There are two dedicated locations for the phone
installation: in the Center Stack or the Center
Console Cubby Box depending on the optional
fitment of the Navigation System.
Center Stack - Without Navigation
The cassette stowage compartment in the Center
Stack is designed to be exchangeable with an
integral pop-out telephone presenter. The
presenter slides smoothly out and the phone
holder flips to an upright position.
J.415.039
StarTAC 130
Phone Presenter
AMPS Phone Presenter
J.415.039
119
JAGUAR
S -TYPE Electrical/Electronic
Center Console Cubby Box - With Navigation
Should the optional Navigation system be fitted in
the Centre Stack to occupy the telephone
presenter position, the phone installation location
is made in the Center Console Cubby Box. A hangup cup is mounted in the cubby box tray.
CENTER console PHONE INSTALLATION
AMPS Phone Installation
StarTAC 130
Phone Installation
J.415.040
SIM Card
The GSM phone is supplied with a Subscriber
Identity Module (SIM) card. A Personal Identity
Number (PIN) needs to be entered to make the
phone operable.
StarTAC 130 SIM CARD
SIM Card
JOL.149
SIM Card Holder
JOL.149
120
Cellular Telephone Control Module (CTCM)
The CTCM is mounted in the trunk and provides
for hands-free audio processing and battery
charging to the portable phone.
Electrical/Electronic
JAGUAR
S -TYPE
Phone System Pre-wire Permutations
Factory Condition
Non-Navigation
Navigation
Nav Pre-wire
N.America /
Rest of World
Europe
All Markets
All Markets
Build Condition
Phone pre-wire to
‘A’ post
Phone pre-wire to
Center Stack
Phone pre-wire to
Center Console
Phone pre-wire to
‘A’ post
Phone in Center
Stack
Dealer fit only using
link lead from A post
to Center Stack
Factory fit or Dealer
fit harness present
Not available
Dealer fit only using
link lead from
A post to Center Stack
Phone in Center
Console
Dealer fit only using
overlay harness from
CTCM to Center
Console
Dealer fit only using
overlay harness from
CTCM to Center
Console
Factory fit or Dealer
fit harness present
Dealer fit only using
overlay harness from
CTCM to Center
Console
121
JAGUAR
S -TYPE Electrical/Electronic
Navigation
General
The Jaguar Navigation system assists the driver by
providing a route to a selected destination. The
Navigation head unit, comprising a 5 inch
(130mm) full color screen and the control switch
NAVIGATION HEAD UNIT
1
2
3
8
1.
2.
3.
4.
7
6
LCD display
Function buttons (F1 to F4)
Information/ASSIST button
Off button
5
5.
6.
7.
8.
4
JOL.135
Zoom control
Map button
Enter button
Cursor control
How the System Works
The system uses signals from the Global
Positioning system (GPS) satellites, which enables
the Navigation ECU to calculate, with the aid of
CD ROM map data, ABS sensors’ signals and Gyro
sensor’s signals, the exact position of the vehicle
to within meters. After entering the desired
destination, the driver is guided along by both
voice and visual instructions. If the driver strays
off the route, the system calculates a new route
showing the easiest way back to the original
destination.
Voice Guidance
A chime and an audible instruction will be heard
just before the vehicle reaches the next junction
along the route where a turn has to be made.
SCREEN DISPLAY
4
3
2
5
1
6
JOL.178
1.
2.
3.
4.
5.
6.
122
assembly is designed as an integral unit of the
center stack. The Navigation Control Unit/CD Map
Loader is mounted in the rear LH side of the trunk
and covered by a dedicated styled trim panel (see
illustration on page 123). The GPS antenna is
located above the rear parcel shelf but hidden
underneath the interior trim.
Digital map information is held on a compact disk
(CD) which is loaded into the Navigation Control
Unit housed in the trunk.
The LCD provides full information for operating
the system by means of menus, text prompts and
map displays. Screen selections are made by the
controls on the front panel.
Destination information
GPS symbol
Map scale
Map heading symbol
Map position markers
Function buttons (F1 to F4)
Screen Guidance
The screen shows the map display with the
current vehicle position and route highlighted.
Just before each turn, the screen automatically
shows the next junction diagram (with turn
information) overlayed on the map display. After
the junction, the screen returns to full map
display.
Interfaces
The system also provides interfaces such as a TV
(Japan only), Vehicle Emergency message system
known as Jaguar ASSIST (North America only) and
Real Time Traffic Information (limited to certain
markets).
TV (Japan only)
The TV is a Dealer fit item and is displayed on the
Navigation screen. The sound is generated through
the vehicle’s audio system in mono only. TV
Electrical/Electronic
controls are incorporated into the Navigation
Head Unit, there is no remote control. Antennas
are integrated into the front and rear bumpers.
Harnesses for the TV are incorporated in all
Japanese vehicles.
Jaguar Assist (North America only)
Assist is an integrated vehicle emergency message
system (VEMS) that uses the Jaguar security
response center for emergency roadside
assistance via the Jaguar in-car telephone
installation. The global positioning system (GPS) is
used to identify the position, direction of travel
and speed of the vehicle. Access to the Assist
feature is through the use of the Navigation
system. The emergency assistance feature allows
rapid access to the emergency services (police,
fire or ambulance) and roadside assistance. Once
assistance has been requested and the vehicle
location confirmed, the appropriate services are
contacted for assistance to be dispatched. In the
unfortunate event of an airbag deployment, the
system will automatically place an emergency call.
Access to the system is gained by pressing the
information button on the Navigation front panel
screen (the ignition must be in position ‘I’ or ‘II’).
While in use, a sequence of messages is displayed
on the LCD.
Note: If an Assist call is initiated and the operator
cannot establish voice communication, police
assistance will be dispatched to the vehicle.
The system can be used wherever a cellular
phone service is available. The Jaguar phone must
be connected to the vehicle, working correctly
and registered with a cellular network. A roaming
airtime agreement is required so that the system
can be used in all areas.
Diagnostic Light
A diagnostic light is integrated into the
information (ASSIST) button. The diagnostic light
flashes throughout an activation but stays on
continuously when a failure is detected. A
message is given on the display: ‘A SSIST
FAILURE’. There are four potential failure modes:
1. No VEMS menu is displayed when the
information ASSIST button is pressed
2. No activation is performed when the enter
button is pressed to make a selection
JAGUAR
S -TYPE
NAVIGATION CONTROL UNIT/CD MAP LOADER
Quarter-turn Fastener
CD Load Cover
JOL.136
3.
4.
VEMS is unable to compute the location of
the vehicle’s current position
The Navigation system is unable to display
any VEMS messages or would display the
wrong VEMS messages.
Real Time Traffic Information (RTTI)
In the UK the provider for RTTI is ‘Trafficmaster’.
Information is collected from their own unique
network of infra-red road sensors which monitor
the average speed of traffic. This information is
sent by radio data link to Trafficmaster’s
operational headquarters. After processing and
editing the information, it is transmitted in real
time, in words and graphics to Trafficmaster
control modules installed in vehicles. RTTI will not
be available on early vehicles but could be Dealer
fitted retrospectively.
Other markets will use different traffic congestion
information services which will depend on market
infrastructure and service provider support. Japan
will use the ‘Vehicle Information and
Communications System’ (VICS).
123
JAGUAR
S -TYPE Electrical/Electronic
Voice Activation
General
Voice Activation, currently available in a limited
number of markets, provides a convenient way of
controlling the following vehicle systems (where
fitted):
•
•
•
Sound System (radio, cassette tape player and
CD player)
In-car Telephone
Climate Control System.
The system is controlled by the Voice button on
the left-hand side of the steering wheel. Voice
commands are picked up by a directional
microphone mounted on the headlining between
the overhead console and the sunvisor. The
microphone is also used for the in-car telephone.
When giving a command, audible feedback will be
heard through the sound system speakers and
messages will be shown on the message center
display. Audible feedback can be turned off if
required. The system is capable of storing unique
nametags for 20 radio stations and 40 phone
numbers. Verbal playback of nametag directories
is provided by issuing the proper voice command
(RADIO DIRECTORY or PHONE DIRECTORY).
VOICE ACTIVATION SYSTEM
1
2
Microphone
Message Center Display
Sound System
SpeakerVoice button
3
JOL.275
124
Language and Accent
Commands are given in English in a natural
speaking voice, without having to pause between
words. Most United kingdom accents (for vehicles
equipped with a UK Voice Module) or North
American accents (for vehicles equipped with a US
Voice Module) are understood without difficulty
but the system also provides for voice training, if
required. Voice feedback is given in UK English
(for vehicles equipped with a UK Voice Module) or
US English (for vehicles equipped with a US Voice
Module).
Voice Commands
Voice commands are generally in the form of:
• System, e.g. Radio
• Function, e.g. Tune
• Action Required, e.g. 99.7 (to select the
frequency).
Note:
1. Voice commands cannot be given while a
phone call is in progress.
2. While a voice command is being processed,
the command can be canceled by pressing the
Voice button again.
3. Audible feedback can be interrupted by
pressing the Voice button during the verbal
playback. In this case the command is not
canceled.
Command Help
There are commands available which give
spoken/visual help for the voice commands. This
provides a useful reminder of the commands
available while driving.
The commands are:
VOICE HELP; RADIO HELP; TAPE HELP; CD HELP;
PHONE HELP AND CLIMATE CONTROL HELP.
4
1.
2.
3.
4.
Personal directories of nametags for phone dialing
and radio station presets can be created and
spoken command help is provided.
Electrical/Electronic
JAGUAR
S -TYPE
Using the System
Initialization
When the ignition switch is turned to position ‘II’, the initialization of the system is carried out, which
takes a few seconds. When complete, the system is ready to accept voice commands. If the voice
button is pressed before initialization is complete, the message center display will show ‘VOICE NOT
READY’.
Audible Feedback, Confirmation & Prompts
For most voice commands, audible feedback of the command, as understood by the system, is available.
Audible feedback may be turned on or off by giving the VOICE FEEDBACK command.
For the phone dial commands, confirmation of the number, before it is dialed, may be turned on or off
by giving the PHONE FEEDBACK command. During some commands for voice training, the user is
prompted by the system to give the next item of information.
For specific operation of all the controls, refer to the Owner’s Voice Activation Handbook.
Voice Training
The Voice Activation System is able to interpret most English speakers without difficulty. If, however, it is
found that commands are sometimes not being recognized, the voice training procedure can be carried
out.
Voice Memories
The system has two memories (A and B) for storing the trained voices. The Voice Memory Directory
command provides an indication of the availability of the two voice memories (Full or Available).
Giving Commands after Training
After Voice training the system will automatically recognize a speaker whose voice is held in voice
memory. The system can still be used by other speakers with no loss of response.
Error Messages
In addition to the voice command prompts given by the system, the following error messages may be
encountered. The messages are shown on the message center with voice confirmation (error tone or
voice playback).
Message
Explanation
NO SPEECH DETECTED
The system did not detect any speech when the voice button
was pressed
NAME TAG TOO LONG
A nametag must not take longer than three seconds to say
NAME TAG NOT UNIQUE
The nametag (or similar sounding name) has already been
used
COMMAND NOT RECOGNIZED
The command was not recognized from the list of voice
commands
HANDBRAKE MUST BE ENGAGED
The handbrake must be applied for voice training
RADIO MUST BE IN TUNER MODE
The sound system must be in radio mode before giving the
Radio Store command
VOICE NOT READY
The voice button was pressed while the voice system was still
initializing
TOO MANY DIGITS
The phone number in a Phone Enter command was too long
125
JAGUAR
S -TYPE Electrical/Electronic
Reverse Park Control
General
The function of the Reverse Park Control (RPC) is
to provide an audible warning to the driver of the
distance to obstacles near the rear bumper of the
vehicle when reversing. The system operates
through four ultrasonic sensors that send out
beams covering the area behind the vehicle.
These beams are reflected by obstructions behind
the vehicle and re-enter the sensors. The reflected
beam information is processed by the reverse
park control module (RPCM) to calculate the
distance of the obstruction. The sounder is then
activated and gives the appropriate warning signal
starting from an intermittent beep (at
approximately 0.8 meters) up to the continuous
‘stop’ tone (at approximately 0.2 meters).
The sensors are fitted, equally spaced, across the
rear bumper. The system is activated when the
gear selector is moved to the reverse position
whilst the engine is running. It can be switched off
by pressing the switch in the overhead console. A
REVERSE PARK CONTROL COMPONENT LAYOUT
RPC Switch
RPC Speaker
RPC Module
RPC Sensor
J.419.027
126
Electrical/Electronic
JAGUAR
S -TYPE
red indicator light in the switch illuminates when
the system is switched off. It is reset every time
the ignition is cycled.
Should there be a failure in the system, the red
indicator light in the switch is constantly
illuminated and a fault code is logged in the
PACM.
The reversing aid comprises the following
components:
• Harness
• PACM located on the LH side of the spare
wheel well
• Speaker located under the trim on the rear
parcel shelf
• Four sensors located in the bumpers (see
page 13)
• Sensor holders located in the bumpers
127
JAGUAR
128
S -TYPE Notes