1
To Purchase This Item, Visit BMI Gaming | www.bmigaming.com | (800) 746-2255 | +1.561.391.7200
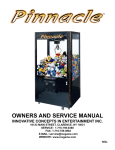
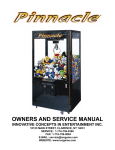
OWNERS AND SERVICE MANUAL
INNOVATIVE CONCEPTS IN ENTERTAINMENT INC.
10123 MAIN STREET, CLARENCE, NY 14031
SERVICE: 1-716-759-0360
FAX: 1-716-759-0884
E-MAIL: [email protected]
WEBSITE: icegame.com
To Purchase This Item, Visit BMI Gaming | www.bmigaming.com | (800) 746-2255 | +1.561.391.7200
TABLE OF CONTENTS
INTRODUCTION………………………………………...PAGE 3
•
•
GAME FEATURES
GAME PLAY
SET-UP / TESTING / MAINTENANCE………………..PAGE 4 –12
•
•
•
•
•
SAFETY PRECAUTIONS
GAME SET-UP
ASSEMBLY
TESTING
CLEANING
PROGRAMMING………………………………………..PAGE 13 –17
•
•
OPTION MODES
ERROR CODES
QUICK TROUBLESHOOTING…………………………PAGE 18 –19
•
PROBLEMS AND SOLUTIONS
GAME REPAIR…………………………………………..PAGE 20 –23
•
•
•
GLASS REPLACEMENT
MECHANICAL REPAIR
ELECTRICAL / ELECTRONIC REPAIR
PARTS LISTINGS……………………………………….PAGE 24
CRANE ASSEMBLY DIAGRAMS……………………...PAGE 25 –28
SCHEMATICS / WIRING DIAGRAMS………………...PAGE 29 –47
WARRANTY INFORMATION…………………………..PAGE 48
ICEDOC BC9001
REVISION A
3-27-02
To Purchase This Item, Visit BMI Gaming | www.bmigaming.com | (800) 746-2255 | +1.561.391.7200
INTRODUCTION
GAME FEATURES
Thank you for your purchase of the new PINNACLE
CRANE™ game from I.C.E.
The brand new PINNACLE CRANE™ all metal crane
game by I.C.E. was designed with the operator in
mind. Reliability, low maintenance, themed cabinetry
and all metal construction are the key design features,
exactly what is needed to ensure a combination of long
life and high profit.
With nearly the entire construction made of metal, it
was only natural to Powder Epoxy Coat everything,
inside and out. This provides the owner-operator with a
game that will certainly outlast its wooden counterparts
for many years to come. The major advantages of all
metal construction include:
− Vault like security
− Long service life
− Low maintenance
− High durability
All windows of the PINNACLE CRANE™, are 1/4”
tempered plate glass to provide an easy to clean,
maximum safety, scratch resistant surface. Other
features include: 41 strand conductor cables (to
prevent fatigue), a full range of operator adjustable
software and a newly designed crane mechanism.
The first step in I.C.E.’s new crane design was to
select several leading cranes available on the market
today, observe and determine what problems can be or
are causes of failure and costly down time. I.C.E. then
surveyed operators nation wide, requesting information
like:
− What are the leading causes of crane
failures in your locations
− What are some problems in servicing
cranes
− What changes would you make to current
cranes to create a better machine
I.C.E.’s engineers then compiled all critical data,
addressed and corrected each problem and used this
information to greate what we now call the PINNACLE
CRANE™.
This method of design ensures that the needs of the
owner-operators dictate the final design parameters,
for who knows a cranes attributes and faults better
than a crane operator.
GAME PLAY
As coins are inserted into the PINNACLE CRANE™ all
metal game, a “Ding” is heard for each coin inserted.
When sufficient coins have been inserted, the claws
click closed and then reopen, which signals the start of
the game. The crane will then position itself in the
middle of the “play field*” and remain there, until the
player is ready.
When the player has moved the joystick or pressed the
buttons to move the crane, the timer on the right
display will begin to count down. The player will then
position the crane above the prize they are attempting
to win and press the drop button to lower the claw.
If the nudging option is on, then the player will have the
ability to keep “nudging” the claw each time the button
is pressed to home in on the chosen prize. If the
nudging option is off, then the player will have only one
chance to drop the claw.
When the claw has fully dropped, it will close and
retract to its uppermost position. The crane will then
automatically position itself over the prize chute at the
rear of the cabinet. The claw will then open, releasing
the prize into the prize chamber. The player can now
remove the prize from the chamber through the prize
door located in the front, lower left corner of the game.
The game is now at its home position and is ready for
the next player in line.
To Purchase This Item, Visit BMI Gaming | www.bmigaming.com | (800) 746-2255 | +1.561.391.7200
SETUP / TESTING / MAINTENANCE
BEFORE YOU BEGIN
IMPORTANT: FAILURE TO FOLLOW THESE
DIRECTIONS CLOSELY COULD CAUSE SERIOUS
DAMAGE TO YOU AND/OR YOUR GAME.
WARNING: WHEN INSTALLING THIS GAME,
A 3 PRONG GROUNDED A.C. RECEPTACLE
MUST BE USED. FAILURE TO DO SO COULD
RESULT IN INJURY TO YOURSELF OR OTHERS.
FAILURE TO USE A GROUNDED RECEPTACLE
COULD ALSO CAUSE IMPROPER GAME
OPERATION, AND / OR DAMAGE TO THE
ELECTRONICS
DO NOT DEFEAT OR REMOVE THE GROUNDING
PRONG ON THE POWER CORD FOR THE SAME
REASON AS GIVEN ABOVE. USING AN
IMPROPERLY GROUNDED GAME COULD VOID
YOUR WARRANTY.
HAVE A QUALIFIED ELECTRICIAN CHECK YOUR
A.C. RECEPTACLE TO BE SURE THE GROUND
IS FUNCTIONING PROPERLY.
TESTING
After the initial setup, it is time to test your game for
proper operation.
1. Locate the game in its permanent location and lock
the casters.
2. Be sure that the game has been properly plugged into
a three prong grounded outlet and that the receptacle
is in good working order.
3. If using an extension cord, be sure it is a three prong
grounded type of at least 16 Ga.
4. Verify that the game is set up for the proper voltage
and turn the power to the game on.
5. The game will run through a test mode at every start
up. See test mode explanation in the programming
section for details.
6. Insert coins/bills at least ten times into the coin mech/
bill acceptor to assure proper operation.
7. Check the credit and prize counters for proper operation.
8. Check that the door disconnect switch works properly.
GAME SET-UP
BEFORE PLUGGING THE GAME IN OR TURNING
IT ON, BE SURE THE GAME HAS BEEN SET TO
THE PROPER VOLTAGE.
9. Check game volume during busy time at location to
set it at the proper level.
CLEANING
Regular cleaning of the game will keep it looking new and
greatly enhance its appeal.
ASSEMBLY INSTRUCTIONS
1. Carefully unbox the game from its packaging.
2. Using the supplied keys, unlock the front door of cabinet.
3. Cut all tie wraps holding the wagon assembly and
crane assembly in place.
4. Plug the game into a three prong grounded receptacle. NOTE: The appliance must be positioned such
that the plug is accessible during use.
5. The game is now ready for start up.
Clean the windows of your PINNACLE CRANE™ with a
standard window cleaner such as Windex®
Clean the cabinet sides with a good cleaner such as
“Fantastik” or “409” and a soft rag. A mild soapy solution
can also be used.
NOTE: DO NOT USE ALCOHOL, THINNERS OF
ANY KIND OR PINBALL PLAYFIELD CLEANERS
ON ANY OF THE CABINET SURFACES,
ESPECIALLY THE DECALS.
IF YOU HAVE ANY QUESTIONS OR COMMENTS
REGARDING INSTALLATION OR PROPER
FUNCTION OF YOUR GAME, PLEASE CALL OUR
SERVICE DEPARTMENT AT 1-716-759-0360
To Purchase This Item, Visit BMI Gaming | www.bmigaming.com | (800) 746-2255 | +1.561.391.7200
SETUP / TESTING / MAINTENANCE
MANUAL SETTING
Initial adjustment tips
−
It is important to know that a mechanical adjustment is considered a “Macro adjustment” or a large adjustment, and that a software adjustment is considered a “Micro adjustment” or a fine adjustment.
−
NOTE: These adjustments need only be performed when setting up the crane for the first time or when
major changes to plush size and/or shape occur. Once a configuration is determined for your particular
requirements, the same configuration in another CRANE GAME may require only minor adjustments.
−
It is advisable that you position your plush such that the “Eyes” are facing forward and looking at your potential customers.
−
To maintain proper payout in either Manual mode or Skill leveling mode, ALL plush in the crane should be
of similar size, shape and weight. DO NOT attempt to use 6” plush with 14” plush in the same crane as
you are likely to have very different payout % from week to week which requires constant monitoring and
adjusting.
−
Set option 0 (Game mode) for game type you desire.
−
Set option 3 (Game cost) for you particular game.
−
For the following tests, make sure that option 9 (Skill leveling strength) is set to 00. Any setting other than
00 and Skill leveling is enabled and incorrect results may occur.
−
Make sure that the claw tips, when closed, are just touching. DO NOT allow them to overlap, for the claw
could mechanically bind, causing down time.
−
CHECK IF YOU HAVE THE CORRECT CLAW SHAPE. Assuming you have a medium claw, standard on
most cranes, set option 8 to 40, 9 to 00 and play the game approximately 25 times. At this level, you
should have difficulty picking up plush.
−
If you are able to pick up plush rather easy, you have the wrong claw shape or size and should go
to the end of this section and see CLAW SHAPE.
−
If you are unable to pick up plush, then set option 8 to 99 and play 25 games. You should now be
able to pick up plush fairly consistently. If this is true, continue on to the next step. NOTE: When
the game is first packed, it is often difficult to pick up plush until an area is cleared to maneuver in.
Take this in to account while determining if the claw size or shape is correct.
−
Initially set option 8 (Manual strength) based on your plush size, such that the claw is just able to hold the
plush when closed. If you are unsure, a good starting point for option 8 is 60 for average size plush and
our standard medium claw. NOTE: When in programming mode at option 8, the claw will begin the open
and close at approximately 5 second intervals. The operator can then associate the claw strength number
on the right display with an actual “physical” claw strength at the claw.
−
Knowing the cost of a game, the average cost of a piece of plush and the desired payout %, calculate the
proper plush dispensing intervals for your setup, using the following formula:
To Purchase This Item, Visit BMI Gaming | www.bmigaming.com | (800) 746-2255 | +1.561.391.7200
SETUP / TESTING / MAINTENANCE
Calculation Option 1
1) 100 * (Game cost)
= A (# of dollars received for 100 games)
2) A * (Desired payout %)
= B (# of dollars worth of plush that should be dispensed in 100 games)
3) B / (Cost of plush)
= C (# of pieces of plush that should be dispensed in 100 games)
4) 100 / C
= Y (Proper plush dispensing intervals)
OR
Calculation Option 2
1) (Plush Cost) / (Game Cost)
= X (# of games required to pay for one piece of plush)
2) (X) / (Desired Payout %)
= Y (Proper plush dispensing interval)
EXAMPLE
Game cost
Avg. cost of 1 plush
Desired payout %
= $0.50
= $2.00
= 33%
Example Calculation Option 1
1) 100 * ($0.50)
= $50
2) $50 * (.33)
= $16.5 worth of plush in 100 games to give a 33% payout
3) $16.5 / ($2.00)
= 8.25 pieces of plush per 100 games to give a 33% payout
4) 100 / (8.25)
= 12.12 round off to 12.
OR
Example Calculation Option 2
1) $2.00 / ($0.50)
=4
2) (4) / (.33)
= 12.12 round off to 12
NOTE: This means that for approximately every 12th game played, 1 piece of plush should be won.
To Purchase This Item, Visit BMI Gaming | www.bmigaming.com | (800) 746-2255 | +1.561.391.7200
SETUP / TESTING / MAINTENANCE
Armed with the information particular to your game (Proper plush dispensing intervals determined above) play at
least 50 games and see if the correct number of plush have been dispensed. (For the example above, in 50 games
you should have dispensed approximately 4 pieces of plush. (Every 12.12 games) NOTE: The more games you
play during the “TEST”, the more accurate your accounting will be). When 50 games have been played, calculate
the payout % using the formula below:
1) (# of plush dispensed) * (Cost of 1 pc. of plush)
(# of games played) * (Cost of game)
= Payout %
EXAMPLE
Cost of a game
Cost of 1 pc. of plush
# of plush dispensed
# of games played
(55)* ($2.00)
(423 * ($0.50)
= $0.50
= $2.00
= 55
= 423
= 52
=52% payout
If the calculated payout is very high, your desired payout + 10% or more, it will be necessary to make a macro
adjustment or move the claw tips apart slightly by loosening the three screws holding the claw slider to the
coil housing and moving the claw slider up slightly. (See Fig. 1) NOTE: MOVING THE CLAW SLIDER 1/8th
OF AN INCH COULD CHANGE YOUR PAYOUT BY AS MUCH AS 40%. BE SURE TO MOVE THE SLIDER
IN VERY SMALL INCREMENTS SO AS NOT TO OVERSHOOT YOUR DESIRED PAYOUT.
If the calculated payout is slightly high, your desired payout + less than 10%, then you can make a
micro adjustment or software claw strength adjustment at Option 8.
Conversely, if the calculated payout is very low or slightly low, you will need to make a macro or micro
adjustment accordingly.
Repeat the 50 games test and calculate the Payout %. Repeat the mechanical adjustment until you
are within 10% of your desired payout. You can now enter the programming mode and adjust Option 8
(Mechanical strength) up or down slightly to achieve your desired payout. Your game is now set up according
to your Desired Payout, Game Cost and Plush Cost.
If after using the initial adjustment tips above, you are still having difficulty in setting up your game, please call
the I.C.E. service line at 1-716-759-0360.
To Purchase This Item, Visit BMI Gaming | www.bmigaming.com | (800) 746-2255 | +1.561.391.7200
SETUP / TESTING / MAINTENANCE
SKILL LEVELING SETTINGS
Initial adjustment tips
−
Before setting up Skill leveling, it is highly advisable to set up manual percentaging. This is a precaution in
the unlikely event that the prize sensor fails or error code 10 or 11 is logged. If either one of these situations occurs, the game will AUTOMATICALLY revert to manual percentaging settings, allowing the game
to still function until the error is corrected. If your manual settings are not set up, it may be possible to dispense too much plush resulting in a loss of revenue for that week, or dispensing too little plush, causing
your customers to feel as though they can not win, which will eventually result in a loss of play and revenue.
−
It is important to know that a mechanical adjustment is considered a “Macro adjustment” or a large adjustment, and that a software adjustment is considered a “Micro adjustment” or a fine adjustment.
−
SPECIAL NOTE: When using Skill leveling, you will be required to reset the computer memory once a
week. This is done to clear computer memory of “portions” of plush that were to be dispensed and have
not been OR “portions of plush that have not been dispensed and should not have been. Since we are
human, we think of plush as whole entities. The computer has the ability to track plush as pieces or fractions of pieces. For example: If we want a 34% payout based on $2.00 average cost plush and $0.50
game play, we want APPROXIMATELY 1 piece of plush dispensed every 12 games. The actual number
is 1 piece of plush for every 11.7647 games. The computer from week to week may have a bunch of the
little pieces of plush that it did not give away and will eventually add up and hit the limit of 8 pieces not dispensed and take you out of Skill leveling Mode. Often this confuses an operator since the game worked
very well for several weeks or even longer, but then kicked into Manual Mode and gave them an Error 11.
To prevent this, it is HIGHLY suggested you reset the computer once a week using the following procedure:
Once a week, or after a minimum of 500 games, enter the programming mode and change the % payout
number up by one number and exit programming mode. The following week, enter the programming mode
and change the % payout number down by one number. Example: Week one, the % payout number = 33.
Week two, change % payout to 34. Week three, change % payout number back to 33, etc. Using % payout
will have the smallest change on payout yet it will reset memory and keep things working as intended.
−
NOTE: These adjustments need only be performed when setting up the crane for the first time or when
major changes to plush size and / or shape occur. Once a configuration is determined for your particular
requirements, the same configuration in another CRANE GAME may require only minor adjustments.
−
It is advisable that you position your plush such that all “Eyes” are facing forward and looking at your potential customers.
−
To maintain proper payout in either Manual Mode or Skill leveling Mode, ALL plush in the crane should be
of similar size, shape and weight. DO NOT attempt to use 6” plush with 14” plush in the same crane as
you are likely to have very different payout % from week to week which requires constant monitoring and
adjusting.
−
Set Option 0 (Game mode) for game type you desire
−
Set Option 3 (Game cost) for your particular game.
−
Make sure that the claw tips, when closed, are just touching.
−
To check if you have the correct claw shape, set Option 8 to 50, Option 9 to 00 and play the game approximately 25 times. At this level, you should have difficulty picking up plush.
To Purchase This Item, Visit BMI Gaming | www.bmigaming.com | (800) 746-2255 | +1.561.391.7200
SETUP / TESTING / MAINTENANCE
−
−
If you are able to pick up plush, you have the wrong claw shape or size and should go to the end of this
section and see CLAW SHAPE
If you are unable to pick up plush, then set Option 8 to 99 and play 25 games. You should now be able
to pick up plush fairly consistently. If this is true, continue on to the next step. NOTE: When the game is
first packed, it is often difficult to pick up plush until an area is cleared to maneuver in. Take this into
account while determining if the claw size or shape is correct.
−
Make sure Option 8 (Manual strength) is et up as detailed above before setting up Skill leveling.
−
Determine the proper Minimum Claw Strength by setting Option to 9 initially to 60 on the right display. Notice
that the claw is opening and closing on a 5 second interval. Hold an average size piece of plush in the claw as
it closes and note whether it has enough claw strength to hold the plush. Repeat this procedure until you find
the breaking point where the claw will hold the piece of plush but if you lower the strength of the claw by 1 or 2
points, the claw will no longer be able to old the plush. This will be the number you want to use as your Skill
leveling strength (Option 9). It will allow a skilled player to move plush around and have the ability to win at any
time, yet requires a skilled player to win easily.
−
Set Option 16 (Plush cost) based on the cost of your plush.
−
Set Option 17 (Desired payout %) based on your desired payout.
−
Knowing the cost of a game, cost a piece of plush and the desired payout %, calculate the proper plush dispensing intervals using the following formula:
Calculation Option 1
1) 100 * (Game cost)
= A (# of dollars received for 100 games)
2) A * (Desire payout %)
3) B / (Cost of plush)
= B (# of dollars worth of plush that should have been dispensed in 100
games)
= C (# of pieces of plush that should be dispensed in 100 games)
4) 100 / C
= Y (Proper plush dispensing intervals)
OR
Calculation Option 2
1) (Plush Cost) / (Game cost)
= X (# of games required to pay for one piece of plush)
2) (X) / (Desired payout %)
= Y (Proper plush dispensing interval)
EXAMPLE
Game cost
Avg. cost of 1 plush
Desired payout %
= $0.50
= $2.00
= 33%
Example Calculation Option 1
1) 100 * ($0.50)
= $50
2) $50 * (.33)
= $16.5 worth of plush in 100 games to give a 33% payout
3) $16.5 / ($2.00)
= 8.25 pieces of plush per 100 games to give a 33% payout
4) 100 / (8.25)
= 12.12 round off to 12
OR
To Purchase This Item, Visit BMI Gaming | www.bmigaming.com | (800) 746-2255 | +1.561.391.7200
SETUP / TESTING / MAINTENANCE
Example Calculation Option 2
1) $2.00 / ($0.50)
=4
2) (4) / (.33)
= 12.12 round off to 12
NOTE: This means that for approximately every 12th game played, 1 piece of plush should be won.
Armed with the information particular to your game (Proper plush dispensing interval determined above) play
at least 50 games and see if the correct number of plush have been dispensed. (For the example above, in
50 games you should have dispensed approximately 4 pieces of plush. (Every 12.12 games) NOTE: The
more games you play during the “TEST”, the more accurate your accounting will be). When 50 games have
been played, calculate the payout % using the formula below:
1) (# of plush dispensed) * (Cost of 1 pc. Of plush)
(# of games played) * (Cost of game)
= Payout %
EXAMPLE
Cost of a game
Cost of 1 pc. Of plush
# of plush dispensed
# of games played
(56) * ($2.00)
(423 * ($0.50)
=$0.50
= $2.00
= 55
= 423
= 52
= 52% payout
If the calculated payout is very high, your desired payout + 10% or more, it will be necessary to make a macro
adjustment or move the claw tips apart lightly by loosening the three screws holding the claw slider to the coil
housing and moving the claw slider up slightly. (See Fig. 1) NOTE: MOVING THE CLAW SLIDER 1/8TH OF
AN INCH COULD CHANGE YOUR PAYOUT BY AS MUCH AS 40%. BE SURE TO MOVE THE SLIDER IN
VERY SMALL INCREMENTS SO AS NOT TO OVERSHOOT YOUR DESIRED PAYOUT.
If the calculated payout is slightly high, your desired payout + less than 10%, then you can make a
micro adjustment or software claw strength adjustment at Option 8.
Conversely, if the calculated payout is very low or slightly low, you will need to make a macro or micro
adjustment accordingly.
Repeat the 50 games test and calculate the Payout %. Repeat the mechanical adjustment until you
are within approximately 5 - 10% of your desired payout. You can now enter the programming mode and adjust Option 9 (Skill leveling strength) up or down slightly to achieve your desired payout. Your game is now
set up according to your Desired Payout, Game Cost and Plush Cost. If at a later date you want to change
your game cost, desired payout, plush cost, etc., it is NOT necessary to re-adjust your game manually. Just
adjust the value option you wish to change in the PROGRAMMING SECTION. The game will adjust to your
new configuration.
If after using the initial adjustment tips above, you are still having difficulty in setting up your game, please call
the I.C.E. service line at 1-716-759-0360.
To Purchase This Item, Visit BMI Gaming | www.bmigaming.com | (800) 746-2255 | +1.561.391.7200
SETUP / TESTING / MAINTENANCE
CLAW SHAPE
In an attempt to satisfy all variables associated with proper payout, I.C.E. has opted to include directions on
how to reshape your medium claw for a lesser and greater mechanical advantage. On the following page are
two medium claw shapes which will give very different mechanical advantages and ultimately very different
claw strengths.
−
When Option 8 is set to 50, and you are still picking up plush, then you will need to reshape your 3
claws to look more like shape “A”. (SEE FIG. 2) NOTE: Be sure to align holes in claw with drawn
holes on the template. This will assure proper shaping of the claw.
−
When Option 8 is set to 99, and you are unable to pick up plush consistently, then you will need to
reshape your 3 claws to look more like shape “B”. (SEE FIG. 2) NOTE: Be sure to align holes in
claw with drawn holes on the template. This will assure proper shaping of the claw.
These are two claw shapes that I.C.E. has proven to work well, although there are many other shapes that
may work. You will need to remove the claws from the claw mechanism by following the steps listed below.
1) Remove the claw mechanism from the coil housing by loosening the three screws on the coil slider
and removing. Be sure not to lose the small spring around the plunger and the black Rynite
washer below the spring. These two parts are critical in the proper operation of the crane mechanism. (SEE FIG. 1)
2) Loosen and remove the six small Phillips head machine screws and Nylock nuts attaching the
three claws to the coil-claw interconnect and coil spider. (SEE FIG.1)
3) Reshape the claws according o the CLAW SHAPE Templates “A” or “B”.
4) Re-assemble in reverse order. Make sure NOT to over tighten the Nylock nuts attaching the claws
to the mechanism, as this would cause binding.
Now that you have reshaped your claws for your plush, return to the beginning of Adjustment tips and proceed through each step.
FIG. 1
To Purchase This Item, Visit BMI Gaming | www.bmigaming.com | (800) 746-2255 | +1.561.391.7200
CLAW
TEMPLATES
DRAWING
To Purchase This Item, Visit BMI Gaming | www.bmigaming.com | (800) 746-2255 | +1.561.391.7200
PROGRAMMING
MODE
DESCRIPTION
(Credit Display)
MIN / MAX / DEF
MEANING
(Timer Display)
BASIC PROGRAMMING
0
Game Type
0, 4, 0
0—Left, Right, Forward, Backward, Nudge
1—Left, Right, Forward, Backward, Drop
2—Right, Forward, Nudge
3—Right, Forward, Drop
4—Single, Move Drop
1
Game Mode
0, 1, 0
0—Normal Play
1—Play till you win
2
Time
10, 60, 20
10—60 Seconds (Inc. every 5 seconds)
3
Coin
0, 9, 2
0—Free Play
1—9 Coins required for a single credit
4
Bill
0, 9, 4
0—Off
1—9 Number of coins each bill is worth
5
Counter Type
0, 1, 0
0—Credit counter
1—Coin counter
6
Attract
0, 30, 20
0—30 Minutes between attract modes
0—Off
7
Attract Type
1, 2, 2
1—Motion only
2—Audio and motion
8
Manual Strength
60, 99, 60
60—99 Claw strength Inc. by 1 (99= MAX)
ADVANCED PROGRAMMING
9
Skill Leveling Strength
0, 99, 0
0—Skill leveling off
40—99 Claw strength in skill (99 = MAX)
10
F / B Speed
10, 20, 20
10 = Low speed
20 = High speed
11
L / R Speed
10, 20, 20
10 = Low speed
20 = High speed
12
Up Speed
15, 20, 20
10 = Low speed
20 = High speed
13
Down Speed
15, 20, 20
10 = Low speed
20 = High speed
14
Right Time
0, 40, 8
0—40 Number of 1/4 sec. time intervals right
15
Forward Time
0, 40, 5
0—40 Number of 1/4 sec. time intervals forward
16
Plush Cost
1, 20, 4
Coins per piece of plush
17
Payout
20, 50, 33
20—50 Desired payout percentage
18
Tickets to Play
0, 99, 0
0—99 tickets to be paid just to play game
19
Tickets if Lose
0, 99, 0
0—99 tickets to be paid if you do not win plush
20
Factory Default
0, 1, 0
0—Normal
1—Restore factory defaults upon next startup
21
Center On / Off
0, 1, 0
0—Center option off
1—Center option on
22
Snap On / Off
0, 1, 1
0—Snap option off
1—Snap option on
23
Up / Down Motor Test
DIAG.
Right display changes: 0—1 Up switch is made
0—2 Down switch is made
0—3 Both switches are made
24
Left / Right Motor Test
DIAG.
Right display changes: 0—1 Left switch is made
25
Front / Back Motor Test
DIAG.
13
Right display changes: 0—1 Back switch is made
To Purchase This Item, Visit BMI Gaming | www.bmigaming.com | (800) 746-2255 | +1.561.391.7200
PROGRAMMING
Mode Explanations
0. GAME TYPE—There are 5 game types:
− 0 Left, Right, Forward, Backward, Nudge—This mode is for a control panel that commonly has
a joystick and allows the player to lower the claw each time the drop button is pressed. This
allows the player to hone in on the prize they are attempting to win. NOTE: The crane will position itself according to the operator presets, options 14 and 15, at coin up if Option 21 is set
to “0” (Off). The crane head will position itself according to the operator presets, options 14
and 15, at the end of the game if Option 21 is set to “1” (On).
− 1 Left, Right, Forward, Backward, Drop—This mode is for a control panel that commonly has a
joystick and the claw drops fully when the drop button is pressed. NOTE: The crane will position itself according to the operator presets, options 14 and 15, at coin up if Option 21 is set to
“0” (Off). The crane head will position itself according to the operator presets, options 14 and
15, at the d of the game if Option 21 is set to “1” (On).
− 2 Right Forward Nudge—This mode is for a control panel that commonly has 3 buttons, one to
move right, one to move forward and one to drop the claw. The player also has the ability to
lower the claw each time the drop button is pressed. This allows the player to hone in on the
prize they are attempting to win. NOTE: Option 21 is not available with this mode and will remain at “0” (off).
− 3 Right, Forward, Drop—This mode is for a control panel that commonly has 3 buttons, one to
move right, one to move forward and one to drop the claw. The claw drops fully when the drop
button is pressed. NOTE: Option 21 is not available with this mode and will remain at “0” (off).
− 4 Single Move Drop—This mode is for a control panel with two buttons only, one to move forward and one to move right. At coin up, the crane will remain over the prize chute to give the
player full access to the playfield. The player will have a chance to move the crane once forward and once to the right, after which the claw will automatically drop.
1. GAME MODE—There are 2 game modes:
− Normal play—This is the standard type of play where a player has inserted enough coins to
create 1 credit and then plays the game. Whether the player wins a prize or not, the game is
over.
− Play till win—In this mode, the player has inserted enough coins to create 1 credit and will be
able to play the game until they win a prize.
2. TIME—This option allows the operator to set the game play length. Options are from 10 seconds
to 60 seconds in 5 second intervals.
3. COIN—This option allows the operator to set the number of coins needed to create 1 credit. A setting
of “0” will put the game into free play.
4. BILL—This option allows the operator to set the number of coins each bill is worth. A setting of “0”
turns this option off.
5. COUNTER TYPE—Setting this option to “0” will have the game count credits on the mechanical and
software counters. Setting this option to “1” will have the game count coins.
6. ATTRACT—This option allows the operator to set the number of minutes between attract modes.
Available settings are from 0 minute to 30 minutes in 1 minute intervals. A setting of “0” turns
off the attract mode.
7. ATTRACT TYPE—This option allows the operator to choose what type of attract mode they want.
- “1” will have an attract mode with movement only.
- “2” will have an attract mode with both audio and movement.
To Purchase This Item, Visit BMI Gaming | www.bmigaming.com | (800) 746-2255 | +1.561.391.7200
PROGRAMMING
8. MANUAL STRENGTH—This option allows the operator to set the strength of the claw for manual
percentaging. Available claw strengths are 40— 99 with 99 = 100% claw strength. NOTE:
When in this mode, the claw will open and close with the strength set in this mode. The
operator will be able to feel each strength setting to determine which best suits their needs.
When the correct strength setting is determined, the operator can just move to the next
option, and the manual strength option is set.
9. SKILL LEVELING—This option allows the operator to set the claw strength for the skill leveling
mode. Available claw strengths are 40—99 = 100% claw strength. NOTE: When in the
auto skill leveling mode, the claw will, at bottoming, close with 100% strength and will
then be backed off to the number set in this mode. i.e. With this mode set to 75, the claw
will, at bottoming, close with 100% strength then back off to 75. NOTE: The claw will open
and close allowing the operator to feel each strength setting to determine which best suits
their needs. When the correct setting is determined, the operator can just move to the next
option and the skill leveling option is set.
10. F / B SPEED—This option allows the operator to adjust the forward / backward speed of the crane.
The available speeds are 10—20 with 10 being slow and 20 being fast.
11. L / R SPEED—This option allows the operator to adjust the left / right speed of the wagon. The
available speeds are 10—20 with 10 being slow and 20 being fast.
12. UP SPEED—This option allows the operator to adjust the up speed of the crane. The available
speeds are 15—20 with 15 being slow and 20 being fast.
13. DOWN SPEED—This option allows the operator to adjust the down speed of the crane. The
available speeds are 15—20 with 15 being slow and 20 being fast.
14. RIGHT TIME—This option allows the operator to adjust the time the right drive motor will stay on, for
centering purposes at game start up. Available time settings are 0—40 intervals of 1/4 sec.
EXAMPLE: If this option is set at 5, then at coin up the right drive motor will stay on for
(5 * 1/4 sec. = 1 1/4 sec.) 1 1/4 sec. This option is used to correctly center the crane at
coin up in different size cranes. An operator can also use this option along with Option 21,
to adjust the position of the crane head when the game is over.
15. FORWARD TIME—This option allows the operator to adjust the time the forward drive motor will stay
on, for centering purposes, at game start up. Available time settings are 0—40 intervals of
1/4 sec. EXAMPLE: If this option is set at 5, then at coin up the forward drive motor will
stay on for (5 * 1/4 sec. = 1 1/4 sec.) 1 1/4 sec. This option is used to correctly center the
crane at coin up in different size cranes. An operator can also use this option along with
Option 21, to adjust the position of the crane head when the game is over.
16. PLUSH COST—The operator will use this option to detail the cost of an average piece of plush used
in their crane, in terms of the lowest denominator coin the game will accept.
EXAMPLE: If the average cost of a piece of plush is $1.50, and the lowest denominator
coin used to coin up the game is $0.25, then the number entered for this option will be 6.
($1.50/$0.25 = 6) The available plush costs for this option are 1—20.
17. DESIRED PAYOUT—The operator will input the desired payout for the skill leveling mode. The
available percentages for this option are 20% - 50%.
To Purchase This Item, Visit BMI Gaming | www.bmigaming.com | (800) 746-2255 | +1.561.391.7200
PROGRAMMING
18. TICKETS TO PLAY— This option is only used if you have a ticket dispenser. In this option, the
operator has the ability to set the number of tickets that a player will be awarded just for
playing the game. The available range is 0 - 99 tickets.
19. TICKETS IF LOSE—This option is only used if you have a ticket dispenser. In this option, the
operator has the ability to set the number of tickets a player will be awarded when a piece
of plush is not won. The available range for this option is 0 - 99 tickets.
20. FACTORY DEFAULTS—A setting of “0” for this option will keep the latest operator settings. A setting
of “1” for this option will restore all options to factory defaults.
21. CENTERING—This option allows the operator to position the crane head any where on the play field.
If Option 21 is set to “0” (Off) the crane head will position it at the beginning of the game
according to the operator presets in Options 14 and 15. If Option 21 is set to “1” (On) the
crane head will position itself at the end of the game according to the operator presets in
Options 14 and 15.
22. SNAP—This option allows the operator to turn on and off the snap of the claws at the start of a
game. If Option 22 is set to “0” (Off), the claws will not snap together at the start of the
game. If Option 22 is set to “1” (On), the claws will snap together at the start of a game.
23. UP / DOWN MOTOR TEST—When the operator moves the joystick left and right, the claw will raise
and lower respectively. The right display will change from: 0—1 If the up switch is made
0—2 If the down switch is made
0—3 If both switches are made
24. LEFT/ RIGHT MOTOR TEST—When the joystick is moved left and right, the wagon assembly will
move to the left and right. The right display will change from: 0—1 If the left home switch is
made
25. FRONT / BACK MOTOR TEST—When the joystick is moved left and right, the crane assembly will
move forward and backwards. The right display will change from: 0—1 If the back home
switch is made
Entering the Programming Mode
To enter the programming mode, open the front door and press the button marked PROG, located near
the main board, and the crane will move to the front center of the game. NOTE: The game WILL NOT go
into the programming mode if the door is “closed”, or the door switch has been pulled to its outer most
position. Once you are in the programming mode, move the joystick forward and backward to move
through the modes. To change the value of the mode, move the joystick left and right. Once all options
have been set, press the drop button and the game will return to regular game play with the new settings.
Entering the Accounting Mode
To enter the accounting mode, unlock and open the front door and press the button marked ACCOUNT,
located near the main board. The left displays will flash between “cr” (Credits) then the number of credits
1 - 9999. If the operator presses the drop button, the displays will flash “pl” (Plush) then the number of
plush that has passed through the sensor. These numbers can never be reset and WILL NOT match the
numbers on the mechanical counters from the counters. It is advisable that the owner note this difference
so that they will be able to track actual software coins / credits and plush out vs. the mechanical counters
for accounting purposes.
To Purchase This Item, Visit BMI Gaming | www.bmigaming.com | (800) 746-2255 | +1.561.391.7200
PROGRAMMING
Test Mode Explanation
Every time that the game is powered up, the door is closed or exiting programming mode, the game will run
through a test mode to check the following items:
- HOME BACK SWITCH
- FRONT / BACK MOTOR
- PRIZE SENSOR
- HOME LEFT SWITCH
- LEFT / RIGHT MOTOR
- OUT OF RANGE
- UP SWITCH
- CREDIT / COIN DISCONNECT
- E² (MEMORY)
- DOWN SWITCH
- CLAW CLOSE, CLAW OPEN
If any of the above items are malfunctioning, the game will light up the 4 decimal points on the podium displays. This will alert the operator that there has been a problem. The operator needs only unlock and open
the front door and the error codes will be displayed one at a time on the left display. To move to the next error
code, the operator needs to press the drop button. Repairs should be made to those areas in which errors
have been logged. When all codes have been seen, and the door is closed, the game will reset the error
codes, run through a test mode to check for proper operation and if all is well, game play can start. If not, the
4 decimals will once again light up and the operator will need to check the error codes again. Game play can
continue to the best of the machine’s abilities, with problems, until the errors are corrected. At no time should
the game be inoperable unless a key component is damaged.
Error code 10 / 11 will alert the operator that the game has paid out 8 too many or 8 too little pieces of plush
when in skill leveling. If this error is logged, the game will automatically revert to MANUAL settings until one of
the following options has been changed. (COST OF PLUSH, SKILL % MIN., % PAYOUT, OR GAME COST)
This is why it is imperative that the manual setting be setup before skill leveling is used.
NOTE: Changing one of these options will reset error code 10 / 11 and the game will begin skill leveling with
the new settings.
NOTE: Some items on the list can not be detected by the game and require that the operator watches for
these actions to be performed during the start up test mode. (Claw close, Claw open)
Error Codes
#
Problem
Solution
1
E² (Memory)
Replace Microprocessor
2
Prize Sensor
Check / Replace Prize Sensor
3
Up Sensor
Check / Replace Up Sensor
4
Down Sensor
Check / Replace Down Sensor
5
Left / Right Sensor
Check / Replace L /R Sensor
6
Front / Back Sensor
Check / Replace F /B Sensor
7
Front / Back Motor
Check / Replace F / B Motor
8
Left / Right Motor
Check / Replace L / R Motor
9
Counter Disconnect
Just a warning that the credit / coin
counters were disconnected at some time.
10
Out Of Range (High)
Change setting for the Cost of Plush,
Skill leveling Min, % Payout or Game Cost
11
Out Of Range (Low)
Change setting for the Cost of Plush,
Skill leveling Min, % Payout or Game Cost
To Purchase This Item, Visit BMI Gaming | www.bmigaming.com | (800) 746-2255 | +1.561.391.7200
QUICK TROUBLESHOOTING
PROBLEM
PROBABLE CAUSE
SOLUTION
THE DECIMALS ON THE 4
DISPLAYS ARE LIT UP
THIS IS IN FACT NOT A PROBLEM BUT A WAY
OF LETTING THE OPERATOR KNOW THAT
THERE WAS A PROBLEM DURING THE START
UP MODE
OPEN THE FRONT DOOR AND THE
ERROR CODES ARE SHOWN ON THE
DISPLAYS. TO ADVANCE THROUGH
THE ERROR CODES, PRESS THE
FIRE BUTTON
NO GAME POWER
ON-OFF SWITCH ON THE GAME IS TURNED OFF
BLOWN A.C. POWER FUSE
GAME NOT PLUGGED OR CORD DAMAGED
BAD TRANSFORMER
TRANSFORMER HARNESS NOT CONNECTED
BAD POWER MODULE
TURN POWER ON
REPLACE WITH PROPER FUSE
CHECK POWER CORD
CHECK FOR PROPER VOLTAGES
CHECK HARNESS
REPLACE POWER MODULE
GAME WILL NOT TAKE MONEY BAD COIN SWITCH
OR GIVE CREDITS CORRECTLY COIN DISCOUNTING SET WRONG
COINS PER CREDIT SETTING INCORRECT
BAD COIN MECHANISM
LOOSE OR DAMAGED HARNESSING
BAD MAIN P.C. BOARD
CHECK W/METER AND REPLACE
CHECK PROGRAMMABLE SETTING
CHECK PROGRAMMABLE SETTING
ADJUST OR REPLACE
CHECK W/METER—REPAIR
REPAIR OR REPLACE MAIN BOARD
DISPLAYS DO NOT WORK
BAD 12V FUSE
BAD DISPLAY P.C. BOARD
BAD MAIN P.C. BOARD
LOOSE OR DAMAGED DISPLAY HARNESSING
REPLACE WITH PROPER FUSE
REPAIR OR REPLACE P.C. BOARD
REPAIR OR REPLACE P.C. BOARD
CHECK W / METER AND REPAIR
CRANE OR WAGON DOES NOT
MOVE
BAD MOTOR
LOOSE OR DAMAGED HARNESSING
BAD SWITCH ON BUTTON OR JOYSTICK
BAD HARNESSING TO BUTTONS OR JOYSTICK
BLOWN FUSE TO MOTORS ON MAIN P.C.B.
REPLACE MOTOR
CHECK W / METER—REPAIR
REPLACE SWITCH
CHECK W / METER—REPAIR
REPLACE WITH PROPER FUSE
CRANE KEEPS TRYING TO
MOVE IN TO THE HOME
POSITION
BAD LIMIT SWITCH(S)
LIMIT SWITCH NOT ALIGNED WITH ACTUATOR
REPLACE SWITCH(S)
ALIGN SWITCH AND ACTUATOR
CLAW WILL NOT CLOSE
BLOWN FUSE TO CLAW ON MAIN P.C. BOARD
BAD COIL
LOOSE OR DAMAGED HARNESSING
CLAW HAS MECHANICALLY JAMMED
REPLACE WITH PROPER FUSE
REPLACE COIL
CHECK W / METER AND REPAIR
FIND JAM AND REPAIR
CLAW STAYS CLOSED
BAD DRIVE TRANSISTOR ON MAIN P.C.B.
CLAW HAS MECHANICALLY LOCKED
REPLACE TRANSISTOR
FIND JAM AND REPAIR
SKILL LEVELING IS NOT
FUNCTIONING
PROGRAMMING IS NOT CORRECTLY SET
BAD PRIZE SENSOR
LOOSE OR DAMAGED SENSOR HARNESS
SET OPTIONS “9”, “16” AND “17”
REPLACE PRIZE SENSOR
CHECK W / METER AND REPAIR
CLAW GOES DOWN AND THEN
UP BUT DOES NOT CLOSE
DOWN SWITCH BAD
LOOSE OR DAMAGED HARNESS TO DOWN
SWITCH
REPLACE DOWN SWITCH
CHECK W / METER AND REPLACE
CLAW COMES UP AND ABOUT
10 SEC. PASSES BEFORE
CRANE MOVES TO THE HOME
POSITION
UP SWITCH BAD
LOOSE OR DAMAGED HARNESS TO UP SWITCH
BROKEN “UP” SPRINGS
REPLACE UP SWITCH
CHECK W / METER AND REPLACE
REPLACE SPRINGS
CRANE OR WAGON WHEELS
SLIP
MISSING OR DAMAGED O-RING DRIVE BELTS
LOOSE SET SCREWS IN WHEELS
LOOSE SET SCREWS IN DRIVE COUPLER
RAILS NEED TO BE SCUFFED
REPLACE O-RING BELTS
TIGHTEN SET SCREWS
TIGHTEN SET SCREWS
SCUFF TOP OF RAILS WITH
SANDPAPER
To Purchase This Item, Visit BMI Gaming | www.bmigaming.com | (800) 746-2255 | +1.561.391.7200
QUICK TROUBLESHOOTING
- NOTE: A self test will be performed each time the front door is “closed” , the game is powered up, or when
you exit programming mode.
- NOTE: The game will not count credits or plush out on either the mechanical or software counters while the
front door is open.
- NOTE: If the Wagon does not move smoothly through a full travel from left to right, check to see that the
wheel spacing is correct. If the spacing is correct, then check the 2 cabinet rails for burrs that may cause the
wheels to bind.
- NOTE: If the Crane does not move smoothly through a full travel from front to back, check to see that the
wheel spacing is correct. If the spacing is correct, then check the 2 separator rails for burrs that may cause
the wheels to bind.
- NOTE: If the Micro track for the left / right movement is binding during its travel, check to see if the top mirror
bracket’s edge, also the shelf the micro track rides on, has been de-burred.
- NOTE: If the front door is having trouble closing fully, check to see that all harnessing is out of the way for
the door to close. Next, check to see that the prize chamber wall is far enough to the right to allow the right
edge of the prize door frame to swing past. Finally, check to see that the door is aligned properly.
- NOTE: If the door will not lock properly or locks with difficulty, check to see that the lock rotates smoothly.
Next, check that the lock rods are not binding on the lock cam or the lock rod guides. Next, check that all friction points have been lubricated with molly grease. Finally, if need be, adjust the lock rod guides such that the
door closes and locks smoothly.
- NOTE: If the decimals light up on the displays after a self test, an error has been logged. When the door is
in the open position, the error codes will be shown on the left display. To advance through the error codes,
press the drop button.
- NOTE: If at the beginning of the self test mode, the claw does not drop, one or more of the following may
apply. The prize sensor is not working or is blocked. The string or string lever is mechanically binding. The up
or down switch is sticking or misaligned from its actuator.
- NOTE: If claw stays closed, it is likely that the diode has blown and the transistor controlling the claw has
also blown. Shut off the game immediately and have a qualified technician install a new coil assembly and
transistor on main board.
- NOTE: If claw is jerky while being lowered, it is likely that the up spring is missing or has not been slightly
elongated properly. Another possibility is that the string has mechanically bound on the spool. To fix the string
binding, enter the programming mode and go to mode 24. By moving the joystick to the left and right, you are
able to raise and lower the claw mechanism. Move the crane over the prize chute and lower the claw mechanism all the way until it starts to wind up backwards. Reverse the motor direction to raise the claw mechanism
and properly rewind the string on the spool. Exit the programming mode and the string should be free of mechanical binding.
- NOTE: If the claw stays open, first check for bad fuses on the main board. Next check that there are no
wires dislodged from the connectors in the harness between the wagon and crane, the harness between the
wagon and the main board, the crane assembly and the wagon assembly. If the problem still exists, and no
fuses are blown or wires dislodged, it is likely that the transistor controlling voltage to the claw has blown on
the main board. Have the coil assembly and transistor on the main board replaced by a qualified technician.
- NOTE: If the crane / wagon, in the home position, tries to move left or back, check to see that the actuators
are both present. Next, check to see that the sensors are present. Next, check to see that the sensors and
actuators are aligned. Then check to see that the sensor wires are not dislodged from the connectors. Finally,
replace the sensor, it is likely to be bad.
To Purchase This Item, Visit BMI Gaming | www.bmigaming.com | (800) 746-2255 | +1.561.391.7200
GAME REPAIR
WARNING: ALWAYS REMOVE POWER FROM
THE GAME BEFORE ATTEMPTING ANY SERVICE, UNLESS NEEDED FOR SPECIFIC TESTING. FAILURE TO OBSERVE THIS PRECAUTION COULD RESULT IN SERIOUS INJURY TO
YOURSELF AND / OR OTHERS.
TROUBLESHOOTING
PHILOSOPHY
To find problems with the game, always check the
obvious first. See that the game is plugged in and
that all of the fuses are good.
Next, check to see that all of the connectors are
firmly seated and that no wires have been pulled
out.
When trying to find out if specific components are
bad or not, try swapping them with components from
another PINNACLE CRANE™ game, if available, to
see if the problem moves with the component or
stays where it was. This will help you decide if you
have a problem with a specific component or maybe
a problem with either the wiring or the main p.c.
board. Use extreme caution when using probes or
volt meters if the game is powered up. If checking
continuity, it is important to disconnect the
harnessing at both ends, as attached they may yield
erroneous results.
If a p.c. board is suspected as causing your
problems, check to see that all of the I.C. chips are
firmly seated on the board.
MAIN P.C. BOARD
REPLACEMENT
1. Remove all A.C. power from the game
FRONT GLASS
REPLACEMENT
1. Remove all A.C. power from the game.
2. Remove the (3) 10-24 carriage bolts holding the
top glass frame in place.
3. Loosen the (5) 1/4-20 kep nuts holding each side
glass retainer in place and slide retainers back.
4. Loosen and remove the (3) self tapping screws
holding the bottom glass retainer / window valance in place.
5. If the glass is broken, be sure to remove all
pieces from where the new glass will rest.
6. With proper ceiling height, slide the new glass in
from the top. NOTE: Be careful to proper align
the glass with the side channels to prevent
breakage.
7. When glass is properly seated, slide the side
glass retainers into place and tighten the (5) 1/420 kep nuts for each side.
8. Re-install the bottom glass retainer and tighten
into place via the (3) self tapping screws
9. Re-install the top window frame and tighten into
place via the (3) 10-24 carriage bolts.
SIDE GLASS
REPLACEMENT
1. Remove all A.C. power from the game.
2. Remove wagon and crane assemblies.
2. Unlock and open the front door
3. Remove front and rear cabinet rails and hardware.
3. Carefully remove all of the connectors from the
main p.c. board.
4. Remove fluorescent lights and brackets on side
where glass is to be replaced.
4. Remove the 4 long plastic hexagon nuts that
secure the board to the main board housing.
5. Remove (2) side window retainers and (1) top
window retainer.
5. Gently pull the p.c. board from the mounting
studs.
6. Remove side marquee.
6. Reassemble in the reverse order using a new
main p.c. board.
7. Back out long 1/4-20 bolts that hold on the side
window retainers so they are flush with the 1”
tube frame.
To Purchase This Item, Visit BMI Gaming | www.bmigaming.com | (800) 746-2255 | +1.561.391.7200
GAME REPAIR
8. Remove bolts holding playfield in place near
bottom of the glass.
9. Install new glass from the inside of the game and
drop into channel in the playfield.
10. Reinstall retainers, lights, brackets, marquee,
playfield bolts and rails in reverse order.
REMOVAL OF WAGON
ASSEMBLY
1. Remove all A.C. power from the game.
2. Unlock and open front door.
3. Remove crane assembly as detailed previously.
PLUSH RETAINER WALL
REPLACEMENT
1. Remove all A.C. power from the game.
2. Unlock and open front door
3. Carefully remove the (2) 1/4-20 nuts holding the
plastic plush retainer / wall to the side of the
game.
4. Loosen black thumb screw securing the micro
track bracket in place. The thumb screw is located on the upper right face of the wagon assembly at rear.
5. Slide the micro track bracket to the right and up
to disconnect it from the wagon assembly.
6. Carefully lift the entire wagon assembly off the
rails and rotate clockwise until the left front wheel
clears the front rail.
4. Remove old plastic plush retainer wall
5. Reassemble in reverse order using new plastic
plush retainer wall.
REMOVAL OF CRANE
MECHANISM
7. Lower the front of the wagon assembly and remove the assembly from between the two rails.
8. The wagon assembly can now be removed from
the cabinet so necessary maintenance / repairs
can be made.
9. Reassemble in reverse order.
1. Remove all A.C. power from the game.
2. Unlock and open the front door.
3. Slide the crane assembly to the front center of
the game.
PRIZE SENSOR
REPLACEMENT
1. Remove all A.C. power from the game.
4. Loosen black thumb screw securing the front to
back micro track bracket in place. The thumb
screw is located on the front face of the crane
assembly nearest the door.
2. Unlock and open the front door.
5. Slide the micro track bracket forward and up to
disconnect it from the crane assembly.
4. Remove the 2 bolts holding the prize sensor
bracket to the playfield and remove the prize
sensor and bracket from the game.
6. Carefully lift the entire crane assembly off the
rails approximately 2 inches, shift to the left as
far as possible, drop the right side down past the
right crane rail and slide the entire assembly out
from between the two separator rails.
7. The crane assembly can now be removed from
the cabinet so necessary maintenance / repairs
can be made
8. Reassemble in reverse order.
3. Disconnect the connector to the prize sensor
board.
5. Remove the 2 plastic hexagonal nuts securing
the sensor board to the bracket.
6. Carefully remove the sensor board from its
mounting studs.
7. Reassemble in reverse order using a new prize
sensor board.
To Purchase This Item, Visit BMI Gaming | www.bmigaming.com | (800) 746-2255 | +1.561.391.7200
GAME REPAIR
STRING REPLACEMENT
MOTOR REPLACEMENT
1. Remove all A.C. power from the game.
1. Remove all A.C. power from the game.
2. Unlock and open front door.
2. Unlock and open front door.
3. Remove crane assembly as previously stated.
3. Remove crane and / or wagon assembly as previously stated. NOTE: What is removed depends on
which motor has gone bad.
4. Disconnect the claw assembly from the crane assembly by removing the two bolts securing the aluminum coil cap to the coil housing.
5. Tie a knot at the end of the replacement string. Use
super glue to prevent the knot from working loose
or use a lighter to melt the knot to prevent loosening.
6. Using a lighter, melt the other end of the string and
form a point before it completely cools.
7. Remove crane housing cap by loosening the (2)
thumbscrews.
8. Feed the pointed end up through the hole in the
coil cap and pull until the knot is firmly seated on
the inside of the cap. SEE CRANE ASSEMBLY
DRAWING
9. A proper string routing diagram is located on the
bottom side of the crane housing cap.
10. Feed the pointed end up through the hole in the
bottom of the crane assembly housing.
11. Feed string over first string guide then under the
next string guide.
12. Finally, feed the string through the hole in the side
of the string spool, attached to the motor shaft, and
tie another knot. (Once again, either use super
glue to prevent the knot from working loose or use
a lighter to melt the knot to prevent loosening)
13. The string is now properly strung.
14. Re-attach the claw assembly to the crane assembly using the two bolts that were removed in step 4.
15. Re-install the crane assembly into the game and
set it in the home position with the claw assembly
hanging in the prize chute.
16. Turn on the game and the crane will automatically rewind the string properly.
4. Loosen two thumb screws securing crane housing
cap in place and remove. NOTE: This step is only
for the 2 motors in the crane assembly.
5. Remove drive o-rings and wheels from the bad motor.
6. De-solder the motor leads from the bad motor.
NOTE: Be sure to note which wire goes to which
motor lead, for if they are re-installed backwards,
the motor will run opposite of its intended direction.
7. Carefully remove the bronze bushing supporting
the motor shaft of the bad motor. NOTE: This step
is only for the 2 motors in the crane assembly.
8. Remove the 4 bolts securing the motor to the housing.
9. Carefully remove the bad motor.
10. Re-assemble in reverse order using new motor.
NOTE: When motor is completely re-installed,
place one drop of thread lock on each of the 4 bolts
that secure the motor in place to prevent the bolts
from backing out.
PRECAUTION
When installing a new motor in any of the three locations, please note that the 4 screws, if tightened too
much, could mis-align the motor and cause binding. It
is advisable that you tighten the 4 screws just enough
to keep the motor from moving. Then apply a small
drop of (Blue) loctite on the back side of each of the 4
screws to prevent the screws from loosening. When
the motor is installed properly, it should draw .5 amps
or less when running at proper 22 volts.
To Purchase This Item, Visit BMI Gaming | www.bmigaming.com | (800) 746-2255 | +1.561.391.7200
GAME REPAIR
FUSE REPLACEMENT
CAUTION FOR CONTINUED PROTECTION
AGAINST RISK OF FIRE. REPLACE ONLY WITH
THE SAME TYPE OF FUSE HAVING THE SAME
ELECTRICAL RATING.
AREA
MAIN BOARD
LOCATION
F2
F3
F4
AMP
6 MDQ
3 MDQ
4 MDQ
VOLT
250
250
250
POWER MOD
—
3 MDQ
250
ROPE LIGHT
CONTROLLER
—
3 MDQ
250
CORD REPLACEMENT
IF THE SUPPLY CORD IS DAMAGED, IT MUST BE
REPLACED BY THE MANUFACTURER OR ITS
SERVICE AGENT OR A SIMILARLY QUALIFIED
PERSON IN ORDER TO AVOID A HAZARD.
To Purchase This Item, Visit BMI Gaming | www.bmigaming.com | (800) 746-2255 | +1.561.391.7200
PARTS LISTINGS
MECHANICAL PARTS
5011
BC1002
BC1003
BC1004
BC1005
BC1006
BC1007
BC1008
BC1011
BC1013
BC1014
BC1015
BC1016
BC1017
BC1018
BC1022
BC1023
BC1025
CG1020
CG1052
CG1055X
CG1061X
CG1054
CG1069X
CG2008
CG3019X
C3030
CG4003
CG1062
CG1066
CG1070
CG1073
CG1075
CG1078A
CG1078B
CG1078D
CG3036
CG3037
CG4004
CG2014
CG3008
CG3009
CG3013
BC3026
BC3027
BC3028
CG5014
CG5015
BC9001
SPRING
LEFT REAR CORNER
RIGHT REAR CORNER
CABINET FRAME
DOOR PANEL
DOOR FRAME
PRIZE DOOR
SIDE PANEL
SIDE WINDOW RETAINER
LOCK CAM
UPPER LOCK ROD
LOWER LOCK ROD
DOOR WHEEL BRACKET
DOOR WINDOW FRAME TOP
PODIUM
REAR CORNER CAP
DOOR SEAL
FRONT WINDOW VALENCE
FRONT / REAR CABINET RAIL
3” SWIVEL CASTER
WAGON ASSEMBLY
CRANE ASSEMBLY
WAGON ROLLER SHAFT
TRACK MOUNT RAIL ASSEMBLY
MOTOR / GEARBOX
THUMB SCREW
WHEEL
O-RING DRIVE BAND
CRANE MOTOR HOUSING CAP
CRANE UP SPRING
COIL HOUSING
COIL SLIDER
COIL PLUNGER
SMALL CLAW
MEDIUM CLAW
JUMBO CLAW
COIL CLAW INTERCONNECT
CLAW SPIDER
STRING
JOYSTICK
MICRO TRACK 56 LINK
MICRO TRACK 35 LINK
COIN FUNNEL
MIRROR
FRONT GLASS
SIDE GLASS
LOCK T-HANDLE
LOCK BARREL
SERVICE MANUAL
GRAPHICS & DECALS
BC7007
BC7013
BC7015
BC7027
DECAL SIDE MARQUEE
DECAL CONTROL PANEL
JOYSTICK
DECAL CONTROL PANEL
BUTTONS
DECAL FRONT MARQUEE
ELECTRICAL / ELECTRONIC
PARTS
2132
2970
FP2007
CG2012
CG2013
CG2010
HH1020
CG3038X
CG2002
BC2032X
CG2034X
2080
208004
2110
2124
CG2039X
HD20224
CG2600
BC3005
BC3006
GE BRIGHT STICK
DOOR SWITCH
SWITCH
F / B, UP, DOWN SENSOR
L / R SENSOR
F / B, UP, DOWN ACTUATOR
L / R ACTUATOR
SOLENOID ASSEMBLY
TRANSFORMER
DISPLAY PCB
MAIN PCB
BRIDGE RECT. 10 AMP 400V
VOLTAGE REG. IC LM338K
TRANSISTOR TIP 122
VOLTAGE REG. IC LM358
PRIZE SENSOR PCB
5 V COUNTER
DBV MARS SERIES 2000
ABS FRONT CORNER VALANCE
ABS REAR CORNER VALANCE
To Purchase This Item, Visit BMI Gaming | www.bmigaming.com | (800) 746-2255 | +1.561.391.7200
CRANE
ASSEMBLY
DIAGRAM
To Purchase This Item, Visit BMI Gaming | www.bmigaming.com | (800) 746-2255 | +1.561.391.7200
WAGON
ASSEMBLY
DIAGRAM
To Purchase This Item, Visit BMI Gaming | www.bmigaming.com | (800) 746-2255 | +1.561.391.7200
CLAW
ASSEMBLY
DIAGRAM
To Purchase This Item, Visit BMI Gaming | www.bmigaming.com | (800) 746-2255 | +1.561.391.7200
STRING
ROUTING
DIAGRAM
To Purchase This Item, Visit BMI Gaming | www.bmigaming.com | (800) 746-2255 | +1.561.391.7200
MAIN
PC BOARD
SCHEMATIC
To Purchase This Item, Visit BMI Gaming | www.bmigaming.com | (800) 746-2255 | +1.561.391.7200
DISPLAY
BOARD
SCHEMATIC
To Purchase This Item, Visit BMI Gaming | www.bmigaming.com | (800) 746-2255 | +1.561.391.7200
PRIZE SENSOR
BOARD
SCHEMATIC
2027X
FAN
CG2061X
OPTO EXT.
HARNESS
CG2052X
MAIN TO
WAGON
CG2039X
PRIZE
SENSOR PCB
CG1055X
WAGON
CG2053X
WAGON TO
CRANE
CG2058X
LAMPS/
SWITCH
HARNESS
CG2006X
WORKBOX
CG2002X 110V
XFMR
CG2060X
OPTO
HARNESS
DOOR INTERLOCK
CG2062X
FAN
HARNESS
CG1078DX
CLAW
CG2006X
FLASHING
LIGHTS
COIN
COUNTER
P4
P7
P1
P3
CG2057X
INTERNAL
LIGHTS
HARNESS
RED
P8
CG1061X
CRANE
RED
CG2066X
DBV EXT.
HARNESS
LAMPS
STICK
BRIGHT
P10
CG2034X
MAIN PCB
P2
PRIZE
COUNTER
DATE
DESCRIPTION
P9
P6
CG2059X
REMOTE
HARNESS
CG2063X
COUNTER
ASY.
CLEAR
LAMP
COIN
LAMPS
CG2032X
DISPLAY PCB
2/19/98
REVISED
11/15/00
CRANE WIRING DIAGRAM
CLEAR
LAMP
CG2058X
VOLUM
E
PROGRA
M
ACCOUNTING
CG2050X
DOOR
HARNESS
CG2054X
DISPLAY
HARNESS
PAGE
DRAWN BY
FILENAM
E
1 OF 17
RMO
PLUSH3.VSD
MARS
AE2400
DBV
SPEAKER
COIN 1
COIN 1
DROP
RIGHT
LEFT
BACK
FORWARD
To Purchase This Item, Visit BMI Gaming | www.bmigaming.com | (800) 746-2255 | +1.561.391.7200
13
2
1
2
1
COUNTERS
3
P8
PRIZE
SENSOR
3
P4
CARRAGE
14
15
10
7
8
11
9
12
4
5
6
1
2
3
P1
1. PRIZE COUNTER
2. 5 VOLTS
3. MCOIN / CREDIT COUNTER
1. 12 VOLTS
2. PRIZE SENSOR
3. GROUND
1. MOTOR UP
2. MOTOR DOWN
3. HOME LEFT / RIGHT SENSOR
4. CLAW UP SENSOR
5. CLAW DOWN SENSOR
6. CLAW CLOSE ( CLAW - )
7. GROUND
8. GROUND
9. MOTOR RIGHT
10. MOTOR BACK
11. HOME FRONT / BACK SENSOR
12. MOTOR LEFT
13. MOTOR FORWARD
14. CLAW POWER ( CLAW + )
15. 36V
5
2
4
1
10
7
4
1
14
15
13
10
7
4
1
DOOR
8
11
9
5
6
12
2
3
P9
DISPLAY
8
11
9
5
6
12
2
3
P6
REMOTE
6
3
P2
1. JOYSTICK UP
2. JOYSTICK DOWN
3. JOYSTICK RIGHT
4. JOYSTICK LEFT
5. JOYSTICK BUTTON
6. COIN INPUT
7. GROUND
8. GROUND
9. GROUND
10. DOLLAR BILL VALIDATOR
11. SPEAKER +
12. SPEAKER 13. 12 VOLTS
14. KEY
15. GROUND
1. SEGMENT A
2. SEGMENT B
3. SEGMENT C
4. SEGMENT D
5. SEGMENT E
6. SEGMENT F
7. 12 VOLTS
8. SEGMENT H
9. SEGMENT G
10. SELECT 1
11. SELECT 2
12. GROUND
1. GROUND
2. PROGRAM BUTTON
3. ACCOUNTING
4. GROUND
5. AUDIO TOP
6. AUDIO WIPER
3
DATE
2
1
8
5
2
7
4
1
P7
8
5
2
7
4
1
1. KEY
2. 16 VAC
3. 10 VAC
4. 36 VAC
5. 10 VAC
6. 13 VAC
7. 36 VAC
8. 16 VAC
9. 13 VAC
1. 12 VOLTS
2. 12 VOLTS
3. 12 VOLTS
4. DOOR SWITCH
5. 12 VOLTS
6. HEADLIGHTS
7. LEFT BLINKER
8. RIGHT BLINKER
9. GROUND
1. TICKET SENSE
2. GROUND
3. TICKET RUN
4. 12 VOLTS
2/19/98
REVISED
11/15/00
CRANE MAIN BOARD
CONNECTOR PIN OUT
POWER
9
6
3
P10
LIGHTS
9
6
DESCRIPTION
TITLE
3
TICKETS
4
P3
PAGE
DRAWN BY
FILENAM
E
2 OF 17
RMO
PLUSH3.VSD
To Purchase This Item, Visit BMI Gaming | www.bmigaming.com | (800) 746-2255 | +1.561.391.7200
A
B
C
D
4
4
Ground
Program
Acct.
Ground
Audio
Audio Pot
6 PIN PLUG #2173
SOLID PIN #2100S
1
2
3
4
5
6
22 "
22 "
21 "
20 "
19 "
22 "
3
GND
#BC2059X-REMOTE
HARNESS
black
black/blue
white/gray
black
red/white
red/black
REMOTE
P2
3
POT
AUD
white/gray
DATE
2
DESCRIPTION
TITLE
ACCT.
ACCT.
3/22/99
black/blue
REVISED
7/3/01
1
1
PAGE
DRAWN BY
FILENAME
BASIC CRANE#BC3003X
PROGRAM
"
REMOTE ASSEMBLY
2
LC BRACKET
#BC3003X-REMOTE
ASSEMBLY
2
1 OF 6
CMZCMZ
BASIC.VSD
A
B
C
D
To Purchase This Item, Visit BMI Gaming | www.bmigaming.com | (800) 746-2255 | +1.561.391.7200
A
B
C
D
P9
white/black
white/brown
white/orange
white/red
white/yellow
black/brown
black
black
black/white
yellow
red/gray
brown/gray
orange
98
"
#650
4
FOR CP IT GOES BETWEEN TRANSFORMER & WORKBOX
NO CAGE
#652
"
"
98 "
92 "
98 "
98 "
97
92
108 "
#650
#651
COIN LAMP
POWER
"
"
"
"
100 "
97 "
98
3
BLACK
WHITE
#650
3
60
"
2
#653T
DATE
2
DESCRIPTION
TITLE
#652
BLACK
WHITE
#650
REVISED
#BC2050X
DOOR
#650
4"
#653T
"
1
1
PAGE
DRAWN BY
FILENAME
QTY
COIN1
#653T
.250 FLAG
#648
2 OF 6
CMZ
BASIC.VSD
PER GAME
#PC20217
DOOR
GREEN/YELLOW
15
TO MARS
2400AE
DBV
use #8162-14 awg male mini
#2513
7/3/01
JOYSTICK
GROUND
4"
5"
LEFT
14"
LAMP
AND COIN
GROUND
.250 FLAG
#648
BUTTON
BASIC CRANE
2 PIN CAP #2181
FEMALE PIN #2102
1
2
WHITE
2"
STRIP
9
8
7
6
5
4
3
2
1
TO
JOYSTICK
1
DOWN
RIGHT
9-PIN CAP MINI #2568
MALE PIN MINI #2569
black/white
yellow
BLACK
COIN1
22"
14"
21"
4"
UP
.250 FLAG
#648
.250 FLAG
#648
.250 FLAG
#648
.250 FLAG
#648
#639
GREEN
32
#653T
4" STRIP
3/22/99
#2874- 3 CONDUCTOR CABLE
46.5"
#PC20217
WORKBOX
#2874- 3 CONDUCTOR CABLE
GREEN
#BC2004X-12" GROUND
4" STRIP
1
2
2 PIN PLUG #2103
14awg PIN #2422
88
88
38
FOR BC IT GOES BETWEEN TRANSFORMER & WORKBOX#1
CAGE & WORKBOX#2
TO DBV POWER
EXTENTION HARNESS
15 PIN PLUG #2144
SPLIT PIN #2100
1
2
3
4
5
6
7
8
9
10
11
12
13
14
15
DOOR
#2955-SPIRAL WRAP
43" SEE SAMPLE
AND BOARD.
Joy Up
Joy Down
Joy Right
Joy Left
TO
Button
Coin 1
MAIN
Ground
PCB
Ground
Ground
DBV
Speaker +
Speaker +12v
KEY(not used)
Ground
4
A
B
C
D
To Purchase This Item, Visit BMI Gaming | www.bmigaming.com | (800) 746-2255 | +1.561.391.7200
A
B
C
D
TO MAIN PCB
4
Seg a
Seg b
Seg c
Seg d
Seg e
Seg f
+12v
Seg h
Seg g
Sel 1
Sel 2
ground
4
P6
brown
red/black
orange/black
yellow
green
blue
ORANGE
gray
white
black/white
tan
BLACK
12 PIN PLUG #2106
SPLIT PIN #2100
1
2
3
4
5
6
7
8
9
10
11
12
DISPLAY
3
3
95 "
DATE
2
DESCRIPTION
TITLE
2
3/22/99
REVISED
#BC2054X
Display
7/3/01
BASIC CRANE
12 PIN PLUG #2106
SPLIT PIN #2100
1
2
3
4
5
6
7
8
9
10
11
12
1
1
PAGE
DRAWN BY
FILENAME
QTY
3 OF 6
CMZRMO
BASIC.VSD
PER GAME
TO DISPLAY
PCB
1
A
B
C
D
To Purchase This Item, Visit BMI Gaming | www.bmigaming.com | (800) 746-2255 | +1.561.391.7200
A
B
C
D
4
4
black
yellow/black
9 PIN PLUG #2292
SOLID PIN #2100S
1
2
3
4
5
6
7
8
9
P7
3
3
40
40
"
"
DATE
2
DESCRIPTION
TITLE
#651
#651
2
3/22/99
REVISED
#BC2058X
DOOR INTERLOCK
7/3/01
BASIC CRANE
1
PAGE
DRAWN BY
5 OF 6
CMZRMO
BASIC.VSD
PER GAME
FILENAME
QTY 1
1
A
B
C
D
To Purchase This Item, Visit BMI Gaming | www.bmigaming.com | (800) 746-2255 | +1.561.391.7200
3
TITLE
A
DATE
2
DESCRIPTION
3/22/99
REVISED
#BC2060X
Opto
7/3/01
BASIC CRANE
3 PIN HOUSING #2945
CONTACT PIN #2201
1
2
3
QTY
1
PER GAME
TO OPTO PCB
D
1
PAGE
DRAWN BY
FILENAME
6 OF 6
CMZRMO
BASIC.VSD
A
B
12"
1
B
4
orange
green/black
black
3 PIN PLUG #2206
SOLID PIN #2100S
1
2
3
2
C
TO MAIN PCB
+12
Prize
Ground
P4
3
C
D
4
To Purchase This Item, Visit BMI Gaming | www.bmigaming.com | (800) 746-2255 | +1.561.391.7200
A
B
C
D
DATE
DESCRIPTION
TITLE
1
2
3
4
5
6
7
8
9
10
11
12
13
14
15
4
REVISED
Main/Wagon
UPPER & LOWER
11/15/00
BLACK
BLACK
BLACK
BLACK
BLACK
BLACK
BLACK
BLACK
BLACK
BLACK
BLACK
BLACK
BLACK
BLACK
GREEN/YELLOW
CUT 42"
39.5" CP"
#CP2052AX
15 PIN CAP #2367
FEMALE PIN #2102
2/19/98
Motor Up
Motor Down
Home L/R
Claw Up
Claw Down
Claw Ground
Ground
Motor Right
Motor Bk
Home F/B
Motor Lt
Motor Fd
Claw +
EARTH
BROWN
RED
BROWN
ORANGE
YELLOW
GREEN
BLUE
BLUE
red
brown
green
black
blue
white
15 PIN PLUG #2144
SPLIT PIN #2100
1
2
6
9
10
12
13
14
3
4
5
7
8
11
15
TO WAGON
EXTENSION
Motor Up
Motor Down
Claw Motor Right
Motor Bk
Motor Lt
Motor Fd
Claw +
Home L/R
Claw Up
Claw Down
Ground
Ground
Home F/B
36v
CARRAGE
TO MAIN PCB
P1
4
PAGE
DRAWN BY
3
3 OF 17
CHERYLZ1RMO
PLUSH3.VSD
CUT 100"
CUT 62"
97" MC "
60" CG "
#MC2052AX #CG2052AX
FILENAM
E
1
PER GAME
#652
TO FRAME
2
QTY
CUT 50"
48" BC "
#BC2052AX
1
PER GAME
CUT 86"
81" LC "
#LC2052AX
2
CUT 110"
108" WC"
#WC2052AX
MAIN TO WAGON UPPER HARNESS
QTY
TWISTED WIRE
GREEN/YELLOW
"
TWISTED WIRE
21
#CP2052X
(130"" CP)
3" STRIP
#LC2052X
(50 LC" & MC)
#WC2052X
(60""WC)
#CG2052X
(91" CG)
#BC2052X
(138"" BC)
#2997-2 CONDUCTOR
POWER CORD
MAIN TO WAGON LOWER HARNESS
3
NOTE:
PRIOR TO1/7/99
THIS HARNESS WAS
PART OF THE WAGON
EXTENSION HARNESS
15 PIN PLUG #2144
MALE PIN #2100
BLACK
BLACK
BLACK
BLACK
BLACK
BLACK
BLACK
BLACK
BLACK
BLACK
BLACK
BLACK
BLACK
BLACK
GREEN/YELLOW
**BEND THIS END
#1 PIN IS DOWN
15 PIN PLUG #2144
MALE PIN #2100
BROWN
RED
BROWN
ORANGE
YELLOW
GREEN
BLUE
BLUE
red
brown
green
black
blue
white
GREEN/YELLOW
Motor Up
Motor Down
Home L/R
Claw Up
Claw Down
Claw Ground
Ground
Motor Right
Motor Bk
Home F/B
Motor Lt
Motor Fd
Claw +
EARTH
TO WAGON TO
CRANE
HARNESS
Motor Up
Motor Down
Claw Motor Right
Motor Bk
Motor Lt
Motor Fd
Claw +
Home L/R
Claw Up
Claw Down
Ground
Ground
Home F/B
EARTH
TO WAGON
HARNESS
1
NOTE:
PRIOR TO 9/11/98
THIS CONNECTOR
WAS A 15 PIN MINI
PLUG W/ FEMALE
PINS
1
2
3
4
5
6
7
8
9
10
11
12
13
14
15
1
2
6
9
10
12
13
14
3
4
5
7
8
11
15
1
A
B
C
D
To Purchase This Item, Visit BMI Gaming | www.bmigaming.com | (800) 746-2255 | +1.561.391.7200
A
B
C
D
4
NOTE:
PRIOR TO 9/11/98
THIS CONNECTOR WAS A 15 PIN MINI CAP
W/ MALE PINS #8162-20-16 AWG MINI
7 "
28 "
BLACK
BLACK
GREEN/YELLOW
GREEN
BLACK
ORANGE
BLACK
BLACK
BLACK
BLACK
15 PIN CAP #2367
FEMALE PIN #2102
PIN #15 USE #2013-14 AWG
1
2
3
4
5
6
7
8
9
10
11
12
13
14
15
BLACK
BLACK
TO MAIN TO
WAGON
HARNESS
Motor Up
Motor Down
Home L/R
Claw Up
Claw Down
Claw Ground
Ground
Motor Right
Motor Bk
HomeF/B
Motor Lt.
Motor Fd.
Claw +
Shield
3
"
"
+
R/L
Motor
Home
sensor F/B
GREEN/YELLOW
8
8
Sensor
L/R
3
QTY
#652
1
31.5 "
PER GAME
DATE
2
DESCRIPTION
TITLE
USE A #2422-14 AWG
MALE PIN WHEN
USING SHIELD
IN PIN 12.
2/19/98
"
REVISED
1
2
3
4
5
6
7
8
9
10
11
12
Shield
Claw +
Motor Bk
Motor Up
Motor Down
Motor Fd.
Claw Up
Claw Down
Claw Ground
TO CRANE
HARNESS
1
11/15/00
#CG2053X
1
PAGE
DRAWN BY
FILENAM
E
4 OF 17
CHERYLZ1RMO
PLUSH3.VSD
NOTE:
PRIOR TO 9/11/98
THIS CONNECTOR WAS A 12 PIN MINI
PLUG WITH FEMALE PINS #8163-MINI
Wagon /Crane
5
GREEN/YELLOW
BLACK
BLACK
BLACK
BLACK
BLACK
BLACK
BLACK
BLACK
BLACK
GREEN/YELLOW
12 PIN PLUG #2106
Male Pin #2100
2
NOTE:SHIELD
REQUIRED FOR CE
GAMES ONLY
30" (CUT AT 32")
LC2053X
#2835- SHIELD
34.5" (CUT 36")
CG2053X
BC
MOVE OVER ON CRANE ASY
FOR 60" SL SINGLE DO THE HIGHLIGHTED AREAS!!!
4
A
B
C
D
To Purchase This Item, Visit BMI Gaming | www.bmigaming.com | (800) 746-2255 | +1.561.391.7200
A
B
C
D
5 "
8 "
GREEN/YELLOW
4
8 "
8 "
8 "
8 "
6 "
8 "
5 "
6 "
8 "
WHITE
YELLOW
BLACK
BROWN
RED
BLUE
12 PIN CAP #2105
FEMALE PIN #2102
1
2
3
4
5
6
7
8
9
10
11
12
NOTE:
PRIOR TO 9/11/98
THIS CONNECTOR
WAS A 12 PIN MINI
CAP WITH MALE PINS
Shield
Claw +
Motor Bk
Motor Up
Motor Down
Motor Fd
Claw Up
Claw Down
Claw Ground
TO WAGON TO
CRANE
HARNESS
4
Sense
Up
3
1
#653
QTY
Sense
Down
3
F/B
Motor
PER GAME
1
2
3
4
U/D
Motor
DATE
2
DESCRIPTION
TITLE
BLACK
WHITE
2/19/98
4-PIN CIRCULAR
CONN.
CONN IS PART OF THE CRANE BOM
SUB ASY SOLDERS THE WIRES FOR
THE MOTORS DIRECT AND ADDS THE
PINS ON THE SENSORS MAKING THOSE
PARTS PART OF THE CRANE BOM!
+
+
2
REVISED
Crane
BLACK
WHITE
11/15/00
#CG2056X
Retractable Cord
1
PAGE
DRAWN BY
FILENAM
E
Claw
Solenoid
1
5 OF 17
CHERYLZ1RMO
PLUSH3.VSD
A
B
C
D
To Purchase This Item, Visit BMI Gaming | www.bmigaming.com | (800) 746-2255 | +1.561.391.7200
A
B
C
D
4
4
TO MAIN PCB
PCNTR
+5v
CCNTR
orange
brown
brown/white
3
QTY
3 PIN PLUG #2206
SOLID PIN #2100S
1
2
3
P8
Counter
3
1
PER GAME
18 "
Black
#2558
DATE
2
DESCRIPTION
TITLE
Red
Red
Black
#2558
#2558
#2558
2
2/19/98
REVISED
Counter
Coin
Counter
5v
Prize
Counter
5v
11/15/00
#CG2063X
1
PAGE
DRAWN BY
FILENAM
E
1
12 OF 17
CHERYLZ1RMO
PLUSH3.VSD
A
B
C
D
To Purchase This Item, Visit BMI Gaming | www.bmigaming.com | (800) 746-2255 | +1.561.391.7200
A
B
C
D
WHITE
BLACK
BLACK
WHITE
3 PIN PLUG #2206
MALE PIN #2422
1
2
3
BLACK
WHITE
4
8
"
12 "
8
"
3
15"
#CG2004X
RED
RED
DATE
10.5v ac @ 3.0 A ac 90%
36 "
SECONDARY
2
2/19/98
9
6
7
4
8
2
5
1
3
REVISED
11/15/00
1
PAGE
DRAWN BY
FILENAM
E
#CG2002X/CG2004X
FRAME
14 OF 17
CHERYLZ1RMO
PLUSH3.VSD
Logic 12v regulated
Claw 36v regulated
Motors 22v unregulated
Lamps 12v unregulated
1
9 PIN PLUG #2292
20-14 awg MALE #8260
KEY
110v Transformer
#652
**PUT 29" OF #2955-BLACK SPIRAL
WRAP 3" BACK FROM THE
CONNECTOR.
13.2v ac @ 2.0 A ac 100%
36v ac @ 3.5 A ac 60%
16.5v ac @ 3.5 A ac 85%
2
DESCRIPTION
TITLE
YELLOW
YELLOW
ORANGE
ORANGE
BLUE
BLUE
TRANSFORMER #CG2002
120v PRIMARY MCI# 2-51-9813
3
GREEN/YELLOW
PRIMARY 120v
TRANSFORMER
#652
COVER
2 PIN CAP #2181
FEMALE PIN #2013
1
2
2 PIN CAP #2181
FEMALE PIN #2102
1
2
120V TO
DBV
120v To AC
INTERNAL
LIGHTS
To 120v
SWITCH
BOX
4
A
B
C
D
To Purchase This Item, Visit BMI Gaming | www.bmigaming.com | (800) 746-2255 | +1.561.391.7200
A
B
C
D
4
1
2
3
6 "
3 PIN PLUG #2206
SOLID PIN #2100S
PIN 1+3 USE #8260-20-14 AWG MALE
BLACK
GREEN/YELLOW
WHITE
#639
.250 #653T
.250 YELLOW
MALE #8282
#DD8239BX-SOCKET ASY
5 1/2"
5 1/2"
#DD8239BX-SOCKET ASY
4
BLACK
GREEN
WHITE
3
3 PIN CAP #2288
FEMALE #2102
1
2
3
18 "
#PC20217
28 "
2
YELLOW
CG
88"
DATE
2
DESCRIPTION
TITLE
RED
10 "
9/15/99
REVISED
1
2
12/4/00
1
PAGE
DRAWN BY
16 OF 16
RMO
CRANPUSH2.VSD
TO TRANSFORMER
#PC20217
FILENAM
E
2 PIN PLUG #2103
SOLID PIN #2100S
BLACK
WHITE
5 "
1
#DD8239SX-SOCKET
ASY W/SPRING
Cranpush
5 "
#639
.250 YELLOW
MALE #8282
WITH
SPRING
10 "
#639
.250 YELLOW
MALE #8282
WITH
SPRING
10 "
#DD8239SX-SOCKET
ASY W/SPRING
#CP8284X-ASY BALLAST
#CP2081X-HARNESS AC BALLAST
#8173-3 CONDUCTOR SVT CABLE
CP
123"
#CG2081X- AC BALLAST HARNESS
#CP2081X- AC BALLAST HARNESS
#8284-BALLAST
(MODEL#WH6-120-6)
#CP8284X- ASY BALLAST
#8283 - FLOURESCENT BULB (24" HO)
#8283 - FLOURESCENT BULB (24" HO)
3
A
B
C
D
To Purchase This Item, Visit BMI Gaming | www.bmigaming.com | (800) 746-2255 | +1.561.391.7200
A
B
C
D
4
1
2
3
4
4 PIN PLUG #2099
SOLID PIN #2100S
blue
black *2
white
orange *2
15 "
#CG2062X-FANTICKET EXTENSION
HARNESS
4
black
1
2
3
4
3
4 PIN CAP #2101
FEMALE PIN #2102
orange
3
orange
black
95 "
4 PIN PLUG #2099
SOLID PIN #2100S
1
2
3
4
DATE
2
DESCRIPTION
TITLE
1
2
3
4
60 "
2/16/01
4 PIN MLX CAP #2158
FEMALE PIN #2176
blue
black
white
orange
#CG2064X-FAN HARNESS
2
2/27/01
1
PAGE
DRAWN BY
FILENAME
FanTicket Extension
To Ticket Dispenser
REVISED
To Fan
1 OF 1
MMARTIN
FANTICKET.VSD
4 PIN MLX CAP #2158
FEMALE PIN #2176
1
2
3
4
1
A
B
C
D
To Purchase This Item, Visit BMI Gaming | www.bmigaming.com | (800) 746-2255 | +1.561.391.7200
A
B
C
D
PCNTR
+5v
CCNTR
Seg a
Seg b
Seg c
Seg d
Seg e
Seg f
+12v
Seg h
Seg g
Sel 1
Sel 2
ground
orange
brown
brown/white
4
3 PIN PLUG #2206
SOLID PIN #2100S
1
2
3
6
"
#2558
#LC2063X-COUNTER
12 PIN PLUG #2106
SPLIT PIN #2100
55 "
#LC2054X-DISPLAY HARNESS
brown
red/black
orange/black
yellow
green
blue
ORANGE
gray
white
black/white
tan
BLACK
COUNTER
P8
1
2
3
4
5
6
7
8
9
10
11
12
P6
Display
4
3
Black
Red
Red
Black
12 PIN PLUG #2106
SPLIT PIN #2100
3
Coin
Counter
5v
Prize
Counter
5v
1
2
3
4
5
6
7
8
9
10
11
12
P1
black
DATE
2
DESCRIPTION
TITLE
"
7/2/98
#652
1
2
3
12 "
REVISED
LITTLE CRANE
GREEN/YELLOW
14 "
3 PIN CAP #2288
FEMALE #2102
BLUE
BROWN
8/31/00
3 "
#651
#651
#651
#651
#PC20217
#638
1
1
PAGE
DRAWN BY
FILENAM
E
#LC2055X-POWER BOX HARNESS
27
#LC2058X-DOOR INTERLOCK
yellow/black
9 PIN PLUG #2292
SOLID PIN #2100S
1
2
3
4
5
6
7
8
9
P7
2
2 OF 4
RMORMO
LC.VSD
A
B
C
D
To Purchase This Item, Visit BMI Gaming | www.bmigaming.com | (800) 746-2255 | +1.561.391.7200
A
B
C
D
WHITE
BLACK
#8173-SVT
18 "
WHITE
BLACK
4
#8173-SVT
10 "
18 "
WHITE
BLACK
1
2
3
3
#PC20217
3 PIN PLUG #2206
SOLID PIN #2100S
#WK2089X-AC ROPE LIGHT HARNESS
FOR WK
1
2
3
2 PIN PLUG #2103
SOLID PIN #2100S
BLACK
WHITE
FOR JC,DC,DCSL,CP,CP AIR CONDITIONER
3 PIN HOUSING #2945
WITH AMP CONTACT #2201
1
2
3
P1
P2
#2089X-AC ROPE LIGHT HARNESS
3 PIN HOUSING #2945
WITH AMP CONTACT #2201
1
2
3
P1
P1
#2033X
PCBA-ROPE LIGHT
CONTROLLER
4
BLUE
BLACK
BROWN
BLUE
BLACK
BROWN
8 "
BLUE
BLK
BLUE
BLACK
BROWN
5 PIN HOUSING #2419
AMP CONTACT PIN #2201
1
2
3
4
5
P2
5 PIN HOUSING #2419
AMP CONTACT PIN #2201
1
2
3
4
5
P2
BUCHANAN
INSULATOR &
SPLICE CAP
FOR-JC
2
6/23/00
REVISED
12/6/00
1
PAGE
DRAWN BY
1 OF 1
LIGHT ROPE
CONTROLLER.VS
D
CHERYLZ1
TO LIGHT
ROPE
TO LIGHT
ROPE
TO LIGHT
ROPE
FILENAM
E
LIGHT ROPE CONTROLLER
#CP2090X-ROPE LIGHT HARNESS
FOR-CP&AC
DESCRIPTION
DATE
TO LIGHT
ROPE
1
#JC2090X-ROPE LIGHT HARNESS
6 1/2"
#2090X-ROPE LIGHT HARNESS
FOR- WK,DC
TITLE
BROWN
5 PIN HOUSING #2419
AMP CONTACT PIN #2201
1
2
3
4
5
P2
2
A
B
C
D
To Purchase This Item, Visit BMI Gaming | www.bmigaming.com | (800) 746-2255 | +1.561.391.7200
To Purchase This Item, Visit BMI Gaming | www.bmigaming.com | (800) 746-2255 | +1.561.391.7200
WARRANTY
I.C.E warrants all components in the PINNACLE CRANE™ game to be free of
defects in materials and workmanship for a period of ninety days from the date of
purchase.
This warranty does not cover items damaged due to normal wear and tear,
subjected to abuse, improperly assembled by the end user, modified, repaired, or
operated in a fashion other than that described in the service manual.
If your PINNACLE CRANE™ game fails to conform to the above-mentioned
warranty, I.C.E.'s sole responsibility shall be at its discretion to repair or replace
any defective component with a new or remanufactured component of equal to or
greater O.E.M. specification.
I.C.E. will assume no liability whatsoever, for costs associated with labor to replace
defective parts, or travel time associated therein.
I.C.E.'s obligation will be to ship free of charge, replacement parts by U.P.S.
Ground, U.S. mail, or other comparable shipping means. Any express mail or
overnight shipping expense is at the cost of the purchaser.
Products will be covered under warranty only when:
·
The serial number of the game with the defective parts is given.
·
The serial number of the defective part, if applicable, is given.
·
Defective parts are returned to I.C.E., shipping pre-paid, in a timely fashion, if
requested by I.C.E.
·
A copy of the sales receipt is available as proof of purchase upon request of
I.C.E.
I.C.E. distributors are independent, privately owned and operated. In their
judgment, they may sell parts or accessories other than those manufactured by
I.C.E. We cannot be responsible for the quality, suitability, or safety of any
non-I.C.E. part, or any modification, including labor, which is performed by such a
distributor.