1
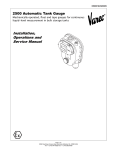
2500
SRM001GVAE0604
2500 Automatic Tank Gauge
Mechanically operated, float and tape gauges for continuous
liquid level measurement in bulk storage tanks
Service Manual
www.varec.com
Varec, Inc.
5834 Peachtree Corners East, Norcross (Atlanta), GA 30092 USA
Tel: +1 (770) 416-6629 Fax: +1 (770) 662-8939
Mechanical Tank Gauge
2
Service Manual
2500
Copyright
All rights reserved. Printed in the United States of America. Except as permitted under the United States Copyright Act
of 1976, no part of this publication may be reproduced, stored in a retrieval system or transmitted in any form or by
any means- electronic, mechanical, photocopying, recording or otherwise- without the prior written permission of the
Publisher:
Varec, Inc.
5834 Peachtree Corners East
Norcross (Atlanta) GA 30096
USA
Trademarks acknowledged
Varec, Inc. recognizes all other trademarks. Trademarks of other products mentioned in this document are held by the
companies producing them.
Microsoft® is a registered trademark of Microsoft Corporation.
Acrobat® is a registered trademark of Adobe Systems Incorporated.
MODBUS® is a registered trademark of Modicon, Inc.
TIWAY® is a registered trademark of Texas Instruments Corporation
HART® interface is a registered trademark of HART Communications Foundation
Delrin is a registered trademark of E. I. du Pont de Nemours Co. (Inc.), Wilmington, DL
Dow Corning RTV 737 is a registered trademark of Dow Corning Inc., Midland MI
Loctite is a registered trademark of Loctite Corp., Newington, CT
Teflon is a registered trademark of E. I. du Pont de Nemours Co. (Inc.), Wilmington, DL
Viton is a registered trademark of E. I. Du Pont de Nemours Co. (Inc.), Wilmington, DL
FuelsManager® is a registered trademark of Varec, Inc. Copyright 2004
RTU8130® is a registered trademark of Varec, Inc. Copyright 2003
TankGate™ is a trademark of Varec, Inc. 2003
TankView® is a registered trademark of Varec, Inc. Copyright 2003
Varec® is a registered trademark of Varec, Inc. Copyright 2003
SRM001GVAE0604
3
Mechanical Tank Gauge
Disclaimer of Warranties
The contract between the Seller and the Buyer states the entire obligation of the Seller. The contents of this instruction
manual shall not become part of or modify any prior or existing agreement, commitment or relationship between the
Seller and Buyer. There are no express or implied warranties set out in this instruction manual. The only warranties
that apply are those in the existing contract between the Seller and Buyer.
Varec Automatic Tank Gauge Model 2500 has not been tested by Varec under all possible operational conditions, and
Varec may not have all the data relative to your application. The information in this instruction manual is not all
inclusive and does not and cannot take into account all unique situations. Consequently, the user should review this
product literature in view of his/her application. If you have any further questions, please contact Varec for assistance.
Limitations of Seller's Liability
In the event that a court holds that this instruction manual created some new warranties, Seller's liability shall be
limited to repair or replacement under the standard warranty clause. In no case shall the Seller's liability exceed that
stated as Limitations of Remedy in the contract between the Seller and Buyer.
Use of parts that are not manufactured or supplied by Varec voids any Varec warranty and relieves Varec of any
obligation to service the product under warranty. Varec recommends the use of only Varec manufactured or supplied
parts to maintain or service Varec 2500 Series Automatic Tank Gauges.
Terms of Use
The information provided in this document is provided "as is" without warranty of any kind. Varec, Inc. disclaim all
warranties, either express or implied, including the warranties of merchantability and fitness for a particular purpose.
In no event shall Varec, Inc. or its suppliers be liable for any damages whatsoever including direct, indirect, incidental,
consequential, loss of business profits or special damages, even if Varec, Inc. or its suppliers have been advised of the
possibility of such damages.
4
Operations Manual
2500
Preface
This manual is intended for users of the Varec 2500 Automatic Tank Gauge (ATG).
Chapter 1 - Maintenance Routines
This chapter describes suggested maintenance routines for the 2500 ATG.
Chapter 2 - Maintenance Kits and Spare parts
This chapter describes the specific maintenance kits or spare parts available for the 2500 ATG.
Chapter 3 - Disassembly and Assembly Instructions
This chapter describes the procedures involved in diassembling and reassmbling the 2500 ATG.
Chapter 4- Troubleshooting
This chapter describes essential information concerning common problems with the 2500 ATG
SRM001GVAE0604
5
Mechanical Tank Gauge
Safety Precaution Definitions
The following types of warnings have been catagorized by Varec for this product. Read and understand this Manual
before installing, operating or performing maintenance on a Model 2500 Automatic Tank Gauge. Follow all precautions
and warnings noted herein when installing, operating or performing maintenance on this equipment.
Note! Follow these specific instructions to optimize the procedure or process
Caution!Damage to equipment may result if this precaution is disregarded.
Warning!Direct injury to personnel or damage to equipment which can cause injury to personnel may result if this precaution is not followed.
Safety Precautions
Caution!Read and understand static and lightning electrical protection and grounding described in API 2003. Make certain that the tank installation, operation and maintenance conforms with the practice set forth therein.
Warning!Make certain that the tank is empty and not in service. Ensure that the tank has been leak and pressure tested
as appropriate for the liquid to be stored. Observe appropriate safety precautions in flammable or hazardous liquid storage areas. Do not enter a tank that has contained hydrocarbons, vapors, or toxic materials, until a gas-free environment
is certified. Carry breathing equipment when entering a tank where oxygen may be displaced by carbon dioxide, nitrogen
or other gases. Wear safety glasses as appropriate. Use a hard hat.
Warning!The mechanical connections between the guide cables, the float, the tape and the gaugehead provide a resistance to ground that is adequate for the safe electrical drain of electrostatic charges that may accumulate in the tank and
the product. Worker activity and worker clothing may accumulate electrostatic charges on the body of a worker. Care
should be used in flammable environments to avoid the hazard.
Whenever the back cover of the gaugehead is removed, stand to one side as the last bolt is removed. If the negator motor
spring is broken, the broken pieces may cause injury when the cover is removed.
6
Operations Manual
2500
Contents
Maintenance Routines
1.1
Suggested Periodic Maintenance Routine . . . . . . . . . . . . . . . . . . . . . . . . . . . . . . . . . . . . . . . . . . . . . . 9
1.1.1
General Inspection . . . . . . . . . . . . . . . . . . . . . . . . . . . . . . . . . . . . . . . . . . . . . . . . . . . . . . . . 10
1.1.2
Operation check . . . . . . . . . . . . . . . . . . . . . . . . . . . . . . . . . . . . . . . . . . . . . . . . . . . . . . . . . . 10
1.1.3
Leak check . . . . . . . . . . . . . . . . . . . . . . . . . . . . . . . . . . . . . . . . . . . . . . . . . . . . . . . . . . . . . . 10
1.1.4
Sediment check . . . . . . . . . . . . . . . . . . . . . . . . . . . . . . . . . . . . . . . . . . . . . . . . . . . . . . . . . . . 10
1.1.5
Deformation check . . . . . . . . . . . . . . . . . . . . . . . . . . . . . . . . . . . . . . . . . . . . . . . . . . . . . . . . 10
1.1.6
Calibration check . . . . . . . . . . . . . . . . . . . . . . . . . . . . . . . . . . . . . . . . . . . . . . . . . . . . . . . . . . 10
1.1.7
Float and guide cables check . . . . . . . . . . . . . . . . . . . . . . . . . . . . . . . . . . . . . . . . . . . . . . . . 10
1.1.8
Lubrication . . . . . . . . . . . . . . . . . . . . . . . . . . . . . . . . . . . . . . . . . . . . . . . . . . . . . . . . . . . . . . . 10
1.1.9
Oil-filled Gauges . . . . . . . . . . . . . . . . . . . . . . . . . . . . . . . . . . . . . . . . . . . . . . . . . . . . . . . . . . 11
1.1.10 Corrosion check . . . . . . . . . . . . . . . . . . . . . . . . . . . . . . . . . . . . . . . . . . . . . . . . . . . . . . . . . . 11
1.1.11 Basic maintenance . . . . . . . . . . . . . . . . . . . . . . . . . . . . . . . . . . . . . . . . . . . . . . . . . . . . . . . . 11
1.1.12 Extended maintenance . . . . . . . . . . . . . . . . . . . . . . . . . . . . . . . . . . . . . . . . . . . . . . . . . . . . . 11
1.1.13 Overhaul maintenance . . . . . . . . . . . . . . . . . . . . . . . . . . . . . . . . . . . . . . . . . . . . . . . . . . . . . 11
Spare Parts and Maintenance Kits
2.1
2.2
2.3
2.4
2.5
2.6
2500 ATG Gaugehead Spare Parts . . . . . . . . . . . . . . . . . . . . . . . . . . . . . . . . . . . . . . . . . . . . . . . . . .
Basic Maintenance Kit . . . . . . . . . . . . . . . . . . . . . . . . . . . . . . . . . . . . . . . . . . . . . . . . . . . . . . . . . . . .
2.2.1
List of parts . . . . . . . . . . . . . . . . . . . . . . . . . . . . . . . . . . . . . . . . . . . . . . . . . . . . . . . . . . . . . .
Extended Maintenance Kit . . . . . . . . . . . . . . . . . . . . . . . . . . . . . . . . . . . . . . . . . . . . . . . . . . . . . . . . .
2.3.1
List of parts . . . . . . . . . . . . . . . . . . . . . . . . . . . . . . . . . . . . . . . . . . . . . . . . . . . . . . . . . . . . . .
2.3.2
Additional items . . . . . . . . . . . . . . . . . . . . . . . . . . . . . . . . . . . . . . . . . . . . . . . . . . . . . . . . . . .
2500 Overhaul/Refurbishing Kit . . . . . . . . . . . . . . . . . . . . . . . . . . . . . . . . . . . . . . . . . . . . . . . . . . . . .
2.4.1
List of parts . . . . . . . . . . . . . . . . . . . . . . . . . . . . . . . . . . . . . . . . . . . . . . . . . . . . . . . . . . . . . .
2.4.2
Additional items . . . . . . . . . . . . . . . . . . . . . . . . . . . . . . . . . . . . . . . . . . . . . . . . . . . . . . . . . . .
Shoulder Bushing Retrofit Kit . . . . . . . . . . . . . . . . . . . . . . . . . . . . . . . . . . . . . . . . . . . . . . . . . . . . . . .
2.5.1
List of parts . . . . . . . . . . . . . . . . . . . . . . . . . . . . . . . . . . . . . . . . . . . . . . . . . . . . . . . . . . . . . .
Negator Cassette and Negator Cassette Kit . . . . . . . . . . . . . . . . . . . . . . . . . . . . . . . . . . . . . . . . . . . .
2.6.1
List of parts . . . . . . . . . . . . . . . . . . . . . . . . . . . . . . . . . . . . . . . . . . . . . . . . . . . . . . . . . . . . . .
13
17
17
19
19
20
24
24
25
27
27
27
27
Instructions
3.1
3.2
3.3
3.4
Gaugehead Disassembly . . . . . . . . . . . . . . . . . . . . . . . . . . . . . . . . . . . . . . . . . . . . . . . . . . . . . . . . . .
Gaugehead Assembly . . . . . . . . . . . . . . . . . . . . . . . . . . . . . . . . . . . . . . . . . . . . . . . . . . . . . . . . . . . . .
Negator Cassette Installation Instructions . . . . . . . . . . . . . . . . . . . . . . . . . . . . . . . . . . . . . . . . . . . . . .
3.3.1
DISASSEMBLY . . . . . . . . . . . . . . . . . . . . . . . . . . . . . . . . . . . . . . . . . . . . . . . . . . . . . . . . . . .
3.3.2
ASSEMBLY . . . . . . . . . . . . . . . . . . . . . . . . . . . . . . . . . . . . . . . . . . . . . . . . . . . . . . . . . . . . . .
Counter Wheel Assembly . . . . . . . . . . . . . . . . . . . . . . . . . . . . . . . . . . . . . . . . . . . . . . . . . . . . . . . . . .
31
33
36
36
36
38
Troubleshooting
4.1
Common Problems . . . . . . . . . . . . . . . . . . . . . . . . . . . . . . . . . . . . . . . . . . . . . . . . . . . . . . . . . . . . . . . 39
4.1.1
Dials Do Not Respond When Check Knob Rotated . . . . . . . . . . . . . . . . . . . . . . . . . . . . . . . 39
4.1.2
Calibration Repeatability Unstable 40
7
Contents
8
Remote Terminal Unit
Operations Manual
2500
1
Maintenance Routines
A regular schedule of maintenance is recommended for the 2500 ATG. The frequency of such inspections depends on
the specific environmental conditions and operation. Due to the various conditions, even from tank to tank on the
same site, installations should be studied and a routine of inspection and maintenance should be planned that is best
suited to individual needs. Regular maintenance will lengthen the service life and assure more accurate reading of the
gauge. In the table below (1.1)we have provided a guide for a routine maintenance procedure. Varec can provide spare
parts, maintenance kits and preventive maintenance advice, training, or warranties. Please consult your product
Operations and Maintenance Manual or a representative for further details.
Hazardous environments
Warning! Observe appropriate safety precautions in flammable or hazardous liquid storage areas. Do not enter a tank
that has contained hydrocarbons, vapors, or toxic materials, until a gas-free environment is certified. Carry breathing
equipment when entering a tank where oxygen may be depleted with carbon dioxide, nitrogen or other gases.
Electrostatic Discharge Hazard
Warning! The mechanical connections between the guide cables, the float, the tape and the gaugehead provide a resistance to ground that is adequate for the safe electrical drain of electrostatic charges that may accumulate in the tank and
the product. Worker activity and worker clothing may accumulate electrostatic charges on the body of a worker. Care
should be used in flammable environments to avoid the hazard. Observe American Petroleum Institute (API) Recommended Practice 2003 or other appropriate industry or Military Standard.
1.1
Suggested Periodic Maintenance Routine
Routine
Inspection
every 90
Days
Inspection
every 6
Months
Inspection
and maintenance every 1
Year
Operation check
x
x
x
Leak check
x
x
x
Sediment check
x
x
x
Deformation check
x
x
x
Calibration
x
x
Float and guide
cables
x
x
Inspection and
maintenance
every 5 Years
Lubricate
x
Oil filled gauge check
x
Corrosion check
x
Basic Maintenance
As required - depending on service conditions
Extebnded Maintenance
As required - depending on service conditions
Refurbish
SRM001GVAE0604
x
As required - depending on service conditions
Overhaul in
conjunction
with API 653
every 10 Years
Recommended
9
Mechanical Tank Gauge
1.1.1
General Inspection
It is recommended that the first inspection after the unit has been placed in service be made at the end of the first
thirty-day period. Subsequent inspections should be made every 90 days. The user may adjust the schedule for his
own convenience and safety, depending upon the product. Varec maintenance service contracts are available - please
consult a sales or service representative for further details.
1.1.2
Operation check
Check the operation of the gauge using the check knob on the front of the gauge. The dial should show the movement
of the float when the check know is rotated.
Caution! Do not release the checker knob and allow the springs to return the mechanism. Over time the springs will break
and jam the gauge.
Caution! Do not turn the operation checker knob on systems that have no float and that are directly connected to a floating roof.
1.1.3
Leak check
Check ther gaugehead and conduit for signs the product in the tank is not leaking. If the gaugehead is oil filled check
for signs the gaugehead is not leaking oil.
1.1.4
Sediment check
Remove the NPT fitting on the bottom of the gaugehead and check for sediment.
1.1.5
Deformation check
Check the pipework conduit for deformations that might inhibit the movement of the tape.
1.1.6
Calibration check
Check the accuracy of the gauge against a hand dip measurment in the tank and calibrate the gauge iof neccassary.
Refer to the 2500 ATG Installation and Operations Maunal for complete calibration instructions
1.1.7
Float and guide cables check
Using a manway or inspection cover check the guidecables and float. The guidcables should be tight and free of kinks
to allow the float to run freely. Check for sedmint on the cables and float that might inhibit movement.
1.1.8
Lubrication
Caution! Do Not use any type of grease, WD-40 or Lithium based lubricant.
Warning! Before lubrication ensure the chemical compatibility of the lubricant with the product in the tank.
Lubricate the moving parts of the gaugehead at regular intervals with a Silicone or Teflon aerosol lubricant such as
Penske Car Care Silicone Spray (available at most auto parts stores) or ZEP 45NC www.zep.com.
Other lubricants recommended for general service
Low pour point, food grade, water white, mineral oil
•Brand Names: ARCO Prime Grade 70
•Lyondell DuoPrime 70, Product Code 16402
Other lubricants for service below 25°F (-4°C)
Automotive antifreeze and water, 50/50 mix
(Propylene Glycol-based antifreeze such as “Sierra” should be considered for environmentally
sensitive areas.)
Caution! These oils may not be compatible with edible oils and edible liquids. Use product compatible substitutes for
tanks holding products for human or animal consumption or products that may react chemically with the oil.
10
Service Manual
2500
1.1.9
Oil-filled Gauges
Caution! Gauges measuring caustic liquids require that the gaugehead be oil filled.
Check the oil is not leaking and change the oil at regular intervals. Dispose of the old oil according to local environmental regulations.
Oil filling the gaugehead is highly recommended to protect the internal parts from possible corrosion attack by
product vapors. Oil filling also provides lubrication for the moving parts and could extend service intervals and overall
gaugehead life.
Fill the gaugehead through the top 1/2-NPT plug. Approximately 4.75 quarts (4.5 liters) of oil are required.To fill the
counter assembly with oil, it is necessary to change the bottom NPT condensate drain plug. Replace it with a solid 1/
4-NPT plug or reverse the top solid plug with the bottom plug. Fill the hole in the condensate drain plug with RTV 737
sealant. The counter assembly will hold approximately 1.06 quarts (1.0 liter).
The appropriate oil selected from above (section 1.1.8 Lubrication) may also be used in conduit Oil Seal Units.
1.1.10
Corrosion check
Check for signs of corrosion. Interior corrosion of the pipe carrying the tape may become deposited in the mechanism
and affect the accuracy.
1.1.11
Basic maintenance
Basic maintenance should be conducted as required depending on the service conditions. The basic maintenace kit
provides all the recommended parts that may need replacing during such a procedure. Follow the dis/assembly
instructions in the following chapter when replacing any parts on the gaugehead.
1.1.12
Extended maintenance
Extended maintenance should be conducted as required depending on the service conditions. The extended
maintenace kit provides all the recommended parts that may need replacing during such a procedure. Follow the dis/
assembly instructions in the following chapter when replacing any parts on the gaugehead.
1.1.13
Overhaul maintenance
A complete gauge installation overhaul should be conducted as part of an API 653 tank overhaul. The overhaul
maintenace kit provides all the recommended parts that may need replacing during such a procedure. Follow the dis/
assembly instructions in the following chapter when replacing any parts on the gaugehead.
SRM001GVAE0604
11
Mechanical Tank Gauge
12
Service Manual
2500
2
Spare Parts and Maintenance Kits
Varec can supply individual spare parts for the 2500 Gaugehead, maintenance kits and installation accessories. The
following kits are specifically designed to assist with a regular schedule of maintenance and improve the quality and
performance of your 2500 ATG.
This chapter details the contents of each kit and provides an illustration to assist in locating the part withing the
assembly. Please refer to chapter 3 - Disassembly and Assembly Instructions before you carry out any maintenance
on the gaugehead.
Part #
Description
13-08766
2500 Basic Maintenance Kit - Imperial
13-08767
2500 Basic Maintenance Kit - Metric
13-08768
2500 Extended Maintenance Kit - Imperial
13-08769
2500 Extended Maintenance Kit - Metric
13-08770
2500 Overhaul/Refurbishing Kit - Imperial
13-08771
2500 Overhaul/Refurbishing Kit - Metric
13-10652
Negator Cassette Kit
13-0974-00
Shoulder Bushing Retrofit Kit
2.1
2500 ATG Gaugehead Spare Parts
Item
Part
Description
1
B4396-071
Back Cover Gasket (Cast gaugehead)
1
02-04490-071
Back Cover Gasket
2
B5059-071
Back Cover Cap Gasket
3
B5060-001
Back Cover Cap
4
B7415-093
Washer
5
B8235-005
Imperial Dial Gear
5m
B8327-005
Metric Dial Gear
6
B7720-071
Counter Cover Gasket
7
B8218-001
Imperial Dial (Fractional or Decimal) - Innage
7m
B8325-001
Metric Dial - Innage
8
BA7761
Tape Storage Sheave Assembly (Includes items:55x2, 57 & 58)
9
B8234-001
Dial Retainer
10
B7693-005
Shaft
11
BA17597
Counter Shaft Assembly
SRM001GVAE0604
13
Mechanical Tank Gauge
Item
Part
Description
12
B10221-093
Seal
13
P34-4
Knob
14
BA14055
Gauge Check Assembly (includes items 61 & 62)
15
B7796-005
Spring
16
B6547-005
Tape Keeper Post
17
02-04488
Back Cover
18
06-08558
Imperial Sprocket Sheave Assembly
18m
06-08559
Metric Sprocket Sheave Assembly
19
DA4044
Counter Cover Assembly (includes items 53 & 54)
20
02-08815
Gaugehead Body
21
BM18849-100
Imperial Counter Assembly
21m
BM18850-100
Metric Counter Assembly
22
P14-146
O Ring
23
P10-2
Retaining Ring
24
P25-16
Pinion Gear
25
B7300-005
Tape Keeper Spring
26
P14-23
O Ring Seal
27
P31-669
Binding Head Mach. Screw
28
P031-04-1697
Set Screw
29
P10-29
Grip Ring
31
P13-20
Bushing
33
02-08543
Washer
34
P030-04-822
1-1/2 NPT Plug
35
P30-237
1/2 NPT Plug
36
P031-32-1661
Washer
37
B4847-005
Washer
38
P031-05-1721
Hex Head Cap Screw
39
P031-07-1679
Rd. Head Mach. Screw
40
P031-01-1719
Binding Head Mach. Screw
41
P31-247
Hex Jam Nut
14
Service Manual
2500
Item
Part
Description
42
P31-612
Hex Socket Set Screw , Cup Pt.
43
P031-08-1720
Self Tap Screw
44
P31-1
Washer
45
P31-13
Shim Washer
46
P030-04-802
3/8 NPT Plug
47
P031-05-1601
Hex Head Cap Screw 68
48
P1-5
Negator Motor Only
BA7762
Negator Motor Sheave Assembly (includes items 55x2 & 56)
49
P031-11-1807
HSCS (not shown)
51
06-10364
Tape Storage Sheave Assembly - Cassette (not shown)
52
06-10490
Handle (Crank) (not shown)
53
P30-236
Top Counter 1/4 NPT Plug
54
B12759-003
Bottom Counter 1/4 NPT Drain Plug
55
02-09598
Bushing shoulder (PTFE)
56
B14872-101
Motor Top Plate
57
P31-671
Screw
58
P31-692
Screw
59
BM3784
Original handle (Crank) Not Shown
61
06-05-152-005
Gauge Check
62
B7795-005
Gauge Check Spring
65
P109-18-010
Thread Protector (not shown)
66
16-08843
Label (not shown)
SRM001GVAE0604
15
Mechanical Tank Gauge
Fig. 2-1 2500 ATG Gaugehead spare parts
35
20
21
31
11
43
5
24
9
7
*
19
53
42
40
39
13
6
54
34
33
29
22
16
27
37
28
12
45
55
* Assembly includes other items - see parts list
Note! Use items 44 and 45 as required
25
31
18
45
44
10
23
45
55
57
45
44
41
3
2
47
20
36
62
10
55
45
8
56
61 33
46 15
26
48 *
*
55
58
23
17
38
16
1
Service Manual
2500
2.2
Basic Maintenance Kit
2.2.1
List of parts
Part No.
Description
13-08766
1 - Basic Maintenance Kit - Imperial
13-08767
2 - Basic Maintenance Kit - Metric
This kit provides all the necessary parts required for basic maintenance on the 2500 Automatic Tank Gaugehead.
Depending on your selection above, you will receive the following metric or imperial parts required.
Item
Part No.
Description
Quantity in kit
1
B4396-071
Back Cover Gasket
1
02-04490-071
Back Cover Gasket
1
5
B8235-005
Imperial Dial Gear
1 (Imperial kit only)
5m
B8327-005
Metric Dial Gear
1 (Metric kit only)
6
B7720-071
Counter Cover Gasket
1
7
B8218-001
Imperial Dial (Fractional or Decimal)
1 (Imperial kit only)
7m
B8325-001
Metric Dial
1 (Metric kit only)
16
B6547-005
Tape Keeper Post
1
21
BM18849-100
Imperial Counter Assembly
1 (Imperial kit only)
21m
BM18850-100
Metric Counter Assembly
1 (Metric kit only)
23
P10-2
Retaining Ring
6
24
P25-16
Pinion Gear
1
25
B7300-005
Tape Keeper Spring
1
27
P31-669
Binding Head Machanical Screw
1
40
P031-01-1719
Binding Head Machanical Screw
3
43
P031-08-1720
Self Tap Screw
3
44
P31-1
Washer
6
45
P31-13
Shim Washer
16
55
02-09598
Shoulder Bushing
4
56
B14872-101
Motor Top Plate
1
na
Ba012g03ae
Service Manual
1
SRM001GVAE0604
17
Mechanical Tank Gauge
Fig. 2-2 2500 ATG Basic Maintenance Kit
21
43
5
7
24
16
27
25
45
6
40
23
45
55
45
44
55
45
44
56
45
55
55
23
1
18
Note! Use items 44 and 45 as required
Service Manual
2500
2.3
Extended Maintenance Kit
2.3.1
List of parts
Part No.
Description
13-08768
1 - Extended Maintenance Kit - Imperial
13-08769
2 - Extended Maintenance Kit - Metric
This kit provides all the parts required for extended maintenance on the 2500 Automatic Tank Gaugehead. Depending
on your selection above, you will recieve the following metric or imperial parts required.
Item
Part No.
Description
Quantity in kit
1
B4396-071
Back Cover Gasket
1
02-04490-071
Back Cover Gasket
1
4
B7415-093
Washer
1
5
B8235-005
Imperial Dial Gear
1 (Imperial kit only)
5m
B8327-005
Metric Dial Gear
1 (Metric kit only)
6
B7720-071
Counter Cover Gasket
1
7
B8218-001
Imperial Dial (Fractional or Decimal)
1 (Imperial kit only)
7m
B8325-001
Metric Dial
1 (Metric kit only)
9
B8234-001
Dial Retainer
1
12
B10221-093
Seal
1
14
BA14055
Gauge Check Assembly
1
15
B7796-005
Spring
1
16
B6547-005
Tape Keeper Post
1
21
BM18849-100
Imperial Counter Assembly
1 (Imperial kit only)
21m
BM18850-100
Metric Counter Assembly
1 (Metric kit only)
22
P14-146
O Ring
1
23
P10-2
RETAINING RING, 5/16 SS
1
24
P25-16
Pinion Gear
1
25
B7300-005
Tape Keeper Spring
1
26
P14-23
O Ring Seal
1
27
P31-669
Binding Head Mach. Screw
1
29
P10-29
Grip Ring
1
SRM001GVAE0604
19
Mechanical Tank Gauge
Item
Part No.
Description
Quantity in kit
31
P13-20
Bushing
1
33
02-08543
Washer
2
37
B4847-005
Washer
1
39
P031-07-1679
Rd. Head Mach. Screw
6
40
P031-01-1719
Binding Head Mach. Screw
3
42
P31-612
Hex Socket Set Screw , Cup Pt.
1
43
P031-08-1720
Self Tap Screw
3
44
P31-1
Washer
1
45
P31-13
Shim Washer
18
48
BA7762
Negator Motor Assembly (includes items 55x2 & 56)
1
55
02-09598
Shoulder Bushing
2
57
P31-671
Screw
1
58
P31-692
Screw
1
59
BM3784
Original handle (Crank) Not Shown
1
AA
BM5478-600
Tape Clamp Assembly
1
BB
A371-071
Cover Gasket (sheave Elbow)
2
CC
02-08563
Cover Gasket (sheave Elbow)
2
na
Ba012g03ae
Service Manual
1
2.3.2
Additional items
Varec also recommends the replacement of the tape (or tape and cable combination) when performing extended
maintenance, based on your specific installtion (tank) type.
Item
Part No.
Description
EE
B7650-606
Tape - Imperial (Length 136'), (316 SS) for a tank 60 ft high
B7650-306
Tape - Imperial (Length 80'), (316 SS) for a tank 32 ft high
B9736-606
Tape - Metric (Length 41.25 m), (316 SS) for a tank 18.29 m high
B9736-306
Tape - Metric (Length 24.38 m), (316 SS) for a tank 9.75 m high
20
Service Manual
2500
Item
Part No.
Description
FF
B7678-606
Tape and Cable (Ø 3/32") Combination - Imperial (Length 133') for a tank 60 ft high
B7678-306
Tape and Cable (Ø 3/32") Combination - Imperial (Length 73') for a tank 30 ft high
B13982-606
Tape and Cable (Ø 3/32") Combination - Metric (length 44.5 m) for a tank 18 m high
B7678-106
Tape and Cable (Ø 3/32") Combination - Imperial (Length 73') for a tank 30 ft high
B13982
Tape and Cable (Ø 3/32") Combination - Metric (Length 22.2 m) for a tank 9 m high
SRM001GVAE0604
21
22
AA
Sheave Elbow
Cover Gasket
(two different types
are supplied)
BB and CC
BB or CC
Tape Clamp Assembly
AA
Example Floating Roof Installation
EE or FF
BB or CC
9
7
39
5
24
21
52
6
43
40
44
45
42
57
29
33
22
1
23
45
44
55
58
55
12
55
27
56
25
48 *
62
61
15
26
45
* Assembly includes other items - see parts list
Note! Use items 44 and 45 as required
23
55
45
37
31
16
Mechanical Tank Gauge
Fig. 2-3 2500 ATG Extended Maintenance Kit
Service Manual
SRM001GVAE0604
DD
HH
AA
EE or FF
BB or CC
Sheave Elbow
Cover Gasket
(two different types
are supplied)
BB and CC
Tape Clamp Assembly
AA
Example Cone Roof Installation
Top Guidewire Anchor
GG
BB or CC
GG
9
7
39
5
24
21
52
6
43
40
44
57
29
38
45
42
33
22
1
23
45
44
55
55
55
12
55
27
56
25
48 *
62
61
15
26
45
* Assembly includes other items - see parts list
Note! Use items 44 and 45 as required
23
58
45
37
31
16
2500
Fig. 2-4 2500 ATG Overhaul /Refurbishment Kit
23
Mechanical Tank Gauge
2.4
2500 Overhaul/Refurbishing Kit
2.4.1
List of parts
Part No.
Description
13-08770
Overhaul/Referbishing Maintenance Kit - Imperial
13-08771
Overhaul/Referbishing Kit - Metric
This kit provides all the parts required for overhaul maintenance on the 2500 Automatic Tank installation. Depending
on your selection above, you will recieve the following metric or imperial parts required.
Item
Part No.
Description
Quantity in kit
1
B4396-071
Back Cover Gasket
1
02-04490-071
Back Cover Gasket
1
5
B8235-005
Imperial Dial Gear
1 (Imperial kit only)
5m
B8327-005
Metric Dial Gear
1 (Metric kit only)
6
B7720-071
Counter Cover Gasket
1
7
B8218-001
Imperial Dial (Fractional or Decimal)
1 (Imperial kit only)
7m
B8325-001
Metric Dial
1 (Metric kit only)
9
B8234-001
Dial Retainer
1
12
B10221-093
Seal
1
14
BA14055
Gauge Check Assembly
1
15
B7796-005
Spring
1
16
B6547-005
Tape Keeper Post
1
21
BM18849-100
Imperial Counter Assembly
1 (Imperial kit only)
21m
BM18850-100
Metric Counter Assembly
1 (Metric kit only)
22
P14-146
O Ring
1
23
P10-2
Retaining Ring
4
24
P25-16
Pinion Gear
2
25
B7300-005
Tape Keeper Spring
1
26
P14-23
O Ring Seal
1
27
P31-669
Binding Head Mach. Screw
3
29
P10-29
Grip ring
1
24
Service Manual
2500
Item
Part No.
Description
Quantity in kit
31
P13-20
Bushing
1
33
02-08543
Washer
2
37
B4847-005
Washer
1
38
P031-05-1721
Hex Head Cap Screw
16
39
P031-07-1679
Rd. Head Mach. Screw
6
40
P031-01-1719
Binding Head Mach. Screw
3
42
P31-612
Hex socket set screw, Cup Pt.
1
43
P031-08-1720
Self Tap Screw
3
44
P31-1
Washer
6
45
P31-13
Shim Washer
14
48
BA7762
Negator Motor Assembly (includes items 55x2 & 56)
1
55
02-09598
Shoulder Bushing
2
56
B14872-101
Motor Top Plate
1
57
P31-671
Screw
1
58
P31-692
Screw
1
59
BM3784
Original handle (Crank) Not Shown
1
AA
BM5478-600
Tape Clamp Assembly
1
BB
A371-071
Sheave Elbow Cover Gasket
2
CC
02-08563
Sheave Elbow Cover Gasket
2
DD
AA1025
Anchor Bottom for 2500 ATG and 6700 Liquid level Indicator,
(Steel)
1
na
Ba012g03ae
Service Manual
1
2.4.2
Additional items
Varec also recommends the replacement of the tape (or tape and cable combination), anchors and guidewires for a
complete overhaul, based on your specific installation (tank) type.
Item
Part No.
Descritpion
EE
B7650-606
Tape - Imperial (Length 136'), (316 SS) for a tank 60 ft high
B7650-306
Tape - Imperial (Length 80'), (316 SS) for a tank 32 ft high
B9736-606
Tape - Metric (Length 41.25 m), (316 SS) for a tank 18.29 m high
B9736-306
Tape - Metric (Length 24.38 m), (316 SS) for a tank 9.75 m high
SRM001GVAE0604
25
Mechanical Tank Gauge
Item
Part No.
Descritpion
FF
B7678-606
Tape and Cable (Ø 3/32") Combination - Imperial (Length 133') for a tank 60 ft high
B7678-306
Tape and Cable (Ø 3/32") Combination - Imperial (Length 73') for a tank 30 ft high
B13982-606
Tape and Cable (Ø 3/32") Combination - Metric (length 44.5 m) for a tank 18 m high
B7678-106
Tape and Cable (Ø 3/32") Combination - Imperial (Length 73') for a tank 30 ft high
B13982-606
Tape and Cable (Ø 3/32") Combination - Metric (Length 22.2 m) for a tank 9 m high
BM5200
Top Anchor - welded, (Steel)
BM5088
Top Anchor - welded, (316 SS)
BM3646
Top Anchor, (150# Steel)
BM3647
Top Anchor, (300# Steel)
B10543-306
Guide Wire Tank Height 32 ft.
B10543-606
Guide Wire Tank Height 60 ft.
GG
HH
26
Service Manual
2500
2.5
Shoulder Bushing Retrofit Kit
2.5.1
List of parts
Part No.
Description
13-09794-00
Shoulder Bushing Retrofit Kit
This kit provides all the necessary parts required for replacing the shoulder bushings on the 2500 Automatic Tank
Gaugehead.
Item
Part#
Description
QTY
23
P10-2
Retaining Ring
4
44
P31-1
Washer
2
45
P31-13
Shim Washer
6
55
02-09598
Shoulder Bushing
2
56
B14872-101
Motor Top Plate
1
na
Ba012g03ae
Service Manual
1
2.6
Negator Cassette and Negator Cassette Kit
2.6.1
List of parts
Item
Part No.
Description
50
06-10368
Negaotr Cassette only
68
13-10652
Negator Cassette kit
This kit (item 68) provides all the parts required for converting a 2500 Automatic Tank Gaugehead fitted with a negator
motor to a gaugehead with a negator cassette.
Item
Part#
Item
QTY
4
B7415-093
Teflon Washer (Not shown - used on older gaugeheads)
2
23
P10-2
Retaining Ring, 5/16 SS
1
44
P31-1
Washer 9/16X21/64X1/16 SS.
1
45
P31-13
Shim washer 562X.316/.313X.005SS
6
49
P031-11-1807
HSCS 1/4-20X1-1/4
2
50
06-10368
Negator Cassette
1
51
06-10364
Tape Storage Sheave Assembly - Cassette
1
SRM001GVAE0604
27
Mechanical Tank Gauge
Item
Part#
Item
QTY
52
06-10490
Handle (Crank)
1
na
Ba012g03ae
Service Manual
1
28
Service Manual
2500
Fig. 2-5 (Top) 2500 ATG Shoulder Bushing Kit Fig. 2-6 (Bottom) 2500 ATG Negator Cassette Kit
45
55
45
23
44
55
45
44
56
55
45
55
23
Note! Use items 44 and 45 as required
Standard Gaugehead
Negator Cassette Conversion Kit Item 68)
replaces all the parts highlighted *
from a standard gaugehead
Note! Use items 44 and 45 as required
*
*
* *
* *
*
45
44
*
45
23
*
*
*
45
51
50
49
Negator Cassette
Gaugehead
52
SRM001GVAE0604
29
Mechanical Tank Gauge
30
Service Manual
2500
3
Instructions
Use of the maintenance kits require that the user understand the disassembly of the gaugehead in order to replace
parts. The exploded view, Figure 2-1, is the key to understanding the disassembly procedure. References in the
following procedures are directed to this figure, unless otherwise indicated. Refer to Model 2500 Instruction Manual
for variations of the standard gaugehead configurations, namely 2500 with Crank and 2500 with cassette Models.
3.1
Gaugehead Disassembly
Perform the following steps to disassemble the gaugehead:
Note! Disassemble the gaugehead only as far as needed to replace worn or defective parts.
Warning! Make certain that the tank is empty and not in service. Observe appropriate safety precautions in flammable or
hazardous liquid storage areas. Do not enter or access a tank that has contained hydrocarbons, vapors or toxic materials
until a gas-free environment is certified. Carry breathing equipment when entering or accessing a tank where oxygen
may be depleted with carbon dioxide, nitrogen or other gases.
Warning! The mechanical connections between the guide cables, the float, the tape and the gaugehead provide an electrical resistance path to ground that is adequate for the safe electrical drain of electrostatic charges that may accumulate
in the tank and product. Worker activity and worker clothing may accumulate electrostatic charges on the body of a
worker. Care should be used in flammable environments to avoid the hazard.
1.Drain the oil from gaugehead if oil-filled.
Warning! Whenever the back cover of the gaugehead is removed, stand to one side as the last bolt is removed. If the
motor spring is broken, the broken pieces may cause injury when the cover is removed.
2.Remove the sixteen back cover bolts (38), back cover and back cover gasket (1).
3.If accessory equipment is attached to the back of the gaugehead, disconnect and remove.
4.Attach the installation crank (Figure 3-1 item #7).
5.Open an inspection hatch or manhole for access to the float.
Warning! Use a firm grasp on the crank. Tighten thumbscrew to lock tape storage sheave before releasing grip. The rapid
unwinding of the motor spring could result in the crank spinning and striking the operator.
Caution! Do not allow the float to fall back to the floor of the tank. Damage may result.
6.Slowly crank the float to the top of the tank.
7.Tighten the thumbscrew to lock the tape storage sheave. (Figure 3-1 item #3).
8.Secure float to top of tank with secondary wire.
Caution! Do not allow the float to drop to the floor of the tank. Damage will result.
9.Disconnect the perforated tape from the float connector.
10. Loosen the thumbscrew and slowly retract the tape into the gaugehead.
SRM001GVAE0604
31
Mechanical Tank Gauge
Fig. 3-1 Tape routing and component location
CAUTION:
Do not release crank handle when negator spring motor
is being loaded and thumbscrew lock is removed.
ITEM
DESCRIPTION
1
SPROCKET SHEAVE
2
TAPE STORAGE SHEAVE
3
THUMBSCREW LOCK
4
TAPE KEEPER
5
MOTOR STORAGE SHEAVE
6
NEGATOR SPRING MOTOR
7
REMOVABLE INSTALLATION CRANK
8
NEGATOR SPRING MOTOR SCREW
9
TAPE SHEAVE PIN OR SCREW
Tape entry for Gauge Monted
on the side of a tank
Tape entry for Gauge Monted
on the side of a tank
1
1
4
4
5
2
2
6
3
7
8
9
TAPE ENTRY FOR GAUGE
MOUNTED ON TOP OF TANK
32
9
TAPE ENTRY FOR GAUGE
MOUNTED ON TOP OF TANK
STANDARD MODEL 2500
MODEL 2500 WITH CARTRIDGE
(WITH NEGATOR SPRING MOTOR)
(CARTRIDGE REMOVED FOR TAPE INSTALLATION)
Service Manual
2500
11.Unwind the motor spring (Figure 3-1 item #6) onto the motor storage sheave (Figure 3-1 item #5).
12.Loosen the motor spring screw (Figure 3-1 item #8) and detach motor spring.
13.Remove retaining ring (23), washer (44) and shim washers (45) from motor shaft.
14.Remove motor storage sheave assembly (48) as a unit.
15.Remove retaining ring (23), washer (44) and shim washers (45) from tape storage sheave shaft.
16.Remove tape storage sheave assembly as a unit.
Note! The sheave shafts are pressed into place and retained with a permanent type Loctite compound. DO NOT REMOVE!.
17.Loosen sprocket sheave set screw (28) and remove sprocket sheave assembly (18), Teflon washer if used (4),
shim washers (45) and washer (37).
18.Remove tape keeper assembly which includes the screw (27), post (16) and spring (25).
19.Remove six counter cover screws (39), counter cover assembly (19) and counter cover gasket (6).
20.Remove three dial retainer screws (40), dial retainer (9) and dial (7).
21.Remove the dial gear (5).
22.Remove the pinion gear (24).
23.Remove three counter assembly mounting screws (43) and counter assembly (21).
24.Remove counter shaft assembly (11) and any shim washers if needed (45).
25.Loosen check knob set screw (42) . Remove check knob (13), grip ring (29) and shim washer (33).
26.Remove gauge check assembly (14), shim washer (33), and gauge check spring (15).
27.Remove Viton “O” ring (22) on outside of gauge check boss.
Note! The check knob shaft Teflon “O” ring (26) on the inside of the gaugehead is pressed into place with a special setting
tool.. If replacement is required, insure that a proper setting tool is available for reinstallation. Do not reuse old “O” ring.
28.Remove Teflon “O” ring (26) only if gaugehead showed signs of leakage.
Note! The counter shaft seal (12) is pressed into place. If replacement is required, insure that proper pressing tools are
used for reinstallation. Do not reuse old seal.
29.Remove countershaft seal (12) only if gaugehead showed signs of leakage.
Note! The counter shaft brass bushings are pressed into the bore with special press fixtures. DO NOT REMOVE BUSHINGS.
30.Clean the disassembled gaugehead and any parts that will be reused with a common automotive type spray or
dip degreaser. Clean and wipe dry in accordance with the directions of the product used.
3.2
Gaugehead Assembly
Perform the following steps to reassemble the gaugehead:
Note! Generally, assembly will be performed in the reverse order of disassembly.
1.If counter shaft seal (12) is being replaced, use a clean, small paint brush and apply white silicone grease (Dow
Corning #4 or equal) to body seal recess. Carefully press seal into place with cavity facing outwards.
SRM001GVAE0604
33
Mechanical Tank Gauge
2. If check knob Teflon “O” ring (26) is being replaced, lubricate “O” ring with white silicone grease (Dow Corning
#4 or equal) and carefully install it into the inside body recess with an appropriate setting tool.
3.Lubricate Viton “O” ring (22) with white silicone grease (Dow Corning #4 or equal) and carefully insert it into the
outside body groove.
4.Assemble gauge check hair spring (15) and shim washer (33) on the gauge check assembly (14). Lubricate the
shaft (60) with white silicone grease (Dow Corning #4 or equal) and insert it into the body.
5.Install shim washer (33) and grip ring (29) to the external shaft projection of the gauge check assembly (14).
6.Place knob (13) with set screw (42) on the external shaft projection of the gauge check assembly (14). Tighten
set screw making sure it contacts the flat on the shaft. Ensure that the gauge check assembly turns smoothly by
turning the knob in ¼ turn intervals.
7.Place any previous shim washers (45) on counter shaft assembly (11) and brush the shaft with white silicone
grease (Dow Corning 4 or equal). Install counter shaft assembly into the body.
8.Place counter assembly (21) on supports and install three mounting screws (43), but do not tighten.
9.Align counter assembly wheels to zero. Install pinion gear (24) on counter base shaft with the 8-tooth side of
the gear nearest the counter base. Mesh the short tooth of the pinion gear into the counter wheel gear.
10.Place dial gear (5), with registering tab upward, on the counter shaft assembly (11)
11.Adjust the dial gear (5) and the counter assembly (21) for a clearance of approximately 0.010” between the pinion gear (24) and the dial gear (5). If the dial gear is below the top of the pinion gear add shim washers (45) under
the counter shaft assembly (11) as required. If the dial gear is higher than the pinion gear, remove shim washers
from under the counter shaft assembly. If no shim washers are present, lightly tap the counter shaft assembly with
a rubber mallet so that the dial gear and the pinion gear are level within 0.010".
12.Adjust the counter assembly (21) to mesh with the pinion gear (24) and the dial gear (5). Rotate the dial gear
to check that all gears mesh smoothly and that the counter wheels operate correctly. Tighten the three screws (43)
mounting the counter assembly.
13.Slip the dial plate (7) under the red pointer of the counter assembly and onto the hub. Rotate the dial plate until
the tab from the dial gear (5) registers with the slot in the dial plate.
14.Install dial retainer (9) on dial (7) and secure it with three screws (40).
15.Place washer (37) and Teflon washer if needed (4) on the counter shaft assembly (11).
16.Place the sprocket sheave assembly on the counter shaft assembly (11).
17.Place the tape storage sheave assembly on the lower shaft.
18.Place the motor storage sheave assembly (48) on the upper right shaft.
19.Align the motor storage (48) and the tape storage sheave assemblies. Ensure that the bottom of the motor storage sheave flange is 0.040 to 0.060” clear of the top surface of the tape storage sheave. Adjust height by using
shim washers (45) as required.
20.Align the groove centerline of the sprocket and the tape storage sheave assemblies. Ensure that the top surface
of the sprocket sheave flange is 0.030 to 0.040” below the top surface of the tape storage sheave flange. Adjust
height by using shim washers (45) as required.
21.When properly aligned, tighten the set screw (28) in the sprocket sheave assembly (18). Test that the counter
assembly (21) functions properly with no axial play in the counter shaft and sheave assemblies.
22.Remove the motor storage sheave assembly (48) from the gaugehead.
23.Assemble tape keeper assembly (16) containing item 27, 16, 28. Apply Loctite #262 or equal to screw threads
and thread assembly into the gaugehead body.
34
Service Manual
2500
24.Adjust the tape keeper spring for a clearance of 0.020 to 0.030” against the sprocket sheave assembly.
25.Place the motor storage sheave assembly (48) back into the gaugehead.
26.Secure the tape storage sheave assembly with retaining ring (23). Use washer (44) and shim washers (45) as
required. Test that the sheave turns freely with less than 0.004” axial play for Standard Model 2500 and no axial
play for 2500 Models with Crank and with cassette.
27.Secure the motor storage sheave assembly (48) with retaining ring (23). Use washer (44) and shim washers (45)
as required. Test that sheave turns freely with 0.005 to 0.010” axial play.
28.Attach the spring motor to the tape storage sheave assembly and tighten screw (Fig. 3-1 item#7). Ensure that
the spring motor is not twisted out of alignment during screw tightening.
29.Open elbow sheave assemblies and inspect operation and condition. Replace cover gasket, defective sheaves
and worn shafts as required. Lubricate the shaft and sheave with a light oil.
Note! To install the gauge tape, load the spring motor, zeroing the display and dial calibration, follow the procedures in
the Model 2500 User Instruction Manual, document number 33-08746.
30.Install counter cover assembly (19) and gasket (6) with six screws (39).
31.Mount and connect any auxiliary equipment to gaugehead back cover.
Note! Torque back cover bolts to 6 ft-lb. Do not over torque!
32.Assemble back cover and back cover gasket (1) to gaugehead with sixteen back cover bolts (38).
33.Refill gaugehead with oil if required.
34.Close the tank inspection hatches and manholes.
SRM001GVAE0604
35
Mechanical Tank Gauge
3.3
Negator Cassette Installation Instructions
Varec's negator cassette is a fully enclosed design to safely contain a damaged or failed negator motor. It will extend
negator motor life by keeping pipe scale and debris off the negator motor. The cassette provides quick and easy
change out of any future negator motor failures.
Caution! Damage to equipment may result if this precaution is disregarded.
Warning! Direct injury to personnel or damage to equipment which can cause injury to personnel may result if this precaution is not followed.
3.3.1
DISASSEMBLY
Perform the following steps to prepare the gaugehead for installation of the negator motor cassette.
1. Note and record gauge level reading.
2. Vent all pressure from gaugehead.
3. Drain the oil if the gauge is oil-filled.
Warning! Whenever the back cover of the gaugehead is removed, stand away as the last bolt is removed. If the negator
motor is broken, the broken pieces may cause injury. Wear gloves and safety glasses.
4. Remove 16 back cover bolts (38) and back cover (17) with any auxiliary equipment attached.
5. Attach the original installation crank (59) provided with the gauge to the tape storage sheave.
Warning! Use a firm grasp on the crank. Tighten thumbscrew before releasing grip. The rapid action of the spring could
result in the crank spinning and striking the operator and damaging equipment.
6. Position an assistant at the outboard sheave elbow to pull up the tape as it is being unwound from the storage
sheave.
7. Remove the outboard sheave elbow cover.
8. Turn the installation crank clockwise to unwind the tape from the storage sheave. While unwinding the tape in
the gaugehead, withdraw the tape at the outboard sheave elbow. Be careful to insure that the tape does not kink
and remains clean.
9. When all tape is removed from the storage sheave, turn the installation crank slowly counter clockwise to wind
the negator motor onto the motor sheave.
10. Detach the negator motor (48) from the storage sheave by loosening the securing screw (57).
11. Remove the negator motor (48), bushings, washers and shims.
12. Remove the storage sheave assembly (8), bushings, washers and shims.
3.3.2
ASSEMBLY
1. Install a Teflon washer if needed (4), a shim washer (45) and the new storage sheave (51) over the lower gaugehead shaft (10).
2. The alignment of the sprocket sheave to the tape storage sheave is very important for proper operation of the
gauge. Adjust the number of shims to bring the sheaves into the specified alignment as shown on Figure 3.-2
3. Complete the installation of the storage sheave by installing shims (45), a Teflon washer if needed (4), and flat
washer (44). Test that the sheave turns freely with no lateral or axial play.
Note! If play is excessive, add shims (45) to remove play.
36
Service Manual
2500
4. Attach the end of the tape over the sheave pin (28) and wind the tape onto the sheave assembly (18) as the
assistant provides some tension on the tape to keep it from kinking or twisting.
5. Prior to installing the cassette (50) into the gaugehead, wind the cassette clockwise using the new crank assembly (52) to the number of turns indicated matching the product level. Lock the crank assembly using the spring
loaded screw into the keyhole slot in the cassette.
6. Install the cassette into the gaugehead with the crank assembly locked in position.
7. Install the two socket head screws (49) to secure the cassette to the storage sheave.
8. Grasp the crank assembly handle and unlock it from the cassette. Rotate the handle to allow the take up of any
slack in the tape.
9. Remove the crank assembly.
10. Check the tape path to insure that the tape is not twisted or kinked.
11. Test the operation of the gauge by rotating the gauge check knob 1/4 turn clockwise and releasing.
12. Reinstall the outboard sheave elbow cover.
13. Reinstall the back cover and any auxiliary equipment.
Note! The slotted coupling on any auxiliary equipment must engage the drive pin on the sprocket sheave.
14. Check the level indication on the gauge and compare it with the prerecorded level reading. Readjust gauge if
levels do not match. Refer to the instruction manuals for re-calibration and operational checkout for the gauge
and any auxiliary equipment.
15. Refill the gaugehead with oil if required.
Fig 3.2 Sheave Alignment
Sheave Alignment
Sprocket
Sheave
SRM001GVAE0604
0.32"
Storage
Sheave
37
Mechanical Tank Gauge
3.4
Counter Wheel Assembly
If the screws (43) and retainer are removed from the counter wheel assembly (21) and the pinion gear (24) is
disengaged, it will be necessary to remove the dial and pinion gears to realign the counter drums and dial plate (7) to
zero or to the calibrated liquid level. The setting of the pinion gear on the 1/2 notch position is a common error during
reassemble.
1.Align counter drums to zero. Install pinion gear on counter base shaft with the 8-tooth side of the gear nearest
the counter base. Mesh the short tooth of the pinion gear into the counter drum gear.
2.Install the dial gear without meshing the pinion gear teeth.
3.Slip the dial plate under the red pointer and onto the hub. Rotate the dial plate until the tab from the dial gear
registers. Install dial retainer and screws.
4.Rotate the dial assembly to ensure that it does not bind on the pointer or pinion gear and that it advances the
counter drum one digit as it crosses the zero position.
38
Service Manual
2500
4
Troubleshooting
4.1
Common Problems
Friction is a common problem that affects gauge accuracy. Some liquids produce corrosion in the mechanism. Periodic
inspection and maintenance provided by a Varec service contract can prevent problems from occurring. Periodic
cleaning, lubrication and replacement of worn parts stops trouble before it starts.
4.1.1
Dials Do Not Respond When Check Knob Rotated
Possible Cause
Action
1
Yes - Replace tape.
Check negator motor attachment to storage sheave.
Check for damaged gauge parts.
Tape broken?
No - Go to 2.
2
Negator motor broken?
Yes - Replace negator.
Do not redrill or repair.
Wear gloves.
Check tape condition.
Check for damaged gauge parts.
No - Go to 3.
3
Tape rewound?
Yes - Tape detached from float.
Replace tape and reattach.
Check for damaged gauge parts.
No - Go to 4.
4
Dials stopped?
Yes - Check for frozen tape sprocket sheave shaft. Repair/replace.
Check for frozen accessory shaft. Repair/replace.
Check dial gear engagement with pinion gear. Adjust/replace.
Check gauge checker for broken spring and damaged ratchet pawl.
Replace.
No - Go to 5.
5
Counter dial wheels stopped; dial plate
rotates?
Yes - Check for worn/broken counter pinion gear and counter wheels.
Replace
Caution! Broken negator spring may cause injury. Stand clear of gaugehead and remove back cover.
SRM001GVAE0604
39
Mechanical Tank Gauge
4.1.2
Calibration Repeatability Unstable
Possible Cause
Action
1
Yes - Clean with automotive type spray degreaser.
Dirty gauge housing?
No - Go to 2.
2
Tape/cable off elbow pulley?
Remove elbow covers
Yes - Reseat and lubricate the gauge.
No - Go to 3.
3
Elbow pulley shaft/bushing worn/corroded?
Yes - Repair or replace
No - Go to 4.
4
Tape pipe/conduit dirty?
Yes - Remove and clean.
No - Go to 5.
5
Guide cables loose, kinked or broken?
Yes - Tighten, repair or replace.
No - Go to 6.
6
Worn Teflon bushings or bearings?
Yes - Refurbish gauge, replace Teflon bushings or bearings. Special
tools may be required.
Caution! Broken negator spring may cause injury. Stand clear of gaugehead and remove back cover.
40
Service Manual
2500
NOTES
SRM001GVAE0604
41
2500
Your offical representative
www.varec.com
Varec, Inc.
5834 Peachtree Corners East, Norcross (Atlanta), GA 30092 USA
Tel: +1 (770) 416-6629 Fax: +1 (770) 662-8939