1
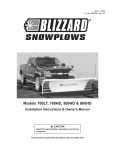
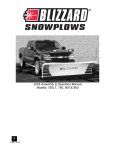
June 15, 2010
Lit. No. B64118, Rev. 05
Models 680LT & 720LT
Installation Instructions & Owner's Manual
CAUTION
See your BLIZZARD sales outlet/Web site for
specific vehicle application recommendations
before installation. The Undercarriage
Selection Guide has specific vehicle and
snowplow requirements.
CAUTION
Read this document before installing the
snowplow.
CAUTION
Read this document before operating or
servicing snowplow.
This manual supersedes all editions with an earlier date.
PREFACE
When service is necessary, your local BLIZZARD
distributor knows your snowplow best. Contact your
BLIZZARD outlet for maintenance, service or any
other assistance you may require.
Congratulations on purchasing the finest straight
blade snowplow available! BLIZZARD ® straight
blades are clearing new trails for innovative design,
rugged durability, quality craftsmanship and superior
performance. Our innovative products are tested all
over the snowbelt.
If you have not already done so, please visit
www.blizzardplows.com to register your new
BLIZZARD snowplow!
This manual provides safety, operation and
maintenance information for your new BLIZZARD
snowplow. To keep your snowplow in good condition,
read and understand this manual and follow its
recommendations. Failure to do so may affect your
warranty coverage.
Lit. No. B64118, Rev. 05
2
June 15, 2010
TABLE OF CONTENTS
Preface ........................................................................ 2
POWER HITCH™ System Instructions ..................... 30
Safety Information ....................................................... 4
Testing Your Snowplow ............................................. 31
Vehicle Application Information ................................... 7
Headlamp Aiming ...................................................... 33
Operation..................................................................... 8
Maintenance .............................................................. 34
Unpacking & Inspection .............................................. 9
Technical Specifications ............................................ 35
Torque Specifications ................................................ 10
Troubleshooting ......................................................... 36
Moldboard & A-Frame Assembly .............................. 12
Parts Lists.................................................................. 38
Moldboard Parts – All Models............................. 38
A-Frame & Pivot Beam Parts – All Models ......... 40
Power Unit Parts – All Models ............................ 42
Lights & Control Parts – All Models .................... 44
Accessories & Kits – All Models ......................... 46
Electrical & Hydraulic Systems.................................. 16
Manifold Assembly &
Electrical Installation – Snowplow Side ....... 16
General System Schematics .............................. 18
Hydraulic Guide .................................................. 19
Electrical Schematics – Snowplow Side ............. 20
Electrical Installation – Vehicle Side ................... 23
Electrical Schematics – Vehicle Side ................. 26
Lit. No. B64118, Rev. 05
3
June 15, 2010
SAFETY
SAFETY DEFINITIONS
WARNING/CAUTION & INSTRUCTION
LABELS
WARNING
Become familiar with and inform users about the
warning and instruction labels on the back of the
blade.
Indicates a potentially hazardous situation,
that if not avoided, could result in death or
serious personal injury.
NOTE: If labels are missing or cannot be read, see
your sales outlet.
CAUTION
Indicates a potentially hazardous situation
that, if not avoided, may result in minor or
moderate injury. It may also be used to alert
against unsafe practices.
WARNING
LOWER BLADE WHEN VEHICLE IS PARKED.
NOTE: Indicates a situation or action that can lead
to damage to your snowplow and vehicle or other
property. Other useful information can also be
described.
DO NOT EXCEED GVWR OR GAWR INCLUDING BLADE
AND BALLAST.
REMOVE BLADE ASSEMBLY BEFORE PLACING
VEHICLE ON HOIST.
CAUTION
MOUNT INSTRUCTIONS
DISMOUNT INSTRUCTIONS
Read Owner's Manual for Complete Instructions.
STEP #1
CONNECT/DISCONNECT
POWER HITCH Switch
CONNECT/DISCONNECT
POWER HITCH Switch
Pushbeam
Receiver
Mount Points
Kickstand Pin
Adjustable
Kickstand
READ OWNER'S MANUAL BEFORE OPERATING OR
SERVICING SNOWPLOW.
Read Owner's Manual for Complete Instructions.
STEP #1
TRANSPORT SPEED SHOULD NOT EXCEED 45 MPH.
FURTHER REDUCE SPEED UNDER ADVERSE TRAVEL
CONDITIONS.
Hitch
Pin
Undercarriage
Pushbeam
A-Frame
Mount Bushing
Slowly Move
Vehicle Forward
POWER
HITCH Arm
Kickstand Pin
Adjustable
Kickstand
POWER
HITCH Arm
PLOWING SPEED SHOULD NOT EXCEED 10 MPH.
WARNING: Keep fingers away. POWER HITCH arm raises behind undercarriage pushbeam.
• Kickstand must be lowered, with kickstand pin seated in lower hole on pivot beam.
• Slowly drive vehicle forward until pushbeam receiver mount points contact
A-frame mount bushings.
• Turn POWER HITCH OPERATION switch (on plow control) to "ON" position.
• Connect plow and vehicle electrical harnesses. Connect weather caps together.
STEP #2
•
•
•
•
•
Raise plow. Lower kickstand until kickstand pin is seated in lower hole on pivot beam.
Lower plow on flat, level surface. Turn vehicle ignition off.
Remove hitch pins from A-frame and undercarriage.
Turn vehicle ignition on.
Turn POWER HITCH OPERATION switch (on plow control) to "ON" position.
CONNECT/DISCONNECT
POWER HITCH Switch
A-Frame
Latch
SEE YOUR SALES OUTLET/WEB SITE FOR SPECIFIC
VEHICLE APPLICATION RECOMMENDATIONS.
59900
STEP #2
Hitch
Pin
A-Frame
Latch
Lock Pin
A-Frame Latch
rotates clockwise
and hooks onto
Draw Pin
Slowly
Move Vehicle
Backward
Kickstand Pin
Adjustable
Kickstand
Draw
Pin
• Pull A-frame latch lock pin out and lower A-frame latch over draw pin.
• Push and hold CONNECT/DISCONNECT switch upward. POWER HITCH arm
will engage back of pushbeam and pull plow into pushbeam receiver mount
points on vehicle.
• Insert both hitch pins and secure each with hair pin cotter.
• Lower POWER HITCH arm to relieve tension on A-frame latch. Raise A-frame
latch and lock into position with lock pin. Raise plow.
• Raise kickstand until kickstand pin seats into upper hole on pivot beam.
POWER HITCH Arm
WARNING: Keep fingers away from plow and truck mounting points.
• Push and hold CONNECT/DISCONNECT switch downward. POWER HITCH
arm will disengage from behind undercarriage pushbeam and lower.
• Disconnect plow and vehicle electrical harnesses. Install weather caps.
• Turn SYSTEM POWER (on plow control) to "OFF" position.
• Slowly move vehicle backward away from plow.
44812
U.S. Patents 5,638,618; 5,899,007; 6,178,669; 6,276,076; 6,393,737; 6,408,549; 6,412,199; 6,442,877; 6,615,513; Canadian and other patents pending.
WARNING
Crush
hazard.
Keep feet
clear.
Lit. No. B64118, Rev. 05
4
June 15, 2010
SAFETY
SAFETY PRECAUTIONS
CAUTION
Read Owner's Manual before operating or
servicing snowplow.
Improper installation and operation could cause
personal injury, and/or equipment and property
damage. Read and understand labels and the
Owner's Manual before installing, operating or making
adjustments.
CAUTION
Transport speed should not exceed 45 mph.
Further reduce speed under adverse travel
conditions.
WARNING
Lower blade when vehicle is parked.
Temperature changes could change
hydraulic pressure, causing the blade to
drop unexpectedly or damaging hydraulic
components. Failure to do this could result in
serious personal injury.
CAUTION
Plowing speed should not exceed 10 mph.
CAUTION
See your BLIZZARD® outlet for application
recommendations.
WARNING
You can die or be seriously injured. Keep
hands and feet away from hitch mechanism
and snowplow blade when operating the
POWER HITCH™ arm. The action of the arm
moves the snowplow toward the vehicle and
into position for proper attachment.
HYDRAULIC SAFETY
WARNING
Hydraulic fluid under pressure can cause skin
injection injury. If you are injured by hydraulic
fluid, get medical attention immediately.
WARNING
The driver shall keep bystanders clear of
the blade when it is being raised, lowered or
angled. Do not stand between the vehicle and
the blade or within 8 feet of a moving blade. A
moving or falling blade could cause personal
injury.
• Always inspect hydraulic components and hoses
before using. Replace any damaged or worn parts
immediately.
• If you suspect a hose leak, DO NOT use your
hand to locate it. Use a piece of cardboard or
wood.
WARNING
FUSES
Do not exceed GVWR or GAWR including the
blade and ballast. The rating label is found on
the driver-side vehicle door cornerpost.
The snowplow electrical and hydraulic systems
contain several blade-style automotive fuses. If
a problem should occur and fuse replacement is
necessary, the replacement fuse must be of the same
type and amperage rating as the original. Installing a
fuse with a higher rating can damage the system and
could start a fire. Fuse Replacement, including fuse
ratings and locations, is located in the Maintenance
Section of this Owner's Manual.
WARNING
To prevent accidental movement of the blade,
always turn the control OFF whenever the
snowplow is not in use. The power indicator
light will turn OFF.
WARNING
Remove blade assembly before placing
vehicle on hoist.
Lit. No. B64118, Rev. 05
5
June 15, 2010
SAFETY
PERSONAL SAFETY
VENTILATION
WARNING
• Remove ignition key and put the vehicle in park or
in gear to prevent others from starting the vehicle
during installation or service.
Vehicle exhaust contains lethal fumes.
Breathing these fumes, even in low
concentrations, can cause death. Never
operate a vehicle in an enclosed area without
venting exhaust to the outside.
• Wear only snug-fitting clothing while working on
your vehicle or snowplow.
• Do not wear jewelry or a necktie, and secure long
hair.
BATTERY SAFETY
• Wear safety goggles to protect your eyes from
battery acid, gasoline, dirt and dust.
CAUTION
Batteries normally produce explosive gases
which can cause personal injury. Therefore,
do not allow flames, sparks or lit tobacco
to come near the battery. When charging or
working near a battery, always cover your
face and protect your eyes, and also provide
ventilation.
• Avoid touching hot surfaces such as the engine,
radiator, hoses and exhaust pipes.
• Always have a fire extinguisher rated BC handy,
for flammable liquids and electrical fires.
FIRE AND EXPLOSION
Batteries contain sulfuric acid which burns
skin, eyes and clothing.
WARNING
Gasoline is highly flammable and gasoline
vapor is explosive. Never smoke while
working on vehicle. Keep all open flames
away from gasoline tank and lines. Wipe up
any spilled gasoline immediately.
Disconnect the battery before removing or
replacing any electrical components.
NOISE
Airborne noise emission during use is below 70 dB(A)
for the snowplow operator.
Be careful when using gasoline. Do not use gasoline
to clean parts. Store only in approved containers away
from sources of heat or flame.
CELL PHONES
A driver's first responsibility is the safe operation of
the vehicle. The most important thing you can do
to prevent a crash is to avoid distractions and pay
attention to the road. Wait until it is safe to operate
Mobile Communication equipment such as cell phones
or two-way radios.
Lit. No. B64118, Rev. 05
6
June 15, 2010
VEHICLE APPLICATION INFORMATION
BALLAST REQUIREMENTS
CAUTION
See your BLIZZARD® outlet for specific
vehicle application recommendations before
installation. The Undercarriage Selection
Guide has specific vehicle and snowplow
requirements.
Position
and secure ballast
as close to the tailgate
as possible.
Vehicle application recommendations are based on
the following:
• The vehicle with the snowplow installed must
comply with applicable Federal Motor Vehicle
Safety Standards (FMVSS).
• The vehicle with the snowplow installed must
comply with the vehicle manufacturer's stated
gross vehicle and axle weight ratings (found on
the driver-side door cornerpost of the vehicle) and
the front and rear weight distribution ratio. In some
cases, rear ballast may be required to comply with
these requirements.
Ballast (additional weight) is an important part of
qualifying vehicles for snowplow eligibility. Rear
ballast must be used when necessary to remain in
compliance with axle ratings and ratios as specified by
the vehicle manufacturer.
If ballast is required, it is important that it be secured
properly behind the rear axle. A ballast retainer kit is
available from your BLIZZARD outlet, PN 62849.
• BLIZZARD Undercarriage Selection Guide is
based on available vehicle capacity for snowplow
equipment on a representative vehicle equipped
with options commonly used for plowing and with
300 lb of front seat occupant weight.
NOTE: The ballast retainer kit is for snowplow
vehicles requiring ballast. See your BLIZZARD
outlet for the correct amount of ballast required.
Include the weight of the retainer as part of the
ballast requirement. Sand bags are recommended
for use as ballast.
• Weights of front seat occupants can be adjusted
above 300 lb but vehicle with snowplow must not
exceed vehicle GVWR or GAWR.
• In some cases there may be additional limitations
and requirements.
NOTE: Ballast recommended and its weight
calculations assume the entire width of the bed is
filled as close to tailgate as possible.
• Installation, modification and addition of
accessories must comply with published
BLIZZARD recommendations and instructions.
Available capacity decreases as the vehicle is
loaded with cargo or other truck equipment or
snowplow accessories are installed.
• If there is uncertainty as to whether available
capacity exists, the actual vehicle as configured
must be weighed.
Lit. No. B64118, Rev. 05
7
June 15, 2010
OPERATION
Your snowplow is the most advanced and versatile
straight blade on the market. The easy-to-use controls
allow you to automatically adjust the snowplow blade
into an infinite number of plowing positions. Review
the illustrations below for instruction on maneuvering
your snowplow.
A. Lowered or Float Position
Pushing the joystick forward, toward the
"Lower/Float" designation on the label, or
pushing the D button on the touchpad will lower
your straight blade to the ground. Pushing and
momentarily holding the control in this position will
allow the snowplow to "float," or follow the contour
of the ground when moving forward or backward.
A.
B. Raised Position
Pulling the joystick back, toward the "Raise"
designation on the label, or pushing the U button
on the touchpad will lift your straight blade off
the ground. To stop raising the snowplow, simply
return the joystick to its "neutral" or center position
or release the touchpad button. The snowplow has
reached its maximum raised position when the
blade stops lifting.
C. Angled Right Position
To angle your straight blade to the right, position
the joystick toward the "R" on the label or push
the R button on the touchpad. To stop angling the
snowplow, return the joystick to its "neutral" or
center position or release the touchpad button.
The snowplow has reached its maximum angled
position when the blade stops moving to the right
side.
B.
D. Angled Left Position
To angle your straight blade to the left, position
the joystick toward the "L" on the label or push
the L button on the touchpad. To stop angling the
snowplow, return the joystick to its "neutral" or
center position or release the touchpad button.
The snowplow has reached its maximum angled
position when the blade stops moving to the left
side.
C.
NOTE: To prevent premature failure of the power
contactor (solenoid), return the joystick to its
neutral (center) position or release the touchpad
button immediately after the blade reaches the
limit of any position. Continuing to hold the
control after the blade has reached the limit of
movement in any position will reduce the life of
the solenoid.
D.
Lit. No. B64118, Rev. 05
8
June 15, 2010
UNPACKING & INSPECTION
Your BLIZZARD® straight blade has been packaged
to withstand transit and weather related damage.
Fully inspect all components upon receipt of your
snowplow. In the event of shipping damage or missing
parts, immediately contact our Customer Service
Department at 1-888-680-8600.
Once you have inspected all parts and removed all
packaging materials, your snowplow is ready to be
fully assembled.
Retain this information for your records.
Date of Purchase:
Begin unpacking and inspection in the following order:
Dealer/Distributor:
1.
Remove the shipping document from the end
panel of the pallet wrap. Retain all documentation
for your records.
Dealer Phone Number:
Snowplow Serial Number:
2. All wood framing and polyethylene material should
be removed from the pallet for easy access to the
snowplow.
Hydraulic Pump Serial Number:
3. Due to the odd shaped components and size
of several assembly parts, various cable ties
and corrugated material are used for scratch
resistance and package orientation. Please
remove these items prior to assembly.
4. Place the main blade assembly on a flat, level
surface.
Lit. No. B64118, Rev. 05
9
June 15, 2010
TORQUE SPECIFICATIONS
TORQUE CHART
CAUTION
Read instructions before assembling.
Fasteners should be finger tight until
instructed to tighten according to the torque
chart. Use standard methods and practices
when attaching snowplow including proper
personal protective safety equipment.
Grade Identification for J429–Grade 5 Bolt
Grade Identification for J429–Grade 8 Bolt
SAE J429 Grade 5 Torque Values
Tightening Torque
Nominal
Clamp Loads
Thread Size
(lb)
"Lubricated"
"Dry"
1/4-20
2,000
6 ft-lb
8 ft-lb
5/16-18
3,350
13 ft-lb
18 ft-lb
3/8-16
4,950
23 ft-lb
31 ft-lb
7/16-14
6,800
37 ft-lb
50 ft-lb
1/2-13
9,050
57 ft-lb
75 ft-lb
9/16-12
11,600
82 ft-lb
109 ft-lb
5/8-11
14,500
113 ft-lb
151 ft-lb
3/4-10
21,300
200 ft-lb
266 ft-lb
7/8-9
29,435
321 ft-lb
430 ft-lb
1-8
38,600
482 ft-lb
640 ft-lb
SAE J429 Grade 8 Torque Values
Tightening Torque
Nominal
Clamp Loads
Thread Size
(lb)
"Lubricated"
"Dry"
1/4-20
2,850
9 ft-lb
12 ft-lb
5/16-18
4,700
18 ft-lb
25 ft-lb
3/8-16
6,950
32 ft-lb
44 ft-lb
7/16-14
9,600
53 ft-lb
70 ft-lb
1/2-13
12,800
80 ft-lb
107 ft-lb
9/16-12
16,400
115 ft-lb
154 ft-lb
5/8-11
20,300
159 ft-lb
211 ft-lb
3/4-10
30,100
282 ft-lb
376 ft-lb
7/8-9
41,550
454 ft-lb
606 ft-lb
1-8
54,540
680 ft-lb
900 ft-lb
8.8
Grade Identification for Metric–Grade 8.8 Bolt
Diameter
(mm)
5
6
7
8
10
12
14
16
18
20
10.9
Metric Class 8.8 Torque Values
Tightening Torque
Clamp Loads
(lb)
"Lubricated"
"Dry"
1,389
3 ft-lb
5 ft-lb
1,965
6 ft-lb
8 ft-lb
2,826
10 ft-lb
13 ft-lb
3,579
14 ft-lb
19 ft-lb
5,672
28 ft-lb
37 ft-lb
8,243
49 ft-lb
65 ft-lb
11,246
77 ft-lb
103 ft-lb
15,882
125 ft-lb
167 ft-lb
19,423
172 ft-lb
229 ft-lb
24,784
244 ft-lb
325 ft-lb
Lit. No. B64118, Rev. 05
Grade Identification for Metric–Grade 10.9 Bolt
Diameter
(mm)
5
6
7
8
10
12
14
16
18
20
10
Metric Class 10.9 Torque Values
Tightening Torque
Clamp Loads
(lb)
"Lubricated"
"Dry"
1,987
5 ft-lb
7 ft-lb
2,812
8 ft-lb
11 ft-lb
4,044
14 ft-lb
19 ft-lb
5,121
20 ft-lb
27 ft-lb
8,116
40 ft-lb
53 ft-lb
11,796
70 ft-lb
92 ft-lb
16,092
111 ft-lb
148 ft-lb
21,970
173 ft-lb
231 ft-lb
26,868
238 ft-lb
317 ft-lb
34,284
338 ft-lb
450 ft-lb
June 15, 2010
TORQUE SPECIFICATIONS
37° JIC Flare Torque Values
Turns
Size
ft-lb
Assembly Steps
min–max
N/A
N/A
2
2
1-1/2
1-1/2
1-1/2
1-1/4
1
1
1
1
1
-02
-03
-04
-05
-06
-08
-10
-12
-14
-16
-20
-24
-32
6–7
8–9
11–12
14–15
18–20
36–39
57–63
79–88
94–103
108–113
127–133
158–167
245–258
1. Make sure the tubing and threads are clean.
2. Lubricate the threads with 10W hydraulic fluid.
3. Hand tighten the nut/sleeve to approximately 30 in-lb.
4. Make alignment marks on the nut and fitting.
5. Tighten to turn or torque specification.
6. When fully tightened, make a second set of alignment marks at the fully tightened position.
NOTE: Torque values specified are for threads lubricated with 10W hydraulic fluid.
Overtightening will reduce the clamping force resulting in loss of seal and reduction of flow.
O-Ring Boss Torque Values
Size
ft-lb
Assembly Steps
min–max
-02
-03
-04
-05
-06
-08
-10
-12
-14
-16
-20
-24
-32
6–7
8–10
13–15
17–21
22–25
40–43
43–57
68–75
90–99
112–123
146–200
154–215
218–290
1. Verify the port, O-ring, sealing surfaces and threads are clean and free of damage.
2. Lubricate the threads and the O-ring with 10W hydraulic fluid.
3. For an adjustable ORB, completely back off the locknut and washer.
4. Hand tighten the fitting until it contacts the port spotface. Point the elbow or tee in the desired
direction and hold.
5. Torque to specification.
NOTE: Torque values specified are for threads lubricated with 10W hydraulic fluid.
Lit. No. B64118, Rev. 05
11
June 15, 2010
MOLDBOARD & A-FRAME ASSEMBLY
1.
Position the pivot beam and A-frame near
the connecting points at the rear of the blade
between the two center support ribs. Insert one
3/4" x 3-7/16" clevis pin through each mounting
hole and secure with 1/4" x 1-1/2" cotter pin.
Spring Loaded
Adjustable
Pivot Beam
Kickstand
2. Mount the kickstand to the end of the pivot beam
(driver's side) using the 1/2" x 4-1/2" bolt provided.
The spring, bushing and locknut are located on
the inside of the pivot beam. Review the diagrams
below and to the right. To pivot the kickstand, pull
the spring loaded leg out and rotate it until the pin
locks into place. Adjust the foot on the stand arm
so that the foot is 1/8" from the ground when the
A-frame is level and the A-frame mount points
are 10-1/2" from the ground. Tighten both of the
locknuts on the kickstand.
1/8" Ground
Clearance
10-1/2"
Lit. No. B64118, Rev. 05
12
June 15, 2010
MOLDBOARD & A-FRAME ASSEMBLY
3. Hook each extension spring to the receiving holes
on the pivot beam and attach the opposite end of
the spring to its respective spade bolts. Install the
spade bolts through the extension spring mounting
angle on the top rear of the blade. Secure each
spade bolt by placing one 5/8" flat washer on the
bolt and thread one 5/8" locknut. Tighten each
locknut until a piece of paper can pass between
the 3rd and 4th coils on the spring.
Lit. No. B64118, Rev. 05
4. Install the blade guides at each end of the
moldboard. Insert the cap screw through the holes
at the top of the wing reinforcement rib. Tighten all
screws with locknuts.
13
June 15, 2010
MOLDBOARD & A-FRAME ASSEMBLY
5. Remove the dust cap from both of the hydraulic
angle cylinder ports and attach one 7/16" male
ORB adapter to each port. Connect the straight
end of one 1/4" x 25" hydraulic hose (B60426)
to each angle cylinder adapter. Be careful not to
overtighten the hose connections. Route both
hoses through the A-frame access holes, near the
angle cylinder mount brackets. Tighten fittings and
hoses according to the torque chart.
7.
Remove the plastic dust caps from the hydraulic
lift cylinder ports. Attach one 7/16" 90° adjustable
elbow ORB adapter to the extend port (base end)
and one 7/16" male ORB connector adapter to
the retract port (rod end). Connect the straight
end of the 1/4" x 13-1/2" hydraulic hose (B60432)
to the rod end adapter. Tighten fittings and hose
according to the torque chart.
8. Position the lift cylinder in the channel opening
under the A-frame. Route the 13-1/2" rod end
hose through the front (closest to the pivot beam)
2" diameter hole in the A-frame. The lift cylinder
base end hole should be aligned with the holes on
either side of the channel. Secure the lift cylinder
to the A-frame using a 5/8" x 5-3/4" clevis pin and
one 1/4" x 1-1/2" cotter pin. Use the access hole in
the A-frame, located on the driver's side, to install
the clevis pin. Connect the 1/4" x 10" hydraulic
hose (B60293) to the base end adapter. Tighten
hose according to the torque chart.
6. Position each angle cylinder with the rod
end of the cylinder in the pivot beam. Secure
the cylinders to the pivot beam with a
3/4" x 3-7/16" clevis pin and a 1/4" x 1-1/2" cotter
pin. Extend each cylinder rod until the cylinder
base mounting hole aligns with the hole on the
A-frame angle cylinder bracket. Insert another
clevis pin and secure it with a cotter pin.
B60004
- Lift Cylinder Rod End
- Angle Cylinders
7/16
7/16
7/16
7/16
9/16
9/16
B60003
- Manifold Ports #1, 2 & 4
Lit. No. B64118, Rev. 05
7/16
7/16
B60008
- Lift Cylinder Base End
14
B60287
- Manifold Port #3
June 15, 2010
MOLDBOARD & A-FRAME ASSEMBLY
9. Remove the draw latch mount pin, spacer and
cotter pin from the draw latch assembly. By
removing this pin, the inner draw latch plates can
swing free. Remove the inner draw latch plate lift
cylinder mount pin. Position the plates on either
side of the lift/lower cylinder rod and insert the
pin through the plates and cylinder rod. With the
cylinder connected to the inner draw latch plates,
rotate the draw latch assembly toward the draw
latch mount holes on the A-frame. Align the holes
in the outer draw latch plate with those of the inner
draw latch plates and the A-frame.
NOTE: The A-frame latch, located at the
rear/center of the A-frame, should be raised
up to insert the draw latch mount pin. Pull the
A-frame latch pull pin out and rotate the latch
counterclockwise if it is locked into position.
Secure the assembly to the A-frame by replacing
the draw latch mount pin, spacer and cotter pin.
Reset the A-frame latch so the A-frame latch pull
pin locks into place.
A-Frame
Lock Pin
A-Frame
Latch
5/8" x 2-1/16"
Inner Draw Latch Plate
Lift Cylinder Mount Pin
Hydraulic
Lift/Lower
Cylinder
1" x 3-1/4"
Draw Latch
Mount Pin
3/16" x 2-1/2"
Cotter Pin
Draw Latch Arm
Pivot Pin
3/4" x 2-1/16"
3/4"-10
Locknut
Inner Draw Latch Plate
Outer Draw Latch Plate
1" x 4-1/2"
Draw Pin
3/4" x 3-1/2"
Cap Screw
Lit. No. B64118, Rev. 05
3/4" x 3-7/16"
Clevis Pin
15
1/4" x 1-1/2"
Cotter Pin
June 15, 2010
MANIFOLD ASSEMBLY & ELECTRICAL INSTALLATION – SNOWPLOW SIDE
NOTE: The snowplow side electrical harness and
connect/disconnect switch must be installed
before the manifold is secured.
1.
NOTE: The flow control knob will need to be
removed to install the fitting into Port #3.
NOTE: DO NOT let any foreign objects enter
into the open ports. The valves can become
contaminated and greatly hinder the snowplow's
performance. Torque to proper specifications.
Remove the nut, washer and alignment ring
from the POWER HITCH™ connect/disconnect
toggle switch and insert it through the back of
the mounting bracket on the A-frame. Align the
notches on the switch and bracket. Replace the
alignment ring, washer and nut and tighten until
the switch is firmly in place. Attach the connector
on the snowplow harness to the switch.
NOTE: All ports are identified by a stamped
number on the manifold. The numbers also
identify the hydraulic functions, which can be
referenced on the label under the hydraulic pump
and manifold cover.
NOTE: Use caution when connecting, switches
can break if done forcefully.
4. Connect the red power wire from the snowplow
harness to the pump motor terminal stud.
Hardware provided on pump.
Flow Control
Knob
NOTE: The red power wire contains an end ring
terminal that is too large for the pump motor
stud. Remove this terminal and replace it with the
1/4" end ring terminal on the pump motor terminal
stud.
5. Align the mount holes in the pump with the holes
in the bracket, located on the A-frame. Secure
with 3/8" x 1-1/4" cap screw, 3/8" lock washer and
3/8" flat washer through the top mount hole in the
bracket and into the pump. Insert 3/8" x 1-1/4" cap
screw, 3/8" lock washer and 3/8" flat washer
through the bottom mount hole in the bracket and
into the pump. This is also the ground location for
the snowplow harness.
3
2. Attach the connector on the harness to the
connector on the coil harness.
NOTE: When installing the manifold between
the mount brackets on the A-frame, hold the
manifold at the sides of the block. Never handle
the manifold by the coils. Doing so can cause a
solenoid cartridge to bend, causing the cartridge
to stick when activated.
3. Assemble the manifold. The manifold, pump
and coil harness have been connected at the
factory; however, the manifold contains several
components that you will need to install prior to
securing the assembly to the A-frame. Each of the
hose ports on the manifold is covered with a dust
cap. Remove the cap and install the appropriate
fitting in its respective port. Tighten fittings and
hoses according to the torque chart. Rest the
manifold assembly between the mount brackets
on the A-frame.
NOTE: The arrow shown on the manifold
illustration indicates the direction the
90° adapters should be positioned to receive the
hydraulic hoses.
Lit. No. B64118, Rev. 05
16
June 15, 2010
MANIFOLD ASSEMBLY & ELECTRICAL INSTALLATION – SNOWPLOW SIDE
6. Remove the bottom bolt, lock washer and flat
washer from the rear pump mount bracket. Route
the black ground wire (from the harness) under the
pump on the driver's side of the A-frame. Align the
tooth lock washer and end ring terminal over the
hole on the bracket and secure them with the lock
washer and bolt.
9. Connect the hydraulic hoses to their respective
adapters on the manifold. Hose PN B60293
Port #3, Hose PN B60432 Port #4 and Hose
PN B60426 Ports #2 and #1. Tighten hoses
according to the torque chart.
10. Position the harness braid in the notch on the
switch bracket and secure it with a cable tie.
NOTE: A medium strength thread-locking
compound should be used on all of the pump
mount fasteners.
7.
NOTE: The diode loop harness should be inside of
the pump cover.
Secure the manifold to the A-frame. Remove
the washers, lock washers and cap screws from
the manifold and align the mount holes with the
A-frame brackets. Properly replace and tighten all
hardware. The passenger-side mount bracket is
the ground for the manifold coil harness.
11. Place the power connector, from the harness,
through the hole in the pump and manifold cover.
Position the cover over the protective toggle switch
hood. Align the front and rear holes in the cover
with the U-nuts located on the mount tabs. Secure
the pump cover with two 3/8" x 1-1/8" knobs.
NOTE: A medium strength thread-locking
compound should be used to secure the manifold
mount fasteners.
The pump cover installs over the top of the draw
latch switch bracket.
8. The manifold contains a red coil wire harness
that must be grounded to the A-frame. Secure
the 3/8" end ring terminal from this harness
to the passenger-side manifold mount bracket
with existing manifold mount hardware. The
internal/external tooth lock washer provided
should install against the mount bracket to provide
a solid ground.
Apply
Thread-Locking
Compound
Lit. No. B64118, Rev. 05
17
June 15, 2010
GENERAL SYSTEM SCHEMATICS
B60344 – ELECTRICAL SCHEMATIC
S8
S3
S4
S6
S5
A
B
C
D
E
F
G
H
J
K
B60344 – HYDRAULIC SCHEMATIC
RIGHT ANGLE
LEFT ANGLE
1
LIFT CYL.
2
3
RV1
RAISE LOWER
4
RV2
FC
3000 PSI
S5
S6
S3
S8
S4
TGP
PGP
T1 P1
Lit. No. B64118, Rev. 05
18
June 15, 2010
HYDRAULIC GUIDE
Hydraulic Valve & Hose Port Guide
Models 680LT & 720LT
RV2
4
FC
2
RV1
1
S5
S4
S8
S6
3
S3
Clockwise – Decrease Snowplow Drop Speed
Counterclockwise – Increase Snowplow Drop Speed
Pressure Gauge
Quick Connect
If being used with auxiliary hydraulics, recommended for systems having a flow rated at 4–30 gallons per minute (gpm) and a
maximum pressure rating of 3,000psi.
VARIABLE FLOW CONTROL VALVE
HYDRAULIC HOSES
Port
Function
Valve
Function
1
2
3
4
Angle Right – Driver-Side Cylinder
Angle Left – Passenger-Side Cylinder
Raise – Lift Cylinder (Base)
Lower – Lift Cylinder (Rod)
FC
Snowplow Drop Speed Adjustment
NOTE: Energize the following solenoids for the functions:
S3
S4
S5
S6
S5 & S8
RELIEF VALVES
Valve
Function
RV1
RV2
Driver-Side Angle Cylinder Relief
Passenger-Side Angle Cylinder Relief
Angle Left – Passenger-Side Cylinder
Angle Right – Driver-Side Cylinder
Float
Raise – Lift Cylinder (Base)
Lower – Lift Cylinder (Rod)
Milwaukee, Wisconsin 53224
Lit. No. B64118, Rev. 05
19
B63177
June 15, 2010
ELECTRICAL SCHEMATICS
BLIZZARD ® HARNESS PLUG (VEHICLE)
UNIVERSAL 14 + 2 MOLD
PIN
NO.
1
2
3
4
5
6
7
8
9
10
11
12
13
14
15
16
COLOR
FUNCTION
BLACK
BLACK
RED
BROWN/WHITE
BROWN
RED/WHITE
RED/BLACK
BLUE/WHITE
BLUE/BLACK
BLUE
LT. GREEN
WHITE
ORANGE
N/A
N/A
N/A
PINK/BLACK
N/A
AWG
GROUND
GROUND
12 VOLT DC (+)
PUMP SOLENOIDTO RING
PUMP SOLENOIDTO MOLEX
RIGHT SLIDE BOX EXTEND
RIGHT SLIDE BOX RETRACT
LEFT SLIDE BOX EXTEND
LEFT SLIDE BOX RETRACT
LEFT ANGLE
RIGHT ANGLE
LIFT
FLOAT
N/A
N/A
N/A
12 (+) VDC FUSED
N/A
4
18
4
18
18
18
18
18
18
18
18
18
18
N/A
N/A
N/A
18
18
WIRE
COLOR
(BLUE)
STRIPE
COLOR
(BLACK)
7
WIRE
COLOR
(RED)
PIN NUMBER
STRIPE
COLOR
(WHITE)
4
BLUE/WHITE
PIN NUMBER
EXAMPLE
RED/BLACK
BLUE/BLACK
BLACK
TOP
8
BLUE
BROWN
7
2
3
4
1
10
15
16
ORANGE
5
6
11
RED/WHITE
14
3
9
1
13
BROWN/WHITE
12
LIGHT GREEN
WHITE
BLACK
PINK/BLACK
RED
VEHICLE HARNESS PLUG (2005)
FACE VIEW LOOKING AT FEMALE CONNECTOR
FEMALE TERMINALS
BLIZZARD HARNESS PLUG (PLOW)
PIN
NO.
1
2
3
4
5
6
7
8
9
10
11
12
13
14
15
16
COLOR
BLACK
N/A
RED
BROWN
RED/WHITE
RED/BLACK
BLUE/WHITE
BLUE/BLACK
BLUE
LT. GREEN
WHITE
WHITE
ORANGE
N/A
N/A
N/A
PINK/BLACK
N/A
FUNCTION
GROUND
N/A
12 VOLT DC (+)
PUMP SOLENOID
RIGHT SLIDE BOX EXTEND
RIGHT SLIDE BOX RETRACT
LEFT SLIDE BOX EXTEND
LEFT SLIDE BOX RETRACT
LEFT ANGLE
RIGHT ANGLE
LIFT
LIFT
FLOAT
N/A
N/A
N/A
12 (+) VDC FUSED
N/A
AWG
4
N/A
4
18
18
18
18
18
18
18
18
18
18
N/A
N/A
N/A
18
18
WIRE
COLOR
(PINK)
STRIPE
COLOR
(BLACK)
15
WIRE
COLOR
(BLUE)
PIN NUMBER
STRIPE
COLOR
(WHITE)
6
RED/BLACK
PIN NUMBER
EXAMPLE
BLUE/WHITE
RED/WHITE
RED
TOP
3
BROWN
4
1
9
12
LIGHT GREEN
5
13
2
10
10
14
BLACK
7
6
15
8
11
16
BLUE/BLACK
BLUE
ORANGE
WHITE (DOUBLE)
PINK/BLACK
PLOW HARNESS PLUG (2005)
FACE VIEW LOOKING AT MALE CONNECTOR
MALE TERMINALS
Lit. No. B64118, Rev. 05
20
June 15, 2010
7
3
1
5
6
(1) BRN
(2) BRN
(3) ORG/RED
(4) WHITE
(5) PNK/BLK
(6) PNK/BLK
4
2
8
F
G
H
J
K
WHT
BLU
BLU/BLK
BLU/WHT
RED/BLK
RED/WHT
WHT
ORG/WHT
ORG
ORG/BLK
ORG/RED
(4) 6 AMP 600 VOLT DIODES
ORG/BLK
ORG/WHT
WHT
ORG/RED
LT GRN
ORG/RED
ORG
B
A
C
H
ORG/BLK
ORG/WHT
G
F
D
J
E
K
ORG/BLK
ORG/WHT
ORG/RED
ORG
WHT
BLK
RED
BRN
RED / WHT
RED / BLK
BLU/ WHT
BLU/BLK
BLU
LT GRN
WHT
ORG
PNK / BLK
1
2
3
4
5
6
7
8
9
10
11
15
8
A
B
C
D
E
3
4
12
13
14
15
9
1
10
2
5
6
7
21
16
Lit. No. B64118, Rev. 05
11
PLOW HARNESS (B62039)
ELECTRICAL SCHEMATICS – SNOWPLOW SIDE
June 15, 2010
TOP
B
K
J
H
G
F
E
D
C
22
ORG/WHT
D4
ORG/BLK
ORG/WHT
RED/WHT
RED/BLK
BLU/WHT
BLU/BLK
BLU
LT GRN
ORG/RED
WHT
ORG/WHT
ORG/BLK
WHT
ORG
ORG/BLK
D3
ORG/RED
ORG
ORG/RED
D1
WHT
D2
ORG
WHT
ORG/WHT
ORG/BLK
ORG/RED
6
WHT
5
PINK/BLK
A
ORG/RED
ORG/RED
ORG/RED
ORG
RED/WHT
RED/BLK
4
2
BRN
WHT
ORG/BLK
ORG/WHT
WHT
BLU/WHT
BLU/BLK
BLU
LT GRN
3
1
BRN
Lit. No. B64118, Rev. 05
PINK/BLK
4GA, BLACK
4GA, RED
PLOW WIRE HARNESS SCHEMATIC (B62039)
WHT
BRN
BLK
RED
RED/WHT
RED/BLK
BLU/WHT
BLU/BLK
BLU
LT GRN
WHT
ORG
PNK/BLK
1
2
4
5
6
7
8
9
10
11
15
3
ELECTRICAL SCHEMATICS – SNOWPLOW SIDE
June 15, 2010
ELECTRICAL INSTALLATION – VEHICLE SIDE
CAUTION
NOTE: Do not fasten the harness to areas that
come in contact with moving engine parts or
possess extreme heat. The harness could become
tangled and/or melt causing electrical failure and
vehicle damage.
Before drilling any holes, check the selected
area for wires, hoses or other obstructions.
1.
With the large plug on the electrical harness
placed near the tow hook, under the bumper, route
the harness over the driver-side fender well and
to the fire wall. Insert the connector end of the
harness through an existing hole in the fire wall
and into the vehicle cab. If an access hole does
not exist, drill an appropriately sized hole through
the fire wall in a convenient location away from
sharp edges and hot or moving parts.
3. Connect the vehicle harness ground wire to the
NEGATIVE (–) terminal on the vehicle's battery.
Cut the wire to length, and strip the end of the
wire. Crimp and solder a 3/8" ring terminal on the
wire.
NOTE: The harness should be secured to
the vehicle prior to taking the necessary
measurement.
NOTE: Keep the snowplow plug and vehicle
connector pins lubricated with a liberal amount of
dielectric grease. Always replace the protective
weather caps when the snowplow is disconnected
from the vehicle.
Measure the distance needed for the power wire
to reach the solenoid. Strip the wire, then crimp
and solder an end ring terminal to it. Connect the
power wire to either large terminal on the solenoid.
2. Attach the power contactor (solenoid) to the
driver's side wheel well or engine fan guard using
#12 x 3/4" self-drilling screws.
4. Strip both ends of the remaining length of red
wire, then attach and solder an end ring terminal
to both. Connect one end of the wire to the open
terminal on the solenoid and the remaining end to
the POSITIVE (+) terminal on the battery.
NOTE: Some model vehicles provide mounting
locations for accessory components.
Always mount the solenoid with the terminals
facing up, for extended solenoid life. Connect
the 24" black ground wire to either small terminal
on the solenoid and attach the opposite end
to the vehicle with a self-drilling screw. Cut the
brown/white pump activation wire on the harness
to length. Strip the end of the harness, and crimp
the eyelet terminal onto it. Attach the eyelet to the
remaining small terminal on the contactor. Secure
it with the hardware provided on the solenoid.
5. Position the main lighting harness with both
of the truck headlamp connectors near each
truck headlamp and the snowplow headlamp
connectors near the grille of the vehicle.
6. Plug the headlamp ground/relay connector from
the vehicle harness into the connector on the
main lighting harness. Securely mount the relay
receptacles to the vehicle with the terminal wires
facing down and the relays facing up. Installing the
relays in this position will allow moisture to drain
from the relay.
Large
Terminals
7.
Remove the front signal lamp assembly from both
sides of the vehicle. On the driver's side, feed the
violet (turn lamp) and gray (run lamp) wires from
the main lighting harness through the opening
in the signal lamp housing. Use a test light or
ohmmeter to determine the proper wires in the
vehicle's electrical system to splice into. Position
Small
Terminals
Lit. No. B64118, Rev. 05
23
June 15, 2010
ELECTRICAL INSTALLATION – VEHICLE SIDE
one end of the turn or run lamp wire into the splice
lock connector, and attach the vehicle wire into
the opposite side. Complete the splice by pinching
both wires together and locking the connector.
Repeat the splice procedure for the remaining
wire.
instrumentation. Do not mount the switch in areas
prohibited by the vehicle manufacturer for crash
worthiness. See the vehicle's body builder's book,
owner's manual or service manual for details. The
shaded areas in the illustration below show the
most commonly restricted areas.
8. Repeat Step 7 for the passenger's side using the
pink (turn lamp) and gray (run lamp) wires.
9. Connect the vehicle headlamps to the main
lighting harness using a light conversion harness
kit. Due to differences in the construction of the
kits, and the various make and model vehicles
BLIZZARD® snowplows are installed on, a
light conversion kit is not packaged with your
snowplow. Contact your local BLIZZARD dealer to
obtain the appropriate conversion harness kit for
your vehicle.
Install the headlamp bracket using two self-drilling
screws. Insert the toggle switch through the
bracket and secure it with the hardware provided.
Plug both of the switch leads into the toggle
switch.
10. Secure the braided harness to the vehicle.
Safely route all harnesses around the engine
components and attach them to the vehicle
with cable ties. Extend the snowplow headlamp
connectors, from the main lighting harness,
through the grille of the vehicle and position the
harness power plug and weather cap near the
bumper. Cable tie the plug to the vehicle bumper
or tow hook to keep the harness from hanging too
low.
NOTE: Both terminals should be inserted into
the spades on the same side of the switch. One
terminal should be positioned in the middle
spade.
Plug both 2-pin connectors together and this
will connect the toggle switch to the vehicle wire
harness. See illustration below.
12. Connect the power wire (with 15 amp fuse) to
a switched power source with a minimum of
15 amps.
CAUTION
Do not alter, modify or install additional
components in shaded areas of the following
illustration. Failure to comply may interfere
with air bag deployment or cause injury to
operator in an accident.
To Control
11. Install the remainder of the vehicle wire harness to
the interior of the cab. Find an accessible location
for the snowplow headlamp toggle switch and
bracket under the dashboard. When choosing
a location for your switch, it should be mounted
in easy reach of the vehicle operator and not
restricting access to vehicle controls or vehicle
Lit. No. B64118, Rev. 05
DPDT
END VIEW
Toggle
(looking at connector) Switch
Vehicle
Harness
Green/Yellow
12" Long
.250
Receptacles
END VIEW
(looking at connector)
24
June 15, 2010
ELECTRICAL INSTALLATION – VEHICLE SIDE
NOTE: The red power wire MUST be fused and
switched ON and OFF with ignition.
NOTE: The operation of the draw latch can only
be controlled when the switch on the control
is in the "POWER HITCH™" position and the
"RAISE/LOWER" rocker switch on the A-frame is
in the neutral (center) position.
Secure all loose wires under the dash.
13. Install the light tower. Position the arms into the
receiving pockets located on the undercarriage.
Each pocket has a lock pin that secures both light
tower arms. Pull out and twist each handle to
temporarily unlock the pins. Place the light tower
into the pockets and re-lock the pins. See your
local BLIZZARD® dealer for complete installation
instructions for your vehicle undercarriage.
17. After completing the mechanical and electrical
installations, test all snowplow and lighting
functions before attempting to drive or plow.
Joystick Control
14. Install the snowplow headlamps. Align one
headlamp stud on the light tower tube with the
mounting hole and insert the threaded stud
through each. Secure the headlamp with one
1/2" galvanized washer (neoprene facing up), one
7/16" external tooth lock washer and locknut.
NOTE: All snowplows are shipped with two caps
that install on the ends of the light tower.
After adding a liberal amount of dielectric grease,
connect the terminals from the snowplow
headlamps to the terminals on the main lighting
harness.
Touchpad Control
15. If using a joystick control, align the mount holes
on the joystick control with the holes located on
the mount pedestal.
NOTE: The radius on the pedestal should face the
dashboard.
Secure the joystick to the pedestal with the
8 x 3/4" machine screws provided. Slide the
hook-and-loop fastener strap through the slots
cut in the pedestal. The D-ring should be located
on the side opposite of the radius. Wrap the strap
around the bench and fasten.
16. Connect the white power connector from the
vehicle wire harness to the connector on the
control station. The power switch should be in the
"OFF" position.
Lit. No. B64118, Rev. 05
25
June 15, 2010
7
1
2
3
4
5
6
7
8
9
10
11
12
RED/WHT – RIGHT SLIDE BOX EXTEND
RED/BLK – RIGHT SLIDE BOX RETRACT
RED – SWITCHED 12 VOLT DC (+)
ORG – FLOAT
BLU/WHT – LEFT SLIDE BOX EXTEND
BLU/BLK – LEFT SLIDE BOX RETRACT
BLK – GROUND
WHT – LIFT
BRN – PUMP SOLENOID
PNK/BLK – FUSED 12 VOLT DC (+)
LT GRN – RIGHT ANGLE
BLU – LEFT ANGLE
RED
BRN/WHT
GRN/YEL
BLK
2
1
1
2
3
4
5
6
7
8
9
10
11
15
9
3
PNK/BLK
4GA RED
BRN
RED/WHT
RED/BLK
BLU/WHT
BLU/BLK
BLU
LT GRN
WHT
ORG
4GA BLK
9
8
4
RED
10 11 12
3
6
2
5
1
FUSE CAP
FUSE BODY
SPRING
FUSE 15AMP
12
13
14
15
16
4
5
6
1
10
2
26
7
Lit. No. B64118, Rev. 05
A
11
B
8
VEHICLE HARNESS (2005)
ELECTRICAL SCHEMATICS – VEHICLE SIDE
June 15, 2010
Lit. No. B64118, Rev. 05
27
1
4GA
BLK
2
BLK
RED
4GA
3
BRN
RED/WHT
RED/BLK
BLU/WHT
BLU/BLK
BLU
LT GRN
ORG
WHT
PNK/BLK
BRN/WHT
11
10
9
8
7
6
5
4
15
BLACK
PNK/BLK
ORG
WHT
LT GRN
BLU
BLU/BLK
BLU/WHT
RED/BLK
RED/WHT
BRN
BLK
NOTE: ALL GROUNDS HAVE BLACK WIRE
B A
BLK
RELAY
LIGHTING HARNESS
GRN/YEL
VEHICLE HARNESS SCHEMATIC (2005)
BLK
BLK
BRN
RED/WHT
RED/BLK
BLU/WHT
BLU/BLK
BLU
LT GRN
WHT
ORG
PNK/BLK
RED
1
2
GRN/YEL
7
9
1
2
5
6
12
11
8
4
10
3
ELECTRICAL SCHEMATICS – VEHICLE SIDE
June 15, 2010
Lit. No. B64118, Rev. 05
28
B62016 WATER RESISTANT
SPLICE LOCK
CONNECTOR
(USED IN INSTALLATION)
OTHER
WIRE
OTHER
WIRE
VIOLET WIRE
B62016 WATER RESISTANT
SPLICE LOCK
CONNECTOR
(USED IN INSTALLATION)
OTHER
OTHER
WIRE
WIRE
GRAY WIRE
A = LOW BEAM (L GREEN/RED)
B = COMMON (WHITE/RED)
C = HIGH BEAM (YELLOW/RED)
C
B
A
30
85
A
A
861
B
B
301
851
87
86
30
85
87a1
871
861
301
851
87a1
JACKET MATERIAL
BLACK NYLON BRAID
86
87
A
B
C
D
E
F
E
C
87a
30
85
861
WHT
BLK
PNK
GRY
LT GRN/BLK
YEL/BLK
F
D
B
A LT GRN
A LT GRN/RED
B WHT/RED
C YEL/RED
86
30
301
87a1
85
861 871
87
87a
871 87a1
B1
YEL/BLK
BLK/WHT
YEL
GRN/YEL
YEL/RED
LT GRN/BLK
BLK/WHT
LT GRN
GRN/YEL
LT GRN/RED
87
86
30
85
87a1
871
861
301
851
87a1
YEL/BLK
BLK/WHT
YEL
GRN/YEL
YEL/RED
LT GRN/BLK
BLK/WHT
LT GRN
GRN/YEL
LT GRN/RED
871 87a1
301
851
87
30
87a
85
301
87a1
861 871
B62016 WATER RESISTANT
SPLICE LOCK
CONNECTOR
(USED IN INSTALLATION)
OTHER
OTHER
WIRE
WIRE
PINK WIRE
86
B1
C
B
A
B62016 WATER
RESISTANT SPLICE
LOCK CONNECTOR
(USED IN INSTALLATION)
OTHER
OTHER
WIRE
WIRE
GRAY WIRE
A = LOW BEAM (L GREEN/RED)
B = COMMON (WHITE/RED)
C = HIGH BEAM (YELLOW/RED)
A LT GRN/RED
B WHT/RED
C YEL/RED
TRUCK LIGHT
BULB
C = HIGH BEAM (YELLOW)
B = COMMON (WHITE/RED)
A = LOW BEAM (L GREEN)
A LT GRN
C
B
A
TRUCK LIGHT
HARNESS
B WHT/RED
87a
F
E
A
B WHT/RED
87
D
C
A BLK
B GRN/YEL
B
A
C YEL
86
WHT
BLK
PNK
GRY
LT GRN/BLK
YEL/BLK
C YEL
TRUCK LIGHT
BULB
C = HIGH BEAM (YELLOW)
B = COMMON (WHITE/RED)
A = LOW BEAM (L GREEN)
C
B
A
TRUCK LIGHT
HARNESS
A
B
C
D
E
F
MAIN LIGHTING HARNESS (2005)
ELECTRICAL SCHEMATICS – VEHICLE SIDE
June 15, 2010
29
F
E
B
A
LT GRN LOW BEAM FEED
A
HIGH BEAM
YEL/RED
VIO
GRY
LOW BEAM
COMMON
LT GRN/RED
WHT/RED
COMMON
YEL
WHT/RED
C
BLK
FROM VEHICLE HARNESS
TRUCK
LIGHT
YEL/BLK
F HIGH BEAM
HIGH BEAM FEED
GRY
LT GRN/BLK
PNK
C RIGHT TURN
E LOW BEAM
BLK
B GROUND
D PARK-RUN
WHT
A COMMON
B
C
D
C
TRUCK
HARNESS
B
A
PLOW
LIGHT
B
YEL/RED
GRN/YEL
BLK/WHT
86
87a
30
YEL/BLK
85
87
LT GRN/RED
86
87a
30
LT GRN/BLK
85
87
YEL/RED
87a
30
YEL/BLK
87
LT GRN/RED
GRN/YEL
87a
30
BLK/WHT
87
LT GRN/BLK
LT GRN
YEL
LT GRN
YEL
Lit. No. B64118, Rev. 05
A
MAIN LIGHTING HARNESS SCHEMATIC (2005)
LT GRN LOW BEAM FEED
A
PNK
GRY
YEL/RED
C
HIGH BEAM
COMMON
LT GRN/RED LOW BEAM
WHT/RED
A
B
COMMON
YEL
WHT/RED
C
HIGH BEAM FEED
YEL/BLK
LT GRN/BLK
GRY
PNK
BLK
WHT
B
F HIGH BEAM
E LOW BEAM
D PARK-RUN
C RIGHT TURN
B GROUND
A COMMON
F
D
B
TRUCK
LIGHT
TRUCK
HARNESS
E
C
A
PLOW
LIGHT
ELECTRICAL SCHEMATICS – VEHICLE SIDE
June 15, 2010
POWER HITCH™ SYSTEM INSTRUCTIONS
Prior to operating your straight blade snowplow, review
the Mounting and Dismounting Instructions label on
the back of the driver-side moldboard.
NOTE: If at any time the Mounting and
Dismounting Instructions label, or any other label
attached to your snowplow becomes illegible,
promptly replace them.
MOUNT INSTRUCTIONS
DISMOUNT INSTRUCTIONS
Read Owner's Manual for Complete Instructions.
Read Owner's Manual for Complete Instructions.
STEP #1
Kickstand Pin
Adjustable
Kickstand
STEP #1
CONNECT/DISCONNECT
POWER HITCH Switch
CONNECT/DISCONNECT
POWER HITCH Switch
Pushbeam
Receiver
Mount Points
Hitch
Pin
Undercarriage
Pushbeam
A-Frame
Mount Bushing
Slowly Move
Vehicle Forward
POWER
HITCH Arm
Kickstand Pin
Adjustable
Kickstand
POWER
HITCH Arm
WARNING: Keep fingers away. POWER HITCH arm raises behind undercarriage pushbeam.
•
•
•
•
•
• Kickstand must be lowered, with kickstand pin seated in lower hole on pivot beam.
• Slowly drive vehicle forward until pushbeam receiver mount points contact
A-frame mount bushings.
• Turn POWER HITCH OPERATION switch (on plow control) to "ON" position.
• Connect plow and vehicle electrical harnesses. Connect weather caps together.
STEP #2
Raise plow. Lower kickstand until kickstand pin is seated in lower hole on pivot beam.
Lower plow on flat, level surface. Turn vehicle ignition off.
Remove hitch pins from A-frame and undercarriage.
Turn vehicle ignition on.
Turn POWER HITCH OPERATION switch (on plow control) to "ON" position.
STEP #2
CONNECT/DISCONNECT
POWER HITCH Switch
A-Frame
Latch
Hitch
Pin
A-Frame
Latch
Lock Pin
A-Frame Latch
rotates clockwise
and hooks onto
Draw Pin
Slowly
Move Vehicle
Backward
Kickstand Pin
Adjustable
Kickstand
POWER HITCH Arm
Draw
Pin
WARNING: Keep fingers away from plow and truck mounting points.
• Pull A-frame latch lock pin out and lower A-frame latch over draw pin.
• Push and hold CONNECT/DISCONNECT switch upward. POWER HITCH arm
will engage back of pushbeam and pull plow into pushbeam receiver mount
points on vehicle.
• Insert both hitch pins and secure each with hair pin cotter.
• Lower POWER HITCH arm to relieve tension on A-frame latch. Raise A-frame
latch and lock into position with lock pin. Raise plow.
• Raise kickstand until kickstand pin seats into upper hole on pivot beam.
• Push and hold CONNECT/DISCONNECT switch downward. POWER HITCH
arm will disengage from behind undercarriage pushbeam and lower.
• Disconnect plow and vehicle electrical harnesses. Install weather caps.
• Turn SYSTEM POWER (on plow control) to "OFF" position.
• Slowly move vehicle backward away from plow.
44812
U.S. Patents 5,638,618; 5,899,007; 6,178,669; 6,276,076; 6,393,737; 6,408,549; 6,412,199; 6,442,877; 6,615,513; Canadian and other patents pending.
Lit. No. B64118, Rev. 05
30
June 15, 2010
TESTING YOUR SNOWPLOW
1.
Fill the hydraulic pump reservoir with BLIZZARD ®
Snowplow Rapid Action Hydraulic Fluid until it
is approximately 3/4" from the top of the tank.
Replace the cap on the reservoir. Remove the
weather caps from each of the snowplow and
vehicle harnesses and connect the plugs. Start
the vehicle and turn the power switch on the
control station in the cab to the "ON" position.
3. Align the POWER HITCH arm on the A-frame
below the pushbeam, with the receiver plates in
line with the receiver plates on the undercarriage.
Pull out the A-frame latch pin and rotate the
A-frame latch clockwise until the latch is resting
on the draw pin. Move the snowplow in position by
activating the POWER HITCH connect switch and
release.
The POWER HITCH arm will rise until it hits the
pushbeam and the draw latch fingers will pull the
snowplow into the vehicle. The receiver plates
on the snowplow and vehicle are now positively
aligned. Insert the two hitch pins through the
mounting holes on the A-frame and secure each
with one hair pin cotter.
PN B63070
B63070
PN
After the two hitch pins are inserted through the
A-frame, lower the POWER HITCH arm using the
toggle switch on the A-frame. Rotate the A-frame
latch counterclockwise until the A-frame latch
lock pin can be reinserted. Fully reinserting the
A-frame latch lock pin will lock the A-frame latch in
place for transport or plowing snow. (See below.)
(.946 LITERS) NET 32 FL. OUNCES
1 U.S. QUART
A-Frame
Latch Pin
29544
A-Frame
Latch
WARNING
You can die or be seriously injured. Keep
hands and feet away from hitch mechanism
and snowplow blade when operating the
POWER HITCH™ arm. The action of the arm
moves the snowplow toward the vehicle and
into position for proper attachment.
Draw Pin
2. To raise the POWER HITCH arm on the
snowplow, turn the power switch on the control
station to the "UP" or "ON" position. Push and
hold the toggle switch on the A-frame upward
into the "CONNECT" position. Notice the action
of the fluid in the reservoir. By activating the
initial hydraulic function, the fluid begins to fill the
system. Push and hold the toggle switch in the
"DISCONNECT" position, the POWER HITCH
arm will lower. Refill the reservoir until the fluid is
approximately 3/4" from the top of the tank.
Lit. No. B64118, Rev. 05
Draw Latch
(in latched position)
4. Return to the interior of the vehicle. Test the
remaining functions of the snowplow. The
system power on the control should be in the
"ON" position. Raise the snowplow to its maximum
height by pulling the joystick back (or down) or
pressing the U button on the touchpad. Angle the
snowplow to the left by moving the joystick toward
the "L" (left angle) on the label or pressing the L
button on the touchpad. If the snowplow function
31
June 15, 2010
TESTING YOUR SNOWPLOW
is slow or delayed, the hydraulic fluid is filling
the cylinder and replacing the air in the system.
Test the remaining functions of the snowplow.
To lower the snowplow to the ground, push the
joystick ahead (or up) or push the D button on the
touchpad.
(No LED Float Light or Indicator Light)
NOTE: The FLOAT function is activated when the
joystick is pushed ahead (or up) into the "LOWER"
position or the D button is pressed on the
touchpad and held there for an additional .5 sec
after the blade contacts the ground. The LED
float light (touchpad only) will come ON when the
snowplow is in FLOAT mode.
WARNING
To prevent accidental plow activation, turn
POWER switch to the “OFF” position when
not in use.
BLZ 1017
Angle the snowplow to the right by moving the
joystick toward the "R" (right angle) on the label or
pressing the R button on the touchpad. Check the
fluid level in the reservoir and fill to 3/4" from the
top of the tank if needed.
5. Check for fluid leaks around the manifold, pump,
hydraulic hoses and all cylinders. If there are any
leaks, turn OFF the power switch on the control
and shut OFF the vehicle engine. Then, tighten
any loose connections and/or fittings. Restart the
vehicle, cycle all blade controls, then check to see
if all the leaks have been stopped after shutting
OFF the control power switch and shutting down
the vehicle.
ON/OFF Switch
(Emergency Stop)
LED Float Light
6. Check that the vehicle and snowplow headlamps
are in proper working condition including the turn
signals.
Indicator Light
(Backlit)
ON/OFF Switch
(Emergency Stop)
Lit. No. B64118, Rev. 05
32
June 15, 2010
HEADLAMP AIMING
e. Check functioning of any automatic vehicle
leveling systems and specific manufacturer's
instructions pertaining to vehicle preparation
for headlamp aiming.
f. Clean lenses.
g. Check for bulb burnout and proper beam
switching.
h. Stabilize suspension by rocking vehicle
sideways.
Fully tighten headlamp fasteners once correct visual
aim is achieved.
1.
Place vehicle on a level surface 25 feet in front of
a matte-white screen, such as a garage door. The
screen should be perpendicular both to the ground
and to the vehicle centerline.
2. The vehicle should be equipped for normal
operation. The snowplow blade should be in place
and in raised position. Below are steps listed
by the Society of Automotive Engineers (SAE)
pertinent to headlamp aiming in specification
#SAE J599d.
4. Mark (or tape) the vertical centerline of the
snowplow headlamps and the vertical centerline
of the vehicle on the screen. Mark the horizontal
centerline of the snowplow headlamps on the
screen (distance from ground to snowplow
headlamp centers).
3. Prepare vehicle for headlamp aim or inspection.
Before checking headlamp aim, the inspector will:
5. Align the top edge of the high intensity zone of
the snowplow lower beam below the horizontal
centerline and the left edge of the high intensity
zone on the vertical centerline for each snowplow
headlamp. (Refer to diagram below.)
a. Remove ice or mud from under fenders.
b. Set tire inflation pressures to the values
specified on vehicle information label.
c. Check springs for sag or broken leaves.
d. See that there is no load in the vehicle other
than the driver and ballast as specified in the
Undercarriage Selection Guide.
Vertical Centerline Ahead of DS
Snowplow Headlamp
Align with
Vehicle
Centerline
Vertical Centerline
Ahead of PS Snowplow Headlamp
Horizontal Centerline
of Snowplow Headlamps
Screen Located 25 Feet from
Snowplow Headlamps
Lit. No. B64118, Rev. 05
High Intensity Zones
of Snowplow Headlamps on Low Beam
33
June 15, 2010
MAINTENANCE
Maintenance
Check fasteners for tightness. Torque to specifications.
Check hoses for wear and leaks.
Check cylinders for leaks, inspect rod ends for corrosion and pitting.
Lubricate all exposed cylinder rod ends with liquid white lithium grease to prevent
corrosion.
Check cutting edges and plow shoes for wear. NOTE: Do not discard plow shoe
washers, these should be retained for different shoe adjustments.
Clean and lubricate all electrical plugs and connections with dielectric grease. Clean
and install all dust caps prior to storing.
Lubricate all pins and bushings, and A-frame latch with NLGI Grade 2 multi-purpose
lithium complex grease with molybdenum (MPGM) to maintain consistent operation.
Clean and paint all scratches or exposed metal with BLIZZARD ® touch-up paint.
Check the hydraulic fluid level. Fill with fluid to 3/4" from the top of the reservoir. Do not
exceed this level. Never mix different types of fluid.
Remove and properly discard the fluid from the pump reservoir. Clean the pump filter
and replace the hydraulic fluid to within 3/4" from the top of the reservoir. Changing the
fluid annually will prolong the life of your pump and manifold. Never mix different types
of hydraulic fluid.
Check the trip spring adjustment. Properly adjusted tension will allow a sheet of paper to
pass between the 3rd and 4th coils of the spring.
Clean snow and ice build-up from the pump and manifold cover.
Pressure wash and dry the entire snowplow prior to storing.
Cover the snowplow with a tarp if stored outside. This will protect your snowplow from
sun fading and inclement weather which can lead to accelerated corrosion.
Periodically
Yearly
X
X
X
X
X
X
X
X
X
X
X
X
X
X
X
X
X
REMOVING FROM STORAGE
LIFTING
1.
To lift and move this snowplow, attach chain fall grab
hooks to outside pivot beam area shown. Always
follow recommended lift warnings and procedures.
See following page for snowplow weights and
dimensions.
Perform all regular maintenance.
2. Replace the hydraulic fluid in the pump reservoir.
Prolonged storage could result in condensation
build-up.
3. Follow the mounting procedure on the
POWER HITCH™ label.
4. Initiate all of the functions. Monitor the fluid level
in the reservoir and fill to 3/4" from the top of the
tank as necessary.
5. Adjust the snowplow headlamps as needed.
Lifting Points
(both sides)
Lit. No. B64118, Rev. 05
34
June 15, 2010
TECHNICAL SPECIFICATIONS
Part
Specification
Length
Thickness
Height
Moldboard
Reinforcement
Cutting Edge (1080)
Finish
Trip Mechanism
Material
A-Frame
Hitch Pins
Finish
Construction
Type
Size
Motor
Pump
Weight
Mount
Reservoir Capacity
Controls
Construction
Manifold
Valves
Angle Cylinders
Stroke
Ram Diameter
Bore Diameter
Cylinders
Raise/Lower Cylinders
Stroke
Ram Diameter
Bore Diameter
Type
Measurements
Snowplow
Housing
Headlamps
Bulb Type
Switch Type
Weight*
Amperage Draw**
Snowplow
Adjustable Plow Shoes
Specs
Mount Mechanism
Control Station
* Weight does not include undercarriage.
680LT
720LT
80" (6'-8")
86" (7'-2")
14 ga
21-1/2"
23-1/2"
4 Ribs @ 3/16"
1/4" x 5"
Powder Coat White
(4) 5/16" Hooked Extension
Rectangular Tube and Channel Type
3/4" x 6" Yellow Zinc
Powder Coat Black
Steel Housing w/Clear Plastic Tank
Internal Gear Pump
0.7cc
12V Starter
32 lb
A-frame Install w/Hex Cap Screws
2 qt
Toggle and Rocker Switch/Joystick or Touchpad
Red Anodized Aluminum
Electro-Hydraulic Cartridge
2
7-5/16"
1-1/4"
1-1/2"
1
4-5/8"
1"
1-3/4"
Low Profile w/Turn Signals
12" W x 5" H x 5-1/4" D
Plastic Composite
High/Low Sealed Beam Halogen 12V Rectangular
Dash Mount, Toggle
361 lb
375 lb
65A (Approximately)
(2) Std.
Hydraulic Power Switch
Joystick or Touchpad
** Amperage Draw specifications are based on snowplow lift operation, at a shop temperature
of 65°F, using BLIZZARD ® Rapid Action Hydraulic Fluid. Amperage will vary with temperature,
fluid viscosity and meter accuracy. Deadheading a snowplow function will result in significantly
increased amperage.
Lit. No. B64118, Rev. 05
35
June 15, 2010
TROUBLESHOOTING
Problem
Pump will not run.
Cause
Snowplow harness may not be
properly connected to the vehicle
harness.
Power or ground cables to the
battery, pump or solenoid may not
be properly connected.
Pump will not run, power to the
solenoid.
The black ground wire and
brown/white activation wire on
the solenoid are not properly
connected.
Pump will not run with power
to the solenoid. Brown/white
activation wire and ground are
properly connected.
The red, hot wire to the pump
motor is not properly connected.
Pump will not turn OFF. Do not
allow the pump motor to run
Solenoid may be damaged.
continuously. Unplug the harness
until the solenoid can be tested or
Short in the control or wire
a BLIZZARD ® outlet can diagnose
harness.
the problem.
Solution
Verify the harnesses are properly connected.
Properly connect all cables. Clean and lubricate with
dielectric grease. If power does not resume, check
the continuity of all cables to find the break.
Properly connect both cables. Test for power
by initiating any control function except FLOAT.
NOTE: The POWER rocker switch must be in
the "ON" position to properly test any snowplow
function. If the solenoid is grounded and no power
exists, diagnose the snowplow and truck harnesses.
Connect red wire and check the black ground wire.
If problem is not resolved, the solenoid could be
inoperable or the pump motor may be worn. Replace
the solenoid if there is no power to the pump.
Replace the pump motor if it is receiving power.
Disconnect the brown/white activation wire from the
solenoid. If the problem is not resolved, replace the
solenoid.
Disconnect the control in the cab. If the pump turns
OFF, there is a short in the electrical system.
Add fluid to within 3/4" from the top of the tank.
Fluid level in the pump reservoir is
Check for leaks around the pump, manifold and
low. Fluid is leaking.
cylinders.
Pump runs but snowplow
Amperage from the vehicle's
Repair or replace vehicle alternator. System
functions are slow.
alternator is too low.
amperage draw is 65A at 1500 psi.
Remove the pump tank and thoroughly clean the
Pump filter may be clogged.
filter.
Lower the draw latch to relieve binding on the
Draw latch is binding the A-frame
A-frame latch will not move.
A-frame latch and reposition the A-frame latch as
latch.
needed.
Control station in the cab may not Connect the power connector from the control to the
be properly connected.
vehicle harness.
A-frame latch is in the (down)
Lift the A-frame latch into the raised position.
locked position.
Diode loop harness may be
Clean diode loop harness thoroughly and/or replace.
Snowplow will not lift. Pump works corroded or could have failed.
properly.
Remove the S6 coil from the cartridge valve.
Position a screwdriver inside of the coil and push
Coils on the manifold may be
the draw latch connect/disconnect toggle switch
damaged.
upward. The screwdriver should be magnetically
drawn to the coil. Replace the coil if there is no
action.
Hydraulic lock in the manifold.
Loosen cartridge valve S6 to relieve pressure and
This occurs if the voltage is
retighten. DO NOT OVERTIGHTEN! Valves should
too low on the coils–should be
be torqued to a maximum of 24 ft-lb.
Snowplow will not lift with
11.8 volts.
magnification to the S6 coil.
Remove any foreign objects that may be obstructing
Solenoid cartridge valve may be
proper valve operation. Replace if not operating
contaminated.
properly after cleaning.
Lit. No. B64118, Rev. 05
36
June 15, 2010
TROUBLESHOOTING
Problem
Snowplow will not stay angled
when plowing.
Snowplow will not angle, pump
works.
Snowplow lowers too slowly.
Cause
The angle pressure relief valve is
set too low. NOTE: Increasing the
pressure relief valve will cause
damage to your snowplow. Do not
set the pressure relief greater than
3000 psi.
Review all probable causes
above.
Variable flow control valve is not
adjusted properly.
Review all probable causes for
snowplow will not lift.
Snowplow drops sporadically.
Variable flow control valve is
opened too far.
Headlamps will not switch from
the vehicle to the snowplow.
No power or ground to the
headlamp relay.
Lit. No. B64118, Rev. 05
37
Solution
Check the pressure relief by testing the valve in-line
with the cylinder. Attach a tee fitting to the angle
cylinder hydraulic adapter and connect the hose
and pressure gauge to the tee. NOTE: The setting
should not exceed 3000 psi.
NOTE: Verify coils S3 and S4 for angle functions.
WARNING: Snowplow can fall suddenly. You
can die or be seriously injured. Drop snowplow
to ground before adjusting flow control.
Turn flow control valve counterclockwise in small
increments and test.
Verify S5 coil (float) or S5 and S8 coils (disconnect)
for magnetism.
WARNING: Snowplow can fall suddenly. You
can die or be seriously injured. Drop snowplow
to ground before adjusting flow control.
Turn clockwise 1/16 turn and test.
Verify the headlamp/ground relay connector is
connected. If the connector is properly attached
replace the headlamp relay(s).
June 15, 2010
MOLDBOARD PARTS – ALL MODELS
3
2
8A
9
1
8
16
11
17
10
18
12
13
4
19
14
15
7
5A
6
5
Lit. No. B64118, Rev. 05
38
June 15, 2010
MOLDBOARD PARTS – ALL MODELS
Item
1
2
3
4
5A
5
6
7
8A
8
9
10
11
12
13
14
15
16
17
18
19
Part
B81061
B81067
B81062
B81073
B61196
B61365
B61098
60045
91192
93010
B61049
68494
91332
B63102
B63110
59900
B63164
44812
B63103
B63111
29256
91337
90576
B61201
B61435
Lit. No. B64118, Rev. 05
Qty
680LT 720LT
1
–
–
1
1
–
–
1
6
6
6
6
2
2
2
2
36
36
2
2
1
1
4
4
4
4
1
–
–
1
1
1
1
1
1
1
1
–
–
1
1
1
4
4
4
4
4
4
4
4
Description
Moldboard
Moldboard
Cutting Edge
Cutting Edge
1/2-13 x 1-1/2 Carriage Bolt G8
1/2-13 Flanged Hex Locknut
Plow Shoe Assy Standard (7-3/4 Shaft) (Incl. Items 5–7)
1-1/8 ID, 1-5/8 OD x 1-1/2 Spacer
1" Flat Washer
7/16 x 1-3/4 Linchpin
Plow Guide Assy (Incl. Items 8 & 9)
5/16-18 x 1 Hex Cap Screw G5
5/16-18 Hex Locknut GB Topring
Decal – PS
Decal – PS
Label – Warning/Caution
Decal, Center Moldboard (BLZ 1074)
Label – POWER HITCH™ Mounting & Dismounting
Decal – DS
Decal – DS
Label – Crush Hazard
5/8-11 Hex Locknut Type NE
5/8 Hardened Washer
5/8-11 x 4-3/8 Spade Bolt, G8
6-7/8 OAL x 2-3/4 OD x 5/16 Extension Spring
G = Grade
39
June 15, 2010
A-FRAME & PIVOT BEAM PARTS – ALL MODELS
36
12
2
35
10
52 53
22
1
51
23
11
24
50
34
13
9
8
26
25
16
6
7
4
54
28
31
29
14
5
15
37
42
49
38
17
48
46
3A
18
37A
47
45
21
20
3
33 32
19
30
39
43
41
17
44
11
40
Item
1
2
3A
3
4
5
6
7
8
9
10
11
12
13
14
Part
B83017
90601
B41039
B41047
B41038
90665
90572
90593
42009
B61293
B41037
B82055
B61434
B61008
B60277
Qty
1
8
1
1
1
2
2
3
1
1
1
7
1
1
2
Description
Pivot Beam
1/4 x 1-1/2 Cotter Pin
Kickstand Assembly (Incl. Items 3–10)
Kickstand Foot
Kickstand Leg
1/2-13 x 1-1/4 Hex Cap Screw G8
1/2 Hardened Flat Washer
1/2-13 Hex Locknut GC
1/2-13 x 4-1/2 Hex Cap Screw G8
1-1/8 OD x 53/64 ID x 2 Compression Spring
3/8 x 1-1/8 OD x 35/64 ID Stepped Bushing
3/4 x 3-7/16 Clevis Pin
1-8 x 6 Hex Cap Screw (4-3/4 Shank) G8
1-8 Top Locknut GC Distorted Thread
Hydraulic Cylinder, Plow Angle
G = Grade
Lit. No. B64118, Rev. 05
SS = Stainless Steel
40
June 15, 2010
A-FRAME & PIVOT BEAM PARTS – ALL MODELS
Item
Part
15
16
17
18
19
20
21
22
23
24
25
26
27
28
29
30
31
32
33
34
35
36
37A
37
38
39
40
41
42
43
44
45
46
47
48
49
50
51
52
53
54
B60426
B60004
B60254
B82061
B60293
B60008
B60432
B61438
B61275
B62038
B82109
B61426
B61105
B40079
B61000
B61309
90018
B61011
B40126
B61295
B82108
B63177
B82087
B82084
B82101
B61363
B61308
B82088
B82095
B82092
B82091
B82096
B82097
B40093
B40116
B61006
B61203
29233
91203
90055
90097
Lit. No. B64118, Rev. 05
Qty Description
2 1/4 x 25 45° Hydraulic Hose Plow Angle Left and Right Cylinder
3 7/16-20 Hydraulic Adapter Male ORB
1 Hydraulic Cylinder, Plow Raise/Lower
1 5/8 x 5-3/4 Clevis Pin
1 1/4 x 10 Hydraulic Hose Raise/Lower, Extend (Base End)
1 7/16-20 90° Adjustable Elbow Hydraulic Adapter ORB
1 1/4 x 13-1/2 45° Hydraulic Hose Raise/Lower, Retract
2 3/8-16 x 1-1/8 Clamping Knob
2 3/8-16 U-Nut
1 DPDT (ON)-OFF-(ON) 16 Amps 115V AC Toggle Switch
1 A-Frame
3 3/4 x 6 Hitch Pin
3 9/64 x 2-11/16 Hair Cotter Pin
1 3/8 x 1-3/4 Pin SS
1 0.94 OAFL x 0.36 OD, 0.029 Wire Compression Spring SS
1 Ring, Standard Split SS
4 5/16-18 x 5/8 Hex Cap Screw G5
4 5/16 Split Lock Washer High-Alloy
2 A-Frame Pivot, Replaceable Bushing
1 Label – POWER HITCH™ Connect/Disconnect Switch (BLZ 1037)
1 Cover, Hydraulic Pump and Manifold
1 Label – Hydraulic Hose Identification Guide (BLZ 1087)
1 Draw Latch Assy (Incl. Items 37–49, 2 [1])
2 Outer Draw Latch Plate – DS and PS
1 1 x 4-1/4 Draw Pin
3 3/16 x 2-1/2 Cotter Pin
1 3/4-10 x 3-1/2 Hex Cap Screw G8
2 Inner Draw Latch Plate
1 1 x 3-1/4 Draw Latch Pin Mount (To A-frame)
1 Draw Latch Arm
1 Draw Latch Finger
1 5/8 x 2-1/16 Inner Draw Pin Latch Plate/Hydraulic Cylinder Rod End
1 3/4 x 2-1/16 Draw Pin Latch Arm Pivot
1 1-1/4 OD, 1-1/16 ID x 1-1/2 Bushing
1 1 OD, 25/32 ID x 5/8 Spacer
1 3/4-10 Hex Locknut GC
1 1" Washer
4 3/8 Hardened Flat Washer
4 3/8 High Alloy Split Lock Washer
3 3/8-16 x 1-1/4 Hex Cap Screw G8
1 3/8-16 x 3/4 Hex Cap Screw G8
G = Grade
SS = Stainless Steel
41
June 15, 2010
POWER UNIT PARTS – ALL MODELS
1
8
4
1A
3
5
7
6
2
10
31
11
9
9A
29
28
30
12
27
13
14
26
16
15
17
25
24
20
23
19
18
21 22
Lit. No. B64118, Rev. 05
42
June 15, 2010
POWER UNIT PARTS – ALL MODELS
Item
Part
Qty Description
ns
B60378
1
1A
B60386
1
1
2
3
4
5
6
7
8
ns
ns
ns
ns
ns
ns
9A
9
10
11
12
13
14
15
16
ns
ns
ns
ns
ns
17
18
19
20
21
22
23
24
25
26
27
28
29
30
31
B60346
B60388
B60283
B60305
B60308
B60437
B60442
B60345
B61631
91201
B60450
B61632
B60343
B60306
B60344
B60414
B60288
56590
B60003
B62114
B60052
B60167
B62148
B62045
B62096
B62097
B62116
B62117
B61010
B61011
B61412
B60510
B62115
B60170
B60475
B62176
B61440
B60287
B60169
B60049
B60038
B60050
48412
1
1
1
1
1
1
1
1
2
2
1
4
1
1
1
1
1
1
3
3
5
2
1
1
15
5
5
1
2
2
2
1
1
1
1
1
1
1
1
8
2
1
1
ga = gauge
Lit. No. B64118, Rev. 05
Pump/Manifold Kit (Incl. Items 1A, 9A, 17–19, 56805 [4], B60427, B61016 [2],
B61214 [2], B61222 [2] & B62039)
Power Unit-Pump Motor Tank Assy (Incl. Items 1–8, B61631, B61558, B60450,
B61632 & B60306)
Breather
Reservoir
Motor, 12V DC
Pump Assembly
Coupling
Filter
Elbow
Grommet
1/4-20 x 3/4 Hex Cap Screw
1/4 Split Lock Washer
Tube, Cut-to-Length Replacement for B60386, B60402 & B60417 Power Units
10-24 Hex Cap Screw w/Nylon Patch
Kit, Brush for 60283 Motor
Kit, Seal
Manifold Assembly
Manifold Block
Pressure Nipple 1/8 PD -4 FJIC
9/16-18 90° Hydraulic Adapter Adjustable Elbow ORB
7/16-20 x 9/16-18 Hydraulic Adapter Straight ORB
Coil, PDL 10V DC
1/2-20 Hex Jam Nut
Valve, Spool, 4-Way, 2-Position CC
Coil Harness Assy (Incl. Items 13, 21 & 24)
Connector, Electric, Male, Plastic
Seal, Cable, Silicone, Orange (18 AWG)
Terminal, Male (18-16 AWG)
Silicone Cavity Plug, White (18-16 AWG)
3/8 End Ring Terminal Copper, 8 ga
5/16-18 x 3-3/4 Hex Cap Screw G8
5/16 Split Lock Washer
5/16 Flat Washer
Valve, Spool, 3-Way, 2-Position
Coil, DDL 10V DC
Valve, Spool, 3-Way, 2-Position
Valve, 2-Way
Coil, PDL 12V DC, (Waterproof, w/O-rings)
10-32 Acorn Hex Nut
9/16-18 x 7/16-20 90° Hydraulic Adapter Adjustable
Valve, Flow Control
Plug, -4 SAE Hollow Hex
3/32 CSW 9/16 ID, 3/4 OD O-Ring Neoprene, 70 Durometer
Plug, -6 SAE Hollow Hex
Relief Valve – 3000 psi
G = Grade
43
ns = not shown
June 15, 2010
LIGHTS & CONTROL PARTS – ALL MODELS
6
5
5A
14
8
7
14A
15
12
13
10
9
2
19
16
17
11
4
18
3
25
23
1
28
1A
22A
24
22
Item
1A
1
2
ns
ns
ns
ns
3
4
ns
ns
ns
ns
27
Part
B62039
B62057
B62001
B62046
B62093
B61439
B62167
B62150
B62000
B62124
B62212
B62035
B62144
Qty
1
1
1
1
10
2
1
1
1
1
1
2
4
ga = gauge
Lit. No. B64118, Rev. 05
26
29
Description
Harness Assembly, Plow (Incl. Items 1–2, B62046, B62093, B61439 & B62167)
Harness, Snowplow
Weather Cap, Rubber, Snowplow Side
Connector, Electric, Female, Plastic
Terminal, Female (18-16 AWG)
Cable Tie, Black,15"
Harness, Diode Loop
Harness, Vehicle
Weather Cap, Rubber, Vehicle Side
1/4 x 1-1/4 Fuse BUSS ARC 15A, 32V
Harness, Main Lighting
Weather Cap, Rubber, Lighting Harness
Headlamp Relay, CB1-D-12V
G = Grade
44
ns = not shown
June 15, 2010
LIGHTS & CONTROL PARTS – ALL MODELS
Item
ns
ns
ns
ns
ns
ns
ns
5A
5
6
7
ns
ns
ns
8
9
10
11
12
13
14A
14
15
16
17
18
19
ns
ns
ns
ns
ns
ns
22A
22
23
24
25
ns
26
27
28
29
Part
Qty Description
B80051
1
B62056
1
B62072
4
B62008
1
B62009
1
B62016
4
B61031
3
B61106
2
B62059
1
B62060
1
B62032
2
B62108
2
B62061
2
56099
1
B61231
1
B61550
2
90651
2
B61111
2
B61427
2
B39054
1
B62073
1
B62074
1
B63106
1
B61185
1
B61127
1
B61254
4
B61174
1
B62185
1
B62186
1
B62187
1
B62188
1
B62189
1
B62190
1
B62138
1
B62024
1
B61041
1
B61088
1
B61031
5
B62127
1
B62142
1
B62192
1
B62191
1
B62202
1
ga = gauge
Lit. No. B64118, Rev. 05
Power Contactor (Solenoid), 12V Continuous
24" Ground Wire, Power Contactor
3/8 End Ring Terminal Copper, 4 ga
Fuse Clip, Mini
Fuse Clip, Auto Blade
Connector, Splice Lock (18-14 AWG)
#12-14 x 3/4 Hex Washer Self-Drilling Screw
Snowplow Headlamp Assy (Incl. Items 5–11 & B62061)
Headlamp – DS
Headlamp – PS
Harness (with 6-pin plug), Snowplow Headlamp Side
Lighting Harness Repair Kit, Harness Side
Bulb, Sealed Beam Halogen (H6545/H4666)
Corrosion Preventive Compound (2 fl oz)
Adapter, Headlamp Ball Stud Mount
1/2 ID x 1 OD Washer Neoprene Backing Galvanized
7/16 Ext. Tooth Lock Washer
7/16-14 Hex Nut G8
2-1/4 ID, 2-3/8 OD x 3/4, Black Vinyl Cap
Light Tower
Control Station Assy, Joystick (Incl. Items 14–19, B62185–B62190)
Control Station, Joystick
Label – Snowplow Power Switch, ON/OFF (BLZ 1061)
Base Plate, Joystick Control Station 1/8 ABS Plastic
61" Hook-and-Loop Fastener Strap with 2" D-Ring, Black
8-32 x 3/4 Pan Head Machine Screw
Label – Control Station, Joystick (BLZ 1017)
Switch-Rocker SPDT ON-OFF-ON Straight Blade Joystick Control Switch
Switch-Straight Blade Joystick Functions
Relay-Straight Blade Joystick
Switch Actuator
Kit-Handle Straight Blade Joystick (Includes Shaft, Sleeve, E-Ring)
Mounting Plate
Snowplow/Vehicle Headlamp Toggle Switch Connection Kit (Incl. Items 22–25)
ON-OFF-ON Toggle Switch, DPDT, 20A/125V AC
Bracket, Snowplow/Vehicle Headlamp Toggle Switch
Label – Snowplow/Vehicle Headlamp Toggle Switch Bracket (BLZ 1008)
#12-14 x 3/4 Hex Washer Self-Drilling Screw
24" ON/OFF Plow Light Switch Lead (Green/Yellow) w/Two 1/4" Receptacles
Touchpad Control Station (Incl. Items 37–39)
Kit, Decal Touchpad w/Adhesive Pads
PC Board, Touchpad Control
Harness, Touchpad Control
G = Grade
ns = not shown
45
June 15, 2010
ACCESSORIES & KITS – ALL MODELS
1.
This kit includes the most common replacement
parts: angle cylinder hose, lift cylinder hose,
hitch pin w/hair pin cotter, angle cylinder
clevis pin w/cotter, 90° angle cylinder fitting,
solenoid, POWER HITCH™ toggle switch,
corrosion preventive compound (2 oz) and
10A fuse. The compact and durable plastic case
(13.5" x 9" x 3.3") allows for easy storage behind
or under your seat.
3. BLIZZARD® hydraulic fluid is specially
formulated for use in BLIZZARD snowplows
and can significantly enhance the operation and
performance of the hydraulic system. BLIZZARD
zinc-free hydraulic fluid maintains its viscosity to
temperatures as low as –25°F. BLIZZARD fluid is
available by the quart, case or 55-gallon drum.
2. Our easy-to-install, adjustable pedestal mount will
position either straight blade control station how
you want it! Ideal for bucket seat vehicles with low
center consoles. Pedestal accessory shipped with
complete hardware and adapter plate.
Lit. No. B64118, Rev. 05
4. Putting your snowplow away for the winter? Have
a deep scratch to cover? Clean up your blade
and snowplow parts with our gloss spray paints.
BLIZZARD touch-up paint provides an excellent
finish to help keep your snowplow looking its best.
Paint provided in 12 oz spray cans.
46
June 15, 2010
ACCESSORIES & KITS – ALL MODELS
6. Ballast (additional weight) is an important part of
qualifying vehicles for snowplow eligibility. Rear
ballast must be used when necessary to remain
in compliance with axle ratings and ratios as
specified by the vehicle manufacturer. If ballast is
required, it is important that it be secured properly
behind the rear axle. A ballast retainer kit is
available from your BLIZZARD® outlet, PN 62849.
Driver-Side
Ballast Retainer
Passenger-Side
Ballast Retainer
5. This adjustable bracket mounts easily to your
straight blade joystick control and installs quickly
onto any door panel. Ideal for left-hand joystick
operation or for vehicles with center consoles. The
window mount bracket is shipped complete with
hardware. Some assembly required.
Item
1
2
3
5
6
Part
B63115
B63078
B63070
B63072
B63091
B61219
B63073
B61261
62849
ns
ns
ns
ns
ns
ns
ns
ns
ns
ns
ns
ns
B61454
B60427
B60428
B61457
B61458
B61531
B60372
B60370
B62195
B62196
96020
96021
4
Qty
680LT 720LT
1
1
1
1
1
1
1
1
1
1
1
1
1
1
1
1
1
1
Lit. No. B64118, Rev. 05
1
1
1
1
1
–
2
1
1
1
1
–
1
1
1
1
–
1
2
1
1
1
–
1
NOTE: The ballast retainer kit is for snowplow
vehicles requiring ballast. See your BLIZZARD
outlet for the correct amount of ballast required.
Include the weight of the retainer as part of the
ballast requirement. Sand bags are recommended
for use as ballast.
Description
Emergency Parts Kit
12" Adjustable Pedestal Mount
BLIZZARD Rapid Action Hydraulic Fluid (Quart)
BLIZZARD Rapid Action Hydraulic Fluid (Gallon)
BLIZZARD Rapid Action Hydraulic Fluid (Drum – 55 gallons)
BLIZZARD High Performance 12 oz Spray Paint, Gloss White
BLIZZARD High Performance 12 oz Spray Paint, Gloss Black
Straight Blade Joystick Window Mount Bracket
Ballast Retainer Kit
Kits
Kit, Hardware, Snowplow Assy Parts
Kit, Hydraulic Adapter (Incl. Items B60003 [3], B60004 [3], B60008 & B60287)
Kit, Hydraulic Hose (Incl. Items B60432, B60293 & B60426 [2])
Kit, Hardware, Moldboard Cutting Edge
Kit, Cutting Edge, Moldboard w/Hardware
Kit, Cutting Edge, Moldboard w/Hardware
Combo Seal Kit, Cyl B60277
Combo Seal Kit, Cyl B60254
Kit, Headlamp B61106 (1-Sealed Beam, 1-Rim , 4-Spacer Bumpers, 4-Screws)
Kit, Headlamp B61106 Signal (1-Bulb, 1-Turn Signal Lens, 1- Gasket, 2-Screws)
Moldboard Label Pack
Moldboard Label Pack
ns = not shown
47
June 15, 2010
Blizzard
PO Box 245038
Milwaukee, WI 53224-9538
www.blizzardplows.com
A DIVISION OF DOUGLAS DYNAMICS, L.L.C.
Copyright © 2010 Douglas Dynamics, L.L.C. All rights reserved. This material may not be reproduced or copied, in whole or in part, in
any printed, mechanical, electronic, film or other distribution and storage media, without the written consent of Blizzard. Authorization to
photocopy items for internal or personal use by Blizzard outlets or snowplow owner is granted.
Blizzard reserves the right under its product improvement policy to change construction or design details and furnish equipment when so
altered without reference to illustrations or specifications used. Blizzard or the vehicle manufacturer may require or recommend optional
equipment for snow removal. Do not exceed vehicle ratings with a snowplow. This product is manufactured under the following U.S. patents:
5,420,480; 5,638,618; 5,899,007; 6,178,669; 6,253,470; 6,276,076; 6,393,737; 6,408,549; 6,412,199; 6,442,877; 6,615,513; 7,134,227;
7,430,821; RE35,700; CAN patents 2,060,425; 2,184,922; 2,229,783; 2,259,508; 2,358,145; 2,358,354; 2,466,195; and other patents pending.
Blizzard offers a limited warranty for all snowplows and accessories. See separately printed page for this important information. The following
are registered (®) or unregistered (™) trademarks of Douglas Dynamics, L.L.C.: BLIZZARD ®, POWER HITCH™.
Printed in U.S.A.
Lit. No. B64118, Rev. 05
48
June 15, 2010