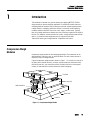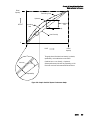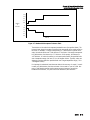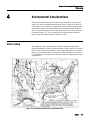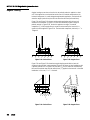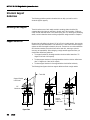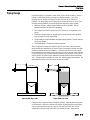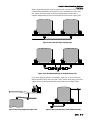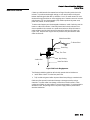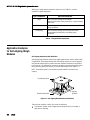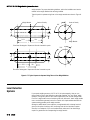
1
Weigh Module Systems Handbook B15598500A (6/09).00 ©Mettler-Toledo, Inc. 1999, 2009 No part of this manual may be reproduced or transmitted in any form or by any means, electronic or mechanical, including photocopying and recording, for any purpose without the express written permission of Mettler-Toledo, Inc. U.S. Government Restricted Rights: This documentation is furnished with Restricted Rights. METTLER TOLEDO Publication Revision History An overview of this manual’s revision history is compiled below. Publication Name: METTLER TOLEDO Weigh Module Systems Handbook Publication Part Number: 15598500A Publication Date: 3/99 Part Number Date Revisions A15598500A 12/99 Added Information about 0958 Flexmount HD and VLM2 Value Line weigh modules. B15598500A 6/09 Replaced information about specific weigh module models with information about generic compression and tension weigh modules. Added information about Fabreeka pads, stabilizers, level detection, and hazardous area classification. Revised information about accuracy, indicators, and enclosure types. INTRODUCTION Information regarding METTLER TOLEDO Technical Training may be obtained by writing, calling, or faxing: METTLER TOLEDO 1900 Polaris Parkway Columbus, Ohio 43240 USA phone: (614) 438-4511 fax: (614) 438-4958 www.mt.com WARNING This publication is provided solely as a guide for individuals who have received technical training and are familiar with the technical manuals of the METTLER TOLEDO products. This guide is not meant to replace the technical manual for various products. Please review the specific technical manuals for detailed instructions and safety precautions before operating or servicing the various METTLER TOLEDO products. METTLER TOLEDO RESERVES THE RIGHT TO MAKE REFINEMENTS OR CHANGES WITHOUT NOTICE. Precautions WARNING READ this manual BEFORE operating or servicing this equipment. FOLLOW these instructions carefully. SAVE this manual for future reference. PERMIT ONLY QUALIFIED PERSONNEL TO SERVICE THIS EQUIPMENT. EXERCISE CARE WHEN MAKING CHECKS, TESTS, AND ADJUSTMENTS THAT MUST BE MADE WITH POWER ON. FAILING TO OBSERVE THESE PRECAUTIONS CAN RESULT IN BODILY HARM. CAUTION DO NOT PASS WELDING CURRENT THROUGH THE LOAD CELLS! WHEN WELDING ON A SCALE, ALWAYS GROUND THE WELDING DEVICE AS CLOSE TO THE WORK AS POSSIBLE. NEVER WELD CLOSER THAN 4 FEET (1.2 METERS) TO ANY LOAD CELL WITHOUT REMOVING THE LOAD CELL. WARNING DO NOT allow untrained personnel to operate, clean, inspect, maintain, service, or tamper with this equipment. ALWAYS DISCONNECT this equipment from the power source before cleaning or performing maintenance. CENTERLIGN WEIGH MODULES DO NOT PROVIDE OVERTURN PROTECTION. IF ANY UPLIFT FORCES ARE GENERATED, UPLIFT/OVERTURN PROTECTION MUST BE ADDED SEPARATELY. WARNING STRUCTURES SUCH AS TANKS AND CONVEYORS MUST BE PROPERLY DESIGNED TO MAINTAIN THE RELATIONSHIP OF THE LOAD SUPPORT POINTS THROUGH THE ENTIRE WEIGHING RANGE. WARNING BE SURE TO BLOCK THE SCALE WHEN IT IS IN THE RAISED POSITION. OBSERVE ALL APPROPRIATE SAFETY PROCEDURES WHEN INSTALLING AND SERVICING THE WEIGH MODULES. CALL METTLER TOLEDO for parts, information, and service. WARNING USE SAFETY CHAINS OR RODS TO PREVENT TANK FROM FALLING IN CASE OF COMPONENT FAILURE. Contents 1 Introduction .................................................................................................. 1-1 Compression Weigh Modules .............................................................................................1-1 Tension Weigh Modules.....................................................................................................1-2 2 Weigh Module Applications............................................................................ 2-1 Tanks, Hoppers, and Vessels ..............................................................................................2-1 Conveyors ........................................................................................................................2-2 Mechanical Scale Conversions ...........................................................................................2-3 Lever Conversion .................................................................................................................. 2-3 Lever Replacement................................................................................................................ 2-5 3 General Considerations ................................................................................. 3-1 Compression versus Tension Load Cells..............................................................................3-1 Static versus Dynamic Loading ...........................................................................................3-2 How Many Load Cells? ......................................................................................................3-2 Field Calibration ...............................................................................................................3-2 Weighing System Performance...........................................................................................3-3 Determining System Accuracy and Repeatability ..................................................................... 3-4 What Kind of Accuracy Can You Expect in the Real World? ...................................................... 3-8 Determining System Resolution ........................................................................................... 3-11 Industry Standards (Legal-for-Trade).................................................................................3-12 United States Standards ...................................................................................................... 3-12 International Standards ....................................................................................................... 3-15 4 Environmental Considerations ........................................................................ 4-1 Wind Loading....................................................................................................................4-1 Example ............................................................................................................................... 4-3 Alternative Method................................................................................................................ 4-4 Seismic Loading ...............................................................................................................4-5 UBC Code Formulas .............................................................................................................. 4-5 FEQ Factors Based on UBC Code.............................................................................................. 4-6 Shock Loading ..................................................................................................................4-7 Vibration ..........................................................................................................................4-9 Temperature Effects.........................................................................................................4-10 Moisture and Corrosion ...................................................................................................4-11 Lightning and Surge Protection.........................................................................................4-11 5 General Installation Guidelines ...................................................................... 5-1 Applying Force to Load Cells ..............................................................................................5-1 Angular Loading.................................................................................................................... 5-2 Eccentric Loading.................................................................................................................. 5-3 Side and End Loading ............................................................................................................ 5-3 Torsional Loading.................................................................................................................. 5-4 Tank and Vessel Design .....................................................................................................5-4 Structural Integrity ................................................................................................................ 5-4 Pressure Imbalances ............................................................................................................. 5-4 Provisions for Test Weights.................................................................................................... 5-5 Structural Support Guidelines.............................................................................................5-6 Mounting Plate Support ......................................................................................................... 5-6 Support Deflection ................................................................................................................ 5-6 Weigh Module and Support Beam Alignment .......................................................................... 5-8 Stiffening Support Structures ................................................................................................. 5-9 Structural Beam Support...................................................................................................... 5-10 Tank Interaction .................................................................................................................. 5-12 Additional Vessel Restraint Methods .................................................................................5-13 Check Rods......................................................................................................................... 5-13 Safety Rods ........................................................................................................................ 5-14 Piping Design .................................................................................................................5-15 Example Calculation ........................................................................................................... 5-17 Piping Installation............................................................................................................... 5-18 Electrical Wiring .............................................................................................................5-21 Load Cell Cables................................................................................................................. 5-21 Home Run Cables ............................................................................................................... 5-23 6 Compression Weigh Modules ......................................................................... 6-1 Introduction ......................................................................................................................6-1 Static versus Dynamic Loading ...........................................................................................6-3 Application Examples for Self-Aligning Weigh Modules ........................................................6-4 Sizing Weigh Modules for Static Systems..........................................................................6-10 Sizing Weigh Modules for Dynamic Systems .....................................................................6-10 Anti-Lift Considerations ...................................................................................................6-11 Selecting Material...........................................................................................................6-11 Weigh Module Orientation ...............................................................................................6-11 Level Detection Systems ..................................................................................................6-12 Installation .....................................................................................................................6-14 7 Tension Weigh Modules................................................................................. 7-1 Introduction ......................................................................................................................7-1 Sizing Weigh Modules .......................................................................................................7-2 Installation .......................................................................................................................7-3 8 Calibration ................................................................................................... 8-1 Calibration with Test Weights.............................................................................................8-1 Calibration with Test Weights and Material Substitution .......................................................8-2 Calibration with Material Transfer ......................................................................................8-2 Electronic Calibration ........................................................................................................8-2 9 Indicators and Applications ............................................................................ 9-1 Indicators .........................................................................................................................9-1 Communications ................................................................................................................... 9-1 Weighing Accuracy................................................................................................................ 9-2 Applications......................................................................................................................9-3 10 Appendices ................................................................................................. 10-1 Appendix 1: Design Qualification Form .............................................................................10-1 Appendix 2: Calculating Reaction Forces...........................................................................10-3 Circular Tank with Four Weigh Modules................................................................................ 10-4 Circular Tank with Three Weigh Modules .............................................................................. 10-6 Appendix 3: Bolt Thread Dimensions.................................................................................10-8 NPT Dimensions.................................................................................................................. 10-8 Straight Thread Dimensions ................................................................................................. 10-9 Appendix 4: NEMA/IP Enclosure Types ............................................................................10-10 Appendix 5: Classification of Hazardous Areas ................................................................10-16 Appendix 6: Chemical Resistance Chart ..........................................................................10-18 11 Glossary ..................................................................................................... 11-1 12 Index.......................................................................................................... 12-1 Chapter 1: Introduction Compression Weigh Modules 1 Introduction This handbook is intended as a guide to selecting and applying METTLER TOLEDO weigh modules for process weighing applications. It provides the scientific data and accepted guidelines needed to help you design an accurate, reliable weighing system. A weigh module is a weighing device that consists of a load cell and the mounting hardware needed to attach the load cell to a tank, hopper, or other vessel. Typically, three or four weigh modules are attached to a tank so that they support the full weight of the tank. This effectively converts the tank into a scale. A weigh module system must be able to (1) provide accurate weight data and (2) support the tank safely. There are two basic types of weigh modules: compression and tension. Compression Weigh Modules Compression weigh modules fit most weighing applications. These modules can be attached directly to the floor, piers, or structural beams. The tank or other structure is mounted on top of the weigh modules. A typical compression weigh module is shown in Figure 1-1. It consists of a load cell, a top plate (which receives the load), a load pin (which transfers the load from the top plate to the load cell), and a base plate (which is bolted to the floor or other support surface). A hold-down bolt is used to prevent the vessel from tipping. Top Plate Load Cell Hold-Down Bolt Base Plate Load Pin Figure 1-1: Compression Weigh Module (6/09) 1-1 METTLER TOLEDO Weigh Module Systems Handbook Tension Weigh Modules Tension weigh modules are used for tanks or hoppers that must be suspended from a building’s superstructure or upper floor. A typical tension weigh module is shown in Figure 1-2. It uses an S-shaped load cell that is threaded on both ends. Each threaded end of the load cell accepts a spherical rod-end bearing and clevis arrangement that connects to existing threaded vessel support rods. Threaded Rod Jam Nut Hitch Pin Clevis Pin Clevis Spherical Rod End Bearing Jam Nut Load Cell Bonding Strap Jam Nut Spherical Rod End Bearing Hitch Pin Clevis Pin Jam Nut Threaded Rod Figure 1-2: Tension Weigh Module 1-2 (6/09) Chapter 2: Weigh Module Applications Tanks, Hoppers, and Vessels 2 Weigh Module Applications Weigh modules can be used to convert nearly any structure into a scale. They can be part of a structure’s original design or can be added to an existing structure. This chapter describes the most common weigh module applications. Tanks, Hoppers, and Vessels Tanks, hoppers, and vessels are used for material handling in many industries. By attaching a system of weigh modules to one of these containers, you can weigh the contents accurately and reliably. This handbook uses “tank” as a generic term to refer to any tank, hopper, or vessel supported by weigh modules. But each is a specific type of container used for the purposes described below: Tanks: A tank is a closed container used to store liquids or solids. Tanks range in size from small residential tanks for propane or heating fuel to large industrial tanks that can hold thousands of pounds of material. Figure 2-1 shows a tank supported by compression weigh modules. Hoppers: A hopper is a container that is open at the top. It is generally used to dispense materials or collect ingredients for later processing. Hoppers tend to be smaller than tanks and are often suspended from a superstructure. Figure 2-2 shows a hopper supported by tension weigh modules. Vessels: A vessel is an elaborate tank with equipment to allow heating, cooling, mixing, or other processes. Many vessels house chemical reactions and therefore must be capable of accepting precisely measured materials. Figure 2-1: Tank Supported by Compression Weigh Modules (6/09) 2-1 METTLER TOLEDO Weigh Module Systems Handbook Figure 2-2: Hopper Supported by Tension Weigh Modules Conveyors To weigh objects that are transported on a conveyor system, mount a section of the conveyor on weigh modules (see Figure 2-3). Because the objects being weighed on a conveyor are usually in motion, these applications require a weigh module capable of withstanding high horizontal shear loads while still delivering repeatable weighments. METTLER TOLEDO self-aligning weigh modules allow the conveyor’s weighing section to move back and forth when exposed to horizontal shear loads. But the load cell’s selfrighting suspension system always returns the conveyor to its “home” position to ensure repeatable weighing. Figure 2-3: Conveyor Supported by Weigh Modules 2-2 (6/09) Chapter 2: Weigh Module Applications Mechanical Scale Conversions Mechanical Scale Conversions There are two ways to convert older mechanical lever scales (see Figure 2-4) for electronic weighing. The first method is a lever conversion. It involves adding an S-Cell tension weigh module, while retaining the levers and weighing platform from the existing mechanical scale. The second method is a lever replacement. It involves removing the levers and adding compression weigh modules beneath the existing weighing platform. Figure 2-4: Mechanical Scale Lever Conversion A lever conversion retains the mechanical scale’s dial head, so that the scale can be used for electronic or mechanical weighing. An S-Cell tension weigh module is inserted into the existing steelyard rod located in the column of the dial head. The dial head is locked out to allow the S-Cell to sense the tension load applied by the transverse lever that extends from the scale pit. In case of a power or load cell failure, the dial head can be unlocked for fully mechanical operation. Figure 2-5 shows a lever conversion. Figure 2-5: Electro-Mechanical Scale (6/09) 2-3 METTLER TOLEDO Weigh Module Systems Handbook How to determine the load cell size needed for a conversion: • Determine the initial pull force at the end of the transverse lever. • Determine the capacity of the existing scale. • Determine the multiple of the lever system. Insert the variables listed above into the following formula: Load Cell Size = Initial Pull + Capacity Multiple Sizing Tips Initial Pull: One way to determine the initial pull is to use a lever to raise the steelyard rod. Attach a lifting point, such as a clamp, to the steelyard rod and make sure it is tightened securely. Calculate the weight by using a multiplier based on the position of the fulcrum. For example, if the fulcrum is 2 inches from the end of the lever that is placed under the lifting point and 20 inches from the opposite end, multiply the load used to raise the steelyard rod by 10 to determine the weight of the platform (see Figure 2-6). Capacity: The capacity of the scale should be marked on the scale’s data plate. Multiple: You can determine the multiple of a lever system by attaching a known test weight to the steelyard rod of the empty scale. The multiple will be the weight change shown on the dial divided by the test weight. For example, if the weight change on the dial is 2,000 pounds for a 5-pound test weight, then the multiple would be 400. 2" 20" Steelyard Rod Clamp Lever Floor Figure 2-6: Using a Lever to Lift the Scale Platform 2-4 (6/09) Chapter 2: Weigh Module Applications Mechanical Scale Conversions Lever Replacement A lever replacement eliminates the mechanical scale’s levers and dial head. The existing weigh platform can be modified to accept compression weigh modules. This conversion results in a fully electronic scale (see Figure 2-7). Figure 2-7: Fully Electronic Scale (6/09) 2-5 Chapter 3: General Considerations Compression versus Tension Load Cells 3 General Considerations Compression versus Tension Load Cells There are two basic types of load cells for use in weigh modules: Compression load cells are designed so that a tank or other structure can be mounted on top of the weigh module. The weight being measured compresses the load cell. Tension load cells are designed so that a tank or other structure can hang from the weigh module. The weight being measured stretches the load cell, creating tension. Whether you use compression or tension weigh modules often depends on the specific application. Table 3-1 provides an overview of how general design factors affect the choice of weigh modules. Design Factor Floor Space Structural Restrictions Weight Limit Load Cell Alignment Compression Load Cells Tension Load Cells Requires enough floor space to accommodate tank size. Might require buffer space around tank. Requires no floor space and can be suspended to allow movement beneath tank. Weak floors might require additional construction or a special installation to accommodate weight of filled tank. Weak overhead supports/ceilings might require additional construction or special installation to accommodate weight of filled tank. Generally unlimited. To ensure accurate load distribution, there should not be more than eight vessel supports. Structural considerations might limit suspension system capacity. With adequate support, suspension systems can safely support as much as 40,000 pounds. Designs may vary and must consider floor deflection, available support beams, and tank size, shape, and condition. Cell alignment will not vary significantly because tension rods and other support equipment tend to accommodate most deflections. Table 3-1: Comparison of Compression and Tension Load Cells (6/09) 3-1 METTLER TOLEDO Weigh Module Systems Handbook Static versus Dynamic Loading When selecting weigh modules for an application, it is important to consider how the load will be applied to the load cells. Most weigh module applications on tanks, hoppers, and vessels are subject to static loading. With static loading, little or no horizontal shear force is transmitted to the load cells. Applications such as conveyors, pipe racks, mechanical scale conversions, and high-powered mixers or blenders are subject to dynamic loading. With dynamic loading, the way in which products are placed on a scale or processed transmits horizontal shear forces to the load cells. Refer to Chapter 6 for a discussion of the types of weigh module suspensions and their application parameters. How Many Load Cells? For an existing installation, the number of weigh modules is determined by the number of existing supports. If a tank has four legs, you will need to use four weigh modules. For a new installation, a three-point support system is inherently more stable and accurate than a four-point support system. If wind, fluid sloshing, or seismic loading is a factor, the tank might require four supports for additional protection against tipping. Most tank scale applications use either three or four weigh modules. A METTLER TOLEDO indicator can sum as many as eight weigh modules, although the weight distribution and shift adjust would probably be less than ideal. To calculate the required capacity for each weigh module, divide the gross capacity of the system by the number of supports. A safety factor should be applied to the gross capacity in case the weight is underestimated or distributed unevenly. The procedure for sizing weigh modules is explained in the chapters about the individual types of weigh modules (Chapters 6 and 7). Environmental factors such as wind loading can also affect the capacity of the weigh modules required for an application (see Chapter 4). Field Calibration Another consideration is how the weigh module system will be calibrated. If you are adding weigh modules to an existing tank, you might need to modify the tank so that you can hang certified test weights from it. At a minimum, the tank should be able to support test weights equal to 20% of the net product weight (programmed capacity). Several methods of field calibration are described in Chapter 8. 3-2 (6/09) Chapter 3: General Considerations Weighing System Performance Weighing System Performance Accuracy, resolution, and repeatability are basic concepts used to measure a weighing system’s performance. Accuracy is how close the reading on a scale’s indicator is to the actual weight placed on the scale. A scale’s accuracy is usually measured against a recognized standard, such as NIST Certified Test Weights. Resolution is the smallest weight change that a digital scale can detect. Resolution is measured in increment size, which is determined by the capabilities of the load cells and digital indicator. A digital weight indicator may be able to display a very small increment size, such as 0.01 pound (resolution); however, that does not mean the system is accurate to 0.01 pound. Figure 3-1 helps to show the difference between accuracy and resolution. Although the indicator has a resolution of 0.1 pound, the weight reading is inaccurate by 0.3 pound. Resolution is determined by an indicator’s electronic circuitry. Many of today’s industrial indicators can resolve a load cell’s signal into 1,000,000 internal divisions and actually display 100,000 divisions. The displayed resolution is determined by how the indicator is configured. But displaying an increment size does not make a scale accurate to that increment. 50.3 LB 50 LB Figure 3-1: Accuracy and Resolution Repeatability is a scale’s ability to display a consistent weight reading each time the same weight is placed on the scale. It is especially important for batching and filling applications, which require that the same amount of a material be used for each batch. Repeatability and accuracy go hand in hand. You can have a repeatable system that is not accurate, but you cannot have an accurate system unless it is repeatable. The following factors can influence the accuracy and repeatability of a weighing system. They are discussed in detail later in this handbook. • Environmental Factors: Wind, Seismic Forces, Temperature, Vibration • Weigh Module System Support Structures • Tank and Vessel Design • Piping Design (Live-to-Dead Connections) • Load Cell Quality • Total Load Cell Capacity • Calibration • Operational / Process Factors (6/09) 3-3 METTLER TOLEDO Weigh Module Systems Handbook Determining System Accuracy and Repeatability Experience has shown that a tank scale fully supported by weigh modules on a firm foundation can be accurate to within 0.1% of the applied load (the weight placed on the scale). When this type of scale is calibrated correctly, it will give an accurate reading of the weight placed on it. Ideally, the percentage of total weight capacity should equal the percentage of total counts (increments). This relationship is illustrated in Figure 3-2. Perfect Performance Counts 1,000 800 600 Ideal 400 200 0 Half Load (50% Capacity) Full Load (100% Capacity) Figure 3-2: Ideal Weight Capacity vs. Counts If a scale has 1,000 counts and a total capacity of 5,000 pounds, then each count should equal 5 pounds. When a 2,500-pound weight is placed on the scale, there should be 500 counts. With a 5,000-pound weight, there should be 1,000 counts. This relationship should not change regardless of whether weight is being added to or removed from the scale. When a scale is not calibrated correctly, this ideal relationship does not hold true. There are four types of errors that cause inaccurate weighing: 3-4 (6/09) • Calibration Errors • Linearity Errors • Hysteresis Errors • Repeatability Errors Chapter 3: General Considerations Weighing System Performance Calibration Errors Some errors are caused because the weighing equipment is not calibrated correctly. When there is a calibration error (see Figure 3-3), the counts-to-load ratio is still a straight line, as it was in the ideal scale. But the line does not reach 100 percent of the counts at full load. The relationship between the weight and the counts is linear but not correct. This is usually caused by an error in the electrical calibration of the scale and can be corrected by recalibrating the scale. Calibration Error Counts 1,000 800 600 Ideal Actual 400 200 0 Half Load (50% Capacity) Full Load (100% Capacity) Figure 3-3: Calibration Error (6/09) 3-5 METTLER TOLEDO Weigh Module Systems Handbook Linearity Errors Linearity is a scale’s ability to maintain a consistent counts-to-load ratio (a straight line on the graph). When there is a linearity error, a scale reads correctly at zero and at full load capacity but incorrectly in between those two points (see Figure 3-4). The weight indication can either drift upward and read higher than the actual weight (as shown in the graph) or drift downward and read lower than the actual weight. Linearity Error Counts 1,000 800 600 Ideal Actual 400 200 0 Half Load (50% Capacity) Figure 3-4: Linearity Error 3-6 (6/09) Full Load (100% Capacity) Chapter 3: General Considerations Weighing System Performance Hysteresis Errors Hysteresis is a scale's ability to repeat measurements as weights are added and removed. Figure 3-5 shows a typical hysteresis error. The scale is accurate at zero and at full load. When weight is gradually added to the scale, the curve drifts downward and the scale displays readings that are too low. When a load is placed on the scale and then the weight is gradually decreased, the curve drifts upward and displays readings that are too high. Hysteresis is measured from the actual linearity curves shown in the graph. It represents an energy loss and is a problem found only in electronic scales, not in mechanical scales. You should take steps to minimize linearity and hysteresis errors in batching, filling, and counting scale applications, especially when the full range of the scale is used. A scale can also display high readings when weight is added and low readings when weight is removed. But those errors would most likely be caused by creep or a mechanical problem, rather than by hysteresis. Hysteresis Error Counts 1,000 Hysteresis 800 600 Ideal Actual 400 200 0 Half Load (50% Capacity) Full Load (100% Capacity) Figure 3-5: Hysteresis Error Repeatability Errors Repeatability is a scale's ability to repeat the same reading when a known weight is applied and removed several times. It is usually expressed as the maximum difference between any two readings taken in the same way and as a percentage of full load. For example, suppose the same 2,500-pound weight is placed on a 5,000-pound scale 100 times, with 2,501 being the highest reading and 2,500 being the lowest. The repeatability is 0.02% (1/5,000) of the scale’s rated capacity (R.C.). (6/09) 3-7 METTLER TOLEDO Weigh Module Systems Handbook What Kind of Accuracy Can You Expect in the Real World? Scale system accuracy depends on the quality of the load cells used. The best you can expect from a scale system is to approach the performance ratings of the load cells alone. Here are typical performance ratings for quality load cells: • Non-linearity: ± 0.01% of Rated Capacity (R.C.) • Hysteresis: ± 0.02% of Rated Capacity (R.C.) • Combined error: ± 0.02% to 0.03% of Rated Capacity (R.C.) Figure 3-6 shows load cell combined error as an error band from zero load to rated capacity. All weight readings should fall within this error band. Under ideal conditions, a scale system’s accuracy can approach or exceed the accuracy of the individual load cells in the system (0.02% of system capacity or better). In the real world, however, accuracy is affected by environmental and structural factors such as vibration, temperature, live-to-dead connections, piping, and module support integrity. Predicting System Accuracy A tank scale’s accuracy is determined by a combination of factors, including the indicator, load cells, mounting hardware, tank design, foundation, and environmental influences. Different applications require different levels of weighing accuracy. A precision batching or filling process requires greater accuracy than a bulk storage operation. Table 3-2 specifies four levels of weighing accuracy and lists the factors that will affect a tank scale’s ability to meet those accuracy levels. Following the recommendations listed in the table will help ensure that a tank scale provides the desired level of accuracy. System Accuracy Summary True system accuracy can be determined only by testing and validating after the entire system has been installed. Once all the piping and system components are attached, “exercise” the vessel by adding test weights or other material up to the full capacity of the scale. That will eliminate any built-up stresses and allow the system to settle. Once the system has settled, run several tests from zero to full capacity to determine resulting system performance. Starting at a no-load condition, apply known weights in convenient steps up to full system capacity. Record the indicated weight at each step. Then take weight readings at the same intervals as weight is removed from the system. To determine actual system error, compare the indicated weight readings with the actual weights applied to the scale. 3-8 (6/09) Chapter 3: General Considerations Weighing System Performance Rated Capacity Decreasing Load Hysteresis Combined Error Increasing Load OUTPUT Non-Linearity Ideal Linearity 0 0 LOAD Rated Capacity The graph above illustrates how linearity, hysteresis, repeatability, and combined error are related. Combined error = non-linearity + hysteresis. Accuracy System performance plots will vary depending on the load cells used and environmental/structural factors. Repeatability Figure 3-6: Sample Load Cell System Performance Graph (6/09) 3-9 METTLER TOLEDO Weigh Module Systems Handbook System Parameters Accuracy High Precision Medium Precision Low Precision Level Detection Accuracy Level Best Better Good Fair System Accuracy (% system capacity)* 0.015 to 0.033 0.033 to 0.10 0.10 to 0.50 Greater than 0.50 Load Cell Utilization (% rated capacity)* ≥ 50 ≥ 30 ≥ 30 ≥ 20 Application Type Reactor vessels for formulation, blending, batching, precision filling Holding tanks, hoppers, conveying systems, batching, filling Holding tanks, hoppers, conveying systems Bulk storage tanks for raw materials and commodities Load Cell Certification C6 or C3 OIML, 5000d CIII NTEP C3 to D1 OIML, 3000d CIII to 10,000d CIIIL NTEP D1 OIML, 1000d CIII NTEP, not approved Approved or not approved Weigh Module Load Suspension Self-aligning Self-aligning or sliding Self-aligning, sliding, or rigid Self-aligning, sliding, or rigid Dead Stand or Dummy Load Cell None None None Only for liquids or gases Provision for test weights, rigid mounting supports Provision for test weights, rigid mounting supports Provision for test weights, rigid mounting supports Rigid mounting supports Scale Equipment Parameters Installation Parameters Tank Characteristics Inlet and Outlet Piping Flexible only Flexible only Flexible and rigid Flexible and rigid Foundation Rigid and isolated from surrounding influences, uniform deflection Rigid and isolated from surrounding influences, uniform deflection Rigid with uniform deflection Rigid with uniform deflection Load Cell Temperature Range Within load cell nominal limits Within load cell nominal limits Within load cell nominal limits Within sensor operating limits Vibration None Limited, use isolation pads and instrument filtering Limited, use isolation pads and instrument filtering Use isolation pads and instrument filtering as required Wind and Air Currents Indoor installation recommended Up to weigh module limits Up to weigh module limits Up to weigh module limits Recommended Procedure Test weights, material substitution Test weights, material substitution, material transfer Material substitution, material transfer Material transfer, electronic CalFREE™ Calibration No Not recommended Yes, when there is no other choice Yes Models Self-aligning Self-aligning, sliding, or tension Self-aligning, sliding, rigid, or tension Combination of live and dead weigh modules or dead stands Material Stainless steel recommended Carbon steel, stainless steel Carbon steel, stainless steel Carbon steel, stainless steel TraxDSP™ Filtering for Stability Recommended Recommended As required As required Predictive Maintenance Recommended Recommended Recommended As required Environmental Parameters Calibration Procedure Weigh Modules Indicators * System capacity is the scale capacity programmed into the indicator. Rated capacity (R.C.) is the capacity of the load cells supporting the scale. Load cell utilization is the percentage of each load cell’s rated capacity used when the scale is loaded from zero to system capacity. Example: If a scale with a capacity of 5,000 pounds is supported by four 2,500-pound load cells, the load cell utilization is 50% of rated capacity. Table 3-2: Tank Weighing Accuracy for Weigh Module Systems 3-10 (6/09) Chapter 3: General Considerations Weighing System Performance Determining System Resolution Non-transactional Process Weighing The ability of a combination of load cells and indicator to give the desired system resolution or increment size can be determined by the following formula: Signal Strength = (Microvolts per Increment) Desired Increment Size ° Load Cell Output (mV/V)* ° Excitation Voltage ° 1,000 Individual Load Cell Capacity ° Number of Load Cells *Most METTLER TOLEDO load cells have an output of 2 mV/V. Enter the desired increment size into the formula, along with the load cell and indicator parameters. If the signal strength (microvolts per increment) exceeds the minimum allowed for the indicator, the system should be able to deliver the desired resolution. Example: Suppose a tank scale has four 5,000-pound load cells (2 mV/V) attached to an indicator that has an excitation voltage of 15 VDC, a minimum of 0.1 microvolt per increment, and a maximum of 100,000 displayed increments. You want to be able to weigh up to 15,000 pounds at 2-pound increments (7,500 displayed increments). Use the formula to determine the required signal strength: 2 lb ° 2 mV/V ° 15 VDC ° 1,000 5,000 lb ° 4 = 3.0 microvolts per increment The minimum allowable signal strength for the indicator is 0.1 microvolt per increment. Since the 3.0-microvolt signal derived from the formula is above this 0.1-microvolt minimum, you should be able to display 2-pound increments. Legal-for-Trade Transactional Weighing If you are using a scale to buy and sell materials by weight, the resolution or increment size is limited by the scale’s approved accuracy class. The following section explains the industry standards for legal-for-trade applications and the limits that they place on a scale’s resolution. (6/09) 3-11 METTLER TOLEDO Weigh Module Systems Handbook Industry Standards (Legal-for-Trade) There are several organizations that set standards for the scale industry and provide type evaluation to ensure the accuracy of scales. In the United States, type approval is given by the National Type Evaluation Program (NTEP), which is administered by the Office of Weights and Measures of the National Institute of Standards and Technology (NIST). In Europe, type approval is given by the European Economic Community (EEC) according to recommendations set by the Organisation Internationale de Métrologie Légale (OIML). United States Standards NIST is part of the United States Department of Commerce. It sponsors the National Conference on Weights and Measures (NCWM), an association of industry representatives and federal, state, and local officials. This organization adopts uniform laws and regulations recommended by NCWM members, and it publishes those regulations in NIST Handbook 44. Adopted by most states and localities, NIST Handbook 44 is the official listing of specifications, tolerances, and other technical requirements for weighing and measuring devices. Type evaluation is the procedure used to test a particular type (or model) of weighing device. NTEP tests a sample of each model in a laboratory or in the field. If the model is produced in various sizes and capacities, NTEP will evaluate a selection of these based on the availability of sizes and capacities, the number of divisions, and the smallest division size. If the tests show that the scale(s) complies with the applicable technical requirements of NIST Handbook 44, NTEP issues a Certificate of Conformance for that model of scale. A Certificate of Conformance indicates that the particular scale tested by NTEP met NIST Handbook 44 requirements, not that all scales produced meet the requirements. It is the scale manufacturer’s responsibility to make sure that every scale of a certified model meets the published specifications. Whether or not all models of an NTEP-certified scale conform to NIST Handbook 44 specifications is solely up to the discretion of the manufacturer. METTLER TOLEDO has procedural controls in place to guarantee that every scale is produced according to the same specifications. NIST Handbook 44 defines both acceptance and maintenance tolerances. Acceptance tolerances must be met when the scale is first certified by NTEP. Maintenance tolerances are twice as large as acceptance tolerances and apply after the scale has been installed. Figure 3-7 shows NIST Handbook 44 acceptance tolerances for Class III scales. 3-12 (6/09) Chapter 3: General Considerations Industry Standards (Legal-for-Trade) +2.5 +2.0 +1.5 +1.0 Number of Divisions +0.5 0 -0.5 500d 2000d 4000d 10,000d -1.0 -1.5 -2.0 -2.5 Class III Figure 3-7: Handbook-44 Acceptance Tolerance Table The divisions on the vertical axis represent permissible error (the specified limits). The horizontal axis shows the number of divisions that corresponds to the actual weight on the scale. For example, if a weight corresponding to 1,000 divisions is placed on the scale, the indicator must read 1,000 divisions ±1.0 division. If the weight corresponds to 3,000 divisions, the tolerance is ±1.5 divisions. At full capacity, the tolerance is ±2.5 divisions. In order to be certified, a scale must perform within the specified limits over a temperature range of at least +10 to +40 degrees Celsius. Typically, scales are designed to perform within the specified limits over a larger temperature range (-10 to +40 degrees Celsius). It is important to understand how tolerances relate to the accuracy of a scale. If a scale is rated as 5,000 divisions, that does not mean it is accurate to 1 part in 5,000. One part in 5,000 should never be used to express accuracy because, according to Handbook-44 tolerances, 2.5 parts of error are allowed at 5,000 divisions. (6/09) 3-13 METTLER TOLEDO Weigh Module Systems Handbook The accuracy of a scale can also be described as a percentage of applied load accuracy. In Figure 3-8 the dashed line indicates a performance of 0.1% of applied load accuracy, compared with Handbook-44 Class III acceptance tolerances. A 0.1% (or ±0.05%) applied load accuracy roughly corresponds with the NIST Handbook 44 chart through 5,000 divisions. Notice, however, that the line indicating 0.1% applied load accuracy falls outside the acceptance tolerance between 3,000 and 4,000 divisions and above 5,000 divisions. Because the 0.1% applied load accuracy method fails to meet tolerance standards at those points, it should be used only as an approximation of the acceptance tolerances. NIST Handbook 44 or local Weights and Measures guidelines should always be used as the actual acceptance tolerances. +2.5 +2.0 +1.5 +1.0 Number of Divisions +0.5 0 -0.5 500d 2000d 4000d 10,000d -1.0 -1.5 -2.0 -2.5 Class III 0.1 percent or ±0.05 percent of Applied Load Method Figure 3-8: Handbook-44 Acceptance Tolerance Table (Percent Applied Load Method) 3-14 (6/09) Chapter 3: General Considerations Industry Standards (Legal-for-Trade) International Standards Although NTEP certification is widely accepted in the United States, it is not a worldwide standard. When selling products outside of the United States, you should understand and follow the local standards. Some common standards include the Measurement Canada standard that is used in Canada and the Organisation Internationale de Métrologie Légale (OIML) standard adopted by the European Economic Community. OIML is an independent international organization that develops standards for adoption by individual countries. Its main task is harmonizing the regulations and metrological controls applied by the national metrological services in the countries that are OIML members. There are two main types of OIML publications: • International Recommendations (OIML R) are model regulations that establish the metrological requirements for scales, as well as requirements for specifying methods and equipment used to check a scale’s conformity. OIML member countries are responsible for implementing the recommendations. • International Documents (OIML D) provide information to help improve the work of the national metrological services. A scale with NTEP certification does not automatically meet OIML standards. Several European testing labs (such as NMi, BTS, and PTB) conduct performance tests to verify whether the equipment meets OIML standards and is capable of performing its intended functions. OIML has its own set of accuracy classes and acceptance tolerances. Instruments are classified according to absolute and relative accuracy. • Verification scale interval (e) represents absolute accuracy. • Number of verification scale intervals (n = Max Capacity/e) represents relative accuracy. The accuracy classes for instruments and their symbols are listed below: Accuracy Class Symbol Special Accuracy I High Accuracy II Medium Accuracy III Ordinary Accuracy IIII Figure 3-9 shows OIML acceptance tolerances, and Figure 3-10 compares those with NIST Handbook 44 tolerances. Again, the vertical axis represents the permissible error and the horizontal axis represents the number of divisions that corresponds to the actual weight on the scale. Note that OIML acceptance tolerances are identical to those in NIST Handbook 44 from 0 to 4,000 divisions. At 4,000 divisions, the NIST acceptance tolerance increases from ±1.5 divisions to ±2.5 divisions, while the OIML acceptance tolerance remains at ±1.5 divisions up to 10,000 divisions. (6/09) 3-15 METTLER TOLEDO Weigh Module Systems Handbook +2.5 +2.0 +1.5 +1.0 Number of Divisions +0.5 0 -0.5 500d 2000d 4000d 10,000d -1.0 -1.5 -2.0 Class III -2.5 Figure 3-9: OIML Acceptance Tolerance Table +2.5 +2.0 +1.5 +1.0 Number of Divisions +0.5 0 -0.5 500d 2000d 4000d 10,000d -1.0 -1.5 -2.0 -2.5 OIML Class III Handbook 44 Handbook 44 & OIML Figure 3-10: Handbook-44/OIML Acceptance Tolerance Overlay In order be classified as “Legal for Trade,” a scale must meet OIML acceptance tolerances. The scale’s weight readings must be within the specified limits, relative to the number of divisions (or increments) that correspond to the actual weight used. For example, if a weight that corresponds to 5,000 divisions is placed on the scale, then the indicator must display 5,000 divisions ±1.5 divisions in order to meet OIML acceptance tolerances. In order for the same scale to meet NIST acceptance tolerances, the indicator could display 5,000 divisions ±2.5 divisions. The wider acceptance tolerance allowed by NIST was originally intended to approximate the 0.1% of applied load method. 3-16 (6/09) Chapter 3: General Considerations Industry Standards (Legal-for-Trade) The biggest difference between NIST and OIML, besides the units used (English and S.I. respectively), is the creep rate specification. Creep is the change in a weight reading when a weight is left on a scale over a period of time. NIST specifications allow a creep rate of 0.5 division for test loads of 0 to 500 divisions, 1.0 division for test loads of 500 to 2,000 divisions, 1.5 divisions for test loads of 2,000 to 4,000 divisions, and 2.5 divisions for test loads of 4,000 to 10,000 divisions when the load is applied for one hour. OIML standards allow a creep rate of 0.5 division for test loads equal to the scale capacity when the load is applied for 30 minutes. As you can see, for most capacities OIML standards are more stringent, allowing a smaller error over a shorter time period. To meet OIML standards, a scale must satisfy all requirements and perform within the calibration tolerance limits. Under EC Weights and Measures regulations, there is a difference between the concepts of a “test certificate” and an “approval.” Approval is given only for entire scales (not for indicators or load cells alone). There are two types of approval: • EC Type Approval for a self-contained complete scale. • EC “Umbrella” Approval for a modular scale, made up of components (indicators, load cells, junction boxes, printers, etc.). Each component must have an EC Test Certificate, which must be listed on the umbrella approval. Once an umbrella approval has been given, additional EC Test Certified components can be added to it later. The approval covers scale systems made up of various combinations of certified components. It also allows you to have one component approved while other components are still being developed. (6/09) 3-17 Chapter 4: Environmental Considerations Wind Loading 4 Environmental Considerations Because environmental factors can affect the accuracy and safety of a weigh module system, they must be considered during the design stage. If a scale will be subject to wind, seismic, or shock loading, you might need to use larger capacity weigh modules or add restraint devices so that the structure remains stable under extreme conditions. NOTE: The information provided in this chapter is for reference only. Consult a Certified Professional Engineer (P.E.) who is familiar with local building codes to determine reaction forces where weigh modules are mounted to a tank. Wind Loading Wind loading can have a significant effect on outdoor weigh module applications. Because the potential for high winds varies from region to region, there is no one safety factor that can be used for all installations. When sizing weigh modules for an outdoor system, you should always factor in the local wind speed characteristics (see Figure 41). In extreme cases, you might need to add external restraints to keep high winds from tipping the tank. Figure 4-1: Wind Speed Characteristics for the United States (6/09) 4-1 METTLER TOLEDO Weigh Module Systems Handbook When wind exerts a simple horizontal force on one side of a tank, it creates a suction force on the opposite side of the tank. These combined forces work to tip the tank in the direction the wind is blowing. There are also right angle suction forces pulling on each side of the tank, but they tend to cancel each other out. The overall effect is that the wind exerts an uplift force on some load cells, a download force on other cells, and a shear force on all the cells. You should determine wind loading for two scenarios: when a tank is empty and when it is full. The equation for calculating wind force is based on wind velocity, tank location, tank geometry, and accepted local standards and codes. Reaction forces (downward upward, and shear) should also be determined. The following information will be needed to calculate these forces: • Gross Weight of the Tank (WG ) • Empty Weight of the Tank (WT ) • Diameter of the Tank (d ) • Height of the Tank’s Legs (hL ) • Height of the Tank (hT ) • Number of Supports (N ) • Wind Velocity (V ) • Safety Factor (SF ) Reaction forces at the weigh modules are calculated via Statics (Equilibrium) based on the wind force at the center of gravity (c.g.) of the tank (see Figure 4-2). Methods for calculating reaction forces are covered in Appendix 2. Compare the reaction forces with the allowable loads for the weigh modules. Allowable loads (such as safe load limit, maximum horizontal force, and maximum uplift force) for METTLER TOLEDO weigh modules are listed on the data sheet for the specific model of weigh module. You can then select weigh modules that are sized to accommodate both the weight of the full tank and the wind loading. It is possible that the load cells required to accommodate both the weight of the tank and wind loading could be large enough to compromise system resolution. If that is the case, consider adding external restraints to the weigh module system (see “Additional Vessel Restraint Methods” in Chapter 5) instead of using the larger load cells. For extra safety, construct wind breaks to shield the tank. d c.g. hT FW Wind Force W hL Figure 4-2: Tank Dimensions and Wind Force 4-2 (6/09) Chapter 4: Environmental Considerations Wind Loading Example In the following example, we will calculate wind loading for a tank supported by four weigh modules and located on the coastline at Tampa, Florida. The wind force code used for this example is the Ohio Basic Building Code (BOCA). Always use the appropriate building code for your area to determine the equivalent wind force. The installation has the following characteristics: WG = 30,000 pounds WT = 5,000 pounds d = 8 feet hL = 4 feet hT = 20 feet N=4 SF = 1.25 To size weigh modules for this tank (assuming no wind force), multiply the gross weight of the full tank by a safety factor of 1.25: 30,000 ° 1.25 = 37,500 Then divide by the number of weigh modules to be used: 37,500 ÷ 4 = 9,375 pounds per load cell To support 9,375 pounds, you would need a 10,000-pound weigh module. So without wind loading, the tank scale would use four 10,000-pound weigh modules. Now calculate the wind force, using the following equation from the Ohio Basic Building Code (BOCA): F = P V ° I ° K Z ° GH ° C F ° A F where: PV = 25.6 lb/ft2 (V=100 mph); Basic Velocity Pressure [BOCA Table 1611.7(3)] I = 1.10 (at hurricane oceanline); Importance Factor [BOCA Table 1611.5] KZ = 1.31 (Exposure Category D); Exposure Coefficient [BOCA Table 1611.7(4)] GH = 1.13 (Exposure Category D); Gust Response Factor [BOCA Table 1611.7(5)] CF = 0.74 [Table 16.11(4)]; Force Coefficient [BOCA Table 1611.9(1-5)] AF = 160 ft2 (20 ft ° 8 ft); Projected Area (normal to wind) Calculation: F = 25.6 ° 1.10 ° 1.31 ° 1.13 ° 0.74 ° 160 = 4,936 The maximum shear force exerted by the wind would be 4,936 pounds at the tank’s center of gravity (see Figure 4-3). (6/09) 4-3 METTLER TOLEDO Weigh Module Systems Handbook 8' c.g. 20' FW = 4,936 lb 30,000 lb gross 5,000 lb tare 4' Figure 4-3: Wind Force Exerted on Sample Tank Scale By using statics (see Appendix 2), we can calculate the maximum downward force and maximum uplift force: • Maximum Shear Force: 4,936 pounds (equals wind force F ) • Maximum Downward Force: 16,138 pounds • Maximum Uplift Force: 7,388 pounds These forces exceed the allowable loads for 10,000-pound weigh modules. To accommodate wind forces for this tank, you will need to use four 20,000-pound weigh modules or add external check rods that are strong enough to handle the additional force (see Chapter 5). Alternative Method The following equation provides a generic method for determining resultant wind force: FW = 0.00256 ° V 2 ° hT ° d ° S where: FW = Resulting Wind Force (pounds) V 2 = Wind Velocity Squared (mph) hT = Height of the Tank (feet) d = Diameter of the Tank (feet) S = Shape Factor: Circular Tanks = 0.6 Hexagonal or Octagonal Tanks = 0.8 Square or Rectangular Tanks = 1.0 FW will be the horizontal force applied at the tank’s center of gravity. Use statics to determine the resulting reaction forces at the supports, and compare the results with the allowable load ratings to size the weigh modules. 4-4 (6/09) Chapter 4: Environmental Considerations Seismic Loading Seismic Loading Seismic forces, movement caused by earthquakes and other shifts of the earth, are among the strongest external forces that can affect a tank scale. Figure 4-4 shows seismic potential for the United States, with seismic zone 0 being the least likely location for an earthquake and seismic zone 4 the most likely location for an earthquake. Seismic forces are analyzed in much the same way as wind forces. An equivalent horizontal shear force (FEQ) is determined by using the appropriate formulas from the governing building code. Formulas referenced in this section are from the 1988 Uniform Building Code (UBC). Many local governments currently base their codes on the International Building Code (IBC), which was developed by the International Code Council (ICC). Check with local authorities to find out which code applies to a specific tank scale. Figure 4-4: Seismic Zones in the United States UBC Code Formulas The following UBC Code formulas are used to determine horizontal shear force (FEQ) for free-standing tanks and for tanks that are part of a structure: V = (ZIC/Rw )W = FEQ for free-standing tanks FP= (ZICP)W = FEQ for tanks that are part of a structure where: V = Base Shear FP = Periodic Force Z = Seismic Zone Factor Zone 4: 0.40 Zone 3: 0.30 Zone 2B: 0.20 (6/09) 4-5 METTLER TOLEDO Weigh Module Systems Handbook Zone 2A: 0.15 Zone 1: 0.10 I = Importance Factor Nonhazardous materials: 1.00 Hazardous materials: 1.25 to 1.50 C = Lateral Force Coefficient: 2.75 for most conditions CP = Lateral Force Coefficient (Tank as part of structure) Nonhazardous materials: 0.75 Hazardous materials: 1.25 Vessels on roof of building: 2.00 RW = Numerical Coefficient from Tables 23-O and 23-Q of UBC Bins & Hoppers: 4.00 Tanks: 3.00 FEQ Factors Based on UBC Code Table 4-1 provides a simpler way to determine horizontal shear force (FEQ). The factors listed in the table are based on the UBC Code formulas presented above. Nonhazardous Free-Standing Bin/Hopper Zone 4 Zone 3 Zone 2B Zone 2A Zone 1 Free-Standing Tank Zone 4 Zone 3 Zone 2B Zone 2A Zone 1 Structural Bin/Hopper/Tank Zone 4 Zone 3 Zone 2B Zone 2A Zone 1 Roof-Mounted Bin/Hopper/Tank Zone 4 Zone 3 Zone 2B Zone 2A Zone 1 Hazardous Conservative Nonconservative 0.28 0.21 0.14 0.10 0.07 0.41 0.31 0.21 0.15 0.10 0.34 0.26 0.17 0.13 0.09 0.37 0.28 0.18 0.14 0.09 0.55 0.41 0.28 0.21 0.14 0.46 0.34 0.23 0.17 0.11 0.30 0.23 0.15 0.11 0.08 0.75 0.56 0.38 0.28 0.19 0.63 0.47 0.31 0.23 0.16 0.80 0.60 0.40 0.30 0.20 1.20 0.90 0.60 0.45 0.30 1.00 0.75 0.50 0.38 0.25 Table 4-1: Horizontal Shear Force Factors (FEQ) Based on UBC Code 4-6 (6/09) Chapter 4: Environmental Considerations Shock Loading Find your application in the table, based on tank location, tank contents, and seismic zone. Multiply the corresponding factor by the gross weight of the tank or vessel. The resulting value will equal the horizontal shear force (FEQ) applied at the tank’s center of gravity (see Figure 4-5): FEQ = Factor Value ° W V = FEQ W gross Figure 4-5: Horizontal Shear Force Applied to Tank Reaction forces at the weigh modules are determined using Statics (see Appendix 2) based on the shear force (FEQ) applied at the tank’s center of gravity. Compare the reaction forces with the allowable loads for the weigh modules. Allowable loads (such as safe load limit, maximum horizontal force, and maximum uplift force) for METTLER TOLEDO weigh modules are listed on the data sheet for the specific model of weigh module. The weigh modules can then be sized to accommodate the resulting seismic loads, or external checking can be added as needed to counter seismic loads. Shock Loading Shock loading can affect a scale’s design, especially for conveyor applications or floor scale conversions. It is caused by an abrupt change in the weight placed on a scale, for example, when an object is dropped on the scale. If shock forces are strong enough, you will need to install higher capacity load cells. To estimate a shock force, you must know the weight of the object being dropped, the vertical distance it is dropped, and the empty weight of the scale structure. You must also know the spring rate of the nominal load cell capacity. The spring rate constant (K) for a load cell is its rated capacity divided by load cell deflection at rated capacity. K= Rated Capacity (R.C.) of Load Cell Deflection at R.C. Deflection at rated capacity for METTLER TOLEDO load cells is listed on the data sheet for the specific model of load cell. For crane loading applications, you need to know the crane’s rate of descent. (6/09) 4-7 METTLER TOLEDO Weigh Module Systems Handbook Determine the nominal load cell capacity by multiplying the scale’s gross capacity by 1.25 and then dividing by the number of supports. Then use one of the following equations to estimate the shock forces caused by dropped or lowered weights. NOTE: The following equations will compute the worst-case value. Equation for Dropped Weight: FMAX = W2 + W1 [1+ 1+ 2NKH W1 + W2 ] Equation for Lowered Weight: FMAX = W2 + W1 [1+ 1+ NK (W1 + W2) V 2 GW1 2 ] Where: FMAX = Shock Force (pounds) W1 = Weight being Dropped or Lowered (pounds) W2 = Dead Weight of Platform (pounds) N = Number of Load Cells K = Spring Rate of Individual Load Cell (pounds/inch) V = Velocity at which Object is Lowered (inches/second) G = Gravity (384 inches/second2) H = Height from which Object is Dropped (inches) Once you have calculated the shock force for a scale, determine how that force will be distributed over the load cells. If an object is dropped in the center of a four-module scale platform, the shock force will probably affect all four load cells equally. If it is dropped on one side of the platform, the shock force could be concentrated on two load cells. To estimate the shock loading per load cell, divide the shock force by the number of load cells it will be concentrated on. Then compare that shock loading with the allowable download ratings per weigh module. If the shock loading is too large for the nominal load cell capacity, you might need to use higher capacity weigh modules. Instead of increasing weigh module capacities, you might consider one of the following ways to reduce the shock loading: • Place objects onto the scale without dropping them. • Add mass to the scale platform. • Use shock-absorbing materials such as Fabreeka® pads, coil springs, railroad ties, or compacted sand to dampen impact forces. (Fabreeka is a registered trademark of Fabreeka International, Inc.) Using Fabreeka Pads Installing Fabreeka elastomeric pads between the weigh module top plates and the weighbridge can reduce the shock load that is transmitted to the load cells. If we consider the spring rate of the Fabreeka pads acting with the load cells, the overall K value or system spring rate will be reduced. Every component in the load path (including the Fabreeka pads and load cells) will deflect slightly, contributing to a reduced spring rate. However, we will consider only the Fabreeka pads and load cells since we have the information available to determine their respective spring rates. A Fabreeka pad’s static spring rate varies with loading. Through testing we have determined the deflection rates based on various pad sizes and weigh module 4-8 (6/09) Chapter 4: Environmental Considerations Vibration capacities. Based on these test results, Fabreeka pads will reduce the overall system spring rate by 5% to 80% over the load cell alone (for a system with four load cells). To determine the K value of Fabreeka pads used for a specific application, refer to the general dimension layout drawing for the pads. You can download the drawing from www.mt.com (on the web page for the specific weigh module). The drawing lists the deflection per pound for each Fabreeka pad. To determine spring rate, use the following formula: K= 1 Force = Deflection Deflection per Pound To determine total system spring rate, use the following formula: K system = 1 (1 / NK Load Cell ) + (1 / NK Fabreeka ) The number of load cells (N ) should equal the number of Fabreeka pads. Vibration If a scale vibrates constantly, it might not come to rest long enough to capture an accurate weight reading. METTLER TOLEDO indicators have built-in filtering systems that can eliminate most of the effects of vibration. When installing a weigh module system, you should take steps to reduce any external or internal vibration that the indicator cannot eliminate. External Vibration: A scale can be affected by vibration from its foundation or from the surrounding environment. We recommend finding the source of the vibration and correcting it to eliminate its effect on the scale. Cutting the floor slab or separating the scale support frame from surrounding structures can also prevent external vibration from affecting a scale’s stability. Internal Vibration: Vibrations produced inside a tank are normally caused by sloshing liquid or agitation. In large tanks, sloshing can produce low-frequency vibrations that are difficult to eliminate at the scale indicator. You can reduce sloshing by installing baffles in a tank. If an agitator and its drive motor are permanently attached to a scale, you might need to incorporate isolation pads (such as Fabreeka pads, available from METTLER TOLEDO) in the mounting of the weigh modules to minimize the internal vibration. To improve weighing accuracy, make sure the agitator is stopped while weight readings are taken. It is difficult to analyze the effects of vibration that is caused by wind. If high accuracy is required, we recommend shielding the scale from wind. Any time a tank is located outdoors, it should be designed to minimize vertical forces resulting from wind. (6/09) 4-9 METTLER TOLEDO Weigh Module Systems Handbook Temperature Effects Temperature can affect a weigh module system by causing structural supports to expand and contract or by exceeding the operating limits of the strain-gauge load cells. As a tank expands and contracts, it pushes or pulls on attached piping. If the piping connections are rigid, this can cause weighing errors. The following equation can be used to calculate the change in the length of a tank as the temperature changes: ΔL = a ° L ° ΔT Where: ΔL = Change in Length a = Coefficient of Linear Expansion L = Original Length ΔT = Change in Temperature Table 4-2 lists temperature specifications for typical analog load cells. The compensated range is the temperature range in which the load cell will meet or exceed NIST Handbook 44 legal-for-trade tolerances. The service/storage range is the temperature range in which the load cell will operate without physical damage. Typical Analog Strain-Gage Load Cells Compensated Range -10°C to +40°C (+14°F to +104°F) Service/Storage Range -50°C to +85°C (-58°F to +185°F) Table 4-2: Load Cell Temperature Specifications In applications with high temperatures inside the tank, you can reduce thermal conduction by placing insulation between the tank and the weigh modules. Use insulating material with a compressive strength above 15,000 psi and thermal conductivity ratings below 2.0 BTU-in/ft2/hr. The material must be able to withstand the exposure temperature for prolonged periods without breaking down or deforming. Two recommended FDA-approved materials are listed below: Acetron® GP Acetal (Acetron is a registered trademark of DSM) • Continuous Service Temperature: 180°F • Heat Deflection Temperature at 264 psi: 220°F • Thermal Conductivity: 1.6 BTU inches/hour/foot2/°F • Coefficient of Thermal Linear Expansion: 5.4 ° 10-5 • Compressive Strength: 15,000 psi Ultem 1000 Polyetherimide (PEI) 4-10 (6/09) • Continuous Service Temperature: 340°F • Heat Deflection Temperature at 264 psi: 392°F • Thermal Conductivity: 0.9 BTU inches/hour/foot2/°F • Coefficient of Thermal Linear Expansion: 3.1 ° 10-5 • Compressive Strength: 22,000 psi Chapter 4: Environmental Considerations Moisture and Corrosion Moisture and Corrosion Moisture or corrosive material on a weigh module can affect the life of the load cells. Debris, such as leaves and dirt, accumulated in and around weigh modules can also cause problems. There are several steps you can take to minimize the potential for moisture and corrosion problems: • Provide adequate drainage away from the weigh modules. • Keep weigh modules clear of snow that will melt and introduce moisture into the system. • Do not use tanks with flat tops that catch and retain water, snow, leaves, or other debris that will add uncompensated weight to the system. • Hose down the tanks regularly to clean accumulated debris. • Keep cables clean and in good condition. Broken cables or worn cable sheathing can allow water to enter and cause corrosion. • Protect cables by placing them in conduit or teflon wrap. • Locate tanks (and weigh modules) away from corrosive materials and chemicals. The combined effects of temperature, water, and air can corrode nearby weigh modules. If tanks are near corrosive substances, provide protective coatings and shieldings. Positive airflow in the area can also help prevent corrosion damage. • Store tools, supplies, and trash away from the tank and weighing system. NEMA/IP classifications for electrical equipment enclosures are covered in Appendix 4. A chemical resistance chart is provided in Appendix 6. Lightning and Surge Protection Lightning protection devices should be installed to protect a scale from being damaged by lightning. Use devices that are designed to keep the current produced by lightning from reaching ground through the load cell. Instead, the devices should provide a lowresistance alternative path to ground near each weigh module (see Figure 4-6). • Verify the integrity of any existing grounding systems. • Use a single-point grounding system. (6/09) 4-11 METTLER TOLEDO Weigh Module Systems Handbook Ground Strap Ground Rod Figure 4-6: Grounding System for a Weigh Module Surges are brief changes in voltage or current. They can be caused by lightning or by equipment with large motor loads (HVAC systems, variable-speed motors, etc.). Minor power surges can be eliminated by using an Uninterruptable Power Supply (UPS) or Power Conditioner. You should provide surge protection to prevent damage to a weigh module system. 4-12 (6/09) Chapter 5: General Installation Guidelines Applying Force to Load Cells 5 General Installation Guidelines Applying Force to Load Cells Load cells that use strain gauges are sensitive enough to detect very small changes in weight. The trick is to make sure that they react only to the weight you want to measure, not to other forces. To get accurate weight readings, you must carefully control how and where weight is applied to a load cell. Ideally, a load cell should be installed so that the load is applied vertically throughout the entire weight range (see Figure 5-1). Force C Force C L C L L Figure 5-1: Ideal Loading (Entire Force Applied Vertically) To attain that ideal, the weigh vessel and load cell support would need to be level, parallel, and infinitely rigid. When a tank scale and its structural supports are designed and installed carefully, it is possible for the scale to approach an ideal loading application. When a scale is not installed properly, there are several types of forces that can affect its accuracy. The following sections describe loading problems commonly encountered in tank scale applications. (6/09) 5-1 METTLER TOLEDO Weigh Module Systems Handbook Angular Loading Angular loading occurs when a force that is not perfectly vertical is applied to a load cell. This diagonal force can be defined as the sum of its vertical component and its horizontal component. In a well-designed weigh module application, the load cell will sense the weight (vertical force) but will not sense the side load (horizontal force). Figure 5-2a and Figure 5-2b show a weigh module application with the load cell anchored to a foundation. In Figure 5-2a, the force exerted by the tank’s weight is perfectly vertical. In Figure 5-2b, the force is applied at an angle. The vertical component (F ) of this angular force is normal to and sensed by the load cell; it is equal to the force applied in Figure 5-2a. The horizontal component (side load) = F ° Tangent θ. F F Figure 5-2a: Vertical Force Figure 5-2b: Angular Force Figure 5-3a and Figure 5-3b show how angular loading would affect a load cell anchored to the tank that is being weighed. Figure 5-3a shows an ideal installation with a perfectly vertical force. In Figure 5-3b, the force (FN ) that is normal to and sensed by the load cell would be less than the vertical force (F ) applied to the load cell in the ideal installation. In this case, FN = F ° Cosine θ. F Figure 5-3a: Vertical Force 5-2 (6/09) FN Figure 5-3b: Angular Force Chapter 5: General Installation Guidelines Applying Force to Load Cells Eccentric Loading Eccentric loading occurs when a vertical force is applied to a load cell at a point other than its center line (see Figure 5-4). This problem can be caused by thermal expansion and contraction or by poorly designed mounting hardware. You can avoid eccentric loading problems by using a weigh module system that will compensate for expansion and contraction. Force C C L L Figure 5-4: Eccentric Loading Side and End Loading Side and end loading occur when horizontal forces are applied to the side or end of a load cell (see Figure 5-5). They can be caused by thermal expansion and contraction, by misalignment, or by vessel movement due to dynamic loading. Side and end forces can affect the linearity and hysteresis of the scale. For static loading applications, use a weigh module system that compensates for thermal movement. For dynamic loading applications, use a weigh module system with a self-aligning load pin suspension. Force Force Figure 5-5: Side and End Forces Applied to a Load Cell (6/09) 5-3 METTLER TOLEDO Weigh Module Systems Handbook Torsional Loading Torsional loading occurs when a side force twists a load cell (see Figure 5-6). It can be caused by structural deflection, system dynamics, thermal movement, or mounting hardware misalignment. Torsional loading will reduce a system’s accuracy and repeatability. To avoid this problem, always follow proper structural support and installation guidelines, and use weigh modules that compensate for tank movement. Force Moment Figure 5-6: Torsional Loading Applied to a Load Cell Tank and Vessel Design The accuracy of a tank scale can be affected by the design of the tank itself. A new tank should be designed so that it will not deflect significantly under the weight of its contents and will not be subject to pressure imbalances when it is filled or emptied. If you are converting an existing tank to a scale, you might need to modify the tank to meet these requirements. Structural Integrity A tank, like its support structure, can deflect under the weight of its contents. This is a special concern if the tank has a large diameter or if the legs are long and tend to bow (see Figure 5-10a). Flexmount weigh modules are designed to compensate for minor tank deflection. But serious tank deflection (more than 0.5 degree from level) will cause linearity errors and inaccurate weighments. The design engineer is responsible for making sure that tank deflection is within specification. Excessive deflection can be corrected by bracing the tank’s legs or connecting them together (see Figure 5-10b). Pressure Imbalances When a material flows rapidly into or out of an unvented tank, it can create a pressure imbalance. If a tank is being filled, the air pressure inside the tank would be greater than the pressure of the air surrounding the tank. For example, suppose 500 cubic feet of liquid from a pressurized pipeline is added to a tank. The liquid would displace 500 cubic feet of air inside the tank. Unless that 500 cubic feet of air is vented, pressure will build up inside the tank. The increased pressure will produce a weighing error until a pressure balance can be restored. A similar condition occurs when a material is discharged rapidly from a tank, creating a partial vacuum inside the tank. To prevent pressure imbalances, make sure that the tank is adequately vented. That will allow you to weigh the contents accurately as soon as the tank is filled or emptied, instead of 5-4 (6/09) Chapter 5: General Installation Guidelines Tank and Vessel Design having to wait for a pressure balance to be restored. Vents should be vertical and provided with clean-out doors and fume stops or dust collectors. Provisions for Test Weights If you are going to use test weights to calibrate a tank scale, you will need some way to hang the test weights from the tank. In most cases, this can be done with some type of mounting lugs spaced evenly around the tank. Figure 5-7 shows a mounting lug with a test weight hanging from it. Use a hoist for raising/lowering the weight. Mounting Lug Chain or Nylon Strap Hoist/Jack Test Weight Figure 5-7: Mounting Lugs for Test Weight (6/09) 5-5 METTLER TOLEDO Weigh Module Systems Handbook Structural Support Guidelines The following guidelines provide information that can help you install a scale’s structural supports properly. Mounting Plate Support The entire surface area of each weigh module’s mounting plates should be fully supported where the plates are mounted to the tank and to the foundation. If there are voids, fill them with steel shims or non-shrink epoxy grout. For mounting and shimming details, see the information about installing compression weigh modules in Chapter 6. Support Deflection Because load cells deflect only about 0.01 to 0.03 inch at rated capacity, they must be sensitive to very small movements. Even deflections in a tank scale’s structural support system can affect the weight indicated by the scale. Excessive or non-uniform deflection will introduce unwanted non-vertical forces at the load cells, reducing a system’s accuracy and repeatability. When designing a weigh module support structure, you should follow these three guidelines: • The support brackets for the weigh modules should not deflect more than 1/2 degree out of level at full capacity. • The base support structure for the weigh modules should not twist or deflect more than 1/2 degree out of level at full capacity. • The base support structure for the weigh modules should deflect uniformly. The following three figures show how support deflection affects a weigh module. Tank Wall Support Bracket is Not Level 1/2° Maximum 1/2° Maximum Support Structure is Not Level Figure 5-8a 5-6 (6/09) Figure 5-8b Figure 5-8c Chapter 5: General Installation Guidelines Structural Support Guidelines • Figure 5-8a: Support bracket is out of level, applying side forces to the load cell. • Figure 5-8b: Support bracket and support structure are aligned properly. • Figure 5-8c: Support structure is out of level, applying side forces to the load cell. A tank scale’s support structure should deflect as little as possible, and any deflection should be uniform at all support points (see Figure 5-9). Excessive deflection can cause inlet and outlet piping to bind, creating linearity errors. When deflection is not uniform, it can cause repeatability errors and zero return errors due to creep. Minimize Deflection Figure 5-9: Weigh Module Base Support Structure Deflection In some cases, a tank’s legs will deflect under the weight of the tank (see Figure 510a). If the deflection is great enough to affect weight readings, you should brace the legs to keep them rigid (see Figure 5-10b). Figure 5-10a: Deflection of Tank Legs Figure 5-10b: Tank Legs Braced (6/09) 5-7 METTLER TOLEDO Weigh Module Systems Handbook Weigh Module and Support Beam Alignment The center line of load application on a load cell should align with the center line of the weigh module’s support beam. Ideal installations for a compression weigh module and tension weigh module are shown in Figure 5-11a and Figure 5-11b. CL CL Support Beam Tank Wall Load Cell Support Beam Load Cell Figure 5-11a: Compression Weigh Module 5-8 (6/09) Figure 5-11b: Tension Weigh Module Chapter 5: General Installation Guidelines Structural Support Guidelines Add web stiffeners or gussets if necessary to prevent the beam from twisting under load (see Figure 5-12). Web Stiffener or Gusset Figure 5-12: Reinforced Weigh Module Support Beam Stiffening Support Structures Metal support structures tend to bend or deflect as the amount of weight placed on them increases. Too much deflection can affect the accuracy of a tank scale. The greatest potential for deflection occurs when a weigh module is mounted at the middle of a support beam’s span. Figure 5-13a shows how a support beam can deflect when a weigh module is mounted at mid-span. If this type of arrangement cannot be avoided, you should reinforce the support beams to minimize deflection. Figure 5-13b and Figure 5-13c show typical reinforcement methods. Figure 5-13a Figure 5-13b Figure 5-13c (6/09) 5-9 METTLER TOLEDO Weigh Module Systems Handbook Structural Beam Support A better way to reduce deflection is to mount weigh modules near grounded vertical columns instead of at the center of horizontal support beams. Be sure to support all weigh modules with the same size structural beams to prevent differential deflection, which can cause nonrepeatability or zero-return problems. Figure 5-14a shows a recommended arrangement with weigh modules mounted near vertical beams, and Figure 5-14b shows weigh modules mounted at the center of horizontal beams. Figure 5-14a: Recommended 5-10 (6/09) Figure 5-14b: Not Recommended Chapter 5: General Installation Guidelines Structural Support Guidelines Figure 5-15 and Figure 5-16 show details of methods used to mount weigh modules near grounded vertical beams. Grounded Vertical Beam Weigh Module Figure 5-15: Structural Beam Support Grounded Vertical Beam Weigh Module Figure 5-16: Structural Beam Support (6/09) 5-11 METTLER TOLEDO Weigh Module Systems Handbook Tank Interaction When tank scales are located next to each other, the weight of one tank can affect the load sensed by the other tank’s weigh modules. There is a strong potential for this type of interaction when the tanks share a common foundation. The following figures show four tank scale installations, ranging from best (Figure 5-17a) to worst (Figure 5-17d). Figure 5-17a Figure 5-17b Figure 5-17a: The best choice is to mount weigh modules on concrete foundations. Since concrete deflects very little, two tanks can share the same foundation without interacting. Figure 5-17b: The next best choice is to mount the weigh modules near vertical beams, with a separate support structure for each tank. This limits deflection and tank interaction. Figure 5-17c Figure 5-17d Figure 5-17c: The next to the worst choice is to mount the weigh modules at the midspan of a horizontal beam, using a separate support structure for each tank. This limits vessel interaction but not support structure deflection. Figure 5-17d: The worst choice is to mount the weigh modules at the mid-span of a horizontal beam, with the two tanks sharing a common support structure. This allows both deflection and vessel interaction. 5-12 (6/09) Chapter 5: General Installation Guidelines Additional Vessel Restraint Methods Additional Vessel Restraint Methods Most METTLER TOLEDO compression weigh modules are designed to be self-checking and provide adequate protection against tipping. But in applications with a potential for excessive wind or seismic load forces, additional restraint systems are often needed. For suspended tension weigh module applications, a safety restraint system is always needed to catch the tank in case its suspension components fail. Check Rods Check rods are used to limit a tank’s horizontal movement so that it will not tip or rotate. They should be positioned at or above the center of gravity of the full tank. Figure 5-18 shows recommended check rod arrangements. Note that the check rod is tangential to the tank, with a gap between the check rod and the bracket on the tank. This enables the check rod to restrain the tank while allowing for minor thermal expansion and contraction. When check rods are installed in a perfectly horizontal position, they do not create vertical forces that will affect the scale’s weight readings. Gap Gap Gaps between the nuts and this bracket are acceptable if a misaligned beam web causes interference (vertical force) against the bracket. Optional Method Gap Figure 5-18: Tank with Check Rods (6/09) 5-13 METTLER TOLEDO Weigh Module Systems Handbook Safety Rods Any tank that is suspended by tension weigh modules should have a secondary safety restraint system. Safety rods must be strong enough to support the filled tank in case the primary suspension system fails. For most applications, you would install one vertical safety rod next to each tension weigh module (see Figure 5-19). Fit each safety rod through an oversized hole in the bracket so that the rod does not influence the live weight readings. Horizontal check rods or bumpers can be used around the perimeter of the tank to keep it from swaying. Support Beam Safety Rod Hopper Gap Figure 5-19: Tension Weigh Module with Safety Rod 5-14 (6/09) Chapter 5: General Installation Guidelines Piping Design Piping Design Any time that piping is connected to a tank scale (a live-to-dead connection), there is a potential for mechanical binding. If piping is not installed properly, it can cause weighing errors by pushing or pulling on the tank. The best way to avoid those problems is to design piping so that it does not exert unwanted forces on a tank. Here are some general guidelines you should follow when designing a piping system: • Make sure the tank’s support structure deflects as little as possible. That will decrease the amount of deflection in the piping. • Run all pipes horizontally from the tank so that the tank is not suspended by the piping. • Locate the first rigid support for the piping as far away from the tank as possible. That will make the piping more flexible. • Use pipe with the smallest diameter and lightest gauge possible. That will make the piping more flexible. • Use flexible piping or connections whenever possible. Why is it important for piping to be flexible? Figure 5-20a shows a tank mounted on weigh modules and supported by an I-beam. A pipe is connected to the tank and rigidly clamped to another structure at a distance (L ) from the tank. When the tank is empty, the pipe remains in a horizontal position and exerts no force on the tank. When the tank is full (see Figure 5-20b), it moves downward because of the deflection of the load cell and the I-beam. This pulls the pipe downward the same distance that the tank deflects (Δh ). The pipe exerts an upward force on the tank, affecting weight measurements. The more flexible the piping is, the less force it will exert on the tank. L L • • • • Figure 5-20a: Empty Tank Δh Figure 5-20b: Full Tank Piping can have a significant effect on weighing accuracy, especially when many pipes are connected to a tank with a relatively low capacity. By designing the piping properly, you can reduce unwanted forces to a fraction of the tank’s live load. Then you can compensate for the remaining forces when you calibrate the scale. Since load cell (6/09) 5-15 METTLER TOLEDO Weigh Module Systems Handbook simulators cannot simulate the forces produced by attached piping, calibration must be performed on the installed tank scale. You can use the following equation to calculate the force exerted by an attached pipe: FP = 0.59 ° (D 4 - d 4) ° Δh ° E L3 where: FP = Force exerted by pipe D = Outside diameter of pipe d = Inside diameter of pipe Δh = Total deflection of pipe at the vessel relative to the fixed point. Total deflection equals the load cell deflection plus support deflection (see the appropriate load cell data sheet for load cell deflection data). E = Young’s modulus L = Length of pipe from the vessel to the first support point The value of E (Young’s modulus) varies for different types of material. Three common values are listed below: • Carbon Steel = 29,000,000 pounds/inch2 (29 ° 106) • Stainless Steel = 28,000,000 pounds/inch2 (28 ° 106) • Aluminum = 10,000,000 pounds/inch2 (10 ° 106) The equation assumes a rigid connection at both ends of the piping, which is generally conservative. Use it to calculate the force exerted by each attached pipe. Then add those forces to determine the total resultant force (F ) exerted by all the piping. Once you have calculated the resultant force, compare it to the following relationship: F ≤ 0.1 ° System Accuracy (in %) ° Live Load (pounds) where: For 0.1% System Accuracy, F ≤ 1% of Live Load For 0.25% System Accuracy, F ≤ 2.5% of Live Load For 0.50% System Accuracy, F ≤ 5% of Live Load For 1.0% System Accuracy, F ≤ 10% of Live Load If the resultant force satisfies this relationship, then the force exerted by the piping is small enough that you can compensate for it during calibration. 5-16 (6/09) Chapter 5: General Installation Guidelines Piping Design Example Calculation Suppose a customer requires a tank scale with a system accuracy of 0.1% of the applied load. One pipe will be connected to the tank. To meet the system accuracy requirement, the vertical force exerted by the pipe (FP) must be equal to or less than 1% times the live load of the system. For this application, assume that the live (net) load equals 25,000 pounds. Use the resultant force formula to determine the maximum pipe force that you can compensate for during calibration: Fp ≤ 0.1 ° 0.1 ° 25,000 pounds FP cannot be greater than 250 pounds maximum pipe force. Use the pipe force equation to calculate the actual force exerted by a pipe with the following characteristics: D = 4 inches (Outside diameter of pipe) d = 3.75 inches (Inside diameter of pipe) Δh = 0.09 inch (Total deflection of pipe at the vessel) E = 29 ° 106 (Young’s modulus) L = 60 inches (Length of pipe from the vessel to the first support point) FP = 0.59 ° (256 - 197.75) ° 0.09 ° 29,000,000 = 415.27 pounds 216,000 Since a pipe force of 415.27 pounds is greater than 250 pounds, it would not satisfy the requirement for a 0.1% accuracy system. One solution is to increase the length of the pipe from 60 inches to 80 inches. When you recalculate the pipe force for a length of 80 inches, you get FP = 175.2 pounds, which is well below the maximum of 250 pounds. (6/09) 5-17 METTLER TOLEDO Weigh Module Systems Handbook Piping Installation This section shows ways to install piping in order to avoid deflection problems. The greater the distance between the tank and the first pipe support, the more flexible the piping connection will be (see Figure 5-21a). Use a section of flexible hose so that the pipe does not exert unwanted forces when the tank deflects (Figure 5-21b). Maximize Distance Figure 5-21a: Distance Between Tank and Pipe Support Flexible Hose Figure 5-21b: Piping with Length of Flexible Hose A 90-degree bend in a horizontal run of pipe will make the piping more flexible (see Figure 5-22). Figure 5-22: Horizontal Piping with 90-Degree Bend 5-18 (6/09) Chapter 5: General Installation Guidelines Piping Design When a single discharge pipe is used by adjacent tanks (see Figure 5-23a), the weight of material being discharged from one tank can exert a downward force on the other tank. Instead, design the system so that the discharge piping from each tank is supported independently and does not interact with the other tank (see Figure 5-23b). Figure 5-23a: Tanks with Single Discharge Pipe Figure 5-23b: Recommended Design for Single Discharge Pipe Do not attach piping to supports for a mezzanine, upper floor, or other structure that deflects separately from the tank (see Figure 5-24a). Instead, attach piping to the tank’s support structure so that the piping moves along with the tank (see Figure 5-24b). Figure 5-24a: Piping Supported by Upper Floor Figure 5-24b: Piping Attached to Tank’s Support Structure (6/09) 5-19 METTLER TOLEDO Weigh Module Systems Handbook When possible, avoid rigid connections between piping and tanks. Note the clearance between the tank and inlet/outlet piping in Figure 5-25. A flexible boot is used to seal each connection. Pipe Support Flexible Dust Boot Gap Inlet Piping Flexible Dust Boot Gap Pipe Support Outlet Piping Figure 5-25: Recommended Flexible Connections Between Tank and Piping 5-20 (6/09) Chapter 5: General Installation Guidelines Electrical Wiring Electrical Wiring A weigh module system requires two types of electrical cables: • Load cell cables to connect each load cell to a junction box (cables are usually supplied with the load cells). • A home run cable to connect the junction box to an indicator. Load Cell Cables Each load cell is connected by cable to a junction box, which adds the individual load cell signals together to provide one signal that can be transmitted to the indicator. Analog is the most common operating mode, but many scale suppliers offer proprietary and non-proprietary digital operating systems. When using a digital system, consult the supplier’s technical manual for proper junction box wiring. Analog Systems Most weighing systems use an analog junction box, which requires an analogcompatible indicator. An analog junction box can sum up to four load cells. For weigh module systems with more than four load cells, you will need to connect several junction boxes together. Sample layouts for analog systems with four and six load cells are shown in Figure 5-26. The maximum number of load cells in a weighing system depends on the indicator’s power supply and the load cell bridge resistance. Load Cell Load Cell To Indicator Load Cell Load Cell Analog System (1-4 cells) Load Cell Load Cell Load Cell To Indicator Load Cell Load Cell Load Cell Analog System (5 or more cells, 6 shown) Figure 5-26: Analog Junction Box Layouts (6/09) 5-21 METTLER TOLEDO Weigh Module Systems Handbook In harsh environments, load cell cables should be protected by running them through conduit. METTLER TOLEDO supplies a large analog junction box that is equipped with 1/2-inch conduit fittings (see Figure 5-27). The box is large enough so that excess cable can be coiled and stored inside the box. Conduit Fitting Conduit Load Cell Cable Figure 5-27: Large Analog Junction Box with Conduit Fittings Load Cell Cable Lengths Normally, each load cell is supplied with a standard length of cable. Do not lengthen or shorten load cell cables in the field. Changing the length of a load cell cable will affect the output signal from the load cell. If a cable is too long, simply coil the excess cable and place it in or near the junction box. You can order junction boxes in sizes that are large enough to hold coiled cables. Never attach excess cable to a live portion of the weighing system. Nonstandard lengths of cable can be ordered for applications that require them. 5-22 (6/09) Chapter 5: General Installation Guidelines Electrical Wiring Home Run Cables A home run cable transmits the summed load cell signal from the junction box to the indicator. To provide accurate weight readings, a scale must be able to distinguish between electrical signals that differ by millionths of a volt. So small amounts of noise introduced through the cables can cause weighing errors. Common sources of noise are radio frequency (RF) and electromagnetic (EM) radiation produced by power cords, power lines, motors, or cellular phones. To reduce radio frequency and electromagnetic interference, install a ferrite ring over the home run cable at the indicator. It should be placed inside a harsh enclosure or as close as possible to the connector on a panel-mount enclosure. Wrap the home run cable conductors and the shield ground wire around the ferrite ring four times (see Figure 5-28). Keep the ferrite ring as close as possible to the point where the cable enters the enclosure. Shield Ground Wire To Ground Stud Ferrite Ring Four Turns Grip Bushing Junction Box Home Run Cable Figure 5-28: Ferrite Ring Apparatus The following installation guidelines will also help prevent electrical interference: • Install cables at least 12 inches from power lines. • Fully insulate and ground cables to prevent them from picking up unwanted noise. Cables are often exposed to mechanical damage or damage caused by water or chemicals. To protect cables from damage, encase them in flexible conduit. Teflon coatings are available to protect cables in corrosive environments. If a mixing agitator is attached to a tank, keep enough slack in the power supply cables to prevent live-todead load interference. (6/09) 5-23 METTLER TOLEDO Weigh Module Systems Handbook Home Run Cable Lengths The maximum length of a home run cable varies with its conductor size (24 gauge, 20 gauge, or 16 gauge) and the type of indicator being used. You can increase the maximum length by using cables with larger conductors (Note: 16 gauge is larger than 24 gauge). If a cable exceeds the recommended length, it will cause a voltage drop that could affect weight readings. Table 5-1 lists recommended maximum cable lengths for load cells with 350-ohm input resistance connected to a typical METTLER TOLEDO indicator with 15-VDC excitation voltage. The maximum cable length is based on total scale resistance (TSR), which is the load cell input resistance (ohms) divided by the number of load cells. To determine the maximum number of load cells that an indicator can power, consult the indicator’s manual. Indicators that are approved for hazardous areas provide a much lower excitation voltage, typically 5 VDC or less. Consult the indicator’s manual to find out if the reduced voltage limits the length of the home run cable. Number of Load Cells TSR (ohms) 24 Gauge (feet) 20 Gauge (feet) 16 Gauge (feet) 1 350 800 2,000 4,000 3-4 117-87 200 600 1,000 6-8 58-44 100 300 500 10 35 70 190 350 Table 5-1: Recommended Maximum Home Run Cable Lengths (For Systems with 350-ohm Load Cells and 15-VDC Excitation) We recommend using a dual-shield cable design to protect the signal from electromagnetic and radio frequency interference. A cross section of this type of home run cable is shown in Figure 5-29. Conductor Polyurethane Jacket Filler 1 2 3 6 Binder 5 First Shield RFI/EMI Second Shield Ground 4 Shield Separator Figure 5-29: Cross Section of Dual-Shield Home Run Cable 5-24 (6/09) Chapter 6: Installing Compression Modules Introduction 6 Compression Weigh Modules Introduction This chapter provides general information about how to select and install compression weigh modules. Each application has unique requirements and should be planned by a qualified structural engineer. When installing weigh modules, refer to the installation and service manual for the specific model. Examples of METTLER TOLEDO compression weigh modules are shown below. Top Mounting Plate Top Mounting Plate Load Cell Anti-Uplift Protection Load Cell Base Mounting Plate Base Mounting Plate FLEXMOUNT Weigh Module (Sliding Suspension) CENTERLIGN Weigh Module (Self-Aligning Suspension) Top Mounting Plate Top Mounting Plate Load Cell Anti-Uplift Protection Base Mounting Plate VLM2 Weigh Module (Rigid Suspension) Load Cell Anti-Uplift Protection Base Mounting Plate VLM3 Weigh Module (Sliding Suspension) (6/09) 6-1 METTLER TOLEDO Weigh Module Systems Handbook Top Mounting Plate Top Mounting Plate Anti-Uplift Protection Load Cell Load Cell Anti-Uplift Protection Base Mounting Plate RINGMOUNT Weigh Module (Self-Aligning Suspension) Base Mounting Plate ULTRAMOUNT Weigh Module (Self-Aligning Suspension) Top Mounting Plate Top Mounting Plate Load Cell Load Cell Anti-Uplift Protection Base Mounting Plate PINMOUNT Weigh Module (Self-Aligning Suspension) 6-2 (6/09) Base Mounting Plate GAGEMOUNT Weigh Module (Self-Aligning Suspension) Chapter 6: Installing Compression Modules Static versus Dynamic Loading Static versus Dynamic Loading When selecting weigh modules for an application, it is important to consider how the load will be applied to the load cells. Most weigh module applications on tanks, hoppers, and vessels are subject to static loading. With static loading, little or no horizontal shear force is transmitted to the load cells. Applications such as conveyors, pipe racks, mechanical scale conversions, and high-powered mixers or blenders are subject to dynamic loading. With dynamic loading, the way in which products are placed on a scale or processed transmits horizontal shear forces to the load cells. A weigh module’s suspension controls how the load is transmitted from the tank or weighbridge to the load cell. When selecting weigh modules, it is important to match the suspension to the type of loading that will be encountered. METTLER TOLEDO offers weigh modules with the following types of suspensions: Rigid Suspension: Bolted connection between load receiver and load cell. Sliding Suspension: Non-bolted connection consisting of a load pin with a flat end positioned against the load receiver and a curved end positioned against the load cell. Self-Aligning Suspension: Non-bolted connection consisting of a rocker load pin that is curved on both ends. This type of suspension provides the best weighing performance over the widest variety of applications. (6/09) 6-3 METTLER TOLEDO Weigh Module Systems Handbook Which type of weigh module suspension should you use? Table 6-1 provides guidelines for proper application. Type of Suspension Application Parameters Rigid Static or dynamic loading without thermal expansion/contraction, piping connections, or high horizontal shear loads. Sliding Static loading with thermal expansion/contraction and flexible piping connections. Self-Aligning Static or dynamic loading with horizontal shear loads, thermal expansion/contraction, and flexible piping connections. Table 6-1: Weigh Module Suspensions Application Examples for Self-Aligning Weigh Modules Self-Aligning Suspensions with Stabilizers Self-aligning weigh modules offer the best weighing performance over the widest variety of applications. Some weigh modules with self-aligning suspensions can be equipped with optional stabilizer links to prevent horizontal movement transverse or longitudinal to the load cell. The stabilizer link consists of adjustable rod end bearings that connect the top mounting plate (load receiver) to the base mounting plate (see Figure 6-1). NOTE: The stabilizer option is not intended to provide additional horizontal force capacity. Top Mounting Plate Base Mounting Plate Optional Stabilizer Figure 6-1: Self-Aligning Weigh Module with Stabilizer There are three situations in which you would use stabilizers: 1. To stabilize a dynamic scale if weighing must take place while, for example, a large mixer is operating. 6-4 (6/09) Chapter 6: Installing Compression Modules Application Examples for Self-Aligning Weigh Modules 2. To stabilize a scale where settling time is critical, for example, a high-speed conveyor scale. 3. To stabilize a dynamic scale in order to protect rigidly attached piping from fatigue and failure. We recommend using stabilizers for the following types of applications. Use one stabilizer per weigh module if the gross weight applied to each weigh module is 10t (22,000 pounds) or less; use two stabilizers per weigh module if the gross weight applied to each weigh module is greater than 10t (22,000 pounds). • Tank with High-Shear Mixer: A high-shear mixer has an outer stator held by the outer rods while a concentric rotor is driven by the central shaft. These devices disperse, emulsify, homogenize, disintegrate, and dissolve liquids or solids in liquids. Materials can be added in large chunks, creating a pulsating effect as they are drawn into the stator. These mixers are typically driven at high speeds and can create high levels of vibration and pulsation. If they operate during weighing, then stabilizers are recommended (see Figure 6-2). • Tank Scale with Mixer and Rigid Piping: When a tank has a powerful mixer and rigid piping, the tank’s constant oscillation can cause fatigue cracking of the pipework. Regardless of whether the mixer operates during weighing, stabilizers can be used to steady the tank and prevent damage to the piping. Note that rigid piping is not recommended because it substantially degrades weighing performance (see Figure 6-3). • Horizontal Batch Mixer: This device has a motor driving a horizontal agitator shaft, which can be a screw or be equipped with paddles. The agitator shaft rotates in a horizontal trough and is typically used to mix or coat dry ingredients and to create slurries or pastes. Typical applications are mixing animal feeds, coating seeds, and mixing concrete. Electric motors up to 150 kW (200 hp) are used, and heavy vibration can be expected because of the nature of the operation. If the agitators operate during weighing, then stabilizers are recommended (see Figure 6-4). • High-Speed Conveyor Scale: High-speed conveyor scales with heavy capacities are rare. If settling time is critical for this type of application, stabilizers should be used to steady the scale (see Figure 6-5). • Vehicle WIM Scale: A Weigh-in-Motion (WIM) scale weighs each axle of a vehicle as the vehicle is driven slowly across the scale and then sums the values to calculate the total weight. This type of application usually involves a pit scale that is wider than the vehicle and long enough to accommodate single or tandem axles. Because settling time is critical, stabilizers should be used to steady the scale (see Figure 6-6). (6/09) 6-5 METTLER TOLEDO Weigh Module Systems Handbook Figure 6-2: Tank Scale with High-Shear Mixer Figure 6-3: Tank Scale with Mixer and Rigid Piping Figure 6-4: Horizontal Batch Mixer Figure 6-5: High-Speed Conveyor Scale Figure 6-6: Vehicle Scale for Weighing in Motion 6-6 (6/09) Chapter 6: Installing Compression Modules Application Examples for Self-Aligning Weigh Modules Self-Aligning Weigh Modules without Stabilizers Stabilizers are not required for the following types of applications: • Tank Scale, Static: A static tank scale, either horizontal or vertical, does not have mixers or violent chemical reactions that would cause the tank to move horizontally. The act of filling and emptying alone does not require stabilizers to be used. A static tank scale does not require stabilizers (see Figure 6-7). • Tank Scale, Stirred: Some tanks have a low-powered mixer with a power rating of 1.5 kW (2 hp) or less. The liquid is stirred with a small marine-type impeller, typically not more than 150 mm (6 inches) in diameter. With suitable filtering software on the indicator, this application typically does not require stabilizers even if stirring occurs during weighing (see Figure 6-8). • Tank Scale with Mixer, Static Weighing: This type of scale is subject to dynamic forces at times but not during the weighing operation. Because the mixer does not affect the weighing results, stabilizers are not required (see Figure 6-9). • Hopper Scale: Some hopper scales have vibrators to aid emptying. Gates can cause additional impact forces when opening and closing. As long as the forces are not present during weighing, a hopper scale does not require stabilizers (see Figure 6-10). • Conveyor Scale, Low Speed: Conveyor scales requiring weigh modules with capacities of 7.5t or more are likely to be low-speed applications for which settling time is not critical. Instead of using stabilizers, it is better to let the scale float freely to absorb shocks and restore itself after any horizontal impacts (see Figure 6-11). • Platform Scale: As long as a platform scale is not subjected to dynamic forces and settling time is not an issue, stabilizers are not required. Even if the platform scale is bumped occasionally (for example, while being loaded by a forklift), it is better to let it float freely to absorb shocks and restore itself after the impact (see Figure 612). • Platform Scale, Drive-On: If a platform scale is used to weigh motorized vehicles such as forklifts, large horizontal forces can result when the vehicle stops. Typically, settling time is not critical in these applications. The normal configuration is to allow the scale to float freely (no stabilizers) but with external bumper bolts to restrict horizontal movement. The bumper gaps should be small enough so that the platform bumps against the external bumpers before contacting the weigh module’s bumpers (see Figure 6-13). NOTE: Although stabilizers are not required for this type of dynamic scale, we recommend using external stops or checking. • Coil Scale, External Stop: With this type of scale, the coil rolls down an incline onto the scale, is stopped by an externally mounted stop, and settles back into a “V” notch in the deck for weighing. After weighing, the stop is raised and the coil is ejected from the notch so that it can roll off the scale. Generally, settling time is not important. Instead of using stabilizers, it is better to let the scale float freely to absorb shocks and to restore itself after any horizontal impact (see Figure 6-14). • Coil Scale, Live Stop: With this type of scale, the coil rolls down an incline onto the scale and is stopped and held in place by a stop mounted on the live scale. After weighing, the stop is retracted and the coil rolls off the scale. Generally, settling time is not important. Severe horizontal forces result when the coil hits the stop. Instead of using stabilizers, it is better to let the scale float freely until it hits external bumpers. The face of the retractable stop should be lined with a compliant (springtype) material. The bumper gap should be small enough so that the platform bumps against the external bumpers before contacting the weigh module’s bumpers (see Figure 6-15). NOTE: Although stabilizers are not required for this type of dynamic scale, we recommend using external stops or checking. (6/09) 6-7 METTLER TOLEDO Weigh Module Systems Handbook NOTE: Sometimes a mixer is mounted independently of the scale on a structural member or on a stand that sits on the floor (see Figure 6-16). It is important to remember that the impeller‘s thrust will cause the scale to seem much lighter or heavier depending on the direction of rotation. It is important that weighing not take place when this type of mixer is operating. Figure 6-7: Tank Scale, Static Figure 6-8: Tank Scale, Stirred Figure 6-9: Tank Scale with Mixer, Static Weighing Figure 6-11: Conveyor Scale, Low Speed 6-8 (6/09) Figure 6-10: Hopper Scale Chapter 6: Installing Compression Modules Application Examples for Self-Aligning Weigh Modules Figure 6-12: Platform Scale Figure 6-14: Coil Scale, External Stop Figure 6-13: Platform Scale, Drive-On Figure 6-15: Coil Scale, Live Stop Figure 6-16: Mixer Mounted Independently (6/09) 6-9 METTLER TOLEDO Weigh Module Systems Handbook Sizing Weigh Modules for Static Systems To design a tank scale that will weigh its contents accurately, you must use weigh modules with the proper load cell capacity. There are three main factors in sizing weigh modules for a tank scale: (1) the weight of the empty tank, (2) the weight of the tank’s contents when full, and (3) the number of weigh modules. The number of weigh modules will equal the number of legs or supports that the tank has. A standard safety factor of 1.25 is normally figured into the calculation to compensate for uneven load distribution and any underestimation of weights. Certain installations might have special environmental considerations requiring additional safety factors. Environmental considerations are discussed in Chapter 4. Calculating Weigh Module Size Suppose that you want to add weigh modules to a tank designed to hold 20,000 pounds of a liquid. The tank itself weighs 10,000 pounds and stands on four legs. Assume that only the standard safety factor is needed for this installation. To determine what size weigh modules you will need, calculate the total weight of the tank and its contents, figure in any safety factors, and then divide by the number of weigh modules. 20,000 lb +10,000 lb 30,000 lb x 1.25 37,500 lb ÷ 4 9,375 lb Weight of liquid Weight of empty tank Total weight Safety factor Adjusted weight Number of weigh modules Weight per weigh module Since each weigh module will need to handle up to 9,375 pounds, the best choice for the job would be weigh modules with a capacity of 10,000 pounds each. Sizing Weigh Modules for Dynamic Systems To design a scale that will weigh material accurately, you must use weigh modules with the proper load cell capacity. There are four main factors in sizing weigh modules for a dynamic application: (1) the empty weight of the weighbridge on which the material will be placed, (2) the maximum weight of the material to be weighed, (3) the number of support points or weigh modules, and (4) the type of loading. The two types of loading to be considered are full end loading and distributed loading. To understand the difference between full end loading and distributed loading, imagine a conveyor scale with a weigh module in each of the four corners of its weighbridge. Full end loading can occur when a small object moves across the weighbridge. Initially, the object’s full weight will be concentrated on the two weigh modules at the front end of the weighbridge. Only when the object approaches the center of the weighbridge will its weight be distributed evenly across all four weigh modules. Distributed loading occurs when an object with a large surface area moves across the weighbridge. By the time its full weight is on the scale, part of the load has been transferred to the weigh modules at the back end of the weighbridge. With full end loading, you will need to size the weigh modules so that two of them are capable of supporting a full load. 6-10 (6/09) Chapter 6: Installing Compression Modules Anti-Lift Considerations A standard safety factor of 1.25 is normally figured into the calculation to compensate for uneven load distribution and any underestimation of weights. Certain installations might have special environmental considerations requiring additional safety factors. Environmental considerations are discussed in Chapter 4. Calculating Weigh Module Size Suppose that you want to size weigh modules for a conveyor section designed to weigh a 3,000-pound billet of aluminum. The conveyor section itself weighs 2,000 pounds and stands on four legs. Since the billet will roll onto the conveyor from one side, the system should be sized for full end loading over two weigh modules. Calculate the total weight of the scale and its contents, figure in any safety factors, and then divide by two weigh modules. 3,000 lb + 1,000 lb 4,000 lb x 1.25 5,000 lb ÷ 2 2,500 lb Weight of billet Weight of empty conveyor section (one half) Total weight Safety factor Adjusted weight Number of weigh modules Weight per weigh module Use four 2,500-lb self-aligning weigh modules for this application. If full end loading is not a consideration, divide the adjusted weight by the total number of weigh modules (4) to determine the capacity of weigh modules that will be needed. Anti-Lift Considerations Wind, seismic, or accidental forces can be strong enough to tip over some tanks. If there is a potential for your tank to tip over, consider using weigh modules with built-in anti-lift devices. Otherwise, external checking will be required to resist tipping moments. Selecting Material Load cells and other weigh module components can be manufactured of carbon steel or stainless steel. Weigh modules that will be exposed to wet or corrosive environments are generally made of stainless steel. When selecting weigh modules, you will need to consider the environment in which they will be used and the materials that your facility will handle. Appendix 6 provides a chemical resistance chart to aid in selecting materials. Weigh Module Orientation Before installing the weigh modules, decide how they will be arranged on your tank. Space the weigh modules so that each one supports an equal amount of weight, and make sure that the weigh modules are properly oriented to one another. How the weigh modules are oriented depends on the type of suspension: rigid, sliding, or self-aligning. Orientation can also be affected by options such as stabilizers used with self-aligning (6/09) 6-11 METTLER TOLEDO Weigh Module Systems Handbook weigh modules. For proper orientation guidelines, refer to the installation and service manual for the weigh modules that are being installed. Typical layouts for systems using three or four weigh modules are shown in Figure 617. Weigh Module Center of Gravity 90° Center of Gravity 1/2 W W 1/2 W 1/2 L 1/2 L Weigh Module L Plan View: Rectangular / Square and Circular 4-module Layouts 120° 1/2 W W 1/2 W 2/3 L 1/3 L L Plan View: Rectangular / Square and Circular 3-module Layouts Figure 6-17: Typical Layouts for Systems Using Three or Four Weigh Modules Level Detection Systems If you expect weighing accuracy of 0.5% to 2% of system capacity, then you can reduce costs by using a level detection system that combines “live” and “dead” weigh modules. This type of system is often used in applications such as bulk-storage tanks. Each “live” weigh module uses a functioning load cell, while each “dead” weigh module uses a nonfunctioning dummy load cell or consists of a simple welded stand with the same mounting geometry as the weigh modules. Although a welded stand is less expensive, a weigh module with a dummy load cell gives you the option of adding a live, functioning load cell at a later date if system accuracy is not adequate. If you use a welded stand, make sure it has load ratings equal to or greater than the corresponding live weigh module. 6-12 (6/09) Chapter 6: Installing Compression Modules Level Detection Systems A combination of live and dead weigh modules can be used only with a symmetrical tank containing liquids or gases. This type of tank provides a constant horizontal center of gravity (C.G.) relative to each weigh module, ensuring that a consistent percentage of the load is applied at each mounting point. Consistent load distribution is critical to the performance of a level detection system. We recommend using only three or four weigh modules for a level detection system. A three-module system uses one live module and two dead modules. In theory, 33% of the total load is supported by the live weigh module. A four-module system uses two live modules and two dead modules, placing 50% of the total load over the live weigh modules. Figure 6-18 shows the proper orientation of a four-module level detection system. Dead Stand Center of Gravity 1/2 W Live Weigh Modules W 1/2 W 1/2 L 1/2 L Dead Stand L Live Weigh Modules with Load Cell Dead Stands Floor Plan & Elevation View: Four-module Level Detection System (two live and two dead modules) Figure 6-18: Layout for a Four-Module Level Detection System (6/09) 6-13 METTLER TOLEDO Weigh Module Systems Handbook Installation The actual installation procedure will depend on the specific requirements of an application. One of the first things to consider is the foundation on which the tank scale will be placed. This is usually a concrete floor or steel support structure. Whichever you are using, you will need to make sure that it is strong enough to remain rigid under the weight of the full tank scale. Base plate bearing data (the pressure that a weigh module exerts on a foundation) is usually listed in the weigh module installation and service manual. NOTE: Make sure to design the tank and support structure so that the load cells will be easy to service. With many types of weigh modules, the top plate must be lifted in order to remove a load cell. If a tank has many piping connections, lifting a top plate can lead to extra expense and downtime. Installing optional spacer plates (available from METTLER TOLEDO) between the weigh modules and tank allow you to service the load cells simply by removing load from the weigh module. General Procedure Protect the load cells during installation. For weigh modules with hold-down bolts, tighten each bolt against the top plate so that no weight will be placed on the load cell. For certain self-aligning weigh modules, replace each rocker pin with an alignment tool. 1. Position a weigh module under each of the tank’s support legs or mounting lugs, and slowly lower the tank onto the weigh modules. 2. Make sure that each load point on the tank is well supported by a weigh module’s top plate and that all top plates are level within +1/16 inch. Otherwise, add shims until each load point is supported and the top plates are level. Shimming Notes: Top Plates • Use full-size shims (equal to the top plate dimensions) to redistribute weight or eliminate rocking across corners. • Use partial-plate shims or stainless steel shim kits to fill voids between the top plate and tank leg / mounting lug. Base Plates • Use an injectable grout (such as Hilti HIT HY 150) to fill large voids between the base plate and foundation when using expansion anchor bolts. 3. Bolt or weld the top plate of each weigh module to the support leg or mounting lug that is resting on it. For welding use a 3/8-inch fillet, 1 inch long on 3-inch centers. CAUTION DO NOT PASS WELDING CURRENT THROUGH THE LOAD CELLS! WHEN WELDING ON A SCALE, ALWAYS GROUND THE WELDING DEVICE AS CLOSE TO THE WORK AS POSSIBLE. NEVER WELD CLOSER THAN 4 FEET (1.2 METERS) TO ANY LOAD CELL WITHOUT REMOVING THE LOAD CELL. 4. Lower the tank onto the support foundation (concrete slab or support beam). Mark the position of the base plate mounting holes on the foundation (see Figure 6-19). 6-14 (6/09) Chapter 6: Installing Compression Modules Installation Figure 6-19: Locating Bolt Holes in Support Steel 5. Raise the tank out of the way and drill the appropriate size anchoring holes in the support foundation. 6. Anchor the weigh module base plates to the foundation, using the instructions given below for the appropriate type of foundation. Level each base plate to within +1/16 inch. All base plates must be in the same level plane within +1/8 inch. For a Level Concrete Floor Foundation: Lower the tank back onto the foundation so that the base plate mounting holes line up with the holes that were drilled in the concrete. Insert a wedge-design expansion anchor bolt into each base plate mounting hole (see Figure 6-20). Follow the anchor bolt manufacturer’s instructions regarding the size and depth of holes and recommended torque values. Impact Section (Dog Point): Prevents thread damage during installation Nut Washer Hold-Down Bolt Anchor Body Base Plate Collar: Prevents wedges from sliding up anchor body Wedge Dimple: Prevents spinning in the hole Wedges: Ensure reliable fastening Expansion Cone: Provides consistent wedge expansion Expansion Anchor Bolt Detail Concrete Expansion Anchor Figure 6-20: Base Plate Bolted to Level Concrete Floor (6/09) 6-15 METTLER TOLEDO Weigh Module Systems Handbook For an Unlevel Concrete Floor Foundation: Install threaded epoxy inserts or J-bolts in the foundation to support the base plates. Place leveling nuts and washers beneath the base plates to adjust for level. Keep the space between each base plate and the concrete floor to a minimum, and fill it with a nonshrink, epoxy grout once all base plates are level and in the same plane (see Figure 6-21). Hold-Down Bolt Leveling Adjustment Nut Base Plate Grout Anchor Insert Concrete J-Bolt Figure 6-21: Base Plate Bolted to Unlevel Concrete Floor NOTE: If you use J-bolt anchors, you will need to place them in the concrete accurately before attaching the weigh modules to the tank supports. Make sure that the tank support holes allow room for adjustment so that the modules can be aligned properly. For a Structural Beam Foundation: Use through bolts, washers, and nuts to anchor the base plate to the flange of the structural beam (see Figure 6-22). Install web stiffeners to prevent the beam from twisting. If shimming is required to level the base plates or to keep them in the same plane, add the shim beneath the entire base plate. If you are welding the base plates to the beam, use a 3/8-inch fillet, 1 inch long on 3-inch centers. Flat Washer Hex Bolt Base Plate Flat Washer Hex Nut Lock Washer Web Stiffener Figure 6-22: Base Plate Bolted to Structural Beam 6-16 (6/09) Chapter 6: Installing Compression Modules Installation 7. After securing all the top plates and base plates, carefully lower the top plate and weigh structure onto the load cells. • For weigh modules with hold-down bolts, adjust the bolts so that they are not tightened against the top plate. Make sure that there is adequate clearance between the hold-down bolts and retaining hole. • For certain self-aligning weigh modules, replace the alignment tool with a rocker pin (with O-Rings). Make sure that there is adequate clearance between the bumper bolts and load cells. 8. Mount the junction box in a location where the load cell cables can be properly terminated in the junction box. Do not mount the junction box on the scale. NOTE: Each load cell is supplied with a standard length of cable. Do not lengthen or shorten load cell cables in the field! Changing the length of a load cell cable will affect the output signal from the load cell. If a cable is too long, simply coil the excess cable and place it in or near the junction box. Nonstandard lengths of cable can be ordered for applications that require them. 9. Connect the load cell cables to the junction box and terminate the wires according to the wiring and color code decal on the underside of the junction box lid. 10. Connect the home run cable from the scale indicator to the junction box. 11. Confirm that all live-to-dead connections (such as piping) are flexible and securely anchored at both the scale and dead connection point. (6/09) 6-17 Chapter 7: Tension Weigh Modules Introduction 7 Tension Weigh Modules Introduction This chapter provides general information about how to install tension weigh modules. Each application has its own unique requirements and should be planned by a qualified structural engineer. When installing weigh modules, refer to the installation and service manual for the specific model. Figure 7-1: Tension Weigh Module (6/09) 7-1 METTLER TOLEDO Weigh Module Systems Handbook Sizing Weigh Modules To design a hopper scale that will weigh its contents accurately, you must use weigh modules with the proper load cell capacity. There are three main factors in sizing weigh modules for a hopper scale: (1) the weight of the empty hopper, (2) the weight of the hopper’s contents when full, and (3) the number of weigh modules. The number of weigh modules will equal the number of supports that the hopper has. A standard safety factor of 1.25 is normally figured into the calculation to compensate for uneven load distribution and any underestimation of weights. Certain installations have special environmental considerations requiring additional safety factors. Environmental considerations are discussed in Chapter 4. Calculating Weigh Module Size Suppose that you want to add weigh modules to a hopper designed to hold 20,000 pounds of grain. The hopper itself weighs 5,000 pounds and is supported by four threaded rods. Assume that only the standard safety factor is needed for this installation. To determine what size weigh modules you will need, calculate the total weight of the hopper and its contents, figure in any safety factors, and then divide by the number of weigh modules. 20,000 lb + 5,000 lb 25,000 lb x 1.25 31,250 lb ÷ 4 7,812.5 lb Weight of grain Weight of empty hopper Total weight Safety factor Adjusted weight Number of weigh modules Weight per weigh module Since each weigh module will need to handle up to 7,812.5 pounds, the best choice for the job would be tension weigh modules with a capacity of 10,000 pounds each. WARNING ALWAYS INSTALL A SECONDARY SAFETY SUPPORT SYSTEM (CHAINS OR RODS) TO PREVENT THE SUSPENDED TANK/HOPPER FROM FALLING IN CASE OF TENSION WEIGH MODULE COMPONENT FAILURE. 7-2 (6/09) Chapter 7: Tension Weigh Modules Installation Installation To maintain the system’s weighing accuracy, make sure that the support steel will not deflect excessively under full working load. General Procedure 1. Position the tension weigh modules around the tank so that each will support an equal portion of the tank’s weight (see Figure 7-2). Make sure that the upper and lower support brackets line up with these positions. 120° 120° 120° Three-Support Plan View 90° 90° 90° 90° Four-Support Plan View Figure 7-2: Plan View of Recommended Weigh Module Arrangements 2. Connect each weigh module clevis to an appropriately sized threaded rod with a jam nut on it. Tighten the jam nut against the clevis to prevent the threaded rod from turning. WARNING ALWAYS INSTALL A SECONDARY SAFETY SUPPORT SYSTEM (CHAINS OR RODS) TO PREVENT THE SUSPENDED TANK/HOPPER FROM FALLING IN CASE OF TENSION WEIGH MODULE COMPONENT FAILURE. 3. Place the threaded rod through a hole in the upper support bracket. Fit a backing plate and washer over the end of the threaded rod. Then double-nut the threaded rod against the backing plate. Attach the other end of the weigh module assembly in the same way (see Figure 7-3). (6/09) 7-3 METTLER TOLEDO Weigh Module Systems Handbook Typical Support Structure Stiffener Plate Double Nuts Backing Plate NOTE: Make sure that the upper and lower clevis brackets are turned at 90 degrees to each other. This will reduce swaying. Safety Rod Stiffener Plates Locking Jam Nut Tank or Hopper Figure 7-3: Typical Tension Weigh Module Installation 4. Install a safety rod next to each weigh module. Leave clearance between the lower support bracket and the washer on the safety rod (see Figure 7-4). 7-4 (6/09) Chapter 7: Tension Weigh Modules Installation To Load Cell Safety Rod Tank or Hopper Mounting Bracket Gap Backing Plate Double Nuts Washer Backing Plate Figure 7-4: Weigh Module Assembly Attached to Lower Support Bracket 5. Once all weigh modules have been installed, make sure that each is hanging vertically (plumb). 6. Tack weld the backing plates into position. Pin or stake the nuts at both ends of the threaded rods to prevent them from turning. 7. If the suspended tank is subject to horizontal movement, install check rods to limit horizontal movement. Figures 7-5 and 7-6 show typical check rod arrangements. Figures 7-7, 7-8, and 7-9 show typical tension weigh module installations. 8. Mount the junction box in a location where the load cell cables can be properly terminated in the junction box. Do not mount the junction box on the scale. NOTE: Each load cell is supplied with a standard length of cable. Do not lengthen or shorten load cell cables in the field! Changing the length of a load cell cable will affect the output signal from the load cell. If a cable is too long, simply coil the excess cable and place it in or near the junction box. Nonstandard lengths of cable can be ordered for applications that require them. 9. Connect the load cell cables to the junction box and terminate the wires according to the wiring and color code decal on the underside of the junction box lid. 10. Connect the junction box to the scale indicator with an appropriate cable. 11. Confirm that all live-to-dead connections are flexible and securely anchored at both the scale and the dead connection point. (6/09) 7-5 METTLER TOLEDO Weigh Module Systems Handbook Check Rod Vertical Column Three-Module System Gap Gap Double Nuts Check Rod Vertical Column Four-Module System Figure 7-5: Plan View of Check Rods for Systems with Three and Four Weigh Modules 7-6 (6/09) Chapter 7: Tension Weigh Modules Installation A A Side of Vessel Gap Section A-A, Gusset Removed Figure 7-6: Plan View of Alternative Check Rod System Safety Wire Rope Figure 7-7: Sample Tension Weigh Module Installation (6/09) 7-7 METTLER TOLEDO Weigh Module Systems Handbook Safety Chain Figure 7-8: Sample Tension Weigh Module Installation Safety Rod Figure 7-9: Sample Tension Weigh Module Installation 7-8 (6/09) Chapter 8: Calibration Calibration with Test Weights 8 Calibration When a weigh module system is installed, it must be calibrated so that the readings on the indicator accurately reflect the amount of weight placed on the scale. METTLER TOLEDO recommends calibrating a scale using test weights equal to the scale’s full capacity. Specific instructions for calibration can be found in the technical manual for the digital indicator that will be used with the weigh modules. The design or size of a tank scale might make it impossible to hang test weights equal to the scale’s full capacity. For those applications, there are several other calibration options: calibration with test weights and material substitution, calibration with material transfer, and electronic calibration. WARNING PERMIT ONLY QUALIFIED PERSONNEL TO SERVICE THIS EQUIPMENT. EXERCISE CARE WHEN MAKING CHECKS, TESTS, AND ADJUSTMENTS THAT MUST BE MADE WITH POWER ON. FAILING TO OBSERVE THESE PRECAUTIONS CAN RESULT IN BODILY HARM. Calibration with Test Weights The most accurate, reliable way to calibrate a scale is with test weights. For this calibration procedure, a tank scale needs to be equipped with some type of mounting lugs for hanging test weights (see Figure 5-7). 1. Begin by taking a weight reading for the empty tank. Adjust the indicator so that it reads zero when the tank is empty. 2. Check each load cell to make sure it is working properly. Hang a test weight near one weigh module and take a reading. Move the test weight to a second weigh module and take a reading. Repeat for each weigh module to make sure that all load cells indicate the same weight. 3. Check for repeatability to make sure there are no mechanical binding or support issues. 4. Add test weights to the scale, taking a reading for each new weight that is added up to the full capacity of the scale. At the very least, you should take weight readings at one quarter of capacity, one half of capacity, three quarters of capacity, and full capacity. 5. If the tank scale will be used to weigh its contents as they are being discharged, you should also take weight readings as you remove the test weights. 6. Use the readings to plot a graph of the scale’s performance from zero to full capacity (and from full capacity back to zero if those readings were taken). (6/09) 8-1 METTLER TOLEDO Weigh Module Systems Handbook Calibration with Test Weights and Material Substitution For large tank scales, it is often physically impossible to hang test weights equal to the tank’s full capacity. In those cases, you can use a combination of test weights and a material (such as water) to calibrate the scale. 1. For example, after taking a zero reading you might hang 500 pounds of test weights and take a reading. 2. Then remove the test weights and add water to the tank until the weight reading is the same as that obtained with the test weights. 3. With the water still in the tank, hang the same test weights and take a second reading. 4. Continue substituting water for the test weights and taking readings until you reach the tank’s full capacity. 5. Once you have taken readings from zero to full capacity, use them to plot a graph of the scale’s performance. Calibration with Material Transfer When test weights cannot be used, you can calibrate a scale with material transfer. Instead of hanging test weights, weigh a material (such as water) on another scale and transfer it to the tank scale that is being calibrated. You can do this in a single transfer or in stages until you reach the tank’s full capacity. This method yields only a rough indication of the scale’s performance. It depends on the accuracy of the existing scale and the integrity of the transfer process. Even in the best conditions, you will not know if allowable errors are cumulative or compensating. Electronic Calibration Load Cell Simulator A tank scale can be calibrated electronically using a load cell simulator. Attach the load cell simulator directly to the digital indicator in place of the home-run cable from the junction box. The simulator sends out a signal equal to the signal the load cells should produce. Electronic calibration is noted for its speed and simplicity; however, it calibrates only the electronics. Because it assumes that the tank and all mechanical connections are working properly, electronic calibration does not verify the scale’s performance. 1. With the simulator adjusted to zero output, set the indicator to zero. 2. Adjust the simulator to full output (a signal equal to that which all the load cells should produce at their rated capacity). 3. Adjust the indicator to show the total capacity of all load cells in the system. 4. Attach the load cell input to the indicator. 8-2 (6/09) Chapter 8: Calibration Electronic Calibration 5. Set the indicator to read zero for the empty weight of the tank. CalFREE Electronic Calibration The CalFREE™ program is another option for calibrating a scale without using test weights. This proprietary METTLER TOLEDO feature is built into the latest line of METTLER TOLEDO industrial indicators and is compatible with systems that use analog load cells rated at 2 mV/V or 3 mV/V. The CalFREE program calculates the full-scale system output in millivolts to calibrate the scale electronically. For most analog scales, this value is nominally 2 or 3 millivolts output per volt of excitation at rated capacity. Due to manufacturing tolerances, the output or sensitivity of an individual load cell can vary slightly from these nominal values. The CalFREE program uses the summed average of the individual load cell sensitivities to determine the expected system output at rated capacity. The calibration certificate for each load cell lists the load cell’s specific sensitivity at rated capacity. A printed calibration certificate is supplied with each load cell that is shipped. Electronic copies of the calibration certificates can be downloaded from the following website: http://calfree-cert.mt.com To locate the calibration certificates for a scale, you will need to know the serial number of each load cell in the scale system. Calibration certificates are stored in PDF format by serial number. For example, the file for load cell serial number 6011154-6LH is 6011154-6LH.pdf. Like a load cell simulator, the CalFREE procedure only calibrates the scale electronically. It does not compensate for mechanical influences such as piping attachments, movement in structural supports, vibration, etc. (6/09) 8-3 Chapter 9: Indicators and Applications Indicators 9 Indicators and Applications Indicators The basic job of a scale indicator is to receive the signal transmitted by the load cells and display it as a weight reading. For process weighing applications, indicators must provide fast, repeatable weight readings that remain stable at relatively high resolutions. But in many cases, the key factor in selecting an indicator is its ability to communicate with the process control equipment used for a specific application. Communications What type of communications capabilities an indicator needs depends on how you plan to use the weight data provided by the scale. For a very simple process, an indicator might use setpoints to tell an operator when to manually fill or empty a tank. For an automated process, the setpoints could actually control valves or feeders. For more complex systems, an indicator might need to interact with a programmable logic controller (PLC) that runs an entire processing operation. An indicator’s ability to interact with other equipment is determined by its communication inputs and outputs. The types of inputs and outputs are described below: Discrete Input/Output Discrete inputs are connections used to trigger a command or action in a scale indicator. Typical commands are Clear, Tare, Print, Zero, switch weight units, switch scales, and disable weight display. Discrete outputs are connections used to relay on/off information from the indicator. They do not transmit actual weight values. Discrete outputs can be used for setpoints or scale status information such as scale in motion, zero, under zero, over capacity, and net/gross weighing mode. Because they are a direct connection from the indicator to the output device, these outputs operate very quickly. Analog Output Analog output is the variable signal of milliamp current or DC voltage that represents a weight value, which can be used by a PLC located up to 50 feet from the indicator. The weight data is converted several times during its transmission from load cells to PLC, with the signal losing a percentage of its accuracy for each conversion. Serial Communication Output Serial communication ports are used to send weight data from the scale to a remote display, fill valves, computer, PLC, printer, or other equipment. These outputs can transmit information about scale status, scale capacity, increment size, setpoint status, weight unit, and net/gross weighing mode. Serial outputs can transmit more information than discrete outputs but have a slower update rate. Long cabling distances are possible, but connection with a PLC requires additional hardware/software. These outputs can communicate in demand, continuous, or host mode. Demand mode sends weight data to a printer or other device only when requested. Continuous mode (6/09) 9-1 METTLER TOLEDO Weigh Module Systems Handbook transmits weight data repeatedly to a remote display or other device. Host mode allows two-way communication between the scale and a host computer. Direct PLC Interface A direct PLC interface makes it possible to transmit the following types of information: • Weight Data: gross, tare, net, rate. • Status Data: motion, net mode, setpoints, data integrity. • Commands: tare, clear, print, zero, load setpoint, load tare, control display messages. • Floating Point Data: special format with additional data and commands. It requires a special printed circuit board (PCB) to interface with a specific manufacturer’s PLC. The following options are available for METTLER TOLEDO IND130, IND560, IND780, and PANTHER indicators: • Allen-Bradley™ RIO – This PCB enables an indicator to operate as an AllenBradley remote input/output (RIO) device. It allows discrete transfer of data from the indicator to the PLC and block transfer of data between the PLC and other devices. • Profibus™-DP – This PCB enables an indicator to communicate with a Siemens or Texas Instruments PLC. Discrete data can be input or output in large blocks. • Modbus TCP – This PCB enables an indicator to communicate with a Modbus TCP network. It allows bi-directional discrete mode communications. • ControlNet – This PCB enables an indicator to communicate with a ControlNet PLC through direct connection to the ControlNet network. It allows bi-directional discrete mode communications. • Ethernet/IP – This PCB enables an indicator to communicate with an Ethernet/IP PLC through direct connection to the Ethernet/IP network at 10 or 100 MBPS speed. It allows bi-directional discrete mode communications. • DeviceNet – DeviceNet is an RS-485-based network using CAN chip technology. It was created for bit- and byte-level devices. Weighing Accuracy Dynamic Weighing Vibration or motion on a scale can make it difficult to get an accurate weight reading. For dynamic weighing applications where the load on a scale is constantly in motion, indicators need to be able to take a series of weight readings and use those readings to calculate an average weight. Filtering Environmental noise is vibration caused by nearby machinery, unstable structures, or wind and air currents. Instead of calculating an average weight reading, most indicators can filter out this noise. An indicator with a wide range of filtering levels usually can provide the best combination of noise reduction and update speed. 9-2 (6/09) Chapter 9: Indicators and Applications Applications Applications Figure 9-1 shows a typical weigh module system with the indicator connected to a customer’s PLC. METTLER TOLEDO Ultramount Set Typical Customer Connection Customer's Programmable Logic Controller Processo PC I/0 I/0 I/0 Ultramount Weigh Modules Field Bus METTLER TOLEDO 560.0 Home Run Cable Stainless Steel Junction box Figure 9-1: Typical Weigh Module System (6/09) 9-3 METTLER TOLEDO Weigh Module Systems Handbook Figure 9-2 shows a weigh module system for a hazardous environment. The weigh module system is located within a hazardous area barrier and connected to an indicator and PLC in a safe area. Safe Area Ex Area METTLER TOLEDO Ultramount Set Typical Customer Connection Customer's Programmable Logic Controller Processor PC (Optional Terminal) METTLER TOLEDO 780.0 Ultramount Weigh Modules Field Bus METTLER TOLEDO 780.0 Stainless Steel Junction box Ex Barrier Figure 9-2: Weigh Module System for a Hazardous Environment 9-4 (6/09) Chapter 9: Indicators and Applications Applications Figure 9-3 shows an overview of sample weigh module systems. Ethernet Level Plant-Wide Information Processo PC Card I/0 I/0 I/0 I/0 PLC Plant Network Field Bus METTLER TOLEDO METTLER TOLEDO 780.0 Device Level or "Sensor" Level 780.0 METTLER TOLEDO 780.0 Weigh Modules Figure 9-3: Overview of Weigh Module Systems (6/09) 9-5 Chapter 10: Appendices Appendix 1: Design Qualification Form 10 Appendices Appendix 1: Design Qualification Form When planning a weigh module application, use the design qualification form on the next page to list the system requirements that need to be considered. (6/09) 10-1 METTLER TOLEDO Weigh Module Systems Handbook METTLER TOLEDO WEIGH MODULE DESIGN QUALIFICATION FORM 1. Type: Tank ____________ Hopper ____________ Vessel ____________ Other ____________ 2. Dimensions: Length ____________ Width (dia.) ____________ Height ____________ 3. Number of supports (Legs / Lugs / Suspension Rods): 4. Distance between supports: 5. Dimension of Legs / Rods: Length ____________ Width (dia.) ____________ Height _____________ 6. Gross capacity: 7. Empty Weight: 8. Nominal load cell capacity (#6 ÷ #3 x 1.25 Safety Factor): 9. Required system resolution (increment size): 10. Seismic conditions? Yes ______ No ______ 11. If yes, UBC seismic zone: 12. Is system located outdoors? Yes ______ No ______ 13. If yes, design wind speed in MPH: 14. Is the tank or vessel jacketed? Yes ______ No ______ 15. Jacket will contain: Coolant ______ Type ____________ Heat source ______ Type ____________ 16. Does jacket continuously circulate? Yes ______ No ______ 17. Is there an agitator? Yes ______ No ______ 18. Will agitator be required to cycle when taking weight readings? Yes ______ No ______ 19. What is the ambient temperature for the area of operation? Min. ____________ Max. ____________ 20. If a reactor vessel, what are the internal temperatures? Min. ____________ Max. ____________ 21. Number of piping terminations (inlets/outlets) to the vessel: 22. How many are: Horizontal to vessel ____________ Vertical to vessel _____________ 23. Is the vessel vented? Yes ______ No ______ 24. Is the area of operation Hazardous/Classified? Yes ______ No ______ 25. If yes, state: Class ____________ Division _____________ Group ____________ 26. Autoignition temperature of the product to be weighed: 27. Load cells to be mounted on: Concrete floor ______ I-Beam ______ Mezzanine ______ 28. Length of cable required from vessel to indicator (Home Run Cable): ____________ 29. Provisions on the tank, vessel, or hopper to hang calibration weights? Yes ______ No ______ __________________________________________________ Prepared By 10-2 (6/09) Date __________________________________________________ Approved By Date Chapter 10: Appendices Appendix 2: Calculating Reaction Forces Appendix 2: Calculating Reaction Forces The effect of wind or seismic events on a tank is defined in terms of reaction forces (downward, upward, and shear). For the sample application used in this appendix, we will assume that the total horizontal shear equals the equivalent force applied at the tank’s center of gravity (c.g.). This total shear force will be distributed evenly among the weigh module supports. Methods for determining wind and seismic forces at a tank’s center of gravity are discussed in Chapter 4. CAUTION THE FOLLOWING CALCULATIONS ARE PROVIDED AS GUIDELINES ONLY. THEY SHOULD NOT REPLACE A STRUCTURAL ENGINEERING EVALUATION OF THE APPLICATION BY A REGISTERED PROFESSIONAL ENGINEER WHO IS FAMILIAR WITH LOCAL BUILDING CODES. Vertical reaction forces are calculated using statics, which is the study of bodies at rest (equilibrium). The following factors are used to calculate reaction forces for a tank scale: hT = Height of Tank (feet) hL = Height of Tank’s Legs (feet) d = Diameter of Tank (feet) WT = Weight of Empty Tank (pounds) WG = Weight of Full Tank (pounds) R1,2 = Reaction Forces at Weigh Module RT = Reaction Force at Weigh Module due to Empty Tank Weight RG = Reaction Force at Weigh Module due to Full Tank Weight F = Equivalent Force due to Wind or Seismic Event (applied at tank c.g.) FD = Downward Force on Weigh Module FU = Upward Force on Weigh Module FY = Vertical Force on Weigh Module MA = Moment about Point A (6/09) 10-3 METTLER TOLEDO Weigh Module Systems Handbook Circular Tank with Four Weigh Modules The following sample shows how statics is used to calculate reaction forces for an outdoor installation of a circular tank with four weigh modules. F Note: F is a horizontal force applied at the tank’s center of gravity. It is usually denoted FW for wind force and FEQ or V for seismic force. d c.g. F hT W hL A R1 R2 Figure 10-1: Circular Tank with Four Weigh Modules Moment about point A due to F (horizontal force at tank’s center of gravity) = - F [ hL + 0.5 hT ] Moment about point A due to reaction force R1 = 2 R1 d sin 45° If a tank is at equilibrium, the sum of the moments about point A will equal zero: ∑MA = 0 Solve for R1 F [ hL + 0.5 hT ] = 2 R1 d sin 45° R1 = 10-4 (6/09) F [ hL + 0.5 hT ] 1. 414 d Chapter 10: Appendices Appendix 2: Calculating Reaction Forces Full Tank, Solve for RG ∑FY = 0 2R1 + 2R2 = WG assuming equal load distribution R1 = R 2 = R G RG = WG 4 Empty Tank, Solve for RT ∑FY = 0 2R1 + 2R2 = WT assuming equal load distribution R1 = R 2 = R T RT = WT 4 Download Force on a Full Tank FD = R1 + RG FD = WG F [ hL + 0.5 hT ] + 1. 414 d 4 The maximum downward force (FD) on a single weigh module equals the distributed weight of the full tank (RG) plus the downward reaction force caused by the wind or seismic event. Compare this maximum downward force to the download rating for the weigh module being considered. If the maximum downward force is greater than the load rating, you should consider using a larger capacity weigh module to avoid overloading. Uplift Force on an Empty Tank FU = R1 - RT FU = F WT [ hL + 0.5 hT ] 1. 414 d 4 Overloading the weigh modules is not the only potential problem for tanks exposed to wind or seismic forces. You should also consider uplift forces acting on the tank. The distributed weight of an empty tank will help prevent the tank from uplifting. So the net uplift force (FU) equals the upward reaction force minus the distributed weight of the empty tank (RT). Compare the net uplift force (FU) with the uplift load rating of the weigh module being considered. If the net uplift force is greater than the uplift load rating of the weigh module, you should consider using a larger capacity weigh module or installing external check rods. A negative number indicates that the weight of the empty tank is greater than the uplift force caused by the wind or seismic event. (6/09) 10-5 METTLER TOLEDO Weigh Module Systems Handbook Circular Tank with Three Weigh Modules The following sample shows how statics is used to calculate reaction forces for an outdoor installation of a circular tank with three weigh modules. F Note: F is a horizontal force applied at the tank’s center of gravity. It is usually denoted FW for wind force and FEQ or V for seismic force. d c.g. F hT W hL A R1 R2 Figure 10-2: Circular Tank with Three Weigh Modules Moment about point A due to F (horizontal force at tank’s center of gravity) = - F [ hL + 0.5 hT ] Moment about point A due to reaction force R1 = R1 [ d + d sin 30° ] 2 2 If a tank is at equilibrium, the sum of the moments about point A will equal zero: ∑MA = 0 Solve for R1 F [ hL + 0.5 hT ] = R1 [ d + d sin 30° ] 2 2 R1 = 4F [ hL + 0.5 hT ] 3d 10-6 (6/09) Chapter 10: Appendices Appendix 2: Calculating Reaction Forces Full Tank, Solve for RG ∑FY = 0 R1 + 2R2 = WG assuming equal load distribution R1 = R 2 = R G RG = WG 3 Empty Tank, Solve for RT ∑FY = 0 R1 + 2R2 = WT assuming equal load distribution R1 = R 2 = R T RT = WT 3 Download Force on a Full Tank FD = R1 + RG WG FD = 4F [ hL + 0.5 hT ] + 3 3d The maximum downward force (FD) on a single weigh module equals the distributed weight of the full tank (RG) plus the downward reaction force caused by the wind or seismic event. Compare this maximum downward force to the download rating for the weigh module being considered. If the maximum downward force is greater than the load rating, you should consider using a larger capacity weigh module to avoid overloading. Uplift Force on an Empty Tank FU = R1 - RT WT FU = 4F [ hL + 0.5 hT ] 4 3d Overloading the weigh modules is not the only potential problem for tanks exposed to wind or seismic forces. You should also consider uplift forces acting on the tank. The distributed weight of an empty tank will help prevent the tank from uplifting. So the net uplift force (FU) equals the upward reaction force minus the distributed weight of the empty tank (RT). Compare the net uplift force (FU) with the uplift load rating of the weigh module being considered. If the net uplift force is greater than the uplift load rating of the weigh module, you should consider using a larger capacity weigh module or installing external check rods. A negative number indicates that the weight of the empty tank is greater than the uplift force caused by the wind or seismic event. (6/09) 10-7 METTLER TOLEDO Weigh Module Systems Handbook Appendix 3: Bolt Thread Dimensions The following tables list National Pipe Taper (NPT) dimensions and straight thread dimensions for hex head bolts. NPT Dimensions 1° 47' A B Effective Thread NPT Size Threads Per Inch A (inches) B (inches) 1/16 27 0.312 0.261 1/8 27 0.405 0.264 1/4 18 0.540 0.402 3/8 18 0.675 0.408 1/2 14 0.840 0.534 3/4 14 1.050 0.546 1 11 1/2 1.315 0.683 1 1/4 11 1/2 1.660 0.707 Table 10-1: NPT Dimensions 10-8 (6/09) Chapter 10: Appendices Appendix 3: Bolt Thread Dimensions Straight Thread Dimensions H Nominal Diameter W Straight Thread Dimensions (US) Threads per Inch Nominal Thread Size Coarse (UNC) Fine (UNF) 6 32 8 Straight Thread Dimensions (Metric) Nominal Diameter W (inches) H (inches) Nominal Thread Size* Thread Pitch (mm) Nominal Diameter W (mm) H (mm) 40 0.1380 – – M3 0.5 3 5.5 2.125 32 36 0.1640 – – M4 0.7 4 7.0 2.925 10 24 32 0.1900 – – M5 0.8 5 8.0 3.650 12 24 28 0.2160 – – M6 1 6 10.0 4.150 1/4 20 28 0.2500 7/16 11/64 M8 1.25 8 13.0 5.650 5/16 18 24 0.3125 1/2 7/32 M10 1.5 10 17.0 7.180 3/8 16 24 0.3750 9/16 1/4 M12 1.75 12 19.0 8.180 7/16 14 20 0.4375 5/8 19/64 (M14) 2 14 22.0 9.180 1/2 13 20 0.5000 3/4 11/32 M16 2 16 24.0 10.180 9/16 12 18 0.5625 13/16 3/8 (M18) 2.5 18 27.0 12.215 5/8 11 18 0.6250 15/16 27/64 M20 2.5 20 30.0 13.215 3/4 10 16 0.7500 1 1/8 1/2 (M22) 2.5 22 32.0 14.215 7/8 9 14 0.8750 1 5/16 37/64 M24 3 24 36.0 15.215 1 8 12 1.0000 1 1/2 43/64 (M27) 3 27 41.0 17.215 1 1/8 7 12 1.1250 1 11/16 3/4 M30 3.5 30 46.0 19.260 1 1/4 7 12 1.2500 1 7/8 27/32 (M33) 3.5 33 50.0 21.260 1 3/8 6 12 1.3750 2 1/16 29/32 M36 4 36 55.0 23.260 1 1/2 6 12 1.5000 2 1/4 1 (M39) 4 39 60.0 25.260 *Thread sizes shown in parentheses are not preferred. Table 10-2: Straight Thread Dimensions (6/09) 10-9 METTLER TOLEDO Weigh Module Systems Handbook Appendix 4: NEMA/IP Enclosure Types The National Electrical Manufacturers Association (NEMA) provides descriptions, classifications, and test criteria relating to enclosures for electrical equipment. Tables 10-3, 10-4, and 10-5 compare the specific applications of enclosures for indoor and outdoor nonhazardous locations and indoor hazardous locations. Provides a Degree of Protection Against the Following Conditions Type of Enclosure 1* 2* 4 4X 5 6 6P 12 12K 13 Access to hazardous parts X X X X X X X X X X Ingress of solid foreign objects (falling dirt) X X X X X X X X X X X X X X X X X X X Ingress of solid foreign objects (circulating dust, lint, fibers, and flyings**) X X X X X X X Ingress of solid foreign objects (settling airborne dust, lint, fibers, and flyings**) X X X X X X X Ingress of water (hosedown and splashing water) X X X X X X X Ingress of water (dripping and light splashing) X Oil and coolant seepage Oil or coolant spraying and splashing Corrosive agents X X Ingress of water (occasional temporary submersion) Ingress of water (occasional prolonged submersion) X X X X *These enclosures may be ventilated. **These fibers and flyings are nonhazardous materials and are not considered Class III type ignitable fibers or combustible flyings. For Class III type ignitable fibers or combustible flyings, see the National Electrical Code, Article 500. Table 10-3: Specific Applications of Enclosures for Indoor Nonhazardous Locations 10-10 (6/09) Chapter 10: Appendices Appendix 4: NEMA/IP Enclosure Types Provides a Degree of Protection Against the Following Conditions Type of Enclosure 3 3X 3R* 3RX* 3S 3SX 4 4X 6 6P Access to hazardous parts X X X X X X X X X X Ingress of water (rain, snow, and sleet**) X X X X X X X X X X X X X X X X X X X X X X Sleet*** Ingress of solid foreign objects (windblown dust, lint, fibers, and flyings) X X Ingress of water (hosedown) Corrosive agents X X X X Ingress of water (occasional temporary submersion) X X X Ingress of water (occasional prolonged submersion) X *These enclosures may be ventilated. **External operating mechanisms are not required to be operable when the enclosure is ice covered. ***External operating mechanisms are operable when the enclosure is ice covered. Table 10-4: Specific Applications of Enclosures for Outdoor Nonhazardous Locations Provides a Degree of Protection Against Atmospheres Typically Containing:* Enclosure Types 7 & 8, Class I Groups*** Class A Acetylene I X Hydrogen, manufactured gas I Diethyl ether, ethylene, cyclopropane I Gasoline, hexane, butane, naphtha, propane, acetone, toluene, isoprene I Metal dust II Carbon black, coal dust, coke dust II Flour, starch, grain dust II X Fibers, flyings** III X Methane with or without coal dust B C Enclosure Type 9, Class II Groups D E F G 10 X X X X X MSHA X *For complete listing, see NFPA 497M. **For Class III type ignitable fibers or combustible flyings, see the National Electrical Code, Article 500. ***Due to the characteristics of the gas, vapor, or dust, a product suitable for one Class or Group may not be suitable for another Class or Group unless marked on the product. Table 10-5: Specific Applications of Enclosures for Indoor Hazardous Locations (6/09) 10-11 METTLER TOLEDO Weigh Module Systems Handbook Tables 10-6 and 10-7 describe the types of enclosures, their applications, and the environmental conditions they are designed to provide protection against. NEMA Type Description 1 Enclosures constructed for indoor use to provide a degree of protection to personnel against access to hazardous parts and to provide a degree of protection of the equipment inside the enclosure against ingress of solid foreign objects (falling dirt). 2 Enclosures constructed for indoor use to provide a degree of protection to personnel against access to hazardous parts; to provide a degree of protection of the equipment inside the enclosure against ingress of solid foreign objects (falling dirt); and to provide a degree of protection with respect to harmful effects on the equipment due to the ingress of water (dripping and light splashing). 3 Enclosures constructed for either indoor or outdoor use to provide a degree of protection to personnel against access to hazardous parts; to provide a degree of protection of the equipment inside the enclosure against ingress of solid foreign objects (falling dirt and windblown dust); to provide a degree of protection with respect to harmful effects on the equipment due to the ingress of water (rain, sleet, snow); and that will be undamaged by the external formation of ice on the enclosure. 3R Enclosures constructed for either indoor or outdoor use to provide a degree of protection to personnel against access to hazardous parts; to provide a degree of protection of the equipment inside the enclosure against ingress of solid foreign objects (falling dirt); to provide a degree of protection with respect to harmful effects on the equipment due to the ingress of water (rain, sleet, snow); and that will be undamaged by the external formation of ice on the enclosure. 3S Enclosures constructed for either indoor or outdoor use to provide a degree of protection to personnel against access to hazardous parts; to provide a degree of protection of the equipment inside the enclosure against ingress of solid foreign objects (falling dirt and windblown dust); to provide a degree of protection with respect to harmful effects on the equipment due to the ingress of water (rain, sleet, snow); and for which the external mechanism(s) remain operable when ice laden. 3X Enclosures constructed for either indoor or outdoor use to provide a degree of protection to personnel against access to hazardous parts; to provide a degree of protection of the equipment inside the enclosure against ingress of solid foreign objects (falling dirt and windblown dust); to provide a degree of protection with respect to harmful effects on the equipment due to the ingress of water (rain, sleet, snow); that provides an additional level of protection against corrosion; and that will be undamaged by the external formation of ice on the enclosure. 3RX Enclosures constructed for either indoor or outdoor use to provide a degree of protection to personnel against access to hazardous parts; to provide a degree of protection of the equipment inside the enclosure against ingress of solid foreign objects (falling dirt); to provide a degree of protection with respect to harmful effects on the equipment due to the ingress of water (rain, sleet, snow); that will be undamaged by the external formation of ice on the enclosure, that provides an additional level of protection against corrosion; and that will be undamaged by the external formation of ice on the enclosure. 3SX Enclosures constructed for either indoor or outdoor use to provide a degree of protection to personnel against access to hazardous parts; to provide a degree of protection of the equipment inside the enclosure against ingress of solid foreign objects (falling dirt and windblown dust); to provide a degree of protection with respect to harmful effects on the equipment due to the ingress of water (rain, sleet, snow); that provides an additional level of protection against corrosion; and for which the external mechanism(s) remain operable when ice laden. 4 Enclosures constructed for either indoor or outdoor use to provide a degree of protection to personnel against access to hazardous parts; to provide a degree of protection of the equipment inside the enclosure against ingress of solid foreign objects (falling dirt and windblown dust); to provide a degree of protection with respect to harmful effects on the equipment due to the ingress of water (rain, sleet, snow, splashing water, and hose-directed water); and that will be undamaged by the external formation of ice on the enclosure. 10-12 (6/09) Chapter 10: Appendices Appendix 4: NEMA/IP Enclosure Types NEMA Type Description 4X Enclosures constructed for either indoor or outdoor use to provide a degree of protection to personnel against access to hazardous parts; to provide a degree of protection of the equipment inside the enclosure against ingress of solid foreign objects (windblown dust); to provide a degree of protection with respect to harmful effects on the equipment due to the ingress of water (rain, sleet, snow, splashing water, and hose-directed water); that provides an additional level of protection against corrosion; and that will be undamaged by the external formation of ice on the enclosure. 5 Enclosures constructed for indoor use to provide a degree of protection to personnel against access to hazardous parts; to provide a degree of protection of the equipment inside the enclosure against ingress of solid foreign objects (falling dirt and settling airborne dust, lint, fibers, and flyings); and to provide a degree of protection with respect to harmful effects on the equipment due to the ingress of water (dripping and light splashing). 6 Enclosures constructed for either indoor or outdoor use to provide a degree of protection to personnel against access to hazardous parts; to provide a degree of protection of the equipment inside the enclosure against ingress of solid foreign objects (falling dirt); to provide a degree of protection with respect to harmful effects on the equipment due to the ingress of water (hose-directed water and the entry of water during occasional temporary submersion at a limited depth); and that will be undamaged by the external formation of ice on the enclosure. 6P Enclosures constructed for either indoor or outdoor use to provide a degree of protection to personnel against access to hazardous parts; to provide a degree of protection of the equipment inside the enclosure against ingress of solid foreign objects (falling dirt); to provide a degree of protection with respect to harmful effects on the equipment due to the ingress of water (hose-directed water and the entry of water during prolonged submersion at a limited depth); that provides an additional level of protection against corrosion; and that will be undamaged by the external formation of ice on the enclosure. 12 Enclosures constructed (without knockouts) for indoor use to provide a degree of protection to personnel against access to hazardous parts; to provide a degree of protection of the equipment inside the enclosure against ingress of solid foreign objects (falling dirt and circulating dust, lint, fibers, and flyings); and to provide a degree of protection with respect to harmful effects on the equipment due to the ingress of water (dripping and light splashing). 12K Enclosures constructed (with knockouts) for indoor use to provide a degree of protection to personnel against access to hazardous parts; to provide a degree of protection of the equipment inside the enclosure against ingress of solid foreign objects (falling dirt and circulating dust, lint, fibers, and flyings); and to provide a degree of protection with respect to harmful effects on the equipment due to the ingress of water (dripping and light splashing). 13 Enclosures constructed for indoor use to provide a degree of protection to personnel against access to hazardous parts; to provide a degree of protection of the equipment inside the enclosure against ingress of solid foreign objects (falling dirt and circulating dust, lint, fibers, and flyings); to provide a degree of protection with respect to harmful effects on the equipment due to the ingress of water (dripping and light splashing); and to provide a degree of protection against the spraying, splashing, and seepage of oil and non-corrosive coolants. Table 10-6: Nonhazardous Area Enclosures (6/09) 10-13 METTLER TOLEDO Weigh Module Systems Handbook NEMA Type Description Requirements/Design Tests* 7 Enclosures constructed for indoor use in hazardous (classified) locations classified as Class I, Division 1, Groups A, B, C, or D as defined in NFPA 70. ANSI/UL 698, ANSI/UL 877, ANSI/UL 886, ANSI/UL 894 8 Enclosures constructed for either indoor or outdoor use in hazardous (classified) locations classified as Class I, Division 1, Groups A, B, C, and D as defined in NFPA 70. ANSI/UL 698, ANSI/UL 877, Rain 9 Enclosures constructed for indoor use in hazardous (classified) locations classified as Class II, Division 1, Groups E, F, or G as defined in NFPA 70. ANSI/UL 698, ANSI/UL 877, ANSI/UL 886, ANSI/UL 894 10 Enclosures constructed to meet the requirements of the Mine Safety and Health Administration, 30 CFR, Part 18. In accordance with the Mine Safety and Health Administration Table 10-7: Hazardous Area Enclosures The International Electrotechnical Commission (IEC) provides international classifications (IP Codes) of enclosures for electrical equipment. Table 10-8 can be used to convert NEMA Enclosure Type Numbers to IEC Enclosure Classification Designations. However, since NEMA Types meet or exceed the test requirements for the IEC Classifications, this table cannot be used to convert IEC Classifications to NEMA Types. IP NEMA Enclosure Type First Character 1 IP0_ X IP1_ IP2_ 2 X 3, 3X, 3S, 3SX 3R, 3RX 4, 4X IP 5 6 6P 12, 12K, 13 Second Character X X X X X X X X X X X X X X X X IP_0 X X X X X X X X X X X X X X X X X IP_1 X X X X X X X X X X X X X X X X X IP_2 IP3_ X X X X X X X X X X X X X IP_3 IP4_ X X X X X X X X X X X X IP_4 IP5_ X X X X X X X X X X X X X X X X IP_6 X IP_7 X IP_8 IP6_ X A B A B A B A B A B A B A B A B A IP_5 B Table 10-8: Conversion of NEMA Type Numbers to IEC Classification Designations An “X” in column A indicates that the NEMA enclosure type exceeds the requirements for the respective IEC 60529 IP first character designation (protection against access to hazardous parts and solid foreign objects). An “X” in column B indicates that the NEMA enclosure type exceeds the requirements for the respective IEC 60529 IP second character designation (protection against the ingress of water). To meet or exceed an IP rating, a NEMA enclosure type must meet or exceed the requirements for both the first character (column A) and the second character (column B). For example, suppose an IEC IP45 enclosure rating is specified. The following NEMA type enclosures meet or exceed the IP45 rating: 3, 3X, 3S, 3SX, 4, 4X, 6, 6P. 10-14 (6/09) Chapter 10: Appendices Appendix 4: NEMA/IP Enclosure Types Table 10-9 provides a brief description of the IP Code. First Character (Protection against solid objects) Second Character (Protection against liquids) 0 = No protection 0 = No protection 1 = Protection against solid objects > 50 mm (for example, hands) 1 = Protection against falling drops of water 2 = Protection against solid objects > 12.5 mm (for example, fingers) 2 = Protection against falling drops of water with enclosure tilted up to 15° 3 = Protection against solid objects > 2.5 mm (for example, tools and wires) 3 = Protection against direct spray of water 4 = Protection against solid objects > 1 mm 4 = Protection against water splashed from any direction 5 = Protection against dust (limited ingress) 5 = Protection against low-pressure jets of water 6 = Totally protected against dust 6 = Protection against strong jets of water 7 = Protection against 15 cm to 1 m immersion 8 = Protection against long periods of immersion 9K = Protection against high-pressure water jets from all directions, 14-16 l/min, 8000-10000 kPa, 80°C, 30 sec, 100150 mm distance. METTLER TOLEDO tests according to DIN 400050 part 9. Table 10-9: Details of the Standard IEC/EN60529 (6/09) 10-15 METTLER TOLEDO Weigh Module Systems Handbook Appendix 5: Classification of Hazardous Areas North America In North America (United States and Canada) there are two codes for explosive area classification or Hazloc (hazardous location) classification, one based on class/divisions and one based on zones. The most commonly found is the class/division classification based on the NEC 500 legislation in the United States and on CEC Section 18 Annex J legislation in Canada (see Table 10-10). The class defines the type of hazard present (gas/dust) and the explosive characteristic of the materials present. The division is based on the occurrence of risk these hazardous materials present. In North America there also exists a zone classification system based on the IEC guidelines and supported by the NEC 505 legislation and the CEC Section 18 legislation (see Table 10-11). Here the risk is divided into three zones rather than two divisions. Currently, however, the zoning system applies only to gas and vapor hazards. Substance Division Class I Gases Vapors Division 1 Areas in which dangerous concentrations of flammable gases/vapors are present continuously or occasionally under normal operating conditions. Division 2 Areas in which dangerous concentrations of flammable gases/vapors are not likely to be present under normal operating conditions. Class II Dusts Division 1 Areas in which dangerous concentrations of flammable dusts are present continuously or occasionally under normal operating conditions. Division 2 Areas in which dangerous concentrations of flammable dusts are not likely to be present under normal operating conditions. Division 1 Areas in which dangerous concentrations of flammable fibers and flyings are present continuously or occasionally under normal operating conditions. Division 2 Areas in which dangerous concentrations of flammable fibers and flyings are not likely to be present under normal operating conditions. Class III Fibers Flyings Table 10-10: Hazardous Area Classes and Divisions 10-16 (6/09) Chapter 10: Appendices Appendix 5: Classification of Hazardous Areas Substance Gases Vapors Dusts NEC 505 Class 1 No NEC classification Zoning Equipment Category Zone 0 Area in which an atmosphere at risk of explosion from gases or vapors is continuously or frequently present during normal operation. 1G Zone 1 Area in which an atmosphere at risk of explosion from gases or vapors can form occasionally during normal operation. 2G (1G)* Zone 2 Area in which an atmosphere at risk of explosion from gases or vapors does not normally form or forms for only short periods during normal operation. 3G (1G & 2G)* Zone 20 Area in which an atmosphere at risk of explosion from flammable dust is continuously or frequently present during normal operation. 1D Zone 21 Area in which an atmosphere at risk of explosion from flammable dust can form occasionally during normal operation. 2D (1D)* Zone 22 Area in which an atmosphere at risk of explosion from flammable dust does not normally form or forms for only short periods during normal operation. 3D (1D & 2D)* *Approved products can also be used. Table 10-11: Hazardous Area Zones Explosive atmospheres can be found in the form of gases, vapors, mists, or dusts which can ignite under certain operating conditions. Potentially explosive atmospheres are found in many industries and all of these have the potential to produce gas, dust, or fumes which can be ignited by an ignition source. Europe and International In Europe the areas are classified using the ATEX legislation. This legislation is based on methods developed by the International Electric Council (IEC) with the aim of creating one global standard. The European Committee for Electrotechnical Standardization (CENELEC) and the IEC agreed in 1994 to combine standards wherever possible, and this led to the ATEX standards being almost identical to the IEC standards. There are, however, some differences, and the harmonization process is still ongoing. The IEC standards are frequently being adopted by national approval agencies such as NEPSI in China. This makes gaining local approvals easier. No single, internationally recognized and accepted standard exists at this time. Global agencies are committed to harmonizing standards, but it will be a long time before this becomes a reality. (6/09) 10-17 METTLER TOLEDO Weigh Module Systems Handbook Appendix 6: Chemical Resistance Chart The following chemical resistance chart is provided as a guide to help select materials for weigh module system components and hardware. The information is reprinted courtesy of Little Giant Pump Company. These recommendations are based on information from material suppliers and careful examination of available published information and are believed to be accurate. However, since the resistance of metals, plastics, and elastomers can be affected by concentration, temperature, presence of other chemicals, and other factors, this information should be considered as a general guide rather than an unqualified guarantee. Ultimately, the customer must determine the suitability of the materials used in various environments. All recommendations assume ambient temperatures unless otherwise noted. The ratings for these materials are based on the chemical resistance only. Added consideration must be given to material selection when the chemical is abrasive, viscous in nature, or has a Specific Gravity greater than 1.1. Note: Ceramagnet “A” is generically known as barium ferrite. RATINGS—CHEMICAL EFFECT A—No effect—Excellent B—Minor effect—Good C—Moderate effect—Fair D—Severe effect—Not Recommended FOOTNOTES 1. PVC—Satisfactory to 72°F 2. Polypropylene—Satisfactory to 72°F 3. Polypropylene—Satisfactory to 120°F 4. Buna-N—Satisfactory for O-Rings 5. Polyacetal—Satisfactory to 72°F 6. Ceramag—Satisfactory to 72°F Acetaldehyde5 A A A - B A A D - - C - D D A - A A D C B A A A - D B B D B C A Acetamide - B A - - C - Acetate Solv.2 A B A B B - Acetic Acid, Glacia1 - B A A B A A C C D A - C B A C D D D B B A A A - D D B C B C B Acetic Acid (20%) - B A - - A A - C - - A B - A A - D - - A A - A - A C - C - - B Acetic Acid (80%) - B A - - A A - C - - A D - A B - D - - B - - B Acetic Acid - B A B B A A C C D C B A B A A D D C B A A A A - C C - C B C A Acetic Anhydride B A A B B A A C D B D D D D A D D D D A A A A A - D A C B B C A Acetone6 A A A B A A A A A A A D D D A D B A D C B A A A A D D B C A D B Acetyl Chloride Acetylene 2 - C A - - - - - - - - - - - - B - - A C B A - B D A - - D - - - - - - A - - - - - - A - A A - A A D A - A - B D - A A - D D - D - - - - - - A - A C - D - - A - - - A - - - - A - A A A A A A A B - B - A A - B - - - A A - Acrylonitrile A A C - B B B A - C - - - B - D - B A A A - C D - D D - A Alcohols Amyl A A A - C A A A B C C A A B A C A A B B B A A A - A A D A A C A - - - D A A A - A A C B A C A Benzyl - A A - B A A A C - Butyl A A A - B B A B C C C A A B A A A A - B B A A A - A A D A A A A Diacetone2 - A A - A A A A C - A - D - Ethyl - A A A B A A A C A A - A C - A B A B B A - A A A A A B A B A A 10-18 (6/09) - - - D B - A A A D D A - A A - A D - B B D A - A A A - - D - A A - D D - D A D A Chapter 10: Appendices Appendix 6: Chemical Resistance Chart Hexyl - A A - A A A A C - A - - - - A A A - Isobutyl - A A - B A A A C - A - - - - A A A B - A - A A - A C B A A A A Isopropyl - A A - B A A A C C A - - - - A A A - Methyl 6 - A - A A - A A D B A A A - A - A A - A C C B A A A - A A A B A A A C A A - B - A A C A D B A - A A A C B - A A A A Octyl - A A - A A A A C - A - Propyl - A A - A A A A - - - - A A A - - A B A - A A A A - - - - A A - A B - B A C A - A - A A - A A B A A A A Aluminum Chloride (20%) - D C D B A A D - D A - A B - A C A - B A A A A - A A - A A A A Aluminum Chloride C D C - D C A C - D B A A A A A - D - Aluminum Fluoride - D C D - D B - - Aluminum Hydroxide6 - A A A A - Alum Potassium Sulfate (Alum), (10%) - A - Alum Potassium Sulfate (Alum), (100%) - D A B B - B C - - A - D A - A - A A B A - - A - B - - A A A A - A A C A - - A A A - A A C D - B A - A - - D A - A - A - - A - A A C A - C A - A - A A A A A - A - A A - A - A - - A A - A - - A - A A - A - A B A A C D - B A - A A - A A - A - A A Aluminum Sulfate - C C A A A A C C D A A A B A A C A - B A A A A - A A - A A A A Amines A A A - A B A B - A B - C A A B D A - - Ammonia (10%) - - A A - A - A D - A - Ammonia, Anhydrous A B A A B B A D - D B D A B A A D A - B A B C A - D B B A A D A - A - - A A - - - - D A - A A - A - - - A A - D D C B B C A - B Ammonia, Liquids - A A A D - B D - A A - A B A A D - - D A - A A - D B B A A D A Ammonia, Nitrate - A A A C - - A - B B - A C - - - A - A A - Ammonium Bifluoride - C A - D - B - - - - A - Ammonium Carbonate B A A A C A B B - C B - A B A A D A - - A - A A - B D C A A - A Ammonium Casenite - - Ammonium Chloride C A C A C D A D C D D A A B A A B A - B A A A A - A A C A A A A Ammonium Hydroxide A A A A C A A D D A C - A B A A D A B B A A A A - B B B A A C A Ammonium Nitrate A A A A B A A D D A D - A B A A C D - B A A A A - D A C A A A A Ammonium Oxalate - A A A - Ammonium Persulfate - A A A C C A A - D A D A - A A D D - Ammonium Phosphate, Dibasic B A A A B A A C - - D - A - A A B A - B A - A A - A A B A A A A Ammonium Phosphate, Monobasic - A A A B A A D - - A - A A A A B A - B A - A A - A A B A A A A Ammonium Phosphate, Tribasic B A A A B A A C - C D - A - A A B A - B A - A A - A A B A A A A Ammonium Sulfate C D B A B A A B C C C A A D A A B D - B A A A A - D A B A A A A - A - - A - - - - D - - - - A - - A - - - - Ammonium Thio-Sulfate - Amyl-Acetate B A A C B A A C - - - - A - - A - - D A - - - - - - - - A D - A D - - - - B - - B - - - - - - - - - A - C - - A - A - A A - A - - A - - - A - - - - - - A - - A - A - - A - A - A - A A - C A - A A A A - - - A A - - A - A - - A - C C D D A D A B - D D A A A - D D D D A D A Amyl Alcohol - A A - B A A A - - A A A B A C A A - B A - A A - B B D A A C A Amyl Chloride - C B - D - A A - - A A D C A D A C - D D - A A - A D - D D D A Aniline B A A A C A B C - - C C D D A D D C D C B A A A - C D C D B D A Anti-Freeze - A A - A - A B B B C - A B A A A A B B A A A A A A A C A A A A Antimony Trichloride - D D - D C A - - - - Aqua Regia (80% HCl, 20% HNO) - D D - D A D D - - - C D D A D D D - D C - Arochlor 1248 - - - A - Aromatic Hydrocarbons - - A - A - Arsenic Acid B A A - D - - D B D D A A B A A D A - B A - A A - A A - A - C A Asphalt - B A - C - - A - C - Barium Carbonate B A A A B A A B - B B - A A A A A A - B A - A A A A A - A - A A Barium Chloride C D A A D A A B - - C A A B A A A B - B A A A A - A A B A A A A Barium Cyanide - - A - Barium Hydroxide B C A A D B B B - C C A A - A A D A - B A A A A A A A C A A A A Barium Nitrate - A A - - - - A - - - - - - - - - A A A - - - A - A A - D - - C - - A - - - - A - D - A A - B - - D - A - - D - - - D A - - - - B - - A A - - A - A - - C - A A - D - C D C D D D D - - A - - A D - D B D A - C - - A - - A D - D D D A - A A - - - - A A - A A A B C B D D A - B - - - - A - - A C - A A - A - A A - A A - A A - B (6/09) 10-19 METTLER TOLEDO Weigh Module Systems Handbook Barium Sulfate B A A A D A A C - C C A A - A A A A - B A A A B - A A D A A - B Barium Sulfide B A A - D B - C - C C - A A A A A A - B A - A A - A A C A A A A Beer2 A A A - A A A A B D D A A - A A B D B B D - A A - A D C A A A A Beet Sugar Liquids A A A - A - Benzaldehyde3 A A A - B A A A - B A C D D A D A C D D D A A A - D D B D A D A Benzene2 B A A A B A B B A B C B D C A D A A D D D A A A A A D - D D D A Benzoic Acid2 B A A A B A A B - D - A A B A A B D - B D - A B - A D - D D D A Benzol - A A - B A A B A - Borax (Sodium Borate) - A A A C B A A B A C A A A A A A A - B A A A A A A B C A A C A Boric Acid B A A A B A A B C D - A A B A A A A - B A - A A A A A - A A A A Brewery Slop - 2 - A - - - - A B A - - - A - A - - A - A A B A B - A - A A - A A - B A A A - D - A D A A - - - - - - A - - - A - A A A D D - D - - - - A A - A A - A - - A - A Bromine (Wet) D D D D D A A C - D D A B B A D D D D D D D D A D A D D D D D C Butadiene A A A - A - - C A C C A A - A - A A - Butane2 A A A - A - - A A C C A A C A D A A B C D A A A - A A D B D D A 1 - A - - - - A A - A - A A - - - - - - - Butter - B A - A - - D - D - - - B - B A - B - - - A A - A A - B A D A Buttermilk A A A A A - - D - D - - - B A A A A B - - - A A - A A - A - D A Butylene A B A - A - - A A A A - B - A - A - Butyl Acetate1 - - A C D D A D A - - - B A A - A A - B A - A Butanol - C - A - A A - - - - - - - - - - - - A A A - A B - - - - - - D D A - C D A A A - D B D D B D A Butyric Acid1 B B A A B A A C - D - A B - A A C D D - A - A D - D D - D B - A Calcium Bisulfate C D A - D - Calcium Bisulfide - - D D D - - A A A - - A - - - - - - - A A C C - A A - B - C A A C - - - Calcium Bisulfite - B A - C A A C - - - A A - A A - A - Calcium Carbonate B A A A C A A C - D - - A A A A A A - B A - A A - A A - A - A A Calcium Chlorate - B A - - A A A - Calcium Chloride C A D C C A A B - C - A A A A A D A B B A A A A B A A B D A A A - B B C - - - A - A - - A - A A - A - A - - A - - A - - A - A A B A A - C A A B - Calcium Hypochlorite D D C C C A B D - D - A D - A A D D - B A - A A - A B C D A C A Calcium Sulfate B A A A B A B B - Calgon - A A - - - C - D - - Cane Juice2 - A A - B - - B C A - - A - - - - - - - - - - - - - - - - A - Calcium Hydroxide - - - - A - A A D A - B A - A A - A A - A D - A - A A A A B A - B A - A A A A A C A A A A - A A A A A A A C B A A A A - A A - D - C A Carbolic Acid (See Phenol) - Carbon Bisulfide2 B A A A A - - Carbon Dioxide (Wet) - A A - C - A C C C - - C - B - - - - A B - - D D - - - - A A - - - - - A A - - A - - - - - A - A A - A A - A - - A - D - A A - - A - A - A A - - - - - - - - - - - - - - D - A A A A D - D D D A - - - A A - - - - - - - - 2 - B A - C - - C C B C - D C A D A A - D D A A B - A D - D D D A Carbon Monoxide - A A - A - - Carbon Disulfide Carbon Tetrachloride2 1 - - - - - A - - B A A - B A - A A - A A B B A C A B B B A C A A C A C D A C C A D A A D D D C A A A A C C D - D C Carbonated Water B A A A A - Carbonic Acid B A B A A - A B - D - A A - A A A A - B A - A A - A B B A A A A - B - D - - A - A A - A A - A A - A - A A A D - Chloracetic Acid2 D D D D C A A D - D - D A D A - D D - D D - A A - D D - D B D B Chloric Acid - D D - Chlorinated Glue - A A - D - - - - - - - - C - D - - A - - A A A - Catsup - - C - D - - A - - A B A B - A - A A - A A - C - - D - A - - - - - - - - - D - D - - A - - - - - C - C D - - - - A - A C - D B D A - D Chlorine, Anhydrous Liquid - D D D D D A D - C - - D B A A D D - D D C A D - A D - D B D B Chlorine (Dry) B A A - D D A A B A - - Chlorine Water D - D - D A B D D D - A A - A C - D - Chlorobenzene (Mono) A A A - B - A B - B C A D D A D A A D D D A A A - A D - D D D A 10-20 (6/09) - - A - - - - - - C A A - D - - D - D D - D C C A - A D C D - - - Chapter 10: Appendices Appendix 6: Chemical Resistance Chart Chloroform A A A A D A A B - D C C D C A D A C D D D C A A A A D D D D D A Chlorosulfonic Acid1 D D - D D A B D - Chlorox (Bleach) - A A - C - A A - D C - A B A A D D B - D C A A - A C - B B D A - - - D D C C A D D D - D D D - C - D D D D D D C Chocolate Syrup - A A - A - Chromic Acid (5%) - A A B C A A D D D - - D - Chromic Acid (10%) - B - - - A A - D - - A A - A A - D - - A - - A - A D - D - - C Chromic Acid (30%) - B - - - A A - D - - B A - A D - D - - A - - A - A D - D - - D Chromic Acid (50%) C B B - C A A D D D - C B B A D D D C C B B D A - A D - D A D C Cider - A A A B - Citric Acid - A A A C A A D C D - A A - A A B C C B B - A A B A D C A A A A - A - D - - - - A A A - - A - - A - A A - A - D A - A - - A B - - A A - C - - B - - - - - - B - C - - - - A A A A - Copper Chloride C D D B D A A D - D - A A B A A B D - B A A - A - A A - A A A A Copper Cyanide - A A A D A A C - D - A A - A A B A - B A A A A - B B - A A A C Copper Fluoborate - D D - D - B D - D - Copper Nitrate B A A B D A A D - Copper Sulfate (5% Solution) - A A A D A A D D D - Copper Sulfate B B - Cream - A A - A - - C - D - - Cresols2 - A A - B - - D C - - D D - Cresylic Acid B A A - C A B C - - Cyclohexane - A - - A A - A - - A - - D - D A - - - D A A A - A A D D D D A Cyanic Acid - A - - - - - - Detergents - A A - A - - A A C D - - - - - - - A - - A - - - A - - A - - A B - A - A A - - - A A A - - A - - - Dichlorethane - A A - Diesel Fuel A A A - A - - A - A A - - Diethylamine A A - - A - - A - - Diethylene Glycol - A - - - - - A - - Diphenyl Oxide - A - - - - - A - Dyes - A A - B - - - D - - - A A - A D - D D D A - - - - - C - D - - A - A B A B B A A A A - A A - B A C A - A - D - - - - - B - - D - D A - D A - - - D A A A - A A - D D D A - - D - A B D - - - C - A A - D B - B B C A - - - - - A A A B B - - - - - - - - A - - - - - A A - A D - D D D A - C - - - - - - - A A - - - - - Epsom Salts (Magnesium Sulfate) B A A A A A B B - - - - A - - A A - - - A - A A - A A - A - C A Ethane A A - - A - - - - - - - D A - - - - Ethanolamine - A A - - - C - - - - - - - A A A - D B C B - C A Ether3 A A A A A - B B A - B - D C - D A C - - - A A A A C D - D C D A Ethyl Acetate2 - A A - B - B B - Ethyl Chloride - A A A B A B B - C D A D D A D A A - D D A A A - A D D C A A A Ethyl Sulfate - D 2 - A - - - - - - - - - - - - - A - D - D D C A A A - D D D D D D A - D D A - - A - B B - A A - A - A - A A - A A - C - - B B D A - D D - C - - A - A - A A B D - B A A A A - A A C A - C A - A A - A A - C - - A - A - A A - A A - A - A A - A A - A A B D - B A - A A - A A - A - - A - A - - A - A A - A A C D - - A A A A A A - - A - A - B - - - A A - A A - A - Coffee - - A B - - B - Citric Oils - - - - A B - C D D B B A A D C - A D C D A B B - D - - A A - A A C A A A A - - - A - - C - - A - A A - A A - B D D A - C D D D A D A A D C C A A A - D D C D B D A - - - - - - - B - - - - - A A - A A - - - - A Ethylene Chloride - A A - C B B A - C C - D - A D A - D - D A A A - A D D D C D A Ethylene Dichloride - A A - D A B C - Ethylene Glycol4 - A A - A - A B B B C A A B A A A A B B A A A A A A A C A A A A Ethylene Oxide - Fatty Acids - A A - B A A C - D - A A B A B A A - B A - A A - A C C B C C A Ferric Chloride - D D D D A B D D D - A A B A A B D - B A A A A - A D C B A A A - A - A - - A - - C - D D A D A A - D A A C A - A D D D C D A - - - - D - A A A A - - - - A A - D D D D C D A Ferric Nitrate - A A A D A A D - Ferric Sulfate - A C A D A A D D D - A A B A A B A C - A A C A - A B C A - A A - A A - A A B D - B A A A A - A A D A A A A Ferrous Chloride - D D - D A B C - D - A A B A A B D - B A A A A - A B C A - A A Ferrous Sulfate B A C - D A B C - D D A A B A A B D - B A A A A - A B - A - A A (6/09) 10-21 METTLER TOLEDO Weigh Module Systems Handbook Fluoboric Acid - D B - Fluorine D D D - D D A D - D D - C - C - - D A - - D - A A B A B B C - B A - A D - A B - A - Fluosilicic Acid - Formaldehyde (40%) - Formaldehyde A A A - A A B A B D A - A B A D A A - B A A A A - D C B D B C A Formic Acid6 C A B B D C A C C D D A D B A A D D - B A A A A B B D C D A C B Freon 111 A - A - B - - B - C B - B D A D A A D C - A A A A B C D D D D A Freon 12 (Wet)2 - - D - B - - B - - - - B D A D A A B C A A A A A A A D B B D A Freon 22 - - A - B - - B - - - - D D - B A A - - - A A A A D D D A A A A Freon 113 - - A - B - - B - - - - C D - - - A A A A C A D A - D A Freon T.F.4 - - A - B - - B - - - - B D - D A A - Fruit Juice A A A A B - Fuel Oils A A A - A A A B - C B A A - A A A A - D B A A A - A A C B D D A - D - B - D D B - - D - A A B A A B D - B A - A D - B A - A - - C - A - - - A - - B B - A A - D - - A A - - D - - - - - - - A - - A A - - D - C - - A A - A - D B B A - - D A A A A B A D A D D A - B - D D - A - D A B A - B A - A A A A A - A - Furan Resin - A A - A - Furfural1 A A A - A - B A - - A - A A - - - A - A - - - - A - A - A - A D - D - D A - A D D - A D B A D D D A A A - D D D D B D A Gallic Acid B A A - A - A A - D D - A A A - Gasoline1 A A A A A D A A - A A A C - A D A A D D C A A A A A A D D C D A 4 - A - - - - - - - B A - - - - - Gelatin A A A A A - A A C D D - A - A A A A - Glucose A - A - A - Glue P.V.A.1 B B A - B A - A - Glycerine A A A A A A A A B B B A A B A A A A C - A - A A - A A B A A A A Glycolic Acid - - - - - A - - - - A - A C - - B A A A - Gold Monocyanide - - A - - - - A - D - - - - Grape Juice - A A - B - - B - D - - A - Grease4 A A A - A - - B - A A - Heptane1 A - A - A - A A - - B A A - A D A A C D D A A A - A A - B D - A Hexane1 A A A - A - A B - - B A C - A D A A D - C A A A - A A B B D D A Honey - A A - A - - A - A - Hydraulic Oils (Petroleum)1 A A A - A - - B - A A - - - A - A A - Hydraulic Oils (Synthetic)1 - A A - A - - A - A - - - - - - A A - - D - A A - A C D - Hydrazine - A A - - - - - - - - D - - Hydrobromic Acid (20%) - - A A - Hydrobromic Acid4 D D D D D A A D - D D A A B A C D D - B B - A A - A D D D A A A Hydrochloric Acid (Dry gas) Hydrochloric Acid (20%) 4 - - D - - - A - A A - A A - A A A A - A A B B - A B A B A A B B A - A A - A A B A A A A - D C A - D - A - - - A - A B A - A A - - C - - - - - - A A - A A - A - - A - A A - A - - A - - A A - A A - A - - A - A B - B B - - A A - A A - A - - A - A A - A A - D - - A - - A - - A - A A - - A - - - - - A A A B - A - A A - A A - A A - A - - A A - A A - D - - D - A - A - - - - - D - A A - A A - B D D A - - A - - A - - - - B - A D - C - - A - - A - A B D B A C A - - - - - B - A - A - D D D D C B D - D - A A B A A D D B A A D A A D A C - C A C A Hydrochloric Acid (37%)4 - D D D D C B D - D - A A B A A D D C A A D A C D A C C C C D A Hydrochloric Acid (100%) - D D - D D C D - D - Hydrocyanic Acid A A A C A A A D D - C - A B A A B A - B A - A A - A C - B - A A Hydrocyanic Acid (Gas 10%) - D D - Hydrofluoric Acid (20%)1 - D D D D D B D - D - Hydrofluoric Acid (75%)1 2 - - - - - - - - A A A - A - A - - D - A - - - - - - A C - C D - C - A A - - - - - - C A C A - C D - D D C D - D - A C B A D D D - C B C D D D A D D D C C C Hydrofluoric Acid (100%) D D D - D D B D - D D - C D A - Hydrofluosilicic Acid (20%) - D D - D D B A - D - - D - A B D D - Hydrofluosilicic Acid - D D - C - C D - - Hydrogen Gas A A A - A - - - - - - D - C D D - - C A - - - - - - - A - - - A - B B A A - A - - - - - - - - A - - - - C C - A C A D D D - - A A A - - D - A - B A A - Hydrogen Peroxide (30%) - - A - A - - D - - B - - D - D - D A - A - A D - A B - B A A C Hydrogen Peroxide (10%) 10-22 (6/09) - - D B A A D D - C A C B C D A D - C A C B - B A - D - - - A C - - - - D A - - - - - - A - A - D - C D - A D - C - - B Chapter 10: Appendices Appendix 6: Chemical Resistance Chart Hydrogen Peroxide - A B A A B A D D D D C A C A B D D - B A C - A A A D C D C C A Hydrogen Sulfide, Aqueous Solution - D A C C A A D C D - A A B A A D D - B A A A A A D C - B A D A Hydrogen Sulfide (Dry) A C A - D - A D C B B - A - A - - - D B - - - - A - - - - A A Iodine - D D D D A B D - D - - D B A A C D D D D - D A - A B - D B D A Iodine (In Alcohol) - - D - A C - D - Iodoform B C A - A - - C - C B - - - A - Isotane2 - - - A - - - - - - - - - - D A - Isopropyl Acetate - - B - C - - - - - - - - - - - A - - - Isopropyl Ether2 A - A - A - - A - - A - - - A D A - - - D - A A - D B - D D D - Jet Fuel (JP#, JP4, JP5) A A A - A - - A - A A A A - A D A A - - D A A A - A A D D D D A Kerosene2 A A A A A A A A A A B A A D A D A A B D D A A A A A A D D A D A - D A - - - - - - - - - - D - - A A A - C - - C - D D - - - A - A - D - Ink - - - Hydroxyacetic Acid (70%) - B - - - D - - B A A - B - - A - - A A - A A - A A - A - A A A A A - A - - A - B - - A - A D - D - - - - - - - - - - D - - - A - - - - - A - A A - - - D A - A A - D D - D B D A Ketones A A A - B A A A - A A D D D A D B A - D D A C A - D D - D D C C Lacquers A A A - A - A - - A C C C - - Lactic Acid A A B C C A A D - D D C A B A A B C - B A A A A - B B - A B A A Lard B A A A A - - A - A C - A - - Latex - A A - A - - A - - A A A - B - Lead Acetate B A A - D A A C - - D - A B A A A A - B A - A A - D B - D A A A Lead Sulfamate - - - - - - - - - - - - - - A - - - A - - Ligroin3 - - A - - - - A - - - - - - - D A - - - D - - A - A A - B A D A Lime - A A - C A - A - A - - A - Lubricants - A A - A A A B - - - - A - A - A A B - A A A A - A A C D - D A Magnesium Carbonate - A A A - - - - A - Magnesium Chloride B B B A D A A B C D C - A B A A A A - B A A - A - A A - A A A A Magnesium Hydroxide A A A - D A A C B B B A A - A A A A - B A A A A - A B - B - C A Magnesium Nitrate - A A A - A A - - - - - A - A A A A - B A - - A - A A - A - Magnesium Oxide - A A - - - - - - A - - - - B - - - - - - - - - C - A D - A - - A - A A - D D - D - D A Lacquer Thinners - - A A - C - - D - C A A - - - - - - - B - - D - D A - - - A A C - A - A A - A A C B - D A - A D - C - A A - - - A - - A - - - - - - - A B C A D C A - A A - A A C B D - A - B A - - - A - A A - C A - A - - A - - A - A A - A - A - A - A A - A Magnesium Sulfate B B A - B A B B B C B - A B A A A A - B A A A A - A A - A D C A Maleic Acid C A A A B A A C - - B - A B A A C A - - C - A A - A D - A D D A Maleic Anhydride - - - - - - A A - A D - D - D A Malic Acid B A A - C - A D - - D - A - A - - A - - - - Mash - A A - - - - - A A - Mayonnaise - - - - - - - - C - - - A A A A B - A - A A - A A - - - - A Melamine - D D - - D - - - - - - A Mercuric Chloride (Dilute Solution) D D D D D A B D D D D - A A A A A A - B A - A A - A A - A A A A Mercuric Cyanide A A A - D A - D - Mercury A A A A C C A D D A A - A - A A A A - B A - A A - A A - A A A A - - - - A A - D D D B B D - Methyl Acrylate - - Methyl Acetone A - A - A - Methyl Alcohol (10%) A - A - C - A C - - B - A - A - Methyl Bromide - - - - - - - - - - - - - D - - A A - A B - D D D B Methyl Butyl Ketone - - A - A - - - - - - - - - - D B - - - - A A - D D C D A D B Methyl Cellosolve - - - A - - - - - - - C B - - - A - A A - D D - D B D C - - - - A - - - - - - - - - - - - - A - - - - - - - - - A - A - D - - - - A - - - - - B A - A A - - C - - - - - A A - - - - - - B - - - - - - - - D - A - A A A - - A - A - A - A A - - - D - - A Methyl Acetate - - - - A - A - Methanol (See Alcohols, Methyl) - - - - - A - A - - D - D D - - A A - - A - B - A A A - D - - - - - - - A - - - - - - - - - - A - - - - - - - A - - - - - A A - D D - B B D A - A - A A - - - A D A - - - - - - A - D D - D - - A - - - - - - A - - - - - B - - - C - A A (6/09) 10-23 METTLER TOLEDO Weigh Module Systems Handbook Methyl Chloride - A A - D A A A - - - A D - A D A A - D D - A A - A D D D C D A Methyl Dichloride - - - - Methyl Ethyl Ketone - A A - A A A A - - - D D - A D B A D D A A A A - D D C D A D B Methyl Isobutyl Ketone2 - - A - - A A - - - - D D - A D B A D - C A A A - D D C D C D B Methyl Isopropyl Ketone - - A - - - - - - - - - - - - D B A - - - Methyl Methacrylate - - - - - - - - - - - - - - A - - - - - A A - D D - D D D A Methylamine A - A - A - - D - B B - - - - B D - - - - - A A - Methylene Chloride A A A - A A A A C - B D D - A D A D - D D - A A - D D - D D D A - - - - - - - - - - - - - D A - - - - - A A - A D - D D D A - A A - D D B D B D B - B - - - - A Milk A A A A A - - C C D D - A - - A A A B B A - A A A A A B A A A A Molasses A A A A A - - A B A A - A - - B A A - B A - A A A A A - A - - A Mustard A A A A B - - B - C B - A - - B B A B - A - A A - A B C C - - A Naptha A A A A A A A B - B B A A C A D A A C D A A A A - A B D D D D A Napthalene B A B - B A A C - B A A D - A D A - Nickel Chloride - A B - D A A D - D - A A B A A B A - B A - A A - A A - A A A A Nickel Sulfate B A B - D A B C C D D A A A A A B A - B A - A A - A A - A A C A Nitric Acid (10% Solution) A A A A D A A D - D D A A B A A D D C B A D C B D A D - D B D A - D B A A A - B D - D D D A Nitric Acid (20% Solution) - A A A D A A D - D - B A B A A D D D B A C D C D A D - D D D B Nitric Acid (50% Solution) - A A A D A A D - D - B A B A A D D D C D C D A - A D - D D D D Nitric Acid (Concentrated Solution) - D B A B A B D D D - Nitrobenzene2 B A B - C A B D - B B D D D A D B C D D C B A A - D D D D D D B - D C A D D D D D D C D A C B D - D D D D Oils Aniline - A A - C A D A - A - - D - A D D C D - A - A A - A D - D B D A Anise - A A - - - - - - - - - - - - - A - - - - - A A - - - D - Bay - A A - - - - - - - - - - - - - A - - - - - A A - A - - D - - A Bone - A A - - - - A - - - - - - - - A - - - - - A A - A A - D - - A Castor - A A - A - - A - A - - A - - - A - - - - - A A A A A - A B A A Cinnamon - A A - - - - - - - - A - A - - - A - A A - D - - D - - A Citric - A A - - - - D - D - - - - - - A A - - A - A A - A A - D - - A Clove - A A - - - - - - - - - - A A - - B - A A - - A Coconut - A A - B - - A - A - - - - - - A A - - A - A A - A A - A A D A Cod Liver - A A - B - - - - - - - - A A C - A - A A - A A - B A D A Corn - A A A B - - B - A - - - - - - A A C - A - A A - A A - D C D A - - - - - A - - - - A Cotton Seed B A A A B - - B - A C - A - A - A A C - A A A A - A A - D C D A Creosote2 - A A - A - - - - - - - - - - - D - A A - A A - B D D A Diesel Fuel (2D, 3D, 4D, 5D) - A A - A - - A - - - - - - - D A A - - A A A A - A A - D D D A Fuel (1, 2, 3, 5A, 5B, 6) - A A - A A A A - - - - A - A D A - Ginger - A A - - - - - - - - - - - - - A - - - - - A A - A A - A - - A Hydraulic (See Hydraulic) - - - - - - - - - - - - - - - - - - - - Lemon - A A - - - - - - - - - - - - - A - - - D - A A - A - - - - - - - B - A A - A B - D D D A - - - - - - - - - D - - - A Linseed - A A A A - - A - A - Mineral A A A A A - - A - A B - A - Olive A A A - A - - B - A B - A - A - A A - - A - A A - A A C B - D A Orange - A A - - - A - A A - A A - D - - A Palm - A Peanut3 - - - - - A A - A - - B - - - - A - - - A A - - - A A - A - - A - A - - A - - - A - - D - A A - A A - D - D A - A - - - - A - - - D - A A - A D - D - - D - C B - A - A - A - - - - A A - A A A - A - 10-24 (6/09) - - - - - - A - A A - - B A A A A A A - B D D A - Peppermint2 - - A A C - A - A A A A A - D D D A - B A A - - Pine - - A B - - D - - - - - - A A - A A - D - - A - A A - A A - D - D A Chapter 10: Appendices Appendix 6: Chemical Resistance Chart Rape Seed - A A - - A - - - - A - - - A - Rosin - A A - A - - - - - - - - A A - - A - A A - A A - Sesame Seed - A A - A - - A - A - - A - - - A - - Silicone - A A - - - A - A - - - A A A - Soybean - A A - A - - B - A - - A - - - A A - - A - A A - A A - D - D A Sperm - A A - - - - A - - - - A - - - A - - - - - A A - A A - D - - A Tanning - A A - - - - - - - - - - A - - - - - A A - A A - D - - A Turbine - A A - A - - A - - - A - C - - - A A - A A - D - D A Oleic Acid - - - - - - - - A - A - - - - - - - - A A - A B - D - D A - - A - A A - A A - D - - - A - A - A A A A A - A - A A B A A B B - B B C C C - A C A C B A B D C - A A - D B D D D D A Oleum (25%) - Oleum B - A - B - - - - - - A - - - - - - A - A D D D D - D - C C - B D D - A - D - - - - B D - A D - - - D - - - A - A C D D D D A Oxalic Acid (Cold) C A B A C C B B C D D - A B A C C D - A A - A A - A B C B A C A Paraffin A A A A A - Pentane A C C - A - B A - B B - - A - B B A A - A B A A B - A - A A - A A - Perchloroethylene2 B A A - A - - C - B B A - - A D A - D - D A A A - A C D D D D A Petrolatum A - A - B - - B - C C - - A D A A B - Phenol (10%) B A A - A - B C - B D - A C A - Phenol (Carbolic Acid) B A A A B C A B D D D A A C A C D D - D B A A D A A D - D D D B - - A D A A D - - D - - - - - - A - A A - A A - B D D A - A A - A A - B A D A - A - - - B D - C D C C Phosphoric Acid (to 40% Solution) - B A A D A A D D D - - A B A A D D C B A A B C D A D - D B C A Phosphoric Acid (40%-100% Solution) - C B B D B A D D D - - A B A A D D D C A A B D D A D - D B C C Phosphoric Acid (Crude) - D C C D C A D D D D A - Phosphoric Anhydride (Dry or Moist) - A A - Phosphoric Anhydride (Molten) - A A - D - Photographic Developer - C A C C A A - Phthalic Anhydride B A B - B - A B - C C - Picric Acid B A A - C - A D D D D - A A A - Plating Solutions Antimony Plating 130°F - - A - - A A - - - - - A - A A - D - - A - - A - A A D A - - B Arsenic Plating 110°F - - A - - A A - - - - - A - A A - A - - A - - C - A A D A - - B Brass Plating Regular Brass Bath 100°F - - A - - A A - - - - - A - A A - A - - A - - C - A A D A - - B - - - - A - A A - A - - A - - D - A A D A - - B - - - - A - D D D C - A C D - A D - D B - A - D - - - D D A - - - D D - - - D - A - - A - D - - D - - A - - - A C - - A - - - - - A - - D D - D - A - - - D C - D - D A - - - B A - A A - A A - A - - A - - - - - A - - - - - A C - - A - A - - - - - A A D A - A A - - High Speed Brass Bath 110°F - - A - - A A - Bronze Plating Copper-Cadmium Bronze Bath R.T. - - A - - A A - - - - - A - A A - A - - A - - C - A A D A - - B Copper-Tin Bronze Bath 160°F - - A - - A A - - - - - D - A A - A - - A - - D - A A D B - - C Copper-Zinc Bronze Bath 100°F - - A - - A A - - - - - A - A A - A - - A - - C - A A - A - - B - - A - - A A - - - - - A - A A - A - - A - - C - A A - A - - B - - A - - D A - - - - - A - A A - D - - A - - D - A B - C - - B - D Cadmium Plating Cyanide Bath 90°F Fluoborate Bath 100°F Chromium Plating Chromic-Sulfuric Bath 130°F - - C - - A A - - - - - A - A D - D - - A - - A - C D - D - Fluosilicate Bath 95°F - - C - - C A - - - - - A - A D - D - - A - - B - C D - D - D D Fluoride Bath 130°F - - D - - C A - - - - - A - A D - D - - A - - B - C D - D - - D Black Chrome Bath 115°F - - C - - A A - - - - - A - A D - D - - A - - A - C D - D - - D Barrel Chrome Bath 95°F - - D - - C A - - - - - A - A D - D - - A - - A - C D - D - - D Copper Plating (Cyanide) Copper Strike Bath 120°F - - Rochelle Salt Bath 150°F - - A - - - A A A - A A - - - - - - - - - D - A A - A - - - A A - - - - - - - A - - C - B - - A - - D - A A - B - - - - C (6/09) 10-25 METTLER TOLEDO Weigh Module Systems Handbook High Speed Bath 180°F - - A - - A A - Copper Plating (Acid) Copper Sulfate Bath R.T. - - D - - A A - - - - - A - A A - D - - A - - D - A A - A - - D - - D - - D A - - - - - A - A A - D - - A - - D - A B - C - - D - - A - - A A - - - - - A - A A - A - - A - - B - A A - A - - B - - - - D - - - - A - A A - A - - A - - D - A D - D - - B Copper Fluoborate Bath 120°F Copper (Misc.) Copper Pyrophosphate 140°F Copper (Electroless) 140°F Gold Plating Cyanide 150°F - - - - - - - D - A A - A - - A - - D - A A - B - - C - - A - - A A C - - - - D - A A - A - - A - - B - A A - A - - D Neutral 75°F - - C - - A A - - - - - A - A A - A - - A - - A - A A - A - - A Acid 75°F - - C - - A A - - - - - A - A A - A - - A - - A - A A - A - - A Indium Sulfamate Plating R.T. - - C - - A A - - - - - A - A A - D - - A - - A - A A - A - - A Iron Plating Ferrous Chloride Bath 190°F - - D - - A D - - - - - D - A A - D - - C - - A - A B - D - - D - - C - - A A - - - - - D - A A - D - - A - - A - A A - B - - D - D Ferrous Sulfate Bath 150°F Ferrous Am. Sulfate Bath 150°F - - C - - A A - - - - - D - A A - D - - A - - A - A A - B - Sulfate-Chloride Bath 160°F - - D - - A D - - - - - D - A A - D - - A - - A - A B - C - - D Fluoborate Bath 145°F - - D - - D B - - - - - D - A A - D - - A - - D - A B - C - - D Sulfamate 140°F - - D - - A B - - - - - A - A A - D - - A - - A - A A - A - - A - - C - - D A - - - - - A - A A - D - - A - - D - A B - C - - A Lead Fluoborate Plating Nickel Plating Watts Type 115-160°F High Chloride 130-160°F - - C - - A A - - - - - D - A A - A - - A - - A - A A - A - - D - - C - - A A - - - - - D - A A - D - - A - - A - A A - B - - D Fluoborate 100-170°F - - C - - D A D - - - - D - A A - D - - A - - D - A B - C - - D Sulfamate 100-140°F - - C - - A A - - - - - A - A A - A - - A - - A - A A - A - - A Electroless 200°F - - - - - - - - D - A D - D - - D - - A - A D - D - - B Rhodium Plating 120°F - - D - - D D - - - - - A - A A D D - - A - - A - A A - B - - A Silver Plating 80-120°F - - A - - A A - - - - - A - A A - A - - A - - B - A A - A - - A Tin-Fluoborate Plating 100°F - - C - - D A - - - - - A - A A - D - - A - - D - A B - C - - A Tin-Lead Plating 100°F - - C - - D A - - - - - A - A A - D - - A - - D - A B - C - - A Zinc Plating Acid Chloride 140°F - - D - - A D - - - - - A - A A - D - - A - - A - A A - A - - A - - C - - A A - - - - - D - A A - D - - A - - A - A A - B - - D Acid Sulfate Bath 150°F - - - - Acid Fluoborate Bath R.T. - - - C - D - - - - - - A - A A - D - - A - - D - A B - C - - A Alkaline Cyanide Bath R.T. - - - A - A A - - - - - A - A A - A - - A - - D - A A - A - - A Potash - A - A C - A C - B - - A B - A B A - B A - A A A A A - B - B A Potassium Bicarbonate - A - B C A B B - D - A A - A A C A C B A A A A - A A - A - B A Potassium Bromide A A - B C A B C - D D A A - A A A C - B A C A A - A A - A A B A Potassium Carbonate B A - A C A A C - B B A A B A A B A - B A A A A A A B - A - B A Potassium Chlorate B A A A B A B B - B B A A B A A B D - B A A A A - A A - A - B A Potassium Chloride C A A B B A A C C B B A A A A A A B C B A A A A - A A - A A A A Potassium Chromate - Potassium Cyanide Solutions B A B A D A A D - B B A A - A A C A - B A A C A - B A - A A A A - B B A - B A - A - - A - - A C - - B - A A D - A A - A - B C Potassium Dichromate B A A A A A B C - B C A A - A A C D - B A A A A - B A - A A A A Potassium Ferrocyanide B A - A C - B A - Potassium Hydroxide (50%) A B B B D C A D D C A D A B A A D A C B A A - D A D B C A A C A Potassium Nitrate B A B A B A B B - Potassium Permanganate B A B B B B B B - B B A A - A A C D C B B A A A - B A - A - B B 10-26 (6/09) - C - A - A - - A - A - - - - - - D - - - A A - B A A C A A B C - B A C A A - B A - A A A A Chapter 10: Appendices Appendix 6: Chemical Resistance Chart Potassium Sulfate B A B B A A A B B B B A A A A A B C - B A A A A - A A C A A C A Potassium Sulfide Propane (Liquified)1 A A - A B - B B - B B - A - A 2 - - - - - - - - - - A - - - - - A A - A A - - A A - B - D - A D A A - Propylene Glycol B B - A A - - B - B B - Pyridine - C - B B - - Pyrogallic Acid B A A A B - A B - B B - A - A - D A - - Rosins A A A A A - B A C - C - - A - A A - Rum - A - A - - Rust Inhibitors - A - A - - - A - A - - Salad Dressing - A - A B - - B - D - - A - Sea Water A A C A C A - C - Shellac (Bleached) A A - A A - - A B B A - - - A - A A - - A - - A - - A - - - - A Shellac (Orange) A A - A A - - A C C A - - - A - A A - - A - - A - - A - - - - A Silicone - B - A B - - A - - - - - - - A A A - - A - A A - A A B A A A A Silver Bromide - C C B D - - - - - - - - A C - - Silver Nitrate B A B A D A A D - D D A A B A A C A - B A - A A - A C - A C A A Soap Solutions1 A A A A C A B B - B A - B B A A A A - B A A A A A A A B B - C A - - - - - - - - - A - - - A - B B B B - - B A D - D A D D - - - - - - - - - A A A - - A - - A A - A A - C - - A - C B A A A - D D - D B D A - A - B A - - A - - D - A A - A A D B D D A - - A A A - - - A A - A A - - - - - - A - A - A A - A A - A - - A - A - - A - A - A A - A A - C - - A - A - A A - A A - - A - - - D - A - A A A A - B A - A A A A A B B A A A - - - - - - - - - - - - - - - - - - - - - - - - A - - A A B A - - - B A A B B A - B - C C A A - A A B A - B A - A A - D D - C - A A - - - A - Sodium Acetate - C - - - Soda Ash (See Sodium Carbonate) - A C B B B - - - - - Sodium Aluminate B - Sodium Bicarbonate B A A A A A - B A C C A A B A A B A B B A A A A A A A C A A A A - A A A - A A - A A B A Sodium Bisulfate A A - A D B B C C D D A A B A A B C C B A A A A - B A C A - A A Sodium Bisulfite - A - A A A B C - D - A A B A A B D B B A A A A - A A C A - A A Sodium Borate B A - A C - A A - C C - C - A - Sodium Carbonate B A B B C A A B B B B A A B A A A A C B A A B A - A A - A A A A Sodium Chlorate B A - A B A B B - Sodium Chloride B A C B C A A B C B C A A B A A A A B B A A A A A A A C A A B A - A - A - - - - - A - B A - - - - C A A B A A D A - B A A A A - A D - A - A A Sodium Chromate A A A - D - B B - B B - Sodium Cyanide B A - A D A - D D B B A A - A A D C - B A A A A - A A D A A A A Sodium Fluoride B C - C C A A C - D D - D D A - - A - C - - - Sodium Hydrosulfite - - A - - - A - A - Sodium Hydroxide (20%) - A A A D A A C D A - A A B A A D C C B A A C D A A A D B A A A Sodium Hydroxide (50% Solution) - A B - D A A C D B - D A B A A D C C C A B C D A D D D C - A A - - - A - A C - - - - - A A D A - - C A A - - A A A B - B A - A - - - - - C - B D - D - D A - A - A - Sodium Hydroxide (80% Solution) - A D - D A B C D C - - A B A A D C C C A B C D A B D D C - B A Sodium Hypochlorite3 (to 20%) - C C C C A A D D D - - A B A A D A - B C C D A B A C D D B C B Sodium Hypochlorite D - D - D A A D - D D A A - A A - A - - C C - D - B B C A - Sodium Hyposulfate - A A - D - - D - - - - A - - Sodium Metaphosphate2 A - A - A - - C C B B - - - A - B A - - D - A A - A A - B A A A Sodium Metasilicate A - A - B - - B - C C - - - A - D - - Sodium Nitrate B A A A A A B B C A B A A B A A B A - B A - A A A D C D B A C A - - - C C B B - - - - - - - - A - - - - - A - C - C C - A A D A - - A B - C - B - Sodium Peroxide B A A - C - B C C D C - A - A - D D - - - - A A - A C D B A C A Sodium Polyphosphate (Mono, Di, Tribasic) - A A - D A A C - - - - A A - A A - D A A A Sodium Silicate B A B A C A B C C - B - A B A A C A - - - - - A A B A - - Sodium Perborate - - - - A A B - - - A - A A - A B D B A C A - A - A A - A A - A A A A Sodium Sulfate B A A C B A B B B A B - A - A A B A - B A A A A - A A - A A C A Sodium Sulfide B A B - D A B D D A B - A B A A B A - B A A A A - A C - A A C A Sodium Sulfite - C C - C A A C - A - - A A A - - D - A - - A A - A A - A - A A (6/09) 10-27 METTLER TOLEDO Weigh Module Systems Handbook Sodium Tetraborate - Sodium Thiosulfate (“Hypo”) A A A - B A - D D C B - A - A A C A - - A - - - - - A - - A B - - - - - A A - A A - - - - A - A A A A - A B - A A C A - A A - - A - - - - - - A A - - - - A A - A A - A - - A - D - - - - - A A A - - - - A A - A A - A - D A Stannic Chloride D D D - D A B D - D D A A - A A C A - B A - - A - A A D A A A A Stannic Fluoborate - Stannous Chloride D D C - D A A D - D D - A A A - Starch B A A - A - Stearic Acid2 B A A A B A A C C C C A A B A A A A - B D - A A A A B D B B C A Stoddard Solvent A A A A A A A A A B B A A D A D A A B D D A A A - A B D D D D A Styrene A A A - A - - A - - - A A A - Sugar (Liquids) A A A A A - A A - B B - - - A A A A B - A - A A A A A - B - A A Sulfate Liquors - C C - B - A C - - - Sulfur Chloride - D D D D - - - - - A A - A - - - Soy Sauce - - - Sorghum - A - - - - - D - - - - - A C - - - - - - A - A A - A - - D - A - - - - B - C C - A - A A A A - B - - A - - - D - - - - - - A - A - B C D D - A A - A A - A A - A - - A - A A - B D D D D D A - - - - C D - - - A C A A D A - A D - A C - A D - D D D C - A - A A - - - - C - - A Sulfur Dioxide2 - A A C A A B B - Sulfur Dioxide (Dry) A A A - A - A A C A B - D - A - Sulfur Trioxide (Dry) A A C - A - Sulfuric Acid (to 10%) - D C C C A A D D D - A A B A A D D B B A A A A - A C - D D C A - - B D B A D B D D C D A A A - D D C B A D A - A - D - - B - B B - A B A D D D - - - - A A - D - - D - D D - B A - A D - D B C A Sulfuric Acid (10%-75%)2 - D D D D C B D D D - A A B A B D D B C A B A D C A D - D D D B Sulfuric Acid (75%-100%) - Sulfurous Acid C C B C C A B D - D D - A B A A D D - B A - B A - A C D B B C A Sulfuryl Chloride - - - - - A - A - Syrup - A A A A - - D - - - - A - - A A A B - A - A A A A A - B - A A Tallow - A A - A - - - - - - A A A - C - Tannic Acid B A A A C A B B - C C A A B A A B D - B A - A A A A D C A A A A - D - - - - D B - D - - - - - - - - - - A - - - - - A A - A A - - A - - A A - - - - - D - A D A A - - A - A A - A C - - - A - A A - A D - - - - A - A - A A - C A A A - - - B A B B C A B A C D D A A B A A B A - B A - A A - A D C A - A A - A A - D - - A B A - B - - - D Tartaric Acid Tetrahydrofuran - - - - B C - A - A D - D - Tanning Liquors Tetrachlorethane - - A B - A A - D - - A - D D A - D - D A D D - A D A A - D C A A A - D D - D B D A Toluene, Toluol3 A A A - A A A A A A A A D D A D A A D D D A A A A C D D D D D A Tomato Juice A A A - A - Trichlorethane - C A - C A A C - C - Trichlorethylene2 B A A - B A A B A C B A D - A D A C D D D C A A C A D D D D D A Trichloropropane - - A - - - A - - - - Tricresylphosphate - - A - - B A A - - - - D - A A C - - Triethylamine - - - - - - A - - Turpentine3 B A A - C - A B C B B A A B A D A A - D B A A A - A D - D D D A Urine - A A - B - - C - B - - A - - A A A - B A - A A - A A - D A - A Vegetable Juice - A A - A - - C - D - - - A A A - Vinegar A A A A D A A B B C D A A - A A B A B B A A A A A A C - B A C A Varnish (Use Viton for Aromatic) A A A A A - - A B - C - Water, Acid, Mine - A A - C - - C D C - - A B - A D A B - A B A A - A A - B - B A Water, Distilled, Lab Grade 7 - A A - B - - A - D - - A B A A A A A - A A A A A A A - B A A A Water, Fresh A A A - A - - A C B D - A B A A A A A A A A A A A A A - B A A A Water, Salt - A A - B - - B C D - Weed Killers - A A - C - - C - - - - - - - - A A - - - - A A - A B - C - - A Whey - A A - B - - - - - - - - - A - - - - A A - A A - - A 10-28 (6/09) - - - - C - C C - - A - - - - - - A A B A B - A A A A - A A - A - - - A D A - - - - - - - - D A - D - B D - - A D A A - - A B - A A A - - - A - A A - A D D D D D A - - A A - A A - A - - - - A A - B D - D A - A - - - A A - A A D B - - - - A - A - A A - A A B D - D A - A - A A A A B C D - D A - A A A A A A A - B A A A - - Chapter 10: Appendices Appendix 6: Chemical Resistance Chart Whiskey and Wines A A A A D - White Liquor (Pulp Mill) - A A - - - A D - C - - A - A A D A - - A - A A - A A - A - - A White Water (Paper Mill) - A A - - - - - A - A A - A - - A Xylene2 A A A - A - A A A A B A D - A D A A D D D A A A A A D D D D D A Zinc Chloride D D B B D A B D D D D A A - A A C A - B A A A A - A A - A A A A - A - D - - B B D D - A - A A A A - B A - A A - A A B A A A A - A - - - - D - D - - - - - - - - B A - - A C - - - - A A A - - A - Zinc Hydrosulfite - Zinc Sulfate B A A A D A B B C C D A C B A A C A - B A A A A - A A - A A C A - A - A A - A (6/09) 10-29 Chapter 11: Glossary 11 Glossary Accuracy — A scale’s ability to provide a weight reading equal to the actual weight placed on the scale. A scale’s accuracy is usually measured against a recognized standard, such as NIST Certified Test Weights. Calibration — The process of equating the graduations on a scale to the actual weight values that they represent. It involves adjusting the scale’s indicator so that it reads zero when no weight is on the scale and reads the full weight capacity when that weight is placed on the scale. Clevis — A U-shaped connector with holes drilled through the arms. A pin is fitted through the holes to attach the clevis to another component. Compression — The act of squeezing or pressing down on a material. A compression weigh module is designed so that its top plate and base plate will be squeezed toward each other when weight is applied to it. Creep — The gradual deflection of a material when a steady force is applied to it. Creep error is the change in a weight reading when a weight is left on a scale for a length of time. Deflection — The bending or twisting of a material when force is applied to it. Distributed Loading — A type of loading in which an object is placed on a scale so that its full weight is spread over all of the scale’s load cells. Dynamic Loading — A situation in which the weight applied to a scale is in motion. One example is a conveyor system used to weigh objects as they move along the conveyor. Electromagnetic Interference (EMI) — The disturbance of an electrical device’s operation that is caused when the device picks up electromagnetic radiation from an outside source. Full End Loading — A type of loading in which an object is placed on a scale so that its full weight is temporarily concentrated over the load cells at one end of the scale. Full end loading is common with conveyor systems, where the object to be weighed moves across the scale from the front end to the back end. Hermetic Seal — A metal cover welded or soldered in place to protect the strain gauges in a load cell. This type of airtight seal is commonly used for harsh environments. Hysteresis — A scale's ability to repeat measurements of weights as they are added and removed. When there is a hysteresis error, a scale will give different weight readings for the same applied load, depending on whether weight is being added to or removed from the scale. A scale with a hysteresis error might display low readings as weight is being added and high readings as it is being removed. Increment — The smallest change in weight that a digital scale can detect (also called a division). Indicator — In a digital scale, the indicator is the part of the scale that receives analog signals transmitted by the load cells and displays them as weight readings. Linearity — A scale’s ability to maintain a consistent counts-to-load ratio from zero to full load capacity. When a scale has a linearity error, it reads correctly at zero and at full load capacity but incorrectly in between those two points. (6/09) 11-1 METTLER TOLEDO Weigh Module Systems Handbook Live Load — The downward force exerted by an object or material being weighed on a scale. Live-to-Dead Connection — A mechanical connection between a scale and an object that you do not want to weigh. A common example is piping connected to a tank scale. If the connection is not flexible enough to allow the scale to move freely, the piping can push or pull on the scale and produce inaccurate weight readings. Load — A mechanical force applied to a scale or other object. Load Cell — The component of a scale that detects the mechanical force exerted by a weight and converts it to an electrical signal. Potted Seal — A layer of organic sealing compound used to protect the strain gauges in a load cell. It is not as effective as a hermetic seal, which is often preferred for harsh environments. Radio Frequency Interference — The disturbance of an electrical device’s operation that is caused when the device picks up radio frequency emissions from an outside source. Rated Capacity — The heaviest load that a scale is designed to withstand under normal conditions. Repeatability — A scale’s ability to display a consistent weight reading each time the same weight is placed on the scale. It is especially important for batching and filling applications, which require that the same amount of a material be used for each batch. Resolution — A scale’s ability to detect changes in weight. For a digital scale, resolution is measured in increment size, which is the smallest weight change that the scale can detect. Safe Overload — The maximum weight that can be applied to a load cell without causing it to fail (typically 150% of rated capacity). Seismic Loading — Forces exerted on a scale or its support structure by earthquakes or other vibrations of the earth. Shear Force — A horizontal force exerted on a scale. Shock Loading — Forces exerted on a scale or its support structure when an object strikes it. Shock forces can be created when an object is dropped on a scale or when a vehicle runs into a scale Spring Rate — A measure of a material’s flexibility. The spring rate constant for a load cell is its rated capacity divided by load cell deflection at rated capacity. Static Loading — A situation in which the load applied to a scale will be weighed while not in motion. Strain Gauge — A wire or series of wires that measures the strain a force exerts on an object. When a strain gauge is attached to a load cell, it measures how much a weight causes the load cell to deflect. The strain gauge stretches as the load cell deflects, increasing the wire’s resistance to an electric current being transmitted through it. Tension — The act of stretching a material. A tension weigh module is designed to stretch as weight is applied to it. Transducer — A device used to convert energy from one form to another. A load cell is a transducer that converts a mechanical force (weight) to an electrical force (current) which can be used to provide a digital weight reading. Type Evaluation — The procedure used to test a particular type (or model) of weighing device. In the United States, the National Type Evaluation Program (NTEP) tests a sample of each model of scale. If the tests show that a scale complies with the 11-2 (6/09) Chapter 11: Glossary requirements of NIST Handbook 44, NTEP issues a Certificate of Conformance for that model of scale. Ultimate Overload — The weight at which a load cell will structurally fail (typically 300% of rated capacity). Weigh Module — A device that can be attached to a tank or other structure to convert the structure into a scale. Weigh modules are attached to a structure so that they support its full weight. A weigh module system should be designed to provide accurate weight readings and support the structure safely. Weighbridge — A scale platform. It is designed to transfer the load placed on it to the scale’s load cells. Wind Loading — Forces exerted on a scale or its support structure by wind currents. (6/09) 11-3 Chapter 12: Index 12 Index A Acceptance Tolerance, 3-12, 3-13, 3-14, 3-15, 3-16 Accuracy, 3-3, 3-4, 3-8, 3-9, 3-10, 3-13, 3-15, 4-9, 5-6, 5-9, 5-15, 5-16, 5-17 Anti-Lift Protection, 6-1, 6-2, 6-11 B Bolt Thread Dimensions, 10-8, 10-9 C Cables, 5-21, 5-23, 5-24, 6-17, 7-5 Calibration, 3-2, 3-3, 3-10, 5-5, 5-15, 5-16, 5-17, 8-1, 82, 8-3 Calibration Errors, 3-4, 3-5 Check Rods, 5-13, 7-5, 7-6, 7-7 Chemical Resistance Chart, 10-18 Compression, 1-1, 2-1, 2-3, 3-1, 5-8, 6-1 Conversions, 2-3 Conveyors, 2-2 Creep, 3-7, 3-17 D Deflection, 3-1, 5-4, 5-6, 5-7, 5-9, 5-10, 5-12, 5-15, 516, 5-17, 5-18 Design Qualification Form, 10-2 Downward Forces, 4-2, 4-4 Dynamic Loading, 3-2, 5-3, 6-3, 6-4 E Electromagnetic Interference, 5-23 F Foundations, 6-14, 6-15, 6-16 H Hazardous Areas, 10-16 Hysteresis Errors, 3-4, 3-7, 3-8, 3-9, 5-3 I Indicators, 3-11, 5-21, 5-23, 9-1, 9-2 J Junction Boxes, 5-21, 6-17, 7-5 L Level Detection, 6-12, 6-13 Lightning, 4-11 Linearity Errors, 3-4, 3-6, 3-8, 3-9, 5-3, 5-4, 5-7 Loading, 3-2, 5-1, 5-2, 5-3, 5-4, 6-3 M Moisture, 4-11 N NEMA/IP Enclosures, 10-10 NIST, 3-3, 3-12, 3-14, 3-15, 3-16, 3-17 NTEP, 3-12, 3-15 O OIML, 3-12, 3-15, 3-16, 3-17 P Piping, 3-3, 3-8, 5-7, 5-15, 5-16, 5-17, 5-18, 5-19, 5-20 Pressure, 5-4 R Radio Frequency Interference, 5-23 Reaction Forces, 4-2, 4-4, 4-7, 10-3, 10-4, 10-5, 10-6, 10-7 Repeatability, 3-3, 3-4, 3-7, 3-9, 5-6, 5-7 Resolution, 3-3, 3-11 S Safety Rods, 5-14, 7-4 Seismic Forces, 3-2, 3-3, 4-1, 4-5, 4-7, 5-13, 10-3, 10-4, 10-5, 10-6, 10-7 Shear Forces, 2-2, 3-2, 4-2, 4-4, 4-5, 4-6, 4-7, 6-3, 10-3 Shock Loading, 4-1, 4-7, 4-8 Side Loading, 5-2, 5-3 Sizing Weigh Modules, 6-10, 7-2 Stabilizers, 6-4 Static Loading, 3-2, 5-3, 6-3, 6-4 (6/09) 12-1 METTLER TOLEDO Weigh Module Systems Handbook Statics, 4-2, 4-4, 4-7, 10-3, 10-4, 10-6 Structural Support, 5-4, 5-6, 5-7, 5-8, 5-9, 5-10, 5-11, 512, 5-15, 5-19 Surge Protection, 4-11 Suspension, 6-1, 6-2, 6-3, 6-4 T Temperature, 3-3, 3-8, 3-10, 3-13, 4-10 Tension, 1-1, 1-2, 2-1, 2-2, 2-3, 3-1, 5-8, 7-1 Test Weights, 5-5, 8-1 12-2 (6/09) U Uplift Forces, 4-2, 4-4 V Vibration, 3-3, 3-8, 3-10, 4-9, 9-2 W Wind, 3-2, 3-3, 3-10, 4-1, 4-2, 4-3, 4-9, 5-13, 10-3, 104, 10-5, 10-6, 10-7 Wiring, 5-21, 5-23, 5-24, 6-17, 7-5 METTLER TOLEDO Publication Suggestion Report If you have suggestions concerning this publication, please complete this form and fax it to (614) 841-7295 Publication Name: METTLER TOLEDO Weigh Module Systems Handbook Publication Part Number: B15598500A PROBLEM(S) TYPE: DESCRIBE PROBLEM(S): Technical Accuracy Text Completeness Procedure/step Example Explanation What information is missing? Publication Date: 6/09 INTERNAL USE ONLY Illustration Illustration Definition Guideline Feature Other (please explain below) Info. in manual Info. not in manual Clarity What is not clear? Sequence What is not in the right order? Other Comments Use another sheet for additional comments. Your Name: Location: Phone Number: Fax this completed form to METTLER TOLEDO at (614) 841-7295 Mettler-Toledo, Inc. Printed in USA 14981600A METTLER TOLEDO 1900 Polaris Parkway Columbus, Ohio 43240 USA P/N: B15598500A (6/09).00 METTLER TOLEDO®, FLEXMOUNT®, CENTERLIGN™, ULTRAMOUNT®, and RINGMOUNT® are trademarks of Mettler-Toledo, Inc. © 2009 Mettler-Toledo, Inc. Printed in USA B15598500A