1
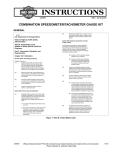
-J05180
REV. 2013-02-05
COMBINATION SPEEDOMETER/TACHOMETER GAUGE KIT
GENERAL
(b)
is03400
U.S. Department of Transportation
National Highway Traffic Safety
Administration
Title 49, United States Code,
Subtitle VI. Motor Vehicle and Driver
Programs,
Part C. Information, Standards, and
Requirements,
Section 32705. Disclosure requirements on transfer
of motor vehicles
(a) (1) Disclosure requirements. Under regulations
prescribed by the Secretary of Transportation that
include the way in which information is disclosed and
retained under this section, a person.transferring
ownership of a motor vehicle shall give the transferee
the following written disclosure:
(A) Disclosure of the cumulative mileage
Chapter 327. Odometers
registered on the odometer.
Section 32703. Preventing tampering
(B) Disclosure that the actual mileage is
unknown if the transferor knows that
the odometer reading is different from
the number of miles the vehicle has
actually traveled.
A person may not —
(1)
advertise for sale, sell, use, install, or have
installed, a device that makes an odometer
of a motor vehicle register a mileage different
from the mileage the vehicle was driven, as
registered by the odometer within the designed
tolerance of the manufacturer of the odometer;
(2)
(3)
(4)
disconnect, reset, alter, or have disconnected,
reset, or altered, an odometer of a motor vehicle
intending to change the mileage registered by
the odometer;
with intent to defraud, operate a motor vehicle
on a street, road, or highway if the person knows
that the odometer of the vehicle is disconnected
or not operating; or
(2)
A person transferring ownership of a motor
vehicle may not violate a regulation prescribed
under this section or give a false statement to
the transferee in making the disclosure required
by such a regulation.
(3)
A person acquiring a motor vehicle for resale
may not accept a written disclosure under this
section unless it is complete.
(4)
(A) This subsection shall apply to all transfers
of motor vehicles (unless otherwise exempted
by the Secretary by regulation), except in the
case of transfers of new motor vehicles from a
vehicle manufacturer jointly to a dealer and a
person engaged in the business of renting or
leasing vehicles for a period of 30 days or less.
conspire to violate this section or section
32704 \ or 32705 of this title.
Section 32704. Service, repair, and replacement
(a)
(B) For purposes of subparagraph (A), the term
“new motor vehicle” means any motor vehicle
driven with no more than the limited use
necessary in moving, transporting, or road
testing such a vehicle prior to delivery from
the vehicle manufacturer to a dealer, but in
no event shall the odometer reading of such
vehicle exceed 300 miles.
Adjusting mileage. A person may service, repair,
or replace an odometer of a motor vehicle if the
mileage registered by the odometer remains the
same as before the service, repair, or
replacement. If the mileage cannot remain the
same —
(1) the person shall adjust the odometer to read
zero; and
(2) the owner of the vehicle or agent of the owner
shall attach a written notice to the left door
frame of the vehicle specifying the mileage
before the service, repair, or replacement
and the date of the service, repair, or
replacement.
Removing or altering notice. A person may not
with intent to defraud, remove or alter a notice
attached to a motor vehicle as required by this
section.
(5)
The Secretary may exempt such classes or
categories of vehicles as the Secretary deems
appropriate from these requirements. Until such
time as the Secretary amends or modifies the
regulations set forth in 49 CFR 580.6, such
regulations shall have full force and effect.
Figure 1. Title 49, United States Code
-J05180
Many Harley-Davidson® Parts & Accessories are made of plastics and metals which can be recycled.
Please dispose of materials responsibly.
1 of 5
GENERAL (CONTINUED)
4.
Unplug the 12-terminal connector [39B] from the back of
the speedometer. press the external latches, and use a
rocking motion to separate the pin and socket halves.
5.
Remove the back clamp. Gently pry the three latches
upward to release the back clamp from the back of the
speedometer.
6.
Lift the console and remove the old speedometer from the
console. Discard the old speedometer, but retain the
rubber gasket and back clamp for use with the new gauge.
Kit Numbers
Table 1. Kit Numbers
Kit
Number
Type
Description
74777-11A Gauge, Speedo/Tach, KMH
Black
74776-11A Gauge, Speedo/Tach, MPH
Black
74775-11A Gauge, Speedo/Tach, KMH
Spun aluminum
74774-11A Gauge, Speedo/Tach, MPH
Spun aluminum
70900171A Gauge, Speedo/Tach,
MPH/KMH
Spun aluminum
NOTE
Set the console securely on the protected top of the fuel tank,
and take care that it does not fall off during the following operations.
7.
Set the console securely on top of the fuel tank.
INSTALLATION AND FINAL CHECK
Service Manual Required
NOTE
Apply window cleaning fluid or mild soapy water to the
speedometer gasket as needed to aid installation.
The rider's safety depends upon the correct installation
of this kit. Use the appropriate service manual procedures.
If the procedure is not within your capabilities or you do
not have the correct tools, have a Harley-Davidson dealer
perform the installation. Improper installation of this kit
could result in death or serious injury. (00333a)
1.
Turn the console over, facing upward.
2.
Place the speedometer gasket into position around the
console speedometer bore.
3.
Fix the new gauge into the bore so that it fits snugly
against the rubber gasket. Rotate the gauge into approximate visual alignment. The back clamp will complete the
alignment.
4.
Turn the console over, face down.
5.
Install the back clamp. Place the back clamp over the back
of the gauge, aligning the two slots with the console
bosses. Press the latches down until they lock into position.
6.
Carefully insert the connector into the back of the
speedometer.
NOTE
This instruction sheet refers to service manual information. A
service manual for this year/model motorcycle is required for
this installation and is available from a Harley-Davidson dealer.
REMOVING THE OLD SPEEDOMETER
1.
Apply power to the motorcycle and record the odometer
reading.
To prevent accidental vehicle start-up, which could cause
death or serious injury, disconnect battery cables (negative
(-) cable first) before proceeding. (00307a)
Disconnect negative (-) battery cable first. If positive (+)
cable should contact ground with negative (-) cable connected, the resulting sparks can cause a battery explosion,
which could result in death or serious injury. (00049a)
2.
Refer to the service manual and follow the instructions
given to remove the seat and disconnect the battery
cables, negative (-) cable first. Retain all seat mounting
hardware.
NOTE
Cover the fuel tank with an H-D Service Cover or clean shop
towel to prevent scratching the finish.
3.
Remove the instrument console acorn nut. Place an H-D
Service Cover or clean shop towels on the fuel tank. Lift
the console from the fuel tank, turn it upside down and lay
it on the covering.
-J05180
2 of 5
is06600
Be sure headlamp, tail and stop lamp and turn signals are
operating properly before riding. Poor visibility of rider to
other motorists can result in death or serious injury.
(00478b)
1
10. Turn the ignition/key switch to IGN, but do not start the
motorcycle. Test for proper turn signal, brake light and tail
light operation.
11. Check the speedometer and tachometer for proper operation.
NOTES
2
•
Both the ECM and speedometer retain the odometer value.
If the speedometer is replaced, it will display the odometer
value stored in the ECM. The replacement speedometer
will become locked to the ECM after 31.1 miles (50km)
have been accumulated. The trip B odometer will display
the countdown mileage. Once the countdown reaches
zero, the speedometer is locked to the ECM. If installed
on another vehicle the odometer will display "VIN ERR".
If the speedometer is removed from the vehicle before the
countdown reaches zero, it has not been locked to the
ECM. This mileage countdown allows for a road test to
verify that speedometer replacement was the proper repair.
•
During the 31.1 miles (50 km) countdown period (before
the speedometer is locked to the ECM), the security light
flashes for up to 15 seconds when battery power is
restored to the electrical system, while the new gauge
synchronizes to the ECM.
•
Gear Indication display is a calculated gear position based
on wheel and engine speed. The gear position displayed
may be momentarily inaccurate depending on rider clutch
use characteristics and clutch wear.This momentary false
reading, although unlikely, can occur if the clutch is allowed
to slip either due to excessive wear, poorly adjusted clutch
or if the operator rides the clutch.
•
If gauge is installed on a motorcycle with ABS, be sure
the ABS warning lamp is working properly. See the owner's
manual for ABS warning lamp operation.
1. Console
2. Connector location
Figure 2. Speedometer/Tachometer Harness Routing
7.
Turn the console over, and center it on the fuel tank. Install
the acorn nut and tighten to 80-100 in-lb (9.0-11.3 Nm).
8.
Apply a light coat of Harley-Davidson electrical contact
lubricant (part number 99861-02), petroleum jelly or corrosion retardant material to the battery terminals. Refer to
the service manual and follow the instructions given to reattach the battery cables (positive cable first).
Backlight Color Modification
The backlight color can be modified for the entire gauge or the
dial, speedometer pointer, tachometer pointer, and display
separately (see Table 2). The gear indication and fuel level
display can also be disabled.
1.
Turn ignition switch to the accessory (ACC) position.
Connect positive (+) battery cable first. If positive (+) cable
should contact ground with negative (-) cable connected,
the resulting sparks can cause a battery explosion, which
could result in death or serious injury. (00068a)
After installing seat, pull upward on seat to be sure it is
locked in position. While riding, a loose seat can shift
causing loss of control, which could result in death or
serious injury. (00070b)
9.
Refer to the service manual, and follow instructions to
install the seat.
-J05180
3 of 5
is07382
Table 2. Color Guide
Number
Range Color
000-015
Red
016-030
Amber (Orange)
031-060
Yellow
061-100
Yellow/Green
101-180
Green
181-250
Green/Blue
251-350
Blue
351-380
Blue/Violet
381-440
Violet
441-490
Pink
491-525
Red
526-600
White/Light Colors
Note: Color descriptions and color ranges are approximate.
Figure 4. Select Display Color
9.
See Figure 4. To change color press and hold both turn
signals where the current color number will be displayed.
10. For coarse adjustment, press left turn signal to count down
and right turn signal to count up incrementally.
is07365
11. For fine adjustment, press and hold left turn signal to count
down and right turn signal to count up.
12. Once desired color is selected press and hold both turn
signals until "SAVED" is displayed.
13. To change the color for the other four components (dial,
speedometer pointer, tachometer pointer, and display),
Toggle over to the color menu by pressing the right turn
signal and follow steps 7 through 10.
14. Once desired setup and colors are finalized, turn ignition
switch to the ignition (IGN) position and verify settings
(gear indication will appear until vehicle is running).
Battery Reconnection and Initialization
Figure 3. Fuel Level Display Setup
2.
3.
See Figure 3. Press and hold both turn signals until fuel
level bars are displayed with "ON/OFF" flashing. "SETUP"
will also appear. If "ON" is flashing, the fuel level display
is enabled.
To disable fuel level press and hold both turn signals until
"OFF" is flashing.
4.
Toggle over to gear indication by pressing the right turn
signal where the six gears will be displayed with "ON/OFF"
flashing. If "ON" is flashing the gear indication display is
enabled.
5.
To disable gear indication press and hold both turn signals
until "OFF" is flashing.
6.
Toggle over to the brightness menu by pressing the right
turn signal where all of the bars and "BRIGHT" will be
displayed.
7.
To dim the backlight press and hold both turn signals until
"dim" and half of the bars are displayed.
8.
Toggle over to the color menu by pressing the right turn
signal where "ALL" and "COLOR" will be displayed.
-J05180
After the battery is reconnected or a new gauge is installed,
the gauge requires about a half tank of fuel to properly initialize
fuel range (miles to empty) functionality.
During consumption of the first full tank of fuel, the gauge
software will begin the process of learning your riding patterns,
eventually tailoring the fuel range calculations to your unique
riding characteristics.
The fuel level display and tank mounted fuel gauge may not
match at all times when starting with a full tank of fuel. The
tank fuel gauge utilizes a continuous sweep needle to indicate
fuel level, while the speedo/tach fuel level utilizes a segmented
display. Each segment represents 1/8 of a tank. For example;
if a given segment just came on or is about to go off, it would
show no change, while the needle on the tank mounted gauge
would likely show a change in position.
Fuel Fill-up and Top-off
When adding fuel to the vehicle it is recommended you add at
least two gallons (7.6 L) of fuel to update the fuel and range
displays. If the fuel display does not update immediately after
the vehicle is put in motion the fuel and range displays will
slowly update over the next 30 miles (48.3 kilometers).
Press and hold the "Trip" reset switch to toggle between the
"mile" and "kilo" displays.
4 of 5
TROUBLESHOOTING
Table 3. Troubleshooting
Operation
Problem
Installation into vehicle LCD states "vin err".
harness
Possible Cause
Possible Solution
Gauge was already "married" (accu- Reinstall on previous vehicle to confirm
mulated 31.1 miles (50 km)) to
no "vin err".
another vehicle.
Entering set up mode
Will not go to set up mode. Loose connection with gauge connector or trip reset button.
Check for bent accessory pin #6 in
gauge connector or check trip reset
button operation.
Gear Indication
Gear Indication does not Not turned on.
operate.
Use instruction sheet to turn on gear
indication in set up mode.
Fuel Level
Fuel Level does not
operate.
Not turned on in set up mode.
Use instruction sheet to turn on fuel
level in set up mode.
Color Changing
Color will not save.
Color was not saved properly.
Use instruction sheet for proper saving
procedure.
Note: Please contact Technical Service with any installation or troubleshooting questions before filing a warranty claim.
-J05180
5 of 5