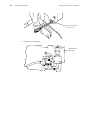
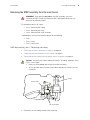
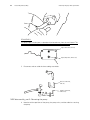
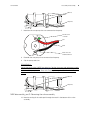
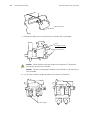
1
Propaq LT Vital Signs Monitor ® Service Manual Software version 1.5X or later ii Welch Allyn Propaq LT Vital Signs Monitor © 2011 Welch Allyn. All rights are reserved. To support the intended use of the product described in this publication, the purchaser of the product is permitted to copy this publication, for internal distribution only, from the media provided by Welch Allyn. No other use, reproduction, or distribution of this publication, or any part of it, is permitted without written permission from Welch Allyn Welch Allyn assumes no responsibility for any injury to anyone, or for any illegal or improper use of the product, that may result from failure to use this product in accordance with the instructions, cautions, warnings, or statement of intended use published in this manual. Welch Allyn, Propaq, Acuity, FlexNet, Smartcuf, and Flexible Monitoring are registered trademarks of Welch Allyn. ParamSet is a trademark of Welch Allyn. Masimo, SET, and LNCS are registered trademarks, and FastSAT and APOD are trademarks, of Masimo Corporation. Possession or purchase of a Masimo SpO2-equipped monitor does not convey any express or implied license to use the device with unauthorized sensors or cables which would, alone or in combination with this device, fall within the scope of one or more of the patents relating to this device. Nellcor and Oximax are registered trademarks of Nellcor Puritan Bennett. Software in this product is Copyright Welch Allyn or its vendors. All rights are reserved. The software is protected by United States of America copyright laws and international treaty provisions applicable worldwide. Under such laws, the licensee is entitled to use the copy of the software incorporated with this instrument as intended in the operation of the product in which it is embedded. The software may not be copied, decompiled, reverse-engineered, disassembled or otherwise reduced to human-perceivable form. This is not a sale of the software or any copy of the software; all right, title and ownership of the software remain with Welch Allyn or its vendors. For information about any Welch Allyn product, call the nearest Welch Allyn representative: USA + 1 315 685 4560 800 535 6663 Canada 800 561 8797 European Call Center + 35 3 46 906 7790 Germany + 49 7477 92 71 86 Latin America + 1 305 669 9003 Singapore + 65 6419 8100 United Kingdom + 44 20 7365 6780 Australia + 61 2 9638 3000 800 074 793 China + 86 216 327 9631 France + 33 1 60 09 33 66 Japan + 81 3 3219 0071 Netherlands + 31 15 750 5000 South Africa + 27 11 777 7555 Sweden + 46 8 58 53 65 51 This device complies with Part 15 of the FCC rules and with the rules of the Canadian ICES-003. Operation is subject to the following two conditions: (1) This device may not cause harmful interference and (2) this device must accept any interference received, including interference that may cause undesired operation. Caution! Changes or modifications not expressly approved by Welch Allyn could void the purchaser’s authority to operate the equipment. REF 810-2712-XX DIR 810-2713-01 A Welch Allyn, Inc. 8500 SW Creekside Place Beaverton, OR 97008-7107 USA www.welchallyn.com Printed in USA Regulatory Affairs Representative Welch Allyn Limited Navan Business Park Dublin Road, Navan County Meath, Republic of Ireland iii Contents 1 - Safety summary . . . . . . . . . . . . . . . . . . . . . . . . . . . . . . . . . . . . . . . . . 1 Warnings. . . . . . . . . . . . . . . . . . . . . . . . . . . . . . . . . . . . . . . . . . . . . . . . . . . . . . . . 1 General safety considerations . . . . . . . . . . . . . . . . . . . . . . . . . . . . . . . . . . . . . . . 1 Electrostatic discharge (ESD) . . . . . . . . . . . . . . . . . . . . . . . . . . . . . . . . . . . . . . . . 2 Symbols . . . . . . . . . . . . . . . . . . . . . . . . . . . . . . . . . . . . . . . . . . . . . . . . . . . . . . . . 2 2 - Overview . . . . . . . . . . . . . . . . . . . . . . . . . . . . . . . . . . . . . . . . . . . . . . . 3 Purpose and scope . . . . . . . . . . . . . . . . . . . . . . . . . . . . . . . . . . . . . . . . . . . . . . . . 3 Technical support services . . . . . . . . . . . . . . . . . . . . . . . . . . . . . . . . . . . . . . . . . . 3 Returning products . . . . . . . . . . . . . . . . . . . . . . . . . . . . . . . . . . . . . . . . . . . . . . . . 4 Product configurations . . . . . . . . . . . . . . . . . . . . . . . . . . . . . . . . . . . . . . . . . . . . . 4 Recommended service intervals . . . . . . . . . . . . . . . . . . . . . . . . . . . . . . . . . . . . . 5 Service options . . . . . . . . . . . . . . . . . . . . . . . . . . . . . . . . . . . . . . . . . . . . . . . . . . . 5 Related documents. . . . . . . . . . . . . . . . . . . . . . . . . . . . . . . . . . . . . . . . . . . . . . . . 6 Controls . . . . . . . . . . . . . . . . . . . . . . . . . . . . . . . . . . . . . . . . . . . . . . . . . . . . . . . . 6 Service menu . . . . . . . . . . . . . . . . . . . . . . . . . . . . . . . . . . . . . . . . . . . . . . . . . . . . 6 3 - Troubleshooting and repair . . . . . . . . . . . . . . . . . . . . . . . . . . . . . . . . 9 Troubleshooting chart . . . . . . . . . . . . . . . . . . . . . . . . . . . . . . . . . . . . . . . . . . . . . . 9 Battery use and care. . . . . . . . . . . . . . . . . . . . . . . . . . . . . . . . . . . . . . . . . . . . . . 16 Service chart . . . . . . . . . . . . . . . . . . . . . . . . . . . . . . . . . . . . . . . . . . . . . . . . . . . . 17 Service menus for repair and network troubleshooting . . . . . . . . . . . . . . . . . . . 19 4 - Disassembly and reassembly. . . . . . . . . . . . . . . . . . . . . . . . . . . . . . 23 Procedures overview . . . . . . . . . . . . . . . . . . . . . . . . . . . . . . . . . . . . . . . . . . . . . 23 Procedures . . . . . . . . . . . . . . . . . . . . . . . . . . . . . . . . . . . . . . . . . . . . . . . . . . . . . 27 5 - Functional verification . . . . . . . . . . . . . . . . . . . . . . . . . . . . . . . . . . . 53 Functional verification overview . . . . . . . . . . . . . . . . . . . . . . . . . . . . . . . . . . . . . 53 Equipment required . . . . . . . . . . . . . . . . . . . . . . . . . . . . . . . . . . . . . . . . . . . . . . 53 Procedures . . . . . . . . . . . . . . . . . . . . . . . . . . . . . . . . . . . . . . . . . . . . . . . . . . . . . 54 Checklist and test results report form . . . . . . . . . . . . . . . . . . . . . . . . . . . . . . . . 65 6 - Replacement parts . . . . . . . . . . . . . . . . . . . . . . . . . . . . . . . . . . . . . . 69 A - 35-ml test volume . . . . . . . . . . . . . . . . . . . . . . . . . . . . . . . . . . . . . . . 71 Index . . . . . . . . . . . . . . . . . . . . . . . . . . . . . . . . . . . . . . . . . . . . . . . . . . . . 73 iv Contents Welch Allyn Propaq LT Vital Signs Monitor 1 1 Safety summary All users of the monitor must read this safety summary and all warning and caution statements in the manual. Warnings WARNING Place the monitor and accessories in locations where they cannot harm the patient should they fall from a shelf or mount. WARNING Do not connect more than one patient to a monitor. WARNING Do not connect more than one monitor to a patient. WARNING Do not use the monitor in an MRI suite or hyperbaric chamber. WARNING To avoid explosion, do not operate the monitor in the presence of flammable anesthetics. WARNING Do not use cables with abraded or broken insulation. WARNING Do not use a monitor that has been damaged. If a monitor has been damaged, remove it from service until it has been verified for proper operation by qualified service personnel. WARNING Use only accessories approved by Welch Allyn. Visit www.welchallyn.com. The use of any other accessories can result in inaccurate patient data, can damage the equipment, and can void your product warranty. WARNING Always use accessories according to the standards of your facility and according to the manufacturer's directions. Caution Do not use cables that do not operate properly. Caution Do not autoclave the monitor. Caution Autoclave accessories only if the manufacturer’s instructions direct you to do so. Many accessories can be severely damaged by autoclaving. 2 Safety summary Welch Allyn Propaq LT Vital Signs Monitor General safety considerations • Frequently check all cables, both electrically and visually. • If the monitor detects an unrecoverable problem, it displays a brief ‘Fault’ message. See “Alert Messages and Status Messages”, Propaq LT Vital Signs Monitor Directions for Use (810-2713-XX). Report all such errors to Welch Allyn. • Do not service a monitor under warranty. Servicing a monitor under warranty voids the warranty. All service on monitors under warranty must be performed by Welch Allyn or at a Welch Allyn authorized service center. Electrostatic discharge (ESD) CAUTION SENSITIVE ELECTRONIC DEVICES DO NOT SHIP OR STORE NEAR STRONG ELECTROSTATIC, ELECTROMAGNETIC, MAGNETIC OR RADIOACTIVE FIELDS. ATTENTION OBSERVE PRECAUTIONS FOR HANDLING ELECTROSTATIC SENSITIVE DEVICES Caution Electrostatic discharge (ESD) can damage or destroy electronic components. Handle static-sensitive components only at static-safe workstation. Caution Assume that all electrical and electronic components of the monitor are static-sensitive. Electrostatic discharge is a sudden current flowing from a charged object to another object or to ground. Electrostatic charges can accumulate on common items such as foam drinking cups, cellophane tape, synthetic clothing, untreated foam packaging material, and untreated plastic bags and work folders, to name only a few. Electronic components and assemblies, if not properly protected against ESD, can be permanently damaged or destroyed when near or in contact with electrostatically charged objects. When you handle components or assemblies that are not in protective bags and you are not sure whether they are static-sensitive, assume that they are static-sensitive and handle them accordingly. • Perform all service procedures in a static-protected environment. Always use techniques and equipment designed to protect personnel and equipment from electrostatic discharge. • Remove static-sensitive components and assemblies from their static-shielding bags only at static-safe workstations—a properly grounded table and grounded floor mat—and only when you are wearing a grounded wrist strap (with a resistor of at least 1 megohm in series) or other grounding device. • Use only grounded tools when inserting, adjusting, or removing static-sensitive components and assemblies. • Remove or insert static-sensitive components and assemblies only with monitor power turned off. • Insert and seal static-sensitive components and assemblies into their original static-shielding bags before removing them from static-protected areas. • Always test your ground strap, bench mat, conductive work surface, and ground cord before removing components and assemblies from their protective bags and before beginning any disassembly or assembly procedures. Service Manual Safety summary Symbols WARNING Indicates conditions that could lead to illness, injury, or death. Caution In this manual, indicates conditions that could damage equipment or other property. 3 4 Safety summary Welch Allyn Propaq LT Vital Signs Monitor 5 2 Overview Purpose and scope This is a reference for periodic preventive maintenance and corrective service procedures for the Propaq LT monitors, models 802LTAN, 802LT0N, 802LTRN, 802LTAS, 802LT0S, and 802LTRS. Corrective service is supported to the level of field-replaceable units. Field-replaceable units include certain circuit-board assemblies, subassemblies, case parts, and other parts. All field-replaceable parts are listed in “Replacement parts” on page 71. WARNING When performing a service procedure, follow the instructions exactly as presented in this manual. Failure to do so could damage the monitor, invalidate the product warranty, and lead to serious personal injury. Caution No component-level repair of circuit boards and subassemblies is supported. Use only the repair procedures described in this manual. Note Repair and replacement of the main board is not supported. Any service work on the main board must be performed by certified and qualified service personnel at an authorized Welch Allyn service center. (For contact information, see page ii.) Repair and replacement of the radio and the antenna is not supported. Any service work on the radio and the antenna must be performed by certified and qualified service personnel at an authorized Welch Allyn service center. (For contact information, see page ii.) This guide provides troubleshooting information, assembly procedures, and instructions for functional testing and performance verification. It is intended for use only by technically qualified service personnel. This guide applies only to the Propaq LT monitor. For service information about any other model of the Propaq monitor, refer to the service manual for that product. Technical support services Welch Allyn offers the following technical support services: Telephone support (1-800-289-2501 and 1-503-530-7500) Loaner equipment Service agreements Service training Replacement service parts Factory service 6 Overview Welch Allyn Propaq LT Vital Signs Monitor For information on any of these services, call one of the numbers listed on page ii. Returning products To return a product for service, contact Welch Allyn Technical Support and request a Return Material Authorization (RMA) number. Note Welch Allyn does not accept returned products without an RMA. When requesting an RMA, please have the following information available: • Product name, model number, and serial number. • Your customer number. • A contact name and phone number. • A complete return shipping address. • Any special shipping instructions. • A purchase-order number or credit-card number if the product is not covered by warranty. • A full description of the problem or service request. Note To ensure safe receipt of your monitor by the service center and to expedite processing and return of the monitor to you, thoroughly clean all residues from the monitor before you ship it to Welch Allyn. United States federal regulations prohibit the processing of any device contaminated with blood-borne pathogens. Welch Allyn thoroughly cleans all returned monitors on receipt, but any monitor that cannot be adequately cleaned cannot be repaired. Before shipping the monitor, please observe these packing guidelines: • Remove from the package all hoses, connectors, cables, sensors, power cords, and other ancillary products and equipment, except those items that might be associated with the problem. • Put the monitor, enclosed in a plastic bag with a packing list, into the original shipping carton with the original packing materials or into another appropriate shipping carton. • Write the Welch Allyn RMA number with the Welch Allyn address on the outside of the shipping carton. Service Manual Overview Product configurations Model numbers for the configurations are as follows: Model Monitoring Parameters FlexNet/Acuity Communication Enabled Top-Level Assembly Serial # Prefix 802LT0N ECG, NIBP, Nellcor SpO2 No 007-0160-XX KA 802LTRN ECG, NIBP, Nellcor SpO2 Yes 802.11 FHSS 007-0161-XX KA 802LTAN ECG, NIBP, Nellcor SpO2 Yes 802.11a 007-0384-XX KA 802LT0S ECG, NIBP, Masimo SpO2 No 007-0268-XX KA 802LTRS ECG, NIBP, Masimo SpO2 Yes 802.11 FHSS 007-0269-XX KA 802LTAS ECG, NIBP, Masimo SpO2 Yes 802.11a 007-0383-XX KA Recommended service intervals Interval or condition Action recommended Procedure Every 6 - 24 months (per hospital protocols) Verify functionality “Functional verification” on page 55 Every 36 months Replace the air filter “Replacing the air filter” on page 30 Every 36 months Replace the battery “Removing the lithium ion battery assembly” on page 29 The battery does not hold a charge Check battery capacity Replace the battery “Functional verification” on page 55 “Removing the lithium ion battery assembly” on page 29 The monitor has been dropped or otherwise damaged Verify functionality “Functional verification” on page 55 The monitor is not functioning properly Verify functionality “Functional verification” on page 55 The monitor does not pass the functional verification Troubleshoot and repair, and then verify functionality “Troubleshooting and repair” on page 11 “Disassembly and reassembly” on page 25 “Functional verification” on page 55 Return the monitor to an authorized “Returning products” on page 6 Welch Allyn service center 7 8 Overview Welch Allyn Propaq LT Vital Signs Monitor Service options Warranty service All repairs on products under warranty must be performed or approved by Welch Allyn. Refer all warranty service to Welch Allyn Factory Service or another authorized Welch Allyn Service Center. Obtain an RMA number for all returns to Welch Allyn Factory Service. (See “Returning products” on page 6.) Caution Unauthorized repairs will void the product warranty. Non-warranty service Welch Allyn Beaverton Factory Service and authorized Service Centers support nonwarranty repairs. Contact any Welch Allyn regional service center for pricing and service options. Welch Allyn offers modular repair parts for sale to support non-warranty service. This service must be performed only by qualified end-user biomedical/clinical engineers using this service manual. Service Manual Overview 9 Related documents Title Reorder Number Propaq LT Vital Signs Monitor Directions for Use 810-1828-XX Controls Monitor Power - Turn the monitor power on or off. Down - Move the cursor down to the next display item. Action - Act based on what is highlighted. Silence/Reset - Silence the current alarm tone for 90 seconds or reset a silenced alarm tone. Left - Move the cursor left to the next display item; decrease the parameter value. Display - Cycle to the next configured display format, or cancel the current control, setup, or pop-up menu. Snapshot - Record a 21-second period of numeric and waveform data. Start/Stop NIBP - Start or stop an NIBP measurement. Right - Move the cursor right to the next display item; increase the parameter value. Up - Move the cursor up to the next display item. Cradle Monitor Release - Press and hold while removing the monitor from the cradle. Service menu To access the monitor service menu: From any main display screen (such as Large Numerics, Dual Waveform, ...): 1. Highlight , HR/PR, SpO2, NIBP, Resp, or , and then press 2. Highlight Setup (at the bottom of the screen) and press HALL, ROBERT E. 3456187 Adult, II . The setup menu appears. 3:00:06P Rm 239 Setup Menu 1mV/cm 80 HR/min . 140/78 12 NIBP mmHg (102) Resp/min 97 % SpO2 Setup: Alarms ECG NIBP Timings Configuration Service Suspend Audible Alarms: Off Alarm Tone Low Exit Trends On (90 sec) Med Snapshots High Setup 3. Scroll right ( ) to highlight Service, and press NIBP and Show Info highlighted. . The service menu appears, with 10 Overview Welch Allyn Propaq LT Vital Signs Monitor STEWART, ANN 7762940 Adult II 3:00:06P Rm ICU 263 1mV/cm Service % HR/min NIBP mmHg Resp/min SpO2 Setup Alarms ECG NIBP Timings Configuration Service Select ( ) to enter service menus (qualified service personnel only). Exit Trends Snapshots STEWART, ANN 7762940 Adult Setup 3:00:06P Rm ICU 263 Service NIBP ECG SpO2 USB Radio Software Display Battery Voltages Buttons NIBP Show Info NIBP Test Characterize Pump Exit The service menu contains 10 sections: Section Operations Status displays NIBP Test NIBP, Characterize Pump Show Info ECG Setup (Enable/Disable HR/PR Alarms) Parameters SpO2 (none) Show Info USB (none) Show Info Radio Monitoring (Monitor the radio), Set Netname Show Info, View and Set Netname Software (none) View Error Log, View RAM Dump, View System Info Display Run Pixel Test, Set Bias View Fonts Battery (none) Show Info Voltages (none) Show Info Buttons Test Buttons (none) 11 3 Troubleshooting and repair Troubleshooting chart . . . . . . . . . . . . . . . . . . . . . . . . . . . . . . . . . . . . . . . . . . . . .11 Battery use and care . . . . . . . . . . . . . . . . . . . . . . . . . . . . . . . . . . . . . . . . . . . . . .18 Service chart . . . . . . . . . . . . . . . . . . . . . . . . . . . . . . . . . . . . . . . . . . . . . . . . . . . .19 Service menus for repair and network troubleshooting. . . . . . . . . . . . . . . . . . . .21 Troubleshooting chart Caution Replace parts, components, or accessories only with parts supplied or approved by Welch Allyn. The use of any other parts can lead to inferior monitor performance and will void the product warranty. General Refer to “Service chart” on page 19 for information on the suggested corrective actions. Symptom Possible cause Possible corrective action The power-on self-test fails. (Indicator: 2 yellow LED flashes followed by an LED flash of any combination of green, yellow, and red). Internal RAM failure. Cycle the power. If the error persists, send the monitor to an authorized Welch Allyn Service Center for service. (See “Returning products” on page 6.) “Recoverable Fault. Restart monitor.“ An invalid condition has been Restart the monitor. If the fault does not detected that might be resolved reappear, continue to use the monitor. by restarting the monitor. “System Fault. Service monitor.“ An unrecoverable system error has occurred. Send the monitor to an authorized Welch Allyn Service Center for service. (See “Returning products” on page 6.) “System Fault. Service radio.“ Radio fault detected. Send the monitor to an authorized Welch Allyn Service Center for service. (See “Returning products” on page 6.) “Battery Fault. Install new battery.“ The battery is not performing to Install a new battery. “Removing the lithium specification. ion battery assembly” on page 29. Software error. Unexpected reset detected. Charging has timed out (Charger Remove the monitor from the cradle and state 5). reinsert it, and then attempt again to charge the battery. If the timeout reoccurs, replace the battery. “Removing the lithium ion battery assembly” on page 29. “Equipment Alert. Charger Fault. Service Charger.“ Cradle power board failure. Insert another monitor and battery pack in the cradle and verify that the symptoms persist. If yes, then replace the cradle power board. “Disassembling the cradle” on page 47. 12 Troubleshooting and repair Symptom Welch Allyn Propaq LT Vital Signs Monitor Possible cause Possible corrective action Monitor fails to power up beyond the Button board not connected. initial screen. Connect the button board to the main board. “Separating the top and bottom chassis halves” on page 31. Monitor is in the cradle and does not The battery is discharged and power up, and the cradle power the cradle is not powering the indicator is off. monitor. Verify that AC power is on, that the power adapter is plugged into AC power and into the cradle, and that the monitor is fully seated in the cradle. Defective power adapter. Replace the power adapter. The charger input fuse is blown. Replace the fuse. “Replacing the fuse” on page 47. Monitor is latched in the cradle but does not power up. Power indicator on the cradle is on. Open the monitor power switch. Replace the bottom chassis (which includes the power switch). “Removing the main board from the bottom chassis assembly” on page 36. Problem with the cradle power board. Replace the cradle power board. “Disassembling the cradle” on page 47. Problem with the monitor. Send the monitor to an authorized Welch Allyn Service Center for service. (See “Returning products” on page 6.) Monitor battery fails to charge. DC power is applied but the power indicator on the cradle remains off. Blown power input fuse on the charger I/O panel. Replace the fuse. “Replacing the fuse” on page 47. Monitor battery run time duration is less than specified. The battery is deficient. Replace the battery. “Removing the lithium ion battery assembly” on page 29. Radio cannot link up to the Acuity Central Station. See “Radio” on page 14. Yellow indicator on the cradle. Monitor current draw is too high. Service the monitor or the cradle. Cradle circuit breaker is tripped. Charger state 1. Monitor has no battery pack. Charger state 4. Install the monitor battery pack. “Removing the lithium ion battery assembly” on page 29. Battery pack temperature is out of range. Charger state 3. Return the battery pack to within the specified temperature range (0C- 40C). Battery pack voltage is too low or the battery fuse is blown. Charger state 4. Replace the battery pack. “Removing the lithium ion battery assembly” on page 29. Battery pack fails to charge in the specified time. Charger state 5. Remove the monitor from the cradle and reinsert it, and then attempt again to charge. If the timeout reoccurs, replace the battery pack. “Removing the lithium ion battery assembly” on page 29. Battery cell(s) over voltage; probably a charge imbalance. Charger state 7. Replace the battery pack. “Removing the lithium ion battery assembly” on page 29. Charger board failure. Examine the cradle internal cabling, the cradle power board, and the interconnect board. “Removing the power/USB flex connector from the bottom chassis” on page 46. Missing or erroneous LCD characters Faulty LCD. Replace the LCD. “Disassembling the top chassis” on page 34. Service Manual Troubleshooting and repair 13 Symptom Possible cause Possible corrective action Button or buttons inoperative. Faulty button or buttons. Replace the top chassis assembly. “Disassembling the top chassis” on page 34. Voltages displayed on the service menu are out of range. Main board fault. Send the monitor to an authorized Welch Allyn Service Center for service. (See page ii.) Repeated occurrence of “SpO2 Fault. The internal SpO2 connector is No sensor detected.“ loose. The NIBP air leak exceeds the specification. “Equipment Alert. NIBP Fault. Air leak. Check hose.“ Secure the internal SpO2 connector. “Removing the main board from the bottom chassis assembly” on page 36. Faulty SpO2 connector panel. Replace the connector panel. “Removing the patient connector panel from the bottom chassis” on page 45. Worn O-ring in the NIBP hose connector. Try a different NIBP hose or replace the O-ring. Deficient NIBP check valve, bleed valve, or overpressure valve. Replace the valve. “Removing the NIBP assembly from the main board” on page 41. NIBP tubing not properly connected. Connect the internal tubing. “Removing the NIBP assembly from the main board” on page 41. If hoses and external fittings are Connect the internal tubing. “Removing the not leaking, internal tubing NIBP assembly from the main board” on might be disconnected. page 41. Repeated occurrence of “NIBP Fault. Internal tubing is disconnected. Air leak. Check hose.“ Internal tubing is damaged. Connect the internal tubing. “Removing the NIBP assembly from the main board” on page 41. Replace the damaged section of internal tubing. “Removing the NIBP assembly from the main board” on page 41. “Equipment Alert. NIBP Fault. Kinked or neonate hose.“ If the correct hose is connected Verfify that the internal in-line NIBP pneumatic and not kinked, then the internal components are properly installed, with no tubing might be blocked. pinching or kinking of tubing. “Removing the NIBP assembly from the main board” on page 41. “Equipment Alert. NIBP Fault. Overpressure condition.“ A transient pressure pulse was introduced into the cuff via sudden and excessive patient motion. “Equipment Alert. NIBP Fault. Calibrating. Please wait.“ An NIBP measurement was Wait 45 seconds after turning on the monitor attempted within 45 seconds of before starting an NIBP measurement. monitor power-up. “Calibrating. Minimize motion.“ Restart the monitor. An NIBP measurement was attempted while the NIBP system was performing a baseline calibration. Wait 15 seconds and retry the NIBP measurement. Excessive cuff artifact. Reduce patient motion. Excessive artifact. “Equipment Alert. NIBP Fault. NIBP subsystem failure. Service required. NIBP disabled.“ The NIBP system self-test has failed 3 times without passing. Minimize patient motion. Send the monitor to an authorized Welch Allyn Service Center for service. (See “Returning products” on page 6.) 14 Troubleshooting and repair Welch Allyn Propaq LT Vital Signs Monitor Radio Radio-equipped Propaq LT monitors support wireless connection to one of the two types of Acuity networks. Model Wireless connection 802LTRN, 802LTRS 802.11 FHSS Acuity network 802LTAN, 802LTAS 802.11a Acuity network 802LT0N, 802LT0S none In facilities with 802.11a networks, administrators can reconfigure the radio, the Acuity network, or both, to meet local security or policy requirements. When you send a model 802LTAN or 802LTAS monitor to Welch Allyn for service, the radio is reset to the factory configuration. Caution If you send a model 802LTAN or model 802LTAS monitor to Welch Allyn for service and the monitor is then returned to you, you must reapply any custom radio settings to the monitor before you attempt to reconnect the monitor to your Acuity network. Radio troubleshooting information applies only to radio-equipped monitors. It is not intended for comprehensive troubleshooting of the Acuity system. To troubleshoot the Acuity system, refer to the appropriate Acuity service contact for your system. Symptom Possible Cause No Acuity connection—network Wireless communication disabled communication icon ( ) is not in the monitor configuration. displayed on the monitor screen. No Acuity connection—network communication icon with slash ( ) is displayed on the monitor screen and the yellow indicator above the screen is lit. Possible Corrective Action Use the configuration utility to enable wireless communication for the monitor. Monitor is out of radio range. Move the monitor within range of an Acuity 802LTRN/S: RSSI > approx. 60. access point. 802LTAN/S: RSSI > approx. 70. Netname (ESSID) set wrong. Set the monitor network name to the Acuity network name. (Default: com.protocol.) USB connected to the monitor through the cradle. Disconnect the USB cable from the cradle. No Acuity connection—network Monitor is intentionally disconnected from the network by communication icon with slash the user. ( ) and “Disconnected” are displayed on the monitor screen, and the green indicator above the screen is flashing. Use the monitor interface to connect to the network. Radio Monitoring service screen persistently displays “Searching for access point”; monitor displays ( ). Move the monitor within range of an access point on the current network. Monitor radio cannot find a signal from the network. Verify the Netname. Radio Monitoring service screen persistently displays “Searching for access point” and “Radio sleeping”; monitor displays ( ). (802LTAN/802LTAS) Display alternates between “search” and “radio sleeping”. Move within range of an access point and wait for up to 3 minutes. The monitor Netname does not match the Acuity network name. Set the monitor Netname to the Acuity network name (default: com.protocol). Service Manual Troubleshooting and repair Symptom Possible Cause Radio Monitoring service screen Invalid authentication credentials; persistently displays “Searching default network settings. for access point”; monitor displays ( ). (802LTAN/802LTAS) Invalid authentication credentials; custom network settings. 15 Possible Corrective Action Reset the monitor radio to factory defaults: 1. 2. 3. Enter the service screen. Press simultaneously Select Yes and press . . Refer to your Acuity network administrator. Radio Monitoring service screen DHCP server is down. persistently displays “Requesting an IP address” and ( ) is DHCP server has no more displayed on the monitor. addresses. Contact Welch Allyn Acuity technical support. (See page ii.) Radio Monitoring service screen persistently displays “Sending Acuity broadcast.” Wait. All Acuity systems with wireless are unavailable. Contact Welch Allyn Acuity technical support. (See page ii.) The Acuity system is at capacity for Turn off another wireless monitor. licenses. Frequent communication faults Faulty antenna or poor antenna with no apparent cause. On the connection. Radio Monitoring service screen, TX/RX errors (PERCENT) is > 5%. Faulty radio connection. Poor radio coverage. Send the monitor to an authorized Welch Allyn Service Center for service. (See “Returning products” on page 6.) Send the monitor to an authorized Welch Allyn Service Center for service. (See “Returning products” on page 6.) Verify that the network has a sufficient density of access points on the current network. 16 Troubleshooting and repair Welch Allyn Propaq LT Vital Signs Monitor Battery states and service State Description Type of State Possible Corrective Action 0 Battery state unknown. Normal transitory. Should not persist. If the state persists, replace the battery pack. “Removing the lithium ion battery assembly” on page 29. 1 Battery voltage too high. Fault—possible cell imbalance Replace the battery pack (“Removing the (Indication can occur with the or charger fault lithium ion battery assembly” on page 29) monitor in or out of the cradle.) or the cradle power board (“Disassembling the cradle” on page 47). 2 Battery fully charged. Normal operating state. 3 Battery partially charged. Normal operating state. 4 30 minutes of charge remaining, undocked. Normal operating state. 5 30 minutes of charge remaining, docked. Normal transitory state. 6 5 minutes of charge remaining, Normal operating state. undocked. 7 5 minutes of charge remaining, Normal transitory state. docked. 8 Battery is exhausted, undocked. Normal operating state. 9 Battery is exhausted, docked. Normal operating state. 10 Battery voltage is too low for recharging, docked. Faulty battery pack. Replace the battery pack. “Removing the lithium ion battery assembly” on page 29. Service Manual Troubleshooting and repair 17 Charger states and service State Description Charger Charger Type of State Status Power LED LED Possible Corrective Action 0 Charger state unknown. n/a n/a Normal initial transitory state of very short duration. n/a 1 Monitor docked, No-power fault. Off Off Normal operating state when the monitor is in the cradle and the cradle is not powered. If the power adapter is not connected, connect it. Fault state if the cradle fuse is open. Replace the fuse. “Replacing the fuse” on page 47. Yellow On Fault—power to the monitor Attempt to recharge by removing automatically disconnected by the the monitor from the cradle and cradle. Possible monitor fault. reinserting the monitor in the cradle. If the fault persists, attempt to recharge another monitor to determine whether the problem is with the cradle or with the monitor main board. Fault—no monitor in the cradle, power input and input fuse OK. Power board fault. Replace the power board. “Disassembling the cradle” on page 47. n/a 2 Monitor docked, charging. Green Green Normal operating state. 3 Monitor docked, temperature fault. Yellow Green Fault—battery pack temperature is Bring the battery pack out of range high or low. temperature into specified range (0° C - 40° C). 4 Monitor docked, battery voltage too low for charging. Yellow Green Fault—battery pack can no longer Replace the battery pack. be charged. “Removing the lithium ion battery assembly” on page 29. 5 Monitor docked, timeout fault. Yellow Green Fault—Battery pack failed to charge within the specified time. Attempt again to charge by removing the monitor from the cradle and reinserting the monitor in the cradle. Replace the battery pack. “Removing the lithium ion battery assembly” on page 29. 6 Monitor docked, charging complete. Off Green Normal operating state. n/a 7 Monitor docked, overcharge fault. Yellow Green Fault—battery pack cells are unbalanced or the cradle is faulty. Replace the battery pack (“Removing the lithium ion battery assembly” on page 29). Replace the power board in the cradle (“Disassembling the cradle” on page 47). 8 Monitor not docked. n/a n/a Normal operating state. n/a 18 Troubleshooting and repair Welch Allyn Propaq LT Vital Signs Monitor Battery use and care The battery meets specification when used in an environment between 0° C and 40° C. • Operating the monitor in a cold environment (below 20° C) reduces battery run time. When the battery is returned to a warmer environment, battery run time returns to normal. • Sustained charging at high temperatures (near 40° C) reduces battery life. • The battery continues to discharge when removed from the monitor, but at a much slower rate than if it were in the monitor. • The battery, when removed from the monitor, discharges more slowly at low temperatures and more quickly at high temperatures. • Maintain battery capacity by storing the battery: • in a discharged state • removed from the monitor • in a cool, dry place Service Manual Troubleshooting and repair 19 Service chart This chart shows which procedure to use for specific service operations on monitors not covered by warranty. Caution Do not service a monitor under warranty. Any service not performed at a Welch Allyn service center voids the product warranty. Note Do not attempt to replace any component, including the NIBP pressure transducers, soldered onto the main board. All service of the main board must be performed at the Welch Allyn factory service center. Monitor Service Action Replace the NIBP air filter. “Replacing the air filter” on page 30. Replace the battery pack. “Removing the lithium ion battery assembly” on page 29. Replace the connector panel 1. “Removing the patient connector panel from the bottom chassis” on page 45. 2. “Functional verification” on page 55. Replace the LCD assembly 1. “Disassembling the top chassis” on page 34. 2. “Set LCD bias” on page 23 3. “Functional verification” on page 55. Replace the top case assembly (with button board and window) 1. “Disassembling the top chassis” on page 34. 2. “Functional verification” on page 55. Replace the bottom case assy (with power switch, power flex cable, and connector panel) 1. “Removing the main board from the bottom chassis assembly” on page 36. 2. “Functional verification” on page 55. Replace the NIBP pump, bleed and dump valves, check valve, or internal tubing 1. “Removing the NIBP assembly from the main board” on page 41. 2. “Characterize NIBP” on page 21. 3. “Functional verification” on page 55. Update the software Send the monitor to a Welch Allyn service center. (See “Returning products” on page 6.) Replace the main board Send the monitor to a Welch Allyn service center. (See “Returning products” on page 6.) 20 Troubleshooting and repair Welch Allyn Propaq LT Vital Signs Monitor Cradle Service Action Replace the fuse 1. Replace the interconnect board 1. “Disassembling the cradle” on page 47. 2. “Functional verification” on page 55. Replace the power board 1. “Disassembling the cradle” on page 47 2. “Functional verification” on page 55. Replace the I/O panel 1. “Disassembling the cradle” on page 47 2. “Functional verification” on page 55. Replace the upper housing 1. “Disassembling the cradle” on page 47 2. “Functional verification” on page 55. Replace the lower housing 1. “Disassembling the cradle” on page 47 2. “Functional verification” on page 55. “Replacing the fuse” on page 47. Service Manual Troubleshooting and repair 21 Service menus for repair and network troubleshooting In addition to the service menus supporting functional verification, these menus support the following service procedures: Characterize NIBP . . . . . . . . . . . . . . . . . . . . . . . . . . . . . . . . . . . . . . . . . . . . 21 Set LCD bias . . . . . . . . . . . . . . . . . . . . . . . . . . . . . . . . . . . . . . . . . . . . . . . . 23 Check radio status. . . . . . . . . . . . . . . . . . . . . . . . . . . . . . . . . . . . . . . . . . . . 23 Note Before beginning any service procedure, read the entire procedure to verify that you have all tools and equipment needed and that you understand each step. Characterize NIBP NIBP characterization sets the volume constants for the NIBP system to assure proper cuff detection. You must characterize the NIBP system if any of the following occurs: • Characterization test failure • Pump failure • Internal tubing replacement (any or all) • Bleed valve, dump valve, or check valve replacement • Main board replacement or repair Caution Main board repair must be performed at the Welch Allyn Factory Service Center. Any change to the main board requires system testing, calibration, and verification, which can be done only at the Factory Service Center. Caution Perform this characterization procedure only if you are prepared and equipped to perform the “Characterization test” on page 61. To complete this test, you must have the 35-ml test syringe described in “35-ml test volume” on page 73. 1. Attach a neonatal hose (008-0265-XX) to the monitor NIBP hose connector. Verify that the hose length is 8 feet ± 4 inches (2.44 meters ± 10 cm). 2. On the monitor, navigate to the Characterize NIBP screen. HR/min Setup HALL, ROBERT E. Audible Alarms Silenced Service 3456187 Adult, NIBP Rm 239 Characterize NIBP. 12:41:32P Service: NIBP ECG SpO2 USB Radio Software Display Battery Voltages Buttons NIBP: Show Info Pump Test Characterize NIBP Characterize NIBP after service to any internal NIBP components. See the Propaq LT Service Manual for the NIBP Characterization Procedure. Exit 22 Troubleshooting and repair Welch Allyn Propaq LT Vital Signs Monitor 3. Simultaneously press and to access the NIBP characterization service screens. A warning message appears: “NIBP characterization affects neonatal cuff detection.” 4. Press to continue. The first steps of the procedure appear: HALL, ROBERT E. 3456187 Audible Alarms Suspended Adult, 12:41:32P Rm 239 Service: NIBP ECG SpO2 USB Radio Software Display Battery Voltages Buttons NIBP: Show Info Pump Test Characterize NIBP 1. Connect a standard neonatal NIBP hose without cuff to the Propaq LT. 2. Block the open end of the hose. 3. With the hose completely blocked, press the select button. Select ( ) to initialize NIBP characterization. Exit 5. Follow the steps as presented on the screen. Note The standard neonatal NIBP hose (008-0265-xx) can be effectively blocked with firm thumb pressure over the fitting opening. Note In this procedure, ‘the select button’ refers to 6. Press . to begin characterization. When the characterization is complete, this screen appears: HALL, ROBERT E. 3456187 Audible Alarms Suspended Adult, Rm 239 12:41:32P Service: NIBP ECG SpO2 USB Radio Software Display Battery Voltages Buttons NIBP: Show Info Pump Test Characterize NIBP NIBP Characterized. Perform verification procedure now. THE VERIFICATION TEST ASSURES PROPER NEONATAL CUFF DETECTION. Failure to perform the verification can result in overinflation of neonatal cuffs. Exit 7. Verify the characterization. (“Characterization test” on page 61.) WARNING Always verify after characterization. Failure to verify a new characterization could result in overinflation of a neonatal cuff. Service Manual Troubleshooting and repair 23 Set LCD bias When the display module has been replaced, you must then set the LCD bias. Note Perform this test only under fluorescent lighting. 1. On the monitor, navigate to the Bias screen. HR/min Setup Service ID: SET_D80GH2FK Display Bias. 20:43:54 Adult Rm Service NIBP ECG SpO2 USB Radio Software Display Battery Voltages Buttons Display Pixel Test Bias Fonts Display Bias 32 Use left ( ) or right ( ) to increase/decrease bias. Exit Use the controls indicated to set the bias. Bias is optimized when the visible shimmer in the test pattern is reduced to the minimum level. Check radio status The Radio Status screens provide information that might be required if you have to troubleshoot the Acuity system network. 24 Troubleshooting and repair Welch Allyn Propaq LT Vital Signs Monitor 25 4 Disassembly and reassembly Procedures overview This describes all disassembly steps required for module-level and board-level service procedures. Disassembly is presented here as a sequence of procedures. Do not perform any unnecessary procedures. Example: Remove the air filter assembly and replace the air filter only if it appears that the filter is clogged and is restricting air flow to the pump. Example: Disconnect and remove the NIBP pump only if you are going to replace the pump or the NIBP air valve assembly. Caution Perform all repair procedures at a static-protected station. Caution Regard all monitor parts as extremely fragile, and execute all procedure steps with care and precision. Except where noted, reassembly is the reverse of the disassembly. Reassembly notes are identified by underlined text. 26 Disassembly and reassembly Welch Allyn Propaq LT Vital Signs Monitor Screws Caution Observe recommended screw torque specifications, especially with screws that secure directly into plastic standoffs. Note To avoid mismatching screws and holes, keep the screws for each piece with that piece as you remove modules, circuit assemblies, and other components. Following are recommended torque specs for all screws used in the monitor: Qty. Part number Location Type Size/length Torque Monitor 2 620-0383-xx Battery Pack Captive screw #6-32, 7/16” 2 inch lbs 4 620-0049-xx Case Machine screw #6-32, 1” 6 inch lbs 2 620-0048-xx Case Machine screw #6-32, ½” 6 inch lbs 4 620-0290-xx Main Board Machine screw #4-40, ¼” 4 inch lbs 1 620-0278-xx Valve bracket Machine screw #4-40, ½” 4 inch lbs 2 620-0290-xx Pump bracket Machine screw #4-40, ¼” 4 inch lbs 4 620-0149-xx Display bracket Thread-forming screw #2-28, ¼” 2 inch lbs 2 620-0408-xx Input flex assy. bracket Thread-forming screw #4-24, 3/8” 4 inch lbs 2 630-0260-xx Power/flex conn. Guide pin #4-40, ½” --- 2 620-0418-xx Power/flex conn. Flat washer 0.215 OD --- 2 620-0217-xx Power/flex conn. Kepnut #4-40 Loctite Cradle 2 620-0423-xx Bed rail hook Shoulder screw M 4x4, hex 12 inch lbs 2 620-0424-xx Bed rail hook Machine screw M 4x5 12 inch lbs 4 620-0188-xx Interconnect Bd. Machine screw #4-20, 3/8” 4 inch lbs 4 620-0188-xx Latch bracket Machine screw #4-20, 3/8” 4 inch lbs 7 620-0415-xx Lower housing Machine screw #6/32, 3/8” 6 inch lbs 3 620-0414-xx Lower housing Washer 0.281” OD --- 1 620-0149-xx I/O panel Thread forming screw #2-28, ¼” 2 inch lbs 1 620-0413-xx I/O panel Nylon washer 0.187” OD --- Service Manual Disassembly and reassembly 27 Connectors Note All connectors are keyed or labeled to facilitate proper connection. Take care to correctly align all connector halves before attempting to connect them. Zero insertion force (ZIF) flex cable connectors ZIF connectors use a sliding outer piece that latches and unlatches to secure and release the flex cable. ZIF cables cannot be successfully connected or disconnected without properly unlatching and latching the sliding outer piece. To disconnect a ZIF cable 1. Using a suitable tool (paper clip, small flat-blade screwdriver, or small needle-nose pliers), slide the latching piece of the connector away from the connector body and toward the cable, releasing the cable from the connector. 2. Remove the cable. To connect a ZIF cable 1. Slide the latching piece of the connector body away from the body. 28 Disassembly and reassembly Welch Allyn Propaq LT Vital Signs Monitor 2. Insert the flex cable into the connector. 3. Slide the latching piece toward the connector body until it clicks into place. Caution Do not attempt to remove a flex cable until the ZIF latch has been opened. Caution Never attempt to disconnect any cable by pulling on the cable wires. Always disconnect cables by grasping and pulling only on the connector halves. Connector locations Connector J1 J2 J3 J4 J5 J6 J7 J8 J9 J10 J11 P2 Connects with: Main Board ECG (flex) On/Off Switch SpO2 (flex) Display module BDM PCMCIA (radio) card Button pad Battery pack Pump/bleed valve Dump valve Speaker Power/USB (flex) Connector Connects with: Charging Cradle - Interconnect Board J1 Cradle power board (3-conductor) J2 Cradle power board (10-conductor) JP1 External USB P1 Propaq LT Monitor Charging Cradle - Cradle Power Board J1 I/O panel (DC input) J2 Cradle interconnect board (10-conductor) J4 Cradle interconnect board (3-conductor) Radio Card (flex) Antenna Service Manual Disassembly and reassembly 29 Procedures Removing the lithium ion battery assembly . . . . . . . . . . . . . . . . . . . . . . . . . . . Replacing the air filter . . . . . . . . . . . . . . . . . . . . . . . . . . . . . . . . . . . . . . . . . . . . Separating the top and bottom chassis halves . . . . . . . . . . . . . . . . . . . . . . . . . Disassembling the top chassis . . . . . . . . . . . . . . . . . . . . . . . . . . . . . . . . . . . . . Removing the main board from the bottom chassis assembly . . . . . . . . . . . . . Removing the NIBP assembly from the main board . . . . . . . . . . . . . . . . . . . . . Removing the patient connector panel from the bottom chassis . . . . . . . . . . . Removing the power/USB flex connector from the bottom chassis . . . . . . . . . Disassembling the cradle. . . . . . . . . . . . . . . . . . . . . . . . . . . . . . . . . . . . . . . . . . 29 30 31 34 36 41 45 46 47 Removing the lithium ion battery assembly WARNING The lithium ion battery can deliver currents sufficient to cause serious personal injury and to damage the monitor. Before opening the monitor for any reason, and before you begin any procedure described in this manual, always remove the battery first. WARNING The only safe method for charging the monitor battery is to insert the completely assembled monitor, with the completely assembled battery pack correctly installed, into the completely assembled charging cradle. Attempting to charge the monitor battery by any other method creates a significant risk of explosion or patient shock hazard. WARNING Do not short the battery connector pins. WARNING Do not attempt to disassemble the battery. The battery pack contains no user-serviceable parts. in Note When the monitor, the cradle, or the battery reaches end of life, recycle it locally according to national, state, and local regulations, or return it to Welch Allyn. The battery pack assembly consists of the rechargeable lithium ion cells, a protection board, and the battery door. It can be replaced only as an assembly. 1. Remove the two screws securing the battery door. Two screws securing the battery door Reassembly: 2 inch lbs 2. Remove the battery assembly from the battery compartment. 30 Disassembly and reassembly Welch Allyn Propaq LT Vital Signs Monitor Battery compartment Battery assembly Battery door Replacing the air filter Note It is not necessary to replace the air filter each time you service or repair the monitor. See “Recommended service intervals” on page 7. 1. Remove the air filter assembly. Air filter assembly Housing 2. Remove and discard the air filter, and replace it with a new one. Service Manual Disassembly and reassembly 31 Air filter 3. If the O-ring shows signs of wear, replace it with a new one. REASSEMBLY: Lubricate the outside of the O-ring with a drop of alcohol to prevent it from riding up the side of the cylinder when inserted. When properly installed, the filter cylinder is perfectly flush with the chassis surface. Cylinder flush with chassis surface Separating the top and bottom chassis halves 1. “Removing the lithium ion battery assembly” on page 29. 2. Remove the four cylindrical rubber plugs from the screw holes in the bottom chassis. Rubber plugs removed REASSEMBLY: When reinstalling the rubber plugs, lubricate the screw holes with water applied with a damp cotton swab. 32 Disassembly and reassembly Welch Allyn Propaq LT Vital Signs Monitor 3. Remove the screws from the bottom chassis. • Remove three screws from the top and one from the bottom left corner. • Remove two screws from inside the battery compartment. Rear chassis screws Reassembly: 6 inch lbs 4. With the monitor face-up, lift the bottom of the top chassis enough to access the speaker cable, and disconnect the speaker cable from J11 on the Main board. Speaker cable J1 connector (speaker) 5. Rotate the monitor 180° to access the top of the top chassis. 6. Disconnect the blue button pad cable from ZIF connector J7. Button pad cable Button pad cable connector (J7) 7. Rotate the monitor 90° to access the display cable connector (J4). 8. Disconnect the display cable from connector J4. Service Manual Disassembly and reassembly 33 Display cable Display cable connector (J4) 9. Remove the slotted blue gasket that runs around the chassis halves. REASSEMBLY: The slotted blue gasket between the top and bottom chassis halves is directional; it can be correctly aligned in only one way. Take care to reinstall the gasket correctly. 34 Disassembly and reassembly Welch Allyn Propaq LT Vital Signs Monitor Disassembling the top chassis The top chassis assembly contains the top plastic panel assembly (including the integrated overlay for buttons, window, LEDs, and trim), the display module, and the speaker. 1. “Removing the lithium ion battery assembly” on page 29. 2. “Separating the top and bottom chassis halves” on page 31. 3. Remove the display module. Caution Take care to protect the front surface of the display module and all surfaces of the display screen from scratching and contamination. a. Remove the four screws from the display bracket, and remove the bracket to free the display module. Bracket screws Reassembly: 2 inch lbs Display module (back side) Bracket Bracket screws Reassembly: 2 inch lbs REASSEMBLY: The display module cable lies under the bracket. b. Remove the display module. REASSEMBLY: Tighten the display bracket screws to a torque of 2 inch lbs. Take care to avoid stripping the plastic screw mounts. Gaskets Service Manual Disassembly and reassembly c. Remove the rubber gaskets from the display module. d. Set aside the display module, protecting the display surface from damage. Display surface 4. Remove the speaker. REASSEMBLY: Before removing the speaker, note the alignment of the speaker cable terminals for rerouting the cable. Speaker cable terminals Speaker cable connector a. Pry the speaker from the adhesive gasket securing it to the chassis. b. Remove any remaining gasket pieces from the front panel and discard them. REASSEMBLY: 1. Install a new gasket. 2. Align the new speaker for proper cable routing. 3. Seat the speaker on the gasket. 35 36 Disassembly and reassembly Welch Allyn Propaq LT Vital Signs Monitor Removing the main board from the bottom chassis assembly Caution Do not touch, move, or adjust the radio antenna. The radio antenna is extremely fragile and is exposed during this procedure. If the antenna is damaged, the monitor must be returned to a Welch Allyn authorized Service Center for repair. 1. “Removing the lithium ion battery assembly” on page 29. 2. “Separating the top and bottom chassis halves” on page 31. 3. Disconnect the power/USB flex cable from the main board connector (P2). Power/USB cable Ferrite bead 4. Remove the four screws holding the main board to the bottom chassis. Service Manual Disassembly and reassembly 37 Main board screws Reassembly: 4 inch lbs 5. Lift the top of the main board slightly away from the chassis to access the NIBP tubing connection to the air inlet/filter. Lift this side of the main board slightly to access the NIBP tubing connection underneath 6. Disconnect the NIBP tubing from the air inlet/filter port. Caution Do not apply tool edges or serrations to the tubing. The tubing is fragile, especially at the joints. To avoid damaging the tubing, disconnect using only your fingers or unserrated pliers. REASSEMBLY: When you reassemble the bottom chassis, verify that the radio card and the antenna are still in the correct positions: 38 Disassembly and reassembly Welch Allyn Propaq LT Vital Signs Monitor ferrite bead in place foam tape (white) in place antenna tucked inside the chassis Note If the radio card or the antenna has been moved out of position, return the monitor to a qualified Welch Allyn service center. The radio and the antenna are not field-serviceable components. REASSEMBLY: When reconnecting the tubing, lubricate the inlet port, using a cotton swab dampened with water. NIBP tubing Dampened cotton swab Air inlet filter port 7. Disconnect the ECG (flex) cable from ZIF connector J1 on the back of the main board. J1 ECG flex cable Service Manual Disassembly and reassembly 39 REASSEMBLY: When reconnecting the ECG cable, be certain that the cable leads are perpendicular to the board and to the ZIF connector before you lock the connector clips. 8. Disconnect the SpO2 (flex) cable from connector J3 on the back of the main board. J1 (ECG) J3 (SpO2) SpO2 flex cable ECG flex cable 9. Disconnect the tubing section at the point shown here: Disconnect the tubing here 10. Disconnect the power switch cable from connector J2 on the back of the main board. 40 Disassembly and reassembly Welch Allyn Propaq LT Vital Signs Monitor Power switch cable connector J2 11. Remove the main board. Main board with NIBP module Service Manual Disassembly and reassembly 41 Removing the NIBP assembly from the main board WARNING After replacing any part of the NIBP assembly, you must characterize NIBP. Failure to characterize NIBP could lead to excessive cuff pressure for neonatal patients. This procedure consists of 3 parts: • Part 1: Removing the Tubing • Part 2: Removing the Pump • Part 3: Removing the Valve Assembly . Depending on what you are replacing, do one of the following: • Part 1 • Parts 1 and 2 • Parts 1 and 2 and 3 NIBP disassembly, part 1: Removing the tubing 1. “Removing the lithium ion battery assembly” on page 29. 2. “Separating the top and bottom chassis halves” on page 31. 3. “Removing the main board from the bottom chassis assembly” on page 36. \ Caution Use extra care when handling the tubing. The tubing, especially at the joints, is very fragile. • Never use sharp-edged tools to grip or remove the tubing. • Always grip the tubing as close as possible to the point of contact with the connector. Pump Valve assembly Tubing Pressure transducers 4. Disconnect the two tubing sections from the pump. 42 Disassembly and reassembly Welch Allyn Propaq LT Vital Signs Monitor REASSEMBLY: The pump input (suction) port is slotted and is oriented away from the main board. The output port (pressure) is not slotted and is oriented toward the main board. Input (smaller hole, with slot) Output (larger hole, without slot) 5. Disconnect and set aside the three tubing assemblies. Input (to smaller hole, with slot) Output (to larger hole, without slot) NIBP disassembly, part 2: Removing the pump 6. Note the relative positions of the pump, the pump wires, and the cable ties securing the pump. Service Manual Disassembly and reassembly 43 Cable ties Pump wires 7. Note how the two pump wires are connected to the pump. Red wire to the + terminal Red Black Black wire to the unmarked terminal 8. Desolder the two pump wires connected to the pump. 9. Clip the pump cable ties. REASSEMBLY: Secure the pump wires INSIDE the cable ties. Position the pump and replacement cable ties in the locations noted in step 6 on page 42. The back of the pump should align with the back of the pump bracket. Note that the pump wires go inside the cable ties as shown: Cable ties Pump wires NIBP disassembly, part 3: Removing the valve assembly 10. Note the routing of the cable pack through the notch in the bottom of the valve assembly. 44 Disassembly and reassembly Welch Allyn Propaq LT Vital Signs Monitor Cable routing notch 11. Remove the single screw securing the valve assembly to the main board. Screw Reassembly: 4 inch lbs Pressure transducers Caution Do not attempt to remove the pressure transducers. The pressure transducers are not user-serviceable. Caution Take extra care to protect the pressure transducers as you remove the valve assembly. 12. Lift the valve assembly straight up and off of the pressure transducers. Pressure transducers Service Manual Disassembly and reassembly 45 Removing the patient connector panel from the bottom chassis 1. “Removing the lithium ion battery assembly” on page 29. 2. “Separating the top and bottom chassis halves” on page 31. 3. “Removing the main board from the bottom chassis assembly” on page 36. 4. Remove the clear plastic cover from the ferrite beads by removing the two screws (one is under a strip of foam tape) securing it to the chassis. Reassembly: 4 inch lbs 5. Pry the ferrite beads from the adhesive on the bottom case. Caution The ferrite beads are extremely brittle and can chip or crack if mishandled. 6. The connector assembly is held in place by the two snap-in clips and by an adhesive gasket. Remove the assembly by pushing in the clips while applying upward pressure on the assembly to break the grip of the gasket. Caution The clips are fragile. Excessive bending will break them. screwdriver tip clip detail REASSEMBLY: 46 Disassembly and reassembly Welch Allyn Propaq LT Vital Signs Monitor Remove all adhesive tape from the ferrite beads and remove all pieces of the adhesive gasket. Use all new adhesive tape on the ferrite beads and a new adhesive gasket on the connector assembly. Removing the power/USB flex connector from the bottom chassis 1. “Removing the lithium ion battery assembly” on page 29. 2. “Separating the top and bottom chassis halves” on page 31. 3. “Removing the main board from the bottom chassis assembly” on page 36. 4. Remove the two hex nuts from the rear of the flex connector. 5. Remove the connector guide posts from the connector well. Caution Use extra care during this procedure to protect all components of the flex circuit. Note The hex nuts and the connector guide posts cannot be reused after removal. The hex nuts are secured with Loctite adhesive. Removing the nuts damages them and damages the guide posts. 6. Remove the Power/USB flex connector assembly. REASSEMBLY: (1) Install the washers onto the new connector guide posts. (2) Seat the guide posts inside the connector well, noting the proper alignment of the flat side of the guide posts. (3) Install the flex connector assembly. (4) Add threadlocker to the screws and tighten the hex nuts enough to slightly compress the foam pad. Service Manual Disassembly and reassembly Disassembling the cradle Note To facilitate reassembly, observe carefully while disassembling. Replacing the fuse 3A, slow blow, 2AG 1. Remove the fuse cover by rotating it (using a screwdriver) 90 counterclockwise. T3A/250V 12-28V fuse cover 3A 2. Remove and replace the fuse. 3. Replace the fuse cover. Removing the bed rail hook 1. Remove the two screws securing the handle to the rear of the cradle. Reassembly: 12 inch lbs 2. Slide the handle up and off of the shoulder screws. 47 48 Disassembly and reassembly Welch Allyn Propaq LT Vital Signs Monitor Removing the lower housing, I/O panel, and power board 1. Remove the seven machine screws from the bottom of the lower housing. Bottom chassis screws (7) Reassembly: 6 inch lbs REASSEMBLY:Note the three screw holes that have nylon washers. These washers must be used in these screw holes. Nylon washers 2. Remove the threadlocking screw and nylon washer from the bottom of the I/O panel. I/O panel screw Reassembly: 2 inch lbs USB-equipped models only: bend this rubber plug out to remove the bottom chassis. (detail) Service Manual Disassembly and reassembly 49 3. With the AC power adapter unplugged from the wall, plug the AC power adapter into the cradle AC power input connector. 4. Using the AC power adapter connector for leverage, carefully rock the I/O panel from side to side to break the bond of the adhesive gasket, and then separate the I/O panel from the upper housing. Note Do not attempt to save the adhesive gasket around the I/O panel. This gasket cannot be reused. 5. Remove and discard all pieces of the I/O panel adhesive gasket. 6. Unplug the AC power adapter from the cradle. 7. Separate the upper and lower cases. 50 Disassembly and reassembly Welch Allyn Propaq LT Vital Signs Monitor Power board Interconnect board 8. Carefully detach the thin, black rubber seal from the upper case. REASSEMBLY: Carefully install the thin, black rubber seal in the trough in the lower case before joining the upper and lower case halves. REASSEMBLY: When the rubber seal is properly installed, the ends of the seal extend into the I/O panel opening. opening for I/O panel tubing ends Service Manual Disassembly and reassembly 51 REASSEMBLY: Align the power board with the slots in the lower cradle housing. lower cradle housing power board alignment slots REASSEMBLY: When closing the cradle, bend the white insulator on the power board to slide along the wall of the lower cradle housing. lower cradle housing insulator 9. Note the routing of the J1 cable on the Interconnect board for later reassembly. 52 Disassembly and reassembly Welch Allyn Propaq LT Vital Signs Monitor J2 J1 10. Disconnect J1 and J2 from the Interconnect board. 11. Remove the Power board and I/O panel by sliding the Power board out from the slots in the upper housing. J1 12. Disconnect the I/O panel connector from J1 on the Power board. J1 Service Manual Disassembly and reassembly 53 REASSEMBLY: (1) Clean all remnants of adhesive from the upper and lower cradle cases, and from the I/ O panel if you are reusing it. (2) Apply a new adhesive gasket to the I/O panel. Note: On USB-equipped cradles, keep the USB port cover out of the way during reassembly. (3) Connect the I/O panel to J1 on the Power board. (4) Install the Power board into the slots in the upper housing. (5) Set the I/O panel in place, but do not remove the protective film from the adhesive gasket until the lower cradle housing is installed. Removing the interconnect board 1. Remove the four screws securing the Interconnect board to the upper housing and lift the Interconnect board from the housing. Interconnect board Reassembly: 4 inch lbs Note An early version of the Interconnect board included a photosensor attached by a 4-wire cable. If this photosensor and cable are present, clip the cables close to the board and remove the cable and photosensor. Removing the latch 1. Remove the four screws holding the latch bracket, and remove the bracket. Alignment slot Alignment pinhole Latch bracket screws (4) Reassembly: 4 inch lbs 54 Disassembly and reassembly Welch Allyn Propaq LT Vital Signs Monitor 2. Remove the two latch springs by compressing them and lifting them off of the posts. REASSEMBLY: Note the small alignment slot on one side of the bracket and the small alignment hole on the other. 3. Remove the latch from the upper housing. Note Interconnect boards shipped in early-production cradles included a photosensor assembly that is no longer used. Later Interconnect boards do not have the photosensor assembly. • If you are reusing the original interconnect board, leave the reflective foil intact; otherwise, disregard the reflective foil. • If you are replacing the latch, the replacement latch on the replacement board might not look like the original. Reassembly: Install the blue button cap on the latch. Orient the flat side of the cap toward the catch. Foil reflector used for some early-production cradles with photosensor. (See the notes on this page and the previous page.) Latch catch The flat side of the blue cap is on the same side as the latch catch. 55 5 Functional verification Functional verification overview This section describes the procedure for a complete functional test to support recommended preventive-maintenance schedules. Equipment required The following equipment is required for functional verification of a fully configured monitor. Commercially available general-purpose/medical test equipment Item Manufacturer part number/specification Power supply Variable, 0-28 VDC, 0.100A (minimum), with voltage and current indicators (for 1mA current measurement) Digital pressure meter Netech Digimano 1000 or equivalent AC withstand voltage (hi-pot) tester Associated Research 3605 or equivalent Hi-Pot Return Test Probe Associated Research 38082 Return Retractor Hi-Pot High Voltage Test Probe Associated Research 38083 Safe-T Probe (High Voltage Test Gun) ECG Simulator Fluke 217A or Equivalent SpO2 simulator (to test the monitor and SpO2 sensor) Fluke (Biotek) Index2 XL/XLFE or equivalent Masimo SpO2 Functional tester, Masimo SET (to test the monitor only) Masimo SET Tester 1795 Cable, Masimo SET, DB9-LNCS (4’, 10’, or 14’) LNC-04-WA 4’ LNCS cable or LNC-10-WA 10’ LNCS cable or LNC-14-WA 14’ LNCS cable Adapter cable, Masimo 1645, MAC-1 SpO2 adapter cable (LNOP-to-LNCS) Nellcor SpO2 Functional tester (to test the monitor only) Nellcor SRC-MAX Extension cable (required for SRC-MAX) Nellcor DEC-8 Syringe, 60-ml, Slip-tip, Luer BD (Becton, Dickinson) 309654 or equivalent 56 Functional verification Welch Allyn Propaq LT Vital Signs Monitor Welch Allyn accessories and test equipment ECG cable, 4’, 5-lead 008-0522-00 (AAMI) or 008-0522-01 (IEC) NIBP Hose, Neonatal, 8’ 008-0265-XX Neonatal #1 cuff, disposable, box of 10 008-0620-XX Adult Cuff 008-0628-XX NIBP Hose, Adult 008-0864-XX DC Input Cable 008-0290-XX DC power adapter 503-0142-XX Procedures Charging cradle This procedure verifies charger operation. It does not verify charger accuracy. Voltage and current are reported on the service screens with wide tolerances, due to measurement limitations of the monitor and limitations in how the cradle reports charging currents. Charger voltages and currents are tested to very narrow tolerances at the factory. Inspecting the monitor connector Inspect the 17-pin monitor connector to verify that it is clean and free of debris. Partially discharging the battery With the monitor out of the cradle, run the monitor until it does a low-battery shutdown. Charging/LED operation 1. Observing correct polarity, connect the DC input cable (008-0290-XX) to the power supply. 2. Set the power supply for 28 VDC. 3. Connect the DC input cable from the power supply to the cradle. 4. With the monitor removed from the cradle, verify that the input current to the cradle is less than 50 mA, the power indicator on the cradle is green, and the status indicator on the cradle is off. 5. Disconnect the power cable from the cradle and the power supply. 6. Connect the AC power adapter (503-0142-XX) to the cradle, and verify that the power indicator on the cradle is ON and the status indicator on the cradle is OFF. 7. Dock the monitor into the cradle, and turn on the monitor if it does not turn on spontaneously. 8. Verify that the status indicator on the cradle is green. 9. After the monitor completes its power-up diagnostics, navigate to Setup > Service > Battery and press . Service Manual Functional verification ID: SET_CAOJ1T9L 57 3:00:06P Adult Rm Service NIBP ECG SpO2 USB Radio Software Display Battery Voltages Buttons Battery Show Info ID: SET_CAOJ1T9L 3:00:06P Adult Rm Service NIBP ECG SpO2 USB Radio Software Display Battery Voltages Buttons Battery Show Info Battery Information Exit SN 044801 V BAT Charge current Battery state Charger state 7.83 0.84 3 2 Exit 10. Verify that the charge current is between 800 mA and 1100 mA and that the charger state is 2. 11. Verify that the battery icon on the monitor is green with a lightning bolt. 12. Press Note to start the NIBP pump. Pump startup may be delayed until power up NIBP testing is completed. 13. Verify after several seconds of pumping that the charge current is less than 220 mA. 14. Verify after several seconds of pumping that V BAT is between 8.14 V and 8.55 V. 15. Press to stop the NIBP pump. 16. Leave the monitor in the cradle until the status indicator on the cradle goes off. 17. Verify that the battery icon on the monitor display contains no lightning bolt. 18. Navigate to Setup > Service > Battery, press , and verify that the charger state is 6. 19. Remove the monitor from the cradle and let the monitor continue to run for a minute. 20. Install the monitor in the cradle and verify that the status indicator on the cradle is briefly green and then goes off. 58 Functional verification Welch Allyn Propaq LT Vital Signs Monitor Charge time (optional procedure) A normally discharged battery pack typically requires 3 hours (4 hours maximum) to fully charge, whether the monitor is on or off during charging. Note A normally discharged battery pack is one on which a monitor has recently run for more than 5 minutes just before a low-battery shutdown. 1. Plug the monitor with the discharged battery into a powered cradle, in an environment with temperature in the range 0 C to 40 C. 2. Note the time required for the status indicator on the cradle to change from green to off. This may be timed during Step 16 on page 57. System tests With the battery fully charged: 1. Power-on the monitor, observing the power-up sequence to verify that all three LED indicators light and that all three audio tones sound. 2. Start a new patient. 3. Highlight and press . 4. Navigate to Setup > Service > Voltages/Show Info and press . 5. Verify that the displayed (measured) values for each supply are within the ranges shown on the screen. 6. Navigate to Service > Display > Pixel Test and press twice. 7. Using the navigation arrows, cycle through the six colors on each screen half, verifying that all pixels are displayed in all colors and with uniform accuracy and brightness. 8. Press to exit the Pixel test. 9. Go to the Buttons test and press twice. 10. Push each button and verify that all button presses are shown. 11. Press and simultaneously to exit the Buttons test. 12. Navigate to Service > Battery > Battery Info. 13. Verify that the charger state is 8. 14. Exit the Service menu. ECG 1. Connect a 5-lead ECG cable between the monitor and the ECG simulator. 2. Set the simulator for Lead II, normal sinus, 80 bpm, 1 mv. 3. Press as needed to view a waveform display. 4. Highlight ‘II’ and press to the display the Waveform Source drop-down menu. Service Manual Functional verification STEWART, ANN 7762940 Adult II 1mV/cm Waveform Source Lead I Lead II 6 sec Lead III aVR aVL aVF V Resp SpO2 Add 2nd Wave HR/min NIBP mmHg 80 59 15:14:28 Rm ED 2263 12 97 % Resp/min SpO2 5. Highlight each ECG Lead (I, II, III, and V) and verify that for each one: • a waveform is present • heart rate is 80 bpm ± 3 bpm 6. Remove one lead and verify that the monitor displays an equipment alert identifying the failed lead: “Equipment Alert/ECG Fault/xx Lead failed”. 7. Replace the lead and wait for the waveform to reappear. 8. Repeat Step 6 and Step 7 for each lead. 9. Reconnect all leads. 10. Set the ECG simulator to a paced signal. 11. Set the monitor pacer indicator ON (Setup > ECG > Pacer Indicator). 12. Verify that the monitor ECG waveform displays the pacers as vertical dashed markers. I mV N 1cm Pacemaker signal indicators Respiration 1. Set the Resp parameters on the ECG simulator to: • • • • 20 breaths/minute breath size = 1 ohm base impedance between 200 and 1200 ohms Lead Select to lead I 2. On the monitor, turn on Resp. 3. Set the Waveform Source to Resp. (See Step 3 and Step 4 in “ECG” on page 58.) 4. Set the monitor Resp Lead to Ld1 (RA-LA). (Resp/min Resp Lead.) 5. Verify that the monitor displays a Resp waveform with a rate of 20 bpm ± 2 bpm. 6. Switch the respiration simulator lead to lead II. 7. Set the monitor Resp Lead to Ld2 (RA-LL). 60 Functional verification Welch Allyn Propaq LT Vital Signs Monitor 8. Verify that the monitor displays a Resp waveform with a rate of 20 bpm ± 2 bpm. SpO2 Test either the monitor or the monitor with the sensor, as required for your application. Note If the default simulation values are outside the monitor alarm limits, either adjust the alarm limits or silence the alarms when they occur. Testing the Model 802LTxN monitors only 1. Power-off the monitor. 2. Connect the Nellcor SRC-MAX SpO2 Functional Tester to the SpO2 input connector through a Nellcor DEC-8 extension cable. 3. Power-on the monitor. The simulator flashes some LED indicators and initializes to a default condition in which the four test parameter indicators are lit closest to their respective selector buttons. The default should be 60 bpm and 75% saturation. 4. When the monitor display stabilizes, verify the following: • pulse rate is 60 bpm ± 3 bpm • saturation is 75% ± 3% 5. Switch the simulator to 200 bpm. 6. When the monitor display stabilizes (which could take as long as 30 seconds), verify that the pulse rate is 200 bpm ± 3 bpm. 7. Switch the simulator to 90% saturation. 8. When the monitor display stabilizes, verify that the saturation is 90% ± 3% 9. Disconnect the simulator. Testing the Model 802LTxS monitors only 1. Connect the Masimo 1795 SET SpO2 Tester to the monitor via a Masimo DB9-LNCS cable (4’, 10’, or 14’) and a Masimo 1645 MAC-1 adapter cable (LNOP-to-LNCS). 2. When the monitor display stabilizes, verify the following: • Pulse rate from SpO2 = 61 bpm ± 3 bpm • SpO2 saturation = 81% ± 2% 3. Disconnect the simulator. Testing the monitor and the sensor 1. Set the Fluke Index2 SpO2 simulator to: Type = [Masimo or Nellcor], % = 94, Rate = 60, motion artifact = No 2. Let the simulator warm up for at least 5 minutes. 3. Connect a sensor to the optical finger of the simulator and to the monitor. 4. When the monitor display stabilizes, verify a saturation reading of 94% ± 4% and a pulse rate of 60 bpm ± 4 bpm. Service Manual Functional verification 61 NIBP Characterization test 1. Attach a neonatal hose (008-0265-XX) to the monitor NIBP air connector. 2. Connect the test syringe, set to a volume of 35 ml, to the neonatal hose. (See “35-ml test volume” on page 73.) Note The syringe plunger must not move when pressure is applied to the syringe cylinder. 3. Set the monitor patient mode to Adult. 4. Start an NIBP reading. 5. Verify that the monitor displays the message “Equipment Alert/NIBP Fault/Kinked or neonate hose”. WARNING If the message “Kinked or neonate hose” does not appear, remove the monitor from service. Characterize NIBP (“Characterize NIBP” on page 21) and then repeat this Characterization Test. If the monitor cannot pass the Characterization Test, return it immediately to an authorized Welch Allyn Service Center. WARNING Use of an uncharacterized monitor can result in overinflation of neonatal cuffs. The monitor is characterized at the factory. If any change to the NIBP components occurs, the monitor must be withheld from service until it has been characterized again. Leak rate test Note If the time spent to run these tests is too long, the monitor times out and dumps pressure. Note This test method uses a higher test pressure than required for compliance to regulatory standards, because only one of the monitor choices for built-in test pressures is equal to or greater than the maximum pressure required by regulatory standards. It also uses a much smaller test volume than required. Using this much more stringent test method assures not only that the monitor meets the requirements of all regulatory standards but also verifies that the leak rate of the monitor is sufficient for the monitor’s neonatal applications. 1. Attach a #1 neonatal cuff and hose to the monitor. 2. Wrap the cuff securely around a solid cylinder of circumference between 1.6 and 1.9 inches (4.1 and 4.8 cm.). 3. Navigate to Service > NIBP > NIBP Test. Note Four test pressures—0, 80, 150, and 300 mmHg—can be selected. The actual instantaneous pressure achieved, as displayed in the lower left, can vary significantly from the selected test pressure. The variance is greatest for the smallest test volumes, where actual pressure attained can be 10 to 20 mmHg greater than the nominal value of the test pressure. 62 Functional verification Welch Allyn Propaq LT Vital Signs Monitor Note Wait one minute for the NIBP to initialize before you select a test pressure. Note Before you switch from one test pressure to another, wait for the pump to fully inflate the cuff and stop pumping. 4. Press to start the test at 80 mmHg. The cuff inflates to approximately 95 mmHg. 5. After several seconds, press again to inflate to 150 mmHg. 6. After several seconds more, press again to inflate to 300 mmHg. The cuff inflates to 300 mmHg and the instantaneous pressure display at the lower left reads +++. 7. Wait until the pressure drops enough for the display to read 299 mmHg. 8. Wait 10 more seconds and then verify that the instantaneous pressure 291 mmHg. 9. Press Note to select 0 mmHg and release pressure. Optionally, you can also test the leak rate at lower pressures, using the following additional steps. 10. Pump to any pressure. 11. Wait 15 seconds and note the instantaneous pressure reading. 12. Wait another 10 seconds and verify that the instantaneous pressure is within 8 mmHg of the noted pressure. Accuracy test 1. Remove the neonate cuff from the monitor and replace it with an adult cuff and hose and a digital pressure meter. 2. Securely wrap the cuff around a solid cylinder of diameter between 3.2 and 4.3 inches (8.1 and 10.9 cm.). Monitor NIBP connector Pressure meter Adult cuff wrapped around a cylinder 3. Press to start the test at 80 mmHg. The cuff inflates to approximately 80 mmHg and then settles to a lower pressure. 4. Verify that the pressure reading on the monitor is within 3 mmHg of the reading on the digital pressure meter. 5. Press to start the test at 150 mmHg. The cuff inflates to approximately 150 mmHg and then settles to a lower pressure. Service Manual Functional verification 63 6. Verify that the pressure reading on the monitor is within 3 mmHg of the reading on the digital pressure meter. 7. Press to start the test at 300 mmHg. The cuff inflates to approximately 300 mmHg and then settles to a lower pressure. Note The monitor might momentarily display +++ (overrange reading) before settling below 300 mmHg. 8. Verify that the pressure reading on the monitor is within 6 mmHg of the reading on the digital pressure meter. 9. Press to return to 0 mmHg pressure. 10. Disconnect the hose from the monitor. Radio test This test applies only to model 802LTAN, 802LTAS, 802LTRN, and 802LTRS monitors. 1. Locate the monitor within 10 feet (unobstructed) of an Acuity System wireless access point. 2. Verify that the network connection symbol Note appears on the monitor. If the connection symbol does not appear, verify that the network is up and that the monitor has not been intentionally disconnected from the network. If the connection symbol still does not appear, refer to “Radio” on page 14. 3. Navigate to Service > Radio > Show Info. 4. Verify: Model 802LTRN, 802LTRS RSSI –41 @ 10 feet Model 802LTAN, 802LTAS RSSI –61 @ 10 feet Safety test (Hi-Pot) The monitor contains no isolation barriers. The cradle contains two 4KV isolation barriers—one between the 17-pin connector on the monitor and the dc power input connector on the cradle, and one between the 17-pin connector on the monitor and the USB connector on the cradle. These barriers are fully tested, at the factory, at 4KV rms at 60 Hz. The power adapter also contains a 4KV isolation barrier. Since each successive exposure to high voltage contributes to the degradation of an isolation barrier, and since no direct mains connection to the cradle exists, the following tests use a hi-pot voltage of 1.5KV as a reasonable compromise. Optionally, this hi-pot test can also be done on the power adapter. Electrical leakage tests for source and sink can also be done on the power adapter or on the cradle as follows: 64 Functional verification Welch Allyn Propaq LT Vital Signs Monitor 1. Tie the ECG inputs of a leakage tester to either (a) the negative pin of the dc output connector of the power adapter or (b) pin 7 or pin 11 of the 17-pin connector on the cradle. 2. Tie the mains connector of the leakage tester to the ac cord of the power adapter or to the negative pin of the dc input connector of the cradle or to the metal shroud of the USB connector of the cradle. Note, however, that with all insulation systems in place, the leakage current of a product’s insulation barrier is determined almost entirely by the capacitance inherent in that barrier, and is thus fixed by materials and spacing within the product. A hi-pot test is more effective than a leakage test for verifying an isolation barrier. Note Check with your local regulatory authority to see whether hi-pot testing has special requirements to meet local laws and regulations. 1. Set up the hi-pot tester as follows: Note For set-up information, refer to the tester manufacturer’s instructions for use. Voltage 1,500 VAC Ramp Down 0 Max Limit 2.50 mA Arc Sense 0 Min Limit 0.003 mA Frequency Set to local (50 or 60 Hz) Ramp Up 5.0 S Continuity Off Dwell 5.0 S Connect Off Delay 0 2. Connect the retractable return probe to the RETURN connector of the hi-pot tester. 3. Connect the high voltage test probe to the HIGH VOLTAGE (HV) connector of the hipot tester and, as required, to the remote trigger jack. 4. Extend the probe tip from the retractable return probe and touch it to either of the negative sockets of the DC input connector on the side of the cradle. (-) (+) 5. Extend the high voltage test probe tip and touch it to pin 7 or pin 11 of the P1 Interconnect connector inside the cradle bay. Caution Do not bend the connector pins. Service Manual Functional verification 11 65 7 6. Holding both probes in contact with the specified pins, trigger the hi-pot test. 7. Hold the test probes in place until the test is completed. Verify that PASS appears in the tester display. 8. For cradles equipped with a USB port: a. Move the return probe to the metal shell of the USB connector on the cradle. b. Keep the high voltage probe on either pin 7 or pin 11 of the interconnect connector. c. With both test probes in contact, trigger the hi-pot test. d. Hold the test probes in place until the test is completed. Verify that PASS appears in the tester display. Battery run time (optional procedure) Charge the monitor in a cradle until the status indicator on the cradle goes off. A new, fully charged battery pack is specified to operate the monitor, given the conditions listed below, for 8 hours under a heavy load or 24 hours under a light load: Standalone Acuity-connected Continuous monitoring Continuous monitoring Back light Off and display set to shortest time-out period Back light Off and display set to shortest time-out period Display on for no more than 5 minutes per hour plus a period at the end of each NIBP measurement and a period for ‘Low Battery’ equipment alerts Display on for no more than 5 minutes per hour plus a period at the end of each NIBP measurement and a period for ‘Low Battery’ equipment alerts ‘Low Battery’ equipment alerts acknowledged within 5 minutes ‘Low Battery’ equipment alerts acknowledged within 5 minutes Monitor at 22°C ± 2°C Monitor at 22°C ± 2°C HR/PR tone set to Low HR/PR tone set to Off Alarm tone set to Low Alarm tone set to Low In continuous communication (no dropouts) with Acuity 66 Functional verification Welch Allyn Propaq LT Vital Signs Monitor Light load (24 hours) • ECG with normal sinus rhythm and 60 beats/minute • Resp at 20 breaths/minute Heavy load (8 hours) • ECG with normal sinus rhythm and 60 beats/minute • Resp at 20 breaths/minute • SpO2 with saturation of 98%, PR of 60 beats/minute • NIBP autointerval of 15 minutes Service Manual Functional verification 67 Checklist and test results report form Use a copy of this 3-page form to track your progress through the validation tests. Test Specification Charging/LED operation 4 Input current, cradle Status, cradle powered, monitor not inserted < 50 mA Power indicator: ON Status indicator: OFF 6 Status, power adapter connected Power indicator: ON 8 Status, monitor running with discharged battery Status indicator: GREEN 10 Charge current, battery fully discharged Charger state, battery fully discharged Status indicator: OFF 800 mA - 1100 mA 2 11 Status, battery charging (green) 13 Charge current, pump running < 220mA 14 Battery voltage, pump running 8.14 V - 8.55 V 17 Status, battery fully charged (green) 18 Charger state, battery fully charged 6 20 Status, cradle transition Status indicator: green and then OFF Battery charge time (optional) 2 Charge time (continued below) < 4 hours Result Pass NA Fail 68 Functional verification Welch Allyn Propaq LT Vital Signs Monitor Test Specification System 1 Indicators, start-up Red, yellow, and green LEDs Low, medium, and loud tones 5 Voltage, power supply Within range 7 Pixels Visual 10 Buttons Visual 13 Charger state 8 ECG 5 Waveform Heart rate Present 80 bpm ± 3 bpm 6-8 Single lead fail (repeat for each lead) Lead Fail message for each lead 12 Pacer indicator Present Respiration 5 Waveform (Lead 1) Heart rate 8 Waveform (Lead 2) Heart rate Present 20 bpm ± 2 bpm Present 20 bpm ± 2 bpm SpO2 - monitor only, Nellcor 4 Pulse rate @ 60 bpm Saturation @ 75% 60 bpm ± 3 bpm 75% ± 3% 6 Pulse rate @ 200 bpm 200 bpm ± 3 bpm 8 Saturation @ 90% 90% ± 3% SpO2 - monitor only, Masimo 2 Pulse rate Saturation 61 bpm ± 3 bpm 81% ± 2% SpO2 - monitor and sensor Pulse rate @ 60 bpm 60 bpm ± 4 bpm Saturation @ 94% 94% ± 4% (continued below) Result Pass NA Fail Service Manual Functional verification Test Specification NIBP characterization 5 Wrong cuff alert “Kinked or neonate cuff” mesage appears NIBP leak rate 8 Leak rate 12 Leak rate 291 mmHg 8 mmHg in 10 seconds NIBP accuracy 4 Accuracy @ 80 mmHg monitor reading = meter reading ± 3 mmHg 6 Accuracy @ 150 mmHg monitor reading = meter reading ± 3 mmHg 8 Accuracy @ 300 mmHg monitor reading = meter reading ± 6 mmHg Radio 2 Network connection 4 RSSI @ 10 feet (symbol is present) RSSI –41 (802LTRN/RS) RSSI –61 (802LTAN/AS) Safety (Hi-Pot) 7 Isolation between the monitor Isolated and the cradle power input 8d Isolation between the monitor Isolated and the USB port Battery run time - new battery (optional) Light load 24 hours Heavy load 8 hours Result Pass NA 69 Fail 70 Functional verification Welch Allyn Propaq LT Vital Signs Monitor 71 6 Replacement parts This list includes field-replaceable service parts only. Product accessories are listed separately at www.welchallyn.com. Order Number 020-0647-XX 020-0631-XX 630-0223-XX 600-0506-XX 660-0227-XX 660-0257-XX 600-0554-XX 020-0649-XX 020-0623-XX 640-0628-XX 640-0647-XX 630-0241-XX 630-0243-XX 660-0218-XX 680-0074-XX 620-0403-XX 020-0625-XX 020-0624-XX 600-0396-XX 600-0500-XX 630-0224-XX 620-0385-XX 620-0397-XX 620-0383-XX 620-0048-XX 620-0049-XX 620-0149-XX 620-0278-XX 620-0290-XX 620-0408-XX 630-0260-XX 620-0418-XX 620-0217-XX 650-0021-XX Description Top chassis Top Panel Assembly (includes buttons, window, panel overlay) Service Kit, Display, Color LCD, QVGA with extender flex Gasket, Display (2 each) Bracket, Display Cable Assembly, LCD Extender Flex Speaker Assembly with Cable Gasket, Speaker Bottom chassis Connector Panel, ECG/SpO2/NIBP Bottom Case Assembly with Power Switch, Connector Panel, and Power Flex) Label, Rear Panel Label, Icon Descriptions Insert, Screw Cover, Bottom Case Insert, Rectangular, Bottom Case Connector Assembly, Power/USB Flex Pump, NIBP, without wires Cable Tie (2 per pump) Tubing Kit (3 Tubing Sections with fittings and check valve) Valve Assembly (Including Pump Wires) Check Valve Filter Cap, Filter O-Ring, Filter Strap Lugs Fasteners, monitor Screw, 6-32 X .437, Captive, Slt, SS Screw, 6-32 X .5, PH, Ph, NyLoc, SS Screw, 6-32 X 1, PH, Ph, NyLoc, SS Screw, 2-28 X .250, TF, PH, Ph, ST, Zinc, Plastite Screw, 4-40 X .5, PHH, PNH SST, NyLoc Patch Screw, 4-40 X .25, PHH, PNH SST with NyLoc Patch Screw, 4-24 X .38, Flt, PHH, Type BT Cap, Plastic, Insert/Guide Pin Washer, Flat, .215” O.D., .115” I.D., .020” Thick, NPR Kepnut, 4-40, Steel, Zinc-Plated Loctite, S/LH, No. 425 Thread Locker 72 Replacement parts 020-0635-XX 020-0638-XX 020-0650-XX 600-0544-XX 503-0058-XX 020-0637-XX 630-0251-XX 630-0252-XX 630-0253-XX 020-0652-XX 020-0651-XX 640-0637-XX 630-0259-XX 600-0526-XX 620-0406-XX 600-0552-XX 620-0188-XX 620-0415-XX 620-0414-XX 620-0423-XX 620-0424-XX 620-0149-XX 620-0413-XX 020-0636-XX Welch Allyn Propaq LT Vital Signs Monitor Charging cradle Interconnect PCB Power Board Assembly, with Power and Interconnect Cables Panel Assembly, I/O, Cradle Gasket, Adhesive, I/O Panel Fuse, 3A, Slo-Blo, 2AG Housing, Upper Cradle Latch, Cradle Bracket, Latch, Cradle Button, Latch, Cradle Housing, Lower Cradle Assembly with USB Housing, Lower Cradle Assembly without USB Label, Cradle Plug, USB, Cradle Foot, Cradle (4 per) Spring, Latch, Cradle (2 per) Foil, Latch, Cradle Fasteners, cradle Screw, Plastite, 4-20 X .375, 60-1, Pan Head, Philips Screw, #6-32 X .375, PNH, PHH, SST, PTH Washer, .281” O.D., .175” I.D., .031” Thick, Nylon Screw, M4 X 4, PRCN Shoulder, AW, SST (2.5 mm Hex Drive) Screw, M4 X 5 mm, PNH, PHH, SST Screw, 2-28 X .250, TF, PH, PH, ST,Zinc, Plastite Washer, .187” O.D., .125” I.D., .031 Thick, Nylon Fastener Assortment, Monitor/Cradle 73 A 35-ml test volume Refer to the illustration below: 1. Move the syringe plunger to the 35-ml line. 2. Drill a small hole (for example, 9/64”) through the syringe and the plunger shaft, at a location between the plunger and the top of the syringe. 3. Insert a rod or bolt (for example, a 6-32 screw) through the hole so that the plunger cannot move, creating a constant volume in the syringe of 35 ml ± 2 ml. 4. Secure the rod or bolt so that it cannot fall out of the hole. -- -- 10 -- -- 20 -- -- 30 -- -- 40 -- -- 50 -- -- 60 ml 74 35-ml test volume Welch Allyn Propaq LT Vital Signs Monitor 75 Index A D accessories, 1 adhesive gasket, 47 air filter replacing, 28 antenna correct position of, 36 not user-serviceable, 3 assembly procedures, 23 autoclave, 1 disassembly procedures, 23 display protecting, 32 removing, 32 B battery end of life, 27 operating states, 14 operation, 16 procedure, partial discharge, 54 removing, 27 storage recommendations, 16 troubleshooting, 14 C cable routing, 41, 49 case disassembly, 29 caution, term defined, 2 characterize NIBP, 19 charger operating states, 15 troubleshooting, 15 chassis disassembly, 29 disassembly, top piece, 32 connector locations, 26 connectors overview, 25 controls, monitor, 6 cradle service chart, 18 E ECG cable, 36 ECG flex cable, 36 electrostatic discharge, see ESD equipment required functional verification, 53 ESD, 2 F field-replaceable unit, 3 functional verification battery run time, 63 checklist and report form, 65 cradle, 54 ECG, 56 equipment required, 53 NIBP, 59 overview, 53 radio, 61 respiration, 57 safety, 61 system tests, 56 G gasket adhesive, 47 large blue, 31 H Hi-Pot, 61 76 Index L LCD bias, 21 M main board not user-serviceable, 3 removing, 34 menu, service, 6 menus, service, 19 monitor service chart, 17 monitor controls, 6 N NIBP characterization, 19 NIBP tubing, 37 NIBP tubing removal, 35 nylon washers, 46 P photosensor (obsolete), 51, 52 power switch, 38 pump removing, 40 wiring, 41 R radio not user-serviceable, 3 radio status checking, 21 reassembly procedures, 23 returning products, 4 RMA, 4 routing, 41, 49 S safety, 1 general information, 1 screws chart, 24 service intervals, 5 warranty and non-warranty, 5 service menu, 6 characterize NIBP, 19 setting the LCD bias, 21 Welch Allyn Propaq LT Vital Signs Monitor service menus, 19 shipping, 4 speaker disassembly, 30 removal, 33 SpO2 cable, 37 T technical support, 3 troubleshooting, 9 tubing, 37 removal, 35 V verification see functional verification W warning, term defined, 2 warranty, 1 washers nylon, 46 Z zero insertion force see ZIF ZIF connectors using, 25