1
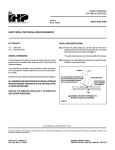
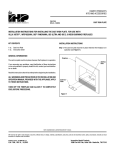
Ontario Infant Hearing Program
Bio-logic NavPro Windows EP/Scout: IHP Protocol Setup Specification & Guide
AEP Software Version 6.1.0
Document Revision 5. April 13, 2006
This document addresses some of the procedures required to implement IHP Audiologic
Assessment protocols on the upgrade NavPro (‘Win AEP’) systems that are targeted for clinical
use by April 2006. It is intended for use in conjunction with the Bio-logic Auditory Evoked
Potential (AEP) System User’s and Service Manual 590-AEPUM1;Rev C (2005).
The purpose of this document is to facilitate system setup and use, consistent with the next
revision of the IHP Audiologic Assessment Protocol, due to be issued by April 24, 2006. In the
Appendix are explanatory notes on novel features and specific operating changes.
With correct set up, we have found the new system to be easier to use, more powerful, and
able to yield cleaner results than the previous system.
For the previous (DOS-based) NavPro AEP systems, IHP ABR test protocols were configured by
Mount Sinai Hospital (MSH) and distributed by disk or email as a replacement for the file
protocol.nrm. It is not possible to continue that practice. The protocols are now contained in
an Access database file, and we are advised against distributing a reconfiguration of that file,
because of a risk of database corruption. Thus, all new NavPros will require protocol setup by
a designated IHP audiologist (DIA) at each IHP testing site. It is NOT the responsibility of Biologic or of EMI to implement the IHP protocol setup.
At first sight the setup may seem tedious, but it is readily mastered by anyone familiar with
Windows. The skills developed by following the procedures given here and in the relevant
parts of the AEPUM manual will prove invaluable when equipment problems occur, when future
changes to IHP protocols are distributed, and to create custom protocols for non-IHP use.
The relevant parts of the AEPUM are best digested with the system fully assembled and ready
for data acquisition. It is not necessary to use a subject or to short-circuit the electrode inputs
with jumpers, in order to set up the testing and reporting protocols.
After completion of all system protocol setup according to the specifications below, DIA
practice with volunteer subjects is essential, before clinical use and training of colleagues in
system operations. The DIA should verify complete and successful system and
protocol setup and operation on volunteer subjects, running all IHP protocols and
printing reports, before replacing your current instrumentation.
Because we are not distributing the standard protocols, and because identical test protocol is a
core principle of IHP operations, all IHP sites are requested to fax or email one full IHP case
report, including ABR waveforms, all the standard collection settings lists, and also the DPOAE
report, to Martyn Hyde at 416.586.8739. Please email [email protected] to alert Martyn
to the fax transmission. Remember to black out the baby’s name from the faxed material.
This transmission is also recommended after any future replacement of equipment
that requires repeat protocol setup. Experience indicates that even with distributed
protocol files, divergences in system setup have occurred.
BIO-LOGIC AEPUM SECTIONS YOU NEED NOT READ FOR IHP TESTING
The user (including the DIA) need NOT read the following sections of AEPUM, which are either
irrelevant for IHP test protocols or are considered by Mount Sinai Hospital (MSH) to be
unhelpful or potentially misleading in the IHP context.
1
Stacked ABR
CHAMP
Stacked ABR/CHAMP Quick Guide
Vestibular Evoked Myogenic Potential VEMP)
Electrical ABR
Noise Level Stop Criterion and Fsp
Labels Toolbar
Digital Filter
Graphmaster
Sequence Setup
SABR/CHAMP Report Layout
Graphmaster
CHAMP Technology Tutorial
Stacked ABR & CHAMP Data Collection
2
3
11-12
27-29
30-32
47-61
76-77
86
89-111
138-144
153
161-166
167-170
171-191
We do not implement Stacked ABR, CHAMP, VEMP and Electrical ABR.
The Noise Level Stop Criterion section text is not appropriate for IHP use.
We do not use waveform labels in IHP, though you may wish to employ that section in nonIHP applications such as oto-neurologic ABR.
We do not use Digital Filters, because they are unnecessary and unverified.
We do not use Graphmaster because the click norms are not relevant to our protocols.
We do not use Sequences (ordered protocol sets) because of the adaptive nature of IHP test
strategies.
ELECTRODE PLACEMENT
AEPUM
P 21
ALL IHP ABR recordings are done with a two-Channel electrode montage. The noninverting electrode is on the highest possible midline forehead position, connected
to Channel 1 Input 1 (white) and jumpered to Channel 2 Input 1 (black). The LEFT
mastoid is to Channel 1 Input 2 (blue), and the RIGHT mastoid to Channel 2 Input 2
(Green). These connections MUST be correct. Never use any other montage for IHP
tests, or incorrect results will occur!
AEP SETUP
All new IHP NavPros should be setup exactly according to the following instructions.
If persistent difficulties are encountered, assistance may be sought from Kris Madsen at MSH,
by email to [email protected] or by phone to 416.586.4800 ext 6130.
In the rest of this document, you will be setting values for many parameters. In some cases,
the correct parameter values may already be set, in which case you simply proceed to the
next parameter specified. Do not assume that any parameter value will be the same as you
were using in the previous instrumentation; please check that each value is set exactly as
given in this document!
If you are now ready to begin the setup, double click the AEP icon to open the
program. If the Open Patient window appears, close that window.
DEFAULT DISPLAY PARAMETERS
P 157
These default settings can be over-ridden, if necessary, by using the icons and options
available in the Display menu.
In the Main Menu shown at the top of the screen on startup, select Setup/Default Display
Parameters
Waveform Grouping: check Match
2
This matches displayed averages by stimulus level, but leaves a small vertical space between
them. This separates the Tags for individual traces. As previously, the Tag is the text string
that identifies key parameters associated with the individual traces, and we have extended
them to incorporate new, trace-specific information. Use of the Superimpose option overlays
trace baselines and their Tags, and this can cause the Tags to become illegible under some
conditions. More importantly, the Match option improves the ability to distinguish the
replicate averages at a given intensity, when the traces overlap. This is especially useful when
trying to identify individual, low-noise, response-negative traces, when one or more of the
replicate averages is noisy. It also reduces the tendency to produce a false impression of
response by vertical positioning of averages so as to maximize overlap in regions of suspected
response. This is a common source of false-positive response identification in noisy records.
Some users will dislike this separated display style at first, many being used to subjective
superpositioning (vertical shifting) of averages to enhance possible response. With practice,
the advantages of slight separation will become clearer. You can always shift the averages
manually if you must, overriding the default setting, but if the Tags become illegible, you must
separate the records. If the waveforms and tags are managed appropriately, you will not
need to annotate any of the records manually.
Alternating Polarity Wave Display: check Alt
It is necessary to display the Rare and Con traces, in the Auditory Dys-synchrony subprotocol. To do this, you must over-ride the display default using the Polarity option on the
Stimulus tab in the Collection Protocol Setup screen (see later).
Stimulus Blocking Appearance: check Show response
This is almost always a better option than a flat line, because the artifact appearance and size
is informative. Large artifacts may cause the preamplifier and filters to produce ‘ringing’
response-like waveforms. If you know nothing about the artifact region, you cannot be aware
of this possibility. Also, artifact size may alert you to poor electrode contact and/or poor
positioning of transducer and electrode leads, causing excessive artifact pickup. Also, artifact
display is crucial in the AD sub-protocol.
Display Scale: check Specific Scale, 0.5 μV
The previous NavPro display scale was typically set at 0.2 μV, and the scale intervals on the
new system are about twice as large, so the visual impression will be similar.
Do not use Auto-Specific Scaling!
Use of auto-scaling makes it VERY difficult to interpret sets of averages correctly. It also
inhibits development of rapid visual assessment skills related to residual noise levels and to
response size. All waveforms should be scaled identically. Under exceptional circumstances,
waveform display scale for specific waves can be altered, for example, in the Analysis menu.
Automatic Collecting Wave Display:
Panel Selection
The data collection screen (not shown at this point) contains two Panels, side by side, that
display acquired averages on common x and y axes. A vertical separator can extend one
panel or the other, but for normal data collection, both panels should be left fully displayed.
The position of the vertical separator affects the waveform plot x-axis scaling on the
report, and it is important that the left and right panels, which display the results for
individual ears side-by-side, have the same horizontal scaling.
Check: Ear Panel Same if you want the Left Ear on the Left Collection panel and the Right
Ear on the Right Panel, or Ear Panel Opposite if you want the standard audiometric display
with the Right Ear on the Left panel, etc.
Automatic Collecting Wave Display:
The screen display is slightly different from that shown in the AEPUM manual.
3
AEP, VEMP & P300: Check Ipsi
Latency Grid: On
Hit OK
Waveform Baseline: Blank
USER PREFERENCES SETUP
P 154
From the main menu, select Setup/User Preferences
These preferences will normally be preset to manufacturer defaults. They should be reviewed
and if necessary modified to reflect the following selections, which will simplify subsequent
test protocol setup and help to avoid errors.
Frequency Duration Units: check cycles
Tone Burst Default Duration and Ramp
For ALL frequencies:
Set Rise/Fall: 2.00
Plateau: 1.00
Check Open the…and check Prompt Exit
Hit OK
Amplifier Units: check Gain
Ramp: Linear
CALIBRATION SETUP
From the main menu, select SETUP/TRANSDUCER CALIBRATION
p 143
Select Insert Earphones
Verify that Manufacturer Defaults and Use Defaults are blank, and if not, set them to
blank.
Insert the following values in the nHL table:
500 Hz 1000 Hz 2000 Hz 4000 Hz
25
25
22
26
Leave all other values unchanged!
Select Bone Oscillator
Verify that Manufacturer Defaults and Use Defaults are blank, and if not, set them to
blank.
Insert the following values in the nHL table:
Leave all other values unchanged!
500 Hz
64
2000 Hz
61
Select Headphones
Verify that Manufacturer Defaults and Use Defaults are blank, and if not, set them to
blank.
Insert the following values in the nHL table:
Leave all other values unchanged!
500 Hz 1000 Hz 2000 Hz 4000 Hz
25
23
26
29
Note that IHP does not endorse either ABR testing or the validity of default
calibration values for any other stimuli than those specified in this document. The
Click value is already correct.
Exit Transducer Calibration by hitting OK, to apply your changes. Re-enter the Insert
Earphones and Bone Oscillator displays and verify that your changes have been
implemented. Exit again with OK.
4
IHP ABR TEST PROTOCOL SETUP
You will have to setup seven distinct test protocols. The instructions that follow are the safest
and quickest way to do it. Essentially, what you do is set up completely and save a new
‘master’ IHP protocol, then you edit only a few fields in a specific sequence, to develop the
complete set of protocols.
Please note carefully each parameter value and text string in the following notes;
some of them may not be what you anticipate, due to new system features and
modifications to IHP protocols.
As you work through these instructions, the level of detail given will decrease, in the
light of your increasing familiarity with the procedures.
If the system opens in the Open Patient window, Close that window to reveal the Main Menu
at the top of the screen.
From the Main Menu, select Setup/Collection Protocols
P 42
You are in the Collection Protocol Setup screen.
Click the down arrow by Protocol Name. You will see a drop-down list of Bio-logic protocols.
We advise you to select and delete them one by one (some, such as CHAMP and SABR, will
not delete), but DO NOT DELETE the following:
ABR (2 Channel, Right Ear, 21.33 ms window)
AEP Default (1 Channel)
Hardware Loop Test
It is tedious to have a large list of irrelevant protocols with the new IHP protocols stuck at the
bottom, every time you want to pick an IHP test protocol. Should you intend to do non-IHP
tests with custom protocols, you can always add additional custom protocols, with or without
parameter and protocol recommendations from MSH, if desired (eg for otoneurologic ABR,
ECochG or cortical N1 tests).
Select protocol ABR (2 Channel, Right Ear, 21.33 ms window)
Select Save As
In Protocol Save As enter the new protocol name as: AEP:IHP Insert 2 kHz 30 dBnHL
Hit OK
Note that we have not included the setup ear in the protocol name. This is a generic IHP 2
kHz minimum-level protocol and you simply choose the test ear before data collection.
Select Recording
You are now in the Recording parameter setup screen.
Enter or verify the following parameters:
Test Type: AEP
P 45
Epoch Time: 21.33
# Points: 512
Pre/Post Time: 0.0
Blocking: 0.0
Maximum# of Averages: 4096
Save Impedance Test Values: check
Noise Level Stop Criterion: check, 30 nV
5
Select Save
Fsp Calculation: blank
Select Stimulus
P 51
Enter or verify the following parameters:
Transducer: Insert Earphones
Ear: Right
Polarity: Alternating
Intensity: 30 dBnHL
Continuous Stimulus: blank
Insert delay: 0.80
Stim Rate: 39.1
Trigger In: blank
Intensity Step: 5
Trigger Out Pulse: blank
Stimulus Type: Tone burst
Frequency: 2000
Ramp: Linear
Plateau (cycle): 1.00
Rise/Fall (cycle): 2.00
Masking type: none
Select Save
Select Amplifier
Enter or verify the following parameters:
P 57
Channel Number:
Enable:
Gain:
Artifact Reject:
Low Filter:
High Filter:
Notch Filter:
Channel 1
Check
150000
check, 15.83
30
1500
blank
Channel 2
Check
150000
check, 15.83 (value is automatic)
30
1500
blank
Input 1:
Input 2:
Fz
A1
Fz
A2
Now you must set up EXACTLY AS FOLLOWS the Tags for the averages; this is very
important.
Select Edit Tag 1
P 60
You are now in Edit Tag Setup
Remove any and all Channel 1 Tag entries from the right-hand Channel 1 Tag window, by
highlighting any entries and hitting Remove.
In the Tag Options list on the left, Select User Text and hit Add
In the text window, type 2k (with NO SPACES) and hit OK
Select Intensity and hit Add
Select Ear Abbr and hit Add
Select Ipsi or Contra Abbr and hit Add
Select Noise Estimate and hit Add
Your selections should now appear in sequence in the Channel 1 Tag window as:
User Text
Intensity
Ear Abbr
Ipsi or Contra Abbr
Noise Estimate
Ignore the contents of the Channel 1 Sample Tag in the Edit Tag Setup screen
Hit OK
Back in the Amplifier window, the Channel 1 Sample Tag should read as: 2k30Rc?
6
DO NOT INSERT ANY SPACES in Tags. There is a string limit and there is only just
room for the additional information now required on actual waveforms.
The ? signifies the Noise Estimate, which only acquires real values for actual waveforms.
Now you are back in the Amplifier window and must select Edit Tag 2
You are back in Edit Tag Setup
Remove any and all Channel 2 Tag entries from the Channel 2 Tag window.
In the Tag Options list on the left, Select User Text and hit Add
In the text window, type 2k (with NO SPACES) and hit OK
Select Intensity and hit Add
Select Ear Abbr and hit Add
Select Ipsi or Contra Abbr and hit Add
Select Noise Estimate and hit Add
Your selections should now appear in sequence in the Channel 2 Tag window as:
User Text
Intensity
Ear Abbr
Ipsi or Contra Abbr
Noise Estimate
Ignore the contents of the Channel 2 Sample Tag in the Edit Tag Setup screen
Hit OK
Back in the Amplifier window, The Channel 2 Sample Tag should read as: 2k30Ri?
Select Save
Select Make Default and select OK in the verification window
Your 2 kHz protocol is now appended to the protocol list and will load on system startup as the
default. You will use IHP Insert 2kHz 30 dBnHL as the toneburst ABR ‘master’ protocol,
which you edit to create the other protocols.
Now Exit from AEP to the desktop. Restart the AEP program.
To create the Insert 500 Hz protocol
In Collection/ Protocol Setup
Select the protocol: AEP:IHP Insert 2 kHz 30 dBnHL (it should be already selected)
Select Save As and rename the protocol as: AEP:IHP Insert 500 Hz 40 dBnHL. Hit OK.
Select Stimulus
Change Intensity to 40 dBnHL
Change Frequency to 500
Select Save
Select Amplifier
Select Edit Tag 1
Highlight User Text in the Channel 1 Tag window and hit Remove
Highlight User Text in the Tag Options window, hit Add, input the string:.5k and hit OK
Highlight User Text in the Channel 1 Tag window, then hit Move Up four times. Hit OK
In Amplifier, the Channel 1 Sample Tag window should contain: .5k40Rc? Hit Save
Select Edit Tag 2
Repeat the procedure used for Edit Tag 1
The Channel 2 Sample Tag window should contain: .5k40Ri?
Select Save
The Insert 500 Hz protocol will be added to the list.
It is assumed that at this point you understand the basic protocol editing and Tag
Setup process. These will not be described in such detail in the following text.
7
To create the Insert 1 kHz protocol
Go to Collection Protocol Setup and select AEP:IHP Insert 2 kHz 30 dBnHL
Select Save As and rename the protocol as AEP:IHP Insert 1 kHz 35 dBnHL. Hit OK
Select Stimulus. Change Intensity to 35 dBnHL and Frequency to 1000. Hit Save
Select Amplifier and Edit Tag 1 and Edit Tag 2, changing the User Text to:1k
Sample Tags 1 and 2 in the Amplifier window should read: 1k35Rc? and 1k35Ri?
Now select Save
To create the Insert 4 kHz protocol
Go to Collection Protocol Setup and select AEP:IHP Insert 2 kHz 30 dBnHL
Select Save As. Rename the protocol as AEP:IHP Insert 4 kHz 25 dBnHL. Hit OK
Select Stimulus. Change Intensity to 25 dBnHL and Frequency to 4000. Hit Save
Select Amplifier and Edit Tag 1 and Edit Tag 2, changing the User Text to:4k
The Sample Tags 1 and 2 should now show: 4k25Rc? and 4k25Ri?
Now select Save
To create the BC 2 kHz protocol
Go to Collection Protocol Setup and select AEP:IHP Insert 2 kHz 30 dBnHL
Select Save As. Rename the protocol AEP:IHP BC 2 kHz 30 dBnHL Hit OK
Select Stimulus. Set Transducer to Bone Oscillator. Hit Save
Select Amplifier and Edit Tag 1 and Edit Tag 2, change the User Text to B2 and move Ear
Abbr and Ipsi and Contra Abbr in front of Intensity. These changes are necessary to
keep the BC tag length to a minimum while retaining all the required information. The
Sample Tags should now show B2Rc30? and B2Ri30?
Now select Save
To create the BC 500 Hz protocol
Go to Collection Protocol Setup and select AEP:IHP BC 2 kHz 30dBnHL
Select Save As and rename the protocol AEP:IHP BC 500 Hz 30 dBnHL. Hit OK.
Select Stimulus and change Frequency to 500. Hit Save.
Select Amplifier and Edit Tag 1 and Edit Tag 2, changing User Text to B.5
The Sample Tags should now show B.5Rc30? and B.5Ri30?
Now select Save
To create the click (AN/AD) protocol
Go to Collection Protocol Setup and select AEP:IHP Insert 2 kHz 30dBnHL
Select Save As and rename the protocol AEP:IHP Insert Click 30 dBnHL. Hit OK.
Select Stimulus
Stimulus Type: Click
Stimulus Rate: 21.1
Intensity Step: 10
Click Duration: 100
Masking Type: None
Select Save
Select Recording
Change the Noise level stop criterion to 20 nV (note the change in value)
Select Save
Select Amplifier
High Filter: both 2000
Low Filter: both 100
8
Note the change in high filter cutoff to 2 kHz, to allow better registration of the true CM
waveform. We have tried 3 kHz, but this allows unnecessary ‘grass’ into the recording.
Edit the Tags, with the User Text as C (with NO SPACES!) and also Add the Polarity Abbr
option immediately below User Text, then Intensity, Ear Abbr, Ipsi or Contra Abbr, and
Noise Estimate.
The Sample Tags in the Stimulus window should read: Ca30Rc? and Ca30Ri?
Select Save
Your IHP collection protocol set is now complete.
To run protocols with TDH 39 earphones
At the point of data collection, Select the relevant Insert protocol and change the
Transducer in Stimulus. Exit the Stimulus window with OK, not with Save! Your
transducer change will be applied only for the protocol you are using currently.
If you wish to create separate, permanent TDH protocols, then you must edit each of the four
toneburst Insert protocols and the click protocol, with the above procedure, using the string
TDH instead of Insert in the protocol names. You should NOT increase the tag length.
REPORT SETUP
P 145
In order to enter Report Setup, you will have to have at least one client entered.
You may create a ‘test’ client for this purpose.
You will need to customize your report. The AEPUM is quite clear about this process. You can
build a report from scratch by first selecting a blank report template and then populating the
blank by dragging the desired items from the tree on the right. Alternatively, you can select
an existing template from the drop-down list and edit it by adding, moving or deleting specific
items. We recommend using ABR-1 and modifying it.
Deleting and Moving Fields on the Template
P 150
You can remove unwanted individual report objects by clicking on them; they will then be
boxed and you hit delete.
You can manipulate sets of objects by positioning the cursor, holding down the left-click
button and dragging a box around the entire set of items you want to delete or drag, then
releasing the left button. The object set will be multiple-boxed. You hit Delete to remove the
set or you position the cursor over the boxed set, left-click and drag the set.
Do this to delete the Latencies set and the Interlatencies set.
Setup/Report Layout/Edit Facility Name?
This allows you to customize your facility name.
Modifying Report Field Labels
P 151
Many of the field labels are unnecessarily long. We are working on the optimal recommended
setup, in order to compact the report; the standard setup will do for the moment.
If you wish, you can change the field labels, including the Header, by right-clicking on the item
you want to change, then hitting Properties and Text, etc.
Saving Template Changes
P 152
See the AEPUM instructions. The IHP Report Template should be stored as IHP ABR.ert
9
DATA COLLECTION
The Main Test Screen is quite intuitive. You have two waveform Display Panels and two EEG
View displays at bottom right.
Panels
The Left and Right panels show whatever you have selected in Default Display Setup,
namely Ear-Panel Same or Ear-Panel Opposite. We strongly recommend that you leave
the vertical panel separator in its default central position. It is sometimes useful to view both
ears simultaneously, for waveform identification. More importantly, changing the panels
changes the report panel x-axes, as noted earlier.
Control Panel
Set to Ipsi for testing with inserts and to Both for testing by bone conduction.
EEG View
The EEG View displays show you both recording channels. The protocols will always allow
you to see the Channel 1 (Left Mastoid) EEG on the Left and Channel 2 (Right Mastoid)
EEG on the Right, if you wish to do so. You may not be interested in both EEGs, although the
ability to see them both may be informative in terms of problems such as 60 Hz artifact or
myogenic artifact, which may allow you to make adjustments to electrodes or to the
positioning of the baby, to achieve best EEG bilaterally. This is highly relevant in Bone
Conduction recordings!
Normally, during actual data acquisition, you will focus on the Ipsilateral EEG Channel, which
will be the Left or Right display, depending on the simulated ear! You can move the EEG
vertical splitter bar to give the maximum view of the ipsilateral EEG Channel, or you can leave
both displayed and simply watch the ipsi channel more closely.
Miscellaneous Operating Notes
Sweep Count
The sweep count is updated every 256 sweeps, not continuously as before. A Noise Estimate
(see Appendix) is similarly updated.
Tag Display and plotting on the Report
The Noise Estimate is a very important new aid to assessment of EEG noise magnitude and
therefore to judgment of response presence or absence. It is best displayed on the trace Tag,
but the problem is that the Tags have a length limit, and long Tags over-run into the
beginning of the average. We have chosen the Tags with absolutely minimal but essential
strings. Unfortunately, Bio-logic gives the Noise Estimate to a quite unnecessary precision,
with two digits after a decimal point. We are working to have this changed. In the meantime,
the irrelevant digits will run into the waves, but not seriously. It is the digits before the
decimal point that matter, and these should be legible.
Polarity
In the AD protocol, you will be collecting replicate Rare and Con averages, as before. While
the system will automatically display the Rare and Con sub-averages, on hitting the
appropriate icon at the top of the Collection screen, this option should NOT be used, because
unfortunately the resulting Rare and Con averages plot a light gray on the report and are not
easy to read. Therefore, you should continue your previous practice, and adjust the polarity
in the Stimulus screen before acquisition of Rare and Con averages.
10
Loading
Loading of runs is now automatic.
BC Testing
Mercifully, there is no longer a need for a transducer switch box. You simply select the
appropriate BC protocol. A cute dog-bone icon will appear on the Collection screen.
Printing
To print results, ensure that the slide bar to the right of the waveforms is at the top. In order
that the waveforms appear on the first page, rather than on two separate pages, waveforms
should be displayed near the bottom of the screen. On selecting the print icon, a print
preview screen will appear. Adjustments to waveform vertical location may be made at that
time, if desired.
SCOUT DPOAE SETUP
Double-click the Scout shortcut icon on the desktop.
Setup/Select protocol: type 1-4 kHz Diagnostic Test
Hit OK
Setup/Display Parameters
Spectrum Ranges
Upper Frequency Limit (kHz): 10
Decibel Range (dB): 100
Autoscale Frequency: check
Bar Plot Spectral Data: blank
DP-Gram Analysis Range
Maximum Level (dB):
70
Minimum Level (dB):
-30
Maximum Frequency (Hz): 16000
Minimum Frequency (Hz): 250
Reference Data: Expanded Boys’ Town Data
Hit OK
Setup/Collection Parameters
Protocol Name: 1-4 kHz Diagnostic Test
Frequencies and Levels
Frequency Begin:
Frequency End
F2/F1 Ratio:
Points per Octave:
L1 Level dB:
L2 Level dB:
4000
1000
1.22
2
65
55
Stopping Criteria
Min DP amplitude (dB):
Noise Floor (dB):
S/N Ratio:
Point Time Limit (sec):
Sample Size:
Number of Tests:
Minimum # Samples
1024
1
50
-5
-17
8
20
Hit OK
11
Hit Yes in response to the Save? question. Save as the Default Protocol.
Scout report printing format
The DPOAE report should display the Left and Right Ears side-by-side, with the
replicate measurements superimposed in each graphical panel. This is done as
follows:
Open the folder icon
You are in ‘Open Scout Patient Data File’
Highlight the required test files, which will usually be contiguous
In Multiple File Selection View, check Right/Left side by side, or check Superimposed if
replicates for only one ear are being printed
Select Open
You will be at a Print Preview screen.
12
APPENDICES
Adjustments to EHL corrections and IHP minimum test levels
We have re-analyzed Stapells’ data on normative relationships between ABR and behavioural
thresholds in infants, and have taken into account the generally increased response
identification expertise of IHP audiologists. We have also adjusted calibration levels slightly.
The net result of these changes, plus a move to recommended increased use of 5 dB steps at
high threshold levels, is that the EHL corrections for ABR thresholds have changed. We have
also adjusted the IHP minimum test levels to reflect these changes.
The EHL adjustments are now as follows:
AC
BC
500 Hz
-15
-5
1000 Hz
-10
2000 Hz
-5
-5
4000 Hz
0
The IHP minimum levels are now set at 25 dB EHL, for all IHP stimulus conditions.
Note that this means that the IHP minimum levels are now as follows:
AC
BC
500 Hz
40
30
1000 Hz
35
2000 Hz
30
30
4000 Hz
25
These levels are considered by IHP to be consistent with a target impairment of >= 30 dBHL
at any frequency in the set [ 0.5, 1, 2, 4 kHz].
Residual Noise Level
As many of you know, use of about 2000 sweeps per average has emerged as a common
practice, but it has serious flaws. We end up making response decisions about averages of
highly variable quality in terms of noise levels, and this leads to errors and bad threshold
estimates. In particular, we may identify responses falsely when there is merely unfortunate
superposition of response-like noise waveforms that happen to be at an acceptable latency,
and we sometimes say that there is no response even when the noise is so large that
statistically we could not have seen a response even if it were there. Judging the adequacy of
noise levels is not easy, nor is resisting the urge to try and make a response decision despite
poor EEG, rather than bring the baby back for retest. Of course, those lapses in judgment are
not in the families’ interest, in the longer term.
To reduce such errors, the IHP protocol emphasizes liberal replication of averages and, in the
latest protocol, liberal use of a 10 dB ascent check, to confirm a questionable threshold upper
bracket. That is better than blind faith in 2000 sweeps, but still permits errors.
A moment’s thought will tell you that it makes much more sense to adjust averaging so as to
tend to yield a consistent, fairly low noise level after the root-N law has done its work. Thus,
the worse the EEG, the more averaging is needed, at least up to a practicable limit.
The residual noise level (RNL) is a calculation of the standard deviation of the noise left in the
average, after a given number of sweeps. It is expressed in nanovolts. It starts off large and
usually gets smaller as the average progresses. Of course, if the EEG is good and then
suddenly develops a lot of artifact at some point, the RNL may suddenly increase. The best
protection against high noise is still to set the gain and artifact reject level appropriately, so
that there is a tickover of sweep rejection even when the EEG is very good. It also remains
important to monitor the ongoing EEG closely, to use the pause and resume functions
appropriately and, given sustained deterioration, to trouble-shoot the electrodes, the
impedances, and the baby.
13
There are two, distinct situations in which the RNL is important. The first leads to a decision
that response is absent, and the second to a decision that response is present. In order to
decide that response is absent, it is necessary that the RNL be low enough that we would be
likely to detect the smallest genuine response of interest. Clearly, if we are unlikely to see a
real response, because of high averaged EEG noise, then any decision that we actually do not
see one has little meaning.
We have set the IHP target RNL criterion to 30 nV for toneburst ABR and 20 nV for click ABR,
based on statistical considerations and our recent clinical experience with the new NavPro.
Generally, these settings will yield a quiet average, although occasional, substantial artifacts in
the average are still possible statistically. Remember, a 30 nV or 20 nV RNL is simply a
statistical guide. If you are not satisfied with the quality of the average, you should
override the stop criterion using the icon in the Collection screen, and continue
averaging.
You will find that if the EEG is very quiet, the stop criteria may be met before 2000 sweeps, in
which case the average is, in principle at least, acceptable noise-wise. More commonly, you
will see that the criterion is not met at 2000 sweeps, and then you should let averaging
continue until the criterion is met or until you have acquired 4096 sweeps, which is the
override stopping number set in the protocols. Then, the obtained final RNL number will assist
your subjective judgment about the reliability of the average. You will find that numbers in
the high 30’s or greater are generally associated with poor reproducibility and substantial
residual noise.
The determination that a response is present is slightly different. Consider a genuine
response of, say, 300 nV peak-to-peak amplitude. Suppose you are averaging and at some
point, after, say, 1000 sweeps or so, the RNL is at about 50 nV. This means that the
amplitude of the possible response is six times the SD of the averaged noise. Statistically,
such a large deflection would be extremely improbable if a genuine response were NOT
present. Therefore, you can conclude that a response IS present, despite the fact that the IHP
target RNL has not been achieved. The question is: what value of the signal to noise ratio
(SNR) is strong evidence of genuine response? This is not a simple question. We have
adopted a provisional criterion SNR of 4.0. That is: if the peak-to-peak amplitude of any
waveform suspected of being a genuine response is more than four times the size of
the RNL at any point during averaging, the average may be terminated immediately,
with a provisional positive judgment.
Because the RNL is a statistical quantity, the SNR of 4.0 does not guarantee that the
waveform is a true response, If you are in any doubt, you should continue averaging until at
least 2048 sweeps, and should replicate the average in the usual way. A genuine response
will almost certainly replicate, so a failure to replicate is very compelling evidence that a
response-like waveform (even one with a large SNR) is not real.
What this means is that IHP is relaxing the requirement that all records must be
replicated.
RECORDS THAT BRACKET THE FINAL THRESHOLD ESTIMATE MUST ALWAYS BE
REPLICATED. RECORDS AT OTHER LEVELS MAY GO UNREPLICATED, PROVIDED THAT
A RECORD THOUGHT TO BE RESPONSE POSITIVE HAS AN SNR OF 4.0 OR GREATER,
OR THAT A RECORD THOUGHT TO BE RESPONSE NEGATIVE HAS ACHIEVED THE IHP
TARGET RNL AND IS CONSIDERED ACCEPTABLY FLAT.
So far, we have discussed going to the target RNL (or the sweep limit of 4096) when the
records appears to be response negative, and stopping averages if an SNR of >= 4 is
obtained, even if the current RNL is greater than the target. But what if the record is unclear?
If a response is looking possible but the SNR criterion of 4 is not being achieved, averaging
must continue until the RNL criterion is met or the sweep max is met. Then, the average must
be replicated and evaluated subjectively, just as you would have done with the previous
instrumentation, without RNL.
14
You may meet averages that look as if they contain a clear response but have a high RNL.
First, you should then question your visual impression, not the calculation, and at least
consider doing some replication to make sure you are right.
Nothing in life is free, and because we all sometimes cut corners and make questionable
decisions with noisy averages, the RNL will catch us out and generally lead to more averaging
and a slight increase in test time. The benefit to everyone is that the decision errors WILL be
fewer, and the test WILL be of higher quality.
As our cumulative experience with RNL in IHP grows, we will move to a consensus approach
about how to optimize its use. The additional application of Fsp to assist response detection
decisions is under evaluation, but its interpretation as implemented is complex and it should
not be used at present.
Power line artifact and the RNL
The electrical noise that contributes to the calculated RNL includes 60 Hz pickup from mains
power lines and mains-powered devices. However, the distortion of the average that will be
caused by a given level of 60 Hz pickup can be variable and difficult to predict, because it
depends on variables such as the stimulus repetition rate, the number of sweeps averaged,
the pattern of sweeps rejected due to artifact, and technical details that may be unique to
specific instrumentation.
The problem is that 60 Hz interference will definitely increase the RNL, but it may or may not
cause substantial distortion of the average. This problem arises because 60 Hz interference is
not a random signal, and the statistical equations that relate the RNL to the actual fluctuations
in the average are correct only for random signals such as the EEG. With the IHP test
parameters, the most likely effect would be a mismatch between the subjective impression of
a fairly quiet EEG with little baseline distortion, and an unexpectedly large value of the RNL.
Remember that 60 Hz interference tends to cause a slow distortion of the average; the
window (21.33 ms) will contain just over one cycle of summed 60 Hz activity, if it occurs
(period 16.67 ms).
One option is to implement the 60 Hz notch filter. That filter will remove much of the 60 Hz
interference and will thereby remove the source of possible inflation of the RNL. A major
concern about notch filters has been the possibility that they would cause major distortion of
the ABR waveform (phase distortion), especially for the long, slow waveforms that are typical
in response to near-threshold 500 Hz stimuli. However, our initial studies to date studies
suggest that the notch filter does not cause major distortion of the ABR. Nevertheless,
further investigation is essential before we can be confident about this. Remember, all
normative data upon which we rely were gathered without notch filter use, because of this
longstanding concern about waveform distortion.
You may select the notch filter in Collection Protocol Setup/Amplifier by checking the Notch
Filter button and exiting with OK to apply it temporarily.
Routine use of the notch filter is not recommended, for several reasons. First, sources that
generate 60 Hz interference may also generate other harmonics, which may not be removed
by the notch filter. This is the case, for example, for radiated fields from fluorescent light
fixtures and dimmers. Second, large 60 Hz interference is symptomatic of several other
conditions that are undesirable. An example is high or asymmetric impedances or other
electrode anomalies that will not only inflate 60 Hz but also compromise the ability of the
differential amplifier to reject a wide range of electrical noise, including EEG noise.
You should make every effort to identify and minimize the 60 Hz interference, as discussed in
the Audiologic Assessment protocol. As a last resort, you may implement the 60 Hz notch
filter. Remember that 60 Hz interference is a strong indicator of something amiss with your
15
physical environment, and that use of the 60 Hz notch can cause waveform distortion and
threshold error. It is strictly a last resort, and absolutely should NOT be used routinely.
We are relaxing the prohibition on notch filter use only to permit gathering of SOME clinical
information under adverse and uncorrectable conditions. Use of the filter should be noted
in the IHP case report, to alert any audit review to possible anomalous results!
An interesting possible use of the RNL is as a measurement tool for 60 Hz interference. For
example, suppose you measure the RNL for, say 2048 sweeps, with the notch filter first out,
then in. The difference between the two RNLs will reflect the effect of removing 60 Hz,
although it will also reflect any change from average to average in the other sources of
electrical activity, such as the EEG itself. Still, this may be a way of quantifying the amount of
60 Hz pickup, and it is being investigated.
Window Length
We have mentioned in the past the desirability of extending the window for 500 Hz, ideally to
26.67 ms, to allow better registration of very late ABR components that appear to go over the
end of the current 21.33 ms window. The problem is that if we wish to display waveforms at
both 500 Hz and other frequencies in a given plot, they must all be on the same x-axis length.
Given the rarity of 500 Hz response loss off the window, we have elected to maintain the
21.33 window for all toneburst responses, to facilitate waveform plotting on a common time
axis.
Click ABR High Filter Cutoff Frequency
The cutoff frequency for CM recording in the AN/AD sub-protocol has been extended to 2000
Hz, because the click CM has energy at frequencies above the 1500 Hz that we were using
formerly. This will change the appearance of the AN/AD CM averages, allowing more highfrequency activity. This is important only for the CM component. Do not be distracted by any
high-frequency noise ripple later in the window. Remember, the ABR itself has little energy
above about 1 kHz.
End:MLH/ U:/MOHLTC/ IHP new NavPro.doc
Revision 5, General Distribution, April 13, 2006 M Hyde/K Madsen
16