1
SC400
Service Manual
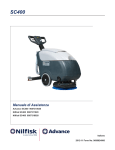
Advance SC400 9087310020
Nilfisk SC400 9087311020
Nilfisk SC400 9087318020
English
2012-11 Form No. 9099624000
Service Manual – SC400
Table of Contents
Table of Contents
Table of Contents . . . . . . . . . . . . . . . . . . . . . . . . . . . . . . . . . . . . . . . 2
General Information . . . . . . . . . . . . . . . . . . . . . . . . . . . . . . . . . . . . . 4
Machine General Description . . . . . . . . . . . . . . . . . . . . . . . . . . . . . . . . . . 4
Service Manual Purpose and Field of Application . . . . . . . . . . . . . . . . . . . . . . . 4
Other Reference Manuals . . . . . . . . . . . . . . . . . . . . . . . . . . . . . . . . . . . . 4
Conventions . . . . . . . . . . . . . . . . . . . . . . . . . . . . . . . . . . . . . . . . . . . 5
Service and Spare Parts . . . . . . . . . . . . . . . . . . . . . . . . . . . . . . . . . . . . . 5
Serial Number Label . . . . . . . . . . . . . . . . . . . . . . . . . . . . . . . . . . . . . . 5
Safety . . . . . . . . . . . . . . . . . . . . . . . . . . . . . . . . . . . . . . . . . . . . . . . 6
Symbols . . . . . . . . . . . . . . . . . . . . . . . . . . . . . . . . . . . . . . . . . . . . . 6
General Instructions . . . . . . . . . . . . . . . . . . . . . . . . . . . . . . . . . . . . . . . 6
Machine Lifting . . . . . . . . . . . . . . . . . . . . . . . . . . . . . . . . . . . . . . . . . 9
Machine Transportation . . . . . . . . . . . . . . . . . . . . . . . . . . . . . . . . . . . . . 9
Machine Nomenclature (know your machine) . . . . . . . . . . . . . . . . . . . . . . . . 10
Handlebar with Control Panel . . . . . . . . . . . . . . . . . . . . . . . . . . . . . . . . 12
Service and Diagnostic Equipment . . . . . . . . . . . . . . . . . . . . . . . . . . . . . . 13
Technical Data . . . . . . . . . . . . . . . . . . . . . . . . . . . . . . . . . . . . . . . . . 14
Dimensions . . . . . . . . . . . . . . . . . . . . . . . . . . . . . . . . . . . . . . . . . . . 15
Maintenance . . . . . . . . . . . . . . . . . . . . . . . . . . . . . . . . . . . . . . . . . . 16
Scheduled Maintenance Table . . . . . . . . . . . . . . . . . . . . . . . . . . . . . . . . 16
Control System . . . . . . . . . . . . . . . . . . . . . . . . . . . . . . . . . . . . . . . . 17
Functional Description . . . . . . . . . . . . . . . . . . . . . . . . . . . . . . . . . . . . 17
Wiring Diagram . . . . . . . . . . . . . . . . . . . . . . . . . . . . . . . . . . . . . . . . 18
Component Locations . . . . . . . . . . . . . . . . . . . . . . . . . . . . . . . . . . . . . 19
Removal and Installation . . . . . . . . . . . . . . . . . . . . . . . . . . . . . . . . . . . 20
Specifications . . . . . . . . . . . . . . . . . . . . . . . . . . . . . . . . . . . . . . . . . 24
Controls and Functions . . . . . . . . . . . . . . . . . . . . . . . . . . . . . . . . . . . . 29
Electrical System . . . . . . . . . . . . . . . . . . . . . . . . . . . . . . . . . . . . . . . 32
Functional Description . . . . . . . . . . . . . . . . . . . . . . . . . . . . . . . . . . . . 32
Fuses . . . . . . . . . . . . . . . . . . . . . . . . . . . . . . . . . . . . . . . . . . . . . . 32
Wiring Diagram . . . . . . . . . . . . . . . . . . . . . . . . . . . . . . . . . . . . . . . . 32
Component Locations . . . . . . . . . . . . . . . . . . . . . . . . . . . . . . . . . . . . . 33
Maintenance and Adjustments . . . . . . . . . . . . . . . . . . . . . . . . . . . . . . . . 34
Troubleshooting . . . . . . . . . . . . . . . . . . . . . . . . . . . . . . . . . . . . . . . . 38
Machine Wiring Diagram . . . . . . . . . . . . . . . . . . . . . . . . . . . . . . . . . . . 39
Specifications . . . . . . . . . . . . . . . . . . . . . . . . . . . . . . . . . . . . . . . . . 40
Recovery System . . . . . . . . . . . . . . . . . . . . . . . . . . . . . . . . . . . . . . . 41
Functional Description . . . . . . . . . . . . . . . . . . . . . . . . . . . . . . . . . . . . 41
Wiring Diagram . . . . . . . . . . . . . . . . . . . . . . . . . . . . . . . . . . . . . . . . 41
Component Locations . . . . . . . . . . . . . . . . . . . . . . . . . . . . . . . . . . . . . 42
Maintenance and Adjustments . . . . . . . . . . . . . . . . . . . . . . . . . . . . . . . . 43
Troubleshooting . . . . . . . . . . . . . . . . . . . . . . . . . . . . . . . . . . . . . . . . 44
Removal and Installation . . . . . . . . . . . . . . . . . . . . . . . . . . . . . . . . . . . 45
Specifications . . . . . . . . . . . . . . . . . . . . . . . . . . . . . . . . . . . . . . . . . 48
2
Service Manual – SC400
Table of Contents
Scrub System, Disc . . . . . . . . . . . . . . . . . . . . . . . . . . . . . . . . . . . . . . 49
Functional Description . . . . . . . . . . . . . . . . . . . . . . . . . . . . . . . . . . . . 49
Wiring Diagram . . . . . . . . . . . . . . . . . . . . . . . . . . . . . . . . . . . . . . . . 49
Component Locations . . . . . . . . . . . . . . . . . . . . . . . . . . . . . . . . . . . . . 50
Maintenance and Adjustments . . . . . . . . . . . . . . . . . . . . . . . . . . . . . . . . 51
Troubleshooting . . . . . . . . . . . . . . . . . . . . . . . . . . . . . . . . . . . . . . . . 53
Removal and Installation . . . . . . . . . . . . . . . . . . . . . . . . . . . . . . . . . . . 54
Specifications . . . . . . . . . . . . . . . . . . . . . . . . . . . . . . . . . . . . . . . . . 60
Solution System . . . . . . . . . . . . . . . . . . . . . . . . . . . . . . . . . . . . . . .
Functional Description . . . . . . . . . . . . . . . . . . . . . . . . . . . . . . . . . . . .
Wiring Diagram . . . . . . . . . . . . . . . . . . . . . . . . . . . . . . . . . . . . . . . .
Component Locations . . . . . . . . . . . . . . . . . . . . . . . . . . . . . . . . . . . . .
Maintenance and Adjustments . . . . . . . . . . . . . . . . . . . . . . . . . . . . . . . .
Troubleshooting . . . . . . . . . . . . . . . . . . . . . . . . . . . . . . . . . . . . . . . .
Specifications . . . . . . . . . . . . . . . . . . . . . . . . . . . . . . . . . . . . . . . . .
61
61
61
62
63
64
64
Squeegee System . . . . . . . . . . . . . . . . . . . . . . . . . . . . . . . . . . . . . . . 65
Functional Description . . . . . . . . . . . . . . . . . . . . . . . . . . . . . . . . . . . . 65
Component Locations . . . . . . . . . . . . . . . . . . . . . . . . . . . . . . . . . . . . . 66
Maintenance and Adjustments . . . . . . . . . . . . . . . . . . . . . . . . . . . . . . . . 67
Troubleshooting . . . . . . . . . . . . . . . . . . . . . . . . . . . . . . . . . . . . . . . . 69
Removal and Installation . . . . . . . . . . . . . . . . . . . . . . . . . . . . . . . . . . . 70
Specifications . . . . . . . . . . . . . . . . . . . . . . . . . . . . . . . . . . . . . . . . . 71
Wheel System, Non-Traction . . . . . . . . . . . . . . . . . . . . . . . . . . . . . . . . 72
Component Locations . . . . . . . . . . . . . . . . . . . . . . . . . . . . . . . . . . . . . 72
Specifications . . . . . . . . . . . . . . . . . . . . . . . . . . . . . . . . . . . . . . . . . 73
3
Service Manual – SC400
General Information
General Information
Machine General Description
The SC400 is a “man-down” industrial machine designed to wash and dry floors, in civil or industrial environments, in one pass. The machine is powered by on-board batteries. The machine is equipped with a single
disc brush, a controlled solution flow dosing system and a rear squeegee with blades, which dries the floor by
vacuuming the dirty water.
Service Manual Purpose and Field of Application
The Service Manual is a technical resource intended to help service technicians when carrying out maintenance and repairs on the SC400, to guarantee the best cleaning performance and a long working life for the
machine.
Please read this manual carefully before performing any maintenance and repair procedure on the machine.
Other Reference Manuals
Model
Product Code
Nilfisk SC400
9087311020
Nilfisk SC400
9087318020
Advance SC400
9087310020
User Manual
Spare Parts List
9099612000
9099613000
9099626000
9099627000
These manuals are available at:
−− Local Nilfisk-Advance Retailer
−− Nilfisk-Advance website: www.nilfisk.com - www.advance-us.com
4
Service Manual – SC400
General Information
Conventions
Forward, backward, front, rear, left or right are intended with reference to the operator’s position, that is to
say in driving position with the hands on the handlebar.
Service and Spare Parts
Service and repairs must be performed only by authorised personnel or Nilfisk Service Centers. The authorised
personnel is trained directly at the manufacturer’s premises and has original spare parts and accessories.
Contact Nilfisk Retailer indicated below for service or to order spare parts and accessories, specifying the machine model and serial number.
(Apply Retailer label here)
Serial Number Label
The machine model name and serial number are
marked on the plate (see the example to the side).
Product number and year of production are marked
on the same plate.
This information is useful when requiring machine
spare parts.
Use the following table to write down the machine
identification data.
Model: Scrubber-Dryer SC400 17 B
Prod. Nr: 9087310020
Serial No: ..................
Date code: .......
IPX4
GVW: 136 kg/300 lb
29 A
Charg.110-240Vac 50-60 Hz
LpA = 65 dB(A)
Battery 24 Vdc
Type E Scrubber Dryer
Conform to:
UL STD 583
Certified to:
CSA STD C22.2 N.68-92
A Nilfisk-Advance Brand
Model . ..............................................................................................................
Product Nr. .......................................................................................................
Serial No. . ........................................................................................................
2%
3084826
“Made in Hungary”
Nilfisk-Advance, Inc.
Plymouth, MN, USA
www.advance-us.com
5
Service Manual – SC400
General Information
Safety
The following symbols indicate potentially dangerous situations. Always read this information carefully and
take all necessary precautions to safeguard people and property.
Symbols
Danger!
It indicates a dangerous situation with risk of death for the operator.
Warning!
It indicates a potential risk of injury for people or damage to objects.
Caution!
It indicates a caution related to important or useful functions.
Note:
It indicates a remark related to important or useful functions.
General Instructions
Specific warnings and cautions to inform about potential damages to people and machine are shown below.
Warning!
Make sure to follow the safety precautions to avoid situations that may lead to
serious injuries.
–– Before performing any cleaning, maintenance, repair or replacement procedure, turn the program selection knob to “0” and disconnect the battery connector.
–– This machine must be used by properly trained operators only.
–– Do not wear jewels when working near electrical components.
–– Do not work under the lifted machine, if it is not securely fixed.
–– Do not operate the machine near toxic, dangerous, flammable and/or explosive powders, liquids
or vapors. This machine is not suitable for collecting dangerous powders.
–– (For WET batteries only). Keep the battery away from sparks, flames and incandescent material.
During the normal operation explosive gases are released.
–– (For WET batteries only). Battery charging produces highly explosive hydrogen gas. Keep the
battery cover open during battery charging and perform this procedure in well-ventilated areas
and away from naked flames.
6
Service Manual – SC400
Caution!
General Information
Make sure to follow the safety precautions to avoid situations that may lead to
serious injuries, damages to materials or equipments.
–– Carefully read all the instructions before performing any maintenance/repair procedure.
–– Before using the battery charger, ensure that frequency and voltage values, indicated on the
machine serial number plate, match the mains voltage.
–– Do not pull or carry the machine by the battery charger cable and never use the battery charger
cable as a handle. Do not close a door on the battery charger cable, or pull the battery charger
cable around sharp edges or corners. Do not run the machine on the battery charger cable.
–– To reduce the risk of fire, electric shock, or injury, do not leave the machine unattended when it
is plugged in.
–– Keep the battery charger cable away from heated surfaces.
–– Before performing any maintenance procedure, disconnect the battery charger cable from the
electrical mains to avoid any risk of fire, electric shock or injuries.
–– Do not smoke while charging the batteries.
–– Always protect the machine against the sun, rain and bad weather, both under operation and
inactivity condition. Store the machine indoors, in a dry place.
–– Before using the machine, close all doors and/or covers.
–– This machine is not intended for use by persons (including children) with reduced physical,
sensory or mental capabilities, or lack of experience and knowledge, unless they have been given
supervision or instruction concerning use of the machine by a person responsible for they safety.
Children should be supervised to ensure that they do not play with the machine.
–– Close attention is necessary when used near children.
–– Use only as shown in this Manual. Use only Nilfisk’s recommended accessories.
–– Check the machine carefully before each use, always check that all the components have been assembled before use. If the machine is not perfectly assembled it can cause damages to people and
properties.
–– Take all necessary precautions to prevent hair, jewels and loose clothes from being caught by the
machine moving parts.
–– Do not use the machine on slopes with a gradient exceeding the specifications.
–– Do not use the machine on incline.
–– Do not tilt the machine more than the angle indicated on the machine itself, in order to prevent
instability.
–– Do not use the machine in particularly dusty areas.
–– Use the machine only where a proper lighting is provided.
–– While using this machine, take care not to cause damage to people or objects.
–– Do not bump into shelves or scaffoldings, especially where there is a risk of falling objects.
–– Do not lean liquid containers on the machine, use the relevant can holder.
–– The machine working temperature must be between 0°C and +40°C.
–– The storage temperature must be between 0°C and +40°C.
–– The humidity must be between 30% and 95%.
–– When using floor cleaning detergents, follow the instructions on the labels of the detergent
bottles.
–– To handle floor cleaning detergents, wear suitable gloves and protections.
–– Do not use the machine as a means of transport; do not push/tow it.
–– Do not allow the brush to operate while the machine is stationary to avoid damaging the floor.
–– In case of fire, use a powder fire extinguisher, not a water one.
–– Do not tamper with the machine safety guards and follow the ordinary maintenance instructions
scrupulously.
–– Do not allow any object to enter into the openings. Do not use the machine if the openings are
clogged. Always keep the openings free from dust, hairs and any other foreign material which
could reduce the air flow.
–– Do not remove or modify the plates affixed to the machine.
–– This machine cannot be used on roads or public streets.
–– Pay attention during machine transportation when temperature is below freezing point. The
water in the recovery tank or in the hoses could freeze and seriously damage the machine.
7
Service Manual – SC400
General Information
–– Use only brushes supplied with the machine or those specified in the User Manual. Using other
brushes could reduce safety.
–– If parts must be replaced, require ORIGINAL spare parts from an Authorised Dealer or Retailer.
–– Do not wash the machine with direct or pressurised water jets, or with corrosive substances.
–– The machine must be disposed of properly, because of the presence of toxic-harmful materials
(batteries, oils, etc.), which are subject to standards that require disposal in special centres (see
the User Manual).
–– (For WET batteries only). When lead (WET) batteries are installed on the machine, do not tilt
the machine for more than 30° from the horizontal plane to prevent the highly corrosive acid
from leaking out of the batteries. If the machine must be tilted to perform any maintenance procedure, remove the batteries.
8
Service Manual – SC400
Machine Lifting
Warning!
Do not work under the lifted machine, if it is not securely fixed.
Machine Transportation
Warning!
Before transporting the machine, make sure that:
All covers are closed.
The recovery tank and the detergent tank are empty.
The batteries are disconnected.
The machine is securely fastened to the means of transport.
General Information
9
Service Manual – SC400
General Information
Machine Nomenclature (know your machine)
Solution tank
Recovery tank
Solution flow opening/closing valve
Solution solenoid valve
Recovery tank cover
Can holder
Handlebar with control panel
Recovery water drain plug
Recovery water drain hose bracket
Recovery water drain hose
Electrical component box
Battery charger
Solution drain hose with level check marks
Battery charger warning lights
Battery charger cable
Battery connector (red)
Serial number plate/technical data/conformity
certification
Squeegee vacuum hose
Squeegee mounting handwheels
Squeegee blade mounting springs
Squeegee lifting/lowering pedal
Squeegee
Rear squeegee blade
Front squeegee blade
Rear support wheel, when the squeegee is lifted
Solution filter
Central wheels on fixed axle
Brush
Brush deck
Parking wheel
Parking wheel positioning pin
P200042
10
Service Manual – SC400
General Information
Machine Nomenclature (Continues)
Recovery tank cover (open)
Recovery tank cover gasket
Vacuum grid with automatic shut-off float
Battery
connection
diagram
T OF
FRON
IN E
MACH
12 V
Recovery tank compartment
Detergent removable filler hose
Solution tank filler neck
12 V
L
PA NE
L
PA NE
OF
BACK E
IN
MACH
Batteries
Lifted
squeegee
Front brush support
Vacuum system motor
Brush motor
Machine forward
speed adjusting handwheel
Brush
Machine straight forward
movement adjusting handwheel
Pad-holder
Pad
Brush rotation direction
P200003
11
Service Manual – SC400
General Information
Handlebar with Control Panel
Program: brush - solution
flow activation
Program selection knob / rotary switch
Program: vacuum
system activation
Program: brush - vacuum system solution flow activation
Machine switching off “0”
Handlebar inclination
adjusting lever
Handlebar
Brush lever(*)
LED indicators for:
- solution quantity
- battery charge
Brush lever(*)
Machine start-up enabling
push-button(*)
Solution flow push-button
(*) The brush levers operate only after pushing the machine start-up enabling push-button
P200044
12
Service Manual – SC400
Service and Diagnostic Equipment
General Information
Besides a complete set of standard meters, the following instruments are necessary to perform fast checks,
maintenance and repairs on Nilfisk-Advance machines:
Besides a complete set of standard meters, the following instruments are necessary to perform fast checks and
repairs on Nilfisk-Advance machines:
• Laptop computer charged with the current version of EzParts, Adobe Reader and (if possible) Internet
connection
• Digital Volt Meter (DVM)
• Amp clamp with possibility of making DC measurements
• Hydrometer
• Battery charge tester to check 12V batteries
• Static control wrist strap
• Dynamometric wrench set
• A copy of the User Manual and Spare Parts List of the machine to be serviced (provided with the machine
or available at www.advance-us.com or other Nilfisk-Advance websites).
The following equipment is also available at Nilfisk-Advance Centers:
• Vacuum water lift gauge, P/N 56205281
13
Service Manual – SC400
General Information
Technical Data
General
Advance
SC400 17 B
Nilfisk
SC400 43 B
FULL PKG
Solution tank capacity
6.0 US gal (23 liters)
Recovery tank capacity
5.5 US gal (21 liters)
Machine length
48.4 in (1,230 mm)
Machine width with squeegee
28.3 in (720 mm)
Machine width without squeegee
22.4 in (570 mm)
Min/max machine height with adjustable handlebar
28.5 - 43.9 in (725 - 1,115 mm)
Minimum turning radius
29.5 in (750 mm)
Cleaning width
17 in (430 mm)
Diameter of wheels on fixed axle
9.8 in (250 mm)
Wheel pressure on the floor
290 psi (2 N/mm2)
Brush/pad diameter
17 in (430 - 432 mm)
Brush pressure with full tank and lowered squeegee
77 lb (35 kg)
Min/max solution flow
01 / 042 gpm (0.4 / 1.6 liters/min)
Sound pressure level at workstation (ISO 11201, ISO 4871, EN 60335-2-72) (LpA)
65 dB(A) ± 3 dB(A)
Machine sound pressure level (ISO 3744, ISO 4871, EN 60335-2-72) (LwA)
89 dB(A)
Vibration level at the operator’s arms (ISO 5349-1, EN 60335-2-72)
< 98.4 in/s2 (< 2.5 m/s2)
Maximum gradient when working
2%
IP protection class
X4
Protection class (electric)
III
Vacuum system motor power
0.4 hp (300 W)
Vacuum water lift (blocked)
47.2 inH2O (1,200 mmH2O)
Brush motor power
0.6 hp (450 W)
Brush motor speed
155 rpm
Total absorbed power
Battery compartment size
29 A (0.75 kW)
13.7x17.7x10.2 in (350x350x260 mm)
Battery voltage
Standard batteries (2)
24V
-
Battery charger
12V - 50 Ah C5
(AGM) Spiracell
-
100-240 VAC
Work autonomy (standard batteries)
1.5 hour
Weight without batteries and with empty tanks
130 lb (59 kg)
Gross vehicle weight (GVW)
300 lb (136 kg)
Shipping weight
Nilfisk
SC400 43 B
179 lb / 81 kg
267 lb / 121 kg
179 lb / 81 kg
14
Service Manual – SC400
General Information
725 ÷ 1115 mm (28.5 ÷ 43.9 in)
Dimensions
1230 mm (48.4 in)
720 mm (28.3 in)
P200074
15
Service Manual – SC400
General Information
Maintenance
The lifespan of the machine and its maximum operating safety are ensured by correct and regular maintenance.
Warning!
Read carefully the instructions in the Safety chapter before performing any
maintenance procedure.
The following table provides the scheduled maintenance. The intervals shown may vary according to particular working conditions, which are to be defined by the person in charge of the maintenance.
For instructions on maintenance procedures, see the following paragraphs.
Scheduled Maintenance Table
Procedure
Daily, after using the
machine
Weekly
Every six
months
Squeegee Cleaning
Brush Cleaning
Tank and Vacuum Grid Cleaning
Squeegee Blade Check and Replacement
Solution Filter Cleaning
Battery Charging
WET battery fluid level check
Screw and nut tightening check
Brush motor carbon brush check and replacement
Vacuum system motor carbon brush check and
replacement
(1) And after the first 8 working hours.
(1)
Yearly
16
Service Manual – SC400
Control System
Control System
Functional Description
The function control is performed with the program
selection knob/rotary switch (SW1), the machine
start-up enabling push button (SW2) (which can be
used simultaneously with the brush levers) and the
solution flow push-button (SW3).
The switch outputs are read by the function electronic board (EB1) which consequently controls the relevant outputs: electromagnetic switch (K1) for brush
motor, relay (K2) for vacuum system motor, while the
solenoid valve (EV1) is activated directly form the
electronic board.
The control circuits are protected by the fuse (F3) on
the function electronic board (EB1).
The LED electronic board (EBLED) has a set of 3
two-color LEDs. The set of 3 LEDs is used to indicate
either battery charge level or water flow level depending on the current mode of operation:
LEDs to display the
battery charge level
LEDs to set water
flow level
The LED electronic board (EBLED) is driven by the
function electronic board (EB1).
Diagram of Output Activation according to the Position of the Switches (SW1), (SW2)
and (SW3)
Program selection knob
/rotary switch (SW1)
settings
Machine start-up
enabling push button
(SW2) settings (with
brush levers)
Function electronic
board (EB1) + LED
electronic board
(EBLED)
Brush motor (M1) +
solenoid valve (EV1)
Vacuum system motor
(M2)
Pressed/released
Off
Off
Off
Released
On
Off
On
Pressed
On
On
On
Released
On
Off
Off
Pressed
On
On
Off
Pressed/released
On
Off
On
LED display
Symbols
Solenoid valve ON time
(EV1)
Solenoid valve OFF time
(EV1)
0
-
Always OFF
1
1 sec
5 sec
2
3 sec
3 sec
3
Always ON
-
O
Solution flow pushbutton setting (SW3)
17
Service Manual – SC400
Control System
Wiring Diagram
DETERGENT FLOW
PUSH-BUTTON (SW3)
BRUSH ENABLING
PUSH-BUTTON (SW2)
ROTARY SWITCH (SW1)
FUNCTION ELECTRONIC
BOARD (EB1)
BRUSH RELEASE
FUSE (F4)
SIGNAL CIRCUIT
FUSE (F3)
+ 24V
JA.1 - Common cathode
LED power supply
J3.1 - Control power supply
J3.2 - Brush function return
JA.6 - LDC-Green anode
LED power supply
JA.5 – LDC-Red anode
LED power supply
J3.3 - Vacuum system function return
J3.4 - Brush rotation enabling
J3.5 - Water push-button return
JA.4 - LDB-Green anode
LED power supply
JA.3 – LDB-Yellow anode
LED power supply
BJ3.7 - Common cathode LED power supply
J3.8 - LDA-G anode LED power supply
J3.9 - LDB-Y anode LED power supply
JA.2 – LDA-Green anode
LED power supply
LED ELECTRONIC
BOARD (EBLED)
J3.10 - LDB-G anode LED power supply
J3.11 - LDC-R anode LED power supply
J3.12 - LDC-G anode LED power supply
P200075
18
Service Manual – SC400
Control System
Component Locations
• Handlebar with control panel
• Program selection knob / rotary switch (SW1)
• LED indicators for:
–– solution quantity
–– battery charge
• Rotary switch (SW1)
• Brush levers
•
•
•
•
•
•
•
Machine start-up enabling push button (SW2)
Solution flow push-button (SW3)
Function electronic board (EB1)
LED electronic board (EBLED)
Low consumption circuit fuse (F3)
Wiring harness
Handlebar inclination adjusting lever
Program selection knob/
rotary switch (SW1)
Solution flow
push-button (SW3)
Handlebar inclination
adjusting lever
Brush lever
Rotary switch (SW1)
Brush lever
Handlebar with control panel
LED indicators for:
- solution quantity
- battery charge
Machine start-up
enabling push button (SW2)
Wiring harness
LED electronic board
(EBLED)
Function electronic board (EB1)
Low consumption circuit fuse (F3)
P200045
19
Service Manual – SC400
Control System
Removal and Installation
Function Electronic Board (EB1) Disassembly/Assembly
Disassembly
1. Drive the machine on a level floor. Make sure
that the machine cannot move independently.
6. Disconnect the connectors (D) of the function
electronic board (E).
2. Turn the machine program selection knob to “0”.
7. Remove the screws (F) and remove the function
electronic board (E).
3. Disconnect the battery connector (red).
4. Disconnect the battery charger cable from the
holder (A).
Assembly
5. Remove the screws (B) and remove the cover (C).
8. Assemble the components in the reverse order of
disassembly, and note the following:
• Set the DIP-switches (G) according to the
machine fitting as shown below.
DIP-switch
Fitting
WET batteries
DIP-switch position
WET (ON)
DIP 1
GEL-AGM batteries
Battery charger installed (standard)
Battery charger not installed
Note:
GEL (OFF)
CH (OFF)
DIP 2
NO CH (ON)
The battery charger is installed on the machine as a standard component; the dipswitch must be turned to OFF (CH position)
F
G
F
E
G
B
D
C
B
F
F
A
P200046
20
Service Manual – SC400
Control System
LED Electronic Board (EBLED) Disassembly/Assembly
Disassembly
1. Drive the machine on a level floor. Make sure that the machine cannot move independently.
2. Turn the machine program selection knob to “0”.
3. Disconnect the battery connector (red).
4. On the lower side of the handlebar with the control panel, unscrew the screws (A).
5. Lower the upper side (B) of the handlebar with the control panel.
6. Disconnect the connector (C) of the LED electronic board (D). Remove the screws (E) and remove the
LED electronic board (D).
7. If necessary, disconnect the connector (F) and remove the solution flow push-button (G) by disengaging
the inner tabs (H).
A
A
B
A
A
C
F
G
H
E
D
E
P200047
21
Service Manual – SC400
Control System
LED Electronic Board (EBLED) Disassembly/Assembly (Continues)
8. If necessary, remove the selector assembly (N) of the machine program selection knob (I), as shown
below:
• Disconnect the connectors (J)
• On the outer side, turn the knob (I) on the position (K) (vacuum system activation).
• Loosen the set screw inside the housing (L), then remove the knob (I) from the housing.
• Remove the screws (M) and, from the inside, remove the selector assembly (N) of the knob (I).
Assembly
9. Assemble the components in the reverse order of disassembly.
J
N
J
K
I
L
M
P20048
22
Service Manual – SC400
Control System
Machine Start-up Enabling Push-Button Disassembly/Assembly (SW2)
Disassembly
1. Drive the machine on a level floor. Make sure
that the machine cannot move independently.
7. Disconnect the connectors (F) of the brush
enabling push-button (G).
2. Turn the machine program selection knob to “0”.
8. Remove the screws (H) and remove the switch
(G).
3. Disconnect the battery connector (red).
4. On the lower side of the handlebar with the
control panel, unscrew the screws (A).
5. Move the upper side (B) of the handlebar with
the control panel.
6. Remove the screws (C) and move the lower side
(D) of the handlebar from the frame (E).
A
9. If necessary, remove from the housing the
enabling push-button (I) of the switch (G).
10. If necessary, remove the brush levers (J) from
the housing.
Assembly
11. Assemble the components in the reverse order of
disassembly.
A
B
A
A
C
C
I
H
E
J
J
D
F
F
G
P200049
23
Service Manual – SC400
Control System
Specifications
Function Electronic Board (EB1) Specifications
FUSES
F4
F3
Code
Description
Type
Size
F3
Low consumption circuit fuse
LITTELFUSE ATOFUSE
5A
F4
Brush release circuit fuse
OMEGA CT520320
20A
DIP-SWITCHES
Ch
GEL
1 2
ON
WET
NO Ch
Description
Code
DIP1
WET/GEL selector
DIP2
Battery charger enabling
24
Service Manual – SC400
Control System
Function Electronic Board (EB1) Connectors
J1: MOLEX MINIFIT type, 6-ways vertical
J1
Description
PIN
6
5
4
3
2
1
Electronic board
in/out
V ref.
I max.
Connected to
in
24V
5A
BAT
1
Electronic board power supply +
2
Solenoid valve power supply +
out
24V
1A
EV1
3
Solenoid valve power supply -
out
0V
1A
EV1
4
Not used
5
Not used
6
Not used
25
Service Manual – SC400
Control System
Function Electronic Board (EB1) Connectors (Continues)
J2: MOLEX MINIFIT type, 8-ways vertical
J2
Description
PIN
8
7
6
5
4
3
2
1
Electronic board
in/out
V ref.
I max.
Connected to
1
Brush fuse voltage drop reading +
in
0V
<1A
F1
2
Brush fuse voltage drop reading -
in
0V
<1A
F1
3
Brush electromagnetic switch power supply
-
out
0V
1A
ES1
4
Vacuum system relay power supply -
out
0V
1A
ES2
5
Electromagnetic switch/relay power supply
+
out
24V
2A
ES1-ES2
6
Brush motor braking circuit
in
24V
100A imp. 0A cont.
ES1.NC
7
Electronic board power supply -
in
0V
5A
BAT
8
Not used
26
Service Manual – SC400
Control System
Function Electronic Board (EB1) Connectors (Continues)
J3: MOLEX MINIFIT type, 12-ways vertical
J3
Description
PIN
12 11 10
9
8
7
6
3
2
1
5
4
Electronic board
in/out
V ref.
I max.
Connected to
1
Control power supply
out
24V
<1A
SW1 - 2 - 3
2
Brush function return
in
24V
<1A
SW1
3
Vacuum system function return
in
24V
<1A
SW1
4
Brush rotation enabling
in
24V
<1A
SW2
5
Water push-button return
in
24V
<1A
SW3
6
Not used
7
Common cathode LED power supply
out
0V
<1A
JA.1
8
LDA-G anode LED power supply
out
0.7V
<1A
JA.2
9
LDB-Y anode LED power supply
out
0.7V
<1A
JA.3
10
LDB-G anode LED power supply
out
0.7V
<1A
JA.4
11
LDC-R anode LED power supply
out
0.7V
<1A
JA.5
12
LDC-G anode LED power supply
out
0.7V
<1A
JA.6
27
Service Manual – SC400
Control System
Function Electronic Board (EB1) Connectors (Continues)
J4: MOLEX MINIFIT type, 2-ways vertical
J4
2
1
PIN
Description
1
Battery charger enabling power supply
2
Battery charger enabling return
Electronic board
in/out
V ref.
I max.
Connected to
out
24V
5A
CH.1
in
24V
5A
CH.2
LED ELECTRONIC BOARD CONNECTOR (EBLED B side)
JA: MOLEX MINIFIT type, 6-ways vertical
PIN
Description
6
5
4
3
2
1
Electronic board
in/out
V ref.
I max.
Connected to
1
Common cathode LED power supply
in
0V
<1A
J3.7
2
LDA-Green anode LED power supply
in
0.7V
<1A
J3.8
3
LDB-Yellow anode LED power supply
in
0.7V
<1A
J3.9
4
LDB-Green anode LED power supply
in
0.7V
<1A
J3.10
5
LDC-Red anode LED power supply
in
0.7V
<1A
J3.11
6
LDC-Green anode LED power supply
in
0.7V
<1A
J3.12
LED Electronic Board (EBLED) Specifications
Code
Description
LDA
GREEN / RED two-color Ø5mm LED
LDB
GREEN / YELLOW two-color Ø5mm LED
LDC
GREEN / RED two-color Ø5mm LED
28
Service Manual – SC400
Control System
Controls and Functions
a. Low consumption circuit fuse (F3): directly downstream of J1.1, it protects all the inner and outer
circuits supplied by the electronic board.
b. Battery charger enabling circuit power supply (J4.1): directly downstream of F3.
c. BATTERY CHARGER enabling (J4.2): if the dip-switch DIP2 is turned to 0 (CH position), the
electronic board functions are activated only when the on-board battery charger is NOT connected to
the electrical mains; if DIP2 is turned to 1 (NO CH position), the electronic board functions are active
whether or not the battery charger is on board.
THE BATTERY CHARGER IS INSTALLED ON THE MACHINE AS A STANDARD
COMPONENT; the dip-switch MUST BE turned to 0 (CH position).
d. BRUSH function: is activated when J3.2 is at 24V with a 1 sec.-delay at switching off.
The BRUSH function includes activation of J2.3 (BRUSH ELECTROMAGNETIC SWITCH) and
J1.2,3 (SOLENOID VALVE) outputs, which are subjected to the presence of the signal on J3.4 with a
1 sec.-delay to switching on. The output on J1.2,3 (SOLENOID VALVE) is controlled by the WATER
FLOW CONTROL function (see step f).
The BRUSH function is subjected to the BATTERY PROTECTION function (see step g) and to the
BRUSH MOTOR PROTECTION function (see step j).
e. VACUUM SYSTEM function: is activated when J3.3 is at 24V with a 1 sec.-delay at switching on and
a 1 sec.-delay at switching off.
The VACUUM SYSTEM function includes the activation of J2.4 (VACUUM SYSTEM RELAY)
output.
The VACUUM SYSTEM function is subjected to the BATTERY PROTECTION function (see step g).
f. WATER FLOW CONTROL function: J1.2,3 (SOLENOID VALVE) output, when activated (see step
d), is modulated by ON/OFF cycles according to the following table; the current status is shown by
the LEDs (see step h):
Solution flow push-button
setting (SW3)
LED display
Solenoid valve ON time (EV1)
Solenoid valve OFF time (EV1)
0
-
Always OFF
1
1 sec
5 sec
2
3 sec
3 sec
3
Always ON
-
The default setting for the solution flow push-button (SW3) is 1.
The next detergent percentage setting is NOT stored into memory when the machine is turned off.
29
Service Manual – SC400
Control System
Controls and Functions (Continues)
g. BATTERY PROTECTION function: battery charge status is shown by the 3 LEDs depending on the
type of battery (WET/GEL, see step j) according to the following diagram:
Transition threshold (V, tolerance ±0.1)
WET
GEL
1
Green (fix) <=> yellow (fix)
22.0
22.2
2
Yellow (fix) => red (flashing 1Hz)
20.4
21.6
3
Safety threshold
19.4
20.6
The transition is filtered with a time constant of 3 sec. as to the supply voltage reading.
When threshold 2 is reached, the J2.3 (BRUSH ELECTROMAGNETIC SWITCH) and J1.2,3
(SOLENOID VALVE) outputs are automatically cut off after a 5 sec.-delay.
In chase threshold 3 is reached, also J2.4 (VACUUM SYSTEM) output is automatically deactivated
(without delays) and the BRUSH MOTOR BRAKING function (see step k) is disabled.
Irrespective of the voltage reading, when transition 2 is performed, it is not possible to go back to
YELLOW or GREEN condition.
The system reset happens when the machine is turned off by turning the rotary switch (SW1) to 0.
h. WATER FLOW SETTING function: When the battery charge status is above threshold 1, the 3 LEDs
show the charge status only during the first 5 sec. after BRUSH or VACUUM SYSTEM function has
been activated, then they switch to the display of water flow setting (see step f). If during the first 5
sec. the push-button SW3 is pressed, the display immediately switches to the water flow setting.
When the water flow setting is displayed, each time the push-button SW3 is pressed, the setting of
the water flow increases by 1 in sequence (from 3 to 0).
When the battery charge status is below threshold 1, the display shows the battery charge status.
The LEDs switches from battery charge status to water flow setting display, only when the pushbutton SW3 is pressed. This display last 5 sec., before switching again. If during the 5 sec. the pushbutton SW3 is pressed, the setting of the water flow increases by 1 in sequence (from x=3 to x=0). If
the push-button SW3 is not pressed for more than 5 sec., the display switches again to the battery
charge status.
i. Battery type selection (WET/GEL): each time the electronic board is switched on, the current
condition is shown for 2 sec. by LEDs according to the following diagram:
WET
RED LED flashing
GEL
GREEN LED flashing
After the first 2 sec., the LEDs show the battery charge status or the water flow level (see step h).
WET/GEL setting depends from dip-switch DIP1 position, according to the silk-screen printed “WET”
and “GEL” marks beside the dip-switch.
30
Service Manual – SC400
Control System
Controls and Functions (Continues)
j. BRUSH MOTOR PROTECTION function: through the differential input (J2.1 - J2.2), the voltage
drop is read on the BRUSH MOTOR fuse: if the voltage drop exceeds the alarm threshold for more
than 30 sec., the J2.3 (BRUSH ELECTROMAGNETIC SWITCH) and J1.2,3 (SOLENOID VALVE)
outputs are switched off until their reset by switching off the electronic board.
When the threshold is exceeded (without delays), the GREEN, YELLOW and RED LEDs flash
simultaneously (freq. 1Hz).
The alarm threshold is 40±2mV, which correspond to about 40±5 Ampere in the motor.
If the protection activates (automatic switching off of J2.3 and J1.2,3 outputs), the GREEN, YELLOW
and RED LEDs continue to flash until their reset by switching off the machine.
k. BRUSH REMOVAL SYSTEM: When the BRUSH function is active and the push-button SW2 is NOT
PRESSED for at least 3 sec., if the push-button SW2 is pressed and released 3 times in 2 sec., the
following cycle is performed:
1) Alternating flashing of RED AND GREEN LEDs for 2 sec. to confirm brush remove mode.
2) Closing (by a TIANBO HJR-3FF-S-Z relay contact) of J2.6 output on J1.1 positive power supply
through F4 fuse, for 2 sec. shunt B+ to both states of motor to cause abrupt stop.
3) Activation after 0,2 sec. of J2.3 (BRUSH ELECTROMAGNETIC SWITCH) output for 1 sec..
The BRUSH REMOVAL SYSTEM is subjected to the BATTERY PROTECTION function (see step g).
During this cycle (which lasts 4 sec.) the SW2 push-button is disabled.
31
Service Manual – SC400
Electrical System
Electrical System
Functional Description
Basically the electrical system consists of a function
electronic board (EB1) which determines the brush
motor, vacuum system motor and solenoid valve activation by means of the relevant controls (rotary switch
(SW1) and brush activation push-button (SW2)), disabling them when the battery voltage drops below the
battery safety threshold value.
The batteries are connected to the system by means of
the ANDERSON POWER connector (C1).
The battery charger (CH) is connected to the batteries
(BAT) directly on the – and + terminals and it supplies the enabling signal to activate the machine functions only when it is disconnected from the electrical
mains with the J4 2-way connector. When the battery
charger is connected to the electrical mains, the battery charger inner relay opens the contact and stops
the enabling signal on the J4 connector.
For further details, see the descriptions of individual
sub-systems.
Fuses
The brush motor circuit is protected from short-circuits by the 40A fuse (F1). The motor is protected
from overloads by means of the electronic protection
system described in the Function Electronic Board
Specifications chapter.
The vacuum system motor circuit is protected by the
30A fuse (F2).
The solenoid valve (EV1) and the function electronic
board (EB1) control circuits are protected by the 5A
fuse (F3) on the function electronic board (EB1).
The brush release circuit is protected by the 20A fuse
(F4) on the function electronic board (EB1).
(Only for 9087311020 - 9087318020 models). The
125A battery fuse (F0) is assembled directly on the
+ terminal of the battery and jump connected to the
negative terminal of the other. This fuse operates only
in case of short circuits on the machine power wiring
harness, to prevent fire or battery explosion.
Wiring Diagram
FUNCTION ELECTRONIC
BOARD (EB1)
BATTERY
CONNECTOR (C1-)
+ 24V
J4.1 - Battery charger enabling power supply
BATTERY
CONNECTOR (C1+)
J4.2 - Battery charger enabling return
BATTERY CHARGER (CH)
24V BATTERY (BAT)
BATTERY FUSE (F0)
P200076
32
Service Manual – SC400
Electrical System
Component Locations
•
•
•
•
•
•
Battery charger (CH)
Batteries (BAT)
Battery connection connector (C1)
Battery wiring harness
Machine wiring harness
Electrical component box
• Battery fuse (F0) (only for 9087311020 –
9087318020 models)
• Brush motor fuse (F1)
• Vacuum system motor fuse (F2)
• Solenoid valve and electronic board fuse (F3)
• Brush release fuse (F4)
Brush release
fuse (F4)
Battery charger (CH)
Brush motor
fuse (F1)
Solenoid valve and
electronic board fuse (F3)
Electrical
component
box
Battery connection
connector (C1)
Machine wiring harness
Vacuum system motor fuse (F2)
Batteries (BAT)
Battery wiring harness
Battery fuse (F0)
(only for 9087311020 – 9087318020 models)
P200050
33
Service Manual – SC400
Electrical System
Maintenance and Adjustments
Battery Installation And Battery Type Setting (WET or GEL/AGM)
Set the electronic board of the machine and the battery charger according to the type of batteries to be installed (WET or GEL/AGM) as shown below.
Machine Setting
1. Disconnect the battery connector (red).
2. Remove the screws (A), then carefully remove the electrical component box cover (B).
3. On the electronic board, turn the microswitch (C) to WET or GEL/AGM, according to the type of
batteries to be installed.
Warning!
Do not move/set the adjacent switch (D).
4. Reinstall the electric component box cover (B) and tighten the screws (A).
D
C
A
B
A
P200051
34
Service Manual – SC400
Electrical System
Battery Installation And Battery Type Setting (WET or GEL/AGM) (Continues)
Battery charger setting
5. To set the battery charger, refer to the relevant Manual supplied with the machine.
Battery Installation
6. Disconnect the vacuum hose (E) from the squeegee (F).
7. Disconnect the recovery water drain hose (G) from the bracket (H).
8. Open the cover (I).
9. Grasp the recovery tank (J) in the area (K) and slightly raise it.
10. Disconnect the vacuum hose (L) from the tank, then remove the tank (J) with the hoses (M) and (N).
11. Install the batteries on the machine according to the diagram (P).
12. Perform steps 6 to 10 in the reverse order.
13. Connect the battery connector (red).
14. Charge the batteries (see the procedure in Battery Charging paragraph).
P
T OF
FRON
IN E
MACH
12 V
12 V
L
PA NE
L
PA NE
I
J
OF
BACK E
IN
MACH
K
H
L
G
N
E
M
F
P200081
35
Service Manual – SC400
Electrical System
Battery Charging
Note:
Charge the batteries when the yellow or red LED turns on, or at the end of each working
cycle. Keeping the batteries charged make their life last longer.
Caution!
When the batteries are discharged, charge them as soon as possible, as that
condition makes their life shorter. Check for battery charge at least once a week.
Caution!
When using lead (WET) batteries, battery charging produces highly explosive
hydrogen gas. Charge the batteries in well-ventilated areas and away from naked
flames.
Do not smoke while charging the batteries.
Do not reinstall the recovery tank until the battery charging cycle is over.
Caution!
Pay careful attention when charging lead batteries (WET) as there may be battery
fluid leakages. The battery fluid is corrosive. If it comes in contact with skin or eyes,
rinse thoroughly with water and consult a physician.
1. Drive the machine to the appointed recharging area.
2. Turn the machine program selection knob to “0”.
3. For WET batteries only:
• Tip up the recovery tank.
• Check the level of electrolyte inside the batteries; if necessary, top up through the caps.
• Leave all the battery caps open for next charging.
• If necessary, clean the upper surface of the batteries.
4. Connect the battery charger cable to the electrical mains (the electrical mains voltage and frequency
must be compatible with the battery charger values shown on the machine serial number plate).
Note:
When the battery charger is connected to the electrical mains, all machine functions are
automatically cut off.
The battery charger red or yellow LED turned on, indicates that the batteries are
charging.
5. When the battery charger green LED stays on, the battery charging cycle is over.
6. When the battery charging is completed, disconnect the battery charger cable from the electrical mains
and wind it round its housing.
7. For WET batteries only:
• Close all the battery caps.
• Tip down the recovery tank.
8. Now the machine is ready to be used.
Note:
For further information about the operation of the battery charger, see the Battery
Charger Manual.
36
Service Manual – SC400
Electrical System
Fuse Check and Replacement
Fuses in the electric component box
1. Drive the machine on a level floor. Make sure that the machine cannot move independently.
2. Disconnect the battery connector (red).
3. Remove the screws (A), then remove the electrical component box cover (B).
4. Check the following fuses for integrity:
• (C): F1 (40 A) circuit breaker, brush motor (open cover).
• (D): F2 (30 A) blade fuse, vacuum system motor.
• (E): F3 (5 A) blade fuse, solenoid valve and electronic board.
• (F): F4 (20 A) glass fuse, brush release system.
5. Replace the open fuse, when the component that caused deactivation has fully cooled down.
6. Place the cover (B) and tighten screws.
7. Connect the battery connector (red).
Battery Fuse (only for 9087311020 – 9087318020 models)
1. Drive the machine on a level floor. Make sure that the machine cannot move independently.
2. Disconnect the battery connector (red).
3. Remove the recovery tank.
4. On the battery cable (G) check/replace the following fuse:
• (H): F0 (125 A) battery fuse.
5. Assemble the recovery tank.
6. Connect the battery connector (red).
G
F
A
H
C
B
E
D
A
P200052
37
Service Manual – SC400
Electrical System
Troubleshooting
Trouble
Possible Causes
Remedy
The machine is not working
The battery connector (C1) is not connected or broken
Connect or replace it
The batteries (BAT) are discharged or its connections are
not efficient
Charge the batteries or clean/repair the
connections
The batteries (BAT) are broken
Check the battery no-load voltage
The battery charger (CH) is broken
Replace
The fuses (F0, F3) are open
Replace
The wiring harness is cut or pressed or short circuited
Repair
The rotary switch (SW1) of the program selection knob is
not working
Replace
The function electronic board (EB1) is broken
Replace
The DIP-switch 2 is turned to NO CH (ON) when the
battery charger is installed
Turn the DIP-switch 2 to CH (OFF)
38
Manuale di Assistenza – SC400
Electrical System
39
Machine Wiring Diagram
VACUUM SYSTEM
MOTOR (M2)
BRUSH
MOTOR (M1)
BATTERY CONNECTOR (C1+)
FUNCTION ELECTRONIC BOARD (EB1)
SIGNAL CIRCUIT FUSE (F3)
24V BATTERY (BAT)
BRUSH RELEASE FUSE (F4)
DETERGENT SOLENOID
VALVE (EV1)
BRUSH MOTOR
FUSE (F1)
BRUSH ELECTROMAGNETIC
SWITCH (K1)
VACUUM SYSTEM
MOTOR FUSE (F2)
VACUUM SYSTEM
RELAY (K2)
LED ELECTRONIC
BOARD (EBLED)
VACUUM SYSTEM
RELAY (K2)
BRUSH
ELECTROMAGNETIC
SWITCH (K1)
ROTARY SWITCH (SW1)
BRUSH ENABLING PUSH-BUTTON (SW2)
DETERGENT FLOW PUSH-BUTTON (SW3)
BATTERY CHARGER (CH)
BATTERY CONNECTOR (C1-)
BATTERY FUSE (F0)
P200077
Service Manual – SC400
Electrical System
Specifications
General
Total absorbed power
Battery compartment size
Battery voltage
Standard batteries (2)
Battery charger
Work autonomy (standard batteries)
Values
29 A (0.75 kW)
13.7x17.7x10.2 in (350x350x260 mm)
24 V
12 V - 50 Ah C5 (AGM) Spiracell
100-240 VAC
1.5 hour
40
Service Manual – SC400
Recovery System
Recovery System
Functional Description
The water recovery system removes the dirty water
from the floor and pipes it to a recovery tank. When
the machine is running, the dirty water on the floor is
collected by the squeegee blades and collected through
the slots in the same, piped through the vacuum hose
and into the tank by the airflow created by vacuum
motor (M2). The dirty water is piped into the recovery
tank, while the airflow continues to the vacuum fan.
The vacuum system motor (M2) is supplied by the
relay (K2) which is driven by the function electronic
board (EB1) when the rotary switch (SW1) is turned
to 1 or 3. The circuit is protected by the fuse (F2).
The automatic float in the vacuum grid stops vacuum
system motor (M2) from collecting any liquids.
When the automatic float closes and shuts down the
vacuum system, the vacuum system motor noise will
increase and the floor will not be dried.
When the recovery tank is full it can be emptied
through the drain hose.
Wiring Diagram
B-
B+
VACUUM SYSTEM
MOTOR FUSE (F2)
VACUUM
SYSTEM RELAY (K2)
VACUUM SYSTEM
MOTOR (M2)
BJ2.4 - Vacuum system relay power supply –
+ 24V
J2.5 - Electromagnetic switch / relay power supply +
FUNCTION ELECTRONIC
BOARD (EB1)
ROTARY
SWITCH
(SW1)
SIGNAL CIRCUIT
FUSE (F3)
+ 24V
J3.1 - Control power supply
J3.3 - Vacuum system function return
P200078
41
Service Manual – SC400
Recovery System
Component Locations
•
•
•
•
•
•
Recovery tank
Vacuum grid with automatic shut-off float
Recovery tank cover
Cover gasket
Recovery water drain hose
Squeegee vacuum hose
•
•
•
•
Vacuum system motor (M2)
Electrical component box
Vacuum system motor fuse (F2)
Vacuum system relay (K2)
Coperchio
serbatoio
Recovery tank
cover acqua di recupero
Guarnizione
Cover gasketdel coperchio
Recovery
Tubo di
scarico water
hose
acquadrain
di recupero
Griglia
aspirazione
con
Vacuumdigrid
with
chiusura
automaticautomatica
shut-off float
a galleggiante
Tubo
di aspirazione
tergitore
Squeegee
vacuum hose
Serbatoio tank
Recovery
acqua di recupero
Motore
Vacuumimpianto
system
di
aspirazione
(M2)
motor
(M2)
Vacuum system relay
Relè (K2)
Vacuum system motor
fuse (F2)
Fusibile
Vano
Componenti
elettrici
Electrical
component
box
P200053
42
Service Manual – SC400
Recovery System
Maintenance and Adjustments
Tank and Vacuum Grid Cleaning
1. Drive the machine to the appointed disposal area.
2. Turn the machine program selection knob to “0”.
3. Open the recovery tank cover (A), then clean and wash the cover, the tank (B) and the vacuum grid (C)
with clean water.
If necessary, release the fasteners (D) and open the grid (C), remove the float (E), clean all the
components and then reinstall them.
If necessary, clean also the solution tank.
Drain the water from the tanks with the relevant drain hoses.
4. Check the recovery tank cover gasket (F) for integrity.
The gasket (F) must be efficient, because it creates vacuum in the tank that is necessary for vacuuming
the recovery water.
If necessary replace the gasket (F) by removing it from its housing (G). When assembling the new
gasket, install its junction (H) in the central rear area as shown in the figure.
5. The gasket (F) must be in good shape, as it is necessary for the recovery tank stay sealed.
6. Close the recovery tank cover (A).
A
F
D
C
E
H
I
D
G
B
C
P200054
43
Service Manual – SC400
Recovery System
Troubleshooting
Trouble
Possible Causes
Remedy
The vacuum system motor (M2) does not
turn on
The vacuum system motor carbon brushes are worn
Replace
The rotary switch (SW1) is broken
Replace
The vacuum system motor is faulty
Check the amperage.
Check the carbon brushes.
Replace.
The recovery water vacuuming is
insufficient or there is no vacuuming
The fuse (F2) is open
Replace
The relay (K2) is broken
Replace
The vacuum grid with automatic shut-off float is activated
because the recovery tank is full
Drain the recovery tank
The vacuum grid is dirty
Clean
The tank cover is not correctly positioned
Adjust
The tank cover gasket is not efficient
Clean/replace
The vacuum system motor filter is dirty
Clean
The vacuum gaskets are damaged or do not match
perfectly
Repair or replace
The squeegee vacuum hose is broken
Replace
The recovery tank vacuum hose is broken
Replace
44
Service Manual – SC400
Recovery System
Removal and Installation
Vacuum System Motor Amperage Check
Warning!
Remove the Amp clamp (C).
This procedure must be
performed by qualified
personnel only.
If the amperage is higher, perform the following
procedures to detect and correct the abnormal
input:
• Check that the vacuum system motor fuse
(F2) is properly tightened.
• Check the condition of the vacuum system
motor carbon brushes.
• Remove the vacuum system motor (see the
procedure in the Vacuum System Motor
Disassembly/Assembly paragraph), and check
the condition of all its components.
1. Check that the squeegee and the vacuum hose
are clean and that there is no dirt in their inner
parts.
2. Keep the squeegee lifted.
3. Remove the screws (A), then remove the
electrical component box cover (B).
Warning!
Do not touch uncovered
electrical components while
performing the following
steps.
4. Apply the Amp clamp (C) on the electrical cable
(D) of the vacuum system motor on the relay
output (E).
5. Turn on the vacuum system and check that the
vacuum system motor amperage is between 13
and 17 A at 24V.
Stop the vacuum system.
Turn the machine program selection knob to “0”.
If the above-mentioned procedures do
not produce the correct readings for the
vacuum system motor amperage, the motor
must be replaced (see the procedure in the
Vacuum System Motor Disassembly/Assembly
paragraph).
Reassembly
6. Assemble the components in the reverse order of
disassembly.
E
A
B
A
D
C
P200055
45
Service Manual – SC400
Recovery System
Vacuum System Motor Carbon Brush Check/Replacement
Disassembly/Check
1. Remove the vacuum system motor (see the
procedure in the Vacuum System Motor
Disassembly/Assembly paragraph).
2. At the workbench, remove the vacuum system
motor guard (A) by disengaging its inner
fasteners (B).
3. With a proper tool, remove the tin soldering spot
(C) between both lead-in wires (D).
4. Disconnect the lead-in wires (D).
5. Remove the screws (E) and remove the carbon
brushes (F).
6. Check the carbon brushes (F) for wear. The
carbon brushes are worn when:
• The contact with the motor armature is insufficient
• The contact surface is not integral
• The stroke is less than 0.12 in (3 mm)
• The spring is broken
In this cases, replace both motor carbon brushes.
Assembly
7. Assemble the components in the reverse order of
disassembly, and note the following:
• after connecting the lead-in wires (D) fasten
them with a tin soldering spot (C).
A
E
E
F
F
D
D
A
B
C
D
P200056
46
Service Manual – SC400
Recovery System
Vacuum System Motor Disassembly/Assembly
Disassembly
1. Remove the recovery tank.
2. Loosen the band (A) and disconnect the hose (B) from the vacuum system motor below.
3. Remove the guard (C).
4. Disconnect the connector (D) of the vacuum system motor (E).
5. Remove the screws (F), then lift them from the housing and remove the vacuum system motor (E).
6. If necessary, remove the sound-proof panels (G) and (H) from the motor.
Assembly
7. Assemble the components in the reverse order of disassembly.
B
E
F
F
A
F
C
D
G
E
H
P200057
47
Service Manual – SC400
Recovery System
Specifications
General
Recovery tank capacity
Vacuum system motor power
Vacuum water lift (blocked)
Values
5.5 US gal (21 liters)
0.4 hp (300 W)
47.2 inH2O (1,200 mmH2O)
48
Service Manual – SC400
Scrub System, Disc
Scrub System, Disc
Functional Description
The disc brush system can be started by the operator.
The disc brush rotates counter-clockwise.
The brush system, when turning, cleans/washes the
floor surface and assists machine forward movement.
The deck, where brushes suitable for cleaning the
particular type of floor are installed, is the main part
of the scrub system. The brush deck is fixed and integrated in the machine with a support bracket. The adjusting systems adjusts the forward speed, while the
handwheel on the deck adjusts the machine straightforward drive.
The brush working pressure is functional to the machine designed balance.
The brush motor (M1) is supplied by the electromagnetic switch (K1) which is driven by the function electronic board (EB1) when the rotary switch (SW1) is
turned to 1 or 2, and the brush enabling push-button
(SW2) is pressed. The circuit is protected by the fuse
(F1) and by the electronic protection system described
in the Function Electronic Board Specifications chapter.
The system, once activated, uses the solution coming
form the solution system, to wash the floor.
In case of brush motor overload, a safety system stops
the brushes after about one minute of continuous
overload. The overload is shown by the three battery
warning LEDs flashing simultaneously.
The overload is detected by monitoring the current
flow sum on the motor. The current is measured by
checking the voltage drop through the fuse (F1). If the
voltage drop is higher than 40 mV, the 3 battery LEDs
flash simultaneously and, if the overload persists, the
motor stops after a variable delay, depending on the
overload amount.
To start scrubbing again after a brush stop due to
overload, cycle the rotary switch (SW1) off and then
back on.
To work properly, the brush motor needs the following:
• Rotary switch (SW1) turned to 1 or 2
• Brush enabling push-button (SW2) pressed
• Charged batteries (the red LED must not be
flashing).
BRUSH RELEASE SYSTEM:
In order to release the brush from its hub, the brush
motor starts running, then it is stopped quickly.
Therefore the brush due to its inertia is disengaged
from the hub. The system works better if the brush
deck is lifted from the floor during this operation.
Wiring Diagram
B-
B+
BRUSH
ELECTROMAGNETIC
SWITCH (K1)
BRUSH MOTOR
FUSE (F1)
BRUSH
MOTOR (M1)
J2.1 - Brush fuse voltage drop reading +
J2.2 - Brush fuse voltage drop reading –
BJ2.3 - Brush electromagnetic switch power supply –
BRUSH
ELECTROMAGNETIC
SWITCH (K1)
J2.5 - Electromagnetic switch/relay power supply +
BRUSH RELEASE
FUSE (F4)
+ 24V
J2.6 - Brush motor braking circuit
BRUSH ENABLING
PUSH-BUTTON (SW2)
ROTARY SWITCH
(SW1)
SIGNAL CIRCUIT
FUSE (F3)
+ 24V
FUNCTION ELECTRONIC
BOARD (EB1)
J3.1 - Control power supply
J3.2 - Brush function return
J3.4 - Brush rotation enabling
P200079
49
Service Manual – SC400
Scrub System, Disc
Component Locations
•
•
•
•
•
Disc brush deck
Brush motor (M1)
Drive hub
Electromagnetic switch (K1)
Brush motor fuse (F1)
• Brush release fuse (F4)
• Machine forward speed adjusting handwheel
• Machine straight forward movement adjusting
handwheel
Brush release fuse (F4)
Brush motor fuse (F1)
Electromagnetic switch (K1)
Brush motor (M1)
Drive hub
Disc brush deck
Machine straight forward movement
adjusting handwheel
Machine forward speed
adjusting handwheel
P200058
50
Service Manual – SC400
Scrub System, Disc
Maintenance and Adjustments
Brush Cleaning
Warning!
It is advisable to wear protective gloves when cleaning the brush because there may
be sharp debris.
1. Remove the brush (as shown in the User Manual).
2. Insert the positioning pin (A) and disengage the machine parking device (B).
3. Clean the brush with water and detergent.
4. Check the brush bristles for integrity and wear; if necessary, replace the brush.
5. Install the brush (as shown in the User Manual).
A
B
P200059
51
Service Manual – SC400
Scrub System, Disc
Machine Forward Movement Adjustment
Note:
The machine speed and forward movement vary according to the type of floor to be
cleaned and the choice of using the brush or the pad.
If necessary, perform the following procedure.
1. Adjust the machine speed with the handwheel (A) according to the following procedure:
• Turn it counter-clockwise to increase the machine speed.
• Turn it clockwise to decrease the machine speed.
2. If it is difficult to keep the machine moving straight-forwardly because it deviates to the left or to the
right, adjust the knob (B) by turning it clockwise or counter-clockwise.
3. With the machine ready to operate, perform hands-on tests of the machine speed; if necessary, perform
step 2 again.
B
A
P200060
52
Service Manual – SC400
Scrub System, Disc
Troubleshooting
Open Circuit
• The fuse (F1) determines an open in the supply circuit of the brush deck motor. This system allows to
prevent the circuits from being damaged under overload conditions.
• The open in the fuse can be caused by the following:
• Short circuit in the brush motor wiring harness; fault in the motor.
Trouble
Possible Causes
Remedy
The brush does not clean properly
The brush is excessively worn
Replace
The brush does not turn
Activation of motor overload
Restart the machine as shown in
the User Manual
The motor carbon brushes are worn
Replace
The motor is faulty
Check the motor amperage/replace
There are ropes or debris restraining the brush rotation
Remove and clean
The fuse (F1) is open
Replace
The motor electromagnetic switch (K1) is damaged
Replace
The brush motor electromagnetic switch wiring harness is
damaged
Repair
The wiring harness between function electronic board
(EB1) and brush motor electromagnetic switch (K1) is
damaged
Repair
The levers or the enabling push-button are broken
Replace
The fuse (F4) is open
Replace.
The electromagnetic switch (K1) is broken
Replace
The brush release system does not work
53
Service Manual – SC400
Scrub System, Disc
Removal and Installation
Brush Motor Amperage Check
Warning!
amperage:
• Check that the brush hub is free from foreign
materials (ropes, dirt, ...) preventing it from
turning.
• Check that the brush motor fuse (F1) is properly tightened.
• Check the condition of the brush motor carbon brushes
• Remove the brush motor (see the procedure
in the Brush Motor Disassembly/Assembly
paragraph), and check the condition of all its
components.
This procedure must be
performed by qualified
personnel only.
1. Remove the brush.
2. Remove the screws (A), then remove the
electrical component box cover (B).
Warning!
Do not touch uncovered
electrical components while
performing the following
steps.
If the above-mentioned procedures do not
produce the correct readings for the brush motor
amperage, the motor must be replaced (see the
procedure in the Brush Motor Disassembly/
Assembly paragraph).
3. Apply the Amp clamp (C) on the electrical cable
(D) of the brush motor on the electromagnetic
switch output (E).
4. Turn on the brush (as shown in the User
Manual) and check that the brush motor
amperage is between 3 and 4 A at 24 V.
Stop the brush rotation.
Turn the machine program selection knob to “0”.
Remove the Amp clamp (C).
If the amperage is higher, perform the following
procedures to detect and correct the abnormal
Reassembly
5. Assemble the components in the reverse order of
disassembly.
A
D
B
A
E
C
P200061
54
Service Manual – SC400
Scrub System, Disc
Brush Motor Carbon Brush Check/Replacement
Disassembly/Check
1. Remove the recovery tank (as shown in User
Manual).
2. Loosen the band (A) and disconnect the hose (B)
from the vacuum system motor below.
3. Remove the guard (C).
8. Check the carbon brushes (H) for wear. The
carbon brushes are worn when:
• The contact with the motor armature is insufficient
• The contact surface is not integral
• The stroke is less than 0.12 in (3 mm)
• The spring is broken
In this cases, replace all motor carbon brushes.
4. On the brush motor (D), if necessary, remove
dirt form the area of the four carbon brush
covers (E).
Assembly
9. Assemble the components in the reverse order of
disassembly.
5. Turn and remove the four covers (E) (bayonet
joint).
6. Remove the carbon brush nuts (F) with the leadin wires.
7. Disengage the tabs (G) and remove the carbon
brushes (H).
B
E
E
A
D
E
E
C
D
H
E
G
F
E
G
P200062
55
Service Manual – SC400
Scrub System, Disc
Brush Deck Disassembly/Assembly
Note:
The figure shows the 520 Watt-motor; the 450 Watt-motor is similar.
Disassembly
1. Remove the recovery tank and the solution tank (as shown in User Manual).
2. Remove the brush (as shown in the User Manual).
3. If possible, place the machine on a hoisting system.
Make sure that the machine cannot move independently.
4. Turn the machine program selection knob to “0”.
5. Disconnect the battery connector (red).
6. On the machine front left side, remove the screw inside the hole (A).
7. With the wheel (B), fully unscrew the threaded pin (C) from the upper nut screw.
8. Turn the handwheel (D) clockwise until the end of the stroke (brush lowering).
9. Unscrew the nut (E) and remove the screw (F) thus letting the brush deck (G) lowering down.
10. Lift the machine front side (P) and keep it lifted.
11. Loosen the clamp (H) and disconnect the hose (I).
C
A
D
B
F
G
E
P
H
I
P200063
56
Service Manual – SC400
Scrub System, Disc
Brush Deck Disassembly/Assembly (Continues)
13. Remove the brush deck (J) by turning it as shown in the figure, then lay it on a flat surface.
14. Cut the clamp (K).
15. Remove the four protecting caps (L) of the four electrical connections (M) of the brush motor (N).
16. Mark the position of each of the four electrical connections (M) to make subsequent assembly easier.
Remove the nuts and disconnect the four electrical connections (M) from the motor.
17. Retrieve the brush deck (J).
Assembly
18. Assemble the components in the reverse order of disassembly.
L
M
K
N
J
L
M
P200064
57
Service Manual – SC400
Scrub System, Disc
Brush Motor Disassembly/Assembly
Disassembly
1. Remove the brush deck (see the procedure in the Brush Deck Disassembly/Assembly paragraph).
2. On the lower side of the deck, remove the centre screw (A).
3. Remove the flange (B).
4. Remove the spacer (C) and the key (D) from the hub (E).
5. Remove the screws (F) and remove the brush case (G).
6. Retrieve the brush motor (H).
Assembly
7. Assemble the components in the reverse order of disassembly.
F
A
B
F
D
C
E
G
H
P200065
58
Service Manual – SC400
Scrub System, Disc
Brush Deck Adjuster Disassembly/Assembly
Disassembly
1. Remove the brush deck (see the procedure in the Brush Deck Disassembly/Assembly paragraph).
2. On the front right side of the machine, remove the screw (A) and the handwheel (B).
3. Remove the nut (C) and, form inside the wall, remove the deck adjuster (D).
Assembly
4. Assemble the components in the reverse order of disassembly.
B
G
C
A
D
P200066
59
Service Manual – SC400
Scrub System, Disc
Specifications
General
Brush/pad diameter
Brush pressure with full tank and lowered squeegee
Values
17 in (430 - 432 mm)
77 lb (35 kg)
Brush motor power
0.6 hp (450 W)
Brush motor speed
155 rpm
Brush motor amps
3 - 4 A, No load
60
Service Manual – SC400
Solution System
Solution System
Functional Description
The solution system supplies the detergent to the
brush when cleaning the floor. The solution tank is
also the main machine body. There is a manual valve
on the left side of the tank to close the water supply
whenever maintenance must be performed on the machine.
The detergent quantity is adjusted by the operator
with the push-button (SW3). The solution flows from
the tank to the tap, through the filter and solenoid
valve (EV1) and then to the brush deck.
The solenoid valve (EV1) is supplied by the function
electronic board (EB1) when the rotary switch (SW1)
Solution flow push-button
setting (SW3)
LED display
is turned to 1 or 2, the brush activation push-button
(SW2) is pressed and the push-button (SW3) setting is
different from 0 (3 LEDs off).
The circuit is protected by the fuse (F3) on the function electronic board (EB1).
The solution valve is pulse width modulated to meter
the flow rate:
Solenoid valve ON time (EV1)
Solenoid valve OFF time (EV1)
0
-
Always OFF
1
1 sec
5 sec
2
3 sec
3 sec
3
Always ON
-
Wiring Diagram
DETERGENT SOLENOID
VALVE (EV1)
J1.2 - Solenoid valve power supply +
BRUSH ENABLING
PUSH-BUTTON (SW2)
DETERGENT FLOW
PUSH-BUTTON (SW3)
ROTARY SWITCH (SW1)
BJ1.3 - Solenoid valve power supply –
SIGNAL CIRCUIT
FUSE (F3)
+ 24V
FUNCTION ELECTRONIC
BOARD (EB1)
J3.1 - Control power supply
J3.2 - Brush function return
J3.4 - Brush rotation enabling
J3.5 - Water push-button return
P200080
61
Service Manual – SC400
Solution System
Component Locations
• Solution tank
• Solution opening/closing valve
• Solution filter
• Solenoid valve (EV1)
• Solution drain and level check hose
Solution tank
Solution drain and
level check hose
Solenoid valve (EV1)
Solution filter
Solution opening/closing valve
P200067
62
Service Manual – SC400
Solution System
Maintenance and Adjustments
Solution Filter Cleaning
1. Drive the machine on a level floor.
2. Turn the machine program selection knob to “0”.
3. Operating under the machine, in front of the left rear wheel, close the solution valve (A).
The valve (A) is closed when it is in the position (B) and it is open when it is in the position (C).
4. Remove the transparent cover (D) and the gasket (E), then remove the filter strainer (F). Clean and
install them on the support (G); install the gasket (E) and the filter strainer (F) properly on the cover (D)
and on the support (G).
5. Open the valve (A) by turning it to position (C).
C
G
A
B
F
E
D
P200068
63
Service Manual – SC400
Solution System
Troubleshooting
Trouble
Possible Causes
Remedy
Small amount of solution or no solution
reaches the brush
The tank filter (optional) is clogged/dirty
Clean
The solution filter is clogged/dirty
Clean
The solenoid valve (EV1) is faulty or the electrical
connection is open
Replace the solenoid valve or repair
the electrical connection
There is dust/debris in the tank or in the detergent hoses,
obstructing the solution flow
Clean the tank/hoses
There is an open in the solenoid valve fuse/electronic
board (F3)
Replace
The solution reaches the brush also when The solenoid valve (EV1) is dirty/broken
the machine is off
Clean/replace
Specifications
General
Values
Solution tank capacity
6.0 US gal (23 liters)
Min/max solution flow
0.1 / 0.42 gpm (0.4 / 1.6 liters/min)
Solution valve winding resistance
50 Ω - 24V
64
Service Manual – SC400
Squeegee System
Squeegee System
Functional Description
The squeegee system cleans the liquid off the floor,
which is then collected by the recovery system.
The squeegee is equipped with wheels; the pressure of
the blades on the floor depends on a gas spring built
in the support, and on the weight of the system.
The squeegee is fastened to the machine by two wing
nuts in the squeegee support slots. In case of fixed
obstacles, the quick-fit system allows for squeegee to
break away from the bracket in order to prevent damage to the squeegee support.
The squeegee support is hinged to the machine which
allows the squeegee to turn sideways.
The 2 blades have different hardness and work side:
- Front blade; to be used only on the ruled side forward to convey the water towards the centre of the
squeegee.
- Rear blade; to be used only on the smooth side forward to dry and collect water.
Each blade has 2 functional edges that can be used
before it needs replacing.
The design and the central duct make it easy for the
squeegee to clear the water.
The squeegee system can be lifted and lowered by the
pedal.
To lift the squeegee it is also possible to tilt the machine backward until the squeegee is raised.
65
Service Manual – SC400
Squeegee System
Component Locations
•
•
•
•
Squeegee
Squeegee blades
Squeegee holder
Blade mounting springs
• Squeegee mounting handwheels
• Squeegee lifting/lowering pedal
• Gas spring
Squeegee mounting
handwheels
Squeegee lifting/lowering
pedal
Blade mounting springs
Squeegee holder
Squeegee
Squeegee blades
Gas spring
P200069
66
Service Manual – SC400
Squeegee System
Maintenance and Adjustments
Squeegee Cleaning
Warning!
It is advisable to wear
protective gloves when
cleaning the squeegee
because there may be sharp
debris.
1. Drive the machine on a level floor. Make sure
that the machine cannot move independently.
2. Turn the machine program selection knob to “0”.
3. Lower the squeegee with the pedal.
5. Loosen the handwheels (C) and remove the
squeegee (B).
6. Wash and clean the squeegee (B). In particular,
clean the compartments (D) and the vacuum
hole (E) from dirt and debris.
7. Check the front blade (F) and the rear blade
(G) for integrity, cuts and tears; if necessary
replace them (see the procedure in the following
paragraph).
8. Assemble the components in the reverse order of
disassembly.
4. Disconnect the vacuum hose (A) from the
squeegee (B).
A
C
B
G
F
D
E
D
E
B
P200070
67
Service Manual – SC400
Squeegee System
Squeegee Blade Check and Replacement
1. Disassemble and clean the squeegee (see the procedure in the relevant paragraph).
2. Check that the edge (A) of the front blade and the edge (B) of the rear blade lay down on the same level,
along their length; otherwise adjust their height according to the following procedure:
• Remove the mounting springs (C), then adjust the front neutral color brown color blade (D) and the
rear neutral color blade (E).
• Install the mounting springs (C) on the front and rear blades.
3. Check that the front blade (D) and the rear blade (E) are integral and free from cuts and lacerations;
if necessary replace them. Also check the front corner (F) of the rear blade (E) for wear; if it is worn,
overturn the blade to replace the worn corner with the other one (G), if it is integral. If the other corner
is worn too, replace the blade.
Caution! Mount both front and rear blades with the smooth side (H) toward the internal
squeegee side [ruled side outside (I)].
4. Assemble the squeegee (see the procedure in the relevant paragraph).
E
D
G
C
A
F
B
C
H
I
P200071
68
Service Manual – SC400
Squeegee System
Troubleshooting
Trouble
Possible Causes
Remedy
The recovery water vacuuming is
insufficient or there is no vacuuming
The squeegee or the vacuum hose is clogged or
damaged
Clean/repair/replace
There is debris under the blade
Remove
The squeegee blade edges are torn or worn
Replace
The gas spring is not efficient
Replace
69
Service Manual – SC400
Squeegee System
Removal and Installation
Gas Spring Disassembly/Assembly
Disassembly
1. If possible, place the machine on a hoisting system (or on a floor with a suitable step), in order to fully
stretch the gas spring (A) of the squeegee support system (B), beyond the support base of the machine
(as shown in the figure).
Make sure that the machine cannot move independently.
2. Turn the machine program selection knob to “0”.
3. Remove the squeegee as shown in Squeegee Cleaning paragraph.
4. Lower the squeegee support system (B) by fully stretching the gas spring (A).
5. Unscrew the nut (C) and remove the relevant screw.
Lower the gas spring (A) and the linkage (D).
6. Unscrew and remove the screw with nut (E).
7. Retrieve the gas spring (F).
Assembly
8. Assemble the components in the reverse order of disassembly.
E
A
F
B
D
C
P200072
70
Service Manual – SC400
Squeegee System
Specifications
General
Values
Machine width with squeegee
28.3 in (720 mm)
Gas spring pressure
40,5 Lb (180 Nm)
71
Service Manual – SC400
Wheel System, Non-Traction
Wheel System, Non-Traction
Component Locations
•
•
•
•
Central wheels on fixed axle
Rear support wheel, when the squeegee is lifted
Parking wheel
Parking wheel positioning pin
Parking
wheel
positioning pin
Parking wheel
Rear support wheel,
when the squeegee is lifted
Central wheels on fixed axle
P200073
72
Service Manual – SC400
Wheel System, Non-Traction
Specifications
General
Values
Minimum turning radius
29.5 in (750 mm)
Diameter of wheels on fixed axle
9.8 in (250 mm)
Wheel pressure on the floor
290 psi (2 N/mm2)
73