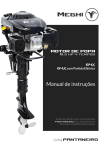
1
General STEYR TURBO DIESEL ENGINES Steyr Marine Engine Family 2012 SERVICE MANUAL Z001138-0 www.steyr-motors.com A-4407 Steyr-Gleink, AUSTRIA 1/65 1st Edition January 2014 STEYR MOTORS GmbH Im Stadtgut B1, Z001138-1_2014-01 General Preliminary Service Manual MARINE 2012 THIS PAGE IS INTENTIONALLY BLANK Z001138-1_2014-01 2/65 General PREFACE STEYR MOTORS GmbH has developed high-performance diesel engines with modulated high-pressure direct injection, especially for special vehicles. STEYR engines are designed to be adapted to various propulsion systems. This SERVICE MANUAL is published with the main intention.to provide information in form of technical data and know-how based on our experience in the diesel engine business, which will enable you in case of possible failure to operate, service and repair the engines Steyr Marine Engine Family 2012 to maintain their operating safety and reliability. To achieve continuous improvement with regard to form and contents of the information required, we are assigned to your aid. We, therefore, would much appreciate your comment to following questions Which descriptions or terms are not understandable? Which supplements or completions do you propose? Where did creep in contents- related mistakes? Please address your comment to: vom Inland from home countries: vom Ausland from foreign countries: 07252/222/52 +43/07252/222/52 07252/222/29 +43/07252/222/29 STEYR MOTORS GmbH After Sales Service Im Stadtgut B1 4400 STEYR AUSTRIA [email protected] http://www.steyr-motors.com 1st Edition Feb. 2012 P/N Z001138-0 3/65 Z001138-1_2014-01 General Preliminary Service Manual MARINE 2012 Repair and maintenance works on engine The descriptions and instructions in this technical documentation should support you in use and repair of our product. They refer to a specific equipment status of engine components and accessories. Your individual engine may be equipped with other or less accessory. For any component not covered in this manual, please contact STEYR MOTORS GmbH, After Sales Service, as to respective documentation. This manual also contains specific references to your personal safety as user, as well as that of your customers, their passengers and other persons being close to the engine. Product specifications, illustrations and technical data When reference is made in this manual to a brand name, product number, product or specific tool, an equivalent product may be used in place of the product or tool referred to, unless stated otherwise. To exclude possible danger, the operator has to provide for adequate safety precautions. All information, illustrations and specifications in this manual are based on the latest product data available at the time of printing. It cannot be guaranteed that this manual is constantly updated. Revised versions edited at a later date of such change. Illustrations in this manual may not always correspond to actual implements or components and are mainly intended as reference. STEYR MOTORS GmbH reserves the right to make changes at any time, without notice, on technical data or models and / or to discontinue models. The right is also reserved to change technical data or components at any time, without incurring any obligation to retrofit new parts on models produced prior to date of such change. To guarantee proper function of the engine and its attached parts after a repair, correct assembly is of utmost importance. Such works are to be carried out with greatest care, in accordance with repair instructions. Warranty: Warranty claims will expire if repair, service and operation of the engine do not correspond to the guidelines defined by STEYR MOTORS GmbH. Please address your warranty claims, in accordance with warranty regulations, directly to the After Sales Service of STEYR MOTORS GmbH. Every STEYR dealer is obliged to fill out the owner identification card enclosed to every sold STEYR engine or every sold vehicle with a built-in STEYR engine. Part 1 (Owner Identification Card) is to be handed over to the customer, part 2 (Dealer Record Card) remains with the dealer and part 3 is to be sent to the After Sales Service of STEYR MOTORS GmbH. This owner identification card serves as a proof of ownership and is to be submitted in case of warranty claims. Z001138-1_2014-01 4/65 General TABLE OF CONTENTS (MAIN ASSEMBLY GROUP ENGINE) GENERAL 01 ENGINE 02 COUPLING 03 FUEL SYSTEM 04 EXHAUST SYSTEM 05 COOLING SYSTEM 06 14 22 5/65 ELECTRICAL EQUIPMENT HYDRAULIC PUMP ENGINE PREHEATING Z001138-1_2014-01 General Preliminary Service Manual MARINE 2012 Components 01 Engine 01.00 Mount Bracket, Lifting Eye, Gasket Set 01.01 Crankcase 01.02 Crankshaft, Bearing, Damper 01.03 Flywheel 01.04 Piston, Rings and Pin, Connection Rod 01.05 Camshaft, Housing 01.06 Oil pump, Oil pipe, Oilcan 01.08 (Page 1 & 2) Intake Manifold Exhaust Manifold 01.13 Oil cooler, Filter 02.00 Fly Wheel housing 02.01 Ring Gear Carrier and Flex Plate 03.02 Unit Injector, Fuel Pump 03.05 Turbocharger 03.09 Fuel Filter 03.11 Glow Plug 02 Coupling 03 Fuel System Z001138-1_2014-01 03.08 Contr. Solenoid, Inj. Timing Device 6/65 General 04 Exhaust System 04.00 Connection to Turbo Charger 05 Cooling System 05.03 Water pipe, Thermostat 05.04 Water pump 05.05 Fan Assy. 06.03 Starter 06.05 Engine Harness 05.06 (Page 1 & 2) Drive Belt, Pulleys, Tensioner-Belt 1 & 2 06 Electrical System 06.01 Alternator, Bracket 06.06 Harness, ECU 14 Hydraulic pump 14.08 Hydraulic pump 52 Air Conditioning 52.00 A-C Compressor 7/65 Z001138-1_2014-01 General Preliminary Service Manual MARINE 2012 VERSIONS OF MANUAL Version Date Modification 1.0 01.02.2013 New edition Z001138-1_2014-01 8/65 General GENERAL Table of Contents A GENERAL REMARKS .................................................................................. 11 A1 A2 A3 A 3.2 Model and Serial Number ....................................................................................... 11 Documentation ........................................................................................................ 12 Technical Data and Overview ................................................................................. 13 Overview engine M16 TCA ..................................................................................... 21 B Specification ................................................................................................ 22 B1 B2 Fuel Requirements .................................................................................................. 22 Motor oil .................................................................................................................. 24 C Maintenance and Service ............................................................................ 25 C1 C1 C2 Trouble Check Chart ............................................................................................... 25 Trouble Check Chart continued............................................................................... 26 Service- and Maintenance Schedule...................................................................... 29 D General Information .................................................................................... 32 D1 D2 D3 D4 Electronic Engine Management System ................................................................. 32 Diagnostic system ................................................................................................... 36 Operation after Break – In ....................................................................................... 41 Extended Storage Preservation Procedure ............................................................. 41 E Quality guidelines for repair ....................................................................... 43 E1 E2 E3 E4 E5 Spare part specification ........................................................................................... 43 Workshop Profile ..................................................................................................... 43 Nomenclature .......................................................................................................... 44 SI – System ............................................................................................................. 46 Abbreviations .......................................................................................................... 47 F Operating material and information on disposal...................................... 48 F1 F2 List of operating material ......................................................................................... 48 Disposal of automotive waste products ................................................................... 49 G Notes on safety ............................................................................................ 50 G1 G2 G3 G4 G5 General notes on safety .......................................................................................... 51 Guidelines for damage prevention .......................................................................... 51 Legal rules .............................................................................................................. 51 Safety in the use of operating material .................................................................... 52 Measures in case of accidents ................................................................................ 52 H Tightening Torques ..................................................................................... 53 H1 H2 Listing of Tightening Torques .................................................................................. 53 General Tightening Torques ................................................................................... 59 9/65 Z001138-1_2014-01 General Preliminary Service Manual MARINE 2012 H3 H4 H5 H6 Testing of torque wrenches ..................................................................................... 61 Non-destructive material testing .............................................................................. 61 Use of adhesive and sealing materials.................................................................... 61 Solvent-free sealing materials ................................................................................. 61 I Wear Limits .................................................................................................. 64 I1 I.1.1 I.1.2 I.1.3 Adjustment information for service and maintenance.............................................. 65 Engine timing (measured with dial indicator No. 2300899/0) .................................. 65 Tension timing belt (measured with tool VR00515/0) .............................................. 65 Start of fuel delivery on the unit injectors (measured with dial indicator No. 2300899/0) ......................................................... 65 Valve clearance (measured with tool No. 2300712/3))............................................ 65 I.1.4 Z001138-1_2014-01 10/65 General A GENERAL REMARKS A 1 Model and Serial Number The primary model and serial number is located on the engine as illustrated. These numbers are required for warranty claims and ordering parts. 11/65 Z001138-1_2014-01 General Preliminary Service Manual MARINE 2012 A 2 Documentation The following documentation is available in English language on our website: Installation manual 2012 P/N Z001139-0 operation-, maintenance & warranty manual P/N Z001140-0 for MARINE 2012 service manual for MARINE 2012 P/N Z001138-0 spare parts catalogue SE126E25 P/N Z011841-0 spare parts catalogue SE156E26 P/N Z011842-0 spare parts catalogue SE196E35 P/N Z011843-0 spare parts catalogue SE236E40 P/N Z011844-0 spare parts catalogue SE236S36 P/N Z011845-0 spare parts catalogue SE266E40 P/N Z011846-0 spare parts catalogue SE266S36 P/N Z011847-0 spare parts catalogue SE286E40 P/N Z011848-0 spare parts catalogue SE306J38 P/N Z011849-0 Optional equipment (IFG, SCC) P/N xxxxxxxxxx tool catalogue for STEYR MOTORS ENGINES P/N Z001125-0 general technical documentation CD – ROM P/N Z 001009/0 Note: Further detailed service information are permanently available for the authorized SMO-Service-Network via log-in through the established extranet access. Z001138-1_2014-01 12/65 General A 3 Technical Data and Overview engine type SE126E25 SE156E26 SE196E35 SE236E40 SE236S36 SE266E40 SE266S36 SE286E40 SE306J38 Number of Cylinders 6 6 6 6 6 6 6 6 6 bore (mm) 85 85 85 85 85 85 85 85 85 stroke (mm) 94 94 94 94 94 94 94 94 94 displacement (cm³) 3200 3200 3200 3200 3200 3200 3200 3200 3200 rated power (kW) 88 110 140 170 170 190 190 205 215 rated speed (rpm) 2500 2600 3500 4000 3600 4000 3600 4000 3800 max. torque (Nm) 390 450 445 470 540 530 600 570 588 max. torque (lb-ft) 288 360 328 347 398 391 443 420 434 Speed at Maximum Torque (rpm) 1800 1800 2050 2550 1800 2300 1800 2550 3300 Maximum test speed (rpm) 2500 2600 3500 4000 3600 4000 3600 4000 3800 Torque at maximum test speed (Nm) 336 404 382 406 451 454 504 489 540 Lower tolerance of maximum power (%) 5 5 5 5 5 5 5 5 5 Upper tolerance of maximum power (%) 5 5 5 5 5 5 5 5 5 13/65 Z001138-1_2014-01 General Preliminary Service Manual MARINE 2012 engine type SE126E25 SE156E26 SE196E35 SE236E40 SE236S36 SE266E40 SE266S36 SE286E40 SE306J38 Fuel rate at rated speed (mm³/stroke) 54,5 65,9 65,2 71,3 75,9 81,1 86,4 86,3 93,4 Fuel rate at Maximum Torque (mm³/stroke) 58 66,8 65 72 78,9 80,5 89,8 85,9 96,3 mean effective Pressure (bar) 13,2 15,9 15,0 15,9 17,7 17,8 19,8 19,2 21,2 specific power (lbs/HP) 6,26 5,01 3,94 3,24 3,24 2,90 2,90 2,69 2,56 dry weight (kg) 340 340 340 340 340 340 340 340 340 specific power (kg/PS) 2,84 2,27 1,79 1,47 1,47 1,32 1,32 1,22 1,16 idle speed (rpm) 630 630 630 630 630 630 630 630 630 aspiration TCA TCA TCA TCA TCA TCA TCA TCA TCA turbo system WG WG WG geom VTG WG VTG WG WG Fuel Cons. at idle speed (kg/h) 0,52 0,52 0,52 0,52 0,52 0,52 0,52 0,52 0,52 air mass flow @ rated power (kg/h) 490 520 710 965 808 980 860 1040 1020 Fuel cons. @ rated power (kg/h) 20,1 25,4 33,7 42,5 40,9 47,3 46,1 51 52,2 Z001138-1_2014-01 14/65 General engine type SE126E25 SE156E26 SE196E35 SE236E40 SE236S36 SE266E40 SE266S36 SE286E40 SE306J38 exhaust mass flow @ rated power (kg/h) 510,1 545,4 743,7 1007,5 848,9 1027,3 906,1 1091 1072,2 max. inlet depression at rated Power (mbar) 30/50 30/50 30/50 30/50 30/50 30/50 30/50 30/50 30/50 spec. fuel consumption at rated power (g/kWh) 228 230 240 249 240 249 243 248 243 min spec. fuel consumption (g/kWh) 205 205 205 210 202 205 205 210 210 compressor outlet temperature at rated power (°C) 130 140 145 200 160 165 175 180 180 boost pressure adjustment value 1mm deflection (mbar) 1680 1680 1880 geometrical turbocharger electronic controlled 1920 electronic controlled 2040 2040 boost pressure adjustment value 3mm deflection (mbar) 1880 1880 2020 geometrical turbocharger electronic controlled 2100 electronic controlled 2240 2240 MAP at rated power (mbar) 2130 2200 2280 2790 2560 2840 2740 2990 3060 15/65 Z001138-1_2014-01 General Preliminary Service Manual MARINE 2012 engine type SE126E25 SE156E26 SE196E35 SE236E40 SE236S36 SE266E40 SE266S36 SE286E40 SE306J38 Map Toleranz (+/-) [mbar] 75 75 75 100 50 75 50 75 75 MAP (mbar) 2180 2240 2440 2900 2690 2840 2800 3000 3060 speed @ max. MAP (1/min) 2200 2350 2800 3550 3050 4000 3300 3800 3800 compression ratio ε = 17,0 ε = 17,0 ε = 17,0 ε = 17,0 ε = 17,0 ε = 17,0 ε = 17,0 ε = 17,0 ε = 17,0 max. exhaust backpressur e (mbar) 150 150 150 150 150 150 150 150 150 backpressur e tolerance (mbar) +0/- 50 +0/- 50 +0/- 50 +0/- 50 +0/- 50 +0/- 50 +0/- 50 +0/- 50 +0/- 50 max. engine cooling water outlet temp. (°C) 81 83 83 85 86 86 86 86 87 exhaust gas temperature (°C) 375 445 480 415 506 510 535 510 525 oil sump temperature (°C) 88 88 95 96 96 97 98 98 98 min. engine compartment pressure (mbar) 10 10 10 10 10 10 10 10 10 min. fuel supply pressure block inlet [mbar] - rel. 3500 3500 3500 3500 3500 3500 3500 3500 3500 Z001138-1_2014-01 16/65 General engine type SE126E25 SE156E26 SE196E35 SE236E40 SE236S36 SE266E40 SE266S36 SE286E40 SE306J38 max. engine coolant outlet temperature [°C] 105 105 105 105 105 105 105 105 105 raw water flow (l/min) 105 105 135 150 150 150 150 150 140 raw water supply pressure (bar) 0,37 0,37 0,67 0,8 0,8 0,8 0,8 0,8 0,75 Tension timing belt [N] 600 +/- 30 600 +/- 30 600 +/- 30 600 +/- 30 600 +/- 30 600 +/- 30 600 +/- 30 600 +/- 30 600 +/- 30 unit injector opening pressure (kPa) 26000 / 36000 kPa 26001 / 36000 kPa 26002 / 36000 kPa 26003 / 36000 kPa 26004 / 36000 kPa 26005 / 36000 kPa 26006 / 36000 kPa 26007 / 36000 kPa 26008 / 36000 kPa UI adjustment (mm) 9,20 9,10 8,85 8,85 8,74 8,65 8,74 8,70 8,65 UI adjustment tolerance ±0,02 ±0,02 ±0,02 ±0,02 ±0,02 ±0,02 ±0,02 ±0,02 ±0,02 UI adjustment check value after engine braking-in 9,25 9,15 8,90 8,90 8,79 8,70 8,79 8,75 8,70 UI base adjustment value (mm) 9,30 9,20 8,95 8,95 8,84 8,75 8,84 8,80 8,75 valve timing adjustment + tolerance (mm) 3,59±0,02 3,59±0,02 3,59±0,02 3,59±0,02 3,59±0,02 3,59±0,02 3,59±0,02 3,59±0,02 3,59±0,02 17/65 Z001138-1_2014-01 General Preliminary Service Manual MARINE 2012 SE126E25 SE156E26 SE196E35 SE236E40 SE236S36 SE266E40 SE266S36 SE286E40 SE306J38 valve clearancy (mm) 0,25 / 0,25 0,25 / 0,25 0,25 / 0,25 0,25 / 0,25 0,25 / 0,25 0,25 / 0,25 0,25 / 0,25 0,25 / 0,25 0,25 / 0,25 X X X X X X X X X X X X X X X X X X Cert. Nr. MED-B-5675 X X X X X X X X X Performance Rating PR, INT, MCD PR, INT, MCD PR, INT, MCD PR, INT, MCD PR, HO PR, INT PR, HO PR, INT PR, INT X X X X X X X X Z- Jet- Prope Powe Powe ller rtrain rtrain Shaft Commercial RCD EU EU 94/25/EC (2003/44/EC) 97/68/EG without integral (2004/26/EG) exhaust engine type X X X X X X X X X Unit Injector 2176554-0 2176554-0 2176554-0 2176554-0 2176554-0 2176554-0 2176554-0 2176554-0 2176554-0 Engine Block 2180996-0 2180996-0 2180996-0 2180996-0 2180996-0 2180996-0 2180996-0 2180996-0 2180996-0 charge air Cooler 2180876-0 2180876-0 2180876-0 2180876-0 2180876-0 2180876-0 2180876-0 2180876-0 2180876-0 piston bowl 2179531-3 2179531-3 2179531-3 2179531-3 2179531-3 2179531-3 2179531-3 2179531-3 2179531-3 Fuel delivery pump 2173396-6 2173396-6 2173396-6 2173396-6 2173396-6 2173396-6 2173396-6 2173396-6 2173396-6 fuel filter 2180831-0 2180831-0 2180831-0 2180831-0 2180831-0 2180831-0 2180831-0 2180831-0 2180831-0 Z001138-1_2014-01 18/65 General engine type SE126E25 SE156E26 SE196E35 SE236E40 SE236S36 SE266E40 SE266S36 SE286E40 SE306J38 Water Pump, ratio 2180867-1 2180867-1 2180867-1 2180867-1 2180867-1 2180867-1 2180867-1 2180867-1 2180867-1 Heatexchanger 2180883-0 2180883-1 2180883-2 2180883-3 2180883-0 2180883-3 2180883-0 2180883-3 2180883-3 Oil cooler 2180824-0 2180824-0 2180824-0 2180824-0 2180824-0 2180824-0 2180824-0 2180824-0 2180824-0 lubricant reservoir 2180643-0 2180643-0 2180643-0 2180643-0 2180643-0 2180643-0 2180643-0 2180643-0 2180643-0 air filter / mark / type 2180286-0 2180286-0 2180286-0 2180286-0 2180286-0 2180286-0 2180286-0 2180286-0 2180286-0 electric system voltage (V) 12V /24V 12V /24V 12V /24V 12V /24V 12V /24V 12V /24V 12V /24V 12V /24V 12V /24V alternator 2180569-0 2180569-0 2180569-0 2180569-0 2180569-0 2180569-0 2180569-0 2180569-0 2180569-0 starter 2040077-1 2040077-1 2040077-1 2040077-1 2040077-1 2040077-1 2040077-1 2040077-1 2040077-1 Max. Ampconsumption @20°C 240 240 240 240 240 240 240 240 240 flywheel /description 2180676-0 2180676-0 2180676-0 2180676-0 2180676-0 2180676-0 2180676-0 2180676-0 2180676-0 flywheel torque of inertia (kgm²) 0,1446 0,1446 0,1446 0,1446 0,1446 0,1446 0,1446 0,1446 0,1446 19/65 Z001138-1_2014-01 General Preliminary Service Manual MARINE 2012 engine type SE126E25 SE156E26 SE196E35 SE236E40 SE236S36 SE266E40 SE266S36 SE286E40 SE306J38 clutch 2179164-0 2179164-0 2179164-0 2179164-0 2179164-0 2179164-0 2179164-0 2179164-0 2179164-0 clutch torque of inertia (kgm²) 0,032 0,032 0,032 0,032 0,032 0,032 0,032 0,032 0,032 gear box description ZF 45 ZF 45 ZF 45 ZF 45 ZF 45 ZF 63 ZF 45 ZF 63 ZF 63 gearbox torque of inertia (idle position) (kgm²) 0,0427 0,0427 0,0427 0,0427 0,0427 0,0427 0,0427 0,0427 0,0427 propeller information 3-4, 17-19 Inch 3-4, 17-19 Inch 3-4, 17-19 Inch 3-4, 17-19 Inch 3-4, 17-19 Inch 3-4, 17-19 inch 3-4, 17-19 inch 3-4, 17-19 inch 3-4, 17-19 inch Turbo Charger no. 2203505-0 2203505-0 2205034-5 2173969-0 2201765-0 2181154-0 2201765-0 2179202-0 2179202-0 Exhaust manifold 2179798-0 2179798-0 2179798-0 2179798-0 2179798-0 2179798-0 2179798-0 2179798-0 2179798-0 Electr. Control Module No. 2181056-0 2181057-0 2181058-0 2181059-0 2181060-0 2181061-0 2181062-0 2181063-0 2181007-0 Z001138-1_2014-01 20/65 General A 3.2 Overview engine M16 TCA Item Designation 1 2 3 4 5 6 7 8 9 10 11 12 13 14 15 16 17 18 19 20 21 22 23 24 25 26 27 28 29 30 31 32 33 34 35 36 37 38 39 40 41 42 43 44 45 46 47 48 49 50 51 52 53 54 Boost Pressure Sensor Zinc Anode (3 Units) Intercooler Fuel Cooler Engine Oil cooler Model and Serial Number Oil Separator Raw Water Drain Plug Valve Crankshaft Housing Ventilation Fuel Filter Fuel Pump Oil Filter Raw Water Inlet Fitting Raw Water Pump Coolant Drain Plug (2 Units) Oil Suction Pipe Oil Dipstick Rack Position Sensor *) Engine Lifting Eye Motor Oil Filler Cap Potentiometer Accelerator Drive Belt, Raw Water Pump Engine Mount Drive Belt Tensioner Cover T-Belt, Lower Vibration Damper Speed Sensor Cover T-Belt, Upper Cover Rear Valve Cover Heat Exchanger Coolant Expansion Tank Cooler Cap Diagnostic Outlet Inversion Switch Connector Instrument Panel Coolant Temperature Sensor Thermostat Housing Hydraulic Oil Tank Circuit Breakers Alternator Hydraulic Pump Oil Drain Plug Starter Motor Engine Management System/Fuses Exhaust Temperature Sensor Air Filter Turbo Charger Exhaust Elbow Starter Relais (Backside E-Box Ground Plate) Flywheel Flywheel Housing Oil Pressure Sensor Hydraulic Oil Cooler *) This sensor is magnetism sensitive. All External magnets must be kept away. 21/65 Z001138-1_2014-01 General Preliminary Service Manual MARINE 2012 B Specification B 1 Fuel Requirements The STEYR Marine Engines are designed for maximum fuel economy. To maintain optimum performance use diesel fuel according to EN 590 or equivalent to meet this specification. When temperatures are below -7° C (20° F), use diesel fuels with additives for low temperature operation. How to Select Fuel Oil Fuel quality is an important factor in obtaining satisfactory engine performance, long engine life, and acceptable exhaust emission levels. Direct injected diesel engines are designed to operate on most diesel fuels marketed today. In general, fuels meeting the properties of CEC RF-03-A-84 have provided satisfactory performance. The ASTM D 975 specification, however, does not in itself adequately define the fuel characteristics needed for assurance of fuel quality. The properties listed in the following fuel oil selection chart have provided optimum engine performance. Z001138-1_2014-01 22/65 General Fuel Oil Selection Chart EN 590 properties UNIT Minimum Cetane number Gravity at 15°C (kg/l) Maximum 52,2 ASTM Test procedure DIN 51773 Kg/ m³ 820 845 EN ISO 3675, EN ISO 12185 250°C % (V/V) - <65% 350°C % (V/V) 85% 95% Flash point °C 55 - CFPP (Cloud point) °C -5 (s) -15 (w) Viscosity Kinematic 40°C mm²/ s 2 4,50 Sulphur content mg/ kg - 10,0 EN ISO 20846, EN ISO 20884 Cupper corrosion Rating Class 1 Class 1 EN ISO 2160 Distillation EN ISO 3405 End point 360°C Carbon residue EN ISO 2719 EN ISO 3104 EN ISO 10370 Conradson number (10% residue) % (m/m) - 0,30 Ash % - 0,01 EN ISO 6245 (m/m) Water content mg/ kg - 200 EN ISO 12937 Oxidation stability g/ m³ - 25 EN ISO 12205 23/65 Z001138-1_2014-01 General Preliminary Service Manual MARINE 2012 B 2 Motor oil To obtain the best engine performance and engine life, STEYR MOTORS High Performance Diesel Engine Oil SAE 5W-30 (Z010059-0) is recommended. Engine oils are specified by ACEA, API service codes and SAE viscosity numbers. If STEYR MOTORS High Performance Diesel Engine Oil is not available, it is required to use a reputable brand of engine oil labelled for ACEA C3 and API CF and SAE 5W-30. Refer to oil identification symbol on the container. Initial filling quantity: SE- 6 Cyl Engines Oil quantity between MIN. and MAX. on dipstick 3,5 Litre Oil change quantity: 16 Litre (without oil filter) Oil filter: Approx. 1 Litre 17,0 Litre (Oil filling, incl. 1Litre oil filter) Oil – specification, Minimum: API: CF ACEA: C3 Recommended engine oil: STEYR MOTORS DIESEL ENGINE OIL – SAE 5W-30 SMO No. Z010059-0 During the break-in period (initial 20 hours), frequently check the oil level. Higher oil consumption is normal until cylinder system is stabilized. The oil level should be maintained between the minimum and maximum mark on the dipstick. The space between the marks represents approximately 3.7 quarts (3.5 litres). For oil level dipstick location, refer to your authorized STEYR MOTORS-dealer. NOTE: Optional there are two different oil dip sticks available according to the engine storage inclination. After first 50 hours of operation change the engine oil and replace the oil filter. Refer to Service and Maintenance Schedule. Oil Identification Symbol Engine oils are specified by ACEA, API service code and SAE viscosity numbers. These may be found on the label, top of can, or API service symbol. NOTE: Some engine oils have several ACEA / API quality ratings. The recommended ACEA / API service letter code must be among these quality ratings. STEYR MOTORS has no values regarding the oil& fuel- consumption, when a not known oil is in use. Refer to F1 - List of operating material Z001138-1_2014-01 API Service Symbol 24/65 General C Maintenance and Service C 1 Trouble Check Chart ATTENTION: After following the “Action” described in chart, and before cranking the engine, make sure there are no loose fuel connections. Make sure engine compartment is free of fuel vapours. Failure to do so could result in fire. SYMPTOM POSSIBLE CAUSE ACTION Engine won’t start 16. Fill tank or open valve. No fuel in tank or shut-off valve closed Starter won’t crank Engine runs erratically 2. Air leak in suction lines Bleed fuel system (6 times 10 sec. ignition on) and check for leaks 3. Fuel line plugged or pump defective Fuel pump may be defective 4. Poor fuel quality Replace fuel 5. Water in fuel filter Replace or drain water from fuel filter. Check fuel supply for water contamination. If water is present, drain fuel tank and flush with fresh fuel. 6. System error or failure Check Engine Management System display for service code 7. Battery output insufficient 16. Battery connections loose or corroded Charge or replace battery. Check for loose connections and corrosions. Clean connections and tighten. 2. Battery is dead Check level of electrolyte and charge battery. 3. Starter connections loose Check connections and tighten. If solenoid clicks when attempting to start engine, check starter. 4. Ignition switch If inoperative, replace. 16. Replace filter. Inspect fuel supply line Water, air and/or dirt in fuel filter 2. Anti-siphon valve stuck 3. Fuel pump 25/65 Clean and inspect or replace. (Tank) Check operation of pump. Replace fuel pump. Z001138-1_2014-01 General C1 Preliminary Service Manual MARINE 2012 Trouble Check Chart continued SYMPTOM POSSIBLE CAUSE ACTION Engine vibrates Unit injector Check Performance loss 16. Check Engine Management System display for service code. Engine coolant temperature; audible alarm. Z001138-1_2014-01 System error or failure 2. Fuel incorrect Fill tank with correct fuel. Check fuel filter and fuel flow condition. 3. Throttle not fully open Check throttle command lever for full travel. 4. Overheating Check cooling system. 26/65 Fuel System Electrical System General Fault Finding [Factors/Cause of Trouble] low battery / Overdischarge Connection failure / Terminal / Main Cable Battery Main Switch not connected low battery Capacity (wrong capacity-size installed) Defective starter switch Defective starter magnetic switch Breakdown of Starter Fuse blown on Ignition switch Emergency Cut off switch interrupted Breakdown of glow plug or air-heater Running out of fuel Fuel valve not opened Clogging of fuel filter or water separator Breakdown of fuel feed pump Air trapped inside the fuel system Clogging of the fuel oil piping before fuel pump Faulty nozzle Incorrect setting of injection timing 27/65 • • • • • • • • • • • • • • • • • • • • • • • • • • • • • • • • • • • • • • • • Z001138-1_2014-01 • • • • • • • • • • • • • • • • unit injector o-ring leaking oil cooler leaking copper-insert or o-ring Incorrect start of fuel-delivery excessive discharge of coolant (filler cap) overheating coolant system leak of gasket, watercooled turbinehousing, exhaust manifold, cylinder missing raw water supply unstable engine running High Blow-By difficult starting No power to engine or key switch Low engine output Abnormal fuel oil and lube oil consumption no compression pressure to feel when turning crank manually no pressure at unit injector no fuel supply pressure at injector after fuel pump is turned on high speed / high frequency running electric fuel pump (high pitched noise) Injection Timing Device not keeping position bad compression No exhaust smoke Little exhaust smoke Does not turn crank significant amount of white exhaust smoke black smoke Slow starter rotations Starter does not rotate General Items to Check / Troubled Systems Others General Fault Finding [Factors/Cause of Trouble] Breakdown of injection pump no hydraulic pressure to build up stuck unit injector / spring remains compressed Faulty driven machinery Clogging fair filter High viscosity of engine oil Damage to or seizure of engine’s rotational/receipicating parts Faulty valve clearance Low compression pressure Damaged ring gear Faulty valve timing / Engine Timing Faulty valve train Faulty Injection Timing Air in coolant system overtemperature of cooling system fuel in coolant coolant in lubricant fuel in lubricant lubricant in coolant Z001138-1_2014-01 • • • • • • • • • • • • • • • • • • • • • • • • • • • • • • • • 28/65 • • • • • • • • • • • • • • unit injector o-ring leaking oil cooler leaking copper-insert or o-ring Incorrect start of fuel-delivery excessive discharge of coolant (filler cap) overheating coolant system leak of gasket, watercooled turbinehousing, exhaust manifold, cylinder missing raw water supply unstable engine running High Blow-By difficult starting No power to engine or key switch Low engine output Abnormal fuel oil and lube oil consumption no compression pressure to feel when turning crank manually no pressure at unit injector no fuel supply pressure at injector after fuel pump is turned on high speed / high frequency running electric fuel pump (high pitched noise) Injection Timing Device not keeping position bad compression No exhaust smoke Little exhaust smoke Does not turn crank significant amount of white exhaust smoke black smoke Slow starter rotations Starter does not rotate General Preliminary Service Manual MARINE 2012 Items to Check / Troubled Systems • • • • • • • • • • • • • • General Service- and Maintenance Schedule Engine Lubrication Engine Cooling System Check Change Check Change Check -For leakage -oil level -oil filter -motor oil -for leakage -fluid level -hoses, hose clamps -antifreeze temperature condition -antifreeze -hoses, hose clamps -zinc anodes -impeller -intercooler Clean Raw Water System -heat exchanger -impeller Change Preserve Raw Water Cooler (OilFuel-Aux. Lubricant) Air Filter -zinc anodes - raw water circuit Check -raw water passages change -zinc anodes Check Change Preserve Check Fuel System Change Preserve -contamination -air filter element -for leakage -hoses -prefilter -fuel filters -prefilter -fuel system -acid level -density -connections -connections Daily After first 50 hours or 6 months Every 300 h. or 12 months Every 600 h. or 24 months notes Every 24 months periodically Every 900 hours or every 48 months Every 900 hours or every 48 months If required If sacrificial progress reaches a material corrosion of 50% After season Clean out desposits in pipelines If sacrificial progress reaches a material corrosion of 50% After season * After season Battery Battery Electronics Check Electrical Equipment check Inversion Switch Check -switch Driving System Recenter -driving unit Turbo Charger Warning Device Check lubricate -actuation - Check -function Safety relevant Check -torque Every 900 hours Engine Mount Screws 29/65 -insulation After season Tighten loose connections. Renew cables, if required See manufacturers specifications Z001138-1_2014-01 General Preliminary Service Manual MARINE 2012 Service- and Maintenance Schedule Check Safety Equipment Condition Check Poly V-Belt - Change Check Lubricate Glow Plugs Change Check ** Poly V-Belt System with optional equipment nd e.g. 2 additional alternator, high power hydrualic pump etc. -plugs Change -water pump, tensioner Check Engine Timing -valve clearance * Every 900 hours or every 48 months Every 1800 hours or every 48 months Every 1800 hours or every 48 months Every 3600 hours or every 48 months Every 900 hours -set timing Every 900 hours Check -set levers -set point -tighten torques Every 900 hours Every 900 hours Every 900 hours unit injector adjustment 300 hrs. Check Change Change Check Front Vibration Damper * Every 1800 hours or every 48 months Check Check Torsional Coupler Local rules and consultion of your STEYR Marine Dealer Check valve clearance 300 hrs. For Commercial use only GearboxSterndrive notes For Commercial use only Unit Injector Hydraulic Pump Every 600 h. or 24 months -belt tension -timing belt -idler pulley Valves Every 300 h. or 12 months -belt, pulleys and tighteners for wear * Poly V-Belt System with standard equipment e.g.: alternator, raw water pump and hydraulic pump Poly V-Belt Tensioner Timing Belt -remote control -emergency cutout -completeness Daily After first 50 hours or 6 months Change Check Z001138-1_2014-01 -oil level -for leakage -hydraulic oil (ATF) -oil level -for leakage -gear oil (ATF) -oil filter -Tightness of bolts -bolts Every 900 h. or every 24 months See Manufacturer’s specification Every 48 months If required, replace bolts by using loctite 243 -tightening torque 30/65 General Service- and Maintenance Schedule Engine Compartment and Bilge Check Shifting Check Steering Check Shaft Bearing Gland Check -leakage water -leakage fuel -leakage exhaust gas -smooth action -adjustment -lubrication -oil level -lubrication -sealing Daily After first 50 hours or 6 months Every 300 h. or 12 months Every 600 h. or 24 months notes Repair or consult your STEYR Marine Dealer If required, to be replaced by your STEYR Marine Dealer See Manufacturer’s specification Consult STEYR Marine Dealer *refer to manufacturer specification. *drain/clean water from separator bowl. NOTE: Oil exchange interval must be adapted acc. application and utilisation of vehicle, respectively quality of engine lubricant in use. 31/65 Z001138-1_2014-01 General Preliminary Service Manual MARINE 2012 D General Information D 1 Electronic Engine Management System The STEYR Marine engine is equipped with an Electronic Management System (EMS) that performs the following: controls engine functions to ensure maximum efficiency. self-diagnostic to protect the engine mechanical components against severe damage if operating parameter exceed limit(s). stores diagnostic data of EMS sensor circuits for maintenance and service. stores abuse data Note: The following general warning informations are provided from Indications of faults are depending on installation done by vehicle manufacturer. EMS. Engine power is reduced if: Note: Example based on standard SteyrMotors-Instrument-Panel Instrument panel maybe different on actual vehicle. Action or possible reason Horn ON 2x p. sec. Gauge reading > 107°C Additional ToolReadings Steyr Diag Power limitation Reduction of engine speed Horn ON 2x p. sec. Gauge reading > 120°C Steyr Diag Service code Reduction of engine speed Horn continuous and Oil indication light continuous switched ON Oil pressure indication light switched ON 1x p. sec. Steyr Diag Power limitation Sensor or connector failure; see service code table See table trouble shooting; Engine oil system Operating Parameter Effect noticed Panel Indication High engine coolant temperature limit exceeded Defect –engine coolant sensor or sensor connection Oil pressure below limit Reduction of engine speed Defect – Oil pressure sensor or sensor connection Reduction of engine speed Z001138-1_2014-01 Steyr Diag Service code See table trouble shooting: Cooling system Sensor or connector failure, see service code table 32/65 General Operating Parameter Effect noticed Insufficient boost pressure or defective sensor Engine speed sensor fault Reduction of engine speed Governor position system During break in phase Engine stops running Irregular engine speed or stalled engine MIL*-ON at high accelerator position (more than 75%) Panel Indication Additional ToolReadings Steyr Diag Power limitation Action or possible reason NO RPM indication in tachometer Steyr Diag Service code Steyr Diag Service code See table trouble shooting; Speed sensor See table trouble shooting; Governing system Indication light “MIL” is swichted ON Steyr Diag Break-in phase See information break in procedure See table trouble shooting; Air charge system Optical and acoustical warning signals are explained on the following tables. “Operating Status and Error Report” *MIL= Mal-function Indication Light 33/65 Z001138-1_2014-01 General Preliminary Service Manual MARINE 2012 Trouble Indication Chart Z001138-1_2014-01 34/65 General 35/65 Z001138-1_2014-01 General Preliminary Service Manual MARINE 2012 Diagnostic system The electronic management system monitors the following engine parameters: oil pressure, boost pressure, coolant temperature, sensor control rack, potentiometer accelerator, speed signal The electronic management system carries out self-diagnostic and/or plausibility checks for all input values and sensor connections. In case of irregularities, there is an optical or audible warning signal. (Note: if prepare and installed by vehicle manufacturer) Existing active failures remain stored until the problem has been solved. Service code has been cleared from the memory to receive actual error code status. To select stored service codes, a PC with diagnostic program (VR00134/0) or diagnostic tool (VR00135/1) is necessary or a SCC (P/No 2179497-0) must be connected. Malfunction during operation is categorised in three different categories intermittent failure, non essential failure and essential failure. The EMS will memorize such errors and if required reduce performance of the engine while operating in a fatal range to its system. Interacting components of engine management system (ECU to unit injector) Steyr-Control-Centre P/No 2179497-0 (front view) Z001138-1_2014-01 36/65 General Starting the Engine Starting procedure for the STEYR MOTORS engine is the same for both cold and warm engines. The engine control unit automatically regulates the fuel supply and the preheating period, for any given temperature. Therefore, the throttle lever should remain in neutral position. 1. To start the engine, move throttle lever into idle position and gear into neutral position. 2. Turn ignition key into position ignition “ON”. An audible alarm will sound and the warning lights are illuminated (temporary), indicating the correct function of the audible and visual warning systems. Note: In case of a low temperature start wait until the combined oil pressure / glow plug pre-heating indication light is turned off, before you continue with the start procedure. 3. Turn ignition key into position “START” and hold in this position until “starting” of engine, but under no circumstances hold in this position for more than ten seconds. If engine does not start, release ignition key momentarily and repeat starting procedure. 4. As soon as engine starts, release ignition key. The audible alarm will stop when normal oil pressure has been reached. If engine fails to start within one minute and / or repeated attempts, contact your STEYR MOTORS Marine dealer. Never turn ignition key to position “START” when engine is running. Stopping the Engine 1. Move throttle lever into idle position and gear in neutral position. 2. Cool down the engine. 3. Turn ignition key to OFF position Do not stop engine at speeds above idle or “accelerate” engine while turning off ignition. This may result in engine failures. 37/65 Z001138-1_2014-01 General Preliminary Service Manual MARINE 2012 Instrument indication during normal operation 1. Ignition ON (...before starting) System check – see light indication Note: At low temperature condition (cold weather) the combined light for glow plug preheating & engine oil pressure will not extinguish after 0,7 sec. (glow plug preheating phase) In this case start engine immediately after the light extinguishes. 2. Ignition ON (...before starting) Indication memorized service codes 3. Engine running (after start) Normal condition Note: For further information see: “Table – Error indication on Instrument Panel” Z001138-1_2014-01 38/65 General Engine Break-In procedure The following procedure must be used on new and rebuilt STEYR Diesel Engines. You must follow the Engine Break-In instructions during the first 20 running hours to ensure maximum performance and longest engine life. NOTE: NONOBSERVANCE OF BREAK-IN INSTRUCTIONS MAY CAUSE SEVERE ENGINE FAILURE. First Two Hours For the first five to ten minutes of operation, run engine at a fast idle (below 1500 RPM). For the remaining first two hours of operation. During this period, vary the engine speed frequently by accelerating to approximately three-fourth throttle for two to three minutes, then speed remain at cruising engine operating temperature, alternate engine speed, while driving, to assist the break-in of rings and bearings. NOTE: DO NOT RUN ENGINE AT A CONSTANT RPM FOR LONGER PERIODS DURING THIS INITIAL TWO HOURS OF BREAK-IN. Attention: Warning indication engine over load during break – in via ECU The ECU controls during the first two hours of engine operation the load on the engine and alarms the drive by the “Check Engine Light”, if much power is demanded from the new engine. Illustration represents an example which may differ from the installation in a vehicle. In case the operator get alert, when running the engine during break in phase, by this “Break – In” warning indication (CEL light – ON), the throttle position must be reduced until this signal extinguish. Next Eight Hours For the next eight hours, continue to run engine at approximately three-fourth throttle or less. Occasionally reduce throttle to lower loads and let engine temperature cool down. During this eight hours of running it is permissible to run at full throttle for periods of less than two minutes. NOTE: DURING BREAK-IN, DO NOT RUN ENGINE AT A CONSTANT RPM FOR LONGER PERIODS. 39/65 Z001138-1_2014-01 General Preliminary Service Manual MARINE 2012 Final Ten Hours of Break-in During the final ten hours of break-in, the engine may run at full speed for five to ten minutes. Operate engine to with specified temperature, at moderate engine speed increase to cool down engine, occasionally reduce the engine speed and load. NOTE: DURING THE BREAK-IN PERIOD, THE ENGINE MUST NOT BE OPERATED AT CONSTANT RPM FOR LONGER PERIODS. During break-in period, be particularly observant of the following: 16. Check motor oil level daily. Always maintain oil level in the desired range between the “MIN” and “MAX” marks on dipstick. When refilling motor oil, refer to information “Motor Oil” (B 2). B. Check oil pressure control lamp. Check the oil level in the engine housing by means of dipstick. If necessary, add oil (DO NOT OVERFILL). In case that the oil pressure control lamp would illuminated check for correct oil level, have the engine checked by your STEYR Service dealer as to malfunction of signal or oil pump. NOTE: During normal operation of engine, oil pressure will rise as RPM increases and fall as RPM decreases. In general, oil pressure will be higher with cold motor oil and specific RPM than with hot motor oil. C. Check engine temperature indication. Normal operation between 80° - 95°. In case of audible alarm, check coolant level in expansion tank (only at cold engine before starting). D. Deviations from normal operating conditions will be indicated by warning lights and audible alarm. As to exact meanings see 06.07.02 & 06.07.05. ATTENTION: In case of non observance of break-in instructions, warranty will expire. Engine to be filled with recommended oil quality only. See chapter „Engine Lubrication“ Z001138-1_2014-01 40/65 General D 2 Operation after Break – In The engines specified in this manual are intended to be operated at different speeds and loads, but not allowing full load of the engine for more than one hour per 12 running hours. Economic driving may be achieved at the following speeds: MARINE 2012 2000 – 3200 rpm which will prolong engine life and reduce emissions and noise. When starting a cold engine, always allow the engine to warm up slowly. Never run the engine at full speed until operating temperature is reached. During the first 50 running hours, check the oil level frequently. D 3 Extended Storage Preservation Procedure 1 Remove the engine from storage and place on a suitable work shop floor with access to all side of the engine. Do not remove from the original packing pallet. 2 Ensure fuel is supplied to the engine and let it run up to temperature. 3 Stop the engine and drain the old engine oil and store for future refill and usage. 4 Mount brand new oil filter on the engine. 5 Fill in preservation oil Shell Ensis Engine Oil 30 (part number Z050323/0- 5litres) to the minimum mark on the dip stick. 6 Connect the fuel system to a tank or canister filled with Shell oil V1404 (part number Z010014/0 -5 liters). See ill. 1 7 Restart the engine and run for 5 minutes in idle speed or max. up to 1500rpm. 8 Disconnect the fuel feed line from the engine and let fuel pump run for max. 10 sec. emptying the fuel system. Repeat until no more fuel comes from the return line. 9 Either drain the preservation oil from the engine and replace with normal specified oil and store for future use. Alternatively leave it in the engine for future preservation work. The preservation oil has a shelf life of also 3 years and may be used any number of times within this period. It is important to note that an engine may never be sold on or installed with this oil in as this will lead to severe engine damage if run for extended periods. 10 Disconnect solenoid of engine to prevent engine from starting. See ill.2 11 Fill a spray bottle with the preservation oil Shell Ensis Engine Oil 30 part number Z050323/0. 41/65 Z001138-1_2014-01 General Preliminary Service Manual MARINE 2012 12 Whilst cranking the engine over, spray the preservation oil into the inlet manifold until visually noticeable Shell Ensis Engine Oil has obtained visual noticeable the exhaust / turbo. Normally this procedure takes 3 to 4 min. See ill. 3 13 Replace all pipes, belts and connections to original condition. 14 Spray on all outside metal parts of engine SHELL ENSIS T (part number 50322) and let it vent by air for 24 hours (bad smell!). 15 Store engine again as in the condition delivered from STEYR MOTORS. 16 The engine is now preserved for one more year. This preservation procedure must be done every year and ensures that all of the air ways systems, raw water systems, oil system and the cylinders are protected against corrosion. This procedure is repeatable up to a maximum of three times, giving a shelf life of up to four years. NOTE: When commissioning or running an engine that has been preserved as stated above the engine will run roughly and smoke for the first few minutes. Do not be alarmed as this is normal until the deposits of the preservation materials have cleared. Z001138-1_2014-01 42/65 General E Quality guidelines for repair E 1 Spare part specification Your STEYR engine was designed for specified operation which means operating conditions such as: * Long-time operation at high speed load and * Operation in salt or brackish water * Operation in very muddy water Only use genuine STEYR spare parts in order to avoid possible loss of performance. For this reason you should insist on the famous quality of genuine STEYR spare parts and under no circumstances use spare parts of unknown quality. E 2 Workshop Profile Independently of the respective repair steps and the legal regulations the workshops have to meet the following requirements: - Clean, dry, and dust free environment - Lifting gear (crane) with a lifting capacity of 5 000 N (500 kg) minimum - Cleaning device (wash basin) for soiled components - Commercial tools - Appropriate test and measuring equipment - Receptacles for operating agents. Depending on the repair step to be carried out, the tools indicated in the STEYR MOTORS TOOL catalogue have to be used. Furthermore special care is to be taken in case of purchasing and stock of required operating material, spare parts and wear parts (e.g. seals, filters, sealants ...). For appointed retailers and authorized workshops of STEYR MOTORS GmbH, the following minimum standard is to be met: - basic training (as soon as possible, after conclusion of contract, for trade and workshop) - biannual training (reoccurring) - tool kit I (service and maintenance tools) - tool kit II – III (depending on repair to be carried out a peripheral and internal work) - procurement and stock of required genuine spare parts (proposed spare parts may be handed out upon request) - spare part catalogue for all STEYR ENGINES models - technical literature - PC diagnostics 43/65 Z001138-1_2014-01 General Preliminary Service Manual MARINE 2012 E 3 Nomenclature Term Description disassemble remove unscrew de flange dismantle Removal of an assembly of a main assembly or of a component of an assembly without other assemblies having been removed before assemble put on, place screw on flange mount Putting on of an assembly on a main assembly or a component of an assembly without further assemblies being put on for functional performance disconnect Separating of connections of lines, pipes and hoses , which are separable connect Putting together separable connections of lines, pipes and hoses pull of Removal of a component with press fit from another press on Placement of a component with press fit to another unscrew Opening of turn able locks tighten Closing of turn able locks disassemble 2.x Removal of an assembly from a main assembly or a component from an assembly, if other assemblies have been removed before assemble 2.x Putting on an assembly to a main assembly or a component of an assembly, if further assemblies are put on for functional achievement loosen Partial unlocking of fixing elements of a component or of an assembly remove Taking off a fixing element of a component or an assembly secure Putting on a fixing element of a component or an assembly and tightening disassemble 3.x Taking apart assemblies into individual components assemble 3.x Putting together components to an assembly adjust Elimination of a deviation by means of provided equipment or Z001138-1_2014-01 Example Valve clearance, start of feeding operation 44/65 General readjust Devices or tools refill Adding and replenishing of operating agents renew Replacing an auxiliary material by a new one gauge Reading in actual positions in programming memory replace Exchanging of a device, a main assembly, an assembly or a component by the same, new or repaired ones measure Steps taken to determine the actual status by evaluating of physical entities check Steps taken to compare the actual status with a determined clean Removal of foreign and auxiliary material maintain Steps taken to keep the respective determined planned status Fasten To secure an element with a bolt and tighten to specified torque. 45/65 Corrosion protection agent, sealing material, paint Valve lift, piston diameter, valve clearance, close fit, V-belt tension Bracket fastened to engine Z001138-1_2014-01 General Preliminary Service Manual MARINE 2012 E 4 SI – System The following measuring units are used: Linear Pressure and Stress km = kilometre m = meter mm = millimetre “ = inch bar = bar Pa = Pascal Kpa = Kilopascal N/mm2 = Newton per square millimetre Area Energy m2 = square meter cm2 = square centimetre J = Joule kW/h = kilowatt hour Volume Power m3 = cubic meter cm3 = cubic centimetre dm3 = cubic decimetre mm3 = cubic millimetre l = litre kW = kilowatt Mass Temperature t = metric ton kg = kilogram g = gram K = degrees Kelvin ° C = degrees Celsius Energy Time N = Newton kN = kilo Newton daN = deka Newton h = hour min = minute s = second Electricity Velocity A = ampere V = volt W = ohm μF = microfarad km/h = kilometre per hour m/s = meter per second Fuel consumption Speed g/kWh = gram per kilowatt hour 1/min = r.p.m. Z001138-1_2014-01 46/65 General E 5 Abbreviations ill. Cu Massy max. TDC PTO WS EMS ECU FlexDef min. BDC DPF EGR DPFCU APS 47/65 illustration copper main assembly maximum top dead center (POWER TAKE OFF) power transmission at front of crankshaft end Wrench Size Electronic Management System Electronic Control Unit extender ECU Electronic Management System for DPF Minimum Bottom Dead Centre Diesel Particulate Filter Exhaust Gas Recirulation Diesel Particulate Filter Control Unit Absolut pressure sensor (parametric) Z001138-1_2014-01 General Preliminary Service Manual MARINE 2012 F Operating material and information on disposal F 1 List of operating material Order No. Qty. Designation VR00207/0 1 Set of fuel and oil for engine service, consisting of: Z050316/0 3 - STEYR Turbo Diesel motor oil SAE 10W-40 (4l. canister) Z010059-0 Shell Rimula R6M 5W30 Z011785/0 3 - STEYR MOTORS engine coolant (5l. can.) 9000190/0 2 - hydraulic oil ATF (1l. bottle) Z012222/0 1 - grease, Never – Seeze; NS-160 B (1 kg can.) Z909570/0 1 - caoutchouc sealing/ electric contacts (148 ml can.) 9000059/1 1 - thread protection 243 (10 ml flask) 9000297/0 1 - surface sealing 5182 (315 ml cartridge) 9000510/5 1 - surface sealing 5910 (50 ml cartridge) 9000019/1 1 - construction adhesive 620 (50ml flask) 9000017/1 1 - construction adhesive 262 (50 ml flask) Z010207/0 1 - contact grease (100 ml tube) Z010226/0 1 - corrosion protection spray (400 ml can.) Z010227/0 1 - corrosion protection wax (120 ml can.) Z010084/0 1 - grease STRABURAX NBU4 (1 kg can.) Z010205/0 1 - fuel rust protection additive (5 lt. can.) 9000197/0 1 - electric contact spray Z011627/0 1 - silver varnish, RAL 9006 (1 lt can) Z010074/0 1 - hardener varnish (0,5 lt. Can) Z010075/0 1 - dilution for varnish (5lt can) 50481 1 - high temperature grease (400 ml can) 10107 1 - Molykote grease Z010014/0 1 - Shell Rimula R3 (long term preservation – 5 litre canister) Z050323/0 1 - Ensis engine oil 30 (long term preservation oil – 5 litre canister) 50481 1 - Ceramic protection spray applicable on TC (400ml can) 50322 1 - Shell Ensis T (external varnish) Z012222-0 1 - High temperature grease (1000 gr.) Z001138-1_2014-01 48/65 General F 2 Disposal of automotive waste products Used operating material is to be collected in special containers to enable possible subsequent treatment. ATTENTION: All operating materials for the engine are subject to the Special Waste Act for disposal. The "Special Waste Catalogue" ÖNORM S 2100 refers to the required disposal in Austria. Respective legal local regulations are to be followed. The maintenance and repair personnel has to take care that operating material and other material to be regarded as special waste product, is always deposited at collection site. Key-No.: 31 423 54 102 54 104 54 202 54 207 54 917 54 927 54 928 55 510 49/65 Description Oil contaminated soil or oil bonding agent Waste oil Fuels Lubricants Vaseline Solid sealing material Oil soiled cleaning rags Used oil and air filters Paint and varnish containing waste material Z001138-1_2014-01 General Preliminary Service Manual MARINE 2012 G Notes on safety Z001138-1_2014-01 50/65 General G 1 General notes on safety The general knowledge and training of the personnel and the contents of the "general regulations of safety technology" and machine safety regulations (Machine safety regulations - Maschinen Sicherheitsverordnung - MSV) is not subject of this chapter. Inappropriate behaviour and insufficient knowledge of hazard during repair works may cause injury to persons. In the description of repair works, such sources of danger are marked with The personnel are to be trained accordingly and requested to follow the safety rules. G 2 Guidelines for damage prevention The general knowledge and training of the workshop personnel and the contents of the "general regulations of safety technology" and machine safety regulations (Maschinen Sicherheitsverordnung - MSV) are not subject of this chapter. Inappropriate behaviour and insufficient knowledge of hazard during repair works may cause injury to persons. In the description of repair works, such sources of danger are marked with While handling with operating materials, take care that these are not applied to visible surfaces. Lubricants should form a thin film on the surface, surplus lubricants are to be wiped off. G 3 Legal rules The following rules and guidelines are valid in Austria. For other countries, follow the local regulations. Maschinen - Sicherheitsverordnung - MSV (machine safety regulations) 51/65 Z001138-1_2014-01 General Preliminary Service Manual MARINE 2012 G 4 Safety in the use of operating material Dangerous operating materials, in the sense of accident prevention, are all operating materials potentially explosive, fire-provoking, easily flammable, poisonous, injurious to health and corrosive. Especially the following material belong to this group: - Spirit - Mineral oils - Battery acid - Anti-freeze agent - Varnishes and diluents - Solvents - Fluid seals and nut locks In case of fire of operating material do not try to extinguish the fire with water. Use carbon dioxide extinguisher or powder extinguisher. Contact fire brigade. When operating material is spilled, e.g. in case of refuelling, it is to be absorbed by sand, soil or an appropriate bonding agent and to be disposed. ATTENTION: In order to prevent health hazards, take care of the following: - Avoid direct contact with dangerous operating material, as far as possible. - Change clothes as quickly as possible, if they are soiled with dangerous operating material. - Do not keep oily rags in work clothes. - Clean oil soiled body parts only with products friendly to skin (never use rubbing sand or solvents). - Never fill operating agents in beverage bottles. G 5 Measures in case of accidents Products First Aid Skin Eyes Diesel fuel and mineral oils Lubricants Anti-freeze agents Brake fluid Battery acid Z001138-1_2014-01 Remove clothes and clean skin thoroughly with water and soap Rinse thoroughly with water for at least 10 minutes. SEE A DOCTOR! Swallowing DO NOT VOMIT The biggest danger after an accidental intake is the fact that liquid could get into lungs by aspiration. DO NOT PROVOKE VOMITING AND IMMEDIATELY SEE A DOCTOR 52/65 General H Tightening Torques H 1 Listing of Tightening Torques Camshaft housing Screw joint to cylinder block 1. step: 15 Nm +/- 2 2. step: 25 Nm +/- 1 Tighten screws of camshaft housing in two steps in precedence of numbering on bearings (from the inside outwards). Plug screw for locking pin In engine housing 50Nm+/-5 Connecting rod screws (apply oil to thread and screw head support) 1. Step: 10 Nm +/- 1 2. Step: 30 Nm +/- 3 3. Step: 75° +/- 4° Main bearing screws (apply oil to thread and screw head support) 1. Step: 35 Nm +/- 3 2. Step: 45° +/- 3° 3. Step: 45° +/- 3° Note: Use new screws 53/65 Z001138-1_2014-01 General Preliminary Service Manual MARINE 2012 Flywheel screws (apply oil to screw head support) 75 Nm +/- 5 (Loctite 243) Vibration damper screws (apply oil to thread and screw head support) a) M12x90 Allen screw – 135 Nm +/- 7 Note: re-assure tightness of bolts and check screw torque settings a second time (copper paste). b) M10x25 - 75 Nm +/-5 (screw quality 12.9) Note: Use Loctite 243 Screw, rear ring carrier (use LOCTITE 243 on thread) 1. step: 8 Nm +/- 1 2. step: 28 Nm +/- 3 Nut, camshaft sprocket (taper degreased on camshaft, thread lubricated) 1. step: 80 Nm +/- 4 2. step: 240 Nm +/-12 Z001138-1_2014-01 54/65 General Screw tooth, belt tensioner 45 Nm +/- 4 Valve adjustment element 55 Nm +/- 3 Remark: Tolerable Torque Requirement for Valve lash adjustment bolt: >20 to <35 Nm NOTE: Replace entire element in case Torque Values of adjustment bolts are outside tolerable torque requirements. Screw, linkage lever CAUTION: left-hand thread 7 Nm +/- 0,5 Stud, unit injector 21 Nm +/- 2 (Loctite 620) 55/65 Z001138-1_2014-01 General Preliminary Service Manual MARINE 2012 Collar nut for unit injector 18 Nm - 2 Nut, adjustment screw of unit injector 30 Nm +/- 3 Plug screw for control rack in camshaft housing 50 Nm +/- 5 Hex. flange nut, exhaust manifold a) b) 23 Nm +/- 2 M8x135 9,5 Nm +/- 1 Z001138-1_2014-01 56/65 General Exhaust turbocharger A B C 23 Nm +/- 2 50 Nm +/- 5 23 Nm +/-2 Screws, intake manifold 23 Nm +/- 2 Glow Plugs 15 + 3Nm Engine oil cooler 23 Nm +/- 2 M8x20 Use Loctite 243 Thermostat A 57/65 23 Nm +/- 2 Z001138-1_2014-01 General Preliminary Service Manual MARINE 2012 Water pump A B 23 Nm +/- 2 9,5 Nm +/- 1 Loctite 243 Alternator 45 Nm +/- 5 M10 Engine Housing 1. 2. 3. 4. 5. 6. 20 Nm M10x200 20 Nm M10x250 23 Nm +/- 2 M8x180 50 Nm +/- 5 M10x200 50 Nm +/- 5 M10x250 9.5 Nm +/- 1 M6x25 Z001138-1_2014-01 58/65 General H 2 General Tightening Torques Values in this table refer to industrial standard and are applicable, if no specific torques are indicated. For studs, tightening torques are to be reduced by 50%. If the tightening torque of a screw connection is not reached, the tightness of the screw/nut Is too low or the ratio of friction do not correspond. In any case, the screw/nut is to be replaced. *) μ tot. = total frictional value 59/65 Z001138-1_2014-01 General Preliminary Service Manual MARINE 2012 Re- Use of Bolts Bolt Location Camshaft housing Vibration Damper Conrod Main Bearing Flywheel Ring Gear Carrier Belt Tensioner Stud Unit Injector Exhaust Manifold Bolts Exhaust Manifold Studs Intercooler Total number of use 2 2 3 3 3 3 3 3 3 3 2 Recommendation Change after exchange of camshaft housing Change at first field change Change at first field change Change at second field change Change at second field change Change at second field change Change at second field change Change at second field change Change at second field change Change at second field change Change after exchange of intercooler In general all torque / angle thightened bolts have to be renewed after 3 times off tightening. Z001138-1_2014-01 60/65 General H 3 Testing of torque wrenches The torque wrenches are subject to regular tests of the set values. By doing so, the tripping value of signalling torque wrenches and the scale accuracy of measuring torque wrenches are tested. H 4 Non-destructive material testing For the detection of surface cracks, the non-destructive test according to colour penetration test procedure is recommended. The work piece is sprayed or coated with a penetration agent, and after drying a developer is applied. After a development time of appr. 10 minutes, defects on the work piece appear as dots or lines. H 5 Use of adhesive and sealing materials In the workshop manual adhesive and sealing materials are specified for the repair of engines and aggregates, which are used at operating temperatures of up to 150° C and agents such as water, coolants and hydraulic fluids, engine and gear oils as well as fuels. Solvent-free sealing materials The hardening takes places without loss of volume, so that a retightening of screw connections is not necessary. Anaerobic sealing materials These are used for securing, fixing and sealing, and only harden under exclusion of air. Solvent containing sealing materials Due to their contents of volatile parts a loss of volume occurs during hardening. During repair, the hardening time is taken into consideration. If such sealing materials are used, special reference is made in the description of the workshop manual. H 6 Solvent-free sealing materials Silicon sealing materials They consist of silicon and filling materials and are free of solvents. The product is applied to the cleaned sealing surface from the tube or cartridge in form of a string. Sealing material residues are removed with cleaning agent. Silicon sealing material is to be stored below 30° C. Anaerobic sealing materials They consist of a single component epoxy in liquid form. The product is applied as a liquid to the components and remains liquid, as long as it is in contact with ambient air (oxygen). Only when the parts are assembled, chemical reaction starts due to exclusion of air (oxygen) and metal contact, i.e. transformation of liquid state into an epoxy built up by molecular chains. Any residues remaining after assembly and/or are pressed out of the connection remain liquid and may be removed easily. 61/65 Z001138-1_2014-01 General Preliminary Service Manual MARINE 2012 General guidelines of application for the of use of anaerobic sealing materials Cleanliness of components Non-metallic surface protection must be removed. In case of repair, soiled and oily components are to be cleaned and residues of adhesive plastic material are to be removed. Thread bores must be re-cut with the appropriate thread bore and blown out with compressed air. If solvents or degreasing agents are used for cleaning, take care that they are completely volatilized before application of the epoxy. Storage At temperatures below 28°C, 1 year minimum. Guidelines of application for securing (S) Designation: SM ....... Securing medium tight (the connection is to be loosened without problems) Designation: SF ........Securing tight (the connection is difficult to loosen) Application: Screw connections Fixing procedure In general, the application of the epoxy to the screw thread is sufficient. If screws are screwed into socket threads, only the thread bore is wet in order to let the air escape during screwing in. Screws or nuts which are tightened with a specified torque, are slightly oiled on their support surface or housing part. Guidelines for fixing (B) Designation: BM ....... Fixing medium tight Designation: BF ........ Fixing tight Application: Jointing connections, bushings, sprockets, belt pulleys, bearings etc. Jointing procedure In case of jointing connections both jointing parts are to be wetted. The wetting has to completely cover the jointing surfaces. The parts are shifted into each other by turning, in case of slide fits. No strength may be exerted to the connection until sturdiness is reached (for time, refer to Table 1). Guidelines of application for sealing (D) Designation: DR ....... Sealing of pipe connections Designation: DF ........Sealing of plane surfaces Application: Sealing of threads, screw connections, jointing connections and plane surfaces. + Z001138-1_2014-01 62/65 General Hardening time Use Securing Fixing Sealing Class SM SF BF DR DF DF Product Loctite 243 Loctite 262 Loctite 620 Loctite 5182 Loctite 5900 Loctite 5910 Hand tightness reached after 15 – 30 min 15 – 30 min 5 – 10 min 0,5- 48 h 30 min 30 min Functional tightness reached after 1h 1h 1h 0,5 h 2h 2h Final tightness reached after 3h 3h 4h 48 h 3h 3h SMO Part No. 9000059-1 9000017-1 9000019-1 9000297-0 9000298-1 9000510-5 Bottle Vol. 10 ml 50 ml 50 ml 315 ml 300 ml 50 ml 63/65 Z001138-1_2014-01 I Wear Limits Part. resp. part union New part tolerance Wear Limit Main bearing clearance radial Main bearing clearance axial 0,032 – 0,099 0,15 0,080 – 0,263 0,30 Connect rod bearing clear. radial Connect rod bearing clear. axial 0,024 – 0,073 Cylinder bore 85,00 – 85,01 0,20 Piston travel clearance 0,071 – 0,099 0,20 84,911 – 84,929 0,10 0,25 – 0,40 0,75 0,25 – 0,40 0,75 0,20 – 0,40 0,75 Axial play 1. ring Axial play 2. ring Axial play 3. ring 0,077 – 0,127 0,25 0,07 – 0,102 0,25 0,03 – 0,065 0,15 Camshaft radial Camshaft axial 0,034 – 0,075 0,20 0,096 – 0,230 0,50 Piston diameter Gap 1. ring Gap 2. ring Gap 3. ring Valve guide 0,064 – 0,217 0,10 0,50 7,000 – 7,015 0,15 Oil pressure idle run Oil pressure rated speed 0,6 – 1,5 0,50 4,0 – 0,7 3,00 Backlash of teeth oil pump Axial play gear wheel 0,2 – 0,3 0,80 0,2 0,40 Turbocharger Radial play of turbine shaft Axial play of turbine shaft Valve Adjustment Element 0,16 mm +/- 0,01 – 35Nm deviation from initial dimension indicates gauging depth up to 3 mm before end of valve guide Clearance between geartooth to housing <0,15 Permissible clearance on turbo charger shaft 0,42 mm +/- 0,04 20 Remark >12Nm Break away Torque! General I 1 Adjustment information for service and maintenance I.1.1 Engine timing (measured with dial indicator No. 2300899/0) Setting instruction: 3,59 +/- 0,02 mm Maintenance instruction: In case the measurements are not within the specified limits of 3,57 to 3,61 mm - than the settings needs to be reset to the original specified value I.1.2 Tension timing belt (measured with tool VR00515/0) Tension instruction: Tension instruction: 600 +/- 30N (new belt) 520 +/- 30 N (used belt) Maintenance instruction: In case the timing belt tension measurement is not within the specified limits of 630 N to 490 N - than the settings needs to be readjusted to the specified value. I.1.3 Start of fuel delivery on the unit injectors (measured with dial indicator No. 2300899/0) Setting instruction: For original settings on your engine please see table 03. 02. 06 Maintenance instruction: In case the measurements are not within the specified limits the settings needs to be reset to the original specified value. I.1.4 Valve clearance (measured with tool No. 2300712/3)) Setting instruction: 0,25 mm Maintenance instruction: In case the measurements are not within the specified limits less than 0,25 more than 0,30 mm - the settings needs to be reset to the original specified value. 65/65 Z001138-1_2014-01 Engine 01 Engine Table of Contents 01.00 Engine Timing, Engine Mount .............................................................. 3 01.00.01 01.00.02 01.00.03 01.00.04 01.00.05 01.00.06 Lock Crank Shaft (Piston No. 1 at TDC) ...................................... 5 Camshaft housing cover and seal ................................................... 8 Maintenance timing belt exchange .................................................. 9 Remove timing belt ........................................................................ 17 Timing adjustment procedure for dismantled engine .................... 19 Replace engine bracket................................................................. 28 01.01 Cylinder Block ..................................................................................... 29 01.01.01 Replace valves .............................................................................. 29 01.01.02 Adjust valve clearance .................................................................. 31 01.01.03 Replace valve guide ...................................................................... 31 01.01.04 Replace pressure regulating valve for oil cooling jet ..................... 32 01.01.05 Replace stud bolt for unit injector .................................................. 33 01.01.06 Replace dowel pin for positioning of unit injector .......................... 33 01.01.07 Replace dowel pin for positioning of camshaft housing ................ 34 01.01.08 Replace O-ring at oil entry to block .......... Fehler! Textmarke nicht definiert. 01.01.09 Mount frame seal ........................................................................... 35 01.02 Crankshaft, Bearing, Vibration Damper..................................... 37 01.02.01 Replace crankshaft ........................................................................ 37 01.02.02 Replace gear for oil pump drive .................................................... 41 01.03 Flywheel ........................................................................................ 42 01.03.01 Replace flywheel ........................................................................... 42 01.04 Piston and Connecting Rod........................................................ 43 01.04.01 Dismantle piston and connecting rod ............................................ 43 01.05 01.05.01 01.05.02 01.05.03 01.05.04 01.05.05 1/84 Camshaft, Housing, Valve Gear ................................................. 45 Replace camshaft housing ............................................................ 45 Replace gas stem gasket (on engine assembly) .......................... 48 Replace control rack ...................................................................... 50 Replace camshaft .......................................................................... 52 Replace eccentric shaft ................................................................. 53 Z001138-1_2014-01 Engine EXCENTRIC SHAFT ....................................................................................... 55 01.05.06 Replace radial shaft seal of camshaft ........................................... 55 01.05.07 Replace cam follower .................................................................... 56 01.05.08 Replace retainer of cam follower ................................................... 57 01.05.09 Replace valve adjusting element................................................... 58 01.06 01.06.01 01.06.02 01.06.03 01.06.04 01.06.05 Engine Housing, Oil Pump, Oil Suction Pipe ............................ 59 Replace engine housing ................................................................ 59 Replace rear ring carrier................................................................ 64 Replace rear radialshaft sealing ring ............................................. 65 Replace oil pump (front ring carrier) .............................................. 66 Replace oil suction pipe/ oil return pipe ........................................ 68 01.08 01.08.01 01.08.02 01.08.03 Intake Manifold/ Exhaust Manifold ............................................. 69 Remove intake manifold ................................................................ 69 Mount intake manifold ................................................................... 75 Disassemble exhaust manifold complete with turbo chargers Fehler! Textmarke nicht definiert. 01.08.04 Mount exhaust manifold ........... Fehler! Textmarke nicht definiert. 01.13 Engine Oil Cooler ......................................................................... 81 01.13.01 Replace engine oil cooler .............................................................. 81 01.13.02 Change motor oil (general)............................................................ 82 Z001138-1_2014-01 2/84 Engine 3/84 • • • • • • • • • • • • • • • • • • • • • • • Z001138-1_2014-01 • • • • • • • • • Check cylinder leckage rate (valve & piston ring) • • • • thermostat stuck open • • fuel oil streaks on water surface raw water entry through exhaust system leaking oil cooler leaking o-ring at unit injector • blue smoke emission • • white smoke emission • • • • black smoke emission • engine running away Wrong position of eccentric shaft Low (drop in) engine output Low compression pressure Knocking noise Large blow-by gas emission* unstable idle running / revs. Exhaust smoke abnormal Large lube oil consumption Large fuel consumption Piston / Combustion - Mechanical system [Factors/Cause of Trouble] Too much oil in the oil pan / oil level too high Faulty valve clearance Faulty engine timing / valve timing Excessive delay in injection timing "Oil leak down" from the valve stem / seal Wear of piston rings and cylinder liner Overcooling of engine Missing or insignificant compression each cylinder Bad or inclompete fuel dispersion in piston board Inferior starting performance of engine Items to Check / Troubled Systems • • • Engine Dismantle Engine Covers Dismantle Front Engine Cover 1. Unscrew 4 hex head screws (SW10) 1 M6x30 3 M6x50 For assembly: Tighten screws with 9,5Nm +/-1 2. Remove front engine cover Assembly is done in reverse order Dismantle Rear Engine Cover 1. Unscrew 6 hex head screws M6x16 (SW10) For assembly: Tighten screws with 9,5Nm +/-1 Secure correct position of the brass inserts 2. Remove rear engine cover Assembly is done in reverse order Z001138-1_2014-01 4/84 Engine 01.00 Engine Timing, Engine Mount 01.00.01Lock Crank Shaft (Piston No. 1 at TDC) Preparation: Put engine out off operation Disconnect battery Remove camshaft housing cover, 01.00.02 Special tool: for vibration damper screws No. 2300700/0 Locking pin No. 2300551/2 3. Unscrew Allen head plug screw (ill.1) (SW10). 4. Turn crankshaft by means of Allen socket size 10 mm until roller of rocker arm cylinder. 1 runs up the ramp of injection cam (ill.3). 5. Insert locking pin 2300551/2 into guide hole and slightly press it against counter weight land of crank shaft 5/84 Z001138-1_2014-01 Engine 6. Continue to turn crankshaft slowly manually in direction of rotation until locking pin engages to slot at the counter weight land of crank shaft ATTENTION: Never actuate starter engine as long as locking pin is inserted. Removal of crank shaft lock pin 1. Pull out locking pin 2300551/2. NOTE: Use new copper sealing. ATTENTION: Prior to starting, make sure that Locking pin has been removed. 2. Clean sealing surface of camshaft housing and camshaft housing cover. Check seal for hardening and damage. Exchange, if necessary. See 01.00.02 3. Remaining assembly is done in reserve order Explanation: (for engine timing) If the crankshaft has been locked in position as described (piston; cylinder; in TDC), the following positions are to be found in case of correct adjustment. The bearing roller of the rocker arm on cyl. 1 is located just before the injection cam cap. Z001138-1_2014-01 6/84 Engine The marked tooth of the camshaft timing belt sprocket stays in line with the upper edge (sealing surface) of the camshaft housing. The notch on the timing belt sprocket of crankshaft is opposite to the arrow marker on the oil pump housing. 7/84 Z001138-1_2014-01 Engine 01.00.02 Camshaft housing cover and seal Remove camshaft housing cover and instruction to exchange cover seal 1. Release 14 hexagon screw SW 10. 2. Remove camshaft housing cover. 3. Release camshaft housing cover sealing by means of screwdriver and remove. 4. Clean sealing surface of camshaft housing and camshaft cover carefully. 5. Position new seal on camshaft housing cover and press it with the thumb into the groove, beginning at the half-moon section (ill.2). 6. Put camshaft housing cover onto camshaft housing. Tighten with 14 hexagon screws SW 10 with a torque of 9,5 Nm +/- 0,5 Z001138-1_2014-01 8/84 Engine 01.00.03Maintenance timing belt exchange Preparation:put engine out of operation disconnect battery remove camshaft housing cover Special tool: for vibration damper screws No. 2300700/0 1 Loosen hexagon screws SW10 remove timing belt covering NOTE: See for arrows markings on used timing belt; mark timing belt if necessary. Consider change intervals – see chart "maintenance". Special tool: dial gauge rail 2306031/6 dial gauge digital 2300899/0 probe pin 2300641/1 V-belt tightener VR00515/0 open-end wrench 2300711/0 extractor VR00113/0 adjust gage eccentric shaft 2300736/1 offset box wrench VR00228-0 9/84 Z001138-1_2014-01 Engine 6. Adjust eccentric shaft with special tool kit 2300736-1 as shown in illustration before. 7. Mount dial gauge rail with brackets 2306031/6 on studs at intake side of camshaft housing. 8. Insert dial gauge 2300899/0 with probe pin 2300641/1 in dial gauge rail and put probe pin onto unit injector plunger guide cylinder 1. 9. Turn camshaft until the roller of rocker arm is located on base circle of injection cam. “Concentric part of cam” 10. Press zero button an digital dial gauge. * Or pre-set conventional type dial gauge to position 20 mm stroke (small pointer at 20 inside scale, big pointer at 0 – outside scale) 11. Lock Crank Shaft, refer 01.00.01 to piston No. 1 at TD Z001138-1_2014-01 10/84 Engine 12. Loosen Allen head screw SW 8 of belt tensioner and remove tensioner. 13. Loosen 3 Torx screws M12 x 90 from vibration damper by means of special tool 2300700/0 and remove vibration damper. 14. Remove timing belt. ATTENTION: With loose and/or removed timing belt, the camshaft or crankshaft must not be turned. This could result in a collision of pistons and valves. 15. Put new timing belt onto crankshaft sprocket and camshaft sprocket (marked tooth of camshaft sprocket points at upper edge of camshaft housing). 11/84 Z001138-1_2014-01 Engine ATTENTION: Pay attention to arrow marker (direction of rotation) on timing belt. 16. Mount vibration damper. Slightly lubricate thread of 3 Torx screws (Lubricant P/N VR00207/0) and tighten with torque wrench to 135 Nm +/-7. NOTE: Recheck torque after first test run. 17. Tightly put on timing belt from crank shaft sprocket over water pump drive pulley and camshaft sprocket, and position camshaft sprocket with marked tooth towards upper sealing edge of camshaft housing. 18. Clean and degrease contact surface of tensioner and camshaft housing. Then mount tensioner. 19. Pre-tension timing belt by turning tensioner on hexagon WS 32 with tool VR00228-0 counter clockwise. Tighten hexagon socket SW 8 with torque wrench to 20 Nm +/- 2. 20. Put on tension gauge No. VR00515/0 (ill.20/pos.1) between camshaft sprocket and tensioner. Pretension timing belt tension by further counter clockwise turning of tensioner hexagon SW 32 to read 600 N +/30 Nm for new timing belt indication on tension gauge between green and red marked field. Z001138-1_2014-01 12/84 Engine ATTENTION: When putting on tension gauge No. VR00515/0, consider the following: The two stop trunnions (ill.20/pos.2)should rest on the forehead of timing belt and must not rest on the back of timing belt Put measuring bow onto tooth. During measuring, completely push in measuring bow and relax quickly. When attaining the required timing belt tension, tighten the Allen head screw SW 8 with torque wrench to 45 Nm +/-4, and hold up at the same time with wrench SW32. 21. Remove locking pin from crank shaft. 22. Turn crankshaft 4 turns and stop at fourth turn with a plunger guide stroke of unit injector of approx. 3.65 mm (dial gauge reading). 23. Then turn back crank shaft by a stroke measurement of 0.5 mm on the dial gauge. 6x NOTE: During above mentioned operation the timing belt should run into place and a uniform tension shall result for measuring of timing belt tension. 13/84 Z001138-1_2014-01 Engine 24. Put on tension gauge No. VR00515/0 between camshaft sprocket and tensioner, as described, and read measured value. Timing belt tension should be 600 N +/- 30 N for a new timing belt. NOTE: If timing belt tension does not correspond to specified tension, loosen tensioner and repeat adjustment according to instructions under item 22 through 25. In this case, a re-positioning of the camshaft sprocket may be required. 25. Turn crankshaft further 2 turns, and at second turn fix crankshaft with locking pin in TDC position (cylinder 1; in TDC). See chapter 01.00.01. With crank shaft in locked position, the plunger guide stroke of the unit injector at first cylinder should show the following value on the dial gauge: Index value of engine timing 3,59 mm +/- 0,02 mm (plunger guide stroke - unit injector) NOTE: If the index value of engine timing should not correspond to the specifically value, follow the instructions as per item 27. Remove camshaft sprocket 26. Loosen hexagon nut of camshaft sprocket SW 30 by holding up with special tool No. 2300711/0 and turn nut by approx. 1/4 rotation. 27. Mount extractor (ill.27/pos.1) camshaft sprocket VR00113/0 and screw in puller screw "LEFTHAND THREAD" by hand. Pre-stress puller screw with approx. 100 Nm +/-5. NOTE: Do not remove camshaft sprocket from conical seat when screwing in the puller screw. Z001138-1_2014-01 14/84 Engine 28. Remove camshaft sprocket from conical seat by one hammer blow on puller screw. NOTE: To correct the setting of engine timing follow further instructions as per item 30. Readjustment of camshaft position in case timing needs to be corrected. NOTE: This is to be carried out, if the index value of the engine timing is not within the allowed adjustment tolerance. 29. Check locking position of crankshaft or lock crank shaft, if necessary. (piston; cylinder 1; in TDC). Refer 01.00. 30. Adjust camshaft to 3,59 mm on the dial gauge by turning with special tool 2300711/0 (ill.30).(plunger guide at unit injector is moved down by 3,59 mm.) NOTE: During this operation, the camshaft sprocket must be released from the taper connection and should only be slightly supported by the cone. Tension of timing belt remains adjusted, as described before. 31. Remove locking pin from crank shaft. Refer 01.00.01 32. Tighten hexagon nut SW 30 of camshaft sprocket to 80 +/-4 Nm by holding up with special tool 2300711/0 at hexagon on camshaft. ATTENTION: During this operation, camshaft sprocket and camshaft are connected for measurement purpose. A positive connection is only achieved by finally tightening the hexagon nut with 240 +/-12 Nm. The previously set stroke on the plunger guide must not be changed when tightening the hexagon nut. 15/84 Z001138-1_2014-01 Engine 33. Turn crankshaft by 2 further turns, and at the second turn fix crankshaft with locking pin in TDC position (cylinder 1; in TDC). See chapter 01.00.01. With locked crankshaft, the plunger guide stroke of unit injector at first cylinder should show the following dial gauge value: Index value of engine timing 3.59 mm +/0,02 mm (plunger guide stroke - unit injector) NOTE: If the index value of engine timing should not correspond to the allowed value, follow the instructions as per item 25. 34. In case of correct index value of engine timing, remove locking pin on crank shaft and tighten hexagon nut of camshaft sprocket SW 30 with 240 +/-12 Nm by holding up with special tool No. 2300711/0. ATTENTION: The following torques are to be checked again: 34 Torque on hexagon nut of camshaft sprocket SW 30 240 +/- 12 Nm. 35 Allen socket head screw SW 8 of timing belt tensioner at 45 +/-4 Nm. 36 Allen screws on vibration damper with 135 +/-4 Nm. 37 Remove adjustment tool from eccentric shaft. Z001138-1_2014-01 16/84 Engine 01.00.04 Remove timing belt Preparation: put engine out of operation disconnect battery remove camshaft housing cover Special tool: for vibration damper screws No. 2300700/0 1. Loosen 3 Allen screws M12 x 90 (Pos 18) from vibration damper by means of special tool 2300700/0 and remove vibration damper. 2. Loosen hexagon screws SW10 remove timing belt covering. NOTE: See for arrows markings on used timing belt; mark timing belt if necessary. Consider change intervals – see chart "maintenance". 17/84 Z001138-1_2014-01 Engine 3. Lock crankshaft, refer 01.00.01 4. Loosen Allen head screw SW 8 of belt tensioner and remove tensioner. 5. Remove timing belt. ATTENTION: With loose and/or removed timing belt, the camshaft or crankshaft must not be turned. This could result in a collision of pistons and valves 6. MOUNT TIMING BELT - refer adjust engine timing; 01.00.05 Z001138-1_2014-01 18/84 Engine 01.00.05Timing adjustment procedure for dismantled engine Function description: Time control of injection and valves are consistent due to the special camshaft design (3 cams per cylinder). During adjustment, pay attention to essential functional elements, such as unit injector, timing belt tension and sense of rotation of engine, in order to achieve the required setting accuracy of injection. A change of the timing belt tension or the sense of rotation during adjustment always causes wrong positioning of the injection control. For this reason it is to be ensured that the adjusting procedure follows the conditions of real operation. Status for job: Camshaft housing cover dismantled. Set up crankshaft to approx. 40° crank angle before TDC (piston; cylinder 1; in TDC) in order to set all pistons in the engine to approximately the same length of stroke, thus providing open space for the valve movement (stroke). This ensures that the camshaft may be turned to the desired position (injection stroke - unit injector cylinder 1) without problems. Crankshaft position with dismantled vibration damper. Crankshaft position with mounted damper, if timing belt has not been removed. NOTE: Before disassembly, mark the vibration damper, with locked crankshaft. A corresponding marking must be made on the timing belt cover. 40° Unit injectors mounted and adjusted. Refer 03.02.02 and 03.02.06. Valve clearance set. Special tool.: dial gauge rail 2306031/6 dial gauge digital 2300899/0 probe pin 2300641/1 V-belt tightener VR00515/0 open end wrench 2300711/0 extractor VR00113/0 adjust gage eccentric shaft 2300736/1, offset box wrench VR00228-0 19/84 Z001138-1_2014-01 Engine 1. Adjust eccentric shaft with special tool 2300736-1 as shown. 2. Mount dial gauge rail with brackets 2306031/6 on studs at intake side of camshaft housing. 3. Insert dial gauge 2300899/0 with probe pin 2300641/1 in dial gauge rail and put probe pin onto unit injector plunger guide cylinder 1. 4. Turn camshaft until the roller of rocker arm is located on base circle of injection cam. “Concentric part of cam” 5. press zero button on digital dial gauge. Or pre-set conventional dial gauge to position 20 mm stroke (small pointer at 20 - inside scale, big pointer at 0 – outside scale) or press zero button on digital dial gauge. 6. Slowly turn camshaft in direction of rotation until dial gauge shows a stroke of 2 mm (injection stroke at unit injector). Z001138-1_2014-01 20/84 Engine 7. Continue to turn crankshaft in direction of rotation and position it with locking pin in crank shaft. TDC (piston; cylinder 1; in TDC, Reference TDC chapter 01.00.01.) 8. Continue to turn camshaft slowly in direction of rotation until a total distance of approx.. 3.65 mm can be read on the dial gauge (plunger stroke at unit injector). Assembly of camshaft sprocket 9. Clean and degrease cone on camshaft and in camshaft sprocket. ATTENTION: Very high for as are transmitted via this conical seat. Therefore, it is extremely important that the two cone surfaces are assembled absolutely clean and greasefree. 10. Shift camshaft sprocket onto cone and slightly lubricate thread at front end of camshaft. Slightly turn hexagon nut and washer by hand. The camshaft sprocket should only slightly be supported by the cone, in this status on easily turning of the camshaft sprocket must be possible. 11. Put timing belt onto pre-positioned crankshaft sprocket (Lock crank shaft -see 01.00.01) and camshaft sprocket (marked tooth of camshaft sprocket points at upper edge of camshaft housing). ATTENTION: 21/84 Pay attention to arrow marker (direction of rotation) on timing belt. Z001138-1_2014-01 Engine 12. Mount vibration damper. Slightly lubricate thread of 3 TORX screws (Lubricant P/N VR00207/0) and tighten with torque wrench to 135 +/-7 Nm. NOTE: Recheck torque after first test run. 13. Tightly put on timing belt from crank shaft sprocket over water pump drive wheel and camshaft sprocket, and position camshaft sprocket with marked tooth towards upper sealing edge of camshaft housing. 14. Clean and degrease contact surface of tensioner and camshaft housing. Then mount tensioner. 15. Pre tension timing belt by turning tensioner on hexagon WS 32 with tool VR00228-0 counter clockwise. Tighten hexagon socket SW 8 with torque wrench to 20 +/- 2 Nm. 16. Put on tension gauge No. VR00515/0 (ill.17/pos.1) between camshaft sprocket and tensioner. Pre tension timing belt tension by further counter clockwise turning of tensioner hexagon (SW 32) to read 600 +/- 30 Nm for new timing belt. ATTENTION: When putting on tension gauge No. VR00515/0, consider the following: The two stop trunnions (ill.17/pos.2) Z001138-1_2014-01 22/84 Engine should rest on the forehead of timing belt and must not rest on the back of timing belt. Put measuring bow onto tooth. During measuring, completely push in measuring bow and relax quickly. When attaining the required timing belt tension, tighten the Allen head screw (SW 8) with torque wrench to 45 Nm +/-4, and hold up at the same time with wrench (SW32). 17. Turn crankshaft to indicated value below (stroke of plunger guide) and Tighten hexagon nut (SW 30) of camshaft sprocket to 80 +/- 4 Nm, by holding up with special tool 2300711/0 at hexagon on camshaft. ATTENTION: Position camshaft to read a pre-stroke of 3.65 mm (movement of plunger guide at unit injector. During this operation, camshaft sprocket and camshaft are connected. A positive connection is only achieved by finally tightening the hexagon nut with 240 +/-12 N 18. Remove locking pin from crank shaft. 19. Turn crankshaft 4 turns and stop at fourth turn with a plunger guide stroke of unit injector of approx. 3.59 mm (dial gauge reading). Then turn back crank shaft by a stroke measurement of 0.5 mm on the dial gauge. NOTE: During above mentioned operation the timing belt should run into place and a uniform tension shall result for measuring of timing belt tension. 23/84 4x Z001138-1_2014-01 Engine 20. Put on tension gauge No. VR00515/0 between camshaft sprocket and tensioner, as described under item 15, and read measured value. Timing belt tension should be 600 +/- 30 Nm for a new timing belt. NOTE: In case of used belt adjust timing belt tension should be 520 +/- 30 Nm. NOTE: If timing belt tension does not correspond to desired value, loosen the tensioner and repeat adjustment according to instructions under item 15 to 20. In this case, a re-positioning of the camshaft sprocket may be required. 21. Turn crankshaft further 2 turns, and at second turn fix crankshaft in TDC position (cylinder 1; in TDC with locking pin in crank shaft in TDC position (cylinder 1; in TDC). See chapter 01.00.01. With crank shaft in locked position, the plunger guide stroke of the unit injector at first cylinder should show the following value on the dial gauge: Index value of engine timing 3.59 mm +/0,02 mm (plunger guide stroke - unit injector) NOTE: If the index value of engine timing should not correspond to the specifically value, follow the instructions as per item 25. 22. In case of a correct index value of engine timing, remove locking pin on crankshaft and tighten the hexagon nut of the camshaft sprocket SW 30 with 240 Nm by holding up with special tool No. 2300711/0. 23. ATTENTION: The following torques are to Z001138-1_2014-01 24/84 Engine be checked again. 1. Torque on hexagon nut of camshaft sprocket (SW 30) □ 240 +/- 12 Nm 2. Allen head screw (SW 8) of timing belt tensioner at □ 45 +/- 4 Nm 3. 3 x TORX screws on vibration damper with □ 135 +/- 7 Nm 24. Remove adjustment tool from eccentric shaft. Remove camshaft sprocket 25. Loosen hexagon nut of camshaft sprocket SW 30) by holding up with special tool No. 2300711/0 and turn nut by approx. ¼ rotation. 26. Mount extractor (ill.27/pos.1) camshaft sprocket VR00113/0 and screw in puller screw "LEFTHAND THREAD" by hand. Pre-stress puller screw with approx. 100 +/-5 Nm. NOTE: Do not remove camshaft sprocket from conical seat when screwing in the puller screw. 27. Remove camshaft sprocket from conical seat by one hammer blow on puller screw. NOTE: To correct the setting of engine timing, follow further instructions as per item 32. 25/84 Z001138-1_2014-01 Engine Readjustment of camshaft position in case of correction of set engine timing NOTE: This is to be carried out, if the index value of the engine timing is not within the allowed adjustment tolerance. 28. Check locking position of crankshaft or lock crank shaft, if necessary. (piston; cylinder 1; in TDC); Refer 01.00.01 29. Adjust camshaft to 3.65 mm on the dial gauge, by turning with special tool 2300711/0 (ill.30) (plunger guide at unit injector is moved down by 3,65 mm.) NOTE: During this operation, the camshaft sprocket must be released from the taper connection and should only be slightly supported by the cone. Tension of timing belt remains adjusted, as described before. 30. Remove locking pin from crankshaft. Refer 01.00.01 31. Tighten hexagon nut (SW 30) of camshaft sprocket to 80 Nm +/-4 by holding up with special tool 2300711/0 at hexagon on camshaft. ATTENTION: During this operation, camshaft sprocket and camshaft are connected measurement purpose. A positive connection is only achieved by finally tightening the hexagon nut with 240 Nm +/-12. The previously set stroke on the plunger guide must not be changed when tightening the hexagon nut. 32. Turn crankshaft by 2 further turns, and at the second turn fix crankshaft in TDC position (cylinder 1; at TDC ) with locking pin in fly wheel bore). See chapter 01.00.01. With locked crankshaft, the plunger guide stroke of unit injector at first cylinder should show the following dial gauge value: Index value of engine timing 3,59 mm +/- 0,02 mm (plunger guide stroke - unit injector) Z001138-1_2014-01 26/84 Engine NOTE: If the index value of engine timing should not correspond to the allowed value, follow the instructions as per item 25. 33. In case of correct index value of engine timing, remove locking pin on crankshaft and tighten hexagon nut of camshaft sprocket SW 30 with 240 +/-12 Nm by holding up with special tool No.2300711/0. 34. ATTENTION: The following torques are to be checked again: 1. Torque on hexagon nut of camshaft sprocket SW 30 q 240 +/-12 Nm. 2. Fillister socket head screw SW 8 of timing belt tensioner at q 45 +/-4 Nm. 3 Allen screws on vibration damper with q 135 +/-4 Nm. 35 Remove adjustment tool 2300736/1 from eccentric shaft. 36 Reassemble opened components for service purpose in reverse order 27/84 Z001138-1_2014-01 Engine 01.00.06 Replace engine bracket ATTENTION: Slightly lift the engine by means of suspension VR 00130/0 at lifting shackles. (approx. 3500 N). Replace engine bracket “Exhaust side” Note: 1 For detailed information refer to vehicle manufacturer. Example: 2 Loosen Hex.Socket Head Cap screws SW 8, remove bracket and washers. NOTE: secure hexagon head screws with LOCTITE 243. Tighten 4x M10 screw with a torque of 45 Nm +/-3. Replace engine bracket “Intake side” Note: 3 For detailed information refer to vehicle manufacturer. Example: 4 Loosen hexagon screws SW 17, remove bracket and washers. NOTE: secure hexagon head screws with LOCTITE 243. Tighten 4x M10 screw with a torque of 45 Nm +/-3. Z001138-1_2014-01 28/84 Engine Cylinder Block 01.01.01 Replace valves Preparation: Disassemble engine housing, 01.06.01, Disassemble crankshaft, 01.02.01, Disassemble pistons, 01.04.01. 1 Insert special tool No. VR00104/0 in cylinder bore and tighten sturdily with two hexagon screws SW19. 2 Mount valve spring retainer No. VR00105/1 . 3 Pre-stress valve spring with hexagon nut SW28. 4 Remove wedges. 5 Relax valve spring again, remove valve spring, spring plate and spring washer. 6 Remove special tool from cylinder bore, remove valves. 29/84 Z001138-1_2014-01 Engine 7 Pull out valve stem gasket with special tool No. 2300758/0. NOTE: When inserting the valves, lubricate valve stem with motor oil. 8 Put special tool No. V000152/0 onto valve stem end and pull on new valve stem over sleeve. 9 Remove sleeve and press on valve stem gasket with special tool No. V000166/0 until valve stem gasket is supported on collar of valve guide. 10 Lubricate valve stem (motor oil). 11 Mount special tool No. VR00104/0 again. 12 Put on spring washer, valve spring and spring plate and pre-stress valve spring with special tool No. VR00105/1. NOTE: The progressively wound end of the valve spring is located on the cylinder block. 13 Insert wedges, relax valve spring and check correct seat of wedges. Z001138-1_2014-01 30/84 Engine 01.01.02 Adjust valve clearance Preparation: Remove camshaft housing cover Valve clearance is adjusted by means of special tool No. VR 00125/0 and adjusting gauge 2300712/3 (ill.1/pos.1) between camshaft base circle (ill.1/pos.2) and cam follower (ill.1/pos.3). NOTE: index value outlet valve 0.25 mm index value intake valve 0.25 mm 01.01.03 Replace valve guide Preparation: Disassemble valves, 01.01.01. 1. Press out valve guide with special tool VR00154/0. 2. Insert valve guide with special tool VR00109/0. 31/84 Z001138-1_2014-01 Engine 01.01.04 Replace pressure regulating valve for oil cooling jet Preparation: Disassemble engine casing 01.06.01 Remove pressure regulating valve with openend wrench (WS13). ATTENTION: Screw in pressure regulating valve until front collar is seated in bore. Screw in pressure regulating valve sturdily. Assembly procedure: NOTE: Secure ONLY thread with structural adhesive LOCTITE 243. Tighten valve assembly with 8 Nm +/- 1 ATTENTION: Only tested valves with an opening pressure of 1.6 bar (+/- 0,15 bar) to be used Z001138-1_2014-01 32/84 Engine 01.01.05 Replace stud bolt for unit injector Preparation: Remove camshaft housing cover, 01.05.01 Remove unit injector, 03.02.02 1. Tighten threaded pin with a torque of 21 +/- 1 Nm (Loctite 620). 01.01.06 Replace dowel pin for positioning of unit injector Preparation: Disassemble camshaft housing, 01.05.01. 1. Insert new dowel pin by means of pressing tool. 33/84 Z001138-1_2014-01 Engine 01.01.07 Replace dowel pin for positioning of camshaft housing Preparation: Disassemble camshaft housing, 01.05.01. Insert new dowel pin by means of pressing tool. ATTENTION: Z001138-1_2014-01 Do not close oil supply duct with dowel pin in front. (see illustration below) ENGINE DAMAGE! 34/84 Engine 01.01.08 Mount frame seal 1. Clean and degrease groove in cylinder block. 2. Position tool no. V000306/0 over cylinder block, apply on metal surface of tool a film of cleaning agent. Slide frame seal over tool as shown in picture. NOTE: For easier installation of frame seal apply alcohol on sealing profile, or ultra clean agent tool V000306/0 metal surface. The alcohol will in place of a lubrication agent during installation process. Clean of the frame seal lip and the block slot using Acetone or a non oil based cleaner (pure alcohol) and give time for dry this before continuing. 35/84 Z001138-1_2014-01 Engine 3. Apply activator 7649 to groove in the cylinder block. After waiting 2 minutes for the activator to cure, apply construction adhesive LOCTITE 620 (green) on both sides of first profile groove in the frame seal. 4. Press frame seal into cylinder block groove, beginning at the cylinder block corner and then along side of the block. NOTE: Only press in the rubber of the frame seal by hand. Do not stretch or displace. Pay attention do least curing time and curing temperature. Also see manufacturer's specifications. 5. Secure the frame seal to the housing using new screws M6x12 Precote83 and tighten to 10 Nm. ATTENTION: Z001138-1_2014-01 Pay attention to safety notes/rules when handling with technical liquids. 36/84 Engine 01.02 Crankshaft, Bearing, Vibration Damper 01.02.01 Replace crankshaft Preparation: Disassemble flywheel housing and flywheel, 01.03.01 und 01.03.02, Disassemble timing belt and vibration damper, Disassemble engine housing, 01.06.01, Disassemble oil suction pipe, 01.06.03. Disassemble oil pump housing, 01.06.02, 1. Turn crankshaft in such a way that piston of first cylinder is located at TDC. ATTENTION: While disassembling the connecting rod bearing caps and the main bearing caps, the crankshaft may not be turned. 2. Loosen the two screws of each connecting rod with special tool 2300746/0, remove connecting rod bearing caps with bearing shell. Push down all pistons and connecting rods to TDC position. NOTE: Remain with crank shaft in position during work operation to avoid damage the bearings. Never turn crank shaft. 3. Loosen two screws of each main bearing remove main bearing shells and caps. 4. Lift out crankshaft. Remove thrust bearings from main bearing section. ATTENTION: When removing, take care that released connecting rods do not hit against cylinder liner! 37/84 Z001138-1_2014-01 Engine 5. Remove main bearing blocks. 6. Pull out oil nozzles for piston cooling. 7. Remove main bearing shells from bearing blocks. NOTE: For assembly, lubricate all bearing with engine oil. All pistons with connecting rods are inserted in the cylinder bore. Mount injection oil nozzles with new O-rings. When inserting the crankshaft, take care that the first connecting rod journal pin is positioned at TDC. 8. Check, for proper installation main bearing shells and connecting rod bearing shells. ATTENTION: Main bearing base and main bearing cap are marked with consequential numbers on one side of the bearing cast. Make sure this number between base and bearing cap match. 9. Insert the two upper thrust bearing segments with bearing surface towards crankshaft. (The side with the numbering is against at main bearing block). Z001138-1_2014-01 38/84 Engine 10. Insert the two upper thrust bearing segments onto main bearing cap and mount main bearing cap. Install remaining main bearing caps with bearing shells and tighten main bearing screws sturdy. 11. Mount connecting rod cap with bearing shell. (pay attention to numbering). Tightening specification for connecting rod screws (thread and screw head support lubricated): 1st working step: all screws 10 Nm +/-1 2nd working step: all screws 30 Nm +/-3 3rd working step: all screws 75 ° +/-4° Special tool No. 2300706/0 ATTENTION: Use new screws Tightening specification for main bearing screws (thread and screw head support lubricated): 1st working step: all screws 35 Nm +/-3 2nd working step: all screws 45 ° +/-4° 3rd working step: all screws 45 ° +/-4° Special tool No. 2300706/0 Tightening sequence 39/84 Z001138-1_2014-01 Engine Measuring of end clearance Put on magnetic holder with dial gauge, put dial gauge / calliper onto crankshaft end. Move crankshaft in forward direction and set dial gauge to zero. Move crankshaft backwards and read measured value. Clearance should be between 0.08 and 0.26 mm. Z001138-1_2014-01 40/84 Engine 01.02.02 Replace gear for oil pump drive Preparation: Disassemble engine housing, 01.06.01, Disassemble timing belt, Disassemble oil pump, 01.06.02, Disassemble oil suction pipe, 01.06.03. 1. Remove woodruff key.(ill.1/pos.1) 2. Pull off gear (ill.1/pos.2) with sleeve ring (ill.1/pos.3). NOTE: Apply surface sealing agent 5182 to contact surfaces of gear towards crankshaft and sleeve ring. 3. Place oil pump drive gear with larger chamfer against crank shaft contact surface to clear machined shaft radius.(ill.2/pos.1) Note: Proper Gear Engagement Clearance P/No. Z002004-0 includes already gear oil pump drive crankshaft P/No. 2172584-2 41/84 Z001138-1_2014-01 Engine 01.03 Flywheel 01.03.01 Replace flywheel Preparation: refer to 02.00.01 Consult the manufacturer of the generator to receive instructions on how to remove respectively disassembly the generator from the engine 1. after proper removal of generator open hex head screw M24 and extract flange with special tool (P/No 2300962-0) Refer to 2.00.01 2. Remove protection cover Loosen fitting nut at Oil supply line on bearing carrier plate (SW14) Remove hex head screw M6 at flange of oil pipe and remove entire pipe. 3. Remove securing bolt / stud at bearing carrier plate 4. Remove bearing carrier from fly wheel housing 5. Lock crank shaft, refer 01.00.01 6. Loosen eight hexagon head screws M10 x 55 - 12.9 (SW17) and remove ring gear carrier. NOTE: Apply thread protection LOCTITE 243 to hexagon head screws and tighten with a torque of 75 Nm +/-4. Z001138-1_2014-01 42/84 Engine 01.04 Piston and Connecting Rod 01.04.01 Dismantle piston and connecting rod Preparation: Dismantle engine housing, 01.06.01 Disassemble crankshaft, 01.02.01. 1. Pull out piston with connecting rod. 2. Remove retainer ring of piston pin by means of a fine blade screwdriver. 3. Push out piston pin, remove piston from connecting rod. 4. Remove piston rings by means of piston ring pliers. ATTENTION: 43/84 For assembly of piston rings, take care of marking "TOP". In case of a change of cylinder diameter, take care of respective repair steps. Z001138-1_2014-01 Engine ATTENTION: For assembly of piston and connecting rod, take care that positioning notch of connecting rod bearing is opposite to the clearance recess for oil injection nozzle. NOTE: For best result position rings with piston gap about one third of a turn a part from each others gap. NOTE: When inserting the piston into cylinder bore, with special tool No. 2300714/1, take care that arrow marking on piston top pointing to the front. Z001138-1_2014-01 44/84 Engine 01.05 Camshaft, Housing, Valve Gear 01.05.01 Replace camshaft housing Preparation: Empty fuel system, 03.02.02 item 2 Disconnect battery Disconnect crankshaft from TDC, 01.00.01 Dismantle unit injectors, 03.02.02 Remove cover timing belt, 01.00.04 1. Release timing belt tensioner, remove tensioner pulley entirely 2. Remove timing belt from camshaft sprocket. 3. Remove plug (ill.2/pos.1) for sensor of control rack. 4. Remove plug (ill.3/pos.1) from control solenoid. 5. Remove plug from magnetic-valve (ill.4/pos.1) and linear-sensor (ill.4/pos.2) 45/84 Z001138-1_2014-01 Engine 6. Disconnect speed sensor (ill.7/pos.1) Speed sensor 7. Dismantle oil supply pipe injection timing device. (ill.9) 8. Loosen hexagon screws SW 13 (7x M8x135 & 7x M8x110) 9. Remove camshaft housing upwards. Remove sealing. Assembly of camshaft housing 1. Clean sealing surfaces of motor block (ill.11/pos.1) and camshaft housing (ill.11/pos.2). 2. Put on camshaft housing sealing (ill.11/pos.3). ATTENTION: Always use new sealing! Z001138-1_2014-01 46/84 Engine 3. Put on camshaft housing. Take care that all cam followers (ill.12/pos.1) rest on valve stems (ill.12/pos.2), are positioned and aligned accordingly. 4. Crankshaft must be set up to approx. 40° before TDC, to avoid a collision of valves with pistons. 40° 5. Tighten screws of camshaft housing in two steps as illustrated. (ill.14) (from inside outwards). Torque: 1. Step 2. Step 15 Nm +/- 1 25 Nm +/- 2 6. Assembly unit injectors; refer 03.02.02 7. Adjust unit injectors, refer to 03.02.06. 8. Adjust valves refer to 01.01.02. 9. Adjust control links (INJECTION QUANTITY ADJUSTMENT), refer to 03.02.04. 10. re-adjust engine timing , refer to 01.00.05 11. Calibration of rack position, refer to 06.10. 03 12. Assembly engine in reversed order 47/84 Z001138-1_2014-01 Engine 01.05.02 Replace gas stem gasket (on engine assembly) Preparation: Disassemble camshaft housing, 01.05.01. ATTENTION: Set piston of respective cylinder on TDC. 1. Mount valve spring retainer No. VR00105/1 ill.1). 2. Compress valve spring (ill.2) with hexagon socket SW28. 3. Remove wedges. 4. Relax valve spring again remove valve spring and spring washer. 5. Remove valve stem gasket with special tool No. 2300758/0. Z001138-1_2014-01 48/84 Engine 6. Put special tool No. V000152/0 onto valve stem end and push new valve stem gasket over sleeve. 7. Remove sleeve and press on valve stem gasket with special tool No. V000166/0 until valve stem is supported on collar of valve guide. 8. Lubricate valve stem (motor oil). 9. Put on valve spring and spring washer and prestress with special tool No. VR00105/1. NOTE: Progressively wound end of valve spring is located at cylinder block. 10. Put in wedges, relax valve spring, check correct seat of wedges. NOTE: In case of replacing other valve stem gaskets, take care that respective piston is set to TDC. 49/84 Z001138-1_2014-01 Engine 01.05.03 Replace control rack Preparation: Drain fuel system, 03.02.02 item 2. Disassemble camshaft housing cover, 01.05.01. Disassemble control solenoid, 03.08.01. Disassemble unit injector of 1st cylinder, 03.02.02. 6-cylinder 1. loosen 2x hex socket head cap screw M8x25 and remove Torsion Arm Assy. Refer to injection timing device 03.08.04 2. Disassemble leaver to governor solenoid by loosening two hexagon screws SW8 (ill.2/pos.1). 3. Disassemble all control links (ill.3/pos.1) by loosening hexagon socket SW4 (ill.3/pos.2). ATTENTION: LEFTHAND THREAD NOTE: Connection of “LEFTHAND THREAD” screws and control links to be opened three times only. Z001138-1_2014-01 50/84 Engine 4. Remove locking pin (ill.4/pos.1) from last bulkhead. 5. Loosen plug screw SW22 (ill.5), remove sealing ring, pull out control rod to the back. Rear site of engine housing. 6. Assembly in reverse order. NOTE: 7. Adjust control, refer to 01.00.04 8. Calibration of rack position, refer to 06.10.03 51/84 Z001138-1_2014-01 Engine 01.05.04 Replace camshaft Preparation:disassemble camshaft housing, refer to 01.05.01. 1. Loosen hexagon nut SW30. (ill.1/pos.1) Retaining at hexagon camshaft. 2. Disassemble camshaft sprocket with special tool No. VR00113/0 (ill.2), remove nut & washer. 3. Remove axial pin and retainer plate for camshaft. 4. Disassemble all cam followers, refer to 01.05.07. 5. Push out camshaft (ill.5) with radial shaft seal to the front. 6. Pull out camshaft from the front of camshaft housing. ATTENTION: Z001138-1_2014-01 At the rear end of camshaft (ill.1/pos.2) the speed sensor wheel is located. When removal or installing the camshaft, take care that bearings surface of camshaft housing does not get damaged. 52/84 Engine 01.05.05 Replace eccentric shaft Preparation: Disassemble camshaft housing cover, 01.05.01. Loosen set screws of unit injector on rocker arm. NOTE: Keep sliding cups below each rocker arm set screw matched to each cylinder. 1. Remove circlips on both sides of rocker arms. 2. Extract retaining clip (ill.2/pos.1) and pin (ill.2/pos.2) from injection timing device linkage. Dismantle clamping-screws from lever eccentric shaft (ill.2/pos.3) 3. Extract axial half-moon rings (ill.5) of eccentric-shaft (2x) (same as for rocker arms) 53/84 Z001138-1_2014-01 Engine 4. Displace rocker arm, remove slide rings, remove rocker arms one by one and pull out eccentric shaft towards cylinder. 6 (ill.6) For Assembly: After installation eccentric shaft rotate shaft that zenith of eccentric-lobe is located at the highest point. Z001138-1_2014-01 54/84 Engine ECCENTRIC SHAFT 01.05.06 Replace radial shaft seal of camshaft Preparation: Lock crankshaft, 01.00.01. Remove timing belt. Disassemble camshaft sprocket 1. Disassemble radial shaft seal. 2. Mount new radial shaft seal with special tool No. VR00122/0. NOTE: Radial shaft seal is waxed; therefore needs not to be oiled. Do not use grease on radial shaft lip seal. 55/84 Z001138-1_2014-01 Engine 01.05.07 Replace cam follower Preparation:disassemble camshaft housing cover. 1. Loosen adjusting screw (ill.1/pos.1) with special tool No. VR00125/0. 2. Lift cam follower spring (ill.1/pos.2) with special tool No. V000121/0. 3. Compress valve spring (ill.1/pos.3) with special tool No. VR00106/0. NOTE: Crankshaft is first to be turned in a position which prevents collision between valve - piston bottom. ATTENTION: Before relaxing the valve spring, check whether the valve keepers (ill.1/pos.4) are still positioned correctly. ENGINE DAMAGE! 4. Lift cam follower from valve stem top and turn sideward. 5. Lift cam follower from ball pin. 6. Lift cam follower by means of needlenosed pliers. NOTE: Adjust valves, refer to 01.01.02. Z001138-1_2014-01 56/84 Engine 01.05.08 Replace retainer of cam follower Preparation:disassemble cam follower, 01.05.08 1. Turn retainer spring (ill.1/pos.1) sideward’s and removes by means of screwdriver from valve adjusting element towards centre. NOTE: Adjust valves, refer to 01.01.02. 57/84 Z001138-1_2014-01 Engine 01.05.09 Replace valve adjusting element Preparation: Disassemble retainer spring of cam follower, 01.05.09 1. Unscrew valve adjusting element with hexagon socket SW21. NOTE: Apply thread protection LOCTITE 243 to valve adjusting element and tighten with a torque of 55 Nm +/-3. NOTE: Adjust valves, refer to 01.01.02. Z001138-1_2014-01 58/84 Engine 01.06 Engine Housing, Oil Pump, Oil Suction Pipe Oil Schematic 01.06.01 Replace engine housing Preparation:disconnect battery close fuel feed- and return line, drain engine oil, refer 01.13.02. Dismantle wiring harness, 06.05.02. dismantle exhaust manifold, remove protection-plate frame seal, refer 01.08.06 59/84 Z001138-1_2014-01 Engine 1. Lift engine with special tool No. VR00130/0 and crane (min. 3500 N). 2. Dismantle oil separator and crank case ventilation hose 3. Remove oil filter 4. Disconnect oil pipe on oil pump and on intake manifold SW 10 NOTE: Tightening torque of fitting on oil pipe 9,5 Nm +/-1. 5. Remove intake manifold refer to 01.08.01 6. Mount it on No. VR00102/0 and trestle No. VR00101/0 by means of four hexagon screws M8x30 SW13. ATTENTION: Z001138-1_2014-01 thread screwing depth 1,5xD For mounting bracket 60/84 Engine 7. Loosen hexagon screws SW10 remove timing belt covering NOTE: See for arrows markings on used timing belt; mark timing belt if necessary. Consider change intervals – see chart "maintenance". 8. Remove poly for poly-V-belt and front vibration damper. 9. Remove starter motor for easy handling. 10. Remove flywheel, refer to 01.03. 61/84 Z001138-1_2014-01 Engine 11. Unscrew frame sealing from engine housing. NOTE: Do not puncture frame seal. 12. First loosen 16 allen head screws SW 5, then 7 hexagon screws SW15 13. Force apart housing half’s and remove. Assembly 1. Check membranes of frame sealing and rubber pads for damage, replace if necessary. 2. Clean and degrease all sealing surfaces. 3. Clean sealing profiles from adhesive residues. 4. Apply front and rear ring carrier with construction adhesive LOCTITE 620, in the area of the parting plane from the engine housing. Wet sealing surfaces of screws with surface sealing agent LOCTITE 5182. Z001138-1_2014-01 62/84 Engine 5. First put suction-sides housing half onto dowel pin, and then check for second housing half whether oil suction pipe and oil suction pipe horn do not collide with the housing. Screw together the housing halves. 6. Tighten 7 hexagon screws SW17 (ill.16/pos.2) with a torque of 50 Nm +/-5 Nm. Fasten 16 Allen head screws SW5 (ill.16/pos.1) with a torque of 10 +/-1 Nm refer to chapter General H Tightening Torques. 7. From engine no: Screw together frame sealing with housing halves. Tighten with a torque of 5,5 Nm +/- 0,5. 8. Assembly engine in reverse order. 63/84 Z001138-1_2014-01 Engine 01.06.02 Replace rear ring carrier Preparation:Dismantle engine housing, 01.06.01 1. Loosen 7 hexagon screws, SW 13. Remove support ring. 2. Clean and degrease all sealing surfaces. 3. Clean surface on mounting bosses of block. 4. Apply LOCTITE to sealing area of block with surface sealing agent LOCTITE 5182. 5. Mount new support ring ATTENTION: Replace radial shaft sealing ring. (recommended tool VR00107/0) NOTE: Secure collar screws of rear ring carrier with thread protection LOCTITE 243. Apply a small amount of LOCTITE onto thread. 6. Tighten M8-collar screws of rear ring carrier with a torque of 28 Nm +/-3. Z001138-1_2014-01 64/84 Engine 01.06.03 Replace rear radial shaft sealing ring Preparation: Remove flywheel, refer 01.03 Remove radial shaft sealing ring 1. Mount special tool No. VR00107/0 to press in the rear radial shaft sealing ring. NOTE: Specified tool enables a replacement of the radial shaft seal with assembled engine housing. 2. Press radial shaft sealing into rear ring carrier by means of special tool No. VR00107/0. NOTE: M8-collar screw must be removed during assembly of the radial shaft seal and collar screw must be tightened and sealed according recommendation in 01.06.02/p. 6. Assembly engine in reverse order. 65/84 Z001138-1_2014-01 Engine 01.06.04 Replace oil pump (front ring carrier) Preparation: dismantle engine housing, 01.06.01. remove timing belt remove vibration damper remove oil pipes 01.06.05 1. Pull of timing belt sprocket by means of special tool No. 2300636/0. 2. Loosen 6 hexagon screws SW13, remove oil pump housing. 3. Clean surface on mounting bosses of block. 4. Apply LOCTITE to sealing area of block and on Gear for Oil pump with surface sealing agent LOCTITE 5182. Z001138-1_2014-01 66/84 Engine ATTENTION: Replace radial shaft sealing ring in oil pump housing. Mount oil pump housing, and insert radial shaft sealing ring with special tool No. VR00118/0. NOTE: Check sealing ring on oil pump housing for damage; exchange oil pump if necessary. Secure the 6 hexagon screws M8x35 with thread protection LOCTITE 243. Apply a small amount of LOCTITE onto thread. Tighten with a torque of 28 Nm +/-2. 5. Clean Surface of Barrel Ring. Use new O-ring 42x2,5. Place Barrel Ring. Use Loctite 5182. 67/84 Z001138-1_2014-01 Engine 01.06.05 Replace oil suction pipe/ oil return pipe Preparation: Exchange engine housing, 01.06.01. 1. Loosen 2 hex screws M6x12 (SW10) on main bearing block For assembly: Tighten screws with 9,5Nm +/-1 Use Loctite 243 on screw threads 2. Remove oil suction pipe For assembly: Use new O-rings and grease with XXX Assembly is done in reverse order of disassembly ATTENTION: Make sure no forces or bracing remain in the assembled pipe system. Z001138-1_2014-01 68/84 Engine 01.08 Intake Manifold 01.08.01 Exchange intake manifold Preparation: Drain raw water circuit Drain closed coolant circuit (refer to 05.00.07) Drain fuel system (refer to XX.XX.XX) Remove oil filter cartridge (refer to 01.13.01) Remove front and rear engine cover (refer to XX.XX.XX) Remove expansion tank (refer to XX.XX.XX) Overview Pfeil 1. Unscrew hexagon screw M6x30 (SW10) of clamp of oil dipstick tube and carefully turn away oil dipstick tube For assembly: Use Loctite 243 on screw thread 69/84 Z001138-1_2014-01 Engine 2. Loosen hose clamps of raw water connection hoses and pull off hoses from heat exchanger For assembly: Tighten hose clamps with 4Nm +/- 0,5 3. Loosen hose clamp and remove air filter from turbo charger intake For assembly: Use new air filter in case of pollution Tighten hose clamp with 4Nm +/- 0,5 4. Remove oil separator from bracket Loosen hose clamp and remove hose from oil separator Dismantle hex head screw M6x16 (SW10) from oil separator bracket For assembly: Tighten screw with 9,5Nm +/-1 5. Loosen hose clamps and remove hose connection from the turbo charger to the pressure pipe For assembly: Tighten hose clamp with 4Nm +/-0,5 Z001138-1_2014-01 70/84 Engine 6. Remove pressure pipe from intake manifold For assembly: Use new gasket Tighten hex sock head cap screws M8x30 (SW6) with 23Nm +/-2 7. Dismantle ground cable from intake manifold For assembly: Tighten hex head screw M8x90 (SW13) with 23Nm +/-2 Ensure electrical connection from intake manifold to engine block 8. Remove fuel supply pipe from engine block inlet For assembly: Use new sealing rings (2) Tighten hollow screw M14x1,5 (SW19) with 37Nm +/-3 9. Remove plug from fuel pump X6 71/84 Z001138-1_2014-01 Engine 10. Remove fuel pump bracket and carefully turn away fuel pump Loosen 2 hex sock head cap screws M8x20 (SW6) and hex head screw M8x20 (SW13) For assembly: Tighten screws with 23Nm +/-2 11. Remove oil supply pipe from intake manifold to Injection Timing Device (ITD) For assembly: Use new sealing rings (4) Tighten hollow screws (2) M12x1,5 (SW17) with 26Nm +/-2 12. Remove Plug from Fuel Supply Pressure Sensor (FSP), B10 Z001138-1_2014-01 72/84 Engine 13. Remove plug from boost pressure sensor (MAP), B4 14. Remove plug from air charge temperature sensor (ACT), B7 15. Remove plug and bracket from potentiometer accelerator, B9 16. Remove plug of Ignition Timing Device Position Sensor (ITP), B2 17. Remove plug of Magnetic Valve (ITV), Y2 73/84 Z001138-1_2014-01 Engine 18. Remove Plug of Lubricant Pressure Sensor (LPS), B5 19. Remove mounts of wiring harness on intake manifold and turn away wiring harness. 20. Loosen hex head screws from intake manifold and remove intake manifold. For assembly: Clean contact surfaces on intake manifold and on engine block. Use new o-rings and grease with XXXX Tighten hex head screws with a torque of 23 Nm +/- 2 6 O-Ring 41x1,78 5 O-Ring 25,12x1,78 1 Moulded Sealing Ring 3 M8x90 hex head screw 4 M8x140 hex head screw 7 M8x220 hex head screw Assembly is done in reverse order of disassembly: Fill cooling system (refer to 05.00.08) Z001138-1_2014-01 Assembly: 74/84 Engine 01.08.02 Mount intake manifold 1. Clean sealing surfaces on motor block (ill.1). 2. Fix 2 seals (ill.1/pos.1) with grease Straburax NB04 on marked surfaces of mono block. 3. Clean sealing surfaces on intake manifold (ill.1/pos.2). 4. Fix intake manifold on engine block by means of 2 Allen head screws (ill.1/pos.3). Screw in remaining 10 Allen head screws SW6, and tighten with a torque of 28 +/-2 Nm. 5. Further assembly is done in reverse order of disassembly. 75/84 Z001138-1_2014-01 Engine 01.08.03 Disassemble exhaust manifold complete with turbo charger Preparation: Drain raw water circuit Drain closed coolant circuit (refer to 05.00.07) Remove front and rear engine cover (refer to XX.XX.XX) Remove exhaust hose from exhaust elbow pipe Overview 1. Remove exhaust hose from exhaust elbow pipe For assembly: Tighten hose clamps with 4Nm +/-0,5 2. Loosen hose clamp of upper raw water connection hose and pull off hose from heat exchanger For assembly: Tighten hose clamp with 4Nm +/-0,5 3. Remove Plug from Speed Sensor (RPM), B3 4. Remove Plug from Exhaust Gas Temperature Sensor (EXT), B8 Z001138-1_2014-01 76/84 Engine If required: 5. Loosen hex head screw M8x120 (SW13) from bracket high riser and remove distance pipe For assembly: Tighten screw with 23Nm +/- 2 6. Remove Plug from Engine Coolant Temperature Sensor (ECT), B6 7. Loosen hose clamp and remove air filter from turbo charger intake For assembly: Use new air filter in case of pollution Tighten hose clamp with 4Nm +/- 0,5 8. Remove oil return pipe Dismantle hex head screws from oil pipe flange. Loosen hose clamp and remove oil return pipe For assembly: Screw size depends on turbo charger model: M8x25 (SW13) 23Nm +/-2 M6x16 (SW10) 9,5Nm +/-1 Use new gasket 77/84 Z001138-1_2014-01 Engine 9. Remove oil supply pipe Refer to chapter: Remove oil supply pipe of turbo charger (01.08.06) If required: 10. Remove Plug from vane actuator on VTG turbo charger, X25 11. Loosen hose clamp and remove hose from heat exchanger For assembly: Tighten hose clamp with XXNm +/-X 12. Remove Coolant Pipe Loosen 3 Hex head screws M8x25 Turn away coolant pipe For assembly: Tighten screws with 23Nm +/-2 Use new O-Rings and grease with XXX Z001138-1_2014-01 78/84 Engine 13. Remove E-box cover Loosen 5 M5x55 hex sock head cap screws and remove E-box cover For assembly: Tighten screws with 4Nm +/-0,5 14. Loosen two hex nut M6 and turn over e-box plate carefully Pfeile auf Schrauben? For assembly: Tighten nuts with 9,5Nm +/-1 15. Loosen 12 hex head screws M8x135 (SW13) and 3 hex flange nuts M6 For assembly: Clean sealing surfaces on motor block. Tighten screws with 23Nm +/-2 and nuts with 9,5Nm +/-1 Use new O-rings and grease with XXX 6 O-Ring 42x2,5 1 O-Ring 5,23x2,62 1 O-Ring 10,77x2,62 2 O-Ring 23,47x2,62 4 O-Ring 29,82x2,62 Assembly is done in reverse order of disassembly Fill cooling system (refer to 05.00.08) 79/84 Z001138-1_2014-01 Engine 01.08.06 Remove oil supply pipe of turbo charger 1. Loosen double length hollow screw on engine block M12x1,5 (SW17) and remove oil pressure sensor (LPS), B5 For assembly: Use new sealing rings Tighten double hollow screw with XXNm +/-X For assembly: 2. Position of lubricant sensor (LPS) as illustrated 3. Loosen oil supply pipe mounting on turbo charger Mounting depends on turbo charger model VTG (Variable Turbine Geometry) Loosen locking nut and remove oil supply pipe assy. Pfeil For assembly: Tighten locking nut with XXNm +/-X WG – turbo charger Loosen throttled hollow screw M12x1,5 (SW17) and remove oil supply pipe For assembly: Tighten throttled hollow screw with XXNm +/X Use new sealing rings Geometrical – turbo charger Loosen hex head screws M8x30 (SW13) For assembly: Tighten screws with 23Nm +/-2 Use new gasket Assembly is done in reverse order Z001138-1_2014-01 80/84 Engine 01.13 Engine Oil Cooler 01.13.01 Replace engine oil cooler Preparation: Drain closed cooling circuit (refer to 05.00.07) Location view 1. Loosen 6 Hex sock. head cap screws M8x20 (SW 6) and remove entire oil cooler. For assembly: Clean sealing surface on oil cooler and on intake manifold Install new O-rings and grease O-rings (SMOP/No. 10107). 4 O-Ring 25,12x1,78 Tighten screws with a torque of 23 Nm +/-2. Use Loctite 243 Assembly is done in reverse order of disassembly: Fill cooling system (refer to 05.00.08) 81/84 Z001138-1_2014-01 Engine 01.13.02 Change motor oil (general) 1. Bring engine to operating temperature and stop engine. 2. Pull oil dipstick off O-Ring seal. 3. Open oil filler cap, but do not remove because of possible contamination. 4. Loosen oil drain plug and drain oil. Dispose sealing rings. 5. Screw in oil drain plug and tighten with a torque of 50 Nm (SW 12). Use new sealing rings. NOTE: Safety advice Pay attention to hot engine oil (Temperature can be well above coolant temperature to max.135°C) Dispose the oil properly according regulation of waste disposal. NOTE: Renew Cu-washer. 6. Remove oil filler cap. Z001138-1_2014-01 82/84 Engine 7. Fill in STEYR turbo diesel engine oil SAE 10W-40 (No. Z010058/0) (ill.3) or equivalent motor oil with characteristic ACEA E4/E5/E7 or B4/02 resp. API code CF or higher. ATTENTION: Oil filling must not exceed the maximum marker. Overfilling results in high operating temperatures, foaming (air in oil), loss in efficiency and a reduced engine life. As to capacity for an oil change, refer to Technical Data and engine overview (chapter General). max. min. As to capacity for first filling (e.g. after engine repair), refer to engine specifications Oil 02.02. 8. Put on oil filler cap and lock. ATTENTION: Check oil level before starting engine. ATTENTION: Remove possible oil contaminations from oil filler cap and environment. Check other fluid level before operating vehicle. ATTENTION: ATTENTION: 83/84 Check oil level after running engine Z001138-1_2014-01 Engine 01.13.03 Change oil filter 1. Loosen the oil filter with oil filter wrench 2300713-1 and. Dispose the oil filter acc. automotive waste disposal regulation. 2. Clean sealing surface of oil filter head. 3. Oil the seal of new oil filter and screw it onto oil filter head until the seal easily rests against. Tighten the oil filter by hand app. with a 3/4 turn. ATTENTION: Z001138-1_2014-01 Remove possible oil contaminations from filter head and environment. Do not forget to check engine oil level! 84/84 Fuel System 03 Fuel System Table of Contents 03.00 Fuel System............................................................................................ 3 03.00.01 General Schematic ........................................................................... 5 03.00.02 Functional description ...................................................................... 5 03.00.03 Unit injector ...................................................................................... 7 03.00.04 Air system M16 VTI .......................................................................... 8 03.00.05 Exhaust pipe and muffler SE-ENGINES .......................................... 9 03.00.06 Schema – Variable Geometry Turbochargers................................ 10 03.02 03.02.01 03.02.02 03.02.03 03.02.04 03.02.05 03.02.06 03.02.07 Fuel Pump, Unit Injector, Lines .................................................. 12 Replace fuel pump (Example) ........................................................ 12 Disassembly and assembly of unit injector .................................... 14 Fix control rack ............................................................................... 23 Adjust control link (injection quantity) ............................................. 24 Release fixing of control rod........................................................... 25 Adjustment of unit injector – start of fuel delivery .......................... 26 Exchange pressure check valve at fuel outlet on block ................. 29 03.05 Turbo charger .............................. Fehler! Textmarke nicht definiert. 03.05.01 Replace Variable Geometry Turbochargers (VGT) ................ Fehler! Textmarke nicht definiert. 03.05.02 Check bearing clearance (Example) .............................................. 31 03.08 03.08.01 03.08.02 03.08.03 03.08.04 03.08.05 Control Solenoid, Injection Timing Device (ITD) ....................... 32 Remove control solenoid................................................................ 32 Install rack control solenoid ............................................................ 33 Replace potentiometer, indication of control rack position............. 34 Remove injection timing device (ITD) ............................................ 36 Install injection timing device (ITD) ................................................ 37 03.09 Change fuel “pre-filter” and “fine-filter” (general description) 38 03.11 Replace Glow Plug ....................................................................... 40 03.12 Measurement of Compression Pressure ................................... 41 03.14 03.14.01 03.14.02 03.14.03 Fuel System Check ...................................................................... 42 Manual injection test method ......................................................... 42 Manual check of unit injector without tool No. VR 00148/0............ 44 Disengagement methode of injection ............................................. 45 1/47 Z001138-1_2014-01 Fuel System 03.14.04 Air bubble formation in fuel system (Example) .............................. 46 Z001138-1_2014-01 2/47 Fuel System 3/47 Z001138-1_2014-01 Fuel System Others Base Engine System Settings Z001138-1_2014-01 • • • • • • • • • • • • • • • • • • • • • • • • • • • • • • • • • • • • • • • • • • • engine remains at idle speed Poor Idle running control Defective RPM Sensor possible • • • Damage to Valve Follower • • • Damage to Piston or Liner • air leaks into fuel supply system (aeration of supply fuel) • • • needle seizure (nozzle) • • Potential for Cavitation Damages to Injector • • Low compression pressure • • Large fuel consumption Low (drop in) engine output • • Black exhaust smoke • • Poor engine starting performance • • Abnormal idling revolutions Exceeds or falls below the regulatory max. engine speed Hunting Frequent engine stoppage Injection System [Factors/Cause of Trouble] Fuel leakage from nozzle body Air trapped in the fuel system at ignition ON Malfunctioning of the rack linkage or control rod Faulty fuel spray from the nozzle Uneven injection pressure from nozzle Malfunctioning of check valve / fuel outlet block Uneven injection quantity Malfunctioning of governor solenoid Faulty valve clearance Uneven compression Faulty valve seat contact Faulty Engine timing Faulty valve timing Defective tachometer of the engine Faulty idling adjustment Overcooling of the engine Faulty speed sensor Faulty accelerator potentiometer White exhaust smoke Fuel system Items to Check / Troubled Systems • • • • • • • • • • • • • • • • • • • • • 4/47 Fuel System Base Engine System Settings Intake & Exhaust system Fuel Injection System 5/47 • • • • • • • • • • • High intake air temperature Faulty valve seat contact Wear or stiffening of valve guide • Wear of piston rings, cylinder liner • • • • • • • • • • • • • • • • • • • • • Z001138-1_2014-01 • • • • • • • • • • • • • • • aerated fuel appearing to return line Incorrect setting of rack linkeages or reference point Potential of corrosion damages to Injector System Potential for Cavitation Damages to Injector Position of excentric shaft incorrect Low compression pressure large blow-by gas emission Engine overheating • • • • • • • • • • • • • • • • • • • • • Low (drop in) engine output Engine stops running Poor engine starting performance Large lube oil consumption Large fuel consumption • • • • • • • • • • Abnormal idling revolutions • • • • • • • White exhaust smoke Black exhaust smoke No / Relatively little exhaust gas Air Intake, Fuel Supply & Injection System [Factors/Cause of Trouble] Running out of Fuel Fuel Supply Line Valve closed Clogging of fuel filter or water separator Breakdown of fuel feed pump Air drawn inside the fuel supply line Clogging of the fuel piping before fuel pump Water or air mixed in fuel Clogging of fuel filter,fuel supply line or water separator Inferior performance of feed pump Faulty spray condition of nozzle Faulty injection timing Inferior performance of delivery valve Clogging of air filter Clogging or collapse of exhaust pipe or muffler Knocking noise Fuel Supply System Items to Check / Troubled Systems • • Fuel System 03.00 Fuel System 03.00.01 General Schematic 03.00.02 Functional description When the ignition switch is turned, an electric fuel pump 3 is put into operation and the fuel flows from the fuel tank through the pre-filter 2. From the fuel pump, fuel is pumped to the engine fuel gallery at the rear inlet 5 and the unit injectors 6. Excess fuel, not used in the engine for combustion, leaves the fuel gallery by pressure check valve at the block outlet 7. The fuel flows from this point into the fuel cooler 8 and from there back to the fuel tank 1. The fuel gets pressurized by the fuel pump 3.The feed pressure to the unit injector is controlled via the pressure check valve 9 at the block outlet. The operating pre pressure in the supply gallery may be in a range of app. 3,5 – 5,5 bar. Refer to engine table for specific value for your engine model. For fuel requirements, refer to chapter GENERAL Z001138-1_2014-01 6/47 Fuel System Specification for fuel pipes Minimum inside diameter: 16 mm Recommended material: stainless steel NOTE: Min. inside diameter for hosepipes or PA-pipes is 16 mm. Rate of flow: 350 l/h (measurement on continuously operated fuel pump) If additional filters getting installed, the requirements of higher flow in the fuel gallery circuit must to be considered. NOTE: pipe connections, pay special attention to the tightness of the suction pipe(s), all fittings and line located before the electric fuel pump! Types of recommended pipe connections Back flow: min. 280 l/h 7/47 Z001138-1_2014-01 Fuel System 03.00.03 Unit injector Z001138-1_2014-01 8/47 Fuel System 03.00.04 Air system M16 VTI Permissible low pressure for air filter and in air intake pipe before of turbo charger: Permissible low pressure before TC - intake = 30 mbar Max. low pressure with loaded air filter element – 50 mbar Change/Replace filter element if low pressure exceeds -50 mbar Air filter: 9/47 cleaning Exchange see Service and Maintenance Chart see Service and Maintenance Chart Z001138-1_2014-01 Fuel System 03.00.05 Exhaust pipe and muffler SE-ENGINES ID Exhaust pipe Engine type Back pressure Permissible tolerance Exhaust mass flow must be properly dimensioned to meet requirements at rated speed gas flow SE-ENGINES 200 mbar +/- 50 mbar 840kg/h @ 3550rpm full load. NOTE: Inside diameter of exhaust pipe and dimension of muffler system must be properly sized to meet requirements of above mentioned specification. Z001138-1_2014-01 10/47 Fuel System 03.00.06 Schema – Variable Geometry Turbochargers Function turbo charging system Turbocharger consists of two fundamental components, a turbine and a compressor. The function of the turbine is to scavenge waste exhaust heat and translate it into rotational motion. This rotational motion is then used to drive the compressor, which compresses air for the consumption of the engine. The purpose behind the turbocharger is to overcome the fundamental drawback of the internal combustion engine, its volumetric efficiency limit. An engine drawing air in from the atmosphere can only achieve a volumetric efficiency of up to 100%, meaning that the pressure inside an individual cylinder is equal to atmospheric pressure while the intake cycle is occurring. Since the amount of power that can be extracted from an engine is proportional to the fuel it burns, and the fuel consumption is limited by the amount of air present in a cylinder, times the number of cylinders (the so-called "displacement"), the volumetric efficiency limit effectively constrains the power of the engine. The turbocharger provides an alternative means of extracting more power from a given displacement by increasing the volumetric efficiency to points significantly above its volumetric design. The pressure in the cylinders is greater than atmospheric, thanks to the compressor on the turbocharger. 11/47 Z001138-1_2014-01 Fuel System Variable Geometry Turbocharger (VGT) Variable Geometry Turbochargers are turbochargers whose geometry and thus effective aspect ratio (A/R) can be altered as needed while in use. The most common design includes several adjustable vanes around a central turbine. As the angle of the vanes change, the angle of air flow onto the turbine blades changes, which changes the effective area of the turbine, and thus the aspect ratio (A/R) changes. The benefit of Variable Geometry Turbochargers lies in reducing lag time The area between the adjustable vanes works as nozzles. These nozzles are thus varied in size as a function of engine operating conditions. By opening the nozzles at high engine speed or closing them at low speed, effectively changing the A/R with engine speed or demands, the turbo can produce boost from a low speed without restricting flow at higher speed. Since a VGT can produce boost at lower engine speed lag time is decreased. Coming out of a transient driving situation with a higher exhaust manifold pressure allows this stored energy, to form in a pressure, to be used to drive the compressor into a higher boost level faster. VGT’s have the advantage that many different pressure ratios can be produced at a single engine speed due to the variable vanes changing the effective area and A/R. The vanes can be manipulated to create an optimal boost pressure at any speed. By producing an optimal boost through a larger engine speed range the overall efficiency is increased. Z001138-1_2014-01 12/47 Fuel System 03.02 Fuel Pump, Unit Injector, Lines 03.02.01 Replace fuel pump (Example) NOTE: Fuel pump operation is controlled by EMS. NOTE: The fuel pump in a vehicle installation may vary in location. Please refer to vehicle manufacturer information to locate this device in a car. Preparation for disassembly RECOMMENDET TYPE OF FUELPUMP 2173396-6 ATTENTION: Close fuel supply valve if existing in this installation ATTENTION: Prior to disassembly, disconnect battery cables from battery, to avoid damages to the electronic system. 1. Disconnect positive cable and negative cable by unscrewing hexagon nuts SW7/8 with washer from terminals of fuel pump. … 2. Loosen clamps and pull off fuel hoses on both sides of fuel pump. 3. Open retainer bracket and remove fuel pump. 13/47 Z001138-1_2014-01 Fuel System Assembly (Example) 1. Mount pump into bracket at correct position of rubber sleeve. Tighten screws of bracket. 2. Attach fuel hoses to pump and tighten hose clamps. 3. Connect cables to negative terminal (-) and to positive terminal (+). Cover the two terminals with neoprene lacquer sealing No. P/N Z909570/0. 4. Connect battery cables. 5. Open fuel supply valves. 6. Operate electric fuel pump by turning on ignition key 3x for 10 sec. to bleed system. 7. Check fuel system for leakage. Z001138-1_2014-01 14/47 Fuel System 03.02.02 Disassembly and assembly of unit injector Preparation: Remove camshaft housing cover. Clean sealing surface of rubber seal and check for hardening and damage. Replace seal, if required. Example: (P/No. Unit injector 2176560-B) NOTE: When replacing or adjusting injectors make sure to identify the type of injector marked on the injector housing as shown. The marking is part of the production number, only the last 4 digits are printed. (560 B) 555-5 557-0 552-1 Preparation for disassembly: - fix control rack (refer 03.02.03) - loosen control link (refer to item 4) - loosen fixing of control rack (refer 03.02.05) - extract retainer c-clip (ill.02/pos.1) and pin (ill.02/pos.2) 15/47 Z001138-1_2014-01 Fuel System - First turn eccentric shaft towards intake manifold until lever of eccentric shaft is free. Lift lever above injection-timing-device. Then turn shaft towards exhaust-system. NOTE: Make sure camshaft lobe is clear of shaft-linkage arrangement. 1. Turn crankshaft until injector cam is at base circle as well intake and exhaust valve are open, in order to permit a lateral shifting of rocker arm for the following disassembly procedure. 2. Before loosening flange nuts of unit injectors, drain the fuel from the supply gallery by opening the fuel feed connector. NOTE: Close fuel supply line well from tank if existing. Z001138-1_2014-01 16/47 Fuel System 3. Remove nuts on unit injector flange (2 nuts SW 13). 4. Loosen left-handed hexagon socket securing the control link on the control rack by using 4 mm hexagon socket wrench (P/N 2300908/0). Turn control link against bulk head. (1 hexagon socket SW 4 ”LEFTHAND THREAD” each unit injector). 5. Insert screwdriver with small blade into recess of retainer ring (half-moon ring) for rocker arm lock, push retainer ring upwards and remove. For disassembly of unit injector, always remove rocker arm retaining ring at timing belt side. 6. Loosen adjusting nut with 17 mm socket wrench (hexagon nut SW 17 and screwdriver). Turn adjusting screw to such an extent that the slide cup is loosely attached to the spring plate. Do not remove. 17/47 Z001138-1_2014-01 Fuel System 7. Move the rocker arm towards timing belt side of engine and remove the slide cup. NOTE: Adjusting screw and slide cup match exactly and thus have to be kept matched. 8. Check position of control link(s) against bulkhead as illustrated. 9. Insert the unit injector lever SMO No. VR 00126/0 below the camshaft and push upwards against the body of unit injector. The unit injector is thus lifted out from the engine block and may be removed manually. NOTE: For disassembly of the unit injector from cylinder No. 1, the control rack is to be moved forward. 10. Remove unit injector with mounting flange. Z001138-1_2014-01 18/47 Fuel System 11. Remove copper seal washer from bottom side of copper insert by means of hook- and lifting tool (No. VR 00116/0). NOTE: Avoid scratches on the sealing surface of the copper insert. Assembly 1. In order to secure an appropriate tight fit, recheck tighten stud bolt with a torque of 20 Nm +/- 1 2. Drain possible fuel residues by means of suction device No. VR 00121/0 from the combustion chamber. Suction device must be equipped with a suction hose of at least 250 mm of length in order that possible fuel residues can be sucked from piston recess. NOTE: Fuel residues in the combustion chamber may cause severe damage to the engine. 3. Check copper insert for possibly remaining seal washers; remove and dispose, if necessary. NOTE: Always use new copper seal washers! (ill.19/pos.1 ) 19/47 Z001138-1_2014-01 Fuel System 4. Clean conical part of copper insert with cleaning mandrel No. 2300565/0. For this purpose, turn cleaning mandrel several times in both directions and then clean copper insert with cleaning tissue. 5. ATTENTION: Insert new special copper seal washer (ill.22/pos.2), from seal kit Z002031/0, with a screwdriver into copper insert. Make sure the copper seal washer is level with the plane. 6. Install new O-rings (ill. 22/pos.1), from seal kit Z002031/0, and cover O-rings with a thin film of clean motor oil. 7. Insert unit injector into bore and align unit injector recess to dowel pin (ill. 23/pos.1) for positioning. Avoid any contact with control link. ATTENTION: Z001138-1_2014-01 Risk of damage to control rack. 20/47 Fuel System 8. Push unit injector firmly downwards in order to position it correctly with the O-rings. 9. Lubricate slide cup with motor oil, put it onto adjustment screw, as shown, and shift it together with rocker arm onto unit injector. 10. Install retainer ring to secure the rocker arm 11. Screw on flange nuts (hexagon nuts SW 13) and tighten evenly. Absolutely tighten nuts with a torque of 18 /-2 Nm. ATTENTION: Pay attention to horizontal installation of mounting flange. 21/47 Z001138-1_2014-01 Fuel System 12. Fix control rack, refer 03.02.03 13. Attach control link to control rack and adjust. Refer to 03.02.04, Adjusting Control Link. 14. Connect eccentric-shaft linkage with injection-timing device (parallel pin, retainer c-clip). 15. Adjust unit injection start of delivery. Refer to 03.02.06, 16. Connect fuel hose fitting and operate electric fuel pump 3 times for 10 seconds via ignition switch to vent/bleed fuel system. Procedure for replacing the Mono Block Copper Inserts TOOLS REQUIRED PART NUMBERS: V000280/0, V000311/0 The above part numbers include the following tools: 1. 1 x Sliding Hammer with M22 thread 2. 1 x Copper insert flanging tool 3. 1 x Tapping guide Additional tools required 4. Unit Injector fixing bracket 5. M22 Tap Procedure: 1. Turn the Crank shaft so that the piston of the cylinder to be worked on is at bottom dead centre (lowest point) 2. Remove the cam housing cover 3. Remove the unit injector from the cylinder to be worked on and slide the rocker arm over to one side. 4. Grease the M22 Tap wrench 5. Insert the tapping guide onto the copper sleeve and screw down using a unit injector fixing bracket and 18Nm. See Pictures below. 6. Using the tap cut a thread into the copper insert, taking care that the tap is straight. Cut 6 full turns of the tap to ensure that enough threads are present to pull the insert out. 7. Remove the tap, the injector bracket and the tapping guide. Z001138-1_2014-01 22/47 Fuel System 8. Screw the sliding hammer into the insert and, using force, hammer the insert 9. 10. 11. 12. 13. 14. 15. 16. 17. 18. 19. 23/47 out. It will be necessary to clean the seating surface extremely well, removing all traces of the old loctite with a strong degreasing agent on a cloth, as below. Clean the new insert also with a degreasing agent and fit a new o-ring. It is necessary to grease the o-ring to allow for a smooth fit, and apply loctite 620 to the contact surface as shown below. Sit the new insert into the block by hand. Press the insert down using the pressing tool and tighten to 18Nm. Grease the flanging tool and insert it into the pressing tool. Screw the flanger all the way down through the insert. This forms a flange on the end of the insert and ensures a sealed fit. Screw the flanger back out of the insert and remove the pressing tool. Suck out any fuel that may have entered into the cylnder with a suction bulb. Refit the unit injector (use new copper washer), slide the rocker arm back into place and refit the half moon ring. Do not forget to set the unit injector travel! When all sleeves have been changed reset the rack calibration. Z001138-1_2014-01 Fuel System 03.02.03 Fix control rack Preparation: Remove camshaft housing cover, refer to 01.00.02 1. Unscrew setpin of control rack (ill.1/pos.1) at the rear bulkhead of camshaft housing, as shown. 2. Position bore (diameter 4 mm) in control rack(ill.2/pos.2) over reference bore (ill.2/pos.3) in the bulkhead wall. 3. Pull control rack manually to the front, against spring resistance, and hold. Insert setpin, as shown, and fasten sturdily. NOTE: Check fixation of common rack after locking by assuring that rack does not move forward or back when trying to move manual. Z001138-1_2014-01 24/47 Fuel System 03.02.04 Adjust control link (injection quantity) Prior to adjustment, unit injector must be tightened properly, and control rack must be fixed in position with set pin. (refer 03.02.03) NOTE: Readjust all control links even if only one link has been opened. STARTING POSITION: Slacken left-handed setscrew of control link (use special tool P/N 2300908/0). Turn control link against bulkhead on camshaft housing. 1. Carefully position end of control link on front side of unit injector quantity control gear (preferably use small screwdriver). 2. Turn control link against unit injector quantity control gear until control gear completely pushes against upper calibrated stop and hold position with screwdriver. Remain in this position and tighten left-hand-thread screw of control link as specified with a torque of 7 Nm +/-1. Repeat steps 1 and 2 for the rest of unit injectors to obtain proper setting of the control rack. 3. Calibrate rack position, refer to 06.10.02 4. Release fixing of control rack, refer to 03.02.05 25/47 Z001138-1_2014-01 Fuel System 03.02.05 Release fixing of control rod 1. Unscrew setpin (ill.3/pos.2) from bulkhead wall. Hold control rack while removing setpin. Slowly release common rack towards the rear to take off applied spring load from the unit injector. (ill.3/pos.1). 2. Reinstall setpin in rear bulkhead bore of camshaft housing (ill.3/pos.1) 3. Tighten setpin snug with a torque of max. 3 Nm. 4. Check common rack for free travel. Common rack must be able to move over its full extend of travel (approx. 18 mm) without constraint. NOTE: The only restriction to feel will be the forces of the springs from the control gear mechanism in the unit injector. The common rack should automatically return to reverse position due to spring load. Z001138-1_2014-01 26/47 Fuel System 03.02.06 Adjustment of unit injector – start of fuel delivery Preparation: Remove camshaft housing cover; refer to 01.00.02. Adjustment of unit injector – start of fuel delivery is recommended to perform prior to engine timing adjustments. NOTE: This adjustment is necessary: - if unit injector was removed - periodically according to maintenance (chart) - if set value has changed (see chart Set Values Unit Injector adjustment). To obtain the proper adjustment value refer to table below and cross reference with 4-digit code on unit injector. Area indicated in illustration. 1. Unit injector must be installed properly and fastened. Control rack and unit injector control gear must be free to move. 2. Put dial gauge rail with bracket, 2306031/6, onto camshaft housing and fasten with M6 screws. 3. Fix eccentric shaft with special tool No. 2300736/1 as shown. 27/47 Z001138-1_2014-01 Fuel System Connect tool VR00236-0 to valve solenoid and connect power on + and – to cable to release hydraulic pressure from device. NOTE: With the tool connected the injection timing device and eccentric shaft can be moved easily. 4. Turn camshaft until bearing roller of rocker arm, for unit injector being adjusted, is situated on the base circle of the injector cam. NOTE: Unit injector spring moves to most upward position. 5. Mount dial gauge No. P/N 2300899/0 with pointer No. P/N 2300641/1 into dial gauge rail. 6. Put pointer onto unit injector plunger guide. 7. Align dial gauge and fix gauge to approx. ¾ of its possible travel (~25 mm). 8. Insert unit injector extracting lever No. VR 00126/0 (ill.6/pos.1) in recess of rocker arm between rocker arm body and roller, as shown, and fully press down spring of unit injector. Press button on dial indicator to obtain zero indication on display “00.0”. Z001138-1_2014-01 28/47 Fuel System 9. Turn adjusting screw (ill.7/pos.1) with torx screwdriver (2300873/0) and set the adjustment value as listed in table below. Hold adjusting screw in this position and tighten hexagon nut (ill.7/pos.2) by means of torque wrench No. 2300743/0 and teehandled socket wrench SW17 (2300773/0) with a torque of 30 Nm +/-3. Set values for unit injector adjustment refer to chapter general MODEL TYPE M16WG M16WG M16WG M16TCA M16VTG M16WG M16VTG M16WG M16WG SE126E25 SE156E26 SE196E35 SE236E40 SE236S36 SE266E40 SE266S36 SE286E40 SE306J38 UNIT INJECTOR 2176554-0 2176554-0 2176554-0 2176554-0 2176554-0 2176554-0 2176554-0 2176554-0 2176554-0 STROKE ADJUSTMENT 9,30 9,20 8,95 8,95 8,84 8,75 8,84 8,80 8,75 TOLERANCE +/- 0,02 +/- 0,02 +/- 0,02 +/- 0,02 +/- 0,02 +/- 0,02 +/- 0,02 +/- 0,02 +/- 0,02 Note: make sure to secure eccentric shaft in reference position with special tool No. 2300736/1 NOTE: To preclude setting properties for new assembly of unit injector (copper ring), we recommend a standard of pre-stroke: value of stroke adjustment acc. to chart minus 0,05 mm. 10. Recheck unit injector stroke adjustment, compress unit injector spring and recheck zero on dial gauge. Release spring load and reject total stroke adjustment as described in steps 8 and 9. ATTENTION: 29/47 In case of deviation, repeat setting procedure. Z001138-1_2014-01 Fuel System 03.02.07 Exchange pressure check valve at fuel outlet on block Pressure check valve is mounted at the block fuel outlet and controls fuel pre-pressure in fuel gallery resp. fuel supply to the individual unit injectors. 1. Unscrew valve SW 19 mm (ill.1), remove 2 Cu-sealing rings. NOTE: Use new Cu-sealing rings for assembly. Tighten with a torque of 40 Nm +/-4. ATTENTION: Z001138-1_2014-01 This part is of importance for the proper function of fuel system. Use only genuine STEYR MOTORS spare part in case of replacement. 30/47 Fuel System Assembly in reverse order: Note: 1. Tighten clamp with a torque of 25 Nm +/-2. 2. Tighten 2 hex head screws and hexagon nut (M8) with a torque of 23 +/-2 Nm. 3. Tighten hollow screw (restricted bore) of oil feed line with a torque of 25 Nm +/-2 Use new sealing rings. 4. Use new flange gasket and tighten 2 hex head screws to a torque of 23 Nm +/-2 5. Tighten hose clamps on drain plug with a torque of 4 Nm +/-0,5 31/47 Z001138-1_2014-01 Fuel System 03.02.08 Check bearing clearance (Example) Measure end clearance: 1. Put test prod of dial gauge onto face of turbine wheel hub. 2. Push cursor downwards and set dial gauge to "0". 3. Push cursor against dial gauge and note deflection of pointer. Permissible end clearance: max. 0.16 mm +/-0,01 Measure radial clearance: NOTE: Determination of radial clearance is only required turbine-sided. 1. Put test prod of dial gauge onto centre of retainer cone of turbine wheel. 2. Pull turbine wheel hub upwards by means of spring balance. Measuring strength 50 N. 3. Note deflection of pointer. 4. Repeat measurement, by turning cursor by 90°. Permissible radial clearance: max. 0.42 mm +/-0,04 Z001138-1_2014-01 32/47 Fuel System 03.08 Control Solenoid, Injection Timing Device (ITD) 03.08.01 Remove control solenoid Preparation: 1. Disconnect battery. Remove intake manifold, refer to 01.08.01. 2. Loosen plug connection (ill.2/pos.1) for control rack potentiometer. 3. Remove plug from control solenoid (ill.2/pos.2). 4. Loosen 4 hexagon screws SST (SW13) on control solenoid housing, remove control solenoid assembly. 33/47 Z001138-1_2014-01 Fuel System 03.08.02 Install rack control solenoid Assembly onto camshaft housing, proceed as follows: NOTE: Use new O-ring to seal control solenoid. 1. Remove camshaft housing cover. 2. Put O-ring into groove of control solenoid 3. Shift control rack by hand (ill.1) to front position and hold. 4. Insert control rack lever so that lever (ill.2/pos.1) is positioned behind disc of solenoid rod (ill.2/2). 5. Bring up control solenoid assembly parallel to sealing surface of camshaft housing, put it onto the dowel pin (ill.3/pos.1) and hold it in place. 6. Slowly release control rack and fasten control solenoid housing by means of 4 hexagon screws. 7. Install 4 hexagon screws M8 and secure with LOCTITE 243. Tighten with a torque 8. Check whether control rack can be moved up to approx. 18 mm against the spring load and returns under the spring load to zero position. ATTENTION: Pin of control rack potentiometer is spring-loaded and might easily slip off from the contact surface of control rack lever, during assembly. In such a case, the control rack is blocked and thus preventing the rack to return to zero delivery ® ENGINE FAILURE. 9. Further assembly is done in reverse order. Z001138-1_2014-01 34/47 Fuel System 03.08.03 Replace potentiometer, indication of control rack position Preparation: remove intake manifold, refer 01.08.01 1. Loosen 2 Allen head screws SW 3 (ill.1/pos.1). Remove potentiometer. Assembly 2. Insert potentiometer in such a way that rod of potentiometer (ill.2/pos.1) is positioned in front of solenoid rod (ill.2/pos.2). 3. Secure 2 Allen head screws Allen socket (3 mm) with LOCTITE 243 and tighten with a torque of 5 Nm +/-0,5. 4. Check whether control rack can be moved up to approx. 18 mm against the spring load and returns under the spring load to zero position. ATTENTION: Pin of control rack potentiometer is springloaded and might easily slip off from the contact surface of control rack lever, during assembly. In such a case, the control rack is blocked and thus preventing the rack to return to zero delivery ® ENGINE FAILURE. 5. Further re-assembly is done in reverse order. 35/47 Z001138-1_2014-01 Fuel System Schema - Injection Timing Device (ITD) Z001138-1_2014-01 36/47 Fuel System 03.08.04 Remove injection timing device (ITD) Preparation: remove intake manifold, refer 01.08.01 remove camshaft housing cover, refer 01.00.02 1. Disconnect battery. 2. Remove c-clip and pull pin out. 3. Remove plug from magnetic-valve. Remove connector from linear position sensor. Remove oil supply line as illustrated. Hollow screw M12x1,5 (SW 17) 4. Loosen 4 hexagon socket head cap screws on ITD housing and remove ITD-assy. Remove O-rings. 37/47 Z001138-1_2014-01 Fuel System 03.08.05 Install injection timing device (ITD) NOTE: Use new O-rings. 1. Put new O-rings onto ITD-housing and lubricate rings with motor oil. 2. Mount ITD on camshaft housing. Re-install lever of eccentric-shaft (ill.1) 3. Mount 4 screws and tighten with a torque of 23 +/-2 Nm. 4. Connect lever with ITD, install pin (ill.2/pos.1) and secure with c-clip (ill.2/pos.2) 5. Connect plug to magnetic-valve and linear-position-sensor. 6. Further re-assembly is done in reverse order. Z001138-1_2014-01 38/47 Fuel System 03.09 Change fuel “pre-filter” and “fine-filter” (general description) Water or other fuel contaminations may form deposits which clog the fuel filter and may lead to consequently damage in the injection system. Change fuel filter on a regular schedule is highly recommended every 300 hours of operation and/or every 2 years at least. ATTENTION: Close supply valve from tank, if existing and tank is higher than fuel filter. 1. Unscrew filter by means of filter wrench No. 2300713/0. Remove filter and dispose. Take care that original seal does not adhere to filter housing. If so, remove seal and dispose. 2. Clean sealing surface on filter head. 3. Slightly oil seal of new fuel filter with clean motor oil 4. Screw on new fuel filter until seal slightly rests on sealing surface of filter head. Then tighten filter by hand, approx. 3/4 turn –hand-tight. 5. Open fuel supply valve if this had been closed. 6. Ventilate fuel system. NOTE: Fuel system can be ventilated via 39/47 Z001138-1_2014-01 Fuel System electric fuel pump. Turn ignition ON a few times for max. 10 sec. ATTENTION: Do not dry run fuel pump. 7. Start engine and check fuel system for leakage. 8. Remove possibly spilled fuel residues. Dispose fuel filter according EPA regulation. Z001138-1_2014-01 40/47 Fuel System 03.11 Replace Glow Plug Preparation: for glow plug of first cylinder, remove control solenoid - refer to 03.08.01 for glow plug of second to sixth cylinder, remove intake manifold refer to 01.08.01 Disconnect battery. 1. Remove connector from glow plug. 2. Unscrew glow plug(s) with special tool No. VR00146/0. 3. Screw in new glow plug(s) by means of special tool No. VR00146/0 and tighten by means of special tool No. 2300703/0 with a torque of 15 +/-1 Nm. NOTE: Grease thread of glow plug with high temperature grease (PN Z012222-0). NOTE: Exactly keep torque of 15 +/1Nm when fixing glow plugs! Further assembly is done in reverse order of disassembly. 41/47 Z001138-1_2014-01 Fuel System 03.12 Measurement of Compression Pressure Preparation: remove glow plug, refer to 03.11 1. Install special tool glow plug adaptor 2300638/2 (ill.1) into cylinder to be checked (ill.2). NOTE: During this compression pressure test the control rack “device-Y20” connector must be unplugged. 2. Connect pressure hose of compression pressure meter No. 2300750/0 to glow plug adaptor (ill.2). 3. Connect pressure hose to compression pressure meter No. 2300750/0 (ill.3). 4. Prepare compression pressure meter, refer to operation instructions of device. 5. Crank engine by operating starter motor for 5 to 10 sec. until indicator needle of compression pressure device does not rise any further. Z001138-1_2014-01 42/47 Fuel System Compression pressure chart nominal value/lower boundary value Refer to engine table MODEL TYPE NOM. VALUE LOWER BOUNDARY VALUE M16TCA M160029/9 21,0 +/- 1,0 bar 18,0 +/- 1,0 bar M16VTI SE-ENGINES 21,0 +/- 1,0 bar 18,0 +/- 1,0 bar 6. Assembly is done in reverse order. Leakage rate: tools, für jedes modell 03.14 Fuel System Check 03.14.01 Manual injection test method Preparation: Remove camshaft housing cover, refer to 01.00.02 1. Remove plug screw SW 24 (ill.1/pos.1) with sealing ring. 2. Mount special tool No. VR00148/0 (ill.2/pos.1) together with sealing ring (ill.2/pos.2). 3. Move control rack by means of special tool No.VR00148/0 into idle injection position (approx.5-6 mm) (ill.3) and remain in this position. 43/47 Z001138-1_2014-01 Fuel System 4. Put tool (unit injector withdrawing lever No. VR00126/0) onto rocker arm of individual unit injectors (ill. 4) and move upper end of lever in direction of air intake manifold. As a result, unit injector is pressed down and injection process is simulated. 5. Adjust control rack by means of special tool No.VR00148/0 to partial load (approx. 10-12 mm in direction full delivery) (ill.3) and remain in this position. Failure diagnostic via manual cracking point at low quantity setting: Proceedings: Rack had been lock and linking lever were readjusted to ensure proper quantity setting as specified. NOTE: When moving the unit injectors, forces from the injector spring can be felt. As soon as fuel delivery starts a slight extra force can be noticed on the lever for very short moment until the needle in the injector cracks open and this slight pressure increase disperses again. This creaking point can be used as reference when remaining the common rack at the same position this forces must be felt on each of the installed injectors. That way injectors who do not show a creaking point have a failure. Further investigations, for example air in the fuel system or mechanical defects on an injector must be undertaken this injectors with such symptoms needs to be exchanged. 6. Repeat test on each unit injector 7. Assembly is done in reverse order. ATTENTION: Z001138-1_2014-01 Absolutely make sure to remove special tool No. VR 00148/0 from camshaft housing. Use new sealing ring on plug screw. 44/47 Fuel System 03.14.02 Manual check of unit injector without tool No. VR 00148/0 Fuel System Check: 1. Investigate condition of return fuel. There should be neither air bubbles nor discoloration (gray/white) in the fuel. 2. Check proper flow quantity (i.e. engine at idle - flow rate after engine block 200 to 240 l/h or approx. 50 to 62 gal./h) Injector Check: To feel the injection activities, move the control rack (quantity delivery) in between its acceptable travel (5 to 14mm) while depressing the „plunger“ with the rocker arm. For safe and easier handling, use our special tool lever (refer to picture in 03.14.01) While moving the rocker arm (and/or the plunger up and down), try to get the control rack into idle delivery position (approx. 4-5 mm). In this spot you will feel only a very slight/short pressure build up as the duration of injection is very short (~5mm³/stroke). Keep this position on the control rack (freeze there) and then move over with tool VR 00126/0 to the next unit injector/rocker arm to repeat the plunge movement and feel the resistance during injection. The test should give an equal pressure load/peak on each injector, while maintaining the same position on the control rack. If one injector fails to show any pressure or this pressure peak is found in a much higher position of the control rack, this is an indication for a possible deficiency on this injector. ATTENTION: 45/47 Before removing this unit injector from the engine, check for proper adjustment of the linking lever and for correct fit/tightness and/or torque of the unit injector mounting nuts. Z001138-1_2014-01 Fuel System 03.14.03 Disengagement methode of injection NOTE: Disengagement method of injection is a simple and effective method to detect defective unit injectors with regard to formation of air bubbles in both the fuel system and the engine cooling system or lack of power if related to deficiencies in injection equipment. NOTE: In case of air in the cooling circuit/system use tool VR00147/0 to detect CO2 concentration in coolant. Preparation: Disconnect crankshaft, refer to 01.00.01 (item 2 - 3 remove valve cover). 1. Mount special tool No. VR00133/3 to disconnect injection. 2. Start the engine, let it run in idle and check if air bubbles form at the fuel return line. NOTE: If there are no bubbles at idle speed of engine, continue with item 3. Otherwise investigate fuel suction line and fittings and correct failure. 3. Bring engine to operating temperature and then test the vehicle under operating conditions and watch for bubbles to form. Keeping this operating condition, continue with item 4. 4. Loosen nut on cover (see ill.), screw in, with fast turns, screw (ill.1/pos.2) until knocking noise disappears. Tighten nut (ill.1/pos.1) again. As a result, unit injector is pressed down to such an extent that injector cam can no more touch the rocker arm, thus preventing the injection of fuel. (respectively eliminating combustion) 5. Test the vehicle with disengaged unit injector under operating conditions and 6. Continue to check all other injectors (cylinders) one by one, in order to detect the defective(s) unit injector(s). NOTE: Air bubble formation will change and/or stop as soon as injection of defective unit injector(s) is disengaged. 7. Replace defective unit injector(s). (Replace unit injector, refer to 03.02.02) Z001138-1_2014-01 46/47 Fuel System 03.14.04 Air bubble formation in fuel system (Example) Preparation: Change fuel filter, if necessary refer to 03.09 (item 1, bleed fuel system) Testing device for fuel return 2300719/1 1. Disconnect hose from fuel return on block fuel cooler outlet to fuel cooler. 2. Connect hose (ill.1/pos.1) of testing device 2300719/1 to block outlet. 3. Connect hose of testing device 2300719/1 with return hose to fuel tank. 4. Hold testing device, glass bulb upwards, or fix it on the vehicle. Procedure: Check 1: Ventilate fuel system by 6 times ignition ON. Observe the sight glass as to complete ventilation of system (bubble-free fuel flow). Result: If a bubble-free fuel flow cannot be achieved, search for the problem at the suction side (from fuel tank to fuel pump). Check: 1. Fuel in tank. 2. Tank suction pipe and fitting 3. Water separator leaky or contaminated. 4. Check all fuel lines connections and fittings in the feed line (suction side) up to fuel pump intake. After a bubble-free fuel flow can be achieved, continue with check 2. Check2: Start the engine and let it run at idle speed. Observe the glass bulb. Result: If bubble formation starts, search for the problem in the unit injectors. Probable contaminations on one or several nozzle elements cause a problem. Due to compression/combustion pressure, gases enter the fuel system through the unit injector nozzle(s). Investigate fuel injectors and replace defective one. Check: Defective unit injector(s) is/are to be detected definitely by means of "manual injection test method" (manual injection test method, refer to 03.14.01 and 03.14.02) If air bubble formation appears during load operation, continue with check 3. Check 3: Start the engine, bring it to operating temperature, test the vehicle under operating conditions and observe the glass bulb. 47/47 Z001138-1_2014-01 Fuel System Result: If it comes to air bubble formation, search for the problem in the area of unit injectors. Control: Defective unit injector(s) is/are to be detected definitely by means of "Disengagement method of injection" (manual injection test method, refer to 03.14.01 and 03.14.02) If there is still air bubble formation, continue with check 4. Check 4: Test the engine in the operating state where bubble formation occurs, by disengagement of injection per cylinder one after the other. (Disengagement method of injection, refer to 03.14.03). Z001138-1_2014-01 48/48 Exhaust System 04 Exhaust System Disassemble / assemble of Turbocharger & Exhaust Elbow 1. Remove air intake pipe. 2. Remove charge air pipe & air filter. 3. Remove exhaust elbow at turbo charger 4. Loosen 3x M8 hex head screws (SW13). 1/3 Z001138-1_2014-01 Exhaust System 5. Loosen Heat Protection Turbo. 6. Loosen exhaust elbow clamp and remove exhaust elbow. 7. Loosen hollow screw M12x1,5. 8. Loosen 2xM8x20 hex screw of oil feed line on turbocharger. 9. Remove flange gasket. Dispose gasket. Z001138-1_2014-01 2/3 Exhaust System 10. Loosen hose clamp (oil feed line). 11. Remove Heat Protection Turbo. 12. Loosen 4xM8 hex flange nut (heat resistant). 13. Remove Turbo-Charger Assembly is done in reverse order. 3/3 Z001138-1_2014-01 Cooling System 05 Cooling System Table of Contents 05.00 05.00.03 05.00.04 05.00.06 05.00.07 05.00.08 Functional Description Engine Cooling Circuit ........................ 4 Error detection cooling system ...................................................... 6 Check points for problems in cooling system ................................ 7 Component checks of engine cooling system ............................... 8 Drain the coolant from engine ..................................................... 11 Fill cooling system (Example) ...................................................... 12 05.03 05.03.01 05.03.02 05.03.03 Pipes, Thermostat...................................................................... 12 Coolant pipes and hoses ............................................................. 12 Exchange thermostat ................................................................... 13 Replace coolant supply manifold ................................................. 14 05.04 05.04.01 05.04.02 Coolant Pump ............................................................................ 15 Exchange coolant pump .............................................................. 15 Install coolant pump ..................................................................... 18 1/21 Z001138-1_2014-01 Cooling System Others Heat coolant Exchanger system Raw Water pump Z001138-1_2014-01 • • • • • • • Discoloration of cooling liquid ECT Gauge Indication to show 120°C ACT Limit exceeded (>65°) • • • • • Coolant discharged from Expansion Tank • • • • • • • • Bubbles in the Radiator / Heat Exchanger • • • • Damage of Raw Water Pump Impeller cooling liquid inlet/outlet temp. Balance is small cooling liquid Temp. (inlet / outlet) Balance is large Large blow-by gas emission Abnormal noise • • • • • • • • • • • • • • • • • • • Low (drop in) engine output loss of cooling liquid Engine cooling liquid temp. Remains low Raw Water & Fresh Water Coolant System [Factors/Cause of Trouble] Poly V-belt slip or breakage Water leaks due to defective seal packing Air is picked in bevor Raw Water Pump Breakage of bearing at Raw Water Pump Obstructed Raw Water Supply (Closed Sea Cock) Breakage of impeller Water leakage from cooling system Scale accumulated in cooling system Inferior thermostat performance Core fin clogged or collapsed Defective radiator cap Water leakage Clogged by scale or other substances Continuous overload operation Faulty indication of ECT gauge Clogging or collapse of exhaust pipe or muffler Faulty copper insert Leakage of Oil Cooler into Coolant Gas leakage from cylinder block Engine overheating Items to Check / Troubled Systems • • • • • • • • • • • • • • 2/21 • • • • • Air Supply System 3/21 Raw Water & Fresh Water Coolant System [Factors/Cause of Trouble] Insufficient air supply / volume to Compartment Air ventilation passage obstructed Contamination of intercooler fins • • • Abnormal noise Large blow-by gas emission cooling liquid Temp. (inlet / outlet) Balance is large cooling liquid inlet/outlet temp. Balance is small Damage of Raw Water Pump Impeller Bubbles in the Radiator / Heat Exchanger • • • Z001138-1_2014-01 ACT Limit exceeded (>65°) ECT Gauge Indication to show 120°C Discoloration of cooling liquid Coolant discharged from Expansion Tank Low (drop in) engine output loss of cooling liquid Engine cooling liquid temp. Remains low Engine overheating Cooling System Items to Check / Troubled Systems • • Cooling System 05.00 Functional Description Engine Cooling Circuit In the closed (primary) cooling circuit of the engine, the coolant circulates by centrifugal pump (circulating pump) mounted at the front of engine block. The pulley of the pump is driven from the back of the timing belt. The pump is maintenancefree. The engine coolant (SMO Z011785/0) in the closed circuit of the cooling system circulates as follows: The circulating pump of the engine feeds this 1:1 Glycol mixture through the coolant distribution manifold into the engine block. The coolant flow is split up to each cylinder in this distribution manifold. The coolant circulates around the cylinders, absorbing the thermal energy from the combustion, passing through ports inside the cylinder blocks to the upper deck portion collecting at the front outlet manifold. In the outlet manifold a cooling sensor is mounted to inform the engine management system about the operating temperatures and conditions of the engine. Part of the coolant flows from the distribution manifold directly into the engine oil cooler and back to the outlet manifold. Depending on engine operating temperature, the coolant is circulated to the thermostat and at low temperature returned to the coolant pump starting its circulation through the block system again. As operating temperature increases the thermostat will gradually/proportionally reduce the flow through the short circuit pipe. As this happen the coolant flow will decrease in the short circuit pipe and coolant will start to flow through the radiator returning to the thermostat back to the circulation pump. During high load and full load operation the thermostat will completely close the short circuit pipe and the entire coolant will circulate over the radiator back to the thermostat and coolant pump. The thermostat is mounted in a separate housing on the intake manifold side of the engine. The thermostat operating temperatures are 80-95 °C. the thermostat is completely open. From this time, the whole coolant flows through the radiator. Here, the hot coolant releases thermal energy via the radiator. The expansion vessel serves as a continuous bleeding system for the coolant circuits and provides sufficient volume for the expending liquid. The expansion vessel is equipped with a filler cap capable to maintain proper pressure in the system. Operating system pressure is regulated via excess-pressure valve (opening pressure 1.5 bar) in the pressure cap. Coolant temperature is measured by means of sensor on the water pump (thermostat) housing, and transmitted to the electronic management system. If during operation the temperature limit exceeds 107°C, the electronic management system will reduce the engine power to a perceptible extent of up to 50%. ATTENTION: Z001138-1_2014-01 To avoid damages on the engine, occurring trouble must be analyzed and eliminated immediately. 4/21 Cooling System 5/21 Z001138-1_2014-01 Cooling System 05.00.03 Error detection cooling system 1. Ask for the following information: - Model and serial number of engine? - Engine operating hours? (wear and corrosion) - How long does the problem already exist? (gradual or sudden occurrence) - Operating conditions prior to occurrence of problem - What repair- or service works have already been carried out (thermostat, etc.)? - At what engine speed does the problem occur? - At what engine load does the problem occur? 2. Closed Cooling Circuit (internal) 2.1 At first, take into consideration the following possibilities: - Defective or faulty coolant temperature sensor. - Coolant level in expansion tank less than minimum. - Malfunction of thermostat - thermostat does not open or opens only partially - thermostat blocked in partially open state - thermostat blocked in completely open state - damaged thermostat sealing ring - Malfunction of coolant circulation pump - pump roller bearing defective - defective seal - case pump wheel - Pressure cap - pressure cap sealing defective (loss of system pressure) - vacuum valve defective - excess-pressure valve defective - opening pressure of cap according to specification 2.2 Malfunction of thermostat - overheating or slow heat build up in coolant system: - Procedure: Let the engine run until indicated temperature exceeds 80° C. Feel temperature in coolant outlet pipe to radiator - Result: Hose cold. - Conclusion: Thermostat got stuck in closed state. - Result: Hose warm or hot. - Conclusion: Thermostat opens partially or completely. - Procedure: Let the engine run; temperature of coolant will rise very slowly Feel temperature in coolant outlet pipe to radiator Z001138-1_2014-01 6/21 Cooling System - Result: Temperature on hose slowly rises simultaneously with temperature of coolant, but does not reach operating temperature (80°C opening temperature of thermostat). - Conclusion: - Thermostat blocked in partially open or completely open state. - Sealing ring of thermostat defective. - Control: - Thermostat got stuck in open or closed position. - Defective thermostat sealing. - Wrong thermostat for this type of engine. 05.00.04 Check points for problems in cooling system 1. Internal Cooling Circuit 1.1 hoses - creaked or leaky 1.2 hose clamps - loose or defective 1.3 thermostat - thermostat defective - wrong thermostat 1.4 cooler cap - defective excess-pressure valve - defective vacuum valve - damaged cover sealing 1.5 coolant circulating pump - defective housing sealing - damaged roller bearing - case pump wheel - defective slide ring seal 1.6 coolant distribution manifold - leaking connections or seals 1.7 oil cooler - leaking connections or seals - damaged hose clamps 7/21 Z001138-1_2014-01 Cooling System 05.00.06 Component checks of engine cooling system 1. Hoses and clamps, drain plug etc. For all models: no special tool required. Control works: Check all external components of cooling system for leakage, wear and damages. Check all connections for tightness. Check hoses for cracks, breaks or wear. Repair works: Repair or exchange 2. Thermostat No special tools required. Control works: As a standard, an 80° C thermostat is used for the vehicle engine. Check thermostat for correct model and correct rated output, corrosion, limited mobility or broken spring. Repair works: No repair possible. Exchange thermostat. Test procedure: Thermostat can be placed in a pot with water. This water can be heated up (oven). While heating up the water, the temperature should be measured. While the temperature increases, the thermostat must change its position closing resp. opening the flow ports. Z001138-1_2014-01 8/21 Cooling System 3. Water pump (coolant circulating pump) No special tools required. Control works: If with running engine leakage at the pump housing relief bore is noticed, the slidering seal may be worn out or damaged inside the pump. To repair this damage the entire pump must be replaced. Repair works: Only exchange of entire pump possible. 4. Cooler cap (Example) No special tools required. Control works: As a standard, a cooler cap with an opening pressure of 1.5 bars is used. Check cooler cap for correct rated output, defective sealing (ill.2/pos.1), defective vacuum valve (ill.2/pos.2) or broken spring (ill.2/pos.3). Repair works: Not provided; exchange cooler cap. 9/21 Z001138-1_2014-01 Cooling System 5. Coolant loss in engine cooling system 5.1 Coolant loss: Control works: - (item 4) check cooler cap - defective monoblock (due to combustion pressure, gases enter the engine cooling system). 5.2 Gas-air mixtures enter the cooling system. 5.2.1 - Defective monoblock This fault only can be stated with using special tool VR 00147/0 (test equipment for CO² in engine cooling circuit). Procedure: See specification from special tool P/N VR 00147/0 Conclusion: CO² entry (combustion gas) in the engine cooling circuit. Control works: Assembly of unit injector, refer to 03.02.02; check specified tightening torque. Repeat test procedure and check according 03.14.03 to determine cylinder affecting the system resp. pushing combustion gases into the coolant system. Repeat check. If result remains unchanged, the monoblock is defective. Repair works: Exchange monoblock. Z001138-1_2014-01 10/21 Cooling System 05.00.07 Drain the coolant from engine To drain the closed cooling circuit, lift or lower the engine in such a way that the engine is in horizontal position, which permits an ideal drainage of engine block. ATTENTION: Approx. 1 litre of coolant will remain in the engine block which is to be considered for refilling. With hot engine, the closed cooling circuit is under pressure. Do not try to open the pressure cap on the expansion vessel or any drain plug or hoses of the coolant system. This may lead to severe injuries by hot coolant under pressure. Wait until the engine has cooled down, then the pressure cap may be opened by 1/4 turn to the left, to release possibly remaining system pressure. Then press down the cap, turn and remove. 1. Loosen hose clamp on lower coolant hose at oil cooler unit. Pull hose from oil cooler nipple and drain coolant into bucket. NOTE: There is no drain plug on the engine through which the coolant from the internal cooling circuit can be drained. ATTENTION: 11/21 The closed cooling circuit must always be filled with coolant. If the circuit remains for a long time without coolant, corrosion damages may occur. Z001138-1_2014-01 Cooling System 05.00.08 Fill cooling system (Example) Closed cooling system 1. Fill cooling circuit with specified coolant (SMO Z011785/0)) only. Coolant level should reach the lower edge of the filler neck in the expansion tank, refer to vehicle manufacturer specification. NOTE: Cooling system purges automatically while filling. ATTENTION: For a new filling of the closed cooling circuit, make sure that the cooling system is purged completely. 2. Let the engine run, check coolant level and refill coolant if necessary. Due to extensioning the coolant-volume, a change of the cooling-systemcharacteristic appears. Check the cooling-system-pressure. The required static pressure at operating temperature (75°-80°C) should be 500 mBar overpressure. If the coolant-volume extends more than 8 litres, a larger expansion tank and a pressure-cap (1,5 Bar opening-pressure) is recommended. With the set “heating pump”, the discharge can be 18 l/min depending on temperatur (connecting limit 75°C, disconnecting limit 70°C) but independent on the engine speed. 05.03 Pipes, Thermostat 05.03.01 Coolant pipes and hoses Remove defective hoses by loosening the respective hose clamps and replace. ATTENTION: Tighten lose clamps with a torque of 3,5 Nm. Z001138-1_2014-01 12/21 Cooling System 05.03.02 Exchange thermostat Preparation: Drain closed cooling circuit refer to 05.00.02.01 Loosen both hose clamps at thermostat housing and pull off both coolant hoses. DISASSEMBLY: 1. Loosen 3 Allen screw M6 holding the thermostat housing. Remove thermostat housing including thermostat. 2. Remove seal and dispose. 3. Remove thermostat from housing. ASSEMBLY: 4. Insert thermostat into housing, ventilation mark (ill.4/pos.1) showing upwards. ATTENTION: Always use new seal. 5. Install new gasket. Insert 3 M6 Allen screws. Tighten screws of thermostat housing with a torque of 9,5 +/-1 Nm. 6. Further re-assembly is done in reverse order. 7. Filling of closed cooling circuit, refer to 05.00.02.01 13/21 Z001138-1_2014-01 Cooling System 05.03.03 Replace coolant supply manifold Preparation: Drain closed cooling circuit refer to 05.00.02.01 Loosen both hose clamps at thermostat housing and pull off both coolant hoses. Disconnect battery. Disassemble control solenoid, 03.08. 1. Loosen 3 hex head screws (SW10) at bracket. 2. Loosen three allen head screws SW5 (ill.1/pos.1), remove coolant supply pipe. 3. Remove gasket and dispose. NOTE: Use new seal for assembly. Reassembly in reverse order. Tighten M6 bolt with a torque of 9,5 Nm +/-1. Z001138-1_2014-01 14/21 Cooling System 05.04 Coolant Pump 05.04.01 Exchange coolant pump Preparation: Remove poly-V-belt remove timing belt, see 01.00.02 drain closed cooling system, refer to 05.00.02 1. Loosen 3 hex flangebolts M8x25 (SW) and remove hoses from front cover. 2. Loosen 3 pcs M8 hexagon head screws one pc M8 Allen screw and one pc M6 Allen screw at coolant pump housing. 3. Remove coolant pump by slight hit with plastic hammer. 4. Remove gasket from engine block. 15/21 Z001138-1_2014-01 Cooling System 5. Loosen 3 Hex screws (M8x25). 6. Remove Cooling Pipe 7. Loosen 3 Hex screws M8x30, one Nut M8 and two hex socket head cap screws (M6x60, M6x30). Z001138-1_2014-01 16/21 Cooling System 8. Extract coolant water pump by hand. 9. Put off the gasket. 10. All parts of water pump. 17/21 Z001138-1_2014-01 Cooling System 05.04.02 Install coolant pump 1. Clean and grease sealing surfaces on water pump and on engine block. 2. Put on new gasket (ill.2/pos.1). 3. Align water pump on engine block. Mount screws and tighten with standard torque for its size. 4. Further assembly is done in reverse order, in accordance with 01.00.02 remove timing belt. 5. Engine timing adjustment according to instructions, refer to 01.00.03 engine timing. M8 tighten with a torque of 23 Nm +/- 2, M6 tighten with a torque of 9,5 Nm +/-1. 6. Put sealing ring into groove. 7. Put sealing ring into groove. 8. Lubricate groove with Molykote. Z001138-1_2014-01 18/21 Cooling System 9. Place gasket. 10. Place coolant water pump. 11. Fix coolant water pump with 3 hex head screws M8x30, one hex nut M8 and two hex socket head cap screws(M6x60, M6x30). 19/21 Z001138-1_2014-01 Cooling System Preparation: Loosen Poly V-Belt, Drain Water All parts of raw water pump: Change Impeller: Disassemble: 1. Loosen 3x hex socket head cap screws M8x25 (SW?????) 2. Put off Water Pump Assembly 3. Loosen 6x hex head screws M4x8 SW 4. Pull out Impeller by use of pliers Assembly is done in reverse order Z001138-1_2014-01 20/21 Cooling System Change Pulley Disassemble: 1. Loosen 3x hex socket head cap screws M8x16 (SW?????) 2. Pull off pulley Assembly is done in reverse order 21/21 Z001138-1_2014-01 Electrical System 06 Electrical Systems Table of Contents 06.00 General ......................................................................................... 5 06.01 06.01.01 Generator................................... Fehler! Textmarke nicht definiert. Exchange / Replace Alternator .................................................... 10 06.02 06.02.01 06.02.02 definiert. Starter motor .............................................................................. 13 Replace starter motor .................................................................. 14 Check starter motor (principal example). Fehler! Textmarke nicht 06.05 definiert. 06.05.01 definiert. 06.05.02 06.05.03 06.05.04 Cables, Wiring Harness – General ......... Fehler! Textmarke nicht 06.05.05 06.05.06 06.05.07 Battery cable lengths and cross-sections Fehler! Textmarke nicht Engine harness ............................................................................ 18 Wiring Diagram – E-Box Wiring Diagram 2181123-0 .................. 22 Wiring Diagram – E-Box Wiring Diagram 2181134-0 .................. 23 23 Wiring Diagram – External E-Box Diagram 2181141-0 ............... 24 Fehler! Textmarke nicht definiert. Wiring Instrument Harness / Marine ............................................ 28 Warning and Parameter Limits from Engine Management System 31 06.06 Description to circuit diagram .................................................. 31 06.07 06.07.01 06.07.02 06.07.03 06.07.10 06.07.11 Electronics – General ................................................................ 33 Electronic engine management system....................................... 33 Diagnostic system........................................................................ 34 Principle service code table ......................................................... 35 Explanations of the “BLimDiag” – “Bit” to limit Beta _max. .......... 38 Configuration engine ECU-M1CU3 with connector A1 ................ 39 06.08 06.08.01 Potentiometer Accelerator and Voltage regulator.................. 41 Potentiometer Accelerator 2180847-0, B09 ................................ 41 1/54 Z001138-1_2014-01 Electrical System 06.08.02 Voltage regulator 24V-12V equalizer 2179789-0 löschen ... Fehler! Textmarke nicht definiert. 06.10 06.10.01 06.10.03 06.10.04 Actor and Sensor ....................................................................... 42 Component configuration engine................................................. 42 Calibration of rack position .......................................................... 43 Replace senders, sensors ........................................................... 45 06.10.04.01 ACT - Air charge temperature sensor, B07 ............... 45 06.10.04.02 ECT - Engine Coolant temperature sensor, B06 ....... 45 06.10.04.03 RPM - Speed sensor, B03 ......................................... 45 06.10.04.04 MAP – Manifold Absolut Pressure Sensor, B04 ........ 46 06.10.04.05 RPos - Sensor for rack position, B01 ........................ 46 06.10.04.06 LPS - Lubricant pressure sensor, B05 ...................... 46 06.10.04.07 FSP – Fuel Supply Pressure Sensor B10 ................. 46 06.10.04.08 ITP – Injection Timing Position Sensor, B02 ............. 47 06.10.04.09 ITV – Ignition Timing Valve, Y2 ................................. 47 06.10.04.10 VTG – Vane Actuator, X25 ...................................... 47 06.10.04.11 FDS-Fuel density Sensor included in Kit Fuel Compensation MS1205010......................................... 48 06.10.04.12 MET- Manifold Exhaust Temperature Sensor X21 .. 48 included in Kit Fuel Compensation MS1205010 ......................... 48 06.10.04.13 WIF – Water In Fuel Sensor (included in Kit Fuel Prefilter MS1203010) ................. Fehler! Textmarke nicht definiert. 06.10.04.14 T2- Compressor Outlet Temperature Sensor .. Fehler! Textmarke nicht definiert. 06.10.04.15 EXT – Exhaust Gas Temperature Sensor ............... 49 06.10.05 06.10.06 Connectors, helpful hints ............................................................. 50 Connectors, assembly instructions .............................................. 51 06.12 Battery ........................................................................................ 53 Z001138-1_2014-01 2/54 Electrical System Engine Management System Electrical System & EMS 3/54 • • • • • • • • • • • • • Indicate Memorized Service Codes Check Relay Check Plug / Connections Check Fuses Resistance too high / Insuficient current flow Insuficient Batterie Voltage Red Flashing Backlight Floating Position Rack 1mm Circuit resistant (60 Ohm closed circuit) Stabilised Power Supply 5V Ignition Signal significant amount of white exhaust smoke Slow starter rotations Electrical System [Factors/Cause of Trouble] Overdischarge of battery Connection failure low battery Capacity Defective Key Switch Emergency Cut Off Switch Defective starter switch Defective starter solenoid Breakdown of Starter Breakdown of glow plug or air-heater ECU Operation Fuel Pump Operation Governor Solenoid (Rack Actuator) Rack Position 10 seconds after "Ignition On" ECU - Sensor Supply Voltage ECU - Ground / Negative CAN - High / CAN - Low CAN - Connection lost Check Engine Light (CEL) Starter does not rotate Items to Check / Troubled Systems • • • • • • • • • • • • • • • • • • • • • • • • • • • • Z001138-1_2014-01 Electrical System Austauschen neu machen lassen von tedoc Z001138-1_2014-01 4/54 Electrical System 06.00 General Wiring For the STEYR Marine Engines wiring and plug connections have been designed according to standard DIN 72 552. In case of necessary repair of a cable connection, take special care that cable quality, isolation, crimping, strand end soldering of cable sockets as well as protective varnish isolation and/or connector locks meet the respective requirements. Tools for crimp connections to be found in tool catalogue P/N Z001002/1 "KIT 3". 5/54 Z001138-1_2014-01 Electrical System 06.01 Alternator Technical Data of alternator 14V / 120Amp: Model Minimum engine speed for Voltage generation Regulated Voltage Load Current Excitation winding resistance Gear Ratio AAK5818-11.204.201 520 min-1 14,6 ± 0,15 V >115 Amp 2,8 ± 0,1Ω i = 2,7 Technical Data of alternator 14V / 150Amp (optional): Model Minimum engine speed for Voltage generation Regulated Voltage Load Current Excitation winding resistance Gear Ratio AAN5356-11.204.202 444 min-1 14,1 ± 0,15 V >155 Amp 2,85 ± 0,1Ω i = 2,7 Z001138-1_2014-01 6/54 Electrical System 7/54 Z001138-1_2014-01 Electrical System Technical Data of alternator 28V / 100Amp (optional): Model Minimum engine speed for Voltage generation Regulated Voltage Load Current Excitation winding resistance Gear Ratio Z001138-1_2014-01 AAN5357-11.204.203 444 min-1 28,4 ± 0,3 V >100 Amp 7,90 ± 0,4Ω i = 2,7 8/54 Electrical System 06.01.01 Adjust Poly-V-belt tension For Engines equipped with Raw Water Pump and Hydraulic Pump Automatic initial tension of belt tension through spring-loaded tightener. POLY-V BELT L=1488 6PK For Engines equipped with Raw Water Pump Automatic initial tension of belt tension through spring-loaded tightener. POLY-V BELT L=1390 6PK For Engines without Raw Water Pump Automatic initial tension of belt tension through spring-loaded tightener. POLY-V BELT L=1095 6PK 9/54 Z001138-1_2014-01 Electrical System 06.01.02 Exchange / Replace Alternator Remove Alternator: 1. Disconnect battery. 2. Remove Poly-V-Belt 3. Disconnect the wiring cables For Assembly: B+ (SW13) B- (SW10) D+ (SW 8) 11 ± 1 Nm 5 ± 0,5 Nm 3,5 ± 0,3 Nm 4. Loosen hex head screw M10x80 (SW17) For Assembly: Tighten with a torque of 45 ± 5 Nm. 5. Loosen hex head screw M10x100 (SW17) For Assembly: Tighten with a torque of 45 ± 5 Nm. Assembly is done in reverse order Note: After Assembly, coat all electric supplies with rubber sealing Z909570-0. Z001138-1_2014-01 10/54 Electrical System 06.01.03 Alternator Performance Checklist Copy to be returned with all alternators changed under warranty. 1. CUSTOMER COMPLAINT / SYMPTOM: 2. EQUIPMENT REQUIRED (FOR QUICK CHECK OF ALTERNATOR ON THE VEHICLE): Digital Voltmeter with measuring range 0 to 50 Volts. 3. ALTERNATOR INSPECTION ON THE VEHICLE Introduction: When a defect in the charging system occurs, the cause can be the alternator with the regulator, the battery, electrical connections in the system (wiring harness), the charge indicator or the driving belt of the alternator. In majority of cases the charge indicator (warning lamp) indicates alternator malfunction. Consequences of alternator malfunction could also be system Low voltage (characteristic evidence is low lights intensity, difficult starting) or High voltage (lamps often blow up, often needed to add water into battery, faster operation of DC motors). Alternator (terminals) designation (alternator with mono-function regulator): Alternator terminal B+ B- (D-) D+ Meaning of Connected the to designation Positive Positive terminal of pole of the the battery alternator (terminal 30) Negative Negative terminal of pole of the the battery alternator (terminal (ground) 31) PreCharge excitation, indicator on inspection the of operation dashboard NOTE: Before commencing with the test of alternator, check the following items (proceed only if the all the answers are “YES”): 11/54 Z001138-1_2014-01 Electrical System 1. CHECK THE FOLLOWING ITEMS: 1. Starter motor – alternator – battery connections OK (oxidation of contacts, loose or broken contacts, burned contacts…)? 2. Ground connection (alternator brackets – engine contact) OK (possible oxidation, rest of painting process, loose contact…)? 3. Starter motor – alternator – battery connection cables without damages? 4. The battery is functional and fully charged? 5. Starter motor is operating correctly? 6. All relevant warning light bulbs are OK? 7. Is Drive belt properly tensioned and without damages? NOTE: Before commencing with the test of alternator, check the following items (proceed only if the all the answers are “YES”) YES NO YES YES YES YES YES YES NO NO NO NO NO NO ALTERNATOR SHOULD ONLY BE REMOVED FROM THE VEHICLE AFTER PERFORMED ALL STEPS OF THE QUESTIONNAIRE BELOW AND THE ESTABLISHED CAUSE FOR MALFUNCTION OF THE VEHICLE IS ALTERNATOR! 2. FOR THE INSPECTION PROCEEDED STEP BY STEP! Engine not started - the ignition switch is turned on Is the warning lamp illuminated? If the answer is “YES” then: Proceed with paragraph 3.2 YES NO If the answer is “NO” then: Connect (D+) terminal of the alternator to negative (-) potential (normally chassis - housing of alternator) and turn on the ignition switch. YES NO Is the warning lamp lighting? If the answer is “YES” then: The cause is broken drive belt or faulty alternator. Replace drive belt or Replace (Repair) alternator. If the answer is “NO” then: The cause is broken or disconnected wires, bad or broken lamp or completely discharged Measured voltage value U (V)= Remark: If the voltage is measured on battery or on alternator terminals (B+/B-) at engine stopped the value should be U 12V (24V for 28V systems). 3. Start the engine and run it at engine nominal rotational speed Has the warning lamp switched off? If the answer is “YES”- the alternator should be OK but an additional check should be performed: Measure the voltage on battery or on alternator terminals (B+/B-) changing rotational speed (idle to maximum) without electrical load applied (only battery) Measured voltage U(V) (*Required voltage value U(V) = (14±1) / (28±1)) Apply electrical load (headlights, front and rear working lights, heater, …) and measure Measured voltage U(V) (*U(V) should be lower for 0.4V to 0.7V) If the measured output voltage is in limits then the alternator works properly. If the answer is “NO” then continue with the following steps: Lamp lights with full intensity all the time? If the answer is “YES” then: Stop the engine, disconnect wire from alternator (D+) terminal and turn on the ignition switch. Does Lamp lights? If the answer is “YES’ then: The cause is failure of the vehicle wiring. If the answer is “NO” then continue with the tests bellow: Are the Lamps lighting with different intensity depending of rotational speed and electrical load? If the answer is “YES” then: Is the drive belt slipping? If the answer is “YES’ then: Check drive belt and pulley. YES NO YES NO YES NO YES NO YES NO If the answer is “NO” then: The cause is broken drive belt or faulty alternator. Replace drive belt or Replace (Repair) alternator. Remark: Voltage measured on battery can be lower as on alternator terminals (B+/B-) but for no more than 0.5V. Z001138-1_2014-01 12/54 Electrical System 06.02 Starter motor 06.02.01 Permanent magnet reduction gear starter motor Model Nominal Tension Nominal Power Sense of Rotation AZE2177-11.131.406 12V 2,0kW Clockwise Model Nominal Tension Nominal Power Sense of Rotation AZE2180-11.131.439 24V 2,5kW Clockwise 13/54 Z001138-1_2014-01 Electrical System 06.02.02 Replace starter motor 1. Disconnect battery. 2. Loosen terminal +30 (battery main cable) on magnetic switch by means of SW13. 50 3. Remove start signal wiring (terminal 50) from blade terminal resp. M4 screw (depending on model). 4. Loosen M10 Allen screws SW8 of starter motor. 5. Remove starter. Assembly is done in reverse order. NOTE: Tighten Allen screws M10 with a torque of 45 Nm +/- 2. Tighten M10 nut at starter motor solenoid for battery positive cable (30) with a torque of 10 Nm +/- 1. Tighten M5 screw for stud signal (50) with a torque of 3 Nm +/- 0,3. Tighten M6 screw for stud signal (50) with a torque of 4 Nm +/- 0,4. Note: After Assembly, coat all electric supplies with rubber sealing Z909570-0. Z001138-1_2014-01 14/54 Electrical System 06.02.03 Checking the starter motor before it is removed from engine: Mechanical checking: Check starter motors fixing screw or bolts. Make sure that they are tightened with proper load. Check connection bolts of terminal. Make sure that they are tightened with proper load. Check if starter motor is damaged from outside (broken parts, burned…). If YES remove the starter. Try to crank the starter and observe untypical operations and sounds. Try to describe the observation. Electrical checking: Check the condition of battery (the battery must be fully charged). Check and clean if necessary the battery contacts. With multimeter measure voltage on battery and check the value in table: Voltage on battery ≥12.60 12.45 12.25 12.05 ≤12.00 Battery sate of charge 100% 75% 50% 25% empty Check the mean starter motor circuit, cable from battery to the starter motor and earth cable. Also check all connections of mean circuit. Make sure that they are In good conditions. Check the key terminal. When the key is turned on the tension must be measured on terminal 50. With multimeter measure the voltage on terminal 50 and it must be higher than 8V on 12V application and higher then 16V on 24V application. Compare also voltage drop between terminal 30 and terminal 50. If the difference is more than 2V when the solenoid is energized means that circuit resistance of terminal 50 is too high. If all above point are checked and starter motor still does not crank the engine with per scripted performance remove the starter. 15/54 Z001138-1_2014-01 Electrical System Checking the starter motor after it is removed from engine When the starter motor is removed from engine also check the condition of flywheel. Visual checking: Check if any starter motor part is mechanically damaged. Check the wear of pinion. Try to rotate the pinion. In one way it must rotate smoothly in other to fill the rotation of armature. Try to pull out the pinion. You need to fill the certain force from 50N 100N. Check the terminal screws (they must not move). Check if there is seen the signs of overheating. you need to 06.02.04 All the observe and finding describe in attached document Checking list. Typical starting Circuit Operation 1. Wire (B) terminal 30 of starter motor must be connected to the battery positive terminal. Starter motor housing must be connects to the battery negative terminal. 2. When wire from relay (A) is energized, current flows through both pull-in winding (C) and hold-in winding (D) to ground. 3. Current through windings engages solenoid plunger (E), which closes main contacts (F). When main contacts close, current through pull-in windings stops. Current continues through hold-in winding, keeping solenoid engaged and main contacts closed. 4. With main contacts closed, current flows from battery cable (B) to starter motor at a very high rate. Four heavy field windings (G) carry current to commutator brushes (H). 5. From field windings, current flows through armature windings (I) to ground (31), making contact through commutator brushes (H). 6. Strong magnetic fields are set up by current flow through field windings and armature windings. 7. Windings are arranged so that magnetic fields constantly repel each other, rotating armature. Z001138-1_2014-01 16/54 Electrical System G A—Wire from Key B—Cable from Battery C—Pull-In Winding D—Hold-In Winding E—Solenoid Plunger F—Main Contacts G—Field Windings H—Commutator Brushes I—Armature K—Relay Winding L—Relay Contact 17/54 E F L B A I 31 H C D K Z001138-1_2014-01 Electrical System 06.02.05 Engine harness Designation connector B1 B2 B3 B4 B5 B6 B7 B8 B9 B10 G1 Z001138-1_2014-01 Component Description 3-pole-plug 4-pole-plug 3-pole-plug 4-pole-plug 3-pole-plug 2-pole-plug 2-pole-plug 2-pole-plug 6-pole-plug 3-pole-plug 3 studs Rack Position Sensor Injection Timing Position Sensor Speed Sensor Manifold Absolute Pressure Sensor Lubricant Pressure Sensor Engine Coolant Temperature Sensor Air Charge Temperature Sensor Exhaust Temperature Sensor Pedal/Accelerator Fuel Supply Pressure Alternator 18/54 Electrical System Designation connector M1 X3 X6 Y1 Y2 Component Description 2 studs 8-pole-plug 2-pole-plug 2-pole-plug 2-pole-plug Starter Harness Intake side Fuel Pump Fuel Metering Solenoid Injection Timing Valve 06.02.06 Connection relay socket for K1, K2 and K4 19/54 Z001138-1_2014-01 Electrical System 06.02.07 Electric – Box front side view Designation A1 F1 F2 F3 F4 F6 K1 K2 K4 X1 X2 X4 X23 X25 Z001138-1_2014-01 Component 80-pole-plug Fuse Fuse Fuse Fuse Fuse Relay Relay Relay 23-pole-plug 6-pole-plug 3-pole-plug 2-pole-plug 12-pole-plug Description M1Cu3 – ECU Connector VBATT 20 Amp Fuel Pump 25 Amp Glow Plugs 50 Amp Glow Plugs 50 Amp Alternator 12,5 Amp Main Relay Fuel Pump Relay Start Enable Relay Panel Connector Diagnostic Connector (EDT 2) Option Water in Fuel (WIF) Option SOLAS (Inversion Switch) Option VTG / SCI 20/54 Electrical System 06.02.08 Electric – Box rear side view Designation K3 X20 X21 Component Relay 6-pole-plug 6-pole-plug X22 X26 4-pole-plug Relay 21/54 Description Glow Plug Relay Option Hybrid Option Manifold Exhaust Temp. (MET) / Fuel Density Sensor (FDS) Option Trim / Gear Option 2-pol Z001138-1_2014-01 Electrical System 06.02.09 Wiring Diagram – E-Box Wiring Diagram 2181123-0 Z001138-1_2014-01 22/54 Electrical System Wiring Diagram – E-Box Wiring Diagram 2181134-0 23/54 Z001138-1_2014-01 Electrical System 06.02.10 Wiring Diagram – External E-Box Diagram 2181141-0 Z001138-1_2014-01 24/54 Electrical System Wiring Diagram – E-Box Wiring Diagram 2181349-0 2014 25/54 Z001138-1_2014-01 Electrical System 06.02.11 Wiring Diagram – E-Box Wiring Diagram 2181350-0 2014 Z001138-1_2014-01 26/54 Electrical System 06.02.12 Wiring Diagram– External E-Box Diagram 2181351-0 2014 27/54 Z001138-1_2014-01 Electrical System 06.02.13 Wiring Instrument Harness / Marine NOTE: For power supply harness to instruments, protecting circuits, fuses and relays, please consult marine manufacturer. 06.02.14 Glow Plugs Functions: Reduce smoke emission Heat up the incoming air Reduce engine noise and vibrations Improve drivability from cold Glow Plugs 12V Technical Data: Electrical test values Current Temperature (850°C) Coil Resistance DC 11V max. 25Amp after 30 seconds 6,3±0,5Amp max. 5 seconds 550mΩ – 670mΩ (at 23±3°C) Glow Plugs 24V Technical Data: Electrical test values Current Temperature (850°C) Coil Resistance DC 11V max. 25Amp after 30 seconds 6,3 ± 0,5Amp max. 5 seconds 2,3Ω – 2,8Ω (at 23±3°C) Z001138-1_2014-01 28/54 Electrical System Exchange Glow Plugs: Preparation: Remove Intake Manifold, refer to 01.08 1. Remove Glow Plug Cable from Glow Plugs. 2. Unscrew Glow Plug by use of special tool VR00146-0 For Assembly: Tighten with a Torque of 15 + 3Nm Use new gasket on Glow Plug Connector. Grease Glow Plugs Thread with Copper paste. Assembly is done in reverse order 29/54 Z001138-1_2014-01 Electrical System 06.02.15 Control lamps Glow Plug Lamp / Oil Pressure Lamp The GPL shall be turned on when the glow plugs are on before cranking or when the oil pressure drops below the level defined by SMO or Lubricant Pressure Sensor is defective (GPL shall blink with 1Hz). At ignition on, the lamp shall be turned on for approx. 0,7 second for checking of the bulb. Glow Plug Lamp on Dash Panel: Glow time depending on present condition of calculated temperature CRKT. Check Engine Lamp The CEL shall be turned on when: a) air charge temperature is above threshold defined by SMO or sensor is defective (CEL shall blink with 2Hz) b) Exhaust Temperature is above threshold defined by SMO or sensor is defective (CEL shall blink with 2Hz) c) fuel metering solenoid cannot be governed (position not reached or blocked) d) rack position sensor defective e) at power on (for approx. 5 seconds) when any error is active f) Limitation during break in phase (two hours) g) SOLAS*: Inversion Switch active h) MET*: Manifold Exhaust Temperature is above threshold defined by SMO or sensor is defective (refer to Chapter General-D1-Trouble Indication) i) FDS*: Fuel Density is below threshold defined by SMO or sensor is defective (refer to Chapter General-D1-Trouble Indication) j) WIF*: Water In Fuel too much water in the water separator (refer to Chapter General-D1-Trouble Indication) *optional Equipment At ignition on, the lamp shall be turned on for approx. 0,7 second for checking of the bulb. Z001138-1_2014-01 30/54 Electrical System 06.02.16 Battery Charge Lamp The battery charge lamp shall be turned on when the Ignition is switched on and during running condition when the alternator doesn’t charge the battery. For further information refer to Chapter General D General Information Trouble Indication Table. 06.02.17 Warning and Parameter Limits from Engine Management System ECT- Characteristic Parameter (TBTLim) Note: Current Value: Limiting starts app. 105°C; Values may get changed during course of development 06.03 Declaration Signal Name ACT AdcCount BARO BETA BETA_MCRK BETA_MIN BETACAL BETACOM BETACORR BETAMAX BETAQM BLIMDIAG CAN CEL CRI CRKT DIAG ECT ENGMODE EXT FDS FMS FPR FSP FUEL_RATE GEAR_INPUT GIR 31/54 Description Air Charge Temperature Analog to digital converted counts Ambient absolute pressure (Barometric) Fuel Quantity to be injected Maximum Fuel Quantity (Beta) during cranking Minimum beta for cold start Fuel quantity calculated from pedal position Commanded beta from idle speed governor Corrected fuel quantity after density compensation Maximum quantity of fuel to be injected Current fuel quantity calculated from engine actual behavior Bitfield to Limit BETA_max Controller area network +- GND Check engine lamp Crank indicator input Crank temperature calculated from ECT and ACT Diagnostic in / out Engine Coolant Temperature Engine operation mode Exhaust Temperature (in elbow pipe) Fuel Density Sensor Fuel metering solenoid Fuel pump relay Fuel Supply Pressure Calculated fuel consumption from actual engine behavior Gear switch input ground isolation relay output Z001138-1_2014-01 Electrical System Signal Name GLOW_PLUGS GND GPL GPR IGN HCU HYB ITDCOM ITDPOS ITP ITV LPS LPS_WARN MAP_u16 MET (T30) MR N_IDLE_u32 NFIX_RPM NIDLETUNE NTC PED RPCOM RPM_N RPM_X RPOS SER START_ENABLE TRIP_FUEL TS_time_ms VBATT VPROT VPWR VREF1 VREF2 VREF3 VTG_POS WIF Z001138-1_2014-01 Description Glow Plug Relay output Earth Glow plug lamp Glow plug relay Ignition switch Hybrid Control Unit Hybrid Commanded Injection timing device position Injection timing device position Injection timing position (linear sensor) Injection timing valve Lubricant Pressure Low lubricant pressure warning Manifold Absolut pressure Manifold Exhaust Temperature sensor Main relay Actual desired speed in idle mode actual desired fixed idle speed Idle speed tuning value, set by EDT2.0 Negative temperature coefficient sensor Pedal 1 / 2 Commanded Rack position Filtered Engine Speed Slightly Filtered Engine Speed Current rack position Start enable relay Starter enable control Calculated fuel consumption from Ignition ON to OFF Global millisecond counter for time measurement Battery voltage (Terminal 30) Protected battery voltage Battery voltage Sensor reference voltage 1 Sensor reference voltage 2 Sensor reference voltage 3 Position VTG (variable turbine geometrie) Water in fuel sensor 32/54 Electrical System 06.04 Electronics – General 06.04.01 Electronic engine management system The STEYR marine engine is equipped with an Electronic Management System (EMS) that performs the following: * controls engine functions to ensure maximum efficiency. * self-diagnostic to protect the engine from damage if operating parameter are exceeded. * stores diagnostic data of EMS server circuits for maintenance and service. Engine power is reduced if the following parameter limits exceeded: * Coolant Temperature too high/low (ECT) * Air Charge Temperature to high (ACT) * Oil Pressure drops below min. limit * Boost Pressure is not correct (MAP) * Exhaust Gas Temperature is too high (EXT) * Injection Timing Device defective (ITD) * Manifold Exhaust Temperature too high (MET) * Fuel Density out of range (FDS) * warning signal * when installed Engine RPM remains on IDLE speed: * if potentiometer accelerator input value reading is incorrect * inversion switch active (option DNV) Engine is stopped in case of: * defective Rack-Position Sensor * defective RPM-Sensor * inversion switch active (option SOLAS) Optical and audible warning signals depend on equipments and standards of marine manufacturer. Refer to chapter general Trouble Indication Chart Please refer to marine manufacturer instruction and explanations. 06.04.02 Software Identification Example: SE236S36_V50000_10E_23101Q.smocrp SE236S36 only for this engine model useable V500000 Software for SE-engine series 10E Main Software-version (A,B,C,D,ect…) 23101Q ongoing software number and letter (higher = newer) 33/54 Z001138-1_2014-01 Electrical System 06.04.03 Diagnostic system The electronic engine management system controls the following parameters: Oil pressure, boost pressure, coolant temperature, air charge temperature, exhaust temperature. The electronic engine management system has an automatic self-test program checking all data of electronic sensors. As soon as a fault is found, there is an optical or audible signal (refer to chart "Service Codes"). Occurred faults remain stored until cancellation. Stored faults may be selected, analyzed and cancelled by means of PC via diagnostic connector or SCC. An indicator for one or several stored service codes is the 5 second "Illumination" of the "CHECK-ENGINE LAMP" and the "WARNING HORN" after ignition ON, instead of usual 0,7 seconds. (refer to chart "Operating Status" according to marine manufacturer) There are three fault categories: temporary faults, non essential faults and essential faults. According to these categories the engine management systems may pick default values or select alternative parameters for fail save governing in order to continue engine operation. If operating values are beyond the parameter limitation, the system will memorize such happenings and store them permanently as misuse code. Illustration of key elements for Diesel engine governing Main components: engine ECU and rack control solenoid with rack position sensor, engine speed sensor, unit injector driven by camshaft via rocker arm. Z001138-1_2014-01 34/54 Electrical System 06.04.04 Principle service code table NOTE: Some codes may not apply due to different application! DTC List / Error Code List - SE Engines V50000.10 actual version Dec. 71 72 Hex. ABBREV. 47 VTGHBRIDGE_E-MIN 48 VTGHBRIDGE_E-MAX POSSIBLE CAUSE signal voltage too low, possible short circuit to ground (X25) signal voltage too high, possible short circuit to battery (X25) 263 107 signal voltage too low, possible short circuit to ground 264 108 275 113 276 114 279 117 280 118 288 120 290 291 375 122 123 177 395 18B 396 18C INVOLVED DEVICE Turbocharger output control Turbocharger output control Barometric Pressure BARO_FP_E-MIN Sensor Barometric Pressure BARO_FP_E-MAX Sensor Air Charge Temperature ACT_E-MAX Sensor Air Charge Temperature ACT_E-MIN Sensor Engine Coolant ECT_E-MIN Temperature Sensor Engine Coolant ECT_E-MAX Temperature Sensor Potentiometer accelerator 1 PED_E-NPL &2 PED1_E-MIN Potentiometer accelerator 1 PED1_E-MAX Potentiometer accelerator 1 FUEL_DENSITY_E-FER Fuel density sensor PF20 - Fuel Pressure PF20_RANGE_E-FER Sensor PF20 - Fuel Pressure PF20_E-MIN Sensor PF20 - Fuel Pressure PF20_E-MAX Sensor 397 18D 544 220 REM_PAD_E-SIG Remote Pedal 545 546 547 594 221 222 223 252 REM_PAD_E-NPL PED2_E-MIN PED2_E-MAX FMS_MALF_E-SIG Remote Pedal Potentiometer accelerator 2 Potentiometer accelerator 2 Fuel Metering Solenoid 595 253 FMS_E-MIN Fuel Metering Solenoid 596 254 FMS_E-MAX Fuel Metering Solenoid 35/54 Variable Limits 20 cnts 0,098 V 1000 cnts 4,888 V 1007 cnts 4,922 V 50 cnts 0,244 V 22 cnts 0,108 V 1000 cnts 4,888 V AdcCountBARO_u16 signal voltage too high, possible short circuit to battery signal voltage too high, possible short circuit to battery (B7) AdcCountACT_u16 signal voltage too low, possible short circuit to ground signal voltage too low, possible short circuit to ground AdcCountECT_u16 signal voltage too high, possible short circuit to battery (B6) Possibly wrong pedal used (B9) signal voltage too low, possible short circuit to ground signal voltage too high, possible short circuit to battery (B9) Timeout of fuel density sensor - check connection and sensor PED 1 + 2 AdcCountPED1_u16 ≠5V 20 cnts 950 cnts fuel pressure is below the limit 0,098 V 4,643 V < 2 bar for 10s signal voltage too low, possible short circuit to ground 20 cnts 0,098 V 1000,5 cnts 4,890 V 20 cnts 1000 cnts 0,098 V 4,888 V 30 cnts 0,147 V 135 cnts 0,660 V AdcCountPF20_u16 signal voltage too high, possible short circuit to battery (B10) time out of can message received from remote accelerator pedal input signal out of valid range signal voltage too low, possible short circuit to ground signal voltage too high, possible short circuit to battery (B9) FMS malfunction error detected rack calibration position is below the minimum SRPOS value (Y1) rack calibration position is beyond the maximum SRPOS value Z001138-1_2014-01 AdcCountPED2_u16 Electrical System DTC List / Error Code List - SE Engines V50000.10 actual version Dec. 600 601 899 900 1029 Hex. ABBREV. 258 RPOS_E-MAX 259 RPOS_E-MIN TLE_OUTL2_GPR_E383 MIN TLE_OUTL2_GPR_E384 MAX 405 EXT_E-MIN 1030 406 EXT_E-MAX 1298 1314 1315 512 522 523 TPCB_E-MAX LPS_E-MIN LPS_E-MAX 1349 545 T30_E-MIN 1350 546 T30_E-MAX 1378 562 VBATTIN_E-MIN 1379 563 VBATTIN_E-MAX 1540 1576 1577 1581 1592 1602 1603 1618 1619 1688 1689 1796 2586 604 628 629 62D 638 642 643 652 653 698 699 704 A1A 2673 2684 4097 RAMECC_E-FER TLE_RL1_FPR_E-MIN TLE_RL1_FPR_E-MAX FMS_E-FER FMS_E-SIG VREF1_E-MIN VREF1_E-MAX VREF2_E-MIN VREF2_E-MAX VREF3_E-MIN VREF3_E-MAX HYB_CLUTCH_E-FER HCU_ERROR_E-FER HCU_OVERLOAD_EA71 FER HCU_OVERTEMP_EA7C FER 1001 ITP_E-MIN Z001138-1_2014-01 INVOLVED DEVICE Rack Position Sensor Rack Position Sensor POSSIBLE CAUSE signal voltage too high, possible short circuit to battery (B1) signal voltage too low, possible short circuit to ground Glow Plug RELAY signal voltage too low, possible short circuit to ground Glow Plug RELAY signal voltage too high, possible short circuit to battery (K3) Exhaust Temperature Sensor Exhaust Temperature Sensor PCB temperature sensor Lubricant Pressure Sensor Lubricant Pressure Sensor T30- Exhaust Temperature Sensor T30- Exhaust Temperature Sensor Battery Voltage Detection Sensor Battery Voltage Detection Sensor ECU Fuel Pump Relay Output Fuel Pump Relay Output Fuel Metering Solenoid Fuel Metering Solenoid VREF1 Sensor VREF1 Sensor VREF2 Sensor VREF2 Sensor VREF3 Sensor VREF3 Sensor Hybrid Transmission Clutch Hybrid Control Unit error on ecu RAM, replace ECU with new one signal voltage too low, possible short circuit to ground signal voltage too high, possible short circuit to battery (K2) rack is not calibrated yet non plausible signal from fms signal voltage too low, possible short circuit to ground signal voltage too high, possible short circuit to battery signal voltage too low, possible short circuit to ground signal voltage too high, possible short circuit to battery signal voltage too low, possible short circuit to ground signal voltage too high, possible short circuit to battery clutch is not engaged right functional error on HCU Hybrid Control Unit too high voltage on HCU Hybrid Control Unit overtemperature on HCU Injection Timing Device signal voltage too low, possible short circuit to ground Variable AdcCountRPOS_u16 signal voltage too low, possible short circuit to ground 1020 cnts 24 cnts Limits 4,985 V 0,117 V 22 cnts 0,108 V 1000cnts 4,888 V 20 cnts 1000 cnts 0,098 V 4,888 V 50 cnts 0,25V 700 cnts 3,421V AdcCountEXT_u16 signal voltage too high, possible short circuit to battery (B8) Sensor fault for PCB temperature - replace ECU signal voltage too low, possible short circuit to ground signal voltage too high, possible short circuit to battery (B5) AdcCountTPCB_u16 AdcCountLPS_u16 signal voltage too low, possible short circuit to ground signal voltage too high, possible short circuit to battery (X21.1) AdcCountT30_u16 Battery voltage is too low AdcCountVBattIn_u16 Battery voltage is too high 36/54 <30 or >135 AdcCountVRef1_u16 AdcCountVRef2_u16 AdcCountVRef3_u16 AdcCountITP_u16 20 cnts 1000 cnts 20 cnts 1000 cnts 20 cnts 1000 cnts 0,098 V 4,888 V 0,098 V 4,888 V 0,098 V 4,888 V 20 cnts 0,098 V Electrical System DTC List / Error Code List - SE Engines V50000.10 actual version Dec. Hex. ABBREV. 4098 1002 ITP_E-MAX INVOLVED DEVICE Position Sensor Injection Timing Device Position Sensor POSSIBLE CAUSE signal voltage too high, possible short circuit to battery (B2) 4112 1010 ITD_INVCALIB_E-FER Injection Timing Device invalid calibration value, recalibrate the ITD 4113 1011 ITD_FP_E-FER Injection Timing Device ITD is possibly not moving (Y2) 4181 1055 T30FB_E-MIN feedback current error 4182 1056 T30FB_E-MAX T30 feedback T30- Exhaust Temperature Sensor 8805 2265 WIF_E-FER 8744 2228 MAP_E-MIN 8745 2229 MAP_E-MAX 9572 2564 VTGPOSFB_E-MIN 9573 2565 VTGPOSFB_E-MAX 49811 C293 HCU_OFFLINE_E-FER Water in fuel sensor Manifold Air Pressure Sensor (Boost pressure Sensor) Manifold Air Pressure Sensor (Boost pressure Sensor) Turbocharger Position Feedback Turbocharger Position Feedback Hybrid Control Unit Limits 1000 cnts 4,888 V <20/>1000 <0,098/>4,888 cnts V ITP deviation > 3° for min. 10s if ECT > 80°C and LPS > 5bar AdcCountT30Fb_u16 Invalid signal level There's too much water in the water separator. Service required level too high for min. 3s * signal voltage too low, possible short circuit to ground 150 cnts 0,733 V 980 cnts 4,790 V AdcCountMAP_u16 signal voltage too high, possible short circuit to battery (B4) signal voltage too low, possible short circuit to ground (X25) AdcCountVTGPOS_u16 signal voltage too high, possible short circuit to battery (X25) HCU is offline, or connection is broken * observation starts 5s after IGN = ON For further information refer to Service Information SI_1303 37/54 Variable Z001138-1_2014-01 Electrical System 06.04.10 Explanations of the “BLimDiag” – “Bit” to limit Beta _max. BLDqm 1 BETA_max limited on max. Injection Quantity Table (FN_QM) BLDact 2 BETA_max limited by Air Charge Temperature (TBACT) BLDla 4 BETA_max limited on insufficient boost pressure at given load & speed (TBLA*TBACT) Note: During transient driving condition BLimDiag parameter must be ignored because this “Bit” indication reflects the dynamic parameter situation of momentary load & speed condition. After establishing steady state condition parameter value (bit) will be considered for computing BETA_max BLDlps 8 BETA_max limited due to insufficient lubricant pressure at present engine speed (TBLPS) BLDect 64 BETA_max limited by engine coolant temperature (TBTLIM) BLDitd 256 BETA_max limited because of ITD-position (ITPcom ≠ actual ITP) BLDitderr 1024 BETA_max limited due to ITV / ITPsensor error high or low BLDext 2048 BETA_max limited by Exhaust Gas Temperature. measured in exhaust elbow (TBEXT) BLDt30 4096 BETA_max limited by Manifold Exhaust Temperature (TBT30LIM) Optional Equipment Explanations of the Engine Mode (ENGMODE) ENGMODE 1 Power ON (when IGN on) ENGMODE 2 Crank (if RPM > 70) ENGMODE 4 Idle (if engine is running) ENGMODE 64 SOLAS (if SOLAS Inversion Switch is active) Z001138-1_2014-01 38/54 Electrical System 06.04.11 Configuration engine ECU-M1CU3 with connector A1 Pin 1 2 3 4 5 6 7 8 9 10 11 12 13 14 15 16 17 18 19 20 21 22 23 24 25 26 27 28 39/54 Designation VRACK RES2 RPOS T30 ITP PF20 ACT EXT -----------------AGND AGND AGND GND C_OO -----------------MAP C_CI VTGPOS GEAR NFIX1 AGND AGND AGND GND GPR RPM RACK ITV Explication Hi Side Protected Output High Current Output Rack Position Input PT200 Temperature Senor Input Analogue Input PullUp / Down Analogue Input PullUp / Down NTC Input NTC Input -------------------------------------------------------------------Analogue Ground Analogue Ground Analogue Ground Digital Ground Low Current Output -------------------------------------------------------------------Analogue Input PullUp / Down Analogue Input PullUp / Down Analogue Input PullUp / Down NTC Input NTC Input Analogue Ground Analogue Ground Analogue Ground Digital Ground Low Current Output Crank Sensor Input Low Side Output – Rack Control High Current Output Z001138-1_2014-01 Electrical System Pin 29 30 31 32 33 34 35 36 37 38 39 40 41 42 43 44 45 46 47 48 49 50 51 52 53 54 55 56 57 58 59 60 61 62 63 64 65 66 67 68 69 70 71 72 73 74 75 76 77 78 79 80 Designation VREF3 VREF2 EC C_OI Overside -----------------NFIX2 ----------------------------------HYB_A1 CF2 CF1 VREF1 VREF2 LPS WIF SOLAS ECT VTG + VTG HYB_A2 -----------------CF3 FPR AGND PED1 -----------------CRI CAN2L GNDPWR VBAT VREF1 PED2 OUVP CAN2H GND GNDPWR VBAT RES1 SER CEL IGN CAN1H GNDPWR GNDPWR HORN GPL MR CAN1L GND GNDPWR VBAT Z001138-1_2014-01 Explication 5V Analogue Voltage Reference 5V Analogue Voltage Reference Analogue Input PullUp / Down Analogue Input PullUp / Down Analogue Input PullUp / Down -------------------------------------------------------------------NTC Input --------------------------------------------------------------------------------------------------------------------------------------High Current Output Me / Hi Current Output Me / Hi Current Output 5V Analogue Voltage Reference 5V Analogue Voltage Reference Analogue Input PullUp / Down Analogue Input PullUp / Down NTC Input NTC Input --------------------------------------------------------------------------------------------------------------------------------------High Current Output -------------------------------------------------------------------Me / Hi Current Output Digital Output – Relay / Lamp Analogue Ground Pedal Position Input -------------------------------------------------------------------Digital Input – Hall Effect CAN Line (250kbit) Power Ground Analogue Input Battery 5V Analogue Voltage Reference Pedal Position Input Digital Input – Hall Effect CAN Line Digital Ground Power Ground Analogue Input Battery Low Current Output Digital Output – Relay / Lamp Digital Output – Relay / Lamp Ignition Switch Input CAN Line Power Ground Power Ground Low Current Output Digital Output – Relay / Lamp Main Relay Output CAN Line 500 (kbit) Digital Ground Power Ground Analogue Input Battery 40/54 Electrical System 06.08 Potentiometer Accelerator and Voltage regulator 06.08.01 Potentiometer Accelerator 2180847-0, B09 PED 1 (Channel 1)= rising Voltage PED 2 (Channel 2) = falling Voltage Summation of both voltages, during the whole range hast to be 5 Volt: PED 1 + PED 2 = 5V ± 120mV 41/54 Z001138-1_2014-01 Electrical System 06.10 Actor and Sensor 06.10.01 Component configuration engine Z001138-1_2014-01 42/54 Electrical System 06.10.03 Calibration of rack position This procedure must be carried out if any of the following has been done: - Control solenoid has been disassembled or replaced, refer to 03. 08. 01. - Rack position sensor has been disassembled or replaced, refer to 03. 08. 03. - Engine control unit has been replaced. - Rack or linkage lever have been replaced or loosened. - ITD has been disassembled or replaced - Torsion Arm Assy has been replaced or loosened - ITP-Sensor has been replaced NOTE: Ensure that the ignition is turned off. 1. Remove threaded pin from position A (ill. 1). 2. Manually move rack (ill.1/B) forward until bore (ill.1/C) is aligned with threaded hole (ill.1/D) and insert threaded tapered pin. The pin must be fastened hand tight and sit correctly in the rack, see ill. 2. above. 3. Adjust eccentric shaft with special tool 2300736/1 so that the eccentric is at the highest point as shown. (ill. 4) NOTE: If it is difficult to turn the eccentric shaft, proceed as following: Turn Ignition “ON” to rotate eccentric shaft clockwise or counter clockwise for max. 30 seconds. By Ignition “ON” and if common rack is fixed in threaded hole (Ill.1/D), the solenoid of Injection Timing Device is pulsed for max. 30 seconds. Turn Ignition “OFF” when eccentric shaft is 43/54 Z001138-1_2014-01 Electrical System at correct position (Ill 4) 4. Turn “ON” ignition switch (min. 20 seconds). NOTE: With fixed rack, rack position will be automatically stored by ECU-M1CU3. Storage process will take approx. 20 sec. 5. Turn “off” ignition switch 6. Loosen threaded pin, while retaining common rack and release under control. Place threaded pin into original position (rear bulkhead wall) (ill.1/A). 7. Turn “ON” ignition switch for min. 10 sec. Note: EMS memorises reference rack position and zero-position of common rack. During this procedure Injection Timing Zero Position value gets stored simultaneously. 8. Turn “OFF” ignition switch. 9. Remove adjustment tool 2300736/1 from eccentric shaft. 10. Check if following parameters are plausible vie SMO-EDT 2.0: “SRPos0” “ITD0Pos” “SRPos18” NOTE: If storage in ECU-M1CU3 was unsuccessful, an error rack code will be displayed. Refer to Table Service Codes for detailed information NOTE: The rack position sensor is magnetism sensitive. All external magnets must be kept away as the may disturb the sensor. Z001138-1_2014-01 44/54 Electrical System 06.10.04 Replace actors, sensors 06.10.04.01 ACT - Air charge temperature sensor, B07 1. Unscrew temperature sensor (SW19) Grease O-rings before replacing sensor. 06.10.04.02 ECT - Engine Coolant temperature sensor, B06 Preparation: Drain the coolant system 1. Remove plug housing. 2. Unscrew engine temperature sensor SW 17. ATTENTION: Use new sealing ring. 3. Fill the cooling system; refer 05.00.08 06.10.04.03 RPM - Speed sensor, B03 1. Press handle and remove plug. 2. Loosen hexagon screw (SW10), remove sensor. ATTENTION: 45/54 For assembly, use new 0ring. Grease O-ring and put it on. Secure hexagon screw with LOCTITE 243 and tighten with a torque of 9,5 +/-1 Nm. Z001138-1_2014-01 Electrical System 06.10.04.04 MAP – Manifold Absolut Pressure Sensor, B04 1. Pull off plug by turning counterclockwise. 2. Loosen sensor (SW27). Remove sensor. Assembly is done in reverse order off disassembly. For replacing the sensor use LOCTITE 243. 06.10.04.05 RPos - Sensor for rack position, B01 1. Remove retaining clip, remove plug housing . 2. Disassemble rack control solenoid, refer to 03.08.01. 3. Loosen 2 hex.sock.hd.cap-screws with hexagon socket (SW3), remove sensor. Assembly is done according to assembly of rack control solenoid, refer to 03.08. 06.10.04.06 LPS - Lubricant pressure sensor, B05 1. Remove plug housing. 2. Unscrew lubricant pressure sensor SW 22 (from mount ATTENTION: Avoid spilling of engine oil. Collect lubricant in a suitable container. 3. Mount sensor with new cupper seal and tighten to 28 Nm +/-2. Use LOCTITE 243 06.10.04.07 FSP – Fuel Supply Pressure Sensor B10 1. Remove plug housing. 2. Unscrew Fuel Supply Pressure sensor (SW 22) 3. Mount sensor by use of LOCTITE 243. Z001138-1_2014-01 46/54 Electrical System 06.10.04.08 ITP – Injection Timing Position Sensor, B02 1. Remove plug from sensor. 2. Loosen 2 hexagon nuts, remove sensor. 3. Don’t forget the washers 06.10.04.09 ITV – Ignition Timing Valve, Y2 1. Remove intake manifold, refer 01. 08. 01. 2. Remove plug from valve. 3. Loosen 2 screws, remove valve and O-ring. FOR ASSEMBLY: Use new O-ring. 06.10.04.010 VTG – Vane Actuator, X25 1. Remove plug from actuator. 2. Remove retaining washer. 3. Loosen 3 hexagon screws and remove actuator. 47/54 Z001138-1_2014-01 Electrical System 06.10.04.011 FDS-Fuel density Sensor included in Kit Fuel Compensation MS1205010 1. Remove plug from sensor. 2. Unscrew Fuel density Sensor M14x1.5 (SW30) and remove sensor. NOTE: Use only in combination with MET Software-version: min. V50000.10D Tighten with a torque of 27Nm +/-3 Renew o-ring & copper seal ring Note: Do NOT push; poke or otherwise touch the Tuning Fork with any object or instrument, as this may cause damage to the Sensor 06.10.04.012 MET- Manifold Exhaust Temperature Sensor X21 included in Kit Fuel Compensation MS1205010 1. Remove plug from sensor. 2. Unscrew T30-Exhaust Gas Temperature Probe M14x1.5 (SW30) and remove sensor. NOTE: Use only in combination with FDS Software-version: min. V50000.10D Z001138-1_2014-01 48/54 Electrical System 06.10.04.013 EXT – Exhaust Gas Temperature Sensor 1. Remove plug housing. 2. Unscrew Exhaust Gas Temperature Sensor (SW 17). ATTENTION: Use new sealing ring. For further information refer to Extranet: Troubleshooting Sensors 49/54 Z001138-1_2014-01 Electrical System 06.10.05 Connectors, helpful hints Pulling lightly on the wire after it is snapped in place will assure the contact is locked. A contact removal tool taped or tie wrapped to the harness will make it easily available should repairs be needed. Tie wraps and tape away from the rear of the connector will allow the wire to be sealed properly. Solder should not be added to Deutsch terminals. Z001138-1_2014-01 50/54 Electrical System 06.10.06 Connectors, assembly instructions Contact insertion Grasp contact approximately (25,4mm) one inch behind the contact crimp barrel. Hold connector with rear grommet facing you. NOTE: For unused wire cavities, insert sealing plugs for full environmental sealing. Push contact straight into connector grommet until a positive stop is felt. A slight tug will confirm that it is properly locked in place. Contact removal With rear insert toward you, snap appropriate size extractor tool over the wire of contact to be removed. Slide tool along into the insert cavity until it engages contact and resistance is felt. Pull contact-wire assembly out of connector. NOTE: Do not twist or insert tool at an angle. 51/54 Z001138-1_2014-01 Electrical System Contact insertion Grasp contact approximately (25,4mm) one inch behind the contact crimp barrel. Hold connector with rear grommet facing you. Push contact straight into connector grommet until a positive stop is felt. A slight tug will confirm that it is properly locked in place. Once all contacts are in place, insert orange wedge with arrow pointing toward exterior locking mechanism. The orange wedge will snap into place. Rectangular wedges are not oriented. The may go in either way. NOTE: The receptacle is shown - use the same procedure for plug. Contact removal Remove orange wedge using needle nose pliers or a hook shaped wire to pull wedge straight out. Z001138-1_2014-01 To remove the contacts, Hold the rear seal in place, gently pull wire backwards, as removing the contact while at the same time will displace the seal. releasing the locking finger by moving it away from the contact with a screwdriver. 52/54 Electrical System 06.12 Battery Battery - Acid Test (when using Acid batteries!) The battery provides the starter engine with energy and supplies the required voltage for lighting and other electrical equipment when the engine is not running. During the starting procedure and when the generator does not generate any current, the battery provides the electronic engine management system with voltage. For M16 TCA Use two 12V batteries with a cold test circuit of 650 ampere each at -18°C and a capacity of 115 Ah at 27°C, to guarantee the supply of the electric and electronic components for all operating conditions. The batteries are connected in series and provide a capacity of 115 Ah / 24 V for the external supply of all electric components on the marine.12V supply of all electric and electronic components on the engine (including instrument panel) by centre tapping. Additional charge is guaranteed by charging equalization. Explanation: Cold current test: The cold current test is a specified load test of a battery. The charge of battery with specified current (e.g. with 650A). After discharge for 30 sec., the voltage should not drop bellow ³9V. Capacity: With a current consumption of 1/20 of specified capacity (e.g. with 115Ah) the battery voltage must not fall below 10 V after 20 hours, to guarantee the engine's starting ability. Maintenance To guarantee long battery life, the following tests should be carried out periodically. 1. The level of battery acid must always be above plates and separators. The acid level should reach the marking on the battery. Acid may only be refilled by an expert when it was definitely stated that some of it has been spilled. ATTENTION: 53/54 Battery fluid is an aggressive acid and must be handled with care. In case of skin contact rinse thoroughly with water and consult a doctor physician. Z001138-1_2014-01 Electrical System 2. The battery should always be charged as full as possible. Regularly check the state of charge with the battery acid tester. We recommend checking the acid density and acid level periodically every two weeks. If the density is 0.04 kg/dm³ below the value of full charge, the battery is to be removed and recharged. DENSITY WITH FULL CHARGE: 1.260kg/dm3 (at 27°C). ATTENTION: Never charge the battery on the marine. The vapours resulting from charging could cause an explosion! For a periodical check of the battery, the following items are to be considered: 1. Protect the marine against acid leakage. 2. Clean battery. 3. Check connections and cables. 4. Clean battery contacts. (neg./pos.) 5. Check holding device of battery. 6. Check housing for damages (acid leakage). 7. Check acid density. 8. Disassemble battery for test. In case of less than 3/4 charge, charge it by means of battery charger, carry out charge test. 9. Check acid level. In case of a bad state of charge or excessive loss of water, check charge circuit. Clean battery, contacts and terminals with a solution of soda and water. This neutralizes the battery acid. After cleaning with the solution, rinse the surface with water by taking care that the solution does not penetrate into the battery ATTENTION: Z001138-1_2014-01 When connecting the battery cables, take special care of correct polarity. Incorrect polarity destroys electronic components. 54/54