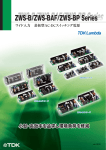
1
SERVICE MANUAL IA L BRIDGE NAVIGATIONAL WATCH ALARM SYSTEM (BNWAS) Ku-BAND VSAT FV-100 BR-500 CO NF ID EN T MODEL www.furuno.co.jp CONFIDENTIAL (internal use only) This confidential document is used only by FURUNO authorized persons. It is strictly prohibited to reproduce the document in whole or in part without prior written permission of FURUNO. The paper used in this manual is elemental chlorine free. ・FURUNO Authorized Distributor/Dealer 9-52 Ashihara-cho, Nishinomiya, 662-8580, JAPAN All rights reserved. Printed in Japan A : APR . 2012 Pub. No. SME-44610-A (NAYO ) BR-500 *00017677510* *00017677510* * 0 0 0 1 7 6 7 7 5 1 0 * BR-500 SME Contents Chapter 1 General 1.1 What is BNWAS? ..................................................................................... 1-1 1.2 IMO Carriage Requirements .................................................................... 1-3 1.3 System Configurations ............................................................................. 1-4 1.4 Maximum Number of Units and Cable Length ........................................ 1-5 IA Chapter 2 Functional Description L 1.5 Connection of Cabin Panel with 4-core Cable ......................................... 1-5 2.1 Printed Circuit Boards .............................................................................. 2-1 EN T 2.2 Main Alarm Panel (BR-510) ...................................................................... 2-1 2.2.1 MAIN Board (20P8200B) ................................................................. 2-2 2.2.2 PWR Board (26P0022A) ...................................................................2-3 2.3 Processor Unit (BR-520) .......................................................................... 2-5 NF ID 2.3.1 MAIN Board (24P0104) .................................................................... 2-5 2.3.2 Power Supply Circuit........................................................................... 2-16 2.3.3 Checking Connection to Processor Unit ............................................ 2-17 2.4 Timer Reset Panel (BR-530/550) ............................................................. 2-18 2.5 Cabin Panel (BR-540) .............................................................................. 2-20 2.6 Motion Detector (BR-560) ....................................................................... 2-21 CO 2.7 Flash Beacon (BR-570) ............................................................................ 2-24 Chapter 3 Location of Parts 3.1 Main Alarm Panel (BR-510) .................................................................... 3-1 3.2 Processor Unit (BR-520) .......................................................................... 3-7 3.3 Timer Reset Panel and Cabin Panel (BR-530/540) ..................................3-13 3.4 Watertight Timer Reset Panel (BR-550) 3.5 Motion Detector (BR-560) 3.6 Flash Beacon (BR-570) ................................................. 3-13 ..................................................................... 3-14 .......................................................................... 3-15 i CONFIDENTIAL (internal use only) This confidential document is used only by FURUNO authorized persons. It is strictly prohibited to reproduce the document in whole or in part without prior written permission of FURUNO. BR-500 SME Chapter 4 Setup 4.1 Menu 4.1.1 Password ............................................................................................ 4-1 4.1.2 Administrator menu ........................................................................... 4-2 4.1.3 Service menu ................................................................................... 4-3 4.2 Backup Officer Name ............................................................................... 4-5 4.3 Master’s Cabin Panel ................................................................................ 4-7 4.3.1 Including Captain in Backup Officers ............................................... 4-7 4.3.2 Not Including Captain in Backup Officers ........................................ 4-7 L 4.4 Buzzer Frequency ..................................................................................... 4-8 IA 4.5 Brilliance of LED and Light ..................................................................... 4-8 4.6 Potentiometers ..........................................................................................4-9 EN T 4.6.1 Processor Unit (BR-520) ................................................................... 4-9 4.6.2 Timer Reset Panel (BR-530) and Cabin Panel (BR-540) .................. 4-9 4.6.3 Flash Beacon (BR-570) ....................................................................... 4-9 4.8 Switches NF ID 4.7 Jumpers 4.7.1 Processor Unit (BR-520) ................................................................... 4-10 4.7.2 Timer Reset Panel (BR-530) and Cabin Panel (BR-540) .................. 4-10 4.7.3 Flash Beacon (BR-570) ..................................................................... 4-10 4.8.1 DIP Switch (S1) ................................................................................. 4-11 4.8.2 Rotary Switch (S2) ............................................................................ 4-11 CO Chapter 5 Maintenance 5.1 Programs for BR-500 ............................................................................... 5-1 5.2 Reading Program Number ........................................................................ 5-1 5.3 Updating Program ....................................................................................5-2 5.3.1 Preparation ......................................................................................... 5-2 5.3.2 Program Files ..................................................................................... 5-3 5.3.3 Editing Batch File .............................................................................. 5-4 5.3.4 Installing USB Driver ........................................................................ 5-5 5.3.5 Upgrading BR-510 ............................................................................ 5-14 5.3.6 Upgrading BR-520 ............................................................................ 5-17 ii CONFIDENTIAL (internal use only) This confidential document is used only by FURUNO authorized persons. It is strictly prohibited to reproduce the document in whole or in part without prior written permission of FURUNO. BR-500 SME 5.4 LEDs 5.4.1 Processor Unit (BR-520) ................................................................... 5-21 5.4.2 Timer Reset Panel (BR-530/550) ...................................................... 5-22 5.4.3 Cabin Panel (BR-540) ..................................................................... 5-22 5.5 Test Points ............................................................................................... 5-23 Chapter 6 Replacement of Major Parts 6.1 Main Alarm Panel (BR-510) .................................................................... 6-1 IA L 6.1.1 Front Panel ......................................................................................... 6-1 6.1.2 MAIN board (20P8200B) .................................................................. 6-1 6.1.3 PWR board (26P0022A) ....................................................................6-7 EN T 6.2 Processor Unit (BR-520) .......................................................................... 6-8 6.2.1 MAIN board and Power case assembly ............................................. 6-8 6.2.2 PWR board and Power supply Fan motor ......................................... 6-10 6.2.3 Fan motor.............................................................................................6-11 6.3 Timer Reset Panel (BR-530) .................................................................... 6-12 6.4 Cabin Panel (BR-540) .............................................................................. 6-13 NF ID 6.5 Motion Detector (BR-560) ....................................................................... 6-14 6.6 Flash Beacon (BR-570) ............................................................................ 6-14 Chapter 7 Troubleshooting 7.1 Self-diagnosis ......................................................................................... 7-1 CO 7.1.1 Self Test ............................................................................................. 7-1 7.1.2 LCD Test .......................................................................................... 7-2 7.2 Checking Connections .............................................................................. 7-3 7.2.1 Main Alarm Panel (BR-510) .............................................................. 7-3 7.2.2 Timer Reset Panel and Cabin Panel (BR-530/540) ........................... 7-3 7.3 Checking Power Supply ........................................................................... 7-4 7.4 FAQs .......................................................................................................7-5 iii CONFIDENTIAL (internal use only) This confidential document is used only by FURUNO authorized persons. It is strictly prohibited to reproduce the document in whole or in part without prior written permission of FURUNO. Chapter 1 General L The Furuno BR-500 Bridge Navigation Watch Safety System (BNWAS) monitors the watch officer's presence through watch safety system functions. A watch officer is required to press the button on a Timer Reset Panel or to operate navigation equipment (i.e. ECDIS and Radar, etc.) at certain preset intervals. If the officer fails to press the button, operate connected equipment or trigger optional motion sensor within preset intervals, visual and audible alarms will be generated in the wheelhouse. If the officer doesn't respond to the alarm, the BR500 BNWAS transfers the alarm to the Cabin Panels installed in other sections of the vessel in order to inform backup officers of the watch officer's incapacity. IA 1.1 What is BNWAS? NF ID EN T The purpose of a Bridge Navigational Watch Alarm System (BNWAS) is to monitor bridge activity and detect operator disability which could lead to marine accidents. The system monitors the awareness of the Officer of the Watch (OOW) and automatically alerts the Master or another qualified OOW if for any reason the OOW becomes incapable of performing the OOW's duties. This purpose is achieved by a series of indications and alarms to alert first the OOW and if he is not responding, then to alert the Master or another qualified OOW. Additionally, the BNWAS provides the Emergency Call function for immediate assistance. The BNWAS should be operational whenever the ship is underway at sea (SOLAS V/19.2.2.3). CO Dormant period The system remains dormant for a period of between 3 and 12 minutes (Td). At the end of this period, the alarm system initiates a visual indication (Prewarning) on the bridge. If the OOW becomes unable to interact with the BNWAS, the system enters a sequence of alarm stages. First stage bridge audible alarm If not reset, the BNWAS additionally sound a first stage audible alarm on the bridge 15 seconds after the visual indication is initiated. Second stage remote audible alarm If not reset, the BNWAS additionally sound a second stage remote audible alarm in the back-up officer's and/or Master's location 15 seconds after the first stage audible alarm is initiated. 1-1 CONFIDENTIAL (internal use only) This confidential document is used only by FURUNO authorized persons. It is strictly prohibited to reproduce the document in whole or in part without prior written permission of FURUNO. 1.1 What is BNWAS? Third stage remote audible alarm If not reset, the BNWAS additionally sound a third stage remote audible alarm at the locations of further crew members capable of taking corrective actions 90 seconds after the second stage remote audible alarm is initiated. Third stage remote alarm Second stage remote audible alarm First stage bridge audible alarm Td Td +0.25 +0.50 IA Td L Visual indication (Prewarning) Td Min. +2.0 EN T Fig.1.1 Sequence of alarm stages NF ID The second and third stage alarms can be reset only by the reset key on the BR-510 main alarm panel. All audible and visible alarms from the main alarm panel, BR-530 timer reset panel, and BR-540 cabin panel go off when the reset key is pressed. To initiate the reset function, an input representing a single operator action by the OOW is required. This input is generated by; CO 1) Pressing the Reset button on the timer reset panel, as well as the main alarm panel, 2) Triggering the motion detector which detects movement of OOW, and 3) Operating the navigational equipment such as ECDIS and radar which provide the Operator Fitness alarm output port. The timer reset panel is installed on the bridge giving proper look out. The BNWAS incorporates the following operational modes: (a) Automatic: Automatically brought into operation whenever the ship's heading or track control system is activated and inhibited when this system is not activated (b) Manual ON: In operation constantly (c) Manual OFF: Does not operate under any circumstances 1-2 CONFIDENTIAL (internal use only) This confidential document is used only by FURUNO authorized persons. It is strictly prohibited to reproduce the document in whole or in part without prior written permission of FURUNO. 1.2 IMO Carriage Requirements 1.2 IMO Carriage Requirements EN T IA L The IMO resolution MSC.282(86) adopted June 2009 states that the BNWAS will be a mandatory requirement on vessels of 150 gross tonnage and upwards and passenger ships irrespective of size as follows: CO NF ID Fig.1.2 IMO carriage requirements 1-3 CONFIDENTIAL (internal use only) This confidential document is used only by FURUNO authorized persons. It is strictly prohibited to reproduce the document in whole or in part without prior written permission of FURUNO. 1.3 System Configurations 1.3 System Configurations Fig.1.3 shows the system configurations of BR-500. Flash Beacon (BR-570) EN T IA L Motion Detector (BR-560) Main Alarm Panel (BR-510) Watertight Timer Reset Panel (BR-550)*1 Watertight Timer Reset Panel (BR-550)*1 CO NF ID Autopilot Backup Navigator Operator Fitness System Fail IEC61162 Timer Reset Panel (BR-530)*1 : Standard supply : Optional supply Cabin Panel (BR-540)*2 Cabin Panel (BR-540)*2 *1: A total of six Timer Reset Panels (BR-530/550) can be connected to BR-520. *2: A total of twelve cabin panels (BR-540) can be connected to BR-520. Fig.1.3 Configuration of BR-500 BNWAS 1-4 CONFIDENTIAL (internal use only) This confidential document is used only by FURUNO authorized persons. It is strictly prohibited to reproduce the document in whole or in part without prior written permission of FURUNO. 1.4 Maximum Number of Units and Cable Length 1.4 Maximum Number of Units and Cable Length Some ports can be used for parallel connections as shown in Table 1.1, considering the maximum of number. Table 1.1 also explains the maximum and total cable length for each unit connected to the processor unit BR-520. Table 1.1 A maximum of unit to be connected in parallel Connection to each terminal board A maximum of 2 units 6 units 40 m (Maximum) 150 m (Total) BR-540 Cabin Panel A maximum of 3 units 12 units 80 m (Maximum) 300 m (Total) BR-560 Motion Detector One unit only BR-570 Flash Beacon One unit only Unit Name BR-530/550 In all Cable Length IA L Timer Reset Panel 50 m (Maximum) 3 units 50 m (Maximum) EN T 2 units 1.5 Connection of Cabin Panel with 4-core Cable BR-520 1 BR-540 12VOUT GND CO 2 3 4 5 6 NF ID The cabin panel, BR-540 is connected to the processor unit, BR-520 with a 6-core cable. However, it may be connected with a 4-core cable if lessening function is accepted: the DUTY LED and TEST button are disabled. PB_DUTY PB_TEST PB_ALM PB_BUZ 1 2 3 4 5 6 ALARM LED Fig.1.4 Connection of BR-540 with 4-core cable 1-5 CONFIDENTIAL (internal use only) This confidential document is used only by FURUNO authorized persons. It is strictly prohibited to reproduce the document in whole or in part without prior written permission of FURUNO. Disabled Disabled Chapter 2 Functional Description This chapter describes the function of each printed circuit board. 2.1 Printed Circuit Boards Table 2.1 shows the Printed Circuit Boards (PCBs) used for the BR-500 BNWAS. Table 2.1 List of PCBs Unit Name Name of PCB NF ID EN T BR-530 Timer Reset Panel BR-540 Cabin Panel BR-550 Watertight Timer Reset Panel BR-560 Motion Detector BR-570 Flash Beacon 20P8200B 26P0022A 24P0104 24P0105 24P0110 ZWS100BAF-24/FUR 24P0106 24P0106A 24P0106 24P0107 24P0108 L BR-520 Processor Unit MAIN PWR MAIN PWR FIL PWR Supply CNT CNT CNT MOT FLB IA BR-510 Main Alarm Panel Type of PCB 2.2 Main Alarm Panel (BR-510) CO The main alarm panel, BR-510 consists of MAIN board (20P8200B), PWR board (26P0022A), and a 4.3-inch WQVGA color LCD (SD80003T00). The main alarm panel is connected to the processor unit, BR-520 via CAN bus, or NMEA2000. Power (12 Vdc) is supplied to the main alarm panel from the processor unit via the NMEA2000 cable. The main alarm panel does not have the power switch. J207 LCD J208 (20P8200B) J104 (26P0022A) NMEA MAIN Board PWR Board J106 J206 CAN Bus J101 Fig.2.1 shows the block diagram of the main alarm panel. Fig.2.1 Block diagram of Main Alarm Panel, BR-510 2-1 CONFIDENTIAL (internal use only) This confidential document is used only by FURUNO authorized persons. It is strictly prohibited to reproduce the document in whole or in part without prior written permission of FURUNO. 2.2 Main Alarm Panel (BR-510) 2.2.1 MAIN Board (20P8200B) There are three types of the MAIN board, 20P8200 as shown in Table 2.2 (reference only). The BR-500 uses the B version of 20P8200. The modification of the board to another version is not recommended, because of the difficulty in soldering and desoldering of small parts. Table 2.2 MAIN boards ROM Label 2051530-xx.xx 20P8200A 20P8200B 2651010-xx.xx 2450056-xx.xx Most Notable Differences Used in C70, C98, C99, C104, C105, GP-33 J209 and U9 are mounted. Above parts are not mounted. RD-33 Above parts are not mounted BR-500 and type of tactile switches differs. IA L Type 20P8200 EN T Fig.2.2 shows the block diagram of MAIN board, 20P8200B. MAIN Board (20P8200) Flash ROM CPU NF ID SDRAM CAN Bus Voltage Detector CO 5V PWR_ON Latch circuit CTX/CRX PWR_F Panel key (x9) Panel illumination Driver PWR_SW Driver PWR_H AN Buzzer LED Driver LCD LCD LCD Backlight Fig.2.2 Block diagram of MAIN board, 20P8200B 2-2 CONFIDENTIAL (internal use only) This confidential document is used only by FURUNO authorized persons. It is strictly prohibited to reproduce the document in whole or in part without prior written permission of FURUNO. 2.2 Main Alarm Panel (BR-510) 2.2.2 PWR Board (26P0022A) The BR-500 uses the PWR board of 26P0022A and the RD-33 of 26P0022. Fig.2.3 shows the block diagram of the PWR board, 26P0022A consisting of a switching regulator, a CAN bus interface circuit, and a NMEA interface circuit. L Receiving PWR_ON signal from the MAIN board, the switching regulator, U1 generates 5 Vdc. The voltage monitor circuit consisting of CR2, R1, and R2 outputs the AN signal to the MAIN board indicating that power is supplied to the board normally. The monitor circuit does not output the signal when power is not supplied to the BR-510. Using the AN signal, the CPU puts the system into a safe state for shutdown. Filter, FL1 TP2 <3< NET_C Switching Regulator, U1 Reverse Polarity Protector, CR1 <4< TP5 EN T NET_S J106 PWR_ON Fuse, F1 (1A) <2< IA TP1 J101 5V 3.3V REG, U3 <19< <20< 3.3V <17< <18< TP3 <4< TD_A TD_B CO <3< CAN Transceiver, U4 Filter, FL2 <5< J104 <2< NF ID Voltage Monitor, CR2 & R1/R2 AN CT CR RS485 Driver, U6 <3< <14< <13< <9< RD_H <4< RD_C <5< Photo coupler, U7 (TLP181) <8< Fig.2.3 Block diagram of PWR board, 26P0022A in BR-510 IMPORTANT! The switching regulator, U1 is changed from L4971D to LT3991 and the level of PWR board from -22 to -33. The PWR board of 22 is used with the MAIN board of 22 and 33 with 55 (FQ4-2011-037). 2-3 CONFIDENTIAL (internal use only) This confidential document is used only by FURUNO authorized persons. It is strictly prohibited to reproduce the document in whole or in part without prior written permission of FURUNO. 2.2 Main Alarm Panel (BR-510) J101 is an NMEA2000 standard connector, or LTW12 of which pin assignments are the following: 3 2 5 4 1 Pin 1: Shield (Bare) Pin 2: NET_C (+12VDC, Red) Pin 3: NET_S (Ground, Black) Pin 4: NET_H (CAN High, White) Pin 5: NET_L (CAN Low, Blue) L Fig.2.4 NMEA2000 connector plug, front view for J101 CO NF ID EN T IA The NET-H and NET-L are sometimes called CAN-H and CAN-L respectively. 2-4 CONFIDENTIAL (internal use only) This confidential document is used only by FURUNO authorized persons. It is strictly prohibited to reproduce the document in whole or in part without prior written permission of FURUNO. 2.3 Processor Unit (BR-520) 2.3 Processor Unit (BR-520) The processor unit consists of MAIN board (24P0104) and a power supply circuit which includes AC line filter, FIL board (24P0110), Power supply (ZWS100BAF-24/FUR), PWR board (24P0105), and a fan motor (MMF-06G12ES-ROD). 2.3.1 MAIN Board (24P0104) The MAIN board is divided into two circuits: Control and Interface according to its function. Each circuit locates as shown in Fig.2.5. Control Circuit EN T IA L I/F Circuit MAIN (24P0104) NF ID Fig.2.5 Circuits in MAIN board, 24P0104 CO 1) Control Circuit The CPU in this circuit reads the DIP switch settings, communicates with the main alarm panel (BR-510) and receives AC/DC Power Fail signals from the main alarm panel. Fig.2.6 shows the block diagram of Control Circuit in the MAIN board, 24P0104. The CPLD stands for Complex programmable Logic Device. Refer to Chapter 4 for the function of switches, S1 and S2. 2) Interface Circuit The interface circuit is further divided into four circuits. (1) CAN bus I/F circuit (CAN transceiver) to communicate with the main alarm panel. (2) Digital signal input circuit (Optocouplers, TLP181) to receive a contact signal. (3) Digital signal output circuit (Digital transistors, DTD114EKT) to output a LVTTL signal. (4) Serial signal input/output (SIO) circuit (RS422 opto isolator and isolated RS485 full-duplex differential line transceiver, 4800/38400 bps selectable) to output the ALR sentence and update program. Fig.2.7 shows the block diagram of Interface Circuit on the MAIN board, 24P0104. 2-5 CONFIDENTIAL (internal use only) This confidential document is used only by FURUNO authorized persons. It is strictly prohibited to reproduce the document in whole or in part without prior written permission of FURUNO. 2.3 Processor Unit (BR-520) CAN I/F CAN Data Address CPLD (U6) AC FAIL P TLP181 (x 21 channels) BCLK DC FAIL P DIP SW (S1) P LED (4CH、 CR1 to CR4) CPU (U5) IA L P DTD114 (x 37 channels) P RXD EEPROM Serial I/F NF ID TXD EN T I/F Block P Rotary SW (S2) CO Fig.2.6 Block diagram of control circuit 2-6 CONFIDENTIAL (internal use only) This confidential document is used only by FURUNO authorized persons. It is strictly prohibited to reproduce the document in whole or in part without prior written permission of FURUNO. 2.3 Processor Unit (BR-520) CAN Transceiver TB2 12VA Photo Couplers (TLP181 x 21 pcs.) Contact signal Main Alarm Panel (BR-510) Reset TB3 | TB6 12VB Timer Rest Panel (BR-530/550) CPU Test TB7 L CPLD Officer Cabin Panel (BR-540) IA | TB12 12VA Test LVTTL TB13 | EN T Digital Transistors (x 37 pcs.) TB15 12VA 12VA Power for Motion TB16 Detector (MAX 2 x BR-560) TB17 Input Port 1 (x5) TB21 Input Port 2 (x3) TB18 System Fail TB19 Flash Beacon Input NF ID : 12VA from#1 to #3 of J4 Input : CO 12VB from #7 of J4 Photo MOS relay (x2) Public Cabin Panel (BR-540) SYS FAIL FLB 12VA Serial I/F Circuit Isolator Used when updating software. TB20 RS485 Driver ALR SIO (To VDR) Fig.2.7 Block diagram of Interface circuit 2-7 CONFIDENTIAL (internal use only) This confidential document is used only by FURUNO authorized persons. It is strictly prohibited to reproduce the document in whole or in part without prior written permission of FURUNO. 2.3 Processor Unit (BR-520) Table 2.3 shows terminal boards in the processor unit, BR-520 and the units to be connected. Table 2.3 Terminal boards and Units to be connected Terminal Board Unit to be connected Maximum Signal AC and DC Ship’s mains (MSC128(75)) - 100/220V &24VDC TB2 BR-510 Main Alarm Panel 1 unit NMEA2000 TB3 to TB6 BR-530/550 Timer Reset Panel 6 units TB7 to TB12 BR-540 Cabin Panel 12 units Contact (NO) & LVTTL Contact (NO) & LVTTL BR-540 Cabin Panel TB16 (Public) BR-560 Motion Detector TB17 (INPUT1) Autopilot TB17 (INPUT2)* TB17 (INPUT3 to 5) TB19 TB20 CO TB21 (INPUT6 to 8) 12VOUT (Max. 300mA) 1 unit Contact (NO) Trackpilot (Backup Navigator) 1 unit Contact (NC) ECDIS/Radar (Operator Fitness) or Motion Detector VDR (System Fail B1/2) 4 units Contact (NO) 2 units Contact (NO) BR-570 Flash Beacon 3 units LVTTL VDR 1 unit IEC61162 ECDIS/Radar (Operator Fitness) or Motion Detector 3 units Contact (NO) NF ID TB18 2 units EN T TB13 to TB15 IA (Officer) L TB1 NO: Normally Open; NC: Normally Close *: Needs to change service menu setting 2-8 CONFIDENTIAL (internal use only) This confidential document is used only by FURUNO authorized persons. It is strictly prohibited to reproduce the document in whole or in part without prior written permission of FURUNO. 2.3 Processor Unit (BR-520) Table 2.4 shows the terminal boards for connection of the timer reset panel and cabin panel. Table 2.4 Terminal board name of TB3 to TB15 NF ID TB13 TB14 TB15 I Signal Name Reset Signal Type Contact O Buzzer LVTTL O LED LVTTL I Test Contact O Buzzer O Alarm LED L I/O LVTTL IA TB7 TB8 TB9 TB10 TB11 TB12 Terminal Board Name RST_RESET (Timer Reset Panel Reset) RST_BUZ (Timer Reset Panel Buzzer) RST_LED (Timer Reset Panel Alarm) OF_TEST (Officer Cabin Panel Test) OF_BUZ (Officer Cabin Panel Buzzer) OF_ALM (Officer Cabin Panel Alarm) OF_DUTY (Officer Cabin Panel Duty) PB_TEST (Public Cabin Panel Test) PB_BUZ (Public Cabin Panel Buzzer) PB_ALM (Public Cabin Panel Alarm) PB_DUTY (Public Cabin Panel Duty) EN T TB # TB3 TB4 TB5 TB6 LVTTL O Duty LED LVTTL I Test Contact O Buzzer LVTTL O Alarm LED LVTTL O Duty LED LVTTL OF: Officer cabin; PB: Public cabin CO The cabin panel in the captain's location is connected to TB7, the cabin panel in the officer's locations to TB8 to TB12, and the cabin panel at the locations of further crew members to TB13 to TB15. The cabin panels connected to TB7 to TB12 can be selected as a backup officer. With the factory default settings, the cabin panel in the officer’s cabin is connected as below. TB7: Captain TB8: Chief Officer TB9: Second Officer TB10: Third Officer TB11: Not programmed TB12: Not programmed 2-9 CONFIDENTIAL (internal use only) This confidential document is used only by FURUNO authorized persons. It is strictly prohibited to reproduce the document in whole or in part without prior written permission of FURUNO. 2.3 Processor Unit (BR-520) CAN bus I/F Circuit The main alarm panel, BR-510 is connected to the processor unit, BR-520 via CAN bus, or NMEA2000. The CAN stands for Controller Area Network. The CAN protocol provides sophisticated error detection mechanisms and the system generates a communication error message, “Failure: Communication” when the communication failure occurs. The heart of the CAN bus I/F circuit is a CAN transceiver, U31. L The main alarm panel is connected to the TB2 of which pin assignment complies with the NMEA2000 standard; #1: FG; #2: 12VA; #3: GND; #4: NET-H; and #5: NET-L. IA The main alarm panel uses 12 V DC from the TB2 in the processor unit as power supply voltage. EN T Digital Signal Input Circuit The circuit consists of photocouplers and associated parts to read the status of the switch (open/closed). The input is isolated from the internal circuit with a photocoupler. Contact signals to be received by this circuit are; NF ID 1) Reset signal (Normally Open) The reset signal from the timer reset panel (BR-530/550), normally open is connected to TB3 to TB6. CO MAIN (24P0104) 12VA RST_RESET CNT (24P0106) #5 TB3 to TB6 #6 RESET SW4 #1 TB22 #2 BR-520 BR-530/550 Fig.2.8 Reset signal from CNT board 2-10 CONFIDENTIAL (internal use only) This confidential document is used only by FURUNO authorized persons. It is strictly prohibited to reproduce the document in whole or in part without prior written permission of FURUNO. SW3 2.3 Processor Unit (BR-520) 2) Test signal (Normally Open) The test signal from the cabin panel is connected to #6 of TB7 to TB15. The test signal is generated by pressing the Test button on the cabin panel BR-540. When the button is pressed, the switch contact is closed. MAIN (24P0104) 12VA BR-540 CNT (24P0106A) S1 OF_TEST #6 PB_TEST TB7 to TB15 #6 TEST TB22 IA L BR-520 Fig.2.9 Test signal from CNT board EN T 3) INPUT signal The INPUT signals are the mode signal from autopilot, the backup navigator signal, the operator fitness signal, and the motion detector output. These signals are connected to the INPUT 1 to 8 ports (TB17 and TB21). NF ID (A) Mode signal from autopilot (Normally Open) The BNWAS incorporates “Automatic” mode which is into operation whenever the ship’s heading or track control system (HCS or TCS) is activated and inhibited when the control system is not activated automatically. This function needs the mode signal from the HCS or TCS. CO The INPUT 1 port is intended for exclusive use to connect the normally open (NO) contact signal from the HCS or TCS. (B) Backup Navigator signal (Normally Close) The Track Control System (TCS) outputs the backup navigator signal when WP pre-warning and WP alarm are not acknowledged. When the BNWAS receives this signal, an "Emergency Call" is activated immediately. The Backup Navigator signal, normally close (NC) contact signal MUST be connected to the INPUT 2 port and set the Input Port 2 in the Service menu to Backup Navigator. 2-11 CONFIDENTIAL (internal use only) This confidential document is used only by FURUNO authorized persons. It is strictly prohibited to reproduce the document in whole or in part without prior written permission of FURUNO. 2.3 Processor Unit (BR-520) The FEA-2x07 series ECDIS outputs the backup navigator alarm signal from; 1) 2) #3 (RL 3NC) and #4 (RL 3C) of J8 in the LAN adapter, and ST05 in the B-adapter (C) Operator Fitness signal (Normally Open) The following equipment outputs the reset signal, called operator fitness signal, normally open (NO) contact signal when the equipment on the bridge is operated. Output from FEA-2x07 series ECDIS #4 (RL 1C) and #5 (RL 1NO) of J6 in the LAN adapter, and ST05 in the B-adapter FAR-2xx7 series Radar #7 and #8 (ALARM4) of J612 (Note: ALARM OUT4 in the ALARM menu is set to Operator Fitness.) EN T IA L Model The signal is connected to one of INPUT ports, Input 2 to Input 8. When the Input 2 port is used, the Input Port 2 in the Service menu is set to Timer Reset. NF ID (D) Motion Sensor signal (Normally Open) The motion detector, BR-560 outputs the normally open (NO) contact signal to reset the BNWAS when it is triggered by the officer. CO The signal is connected to one of INPUT ports, Input 2 to Input 8. When the Input 2 port is used, the Input Port 2 in the Service menu is set to Timer Reset. MAIN (24P0104) BR-520 12VA MOT (24P0107) U1 5V #1 INPUT #5 #3 #6 #4 TB17 Motion OUT #2 #3 VDD OUT GND TB23 BR-560 Fig.2.10 INPUT signal from Motion sensor 2-12 CONFIDENTIAL (internal use only) This confidential document is used only by FURUNO authorized persons. It is strictly prohibited to reproduce the document in whole or in part without prior written permission of FURUNO. 2.3 Processor Unit (BR-520) Table 2.5 lists the INPUT ports and its usage. The type of contact signal connected to the “INPUT 2” is menu selectable: either normally open (NO) or normally close (NC). Table 2.5 INPUT ports and its usage TB# Pin# Signal Name Signal Type Usage INPUT1 Normally Open Dedicated port for Autopilot #3/#4 INPUT2 Normally Open* This port can receive either normal open or normal close signal according to Service menu setting. The normally close signal is typically the Backup Navigator alarm signal. #5/#6 INPUT3 Normally Open #7/#8 INPUT4 #9/#10 INPUT5 INPUT6 #3/#4 INPUT7 #5/#6 INPUT8 The signal to reset the timer, such as Operator fitness signal and the output from the motion detector, BR-560 is connected these ports. EN T TB21 #1/#2 IA L TB17 #1/#2 CO NF ID *: Changeable to Normally Close in the service menu. 2-13 CONFIDENTIAL (internal use only) This confidential document is used only by FURUNO authorized persons. It is strictly prohibited to reproduce the document in whole or in part without prior written permission of FURUNO. 2.3 Processor Unit (BR-520) Digital Signal Output Circuit Table 2.6 shows the output signals from the open collector low-voltage TTL circuit. Note 1) The second stage alarm is omitted in the Administrator menu. Note 2) The system is set not to send the second and third stage alarms to the flash beacon with the DIP switch S1 on the MAIN board. Note 3) The SYS FAIL signal is output from the MOSFET relay, AQW612EHA for opto-isolation of the output from the external circuit. L Note 4) Version 01.06 and later of BR-520 MAIN program outputs the PB_DUTY signal from the second stage or the third stage (menu selectable). V01.05 and earlier outputs the PB_DUTY signal from the second stage alarm. Signal Name IA Table 2.6 Outputs from Open Collector Circuit Description (Signal Type) Output to H/L during a prewarning and the first to third BR-530/550 stage alarms BUZ DUTY H/L during the first to third stage alarms All PB_DUTY and OF_DUTY selected by SEL key become H. The status of OF_DUTY1 (captain) signal depends on menu setting. CO BUZ BR-540 NF ID ALM EN T LED FLB SYS_FAIL When an emergency call and the second stage alarm are triggered, all PB_DUTY and OF_DUTY selected by SEL key become H. The status of OF_DUTY1 (captain) signal depends on menu setting. See Note 4. When the third stage alarm is triggered, all DUTY signal becomes H. Same as ALM signal above H/L during a prewarning and first to third stage alarms (See Note 2.) When the "Failure" message is generated, the system outputs the contact (NO) signal. 2-14 BR-570 VDR CONFIDENTIAL (internal use only) This confidential document is used only by FURUNO authorized persons. It is strictly prohibited to reproduce the document in whole or in part without prior written permission of FURUNO. 2.3 Processor Unit (BR-520) Serial Signal Input/output Circuit The BR-500 outputs the ALR sentence to the VDR in IEC 61162 format. The baud rate is selected to either 4800 or 38400 by the DIP switch, S2 on the MAIN board (24P0104) in the processor unit. When upgrading the system, both input and output circuits are used. ALR Sentence $BNALR, hhmmss.ss,xxx,A,A,c- -c,*hh<CR><LF> L ‒ hhmmss.ss: This part may be left blank if the BNWAS does not include UTC time information IA ‒ xxx: Designation of source of alarm or source of reset command. The automatic mode is designated as "000". EN T ‒ A: A = Dormant period exceeded V = Dormant period not exceeded ‒ A: A = Alarm acknowledged V = Alarm unacknowledged NF ID ‒ c - - c: BNWAS mode (see 3.1.1): c1; c2; c3 c1 = AUT, MAN, or OFF c2 = Dormant period in min, (03 – 12) c3 = Alarm stage: 1, 2, or 3. Example: $BNALR,,000,A,V,C1=AUT;C2=03;C3=1*hh<CR><LF> CO A terminating resistor is installed across the RDA and RDB lines. If necessary, remove this resistor by changing the short plug from #1/#2 (Factory setting) to #2/#3. In most cases, it is not necessary to remove the resistor. TB20 A RS485 Driver B CPU 1 TD_A 2 TD_B J7 A RS422 Isolator B TB20 3 2 1 3 RD_A 4 RD_B 330Ω/1W, 3 pcs. Fig.2.11 Terminating resistor in serial input circuit 2-15 CONFIDENTIAL (internal use only) This confidential document is used only by FURUNO authorized persons. It is strictly prohibited to reproduce the document in whole or in part without prior written permission of FURUNO. 2.3 Processor Unit (BR-520) 2.3.2 Power Supply Circuit Fig.2.12 shows the block diagram of the power supply circuit in the processor unit, BR-520. The circuit generates 12VA, 12VB, and 5V, and sends them to the MAIN board, 24P0104. FIL board AC/DC Power Supply (24P0110) (ZWS100BAF) (DC) #3/#4 AC POWER FAIL CR8 IA TB1 #1/#2 Fuses, Filters & Switch (XF1, XF2, L5 & S2) DC-: #1 to #4 DC+:#5 to #8 Detector (U3) Fuse, Filters & Switches (XF3, L2 & S3) EN T (AC) J2 L J1 CR7 #15 J3 DC POWER FAIL #16 Detector (U4) NF ID CR9 TP4 12V_A DC/DC Converter (U5) #1/#2/#3 CR1 J3 TP3 CO DC/DC Converter (U1) 12V_B #7/#8 CR2 TP2 DC/DC Converter (U2) 5V #11/#12 CR3 Fig.2.12 Block diagram of power supply circuit in BR-520 2-16 CONFIDENTIAL (internal use only) This confidential document is used only by FURUNO authorized persons. It is strictly prohibited to reproduce the document in whole or in part without prior written permission of FURUNO. 2.3 Processor Unit (BR-520) 2.3.3 Checking Connection to Processor Unit The following operation generates the test signal from the timer reset panel and the cabin panel for checking connection to the processor unit. Unit Operation to generate TEST signal BR-530 Pressing and holding down RESET button for five seconds or more BR-540 Pressing TEST button IA L Receiving the Test signal, the CPU in the processor unit outputs an ACK signal for five seconds to the panel through the LED and buzzer lines. EN T If the LED and buzzer on the panel activate for five seconds after pressing the TEST button, the connection between the panel and the processor unit is good. CO NF ID This test function is disabled when the cabin panel is connected to the processor unit with a four core cable. 2-17 CONFIDENTIAL (internal use only) This confidential document is used only by FURUNO authorized persons. It is strictly prohibited to reproduce the document in whole or in part without prior written permission of FURUNO. 2.4 Timer Reset Panel (BR-530/550) 2.4 Timer Reset Panel (BR-530/550) IA L Fig.2.13 shows the general circuit diagram of the timer reset panel, BR-530/550. EN T Fig.2.13 General circuit diagram of Timer Reset Panel, BR-530/550 NF ID The Timer Reset Panel uses the CNT board of 24P0106. Table 2.7 shows differences between 24P0106 for the timer reset panel and 24P0016A for the cabin panel. In the table, “X” means that the part is mounted. Table 2.7 Differences between 24P0106 and 24P0016A. P.C.B. Used for JP1 JP2 S1 J1 24P0106 BR-530/550 X X 24P0106A BR-540 X *1 X *1: None (until June 2011) and 0.1uF (from July 2011) CR2 *2 *2 CR3 R3 UY1105W 470, 1/2W UR1105W 910, 1/2W CO *2: BR-530: HUG1105W-TR (until December 2011) and PG1102W-TR (from 2012) BR-540: same as BR-530 BR-550: HUG1105W-TR Function of 24P0106 The board is divided into two circuits: LED and buzzer. The tactile switch, S1 is not mounted on this board. In the LED circuit, CR2 is the green RESET LED and lights when the system is on. CR3 is the yellow ALARM LED and lights when receiving the LED alarm signal from the processor unit at #4 (LED) of TB22. 2-18 CONFIDENTIAL (internal use only) This confidential document is used only by FURUNO authorized persons. It is strictly prohibited to reproduce the document in whole or in part without prior written permission of FURUNO. 2.4 Timer Reset Panel (BR-530/550) R2 and R3 preset the brightness of CR2 and CR3 respectively. The brilliance of ALARM LED is adjusted through the BRILL window on the Main Alarm panel. (The CPLD should be V01.02 or later.) The buzzer circuit consists of LS1, LS2, Q1 to Q4 and U1. The buzzer sounds when the H signal is received at #5 (BUZ) of TB22. The performance standard IEC62616 defines the sound pressure level of the BNWAS 1 m from the source as below. (a) First stage bridge audible alarm: At least 75 dB (A) but not greater than 85 dB (A) IA L (b) Second and third stage remote audible alarm: At least 75 dB (A) but not greater than 120 dB (A). EN T Thus, the sound pressure level of the piezoelectric buzzer in the BR-530/550 timer reset panel and BR-540 cabin panel is at least 75 dB, but not greater than 85 dB. The jumper plug on J2 selects a resistor to adjust the sound pressure level. Placing the plug between pins #1 and #2 selects 0 ohm, 1/2W (R13) and pins #3 and #4, 100 ohms (R14) connected to the power supply line in series. NF ID 12V R13 R14 1 2 3 4 CO J2 Fig.2.14 Buzzer drive circuit NEVER change the jumper plug on J2. The buzzer frequency is set to 4.15 kHz, 4.2 kHz, or 4.25 kHz with the rotary switch S2 on the MAIN board in the Processor unit. See section 4.8. The RESET button, or push button S1 on the Timer Reset panel is connected to #1 and #2 (GND) of J1 on the CNT board. 2-19 CONFIDENTIAL (internal use only) This confidential document is used only by FURUNO authorized persons. It is strictly prohibited to reproduce the document in whole or in part without prior written permission of FURUNO. 2.5 Cabin Panel (BR-540) 2.5 Cabin Panel (BR-540) Fig.2.15 shows the general circuit diagram of the cabin panel, BR-540. EN T IA L The cabin panel uses the CNT board of 24P0106A consisting of a DUTY LED (CR2), an ALARM LED (CR3), buzzers (LS1 and LS2), and a tactile switch (S1). NF ID Fig.2.15 General circuit diagram of Cabin Panel, BR-540 Function of 24P0106A This board has the same functions as 24P0106 except for the following points. CO CR2 is the green DUTY LED which comes on when the DUTY signal (L) is received at #3 (DUTY) of TB22 while CR3 the red ALARM LED which comes on when the ALM signal (L) at #4 (ALM) of TB22. The tactile switch, S1 is a test button which generates the test signal. 2-20 CONFIDENTIAL (internal use only) This confidential document is used only by FURUNO authorized persons. It is strictly prohibited to reproduce the document in whole or in part without prior written permission of FURUNO. 2.6 Motion Detector (BR-560) 2.6 Motion Detector (BR-560) Fig.2.16 shows the general circuit diagram of the motion detector, BR-560. EN T IA L The MOT board, 24P0107 used in the motion detector mainly consists of a motion sensor U1 (EKMC1601111) and a three-terminal voltage regulator U2 (TA78L05F). Fig.2.16 General circuit diagram of Motion Detector, BR-560 NF ID The sensor output is connected to #3 (Motion OUT) of TB23 via an inverter Q1. See Fig.2.17. MOT (24P0107) TB23 #1 GND #2 Motion OUT #3 GND #4 CO 12V U2 5V Q1 U1 #1 #2 #3 VDD OUT GND Fig.2.17 Simplified circuit diagram of MOT board Specification of Motion Sensor Detection range: Maximum 5 m Detection Area (Angle): ± 40 Movement speed: 1.0 m/s Target size: 700 x 250 mm 2-21 CONFIDENTIAL (internal use only) This confidential document is used only by FURUNO authorized persons. It is strictly prohibited to reproduce the document in whole or in part without prior written permission of FURUNO. 2.6 Motion Detector (BR-560) IA L Figs.2.18 and 2.19 show the block diagram and pin assignment of the motion sensor respectively. NF ID EN T Fig.2.18 Block diagram (Digital output circuit) of Motion Sensor Fig.2.19 Pin assignment of Motion Sensor (Bottom view) CO Fig.2.20 shows the sensor output signal. The Circuit Stability Time (Twu) is about 30 seconds (maximum). During this stage, the output status is undefined (ON/OFF) and detection is therefore not guaranteed. Power supply Detecting Target Sensor output voltage Fig.2.20 Sensor output voltage 2-22 CONFIDENTIAL (internal use only) This confidential document is used only by FURUNO authorized persons. It is strictly prohibited to reproduce the document in whole or in part without prior written permission of FURUNO. 2.6 Motion Detector (BR-560) The Motion Sensor is a pyroelectric infrared sensor that detects variations in infrared rays. However, it may not detect in the following cases: lack of movement, no temperature change in the heat source. Besides, it could also detect the presence of heat sources other than a human body. Efficiency and reliability of the system may vary depending on actual operating conditions: L 1) Detecting heat sources other than the human body, such as: a) Small animals entering the detection area. b) White light source (sunlight, car headlights, etc.) directly hitting the sensor. c) Sudden temperature changes in the detection area caused by humidifier water vapor emission, or air conditioning system hot/cold air emissions. EN T IA 2) Difficulty in sensing the heat source a) Glass, acrylic or similar materials standing between the target and the sensor may not allow a correct transmission of infrared rays. b) Non-movement or quick movements of the heat sources inside the detection area. NF ID 3) Expansion of the detection area In case of considerable difference in the ambient temperature and the human body temperature, detection area may be wider apart from the configured detection area. 4) Other handling cautions (1) Degradation of detecting performance will happen if dirt and dust adhere to the lens. CO (2) The lens of the Polyethylene lens type is made of soft materials (Polyethylene). If any loads or shocks are applied to the lens, due to deformities, and damages, this will lead to malfunction, or deterioration of performance. (3) The sensor may be damaged by ±200 volts of static electricity. Avoid direct hand contact with the pins and be very careful when operating the product. Fig.2.21 How sensor works 2-23 CONFIDENTIAL (internal use only) This confidential document is used only by FURUNO authorized persons. It is strictly prohibited to reproduce the document in whole or in part without prior written permission of FURUNO. 2.7 Flash Beacon (BR-570) 2.7 Flash Beacon (BR-570) IA L Fig.2.22 shows the general circuit diagram of the flash beacon, BR-570. EN T Fig.2.22 General circuit diagram of Flash Beacon, BR-570 NF ID The leads L1 and L2 on the light, DS1 (Type:LC-M0901DCKXB5B0034, C/N:00017439010)are connected to #1 and #2 of J1 on the FLB board, 24P0108 respectively. L1 L2 Fig.2.23 Bottom view of DS1 CO The FLB board includes the preset dimmer R2. When R2 is used, the short plug is placed between #2 and #3 on J2. See Fig.2.24. BR-520 (TB19 #1) 1 12VIN 12V NC J2 >1> >2> > 4 >3> > R2, 3k BR-520 (TB19 #3) 5 3 J1 >1> >2> FLB L1 L2 Light (LED) FLB board (24P0108) Fig.2.24 Using internal dimmer, R2 2-24 CONFIDENTIAL (internal use only) This confidential document is used only by FURUNO authorized persons. It is strictly prohibited to reproduce the document in whole or in part without prior written permission of FURUNO. 2.7 Flash Beacon (BR-570) When an external dimmer (3k ohms) is used, connect it between #4 and #5 on TB24 and the short plug is placed between #1 and #2 on J2. See Fig.2.25. TB24 BR-520 (TB19 #1) 1 12VIN 12V J2 >1> > >2> > 4 >3> 3k BR-520 (TB19 #3) R2, 3k 5 3 J1 L1 >1> L2 >2> FLB IA FLB board (24P0108) Light (LED) L External dimmer NC CO NF ID EN T Fig.2.25 Connecting external dimmer 2-25 CONFIDENTIAL (internal use only) This confidential document is used only by FURUNO authorized persons. It is strictly prohibited to reproduce the document in whole or in part without prior written permission of FURUNO. Chapter 3 Location of Parts EN T IA L 3.1 Main Alarm Panel (BR-510) CO NF ID Fig. 3.1 Front Panel 510, Front view Rubber key 510 (24-012-1102) Fig. 3.2 Front Panel 510, Rear view 3-1 CONFIDENTIAL (internal use only) This confidential document is used only by FURUNO authorized persons. It is strictly prohibited to reproduce the document in whole or in part without prior written permission of FURUNO. EN T IA L 3.1 Main Alarm Panel (BR-510) J101 (CAN Bus) Watertight cap, MJ-AC (J104, NMEA) CO NF ID Fig. 3.3 Main Alarm Panel, Rear view Fig. 3.4 Main Alarm Panel without front panel 510 3-2 CONFIDENTIAL (internal use only) This confidential document is used only by FURUNO authorized persons. It is strictly prohibited to reproduce the document in whole or in part without prior written permission of FURUNO. 3.1 Main Alarm Panel (BR-510) EN T IA L PWR board (26P0022A) CO NF ID Fig. 3.5 BR-510 Rear cover with PWR board Fig. 3.6 BR-510 with front and rear covers removed 3-3 CONFIDENTIAL (internal use only) This confidential document is used only by FURUNO authorized persons. It is strictly prohibited to reproduce the document in whole or in part without prior written permission of FURUNO. 3.1 Main Alarm Panel (BR-510) Plate (FG), 20-032-1036 EN T IA L Chassis Chassis (20-032-1033) CO NF ID Fig. 3.7 BR-510 rear view with rear cover removed Fig. 3.8 BR-510 rear view with PLATE (FG) removed 3-4 CONFIDENTIAL (internal use only) This confidential document is used only by FURUNO authorized persons. It is strictly prohibited to reproduce the document in whole or in part without prior written permission of FURUNO. 3.1 Main Alarm Panel (BR-510) LCD, SD80003T00 EN T IA L Holder (LCD), 20-032-1031 MAIN board (20P8200B) SP1 (TMX-05H N/L) NF ID Fig. 3.9 MAIN board with Holder (LCD), Front view MAIN board (20P8200B), Solder side CO Holder (LCD), 20-032-1031 Shield (MAIN) A Fig. 3.10 MAIN board with Holder (LCD), Rear view 3-5 CONFIDENTIAL (internal use only) This confidential document is used only by FURUNO authorized persons. It is strictly prohibited to reproduce the document in whole or in part without prior written permission of FURUNO. 3.1 Main Alarm Panel (BR-510) NF ID EN T IA L LCD Holder Assy., or LCD with Holder (LCD), rear side MAIN board (20P8200B), Parts side Fig. 3.11 MAIN board assembly TP2 CO TP4 C3 (No parts) TP3 TP11 TP6 F1, 1A J104 J102 (No parts) J101 TP1 TP12 (Left) & TP5 (Right) Fig. 3.12 PWR board (24P0022A), Parts side 3-6 CONFIDENTIAL (internal use only) This confidential document is used only by FURUNO authorized persons. It is strictly prohibited to reproduce the document in whole or in part without prior written permission of FURUNO. 3.2 Processor Unit (BR-520) 3.2 Processor Unit(BR-520) (A) Processor Unit with PWR board (-11) The processor unit with the shield case was produced until around June 2011. Power Supply Assy. NF ID EN T IA L Shield case (M2) Fig. 3.13 Processor unit with cover removed (Original type) Shield Case (M2) CO Clamp for WAGO operating tool MAIN board (24P0104) Fig. 3.14 Processor unit with cover removed (Original type) 3-7 CONFIDENTIAL (internal use only) This confidential document is used only by FURUNO authorized persons. It is strictly prohibited to reproduce the document in whole or in part without prior written permission of FURUNO. 3.2 Processor Unit (BR-520) (B) Processor Unit with PWR board (-22) Fan motor Type: MMF-06G12ES-ROD C/N: 000-174-638-10 IA L WAGO Operating tool, Type: 236-332, C/N: 000153705 EN T View from A MAIN board (24P0104-00) A CO NF ID Power Supply Assy. Improving the EMC quality on the PWR board (-22), shield cases M1 and M2 and the EMI cores are deleted. (From productions in July 2011) Fig. 3.15 Processor unit with cover removed (Current type) 3-8 CONFIDENTIAL (internal use only) This confidential document is used only by FURUNO authorized persons. It is strictly prohibited to reproduce the document in whole or in part without prior written permission of FURUNO. 3.2 Processor Unit (BR-520) J/P7 (Default: #1-#2) Jumper, J7 EN T IA L See enlarged views (Figs.3.17 and 3.18). J7* NF ID A CO B TB2 TB13 to TB17 from bottom TB3 toTB6 from bottom TB7 to TB12 from bottom TB18 to TB21 from bottom *: On the MAIN board of -11 and later, J7 is mounted in paralle with the terminal board (The bottom pin is #1). Fig. 3.16 MAIN board (24P0104) 3-9 CONFIDENTIAL (internal use only) This confidential document is used only by FURUNO authorized persons. It is strictly prohibited to reproduce the document in whole or in part without prior written permission of FURUNO. 3.2 Processor Unit (BR-520) CR1 to CR4 from top TP4 J5 L TP5 EN T IA TP2 J4 NF ID TP1 J6 TP3 Fig. 3.17 Enlarged view of A in Fig.3.16 CO S1 (#1 to #8, from left) J8 S2 Fig. 3.18 Enlarged view of B in Fig.3.16 3-10 CONFIDENTIAL (internal use only) This confidential document is used only by FURUNO authorized persons. It is strictly prohibited to reproduce the document in whole or in part without prior written permission of FURUNO. 3.2 Processor Unit (BR-520) PWR Case (Bottom) PWR Case (Top) IA L Fan Motor Assy. MMF-06G12ES-ROD (000-174-638-10) NF ID EN T PWR board (24P0105) FIL board (24P0110) CO PWR Case (Bottom) Power Supply assy. Type: ZWS100BAF-24/FUR C/N: 00017442211 PWR Case (Top) Fig. 3.19 Power Supply Assembly 3-11 CONFIDENTIAL (internal use only) This confidential document is used only by FURUNO authorized persons. It is strictly prohibited to reproduce the document in whole or in part without prior written permission of FURUNO. 3.2 Processor Unit (BR-520) CR1 S3 TB1 CR2 L CR3 This board requires EMI cores on the cables. IA S2 J3 TP4 TP2 TP3 CR7 (upper) & CR8 (lower) NF ID TP1 EN T Fig. 3.20 PWR board, 24P0105-11 TP5 CO J2 J1 XF1, XF2, XF3 from bottom Fig. 3.21 PWR board, 24P0105-22 (from July 2011) CN51 CN1 VR51 Fig. 3.22 ZWS100BAF-24/FUR 3-12 CONFIDENTIAL (internal use only) This confidential document is used only by FURUNO authorized persons. It is strictly prohibited to reproduce the document in whole or in part without prior written permission of FURUNO. 3.3 Timer Reset Panel and Cabin Panel (BR-530/540) 3.3 Timer Reset Panel and Cabin Panel (BR-530/540) The BR-540 does not have the push buttton. J2 CNT board BR-530: 24P0106 BR-540: 24P0160A TB22 J1 R4 EN T IA L R2 NF ID Push button (BR-530 only) Type: AR22M0R-10YZ9, C/N: 00017441510 Fig.3.23 BR-530/540 with cover removed CO S1 (24P0160A only) LS1 PKM22EPPH4020-B0 LS2 Fig.3.24 CNT board (24P0106/A), Sodering side 3.4 Watertight Timer Reset Panel (BR-550) See Fig.3.23. 3-13 CONFIDENTIAL (internal use only) This confidential document is used only by FURUNO authorized persons. It is strictly prohibited to reproduce the document in whole or in part without prior written permission of FURUNO. 3.5 Motion Detector (BR-560) 3.5 Motion Detector (BR-560) MOT board (24P0107), Parts side L TB23 EN T IA Motion Sensor, EKMC1601111 (not shown) GND Vdd OUT CO NF ID Fig.3.25 Motion Detector, rear view with cover removed Motion Sensor, EKMC1601111 Fig.3.26 MOT board (24P0107), soldering side 3-14 CONFIDENTIAL (internal use only) This confidential document is used only by FURUNO authorized persons. It is strictly prohibited to reproduce the document in whole or in part without prior written permission of FURUNO. 3.6 Flash Beacon (BR-570) 3.6 Flash Beacon (BR-570) TB24 R4 J2 J1 L2 EN T L1 IA L FLB board (24P0108) NF ID Light, MLC-M0901DCKXB5B0034 CO Fig.3.27 Flash Beacon, BR-570 with cover removed 3-15 CONFIDENTIAL (internal use only) This confidential document is used only by FURUNO authorized persons. It is strictly prohibited to reproduce the document in whole or in part without prior written permission of FURUNO. Chapter 4 Setup This chapter describes how to setup BR-500. 4.1 Menu The system is setup through the password-protected Administrator and Service menus. 4.1.1 Password This system requires a password to open the menu and to change the operation mode. IA L (1) Password for Administrator To open the administrator menu and change the operation mode, entering the following password, or making the following keystroke is required. Disclose this password to the master, or captain. EN T Up arrow key > Right arrow key > Down arrow key > Left arrow key > ENT/CALL > MENU/ESC 1 6 NF ID 4 5 2 3 Fig.4.1 Administrator Password CO (2) Password for Servicemen To open the service menu, entering the following password, or making the following keystroke is required. It is not necessary to disclose this password to the master. Up arrow key > Down arrow key > Left arrow key > Right arrow key > MENU/ESC > ENT/CALL 1 5 4 3 6 2 Fig.4.2 Serviceman Password 4-1 CONFIDENTIAL (internal use only) This confidential document is used only by FURUNO authorized persons. It is strictly prohibited to reproduce the document in whole or in part without prior written permission of FURUNO. 4.1 Menu 4.1.2 Administrator menu Fig.4.3 shows the Administrator menu. To open the menu, use the steps below. 1. Press MENU/ESC key. You are asked to enter the password. 2. Enter the administrator password (Up > Right > Down > Left > ENT > MENU). 3. Use the up or down arrow key to select a menu item, and then press the ENT/CALL key. An options window or spinner box appears depending on your selection. NF ID EN T IA L 4. Use the up or down arrow key to select an option or set a value, and then press the ENT/CALL key. Fig.4.3 Administrator Menu The following describes the items available under the administrator menu. All factory default values are shown in bold in Table 4.1. CO Table 4.1 Description of Administrator menu Menu Items Watch Time Interval Description Sets the watch time interval (Dormant period) Options 3 to 12 minutes (10 min) 2nd Stage Interval Sets the time interval for the 2nd 90 to 180 seconds stage Captain Backup Selects whether to forward the OFF: alarm to the Cabin Panel in the Forward in 3rd stage. Captain’s quarters in the 2nd stage ON: or the 3rd stage. Forward in 2nd stage. 2nd Stage Selects whether to omit 2nd stage OFF: Omit alarm. alarm or not. ON: Don’t omit alarm. (Cont’d) 4-2 CONFIDENTIAL (internal use only) This confidential document is used only by FURUNO authorized persons. It is strictly prohibited to reproduce the document in whole or in part without prior written permission of FURUNO. 4.1 Menu Backup Officer Changes the function of the cabin See section 4.3. panel in the captain cabin (whether the captain is selected as a backup Backup/Captain 2nd Stage Buzzer Selects a 2nd stage buzzer pattern. Key Beep Turns on/off the key beep. Self TEST Language See Chapter 7. navigation officer or not). L OFF (250ms) EN T ON (200ms) English, Japanese, Chinese, Korean, and Russian. IA Chooses a language. Intermittent1/ Intermittent2 (See Fig.4.4.) OFF/ON Fig.4.4 (a) Pattern of buzzer, Intermittent 1 OFF (400ms) NF ID ON (200ms) Fig.4.4 (b) Patterns of buzzer, Intermittent 2 4.1.3 Service menu Fig.4.5 shows the service menu. To open the menu, use the steps below. 1. Press MENU/ESC key. You are asked to enter the password. CO 2. Enter the servicemen password (Up > Down > Left > Right > ENT > MENU). Fig.4.5 Service menu 4-3 CONFIDENTIAL (internal use only) This confidential document is used only by FURUNO authorized persons. It is strictly prohibited to reproduce the document in whole or in part without prior written permission of FURUNO. 4.1 Menu Each item in the service menu is setup as below. 1) System TEST Used to carry out Self TEST and LCD TEST. The Self TEST checks the system for proper operation. The LCD TEST checks the LCD on the Main Alarm Panel for proper display of colors. 2) Input Port2 Selects the type of signal to be received at the INPUT2 port: Backup Navigator or Timer Reset signal. (Factory default: Reset signal) L 3) Buzzer Tone (Main) Sets the frequency of the buzzer in the Main Alarm Panel to 1300 to 1699 (Hz). (Factory default: 1500 Hz) EN T IA 4) Restore Factory Settings Restores all settings back to factory default settings. To do so, use the following procedure. 1. Select [Restore Factory Settings] by using the cursor pad, and then press the ENT/CALL key. NF ID 2. Select [ON], and then press the ENT/CALL key, and the confirmation menu appears. CO Fig.4.6 Confirmation message 3. Select "Yes", and then press the ENT/CALL key. 4. The unit automatically restarts and resets all settings back to original factory settings. 4-4 CONFIDENTIAL (internal use only) This confidential document is used only by FURUNO authorized persons. It is strictly prohibited to reproduce the document in whole or in part without prior written permission of FURUNO. 4.2 Backup Officer Name 4.2 Backup Officer Name The cabin panel in the captain (Master) cabin is connected to TB7 and the cabin panel in the officer cabin is connected to one of terminal boards, TB8 to TB12. It is recommended to make connections as shown in Table 4.2. If another connection is made, it is necessary to edit the backup officer name. Table 4.2 Connection of Alarm Panel in Captain and Officer cabins TB Number Default Backup Officer Name Alarm Panel in Master cabin Captain TB8 Chief officer cabin C/Officer TB9 Second officer cabin 2/Officer TB10 Third officer cabin TB11 (spare) TB12 (spare) IA L TB7 3/Officer EN T Blank Blank NF ID A) Changing Navigation Officer Name If the connection of the cabin panel is not the same as Table 4.2, the backup officer name is changed by following the steps below. The name of navigation officer may be changed to the desired one, such as a nickname. 1. Select Backup Officer in the administrator menu. CO 2. Select the backup officer of which name is changed. Fig.4.7 Backup officer list 4-5 CONFIDENTIAL (internal use only) This confidential document is used only by FURUNO authorized persons. It is strictly prohibited to reproduce the document in whole or in part without prior written permission of FURUNO. 4.2 Backup Officer Name 3. Press the ENT/CALL key and the spinner box appears. Long pressing the ENT/CALL key deletes all characters in the selected line. Fig.4.8 Editing Officer Name L 4. Use the up or down arrow key to select a character. 6. Repeat steps 4 and 5 to change other characters. EN T 7. Press the ENT/CALL key. IA 5. Use the right or left arrow key to move the cursor over the character to be changed. To delete the entire line, press the ENT/CALL key and hold down until the line disappears. NF ID B) Adding another Navigation Officer Two navigation officers can be added to the lower two lines in the backup officer list. To add an officer into the list; 1. Select Backup Officer in the administrator menu. 2. Select a blank line (#5 or #6). CO 3. Press the ENT/CALL key and the spinner box appears. 4. Use the up or down arrow key to select a character. 5. Use the right arrow key to move the cursor for entering another character. 6. Repeat steps 4 and 5. 7. Press the ENT/CALL key when all characters are entered. 4-6 CONFIDENTIAL (internal use only) This confidential document is used only by FURUNO authorized persons. It is strictly prohibited to reproduce the document in whole or in part without prior written permission of FURUNO. 4.3 Master’s Cabin Panel 4.3 Master’s Cabin Panel The cabin panel connected to TB7, or the master’s cabin panel is setup as one of backup officers. If necessary, change can be made by using the following steps. 4.3.1 Including Captain in Backup Officers When the captain needs to be selected as a backup officer, setup the BR-500 as below. 1. Open the Administrator menu. 2. Select Backup Officer. 3. Select Captain and press the ENT/CALL key. L 4. Select “Backup” and press the ENT/CALL key. IA Backup: Captain is able to be selected as a backup officer. Captain: Captain is not able to be selected as a backup officer. EN T Backup Captain (Step 4) (Step 3) Fig.4.9 Selecting function of Captain’s cabin panel CO NF ID Now, the captain can be assigned as a backup officer with the SEL key as shown in Fig.4.10. Fig.4.10 Captain being selected as a backup officer 4.3.2 Not Including Captain in Backup Officers When the captain does not need to be selected as a backup officer, setup the BR-500 as below. 1. Open the Administrator menu. 2. Select Backup Officer. 3. Select “Captain” and press the ENT/CALL key. 4-7 CONFIDENTIAL (internal use only) This confidential document is used only by FURUNO authorized persons. It is strictly prohibited to reproduce the document in whole or in part without prior written permission of FURUNO. 4.3 Master’s Cabin Panel 4. Select “Captain” and press the ENT/CALL key. 5. Select Captain Backup in the Administrator menu. 6. Select ON or OFF so that either the second stage and the third stage alarms or the third stage alarm is transferred to the cabin panel in the captain’s cabin. ON: The second stage and third stage alarms are forwarded. OFF: The third stage alarm is forwarded. (Factory default) EN T IA L Now, the CAPTAIN in the backup officer display is preceded by a lower-case “c” in reverse video as shown in Fig.4.11 and the cabin panel in the captain’s cabin cannot be selected as a backup officer. NF ID Fig.4.11 Captain not being included in backup officer 4.4 Buzzer Frequency CO The buzzer frequency can be changed as shown in Table 4.3. Table 4.3 Changing buzzer frequency Buzzer in Main Alarm Panel (BR-510) Cabin Panel (BR-540) How to change buzzer frequency Buzzer Tone (Main) in Service menu (1300 to 1699 Hz), Default: 1500 Hz SW2 on MAIN board in Processor unit 4.2 kHz (0, 3 to F), 4.15 kHz (1), and 4.25 kHz (2), Default: 4.2 kHz (0) 4.5 Brilliance of LED and Light The brilliance of the LEDs on the BR-540 cabin panel and the light on the BR-570 flash beacon is preset with the potentiometer as shown in Table 4.4. 4-8 CONFIDENTIAL (internal use only) This confidential document is used only by FURUNO authorized persons. It is strictly prohibited to reproduce the document in whole or in part without prior written permission of FURUNO. 4.6 Potentiometers Table 4.4 Preset of Brilliance Unit BR-540 BR-570 LED/Light Alarm LED Reset/Duty LED Light Adjuster R2 on CNT board R4 on CNT board R2 on FLB board 4.6 Potentiometers The potentiometers are used as below. IA L 4.6.1 Processor Unit (BR-520) The output voltage from the power supply (AC/DC converter), ZWS100BAF-24/FUR is adjusted by VR51. EN T Table 4.5 VR51 on ZWS100BAF-24/FUR Power Supply (ZWS100BAF-24/FUR) Parts No. Name Ratings VR51 Output voltage 25.5V±0.2Vdc Measured across #1 and #8 of CN51 NF ID 4.6.2 Timer Reset Panel (BR-530) and Cabin Panel (BR-540) R2 and R4 on the CNT board are used to adjust the brilliance of Alarm and Reset/Duty LEDs respectively. Table 4.6 R2/R3 on CNT board CO CNT board (24P0106/A) – BR-530/540/550 Parts No. Name Factory Setting Remarks R2 Alarm LED Fully clockwise * Clockwise to increase R3 Reset/Duty LED Fully clockwise *: BR-530: Fully counter clockwise 4.6.3 Flash Beacon (BR-570) The brilliance of the flash beacon is preset by R2 on the FLB board, 24P0108 when the optional dimmer is not used. Table 4.7 R3 on FLB board FLB board (24P0108) – BR-570 Parts No. Name Factory Setting R2 Alarm LED Fully clockwise 4-9 Remarks Clockwise to increase CONFIDENTIAL (internal use only) This confidential document is used only by FURUNO authorized persons. It is strictly prohibited to reproduce the document in whole or in part without prior written permission of FURUNO. 4.7 Jumpers 4.7 Jumpers No jumper change is necessary except for when the optional dimmer is connected to the flash beacon, BR-570. 4.7.1 Processor Unit (BR-520) Jumper J7 in the MAIN board is used to connect and disconnect the terminating resistor located across the receiver input terminals. If necessary, disconnect the resistor by placing the jumper on pins #2-#3. Table 4.8 J7 on MAIN board EN T IA L MAIN board (24P0104) – BR-520 Parts No. Name Remarks J7 Terminator #1 and #2: Terminator is connected. (Default setting) #2 and #3: Terminator is disconnected. NF ID 4.7.2 Timer Reset Panel (BR-530) and Cabin Panel (BR-540) Jumper J2 on the CNT board, 24P0106/A selects the resistor (0 ohm or 100 ohms) to adjust the sound pressure level of the buzzer: placing the jumper on pins #1-#2 selects 0-ohm resistor and pins #3-#4 100-ohm resistor. Use this jumper in the factory default position. Table 4.9 J2 on CNT board CO CNT board (24P0106/A) – BR-530/540/550 Parts No. Name Remarks J2 Volume #1 and#2: 0 ohm; #3 and #4: 100 ohms 4.7.3 Flash Beacon (BR-570) When the external 3k-ohm dimmer (optional) is connected to the BR-570, change the jumper plug from pins #2-#3 to pins #1-#2. Table 4.10 J2 on FLB board FLB board (24P0108) – BR-570 Parts No. Name Remarks J2 Dimmer selection #1 and #2: When using external dimmer. #2 and #3: When not using external dimmer. (Factory default) 4-10 CONFIDENTIAL (internal use only) This confidential document is used only by FURUNO authorized persons. It is strictly prohibited to reproduce the document in whole or in part without prior written permission of FURUNO. 4.8 Switches 4.8 Switches The switches on the MAIN board, 24P0104 in the Processor unit, BR-510 are used as below. S1 Enlarged view S2 L MAIN board, 24P0104 IA Fig.4.12 Switches on MAIN board (24P0104) 1 Function Program overwrite OFF 2 I/O test Disable Enable 3 4 ALR output interval 30s 60s Blink Off 5 Function of flash beacon at 2nd & 3rd stages Startup mode of processor unit Normal R&D 6 IEC 61162 Baud rate (bps) 4800 38400 Enable NF ID # EN T 4.8.1 DIP Switch (S1) Table 4.11 shows the function of the DIP switch, S1. The factory default settings are all OFF. Table 4.11 Function of S1 Output of the second stage No alarm from TB13/TB14/TB15 8 Not used CO 7 ON Disable Remarks Used when updating software R&D use only Yes See Note. Note: This switch works in BR-520 MAIN program 2450060-01.06 and later. 4.8.2 Rotary Switch (S2) The frequency of the buzzer on the main alarm panel is adjusted with the rotary switch, S2 on the MAIN board, 24P0104 as shown in Table 4.12. (Factory default in bold) Table 4.12 Function of S2 Switch position Buzzer Frequency 0 4.2 kHz 1 4.15 kHz 4-11 2 4.25 kHz 3 to F 4.2 kHz CONFIDENTIAL (internal use only) This confidential document is used only by FURUNO authorized persons. It is strictly prohibited to reproduce the document in whole or in part without prior written permission of FURUNO. Chapter 5 Maintenance Software update procedure is explained in this chapter. The function of LED and test points is also explained. 5.1 Programs for BR-500 Table 5.1 lists programs for BR-500. The program for the Complex Programmable Logic Device (CPLD) is installed and upgraded only at the factory. IA L Note) The vessel Japanese flag/JG (Japanese Government) class should equipped with BR-520 of which CPLD program is V01.02 or later. The V01.01 CPLD program cannot adjust the brilliance of the Alarm LED on the timer reset panel and the LED on the flash beacon from the main alarm panel (through BRILL window). EN T Table 5.1 Programs for BR-500 (as of November 2011) Unit BR-510 Program name Program number Boot 2450054-01.05 MAIN (CPU) 2450056-01.10 BR-520 Boot MAIN (CPU) CPLD*1 NF ID 2450058-01.02 2450060-01.05 *2 2450065-01.02 Remarks When shipped as BR-510: #000431 and after When shipped as BR-500: #500876 and after #6423-0916 and after CO *1: Installed and upgraded only at factory *2: From December 2011, BR-520 MAIN program is updated to V01.06. This program allows the cabin panel in public space to select the alarm: the second or third stage with #7 of S1 on the MAIN board. 5.2 Reading Program Number The Self Test in the Administrator and Service Menus shows the program numbers. Before and after upgrading the system, check the program versions by using the following procedure. 1. Press MENU/ESC key and “Enter Password” appears. 2. Enter the password (press ▲, ►, ▼, ◄, ENT/CALL and then MENU/ESC). 3. Select Self TEST. 4. Press MENU/ESC key three times to return to the normal display. 5-1 CONFIDENTIAL (internal use only) This confidential document is used only by FURUNO authorized persons. It is strictly prohibited to reproduce the document in whole or in part without prior written permission of FURUNO. 5.2 Reading Program Number Program numbers for BR-510 Program numbers for BR-520 L Fig.5.1 Program numbers in Self TEST display IA 5.3 Updating Program EN T This section describes how to update the Main Alarm Panel (BR-510) and Processor unit (BR-520). Note: 1) Edit the two batch files (those with the “bat” extension) to use the COM port number appropriate for your PC. NF ID 2) Use BR-510 and BR-520 in a combination of the latest program version. If not, some features may not work. 3) The MAIN and Boot programs are updated in no particular order. 4) Make sure that the power does not go OFF during upgrading. If the power is off, update the system again. 5) The time needed to upgrade each program is; Necessary Time BR-510 MAIN (CPU) BR-510 Boot BR-520 MAIN (CPU) BR-520 Boot about 6 minutes about 2 minutes about 2 minutes about 1 minute CO Program Name 5.3.1 Preparation To update the BR-500, following things are necessary. 1) 2) 3) 4) 5) Update programs for BR-510 and BR-520 1 x PC (Windows XP or Windows 7 32 bit version) 1 x USB to RS-422/RS-485 converter (e.g. ADLINK ND-6530) 1 x Cable with a 6-pin MJ connector 1 x 2-pair signal cable 5-2 CONFIDENTIAL (internal use only) This confidential document is used only by FURUNO authorized persons. It is strictly prohibited to reproduce the document in whole or in part without prior written permission of FURUNO. 5.3 Updating Program 5.3.2 Program Files The latest program is supplied in the ZIP folder of which file structure is as below. The file size varies according to the program version. Program ZIP folder for BR-510 (Example: 2450054-0105 2450056-0110.zip) 2) Program ZIP folder for BR-520 (Example: 2450058-0102 2450060-0105.zip) CO NF ID EN T IA L 1) 5-3 CONFIDENTIAL (internal use only) This confidential document is used only by FURUNO authorized persons. It is strictly prohibited to reproduce the document in whole or in part without prior written permission of FURUNO. 5.3 Updating Program 5.3.3 Editing Batch File It is assumed that the USB to RS-422/RS-485 converter is connected to COM 1 port. If you need to use a serial port other than COM1, you can edit the batch file using notepad or any other text editor. Each program includes two batch files: up.bat and upboot.bat. To edit the batch file; 1. Right click the batch file and select Edit. L 2. Change the port number. (a) up.bat for BR-510 and BR-520 Change the number in the DPORT line. EN T Default upload mode IA Compile mode NF ID Fig.5.2 Text in up batch file CO (b) BR-510 upboot.bat Change the number followed by a colon. Fig.5.3 Text in BR-510 up.boot.bat file (c) BR-520 upboot.bat Change the number followed by a colon. Fig.5.4 Text in BR-520 upboot.bat file 3. Save the edited text. 5-4 CONFIDENTIAL (internal use only) This confidential document is used only by FURUNO authorized persons. It is strictly prohibited to reproduce the document in whole or in part without prior written permission of FURUNO. 5.3 Updating Program 5.3.4 Installing USB Driver This section describes how to install the Adlink 6530 Driver. If you use the converter of another type, follow the instructions in the manual which comes with the converter. To installing the Adlink 6530 Driver; 1. Take the ‘ADLINK All in One CD’ and insert it into the CD-ROM drive. 2. An Installation Screen should come up giving you some options. Click on ‘Exit’ to get out of the Installation Screen. 3. Right click on the ‘Start’ button. 4. Click on Explore. NF ID EN T IA L 5. On the left side of the window, click on the Adlink CD (50-30007-0080). Fig.5.5 Selecting 50-30007-0080 CO 6. Double click on the NuDAM folder on the right side of the window. Fig.5.6 Double clicking NuDAM 5-5 CONFIDENTIAL (internal use only) This confidential document is used only by FURUNO authorized persons. It is strictly prohibited to reproduce the document in whole or in part without prior written permission of FURUNO. 5.3 Updating Program IA L 7. Double click on the ND6530 folder. EN T Fig.5.7 Double clicking ND6530 CO NF ID 8. Double click on whatever operating system you use. Win2KXP is for Windows 2000 and XP operating systems. Win2KXP is used in this example. Fig.5.8 Selecting OS (Windows XP) 5-6 CONFIDENTIAL (internal use only) This confidential document is used only by FURUNO authorized persons. It is strictly prohibited to reproduce the document in whole or in part without prior written permission of FURUNO. 5.3 Updating Program CO NF ID EN T 10. A Setup Screen will appear. Click on ‘Next’. IA Fig.5.9 Double clicking Setup.exe L 9. Double click on the ‘Setup.exe’ application to install the driver. Fig.5.10 Setup Screen 5-7 CONFIDENTIAL (internal use only) This confidential document is used only by FURUNO authorized persons. It is strictly prohibited to reproduce the document in whole or in part without prior written permission of FURUNO. 5.3 Updating Program 11. Enter your name and company name in the spaces provided. EN T IA L 12. Click on the ‘Next’ button when you have completed this. Fig.5.11 User Information display CO NF ID 13. Click Next on the Choose Destination Location screen, Fig.5.12. Fig.5.12 Choose Destination Location 5-8 CONFIDENTIAL (internal use only) This confidential document is used only by FURUNO authorized persons. It is strictly prohibited to reproduce the document in whole or in part without prior written permission of FURUNO. 5.3 Updating Program EN T IA L 14. Click Next on the Select Program Folder screen, Fig.5.13. Fig.5.13 Select Program Folder screen CO NF ID 15. Click Next on the Start Copying Files screen, Fig.5.14. Fig.5.14 Start Copying Files screen 5-9 CONFIDENTIAL (internal use only) This confidential document is used only by FURUNO authorized persons. It is strictly prohibited to reproduce the document in whole or in part without prior written permission of FURUNO. 5.3 Updating Program EN T IA L 16. Select “Yes, I want to restart my computer now.” and click Finish on the Setup Complete screen. Fig.5.15 Setup Complete screen CO NF ID 17. NOW CONNECT THE ND6530 TO the USB port on the PC and wait until the following wizard window appears on the PC. Select No, not this time and then click Next. Fig.5.16 Found New Hardware Wizard 5-10 CONFIDENTIAL (internal use only) This confidential document is used only by FURUNO authorized persons. It is strictly prohibited to reproduce the document in whole or in part without prior written permission of FURUNO. 5.3 Updating Program EN T IA L 18. Select “Install the software automatically [Recommended]” and click Next. Fig.5.17 CO NF ID 19. When the following window appears, click Continue Anyway. Fig.5.18 5-11 CONFIDENTIAL (internal use only) This confidential document is used only by FURUNO authorized persons. It is strictly prohibited to reproduce the document in whole or in part without prior written permission of FURUNO. 5.3 Updating Program EN T IA L 20. Wait until software installation is complete and click Finish. Fig.5.19 CO NF ID 21. Right-click the My Computer icon, select Properties. When the system properties window appears, select the Hardware tab, and then Device Manager. Fig.5.20 System Properties 5-12 CONFIDENTIAL (internal use only) This confidential document is used only by FURUNO authorized persons. It is strictly prohibited to reproduce the document in whole or in part without prior written permission of FURUNO. 5.3 Updating Program 22. Click the plus sign in front of "Ports (COM & LPT)" to view your COM port assignments. In the example below, ADLINK ND-6350 USB-to-Serial Bridge (COM7) is assigned to "COM7". (Enlarged) EN T IA L ADLINK ND-6530 USB-to-Serial Bridge (COM7) CO NF ID Fig.5.21 Device Manager 5-13 CONFIDENTIAL (internal use only) This confidential document is used only by FURUNO authorized persons. It is strictly prohibited to reproduce the document in whole or in part without prior written permission of FURUNO. 5.3 Updating Program 5.3.5 Upgrading BR-510 The BR-510 processor unit uses two programs: Main and Boot. Following describes how to update these programs. (1) MAIN program of BR-510 To update the BR-510 MAIN program; 1. Copy the program zip folder (2450054-0105.zip) onto a PC. 2. Edit the batch file if necessary. See section 5.3.3. 3. Ensure that the unit is turned off. IA L 4. Connect the PC to the BR-510 via a USB to RS-422/RS-485 converter as shown in Fig.5.22. BR-510 PC NMEA NF ID DC12V (BR-520 or External Power supply) EN T Cable with a 6-pin USB Converter MJ connector Fig.5.22 Connection of PC to NMEA port on BR-510 via converter 12 Vdc CO BR-520 (External 12 Vdc may be connected instead of BR-520.) TB2 Shield 1 12VAOUT 2 CAN bus <1 FG <2 NET S GND 3 <3 NET C NET H 4 <4 NET H NET L 5 USB Converter BR-510 <5 NET L NMEA TD A 1> 1 TX+ TD B 2> 2 TX- RX H 3> 3 RX+ RX C 4> 4 RX- NC 5> 5 GND FG 6> 6-pin MJ cable Fig.5.23 5. Double click up.bat in the program folder. 6. Wait until TARGET POWER ON message appears. See Fig.5.24. 5-14 CONFIDENTIAL (internal use only) This confidential document is used only by FURUNO authorized persons. It is strictly prohibited to reproduce the document in whole or in part without prior written permission of FURUNO. PC USB IA L 5.3 Updating Program TARGET POWER ON. 7. Turn on the BR-510. EN T Fig.5.24 New program is loaded automatically with the following changes in the display. If the display does not change, reboot the system and upgrade the unit again. If you still have the problem, check the settings on the converter. CO NF ID Note) Do not turn off the unit during upgrade. Changes after power on Fig.5.25 Task completion indicator The progress of task completion is displayed on the bottom line: xx% completed. The Command prompt closes and the BR-510 reboots automatically when the new program is loaded completely. The next step is to load new Boot program. 5-15 CONFIDENTIAL (internal use only) This confidential document is used only by FURUNO authorized persons. It is strictly prohibited to reproduce the document in whole or in part without prior written permission of FURUNO. 5.3 Updating Program (2) Boot program of BR-510 The BR-510 boot program is updated with the same procedure as the MAIN program. 1. Turn off the BR-510 and check the connections, referring to Fig.5.22. EN T IA L 2. Double click upboot.bat in the program folder. 3. Wait until TARGET POWER ON message appears. See Fig.5.26. TARGET POWER ON. NF ID Fig.5.26 4. Turn on the BR-510. New program is loaded automatically with the following changes in the PC screen. CO Note) Do not turn off the unit during upgrade. Changes after power on Fig.5.27 The progress of task completion is displayed on the bottom line: xx% completed. The Command prompt closes and the BR-510 reboots automatically when the new program is loaded completely. 5. Carry out the self test to read the program numbers. This step may be done after updating BR-520. 5-16 CONFIDENTIAL (internal use only) This confidential document is used only by FURUNO authorized persons. It is strictly prohibited to reproduce the document in whole or in part without prior written permission of FURUNO. 5.3 Updating Program 5.3.6 Upgrading BR-520 The processor unit, BR-520 also uses two programs: Main and Boot. Following describes how to update these programs. (1) MAIN program of BR-520 To update BR-520 MAIN program; 1. Copy the program zip folder onto a PC. 2. Edit the batch file if necessary. 3. Ensure that the unit is turned off. L 4. Connect the PC to TB20 in the BR-510 via a USB to RS-422/RS-485 converter as shown in Fig.5.28. IA BR-520 PC EN T USB Converter Two pair signal cable NF ID 24VDC USB cable Fig.5.28 Connection of PC to TB-20 in BR-520 via converter USB Converter TB20 6 RD_B 4 1 TX+ RD_A 3 2 TX- TD_B 2 3 RX+ TD_A 1 4 RX- 5 GND CO Shield MAIN (24P0104) TB1 3 4 24VDC(+) 24VDC(-) PWR (24P0105) Fig.5.29 5-17 CONFIDENTIAL (internal use only) This confidential document is used only by FURUNO authorized persons. It is strictly prohibited to reproduce the document in whole or in part without prior written permission of FURUNO. PC 5.3 Updating Program 5. Double click up.bat in the program folder. EN T IA L 6. Wait until TARGET POWER ON message appears. Fig.5.30 NF ID 7. Turn on the BR-520. New program is loaded automatically with the following display. If the display does not change, reboot the system and upgrade the unit again. If you still have the problem, check the settings on the converter. CO Note) Do not turn off the unit during upgrade. Changes after power on Fig.5.31 5-18 CONFIDENTIAL (internal use only) This confidential document is used only by FURUNO authorized persons. It is strictly prohibited to reproduce the document in whole or in part without prior written permission of FURUNO. 5.3 Updating Program The progress of task completion is displayed on the bottom line: xx% completed. The Command prompt closes and the BR-520 reboots automatically when the new program is loaded completely. The next step is to load new Boot program. (2) Boot program of BR-520 The BR-510 boot program is updated with the same procedure as the MAIN program. 1. Turn off the BR-510 and check the connections, referring to Fig.5.28. NF ID EN T IA L 2. Double click upboot.bat in the program folder. 3. Wait until TARGET POWER ON message appears. See Fig.5.32. Fig.5.32 CO 4. Turn on the BR-520. New program is loaded automatically with the following changes in the PC screen. Note) Do not turn off the unit during upgrade. Changes after power on Fig.5.33 5-19 CONFIDENTIAL (internal use only) This confidential document is used only by FURUNO authorized persons. It is strictly prohibited to reproduce the document in whole or in part without prior written permission of FURUNO. 5.3 Updating Program 5. Carry out the self test and read program numbers. BR-510 Boot and CPU (MAIN) IA L BR-510 Boot, CPU (MAIN), and CPLD CO NF ID EN T Fig.5.34 Reading program numbers 5-20 CONFIDENTIAL (internal use only) This confidential document is used only by FURUNO authorized persons. It is strictly prohibited to reproduce the document in whole or in part without prior written permission of FURUNO. 5.4 LEDs 5.4 LEDs The function of the light-emitting diodes (LEDs) is described in this section. 5.4.1 Processor Unit (BR-520) The LEDs on the MAIN (24P0104) and PWR (24P0105) boards work as described in Tables 5.2 and 5.3 respectively. CR1 to CR4 on the MAIN board light instantaneously at power on. See Table 5.2 (b). Table 5.2 (a) LEDs on MAIN board (24P0104) MAIN board (24P0104) Status CPU TEST4 Off CR2 CPU TEST3 Off CR3 CPU TEST2 Off CR4 CPU TEST1 Off CR5 PLD TEST4 CR6 PLD TEST3 CR7 PLD TEST2 CR8 PLD TEST1 See table 5.2 (b). EN T CR1 Remarks L Name IA Partrs No. Not used Off Not used Off Not used Off Not used NF ID Off Table 5.2 (b) CR1 to CR4 on MAIN board CR2 CR3 CR4 Starter program runs normally Off Light Light Light Boot program runs normally Off Off Light Light Main Program runs normally Off Off Off Off CO CR1 Table 5.3 LEDs on PWR board (24P0105) PWR board (24P0105) Parts No. Name Status Condition CR1 12V_A Light 12V_A is output normally. CR2 12V_B Light 12V_B is output normally. CR3 5V Light 5V is output normally. CR7 DC_PWR Light DC supply voltage is input. CR8 AC_PWR Light AC supply voltage is input. 5-21 CONFIDENTIAL (internal use only) This confidential document is used only by FURUNO authorized persons. It is strictly prohibited to reproduce the document in whole or in part without prior written permission of FURUNO. 5.4 LEDs 5.4.2 Timer Reset Panel (BR-530/550) Two LEDs on the Timer Reset Panel are CR2 and CR3 on the CNT board, 24P0106. Table 5.4 LEDs on CNT board (24P0106) CNT board (24P0106) - BR-530/550 Parts No. Name Status Remarks CR2 ALARM Off Blinks when alarm is generated. CR3 RESET Light Goes off when power is removed. L 5.4.3 Cabin Panel (BR-540) EN T IA The status of the ALARM LED on the cabin panel in the public cabin depends on the setting of #7 of DIP switch S1 on the MAIN board in the processor unit. When the MAIN program for the BR-520 MAIN board is V01.05 and earlier, the alarm is always sent to the public cabins from the second stage. Table 5.5 LEDs on CNT board (24P0106A) CNT board (24P0106A) - BR-540 CR2 CR3 Name Status ALARM Off DUTY *1 Remarks NF ID Parts No. Lights when the alarm is generated.*2 CO *1: The LED in the assigned backup officer and public cabins lights and the LED in other cabins is off. *2: The alarm is generated according to settings of S2 on the MAIN board (V01.06 and later) and menu. 5-22 CONFIDENTIAL (internal use only) This confidential document is used only by FURUNO authorized persons. It is strictly prohibited to reproduce the document in whole or in part without prior written permission of FURUNO. 5.5 Test Points 5.5 Test Points Tables 5.6 and 5.7 list the test points on the MAIN (24P0104) and PWR (24P0105) boards in the processor unit respectively. The silk screen text indicates the test point numbers, but no test pin is mounted on the printed circuit board. Table 5.6 Test points on MAIN board (24P0104) MAIN board (24P0104) Parts No. Signal Name Rating 3.3V 3.0 to 3.6V TP2 5V 4.85 to 5.15V TP3 GND 0V TP4 RESET_N 3.3V TP5 GND 0V IA L TP1 EN T Table 5.7 Test points on PWR board (24P0105) PWR board (24P0105) Parts No. Signal Name Rating GND 0V TP2 12V_B 11.4 to 12.6V NF ID TP1 5V 4.85 to 5.15V TP4 12V_A 11.4 to 12.6V CO TP3 5-23 CONFIDENTIAL (internal use only) This confidential document is used only by FURUNO authorized persons. It is strictly prohibited to reproduce the document in whole or in part without prior written permission of FURUNO. Chapter 6 Replacement of Major Parts This chapter describes step by step procedure for removing major parts. Note that some parts are not supplied as a maintenance parts. 6.1 Main Alarm Panel (BR-510) 6.1.1 Front Panel Use a small screwdriver to carefully pry the front panel out. There are eight small indents (two on each side) on the front panel. L Rubber key 510 (24-012-1102) EN T (19-028-1502) IA Furuno logo NF ID Catch Panel 510 (24-012-1101) Backside Fig.6.1 Removing Front panel CO 6.1.2 MAIN board (20P8200B) To remove the MAIN board, 20P8200B, remove the front panel first, referring to section 6.1.1. Then, follow the steps below. 1. Remove six self-tapping (Delta PT) screws, #1 to #6 shown in Fig.6.2. Connector for connection with MAIN board Cover (Front) assy. Cover (Rear) RD assy. Fig.6.2 Removing screws which fixes Cover (Front) assy. 6-1 CONFIDENTIAL (internal use only) This confidential document is used only by FURUNO authorized persons. It is strictly prohibited to reproduce the document in whole or in part without prior written permission of FURUNO. 6.1 Main Alarm Panel (BR-510) NOTE: When assembling the Cover (front) assembly, tighten screws #1 to #6 in the numbered sequence as shown in Fig.6.2. IA L 2. Lift the Cover (Front) assembly straight up. The Cover (Front) assembly with the MAIN board and LCD assembly has a connector connection to the Cover (Rear) assembly with the PWR board as shown in Fig.6.3. EN T Fig.6.3 Connection between PWB and MAIN boards NF ID 3. Disengaging the catches, remove the Plate (FG) from the chassis. See Fig.6.4. CO Plate (FG) Hole for catch Chassis Catch fitted into hole Connector for PWR board Fig.6.4 Removing Plate (FG) 6-2 CONFIDENTIAL (internal use only) This confidential document is used only by FURUNO authorized persons. It is strictly prohibited to reproduce the document in whole or in part without prior written permission of FURUNO. 6.1 Main Alarm Panel (BR-510) 4. Loosen seven + pan head P-Tite screws Note When assembling, use the positioning projections marked with & in Fig.6.5 and tighten screws #1 to #7 in numerical sequence as shown in Fig.6.5. 5. Remove the Chassis and then the MAIN board/Holder (LCD) assembly. IA Chassis 6 5 L + pan head P-Tite screw, 2.6x8, 7 pcs. EN T 7 2 1 3 NF ID 4 CO MAIN board/Holder (LCD) Assy. Concave side Packing Cover (Front) Assy. Fig.6.5 Disassembling Cover (Front) assembly 6-3 CONFIDENTIAL (internal use only) This confidential document is used only by FURUNO authorized persons. It is strictly prohibited to reproduce the document in whole or in part without prior written permission of FURUNO. 6.1 Main Alarm Panel (BR-510) 6. Disassemble the MAIN board/Holder (LCD) assembly by using the following steps. 1. Disengage the PCB catches both side of the MAIN board. 2. Lift the near side of the MAIN board and gently pull it out of the grooves. Fig.6.7 Note that the MAIN board is still connected to the holder (LCD) by the flat cables. Holder (LCD) assembly L Groove for MAIN board IA PCB catch EN T MAIN board (20P8200B) NF ID Near side CO Fig.6.6 MAIN board with holder (LCD) MAIN board (20P8200B) Groove for MAIN board 2 LCD Holder Assy. 1 Holder (LCD) Assy. Fig.6.7 Removing MAIN board from grooves 6-4 CONFIDENTIAL (internal use only) This confidential document is used only by FURUNO authorized persons. It is strictly prohibited to reproduce the document in whole or in part without prior written permission of FURUNO. 6.1 Main Alarm Panel (BR-510) 3. Place the MAIN board with the shield case side down. Fig.6.8. L 4. Unplug rotary backlock type FPC connectors, J207 and J208. First, read the precautions for the connector on the next page. NF ID MAIN board (20P8200B) EN T IA Holder (LCD) Assy. See the next page for connecting and disconnecting the FPC connector. J207 J208 CO Fig.6.8 Rotary backlock type FPC connectors, J207 and J208 IMPORTANT! The MAIN board, 20P8200B-55 is used with the PWR board 20P0022A-33 and 0P8200B-22 with 20P0022A-22. 6-5 CONFIDENTIAL (internal use only) This confidential document is used only by FURUNO authorized persons. It is strictly prohibited to reproduce the document in whole or in part without prior written permission of FURUNO. 6.1 Main Alarm Panel (BR-510) Flexible Printed Circuit (FPC) Connector Following describes how to lock and unlock the rotary lock Flexible Printed Circuit (FPC) connector. If the FPC connector is not operated correctly, the damage to the connector and/or FPC and contact failure will result. IA L CAUTION a) Do not lock the slider without an FPC inserted. b) Do not apply pressure horizontally to the board. Fig.6.9 Locking rotary lock EN T Disconnecting cable 1. Move the slider (lever) upwards to disengage the locking mechanism. 2. Once the lock has been disengaged, pull the FPC out the cable. NF ID Connecting cable 1. Ensure that the slider is unlocked. 2. Insert the FPC right to the back of the connector. 3. Activate the slider and lock the FPC in place. CO Step 1 Release rotary lock. Step 2 Insert FPC. Step 3 Lock rotary lock. Fig.6.10 Connecting FPC cable 6-6 CONFIDENTIAL (internal use only) This confidential document is used only by FURUNO authorized persons. It is strictly prohibited to reproduce the document in whole or in part without prior written permission of FURUNO. 6.1 Main Alarm Panel (BR-510) 6.1.3 PWR board (26P0022A) To remove the PWR board (26P0022A), first remove the Cover (Rear) assembly by using the procedure below. When only PWR board is removed, it is not necessary to remove the front panel. 1. Set the main alarm panel face down on a soft surface. 2. Remove nuts which hold the connector and washers and nuts on the ground terminal. Waterproof cap Type: MJ-AC, C/N:000-154-498 M4 wing nut M4 FW Nut which comes with LTW12 connector Nut which comes with A15 connector L M4 SW M4 FW IA M4 Hex nut M4 SW NF ID EN T M4 FW Fig.6.11 3. Prying the two catches (top and bottom) open, remove the Cover (Rear) RD assembly. 4. Unplug the PWR board from the connector on the MAIN board. CO Note 1: PWR board of 22 is used with MAIN board of 22 and 33 with 55. Connectors providing the connection between PWR and MAIN boards Cover (Rear) RD Assy. PWR board Packing O ring MAIN board Catch (on top and bottom) Bottom catch locates here. O ring (CO 0502 (S4), 000-166-377) Note 2: Put o-rings aside where they will not be lost. Fig.6.12 Removing cover (Rear) RD assy. 6-7 CONFIDENTIAL (internal use only) This confidential document is used only by FURUNO authorized persons. It is strictly prohibited to reproduce the document in whole or in part without prior written permission of FURUNO. 6.2 Processor Unit (BR-520) 6.2 Processor Unit (BR-520) There are two types of the processor unit: the earlier production has shield cases and the current production does not. Following describes the procedure to disassemble the processor unit of the earlier production. 6.2.1 MAIN board and Power case assembly To disassemble the processor unit; 1. Remove five type F binding head + Sems M4x10 screws to remove the top cover. IA L Type F binding head + Sems screw, M4x10, 5 pcs. EN T Top cover NF ID Fig.6.13 Removing top cover CO 2. Loosen five M4x10 Sems screws and remove the shield case (M1). Type F binding head + Sems screw, M4x10 5 pcs. Shield Case (M1) Fig.6.14 Removing Shield case (M1) 6-8 CONFIDENTIAL (internal use only) This confidential document is used only by FURUNO authorized persons. It is strictly prohibited to reproduce the document in whole or in part without prior written permission of FURUNO. 6.2 Processor Unit (BR-520) 3. Unclamp the cable on the shield case (M2), remove four M4x10 screws, and then detach the shield case (M2). Shield Case (M2) Clamp Type F binding head + Sems screw, M4x10 4 pcs. IA L MAIN board (24P0104) EN T Fig.6.15 Removing Shield Case (M2) 4. To remove MAIN board (24P0104), unplug J4 and J8, and then remove eleven M3x6 screws. NF ID 5. To remove the power case assembly which includes PWR board, 24P0105 and Power supply (ZWS100BAF-24/FUR), remove four M3x6 screws. Binding Head screw, M3x6, 4 pcs. J4 Binding Head screw, M3x6, 11 pcs. J8 CO Power Case Assy. MAIN board (24P0104) Fig.6.16 Removing MAIN board and Power Case Assy. 6-9 CONFIDENTIAL (internal use only) This confidential document is used only by FURUNO authorized persons. It is strictly prohibited to reproduce the document in whole or in part without prior written permission of FURUNO. 6.2 Processor Unit (BR-520) 6.2.2 PWR board and Power supply Fan motor The power case assembly consists of the Power case (Lower) assembly which includes PWR board (24P0105) and fan motor and the Power case (Upper) assembly which includes the power supply (ZWS100BAF-24/FUR). Use the following steps for disassembling. 1. Loosen four + bind screws marked by * in Fig.6.17 to open the case. Note; When assembling, use locating holes marked by &. See Fig.6.17. IA L 2. Unplug J2 on the PWR board (24P0104) and separate the power case (Upper) assembly from the power case (Lower) assembly. NF ID EN T Power case (Lower) assy. PWR board (24P0105) Power case (Upper) assy. &: Locating hole Fig.6.17 Disassembling power case assembly To remove PWR board (24P0104); CO 1. Remove two M3x6 screws which fix the PWR shield plate. See Fig.6.18. 2. Remove six M3x6 screws which fix the PWR board to the chassis. Screw fixing PWR shield plate, M3x6 PWR board fixing screws, M3x6 PWR board (24P0105) Fig.6.18 Removing PWR board (24P0105) 6-10 CONFIDENTIAL (internal use only) This confidential document is used only by FURUNO authorized persons. It is strictly prohibited to reproduce the document in whole or in part without prior written permission of FURUNO. 6.2 Processor Unit (BR-520) To remove Power Supply (AC/DC converter); The power supply, or AC/DC converter is removed from the power case (Upper) by using the steps below. 1. Remove four M3 x 6 screws to remove the Power supply (ZWS100BAF-24/FUR). FIL Board (24P0110) IA L Clamp the cable when assembling. EN T Power Supply ZWS100BAF-24/FUR Power case (Upper) assy. Fig.6.19 Removing Power supply NF ID 6.2.3 Fan motor The life time of the fan motor on the power case (Lower) assembly varies according to the ambient temperature, but it is about five years typically. To remove the fan motor, remove two M3x30 screws. The label sticker on the fan motor is facing inward. CO Use dowels on the chassis to align the fan motor so that the mounting holes not in use on the fan are over the dowels. Power case (Lower) assy. Dowel M3x30, 2 pcs. Fan motor assy. MMF-06G12ES-ROD Label PWR board (24P0105) (000-174-638-10) Fig.6.20 Removing fan motor 6-11 CONFIDENTIAL (internal use only) This confidential document is used only by FURUNO authorized persons. It is strictly prohibited to reproduce the document in whole or in part without prior written permission of FURUNO. 6.3 Timer Reset Panel (BR-530) 6.3 Timer Reset Panel (BR-530) The timer reset panel includes the CNT board (24P0106) and a push button, AR22EOR-10BZ1. 1. To remove the CNT board and push button, first, remove the cover assembly by loosening four M3x10 Sems screws. See Fig.6.21. L Type B Sems screw, M3x10, 4 pcs. EN T IA Cover Assy. NF ID Fig.6.21 Removing Cover assembly from BR-530 Push button (AR22EOR-10BZ1) The button consists of an operator and a contact block. To detach the contact block from the operator, pull-out the contact block in the direction by the arrow in Fig.6.22 while keeping the white release arm pressed with one finger. CO Mounting operator to panel As shown in Fig.6.22, align the release arm with the operator groove at the arrow mark. Then, insert the contact block into the operator until it clicks. Contact block Operator Nut Arrow mark Packing Release arm Push button Fig.6.22 Push button, AR22EOR-10BZ1 6-12 CONFIDENTIAL (internal use only) This confidential document is used only by FURUNO authorized persons. It is strictly prohibited to reproduce the document in whole or in part without prior written permission of FURUNO. 6.3 Timer Reset Panel (BR-530) 2. Unplug J1, remove four + pan head P-Tite screw, 2.6x8, and then remove the CNT board (24P0106). 3. Detach the contact block from the operator, unscrew the nut, and remove the operator of the push button. Note: When assembling, insert the operator of the push button with the arrow mark outward. The operator should have the packing. The convex on the operator nut is facing you. L Operator CNT board, 24P0106 IA Packing EN T J1 + pan head P-Tite, 2.6x8, 4 pcs. Operator nut View from A NF ID Convex on nut should face this side. Arrow mark Fig.6.23 Mounting CNT board and Operator of push button CO Connect to J1 on CNT board. Contact Block Fig.6.24 Mounting Contact Block of push button 6.4 Cabin Panel (BR-540) To remove the CNT board, 24P0106A in the cabin panel, BR-540, refer to “Timer Reset Panel”, previous section. 6-13 CONFIDENTIAL (internal use only) This confidential document is used only by FURUNO authorized persons. It is strictly prohibited to reproduce the document in whole or in part without prior written permission of FURUNO. 6.5 Motion Detector (BR-560) 6.5 Motion Detector (BR-560) The MOT board, 24P0107 is fixed in the Motion detector (BR-560) with four + pan head P-Tite 2.6x8 screws. See Fig.6.25. L MOT board (24P0107) EN T IA + pan head P-Tite 2.6x8, 4 pcs. Fig.6.25 Fixing MOT board in Motion Detector panel 6.6 Flash Beacon (BR-570) CO NF ID The LED light is fixed onto the flash beacon panel as shown in Fig.6.26. Note: Two packings are used. Nut Washer Packing Light (LED) Packing Hood, ML-1568 (000174488) Light (LED), MLC-M0901DCKXB5B0034 (000174390) L2 Hood View from A L1 Fig.6.26 Fixing Light onto Flash Beacon panel 6-14 CONFIDENTIAL (internal use only) This confidential document is used only by FURUNO authorized persons. It is strictly prohibited to reproduce the document in whole or in part without prior written permission of FURUNO. Chapter 7 Troubleshooting This chapter describes self test and connection check procedures. 7.1 Self-diagnosis The system provides two test capabilities: Self test and LCD test. The self test checks the operating status of the RAM/ROM and keyboard while the LCD test the LCD monitor. The self test is carried out through the Administrator and Service menus and the LCD test through the Service menu. IA NF ID EN T Figs.7.1 and 7.2 show the menus used for self test. L To terminate the test, press MENU key three times. Fig.7.2 Service menu CO Fig.7.1 Administrator menu 7.1.1 Self Test The self test is carried out through the Administrator and Service menu. When using Administrator menu; 1. Open the Administrator menu with the password. 2. Select the Self TEST and press ENT/CALL key. 3. The self test result like Fig.7.3 is displayed. 4. Press the key for test. If the key works normally, the color changes to red in the display. The color is back to black when the key is pressed again. 5. Press MENU/ESC key three times to terminate the test. 7-1 CONFIDENTIAL (internal use only) This confidential document is used only by FURUNO authorized persons. It is strictly prohibited to reproduce the document in whole or in part without prior written permission of FURUNO. 7.1 Self-diagnosis When using Service menu; 1. Open the Service menu with the password. 2. Select the System TEST and press ENT/CALL key. 3. Select the Self test and press ENT/CALL key. 4. For keyboard test, press a key so that the corresponding key in the display becomes red. DC input voltage (10.8 to 13.2V) IA EN T Key and keypad test Count (How many times is selftest performed) L ROM/RAM test and Program numbers NF ID Fig.7.3 BR-500 Self Test display 7.1.2 LCD Test The LCD test is for colors and pixels. To test the LCD, use the steps below. CO 1. Open the Service menu with the password. 2. Select the System test and press ENT/CALL key. 3. Select the LCD TEST and press ENT/CALL key. The display becomes uniformly red. 4. Press the ENT/CALL key again, and the display changes to green. Pressing the ENT/CALL key repeatedly will sequence through the displays in following colors, and go back to the first display again. Red > Green > Blue > Gradation red > Gradation green > Gradation blue > White > Black > Gradation black > Red 5. Press MENU/ESC key three times to terminate the test. 7-2 CONFIDENTIAL (internal use only) This confidential document is used only by FURUNO authorized persons. It is strictly prohibited to reproduce the document in whole or in part without prior written permission of FURUNO. 7.2 Checking Connections 7.2 Checking Connections The system provides the function to check the connection of the unit to the processor unit. 7.2.1 Main Alarm Panel (BR-510) The main alarm panel, BR-510 is connected to the processor unit, BR-520 via NMEA2000 capable of detecting an error. If the BR-510 does not receive the ACK signal from the BR-520 after sending the signal, an Acknowledgement Error occurs and "Failure: Communication" message is generated in red. IA L 7.2.2 Timer Reset Panel and Cabin Panel (BR-530/540) These units output a test signal to the processor unit when the following operation is made. EN T a) On Timer Reset Panel (BR-530/550), long press RESET button. b) On Cabin Panel (BR-540), press TEST button. NF ID Receiving the test signal, the processor unit generates the ACK signal for five seconds and sends it to the panel. Table 7.1 ACK signal being generated by Processor Unit TB in BR-520 TB-3 to TB-6 TB-7 to TB-15 ACK Signal H/L H/L H H H/L Output from RST LED RST BUZ DUTY ALM BUZ BR-530/550 BR-540 CO Output to If the panel is connected to the processor unit normally, the LED and buzzer activate for five seconds as shown in Table 7.2 when the test signal is received. Table 7.2 Status after pressing TEST button Unit Visual/Audio alarms BR-530/550 Alarm LED Buzzer Status Blinks Sounds 7-3 DUTY LED BR-540 ALARM LED Buzzer Lights Lights Sounds CONFIDENTIAL (internal use only) This confidential document is used only by FURUNO authorized persons. It is strictly prohibited to reproduce the document in whole or in part without prior written permission of FURUNO. 7.3 Checking Power Supply 7.3 Checking Power Supply The power supply circuit in the processor unit generates AC and DC power failure signals: AC POWER FAIL and DC POWER FAIL when power is not supplied. These signals are output from pins #15 and #16 of J3 on the PWR board, 24P0105 to pins #15 and # 16 of J4 on the MAIN board, 24P0104 respectively. When the MAIN board receives the signal, it generates the red error message, "Failure: AC (or DC)". The power indicator appears at the upper right of the display on the main alarm panel. When the system is powered by both AC and DC power supplies, the power indicator reads "Power AC/DC". When only AC power is present, the indication is "Power AC". IA Power AC/DC: Powered from both AC and DC power supplies. Power AC: Powered from AC power supply. Power DC: Powered from DC power supply. Power --/--: No data (The main alarm panel fails communication with the processor unit.) EN T 1) 2) 3) 4) L Power indicators Fig.7.4 Power indicator in the top line of display CO NF ID Incorrect power error message If the indication is "Failure: DC (AC)" when AC (DC) power is removed, check the connection between the PWR and MAIN boards. Probably, the AC/DC POWER FAIL lines are connected reversely. J3 on the PWR board and J4 on the MAIN board are connected with straight-through cables. The pins #15 and #16 on these connectors are AC POWER FAIL and DC POWER FAIL lines respectively. If the lines are crossed over, the incorrect error message is generated. #16 #1 BR-520 Processor Unit J3 on PWR board J4 on MAIN board Fig.7.5 Connections between PWR and MAIN boards 7-4 CONFIDENTIAL (internal use only) This confidential document is used only by FURUNO authorized persons. It is strictly prohibited to reproduce the document in whole or in part without prior written permission of FURUNO. 7.4 FAQs 7.4 FAQs The following frequently asked questions (FAQs) are some of the most common that we receive. Q1: How to adjust the buzzer sound pressure level? A1: The sound level cannot be adjusted. The IEC62616 provides that the first stage bridge audible alarm sound pressure level 1 m from the source shall be at least 75 dB but not greater than 85 dB and the second and third stage remote audible alarm sound pressure level 1 m from the source shall be at least 75 dB but not greater than 120 dB. IA L The BR-500 generates the audible alarm with the sound pressure level of 75 dB to 85 dB. The level varies slightly according to the buzzer tone. EN T Q2: How to adjust the buzzer tone? A2: On the Main alarm panel, the buzzer tone is adjusted through the service man menu (Default frequency: 1500 Hz). On the Cabin panel, the buzzer tone is adjusted by the rotary switch S2 in the BR-520 (Default frequency: 4.2 kHz). NF ID Q3: What is operator fitness signal? A3: The equipment on the bridge outputs a signal every time when the bridge operator makes any operation. This signal is called “Operator fitness” signal and generally a contact closure signal. FEA-2x07 series ECDIS and FAR-2xx7 series radar outputs this signal. CO Q4: What is backup navigator signal? A4: The track control system generates a backup navigator alarm if the actual course change alarm is not confirmed by the officer of the watch within 30 seconds of wheel-over. The track control system outputs this signal. Receiving the backup navigator (alarm) signal, the BNWAS activates an emergency call. Q5: How to connect FAR-2xx7 radar to BR-500? A5: Pins #7 and #8 of J612 in FAR-2xx7 are connected to the INPUT port of BR-500. In the Alarm menu of radar, the ALARM OUT4 is set to Operator Fitness. Q6: How to connect the autopilot and ECDIS/TCS to BR-500? A6: The autopilot mode signal is connected to INPUT1 port on BR-500. The ECDIS/TCS outputs the operator fitness and backup navigator alarm signals. The operator fitness signal is connected to the INPUT port except for INPUT1.The backup navigator alarm signal is connected to the INPUT2 port and the function of INPUT2 port is changed through the service menu accordingly. 7-5 CONFIDENTIAL (internal use only) This confidential document is used only by FURUNO authorized persons. It is strictly prohibited to reproduce the document in whole or in part without prior written permission of FURUNO. 7.4 FAQs Q7: Can FR-2165DS be connected to the BNWAS? A7: No, FR-21x5 and FR-28x5 series radar does not output the operator fitness signal. Only FAR-2xx7 series radar outputs the operator fitness signal. Q8: When the BNWAS is installed on board an existing ship, is it necessary to connect to the VDR and the autopilot? A8: The NK does not define these connections, but it is recommended to connect them as below. Autopilot: Connect the autopilot to the BNWAS. If the autopilot does not output the contact closure mode signal, consult the ship classification societies. IA L VDR: Connect the VDR to the BNWAS if possible. Both ALR sentence and System Failure signal are connected. EN T Q9: Can the timer reset panel be installed outside the bridge? A9: No, it must be installed in the bridge according to MSC128 (75). NF ID Q10: Which terminal board is used for the cabin panel in Captain and Backup officers? A10: The captain is always connected to TB7. It is recommended that the chief officer, second officer, and third officer are connected to TB8 to TB10 respectively so that it is not necessary to change the officer name through menu. Q11: How to connect an external alarm. A11: A buzzer or LED is connected via a relay circuit as shown in Fig.7.6. The resister in the relay circuit is selected so that the output current from the BR-520 is 10 mA or less. CO ALM Output Circuit Relay Circuit BR-520 Relay 10mA MAX. Buzzer or ALM LED Fig.7.6 Connecting external buzzer 7-6 CONFIDENTIAL (internal use only) This confidential document is used only by FURUNO authorized persons. It is strictly prohibited to reproduce the document in whole or in part without prior written permission of FURUNO. 7.4 FAQs Q12: Which stage of the alarm should trigger the cabin panel in crew and public areas? A12: The NK defines that the third stage alarm triggers the cabin panel in crew and public areas. Other classification societies do not define about this matter. CO NF ID EN T IA L In BR-520 MAIN program, 2450060-01.05 and earlier, the cabin panel in crew and public areas, or connected to TB13, TB14, and TB15 receives the alarm from the second stage. If the second stage alarm is not required, update the BR-520 MAIN program to V01.06 and later. In these program, #7 of S1 on the MAIN board in the processor unit chooses the alarm output from TB13, TB14, and TB15: the second stage or the third stage alarm. 7-7 CONFIDENTIAL (internal use only) This confidential document is used only by FURUNO authorized persons. It is strictly prohibited to reproduce the document in whole or in part without prior written permission of FURUNO. メインアラーム パネル MAIN ALARM PANEL BR-510 *1 IV-2sq. 注記 *1)造船所手配。 *2)オプション。 *3)キャビンパネルは最大3台まで接続可能。 *4)モーション検出器に変更可能。 *5)モーション検出器・オペレータフィットネスに変更可能。 キャビンパネル CABIN PANEL BR-540 *2 キャビンパネル CABIN PANEL BR-540 *2 CONFIDENTIAL (internal use only) This confidential document is used only by FURUNO authorized persons. It is strictly prohibited to reproduce the document in whole or in part without prior written permission of FURUNO. ケーブル長さ合計: 最大80m TOTAL CABLE LENGTH: UP TO 80m NOTE *1: SHIPYARD SUPPLY. *2: OPTION. *3: MAX.3 CABIN PANELS CAN BE INSTALLED. *4: CONNECTION CAN BE CHANGED TO MOTION DETECTOR. *5: CONNECTION CAN BE CHANGED TO MOTION DETECTOR OR OPERATOR FITNESS. DRAWN 19/Aug/2011 CHECKED 19/Aug/2011 APPROVED SCALE 19/Aug/2011 DWG No. C4461-C01- N REF.No. 1 2 3 4 5 6 同上 DITTO TB15 12VAOUT GND PB_DUTY3 PB_ALM3 PB_BUZ3 PB_TEST3 TB14 12VAOUT GND PB_DUTY2 PB_ALM2 PB_BUZ2 PB_TEST2 L 1 2 3 4 5 6 7 8 9 T.YAMASAKI H.MAKI MASS Y.NISHIYAMA kg 24-012-6001-2 キャビンパネル CABIN PANEL BR-540 *2 *3 キャビンパネル CABIN PANEL BR-540 *2 *3 キャビンパネル CABIN PANEL BR-540 *2 キャビンパネル CABIN PANEL BR-540 *2 *3 キャビンパネル CABIN PANEL BR-540 *2 *3 VDR, ETC. VOLUME (3kΩ) *1 1 2 3 4 5 JB *1 ALARM SYSTEM VDR *1 MPYC-2 TTYCS-1 同上 DITTO 同上 DITTO *1 MPYC-4,MAX.50m *5 1 2 3 4 5 12VIN GND FLB DIM-P DIM-N BACK-UP NAVIGATOR 5 TB20 TD-A 1 TD-B 2 3 4 SHIELD 5 6 TB19 12VAOUT GND FLB1 12VAOUT GND FLB2 12VAOUT GND FLB3 *1 MPYC-2 *1 *1 MPYC-2 MPYC-2 *1 MPYC-2 *1 *1 MPYC-2 MPYC-2 *1 MPYC-2 AUTOPILOT OPERATOR FITNESS 1 2 3 4 5 6 1 2 3 4 5 6 同上 DITTO TB13 12VAOUT GND PB_DUTY1 PB_ALM1 PB_BUZ1 PB_TEST1 *1 MPYC-2 *4 *1 MPYC-7 TB7-15 12VAOUT GND PB_DUTY PB_ALM PB_BUZ PB_TEST 12V GND DUTY ALM BUZ TEST 1 2 3 4 5 6 1 2 3 4 5 6 INPUT2 3 GND 4 INPUT5 9 GND 10 TB21 INPUT6 1 GND 2 INPUT7 3 GND 4 INPUT8 5 GND 6 TB18 SYS_FAIL_B1 1 SYS_FAIL_COM1 2 SYS_FAIL_B2 3 SYS_FAIL_COM2 4 IA INPUT1 1 GND 2 12VIN GND SENSOR_OUT GND 12VIN GND SENSOR_OUT GND MAX. 2 SETS 1 2 3 4 5 6 12V GND DUTY ALM BUZ TEST 1 2 3 4 5 6 *1 MPYC-7 OFFICER CABIN PANEL TB12 12VAOUT GND OF_DUTY6 OF_ALM6 OF_BUZ6 OF_TEST6 1 2 3 4 1 2 3 4 モーション検出器 MOTION DETECTOR BR-560 *2 JB *1 OFFICER #1 1 2 3 4 5 6 1 2 3 4 5 6 同上 DITTO *1 MPYC-4,MAX.50m *1 MPYC-4,MAX.50m 12VIN GND NC LED BUZ RESET 1 2 3 4 5 6 モーション検出器 MOTION DETECTOR BR-560 *2 5 6 7 8 1 2 3 4 5 6 7 8 ケーブル長さ合計: 最大40m TOTAL CABLE LENGTH: UP TO 40m TB11 12VAOUT GND OF_DUTY5 OF_ALM5 OF_BUZ5 OF_TEST5 TB16 12VAOUT 12VAOUT 12VAOUT 12VAOUT GND GND GND GND TB17 INPUT3 GND INPUT4 GND *1 MPYC-7 12VIN GND NC LED BUZ RESET 1 2 3 4 5 6 4 キャビンパネル:最大12台。ケーブル長さ:全長300m以下。 CABIN PANEL: UP TO 12 SETS FOR OFFICER AND PUBLIC USE. TOTAL CABLE LENGTH: UP TO 300m *1 MPYC-4 12V GND DUTY ALM BUZ TEST 1 2 3 4 5 6 同上 DITTO TB10 12VAOUT GND OF_DUTY4 OF_ALM4 OF_BUZ4 OF_TEST4 RST_LED4 3 RST_BUZ4 4 RST_RESET4 5 TB6 12VBOUT 1 GND 2 *1 MPYC-7 最大2台 *1 MPYC-7 1 2 3 4 5 6 同上 DITTO TB9 12VAOUT GND OF_DUTY3 OF_ALM3 OF_BUZ3 OF_TEST3 RST_LED3 3 RST_BUZ3 4 RST_RESET3 5 TB5 12VBOUT 1 GND 2 BR-530 *2 1 2 3 4 5 6 1 2 3 4 5 6 同上 DITTO TB8 12VAOUT GND OF_DUTY2 OF_ALM2 OF_BUZ2 OF_TEST2 3 1 2 3 4 5 6 12V GND DUTY ALM BUZ TEST 1 2 3 4 5 6 1 2 3 4 5 6 CAPTAIN ROOM 12V GND DUTY ALM BUZ TEST *1 MPYC-7 タイマーリセットパネル TIMER RESET PANEL BR-530 *2 EN T 1 2 3 4 5 6 JB *1 12VIN GND NC LED BUZ RESET 1 2 3 4 5 6 MPYCY-7 *1 12VIN GND NC LED BUZ RESET 1 2 3 4 5 6 2 12V GND DUTY ALM BUZ TEST *1 MPYC-7 3 4 5 1 2 JB *1 12VIN GND NC LED BUZ RESET 1 2 3 4 5 6 MPYCY-7 *1 タイマーリセットパネル:最大6台。ケーブル長さ:全長150m以下。 TIMER RESET PANEL (MAX. 6 SETS) 防水型タイマーリセットパネル TOTAL CABLE LENGTH: UP TO 150m WATERTIGHT TIMER RESET PANEL BR-550 *2 NF ID 1 2 3 4 5 6 制御部 PROCESSOR UNIT BR-520 CO 12V GND DUTY ALM BUZ TEST TB7 12VAOUT GND OF_DUTY1 OF_ALM1 OF_BUZ1 OF_TEST1 1 2 3 4 5 6 *1 MPYC(Y)-7 3 4 5 ケーブル長さ合計: 最大40m TOTAL CABLE LENGTH: UP TO 40m *1 MPYC-7 RST_LED2 3 RST_BUZ2 4 RST_RESET2 5 TB4 12VBOUT 1 GND 2 RST_LED1 3 RST_BUZ1 4 RST_RESET1 5 1 2 JB *1 BR-530 *2 1 2 3 4 5 6 TB2 SHIELD 12VAOUT GND NET-H NET-L 1 2 3 4 5 3 (+) 4 (-) TB1 1 AC 2 AC *1 MPYC(Y)-7 12VIN GND NC LED BUZ RESET 防水型タイマーリセットパネル WATERTIGHT タイマーリセットパネル TIMER RESET PANEL TIMER RESET PANEL BR-550 *2 BR-530 *2 12V GND DUTY ALM BUZ TEST 1 2 3 4 5 FRU12-05AFFM-10M,10m 20/30/40/50m(*2) SHIELD アカ RED P クロ BLK シロ WHT P アオ BLU *1 IV-2sq. NETWORK FG NET-S NET-C NET-H NET-L (BUCK-UP BATTERY) C *1 DPYC-2.5 *1 DPYC-1.5 B 24VDC 100-230VAC 1φ,50/60Hz TB3 12VBOUT 1 GND 2 A 1 2 3 4 5 6 1 6 S-1 フラッシュビーコン FLASH BEACON BR-570 *2 最大3台 MAX. 3 SETS PUBLIC CABIN PANEL ケーブル長さ合計: 最大80m TOTAL CABLE LENGTH: UP TO 80m キャビンパネルの4芯ケーブル接続例 EXAMPLE FOR CONNECTION CABIN PANEL WITH 4-CORE CABLE キャビンパネル CABIN PANEL BR-540 D DUTY-LEDおよびTEST機能は使用不可 DUTY-LED AND TEST FUNCTIONS ARE DISABLE TITLE BR-500 名称 船橋航海当直警報装置 相互結線図 NAME BRIDGE NAVIGATIONAL WATCH ALARM SYSTEM INTERCONNECTION DIAGRAM CO NF ID EN T IA L S-2 CONFIDENTIAL (internal use only) This confidential document is used only by FURUNO authorized persons. It is strictly prohibited to reproduce the document in whole or in part without prior written permission of FURUNO. CO NF ID EN T IA L S-3 CONFIDENTIAL (internal use only) This confidential document is used only by FURUNO authorized persons. It is strictly prohibited to reproduce the document in whole or in part without prior written permission of FURUNO.



![LC-3CH-CMJ1OL [更新済み]](http://vs1.manualzilla.com/store/data/006541650_2-140870d017caf8877b51d73cb9426b95-150x150.png)