1
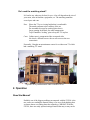
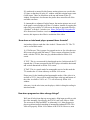
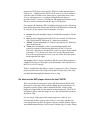
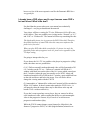
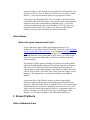
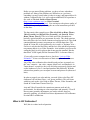
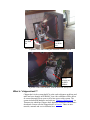
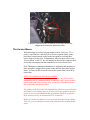
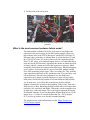
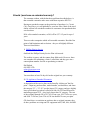
F38310 HDTV FAQ
Last Edit: 8/1/05
Version: 1.3
PLEASE EMAIL ME AT [email protected] WITH SUGGESTIONS AND
MATERIAL FOR ADDTION TO THIS FAQ. PLEASE INCLUDE THE NAME YOU
USE ON THE HOME THEATER SPOT AND/OR AVS FORUMS. THE SOURCE
DOCUMENT IS BEING PREPARED IN MICRSOFT WORD. PLEASE MAKE SURE
YOU DO NOT HAVE ANY MACROVIRUSES BEFORE YOU SEND ME ANY
CONTRIBUTIONS.
I RESERVE THE RIGHT TO USE AS IS, EDIT, OR IGNORE ANY SUGGESTIONS
THAT ARE MADE.
THANKS ARE DUE TO OTHER MEMBERS OF THE AVS FORUM AND THE
HOME THEATER SPOT. THEY ARE RESPONSIBLE FOR MOST OF THE
INFORMATION I HAVE GLEANED REGARDING HDTV, DVD, AND THE F38310.
THE HOME THEATER SPOT IS NOW RESTRICTED TO PAID ACCESS ONLY SO I
NO LONGER PARTICIPATE THERE. SEVERAL OF THE SPOT’S MAJOR RCA
CONTRIBUTERS ARE NOW POSTING ON HDTVOICE.
FEEL FREE TO LINK TO THIS DOCUMENT. I CONSIDER IT PUBLIC DOMAIN
FOR ANYONE TO COPY AND POST FREELY. PLEASE DO NOT MAKE
CHANGES IN THIS DOCUMENT WITHOUT ASKING ME.
I DO NOT GUARANTEE THE ACCURACY OF ANY OF THE INFORMATION.
MOST OF IT COMES FROM PERSONAL EXPERIENCE AND FROM POSTS ON
THE AVS FORUM HDTV CRT FORUM AND THE HOME THEATER SPOT RCA
FORUM. MY THANKS ARE DUE TO ALL OF THE CONTRIBUTORS OF THESE
FORUMS. ANY MISTAKES ARE MY OWN. THIS DOCUMENT TOOK MANY
MONTHS TO COMPLETE, SO SOME OF THE LINKS TO WEBPAGES MAY BE
DEAD. YOU SHOULD BE ABLE TO FIND THE LINKS OR THEIR EQUIVALENTS
USING THE WEB SEARCH PAGE OF YOUR CHOICE.
ANY TWEAKS OR FIXES THAT ARE REFERENCED IN THE DOCUMENT
BELOW ARE AT YOUR OWN RISK. THERE ARE INHERENT DANGERS TO
MODIFYING CONSUMER ELECTRONICS OUTSIDE THE USER MANUAL.
MAKE SURE YOU FULLY UNDERSTAND WHAT YOU ARE DOING, WHY YOU
ARE DOING IT, AND WHAT THE DANGERS ARE TO YOU AND YOUR
EQUIPMENT BEFORE YOU MAKE ANY MODIFICATIONS.
PLEASE CHECK OUT MY HOME PAGE FOR UPDATES.
I HOPE THIS DOCUMENT HELPS YOU! ENJOY!
JOSEPH SHOVLIN
The Unofficial F38310 FAQ
Statement of purpose:
The F38310 is a very popular, entry level HDTV set with an internal ATSC tuner.
If this is your first introduction to HDTV’s and home theater in general, there is an
extremely steep learning curve to getting the most out of this versatile television.
The purpose of this FAQ is to acquaint you with the abilities and limitations of this set,
and to give you the background to understand the technological issues this set presents.
This FAQ will not be able to give you a full education in HDTV, DVD, and home theater.
You can best prepare yourself for F38310 ownership by spending a few days reading
through several of the very good DVD and HDTV FAQ’s easily found using a web
search engine. There will be links to several of these sites as you read through the FAQ.
The information in this FAQ has been compiled from posts regarding F38310 ownership
and operation on two of the best home theater discussion groups on the web: The Home
Theater Spot from their RCA Forum and The AVS Forum from their HDTV Directview
CRT Forum. If you perform some simple searches on these forums, you will find the
source posts for most of the information on this thread. Home theater forums are a
GREAT source of information and help for topics related to digital television, home
theater, and home audio.
1. Specs and hardware details
RCA Manufacturer Product Page:
Main Product Page
Specifications (html)
Specifications (pdf)
Warranty Information
F38310 Product Manual (Adobe PDF format):
From 2000
From 2001
Matching Stand
Where To Buy
No longer under production.
New or Refurbished: Only floor models available.
E-Bay, Classifieds, “Swap and Sell” Magazines
Native Scan Rates
480p (on component input only)
540p (upconverted NTSC)
1080i (upconverted 480p and 720p ATSC + 1080i ATSC)
Screen Resolution
1280H x 1080V
Video Inputs:
(1) Rear DirecTV Satellite Dish;
(2) Rear NTSC/ATSC RF (Antenna A and B);
(1) Front (composite video; R/L Stereo Audio);
(3) Rear Audio/Video (composite video or S-video; R/L stereo audio);
(1) Rear Component (YPrPb; 480i, 480p, 1080i; R/L stereo audio).
Rumor has it that 540p will also work over the component input.
Video Outputs:
None.
Audio Outputs:
(1) R/L Stereo Audio Fixed Level
(1) R/L Stereo Audio Variable Level
(1) Optical TOS Link digital audio (Dolby Digital and PCM)
(1) R/L External Speakers Connection (not for surround)
(1) Headphone jack (front panel)
Miscellaneous:
Telephone jack (for built-in DirecTV receiver)
DirecTV Access Card Slot
Matching Stand/Entertainment Center
Do I need the matching stand?
It’s hard to say what may be best for you. A lot will depend on the size of
your room, taste in furniture, equipment, etc. The matching stand has
several pros and cons.
Pros: Places the TV at a viewing height that is comfortable
The stand conforms to the contours of the set
Pre-assembled (except for smoked glass doors)
Large opening in the back for cable management
Top of stand has ‘locking’ pins to keep the TV in place
Cons: Cabinet area is compromised due to tapered sides
No wheels, difficult to move the set out to access the rear
connections
Personally, I bought an entertainment center for a widescreen TV which
had a matching TV stand.
A picture of my entertainment center with the F38310.
2. Operation
Read the Manual!
Probably one of the biggest problems encountered with the F38310 is the
new owner not reading the manual! Many of us are at fault thinking that
we know almost everything about the technology. WRONG! With the
F38310, there are many options/settings/features that may or may not be
available depending on the types of connections (DirecTV, cable, antenna,
DVD, VCR).
Do yourself a favor, read the manual two or three times. Use your remote
while reading and play around to get familiar with the
options/settings/features of the TV. (The best time for me was early in the
morning while the family was still sleeping… no interruptions!) Then
further questions can be answered on one of the forums!
Initial Setup
Getting Started
Assuming that you have read the manual, all of your connections have
been properly connected to proper inputs (I.E. DVD player, DirecTV,
Audio receiver, antenna, etc.).
Hopefully you have a ‘power strip/surge suppressor’. It is highly
recommended if you do not have one already. Plug in your set and power
it on.
On initial startup, you will get a menu that will instruct you with the
configuration of your inputs. Follow the instructions. This is where you
can assign what devices are connected to specific inputs (I.E. Antenna A =
cable, Antenna B = Air). Once the physical connections have been
assigned, the menu will ask to perform a ‘Channel Search’. Select ‘OK’
and let ‘er rip. This will take approx. 10-15 minutes to find all of the
available channels.
Hopefully when this is completed, you should get reception from a
channel on the desired inputs. Selecting specific inputs and changing
channels is outlined in the User’s Manual.
Initial Recommendations
Initially, the TV is at factory settings. It is highly recommended that some
of the picture settings immediately be adjusted. The most important setting
to lower is the “Contrast”. This factory setting usually is set very high and
is called ‘Torch Mode’. If this is set at a high value, it will cause to the
screen to age (burn) prematurely. The ‘Contrast’ should be set below 50%
(halfway) or lower. From the remote (using the blue arrow buttons to
navigate):
•
•
•
Menu
Picture Quality
Picture Settings
•
•
Contrast
Use ‘left arrow’ to move the ‘slider’ below halfway.
Note: This adjustment needs to be performed on each input selection
(Antenna A, Antenna B, DirecTV, Component, etc) as the adjustments are
independent for each one. Perform the ‘color/tint’ adjustments to your
personal taste and set the ‘Black Level’ to about 50%.
Once this is completed, perform adjustment to the “Sharpness”. Using the
process above, set this setting to one or two clicks from dead left. The
sharpness setting, when set high, will cause ‘ringing’ on the edges of
objects in certain scenes. Although this will not cause any harm to the TV,
most users feel that adding sharpness looks ‘artificial’. This is a debated
preference and ultimately it you need to be the judge. Additionally, with
the ‘sharpness’ setting (one notch up), Scan Velocity Modulation (SVM)
is always on by default. Again, this is discussed frequently on the forum(s)
and is a matter of taste. Note: SVM can be manually/permanently disabled.
See “Disabling SVM Mod” below.
Audio Selections/Options
What are all these audio outputs for?
First, all of the following info is documented in the User’s Manual. What
follows will present the same information and hopefully add clarity based
on other’s experiences.
Front Panel Output
Headphone jack – Inserting a plug will automatically disable the internal
and/or external speakers. The volume to the headphones can be changed
via the remote in the normal fashion. (Note: the headphone input is a
‘stereo minijack’ (1/8”). If your headphones have a ¼” plug, you can
purchase an adapter at most electronics stores (Lowes, Home Depot,
Circuit City, Best Buy, Radio Shack).
Rear Panel Outputs
Fixed – Use this output if you want to have analog audio routed to your
A/V receiver and use it’s volume control to adjust the volume.
Variable – Use this output to route analog audio to an A/V receiver.
Adjust the volume with the TV’s remote.
Although these interfaces are useful, if you have an A/V receiver or
processor with digital inputs, it is recommended to use the ‘Digital
Audio Out’ connection to achieve the best quality.
EXT – Allows you connect external speakers of your choice. The external
speakers should be non- powered and connected with 16awg wire (see
page 14). If you choose to connect external speakers, you have the option
to use both internal and external speakers simultaneously. Flip the
“EXT/INT” switch on the back panel to ‘EXT’ to use both or via the ‘User
Menu’ (From the remote: MENU > Audio > Speakers) you can disable the
internal speakers to use only the external speakers. (Note: Although the
manual states the these speaker connections are for “surround” speakers,
that is incorrect! The external speakers provide no type of surround
function whatsoever!)
Digital Audio Out – Use a TOSLink digital cable to connect to a Dolby
Digital receiver. It is highly recommended to utilize this connection for
achieve the best quality for sound. An undocumented feature when using
this output is that not only will it pass Dolby Digital, but also converts
ALL audio (from any input source) to PCM.
Note: This output must be manually activated via the User Menus!
On the remote, press:
¾ Menu
¾ Audio
¾ Optical Output
¾ Auto Select (this will automatically detect Dolby Digital or PCM)
How Do I Find Channels/Stations?
Connect the desired coax cable(s) to their respective inputs (I.E. Antenna
A = OTA antenna, Antenna B = cable TV). Once this is accomplished, the
easiest way to set/locate available channels is to perform the following:
¾
¾
¾
¾
¾
¾
¾
¾
Menu
System Options
Signal Source
Antenna A
Signal Type
Cable or Air (if OTA antenna, use AIR, Cable TV use CABLE)
Channel Search
Full Search
The TV will automatically locate/add all of the available channels. This
process should take approximately 15 minutes.
Off-Air Guides
This feature is primarily for “Program Guide” information from DirecTV.
But, again, an undocumented feature is that this can be used to re-map
Digital OTA Stations from the ‘real’ channel number to the affiliate
number based on the PSIP information (For further info, refer to: The
Sarnoff PSIP Tutorial ). For instance, if WPVI broadcasts it’s analog
signal on Channel 6 and it’s digital signal on Channel 64, the Off-Air
guides may display the digital channel as “6-1”. Therefore, when using the
“Channel up” button, As you progress through the channels, the remapped digital channels will follow the analogs (I.E. 3, 3-1, 6, 6-1, 10, 101, 12, 12-1, 12-2, 12-4). You can still tune to 64; it will find the mapped
channel on 6-1. The local affiliate will determine whether their digital
station remaps to the analog or not.
PIP
PIP works for NTSC inputs only. (Front; Video 1-3, NTSC on Ant A, B)
PIP does not work for ATSC (any flavor), DirecTV, or the component
input (any flavor).
To switch inputs in a PIP window, bring up the channel control for the PIP.
Press the ANT button to swap antennas or the Input button to change
inputs.
Screen Modes
For NTSC video only (includes 480i on the component input and directv):
“Normal” - 4:3 (with grey bars)
“Full”
– horizontal stretch (for anamorphic/enhanced DVD video)
“Fill”
– zoom (for letterboxed/matted television and DVD video)
The F38310 is unable to scale deinterlaced DVD video (480p) or
Enhanced/High Definition ATSC TV (480p, 720p, 1080i)
Watching DVD’s
What format is DVD video?
DVD video is inherently 4:3. Say it, out loud, slowly, three times. This is
the #1 most misunderstood characteristic of DVD video. DVD video is
inherently 4:3.
Video is stored on DVD’s in three ways:
1) 4:3 fullscreen: In this format, motion pictures are cropped to fit the 4:3
window, then saved to the disc. Television video, which is already 4:3 is
presented unchanged, hence the name “full-screen”.
2) Letterboxed or matted: In this format, motion pictures are saved in the
4:3 frame so that they fit in the 4:3 window with their original aspect ratio
(OAR) intact. There are black bars at the top and bottom of the 4:3
window. Resolution is lost because the picture does not utilize all of the
available scan lines.
3) Anamorphic or enhanced: In this format, the motion pictures are saved
at the proper vertical height to fill the 4:3 window; instead of cropping the
edges like you would for 4:3 full screen, the image is squeezed sideways,
“squished” to fit the 4:3 window (see Home Theater HiFi November-99
for a discussion of letterbox versus anamorphic video). For widescreen
movies, this improves the effective resolution of the video.
How does an interlaced player present these formats?
An interlaced player sends the video in the 4:3 frame to the TV. The TV
can be set for three modes.
1) 4:3 Fullscreen. This is proper for cropped movies or for video that was
full screen to begin with (like many TV show season collections). In this
mode, with the F38310, there are grey sidebars added to fill the 16:9
screen.
2) "Fill". This is a zoom mode for letterboxed movies. In this mode the TV
expands the 4:3 frame presented by the DVD player in both the horizontal
and vertical dimensions to fill the 16:9 screen.
3)"Full". This is a stretch mode for anamorphic movies. In this mode the
TV stretches the 4:3 frame sideways to fill the 16:9 screen.
Please note, for the letterboxed and anamorphic modes, if the video is in
an OAR of 2.35:1, there will be small black bars at the top and bottom of
the video. An OAR of 1.85:1 or 1.77:1 will effectively fill the 16:9
window.
Also note, it is the television, not the player, which is doing the scaling in
interlaced mode.
How does progressive video change things?
Well, not all televisions that can accept native 480p input are able to scale
the video internally. Specifically, the F38310 can't scale 480p or 1080i.
The set treats all 480p and HDTV as inherently 16:9. Most progressive
players perform internal stretching of anamorphic/enhanced DVD. This
video will properly fill the 16:9 window of the F38310. However, most
progressive DVD players will send 4:3 fullscreen video and letterboxed
video as 4:3 -- and because the F38310 locks in at 16:9, you are unable to
scale the video to fill the screen. Some players, specifically those with a
Genesis video processor, can perform scaling before the image is
presented to the TV screen. 4:3 fullscreen and letterboxed material can be
forced to several zoom modes with this type of DVD player.
For example, the Panasonic RP91 is highly praised (go to one of the many
home theater discussion forums and enter their DVD Hardware forum and
do a search). It has 4 modes for non-amorphic 4:3 video:
a) Normal, the (non-amorphic) image is stretched horizontally to fill the
screen;
b) Auto, properly flagged letterboxed DVD's are zoomed; 4:3 fullscreen
video is presented in "fullscreen" 4:3 mode (non-zoomed);
c) Shrink, all (non-anamorphic) 4:3 video is presented in 4:3 fullscreen
(non-zoomed) mode;
d) Zoom, all (non-amorphic) video is presented horizontally and
vertically zoomed for letterboxed material to fill the 16:9 screen.
There are a few players (not the RP91) with "free zoom" modes which
can zoom a 2.35:1 movie to fit in the 16:9 screen without any black
bars at the top and bottom, however, you lose a little bit of the picture
on the right and left edges.
Anamorphic video is always stretched to fill the screen. Most progressive
capable DVD players will properly scale anamorphic video and send it to
the F38310 as a 16:9 image.
There is a tradeoff for the ability to zoom 4:3 progressive video. Generally,
people consider other video chips, such as the Faroudja/Sage video chip,
to handle deinterlacing better than the Genesis chip.
So, what are the DVD player choices for the F38310?
Well, you can buy an inexpensive player like the Panasonic RP56, with
the Sage/Faroudja chip, which everyone highly praises primarily for it’s
progressive picture quality, and for letterboxed video, switch off the
progressive output and view the material in interlaced mode. The F38310
will then be able to zoom the image for you, and will internally upconvert
the 480i to 540p.
Or, you can go with a player that zooms progressive video for you.
Generally this will be a player with a Genesis video chip, and there are
several good ones out there. Inexpensive players with the Genesis chipset
won't handle deinterlacing as well as those with the Sage/Faroudja chipset,
however a few of the more expensive one like the Panasonic RP91 do a
very good job.
I already have a DVD player and it says it zooms some DVD’s
but not others! What’s the deal?
I'm afraid that the person who wrote your manual was technically
challenged -- or trying to dumb down the material
Your player will have a setting for TV size; Widescreen/16:9 will be one
of the choices. There are probably two viewing modes: “Normal” or “4:3”
and “Full” or “Widescreen”. The manual will then say something like this:
The displayable picture size is preset on the DVD Video disk. Therefore,
the playback picture of some DVD video discs may not conform to the
picture size you select.
When you play DVD video disks recorded in 4:3 picture size only, the
playback picture always appears in the 4:3 picture size regardless of the
TV shape setting.
I'm going to interpret this for you:
If you choose the 16:9 TV size, and have the player in progressive (480p)
mode, then there are two possibilities:
(1) 4:3 Full-screen and Letterboxed/matted video will be formatted to fill
a 4:3 window on the TV set – “fullscreen” material will fill the 4:3
window with black bars on the sides of the 16:9 screen which extend past
the 4:3 window (where the gray bars usually are for NTSC video) and
letterboxed material will be OAR in the 4:3 window, again with black bars
on the side and above and below the image. You will not be able to
change the viewing mode with the F38310.
(2) Anamorphic or "enhanced for widescreen" material will be stretched to
fill the 16:9 window. It doesn’t matter what mode the F38310 is in – it
will properly show the image (there may be black bars at the top and
bottom if it is a widescreen movie).
If you don’t want to purchase a new player, but you want to be able to
scale letterboxed video, while retaining the ability to watch anamorphic
video in the progressive format, all you can do is switch between
progressive and interlaced play.
While the F38310 cannot change screen formats for 480p (this is the
format of "progressive DVD") or 1080i (high definition) material over
component input, it CAN change the screen format for 480i material. You
don't have to go to s-video to allow the F38310 to use its (sucky) scaling
abilities -- you can just switch the player out of progressive format.
On my player, the Panasonic RP91, this is as simple as pressing a button
on the front panel of the DVD player. Some players have dual component
outputs for progressive and interlaced component video -- in that case
you'll want a component video switch like the JVC JX-S111 three way
component video switch ($75, etronics.com). Read your DVD player
manuals to see how you switch from one format to the other
Video Games
What video game console should I get?
As for what games support 480p, high defintion and/or are 16:9
widescreen, see the Home Theater Forum HD Video Game Link the Home
Theater Forum HD Video Game Link or a searchable database at HDTV
Pub. Dreamcast, Game Cube, and Playstation 2 all have some games in
480p and (and some more games that are 480i 16x19). As to how to get
these other systems into 480p mode, you'll have to read the respective
console manuals.
The majority of XBox games (assuming you properly set up the console
and have the high definition video pack) are 480p. Some are widescreen.
There are a few at 1080i and 720p; unfortunately the F38310 doesn't
support 720p over the component input. Apparently, the XBox does NOT
convert 720p to 1080i -- Microsoft says it won't, game developers say the
hardware CAN support this, so some time in the future this might be
possible.
At this time (May, 2004) Xbox is the only system to support high
definition. Putting aside the games and looking at the technology alone,
right now, XBox seems the way to go with the F38310. As new generation,
high definition game systems are introduced in the next few years, you’ll
want to look for consoles that support 1080i over a component output. As
of May, 2004 there are still only 4 Xbox games which support 1080i:
Dragon’s Lair 3D, Enter the Matrix, MX Unleashed, and Syberia.
3. Known Problems
Video Calibration Discs
Before you get started fixing problems, you have to know what those
problems are. Many of the problems are difficult to see (you know
something is wrong, but not what it is that is wrong), and impossible to fix
without a calibration disc. It is well worth an additional $50 to purchase a
disc such as The Avia Guide to Home Theater
(http://www.ovationsw.com/) or Video Essentials
(http://www.videoessentials.com/). You can improve the picture quality of
the F38310 very easily by following the on screen instructions provided
on the discs.
The three main video setup discs are The Avia Guide to Home Theater,
Video Essentials (and Digital Video Essentials), and Sound & Vision
Home Theater Tune-Up. The Avia Guide and Video Essentials are
basically equivalent (there are proponents for each). They both contain a
blue color filter, the Avia Guide contains red and green as well. They both
contain additional geometry test patterns we will talk about later. The
Sound & Vision disc is also produced by Avia, and is a "beginner" disc -I believe it only has the blue filter, and has less of the advanced geometry
test patterns than Avia or Video Essentials. Avia includes q test screen for
setting the black level for players that do not pass the standard “blacker
than black” 0 IRE signal (like the Panasonic RP91 I referenced above).
If you really want to compare the two, check out “Avia or Video
Essentials?”. It has a nice discussion of their strengths and weaknesses.
Any of the video calibration discs should teach you how to properly set
the "user" controls -- tint, color, contrast, black level, and sharpness. As
"home theater" set up discs, they will also help you properly position and
set the loudness of your 5+ surround speakers and subwoofer. With the
advanced test patterns you can adjust overscan and picture tilt (discussed
later).
In order to properly set color and tint, you need a blue color filter (ISF
claibrators will use three filters -- red, green, and blue). This will come
with discs such as the Avia Guide to Home Theater, Video Essentials, and
Sound & Vision Home Theater Tune-Up.
Avia and Video Essentials also contain test patterns used only by
professionals, for adjusting set color temperature and geometry. We will
discuss some geometry adjustments you can do at home, however,
generally speaking, you should leave these adjustments to ISF calibrators
or trained RCA technicians.
What is ISF Calibration?
Well, this is a rather involved question.
The ISF, or Imaging Science Foundation was formed to train dealers and
service technicians how to properly calibrate and optimize picture quality
on high definition television sets.
Direct-view CRT’s like the F38310 don’t need a proper ISF calibration as
badly as rear projection television sets, so most of the material on-line is
aimed towards RPTV. However, most of the issues involved in calibrating
RPTV’s are identical to calibrating CRT’s. Because the situation is very
involved, I am going to punt and send you to:
FAQ: How to Adjust a TV
Keohi HDTV ISF Calibration Page
Tru-Line Video's Directview CRT Calibration FAQ
Bjorn's ISF Calibration Service
What will it improve and why would I want to do it?
Well, you should understand that better having read the information in the
above links. The colors will look more natural, and the geometry will look
better.
The Fan is Always On!
Yes, there is a fan always on while the set is plugged in. There is nothing
you can do about this. There are actually three fans in the F38310, two
cool the tube and set electronics, and turn on and off with the television.
The third stays on while the set is plugged in; it is internal to the DM1
tuning module. This DirecTV tuner is always on while the set is plugged
in (for things like dialing out at night to report pay-per-view usage). Some
people power down the sets to turn the fan off (via unplugging the set or
flipping off the power strip); others leave it on all the time. There is some
small, finite chance of a power glitch when plugging/unplugging the
electronics, so if it doesn’t bother you, leave it plugged in.
Fan #2:
On With
Set
Fan #1:
On With
Set
A picture of the fans cooling the electronics on the F38310
Fan #3:
Always on;
In DM1
Module
A picture of the DM1 Module, with the third fan, always on.
What is “chippercheck”?
Chippercheck is the system that RCA techs used to diagnose problems and
make and save changes in EEPROM. Your video calibrator will be able to
do a more thorough job on your set if he has access to this system. The
system includes both hardware and software. Thomson Chippercheck is a
Thomson site which has Chipper check hardware schematics and software
downloads. Sencor sells the chippercheck2 at Sencore. There are nice
tutorials, manuals and service bulletins here.
A picture of the rear of the set with the cover removed and the
chippercheck connector attached (circled).
The Service Menus
Well this brings us to what everyone wants to know. Not every TV is
perfect ‘out of the box’ and the F38310 is not exception! Many, many
posts have been discussed on the forums in regard to resolving these
issues. Some are easy to fix. Unfortunately, it does require access to the
‘Service Menu’ in the TV. We will attempt to describe the symptoms that
are usually encountered and the method used to resolve these issues.
RCA/Thompson recommends adjustments to alignment and geometry be
made using their chippercheck system rather than the front panel service
menu. You may be able to rent or borrow this system from a local RCA
repair shop.
NOTE: PLEASE READ THIS DISCLAIMER!
Some fixes require you to enter the ‘Service Menu’ area. This menu is
intended for use by ‘Authorized RCA Technicians’ only! Access to these
menus could void your warranty. Also, you may be vulnerable to errors
that could make your picture worse.
The authors of the FAQ take NO responsibility whatsoever and will not be
held liable for any damage done to your set and do not guarantee positive
results. It is our recommendation that all problems should be reported to
RCA and resolved by an ‘Authorized RCA Technician’.
Before you make any changes to your set mark down the current settings.
That way, you can attempt to return to the status quo after making things
worse.
Service Manual
A portion of the service manual can be access from:
http://www.manitoupark.com/public/f38310.asp
This portion of the manual will outline the parameters (P:) and values (V:)
that are required for various adjustments.
Entering Service Mode
Have the TV powered on for at least 10 minutes prior to making any
adjustments.
Be aware that each scan rate (1080i, 540p, and 480p) is independent and
must be adjusted individually! The adjustments will only affect the present
video type. This is DIFFERENT than the picture settings which are
INPUT dependent. These settings are SCAN RATE dependent. Remember,
480i is up-converted to 540p. You’ll want to align the set in each mode. A
signal generator with a component output which can be set for 480i, 480p,
and 1080i is of great use for this. I do not know if there is an advantage to
using a 540p signal over 480i.
On the front panel (FPA) of the F38310, simultaneously and quickly press
the “CH-Down” and “DirecTV” buttons. If successful, you should have
displayed on the bottom of the screen:
Version Number: XX.XX
P:0 V:0
(Note: Modifications to the parameters and values can be performed using
the remote at this point. The remote must be in “TV” mode. To be sure,
cover the IR bulb on the remote and depress the “TV” button, then you
can use the remote for adjustments.)
Before adjustments can be performed, you must enter the password code
to enable the FPA (or remote) for access. Use the “Volume Up” button to
change V:0 to V:76. Once this is done, you can now change the parameter
setting for the desired function.
Be sure to write down the V: settings PRIOR to making changes in the
event you need to revert.
Increasing Overscan
This work-around will minimize the squeezing at the outer left and right
edges of the screen. There will be some sacrifice of picture content on all
edges. This ‘enlargement solution,’ when used to view DVDs, minimizes
the server squeezing on both sides of the screen.
This adjustment which is done in the service mode, makes the gray bars
smaller and the 4:3 picture slightly enlarged, with some over-scanning on
the top and bottom of the 4:3 image. When in widescreen you also lose
some picture content on the horizontal edges. It helps to use a test pattern
from AVIA or Video Essentials when making these adjustments to
maintain a perfect circle in the center of the screen.
Enter the service mode; enlarge the entire picture by adding 10 points to
P:5 width adjustment and 15 points to P:11 vertical size adjustment.
Adjusting the “Fill” Mode
Unfortunately, there is no known way to adjust the fill mode without
changing the geometry of the set in the other video modes as well.
There is a “halo” on each side of the set!
When you are watching 16:9 material, especially DVD’s, you may notice
that the right and left edges of the picture are lighter than the rest of the
viewing area. This is caused by the electron beam slowing down as it
reaches the sides of the screen – it paints the region a little bit longer than
it does in the central viewing area. There is no way to “fix” this – you can
make it less noticible by turning the black level down a notch or two
(making the screen darker). Increasing overscan may also help a little. If
this is a big problem you probably have a poorly calibrated set -- you will
be able to improve it by running a video calibration program like Avia or
Video Essentials.
What is scan velocity modulation (SVM) and why do I care about
it? How is it disabled?
For explanation of SVM see: Keohihdtv Learn About SVM
How much or how little disabling SVM improves picture quality is very
subjective.
To disable Scan Velocity Modulation:
1) The only cables you need to disconnect from the rear before you start
are the ones attached to the section with the DirecTV card. Remove
the back of the unit. There are ~ 12 screws holding it on. It should
slide off easily (if not, you missed a screw).
2) Looking from the back of the set: On the right side you will see an
orange/brown wire pair on the electronics mounted to the gun stem of
the tube. This wire pair is labeled “P5201”. It is about 6" long. It is the
only orange/brown wire pair there is. Both ends are plastic push-clips.
Disconnect it from the gun electronics; leave it hanging.
3) Put the back of the set back on.
Above: A picture of the disconnected orange/brown SVM wirepair
(circled).
What is the most common hardware failure mode?
The main problem with the F38310 has to do with several diodes and
capacitors in the power supply for the DM1 tuning module. When you
hear someone refer to the F38310 having an "internal DTC100 DirecTV
HD tuner" this is what they are talking about. It is both the DirecTV and
the ATSC/NTSC tuner. It is used to process all video input through the
DirecTV, RF, video, and component inputs (there is a second tuner that is
used only for the PIP function). Apparently the diodes are under-specified
or faulty, and fail, causing the load on the capacitors to increase, which
eventually causes them to overheat and leak dielectric. When this happens,
an AC ripple is over-laid on the DC power of the DM1 module causing
90% of the symptoms people report. This is a warranty fix. They used the
same capacitors and diodes in ALL production runs. If you are lucky, and
call in right away when the first symptoms occur, the diodes and
capacitors may be simply replaced (often service techs will use higher
rated parts), which fixes the problem IF it hasn't killed the DM1 module
yet. In most cases, you will be able to get them to do this in-house,
without relocating the set back to the workshop. If they won't, then call a
different service shop. Replacing the DM1 module takes a lot longer than
replacing a few capacitors and diodes. With many sets the symptoms crop
up right away, some take longer. This is the biggest argument for buying
an extended warranty. If you can through the original point of sale, by all
means do so -- I believe it is much cheaper that way -- RCA charges
$173/year for up to three years for their extended warranty.
The original source of this information is at the Home Theater Spot
F38310 Diodes Thread.
DM1 Module
DM1 Power
Supply
A picture of the rear of the set with the back removed.
Service Bulletins
Thomson Service Bulletins regarding the F38310’s DTV306 Chassis can be
found at :
(Not a hyperlink!)
http://www.thomsonnetwork.com/unprotected/Search?USETYPE=GET&
querytext=dtv306&doctypes=&brands=RCA,PROSCAN,UNBRANDED
&categories=ACCESSORIES,AUDIO,COLOR_TV,COMMUNICATION
,DTVS,DVD,MULTIMEDIA,VIDEO&languages=&numdocsperpage=10
&firstdocnum=1&maxnumberdocs=500000&dosearch=1
This has links to the user manual, spec sheet, and some of the same above
bulletins:
(Not a hyperlink!)
http://www.thomsonnetwork.com/unprotected/Search?USETYPE=GET&
querytext=f38310&doctypes=&brands=RCA,PROSCAN,UNBRANDED
&categories=ACCESSORIES,AUDIO,COLOR_TV,COMMUNICATION
,DTVS,DVD,MULTIMEDIA,VIDEO&languages=&numdocsperpage=10
&firstdocnum=1&maxnumberdocs=500000&dosearch=1
(Sorry About the Length of the Links!)
I’ve archived these bulletins at my Home Page
Should I purchase an extended warranty?
The common wisdom, with the hardware problems described above, is
that extended warranties make sense with these expensive HDTV’s.
Buying an extended warranty at the point/time of purchase (i.e. Circuit
City, Good Guys, etc) will probably be your best value. Most of the retail
chains will not sell extended warranties to customers who purchased their
sets elsewhere.
RCA sells extended warranties, at 20% off for $173.15/year for up to 3
years.
There are other companies which sell extended warranties. Read the fine
print to find limitations and exclusions – they are all slightly different.
Three are listed below:
1) Phillips Priority Service
On Keohi the Phillips Priority Service Plan is discussed.
The website is sparse, and the contact form didn't work. However, there
was a number for submitting a claim. I called that, and they gave me a
contact/phone number for info on purchasing a contract:
Phil Pollard
ON SITE LTD
[email protected]
(800) 732-1669
You must have at least 30 days left on the original one year warranty.
2) GE Appliances Extended Warranties
A description of the service plan can be found by clicking on "the fine
print". I input my purchase date, model number, serial number, and chose
the category 'TV -- 32"-36"' was the largest TV category and gave slightly
lower prices than I got when I called in at 800-626-2224 and referred to
marketing program 5555 -- they had a larger than 36" category. The cost
of the warranty through GE is $137.42 for one year, $247.36 for two years,
and $494.72 for four years. This is $30 less than RCA's one-year plan.
GE doesn't have a restriction on purchase date or original warranty; they
do have problems servicing non-GE equipment in KS, ME, MA, and NM.
4) Kemper Warranty Solutions
They have an HDTV plan for 3 years for $205 and for 5 years for $250.
You must have an original receipt of less than one year old.
5) Warrantech Warranties
Note: I do not endorse, recommend, or have any relationship with the
above companies. I have no information on consumer satisfaction or
company performance. Pricing information is from 2/2/03.
Firmware Upgrades
The F38310 has an internal DM1 tuning module – the same as in a DTC100 Directv HD tuner. This is guts of the set, and provides both the OTA
ATSC tuning capability and the reception of DirecTV's satellite broadcast.
This tuner has "firmware" -- software which controls it. This includes the
menu system as well as video functionality (how it processes video).
Originally, the F38310 was shipped with version 3.72. Some
improvements were made in the firmware, and the DTC100/F38310
automatically downloaded the upgrade to version 4.0b over the DirecTV
satellite connection. Additional improvements were made, and 4.0b was
upgraded 4.037, which was upgraded to 5.1. When the version 5 upgrade
happened, they discontinued the version 4 upgrade -- and because you
can't upgrade across 2 versions, if you have version 3.72 you are stuck
with it -- unless you request a "paddle upgrade". Call RCA’s customer
service number on their website. RCA will send a computer card that fits
into your DirecTV card slot and performs the upgrade. They will pay a
service technician to perform the upgrade (even if your set is out of
warranty). I was told it will take approximately a week to get a card out to
the servicer.
This is what Thomson says about the differences between 3.72 and 4.0B
for a DTC-100 DirecTV Receiver:
Software code version 3.72 problems
Earlier versions of the High Definition Receiver with software code version 3.72 may
have trouble with the following:
Ability to accommodate variations in the way broadcasters are sending ATSC audio
data.
Ability to receive local-into-local channels from DIRECTV®'s satellite at 119 degrees.
Ability to receive DIRECTV®'s high definition pay-per-view channels without having
to go through numerous steps.
A software update, version 4.0B, was made available to consumers via a DIRECTV®
satellite broadcast in March 2000.
In addition to correcting the issues above, the update added several additional features
to the High Definition Receiver including:
Ability to display 16x9 formats as full screen on NTSC outputs.
Ability to turn off the top and bottom gray panels when displaying 16x9 video in
letterbox format.
The antenna info screen will start with the channel the user is watching.
The ATSC signal meter updates much more frequently, making it easier to use.
The audio will not go away after several minutes in the dish pointing screen.
Keohi HDTV's DTC100 Tips Page, lists differences between 4.0b and
4.037.
I haven't found a description of the differences between 4.037 and 5.1.
Many of the changes in firmware (such as the grey/black bar functionality)
apply only to the DTC100 and not to the F38310.
I found one service bulletin regarding a paddle upgrade of a DM1 module,
for a DTV300 chassis.
This should be an "at your own risk" operation -- I am putting this info out
only FYI to make your own decision on. I have only heard of one F38310
upgrade, over on the AVS Forum's HDTV CRT forum, and it was
unsuccessful. The Thomson rep I talked to claimed that there are no
outstanding/known issues regarding a paddle upgrade with an F38310. I
assume that, because their tech performs the upgrade at their cost, that
Thomson assumes liability for the upgrade process.
Adding a Video Output
The Sixteen Nine Time Company sells a hack which will allow HDTV to
be recorded on a D-VHS Video Recorder or HTPC.
My summary is below:
There are two separate upgrades: the HDVR Firewire upgrade and AVX1
Video Processor.
The HDVR firewire upgrade allows an ATSC channel to be recorded on a
DVHS recorder or PC. The entire broadcast stream is recorded (all the
subchannels) through a firewire output on the DM1. In order to view it at
all with the DVHS recorder (i.e. through the recorder's video outputs) the
recorder needs an internal ATSC tuner, for which reason they recommend
JVC DVHS recorders. During the initial record with a JVC DVHS deck,
you will only be able to view the first subchannel; on playback (via the
JVC's video outputs) you will be able to choose the subchannel. To view
the recorded material from a DVHS recorder without an internal tuner,
you have to view it on the F38310 via the firewire input, while tuning to
an ATSC station. You can ONLY record ATSC from AntA or AntB with
this upgrade.
The AVX1 seems to basically be a computer that converts the raw
DirecTV satellite HDTV signal to ATSC. They give instructions on how
to make one yourself (they may provide the siftware free with an HDVR
upgrade -- that isn't clear to me).
Basically, these are the only things you can record -- ATSC from the
antennas with the firewire upgrade, and HD channels on DirecTV with the
AVX1 processor. There is no support for recording NTSC on the antennas,
the other video inputs, or non-HD DirecTV channels, and the format the
video is in is not compatible with recorder's analog video outputs (except
for DVHS decks with internal ATSC tuners).
This is what a representative of the Sixteen and Nine Time Company told
me:
“Removal and installation of the module is difficult and requires an experienced TV
service technician. This task is not recommended due to the internal construction of
the set and the fact that the video cable exits from the module in a different way from
the DTC100 that is not covered by our instructions.
Our instructions for the DTC100 install are the text file within the following zip file.
http://www.169time.com/DTC100_install_rev15.ZIP
We have heard that it was done with success, but there are no details..”
They offered me (and may offer you) a discount for an upgrade if you
document it and provide step by step photos. Without discount, the
upgrades together cost $1000.
If anyone goes this route (or attempts to do so), please let me know the
results.
Prepared by Joseph Shovlin
[email protected]
DrJoe on the HDTVoice and AVS Forums