1
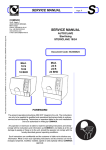
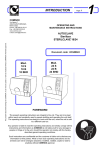
SERVICE MANUAL
-Steam Steriliser-
FOREWORD
This manual IS NOT an integral part of the steriliser.
The manual is addressed to qualified, specialised technicians for routine maintenance
and repairs.
Technicians or operators mused be authorised in writing by COMINOX.
Technicians must read this manual and follow the instructions herein contained. COMINOX
is not liable for any injury and/or damage to people or property or to the steriliser itself
should the conditions herein illustrated be disregarded.
This manual contains industrial secrets which must not be disclosed. The manual and its
annexes must not be edited, modified, copied or given to third parties unless authorised
by COMINOX.
2
Contents
CONTENTS
CONTENTS ........................................................................................................................................ 3
Reference list .................................................................................................................................... 5
Graphical reference representation Model 6 S Dynamica ..................................................... 6
Graphical reference representation Model 18 .......................................................................... 7
Graphical reference representation Model 24 .......................................................................... 8
Graphical reference representation of common components ............................................. 9
TECHNICIAN MENU ....................................................................................................................... 11
Inputs ............................................................................................................................................... 13
Outputs ............................................................................................................................................ 14
PT1 / PT2 / PT3 board calibration ................................................................................................ 15
TP board calibration...................................................................................................................... 19
PT1 / PT2 / PT3 probe calibration ................................................................................................ 20
PT1 / PT2 / PT3 correction ............................................................................................................. 20
Continuous cycle........................................................................................................................... 21
Security code ................................................................................................................................. 22
Chamber load test ........................................................................................................................ 22
Accessories ..................................................................................................................................... 23
Delete maintenance .................................................................................................................... 24
Simplified version of the Technician Menu (PUCK) ................................................................... 24
MAINTENANCE .............................................................................................................................. 25
Items ................................................................................................................................................. 25
Save maintenance ....................................................................................................................... 26
Scheduled service table .............................................................................................................. 27
MESSAGES ...................................................................................................................................... 28
Scheduled maintenance ............................................................................................................. 28
Check water quality ..................................................................................................................... 28
Drain waste water ......................................................................................................................... 28
Cooling pause................................................................................................................................ 30
ALARMS .......................................................................................................................................... 31
Insufficient water quality alarm ................................................................................................... 31
Insufficient water level alarm....................................................................................................... 31
Chamber level alarm .................................................................................................................... 32
Insufficient steam alarm ............................................................................................................... 33
Pressurisation alarm ....................................................................................................................... 34
Overtemperature alarm ............................................................................................................... 34
Insufficient vacuum alarm ........................................................................................................... 34
Fractioned vacuum alarm ........................................................................................................... 34
Sterilisation temperature band alarm: overtemperature / undertemperature ................. 35
Level probe alarm ......................................................................................................................... 36
Coil alarm........................................................................................................................................ 36
Self-filling alarm .............................................................................................................................. 37
3
Contents
Door alarm ...................................................................................................................................... 38
PT1 temperature probe alarm..................................................................................................... 39
Drain alarm ..................................................................................................................................... 39
Misalignment alarm....................................................................................................................... 39
Pressure transducer alarm............................................................................................................ 40
Manual stop alarm ........................................................................................................................ 40
Power missing alarm...................................................................................................................... 40
Event alarm..................................................................................................................................... 40
Alarm code list .............................................................................................................................. 41
ADDITIONAL CHECKS AND SETTINGS ........................................................................................... 42
Display off or not clear.................................................................................................................. 42
Level probe check ........................................................................................................................ 42
Safety valve check ....................................................................................................................... 43
Door adjustment ............................................................................................................................ 44
Pressure rises too slowly ................................................................................................................. 45
Poor drying ...................................................................................................................................... 45
Steam leakage from the safety valve ....................................................................................... 45
Vacuum pump servicing procedure ......................................................................................... 46
Water automatic inlet does not work correctly ....................................................................... 48
The printer does not print ............................................................................................................. 48
AUTOMATIC WATER INLET AND DIRECT DRAIN SYSTEM INSTALLATION ..................................... 49
INSTALLATION OF THE SPEEDY WATER DEMINERALIZATION SYSTEM .......................................... 51
STERILCARD READER INSTALLATION ............................................................................................. 54
PRINTER INSTALLATION .................................................................................................................. 56
FIRMWARE UPGRADE ..................................................................................................................... 59
DIAGRAMS AND WIRINGS ............................................................................................................ 60
Logic electronic board ................................................................................................................. 60
Electronic power board ............................................................................................................... 61
Wiring diagram - 18/24 S - B - BHD .............................................................................................. 64
Wiring diagram 6 S Dynamica..................................................................................................... 65
Wiring diagram - 18 S Dynamica ................................................................................................ 66
Hydraulic diagram 18/24 S - B - BHD .......................................................................................... 67
Hydraulic diagram 6/18 S Dynamica ......................................................................................... 68
STEAM PEAK diagram .................................................................................................................... 69
p>1,2 bar VACUUM PULSE diagram ........................................................................................... 70
p<=1,2 bar VACUUM PULSE diagram ......................................................................................... 71
DRYING diagram ........................................................................................................................... 72
APPENDIX 1: 18/24 CYCLE SET POINTS ........................................................................................ 73
APPENDIX 2: COLDEST AND WARMEST POINT DEFINITION ......................................................... 74
4
Contents
Reference list
03, Power cable
05, Measuring funnel
06, SterilCard
08, Tray support
09, Chamber
10, Clean water tank
11, Waste water recovery tank
12, Safety valve
13, Main switch
14, Filler
15, Air sterilisation filter
16, Door
17, Safety thermostat
18, Door
19, Coil grid
20, Drain filter
21, Chamber probe
24, Clean water drain tap
25, Waste water drain tap
26, Printer
29, Automatic water inlet
30, Direct drain
31, Chamber seal
32, Fuses
33, Logic board
34, Power board
35, Water inlet pump
36A, Micro-switch M1
36B, Micro-switch M2
37, Unlocking tool
38, Transducer
39, Chamber temperature probe
40, Inspection plugs
41, Vacuum pump
42, Fans
43, Level probes
46, Automatic water inlet pump
5
Contents
Graphical reference representation Model 6 S Dynamica
6
Contents
Graphical reference representation Model 18
7
Contents
Graphical reference representation Model 24
8
Contents
Graphical reference representation of common components
40
9
10
Technician Menu
TECHNICIAN MENU
Insert the Technician’s SterilCard to access the Technician Menu.
If the steriliser is not equipped with a SterilCard reader, a Technician’s SterilCard kit may be
employed. The kit includes a reader, a Technician’s SterilCard and a cable for connecting
the reader to logic board 33 (connector J5).
In STAND BY mode, press MENU and use the ↑↓ arrows to select the Technician Menu
(option 6):
Press ENTER to open the Technician Menu:
11
Technician Menu
Use the ↑↓ arrows to scroll the list and highlight the required option. Press ENTER to access
the selected option.
Press Å to go back to the MENU page.
12
Technician Menu
Inputs
The status of the steriliser inputs can be displayed:
• S1 is the clean water tank 10 safety probe
• S2 is the clean water tank 10 minimum level probe
• S3 is the clean water tank 10 maximum level probe
• S4 is the waste water recovery tank 11 maximum level probe (not used in
6/18 S Dynamica models)
• S5 is the chamber 09 level probe for models 18/24 S Dynamica - S - B – BHD
(not used in 6 S Dynamica model)
• S6 is not used
• S7 is not used
• PT1 is the temperature probe 39 in chamber 09
• PT2 is not used
• PT3 is not used
• Pressure transducer 38
• Conductivity meter (optional; standard on BHD models)
• Micro-switch M1 36A: door locked
• Micro-switch M2 36B: door pre-lock
Use the ↑↓ arrows to scroll the list and press Å to go back to the Technician Menu.
13
Technician Menu
Outputs
The status of the steriliser outputs can be displayed and modified:
• EV1 charge to which the water inlet pump 35 is connected in parallel
(included on all models)
• EV2 drain (included on all models)
• EV3 3-way (not included on 6/18 S Dynamica models)
• EV4 steam (not included)
• EV5 drying (not included on 6/18 S Dynamica models)
• EV6 by-pass (not included on 6/18 S Dynamica models)
• Water pump is the automatic water inlet pump 46 (optional; standard on
BHD models). If the steriliser is provided with connections to the SPEEDY
WATER demineralisation system, the pump is replaced by solenoid valve EV7
(see page 51)
• Vacuum pump (not included on 6/18 S Dynamica models)
• Door lock (included on all models)
• The fan(s) are fans 42: single on 6/18 S Dynamica and 18 S; double on other
models
• Aux 1 is not used
• Aux 2 is not used
• External coil for pre-heating and drying chamber 09
• Internal coil for steam generation
NB. The internal coil is:
• The external cylindrical band arranged around chamber 09 in models 18 S
Dynamica, 18/24 S - B - BHD
• The series of lower and upper coils external to chamber 09 in 6 S Dynamica
The internal coil is:
• The coil in chamber 09 in models 18 S Dynamica, 18/24 S - B - BHD
• The lower coil external to chamber 09 in 6 S Dynamica
Use the ↑↓ arrows to scroll the list and highlight the required option. Press ENTER to change
the output state (ON/OFF).
Press Å to go back to the Technician Menu.
14
Technician Menu
PT1 / PT2 / PT3 board calibration
This procedure is used to calibrate temperature probe PT1, PT2 and PT3.
A specific calibration kit is needed for calibration:
0-5V switch
to connector CN11
to connector CN12,
CN13 o CN14
Temperature selector
To calibrate PT1, PT2 or PT3 select option 3, 4 or 5 respectively in the Technician Menu:
15
Technician Menu
Press ENTER:
Disconnect the connector from the electronic power board corresponding to the
temperature probe you want to calibrate: disconnect connector CN12 for sensor PT1,
connector CN13 for sensor PT2 or connector CN14 for sensor PT3.
Connect the 2 pin cable of the calibration tool to connector CN12, CN13 or CN14 of the
power board. Put ON the switch number 1 of the temperature selector, which corresponds
to a 1000 Ohm sample coil, corresponding to 0°C:
16
Technician Menu
Wait for at least 10 seconds and press ENTER.
17
Technician Menu
To calibrate temperature sensor PT1, put OFF the switch number 1 of the temperature
selector and put ON the switch number 2 of the temperature selector, which corresponds
to a 1573 Ohm sample coil, corresponding to 150°C:
Wait for at least 10 seconds and press ENTER.
To calibrate temperature sensor PT2 or PT3, put OFF the switch number 1 of the
temperature selector and put ON the switch number 3 of the temperature selector, which
corresponds to a 1832 Ohm sample coil, corresponding to 220°C:
Wait for at least 10 seconds and press ENTER.
Press Å to go back to the Technician Menu without changing the calibration.
18
Technician Menu
TP board calibration
This procedure is used to calibrate the pressure transducer.
Select option number option 6 in the Technician Menu and press ENTER:
Disconnect the connector CN11 corresponding to the pressure transducer from the
electronic power board:
Connect the 4 pin cable of the calibration tool to connector CN11 of the power board.
Set the calibration tool switch to 0 V (position 2):
19
Technician Menu
Wait for at least 10 seconds and press ENTER.
Now set the calibration tool switch to 5 V (position 1).
Wait for at least 10 seconds and press ENTER.
Press Å to go back to the Technician Menu without changing the calibration.
PT1 / PT2 / PT3 probe calibration
This procedure is used to complete the calibration of the temperature probes PT1, PT2 and
PT3. This operation must be performed whenever a temperature probe is replaced.
Press +/- to enter a 0°C value of the temperature probe shown on the label or on the wire
sheath (e.g.: if a value of 1000.2 is shown on the PT1 sensor label, press + twice to display
1000.2). Press ENTER to confirm.
Press Å to go back to the Technician Menu without changing the calibration.
PT1 / PT2 / PT3 correction
This procedure is used to correct the temperature value displayed during the sterilising
process. For example, if using an external sampling tool a temperature lower than the one
20
Technician Menu
displayed is measured in the chamber during the sterilisation process, the temperature
may be corrected as follows:
Press +/- to enter the correction which will change the temperature shown on the display.
Press ENTER to confirm.
Press Å to go back to the Technician Menu without changing the correction.
Continuous cycle
A CONTINUOUS CYCLE is a test cycle which includes pre-vacuum, 2 fractioned vacuum
pulses, pressurisation, sterilisation (2 minutes) and drying (3 minutes). Minimum pressure
values higher than standard cycles are reached during the vacuum phases. The purpose
of the test cycle is to run the steriliser continuously, for instance at night, to test efficacy of
the performed maintenance operations:
Press +/- to enter the number of cycles and press ENTER to confirm.
Press Å to go back to the Technician Menu without making changes.
CONTINUOUS CYCLE will be available in STAND BY mode if a number higher than zero is
set; press ENTER to repeat the cycle for the set number of times.
21
Technician Menu
Security code
Press ENTER to set the security code to 1.
Chamber load test
This test can only be run on 18 S Dynamica and 18/24 S - B - BHD models.
Do not run this test on 6 S Dynamica.
Press ENTER to operate the water inlet pump 35. The following screen will be displayed:
Press STOP to stop loading the chamber.
If chamber water level probe S5 is closed, the following message will be displayed for 5
seconds:
22
Technician Menu
The Technician Menu will then appear.
Accessories
Select Accessories (option 16) and press ENTER. The external charge value (ON/OFF) will
appear. Press ↑↓ to change the value, press ENTER to confirm and move to the next
option.
Press Å to go back to the Technician Menu without changing accessory settings.
23
Technician Menu
Delete maintenance
Press YES to delete all maintenance interventions performed on the steriliser from the
machine memory and reset the remaining day and cycle counters for all components.
Press NO to keep the maintenance log and go back to the Technician Menu.
NB. After installing the steriliser, delete the maintenance log to reset the remaining days
and cycles for all components.
Simplified version of the Technician Menu (PUCK)
To access the simplified version of the Technician Menu when the Technician’s SterilCard is
not available, simultaneously press the second and fourth button on the left and switch
the steriliser on using main switch 13.
The following screen will appear:
This Technician Menu contains only two options:
1. Security code =1
2. Accessories
These options correspond exactly to those contained in the Technician Menu and
described above.
24
Maintenance
MAINTENANCE
In STAND BY, press MENU and use ↓ to select the Maintenance Menu (option 5). Press
ENTER to display the following screen:
This menu contains only two options:
1. Items
2. Save maintenance
Items
Press ENTER to display the list of items subject to scheduled maintenance:
The remaining days and cycles and the last three replacements are shown for each
item with the date of intervention and the total number of cycles when the
replacement was performed.
Use the ↑↓ arrows to scroll the list of items.
25
Maintenance
Press ENTER to record replacement:
Press YES to store replacement information in the maintenance memory. Press NO to
go back to the list of items.
Save maintenance
Press ENTER to display the following screen:
Press NO to go back to the Maintenance Menu.
Press YES to store the maintenance operation on the inserted SterilCard 06. The archive
will be overwritten each time.
26
Maintenance
Scheduled service table
Item
Air filter*
Water filter
Vacuum pump kit
EV2 drain
EV6 by-pass
Empty tank probe
Water inlet pump
Internal coil
Door gasket*
Chamber level probe
Fan(s)
Temperature probe 1
Chamber safety thermostat
Pressure transducer
Chamber safety probe
Number of
cycles or
max
allowed
time
400
1 year
1500
2 years
1000
2 years
1500
2 years
3000
3 years
1500
2 years
2000
2 years
6000
6 years
3000
2 years
3000
3 years
4000
3 years
6000
6 years
6000
6 years
6000
6 years
3000
3 years
Service date
Number of
cycles
performed at Technician signature
intervention
operation
* this item can be replaced by the user.
!
After each component fixing or replacing, please check the correct functioning
of the component itself and the whole sterilizer by running a complete sterilization
cycle.
27
Messages
MESSAGES
Messages contain information and warnings and usually require the user to perform a
simple correction or check.
Message / Cause / • Solution
Scheduled maintenance
This message indicates the need for a scheduled maintenance on one or more
components.
This message will appear when the steriliser is in STAND BY mode and the remaining cycles
or days of life of one or more components are expiring.
•
The steriliser may however allow to run one or more cycles but the component
subject to scheduled maintenance must be replaced (see chapter MAINTENANCE).
Check water quality
This message appears only on models fitting an external water demineralisation system
(optional) or if the water is automatically loaded from an external tank (optional; standard
on BHD models); in this case, the steriliser monitors conductivity of loaded water.
The steriliser will display this message in STAND BY mode and only when an automatic water
inlet 29 is installed (see USE AND MAINTENANCE MANUAL, chapter CONNECTIONS) and Selffilling in the Main Settings Menu is ON. This indicates that the water conductivity has
exceeded the optimal level (15 µS/cm) but is still acceptable.
•
The steriliser may allow to run one or more cycles but it is advisable to proceed as
described in section INSUFFICIENT WATER QUALITY because this alarm could stop
operation of the steriliser.
Note: If the water conductivity increases, it means that mineral salts contents has increased
and water is therefore NO LONGER suitable.
Drain waste water
This message indicates that the waste water recovery tank 11 is full and must be emptied.
The steriliser shows this message in STAND BY mode.
•
•
•
28
Empty the tank (see USE AND MAINTENANCE MANUAL, chapter MANUALLY DRAIN
TANKS).
ATTENTION: The liquid may be very hot and infected and must be disposed
according to local regulations.
If the direct drain 30 is installed, you should check that it is connected correctly
and that the pipe is neither bent nor clogged.
If the message is still displayed after emptying the tank, check:
- the level probe which could be dirty or fouled by algae or lime scale caused by
water stagnating in the tank; this could generate false readings (see LEVEL PROBE
TEST);
Messages
Waste water recovery tank 11
on models 24
Waste water recovery tank 11
on models 18
- the probes and steriliser grounding, as correct steriliser operations depend on the
correct grounding connection.
If the steriliser is not used for a long period, empty out the tanks and clean them carefully
with a cleaning solution (70% water and 30% alcohol). Do NOT use this solution for cycles.
Rinse out with plenty of water before any further operation. The waste water recovery
tank 11 can be filled without removing any parts. Simply connect a pipe to the waste
water drain tap 25 and hold the fluid container higher than the steriliser. The tank can be
filled by removing the panelling and detaching one of the two pipes on top.
29
Messages
Cooling pause
This message indicates that the temperature in chamber 09 is too high to start or continue
a cycle (see USE AND MAINTENANCE MANUAL, chapter OPERATION).
The steriliser will display this message in STAND BY mode or after starting a cycle and will
stop only during the pre-vacuum phase. This message normally appears when several
cycles are run one after the other and no time is allowed for the chamber to cool down.
•
•
•
30
In such conditions, simply let the chamber cool down. To speed up cooling, open
door 16, otherwise cooling will take considerably longer. To open the door, press STOP,
cancel the MANUAL STOP ALARM and wait for a few seconds for the pressure inside
the chamber to equalise ambient pressure to allow the door to be opened.
With the door closed the operating cycle will resume automatically when the allowed
temperature is reached.
If you opened the door, start the cycle again after cooling down the steriliser.
Alarms
ALARMS
Alarms indicate the presence of a possible fault and the need for repairs.
If a fault occurs during a cycle, the cycle will be immediately interrupted and a buzzer will
sound for 15 seconds to indicate the alarm conditions. A description of the alarm will
appear on the display along with the cycle and phase when the alarm occurred. To reset
an alarm, press SILENCE ALARM and enter the security code or SterilCard 06.
An alarm will cause the steriliser to be switched off. Therefore, after cancelling the alarm
and solving the cause, you will need to switch the steriliser back on before starting a new
cycle.
The load in the steriliser during the cycle interrupted by the alarm is to be considered NON
STERILE and must be dried and repacked, if required.
Description / Cause / • Solution
Insufficient water quality alarm
This alarm is available only on models fitting an external water demineralisation system
(optional) or if the water is automatically loaded from an external tank (optional; standard
on BHD models); in this case, the steriliser monitors conductivity of loaded water.
In such conditions, the alarm indicates that the water conductivity value has exceeded an
acceptable level and stops the automatic water inlet.
The steriliser will display this message when a cycle is started (see USE AND MAINTENANCE
MANUAL, chapter ALARMS), only when an automatic water inlet 29 is installed (see USE
AND MAINTENANCE MANUAL, chapter CONNECTIONS) and Self-filling in the Main Settings
Menu is ON.
It indicates that the conductivity of the water provided is no longer acceptable (>30
µS/cm); this alarm is always preceded by the CHECK WATER QUALITY message.
•
•
•
If the steriliser is connected to a demineralisation system, change the cartridge
following the manufacturer’s instructions. After replacing the cartridges, rinse the clean
water tank 10.
If the steriliser takes water from an external tank, change the water because it is no
longer suitable.
If you want to run the steriliser without replacing the cartridges in the water
demineralisation unit, re-start the steriliser by setting Self-filling OFF and manually fill the
tank through the filler 14. In this case, the water will not be monitored and you should
make sure that the quality is suitable.
Insufficient water level alarm
It indicates that there is no distilled or demineralised water in the clean water tank 10.
The steriliser will show this alarm if probe S2 is uncovered when cycle is started or if probe S1
is uncovered during a cycle.
•
If the alarm appears when a cycle is started, fill the clean water tank 10.
To fill the tank without the self-filling function, loosen and remove the plug from filler 14
and insert the supplied measuring funnel 05 (use suitable water only).
If the steriliser is on and in STAND BY when filled, the “Minimum water level” and
“Maximum water level” messages on the display may be used to check the level. A
31
Alarms
buzzer will sound for 3 seconds when the “Maximum water level” is reached to indicate
that the tank is full. If you do not hear the signal, excess water will flow out from the filler.
• If the alarm is displayed during the cycle, fill the tank and proceed as shown in the
INSUFFICIENT STEAM ALARM procedure. Furthermore, check and replace the clean
water tank 10 level probe insulation.
Note: In 18 S Dynamica and 18/24 S - B - BHD models, the steriliser introduces water into the
chamber by means of the pump to generate steam until the water touches the chamber
probe 21. If water is not sufficient during the water inlet phase, it means that there is
leakage of steam from the valves, from the chamber or from the pipes.
• In extreme conditions, when a SPECIAL cycle is run with three fractioned vacuum pulses
and with a very heavy porous load, the expected minimum level may not be sufficient.
Reduce the load or use two vacuum pulses only.
Note: Steam is generated in 6 S Dynamica by introducing water in the chamber using the
pump and measuring the required amount by means of the volumetric counter. If there
are no leakages of water from underneath the steriliser, check correct operation of the
volumetric counter and replace it, if required.
Chamber level alarm
This alarm indicates that the time required to fill chamber 09 with the required amount of
water has elapsed.
In 18 S Dynamica and 18/24 S - B - BHD models this alarm is displayed when chamber probe
21 does not detect water in the chamber. In 6 S Dynamica the alarm appears when the
volumetric counter does not detect the required amount of water before the timeout.
•
•
When using 18 S Dynamica and 18/24 S - B - BHD, check inclination of the steriliser (see
USE AND MAINTENANCE MANUAL, chapter INSTALLATION).
If the problem persists, check:
- that the water inlet pump 35 and the solenoid valve EV1 are pumping water into
chamber 09;
- if solenoid valve EV1 winding has blown;
- the water inlet pump 35;
- the water filter;
- fuse F1 on the power board 34.
If none of these causes are found, check chamber probe 21 which is probably not
detecting the level and the probe electric connection.
To check correct operation probe:
- open door 16 and remove the entire contents of chamber 09;
- remove tray support 08;
- remove coil grid 19 by loosening the corresponding screw;
- reassemble back to front, i.e. by turning the grid and seal horizontally;
- switch the steriliser on in STAND-BY mode;
- run Chamber load test from the Technician Menu (option 15).
The probe could be dirty or the power cable could be interrupted. Furthermore, check
level probe grounding.
32
Alarms
Insufficient steam alarm
This alarm indicates leakage of steam from chamber 09.
The alarm may appear during a cycle, when the suitable pressure needed to run a cycle is
not reached at a temperature of 114°C. Pressure is detected by transducer 38 and
temperature by chamber temperature probe 39.
•
•
•
•
•
•
Check the efficiency and cleanliness of chamber seal 31 and of the flange of chamber
09 on which it is fitted. Replace if damaged.
If leakage of steam is found, adjust the door closing as shown in chapter DOOR
ADJUSTMENT.
Check inclination of the steriliser again (see USE AND MAINTENANCE MANUAL, chapter
INSTALLATION).
Check correct operation of pressure transducer 38 and temperature probe 39 using an
appropriate measuring tool.
Check internal coil.
Check that the total weight of the load is not exceeded (see USE AND MAINTENANCE
MANUAL, chapter OPERATING USE).
If the alarm is not resolved after these checks, check drain solenoid valve EV2 (see
diagrams). This is connected to the chamber drain and is the first solenoid valve to
intercept the steam. For this reason, it might need to be replaced.
Replace the solenoid valve when time or number of cycles
shown in the Scheduled service table is exceeded (see USE AND
MAINTENANCE MANUAL, chapter MAINTENANCE). Proceed as
follows if cleaning is required:
- Remove the solenoid valve and keep track of the
sequence of parts in order to refit them correctly.
- Carefully clean the hole in the valve body (A).
- Carefully clean the core (B). The seal pushed by the
spring (C); should slide smoothly inside. Should the seal be
deformed, the valve will need to be replaced.
If the steam keeps leaking, pressurise the steriliser and locate the leak by following the
following practical procedure:
- Close the previously checked chamber door properly.
- Remove the cover from the steriliser.
- Energise the winding of solenoid valve EV2 (see wiring diagrams) with an external
power cable at 230V: it should be normally open NO.
- Remove one of the inspection plugs 40 and connect a compressor (2÷3 bars).
- Introduce compressed air and hold the chamber pressurised for approximately 15
minutes: locate the leakage by observing the unit.
• Check the pressure/temperature alignment during a cycle (see STERILISATION
TEMPERATURE BAND ALARMS).
• Run a VACUUM TEST to check for pressure losses.
33
Alarms
Pressurisation alarm
This alarm indicates that the temperature has not increased properly in chamber 09 during
the steam phase (steam or pressurisation peaks).
The steriliser may display this alarm during a cycle, during steam phases, when the pressure
does not correspond to the saturated steam curve.
•
•
•
Follow the instructions in the INSUFFICIENT STEAM ALARM solution.
If the alarm persists, there could be a fault in the heating circuit. Check that during
pressurisation or steam peaks (fractioned vacuum), the chamber internal coil is
correctly powered (see wiring diagrams).
Replace chamber probe 21 (see technical newsletter).
Overtemperature alarm
The alarm indicates that temperature inside chamber 09 has exceeded 150°C.
The steriliser may display this alarm when the temperature reaches 150°C.
•
•
•
Check that the wires of the chamber temperature probe 39 and the transducer 38 are
neither disconnected, nor worn or faulty.
Check the correct load positioning, which should be correctly arranged on the
supports.
Replace chamber probe 21 (see technical newsletter).
Insufficient vacuum alarm
This alarm indicates that during the pre-vacuum phase, the pressure did not drop to the
correct set value.
This alarm is displayed during the pre-vacuum phase of a cycle when the pressure does not
drop to the correct value in the expected time.
•
•
•
•
•
Check the efficiency and cleanliness of chamber seal 31 and of the flange of chamber
09 on which it is fitted. Replace if damaged.
Check vacuum pump 41 (see ADDITIONAL CHECKS AND SETTINGS – Vacuum Pump).
Check correct positioning of drain filter 20 and its cleanliness.
Check correct positioning of fans 42.
Check that the steriliser is sufficiently ventilated.
Fractioned vacuum alarm
This alarm indicates that vacuum was not created inside chamber 09.
This alarm is displayed during a cycle, during a vacuum pulse in the fractioned vacuum
phase, when the pressure does not drop to the correct value in the expected time.
•
•
•
•
34
Check that the total maximum load weight was not exceeded and that the materials
forming the load are compatible with the selected cycle (see USE AND MAINTENANCE
MANUAL, chapter OPERATING USE), for example, NEVER mix fabrics with solid materials.
Check correct positioning of fans 42.
Check the steriliser is sufficiently ventilated (in particular if built-in).
Check that vacuum pump 41 is properly powered and that it works correctly.
Alarms
Sterilisation temperature band alarm: overtemperature / undertemperature
Both alarms indicate that the temperature is out of the sterilising band (tolerance) defined
by EN 13060. This standard defines the tolerance band (0°C - +4°C) from the setting value
during sterilization. For example, if the setting is 134°C, the temperature should be in the
band 134°C-138°C.
The steriliser may display one of these alarms during sterilisation when the temperature in
chamber 09 and/or the theoretic steam temperature are out of the tolerance band.
This alarm could be generated by incorrect temperature and pressure values.
• If the UNDERTEMPERATURE alarm appears, check that the load weight does not exceed
the maximum value allowed (see USE AND MAINTENANCE MANUAL, chapter
OPERATING USE).
• Check steriliser temperature and pressure.
Temperature adjustment
The temperature displayed must be 0.5°C lower than the actual temperature in chamber
09.
To adjust the temperature, firstly calibrate chamber temperature probe 39 in the
Technician Menu, options 3 (PT1 board calibration) and 7 (PT1 probe calibration).
If the temperature is still not correct, adjust the Correction parameter in the Technician
Menu (see step 1 and 2) or replace the sensor (step 3).
1. Using an external tool
- Remove the steriliser from the unit (if it is built-in) and remove the covering.
- Loosen and remove one of the inspection plugs 40 on chamber 09.
- Insert the probe of the external tool checking its tightness and place it in contact with the
end of chamber temperature probe 39. Alternatively, wireless probes may be used. These
are introduced into the sterilising chamber and do not require assembly.
- Start an operating cycle and check the values. This operation should preferably be
performed with Cycle 134 HOLLOW/POROUS, because the pressure in this cycle is best
aligned to the saturated steam curve.
- Adjust the temperature using the Correction parameter in the Technical Menu (option
10).
2. Using a sample coil
- Switch off the steriliser using main switch 13 and disconnect chamber temperature probe
39 (connector CN12 on power board 34).
- Connect a sample coil with an R value from 1000 to 1573 Ohm, corresponding to a
temperature (°C) of
T = (-R0*A+(R0^2*A^2-4*R0^2*B+4*R0*R*B)^0,5)/2/R0/B
where
R0 = value of chamber temperature probe 39 at 0°C (written on label and set in PT1
probe calibration in the Technician Menu)
A = 0,0039083
B = -0,0000005775
- Switch on the steriliser and check the temperature value which appears on the display.
- Adjust the temperature using the Correction parameter in the Technical Menu (option
10).
35
Alarms
3. Replacing the PT1 temperature probe
- Replace chamber temperature probe 39.
- Select option 3 in the Technician Menu (Board calibration PT1 page 12) and proceed
with calibration.
- Select option 3 in the Technician Menu (PT1 Probe calibration page 15) and enter the R0
value.
Adjusting pressure setting
To adjust pressure setting select option 6 from the Technician Menu (TP Board calibration
on page 4) and follow the instructions.
Replace the transducer if the error between the pressure shown on the display and the
pressure indicated by an external calibration tool exceeds ±50 mbar.
•
If the alarm is not resolved, possible causes are:
- sudden leakage from a valve or a disconnected pipe;
- faulty chamber temperature probe 39;
- faulty transducer 38;
- faulty electronic board.
Level probe alarm
This alarm indicates inconsistent operation of the level probes in the clean water tank 10.
For example, if the maximum level probe detects presence of liquid, minimum level probe
and tank safety probe should also detect it.
The steriliser shows this message in STAND BY mode.
•
•
•
•
Empty, clean and fill clean water tank 10: the operation must be performed at
environmental temperature.
Check the level probes.
Replace the level probe insulation (see page 29).
Check water quality: Excessively pure water is corrosive (it removes salts from metals)
and cannot be detected by the probes. In particular, DO NOT use bidistilled water or
water with a conductivity of less than 1 µS/cm.
Coil alarm
This alarm indicates that the coil element circuit is either open or interrupted.
The alarm is displayed on the steriliser in any condition coil circuit is NOT detected as
closed.
Perform the following checks in the order shown:
• Rearm safety thermostat 17 by removing the plug and pressing the button underneath.
The thermostat may be rearmed only if chamber 09 has cooled down. To speed up
cooling, open door 16, which will however be locked. Door 16 can be opened by
inserting unlocking tool 37 (provided to service technicians) into the special hole on the
right under the door.
36
Alarms
Unlocking tool 37 must be fully inserted. Open the door without forcing it, remove
unlocking tool 37 and open the handle completely.
•
•
Check the coils with a tester for continuity without checking the value.
Check TRIAC components on power board 34 and replace the electronic board pair, if
required.
Self-filling alarm
This alarm is present on models with automatic water inlet 29 (only (optional on BHD
models).
The steriliser will display this message in STAND BY mode only when the automatic water
inlet is fitted (see USE AND MAINTENANCE MANUAL, chapter CONNECTIONS).
• In configuration (A), fill or replace the distilled or demineralised water tank.
Note: Constantly running the pump without water will effect durability and drastically
reduce the component’s life.
• Check that the inlet pipe is neither bent nor twisted.
• If the problem persists, check if the automatic water inlet pump 46 is working.
37
Alarms
•
•
In configuration (B), check that the water supply tap is open and that the mains water
pressure is higher than the minimum pressure indicated for the installed demineralisation
system.
If the problem persists, check if solenoid valve EV7 opens correctly.
In both cases, check:
- that all connections are properly connected;
- that all pipes are in their seats and neither cracked nor twisted.
Door alarm
This indicates that door 16 is not correctly closed.
The steriliser may display this message when an attempt is made to start a cycle but the
door is not completely locked. The steriliser will not start in this condition.
•
•
Close the door well before starting a cycle.
If the problem persists, despite the door being locked, micro-switch M1 36A and/or
micro-switch M2 36B are not correctly pressed or faulty. Check that:
- the lock nuts on the micro-switches are tight;
- the pin is not bent, out of its seat, or loose;
- there is continuity at micro-switch contacts (use a tester);
- there are no obstructions or dirt near the micro-switch rod;
- the connection cables between the door and the steriliser are operating and
properly connected.
Note: To determine which of the two micro-switches is generating the signal, check:
- if the alarm is triggered immediately after starting the cycle, it means that the pre-closing
micro-switch is not working (micro-switch M2 36B);
- if the alarm is triggered 3 minutes after starting the cycle, it means that the door lock
micro-switch is not working (micro-switch M1 36A).
Micro-switch M1 36A:
38
Alarms
Micro-switch M2 36B:
PT1 temperature probe alarm
This is triggered when chamber temperature probe 39 in the steriliser is disconnected or
faulty.
The steriliser shows this alarm during operation when the probe detects a temperature of
less than 3°C.
•
•
•
Check the connection of chamber temperature probe 39 to connector CN12.
Replace the probe if faulty.
Check temperature setting following the instructions shown in the STERILISATION
TEMPERATURE BAND ALARM section.
Drain alarm
This indicates that the pressure did not drop to the correct predetermined value during
draining.
This alarm is displayed during the draining phase of a cycle when the pressure did not drop
to the correct value in the expected time.
•
•
•
•
Check solenoid valve EV6.
Check solenoid valve EV3.
Check operation of vacuum pump 41.
Proceed as shown for the FRACTIONED VACUUM ALARM.
Misalignment alarm
This indicates that the temperature in chamber 09 does not correspond to the theoretic
steam temperature.
The steriliser displays this alarm during the sterilisation phase when the temperature in
chamber 09 and the theoretic steam temperature differ by more than 2°C.
This alarm could be generated by incorrect temperature and pressure values.
• Check the temperature and pressure settings of the steriliser following the
instructions shown in the STERILISATION TEMPERATURE BAND ALARM section.
39
Alarms
Pressure transducer alarm
This is triggered when transducer 38 in the steriliser is disconnected or faulty.
The steriliser shows this alarm during operation when the transducer detects a pressure of
less than 30 mbars.
•
•
•
Check the connection of transducer 38 to connector CN11.
Replace the transducer if faulty.
Check the pressure setting following the instructions shown in the STERILISATION
TEMPERATURE BAND ALARM section.
Manual stop alarm
This indicates that that STOP was pressed during a cycle before the cycle was completed.
The steriliser displays this alarm during operation and stops to inform the user that the load
MAY NOT BE STERILE.
•
This is not a failure but a cycle stop override caused by the operator. For this reason,
there are no operations to be performed but the load MAY NON BE STERILE. A new
sterilisation cycle must be started.
Note: Manual cycle stops should always be avoided unless in case of extreme need. If the
steriliser has already performed the fractioned vacuum or pressurisation phases, the
material inside could be wet and the steriliser may not start properly. Dry the material well
and change the bags.
Power missing alarm
This indicates that a power blackout occurred during a cycle.
The steriliser displays this alarm when power is restored. The cycle and the phase when
the blackout occurred will appear on the display.
The last alarm will appear if the blackout occurred in presence of an alarm.
•
On the basis of the message on the display, you can infer if the steriliser managed
to complete the sterilising cycle or not despite the power blackout.
A blackout may be caused by various reasons:
- the steriliser was accidentally switched off by means of main switch 13;
- mains blackout;
- power cable 03 not plugged in correctly or damaged;
- blown fuses 32.
Event alarm
This indicates that one of the timed phases (sterilisation, drying or vacuum test hold) was
not completed correctly.
• Contact COMINOX.
40
Alarms
Alarm code list
Code
Alarm type
00
01
02
03
04
05
06
07
08
09
10
11
12
13
14
15
16
17
18
19
20
21
22
23
24
25
26
27
28
29
30
COIL
OVERTEMPERATURE PT1
INSUFFICIENT STEAM
INSUFFICIENT WATER LEVEL
MAX WATER LEVEL
DOOR
MANUAL STOP
INSUFFICIENT VACUUM
FRACTIONED VACUUM
LEVEL PROBE
PRESSURISATION
OVERTEMPERATURE BAND
UNDERTEMPERATURE BAND
POWER MISSING
DRAIN
MISALIGNMENT
PRESSURE TRANSDUCER
PT1 TEMPERATURE PROBE
EVENTS
41
Additional Checks And Settings
ADDITIONAL CHECKS AND SETTINGS
Display off or not clear
Proceed as follows if no writing appears on the display and/or any if the display is not very
clear:
• Check that power socket is powered, the power cable 03 is correctly plugged in
and connected to the steriliser.
• Check fuses 32. Check that the main switch 13 is pressed to position “I”.
• Check the fuses on electronic power board 34.
• If the display is not clear from where you are standing, change reading position or
angle. If the display is clearer, adjust contrast by means of trimmer PT1 starting from
your preferred reading position (see chapter DIAGRAMS AND WIRING, Logic
electronic board).
Level probe check
Level probes 43 of both tanks are simple metal rods fitted into the container to be
monitored and insulated from it. The probe circuit is closed when liquid is present.
The presence of fouling or lime scales may create electric continuity between tank metal
and level probe rod and consequently read the presence of liquid in the tank when the
tank is empty.
42
Additional Checks And Settings
If messages and alarm appear after emptying the tanks, remove the probes and clean
the probes carefully as follows:
- Remove the cover and the faston (A) from the
probe bulb.
- Use a wrench ch 13 to loose the probe holder (B)
and remove the probe rod.
- Remove the Teflon ogive seal (C) ; this is generally
deformed to seal the probe holder and assumes the
shape of the threaded hole. To remove the ogive
seal, unscrew the ogive with a screwdriver and
replace it, if required.
- Carefully clean inside the casing (C) and the rod
and refit.
Safety valve check
The safety valve should be checked every six months. For this check chamber 09 should
be cold and door 16 open.
To ensure proper operations of safety valve 12, loosen the cover and unscrew the valve
upper plug. Pull the plug upward to open the valve manually. Close the plug.
43
Additional Checks And Settings
Door adjustment
• Procedure for 18/24 litre models: if leakages still occur after checking and cleaning
chamber seal 31 and the flange of chamber 09 on which it rests, you will need to:
- Switch the steriliser off and wait for it to cool down, then open the door.
- Use a wrench ch5 to loosen the screw inside the hole on the left side of the
door. When the screw is loose, the plate will be free to rotate.
- Turn the plate anticlockwise for about ¼ of a turn or as required.
- Tighten the Allen screw ch5.
- When closing the door, a higher resistance should be felt.
- Test tightness by starting a new cycle. Repeat the operation if required.
• For 6 S Dynamica, in case of leaks do the following:
- Check and clean chamber seal 31.
- Adjust the door closing by following these steps:
o Switch the steriliser off and wait for it to cool down, then open the
door.
o Remove the cover from the steriliser.
o Rotate the screw on top of the chamber to adjust the hook and thus
adjusting the door closing.
o Test tightness by starting a new cycle. Repeat the operation if
required.
Note: Do not tighten the door excessively. Excessive pressure may deform the seal.
44
Additional Checks And Settings
Water in the chamber after the cycle
Proceed as follows if there is still water inside chamber 09:
• Check that a cycle with drying phase has been selected. Otherwise, the presence
of water or humidity in the chamber is a normal condition.
• Check the cleanliness and correct positioning of drain filter 20 see USE AND
MAINTENANCE MANUAL, chapter MAINTENANCE).
• Check inclination of the steriliser again (see USE AND MAINTENANCE MANUAL,
chapter INSTALLATION).
• In 6/18 S Dynamica models with direct drain, check that the drain tube is clear (it
must NEVER be immersed in water).
Pressure rises too slowly
Proceed as follows if the pressure, rises too slowly at the end of the cycle:
• Check air sterilisation filter 15 and replace it, if required. Note that this filter, as many
other components, has a specific duration (see USE AND MAINTENANCE MANUAL,
chapter MAINTENANCE). NEVER run sterilisation cycles without this filter or if the filter
is damaged or perforated. The load could be contaminated by ambient air.
Poor drying
Proceed as follows if drying is not satisfactory at the end of the cycle:
• Check that a cycle with drying phase has been selected and that the selected
cycle is suitable for the material to be sterilised (see USE AND MAINTENANCE
MANUAL, chapter OPERATING USE).
• Check that the total maximum load is not exceeded.
• Check that load is prepared correctly.
• Check cleanness and correct positioning of drain filter 20.
• Check air sterilisation filter 15.
• Check inclination of the steriliser again (see USE AND MAINTENANCE MANUAL,
chapter INSTALLATION).
• Check that the valve EV5 (see wiring diagrams) opens during the drying phase. This
valve is normally closed but allows air peaks in during the drying phase.
Steam leakage from the safety valve
A steam leakage from safety valve 12 may occur in various conditions:
• A suitable safety valve must be fitted if the steriliser is installed at more than 1500
meters above sea level (see USE AND MAINTENANCE MANUAL, chapter TECHNICAL
SPECIFICATIONS).
• If the unit is installed at an altitude below 1500 meters above sea level and/or the
problem repeatedly occurs, check the valve efficiency or replace it.
45
Additional Checks And Settings
Vacuum pump servicing procedure
The vacuum pump can be serviced by cleaning it and replacing the seals which are
supplied in the specific kit.
Proceed as follows for vacuum pump 2119:
•
Remove the pump and carefully check the
position of components.
•
Check that the membranes are not cracked.
Clean or replace them.
•
Check the rubber valves. Clean or replaced
them. Make sure the position and orientation is
correct when refitting.
Vacuum pump kit 2119:
Vacuum pump 2119:
46
Additional Checks And Settings
Proceed as follows for vacuum pump 41 B:
•
Remove the pump and carefully check the position and orientation of
components.
•
Check that membrane C, valves D and ORings are not damaged. clean them or
replace them if required.
•
Membrane C is fitted onto the pump piston
by turning it clockwise. To prevent
movements, use thread lock liquid or paste.
•
When refitting, be careful to arrange the
parts correctly. It may not be possible to refit
the parts if they are not correctly oriented.
Refit outlet F after fastening membrane C.
Slide the lips of membrane C over the inner
ring of the block using a screwdriver.
Note: If the pump is to be replaced, remove the
rubber plugs E.
Note: Check correct fastening of the delivery and
suction fittings.
Vacuum pump kit 41 B:
Vacuum pump 41 B:
47
Additional Checks And Settings
Water automatic inlet does not work correctly
Proceed as follows if the automatic water inlet 29 optional) is not working correctly:
• Check that this device is actually available because not all models are supplied
with the automatic water inlet.
• Check the External Charge setting (ON) in the Technician - Accessories Menu.
• Check the Self-filling setting (ON) in the Basic Setting Menu (see OPERATION
INSTRUCTIONS, chapter OPERATION).
• For configuration A from external tank, check that there is water in the tank; if there
is water and the AUTOMATIC WATER INLET ALARM is on, check that the inlet pipe is
well positioned and touches the bottom of the tank; check that the tube is not bent
or twisted; check operation of the automatic inlet pump 46.
• In some cases, if the automatic water inlet pump 46 runs dry for a long period of
time, performances may degrade and priming and filling the unit will not be
possible in the expected times. Replace the pump in this case.
• For configuration B (supply from water mains), check that the mains water tap is
open. If the tap is open and the AUTOMATIC WATER INLET ALARM is on, check for
flow of water downstream of the installed demineralization system. Check inlet
solenoid valve EV7.
• Check fuse F1 on the power board 34. This fuse protects all loads; replace it if
required.
The printer does not print
Proceed as follows after having checked that the printer is present and settings Printer ON
in the Technician - Accessory Menu:
• Check that Printer setting in the Basic Setting Menu allows use of the printer (see
OPERATION INSTRUCTIONS, chapter OPERATION).
• Check that door 18 and the internal flap containing the roll are closed.
• Check that the paper roll is present and correctly fitted.
Note: Never pull paper out as this may open the internal flap or tear it out of position. To
eject the entire printout, press FEED (in STAND BY mode) on the printer control panel. The
paper will be fed by a small amount each time the button is pressed.
• Check fuses 32 and fuse F1 on power board 34. Check the connection between
board and printer (see chapter Printer Installation).
48
Automatic filling
Automatic water inlet and direct drain system installation
This accessory may be fitted after installing the steriliser and it includes both the automatic
water inlet 29 and direct drain system 30. These systems are the same for all models: only
the tube length and arrangement changes.
• Pull out the steriliser (if built-in), place it in an appropriate position and remove the
cover.
• Remove plugs (T) from the lower part of the steriliser (right-hand side).
• Fit the plastic fitting on the larger hole used for draining.
• Fit the fittings and the hose holders for the automatic water inlet 29 on the smaller
hole. Direct the hose holder towards the drain.
49
Automatic filling
•
Fit the automatic water inlet pump 46 correctly blocking it on its support.
•
Fit the branches (Y) and all connecting pipes.
•
Fit the external filling and drain pipes; the end of the inlet pipe is cut in a particular
manner to prevent a suction effect when it rests on the bottom of the tank. The
drain pipe is provided with a quick coupling male attachment.
Test tightness.
In the Technician Menu, Accessories option (option 16), set External Charge ON;
check operation of the steriliser. Close and restart the unit.
•
•
50
Speedy Water
Installation of the SPEEDY WATER demineralization system
The SPEEDY WATER demineralization system should be used to connect the SterilClave
6/18/24 sterilisers to the mains water in automatic water inlet configuration B (see USER
AND MAINTENANCE MANUAL, chapter CONNECTIONS).
The SPEEDY WATER demineralization system consists of:
• conductivity meter, to be fitted on the steriliser;
• purification block B (ionic exchange resins), easy to substitute;
• support bracket A for the above mentioned block, to be attached to the wall.
Control of water quality
The conductivity meter allows the steriliser to constantly check that the quality of water
coming from the purification block is suitable for sterilization.
In particular, when the first threshold (15 µS/cm, maximum conductivity recommended
under EN 13060 for feedwater) is exceeded, when in STANBY mode the steriliser displays
the message “Check water quality”, so as to indicate that it is time to change the resins.
When the second threshold (30 µS/cm) is exceeded, the INSUFFICIENT WATER QUALITY
ALARM stops water coming in automatically from the purification block and warns that it is
necessary to change the resins.
Purification block
By treating mains water with a flow of about 650 µS/cm the purification block B is able to
produce 250 liters of water below the first threshold (15 µS/cm) and another 50 before
reaching the second (30 µS/cm) threshold, giving a total of 300 liters (Æ 600 cycles).
Technical data
Flow rate
Dimensions H x W x D
Operating weight
Mains water requirements
between 0,5 and 0,7 l/min
520 x 160 x 90 mm
4.7 kg
pressure between 1 and 4.5 bar
Support bracket
The support bracket A is equipped with rapid connections for connecting to the mains
water (inlet) and to the steriliser (outlet). These fittings are suitable for 8 mm external
diameter pipes. There are also four 7 mm holes for wall mounting.
Bracket technical data
Dimensions H x W x D
Operating weight
270 x 160 x 180 mm
0.9 kg
Maintenance of the SPEEDY WATER demineralization system
When the purification block B needs to be changed:
• Switch OFF the steriliser, open the mains water tap and put a container to collect any
water spillage under the support bracket A.
• Lift the front cover of the support bracket A.
• Remove the metal blocking plate D.
• Detach the purification block B from the support and install the new one as set out in the
instructions below.
51
Speedy Water
Installation of the SPEEDY WATER demineralization system
To install the SPEEDY WATER demineralization system on a steriliser already fitted with
automatic water inlet 29 and direct drain 30, follow these steps:
• Install support bracket A to a wall suitable to hold the weight of the plate and of the
purification block B during operations (5.6 kg). Take into account the vertical space
needed to position the block.
• Turn off the mains water tap and remove the plugs from the connections behind the
bracket.
• Connect the pipe from the water mains to the rear right section of the bracket (bearing
the label “IN” at the front) and the pipe to the steriliser to the rear left section of the
bracket (bearing the label “OUT” on the front). Use the supplied pipes (2 m each) and
push them as far as possible into the connections.
• Remove the plugs positioned under the front cover of the bracket.
• Remove the protective plugs from the purification block B inlets and wet their seals with
demineralized water to ensure maximum efficiency.
• Lift the cover of the bracket and place the purification block B onto the metal guide pin
C, pushing it till the notch in the guide pin appears at the front.
• Fix the purification block B by fitting the metal blocking plate D into the groove in the
guide pin C, and lower the cover of the support bracket A.
• Take the sterilizer out of the casing, if any. Place it in an appropriate place and remove
the cover.
• Replace the hose holders of the automatic water inlet 29 joint with the straight fittings
supplied and connect the pipe from support bracket A to the external one.
52
Speedy Water
• Replace the automatic water inlet pump 46 and the connection pipes with the solenoid
valve EV7 (mounted on its support and with the outlet hose holders and the inlet L-joint)
and the pipes supplied. Use the teflon pipe to connect the internal joint on the back of
the steriliser with the solenoid valve EV7 (inlet 1) and use the silicone pipe to connect the
solenoid valve EV7 (outlet 2) to the clean water tank 10:
• Insert the probe support E in the silicon pipe and fasten the ends with the pipe clamps
provided. Connect to the pins using the appropriate screws and ready to use and
clamped blue cables with eyelets to the filler 14. Clamp probe support E to the supplied
support screwed into the slit J, making sure there is no contact between the pins and
other parts of the steriliser.
• Open the water tap.
• Test the steriliser and the joints.
• Check operations, close the mains water tap and install the sterilizer again.
53
SterilCard reader
SterilCard reader installation
The SterilCard kit includes:
• Administrator and User SterilCard
• SterilCard reader
• SterilCard reader support
• Cable
• 4 self-tapping screws
• 4 spacers
• 4 M3x6 screws
• 4 nuts
• 8 washers
Follow these instructions to assemble the SterilCard kit:
1. Assemble the SterilCard reader on its support as shown in the picture:
In order to obtain this assembly:
54
•
M3x6 screw
•
Washer
•
SterilCard reader
•
Spacer
•
SterilCard reader support
•
Washer
•
Nut
SterilCard reader
2. Mount the assembly in the control panel with the 4 self-tapping screws as shown in the
picture.
Note: The assembly must be placed as high as possible, so that the opening of the control
panel is aligned with the one of the SterilCard reader.
3. Connect end A of the cable to the SterilCard reader and connect end B to the J5
connector of the logic board. Reassemble the control panel on SterilClave.
4. Turn on the sterilizer and insert the Technician SterilCard. In the Technician Menu, scroll
to Accessories (option 16) and set CARD Reader on ON. Check that the card reader
works correctly.
5. Turn off the steriliser using the main switch and remove the Technician SterilCard. Turn
on the steriliser and insert the Administrator SterilCard.
55
Printer
Printer installation
If the set up of the printer 26 (optional) takes place following the purchase of the steriliser,
a specific kit is provided. To install the components follow the procedure described below.
Note: This procedure is flexible. For this reason, keep track of the removal sequence for reestablishing the correct operating conditions.
•
•
56
Pull out the steriliser (if built-in), place it in an appropriate position and remove the
cover.
Remove the lid (R) and keep the four fastening screws as they will be needed to fit
the printer support frame.
Printer
•
Fit the frame (C) on the control panel (P) with the four screws previously removed
from the lid (R).
•
•
Connect the printer cable (L) to connector CN2 of the printer.
Insert the printer into the frame (C) and make the fastening side tabs snap.
57
Printer
•
Connect the printer cable (L) to connector CN6 on power board 34:
CN6
•
58
In the Technician Menu, scroll to Accessories (option 16), set Printer ON and check
operation. Close and reinstall the steriliser.
Firmware upgrade
Firmware upgrade
To upgrade the firmware file, the configuration file and the parameters file, follow these
steps:
1. Connect the steriliser to the computer using the USB serial cable.
2. Turn on the sterilizer from the main switch 13.
3. Turn on the computer and install the program SterilClaveVxx.exe following the
instructions displayed on the screen.
4. Start the program SterilClaveVxx.exe.
5. Choose the data transfer rate: select 115200 bps.
6. Type the number of the COM port to which the steriliser is connected.
7. Click Open.
8. Click the Debug tab.
9. Click Identify. If the box below displays numbers different from zero the connection
has been established correctly; otherwise, check the number of the COM port and
the cable because there is something wrong with the connection.
10. Click the Download tab to download the firmware file, the configuration file and
the parameter file, IN THIS ORDER.
11. Click Download Firmware File and select the firmware file (.s19) from a folder to start
downloading. When the download is completed, the message OPERATION
SUCCESSFUL will be displayed in the box.
12. Click Download Configuration File, select the configuration file (.cmxcnf) from a
folder to start downloading.
13. Click Download Parameters File, select the parameters file (.cmxpars) from a folder
to start downloading.
Click Close to close the connection and click Exit to exit the program.
59
Diagrams and wirings
DIAGRAMS AND WIRINGS
Logic electronic board
Logic board 33 is a low voltage board common to all models.
J1
J3
J5
J6
PT1
60
Connection cable to power board 34
Connection cable to the serial port
Connection cable to the SterilCard reader
Connection cable to the keyboard
Display adjustment trimmer (see chapter DISPLAY OFF OR NOT CLEAR)
Diagrams and wirings
Electronic power board
The power board 34 is common to all models.
J1
CN1
CN2
CN3
CN4
CN5
CN6
CN7
CN8
CN9
CN11
CN12
CN 13
FS1
Connection cable to logic board 33
Load connector:
1 - Solenoid valve EV1 and water inlet pump 35 [orange]
2 - Water drain solenoid valve EV2 [brown]
3 - Three-way solenoid valve EV3 [pink-black]
4 - Steam solenoid valve EV4 [green]
5 - By-pass solenoid valve EV5 [purple]
6 - Drying solenoid valve EV6 [white-black]
7 - Automatic water inlet pump 46 (configuration A) or solenoid valve EV7
(configuration B) [blue]
8 - Vacuum pump 41 [pink]
9 - Door lock [gray]
10 - Fans 42 [red]
Contactor connector
Power supply connector
Internal coil connector
External coil connector
Printer connector
Level probe connector:
1 – Ground [yellow-green]
2 - Conductivity meter ground [blue]
3 - Probe S7 (not used)
4 - Probe S6 (not used)
5 - Probe S5 (not used in 6 S Dynamica) for chamber level 09 (18/24 S
Dynamica - S - B – BHD models) [orange]
6 - Conductivity meter signal [blue]
7 - Maximum level probe S3 for clean water tank 10 [blue]
8 - Maximum level probe S4 for waste water recovery tank 11 (not used in
6/18 S Dynamica models) [red]
9 - Safety probe S1 for clean water tank 10 [white]
10 - Minimum level probe S2 for clean water tank 10 [yellow]
Micro-switch connector:
1 - M1 door locked [red]
2 - M2 pre-lock [yellow]
3 - Common [black]
Volumetric counter connector
Pressure transducer connector
PT1 temperature probe connector
PT2 temperature probe connector
Grounding connector
61
Diagrams and wirings
FUSES
F1
F2
F3
F4
F5
F6
4A
4A
4A
16 A
10 A
0.63 A
LED
DL1
DL2
DL3
DL4
DL5
DL6
62
Internal coil on LED
+5V power LED
External coil on LED
Coil safety LED (on in normal conditions, off when a COIL ALARM occurs)
Printer power LED
+24V power LED
Diagrams and wirings
63
Diagrams and wirings
Wiring diagram - 18/24 S - B - BHD
-
64
EV...
P1
B
P2
CT
PR
F
PV
FU
RA
ET
RI
IB
T
Solenoid valves
Water inlet pump 35
Door lock winding
Automatic water inlet pump 46 (config. A), solenoid valve EV7 (config. B)
Power contactor
Safety pressure switch
Anti-jamming filter
Vacuum pump 41
Fuses 32
Drying coil
Fans 42
Inlet coil
Main switch 0-1
Safety thermostat 17
Diagrams and wirings
Wiring diagram 6 S Dynamica
-
EV...
P1
B
P2
CT
PR
F
PV
FU
RS
ET
RI
IB
T
Solenoid valves
Water inlet pump 35
Door lock winding
Automatic water inlet pump 46 (config. A), solenoid valve EV7 (config. B)
Power contactor
Safety pressure switch
Anti-jamming filter
Vacuum pump 41
Fuses 32
Upper coil
Fans 42
Lower coil
Main switch 0-1
Safety thermostat 17
65
Diagrams and wirings
Wiring diagram - 18 S Dynamica
-
66
EV...
P1
B
P2
CT
PR
F
PV
FU
RA
ET
RI
IB
T
Solenoid valves
Water inlet pump 35
Door lock winding
Automatic water inlet pump 46 (config. A), solenoid valve EV7 (config. B)
Power contactor
Safety pressure switch
Anti-jamming filter
Vacuum pump 41
Fuses 32
Drying coil
Fans 42
Inlet coil
Main switch 0-1
Safety thermostat 17
Diagrams and wirings
Hydraulic diagram 18/24 S - B - BHD
-
EV...
RS1
C
RS2
F
RSD
P1
SC
P2
SS
TP
PR
SV
PV
VS
RC
VU
Solenoid valves
Clean water drain tap 24
Condenser
Waste water drain tap 25
Air sterilisation filter 15
Direct drain (BHD model only)
Water inlet pump 35
Clean water tank 10
Automatic water inlet pump 46 (config. A), solenoid valve EV7 (config. B)
Waste water recovery tank 11
Transducer 38 (pressure)
Safety pressure switch
Condensation tank
Vacuum pump 41
Safety valve 12
Filler 14
Check valves
67
Diagrams and wirings
Hydraulic diagram 6/18 S Dynamica
-
68
EV...
RS1
C
RS2
F
SD
P1
SC
P2
SS
TP
PR
SV
PV
VS
RC
VU
Solenoid valves
Clean water drain tap 24
Condenser
Waste water drain tap 25
Air sterilisation filter 15
Direct drain
Water inlet pump 35
Clean water tank 10
Automatic water inlet pump 46 (config. A), solenoid valve EV7 (config. B)
Waste water recovery tank 11
Transducer 38 (pressure)
Safety pressure switch
Condensation tank
Vacuum pump 41
Safety valve 12
Filler 14
Check valves
Diagrams and wirings
STEAM PEAK diagram
P1, EV1 ON until the water reaches the chamber level probe
EV2 ON
Internal coil ON
Î
Water is vaporised inside the chamber
69
Diagrams and wirings
p>1,2 bar VACUUM PULSE diagram
Pressure inside the chamber is higher than the atmospheric value
Î
70
Steam flows naturally
Diagrams and wirings
p<=1,2 bar VACUUM PULSE diagram
EV3 ON
EV6 ON
PV ON
Î
Steam/air removal from the chamber
EV2/EV3 cycle introduces air in the pump and removes condesed steam
71
Diagrams and wirings
DRYING diagram
EV3 ON
EV6 ON
PV ON
Moreover EV5 is periodically ON
Î
72
Steam removed from the chamber is replaced by filtered air
Appendix 1
APPENDIX 1: 18/24 CYCLE SET POINTS
18/24 B - BHD CYCLE SET POINTS
Pre‐
vacuum pressure (mbar) Steam peak pressure (mbar) Vacuum pulse pressure (mbar) Sterilisation temperature (°C) Sterilis
ation temper
ature (min) Drying pressure (mbar) Drying max pressure (mbar) Drying length (min) 121 UNWRAPPED 200 2300 1240 121 15 ‐ ‐ ‐ 134 UNWRAPPED 200 2300 1240 134 4 ‐ ‐ ‐ 134 WRAPPED 200 1980 300 134 4 200 350 20 150 2100 190 121 15 200 350 20 150 3100 190 134 4 200 350 20 134 PRION 150 3100 190 134 18 200 350 20 B&D TEST 150 3100 190 134 3,5 200 350 5 VACUUM TEST 130 ‐ ‐ ‐ ‐ ‐ ‐ ‐ 121 HOLLOW/POROUS 134 HOLLOW/POROUS 18 S CYCLE SET POINTS
Sterilisat
ion Sterilisation temperature tempera
ture (°C) (min) Drying pressure (mbar) Drying max pressure (mbar) Drying length (min) 15 ‐ ‐ ‐ 134 4 ‐ ‐ ‐ 300 134 4 350 500 25 2100 300 121 15 350 500 25 300 3100 300 134 4 350 500 25 134 PRION 300 3100 300 134 18 350 500 25 B&D TEST 300 3100 300 134 3,5 350 350 5 VACUUM TEST 300 ‐ ‐ ‐ ‐ ‐ ‐ ‐ Pre‐
vacuum pressure (mbar) Steam peak pressure (mbar) Vacuum pulse pressure (mbar) 121 UNWRAPPED 300 2300 1240 121 134 UNWRAPPED 300 2300 1240 134 WRAPPED 300 1980 300 121 HOLLOW/POROUS 134 HOLLOW/POROUS 73
Appendix 2
APPENDIX 2: COLDEST AND WARMEST POINT DEFINITION
Coldest point SterilClave 18/24: n° 5
Warmest point SterilClave 18/24: n° 6
74
75
76
SCG02LCD September 2010. Rights reserved to make changes without notice.
Cominox S.r.l.
via G. Viganò, 7 - 20048 Carate B.za (Mi) Italia
tel. +39 0362 912312 - Fax +39 0362 900940
www.cominox.it