1
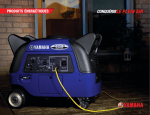
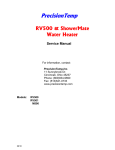
1
2
3
From the Editor
Welcome to the first ever completely online issue of RV Technician magazine. The
February/March issue is packed full of information to help you prepare for a busier spring as the
RV industry heads into recovery. There is valuable information to help you help your customers
have the best RVing experience possible.
First up is “Battery Charging – What’s Temperature Got to Do With it?” by Steve Savage of
Mobility RV Service. This article covers how to properly maintain and charge RV batteries, along
with how weather impacts a battery. Next is “Tankless Water Heating for RVs,” by Gerry Wolter of
Precision Temp, Inc. This article covers the difference between conventional and tankless water
heaters, the benefits of tankless heaters for RVs, and how to install one. “Tools: To Buy or Not to
Buy,” by RVDA Service Consultant Tony Yerman discusses whether you need to buy a tool or
make your own. It also provides ideas about how to use the tools you need. “RV-C Protocol: A
Full Overview,” courtesy of RVIA, covers all the details of the RV-C protocol. While this protocol is
not used on all RVs currently, it is quickly becoming the norm, and this article will help explain
what it is, how it works, and how it will benefit RV technicians in the near future. “Technicians
Share 'Why I’m a Certified RV Technician,'” by Jim Carr of the Florida RV Trade Association
(FRVTA), offers insight into why two technicians became certified. Finally, the safety article from
the Occupational Safety and Health Administration (OSHA) covers the proper use and care of
jacks in the service department. There is also information on the upcoming Trouble Shooter Clinic
scheduled for March 8-12 in Elkhart, IN.
Changes to the Magazine
We have again made some changes to this magazine. Because of a decline in print advertising,
the RVDA Education Foundation Board of Directors determined the best way to continue to serve
the RV industry was to move to a more frequent publication schedule online. We are now emailing subscribers six issues a year, instead of four mailed copies. None of the features of the
magazine will disappear, this simply will allow us to provide you with more information in a more
timely manner. In addition to the two additional issues each year, subscribers will also have
access to a special subscribers-only website. This website will not only include the articles from
the current issue, but will also have all 17 past issues of the magazine available for quick
reference. Please make sure that the RVDA Education Foundation has your current e-mail
address to ensure that you receive each issue. To update your e-mail, call the dealer services
hotline or e-mail [email protected].
RV TECHNICIAN · February/March 2010
4
Special Thanks
I want to give a special thanks to all the readers who suggested articles for this issue. Many
articles are the result of direct requests from fans of the certified RV technician Facebook page. I
hope this trend continues, so if you have requests or suggestions for articles, don’t hesitate to email or call me directly, or to post them on the Facebook page. I will do my best to find an author
for the article you suggest. We are always looking for input on how we can make the magazine
better. Finally, feel free to contact me if you are interested in being a part of the RV Technician
Advisory Group. The advisory group deserves a lot of credit for the quality of articles and making
sure that the information is accurate.
Melissa Broadus, Editor, [email protected]
5
RV TECHNICIAN · February/March 2010
BATTERIES
Battery Charging – What’s Temperature Got to Do With It?
by: Steve Savage
As the saying goes; you can have something done
rapidly, cheaply, or expertly, but you can’t have all
three. The same holds true for some of the things we
seldom consider when working on RVs. Take battery
charging for example. How could anything be more
basic?
Every RV has a battery bank consisting of one or more batteries. The battery bank, in turn, is
wired in parallel to a charger housed in either a converter or inverter (We’ll save solar systems for
a future article). The system terminates on a distribution panel, which feeds the 12-volt circuits in
the RV. When the customer’s shoreline is plugged into the campground pedestal or the generator
is running, the charging system (inverter or converter) charges the batteries. And, if that was all
there was to it, there would be little more to say about battery charging. In reality, however, the
story doesn’t stop there.
Charging
Unlike other types of batteries, the lead-acid batteries found in RVs do not develop a memory and
should never be completely discharged. In fact, the flooded cell batteries with which we are all
familiar, as well as the more costly absorbed glass batteries (AGMs or VRLAs), last much longer
if not severely discharged or overcharged. The further batteries deviate from their fully charged
state, the shorter their lifespan.
In order to establish the charging voltage, most charging systems depend on continual interplay
between the push of current from the charger and the push back from the batteries, as they
charge. Think of charging a battery like blowing up a balloon. The more the balloon is inflated, the
harder it becomes to inflate. When designing charging systems for lead-acid batteries,
manufacturers choose charging voltages low enough to guard against gassing, but high enough
to maximize service life.
When charger voltage is set too low, batteries are not fully charged (topped off), and sulfation
becomes a problem. Sulfation, or the build-up of sulfur on the battery plates, can severely shorten
battery life. When voltage is too high, batteries can self-destruct due to thermal runaway i.e.,
overheating.
The most basic battery chargers simply push current into the battery and, although inexpensive,
can damage batteries due to overcharging. The more sophisticated multi-stage chargers do a
more complete job of charging the battery. By way of quick review, they begin the charge cycle by
pushing a higher number of amps into the battery, when it is at its lowest voltage. Then, when the
battery reaches 80 – 90 percent of full charge voltage, the charger increases the voltage, or push,
at the same time reducing the amount of current to top off the battery. When the battery is fully
charged, the charger reduces both voltage and amperage to maintain a “float” charge. At this
stage, the minimal charge rate reduces the likelihood of water loss, or gassing, and prevents
battery self-discharge.
6
RV TECHNICIAN · February/March 2010
Impact of Temperature on Charging
Simple enough so far? A charger pushes amps into the battery. Now here is where it gets tricky.
Chargers are dumb, so the manufacturer has to program them with a charging algorithm telling
them how hard to push. Making this decision is not as simple as one might assume, because
temperature plays a crucial role in the equation. In order to maximize battery life, charger voltage
should be higher when batteries are cold, and lower when battery temperatures rise. Most
charging systems, however, respond to battery voltage. They do not have the ability to make
adjustments based on battery temperature.
While in theory, an owner could manually adjust charger output depending on the season of the
year, or the area in which they are traveling, charging systems seldom offer that feature. In
addition, it is far simpler to have a temperature sensor
riding shotgun on the battery or battery terminal fine
tuning charger output. Some converters and inverters
come standard with temperature compensation or offer
it as an option.
Now let’s suppose your customer is in the market for a
charging system and asks you about temperature
compensation. They may already know a charging
system capable of compensation will cost slightly more
on the front end. Is it worth the extra money?
There are at least two real world advantages to
temperature compensation. First, temperature compensation enables chargers to more closely
match output to the needs of the batteries, thereby reducing discharge/recharge cycle times.
Secondly, temperature compensation reduces plate sulfation that results when a charger fails to
“top off” the batteries in cold weather and guards against overcharging in warm weather (a 15degree rise in battery temperature from the ideal 77 degrees can halve battery life).
What’s involved in the installation? Not much. Converters and inverters offering temperature
compensation are drop-in replacements for many standard models. The only difference is the
addition of a remote sensor on the battery terminal, with a lead running from the batteries to the
charger. The sensor plugs into the charger. For most RVers, less frequent battery replacement
will offset the slightly higher initial cost of a charging system with temperature compensation and
may provide them with a more efficient charging system.
Steve Savage is a Master Certified RV technician, the owner/operator of Mobility RV
Service in Bristol, TN, and member of the RV Technician Advisory Group. His articles
frequently appear in consumer and industry magazines. For questions or comments, email Steve at [email protected].
7
RV TECHNICIAN · February/March 2010
WATER HEATERS
Tankless Water Heating for RVs
by: Gerry Wolter
Tankless (instantaneous) water heaters have
been around for many years in homes, but are
relatively new for RVs. Yet they actually make
more sense for RV owners, and here’s why.
Differences Between Water Heaters
Tank heaters heat water slowly and store it for
later use. Most homes have tank heaters of 3060 gallons. With 30 to 60 gallons of hot water,
you can take a long, relaxing shower with little
concern of running out. For RVers, tank heaters
are much smaller, generally six to 10 gallons. In
normal use, this provides about four to eight
gallons before the water starts getting noticeably
cooler. This is less than ideal if you want to relax
in the shower or properly rinse your hair.
Tankless heaters heat the water as it flows through a heat exchanger only when the water is
running. Because they heat quickly, tankless heaters do not need to store water. The result: an
endless supply of hot water.
As mentioned above most tankless heaters are designed for home use, so they are wall hung,
requiring a flue through the roof and a combustion air supply from the outside. This type of
installation is not acceptable for the RV application and most are not certified for mobile use.
Installation/Modifications
In the mid 90s, a tankless water heater designed for RV use was introduced. It installs and flues
like a conventional six or 10 gallon tank heater. It is direct vent, meaning that it can retrofit a tank
heater with little or no modifications to the RV. It is only half the size of a 10-gallon tank and fits in
the same cutout as the tank heater. Replacing a six-gallon unit will require modifying the cutout
slightly. The whole unit weighs only 32 pounds wet, and it does not need to sit on the floor. This
increases the flexibility in mounting and may free up additional storage space in the RV.
The water heater is designed to be installable and removable from the exterior of the vehicle. The
mounting instructions are for a flush mount and surface access doors. No other door should be
used. Doing so could cause the heater to malfunction and could cause damage or injury.
Selecting Installation Location
The water heater must not be installed in an area where the vent can be covered when any door
or access panel on the RV is opened. The water heater should be located in an area where
leakage will not result in damage to other items, or the structure. If such an area cannot be
avoided, it is recommended that you install a suitable pan and drain under the heater.
Install the heater as close to the gas supply as practical to minimize the length of the gas line.
There must be a minimum of 8-inches of clearance between the vent cover and any other surface.
Do not install where the vent is closer than one foot from any window or opening into the RV.
8
RV TECHNICIAN · February/March 2010
Although the heater can be mounted with zero clearance around the sides, top, and bottom, be
sure that the installation does not interfere with any wiring, plumbing, or cabinets inside the coach.
Do not install the water heater or any other appliance where it can vent into an area covered by
an awning, canopy, or any other enclosure. For better support and ease of installation, install
where the bottom of the heater case rests on a floor.
Installing Heater in the Side Wall of a Coach
The flush mount can retrofit a 10-gallon flush mount water heater without sidewall modification
regardless of sidewall framing. If the sidewall framing is steel or aluminum, rather than wood, and
the original water heater is anything other than a 10-gallon flush mount water heater, it is
recommended that only the surface mount configuration be used.
Surface Mount Installation
Surround the opening on the skin of the coach with four to six inches of masking tape to protect
the skin of the sidewall.
The rough opening for the heater should be 13.75-inches wide x 14.625-inches high. This is about
2.75 inches taller than a six-gallon tank heater. If the opening needs to be enlarged by cutting the
internal sidewall structural member, a 2 x 2-inch wood support should be installed.
Do this on the inside of the side wall so that a screw would go through the screw hole on the case
flange, through the side wall, and into the 2 x 2-inch support sandwiching the side wall between
the flange and the 2 x 2-inch support.
Attach a 3/4-inch thick 2 x 2-inch wide wood spacer to the bottom of the cut out. This will center
the flange of the heater vertically in the opening.
9
RV TECHNICIAN · February/March 2010
Place the bottom of the back of the heater on the bottom frame of the opening. Tilt the water
heater back and feed the gas line through the gas line grommet. (Note: If there is no access from
the inside of the coach to the back of the water heater compartment, the water lines and electrical
must be connected at this stage.)
Push the heater into the opening. Center the heater in the opening and start a screw in the top
center hole. Run the screw down but not tight. Apply silicone or other appropriate sealant under
the flange.
Push the unit into the opening to bed into the sealant. Now screw in the other three center
screws. Apply silicone or other appropriate sealant heavily in the corners and on the flange
around the corner holes.
Place in the corner pieces, so the holes line up and put four screws in each corner. Seal where
the corner bracket meets the corner of the case. Remove excess sealant.
Note: This is only one installation option. For more options visit www.precisiontemp.com.
Connecting Gas Supply
The gas line should be an approved type and size, with a 3/8-inch female flare nut. If the gas line
is very long or has numerous bends in it, it should not be less than 5/16-inch ID, or performance
of the water heater will suffer. The maximum inlet gas pressure must not exceed 13 water column
inches.
Some standards may require a manual gas shut off valve in the gas line external to the water
heater. The water heater must be isolated from the gas supply during any pressure testing of that
system at test pressures equal to or in excess of 1/2 PSIG.
To Connect A Gas Line:
1. Remove foil insulation and set aside until gas line connection is complete.
Note: The gas line can be routed into the case through the grommet in the back or through
the side of the case. If the gas line is to be brought into the side of the case, the positions
of the knockout plug in the side of the case and the sealing grommet in the back of the
case should be reversed. Both of these devices will snap in and out.
Never operate the heater with either of these holes left open. The gas inlet fitting on the top of the
gas solenoid valve must be repositioned to point to the side of the case. To do so, support the gas
valve and back-up with a wrench, turn the gas fitting 1/4 turn clock-wise taking care not to
damage the threads.
Caution: Turning the gas-fitting counter clock-wise may cause the seal to leak.
2. Route gas line through sealing grommet (back or side) of heater case. Take care not to
damage wiring.
3. Screw gas line fitting onto the flare fitting of the gas valve by hand, then tighten with a basin
wrench or crow's foot.
10
RV TECHNICIAN · February/March 2010
4. Turn on gas
supply and check
for leaks using a
soapy solution on
the joint. Never use
a flame to check for
leaks. Be sure that
sealing grommet is
intact. If it is torn or
distorted during
installation, fill cup
on back of grommet
with silicone caulk
to seal against any
possible leaks.
Warning: This
flare fitting is a dry
seal. Pipe dope
should never be
used on this
fitting.
5. Replace the foil
insulation taking
care that it is
secured to the
Velcro attachment
points.
Connecting the
Electrical Supply
The water heater is
designed for 12
VDC negative
ground. Never
connect to 115
VAC. The power
leads are on the
back of the heater
and should be
connected directly to the breaker panel of the coach, extending the wires if necessary. Red is
positive (+) and black is negative (-).
If the leads need to be extended or any wiring is extended or replaced inside the heater, use a
minimum of 18-gauge wire with a temperature rating of 105 degrees C. It is suggested that the
heater be connected to a switch or breaker rated at 2 amps.
Never connect heater to a power converter without a battery in line. Doing so could damage the
heater and void the warranty. Be sure that the heater is connected to a "filtered" (pure DC) circuit
of the converter. To test whether the circuit is pure DC, take a voltage reading using a multimeter
set on the AC voltage scale. If the reading is more than 1/4 volt, the circuit is not DC voltage and
should not be used.
11
RV TECHNICIAN · February/March 2010
Connecting the Water Supply and Hot Water Outlet
The water connections are on the back of the heater. They are marked "Cold" inlet and "Hot"
outlet. The hot water is on the bottom and cold water is on the top. This is reverse of most tank
heaters.
The standard fitting is 1/2-inch NPT. Piping and components connected to the heater shall be
suitable for use with potable water. The heater shall not be connected to any system or
component(s) previously used with a non-potable appliance. When tightening water connections
to the water line, be sure to back up the fittings with a wrench as to not damage the copper water
tubing. Re-tighten the compression nuts on the water fittings.
With the power and gas supply to the heater turned off, pressurize the water system, purge it of
all air and check for leaks. Also, verify that the rotor in the flow meter is rotating counter-clockwise
while a hot water tap is turned on. If it is not rotating counterclockwise, then the hot and cold
water lines were installed backwards.
Recommendations for Water System Installation
In order to realize all of the temperature control features of the water heater and to extend the life
of the water system, observe the following recommendations:
● Be sure all water strainers and aerators are removed and cleaned.
● Any water flow restrictor located on the inlet of the showerhead should be removed. Failure to
remove this could effect the performance of the temperature control.
● Keep hot water lines as short as possible and no larger than 1/2-inch ID to conserve water and
accelerate the delivery of hot water.
● Install a water strainer into the water line preceding the water heater to keep particulate matter
out of the system.
● Always have a water pressure reducer in place when using city pressure water.
● It is strongly recommended that an accumulator tank be installed in the cold water line. This
maintains a constant flow of hot water when using the pump, enhances the operation of the water
heater, and extends the pump life.
Tankless systems can provide RVers with more comfort on the road. Bottom line: tankless
systems are the only RV water heaters that deliver showers customers want, for as long as they
want them. The only downside of tankless water heating is that the owner will lose that extra
closet…the shower stall.
Gerry Wolter is president of PrecisionTemp, Inc. For more information, questions, or
comments call (800) 934-9690 or visit www.precisiontemp.com.
12
RV TECHNICIAN · February/March 2010
TOOLS
Tools: To Buy or Not to Buy
by: Tony Yerman
It has been said that, “Necessity is the mother of invention.” I know this is true, because I’ve been
working on RVs for over 30 years. You have to be creative and literally invent some of your own
tools to make some of the repairs needed.
How many times have you ordered a part or read a service manual, which tells you that a specific
tool is required, and the tool is not supplied with the part? How many times have you seen a tool
in a magazine or catalog, ordered it, and paid a lot of money for the tool and shipping only to look
at it and think, “Man, I could have made this!?”
I know many technicians who feel that they must have every tool for every job. They have huge
toolboxes packed with meters, wrenches, and other attachments, which they can only use for one
specific repair. Do they really need all of these? I’ve got a couple of ideas for you to think about.
Tools to Buy
I believe that any tool, which makes a job easier and more efficient, is a tool I should have,
especially if I perform the task for which it is used often. For example, a propane gas manometer.
There isn’t an RV technician in the business that doesn’t need one of these. There are the basic
u-tube type manometers, analog pressure dials, and even a
digital gauge. Did you know you can make a manometer?
You simply need tubing, fittings, and a ruler. It’s a good
idea to attach the tubing to a flat surface like a piece of
wood, then mark off the inch measurements. This can be
done, and in some instances, it probably should be done. If
you have a dial gauge and don’t have a u-tube, how can
you calibrate the dial occasionally? You could make your
own u-tube.
You wouldn’t however make a multimeter for electrical
testing. I use both the manometer and multimeter regularly,
so these are tools that I purchased. This ensured that I got a high quality tool.
Tools not to Buy
There are some tools that you may use once and never use again. These are tools that you
should try to make, borrow, or rent. A good example is alternator testing equipment, other than a
multimeter. Take the alternator off and take it to an auto parts store. Most of them have a device
that they can set up the unit in, connect it to a load, and tell you in seconds if the unit is bad, or if
you have to go back and keep looking.
There is an appliance manufacturer who requires a
shop to buy a piece of diagnostic equipment in order to
be considered factory authorized. Being an authorized
RV dealer for an RV company using this appliance,
omits the need for this expensive tool. I found that, in
my opinion, I could do anything with a multimeter that
this device could do.
13
RV TECHNICIAN · February/March 2010
I’m sure you’ve seen the box with pigtails that allows one to check the exterior lighting and
umbilical cord circuits on travel trailers. Would you buy one or make one? I have made up a few
short harnesses with the tow vehicle end of the connector. I have a little fishing tackle box that I
keep them in. I use a multimeter and test light along with a 12V battery pack, which I also use to
jump-start RVs, extend slide out rooms or jacks, and operate other various pieces of equipment.
To make everything look a little more professional, I store everything in a nice Rubbermaid box
and keep it attached to a two-wheel hand truck. My battery jumper box even has a voltmeter, so I
can plug in the RV to AC voltage and see if the converter was charging through to the trailer
connector.
A lot of what you don’t buy is based on personal ability, manufacturer/dealer requirements, and a
general shop appearance.
RVDA Service Consultant Tony Yerman is a Master Certified Technician, an Ohio repair
specialist, and the author of the RV Damage Repair Estimator. If you have questions or
comments, contact Tony at [email protected].
14
RV TECHNICIAN · February/March 2010
RV-C
RV-C Protocol: A Full Overview
courtesy of RVIA
Several years ago, the Recreation Vehicle Industry Association (RVIA) brought together RV
manufacturers, suppliers, and vendors to create a universal protocol – a way to tie together
virtually every part of the modern RV. The group studied other industries and co-opted the best
ideas, then expanded them to encompass the ideal RV. They were innovative, yet conservative,
and they built a breakthrough protocol called RV-C.
The foundation of RV-C is the same core technology that the U.S. Government mandates for
every new car and truck. Just two wires in the unit connect all electronic components in the
network, allowing full communications between every element of the RV. RV-C brings the RV
industry into a new era of technological progress, and impacts how RVs are designed,
manufactured, serviced, and enjoyed.
MONITORING, CONTROL, AUTOMATION, TROUBLINGSHOOTING, & DIAGNOSTICS
Connecting key devices through RV-C, allows RV components to behave more intelligently. They
share information and coordinate their operation. They provide troubleshooting information to the
technician. The system also allows components to be monitored and controlled remotely. Many
features that would be impossible to implement without networking become economical and easy
through RV-C.
THERE ARE TWO MAIN PARTS TO RV-C
The first part of RV-C is a hardware specification, which allows RV appliance designers to add
inexpensive circuitry to their products to access the network, and tell the RV builder how to
connect these components. This specification is based on CAN – Control Area Network, which is
the same hardware used by almost all modern cars and is proven reliable in the harshest
environments.
These wires form a digital data bus similar to the Ethernet used to connect PCs, but designed for
a harsher environment. This data pair runs through the RV, and short drop connections run from
this backbone to each network device. A 120-ohm resistor is on each end of the data backbone
harness to absorb signal reflections. RV-C differs from most protocols in that every device is
equal. There is no “master” node or server. Because every device can talk directly to every other
device on the network, the RV designer can create multiple control and monitoring points for any
and every device. Because RV-C provides a standardized language, components don’t even have
to know the make or model of any other product to interact.
With so many interconnections reduced to just a single data pair, RV-C has the ability to save the
RV builder both wire and troublesome connections. By replacing individual signal wires with a
single data pair, RV-C helps make RV electrical systems more reliable, as well as saving money,
and time in installation.
The second part is a language, or more precisely, a dictionary for all products to use while talking
on this network. This language is what separates RV-C from other CAN networks. It addresses
the unique needs of the modern RV.
15
RV TECHNICIAN · February/March 2010
ONCE COMPONENTS CAN TALK, THEY CAN INTERACT INTELLIGENTLY
Potentially, every device can read the status of the AC and DC power, climate control, chassis
(including the engine and transmission), and more. They can use this information to adjust their
behavior or act automatically according to the context. They may moderate their power
consumption according to the battery level or AC power source. They may change their operation
according to whether the RV is moving, a slide room is extended, or the waste tanks are full. All of
this intelligence resides entirely in the software – making it inexpensive to add and simple to
configure and customize.
TROUBLESHOOT EVERYTHING AT ONCE
With RV-C, technicians can troubleshoot systems as a whole, rather than just one piece, and test
systems over time.
“For example, one manufacturer was able to troubleshoot a difficult intermittent electrical problem
using RV-C by recording data from the generator and transfer switch simultaneously,” said Martin
Perlot of SilverLeaf Electronics. “At first they thought the problem was in the generator, but after
logging data over a period of time they discovered the problem was just a bad AC neutral
connection.”
The ability to do long term tests and record data is particularly powerful. Intermittent faults are the
most frustrating kind to troubleshoot and, risk stranding our customers. RV-C gives us a way to
watch the RV and test it over time without a human monitoring it all.
RV-C ALSO SEPARATES THE CONTROL FROM THE APPLIANCE
A single panel can control multiple components, and there can be more than one control panel in
the RV. RV-C allows RV builders to tailor their products to their specific customer needs – making
16
RV TECHNICIAN · February/March 2010
the RV simpler and easier to enjoy.
HOW WILL TECHNICIANS BENEFIT FROM RV-C?
There are many ways this will benefit RV technicians and dealership service departments.
One of the greatest benefits is the technician has access to the same configuration and test
procedures that factories use. Since manufacturers and technicians are using the same
techniques and tools, the term "factory
specifications" finally has some practical
meaning.
“For example, if an inverter/charger must
be replaced by a technician, the new unit
can be quickly configured for the specific
coach, exactly as the manufacturer
specifies,” says Perlot.
Technicians will also benefit from RV-C,
because it is very service-friendly. It
speeds up the amount of time it will take
to troubleshoot an RV, and help keep
customers happier and more loyal to the
dealership.
One of the key advantages of RV-C is
that every device shares the same
service tool and techniques. This cuts
the training and expense down
considerably. When the technician
encounters something new, he doesn't
have to scramble to get a new cable or
learn new software. He only has to worry
about the specific features of that
particular product, not about how to hook
up to it, or run the software.
“Another small, but powerful feature of
RV-C is the product identification
scheme,” adds Perlot. “When the
technician plugs his computer into the
network he immediately gets a list of all
the RV-C devices in the system,
including the part numbers and in some cases, even the serial numbers. This certainly makes it
easier to order the right part when something needs to be replaced.”
WHAT DOES A SERVICE DEPARTMENT NEED TO IMPLEMENT RV-C
There is a reasonably priced PC adapter and software package available. Dealerships can install
the software on multiple computers, so that the USB-to-RV-C adapter is usable from more than
one PC.
For more information on RV-C protocol, visit www.RV-C.com or contact RVIA at
[email protected].
17
RV TECHNICIAN · February/March 2010
CERTIFICATION
Technicians Share “Why I’m a Certified RV Technician”
by: Jim Carr
As training director for the Florida RV Trade Association (FRVTA),
I am constantly in contact with RV technicians, service managers,
general managers, and even the RV owners throughout Florida
and across the nation. Here are some real life insights into the
value of technician certification as told to me by RVDA-RVIA
Certified Technicians.
Mark: A 29-year-old high school graduate began working part-time
at a small RV dealership as a lot boy while in high school. Mark
liked the work, saw opportunity, and was encouraged by the owner
to consider working full time after graduation as a technician trainee. Mark said this one simple
conversation, with encouragement and support, launched him on his RV career, and led to his
certified technician status.
The original dealership where Mark worked was sold six years ago, and another dealership
recruited him because of his experience, combined with a resume´ that included attending
Trouble Shooter Clinics, online training, supplier and manufacturer schools, and certification. The
new dealership hired him as a lead technician and recently promoted him to service manager. “I
feel I have a career, not just a job. I am a professional doing a valuable job for people who really
appreciate it – my employees, my employer, and most importantly my customers. It’s a nice
feeling, like I’m contributing to making lives a bit better.”
I asked Mark if he’s run into some of the same “economy” issues that the entire RV industry is
facing. “Oh yeah, we’ve had budget concerns and had to let two technicians go, but luckily it
stopped there,” he said. “We put a real emphasis on our service department and continually
contact customers offering a nice menu of service ‘specials,’ and our shop work has stayed
steady. Of course, we enjoy a very good reputation locally for being a quality dealership, and that
helps a lot. We’ve even utilized our in-house talent (service technicians) to completely remodel
two of our eight service bays and provide general site clean up on a regular basis. Yes, we’ve had
down time, but not often. I use any slowdowns as opportunities to train and grow. Everyone
seems to be buying into it and appreciating the effort. With 18 technicians on board, with more
than half certified and the other half committed to becoming certified; our owner just makes that
an understanding of how things will be.
“Being a certified technician is important to me, it separates me from a lot of the others, but more
than that it gives me status, to myself, my family, my employer, and my customers. That’s
important to me.”
Joey: A 51-year-old high school graduate with 28 years experience as an RV technician, two
years as a certified technician. “I have worked for 11 different RV dealerships in three states and
never really thought about being certified. In fact, I actually avoided it. I didn’t like school and I
didn’t see myself doing bookwork or taking tests. I just wanted to work with my tools and be left
alone. Sometimes it got me in trouble and cost me a job or two, but there were always other jobs,
so I just moved on,” Joey said.
18
RV TECHNICIAN · February/March 2010
This may seem like an unusual case, but believe me it is more common than we realize. Joey is
typical of some older workers who know their jobs. They are good technicians but just can’t get
over the “school work and test taking” issue to get to that certification level. Most rationalize that
they don’t need certification and point to new technicians who have it, but still don’t know as much
as them, or at least the experienced non-certified, technician thinks so. What they miss is the
value of continuous improvement, of joining a career movement, and leaving the “job jumping”
behind. In short, these types of technicians miss becoming a true professional.
So, why after 26 years did Joey become a certified technician? “Two reasons,” Joey said. “I could
see the handwriting on the wall, I either got with it or I could be out of work; jobs were not as
plentiful anymore and I was running out of dealerships . . . and my new lead technician and now
service manager was a pretty sharp young guy who really gave me a sense of belonging and
confidence. He told us one day at a meeting that it was his and the owner’s goal to get as many
technicians certified as possible. He explained how we were going to go about it, and how he
would be with us all the way and work with us one-on-one, if necessary. He also explained the
rewards for certifying-- money, professionalism, better performance, and just a good feeling about
oneself. That night I had one of those ‘come to Jesus’ moments with myself and made the
decision that if I were going to stay in this business, and stay at this dealership, especially in this
economy, I’d better get certified.”
“It was the best decision I ever made. It wasn’t easy, but as Mark promised, he stuck with us,
especially me, and got me over the fear of books and tests. He gave me the confidence needed
and on the first try. I scored high enough to become a Master Certified RV Technician. I couldn’t
believe I avoided taking that test all those years. It would have saved me a lot of miles and
moving expenses, and one wife, not to mention how much better I feel about myself. Now when I
hear an older technician say he doesn’t need certification, I know he’s just afraid of the process
and deep down wishes he had it.”
Yes, Mark and Joey work in the same dealership. These two technicians represent both ends of
the current RV technician workforce spectrum; older and younger, fearful and gung-ho, denial and
vision. Yet, both were motivated by the same simple word: ENCOURAGEMENT. Please don’t
underestimate the impact that a positive attitude and encouragement can have on a fellow
worker. If you’re in a position of authority, you have the pulpit, not to mention the responsibility to
develop everyone you can to a higher level. It could be as simple as, “I believe you can do it.”
Interested? Here is some general information on Certification and Re-Certification.
CERTIFIED TECHNICIANNICIAN:
● Answer 146 out of 200 questions correctly (73%)
● Complete 14 task sign-off sheets
MASTER CERTIFIED TECHNICIAN:
● Answer 175 out of 200 Questions correctly (87.5%)
● Document five years experience in RV technician field *
● Complete 14 task sign-off sheets
* If five-year requirement is not met, the tested individual will receive certified status until their fifth
anniversary, at which time they will become Master Certified.
NOTE: Testing dates are set through RVDA. Online testing is now available at registered
testing centers through the U.S. Visit www.rvtechnician.com for complete information.
19
RV TECHNICIAN · February/March 2010
RV SERVICE TEXTBOOKS
SUMMARIES & ORDER FORM
Published by RVIA, Available through The RV Learning Center
These RV textbooks are useful for current RV service technicians and those interested
in starting a career in RV service. The 16-volume series, developed by leading
RV service experts, covers RV components and operating systems. SAVE WHEN
YOU ORDER THE COMPLETE SET! (see next page for details)
Textbook Title
Introduction to RV Service Provides an introduction to the RV industry, the various types of RVS
and their structural characteristics and systems, the basic tools utilized by RV technicians, and safety
in the RV workplace. Summaries of industry codes and standards and RV technician job classifications are also included as well as basic information on using RV service manuals. Developing and
demonstrating solid customer relations and record keeping skills are also addressed.
Price
$19.95
Basic Electricity Provides a thorough introduction to the basic principles of electricity by covering
topics such as what electricity is, how it is produced, how it is used, and how it is measured; AC and
DC electricity and circuits; and generators and motors.
$26.95
RV Electrical Systems Provides instruction on performing AC and DC voltage systems inspections
and tests; servicing AC and DC power sources; servicing wiring/distribution systems; and maintaining, repairing and inspecting AC and DC devices.
$49.95
RV LP Gas Systems Provides instruction on inspecting and maintaining LP gas containers and fittings; inspecting and maintaining regulators; inspecting and maintaining the piping system; performing LP gas system tests; purging and filling containers; transferring LP gas from container to
container; and burning off LP gas in a container.
$49.95
Generators Covers the installation, maintenance and repair of RV generators, the generator section
and control system. This includes inspecting, maintaining and repairing generator components and
verifying battery voltage, fuel source and pressures, engine operation, output voltage and frequency,
and governor operation.
$39.95
RV Ranges & Cooktops Provides instruction on the installation, repair and replacement of ranges
and ovens. This includes verifying gas pressure; verifying grate clips installation; checking lines and
fittings; repairing and replacing components; verifying range burners are not affected by operation of
force air furnace or other appliances; and performing function test.
$39.95
RV Water Heaters Covers the installation, repair and replacement of RV water heaters — Pilot, DSI
(direct spark ignition) and Electric. Topics addressed include inspecting ignition systems, verifying
gas pressure; troubleshooting the sequence of operation, repair and replacement of various components; draining and flushing the water heater and inspecting fittings for calcium deposits; checking
fittings on the tank; inspecting and replacing the water tank; and checking lines and valves for
motor aide.
$39.95
RV Plumbing Systems Provides instruction on performing fresh water systems tests; inspecting and
repairing fresh water storage tanks, distribution systems, and fixtures and devices; performing waste
water systems tests; and inspecting, repairing and replacing waste holding tanks and drainage piping
systems.
$39.95
RV Heating Systems Covers installation, repair and replacement of RV heating systems, including
gravity, pilot and DSI (direct spark ignition furnaces). Topics examined include verifying LP-gas
pressure and electrical voltage; inspecting and cleaning burner, pilot, exhaust tube and air intake;
troubleshooting the sequence of operation; repairing and replacing various furnace components;
inspecting and correcting ducting and return air.
20
$39.95
# books Total $
Textbook Title
Price
RV Refrigerators Provides instruction on the installation, repair and replacement of absorption
refrigerators (manual and automatic selection). This includes verifying proper venting, AC and DC
power sources, LP gas pressure, and leveling; diagnosing and replacing electric and gas components;
diagnosing and replacing the cooling unit; diagnosing, repairing and replacing the internal ice maker
components; and performing function tests.
$39.95
RV Air Conditioning Covers the installation, repair and replacement of air conditioning and heat
pump units, including verifying air flow, assessing the integrity of the electrical system, and evaluating the integrity of refrigerant systems.
$39.95
RV Pre-Delivery Inspection Introduces and explains the many important steps in inspecting the
RV before delivering to the customer, including checking LP gas systems, pre- testing all appliances
and accessories, testing and inspecting the AC and DC electrical system; checking safety items, lighting, window roof molding seals, and wiper blades; checking and lubricating doors; visually inspecting fluid levels; and more.
$39.95
RV Preventive Maintenance Examines what services to perform for preventative maintenance, including checking LP gas systems; servicing and adjusting appliances; testing G.F.C.Is; winterizing and dewinterizing coach; checking safety items; checking and lubricating doors; checking exterior lights;
checking window roof molding seals; changing oil and filter on power plants; checking wiper blades;
visually inspecting fluid levels; servicing batteries; inspecting belts and hoses; changing chassis oil and
filter and lubricating chassis; changing transmission oil, filter and gasket; visually inspecting chassis;
checking lug nuts and tire pressure; flushing and refilling cooling system; and performing a test drive.
$39.95
Welding Describes the types of welding, including oxy-acetylene gas welding/cutting; arc welding; MIG
welding; TIG welding and plasma cutting/welding; outlines safety procedures; and shop equipment.
$16.95
Brake Suspension & Towing Systems Defines, identifies, and explains all major facets of brake suspension and towing systems.
$39.95
NEW! RV Hydraulics Defines and explains RV hydraulic systems.
$39.95
Save $200 – Complete Book Set
$399.00
TOTAL COST OF TEXTBOOKS IF PURCHASED INDIVIDUALLY
$603.20
NOW AVAILABLE ON CD-ROM Save $200 - CD-ROM version
(NOTE: The Basic Electricity and Welding manuals are NOT on the CD-ROM, but will be included in
your order.)
$399.00
Price includes shipping and handling. Bulk rate available upon request for six or more individual text books and sets.
# books Total $
Total Amount Enclosed: $
Name: __________________________________________________________________________________________________
Company Name: ________________________________________________________________________________________
Shipping Address: ________________________________________________________________________________________
______________________________________________________________________________________________________
City:______________________________________________________ State: ______________ Zip: ____________________
Phone: ____________________________________________________ Fax: ________________________________________
Method of Payment (Please Check One):
❏ Check (Made Payable to the RVDA Education Foundation)
❏ Send an Invoice (RVDA Members Only)
❏ Credit Card:
❏ Visa
❏ MasterCard
❏ Amex
Mail this form to The RV Learning Center
or fax to (703) 359-0152.
For more information call (703) 591-7130 or visit
our website at www.rvlearningcenter.com
Card No.:__________________________________________________ Expiration Date: ______________________________
Name on Card: __________________________________________________________________________________________
Signature: ______________________________________________________________________________________________
Billing Address (if different from above): ______________________________________________________________________
______________________________________________________________________________________________________
21
SAFETY
Proper Use and Care of Jacks in the Workplace
compiled from the Occupational Safety and Health
Administration
A jack is one of the easiest pieces of equipment to operate.
Every year, however, many technicians are seriously injured
because they didn’t use the jack correctly. Also, lack of
proper care and maintenance of jacks can lead to these
accidents. To avoid accidents involving jacks in your
dealership, implement and follow a few simple rules.
Proper Use of Jacks
●Always use a jack with a rated capacity that equals or
exceeds the load you are lifting. The rated load should be legibly and permanently marked in a
prominent location on the jack by means of casting, stamping, or other suitable methods.
● Always set the jack on a firm and level foundation.
● Make sure the load limit of the floor is not exceeded when working on a floor of any kind.
● Set the jack perpendicular, at a right angle, to the load.
● Have enough help when you install or move a jack.
● Provide employees with proper training on how to use jacks.
Proper Care and Maintenance of Jacks
● Keep jacks clean and accessible.
● Lubricate jacks at regular intervals. Lubricate only specified locations.
● Monthly, examine and test jacks for defects. Remove defective jacks from use immediately. Tag
the jack as out of service, and do not use until repaired.
● Check repaired or replacement parts for defects.
● Provide employees with proper training on how to care for, examine, and test jacks.
Accidents caused by improper use, care, and maintenance of jacks are easily avoidable by
following the above rules. For more information about proper use and care of jacks, visit the
Occupation Safety and Health Administration website at www.osha.gov.
22
RV TECHNICIAN · February/March 2010
RV Technician Certification Preparation Course
Interactive-Multimedia, Online Format
• Combines text, audio, graphics, and video, with mentor-led technician
community forum – all content delivered online (no books or handouts)
• Available 24 hours a day, seven days a week for 12 months (with computer
and high speed internet connection)
Corresponds to RV Certification Test Sections
Available Anywhere &
Anytime (with high speed internet
connection)
• Propane; Electrical; Plumbing; Brakes, Suspension & Towing; Appliances;
Generators; Hydraulics; Exterior; Interior; Expandable Rooms; Miscellaneous
(Welding Safety, Customer Care)
• Fulfills 40 hour RVDA-RVIA RV Service Technician recertification requirement
Personal Progress Tracking
• Automatically tracks individual’s progress
• Quizzes after each chapter and section with immediate feedback
• A final assessment that is similar to the RV technician certification test
Every RV Technician Can Have Access to Individual
Self-Study Online Certification Preparation
Registration Information
SAVE!
Company:
.
Address:
.
City/State/Zip:
.
Phone:
Fax:
up to 40% discount
when registering multiple technicians at
one time
Tuition
.
Yes! Sign up the following from our dealership:
Name:
.
E-mail:
.
Name:
.
E-mail:
.
Name:
.
E-mail:
.
Name:
.
E-mail:
.
Title:
.
E-mail:
.
Method of Payment
All registrations must be pre-paid in U.S. funds.
□ Check Enclosed: Make Check Payable to: The RVDA Education Foundation
□ Send Invoice (RVDA Members Only) □ VISA □ MC □ AMEX
Cardholder’s Name:
Acct. Number:
Cardholder’s Signature:
Billing Address:
23
Price Per Person
1-3
$249.00
4-9
$199.75
10+
$159.99
Developed by RVIA
Available through the RV Learning
Center
Send progress reports to the following supervisor:
Name:
# Technicians
.
Exp.:
.
Security Code:
.
Important:
• The RV Technician Certification
Preparation course offers RV service
technicians the means to prepare for the
technician certification test through an
online, self-study format. Information about
the RVDA-RVIA RV Service Technician
Certification Program is available at:
www.rvtechnician.com. The certification
testing fee is not included in the course
fee.
• Registration gives the technician 365 days
to complete the course by achieving 80%
or higher score on the final assessment.
The technician should plan for certification
testing within the enrollment period as
course extensions are not available.
.
Return completed form to: RVDA I 3930 University Drive I Fairfax, VA 22030 I Ph. (703) 591-7130 I Fax (703) 359-0152
www.rvlearningcenter.com I [email protected]
[code: cpwld]
New Products
New RV Fan Circulates Air Effortlessly
RVs need continuous fresh air to ensure the most comfortable and
enjoyable inside environment. MaxxAir's new MaxxFan Standard models
not only provide exceptional ventilation, but feature twin lifting arms to
prevent the lid from fluttering in high winds or when driving.
The MaxxFan Standard models offer a flush-mounted, easy-to-clean keypad, which controls the
10-speed fan motor, thermostat, air intake, and exhaust functions. Providing 900 cu. ft. of air per
minute to keep the RV's cabin cool and comfortable, the fans can also operate with the lid closed
to circulate air in ceiling fan mode.
With a simple-to-remove interior insect screen, owners simply rotate the four retaining knobs to
remove the screen for cleaning. The MaxxFan Standard models feature a powerful, fuseprotected 12V fan motor and a 12-inch, 10-blade fan. Their lids close securely for a low-profile
appearance.
Fitting all standard 14-inch x 14-inch roof openings, they come with all mounting screws and
hardware for straightforward installation. They also include waterproof, molded mounting holes for
use when installing MaxxAir vent covers.
The MaxxAir MaxxFan Standard is available in two models, the 4000K and the 4500K. The 4000K
has a white, manual-open lid, while the 4500K has a smoke-tinted, electric-open lid. The 4500K
also includes a rain sensor, which automatically closes the lid when it rains and protects the RV's
interior.
Contact MaxxAir Vent Corporation, 5513 W. Sligh Ave., Tampa, FL 33634, USA. 800-780-9893;
Fax: 813-876-2550. [email protected]; www.maxxair.com.
New SHURflo Revolution Series Pump
SHURflo announced the release of its latest series of fresh
water pumps: The Revolution 4008. Designed for all travel
trailers, fifth wheels, and motorhomes, this pump delivers
three-gallons per minute, and pressures up to 55 psi.
SHURflo’s Revolution utilizes flow reaction technology to
reduce noise, vibration, and excessive pump cycling.
Using the same quality and innovative processes that
make them a leading RV pump supplier, SHURflo
engineered the Revolution 4008 with a superior four-chamber design that incorporates a patentpending flow reaction technology, providing quiet pump operation. Features include: Over-molded
single-piece diaphragm, adjustable switch and by-pass, thermal overload protection, and
SHURflo’s benchmark umbrella valve design.
Since 1968, SHURflo has designed and manufactured high quality, long lasting pumps and
motors in the RV industry. SHURflo’s commitment to innovation, quality, and service is what sets
SHURflo apart from all others.
For more information about the Revolution 4008, call SHURflo at (800) 854-3218, Fax a request
to (562) 795-7564, or visit www.shurflo.com.
24
RV TECHNICIAN · February/March 2010
Winegard Introduces New SENSAR IV Antenna
Winegard Company took RV TV reception to the next level with the introduction of the SENSAR
IV amplified antenna. The company, an innovator in TV reception for more than 55 years,
integrated its SENSAR III antenna with the UHF-enhanced Wingman antenna for increased overthe-air TV viewing.
Optimized for the new DTV spectrum, the new SENSAR IV
receives all available VHF/UHF/Digital channels, enabling
viewers to enjoy watching all local programming in the
U.S.while the RV is parked.
"With the changes brought on from the digital transition and
the frequencies the local broadcasters now use to transmit
their programming, it became apparent we needed to
integrate the Wingman with the SENSAR III to adapt to the
change," said Aaron Engberg, Winegard mobile products
director. "The enhanced SENSAR IV provides an unsurpassed range of up to 55 miles allowing it
to receive the most television stations."
The antenna can be raised, lowered, and rotated with a hand crank from inside the RV and lowers
to only 4 inches above the roof while traveling. The SENSAR IV head requires 46.25-inches x
15.25-inches of unobstructed roof space while it is stowed.
Winegard Company has manufactured quality TV and radio reception products for more than 55
years. Headquartered in Burlington, IA, Winegard enjoys a worldwide reputation that is based on
many industry "firsts," including the all-channel "Yagi" TV antenna, 82-channel antenna, antenna
mounted preamplifiers, antenna amplifiers, the anodizing process, perforated aluminum satellite
antenna, and the RV television antenna, among others.
For more information visit www.winegard.com or call (800) 288-8094.
Yamaha Introduces All-New EF2400iSHC Generator
Yamaha Motor Corporation, U.S.A., introduced a high current
version of the top selling EF2400iS – the new EF2400iSHC.
Compact, lightweight, and quiet while still powerful, reliable and
with low emissions, the Yamaha EF2400iSHC generator is perfect
for camping and tailgating.
The new Yamaha generator starts appliances quicker thanks to
high current technology and special field effect transistors in the
electronic controller. These features combine to increase the surge output, helping the new
generator respond more quickly for greater big-appliance starting capacity and longer run time. A
powerful 171cc engine and Yamaha’s smart throttle allows the generator to run at a slower engine
speed resulting in quieter running and maximum fuel efficiency – up to 8.6 hours at 1/4-capacity
load on one tank of fuel.
To ensure the generator retained its portability, without sacrificing strength or reliability, designers
used a die cast aluminum frame and aluminum flywheel. Additionally, the generator has an actual
noise level range of only 53-60 decibels, giving consumers a lightweight, quiet running, and
durable generator.
25
RV TECHNICIAN · February/March 2010
With a single side-mounted control panel that puts all controls on one surface and a detachable
rear panel for easy access to service and maintenance points, the new EF2400iSHC is simple to
use and easy to maintain, and like all recently introduced Yamaha generators, the EF24000iSHC
meets the strictest emission standards in the country making it legal in all 50 states.
For more information, visit www.yamaha-motor.com/generators or call (800) 88-YAMAHA.
Generac Introduces New Hybrid Electrical System for RVs
Generac Power Systems, Inc., a leading manufacturer of residential and commercial standby
generators, has introduced a new Hybrid Electrical System for RVs.
As today’s RVs have all the bells and whistles, and comforts of home, they are using far more
energy than ever before. Generac partnered with Magnum Energy and Precision Circuits, Inc. to
introduce the first Hybrid Electrical System to deliver all the power needed for large RVs without
having to install a larger, more costly generator.
The new Hybrid Electrical System can save up to $3,000 on the cost of a larger generator and
weighs 270 pounds less – thus, increasing fuel savings and lowering emissions. This smart power
management system begins to supply power to the coach one circuit at a time – keeping all start
up spikes in energy to a minimum. This allows the system and the generator to run up to three
separate air conditioners at one time. If peak demand exceeds the output of the generator, the
inverter turns on, and supplements the power. If the battery voltage drops too low, the Hybrid
Electrical System will begin to shed non-critical loads until maintaining a balance. Once the peak
demand is over, the system begins to return service to the preselected loads supplying seamless,
clean power.
For more information on Generac RV products, visit www.Generac.com or call (888) GENERAC.
Product Updates
Improved MaxxAir Cover Provides Fresh Air Rain or Shine
Proper ventilation is always important in an RV, but it's needed even more when the weather is
less than ideal. Allowing ceiling fans to run despite rainy weather, MaxxAir Vent Corporation's
improved Fan/Mate models 850 and 950 rain covers completely enclose a roof fan or roof vent.
They provide fresh air while also offering excellent rain protection for the RV's interior.
With a vent area 20 percent larger than the previous version, the new Fan/Mate models 850 and
950 ensure even better fan performance by allowing high-volume airflow. Their redesigned
louvers and protective, galvanized screens serve as a superior safeguard against rain and keep
wind-blown leaves and debris out of the fan's blades. Due to the covers' convenient, hinged
mounting brackets, opening the Fan/Mate cover doesn't require any tools and allows easy access
for servicing the fan.
Designed for use with high-powered ceiling fans, the Fan/Mate is offered in white or black to
accent custom-painted RVs. Constructed from high-strength polyethylene with UV inhibitors, it's
built for years of service. Each unit comes with a three-year limited warranty and measures 32.5inches x 20.5-inches x 9.93-inches.
For more information call MaxxAir Vent Corporation at (800) 780-9893, e-mail
[email protected], or visit www.maxxair.com.
26
RV TECHNICIAN · February/March 2010
Online Training with FRVTA’s
DISTANCE LEARNING NETWORK
FRVTA–RV Learning Center Partnership
The DLN offers online training for:
$995 per year for each dealership location
Over 40 sessions available, 24 hours a
day, seven days a week with full access
to training through July 31, 2010!
• RV Technicians – An excellent resource for
techs preparing for certification and techs
seeking recertification continuing education credits.
• Service Writers/Advisors –
Useful for new staff and experienced personnel preparing for the
RV Learning Center’s Service
Writer/Advisor certification.
The DLN offers your
dealership:
• Training at your dealership
• Together as a group
• Without any travel time or expenses
• Greeters/Receptionists –
Emphasizes customer interaction and service.
• On a pace determined by your needs
• At times to suit your operation
• For one fixed price of $995 for the subscription term
• Dealers/GMs – Features hot topics, including Lemon Laws, LP gas licensing issues, and
Red Flags.
DEALERSHIP REGISTRATION
Company Name: ____________________________________________________________________________________________
Address: ____________________________________________ City:________________________ State: ____ Zip: __________
Phone: ______________________________________________ Fax: __________________________________________________
Mentor Name: ________________________________________________________ Phone: ______________________________
E-mail (at dealership) : __________________________________________________ Fax: ________________________________
**High speed internet access required. RVIA Service Textbooks not included**
_____ location(s) at $995 each = payment due: $__________________ (select payment method below)
PAYMENT METHOD
❑
(complete lower section & mail or fax to):
PAY BY CHECK OR MONEY ORDER
❑
PAY BY VISA, MASTERCARD
Florida RV Trade Association, 10510 Gibsonton Drive, Riverview, FL 33578, (813) 741-0488, Fax: (813) 741-0688
Name on Credit Card: ______________________________________________________________________________________
Card Number: ________________________ Security Code: _________ Expires: ______________________________________
Card Billing Address: ________________________________ City:________________________ State: ____ Zip: __________
Card Holder Signature: ______________________________________________________________________________________
For more
information, call (386) 754-4285 or go to www.lakecitycc.edu/departments/rvinstitute
27
Recalls
EQUIPMENT: ELECTRICAL: JACK
Make: Keystone
Model: Raptor
Year: 2010
Recall Number:09V492000
Potential Number of Affected Units: 155
Summary: On certain Raptor fifth wheels, the rear stabilizing jacks may extend while driving due
to exposed wiring on the extend/retract switch for the jacks. If the exposed wiring is subject to
road spray, it may activate the remote control panel and extend the jacks.
Consequence: If the jacks extend while driving, it increases the risk of loss of vehicle control
leading to a vehicle crash.
Remedy: Dealers will replace the extend/retract switch with a sealed switch supplied by
Keystone. This service will be performed free of charge. The safety recall began in January 2010.
Owners may contact Keystone at (866) 425-4369.
Check http://www-odi.nhtsa.dot.gov/cars/problems/recalls/recallsearch.cfm frequently for recall
updates.
28
RV TECHNICIAN · February/March 2010
RV Training Calendar
For the most up-to-date training available visit www.rvtrainingcalendar.org
2010 RV Dealers International Convention/Expo Featuring the RV Learning Center
October 5 – 8.......................................................Las Vegas, NV
Presented by RVDA & RVDA of Canada
Troubleshooter Clinic
March 8 - 12.........................................................Elkhart, IN
Presented by RVST
Recreational Vehicle Service & Repair Training
March 29 - June 6.................................................Largo, FL
July 4 – September 10..........................................Largo, FL
September 19 – November 19..............................Largo, FL
Provided by the Recreational Vehicle Training Center, Inc.
Towing Seminars
March 25.................................................................Denver, CO
April 8.....................................................................Issaquah, WA
September 16.........................................................Markham, ON Canada
September 30.........................................................St. Louis, MO
October 14..............................................................Elk Grove Village, IL
Presented by Cequent Performance Products
Dometic One Day RV Tech School
March 3...................................................................Houston, TX
March 4...................................................................Scott, LA
March 16.................................................................Saskstoon, SK
March 18................................................................Little Rock, AR & Grand Prairie, AB
March 23................................................................Bakersfield, CA
March 25................................................................Mesa, AZ
March 30................................................................Albuquerque, NM
Presented by Dometic Corporation
Dometic Two Day RV Tech School
March 3 - 4...................................................................Johnson City, TN
Presented by Dometic Corporation
RV Refrigerator Reconditioning Training
May 10 - 4................................................................Benton, KY
June 7 - 11...............................................................Benton, KY
Presented by Ford RV Refrigeration Training Center and The RVRN Association
Ongoing Online Training
August 1, 2009 – July 31, 2010
Distance Learning Network Training
Present by FRVTA
29
RV Technician Training Online: Self
Study Prep Course
Developed by RVIA available through the RV
Learning Center
RV TECHNICIAN · February/March 2010
News and Notes
Dan Pearson Elected Vice Chairman of the RVDA Education Foundation Board of
Directors
The RVDA Education Foundation Board of Directors elected Dan Pearson of
PleasureLand RV Centers, Inc., in St. Cloud, MN, as Vice Chairman at their meeting
on November 30, in Louisville, KY.
Pearson has a long record of service to RV dealers. He is a Participating Past
Chairman of RVDA, serves on the RV Assistance Corp. Board of Directors, and is
active in the Minnesota RV Dealers Association. He is also a major financial contributor to the
Foundation’s RV Learning Center. Pearson succeeds Jim Sheldon of Monaco, who will remain on
the Foundation’s Board of Directors.
“Since the formation of the RVDA Education Foundation in the early 1990s, Dan Pearson has
been instrumental in the development of continuing education programs for dealership
personnel,” said RVDA Education Foundation Chairman Rick Horsey of Parkview RV Center in
Smyrna, DE. “Dan is one of the best minds in RV retailing today, and we are fortunate to have him
serve as Vice Chairman while the Foundation develops programs that meet the challenges the
RV industry faces today and in the future.”
The Foundation Board of Directors also re-elected Rick Horsey as Chairman, Bill Koster of
Protective, as Secretary/Treasurer. The RVDA Board of Directors elected Jeff Pastore of Hartville
RV Center, in Hartville, OH, as a Director at its meeting in Louisville on November 30.
10th Edition Service Management Guide Available
by: Dave Horne
The RV Learning Center’s popular Service Management Guide, or flat rate
manual, is available as a printed manual and on CD-ROM.
The Service Management Guide is developed by dealers, service
managers, and technicians to provide average work unit times for basic
service functions performed by competent RV technicians. The new 10th
edition includes more than 400 time changes and additions from the
previous edition. The guide also features procedures and times for radio, TV, and satellite
systems, with revised sections on awnings, electrical, structures, exteriors, and interiors.
In addition, the guide includes new check sheets for water heater service, safety inspection, and
more.
“The Service Management Guide features Pre-Delivery Inspection forms (PDIs) and check sheets
for dealers to adapt to their business culture,” says Gary Motley of Motley RV Repair in Oklahoma
City, OK. “These PDIs and check sheets are to be used as guidelines, leaving plenty of flexibility
for employees to modify these forms to their dealership’s needs.”
“The Service Management Guide is a useful tool for dealers, general managers, and service
managers to determine productivity in the service department,” said RV Education Foundation
Chairman Rick Horsey of Parkview RV Center in Smyrna, DE.
Visit www.rvlearningcenter.com to order your copy of the RV Learning Center’s 10th edition
Service Management Guide.
30
RV TECHNICIAN · February/March 2010
The RV Learning Center Now on YouTube
by: Dave Horne
The RV Learning Center created its own YouTube channel to increase its exposure on social
media sites. YouTube allows users to upload video clips and share them on the internet. The
channel, located at http://www.youtube.com/user/rvlearningcenter, provides informational videos
on the products and services offered by the RV Learning Center.
Currently Uploaded Videos:
● An introduction to the RV Learning Center
● The 10th Edition Service Management Guide
● The Damage Repair Estimator
● Technician Online Certification Preparation Course
Future Videos:
● The annual RV Dealers International Convention/Expo Workshop Speakers
● More informational videos on RV Learning Center products and services
● Testimonials from various RVDA dealer members
The benefit of the RV Learning Center on YouTube is that it provides a central location for
members to find audio and text-based informational videos. It also provides a forum for those with
a slow internet connection to watch videos without the hassle of long download times. In addition,
subscribers to the channel will get the latest information on the RV Learning Center before
anyone else.
Join the Certified RV Technicians Page on Facebook
by: Melissa Broadus
The RV Learning Center has created a fan page on Facebook
for RV technicians. This page gives computer savvy
technicians important updates on available training,
certification, articles, and news.
Join the fan page now, by visiting www.rvda.org! Then simply
sign into your Facebook account and become a fan. If you are
not already on Facebook, visit www.facebook.com, and sign up.
Don’t miss out on the most up-to-date information available for RV technicians.
The RV Learning Center is dedicated to providing dealers and their employees with innovative
ways to operate RV dealerships through an array of education resources including publications,
distance learning, live workshops, online products, training, and certification programs for RV
dealership personnel. For more information on the RVDA Education Foundation’s RV Learning
Center, visit www.rvlearningcenter.com, send an e-mail to [email protected], or send a fax to (703)
359-0152. The RVDA Education Foundation is a tax exempt organization as described in section
501(c)(3) of the Internal Revenue Code. Contributions may be tax deductible as charitable
donations.
31
RV TECHNICIAN · February/March 2010
NEW! 10th Edition
Service Management Guide (Flat Rate Manual)
The expanded Service Management Guide offers over 100 pages of average work unit
times for the most basic service functions performed by competent RV technicians.
¾
The 10th Edition of the Service Management Guide offers extensive
updates and additions provided by dealers, service managers, and
technicians.
¾
It also offers all new Service Check Sheets that provide a valuable
reference for service managers and technicians.
¾
It is a great tool for the service department when working with extended
service contracts.
¾
The Service Management Guide is also available in CD-ROM.
The Service Management Guide is designed to provide reasonable guidance relative to the time required for competent
technicians to complete assigned tasks. It is an important part of the service management system, but it is not intended to
be the sole determinant of prices or rates charged in that sale of service.
Manual or CD-ROM: RVDA Members $164.95
Non-Members: $330.00
Manual and CD-ROM: RVDA Members $275.00
Non-Members: $550.00
Order Online at http://www.rvlearningcenter.com
Order Form – 10th Edition Service Management Guide (Flat Rate Manual)
Name:____________________________________________________________________________________________
Company Name:___________________________________________________________________________________
Address:_________________________________________________________________________________________
City:__________________________________________State:________Zip Code:______________________________
Phone:___________________________________Fax:______________________E-mail:________________________
___RVDA Member
___Non-RVDA Member Manual - # of Copies:___ CD-ROM - # of Copies:____
Method of payment (Please check one)
___Check enclosed (Made Payable to The RVDA Education Foundation)
___Send an invoice (members only) Credit Card: __Visa __Master Card __American Express
Card Number:____________________________________________Expiration Date:___________________________
Name on Card:_____________________________________Signature:______________________________________
Billing Address:_________________________________________________________Billing Zip:_________________
32
RVDA, 3930 University Dr, Fairfax, VA 22030 (703) 591-7130, Fax (703) 359-0152, Email: [email protected]
*
Protective is pleased to introduce the
enhanced XtraRide RV Service Agreement Program!
Available January 1, 2010**
Contact your Protective agent today to learn more about
all of the exciting program enhancements and benefits.
Start selling the enhanced XtraRide Program today!
XtraRide Service Agreements
Dealer Experience Refund & Reinsurance Programs
F&I Training
I
I
Post Sale Programs
I
Rental Programs
On-Line Rating, Reporting & Agreements
Call today to find out how
XtraRide can increase your dealer
profits and customer satisfaction.
888.258.1901
www.protectiveassetprotection.com
33
The XtraRide Service Agreement Program is backed by Lyndon Property Insurance Company, a Protective company, in all states except New York. In New York this product is backed by Old Republic Insurance
Company. *An RVDA endorsed product or service is one that has been extensively evaluated by the RVDA to assure quality, dependability and overall value. RVDA and the RVDA Education Foundation receive
compensation from a Protective company for business generated by RV dealers. **The enhanced XtraRide Program may not be available in every state on 1/1/2010 pending state approval.