1
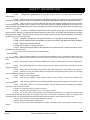
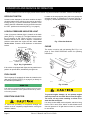
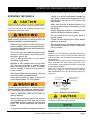
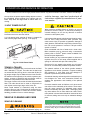
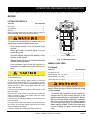
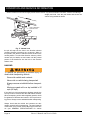
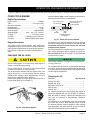
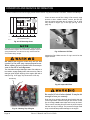
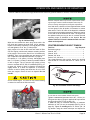
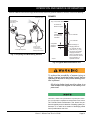
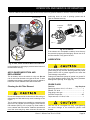
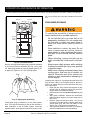
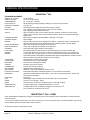
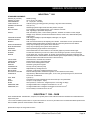
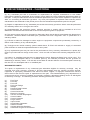
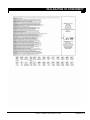
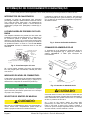
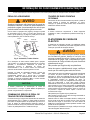
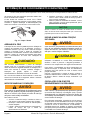
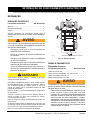
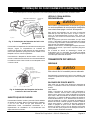
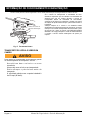
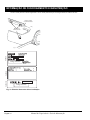
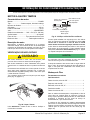
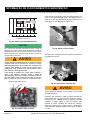
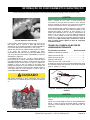
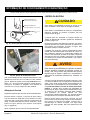
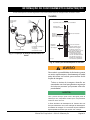
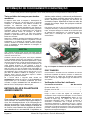
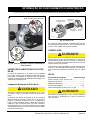
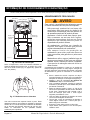
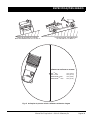
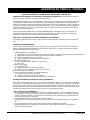
OPERATION AND SERVICE INFORMATION
Read all of Manual to become thoroughly familiar with this vehicle. Pay particular attention to all Notes, Cautions and Warnings
To reduce the possibility of severe injury
caused by a broken socket when removing
wheels, use only sockets designed for
impact wrench use.
Use caution when inflating tires. Overinflation could cause the tire to separate from
the wheel or cause the tire to explode,
either of which could cause severe injury.
Do not use low inflation pressure tires on any
E-Z-GO vehicle. Do not use any tire which has
a recommended inflation pressure less than the
inflation pressure recommended in Owner’s
Manual.
Use caution when inflating tires. Due to the low volume of
the small tires, overinflation can occur in seconds. Overinflation could cause the tire to separate from the wheel
or cause the tire to explode.
Tire inflation should be determined by the condition of the
terrain. See GENERAL SPECIFICATIONS section for
recommended tire inflation pressure. For outdoor applications with major use on grassy areas, the following
should be considered. On hard turf, it is desirable to have
a slightly higher inflation pressure. On very soft turf, a
lower pressure reduces the possibility of tires cutting into
the turf. For vehicles being used on paved or hard surfaces, tire inflation pressure should be in the higher
allowable range, but under no condition should inflation
pressure be higher than recommended on tire sidewall.
All four tires should have the same pressure for optimum handling characteristics. Be sure to install the valve
dust cap after checking or inflating.
The vehicle is fitted with low pressure tubeless tires
mounted on one piece rims; therefore, the most cost
effective way to repair a puncture in the tread is to use a
commercial tire plug.
To reduce possibility of severe injury, be sure
mounting/demounting machine is anchored to
floor. Wear OSHA approved safety equipment
when mounting/demounting tires.
If the tire is to be removed or mounted, the tire changing
machine manufacturer’s recommendations must be followed in order to reduce possibility of severe injury.
Wheel Installation
To reduce the possibility of component damage, do not
tighten lug nuts to more than 85 ft. lbs. (115 Nm) torque.
It is important to follow the ‘cross sequence’ pattern when
installing lug nuts. This will assure even seating of the wheel
against the hub.
With the valve stem to the outside, mount the wheel onto
the hub with lug nuts. Finger tighten lug nuts in a ‘cross
sequence’ pattern (Ref Fig. 14 on page 10). Tighten lug
nuts in the ’cross sequence’ pattern by torquing in 20 ft.
lbs. (30 Nm) increments following the ‘cross sequence’
pattern.
'Cross Sequence'
3
1
Tire style
may vary
4
2
Ref Whi 1
Fig. 14 Wheel Installation
Tire plug tools and plugs are available at most automotive parts
outlets and have the advantage of not requiring the tire be
removed from the wheel.
LIGHT BULB REPLACEMENT
If the tire is flat, remove the wheel and inflate the tire to
the maximum recommended pressure for the tire.
Immerse the tire in water to locate the leak and mark with
chalk. Insert tire plug in accordance with manufacturer’s
instructions.
To reduce the possibility of premature bulb failure, do not
touch new bulbs with bare fingers. Use clean, dry tissue
or paper towel to handle the glass portion of the bulb.
For vehicles with headlights mounted in cowl, locate the
two screws on backside of cowl that secure headlight
Page 10
Owner’s Manual and Service Guide