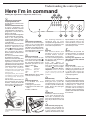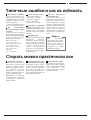
1
9 #6: Lavabiancheria Istruzioni per l’installazione e l’uso Washing machine Instructions for installation and use Machine à laver Instruction pour l'installation et l'emploi Waschvollautomat Installations- und Bedienungsanleitungen Còèðàëüíàÿ ìàøèíà Ðóêîâîäñòâî ïî óñòàíîâêå è ýêñïëóàòàöèè I Lavabiancheria 1 Istruzioni per l’installazione e l’uso GB Washing machine 13 Instructions for installation and use F Machine à laver 25 Instruction pour l'installation et l'emploi D Waschvollautomat 37 Installations- und Bedienungsanleitungen CIS Còèðàëüíàÿ ìàøèíà Ðóêîâîäñòâî ïî óñòàíîâêå è ýêñïëóàòàöèè 49 Guida rapida Scopri qui i 11 argomenti che vengono spiegati nelle pagine di questo manuale. Leggi, impara, divertiti: scoprirai tanti piccoli segreti per lavare meglio, con meno fatica e facendo durare di più la tua lavatrice. Soprattutto, con un occhio di riguardo alla sicurezza. 1.Installazione e trasloco (p. 10) L’installazione, dopo la consegna o dopo un trasloco, è l’operazione più importante per il buon funzionamento della lavabiancheria. Verifica sempre: 1. Che l’impianto elettrico sia a norma; 2. Che i tubi di carico e scarico dell’acqua siano collegati correttamente. Non utilizzare mai tubi già usati. 3. Che la lavabiancheria sia a livello. Ne vale la pena: per la durata della lavabiancheria e per la qualità del tuo bucato; 4. Che siano state rimosse le viti di fissaggio del cestello, poste sullo schienale della lavabiancheria. 2. Cosa va in lavatrice e come avviarla (p. 2) Suddividere correttamente la biancheria è un’operazione importante sia per la riuscita del bucato, sia per la durata della lavatrice. Impara tutti i trucchi e i segreti per dividere il bucato: colori, tipo di tessuto, tendenza a produrre lanugine sono i criteri più importanti. 3.Guida per capire le etichette (p. 5) I simboli contenuti nelle etichette dei capi d’abbigliamento sono molto facili da capire e altrettanto importanti per la riuscita del lavaggio. Qui trovi una facile guida per destreggiarti fra temperature consigliate, tipi di trattamento, modalità di stiratura. 4.Consigli utili per non sbagliare (p. 6) Una volta c’erano le nonne a dare buoni consigli - e i tessuti sintetici non esistevano: per forza era facile lavare. Oggi è la tua lavabiancheria che ti dà molti buoni consigli. 5.Il cassetto dei detersivi (p. 7) Come utilizzare il cassetto dei detersivi e la vaschetta della candeggina. 6.Capire il pannello dei comandi (p. 3) Il pannello dei comandi è molto semplice. Pochi comandi essenziali per decidere ogni tipo di lavaggio, dal più energico, capace di pulire la tuta di un meccanico, fino a quello delicatissimo per la lana. Prendici confidenza e laverai meglio, facendo durare di più la tua lavatrice. È facile. 7. Guida ai programmi di lavaggio (p. 4) Una facile tabella per decidere a colpo d’occhio tutti i programmi, le temperature, i detersivi ed eventuali additivi. Usa quello giusto e avrai un bucato migliore, risparmiando tempo, acqua ed energia, giorno dopo giorno. 1 Istruzioni per linstallazione e luso 8.Cura e manutenzione (p. 11) La tua lavabiancheria è un’amica: bastano poche, piccole attenzioni per ripagarti con tanta fedeltà e dedizione. Curala con sollecitudine e laverà per te per anni e anni. 9. Problemi e soluzioni (p. 8 e 9) Prima di chiamare il tecnico, guarda qui: moltissimi problemi possono avere una soluzione immediata. Se poi non riesci a risolvere chiama il numero dell’assistenza Indesit e in poco tempo qualsiasi guasto sarà riparato. 10.Caratteristiche tecniche (p. 9) Qui trovi le caratteristiche tecniche della tua lavatrice: sigla del modello, specifiche elettriche ed idriche, dimensioni, capacità, velocità della centrifuga e conformità alle norme e alle direttive italiane ed europee. 11.Sicurezza per te e i bambini (p. 12) Qui trovi consigli indispensabili per la sicurezza tua e di tutta la famiglia. Perché è la cosa più importante che c’è. M Cosa va in lavatrice? Prima di lavare, puoi fare molto per lavare meglio. Suddividi i capi secondo tessuto e colori. Guarda le etichette e segui le indicazioni. Alterna capi piccoli e capi grandi. Prima di lavare. Le etichette ti dicono tutto. Suddividi la biancheria secondo il tipo di tessuto e la solidità dei colori: i tessuti robusti vanno separati da quelli delicati. I colori chiari vanno separati da quelli scuri. Vuota tutte le tasche (monetine, carta, denaro e piccoli oggetti) e controlla i bottoni. Ripara subito oppure togli i bottoni pericolanti perché potrebbero staccarsi durante il lavaggio. Guarda sempre le etichette: ti dicono tutto sul capo di abbigliamento e su come lavare nel modo migliore. A pagina 5 trovi tutti i segreti dei simboli riportati sulle etichette dei capi d’abbigliamento. Le loro indicazioni sono preziose per lavare meglio e far durare di più i capi. Dispositivo antisbilanciamento. Questa lavabiancheria è dotata di uno speciale dispositivo di controllo elettronico per bilanciare bene il carico: prima della centrifuga, questo dispositivo garantisce che la biancheria si disponga nel modo più uniforme Separare i capi per tipo di tessuto e colore, è importante per avere buoni risultati possibile nel cestello, compatibilmente con il tipo di biancheria e con la sua disposizione iniziale. È per questo che la macchina, anche al massimo dei giri, non vibra e non produce rumori. Avviare la lavabiancheria Appena installata, fai un ciclo di lavaggio impostando il programma "1" a 90 gradi. Avviare la lavabiancheria nel modo giusto è importante sia per la qualità del lavaggio, sia per prevenire problemi e aumentare la durata della lavatrice. Dopo aver caricato la biancheria, versato il detersivo e gli eventuali additivi controlla sempre che: Per i capi più delicati: chiudi biancheria intima, calze femminili e capi delicati in un sacchetto di tela per proteggerli 1. L’oblò sia ben chiuso. 2. La spina sia inserita nella presa. 3. Il rubinetto dell’acqua sia aperto. 4. La manopola A sia posizionata su uno dei simboli (Stop/ Reset). Scegliere il programma Il programma si sceglie in base al tipo di indumenti da lavare. Per scegliere il programma, consulta la tabella a pagina 4. Ruota la manopola A finché il programma prescelto non coincide con l'indice posto nella parte superiore della manopola stessa, imposta la temperatura utilizzando la manopola B, verifica che la manopola C sia nella posizione che desideri, se necessario utilizza i pulsanti E, F, G ed H e quindi premi il pulsante di acceso/spento I (posizione I). Ricordati infine che la "partenza programmata", se vuoi utilizzarla, va impostata prima del ciclo di lavaggio. Alla fine del lavaggio... Attendi che la spia M sia spenta: ci vogliono circa tre minuti. Poi spegni la lavabiancheria premendo il pulsante di accesospento I (posizione O). A questo punto puoi aprire con sicurezza l’oblò. Dopo aver tolto la biancheria appena lavata, lascia sempre l’oblò aperto o semiaperto in modo che l’umidità rimasta all’interno possa evaporare. Chiudi sempre il rubinetto dell'acqua. Ricordati che in caso di mancanza di alimentazione o di spegnimento della lavabiancheria, il programma selezionato ripartirà dal punto in cui è stato interrotto. Come eliminare le macchie più frequenti Inchiostro e biro Tamponare con cotone imbevuto di alcol metilico o alcol a 90°. Catrame Tamponare con burro fresco, passare della trementina a poi lavare immediatamente. Cera Raschiare e poi passare con il ferro ben caldo fra due fogli di carta assorbente. Poi passare cotone con acquaragia o alcol metilico. Gomma americana Passare il solvente dello smalto per unghie e poi uno straccio pulito. Muffa Cotone e lino bianco vanno messi in una soluzione di 5 parti d’acqua, una di candeggina e un cucchiaio di aceto, poi lavare subito. Per gli altri tessuti bianchi acqua ossigenata a 10 volumi e poi lavare immediatamente. Rossetto Tamponare con etere se il tessuto è lana o cotone. Per la seta usare la trielina. Smalto per unghie Poggiare il tessuto dalla parte della macchia su un foglio di carta assorbente, bagnare con il solvente, spostando il capo man mano che il foglio si colora. Erba Tamponare con il cotone imbevuto di alcol metilico. Istruzioni per linstallazione e luso 2 Capire il pannello dei comandi Qui comandi tu Scegliere i programmi giusti è importante. Ed è facile. F Manopola programmi e partenza programmata Serve per selezionare il programma di lavaggio. Ruotate questa manopola esclusivamente in senso orario. Per selezionare i programmi devi far coincidere l’indice posto sulla manopola con il simbolo/numero corrispondente al programma desiderato. A questo punto premi il pulsante di acceso spento I (posizione I), la spia L inizia a lampeggiare. Dopo 5”, l’impostazione viene accettata, la spia L smette di lampeggiare (rimanendo accesa) e inizia il ciclo di lavaggio. Se vuoi interrompere il programma in corso o impostarne uno nuovo, seleziona uno dei simboli (Stop/Reset) e aspetta 5”: quando l’annullamento è stato accettato, la spia L lampeggia, a questo punto puoi spegnere la macchina. Puoi usare questa manopola per ritardare il funzionamento della lavatrice. Seleziona una delle quattro posizioni di partenza programmata, premi il pulsante di acceso/spento I (posizione I) e attendi 5”. A questo punto l’imposta-zione viene accettata (la spia L rimane accesa) e puoi selezionare il programma che desideri. La spia L effettua un lampeggio particolare (2 accesa e 4 spenta) per indicare che è stata impostata la partenza programmata. Durante questa fase è possibile aprire loblò e modificare il carico di biancheria. Dopo che il ciclo di lavaggio è stato impostato ed accettato dalla lavabiancheria, lo spostamento della manopola non ha più alcuna influenza (tranne che nella posizione Stop/Reset). E D Manopola temperatura Serve per impostare la temperatura di lavaggio indicata nella tabella dei programmi (vedi pag.4). Ti permette inoltre, se vuoi, di ridurre la temperatura consigliata per il programma selezionato, sino al lavaggio a freddo ( ). Manopola centrifuga Serve per escludere la centrifuga (selezionando il simbolo ) e per ridurre la velocità di centrifuga del programma selezionato. Le velocità massime previste per i 4 tipi di tessuto sono: Tessuto Velocità Cotone 1200 giri al minuto Sintetici 800 giri al minuto Lana 600 giri al minuto Seta no In ogni caso, la macchina compie una distribuzione del carico a bassa velocità. Cassetto detersivi È diviso in tre scomparti: 1. Detersivo per il prelavaggio; 2. Detersivo per il lavaggio; 3. Ammorbidenti, apprettanti, profumi. La lavabiancheria è provvista inoltre della vaschetta aggiuntiva 4 (in 4 1 Il cassetto dei detersivi con la vaschetta aggiuntiva per la candeggina è qui. 3 Istruzioni per linstallazione e luso 2 3 H G M L I dotazione) per la candeggina, da inserire nello scomparto 1. Stira facile Questa funzione consente di ottenere un bucato non spiegazzato, quindi più facile da stirare. La puoi utilizzare con i programmi 3-4 (Cotone), 5-6 (Sintetici) e 8- 9 (Delicati). Premendo questo pulsante nei programmi 5-6-8-9 il ciclo di lavaggio si fermerà sul simbolo , puoi completarlo premendo di nuovo il pulsante E. Nota: Questa funzione non deve essere utilizzata con il pulsante H (antimacchia) premuto. Extra economy Questo pulsante riduce il consumo di acqua nei risciacqui. Consigliamo di utilizzarlo esclusivamente quando la lavabian-cheria non è a pieno carico, riducendo opportunamente la quantità di detersivo. Lavaggio rapido Questo pulsante riduce la durata del programma di lavaggio di circa il 30%. Non può essere utilizzato con i programmi speciali (vedi pag. 4) e quelli per lana e seta. Antimacchia (vedi pag. 7) Con questo comando la lavabiancheria effettua un lavaggio più intenso che ottimizza l'efficacia degli additivi liquidi, permettendo di eliminare le macchie più resistenti. Quando schiacci il pulsante antimacchia non puoi effettuare il prelavaggio e la funzione Stira facile (pulsante E). C B A Acceso-spento Quando il pulsante I è premuto, la lavabiancheria è accesa, quando non è premuto è spenta. Lo spegnimento della macchina non annulla il programma selezionato. Spia acceso-spento La spia L lampeggia quando la macchina è accesa e attende l'impostazione di un programma. La luce fissa indica l'accettazione del programma impostato. Spia oblò bloccato La spia accesa indica che l'oblò è bloccato per impedire aperture accidentali. Per evitare danni è necessario attendere che la spia sia spenta prima di aprire l'oblò. L'attesa è di tre minuti circa. Cosa vuoi lavare, oggi? I programmi per tutte le stagioni Natura dei tessuti e dello sporco Manopola program. Manopola temperat. Detersivo lavaggio Ammorb. Candeggina Durata e Tasto del ciclo Antimacchia (minuti) Descrizione del ciclo di lavaggio COTONE 165 Prelavaggio, lavaggio a 90°C, risciacqui, centrifughe intermedie e finale Delicata/ Tradiz. 145 Lavaggio a 90°C, risciacqui, centrifughe intermedie e finale ◆ Delicata/ Tradiz. 130 Lavaggio a 60°C, risciacqui, centrifughe intermedie e finale ◆ Delicata/ Tradiz. 95 Lavaggio a 40°C, risciacqui, centrifughe intermedie e finale ◆ Delicata/ Tradiz. Bianchi eccezionalmente sporchi (lenzuola, tovaglie, ecc.) 1 90°C ◆ ◆ Bianchi eccezionalmente sporchi (lenzuola, tovaglie, ecc.) 2 90°C ◆ ◆ Bianchi e colorati resistenti molto sporchi 3 60°C ◆ Bianchi poco sporchi e colori delicati (camice, maglie, ecc.) 4 40°C ◆ Risciacqui/Candeggina Risciacqui, centrifughe intermedie e finale Centrifuga Scarico e centrifuga finale Stop/Reset Interrompe/Annulla il programma selezionato SINTETICI Sintetici con colori resistenti molto sporchi (biancheria per neonati, ecc.) 5 60°C ◆ ◆ Delicata 100 Lavaggio a 60°C, risciacqui, antipiega o centrifuga delicata Sintetici con colori delicati (biancheria di tutti i tipi leggermente sporca) 6 40°C ◆ ◆ Delicata 70 Lavaggio a 40°C, risciacqui, antipiega o centrifuga delicata Sintetici con colori delicati (biancheria di tutti i tipi leggermente sporca) 7 30°C ◆ ◆ 30 Lavaggio a 30°C, risciacqui e centrifuga delicata Risciacqui/Candeggina ◆ Ammorbidente ◆ Risciacqui, antipiega o centrifuga delicata Delicata Risciacqui con prelievo dell'ammorbidente, antipiega o centrifuga delicata Centrifuga Scarico e centrifuga delicata Stop/Reset Interrompe/Annulla il programma selezionato DELICATI Lana 8 40°C ◆ ◆ 60 Lavaggio a 40°C, risciacqui e centrifuga delicata Capi e tessuti particolarmente delicati (tende, seta, viscosa, ecc.) 9 30°C ◆ ◆ 50 Lavaggio a 30°C, risciacqui, antipiega o scarico Risciacqui ◆ Centrifuga Risciacqui, antipiega o scarico Scarico e centrifuga delicata Scarico Scarico Stop/Reset Interrompe/Annulla il programma selezionato PARTENZA PROGRAMMATA 12 - 9 - 3 - 1 Ritarda la partenza di 12 - 9 - 3 - 1 ore Stop/Reset Interrompe/Annulla il programma selezionato Importante: per annullare il programma di lavaggio appena impostato, seleziona uno dei simboli (Stop/Reset) e attendi almeno 5”. I dati riportati nella tabella hanno valore indicativo, possono variare a seconda della quantità e del tipo di biancheria, della temperatura dellacqua di rete e della temperatura dellambiente. Programma Speciale Lavaggio quotidiano La tua lavabiancheria ha un programma studiato per lavare indumenti leggermente sporchi in poco tempo. Impostando il programma 7 alla temperatura di 30°C è possibile lavare insieme tessuti di diversa natura (esclusi lana e seta), con un carico massimo di 3 kg. Questo programma permette di risparmiare tempo ed energia, perché dura solo 30 minuti circa. Ti consigliamo l'uso di detersivo liquido. Istruzioni per linstallazione e luso 4 Capire le etichette Impara questi simboli e laverai meglio, i tuoi capi dureranno di più e la tua lavabiancheria ricambierà la tua attenzione lavando meglio. In tutta Europa ogni etichetta contiene un messaggio, affidato a piccoli ma importanti simboli. Imparare a comprenderli è importante per lavare meglio e trattare i propri capi di vestiario nel modo giusto. Si dividono in cinque categorie, rappresentate da forme diverse: lavaggio , candeggio , stiratura , pulitura a secco e infine asciugatura . Consigli Utili Rivolta le camicie per lavarle meglio e farle durare di più. Togli sempre gli oggetti dalle tasche. Guarda le etichette: ti danno indicazioni utili e preziose. Nel cestello, alterna capi grandi con capi piccoli. Attenta a non sbagliare temperatura.... Consulta e impara i simboli di questa tabella: ti aiuteranno a lavare meglio, trattare meglio i tuoi capi, far rendere di più la tua lavabiancheria. Lavaggio Azione forte Candeggio Stiratura Pulitura a secco Azione delicata Temp. alta A cl Lavaggio a 95°C Asciugatura Si può candeggiare in acqua fredda Temp. moderata Asciugabile in macchine asciugabiancheria Stiratura forte max 200°C Pulitura a secco con tutti i solventi Stiratura media max 150°C Pulitura a secco con percloro, benzina avio, alcool puro, R111 e R113 Stiratura max 110°C Pulitura a secco con benzina avio, alcool puro e R113 Asciugare disteso Non pulire a secco Asciugare appeso un capo non centrifugato P Lavaggio a 60°C Non candeggiare Non asciugabile in macchine asciugabiancheria F Lavaggio a 40°C Lavaggio a 30°C Lavaggio delicato a mano Non lavare in acqua 5 Istruzioni per linstallazione e luso Non stirare Asciugare su appendiabiti Consigli utili per non sbagliare Non lavare mai in lavatrice... biancheria non orlata, sfilacciata o stracciata. Se è necessario lavarla, chiuderla in un sacchetto. Biancheria con colori forti insieme a quella bianca. Ma quanto pesi? 1 lenzuolo 400-500 gr. 1 federa 150-200 gr. 1 tovaglia 400-500 gr. 1 accappatoio 900-1.200 gr. 1 asciugamano 150-250 gr. Attenti al peso! Per ottenere i migliori risultati, non superare i pesi indicati, riferiti al carico massimo di biancheria asciutta: Le T-shirt colorate, quelle stampate e le camicie durano di più se lavate alla rovescia. Le T-shirt e le felpe stampate vanno sempre stirate alla rovescia. - Tessuti resistenti: massimo 5,5 kg - Tessuti sintetici: massimo 2,5 kg - Tessuti delicati: massimo 2 kg - Pura lana vergine: massimo 1 kg Allarme salopette. Le diffusissime tute tipo “salopette” hanno delle bretelle con ganci che possono danneggiare il cestello o gli altri capi durante il lavaggio. Se infili i ganci nella tasca della pettorina e li fissi con spille da balia elimini ogni pericolo. Vacanze: staccare la spina. Quando vai in vacanza, è consigliabile staccare la spina, chiudere il rubinetto di ingresso dell’acqua e lasciare aperto o socchiuso l’oblò. Così facendo, il cestello e la guarnizione resteranno ben asciutte e all’interno non si formeranno odori sgradevoli. CICLO LANA Per ottenere i migliori risultati utilizza un detersivo specifico, facendo attenzione a non superare 1kg di carico. Come lavare quasi tutto Le tende. Tendono a spiegazzarsi moltissimo. Per limitare questo effetto ecco un consiglio: piegale bene e sistemale dentro una federa o un sacchetto a rete. Lavale da sole e in modo che il peso complessivo non superi il mezzo carico. Ricordati di utilizzare il programma specifico 9 che prevede in automatico l'esclusione della centrifuga. Piumini e giacche a vento. Anche i piumini e le giacche a vento, se l’imbottitura è d’oca o di anatra, possono essere lavate in lavatrice. L’importante è non fare un carico di 5,5 kg. ma al massimo di 2-3 kg. ripetendo il risciacquo una o due volte utilizzando la centrifuga delicata. Scarpe da tennis. Le scarpe da tennis devono essere prima pulite dal fango e si possono lavare anche insieme ai jeans e ai capi più resistenti. Non lavarle insieme a capi bianchi. Istruzioni per linstallazione e luso 6 Importante per lavare meglio Il segreto del cassetto dei detersivi Il primo segreto è il più facile: il cassetto dei detersivi si apre ruotandolo verso l'esterno. Devi versare i detersivi e l'eventuale additivo seguendo le dosi indicate dai fabbricanti: in genere trovi tutte le informazioni sulla confezione. Le dosi variano in funzione del carico di biancheria, della durezza dell'acqua e del grado di sporco. Con l'esperienza, imparerai a dosare le quantità in modo quasi automatico: diventeranno il tuo segreto. Prima di versare il detersivo per il prelavaggio nello scomparto 1 verifica che non sia inserita la vaschetta aggiuntiva 4 riservata al candeggio. Quando versi l’ammorbidente nello scomparto 3 evita che questi fuoriescano dalla griglia. La lavabiancheria è in grado di prelevare automaticamente l’ammorbidente ad ogni programma di lavaggio. Il detersivo liquido va versato nello scomparto 2 e solo pochi istanti prima dell'avvio della macchina. Ricorda che il detersivo liquido è particolarmente adatto per lavaggi con temperature fino a 60 gradi e per i programmi di lavaggio che non prevedano la fase di prelavaggio. Sono in vendita detersivi liquidi o in polvere con contenitori speciali che vanno messi direttamente dentro il cestello, secondo le istruzioni scritte sulla confezione. Non usare mai detersivi per il lavaggio a mano, perché formano troppa schiuma, potenzialmente dannosa per la lavatrice. Fanno eccezione i detersivi specificamente studiati per il lavaggio a mano e per quello in lavatrice. Un ultimo segreto: quando lavi con acqua fredda, riduci sempre la quantità di detersivo: nell'acqua fredda si scioglie meno che nell'acqua calda, e quindi andrebbe in parte sprecato. Il cassetto dei detersivi è estraibile e per lavarlo basta sfilarlo, tirandolo verso l’esterno come indica la figura e lasciarlo per un po’ di tempo sotto l’acqua corrente. Risparmio ben gestito Nello scomparto 1: Detersivo per prelavaggio (polvere) 4 1 2 3 Nello scomparto 3: Additivi (ammorbidenti, profumi, ecc.) Nello scomparto 4: Candeggina e candeggina delicata. Ciclo candeggio e pulsante antimacchia Qualora sia necessario candeggiare, devi inserire la vaschetta aggiuntiva 4 (in dotazione) nello scomparto 1 del cassetto dei detersivi. Quando versi la candeggina, fai attenzione a non superare il livello "max" indicato sul perno centrale (vedi figura). L'utilizzo della vaschetta aggiuntiva per la candeggina esclude la possibilità di effettuare il prelavaggio. La candeggina tradizionale va utilizzata esclusivamente per i tessuti resistenti bianchi, mentre quella delicata va utilizzata per i tessuti colorati e sintetici. Una guida per un uso economico ed ecologico degli elettrodomestici MASSIMO CARICO Il modo migliore per non sprecare energia, acqua, detersivo e tempo è quello di utilizzare la lavatrice con il massimo carico consigliato. Un pieno carico al posto di due mezzi carichi permette di RISPARMIARE fino al 50% di energia. IL PRELAVAGGIO È PROPRIO NECESSARIO? Solamente per biancheria davvero sporca. Programmare un lavaggio SENZA prelavaggio per biancheria poco sporca o mediamente sporca permette di RISPARMIARE detersivo, tempo, acqua e tra il 5 e il 15% di energia. IL LAVAGGIO CON ACQUA CALDA È DAVVERO NECESSARIO? Trattare le macchie con uno smacchiatore o immergere le macchie asciutte in acqua prima del lavaggio permette di ridurre la necessità di programmare un lavaggio con acqua calda. Utilizzare un programma di lavaggio a 60° per RISPARMIARE fino al 50% di energia. PRIMA DI UTILIZZARE UN PROGRAMMA DI ASCIUGATURA ... Selezionare un'alta velocità di centrifuga se il bucato deve essere asciugato in un asciugatore. Un ridotto contenuto di acqua nel bucato consente di RISPARMIARE tempo ed energia nel programma di asciugatura. 7 Istruzioni per linstallazione e luso Nello scomparto 2: Detersivo per lavaggio (polvere o liquido) Non puoi effettuare il candeggio con il programma “Seta” e con i “programmi speciali” (vedi pag. 4). Usa il pulsante antimacchia ogni volta che vuoi fare il candeggio. Nel caso tu lo voglia fare separatamente devi versare la candeggina nella vaschetta aggiuntiva 4, premere il pulsante H (antimacchia), accendere la macchina, quindi selezionare uno dei simboli secondo il tipo di tessuto. Quando candeggi durante il normale ciclo di lavaggio, versa il detersivo e gli additivi negli appositi scomparti, premi il pulsante H (anti macchia), imposta il programma che desideri e accendi la lavabiancheria. Problemi e soluzioni Prima di telefonare, leggi qui Può accadere che la lavabiancheria non funzioni. In molti casi si tratta di problemi facilmente risolvibili senza dover chiamare il tecnico. Prima di telefonare all’assistenza, controlla sempre questi punti. La Lavabiancheria non parte. La spina è ben inserita nella presa? Facendo le pulizie potrebbe essersi mossa. C’è corrente in casa? Potrebbe essere scattato il salvavita, magari perché ci sono troppi elettrodomestici accesi. Oppure c’è un blackout generale nella tua zona. L’oblò è ben chiuso? Per motivi di sicurezza, la lavatrice non può funzionare se l’oblò è aperto oppure è chiuso male. Il pulsante di Acceso/Spento è premuto? Se si, è stata impostata una partenza programmata. Ma dov’è finita tutta l’acqua? Semplice: con la nuova tecnologia Indesit, ne basta meno della metà, per lavare bene il doppio! È per questo che non vedi l’acqua nell’oblò: perché è poca, pochissima, per rispettare l’ambiente ma senza rinunciare al massimo pulito. E in più, risparmi anche energia elettrica. La manopola per la partenza programmata, nei modelli dov’è prevista, è nella posizione corretta? Il rubinetto dell’acqua è aperto? Per motivi di sicurezza, se la lavatrice non carica acqua non può partire con il lavaggio. vuoti la vasca, spegni la lavabiancheria, seleziona uno dei simboli stop/reset , quindi riaccendila. Se la manopola continua a girare, chiama l'assistenza perché sta segnalando un'anomalia. La lavabiancheria non carica acqua. GIUSTO SBAGLIATO Chiudere il rubinetto dopo ogni lavaggio. Limita l’usura dell’impianto idraulico della lavabiancheria ed elimina il pericolo di perdite quando in casa non c’è nessuno. Lasciare sempre socchiuso l’oblò. In questo modo non si creano cattivi odori. Pulire delicatamente l’esterno. Per pulire l’esterno e le parti in gomma della lavabiancheria, usa sempre un panno imbevuto di acqua tiepida e sapone. Lasciare attaccata la spina mentre pulisci la lavabiancheria. Anche durante i lavori di manutenzione, la spina va sempre staccata. Usare solventi e abrasivi aggressivi. Mai usare prodotti solventi o abrasivi per pulire l’esterno e le parti in gomma della lavabiancheria. Trascurare il cassetto dei detersivi. È estraibile e per lavarlo basta lasciarlo un po’ di tempo sotto l’acqua corrente. Andare in vacanza senza pensare a lei. Prima di andare in vacanza, controlla sempre che la spina sia staccata e il rubinetto dell’acqua sia chiuso. Il tubo è ben collegato al rubinetto ? Manca l’acqua? Potrebbero essere in corso dei lavori nel condominio o nella via. C’è sufficiente pressione? Potrebbe esserci un guasto all’autoclave. Il filtro del rubinetto è pulito? Se l’acqua è molto calcarea, oppure se recentemente sono stati fatti lavori all’acquedotto, il filtro del rubinetto potrebbe essere ostruito da frammenti e detriti. Il tubo di gomma è piegato? Il percorso del tubo di gomma che porta l’acqua alla lavatrice deve essere il più rettilineo possibile. Controlla che non sia schiacciato o piegato. La manopola dei programmi ruota di continuo? Aspetta alcuni minuti affinché la pompa di scarico La lavabiancheria carica e scarica acqua di continuo. Il tubo è posto troppo in basso? Deve essere installato ad un’altezza variabile fra 60 e 100 cm. La bocca del tubo è immersa nell’acqua? Lo scarico a muro ha lo sfiato d’aria? Se dopo queste verifiche il problema non si risolve, chiudi il rubinetto dell’acqua, spegni la lavabiancheria e chiama l’assistenza. Se abiti a un piano alto, potrebbero essersi innescati fenomeni di sifonaggio. Per risolverli occorre installare una valvola apposita. Istruzioni per linstallazione e luso 8 È stretta tra mobili e muro? Se non è un modello da incasso, durante il ciclo di centrifugazione la lavatrice ha bisogno di oscillare un po’. È opportuno che intorno ad essa ci siano alcuni cm liberi. Il tubo di scarico è piegato? Il percorso del tubo di scarico deve essere il più rettilineo possibile. Controlla che non sia schiacciato o piegato. La conduttura dell’impianto di scarico è ostruita? L’eventuale prolunga del tubo di scarico è irregolare e impedisce il passaggio dell’acqua? La lavabiancheria non scarica o non centrifuga. Il detersivo è adatto per l’uso in lavatrice? Verifica che contenga la definizione “per lavatrice” oppure “a mano e in lavatrice”, o simile. Il programma scelto prevede lo scarico dell’acqua? Con alcuni programmi di lavaggio occorre azionare lo scarico manualmente. La funzione “Antipiega" nelle lavabiancheria dove è prevista - è attiva? Questa funzione richiede di azionare lo scarico manualmente. La pompa di scarico è intasata? Per ispezionarla, chiudere il rubinetto, staccare la spina e seguire le istruzioni a pagina 11, oppure chiamare l’assistenza tecnica. Si forma troppa schiuma. La lavabiancheria perde acqua. La lavabiancheria vibra molto durante la fase di centrifuga. Non ricorrere mai a tecnici non autorizzati e rifiuta sempre l’installazione di pezzi di ricambio non originali. Il gruppo oscillante interno, al momento dell’installazione, è stato sbloccato correttamente? Vedi la pagina successiva dedicata all’installazione. La lavabiancheria è ben livellata? Il livellamento dell’apparecchio va controllato periodicamente. Col tempo la lavatrice potrebbe essersi spostata in modo impercettibile. Agire sui piedini controllando con una livella. La ghiera del tubo di carico è ben avvitata? Chiudi il rubinetto, stacca la spina e prova a stringerla senza forzare. Il cassetto dei detersivi è intasato? Prova ad estrarlo e lavarlo sotto l’acqua corrente. Il tubo di scarico non è ben fissato? Chiudi il rubinetto, stacca la spina e prova a fissarlo meglio. Caratteristiche tecniche Modello W 125 TX Dimensioni larghezza cm 59,5 altezza cm 85 profondità cm 53,5 Capacità da 1 a 5,5 kg Collegamenti elettrici tensione a 220/230 Volt 50 Hz potenza massima assorbita 1850 W Collegamenti idrici pressione massima 1 MPa (10 bar) pressione minima 0,05 MPa (0,5 bar) capacità della cesto 46 litri Velocità di centrifuga sino a 1200 giri al minuto Programmi di controllo secondo la norma IEC456 effettuato con 5 kg di carico Questa apparecchiatura è conforme alle seguenti Direttive Comunitarie: - 73/23/CEE del 19/02/73 (Bassa Tensione) e successive modificazioni - 89/336/CEE del 03/05/89 (Compatibilità Elettromagnetica) e successive modificazioni 9 Istruzioni per linstallazione e luso La quantità è quella giusta? Un eccesso di detersivo, oltre a produrre troppa schiuma, non lava in modo più efficace e contribuisce a produrre incrostazioni nelle parti interne della lavatrice. Se, nonostante tutti i controlli, la lavabiancheria non funziona e l’inconveniente rilevato continua a manifestarsi, chiama il Centro Assistenza autorizzato più vicino, comunicando queste informazioni: - il tipo di guasto - la sigla (Mod. ....) - il numero di serie (S/N ....) Trovi queste informazioni sulla targhetta applicata nella parte posteriore della lavabiancheria. Installazione e trasloco Quando arriva la lavabiancheria Che sia nuova oppure appena trasferita da una casa all’altra, l’installazione è un momento importantissimo per il buon funzionamento della lavabiancheria. Dopo aver tolto l’imballaggio assicurati dell’integrità dell’apparecchio. In caso di dubbio, chiama subito un tecnico qualificato. L’interno della lavabiancheria viene bloccato, per il trasporto, da quattro viti sullo schienale. I piedini anteriori sono regolabili. Prima di mettere in funzione la lavatrice, rimuovi le viti, togli il gommino con il relativo distanziale (conserva tutti i pezzi) e chiudi i fori con i tappi di plastica forniti in dotazione. Importante: Chiudi con il tappo (in dotazione), i 3 fori nei quali era alloggiata la spina, situati nella parte posteriore in basso a destra della lavabiancheria. A Il particolare A non deve essere rimosso. Livellamento Per il buon funzionamento della lavatrice è importante che questa sia bene in piano. Per effettuare il livellamento basta agire sui piedini anteriori; l’angolo di inclinazione, misurato sul piano di lavoro, non deve superare i 2°. In caso di moquette, assicurarsi che non venga ostruita la ventilazione nell’area di appoggio. Conserva le viti di bloccaggio e i distanziali. In caso di trasloco ti saranno utili per bloccare nuovamente le parti interne della lavabiancheria che sarà così protetta dagli urti durante il trasporto. Collegamento alla presa d’acqua La pressione idrica deve essere compresa tra i valori indicati nella targhetta posta sul retro. Allacciare il tubo di carico a una presa d’acqua fredda con bocca filettata da 3/4 gas interponendo la guarnizione in gomma con il filtro. A Il filtro del tubo in gomma. Se la tubazione dell’acqua è nuova o è rimasta inattiva, prima di allacciare far scorrere l’acqua finché non è limpida e priva di impurità. Collegare il tubo alla macchina, in corrispondenza dell’apposita presa d’acqua in alto a destra. mini ad un’altezza tra 60 e 100 cm. Nel caso in cui sia indispensabile fissare l’estremità del tubo a una altezza dal pavimento inferiore ai 60 cm è necessario che il tubo venga fissato nell’apposito gancio posto sulla parte alta dello schienale. Il gancio da utilizzare se il tubo di scarico termina a meno di 60 cm di altezza. Se il tubo scarica nella vasca o nel lavabo, applicare la guida in plastica e legare al rubinetto. Per eliminare questo inconveniente sono disponibili in commercio apposite valvole antisifonaggio. Collegamento elettrico Prima di collegare la macchina alla presa elettrica accertarsi che: 1) la presa elettrica sia in grado di sopportare il carico massimo di potenza della macchina indicato nella targhetta caratteristiche e che sia a norma di legge; 2) la tensione di alimentazione sia compresa nei valori indicati nella targhetta caratteristiche; 3) la presa sia compatibile con la spina della macchina. In caso contrario non utilizzare adattatori ma procedere invece alla sostituzione della presa o della spina; 4) gli impianti elettrici domestici devono essere dotati di “messa a terra”. La guida per lo scarico in vasche e lavabi. Presa dacqua in alto a destra. Collegamento del tubo di scarico Sul retro della macchina ci sono due agganci (destro o sinistro) ai quali fissare il tubo di scarico. Inserire l’altra estremità in una conduttura oppure appoggiarlo al lavandino o alla vasca evitando strozzature e curvature eccessive. È importante che ter- Non deve mai rimanere immerso nell’acqua. Sono sconsigliati tubi di prolunga. Nel caso sia assolutamente indispensabile, la prolunga deve avere lo stesso diametro del tubo originale e non deve superare i 150 cm. In caso di scarico a muro, far verificare la sua efficienza da un tecnico abilitato. Se l’abitazione si trova negli ultimi piani di un edificio, è possibile che si verifichino fenomeni di sifonaggio per cui la lavabiancheria carica e scarica acqua di continuo. Attenzione! L’azienda declina ogni responsabilità qualora queste norme non vengano rispettate. Sacchetti in plastica, polistirolo espanso, chiodi e gli altri elementi dell’imballo non sono giochi per bambini in quanto potenziali fonti di pericolo. Istruzioni per linstallazione e luso 10 Cura e Manutenzione facile Trattala bene e sarà sempre amica tua La tua lavabiancheria è un’affidabile compagna di vita e di lavoro. Tenerla in forma è importante. Anche per te. La tua lavabiancheria è progettata per durare molti anni senza problemi. Qualche semplice accorgimento aiuta a tenerla in forma e farla durare ancora di più. Prima di tutto, devi chiudere sempre il rubinetto dell’acqua dopo ogni lavaggio: la continua pressione dell’acqua può usurare alcuni componenti. Inoltre, così facendo, elimini il pericolo di perdite quando in casa non c’è nessuno. Se l’acqua della tua zona è troppo dura, usa un prodotto anticalcare (l’acqua è dura se lascia facilmente tracce biancastre intorno ai rubinetti oppure intorno agli scarichi, specialmente della vasca da bagno. Per avere informazioni più precise sul tipo di acqua del tuo impianto, puoi rivolgerti all’Acquedotto locale oppure a un idraulico di zona). Occorre vuotare sempre le tasche, togliendo anche spille, distintivi e qualsiasi oggetto duro. L’esterno della lavabiancheria va lavato con un panno imbevuto di acqua tiepida e sapone. È importante lavare periodicamente il cassetto estraibile dei detersivi. Per prevenire incrostazioni basta tenerlo qualche tempo sotto il rubinetto dell’acqua corrente. Mai esagerare con le dosi. Il normale detersivo contiene già prodotti anticalcare. Solo se l’acqua è particolarmente dura, cioè molto ricca di calcio, ti consigliamo di utilizzare ad ogni lavaggio un prodotto specifico. Saltuariamente può essere utile un ciclo di lavaggio con una dose di prodotto anti-calcare, senza detersivo e senza biancheria. Non utilizzare nessun detersivo o additivo in dosi troppo abbondanti perché potrebbero causare un’eccessiva produzione di schiuma, con produzione di incrostazioni e possibili danni ai componenti della tua lavabiancheria. Vuota sempre le tasche: i piccoli oggetti possono danneggiare la tua lavabiancheria. Quando serve, un’ispezione alla pompa e al tubo di gomma. La lavabiancheria è dotata di una pompa autopulente che non ha bisogno di operazioni di pulizia e manutenzione. Può però succedere che piccoli oggetti cadano accidentalmente nella pompa: monete, fermagli, bottoni pericolanti e altre piccole cose. Per evitare danni, vengono fermati in una precamera accessibile, posta nella parte inferiore della pompa. Per accedere a questa precamera è sufficiente rimuovere il pannello di copertura posto nella parte inferiore della lavabiancheria con l'ausilio di un giravite (figura 1); togliere quindi il coperchio ruotandolo in senso antiorario (figura 2) e ispezionare accuratamente l’interno. Il tubo di gomma Controlla il tubo di gomma almeno una volta all’anno. Va sostituito subito se presenta screpolature e fessure poichè durante i lavaggi deve sopportare forti pressioni che potrebbero provocare improvvise spaccature. Fig. 1 Fig. 2 Attenzione: assicurati che il ciclo di lavaggio sia terminato e stacca la spina prima di togliere il coperchio e prima di qualsiasi operazione di manutenzione. E' normale che dopo aver tolto il coperchio fuoriesca una piccola quantità di acqua. Nel rimontare il pannello di copertura, assicurati di inserire i ganci posti nella parte inferiore nelle apposite asole prima di spingerlo contro la macchina. 11 Istruzioni per linstallazione e luso È sempre più importante La sicurezza per te e i tuoi bambini La tua lavabiancheria è costruita secondo le più severe norme internazionali di sicurezza. Per tutelare te e tutta la tua famiglia Leggi attentamente queste avvertenze e tutte le informazioni contenute in questo libretto: è importante perché, oltre a numerose notizie utili, forniscono importanti informazioni su sicurezza, uso e manutenzione. 1. La lavabiancheria non va installata all’aperto, nemmeno se lo spazio è riparato da una tettoia, perché è molto pericoloso lasciarla esposta alla pioggia e ai temporali. 2. Deve essere usata soltanto da adulti ed esclusivamente per lavare la biancheria secondo le istruzioni scritte in questo manuale. 3. Se dev’essere spostata, lavorare in due o tre persone con la massima attenzione. Mai da soli perché la macchina è molto pesante. 4. Prima di introdurre la biancheria controlla che il cestello sia vuoto. 5. Non toccare la macchina a piedi nudi oppure con le mani o i piedi bagnati o umidi. 6. Non usare prolunghe e multiple, pericolose soprattutto in ambienti umidi. Il cavo di alimentazione non deve subire piegature o compressioni pericolose. 7. Non aprire il cassetto dei detersivi mentre la macchina è in funzione; non usare detersivo per il lavaggio a mano poiché la sua schiuma abbondante potrebbe danneggiare le parti interne. Voglio solo un tecnico specializzato e autorizzato con ricambi originali garantiti Indesit! 8. Non tirare mai il cavo né la lavabiancheria per staccare la spina dalla presa a muro: è molto pericoloso. 9. Durante il funzionamento della lavabiancheria non toccare l’acqua di scarico perché può raggiungere temperature elevate. L’oblò, durante il lavaggio tende a scaldarsi; tieni lontani i bambini. Non forzare mai l’oblò perché questo potrebbe danneggiare il meccanismo di sicurezza posto sull’apertura che ha il compito di proteggere da aperture accidentali. 10. In caso di guasto, chiudi prima di tutto il rubinetto dell’acqua e stacca la spina dalla presa a muro; in nessun caso accedere ai meccanismi interni per tentare di ripararla. Come cambiare il cavo di alimentazione Il cavo di alimentazione è speciale e può essere acquistato esclusivamente presso i Centri di Assistenza Tecnica autorizzati. Per sostituirlo occorre fare così: 1. Assicurati che la lavabiancheria sia spenta e la presa sia scollegata. 2. Togli il top di copertura svitando le due viti I, e poi tiralo verso di te [fig 3]. 3. Scollega i cavetti dal filtro antidisturbo F [fig. 4] facendo attenzione alla loro posizione (cavetto Blu=N; cavet- to Marrone=L) lasciando per ultimo il cavetto di terra . Nota: le lettere L, N e il simbolo sono riportati sul filtro antidisturbo. 4. Allontana leggermente la parte superiore del passacavo dallo schienale, tira il cavo di alimentazione verso l'alto e quindi estrailo [fig. 5]. Per collegare il nuovo cavo agisci in senso inverso. Per rimontare il top di copertura appoggialo sulla lavabiancheria [fig. 6] e fallo scorrere in avanti finché i ganci posti nella parte anteriore non vanno a inserirsi nelle apposite asole ricavate sul cruscotto, quindi riavvita le viti. I N L F Fig. 3 Fig. 4 Fig. 5 Fig. 6 Istruzioni per linstallazione e luso 12 Quick guide Here are the 11 topics explained in this manual. Read, learn and have fun: you will discover many secret ways to get a better wash, more easily and making your washing machine last longer. 1. Installation and removal (p. 22) Installation, after delivery or transport, is the most important operation for the correct functioning of your washing machine. Always check: 1. That the electric system conforms to regulations; 2. That the inlet and draining pipes are connected correctly. Never use pipes that have already been used. 3. That the washing machine is levelled properly; something worth checking to aid the performance of your washing machine; 4. That the drum's fixing screws have been removed from the back of the washing machine; 2. What goes in your washing machine and how to start it (p. 14) A correct distribution of your laundry is vital to the successful outcome of the wash and the life of the washing machine. Learn all the tips and secrets to dividing your linen: colour, type of fabric. 3.Guide to understanding labels (p. 17) The symbols on the labels of your garments are easy to understand and equally important for the success of your wash. The guide includes simple instructions to help you choose the right temperature, wash cycles and ironing methods. 4.Useful tips to avoid mistakes (p. 18) Years back, our grandmothers were the ones who gave us good advice - and in those days synthetic fibres did not exist: washing was easy. Today, your washing machine offers you helpful advice allowing you to wash wool even better than an expert laundress would by hand. 5.The detergent dispenser (p. 19) How to use the detergent dispenser and the bleach compartment. 6.Understanding the control panel (p. 15) Washing machine’s control panel is very simple. It has only a few essential buttons to help you choose any type of wash cycle, ranging from the most energetic, capable of cleaning a mechanic’s overalls, to the most delicate for wool. Familiarising yourself with it will help you get the best out of your wash while helping your washing machine last longer. It’s easy. 7. Guide to the wash programmes (p. 16) Herein is an easy table to help you choose the right programme, temperature, detergents and possible additives. Choose the right programme and you will get better results with your wash while saving time, water and energy, day after day. 13 Instructions for installation and use 8. Care and maintenance (p. 23) With just a bit of care, it will repay you with loyalty and devotion. With the necessary upkeep, it will wash for years and years to come. 9. Problems and solutions (p. 20 and 21) Before calling a technician, read these pages: immediate solutions may be found for a number of problems. If the problem persists, call your local Indesit customer services who will be pleased to help. Any failure will be repaired, as soon as possible. 10.Technical characteristics (p. 21) Herein are the technical features of your washing machine: model type number, electric and water specifications, size, capacity, speed of the spin cycle and compliance with Italian and European regulations. 11. Safety for you and your family (p. 24) Here you will find the necessary safety guidelines, and it is important for you to read this section carefully. M What goes in your washer? Before washing, you can do a great deal to ensure better results. Divide your garments according to fabric and colour. Read the labels, follow their guidelines. Before washing. The labels say it all. Divide your washing according to the type of fabric and colour fastness. Empty all pockets (coins, paper, money and small obejects) and ensure all loose buttons are repaired or removed prior to loading. Always look at the labels: they tell you everything about your garment and how to wash it in the best possible way. The table on page 17 shows all meanings behind these symbols. Their recommendations are important to achieve better wash results. Dividing your garments according to fabric and colour, is very important for good results Big and small happily together. This washing machine has a special electronic control device for even distribution: before the spin cycle starts, this device allows the garments to positions themselves, to minimise noise and vibrations during the spin cycle. Starting the washer After installing your new washing machine, start a wash cycle by setting programme "1" at 90 degrees. Starting your washing machine in the right way is important for the quality of your wash, to help prevent future problems and enhance life expectancy of your appliance. Once you have loaded your washing machine and added the detergent together with any fabric conditioner, always check that: For more delicate garments: protect underwear, tights and stockings and delicate items by placing them in a canvas pouch 1. The door is closed correctly. 2. The plug is secured in the socket. 3. The water supply is turned on. 4. Selector knob A is positioned on one of the symbols (Stop/ Reset). Choose the desired programme The programme is selected according to the type of garments that need to be washed.To choose a programme, refer to the table on page 16. Turn knob A until the selected programme is aligned with the mark on the knob, turn knob B to the desired temperature settings, check that knob C is in the desired position, if necessary use buttons E, F, G and H, and lastly, press on/off button I (I position). Remember that, if you want to use it, the "programmed start" should be set before the wash cycle. At the end of the wash cycle... The M lamp to extinguish: it will take about three minutes. Then turn the washing machine off by pressing on-off button I (O position). You can now open the washing machine door safely. After having removed the freshly cleaned washing, leave the door open to allow air circulation inside the drum. Always disconnect electricity at the socket and turn off the water supply. Remember that, in the event of a power failure, or should the washing machine switch itself off, the programme chosen will remain in its memory. How to eliminate the most common stains Ink and biro Dab with a wad of cotton soaked in methyl alcohol or alcohol at 90°. Tar Dab with fresh butter, rub in turpentine then wash immediately. Wax Scrape away, then run a hot iron between two sheets of absorbent paper. Then rub in cotton with turpentine or methyl alcohol. Chewing gum Rub in nail polish remover and wipe with a clean rag. Mold Cotton and white linen should be placed in a solution of 5 parts water, one bleach and a spoon of vinegar, then washed immediately. For other white fabrics, use hydrogen peroxide at 10 volumes and wash immediately. Lipstick Dab with ether on wool or cotton. Use tricloroetilene for silk. Nail polish Place a sheet of absorbent paper on the side of the stain, wet it with nail polish remover, shifting the garment as the sheet gradually changes colour. Grass Dab with a wad of cotton soaked in methyl alcohol. Instructions for installation and use 14 Understanding the control panel Here I’m in command Making the right choice is important. And it’s easy. F E Programme selector knob and programmed start Use this knob to select the wash programme. Turn this knob clockwise only. To select a programme, you should turn the knob so that the symbol/number of the desired programme is in line with the pointer on the knob. Now press on/off button I (position I), pilot lamp L will start flashing. After 5", the setting will be accepted, pilot lamp L will stop flashing (staying lit) and the wash cycle will begin. Should you wish to interrupt the programme in progress or set a new one, select one of the symbols (Stop/Reset) and wait 5" : when the cancellation has been accepted, pilot lamp L flashes, and you can then turn the appliance off. You can use this knob to delay the appliance's operation. Select one of the four delay time positions, press the on/off button I (position I) and wait 5". The setting has now been accepted (pilot lamp L stays lit) and you can select the programme you desire. Pilot lamp L has a particular flashing motion (2" on and 4" off) to indicate that a delayed start has been set. During this phase, you can open the appliance door and change the washing load, should you wish to do so. After the wash cycle has been set and accepted by the washing machine, turning the knob will have no effect (except for when it is on position Stop/Reset). D Temperature control knob It is used to set the wash temperature in the recommended programme table on pag. 16. It also allows you to reduce the temperature recommended for the selected programme, and even to set a cold wash cycle ( ). Spin exclusion knob It is used to exclude the spin cycle (by choosing symbol ) or to reduce the spin speed of the selected programme. The maximum speed for the four types of fabric are: Fabric Speed Cotton 1200 rpm Synthetics 800 rpm Wool 600 rpm Silk no Note: distribution phase will be carried out at low speed. Detergent dispenser It is divided into three compartments: 1. Detergent for pre-wash; 2. Detergent for the main cycle wash; 3. Fabric conditioner. The detergent dispenser with the additional bleach compartment is here. 15 Instructions for installation and use G 2 M L I C B A The washing machine is equipped with an extra compartment 4 (provided as an accessory) for the bleach, to be inserted in compartment 1. liquid additives, thus allowing more resistant stains to be removed. When you press the stain removal button, you cannot activate the pre-wash. Easy iron This function allows your washing to come out of the machine without creases, making it much easier to iron. You can use it with programmes 3-4 (Cotton), 5-6 (Synthetics) and 8-9 (Delicates). Press this button in programmes 5-6-8-9 and the wash cycle will come to a stop on symbol . You can complete it by pressing button E again. Important: this function should not be used when button H (stain removal) has been pressed. On-off When button I is pressed, the washing machine is switched on, when it is not the machine is switched off. Turning the appliance off does not cancel the selected programme. Extra Economy Reduces water consumption during the rinse cycles. We recommend that you use this function only with small laundry loads, dosing the detergent proportionally. Rapid wash This button reduces the length of the wash programme by about 30%. It cannot be used with special programmes (see page 16) or those for wool and silk. 4 1 H 3 Stain removal (see page 19) Thanks to this command, the washing machine will carry out a more intensive wash that optimises the effectiveness of the The on-off lamp Lamp L flashes when the appliance is switched on and awaiting a programme to be set. A steady light means the appliance has accepted the selected programme. The door block lamp The safety lamp indicates that the washing machine door is locked to prevent it from being opened accidentally. To avoid any damages to lock mechanism, you must wait for the lamp to extinguish, before attempting to open the door which takes around three minutes. What are you washing today? A programme for all seasons Type of fabric and degree of soil Programme Temperature Detergent knob knob for wash Fabric softener Stain rem. Length of button/ the cycle Bleach (minutes) Description of wash cycle COTTON 165 Prewash cycle, wash cycle at 90°C, rinse cycles, intermediate and final spin cycles Del./Trad. 145 Wash cycle at 90°C, rinse cycles, intermediate and final spin cycles ◆ Del./Trad. 130 Wash cycle at 60°C, rinse cycles, intermediate and final spin cycles ◆ Del./Trad. 95 Wash cycle at 40°C, rinse cycles, intermediate and final spin cycles ◆ Del./Trad. Exceptionally soiled whites (sheets, tablecloths, etc.) 1 90°C ◆ ◆ Exceptionally soiled whites (sheets, tablecloths, etc.) 2 90°C ◆ ◆ Heavily soiled whites and fast colours 3 60°C ◆ Slightly soiled whites and delicate colours (shirts, jumpers, etc.) 4 40°C ◆ Rinse cycles/Bleach Rinse cycles, intermediate and final spin cycles Spin cycle Draining and final spin cycle Stop/Reset Interrupts/Cancels the selected programme SYNTHETICS Heavily soiled fast colour synthetics (baby linen, etc.) 5 60°C ◆ ◆ Delicate 100 Wash cycle at 60°C, rinse cycles, anticrease or delicate spin cycle Delicate colour synthetics (all types of slightly soiled garments) 6 40°C ◆ ◆ Delicate 70 Wash cycle at 40°C, rinse cycles, anticrease or delicate spin cycle Delicate colour synthetics (all types of slightly soiled garments) 7 30°C ◆ ◆ 30 Wash cycle at 30°C, rinse cycles and delicate spin cycle Rinse cycles/Bleach ◆ Fabric softener ◆ Rinse cycles, anti-crease or delicate spin cycel Delicate Rinse cycles with automatic introduction of softener, anti-crease or delicate spin cycle Spin cycle Draining and delicate spin cycle Stop/Reset Interrupts/Cancels the selected programme DELICATES Hand wash 8 40°C ◆ ◆ 60 Wash cycle at 40°C, rinse cycles and delicate spin cycle Particularly delicate garments and fabrics (curtains, silk, viscose, etc.) 9 30°C ◆ ◆ 50 Wash cycle at 30°C, rinse cycles, anticrease or draining Rinse cycles ◆ Rinse cycles, anti-crease or draining Spin cycle Draining and delicate spin cycle Draining Draining Stop/Reset Interrupts/Cancels the selected programme PROGRAMMED START 12 - 9 - 3 - 1 hour delay Start is delayed by 12 - 9 - 3 - 1 hours Stop/Reset Interrupts/Cancels the selected programme Important: to cancel the wash programme you have just set, select one of the symbols (Stop/Reset) and wait for at least 5 seconds. The data found in the table is purely indicative, and can vary according to the quantity and type of washing, the water system temperature and the room temperature. Special programme Daily wash Your washer has a programme available for the washing of lightly soiled garments in a short amount of time. By setting programme 7 at a temperature of 30°C, you can wash different types of fabrics together (except for wool and silk), with a maximum load of 3 kg. This programmes allows you to save on both time and energy as it only lasts around 30 minutes. We recommend the use of liquid detergent. Instructions for installation and use 16 Understanding labels Learn the meaning of these symbols and you will get better results, your garments will last longer resulting in an improved wash. All over Europe, garment labels contain messages expressed in small yet important symbols. Understanding them is very important if you want to get better results and treat your garments the way they deserve to be treated. These symbols are divided in five different categories and shapes: washing , bleaching , ironing , dry cleaning and drying . Useful tips Turn shirts inside out to get better results and make them last longer. Always empty pockets of their contents. Look at the label: it will always give you useful advice. When loading your washing, try to have a mixture of large to small items. Make sure you select the right temperature! Consult and learn the symbols in this table: they will help you obtain a better wash, treat your clothes properly, and get a better performance out of your washing machine. Wash Strong action Bleaching Ironing Dry cleaning Delicate action High Temp. Bleaching only in cold water Low Temperat. A cl Wash at 95°C Drying Hot iron at max 200°C Dry clean with any solvent Medium hot ironing at max 150°C Dry clean only with perchloride, benzine av., pure alcohol, R111 and R113 Iron at max 110°C Dry clean with av. benzine, pure alcohol and R113 Spread to dry Do not dry clean Hang to dry without spin drying Machine dryable P Wash at 60°C Do not bleach Do not machine dry F Wash at 40°C Wash at 30°C Hand wash Not washable in water 17 Instructions for installation and use Not ironable Dry on clothes hanger Useful tips Never use your washing machine to wash... torn, fraying or non-hemmed linen. If it is absolutely neccessary, place it in a bag for protection. Do not wash coloured linen with whites. How much does it weigh? 1 sheet 400-500 gr. 1 pillow case 150-200 gr. 1 tablecloth 400-500 gr. 1 bathrobe 900-1,200 gr. 1 towel 150-250 gr. Watch the weight! For best results, do not exceed the weight limits stated below (figures show weight of dry garments): Coloured T-shirts, printed ones and shirts last longer if turned inside out before washing. Printed T-shirts and sweatshirts should always be ironed inside out. - Resistant fabrics: 5,5 kg maximum - Synthetic fabrics: 2.5 kg maximum - Delicate fabrics: 2 kg maximum - Pure new wool: 1 kg maximum Dungaree alert. Very popular “salopette” type overalls have straps with hooks that can damage the drum of your washing machine or other garments during the wash. To minimise the risk, place hooks in the pocket and fasten with safety pins. Holidays: unplug the appliance. It is recommended that you should unplug the machine from the socket and turn off the water supply. Leave the door ajar to allow air circulation to the draw and the door gasket area.This will prevent unpleasant odours. WOOL CYCLE For best results, we recommend you use a specific detergent, taking care not to wash more than 1 kg of laundry. How to wash almost anything Curtains. Curtains tend to crease a great deal. A useful tip to reduce creasing: fold the curtains and place them in a pillow case or mesh bag. Do not load anything else inside the appliance, this will ensure that the overall weight does not exceed the half load. Remember to use the specific programme 9 which automatically excludes the spin cycle. Quilted coats and anorak. You can wash quilted coats and wind-cheaters, too, if they are padded with goose or duck down. Do not load more than 2-3 kg and never load 5,5 kg. Repeat rinse once or twice using the gentle spin. Trainers. Once you have removed mud and dirt from trainers, you can even wash them with jeans or any other tough garments. Do not wash trainers with whites. Instructions for installation and use 18 It’s important for a good wash Useful tips about the detergent dispenser The first secret is the easiest: the detergent dispenser is opened by rotating it outwards. You must follow the dosage recommendations provided by the manufacturers when adding detergent or fabric conditioner. Doses will vary according to the wash load, the water hardness and how soiled the washing is. Experience will help you select the right dosage almost automatically: it will become your secret. Before adding detergent for prewashing in compartment 1, make sure that the extra compartment for bleach 4 has not been inserted. Ensure no overfilling when adding fabric conditioner in compartment 3. The washing machine automatically adds the softener to the wash in each programme. Liquid detergent is poured into compar tment 2 just a few seconds before starting the wash cycle. Remember that liquid detergent is only designed for wash cycles of up to 60 degrees on non pre-wash items. Special containers are sold with liquid or powder detergents for placing inside the washing machine drum, these are positioned according to the instructions found in the detergent box Never use hand wash detergent, because it may form too much foam, which could damage the washing machine. Detergents that are specifically formulated for both hand and machine wash are an exception. One last secret: when washing with cold water, always reduce the amount of detergent you use: it dissolves less easily in cold water than in hot water, so part of it would be wasted. The detergent dispenser can be removed and cleaned: pull it outwards, as indicated in the figure. Then leave it under running water for a few minutes. Cutting costs efficiently In compartment 1: Detergent for pre-washing (powder) 4 1 In compartment 2: Detergent for washing (powder or liquid) 2 3 In compartment 4: Bleach and delicate bleach. Bleach cycle and stain remover button If bleaching is necessary, the extra case 4 (provided) must be inserted into compartment 1 of the detergent dispenser. When pouring in the bleach, be careful not to exceed the "max" level indicated on the central pivot (see illustration). The use of the additional bleach container excludes the possibility of using the pre-wash cycle. Traditional bleach can only be used on sturdy white fabrics, whereas delicate bleach can be used for coloured fabrics, synthetics and for wool. A guide to environmentally friendly and economic use of your appliance. MAXIMISE THE LOAD SIZE Achieve the best use of energy, water, detergent and time by using the recommended maximum load size. SAVE up to 50% energy by washing a full load instead of 2 half loads. DO YOU NEED TO PRE-WASH? For heavily soiled laundry only! SAVE detergent, time, water and between 5 to 15% energy consumption by NOT selecting Prewash for slight to normally soiled laundry. IS A HOT WASH REQUIRED? Pretreat stains with stain remover or soak dried in stains in water before washing to reduce the necessity of a hot wash programme. SAVE up to 50% energy by using a 60°C wash programme. BEFORE USING A DRYING PROGRAMME ... SAVE energy and time by selecting the highest suitable spin speed to reduce the water content in laundry before using a drying programme. 19 Instructions for installation and use In compartment 3: Additives (softeners, perfumes, etc.) You cannot bleach with the “Silk” programme and with the “special programmes” (see page 16). Use the stain removal button every time you want to bleach. Should you want to do it separately you must pour the bleach into the additional container 4, press button H (stain removal), star t the washing machine, then select one of the symbols according to the type of fabric. When you bleach during a normal wash cycle, pour the detergent and any additives in the special compar tments, press button H (stain removal), set the programme you desire and turn the washing machine on. Troubleshooting Before calling, read the following In most cases, when your washing machine fails to work, the problems arising can be easily solved without having to call for a technician. Before calling for assistance, always check these points. The washing machine fails to start. Is the plug correctly inserted into the socket? It could have been moved whilst cleaning. Is there electricity in the house? A circuit breaker may have switched off as a result of too many electrical appliances working at the same time. Or maybe due to a general failure in your entire area. Is the washing machine door closed properly? For safety reasons, the washing machine cannot work if the door is open or not shut properly. Is the On/Off button pressed? If it is, then a programmed start has been set. But where did all the water go? Simple: with the new Indesit technology, you need less than half of it, to get good results on twice as much! This is why you cannot see the water through the door: because there is little, very little of it, to respect the environment yet without renouncing maximum cleanliness. And, on top of that, you are also saving electricity. Is the programmed start knob, in the correct position for those models concerned? Is the water supply turned on? For safety reasons, if the washing machine does not load water, it cannot start a wash cycle. select one of the symbols stop/reset , then switch it back on. If the knob continues to turn, call for assistance because it is showing an anomaly. The washing machine fails to fill with water. RIGHT WRONG Turn off the water supply after use. This will eliminate the possibility of leakage. Leave the washing machine plugged in while cleaning. Even during maintenance, the appliance should always be unplugged. Always leave the appliance door ajar to avoid bad odours. Clean the appliance’s exteriors gently. To clean the exteriors and the rubber parts of the appliance, always use a soft cloth dipped in warm and soapy water. Use solvents and aggressive abrasives. Never use solvents or abrasives to clean the external and rubber parts of the washing machine. Neglect the detergent dispenser. It is removable and can easily be cleaned by leaving it under running water. Go on holiday without thinking about her. Before leaving, always make sure that the washing machine is unplugged and that the water supply is turned off. Is the hose correctly connected to the tap? Is there a water shortage ? There could be work in progress in your building or street. Is there sufficient water pressure? The autoclave may be malfunctioning. Is the tap filter clean? If the water is very calcareous, or if work has recently been carried out on the water piping, the tap filter could be clogged with particles and debris. Is the rubber hose kinked? The tract of the rubber hose bringing water to washing machine must be as straight as possible. Make sure it is not squashed or kinked. The programme selector knob keeps turning? Wait a few minutes for the drain pump to empty the tub, switch the washer off, The washing machine continuously fills and drains water. Is the drain hose positioned too low? It must be installed at a height ranging from 60 to 100 cm. Is the end of the hose immersed in water? Does the wall drainage system have a breather pipe? If the problem persists even after these checks, turn the water supply off the machine and call for assistance. If you live on an upper floor of your building, there may be a problem with your drain trap. To solve this problem, a special valve must be installed. Instructions for installation and use 20 Is the drain hose kinked? The tract of the drain hose must be as straight as possible. Make sure the drain hose is not squashed or kinked. Is the washing machine’s drain duct clogged? Is there an extension of the drain hose? If so, is it positioned incorrectly, blocking the water flow? The washing machine does not drain or spin. Does the selected programme incorporates water draining? Some programmes stop at the end of the wash cycles and draining will have to be selected manually. Is the “Anti-crease" function -where provided enabled? This function requires manual selection for draining. Is there space between the machine and adjacent units? If it is not a built-in model, the washing machine will oscillate a bit during the spin cycle. A few cm of space should therefore be left around it. Too much foam. Is the detergent appropriate for machine washing? Check whether the definition on its label reads “for machine wash” or “hand and machine wash”, or any other similar wording. The washing machine leaks. Excessive vibration during the spin cycle. Is the drain pump clogged? To check it, turn off the water supply, unplug the washing machine and follow the instructions on page 23, or call for technical assistance. Always get assistance from authorised technicians and always insist on original spare parts. Have all transit screws been removed durind installation? See the following page on installation procedures. Has the washing machine been levelled correctly? The levelling of the appliance should be checked periodically. Adjust the feet and check them with a level. Is the correct amount being used? An excessive amount of detergent, besides producing too much foam, does not guarantee a more effective wash, and causes scaling in the internal parts of the appliance. Is the metal ring of the inlet hose properly attached? Turn off the water supply, unplug the appliance and try tightening its attachment without forcing it. Is the detergent dispenser obstructed? Remove and wash it under tap water. Is the drain hose well attached? Turn off the water supply, unplug the appliance and try tightening its attachment. If, despite all checks, the washing machine fails to function and the problem persists, call your nearest authorised Customer Service Centre, providing the following information: - the nature of malfunction - the model type no. (Mod. ....) - the serial number (S/N ....) This information can be found on the data plate situated at the back of the washing machine. Technical characteristics Model W 125 TX Dimensions width 59,5 cm height 85 cm depth 53,5 cm Capacity from 1 to 5,5 kg Electrical connections voltage 220/230 Volt 50 Hz maximum absorbed power 1850 W Water connections maximum pressure 1 MPa (10 bar) minimum pressure 0,05 MPa (0,5 bar) drum capacity 46 litre Spinning speed up to 1200 rpm Control programs in carried out with 5 kg load compliance with IEC regulation 456 This appliance conforms with the following E.E.C. directives: - 73/23/EEC of 19/02/73 (Low Voltage) and subsequent modifications - 89/336/EEC of 03/05/89 (Electromagnetic Compatibility) and subsequent modifications 21 Instructions for installation and use Installation and removal When the new washer arrives Whether new or just transported to a new house, installation is extremely important for the correct functioning of your washing machine. After removing the appliance from its packaging, check that it is intact. If in doubt, contact a qualified technician immediately. The inside of the machine is supported, for transportation, by four screws on the back panel. The front feet are adjustable. Before using the washing machine, remove the screws, remove the spacers together with the rubber tubes attached to them (keeping all the parts) and use the plastic plugs provided to fill in the holes. Important: Use the cap (provided) to close the 3 holes which housed the stop pin, situated in the right-hand part of the lower back of the washing machine. Connection to the water mains Water pressure must range within the values indicated on the data plate on the rear of your washing machine. If the water pipes are new or left unused, then before connecting the machine run the water until clear to remove debris. Connect the inlet hose to a cold water tap having a ¾ “ BSP thread. Ensure that the rubber sealing washers are fitted at each end of the inlet hose, with the fitter washer at the tap end. A necessary to fix the end of the hose at a height below 60 cm from the ground, it must be fixed in the appropriate hook placed on the upper part of the back panel. The hook to be used in case the drain hose ends at a height below 60 cm. If the drains hose empties into a tub or sink then fit the plastic guide and secure it to the tap. Electric connection Before connecting the appliance to the electric socket, be sure that: 1) the electric socket is able to sustain the appliance’s maximum power load indicated on the data plate and in compliance with the law; 2) the supply voltage is included within the values indicated on the data plate; 3) the socket is compatible with the appliance’s plug. If not, do not use adapters, but replace either the socket or the plug; 4) electric household appliances must be equipped with an “earthing” system. A The rubber hose filter. Part A must not be removed. Levelling The washing machine must be levelled appropriatey in order to guarantee its correct functioning.To level the appliance, the front feet must be adjusted; the angle of inclination, measured according to the worktop, must not exceed 2°. When placed on carpet, make sure the ventilation is not reduced. Retain the transit screws, spacers and washers. Should you move house then these should be replaced to support the inside of the machine to prevent damage when transporting the machine. Connect the inlet hose to the threaded connector on the machine rear. Water pipe inlet at the top right. Connecting the drain hose There are two hooks (right or left) on the rear of your washing machine to which the drain hose is to be fixed. Insert the other end in a stand pipe or place it on the edge of a sink or tub avoiding excessive kinks and bending. It should be placed at a height ranging from 60 to 100 cm. If it is The guide for draining into tubs and sinks. The end of the drain hose must be positioned so that it cannot become submerged. Extensions are unadvisable. In case of absolute need, the extension must have the same diameter as the original hose and must not exceed 150 cm. In case of wall draining pipes, their efficiency must be checked by a qualified technician. If the dwelling is on one of the upper floors of a building, there may be drain trap problems causing the washing machine to load and unload water continuously. In order to avoid such an inconvenience, special anti-drain trap valves are available in shops. Warning! The company denies all liability if and when these norms are not respected. Plastic bags, expanded styrofoam, nails and other packaging parts are not children’s toys, and are potentially dangerous. Instructions for installation and use 22 Easy Care and Maintenance Treat your machine well and it will provide many years of trouble free service Your washing machine is a reliable companion in life and on the job. It is just as important for you to keep it in shape. Your washing machine is designed to provide reliable service over many years. A few simple steps will help to prolong its life and avoid problems. It is advisable, to turn off water taps when the machine is not to be used, this protects the hoses, etc. If the water in your area is too hard, use a deliming product (water is hard if it often leaves whitish stains around taps or drains, especially of bath tubs. For more accurate information as to the type of water in your system, call the local water works or a local plumber). Pockets must always be emptied removing even pins, badges and any other hard object. The washing machine exterior should be cleaned with a rag dipped in lukewarm water and soap. It is important to wash the detergent dispenser regularly. To prevent dried washing powder from accumulating, place the dispenser under running water for a few minutes. Never exaggerate with doses. Normal detergents already contain deliming agents. Only if the water is particularly hard, that is, rich in lime content, do we recommend the use of a specific product at every wash. A periodical wash cycle with a dose of a deliming product, without detergents or washing, may prove useful. Never use too much detergent or additives because this could cause an excess amount of foam, scaling and possible damage to the component parts of your washing machine. Do not forget to empty all pockets: small objects can cause damage to your washer. When in need, check the pump and the rubber hose. The washer comes equipped with a self-cleaning pump that does not require any cleaning or maintenance. Small objects may accidentally fall into the pump: coins, hair clips, loose buttons and other small items. To avoid possible damage, they are withheld in an accessible pre-chamber, situated at the lower end of the pump. Attention: Before attempting to examine this pre-chamber, first ensure that the machine has finished its programme and is empty. Unplug the machine, as with any maintenance. Fig. 1 To gain access gently ease down the top of the plinth panel situated at the base of the machine, with a screwdriver etc, to release it. Then ease the top edge forward to allow it to be lifted clear (Fig. 1). Place a shallow dish or tray below the cover of the pre-chamber to catch the small amount of water present. Release the cover by turning anticlockwise (Fig. 2). Ensure that the cover is securely replaced. Re-fit the plinth cover by inserting the hooks on its lower edge into the slots and ease the top edge back into position. Fig. 2 The water inlet hose Check the rubber hose at least once a year. If you see any cracks, replace it immediately. When you use your washing machine, water pressure is very strong and a cracked tube could easily split open. 23 Instructions for installation and use Important for the safe use of your washing machine Your safety and that of your family Your washer has been built in compliance with the strictest international safety regulations. To protect you and all your family. Read these instructions and all the information in this manual carefully: they are an important source, not only of numerous useful tips, but also of vital information on safety, use and maintenance. 1. the machine should not be installed in an outdoor environment, not even when a roof shelters the area, because it may be very dangerous to leave it exposed to rain and thunderstorms. 2. It must only be used by adults and exclusively for washing clothes following the instructions provided in this manual. 3. Should it have to be moved, proceed with the help of two or three people and handle it with the utmost care. Never try to do this alone, because the appliance is very heavy. 4. Before loading the washing machine, make sure the drum is empty. 5. Never touch the washing machine when barefoot or with wet or damp hands or feet. 6. Never use extensions or multiple plugs, which are particularly dangerous in humid environments. The power supply cable must never be bent or dangerously compressed. 7. Never open the detergent dispenser while the appliance is functioning; do not use hand wash detergent because the abundance of foam could damage its internal parts. I only want an authorised specialised technician with original Indesit spare parts! 8. Never pull on the supply cable or the washing machine to disconnect it from the wall socket: it is extremely dangerous. 9. While the appliance is functioning, do not touch the drain water as it could reach very high temperatures. The appliance door, during wash cycles, tends to become hot; ensure that children do no touch it. Never force the washing machine door because this could damage the safety lock which prevents accidental opening when the nachine is working. Allow a few minutes at the end of the program for the lock to release. 10. In case of malfunctio-ning, first close the water tap and unplug the appliance from the wall socket; do not under any circumstances touch internal parts in order to attempt repairs. How to change the power supply cable The washing machine power supply cable is special and can be purchased exclusively from authorised Technical Service Centres. To replace the cable: 1. Make sure that the machine is switched off and unplugged. 2. Remove the covering lid by unscrewing the two screws I, and then pull it towards you [fig. 3]. 3. Disconnect the wires from the radio interference suppressor F [fig. 4] noting as to their position (Blue=N wire; Brown=L wire) leaving the earth wire until last . N.B.: letters L, N and the symbol are indicated on the radio interference suppressor. 4. Remove the upper part of the cable slightly from the back panel of the appliance, pull the power supply cable upwards and take it out [fig. 5]. To connect the new power supply cable, reverse the procedure. To put the covering lid back on, rest it on the washing machine [fig. 6] and let it slide forwards until the hooks situated on the front slide into the special slots formed into the control panel and tighten the screws back on. I N L F Fig. 3 Fig. 4 Fig. 5 Fig. 6 Instructions for installation and use 24 Guide rapide Découvrez ci-dessous les 11 sujets qui seront développés dans les pages de ce manuel. Lisez, apprenez, amusezvous: vous découvrirez un tas de petits secrets pour laver mieux, avec moins d’efforts tout en augmentant la longévité de votre lave-linge. Et surtout, en toute sécurité. 1.Installation et déménagement (page 34) Pour un bon fonctionnement de la machine à laver, l’opération la plus importante après sa livraison ou après un déménagement, est sans aucun doute son installation. Vérifiez toujours: 1. si l’installation électrique est conforme; 2. si les tuyaux d’arrivée et de vidange de l’eau sont bien raccordés correctement. Ne jamais utiliser des tuyaux usés. 3. si le lave-linge est bien de niveau. C’est important: pour la longévité de votre lave-linge et pour la qualité de votre lavage. 4. que toutes les vis de fixation du tambour, situées à l'arrière du lave-linge, ont bien été enlevées. 2. Comment charger votre lave-linge et mettre en service la machine à laver (page 26) Triez correctement votre linge: c’est une opération importante dont la réussite de votre lessive dépend entièrement. Apprenez tous les trucs et tous les secrets pour bien trier votre lessive: les couleurs, les textiles, la tendance à produire des peluches, voilà quels sont les critères les plus importants. 3.Guide pour comprendre les étiquettes (page 29) Les symboles reportés sur les étiquettes des vêtements sont très faciles à comprendre et importants quant à la réussite du lavage. Ce guide vous aidera à vous y retrouver parmi les températures conseillées, les types de lavage et de repassage. 4.Conseils utiles pour ne pas vous tromper (page 30) Autrefois, on suivait les bons conseils de grand-mère - et les matières synthétiques n’existaient pas: il était donc facile de laver. Aujourd’hui, la votre machine à laver vous donne de bons conseils et vous permet même de laver laine aussi bien qu’une blanchisseuse. 5. Le tiroir à produits lessiviels (page 31) Comment utiliser le tiroir à produits lessiviels et le bac à eau de Javel. 7. Guide des programmes de lavage (page 28) Un tableau facile à consulter pour cerner d’un seul coup d’oeil tous les programmes, les températures, les produits lessiviels et additionnels. Utilisez le bon et vous obtiendrez de meilleurs résultats en économisant du temps, de l’eau et de l’électricité, jour après jour. 8.Soin et entretien (page 35) La votre machine à laver est une amie: quelques petites attentions suffisent pour qu’elle vous rende la pareille en fidélité et dévotion. Chouchoutez-la, elle lavera pour vous pendant des années et des années. 9. Problèmes et solutions (pages 32 et 33) Avant d’appeler un technicien, lisez ces pages: de nombreux problèmes peuvent trouver une solution immédiate. Si vous n’arrivez pas à les résoudre, appelez alors le numéro de votre SAV et en un rien de temps la panne sera réparée. 10.Caractéristiques techniques (page 33) Vous y trouverez les caractéristiques techniques de votre lave-linge: sigle du modèle, spécifications électriques et hydrauliques, dimensions, capacité, vitesse d’essorage et conformité aux normes et aux directives italiennes et européennes. 6.Bien maîtriser le bandeau de commandes (page 27) 11.Sécurité pour vous et vos enfants (page 36) Le bandeau de commandes de la machine à laver est très simple. Quelques commandes essentielles pour choisir les types de lavage, du plus énergique, pour laver une combinaison de mécanicien, jusqu’au plus délicat pour la laine. Apprenez à vous en servir, vous laverez mieux et prolongerez la durée de vie de votre lave-linge. C’est facile. 25 Mode dinstallation et demploi Vous y trouverez tous les conseils indispensables à votre sécurité et à celle de votre famille. C’est ce qu’il y a de plus important. Que placer dans votre M lave-linge? Quelques astuces pour mieux laver. Triez votre linge en tenant compte des textiles et des couleurs. Attention aux étiquettes, suivez leurs indications. Alternez les petites et les grandes pièces. Avant de laver. Triez votre linge selon le type de tissu et la résistance des couleurs: les tissus plus résistants doivent être séparés des délicats. Séparez les couleurs claires des couleurs foncées. Videz toutes les poches (pièces de monnaie, papier, argent et petits objets) et contrôlez les boutons. Recousez tout de suite les boutons ballants, vous éviterez ainsi qu’ils ne se détachent en cours de lavage. Les étiquettes vous disent tout ce qu’il faut. Lisez toujours les étiquettes: vous saurez tout sur vos vêtements et sur leurs meilleures conditions de lavage. Page 29, nous vous dévoilerons tous les secrets qui se cachent derrière les symboles reportés sur les étiquettes des vêtements. Leurs indications sont précieuses, elles vous aideront à conserver la beauté de vos vêtements. Dispositif antibalourds. Ce lave-linge est équipé d’un dispositif spécial à contrôle électronique pour bien équilibrer le chargement: avant l’essorage, ce dispositif veille à ce que le linge soit bien réparti à l’intérieur du tambour, compte tenu du type de linge et de sa disposition initiale. Triez votre linge par type de tissu et couleur: vous obtiendrez de meilleurs résultats Ainsi le lave-linge ne vibre pas et ne fait pas de bruit même à une vitesse maximum. Démarrage de la lave-linge Dès son installation, démarrez un cycle de lavage en sélectionnant le programme "1" à 90 degrés. Une bonne mise en service de la votre machine à laver est primordiale tant pour la qualité du lavage que pour éviter des problèmes et augmenter sa longévité. Après avoir chargé le linge et dosé les produits lessiviels, contrôlez toujours si: Chouchoutez votre linge: placez vos pièces de lingerie, vos bas et vos vêtements délicats dans un sachet en toile pour les protéger 1. Le hublot est bien fermé. 2. La fiche est bien branchée dans la prise. 3. Le robinet de l’eau est ouvert. 4. Le bouton A est bien placé en face de l’un des symboles (Stop/Reset). Choisissez un programme Choisissez ce programme en fonction du type de linge à laver. Pour opérer ce choix, consultez le tableau page 28. Tournez le bouton A pour amener le programme choisi en face du repère situé dans le haut de la bouton, programmez la température à l'aide du bouton B, vérifiez que le bouton C est bien dans la position que vous désirez, sinon utilisez les touches E, F, G et H, puis appuyez sur le bouton marche/ arrêt I (position I). N’oubliez pas enfin de sélectionner, si vous le désirez, le "départ programmé" avant le cycle de lavage. Une fois le lavage terminé... Attendez que l’indicateur lumineux M s’éteigne: il faut compter environ trois minutes. Eteignez alors la machine à laver en appuyant sur la touche marche-arrêt I (position O). Vous pouvez alors ouvrir le hublot en toute sécurité. Après avoir sorti le linge, laissez le hublot ouvert ou entrouvert pour que l’humidité à l’intérieur puisse s’évaporer. Fermez toujours le robinet de l’eau. N’oubliez pas qu’en cas de coupure de courant ou si vous éteignez le lave-linge, le programme sélectionné reste mémorisé. Comment enlever les taches les plus courantes Encre et stylo à bille Tamponnez avec du coton imbibé d’alccol méthylique ou d’alcool à 90°. Goudron Tamponnez avec du beurre frais, passez de la térébenthine puis lavez immédiatement. Cire Raclez puis repassez avec un fer bien chaud entre deux feuilles de papier buvard. Passez ensuite du coton imbibé d’essence de térébenthine ou d’alcool méthylique. Chewing-gum Passez du solvant pour vernis à ongles puis un chiffon propre. Moisissure Plongez le coton et le lin blanc dans une solution formée de 5 parties d’eau, une d’eau de javel et une cuillère à soupe de vinaigre, lavez aussitôt. Pour les autres tissus blancs, utilisez de l’eau oxygénée à 10 volumes puis lavez aussitôt. Rouge à lèvres Tamponnez à l’éther les tissus de laine ou de coton. Pour la soie, utilisez du trichloréthylène. Vernis à ongles Posez le tissu du côté de la tache contre une feuille de papier buvard, mouillez de solvant, en déplaçant le vêtement au fur et à mesure que la feuille se colore. Herbe Tamponnez avec du coton imbibé d’alcool méthylique. Mode dinstallation et demploi 26 Maîtrise du panneau de commandes C’est vous qui commandez Choisir les bons programmes: c’est important et c’est facile. F E Bouton programmes et départ différé Il sert à sélectionner le programme de lavage. Ne tournez ce bouton que dans le sens des aiguilles d'une montre. Pour sélectionner les programmes, amenez le symbole/numéro correspondant au programme désiré en face du repère situé sur le bouton. Appuyez alors sur la touche marche / arrêt I (position I), la lampe-témoin L commence à clignoter.Au bout de 5", la sélection est acceptée, la lampetémoin L cesse de clignoter (mais reste allumée) et le cycle de lavage débute. Si vous désirez interrompre le lavage en cours ou en programmer un autre, sélectionnez l'un des symboles (Stop/Reset) et attendre 5" : quand l'annulation est acceptée, la lampe-témoin L clignote, vous pouvez alors éteindre votre machine. Vous pouvez utiliser ce bouton pour différer le fonctionnement du lavelinge. Sélectionnez une des quatre positions de départ différé, appuyez sur la touche marche/arrêt I (position I) et attendre 5". La sélection est alors acceptée (la lampe-témoin L reste allumée) et vous pouvez sélectionner le programme souhaité. L'indicateur lumineux Lclignote de façon particulière (2" allumé et 4" éteint) pour signaler qu'il y a programmation d'un départ différé. Pendant cette phase, vous pouvez ouvrir le hublot pour compléter votre chargement de linge. Une fois que le cycle de lavage a été sélectionné et accepté par le lavelinge, un changement de position du bouton n’aura aucune conséquence (sauf dans la position Stop/Reset). D Bouton température Il sert à sélectionner la température de lavage indiquée dans le tableau des programmes (voir page 28). Il vous permet aussi de réduire la température conseillée pour le programme sélectionné, jusqu’au lavage à froid ( ). Bouton essorage Il sert à supprimer l’essorage (sélectionnez le symbole ) et à réduire la vitesse d’essorage du programme sélectionné. Les vitesses maximum prévues pour les 4 types de tissu sont: 6EIIK 8EJAIIA Coton 1200 tours minute Synthétiques 800 tours minute Laine 600 tours minute Soie non De toute manière, la machine procède à une répartition de la charge à faible vitesse. Tiroir à produits lessiviels Il est à trois bacs: 1. Produit de prélavage; 2. Produit de lavage; 3. Assouplissants, parfums... Le lave-linge est aussi équipé d’un bac supplémentaire 4 (fourni) pour l’eau de Javel, à insérer dans le compartiment 1. 4 1 Le tiroir à produits lessiviels avec son bac à eau de javel supplémentaire est ici. 27 Mode dinstallation et demploi 2 3 H G M L I Repassage facile Grâce à cette fonction, votre linge ne sera pas froissé et donc beaucoup plus facile à repasser. Vous pouvez l'utiliser avec les programmes 3-4 (Coton), 5-6 (Synthétiques) et 8-9 (Délicats). Si vous appuyez sur cette touche en utilisant les programmes 5-6-8-9 votre cycle de lavage s'arrêtera en face du symbole , pour l'achever, appuyez à nouveau sur la touche E. Important: ne pas utiliser cette fonction quand le bouton H (anti-taches) est enfoncé. Extra economy Cette touche réduit la consommation d’eau lors des rinçages. Nous vous conseillons de ne l’utiliser qu’en cas de chargement incomplet et de réduire la quantité de produit lessiviel. Peu sale Cette touche réduit la durée du programme de lavage d’environ 30%. A ne pas utiliser avec les programmes spéciaux (voir page 28) et les programmes laine et soie. Anti-taches (voir page 31) Grâce à cette commande la lave-linge effectue un lavage plus intense qui optimise l’effet des addittifs liquides permettant ainsi d’éliminer les taches les plus difficiles. Quand la touche anti-taches est activée, pas de prélavage possible. C B A Appuyez sur la touche I pour allumer votre lave-linge, relachez-la pour l’éteindre. L'arrêt de la machine n'annule pas le programme sélectionné. Voyant marche-arrêt Le voyant L clignote pour signaler que la machine est allumée et attend d’être programmée. Sa lumière fixe indique que le programme sélectionné est accepté. Voyant hublot bloqué L’allumage du voyant indique que le hublot est bloqué pour empêcher toute ouver ture accidentelle. Attendez que le voyant s’éteigne avant d’ouvrir le hublot . L'attente est d’environ trois minutes. Que laver, aujourd’hui? Des programmes pour toutes les saisons Nature des tissus et degré de salissure Bouton program. Bouton températ. Lessive lavage Assoupl. Touche antitaches/ Javel Durée du cycle (minutes) Description du cycle de lavage COTON 165 Prélavage tiède, lavage à 90°C, rinçages, essorages intermédiaires et final Dél./Trad. 145 Lavage à 90°C, rinçages, essorages intermédiaires et final ◆ Dél./Trad. 130 Lavage à 60°C, rinçages, essorages intermédiaires et final ◆ Dél./Trad. 95 Lavage à 40°C, rinçages, essorages intermédiaires et final ◆ Dél./Trad. Blancs extrêmement sales(draps, nappes, etc.) 1 90°C ◆ ◆ Blancs extrêmement sales(draps, nappes, etc.) 2 90°C ◆ ◆ Blancs et couleurs résistantes très sales 3 60°C ◆ Blancs peu sales et couleurs délicates (chemises, pulls, etc.) 4 40°C ◆ Rinçages/Javel Rinçages, essorages intermédiaires et final Essorage Vidange et essorage final Stop/Reset Interrompt/Annule le programme sélectionné SYNTHETIQUES Synthétiques couleurs résistantes très sales (linge de bébé, etc.) 5 60°C ◆ ◆ Délicate 100 Lavage à 60°C, rinçages, anti-froissement ou essorage délicat Synthétiques couleurs délicates(linge en tout genre légèrement sale) 6 40°C ◆ ◆ Délicate 70 Lavage à 40°C, rinçages, anti-froissement ou essorage délicat Synthétiques couleurs délicates(linge en tout genre légèrement sale) 7 30°C ◆ ◆ 30 Lavage à 30°C, rinçages et essorage délicat Rinçages/Javel ◆ Assouplissant ◆ Rinçages, anti-froissement ou essorage délicat Délicate Rinçages avec prélèvement de l'assouplissant, antifroissement ou essorage délicat Essorage Vidange et essorage délicat Stop/Reset Interrompt/Annule le programme sélectionné DELICATS Lainage 8 40°C ◆ ◆ 60 Lavage à 40°C, rinçages et essorage délicat Vêtements et tissus particulière-ment délicats (rideaux, soie, viscose, etc.) 9 30°C ◆ ◆ 50 Lavage à 30°C, rinçages, anti-froissement ou vidange Rinçages ◆ Rinçages, anti-froissement ou vidange Essorage Vidange et essorage délicat Vidange Vidange Stop/Reset Interrompt/Annule le programme sélectionné DÉPART DIFFÉRÉ Retard de 12 - 9 - 3 - 1 heures Diffère le départ de 12 - 9 - 3 - 1 heures Stop/Reset Interrompt/Annule le programme sélectionné Important: pour annuler le programme de lavage que vous venez de lancer, sélectionnez l’un des symboles (Stop/Reset) et attendez au moins 5”. Les données reportées dans le tableau sont fournies à titre indicatif, elles peuvent varier selon la quantité et le type de linge, la température de l'eau d'alimentation et la température ambiante. Programme Spéciaux Lavage express Votre machine à laver dispose d’un programme spécial permettant de laver des vêtements peu sales en un rien de temps. En choisissant le programme 7 à 30°C, vous pouvez laver ensemble des tissus différents (sauf laine et soie), avec une capacité maximum de 3 kg. Ce programme permet de faire des économies de temps et d’électricité, parce qu’il ne dure que 30 minutes environ. Nous vous conseillons d’utiliser des lessives liquides. Mode dinstallation et demploi 28 Sachez lire les étiquettes Apprenez à lire ces symboles, vous laverez mieux, votre linge durera plus longtemps et votre lave-linge ne vous en servira que mieux. Par tout en Europe, les étiquettes contiennent des messages sous forme de petits mais très importants symboles. Il est primordial d’apprendre à les comprendre pour mieux laver et traiter vos vêtements. On compte cinq catégories de sigles différents: lavage , Javel , repassage , nettoyage à sec et enfin séchage . Conseils Utiles Retournez les chemises, elles seront mieux lavées et dureront plus longtemps. Videz bien les poches. Lisez les étiquettes: leurs conseils sont précieux et utiles. Dans le tambour, alternez grandes et petites pièces de linge. Attention à ne pas vous tromper de température.... Lisez et mémorisez les symboles de ce tableau: vous apprendrez à mieux laver et traiter votre linge et à augmenter les performances de votre machine à laver Indesit. Lavage Action forte Blanchissage Repassage Nettoyage à sec Action délicate Temp. élevée On peut blanchir dans l'eau froide Temperat. modérée A cl Lavage à 95° Séchage Repassage fort max200°C Nettoyage à sec avec tous les solvants Sécher en machine P Lavage à 60° Ne pas blanchir Repassage moyen max 150°C Nettoyage à sec avec perchlorure, benzine, alcool pur, R111 et R113 Ne pas sécher en machine F Lavage à 40° Repassage max 110°C Lavage à 30° Ne pas repasser Lavage délicat à la main Ne pas laver dans l'eau 29 Mode dinstallation et demploi Nettoyage à sec avec benzine, alcool pur et R113 Ne pas nettoyer à sec Sécher à plat Sécher étendue une pièce pas essorée Sécher sur cintre Quelques conseils pour ne pas vous tromper Ne lavez jamais à la machine... du linge non ourlé, , effiloché ou déchiré. Si vous devez absolument le laver, enfermez-le dans un sac. Du linge aux couleurs vives avec du linge blanc. Attention au poids! Pour obtenir d’excellents résultats, ne dépassez jamais les poids indiqués, se référant à la capacité maximum de linge sec: - Tissus résistants: maximum 5,5 kg - Textiles synthétiques: maximum 2,5 kg - Textiles délicats: maximum 2 kg - Pure laine vierge: maximum 1 kg Mais combien pèsent-ils? 1 drap 400-500 g 1 taie d’oreiller 150-200 g 1 nappe 400-500 g 1 peignoir 900-1.200 g 1 serviette éponge 150-250 g Les Tee-shirts couleur, les imprimés et les chemises durent plus longtemps si vous les lavez à l’envers. Repassez toujours vos Tee-shirts et vos sweats imprimés sur l’envers. Alarme salopettes. Elles ont du succès ces combinaisons genre “salopette” mais leurs bretelles ont des crochets qui peuvent endommager le tambour ou les autres vêtements. Pourquoi ne pas les enfiler dans la poche de la bavette et les fixer avec des épingles à nourrice pour supprimer tout danger! Vacances: débranchez la fiche. Quand vous par tez en vacances, mieux vaut débrancher la fiche, fermer le robinet d’arrivée de l’eau et laisser le hublot entrouvert ou ouvert. Ainsi, le tambour et le joint resteront bien secs et vous éviterez la formation de mauvaises odeurs. CYCLE LAINE Pour obtenir de meilleurs résultats, utilisez une lessive spéciale laine et ne lavez pas plus d'un kilo de linge à la fois. Comment laver presque tout Les rideaux. Ils ont tendance à beaucoup se froisser. Nous vous conseillons: de bien les plier et de les glisser dans une taie d’oreiller ou dans un sac genre filet. Lavez-les seuls de manière à ce que leur poids total ne dépasse pas une demi-charge. N’oubliez pas de sélectionner le programme spécial 9 qui supprime automatiquement l’essorage. Doudounes et anorak. Les doudounes et les anoraks aussi peuvent être lavés à la machine s’ils sont en duvet d’oie ou de canard. Ce qui compte c’est de ne pas dépasser une charge de 2-3 kg maximum, de faire faire deux ou trois rinçages de suite et un essorage léger. Chaussures de tennis. Débarassez les chaussures de tennis de la boue et lavez-les avec les jeans et les vêtements plus résistants. Ne les lavez pas avec du linge blanc. Mode dinstallation et demploi 30 Important pour mieux laver Le secret du tiroir à produits lessiviels Son premier secret, le plus facile, c’est qu’il faut le faire pivoter vers la gauche pour l’ouvrir. Versez les produits lessiviels et l’additif éventuel en ne dépassant pas les doses conseillées par le fabricant: celles-ci sont généralement indiquées sur les paquets. Les doses varient en fonction de la charge, de la dureté de l’eau et du degré de salissure. L’expérience aidant, vous apprendrez à doser les quantités presque automatiquement: ce sera votre secret. Avant de verser la lessive pour le prélavage dans le compartiment 1 contrôlez qu’il n’y ait pas à l’intérieur le bac supplémentaire à eau de javel 4 . Quand vous versez l’assouplissant dans le bac 3, attention à ce qu’il ne déborde pas de la grille. Le lave-linge prélève automatiquement l’assouplissant lors de chaque programme de lavage. Versez la lessive liquide dans le bac 2 quelques instants avant de brancher votre machine. N’oubliez pas que la lessive liquide est particulièrment indiquée pour des lavages à des températures allant jusqu’à 60 degrés et pour les programmes de lavage qui ne prévoient pas de prélavage. Vous trouverez dans le commerce des lessives liquides ou en poudre avec boule doseuse à placer directement dans le tambour, leur mode d’emploi est indiqué sur le paquet. N’utilisez jamais de lessive pour lavage à la main, leur excès de mousse risquerait d’endommager votre lave-linge. Les lessives spéciales main et machine font bien sûr exception. Encore un petit secret: quand vous lavez à l’eau froide, réduisez la quantité de lessive car cette dernière s’y dissout moins bien que dans l’eau chaude et serait en partie gaspillée. Le tiroir à produits lessiviels est amovible. Pour le laver, sortez-le en le tirant vers vous (voir figure) et rincez-le à l’eau courante. Des économies sur toute la ligne Bac 1: Lessive prélavage (en poudre) 4 1 Bac 2: Lessive lavage (en poudre ou liquide) 2 3 Bac 4: Javel et détachant délicat Cycle blanchissage et touche anti- taches Si vous voulez blanchir votre linge, placez le bac supplémentaire n°4 (fourni) dans le compartiment 1 du tiroir à produits lessiviels. Lorsque vous versez l’eau de Javel, attention à ne pas dépasser le niveau "max" indiqué sur le pivot central (voir figure). L’utilisation du bac supplémentaire à eau de Javel exclut la possibilité d’effectuer un prélavage. N’utilisez de l’eau de javel que pour les tissus blancs résistants et des détachants délicats pour les couleurs, les synthétiques et la laine. Guide pour un emploi économique et écologique des électroménagers CHARGE MAXIMUM La meilleure façon d’éviter des gaspillages d’électricité, d’eau, de lessive et de temps, c’est d’utiliser votre lave-linge au maximum de la charge conseillée. Mieux vaut une pleine charge que deux demies, vous pourrez ECONOMISER jusqu’à 50% d’électricité. UN PRELAVAGE EST-IL VRAIMENT NECESSAIRE? Uniquement en cas de linge vraiment sale. Programmer un lavage SANS prélavage pour du linge peu sale ou moyennement sale permet d’ECONOMISER sur la lessive, le temps, l’eau et de 5 à 15% d’électricité. UN LAVAGE A L’EAU CHAUDE EST-IL VRAIMENT NECESSAIRE? Avant le lavage, traitez les taches avec un détacheur ou mettez a tremper le linge taché dans l’eau, vous pourrez sélectionner un programme de lavage à l’eau chaude à une température moins élevée. Choisissez un programme de lavage à 60° pour ECONOMISER jusqu’à 50% d’électricité. AVANT DE SELECTIONNER UN PROGRAMME DE SECHAGE ... Sélectionnez une vitesse d’essorage très élevée pour éliminer le surplus d’eau avant de lancer le programme de séchage. Vous ECONOMISEREZ du temps et de l’électricité. 31 Mode dinstallation et demploi Bac 3: Additifs (assouplissants, parfums, etc.) Supprimez-le pour le programme “Soie” et les “programmes spéciaux” (voir page 28). Utilisez la touche anti-taches chaque fois que vous voulez blanchir. Si vous voulez le faire séparément, versez l’eau de Javel dans le bac supplémentaire 4, appuyez sur la touche H (anti- taches), allumez votre machine et sélectionnez l’un des symboles selon le type de tissu. Pour des opérations de blanchissage pendant un cycle de lavage normal, versez la lessive et les additifs dans les bacs correspondants, appuyez sur la touche H (anti-taches), allumez la machine à laver et sélectionnez le programme désiré. Problèmes et solutions Avant de téléphoner, lisez ce qui suit Il peut arriver que le lave-linge ne fonctionne pas bien. Il s’agit très souvent de problèmes faciles à résoudre sans l’aide d’un technicien. Avant d’appeler le SAV, effectuez les contrôles suivants. Le lave-linge ne démarre pas. La fiche est-elle bien branchée dans la prise? Elle pourrait avoir été déplacée en faisant le ménage. Y a-t-il du courant? Le disjoncteur pourrait s’être déclenché parce qu’il y a trop d’électroménagers branchés en même temps. Ou bien il peut y avoir une panne de courant dans votre quartier. Le hublot est-il bien fermé? Par sécurité, le lave-linge ne Mais l'eau, où donc est-elle passée? fonctionne pas si le hublot est ouvert ou mal fermé. La touche Marche-arrêt est-elle enfoncée? Dans ce cas, un dépar t différé a été programmé. C'est très simple: grâce à la nouvelle technologie Indesit, il en faut moins que la moitié, pour bien laver le double de linge! Voilà pourquoi vous ne voyez pas d'eau par le hublot: parce qu'il y en a peu, très peu, pour protéger l'environnement sans pour autant renoncer à une propreté éclatante. Et ce n'est pas tout: vous faites en plus des économies d'électricité. Le bouton de départ différé, sur les modèles qui en prévoit un, est-il dans une position correcte? Le robinet de l’eau est-il ouvert? Par sécurité, s’il n’y a pas d’arrivée d’eau, le lavage ne démarre pas. Le bouton des programmes tourne sans cesse? Attendez quelques minutes pour que la pompe de vidange vide la cuve, éteignez la lave-linge, sélectionnez l’un des symboles stop/reset , puis rallumez. Si le bouton tourne toujours, c’est un signal de panne, appelez le SAV. Il n’y a pas d’arrivée d’eau. A FAIREA NE PAS FAIRE Fermer le robinet après chaque lavage. Cela réduit l’usure de l’installation hydraulique du lavelinge et évite le danger de fuites quand il n’y a personne à la maison. Laisser toujours le hublot entrebaillé. Pour éviter la formation de mauvaises odeurs. Nettoyer l’extérieur avec soin. Pour nettoyer l’extérieur et les parties en caoutchouc, utilisez toujours un chiffon imbibé d’eau et de savon. Laisser la fiche branchée pendant le nettoyage du lave-linge. Même pendant les travaux d’entretien, il faut toujours débrancher la fiche. Utiliser des solvants et des produits abrasifs agressifs. Ne jamais utiliser de produits solvants ou abrasifs pour nettoyer l’extérieur et les parties en caoutchouc. Négliger le tiroir à produits lessiviels. Il est amovible, pour le laver il suffit de le laisser un peu sous un jet d’eau courante. Partir en vacances sans se soucier de lui. Avant de partir, il faut toujours contrôler si la fiche est bien débranchée et le robinet de l’eau fermé. Le tuyau est-il bien raccordé au robinet? Panne d’eau? N’y a-t-il pas des travaux en cours dans votre immeuble ou dans la rue? La pression est-elle suffisante? La moto-pompe pourrait être en panne. Le filtre du robinet est-il propre? Si l’eau est très calcaire, ou suite à des travaux récents sur la canalisation d’eau, le filtre pourrait être bouché par des détritus. Le tuyau en caoutchouc n’est-il pas plié? Le parcours du tuyau en caoutchouc qui amène l’eau au lave-linge doit être le plus rectiligne possible. Contrôlez s’il n’est pas écrasé ou plié. Le lave-linge prend l’eau et vidange continuellement. Le tuyau est placé trop bas? Il faut l’installer entre 60 et 100 cm de haut. L’embouchure du tuyau est plongée dans l’eau? L’évacuation murale a-t-elle un évent? Si après ces vérifications, le problème persiste, fermez le robinet de l’eau, éteignez la machine et appelez le SAV. Si vous habitez en étage, il pourrait y avoir des phénomènes de siphonnement. Pour les résoudre, il faut monter une soupape spéciale. Mode dinstallation et demploi 32 Est-ce que le tuyau d’évacuation est plié? Le parcours du tuyau doit être le plus rectiligne possible. Contrôlez s’il n’est pas écrasé ou plié. Est-ce que la conduite de l’installation de vidange est bouchée? S’il y a une rallonge, est-ce qu’elle est bien montée ou empêche-t-elle l’eau de passer? Votre lave-linge ne vidange pas et n’essore pas. Est-ce que la machine est coincée entre des meubles et le mur? A moins que ce soit un modèle à encastrer, votre lave-linge a besoin d’osciller un peu pendant l’essorage. Prévoyez quelques cm de libres tout autour. Il y a un excès de mousse. Est-ce que vous utilisez bien une lessive machine? Vérifiez qu’il y ait bien l’inscription: “pour lave-linge” ou bien “main et machine”. Est-ce que le programme choisi prévoit la vidange de l’eau? Pour certains programmes de lavage il faut intervenir pour lancer la vidange . Est-ce que la fonction “Arrêt cuve pleine” - si elle est prévues - est activé? Il faut là aussi intervenir pour actionner la vidange. Est-ce que la quantité est correcte? Un excès de lessive produit plus de mousse mais ne lave pas mieux tout en produisant des incrustations à l’intérieur du lave-linge. Le lave-linge a des fuites. Votre lave-linge vibre beaucoup en phase d’essorage. Est-ce que la pompe d’évacuation est bouchée? Pour l’inspecter, fermez le robinet, débranchez la fiche et suivez les instructions fournies page 35 ou bien appelez le SAV. Ne vous adressez jamais à des techniciens non agréés et exigez toujours l’emploi de pièces détachées originales. Est-ce que le groupe oscillant interne a bien été débloqué lors de l’installation? La page qui suit est consacrée à l’installation. Est-ce que la machine est bien de niveau? Contrôlez régulièrement sa mise à niveau. A la longue, le lave-linge pourrait s’être légèrement déplacé. Agissez sur les pieds et contrôlez à l’aide d’un niveau. Est-ce que la bague du tuyau d’arrivée de l’eau est bien vissée? Fermez le robinet, débranchez la fiche et essayez de la serrer sans forcer. Est-ce que le tiroir à produits lessiviels est engorgé? Essayez de le sortir et de le laver à l’eau courante. Est-ce que le tuyau de vidange n’est pas bien fixé? Fermez le robinet, débranchez la fiche et essayez de mieux le fixer. Si malgré tous ces contrôles, votre lave-linge ne fonctionne pas et l’inconvénient persiste, appelez le SAV le plus proche de votre domicile en précisant: - le type de panne - le sigle (Mod. ....) - le numéro de série (S/N ....) Vous trouverez tous ces renseignements sur la plaquette signalétique située sur le panneau arrière de votre lave-linge. Caractéristiques techniques Modèle W 125 TX Dimensions largeur cm 59,5 hauteur cm 85 profondeur cm 53,5 Capacité de 1 à 5,5 kg Connexions électriques tension à 220/230 Volt 50 Hz puissance max. absorbée1850 W Connexions hydrauliques pression maximum 1 MPa (10 bar) pression minimum 0,05 MPa (0,5 bar) capacité du tambour 46 litres Vitesse d'essorage jusqu' à 1200 tours par minute Programmes de contrôle suivant norme IEC 456 effectué pour une charge de 5 kg Cet appareil est conforme aux Directives Communautaires suivantes: - 73/23/CEE du 19/02/73 (Basse Tension) et modifications successives - 89/336/CEE du 03/05/89 (Compatibilité électromagnétique) et modifications successives 33 Mode dinstallation et demploi Installation et déménagement Quand la lavelinge arrive Que votre lave-linge soit neuf ou que vous veniez juste de déménager, son bon fonctionnement dépend en grande partie de son installation. Après avoir déballé l’appareil, vérifiez s’il est en bon état. En cas de doute, faites appel à un professionnel du secteur. Pour permettre son transport, l’intérieur du lave-linge a été bloqué à l’aide de quatre vis sur le panneau arrière de la machine. Avant de brancher votre lave-linge, enlevez les vis, le caoutchouc et la cale (conservez bien toutes ces pièces) et bouchez les trous à l’aide des cache-trous en plastique fournis avec l’appareil. Important: fermez à l'aide du bouchon (fourni) les 3 trous où était montée la fiche et qui se trouvent sur le panneau arrière du lave-linge, en bas à droite. A La pièce A ne doit pas être enlevée. Mise à niveau Pour bien fonctionner, il est important que votre lave-linge soit bien posé à plat. Pour bien le niveler, il suffit d’agir sur ses pieds avant; son angle d’inclinaison , mesuré sur le plan de travail, ne doit pas dépasser 2°. Si vous avez de la moquette, attention à ce que la ventilation ne soit pas bouchée au niveau du socle. Conservez les vis de blocage et la cale. En cas de déménagement vous pourrez vous en resservir pour bloquer les pièces internes du lave-linge et le protéger ainsi contre les chocs pendant son transport. Les pieds avant sont réglables. Raccordement à la prise d’eau La pression de l’eau doit être comprise entre les valeurs indiquées sur la plaquette fixée à l’arrière de l’appareil. Raccordez le tuyau d’arrivée à une prise d’eau froide à embout fileté 3/4 gaz ou 20x27 en interposant le joint en caoutchouc avec le filtre. l’évier ou à la baignoire en évitant de l’écraser ou de trop le plier. Il faut absolument qu’il débouche entre 60 et 100 cm de haut. Si vous êtes obligés de fixer l’extrémité à moins de 60 cm au-dessus du sol, il faut que vous fixiez le tuyau au crochet prévu dans le haut du panneau arrière de la machine. A Le crochet à utiliser si le tuyau débouche à moins de 60 cm de haut. Le filtre du tuyau en caoutchouc. Si les canalisations d’eau sont neuves ou inutilisées depuis longtemps, faites couler l’eau jusqu’à ce qu’elle soit limpide et sans impuretés. Raccordez le tuyau à la machine, au niveau de la prise d’eau prévue en haut, à droite. Si le tuyau évacue dans la baignoire ou dans le lavabo, appliquez le support en plastique et attachez-le au robinet. qui font que votre lave-linge prend et évacue l’eau continuellement. Pour supprimer cet inconvénient, vous pouvez trouver dans le commerce des valves spéciales anti-siphonnement. Branchement électrique Avant de brancher la machine à la prise de courant, contrôlez que: 1) la prise de courant est conforme aux normes et que sa charge électrique est bien apte à supporter la puissance maximum de la machine figurant sur la plaquette des caractéristiques ; 2) la tension d’alimentation est bien comprise entre les valeurs figurant sur la plaquette des caractéristiques; 3) la prise est bien compatible avec la fiche de la machine. En cas d’incompatibilité, n’utilisez pas d’adaptateurs mais remplacez la prise ou la fiche; 4) votre installation électrique dis-pose bien d’une “mise à la terre”. Le support pour évacuation dans une baignoire ou dans un lavabo. Prise deau en haut à droite. Raccordement du tuyau de vidange Deux crochets (droit ou gauche) situés à l’arrière de la machine vous permettent de fixer le tuyau de vidange. Introduisez l’autre extrémité dans un conduit ou bien accrochez-le à Ne le laissez jamais tremper dans l’eau. L’utilisation de rallonges est absolument déconseillée. Si vous ne pouvez vraiment pas vous en passer, il faut qu’elle ait le même diamètre que le tuyau original et moins de 150 cm de long. En cas d’évacuation murale, faites vérifier son efficacité par un professionnel agréé. Si vous habitez en étage dans un immeuble, il peut y avoir des phénomènes de siphonnement Attention! Nous déclinons toute responsabilité en cas de non respect des normes énumérées ci-dessus. Ne laissez pas les enfants jouer avec les sachets plastique, le polystyrène expansé, les clous et les autres éléments d’emballage, ils pourraient être dangereux. Mode dinstallation et demploi 34 Soins et Entretien facile Chouchoutez-le et il vous sera toujours fidèle Votre lave-linge est un vrai compagnon de vie et de travail. Le garder en forme, cest important. Pour vous aussi. La votre lave-linge est conçu pour durer longtemps sans causer de problèmes. Quelques astuces vous permettront de le garder toujours en forme et d’augmenter sa longévité. En premier lieu, fermez toujours le robinet de l’eau après chaque lavage: la pression continue de l’eau peut provoquer l’usure de certains composants. Vous éliminerez aussi tout danger de fuites en votre absence. Si votre eau est trop dure, utilisez un produit anticalcaire (une eau dure laisse des traces blanchâtres autour des robinets ou bien au niveau des bondes, notamment dans la baignoire). Si vous désirez avoir des renseignements plus précis à propos de l’eau de votre installation, adressez-vous au Service des eaux municipal ou bien à un plombier. Il faut toujours vider les poches et enlever les objets durs, les broches ou les pin’s par exemple. Lavez l’extérieur du lave-linge avec un chiffon, de l’eau tiède et du savon. Lavez périodiquement le tiroir à produits lessiviels. Pour éviter que des incrustations ne se forment, placez-le sous un jet d’eau courante. N’ayez pas la main lourde. Les lessives normales contiennent déjà des produits anticalcaires. Donc, n’ajoutez à votre lavage un produit spécifique que si votre eau est particulièrment dure, c’est à dire très riche en calcaire. Il peut être utile, de temps en temps, d’effectuer un cycle de lavage avec une dose de produit anticalcaire, sans lessive et sans linge. N’ayez pas la main lourde avec les produits lessiviels, l’excès de mousse pourrait causer de incrustations et abîmer les composants de votre machine. Videz toujours les poches: les petits objets peuvent endommager votre machine à laver. En cas de besoin, inspectez la pompe et le tuyau en caoutchouc. La votre lave-linge est équipée d’une pompe autonettoyante qui n’exige aucune opération de nettoyage et d’entretien. Il peut toutefois arriver que de menus objets tombent par mégarde dans la pompe: des pièces de monnaie, des barrettes, des boutons etc. Pour éviter qu’ils n’endommagent la machine, ils sont bloqués dans une préchambre accessible, située en bas de la pompe. Pour accéder à cette préchambre, il suffit de démonter le panneau situé en bas du lave-linge à l’aide d’un tournevis (figure 1); enlevez ensuite le couvercle en le faisant tourner dans le sens inverse des aiguilles d’une montre (figure 2) et inspectez soigneusement l’intérieur. Fig. 1 Le tuyau en caoutchouc Contrôlez le tuyau en caoutchouc au moins une fois par an. Remplacez-le dès que vous remarquez des craquèlements et des fissures qui pourraient entraîner des cassures. Fig. 2 Attention: contrôlez que le cycle de lavage est bien terminé et débranchez la fiche avant d’enlever le couvercle et avant toute opération d’entretien. Il est normal qu’un peu d’eau s’échappe quand vous enlevez le couvercle. Lorsque vous remontez le panneau extérieur, attention à bien enfiler les crochets du bas dans les fentes avant de le pousser contre la machine. 35 Mode dinstallation et demploi Ce qui compte par dessus tout Votre sécurité et celle de vos enfants La votre lave-linge a été fabriquée selon les normes internationales de sécurité les plus sévères. Pour vous protéger ainsi que votre famille. Lisez attentivement ces conseils ainsi que toutes les informations contenues dans ce mode d’emploi: ils vous fourniront no n seulement des renseignements utiles mais aussi des conseils importants sur la sécurité, l’utilisation et l’entretien. 1. La machine à laver ne doit pas être installée dehors, même à l’abri, car il est très dangereux de la laisser exposée à la pluie et aux orages. 2. Elle ne doit être utilisée que par des adultes et exclusivement pour laver du linge selon les instructions reportées dans ce mode d’emploi. 3. Deux ou trois personnes sont nécessaires pour la déplacer en faisant très attention. Ne jamais la déplacer seul car la machine est très lourde ou utilisez un engin de manutention (“diable”). 4. Avant d’introduire votre linge, contrôlez si le tambour est bien vide. 5. Ne touchez jamais la machine pieds nus ou bien les mains ou les pieds mouillés ou humides. 6. N’utilisez ni rallonges ni prises multiples, dangereuses surtout dans des endroits humides. Le câble d’alimentation ne doit être ni plié ni écrasé. 7. N’ouvrez pas le tiroir à produits lessiviels pendant le fonctionnement de la machine; n’utilisez jamais de J’exige un professionnel qualifié et agréé et des pièces de rechange originales garanties Indesit! lessive pour lavage à la main sa mousse abondante pourrait endommager les par ties inter nes de la machine. 8. Ne tirez jamais sur le câble ni sur le lave-linge pour débrancher la fiche de la prise murale: c’est extrêmement dangereux.. 9. En cours de fonctionnement, ne touchez pas à l’eau évacuée, elle peut atteindre des températures très élevées. Pendant le lavage, le hublot a tendance à se réchauffer; gardez vos enfants à bonne distance. Ne forcez jamais pour ouvrir le hublot vous risqueriez d’endommager le mécanisme de sécurité prévu pour prévenir les ouver tures accidentelles. 10. En cas de panne, fermez avant tout le robinet de l’eau et débranchez la fiche de la prise murale; n’essayez en aucun cas d’accéder aux mécanismes internes pour la réparer. Comment changer le câble d’alimentation Le câble d’alimentation de la machine à laver est un câble spécial qui n’est disponible qu’auprès des SAV agréés. Pour le remplacer, procédez comme suit: 1. Contrôlez que la machine à laver est bien éteinte et que la fiche est bien débranchée. 2. Démontez le dessus en dévissant les deux vis I puis tirez-le vers vous [fig. 3]. 3. Déconnectez les câbles du filtre antiparasite F [fig. 4] en repérant bien leur emplacement (fil Bleu=N; fil Marron=L) en laissant en dernier le fil de terre . Remarque: les lettres L, N et le symbole sont reportés sur le filtre antiparasite. 4. Eloignez légèrement la partie supérieure du passe-fil du panneau arrière, tirez le câble d’alimentation vers le haut, sortez-le [fig. 5]. Pour raccorder le nouveau câble, procédez en sens inverse. Pour remonter le dessus, posezle sur le lave-linge [fig. 6] et faites-le glisser vers l’avant jusqu’à ce que ses crochets avant aillent se loger dans les fentes spécialement prévues sur le tableau de bord, puis revissez les vis. I N L F Fig. 3 Fig. 4 Fig. 5 Fig. 6 Mode dinstallation et demploi 36 Kurzanleitung Erkunden Sie hier die 11 Argumente, die auf nachfolgenden Seiten dieses Handbuches näher erklärt werden. Lesen Sie diese, merken Sie sich diese und haben Sie viel Spaß dabei; Sie werden viele kleine Geheimnisse entdecken, die Ihnen dazu verhelfen, besser und müheloser zu waschen und Ihren Waschvollautomaten länger zu erhalten. 1. Installation und Umzug (Seite 46) Die Installation, sei es die eines neuen Gerätes oder die nach einem Umzug, ist die wichtigste Voraussetzung für die optimale Betriebsweise Ihrer Waschmaschine. In jedem Falle ist sicherzustellen: 1. dass die Elektroanlage den einschlägigen Vorschriften entspricht; 2. dass Versorgungs- und Ablaufschläuche vorschriftsmäßig angeschlossen wurden. Verwenden Sie niemals bereits gebrauchte Schläuche. 3. dass der Waschvollautomat eben aufgestellt wurde. Es macht sich belohnt: durch längere Lebensdauer und beste Wasch wirkung; 4. dass die auf der Rückwand des Waschvollautomaten befindlichen Trommel-Befestigungsschrauben abgenommen wurden. 2. Was kann im Waschvollautomaten gewaschen werden und wie wird er in Betrieb gesetzt? (Seite 38) Ein korrektes Sortieren Ihrer Wäsche ist nicht nur für ein optimales Waschergebnis von äußerster Wichtigkeit, sondern auch für die Lebensdauer des Gerätes. Lernen Sie die wichtigen Kniffe und Tips, die beim Wäschesortieren zu beachten sind: Farben, Gewebeart, Neigung zu Flusenbildung sind die wichtigsten Kriterien. 3.Leitfaden zur Verdeutlichung der Etiketten (Seite 41) Die auf den in jedem Kleidungs- bzw. Wäschestück befindlichen Etiketten abgebildeten Symbole sind leicht verständlich und äußerst wichtig für ein optimales Waschergebnis. In diesem Abschnitt erhalten Sie einige Tips zu den empfohlenen Temperaturen, der Art der Behandlung, der Bügelweise. 4.Praktische Ratschläge um Fehler zu vermeiden (Seite 42) Einmal waren es unsere Großmütter, die uns mit guten Ratschlägen zur Seite standen, außerdem gab es damals noch keine Kunstfasern: Heute ist es nicht mehr so einfach. Aber es gibt Waschmaschine, die Ihnen mit guten Ratschlägen zur Seite steht. Sie können sogar Wollwäsche bedenkenlos in der Maschine waschen. 7. Leitfaden zur Wahl der Programme Ihrer Waschmaschine (Seite 40) Eine einfache, praktische, übersichtliche Tabelle hilft Ihnen bei der Wahl der Temperaturen, des geeigneten Waschmittels und eventueller Zusätze. Eine korrekte Wahl dieser Komponenten, eine angemessene Dosierung des Waschmittels sind eine Garantie für optimale Waschergebnisse. Sie sparen Zeit, Wasser und Strom, Tag für Tag. 8.Reinigung und Pflege (Seite 47) Waschmaschine ist Ihre Freundin: Sie verlangt nur einige kleine Aufmerksamkeiten und dankt Ihnen dafür mit Treue und Zuverlässigkeit. Pflegen Sie sie, und Sie werden noch lange Freude an Ihrer Maschine haben. 9. Probleme und Lösungen (Seite 44 und 45) Bevor Sie den Einsatz eines Technikers anfordern, lesen Sie diesen Abschnitt: Für vieles findet sich eine einfache, sofortige Lösung. Sollten Sie jedoch keine geeignete Lösung finden, dann fordern Sie den Indesit-Kundendienst an, der für eine sofortige Behebung einer jeden Betriebsstörung sorgen wird. 10.Technische Eigenschaften (Seite 45) 5.Die Waschmittelschublade (Seite 43) Hier finden Sie die technischen Daten Ihres Vollwaschautomaten: Modellkennzeichen, Daten für den Elektro- und Wasseranschluss, Abmessungen, Kapazität, Schleudertouren und Übereinstimmungserklärung mit den italienischen und europäischen Richtlinien und Vorschriften. Wo und wie werden Reiniger und eventuelle Zusätze eingefüllt? 11. Ihre Sicherheit und die Ihrer Kinder (Seite 48) 6.Machen Sie sich mit der Schalterblende vertraut (Seite 39) Hier finden Sie unentbehrliche Ratschläge für Ihre Sicherheit und die Ihrer Familie. Die wichtigste Voraussetzung! Die Schalterblende Ihrer Waschmaschine ist klar und übersichtlich. Rasch übersehen Sie, welches Waschprogramm zu wählen ist und wie es abgerufen werden kann, vom energischsten Vollwaschprogramm bis hin zum Schonprogramm für Wolle. Sie werden sehen, es wird ganz leicht sein. 37 Installations- und Bedienungsanleitungen M Was darf in die Waschmaschine? Sie können viel dazu beitragen, dass Ihre Wäsche besonders rein wird, noch bevor der Waschvorgang beginnt. Trennen Sie die Wäsche nach Farben und Material. Kontrollieren Sie die Wäscheetiketten und befolgen Sie die dort aufgezeichneten Waschanleitungen. Geben Sie abwechselnd kleine und große Wäschestücke in die Wäschetrommel. Vor dem Waschen. Trennen Sie die Wäsche nach Material und nach Farbfestigkeit: strapazierfähige Stoffe sollten nicht gemeinsam mit Feinwäsche gewaschen werden. Helle Farben müssen stets von dunklen getrennt gewaschen werden. Entleeren Sie alle Taschen (Kleingeld, Papier, Geldscheine und Kleingegenstände) und kontrollieren Sie auch die Knöpfe.Wenn ein Knopf lose ist, nehmen Sie ihn ab oder nähen Sie ihn fest, denn er könnte beim Waschen abspringen. Die Wäscheetiketten verraten Ihnen alles. Gleichmäßige Gewichtsverteilung. Kontrollieren Sie stets die Wäscheetiketten: hieraus gehen alle Informationen zum Wäsche- oder Kleidungsstück hervor, auch wie es am besten gewaschen wird. Auf Seite 41 wird die „Geheimsprache" aller Wäscheetiketten entschlüsselt. Die Angaben, die Sie dort finden, sind überaus nützlich, um Ihre Wäsche materialgerecht zu waschen und lange Ihre Freude daran zu haben. Dieser Waschvollautomat ist mit einer speziellen elektronisch gesteuerten Vorrichtung ausgestattet, wodurch das Gewicht der Wäsche stets gleichmäßig ver teilt wird: vor dem Schleudern sorgt diese Vorrichtung dafür, dass die Wäsche so gleichmäßig wie möglich in der Wäschetrommel Die Wäschestücke nach Gewebe, Farbe und Flusenbildung zu trennen, ist ein wichtiger Schritt, um gute Waschergebnisse zu erzielen. angeordnet wird, natürlich immer so weit es der Wäschetyp und die anfängliche Lage gestatten. Dies ist auch der Grund dafür, weshalb diese Waschmaschine auch bei höchster Drehzahl nicht vibriert und somit äußerst geräuscharm ist. Wie setzen Sie Ihre Waschmaschine in Betrieb? Nachdem Sie den Waschvollautomaten installiert haben, führen Sie den ersten Waschvorgang mit Programm "1" und bei 90° C durch. Es ist wichtig, dass Sie Ihre 3. der Wasserhahn auf ist. Waschmaschine richtig in Betrieb 4. sich der Schalter A auf einem (Stop/Reset) nehmen, und zwar nicht nur, um der Zeichen eine gute Waschqualität zu befindet. garantieren, sondern auch um Probleme am Gerät zu vermeiden Das Programm auswählen und somit seine Lebensdauer zu Das Programm wird nach dem verlängern. Nachdem Sie die Wäschetyp, dem Schmutzgrad und Wäsche, das Waschpulver und derMengeausgewählt.Umdasrichtige Bitte vergessen Sie nicht, dass eventuelle Zusätze in den Programmauszuwählen,sieheTabelle die Funktion „Programmierter Waschvollautomaten gegeben auf Seite 40. Drehen Sie den Start" vor dem Waschvorgang haben, kontrollieren Sie stets, ob Programmwähler A bis das gewählte eingestellt werden muss. Programm mit dem auf dem oberen 1. die Tür gut geschlossen ist. 2. der Stecker in der Steckdose Rand des Drehknopfs befindlichen Am Ende des Waschganges Zeiger übereinstimmt, stellen Sie mit ist. Warten Sie, bis die der Programmierscheibe B die Anzeigeleuchte M erlischt: das Für Feinwäsche: Geben Temperatur ein, stellen Sie sicher, dass dauert ca. drei Minuten lang. Sie Ihre Unterwäsche, sich der Schalter C auf der von Ihnen Dann schalten Sie Ihre Damenstrümpfe und gewünschten Einstellung befindet, Waschmaschine aus, indem Sie andere Feinwäsche in ein drücken Sie gegebenenfalls dieTasten die EIN/AUS-Taste I drücken, so Stoffsäckchen, um sie zu E, F, G und H, und drücken Sie dass sie auf O steht. Nun schützen. daraufhin die EIN/AUS-Taste I können Sie die Tür ohne Gefahr (Einstellung I). öffnen. Lassen Sie die Tür immer einen Spalt weit offen stehen, nachdem Sie die Wäsche herausgenommen haben, so dass die Feuchtigkeit, die sich angesammelt hat, verdunsten kann. Schließen Sie stets den Wasserhahn. Hinweis: Falls es zu einem Stromausfall kommt oder die Waschmaschine während des Waschganges abgeschaltet wird, bleibt das ausgewählte Programm gespeichert. So können Sie die gängigsten Flecken entfernen: Tinte und Kugelschreiber: Betupfen Sie den Fleck mit einem Wattebausch, den Sie mit Methylalkohol oder mit 90°igem Alkohol getränkt haben. Teer: Betupfen Sie den Fleck mit frischer Butter, danach fahren Sie mit Terpentin darüber und waschen das Ganze dann sofort aus. Wachs: Schaben Sie erst das feste Wachs ab und legen Sie dann den Fleck zwischen zwei Löschblätter: nun bügeln Sie mit dem heißen Bügeleisen darüber. Daraufhin wischen Sie den Fleck noch mit einem Wattebausch mit Farblösungsmittel oder mit Methylalkohol ab. Kaugummi: Reiben Sie den Kaugummi mit Nagellackentferner ab und trocknen Sie das Ganze dann mit einem sauberen Lappen nach. Schimmel: Baumwolle und weißes Leinengewebe geben Sie in eine Lösung von 5 Teilen Wasser, einem Teil Bleichmittel und einem Esslöffel Essig, danach sofort auswaschen. Für alle übrigen weißen Gewebe verwenden Sie Wasserstoffperoxyd (1:10) und waschen daraufhin sofort das Gewebe aus. Lippenstift: Reiben Sie den Fleck mit Äther ab, wenn es sich um Wolle oder Baumwolle handelt. Bei Seide verwenden Sie Trichloräthylen. Nagellack: Legen Sie das Gewebe mit dem Fleck nach unten auf ein Löschblatt, tränken Sie das Ganze mit Nagellackentferner und verschieben Sie den Fleck stets, wenn sich das Löschpapier färbt. Gras: Betupfen Sie den Fleck mit einem Wattebausch, den Sie mit Methylalkohol getränkt haben. Installations- und Bedienungsanleitungen 38 Machen Sie sich mit der Schalterblende vertraut Hier bestimmen Sie Die Wahl des geeigneten Programms ist absolut wichtig und leicht. Programmierscheibe- und Startvorwahl Mit diesem wählen Sie das Waschprogramm. DrehenSiediesen Knebel bitte nur im Uhrzeigersinn. ZurWahlderProgrammeistderaufdem Drehknopf befindliche Zeiger mit dem Symbol bzw. der Nummer des entsprechenden, gewünschten Programmes in Übereinstimmung zu bringen. DrückenSiedaraufhindieEIN/ AUS-Taste I (Einstellung I), die AnzeigeleuchteL blinkt.Nach5"(sec.), d.h.nachdemdieEinstellungakzeptiert wurde, stellt die Anzeigeleuchte L ihr Blinken ein (sie bleibt jedoch eingeschaltet) und der Waschgang startet. Möchten Sie das laufende Programmunterbrechenodereinneues einstellen,wählenSieeinesderSymbole (Stop/Reset) und warten Sie bitte 5"(sec.):DasBlinkenderKontrolleuchte L ist ein Zeichen dafür, dass das Löschen des Programms akzeptiert wurde, nun können Sie Ihren Waschvollautomatenausschalten. Mit diesem Knebel kann das Einschalten Ihres Waschvollautomaten verzögert werden. Wählen Sie eine der vier Startverzögerungs-Einstellungen, drücken Sie die EIN/AUS-Taste I (Einstellung I) und warten Sie 5"(sec.). NachAblaufdieserkurzenZeitwirddie Einstellung akzeptiert (die AnzeigeleuchteL bleibteingeschaltet), wählen Sie daraufhin das gewünschte Programm. Die Anzeigeleuchte L zeigt mit unregelmäßig intermittierendem Blinken (2 eingeschaltet und 4 ausgeschaltet)an,dasseinverzögerter Start programmiert worden ist. Während dieser Phase kann die Tür noch geöffnet werden, um die Wäscheladung zu ändern. Im Anschluss einerWaschprogrammWahlundentsprechenderAnnahmeseitensdesWaschvollautomatenhatjeglichesDrehendiesesKnopfes(mitAusnahme der Einstellung Stop/Reset) keinen Einfluss mehr auf das Waschprogramm. D TemperaturProgrammierscheibe Mit dieser werden die entsprechenden, in der Programm-Tabelle empfohlenen Waschtemperaturen (auch ein Kaltwaschprogramm) eingestellt ( ). SchleudertourenProgrammierscheibe Mit dieser kann die Schleuder ganz ausgeschlossen werden (wählen Sie hierzu das entsprechende Symbol ), oder die Schleudertouren für ein gewähltes Programm herabgesetzt werden. Die für die 4 Gewebearten vorgesehenen Spitzenschleudertouren sind folgende: Gewebe Schleudertouren Baumwolle 1200 U/min Kunstfaser 800 U/min Wolle 600 U/min Seide nicht schleudern Ein Sanftanlauf und eine Unwuchtüberwachung sorgen dafür, dass die Wäsche dabei ganz pflegeleicht behandelt wird. Waschmittelschublade Diese ist in 3 Kammern unterteilt: 1. Waschmittel für die Vorwäsche; 2. Waschmittel für den Hauptwaschgang; 3. Weichspüler, Stärke, Duftstoffe. 4 1 Der Reinigerbehälter mit der Kammer für Bleichmittelzusätze befindet sich hier. 39 Installations- und Bedienungsanleitungen 2 3 F E H G M L I Der Waschvollautomat ist außerdem mit einer zusätzlichen Kammer 4 (als Beipack) für Bleichmittel ausgestattet, die in die Kammer 1 eingesetzt werden kann. Bügelfreundlich Wird diese Funktion abgerufen, wird Ihre Wäsche knitterfrei gewaschen, und ist somit einfacher zu bügeln. Diese Funktion kann zu den Programmen 3-4 (Baumwolle), 5-6 (Kunstfasern) und 8-9 (Feinwäsche) hinzugeschaltet werden. Wird sie zu den Programmen 5-6-8-9 hinzugeschaltet, wird das Waschprogramm auf dem Symbol angehalten, durch erneutes Drücken der Taste E wird das Programm fortgesetzt. Wichtig: Diese Funktion darf nicht eingestellt bzw. abgerufen werden, wenn die FleckenstoppTaste H gedrückt ist. Extra economy Durch Betätigen dieser Taste wird der Wasserverbrauch bei den Spülprogrammen für Baumwolle herabgesetzt.Wir empfehlen, diese Taste ausschließlich dann zu verwenden, wenn der Waschautomaten nicht komplett gefüllt ist, und das Waschmittel dann entsprechend zu verringern. Kurzwäsche Diese ermöglicht Ihnen, für die kurze Wäsche zwischendurch, die Dauer des Waschprogramms um 30% zu kürzen. Dies gilt nicht für die Spezialprogramme (siehe Seite 40) und die für Wolle und Seide. C B A Fleckenstopp (s. Seite 43) Wird diese Funktion abgerufen, wäscht Ihre Waschmaschine ganz besonders intensiv, zur Optimierung der Wirkung der flüssigen Zusätze, wodurch auch die hartnäckigsten Flecken beseitigt werden. Wird die Fleckenstopp-Taste gedrückt, kann die Funktion Vorwäsche nicht aktiviert werden. EIN/AUS Befindet sich die Taste I eingedrückt, ist Ihr Waschvollautomat eingeschaltet, ist diese nicht gedrückt, ist Ihr Waschvollautomat ausgeschaltet. Ein Ausschalten des Geräts bewirkt kein Löschen des gewählten Programms. EIN/AUS-Anzeigeleuchte Bei eingeschaltetem Gerät blinkt die Anzeigeleuchte L, und wartet auf Eingabe eines Programmes. Ein Umschalten auf feststehendes Licht bedeutet, dass das eingegebene Programm akzeptiert wurde. Türsicherungs-Anzeigeleuchte Durch Leuchten dieser Led-Anzeige meldet das Gerät, dass die Tür blockiert ist, um ein versehentliches Öffnen zu vermeiden.Warten Sie bitte, dass diese Leuchte erlischt (ungefähr 3 Minuten), bevor Sie die Tür öffnen, um Schäden an dieser Vorrichtung auszuschließen. Was soll heute gewaschen werden? Waschprogramme für jede Jahreszeit Gewebeart und Verschmutzungsgrad Programmwähler Temp. Wasch- Weich- Bleichmittel u. Wasch-daWähler mittel macher Fleckenstopp- uer (Min.) Taste Beschreibung des Waschprogramms BAUMWOLLE Kochwäsche (Bettücher, Tischdecken usw.) 1 90°C ◆ ◆ Kochwäsche (Bettücher, Tischdecken usw.) 2 90°C ◆ ◆ Widerstandsfähige, stark verschmutzte Weißund Buntwäsche 3 60°C ◆ Leicht verschmutzte Weißwäsche und empfindliche Buntwäsche (Oberhemden, Maschenwareusw.) 4 40°C ◆ Spülgänge/Bleichmittel 165 Lauwarme Vorwäsche, waschen bei 90°C, Spülgänge, Zwischen- und Endschleudern Schon./ Trad. 145 Waschen bei 90°C, Spülgänge, Zwischenund Endschleudern ◆ Schon./ Trad. 130 Waschen bei 60°C, Spülgänge, Zwischenund Endschleudern ◆ Schon./ Trad. 95 ◆ Schon./ Trad. Waschen bei 40°C, Spülgänge, Zwischenund Endschleudern Spülgänge, Zwischen- und Endschleudern Schleuder Ablauf und Endschleudern Stop/Reset Unterbricht/Löscht das eingestellte Programm KUNSTFASERN Stark verschmutzte, farbechte Kunstfasergewebe (Babywäsche usw.) 5 60°C ◆ ◆ Schon. 100 Waschen bei 60°C, Spülgänge, Knitterschutz oder sanftes Schleudern Zarte bunte Kunstfasergewebe (leicht verschmutzte Feinwäsche jeglicher Art) 6 40°C ◆ ◆ Schon. 70 Waschen bei 40°C, Spülgänge, Knitterschutz oder sanftes Schleudern Zarte bunte Kunstfasergewebe (leicht verschmutzte Feinwäsche jeglicher Art) 7 30°C ◆ ◆ 30 Waschen bei 30°C, Spülgänge und sanftes Schleudern Spülgänge/Bleichmittel ◆ Weichmacher ◆ Spülgänge, Knitterschutz oder sanftes Schleudern Schon. Spülgänge mit Einspülung des Weichmachers, Knitterschutz oder sanftes Schleudern Schleuder Ablauf und sanftes Schleudern Stop/Reset Unterbricht/Löscht das eingestellte Programm FEINWÄSCHE Hand waschen 8 40°C ◆ ◆ Sehr zarte Feinwäsche (Gardinen, Seide, Viskose, usw.) 9 30°C ◆ ◆ Spülgänge ◆ . 60 Waschen bei 40°C, Spülgänge und sanftes Schleudern 50 Waschen bei 30°C, Spülgänge, Knitterschutz oder Ablauf Spülgänge, Knitterschutz oder Ablauf Schleuder Ablauf und sanftes Schleudern Ablauf Ablauf Stop/Reset Unterbricht/Löscht das eingestellte Programm STARTVORWAHL 12 - 9 - 3 - 1 Startvorwahl 12 - 9 - 3 - 1 Std. Stop/Reset Unterbricht/Löscht das eingestellte Programm Wichtig: Um ein soeben eingegebenes Programm zu löschen, wählen Sie bitte eines der Symbole ( mindestens 5”. Stop/Reset) und warten Sie Bei den in der Tabelle angegebenen Daten handelt es sich um Richtwerte, die je nach Menge und Art der Wäsche, der Temperatur der Wasserzufuhr, der Raumtemperatur usw. variieren. Spezialprogramme Die tägliche Wäsche Waschmaschine stellt Ihnen ein Programm zur Verfügung, das Ihnen ermöglicht, leicht verschmutzte Wäsche in kurzer Zeit wirtschaftlich zu waschen. Wählen Sie das Programm 7 und eine Temperatur von 30°C. Auch Gewebe unterschiedlicher Art (mit Ausnahme von Wolle und Seide) können in diesem Programm, bei maximaler Lademenge von 3 kg, zusammen gewaschen werden. Mit diesem Programm sparen Sie Zeit und Energie, denn die Waschzeit beträgt nur ca. 30 Minuten. Es ist ratsam, flüssige Waschmittel einzusetzen. Installations- und Bedienungsanleitungen 40 Leitfaden zur Verdeutlichung der Wäscheetiketten Prägen Sie sich diese wenigen Symbole ein. Ihre Wäsche wird es Ihnen danken, sie wird sauberer, hält länger, bleibt formschön und auch Ihr Waschvollautomat wird sein Bestes geben. Innerhalb Europas sprechen die auf den Wäscheetiketten abgebildeten Symbole "dieselbe Sprache". Versuchen Sie, diese zu verstehen und sich diese zu eigen zu machen, sie werden Ihnen eine wertvolle Stütze sein bei der korrekten Behandlung Ihrer Kleider und Wäscheteile. Sie werden in fünf Kategorien unterteilt, und beziehen sich auf: Waschen , Bleichen , Bügeln ,chem. Reinigen und Trocknen . Praktische Ratschläge Ziehen Sie Oberhemden und Blusen auf links. Entleeren Sie alle Taschen. Kontrollieren Sie stets die Etiketten. Füllen Sie große und kleine Wäscheteile abwechselnd in die Wäschetrommel. Wählen Sie die richtige Temperatur Vergleichen Sie die Etiketten mit den Symbolen dieser Tabelle: Ihre Wäsche wird es Ihnen danken, sie wird sauberer, hält länger, bleibt formschön und auch Ihre Waschmaschine Indesit wird ihr Bestes geben. Waschen Energisch Chloren Bügeln Chemische Reinigung Hohe tem peratur Mild A cl Waschen bei 95° Trocknung Chlorbleiche möglich Heiß bügeln max 200°C Mit allen Lösemitteln Mäßige temperatur Trocknen in Wäschetrocknern möglich P Waschen bei 60° Chlorbleiche nicht möglich Mäßig heiß bügeln max 150°C Mit Perchlorat Flugbenzin, reinem Alkohol, R111 und R113 Trocknen in Wäschetrocknern nicht möglich Bügeln max 110°C Mit Flugbenzin, reinem Alkohol, und R113 Ausgebreitet trocknen Nicht bügeln Keine chemische Reinigung möglich Aufgehängt trocknen (nicht geschleudert) F Waschen bei 40° Waschen bei 30° Handwäsche Nicht waschen 41 Installations- und Bedienungsanleitungen Auf Kleiderbügel trocknen Praktische Ratschläge um Fehler zu vermeiden Waschen Sie in der Maschine keine Wäsche, die ungesäumt, ausgefranst oder zerrissen ist. Gegebenenfalls sind solche Teile in einem Kissenbezug zu waschen. Waschen Sie Buntwäsche nicht mit Weißwäsche zusammen. Wie schwer ist Wäsche? 1 Bettuch 400-500 gr 1 Kissenbezug 150-00 gr 1 Tischdecke 400-500 gr 1 Bademantel 900-1.200 gr 1 Handtuch 150-250 gr Achten Sie auf das Gewicht! Das angegebene Gewicht, das sich auf die maximale Ladung an Trockenwäsche bezieht, sollte nicht überschritten werden: Farbige T-Shirts, bedruckte TShirts und auch Oberhemden und Blusen bleiben länger schön, wenn sie vor dem Waschen auf links gezogen werden. T-Shirts und Sweatshirts sollten stets von links gebügelt werden. Widerstandsfähige Gewebe: max. 5,5 kg Kunstfasergewebe: max. 2,5 kg Feinwäsche: max. 2 kg Reine Wolle: max. 1 kg Vorsicht bei Overalls. Die weit verbreiteten und gern getragenen Overalls des Typs "Arbeiteranzug" haben Träger mit Schnallen und Haken, die nicht nur die Wäschetrommel, sondern auch die anderen Wäschestücke beschädigen könnten. Stecken Sie sie vor dem Waschen in die Brusttasche und befestigen Sie diese mit Sicherheitsnadeln, um jegliche Gefahr auszuschließen. Urlaub: Stecker herausziehen! Bevor Sie in Urlaub fahren, empfiehlt es sich, den Stecker aus der Steckdose zu ziehen, den Wasserhahn abzudrehen und die Tür offen, oder zumindest etwas vorstehen zu lassen. Hierdurch bleiben Wäschetrommel und Gummimanschette trocken, wodurch die Bildung unangenehmer Gerüche vermieden wird. WOLLWASCHGANG Um bestmögliche Waschergebnisse zu erzielen empfiehlt sich der Einsatz eines Spezialwaschmittels. Achten Sie auch darauf, die Lademenge von 1 kg Trockenwäsche nicht zu überschreiten. Wie wasche ich Gardinen. Da Gardinen sehr leicht knittern, sollten diese zusammengefaltet in einem Kissenbezug oder in einem netzartigen Beutel gewaschen werden. Waschen Sie diese allein und achten Sie darauf, dass das Gesamtgewicht die Hälfte der maximalen Lademenge nicht übersteigt. Stellen Sie das Spezialprogramm 9 ein, das ein automatisches Ausschließen der Schleuder vorsieht. Skijacken und Anoraks. Auch Skijacken und Anoraks können in der Maschine gewaschen werden, wenn es sich um Gänse- oder Entendaunen-federn handelt. Wichtig ist, dass das Gerät nicht mit einem Gewicht von 5,5 kg beladen wird, sondern höchstens 2/3 kg, und dass der Spülgang ein oder zweimal wiederholt wird, und ein sanfter Schleudergang eingeschaltet wird. Tennisschuhe. Entfernen Sie eventuelle Schlammreste. Tennisschuhe können zusammen mit Jeans und ähnlichen widerstandsfähigen Wäschestücken gewaschen werden. Zusammen mit Weißwäsche sollten sie jedoch nicht gewaschen werden. Installations- und Bedienungsanleitungen 42 Wichtige Regeln für ein besseres Waschergebnis Das Geheimnis der Waschmittelschublade Der erste Geheimtip ist der leichteste: die Waschmittelschublade öffnet sich, indem Sie sie nach außen drehen. Geben Sie das Waschmittel und eventuelle Zusätze gemäß den Mengenangaben des Herstellers in die entsprechende Kammer: normalerweise finden Sie alle Informationen auf derVerpackung.DieWaschmittelmenge ändert sich je nach Wäschemenge, nach dem Härtegrad des Wassers und nach der Verschmutzung der Kleider. Mit ein bißchen Erfahrung werden Sie lernen, die Mengen fast automatisch zu dosieren: damit werden auch Sie Ihren Geheimtip haben. Bevor Sie das Waschmittel für die Vorwäsche in Kammer 1 geben, vergewissern Sie sich, dass die Zusatzkammer 4, die dem Bleichen vorbehalten ist, nicht darin ist. Wenn Sie Weichspüler in die Kammer 3 geben, achten Sie darauf, dass dieser nicht über das Gitter austritt. DerWaschvollautomat entnimmt den Weichspüler bei jedem Waschprogramm automatisch. Flüssigwaschmittel werden in Kammer 2 gegeben, aber erst kurz vor dem Einschalten der Waschmaschine. Vergessen Sie nicht, dass Flüssigwaschmittel besonders geeignet sind fürWaschprogramme bis zu 60 Grad und für all jene Programme, die keine Vorwäsche benützen. Sie finden sowohl Flüssigwaschmittel als auch Waschpulver mit speziellen Dosierbechern im Handel, die direkt in die Wäschetrommel gegeben werden, so wie auf der Packung beschrieben. Verwenden Sie nie Waschmittel für die Handwäsche, denn sie schäumen zu stark, was dem Waschvollautomaten gegebenenfalls schaden könnte. Davon ausgenommen sind die Waschmittel, die speziell sowohl für die Handwäsche als auch für die Waschmaschine geeignet sind. Und nun noch ein letzter Geheimtip: wenn Sie mit kaltem Wasser waschen, reduzieren Sie stets die Waschmittelmenge; im kalten Wasser löst es sich nämlich schlechter auf als im warmen, daher wäre ein Teil verschwendet. Die Waschmittelschublade ist ausziehbar; um diese zu reinigen ziehen Sie sie, wie auf der Abbildung veranschaulicht, nach vorne hin heraus und spülen diese dann unter fließendem Wasser aus. Sparsam und vernünftig waschen In Kammer 1: Waschpulver für die Vorwäsche (kein Flüssigwaschmittel) 4 1 2 3 In Kammer 3: Zusätze (Weichspüler, Duftstoffe usw.) In Kammer 4: Traditionelle und schonende Bleichmittel. Waschgang zum Bleichen und Fleckenstopptaste Falls es nötig sein sollte, Ihre Wäsche zu bleichen, müssen Sie die Zusatzkammer 4 (liegt dem Waschvollautomaten bei) in die Kammer 1 der Waschmittelschublade einfügen. Wenn Sie das Bleichmittel hinein gießen, achten Sie darauf, den Höchststand, der auf dem Zentralstift mit "max" gekennzeichnet ist (siehe Abbildung) nicht zu überschreiten. Der Einsatz der Zusatzkammer schließt die Möglichkeit einer Vorwäsche aus. Traditionelle Bleichmittel (Hypochloridlaugen) dürfen ausschließlich bei strapazierfähigen weißen Stoffen verwendet werden, während schonende Bleichmittel auch für färbige Anleitungen zum wirtschaftlichen und umweltfreundlichen Einsatz Ihres Waschvollautomaten. WÄSCHEKAPAZITÄT VOLL AUSNÜTZEN Die beste Weise, um weder Strom, Wasser, Waschmittel noch Zeit zu verschwenden, besteht darin, die Waschmaschine mit der empfohlenen Höchstwäschemenge zu benützen. Bei einer vollen Auslastung Ihres Waschvollautomaten können Sie verglichen mit zwei halben Auslastungen bis zu 50% Energie SPAREN. IST DIE VORWÄSCHE TATSÄCHLICH NÖTIG? Nur wenn die Wäsche wirklich sehr schmutzig ist. Wählen Sie für wenig oder durchschnittlich schmutzige Wäsche einen Waschgang OHNE Vorwäsche: auf diese Weise können Sie Waschmittel, Zeit, Wasser und von 5 bis 15% Energie SPAREN. IST ES WIRKLICH NÖTIG, BEI HEIßEN TEMPERATUREN ZU WASCHEN? Wenn Sie die Flecken vorab mit einem Fleckenlöser behandeln oder die angetrockneten Flecken vor der Wäsche einweichen, können Sie in vielen Fällen auf den Heißwaschgang verzichten. Wenn Sie ein Waschprogramm mit 60° C benützen, so SPAREN Sie bis zu 50% Energie. BEVOR SIE EIN TROCKENPROGRAMM WÄHLEN … Wählen Sie eine hohe Drehzahl für den Schleudergang aus: dadurch wird der Wassergehalt in der Wäsche herabgesetzt, bevor Sie den Trockengang starten. Auf diese Weise können Sie Zeit und Energie SPAREN. 43 Installations- und Bedienungsanleitungen In Kammer 2: Waschmittel für die Hauptwäsche (Waschpulver oder Flüssigwaschmittel) Wäsche, Feinwäsche und Wolle verwendet werden können. Bitte achten Sie darauf, dass nur resistente Stoffe diesem Vorgang unterworfen werden dürfen. Mit dem Programm "Seide" und mit den "Spezialprogram-men" können Sie nicht bleichen (siehe Seite 40). Benützen Sie die Fleckenstopptaste immer, wenn Sie bleichen wollen.Falls Sie den Bleichvorgang getrennt durchführen wollen, müssen Sie das Bleichmittel in die Zusatzkammer 4 schütten und die Taste H (Fleckenstopptaste) drücken; daraufhin schalten Sie die Waschmaschine ein und wählen eines der Gewebesymbole aus , je nach Stoffart. Wenn Sie während des normalen Waschganges bleichen wollen, geben Sie das Waschmittel und die Zusätze in die dafür vorgesehenen Kammern, drücken die Taste H (Fleckenstopptaste), Zur Pflege von Wollteilen empfiehlt sich der Einsatz von Spezialwaschmittel. Probleme und Lösungen Bevor Sie telefonieren, lesen Sie bitte Folgendes Eventuell an Ihrem Waschvollautomaten auftretende Betriebsstörungen könnten vielleicht behoben werden, ohne den Kundendienst anzufordern. Überprüfen Sie demnach zuerst folgende Punkte. Der Waschvollautomat startet nicht. Steckt der Stecker fest in der Steckdose? Bei den Hausarbeiten könnte dieser etwas herausgezogen worden sein. Besteht ein Stromausfall? Wurde vielleicht durch Überlastung (Einschalten mehrerer Hausgeräte) ein Ansprechen der Sicherung verursacht, oder besteht vielleicht ein Stromausfall im gesamten Wohngebiet? Ist die Tür gut geschlossen? Aus Sicherheitsgründen wird ein Start der Maschine ausge- Wo ist denn das ganze Wasser geblieben? schlossen, wenn die Tür offenbleibt bzw. nicht richtig geschlossen wird. Wurde die EIN/AUS-Taste gedrückt? Wenn ja, wurde vielleicht ein Programm mit Startvorwahl gespeichert. Einfach: mit der neuen Indesit-Technik, es genügt weniger als die Hälfte, um die doppelte Wäschemenge gründlich zu waschen! Deshalb sehen Sie das Wasser nicht durch die Tür hindurch: weil es wenig ist, äußerst wenig, um die Umwelt zu schonen, ohne auf höchste Reinigungswirkung verzichten zu müssen. Und außerdem sparen Sie dabei auch noch Strom. Befindet sich der Startvorwahl-Knopf, bei den Modellen, die einen solchen vorsehen, auf der richtigen Einstellung? Ist der Wasserhahn aufgedreht? Eine der Sicherheitsvorrichtungen verhindert den Start der Maschine, wenn diese kein Wasser lädt. Waschmaschine aus, wählen Sie eines der Symbole Stop/Reset , und schalten Sie dann Ihre Maschine wieder ein. Sollte jedoch die Programmwählerscheibe weiterhin drehen, liegt eine Betriebsstörung vor, fordern Sie in diesem Falle den Kundendienst an. Der Waschvollautomat lädt kein Wasser. RICHTIG FALSCH Nach dem Waschen den Hahn wieder schließen. Verhindert einen raschen Verschleiß der Hydraulikanlage der Waschmaschine und verhindert Wasserschäden während Ihrer Abwesenheit. Tür stets vorstehen lassen, um Geruchsbildung zu vermeiden. Sanfte Reinigung der Außenflächen. Die äußeren Teile sowie die Teile aus Gummi sind mit einem mit lauwarmer, milder Spüllauge angefeuchteten Tuch zu reinigen. Den Stecker nicht herauszuziehen, wenn die Maschine gereinigt wird. Auch während der Wartungsarbeiten muss der Stecker herausgezogen werden. Der Einsatz von Löse- und Scheuermitteln. Diese dürfen zur Reinigung der äußeren Teile und der Teile aus Gummi nicht eingesetzt werden. Die Waschmittelschublade zu vernachlässigen. Sie kann herausgezogen werden, und kann demnach unter laufendem Wasser ausgespült werden. Sich in Urlaub zu begeben, ohne sich um die Maschine zu kümmern. Bevor Sie in Urlaub fahren ist sicherzustellen, dass der Stecker gezogen und der Wasserhahn abgedreht wurde. Ist der Schlauch korrekt am Wasserhahn angeschlossen? Fehlt Wasser? Vielleicht wurde die Wasserzufuhr aufgrund eventueller Arbeiten in Ihrem Wohnviertel kurzfristig unterbrochen. Ist der Druck ausreichend? Vielleicht eine Störung an der Druckpumpe. Ist der Wasserfilter sauber? Durch sehr kalkhaltiges Wasser, oder auch nach Arbeiten an der Leitung könnte das Sieb des Wasserhahns verstopft worden sein. Ist der Gummischlauch eingeklemmt oder geknickt? Der Wasserzufuhrschlauch muss möglichst gerade verlegt werden. Stellen Sie sicher, dass er weder eingeklemmt noch geknickt wurde. Dreht sich die Programmwählerscheibe ununterbrochen? Warten Sie bitte einige Minuten, bis das Wasser vollständig abgepumpt ist, schalten Sie Ihre Der Waschvollautomat lädt laufend Wasser und pumpt es laufend ab. Liegt der Ablaufschlauch zu tief? Dieser muss in einer Höhe von 60 bis 100 cm installiert werden. Liegt das Schlauchende vielleicht unter Wasser? Wurde der Mauerablauf mit einer Entlüftungsöffnung versehen? Sollte die Betriebsstörung nach diesen Kontrollen weiterhin bestehen, drehen Sie bitte den Wasserhahn ab, schalten die Maschine aus und fordern den Kundendienst an. Wohnen Sie sehr hoch (auf den letzten Etagen) könnte es sich auch um einen Syphonvakuumeffekt handeln. In diesem Fall ist ein entsprechendes Ventil zu installieren. Installations- und Bedienungsanleitungen 44 den Anleitungen auf Seite 47, oder fordern Sie den Kundendienst an. Ist der Ablaufschlauch geknickt? Dieser muss möglichst gradlinig verlegt werden. Stellen Sie sicher, dass er weder eingeklemmt noch geknickt wurde. Ist die Ablaufleitung verstopft? Wurde der Ablaufschlauch mit einer nicht ordnungsgemäßen Verlängerung versehen, die den Ablauf verhindert? Der Waschvollautomat pumpt nicht ab und schleudert nicht. Wurde der Waschvollautomat in eine Küchenzeile integriert? Sollte es sich um ein nicht integrierbares, bzw. nicht einbaufähiges Modell handeln, muss der Waschvollautomat während des Schleuderns etwas oszillieren, und verlangt demnach an allen Seiten einige freie Zentimeter. Es bildet sich zu viel Schaum. Wurde ein maschinengeeignetesWaschmittel eingesetzt? Kontrollieren Sie, was auf der Verpackung aufgedruckt ist: "Für Waschmaschinen" oder "Für Handwäsche" oder Ähnliches. Sieht das eingestellte Programm denWasserablauf vor? Bei einigen Programmen muss der Ablauf manuell gestartet werden. Wurde die "Knitterschutz"Funktion - bei den Geräten, die eine solche vorsehen - aktiviert? Bei dieser Funktion ist der Schleudergang manuell zu aktivieren. Ist die Ablaufpumpe verstopft? Um dies zu überprüfen drehen Sie bitte den Wasserhahn ab, ziehen den Stecker heraus und folgen Sie Der Waschvollautomat ist undicht. Der Waschvollautomat vibriert zu stark während des Schleuderns. Wenden Sie sich ausschließlich an autorisierte Fachkräfte und verlangen Sie den Einsatz von OriginalErsatzteilen. Wurde bei der Installation die innere Schwingergruppe korrekt befreit? Siehe nächste Seite, Abschnitt Installation. Wurde der Waschvollautomat eben aufgestellt? Dies sollte regelmäßig kontrolliert werden. Der Waschvollautomat könnte im Laufe der Zeit unmerklich verrückt sein. Regulieren Sie die Stellfüße unter Zuhilfenahme einer Wasserwaage. Technische Daten Modell W 125 TX Abmessungen Breite cm 59,5 Höhe cm 85 Tiefe cm 53,5 Fassungsvermögen 1 - 5,5 kg Stromanschluß Spannung 220/230 Volt 50 Hz Höchstleistungsaufnahme 1850 W Wasseranschluße Höchstdruck 1 MPa (10 bar) Mindestdruck 0,05 MPa (0,5 bar) Fassungsvermögen der Tromme 46 liter Schleudergeschwindigkeit Bis 1200 U/min Kontrollprogramm gemäß der Norm IEC 456 Bei einer Wäscheladung von 5 kg. Wurde der Ablaufschlauch fest aufgeschraubt? Drehen Sie den Wasserhahn ab, ziehen Sie den Stecker aus der Steckdose und versuchen Sie, die Nutmutter etwas mehr anzudrehen (nicht zu fest). Ist die Waschmittelschublade verstopft? Versuchen Sie, diese abzunehmen reinigen Sie sie unter laufendemWasser. Ist der Ablaufschlauch unzureichend befestigt? Drehen Sie den Wasserhahn ab, ziehen Sie den Stecker aus der Steckdose und versuchen Sie, den Schlauch besser zu befestigen. Wurde mit zuviel Waschmittel gewaschen? Eine zu hohe Reinigermenge, die außerdem zuviel Schaum erzeugen würde, führt nur zu Verkrustungen im Innern des Waschvollautomaten, der Reinigungseffekt wird dadurch nicht erhöht. Sollte trotz all dieser Kontrollen die Betriebsstörung an Ihrem Waschvollautomaten weiter bestehen bleiben, dann wenden Sie sich an die nächstgelegene autorisierte Kundendienststelle und geben Sie hierbei folgende Daten an: - Art der Störung - Modell-Kennzeichen (Mod. ....) - Seriennummer (S/N ....) Diese Daten entnehmen Sie bitte dem auf der Rückseite der Maschine befindlichen Typenschild. Dieses Gerät entspricht den folgenden EG-Richtlinien: - 73/23/EWG vom 19.02.73 (Niederspannung) und nachfolgenden Änderungen - 89/336/EWG vom 03.05.89 (elektromagnetische Verträglichkeit) und nachfolgenden Änderungen 45 Installations- und Bedienungsanleitungen Installation und Umzug Waschmaschine zieht in Ihr Haus ein Egal, ob Sie Ihren Waschvollautomaten neu kaufen oder ob Sie ihn aufgrund eines Umzugs neu anschließen müssen, die Installation ist ein überaus wichtiger Vorgang für eine einwandfreie Funktion der Waschmaschine. Nachdem Sie das Gerät ausgepackt haben, vergewissern Sie sich in erster Linie,dasseskeinenSchadenerlittenhat. FallsSieirgendwelcheZweifeldiesbezüglich haben, rufen Sie sofort einen FachmannzuHilfe.DieWäschetrommel wirdwährenddesTransportesmitvier Schrauben an der Rückwand des Waschvollautomaten befestigt. gungswinkel der Waschmaschine, der auf der Arbeitsfläche gemessen wird, darf nicht mehr als 2% betragen. Falls Sie als Unterlage einen Teppichboden haben, vergewissern Sie sich, dass die Belüftung auf der Standfläche nicht beeinträchtigt wird. Die vorderen Füße sind regulierbar. Wasseranschluss Bevor Sie den ersten Waschgang starten, nehmen Sie die Schrauben und auch die Gummiringe sowie das Distanzstück ab (bewahren Sie alles gut auf) und verschließen Sie die Löcher mit den Plastikstöpseln, die mit der Waschmaschine mitgeliefert werden. Wichtig: Die unten rechts auf der Rückseite des Waschvollautomaten befindlichen 3 Löcher, in denen der Stecker untergebracht war, müssen mit beiliegendem Stöpsel geschlossen werden. Der Wasserdruck muss den Werten entsprechen, die auf dem Typenschild auf dem Rückteil des Waschvollautomaten angegeben sind. Schließen Sie den Wasserschlauch an einen Kaltwasserhahn mit einem Gewindeanschluss zu ¾ Gas an und geben Sie die Gummidichtung zwischen den Anschluss und den Filter. A A Der Filter des Gummischlauches. Das Teil A darf nicht entfernt werden. Standfläche Wenn Ihr Waschvollautomat gut funktionieren soll, ist es wichtig, dass er vollkommen gerade steht. Um dem Gerät einen perfekten Stand zu verleihen, brauchen Sie nur die vorderen Füße entsprechend einzustellen; der Nei- Bewahren Sie die Schrauben und das Distanzstück, mit dem Sie den Innenteil der Waschmaschine blockieren können, auf. Falls Sie umziehen sollten, werden sie Ihnen dienlich sein, um die Wäschetrommel erneut zu blockieren, wodurch sie während des Transportes gegen Schläge geschützt ist. Wenn die Wasserleitungen neu sein sollten oder längere Zeit unbenutzt waren, lassen Sie das Wasser so lange laufen, bis es klar und frei von allen Verunreinigungen ist, bevor Sie den Schlauch anschließen. Daraufhin schließen Sie den Schlauch an den Wasserhahn an, der sich auf dem Rückteil der Waschmaschine oben rechts befindet. können. Führen Sie das andere Ende in eine Abwasserleitung ein oder legen Sie es auf ein Waschbecken oder eine Badewanne. Achten Sie hierbei jedoch darauf, dass der Schlauch nicht allzu stark gebogen wird. Es ist wichtig, dass der Schlauch auf einer Höhe von 60 bis 100 cm endet. Falls es unumgänglich ist, den Schlauch auf einer geringeren Höhe als 60 cm über dem Boden anzuschließen, so müssen Sie ihn in den Haken einfügen, der auf dem oberen Teil der Rückseite angebracht ist. Dieser Haken muss verwendet werden, wenn der Ablauf weniger als 60 cm über dem Boden liegt. Wenn der Ablaufschlauch in eine Wanne oder ein Waschbecken geführt wird, so bringen Sie den Kunststoffbogen an und binden den Schlauch am Wasserhahn fest. Der Kunststoffbogen für den Wasserablauf in Wannen oder Waschbecken. Wasserhahn oben rechts. Anschluss des Ablaufs Auf der Rückseite des Waschvollautomaten befinden sich zwei Anschlüsse (rechts oder links), an die Sie den Ablaufschlauch anschließen Der Schlauch darf nie im Wasser liegen.Es sollten keine Verlängerungsschläuche verwendet werden. Falls dies absolut unvermeidlich ist, so sollte die Verlängerung denselben Durchmesser haben wie der Originalschlauch und er darf in keinem Fall länger als 150 cm sein. Falls Sie über einen Wandablauf verfügen, lassen Sie bitte von einem Exper- ten kontrollieren, ob dieser auch geeignet ist. Falls Sie in einer der obersten Etagen eines Gebäudes wohnen, kann es passieren, dass sich im Syphon ein Vakuum bildet, wodurch der Waschvollautomat ständig Wasser ansaugt und wieder abpumpt. Um dieses Problem zu lösen, finden Sie im Handel spezielle Syphonventile. Stromanschluss Bevor Sie die Waschmaschine ans Stromnetz anschließen, vergewissern Sie sich, dass folgendeVoraussetzungen gegeben sind: 1) die Steckdose muss die Höchstleistung, die auf dem Typenschild auf der Rückseite der Waschmaschine angegeben ist,vertragen und den gesetzlichen Sicherheitsvorschriften entsprechen; 2) die Stromspannung muss den Angaben entsprechen, die auf demTypenschild der Waschmaschine vermerkt sind; 3) der Stecker muss in die Steckdose passen.Falls dies nicht der Fall ist, benützen Sie keine Zwischenstecker, sondern lassen den Stecker oder die Steckdose austauschen; 4) die elektrischen Haushaltsgeräte müssen über eine Erdung verfügen. Achtung! Der Hersteller lehnt jede Verantwortung ab, falls diese Vorschriften nicht eingehalten werden sollten. Plastiktüten, Schaumgummi, Nägel und andere Verpackungsmaterialien sind kein Spielzeug für Kinder: sie können eine ernsthafte Gefahr darstellen. Installations- und Bedienungsanleitungen 46 Leichte Pflege und Wartung Behandeln Sie Ihre Waschmaschine gut und Sie werden inIhreihr eine treue Freundin haben Waschmaschine ist ein verlässlicher Lebens- und Arbeitspartner. Es ist daher wichtig, sie fit zu halten. Auch für Sie. Der Waschvollautomat ist so gebaut worden, dass Sie problemlos viele Jahre lang Ihre Freude daran haben können. Einige einfache Vorkehrungen aber helfen Ihnen, Ihr Gerät stets fit zu halten und seine Lebensdauer zusätzlich zu verlängern. In erster Linie müssen Sie nach jeder Wäsche immer den Wasserhahn schließen: der ständige Wasserdruck kann einigen Bestandteilen schaden. Außerdem vermeiden Sie auf diese Weise eventuelle Wasseraustritte, wenn niemand im Hause ist. Wenn das Wasser in Ihrer Gegend allzu hart ist, benützen Sie ein Entkalkungsmittel (das Wasser ist hart, wenn es um den Wasserhahn oder den Ablauf herum leicht weiße Spuren hinterlässt, was Sie vor allem in der Badewanne feststellen können. Um genauere Informationen zum Wassertyp in Ihrer Sanitäranlage zu erhalten, können Sie sich an das Wasseramt Ihrer Gemeinde oder an Ihren Klempner wenden. Leeren Sie stets alle Taschen, nehmen Sie auch Broschen, Abzeichen und alle übrigen harten Gegenstände ab. Die Außenwände des Waschvollautomaten werden mit einem weichen Tuch und einer lauwarmem Seifenlauge gereinigt. Es ist wichtig, die ausziehbare Waschmittelschublade regelmäßig zu reinigen. Um Ablagerungen entgegenzuwirken, brauchen Sie die Schublade nur einige Zeit lang unter fließendem Wasser zu lassen. Nie mit der Waschmittelmenge übertreiben. Normale Waschmittel enthalten bereits einen Kalklöser. Nur wenn das Wasser ganz besonders hart ist, das heißt, wenn es besonders kalkreich ist, empfehlen wir Ihnen, bei jeder Wäsche ein Spezialprodukt zu verwenden. Gelegentlich können Sie auch einen Waschgang mit einem Kalklöser durchführen, ohne Waschmittel und ohne Wäsche. Verwenden Sie nie allzu große Mengen Waschmittel oder Zusätze, denn dies könnte zu starken Schaumbildungen führen, was Ablagerungen und Schaden an einigen Bestandteilen der Waschmaschine zur Folge haben kann. Leeren Sie stets alle Taschen: kleine Gegenstände können Ihrer Waschmaschine schaden. Bei Bedarf kontrollieren Sie die Pumpe und den Gummischlauch. Waschmaschine verfügt über eine selbstreinigende Pumpe, die keinerlei Reinigung oder Wartung erfordert. Es kann jedoch geschehen, dass versehentlich kleine Gegenstände (Kleingeld, Sicherheitsnadeln, Haarspangen, abgesprungene Knöpfe und ähnliches) in die Pumpe fallen. Um Schäden zu vermeiden, bleiben diese Gegenstände in einem Vorraum liegen, der sich auf der Unterseite der Pumpe befindet und zugänglich ist. Um Zugang zu diesem Vorraum zu bekommen, brauchen Sie nur mit einem Schraubenzieher das Abdeckpaneel abzuschrauben, das sich im unteren Teil der Waschmaschine befindet (Abb. 1), und dann den Deckel abnehmen, indem Sie ihn gegen den Uhrzeigersinn drehen (Abb. 2). Daraufhin können Sie den Innenraum sorgfältig kontrollieren. Abb. 1 Der Gummischlauch Kontrollieren Sie den Gummischlauch mindestens einmal im Jahr. Wenn er Risse oder Verschleißstellen aufweist, muss er unmittelbar ausgetauscht werden, denn während der Wäsche muss er einen starken Druck aushalten, der ein plötzliches Reißen zur Folge haben könnte. Abb. 2 Achtung: Vergewissern Sie sich stets, dass der Waschgang beendet ist und ziehen Sie den Stecker aus der Steckdose, bevor Sie den Deckel abnehmen oder sonst irgendwelche Wartungsarbeiten vornehmen. Es ist normal, dass nach Abnahme des Deckels etwas Wasser herausfließt. Wenn Sie das Abdeckpaneel wieder einsetzen, kontrollieren Sie, dass die Haken im unteren Teil in die Halterungen einrasten, bevor Sie es gegen das Gerät drücken. 47 Installations- und Bedienungsanleitungen Absolut vorrangig Ihre Sicherheit und die Ihrer Kinder Waschmaschine wurde nach den strengsten internationalen Sicherheitsvorschriften gebaut - zu Ihrer Sicherheit und der Ihrer Familie. Lesen Sie bitte aufmerksam die nachstehenden Hinweise, sowie die des gesamten Handbuches. Sie liefern nicht nur zahlreiche praktische Hinweise, sondern wichtige Informationen hinsichtlich der Sicherheit, dem Gebrauch und der Wartung. 1. Waschmaschine darf nicht im Freien installiert werden, auch nicht, wenn es sich um einen geschützten und überdachten Platz handelt. Es ist gefährlich, Ihren Vollwaschautomaten Gewittern und Unwettern auszusetzen. 2. IhrWaschvollautomat ist nur von Erwachsenen zu gebrauchen und ausschließlich zum Waschen Ihrer Wäsche gemäß den in diesem Handbuch enthaltenen Anweisungen. 3. Muß er versetzt werden, sollten hierfür mindestens 3 Personen verfügbar sein. (Vorsichtig vorgehen). Versuchen Sie es niemals allein, der Waschvollautomat ist äußerst schwer. 4. Bevor Sie die Wäsche einfüllen, stellen Sie bitte sicher, dass die Trommel auch leer ist. 5. Bedienen Sie die Maschine nicht barfuß, oder mit nassen bzw. feuchten Händen, oder wenn Sie auf feuchtem Boden stehen. 6. Verwenden Sie keineVerlängerungen und Mehrfachstecker, die besonders in feuchten Räumlichkeiten sehr gefährlich sind. 7. Öffnen Sie die Waschmittelschublade nicht, wenn die Maschine in Betrieb ist; Wenden Sie sich nur an autorisiertes Fachpersonal und verlangen Sie nur mit Garantie versehene Indesit-OriginalErsatzteile! verwenden Sie keine Waschmittel für Handwäsche, diese schäumen zu sehr und könnten die inneren Teile Ihrer Maschine beschädigen. 8. Ziehen Sie niemals den Stecker am Versorgungskabel, oder am Gerät selbst aus der Steckdose: dies ist zu gefährlich. 9. Das Ablaufwasser kann äußerst heiß werden, berühren Sie dieses demnach nicht. Auch die Tür kann heiß werden, halten Sie deshalb Kinder fern. Versuchen Sie niemals, die Tür mit Kraft zu öffnen, dies könnte den Sicherheitsmechanismus beschädigen, der vor unabsichtlichem Öffnen der Tür bei laufender Maschine schützt. 10. Drehen Sie im Falle einer Betriebsstörung den Wasserhahn ab und ziehen Sie den Stecker aus der Steckdose, versuchen Sie nicht, Schäden an inneren Maschinenteilen selbst zu beheben. Austausch des Versorgungskabels Beim Versorgungskabel Ihrer Waschmaschine handelt es sich um ein Spezialkabel, das nur bei den autorisierten Indesit-Kundendienstzentren erhältlich ist. Dieses ist wie folgt auszutauschen: 1. Vergewissern Sie sich, dass Ihre Waschmaschine ausgeschaltet, und der Stecker herausgezogen ist. 2. Nehmen Sie den Deckel ab. Schrauben Sie hierzu die beiden Schrauben I aus, und ziehen Sie den Deckel nach vorne hin ab. [Abb. 3] 3. Nehmen Sie die Drähte vom Entstörer F [Abb. 4] ab, achten Sie hierbei auf die korrekten Anschlussstellen (Blauer Draht =N; Brauner Draht =L) und lassen Sie den Erdleiter bis zum Schluss. Anmerkung: die Buchstabe L, N und das Symbol sind auf dem Entstörer abgebildet. 4. Drücken Sie den oberen Teil der Kabeldurchführung leicht von der Rückwand weg, ziehen Sie daraufhin das Versorgungskabel nach oben hin heraus [Abb. 5]. Gehen Sie in umgekehrter Reihenfolge vor, um das neue Kabel anzuschließen. Schieben Sie hierauf den Deckel wieder auf, setzen Sie ihn hierzu auf den Waschvollautomaten [Abb. 6] und schieben Sie ihn nach vorne und zwar so, dass seine vorderen Haken in die entsprechenden Schlitze der Schalterblende eingreifen, schrauben Sie abschließend die Schrauben wieder ein. I N L F Abb. 3 Abb. 4 Abb. 5 Abb. 6 1nstallations- und Bedienungsanleitungen 48 Êðàòêèé ïóòåâîäèòåëü Ïðî÷èòàéòå, èçó÷èòå è èçâëåêèòå ìàêñèìàëüíóþ âûãîäó! Íàñòîÿùåå Ðóêîâîäñòâî ñîäåðæèò 11 ðàçäåëîâ. Âíèìàòåëüíî èçó÷èòå èõ. Âû îòêðîåòå äëÿ ñåáÿ ìíîæåñòâî ñåêðåòîâ ýôôåêòèâíîé ñòèðêè, óçíàåòå âîçìîæíîñòè ñâîåé ñòèðàëüíîé ìàøèíû, íàó÷èòåñü îáðàùàòüñÿ ñ íåé. Íàñòîÿòåëüíî ðåêîìåíäóåì îáðàòèòü îñîáîå âíèìàíèå íà ïðàâèëà òåõíèêè áåçîïàñíîñòè. 1. Óñòàíîâêà è ïîäêëþ÷åíèå (ñ. 58) Óñòàíîâêà î÷åíü âàæíàÿ îïåðàöèÿ, îò êîòîðîé âî ìíîãîì çàâèñèò, êàê áóäåò ðàáîòàòü âàøà ñòèðàëüíàÿ ìàøèíà. Îáÿçàòåëüíî ïðîâåðüòå: 1. Ñîîòâåòñòâèå õàðàêòåðèñòèê ñòèðàëüíîé ìàøèíû è ýëåêòðè÷åñêîé ñåòè â âàøåì äîìå. 2. Ïðàâèëüíîñòü ïîäêëþ÷åíèÿ çàëèâíîãî è ñëèâíîãî øëàíãîâ. Íå èñïîëüçóéòå øëàíãè ïîâòîðíî. 3. Ãîðèçîíòàëüíîñòü óñòàíîâêè ýòî âëèÿåò íà ñðîê ñëóæáû ñòèðàëüíîé ìàøèíû è êà÷åñòâî ñòèðêè. 4. ×òî ôèêñèðóþùèå áàðàáaí áîëòû, êîòîðûå íàõîäÿòñÿ ía çaäíåé ñòîðîíå ìaøèíû, óäaëåíû. 2. Ïîäãîòîâêà áåëüÿ è çàïóñê ìàøèíû (ñ. 50) Ïðàâèëüíûé ïîäáîð ñòèðàåìûõ âåùåé è ðàâíîìåðíîñòü çàãðóçêè ãàðàíòèðóþò âûñîêîå êà÷åñòâî ñòèðêè è äîëãèé ñðîê ñëóæáû ìàøèíû.  ýòîì ðàçäåëå âû íàéäåòå ìíîãî ïîëåçíûõ ñîâåòîâ. 3. ×òî íà ýòèêåòêàõ (ñ. 53) 8. Îáñëóæèâàíèå è óõîä (ñ. 59) Còèðàëüíàÿ ìàøèíà âàø íàñòîÿùèé äðóã. Ïðîÿâèòå ê íåìó âíèìàíèå, è îí îòâåòèò âàì ïðåäàííîñòüþ è áëàãîäàðíîñòüþ. Íå ñëèøêîì îáðåìåíèòåëüíûé óõîä çà ñòèðàëüíîé ìàøèíîé ïðîäëèò ñðîê åå ñëóæáû íà ìíîãèå ãîäû. 9. Âîçìîæíûå íåèñïðàâíîñòè è ñïîñîáû èõ óñòðàíåíèÿ (ñ. 56 è 57) Âû äîëæíû íàó÷èòüñÿ ÷èòàòü ýòèêåòêè, ïðèêðåïëÿìûå ê îäåæäå è áåëüþ, ÷òîáû ïðàâèëüíî âûáèðàòü ðåæèìû ñòèðêè, ñóøêè è ãëàæåíèÿ. Ìíîãèå ïðîáëåìû âû ñìîæåòå ðåøèòü ñàìè, åñëè âíèìàòåëüíî èçó÷èòå ïðèâåäåííûå â ýòîì ðàçäåëå ðåêîìåíäàöèè.  ñëîæíûõ ñèòóàöèÿõ íåìåäëåííî âûçûâàéòå òåõíèêîâ ñåðâèñíîãî öåíòðà Indesit. 4. Òèïè÷íûå îøèáêè è êàê èõ èçáåæàòü (ñ. 54) 10. Òåõíè÷åñêèå õàðàêòåðèñòèêè (ñ. 57) Ðàíüøå âû îáðàùàëèñü çà ñîâåòàìè ê ñâîèì áàáóøêàì. Íî â èõ âðåìåíà åùå íå áûëî ñèíòåòè÷åñêèõ òêàíåé è ñòèðêà ñ÷èòàëàñü ïðîñòûì äåëîì. Ñåãîäíÿ ëó÷øèé êîíñóëüòàíò Còèðàëüíàÿ ìàøèíà. Áëàãîäàðÿ åé âû ñìîæåòå ñòèðàòü äàæå øåðñòÿíûå èçäåëèÿ, è ðåçóëüòàò áóäåò ëó÷øå, ÷åì ïðè ðó÷ãîé ñòèðêå. Êðàòêèå òåõíè÷åñêèå äàííûå, êîòîðûå íåîáõîäèìî çíàòü âëàäåëüöó ñòèðàëüíîé ìàøèíû: ìîäåëü, ïîòðåáëåíèå ýëåêòðîýíåðãèè, ðàñõîä âîäû, ãàáàðèòû, ñêîðîñòü âðàùåíèÿ áàðàáàíà â ðàçíûõ ðåæèìàõ, ñîîòâåòñòâèå èòàëüÿíñêèì è åâðîïåéñêèì íîðìàì è ñòàíäàðòàì è ïð. 5. Ðàñïðåäåëèòåëü ìîþùèõ ñðåäñòâ (ñ. 55) 11. Âàøà áåçîïàñíîñòü è áåçîïàñíîñòü âàøèõ äåòåé (ñ. 60) Ñîâåòû è ðåêîìåíäàöèè ïî èñïîëüçîâàíèþ îòäåëåíèé ðàñïðåäåëèòåëÿ ìîþùèõ ñðåäñòâ. Êàê îáåñïå÷èòü áåçîïàñíîñòü äîìà è ñåìüè ýòî ñàìîå ãëàâíîå, ÷òî âû äîëæíû çíàòü êàê âëàäåëåö è ïîëüçîâàòåëü ñòèðàëüíîé ìàøèíû. 6. Ïàíåëü óïðàâëåíèÿ (ñ. 51) Êîíñòðóêöèÿ ïàíåëè óïðàâëåíèÿ Còèðàëüíàÿ ìàøèíà ïðîñòà: âñåãî íåñêîëüêî êíîïîê, ñ ïîìîùüþ êîòîðûõ âû âûáèðàåòå ðåæèì ñòèðêè (îò èíòåíñèâíîãî äî äåëèêàòíîãî). Ïðè ïðàâèëüíîì âûáîðå ðåæèìà âûñîêîå êà÷åñòâî ñòèðêè è äîëãîâå÷íîñòü ìàøèíû ãàðàíòèðîâàíû. 7. Ïðîãðàììû ñòèðêè (ñ. 52) Òàáëèöà ïðîãðàìì ïîçâîëèò âàì ïðàâèëüíî âûáðàòü òåìïåðàòóðíûé ðåæèì, ìîþùèå ñðåäñòâà, îïîëàñêèâàòåëè è ñìÿã÷èòåëè. Ïðàâèëüíûé âûáîð ïðîãðàììû ýòî íå òîëüêî âûñîêîå êà÷åñòâî ñòèðêè, íî è ñóùåñòâåííàÿ ýêîíîìèÿ ýëåêòðîýíåðãèè è âîäû. 49 Ðóêîâîäñòâî ïî óñòàíîâêå è ýêñïëóàòàöèè Êàê ïîëüçîâàòüñÿ ìàøèíîé Âû ñäåëàåòå áîëüøîå äåëî, åñëè ïåðåä ñòèðêîé ðàññîðòèðóåòå áåëüå ïî ìàòåðèàëó è öâåòó, ïðî÷èòàåòå ýòèêåòêè íà îòäåëüíûõ âåùàõ è ñìåøàåòå êðóïíûå âåùè ñ ìåëêèìè. Ïîäãîòîâêà áåëüÿ. Ðàçáåðèòå áåëüå ïî ìàòåðèàëó è ïî óñòîé÷èâîñòè îêðàñêè. Áåëîå è öâåòíîå áåëüå ñòèðàéòå îòäåëüíî. Íå çàáóäüòå âûíóòü âñå èç êàðìàíîâ, îñîáåííî ìåëêèå ïðåäìåòû, (ìîíåòû, çíà÷êè, èãîëêè è äð.), êîòîðûå ìîãóò ïîâðåäèòü ìàøèíó. Ïðîâåðüòå, õîðîøî ëè äåðæàòñÿ ïóãîâèöû è çàñòåãíèòå ìîëíèè. Ñâåðÿéòåñü ñ ýòèêåòêàìè. Íà îäåæäå è áåëüå èìåþòñÿ ýòèêåòêè, ïîêàçûâàþùèå êàê óõàæèâàòü çà ýòèìè èçäåëèÿìè.  òàáëèöå (ñì. ñ. 53) ïðèâåäåíû ñèìâîëû, ïðîñòàâëÿåìûå íà ýòèêåòêàõ, è ðàñêðûòî èõ ñîäåðæàíèå. Ñîáëþäåíèå ïðàâèë ñòèðêè íàäîëãî ñîõðàíèò âàøè âåùè. M Äëÿ ïîëó÷åíèÿ õîðîøèõ ðåçóëüòàòîâ î÷åíü âàæíî ðàçîáðàòü áåëüå ïî òêàíè è öâåòó Ñìåøèâàéòå êðóïíûå è ìåëêèå âåùè ïðè çàãðóçêå ìàøèíû. Ìàøèíà îáîðóäîâàíà ýëåêòðîííûì óñòðîéñòâîì, êîíòðîëèðóþùèì çàãðóçêó áàðàáàíà. Ïåðåä âûïîëíåíèåì öèêëà îòæèìà ýòî óñòðîéñòâî ñòàðàåòñÿ áîëåå èëè ìåíåå ðàâíîìåðíî ðàñïðåäåëèòü íàãðóçêó ïî áàðàáàíó, ÷òî, â ñâîþ î÷å- ðåäü, çàâèñèò êàê îò òèïà ñòèðàåìûõ âåùåé, òàê è îò èõ íà÷àëüíîé çàãðóçêè. Åñëè íàãðóçêà ðàñïðåäåëåíà áîëåå èëè ìåíåå ðàâíîìåðíî, òî ìàøèíà ìîæåò âûïîëíÿòü îòæèì íà âûñîêèõ îáîðîòàõ áåç øóìà è òðÿñêè. êíîïêó âêëþ÷åíèÿ/ âûêëþ÷åíèÿ I (ïîçèöèÿ I). ñòèðàëüíóþ ìàøèíó íàæàòèåì êíîïêè I (ïîëîæåíèå O). Îòêðîéòå äâåðöó ìàøèíû. Âûíóâ áåëüå, îñòàâüòå äâåðöó ìàøèíû ïðèîòêðûòîé, ÷òîáû äàòü èñïàðèòüñÿ îñòàâøåéñÿ âëàãå. Ïåðåêðîéòå êðàí ïîäà÷è âîäû.  ñëó÷àå îòêëþ÷åíèÿ ýëåêòðîïèòàíèÿ èëè ñàìîïðîèçâîëüíîãî âûêëþ÷åíèÿ ìàøèíû çàäàííàÿ ïðîãðàììà ñîõðàíÿåòñÿ â ïàìÿòè. Ïóñê ìàøèíû Ïîñëå óñòàíîâêè íîâîé ìàøèíû âêëþ÷èòå öèêë ñòèðêè ïî ïðîãðàììå 1 ñ òåìïåðàòóðîé 90°Ñ. Ïðàâèëüíûé ïóñê ìàøèíû 1. Äâåðöà ìàøèíû íàäåæíî î÷åíü âàæåí ñ òî÷êè çðåíèÿ çàêðûòà. ïîâûøåíèÿ êà÷åñòâà ñòèð- 2. Ìàøèíà âêëþ÷åíà â êè è óâåëè÷åíèÿ ñðîêà ýêñýëåêòðè÷åñêóþ ñåòü. ïëóàòàöèè îáîðóäîâàíèÿ. 3. Îòêðûò êðàí ïîäà÷è Ïîñëå çàãðóçêè ìàøèíû è âîäû. çàïðàâêè ìîþùèõ ñðåäñòâ è 4. Ðóêîÿòêà À íàõîäèòñÿ â ðàçëè÷íûõ äîáàâîê îáÿçàïîëîæåíèè l(Stop/Reset). òåëüíî óáåäèòåñü â òîì, ÷òî: Âûáîð ïðîãðàììû Âûáåðèòå íóæíóþ ïðîãðàììó Äëÿ çàùèòû ïðåäìåòîâ ïî òàáëèöå, êîòîðàÿ ïðèâåäåíà îäåæäû èç äåëèêàòíûõ íà ñ. 52. Ïîâåðíèòå ðóêîÿòêó ïðîãðàììàòîðà À òàê, ÷òîáû òêàíåé (íèæíåå áåëüå, âûáðàííàÿ ïðîãðàììà ñîâïàëà ÷óëêè) ïîìåñòèòå èõ c îòìåòêîé íà ðóêîÿòêå; ïðè â õîëùåâûå ìåøî÷êè ïîìîùè ðóêîÿòêè òåðìîñòàòà  óñòàíîâèòå íåîáõîäèìóþ òåìïåðàòóðó; óáåäèòåñü, ÷òî ðóêîÿòêà âûáîðà ñêîðîñòè îòæèìà Ñ íàõîäèòñÿ â òðåáóåìîì ïîëîæåíèè, åñëè íåîáõîäèìî, íàæìèòå êíîïêè E, F, G, H, çàòåì íàæìèòå Íàïîìèíàåì, ÷òî ïðîãðàììíûé ïóñê, åñëè âû õîòèòå èì âîñïîëüçîâàòüñÿ, äîëæåí áûòü óñòàíîâëåí äî íà÷àëà öèêëà ñòèðêè. Ïî îêîí÷àíèè ñòèðêè Æäèòå, êîãäà ïîãàñíåò èíäèêàòîð M ýòî äîëæíî ïðîèçîéòè ïðèáëèçèòåëüíî ÷åðåç 3 ìèíóòû ïîñëå îêîí÷àíèÿ ñòèðêè. Âûêëþ÷èòå Êàê èçáàâèòüñÿ îò ïÿòåí: îáùèå ðåêîìåíäàöèè Ïàñòà øàðèêîâûõ ðó÷åê èëè ôëîìàñòåð: íàíåñèòå ìåòèëîâûé ñïèðò íà êóñî÷åê âàòû è ïðîòðèòå ïÿòíî, çàòåì ñòèðàéòå ïðè 90 °Ñ. Äåãîòü è ñìàçêà: ñ÷èñòèòå òîëñòûé ñëîé çàãðÿçíåíèÿ, ðàçìÿã÷èòå îñòàòîê ìàðãàðèíîì èëè ñëèâî÷íûì ìàñîì, îñòàâüòå íà âðåìÿ; çàòåì ñíèìèòå ñêèïèäàðîì è ñðàçó æå ïðîñòèðàéòå âåùü. Âîñê: ñ÷èñòèòå âîñê, ïîëîæèòå òêàíü ìåæäó äâóìÿ ëèñòàìè ðûõëîé áóìàãè è ïðîãëàäüòå ãîðÿ÷èì óòþãîì; ñðàçó æå îáðàáîòàéòå âàòíûì òàìïîíîì, ñìî÷åííûì ñêèïèäàðîì èëè ìåòèëîâûì ñïèðòîì. Æåâàòåëüíàÿ ðåçèíêà: óäàëèòå ñ ïîìîùüþ æèäêîñòüè äëÿ ñíÿòèÿ ëàêà, çàòåì ïðîòðèòå ÷èñòîé òêàíüþ. Ïëåñåíü: õëîïêîâûå è ëüíÿíûå òêàíè çàìî÷èòå â ðàñòâîðå 1 ÷àñòè æèäêîãî ìîþùåãî ñðåäñòâà íà 5 ÷àñòåé âîäû è äîáàâüòå ñòîëîâóþ ëîæêó óêñóñà. Òîò÷àñ ïðîñòèðàéòå. Çàãðÿçíåíèÿ èíûõ áåëûõ òêàíÿõ ñìî÷èòå â 10%-íîì ðàñòâîðå ïåðåêèñè âîäîðîäà è ïðîñòèðàéòå. Ãóáíàÿ ïîìàäà: õëîïîê èëè øåðñòü îáðàáîòàéòå æèäêèì ìîþùèì ñðåäñòâîì è ïðîòðèòå; øåëê î÷èùàéòå ïÿòíîâûâîäèòåëåì. Ëàê äëÿ íîãòåé: ïîëîæèòå òêàíü ìåæäó äâóìÿ ëèñòàìè ðûõëîé áóìàãè, ñìî÷èòå æèäêîñòüþ äëÿ ñíÿòèÿ ëàêà. Ïÿòíà îò òðàâû: èñïîëüçóéòå òàìïîí, ñìî÷åííûé ýòèëîâûì ñïèðòîì. Ðóêîâîäñòâî ïî óñòàíîâêå è ýêñïëóàòàöèè 50 Ïàíåëü óïðàâëåíèÿ Óïðàâëÿÿ ìàøèíîé ãëàâíîå ñäåëàòü ïðàâèëüíûé âûáîð. È ýòî î÷åíü ïðîñòî! F E H G M L Ïåðåêëþ÷àòåëü ïðîãðàìì è ïóñêà ïðîãðàììû Èñïîëüçóéòå ýòó ðóêîÿòêó äëÿ âûáîðà ïðîãðàììû ñòèðêè. Ïîâîðà÷èâàéòå ðóêîÿòêó òîëüêî ïî ÷àñîâîé ñòðåëêå. Äëÿ òîãî, ÷òîáû âûáðàòü ïðîãðàììó, ïîâåðíèòå ðóêîÿòêó ïðîãðàììàòîðà òàê, ÷òîáû ñèìâîë/ íîìåð òðåáóåìîé ïðîãðàììû ñîâïàë ñ îòìåòêîé íà ðóêîÿòêå. Íàæìèòå êíîïêó âêëþ÷åíèÿ/ âûêëþ÷åíèÿI (ïîçèöèÿ I), èíäèêàòîð Míà÷íåòìèãàòü. ×åðåç 5 ñåêóíä óñòàíîâêè áóäóò ïðèíÿòûèïîäòâåðæäåíû,öèêëñòèðêè íà÷íåòñÿ, êîãäà èíäèêàòîð L ïåðåñòàíåòìèãàòü(îñòàíåòñÿãîðåòü). ÅñëèÂûõîòèòåïðåðâàòüïðîãðàììó âïðîöåññåâûïîëíåíèÿèëèèçìåíèòü óñòàíîâêè, âûáåðèòå îäèí èç ñèìâîëîâ (Stop/Reset)èïîäîæäèòå 5 ñåêóíä: îòìåíà ïðîãðàììû áóäåò ïîäòâåðæäåíàìåðöàíèåìèíäèêàòîðà L,ïîñëåýòîãîÂûìîæåòåâûêëþ÷èòü ìàøèíó. Âûìîæåòåèñïîëüçîâàòüýòóðóêîÿòêó äëÿ óñòàíîâêè îïåðàöèé ñ îòëîæåííûìñòàðòîì. Âûáåðèòå îäíó èç ÷åòûðåõ ïîçèöèé òàéìåðà,íàæìèòåêíîïêóâêëþ÷åíèÿ/ âûêëþ÷åíèÿ I (ïîçèöèÿ I) è ïîäîæäèòå5ñåêóíä. Óñòàíîâêàáóäåò ïîäòâåðæäåíà, êîãäà èíäèêàòîð L çàãîðèòñÿ, òåïåðü âû ìîæåòå óñòàíîâèòüíåîáõîäèìóþïðîãðàììó. ÌåðöàíèåèíäèêàòîðàL (2ñåêãîðèò è ÷åðåç 4 ñåê) ãàñíåò òàêæå ïîêàçûâàåò, ÷òî óñòàíîâëåíà ïðîãðàììàñîòëîæåííûìñòàðòîì. Âýòîâðåìÿìîæíîîòêðûòüäâåðöó èïåðåçàãðóçèòüìàøèíó. Êîãäà ïðîãðàììíûé ïóñê è ïðîãðàììà óñòàíîâëåíû, âðàùåíèÿ ïåðåêëþ÷àòåëÿóæåíåèìåþòíèêàêîãî çíà÷åíèÿ, çà èñêëþ÷åíèåì óñòàíîâêè â ïîëîæåíèå (Stop/ Reset). D Ðóêîÿòêà âûáîðà ïðîãðàìì Ðóêîÿòêà ïðåäíàçíà÷åíà äëÿ âûáîðà òåìïåðàòóðû ñòèðêè ñîãëàñíî òàáëèöå ïðîãðàìì. Êðîìå òîãî, ñ ïîìîùüþ ýòîé ðóêîÿòêè âû ìîæåòå óñòàíîâèòü òåìïåðàòóðó íèæå ðåêîìåíäîâàííîé èëè âûïîëíèòü õîëîäíóþ ñòèðêó ( ). Êíîïêà èñêëþ÷åíèÿ îòæèìà Ýòîé êíîïêîé âûêëþ÷àåòñÿ ðåæèì îòæèìà (ñèìâîë ) èëè óñòàíàâëèâàåòñÿ ñêîðîñòü îòæèìà íèæå, ÷åì ïðåäóñìîòðåíî ïðîãðàììîé. Ìàêñèìàëüíàÿ ñêîðîñòü âðàùåíèÿ áàðàáàíà ïðè îòæèìå: Õëîïîê 1200 îá./ìèí Ñèíòåòèêà 800 îá./ìèí Øåðñòü 600 îá./ìèí Øåëê Íåò Ðàñïðåäåëåíèå ìàññû áåëüÿ ïî áàðàáàíó âñåãäà âûïîëíÿåòñÿ íà ìåäëåííûõ îáîðîòàõ. Ðàñïðåäåëèòåëü ìîþùèõ ñðåäñòâ Ðàñïðåäåëèòåëü ìîþùèõ ñðåäñòâ èìååò òðè îòäåëåíèÿ: 1 - ìîþùåå ñðåäñòâî äëÿ ïðåäâàðèòåëüíîé ñòèðêè 2 - ìîþùåå ñðåäñòâî äëÿ ñòèðêè 3 - äîáàâêè (ñìÿã÷èòåëè, àðîìàòèçàòîðû è ïð.) 4 Ðàñïðåäåëèòåëü ìîþùèõ ñðåäñòâ ñ äîïîëíèòåëüíîé âñòàâêîé äëÿ îòáåëèâàòåëÿ íàõîäèòñÿ çäåñü . 1 51 Ðóêîâîäñòâî ïî óñòàíîâêå è ýêñïëóàòàöèè 2 3 I Äîïîëíèòåëüíîå îòäåëåíèå 4, ïðåäíàçíà÷åííîå äëÿ îòáåëèâàòåëÿ, ìîæíî âñòàâèòü â îòäåëåíèå 1. Ëåãêîå ãëàæåíèå Ïðèìåíåíèåýòîéôóíêöèèïîçâîëÿåò Âàì èçáåæàòü îáðàçîâàíèÿ ñêëàäîê íà áåëüå è òåì ñàìûì îáåïå÷èòü áîëåå ëåãêîå ãëàæåíèå. Âû ìîæåòå èñïîëüçîâàòü ôóíêöèþ âìåñòå ñ ïðîãðàììàìè 3-4 (Õëîïîê), 5-6 (Ñèíòåòèêà) è 8-9 (Äåëèêàòíûå òêàíè). Íàæìèòå êíîïêó íà ïðîãðàììàõ 5-6-8-9 è ìàøèíà îñòàíîâèòñÿ íà ñèìâîëå . Çàâåðøèòü ñòèðêó Âû ìîæåòåïîâòîðíûìíàæàòèåìêíîïêè Å. Âíèìàíèå: Âû íå ìîæåòå âîñïîëüçîâàòüñÿýòîéôóíêöèåé,åñëè íàæàòà êíîïêàH (âûâåäåíèå ïÿòåí). Êíîïêà ýêñòðà-ýêîíîìèè Óìåíüøàåò ïîòðåáëåíèå âîäû ïðè ïîëîñêàíèè. Ðåêîìåíäóåòñÿ èñïîëüçîâàòü ýòó ôóíêöèþ ïðè íåïîëíîé çàãðóçêå ìàøèíû, ïðîïîðöèîíàëüíî óìåíüøàÿ êîëè÷åñòâî ìîþùåãî ñðåäñòâà. Óñêîðåííàÿ ñòèðêà Ïðè íàæàòèè ýòîé êíîïêè ïðîäîëæèòåëüíîñòü öèêëà ñòèðêè ñîêðàùàåòñÿ ïðèáëèçèòåëüíî íà 30%. Êíîïêà íå èñïîëüçóåòñÿ â ñïåöèàëüíûõ ïðîãðàììàõ (ñì. ñ. 52), à òàêæå â ïðîãðàììàõ ñòèðêè èçäåëèé èç øåðñòè è øåëêà. Óäàëåíèå ïÿòåí (ñì. ñ. 55) Ýòîé êíîïêîé çàäàåòñÿ ðåæèì óñèëåííîé ñòèðêè. Ýôôåêòèâíîñòü èñïîëüçîâàíèÿ äîáàâîê ê ìîþùåìó ñðåäñòâó óâåëè÷èâàåòñÿ, ïðè ýòîì óäàëÿþòñÿ ñàìûå ñòîéêèå çàãðÿçíåíèÿ. C B A Êíîïêà âêëþ÷åíèÿ / âûêëþ÷åíèÿ Íàæàòèå íà êíîïêó âêëþ÷àåò ìàøèíó. Åñëè êíîïêà íå íàæàòà, òî ìàøèíà âûêëþ÷åíà. Âûêëþ÷åíèå ìàøèíû íå îòìåíÿåò çàäàííóþ ïðîãðàììó. Èíäèêàòîð âêëþ÷åíèÿ / âûêëþ÷åíèÿ Èíäèêàòîð L ìèãàåò, êîãäà ìàøèíà âêëþ÷åíà è îæèäàåò ââîäà ïðîãðàììû. Åñëè èíäèêàòîð L ñâåòèòñÿ íå ìèãàÿ, òî ýòî îçíà÷àåò, ÷òî çàäàíèå ïðèíÿòî. Èíäèêàòîð áëîêèðîâêè äâåðöû Èíäèêàòîð ïîêàçûâàåò, ÷òî äâåðöà ìàøèíû áëîêèðîâàíà. Ïîïûòêà ñ ñèëîé îòêðûòü äâåðöó ìîæåò ïðèâåñòè ê ïîëîìêå ìàøèíû. Äîæäèòåñü, êîãäàèíäèêàòîðNïîãàñíåò.Îáû÷íî èíäèêàòîð ãàñíåò ÷åðåç 3 ìèíóòû ïîñëå îêîí÷àíèÿ ñòèðêè. M ×òî ñòèðàåì ñåãîäíÿ? Ïðîãðàììû íà âñå ñëó÷àè æèçíè Òêàíü è ñòåïåíü çàãðÿçíåíèÿ Ïðîãðàììà Òåìïåðàò- Ìîþùååóðà ñðåäñòâî Ñìÿã÷èòåëü Óäàëåíèå Äëèòåëïÿòåí/Îò- úíîñòú áåëèâàíèå öèêëà (ìèí) Îïèñàíèå öèêëà ñòèðêè Õëîïîê Ñèëüíî çàãðÿçíåííîå áåëîå áåëúå (ïðîñòú²íè, ñêàòåðòè è ò.ä) 1 90°C ◆ ◆ Ñèëüíî çàãðÿçíåííîå áåëîå áåëúå (ïðîñòú²íè, ñêàòåðòè è ò.ä) 2 90°C ◆ ◆ Ñèëüíî çàãðÿçíåííîå áåëîå è ëèíÿþùåå öâåòíîå áåëúå 3 60°C ◆ Ñëàáî çàãðÿçíåííîå áåëîå è öâåòíîå äåëèêàòíîå áåëúå (ðóáàøêè, òåííèñêè è ïð.) 4 40°C ◆ Ïîëîñêàíèå/Îòáåëèâàíèå 165 Ïðåäâàðèòåëüíàÿ ñòèðêà â òåïëîé âîäå -, Ñòèðêà ïðè 90°C, ïîëîñêàíèå, ïðîìåæóòî÷íûé è îêîí÷àòåëúíûé îòæèì Äåëèêàòí./ Îáû÷í. 145 Ñòèðêà ïðè 90°C, ïîëîñêàíèå, ïðîìåæóòî÷íûé è îêîí÷àòåëúíûé îòæèì ◆ Äåëèêàòí./ Îáû÷í. 130 Ñòèðêà ïðè 60°C, ïîëîñêàíèå, ïðîìåæóòî÷íûé è îêîí÷àòåëúíûé îòæèì ◆ Äåëèêàòí./ Îáû÷í. 95 Ñòèðêà ïðè 40°C, ïîëîñêàíèå, ïðîìåæóòî÷íûé è îêîí÷àòåëúíûé îòæèì ◆ Äåëèêàòí./ Îáû÷í. Ïîëîñêàíèå, ïðîìåæóòî÷íûé è îêîí÷àòåëúíûé îòæèì Îòæèì Ñëèâ è îêîí÷àòåëúíûé îòæèì Îñòàíîâêà/çàïóñê (Stop/Reset) Ïðåðûâàíèå/îòìåíà ïðîãðàììû ÑÈÍÒÅÒÈÊÀ Öâåòíàÿ, ëèíÿþùàÿ, ñèëúíî çàãðÿçíåííàÿ (äåòñêàÿ îäåæäà è ïð.) 5 60°C ◆ ◆ Äåëèêàòíàÿ 100 Öâåòíàÿ, äåëèêàòíàÿ, ñëàáî çàãðÿçíåííàÿ (ëþáàÿ îäåæäà) 6 40°C ◆ ◆ Äåëèêàòíàÿ 70 Ñòèðêà ïðè 40°C, ïîëîñêàíèå, îñòàíîâêà ñ âîäîé èëè äåëèêàòíûé îòæèì Öâåòíàÿ, äåëèêàòíàÿ, ñëàáî çàãðÿçíåííàÿ (ëþáàÿ îäåæäà) 7 30°C ◆ ◆ 30 Ñòèðêà ïðè 30°C, ïîëîñêàíèå è äåëèêàòíûé îòæèì Ïîëîñêàíèå/Îòáåëèâàíèå ◆ Ñìÿã÷åíèå Ñòèðêà ïðè 60°C, ïîëîñêàíèå, îñòàíîâêà ñ âîäîé èëè äåëèêàòíûé îòæèì Ïîëîñêàíèå, îñòàíîâêà ñ âîäîé èëè äåëèêàòíûé îòæèì Äåëèêàòíàÿ Ïîëîñêàíèå, àâòîìàòè÷åñêîå äîáàâëåíèå ñìÿã÷èòåëÿ, îñòàíîâêà ñ âîäîé èëè äåëèêàòíûé îòæèì ◆ Îòæèì Ñëèâ è îêîí÷àòåëúíûé îòæèì Îñòàíîâêà/çàïóñê (Stop/Reset) Ïðåðûâàíèå/îòìåíà ïðîãðàììû ÄÅËÈÊÀÒ. ÒÊÀÍÈ Ðó÷íàÿ ñòèðêà 8 40°C ◆ ◆ 60 Ñòèðêà ïðè 40°C, ïîëîñêàíèå è äåëèêàòíûé îòæèì Îñáî äåëèêàòíûå èçäåëèÿ è òêàíè (øòîðû, øåëê, âèñêîçà) 9 30°C ◆ ◆ 50 Ñòèðêà ïðè 30°C, ïîëîñêàíèå, îñòàíîâêà ñ âîäîé èëñëèâ Ïîëîñêàíèå ◆ Ïîëîñêàíèå, îñòàíîâêà ñ âîäîé èëñëèâ Îòæèì Ñëèâ è îêîí÷àòåëúíûé îòæèì Ñëèâ Ñëèâ Îñòàíîâêà/çàïóñê (Stop/Reset) Ïðåðûâàíèå/îòìåíà ïðîãðàììû ÏÐÎÃÐÀÌÌÍÛÉ ÏÓÑÊ Ñ çàäåðæêîé 12 - 9 - 3 - 1 ÷àñ Ïóñê ÷åðåç12 - 9 - 3 - 1 ÷àñ Îñòàíîâêà/çàïóñê (Stop/Reset) Äëÿ îòìåíû ïðîãðàììû âûáåðèòå ëþáîé ñèìâîë Ïðåðûâàíèå/îòìåíà ïðîãðàììû (Stop/Reset) è æäèòå 5 ñåê. Äàííûå, ïðèâåäåííûå â òàáëèöå, ÿâëÿþòñÿ âñåãî ëèøü ñïðàâî÷íûìè è ìîãóò ìåíÿòüñÿ â çàâèñèìîñòè îò êîíêðåòíûõ óñëîâèé ñòèðêè (îáúåì ñòèðêè, òåìïåðàòóðà âîäû â âîäîïðîâîäíîé ñèñòåìå, êîìíàòíàÿ òåìïåðàòóðà è äð.) Ñïåöèàëüíûå ïðîãðàììû Ïîâñåäíåâíàÿ ñòèðêà : ïðîãðàììà áûñòðîé ñòèðêè äëÿ ñëàáî çàãðÿçíåííîé îäåæäû. Âûáåðèòå ïðîãðàììó 7 è òåìïåðàòóðó 30°C è ìîæåòå ñòèðàòü îäåæäó èç ñàìûõ ðàçíûõ òêàíåé (êðîìå øåðñòè è øåëêà) ïðè ìàêñèìàëüíîé çàãðóçêå áàðàáàíà 3 êã. Ïðîãðàììà, äëÿùàÿñÿ îêîëî 30 ìèíóò, îòëè÷àåòñÿ ýêîíîìíûì ðàñõîäîì ýëåêòðîýíåðãèè. Ðåêîìåíäóåì ïîëüçîâàòüñÿ æèäêèì ìîþùèì ñðåäñòâîì. Ðóêîâîäñòâî ïî óñòàíîâêå è ýêñïëóàòàöèè 52 Ñèìâîëèêà íà ýòèêåòêàõ Ñèìâîëû íà ýòèêåòêàõ, ïðèêðåïëÿåìûõ ê îäåæäå, ýòî ñâîåãî ðîäà èíñòðóêöèè, âûïîëíåíèå êîòîðûõ ïîçâîëèò âàì äîáèòüñÿ çàìå÷àòåëüíûõ ðåçóëüòàòîâ ïðè ñòèðêå è äîëüøå ñîõðàíèò âàøó îäåæäó.  ñòðàíàõ Åâðîïû ñèìâîëèêà íà ýòèêåòêàõ îäåæäû íåñåò î÷åíü âàæíóþ èíôîðìàöèþ. Âû äîëæíû íàó÷èòüñÿ ïîíèìàòü ýòè ñèìâîëû, ÷òîáû ïðàâèëüíî óõàæèâàòü çà îäåæäîé. Âñå ñèìâîëû ðàçäåëÿþòñÿ íà ïÿòü ãðóïï: ñòèðêà , îòáåëèâàíèå , ãëàæåíèå , õèì÷èñòêà è ñóøêà . Ïîëåçíûå ñîâåòû Ðóáàøêè âûâåðíèòå íàèçíàíêó ýòî ïîçâîëèò äîáèòüñÿ ëó÷øèõ ðåçóëüòàòîâ ïðè ñòèðêå è ðóáàøêè ïðîñëóæàò äîëüøå. Îáÿçàòåëüíî âûíüòå âñå èç êàðìàíîâ. Ïåðåä ñòèðêîé ñâåðüòåñü ñ ýòèêåòêàìè íà îäåæäå. Ïðè çàãðóçêå ìàøèíû ñìåøèâàéòå êðóïíûå è ìåëêèå ïðåäìåòû îäåæäû. Òåìïåðàòóðó íàäî âûáèðàòü ïðàâèëüíî! Èçó÷èòå ïðåäëàãàåìóþ òàáëèöó, ïîñòàðàéòåñü çàïîìíèòü ñèìâîëüíûå îáîçíà÷åíèÿ. Ýòî ïîìîæåò âàì ëó÷øå óõàæèâàòü çà ñâîåé îäåæäîé è èñïîëüçîâàòü ñòèðàëüíóþ ìàøèíó Indesit Còèðàëüíàÿ ìàøèíà ñ íàèáîëüøèì ýôôåêòîì. Ñòèðêà Íîðìàëüíàÿ Îòáåëèâàíèå Ãëàæåíèå Õèì÷èñòêà Âûñîêàÿ òåìïåðàòóðà Äåëèêàòíàÿ cl Ñòèðêà ïðè 95°C Ñóøêà Îòáåëèâàòü òîëüêî â õîëîäíîé âîäå Óìåðåííàÿ òåìïåðàòóðà A Ãëàäèòü ïðè max200°C Õèì÷èñòêà ñ ëþáûì ðàñòâîðèòåëåì Ìàøèííàÿ ñóøêà P Ñòèðêà ïðè 60°C Íå îòáåëèâàòü Ãëàäèòü ïðè max150°C Õèì÷èñòêà: òîëüêî ïåðõëîðèä, áåíçèí, ñïèðò, R111 è R113 Íåëüçÿ ñóøèòü â ìàøèíå F Ñòèðêà ïðè 40°C Ãëàäèòü ïðè max110°C Õèì÷èñòêà: áåíçèí, ñïèðò è R113 Ñóøèòü ðàñïðàâëåííûì Ñòèðêà ïðè 30°C Íå ãëàäèòü Íå ïîäâåðãàòü õèì÷èñòêå Ñóøèòü íà âåðåâêå Ðó÷íàÿ ñòèðêà Íå ñòèðàòü 53 Ðóêîâîäñòâî ïî óñòàíîâêå è ýêñïëóàòàöèè Ñóøèòü íà ïëå÷èêàõ M Òèïè÷íûå îøèáêè è êàê èõ èçáåæàòü Íå ñòèðàéòå â ìàøèíå. - âåòõèå, íåïðî÷íûå è íåæíûå âåùè. Åñëè âñå-òàêè òðåáóåòñÿ ïîñòèðàòü ýòè âåùè â ìàøèíå, ïîìåñòèòå èõ â ëüíÿíîé ìåøî÷åê; - ãëóáîêî îêðàøåííûå âåùè âìåñòå ñ áåëûìè âåùàìè. Íå ïðåâûøàéòå ðåêîìåíäîâàííûå íîðìû çàãðóçêè. Åñëè âû õîòèòå äîáèòüñÿ íàèëó÷øèõ ðåçóëüòàòîâ ñòèðêè, íå ïåðåãðóæàéòå ìàøèíó. Íîðìû çàãðóçêè ñóõîãî áåëüÿ ïðèâåäåíû íèæå: Ïðî÷íûå òêàíè: 5,5 êã (ìàêñèìóì) Ñèíòåòè÷åñêèå òêàíè: 2,5 êã (ìàêñèìóì) Äåëèêàòíûå òêàíè: 2 êã (ìàêñèìóì) Øåðñòü: 1 êã (ìàêñèìóì) 1 1 1 1 1 ×òî è ñêîëüêî âåñèò? ïðîñòûíÿ: 400-500 ã íàâîëî÷êà: 150-200 ã ñêàòåðòü: 400-500 ã õàëàò: 900-1200 ã ïîëîòåíöå: 150-200 ã Òåííèñêè è áóìàæíûå ñâèòåðà, îêðàøåííûå èëè ñ íàäïèñÿìè, ïðè ñòèðêå ëó÷øå âûâîðà÷èâàòü íàèçíàíêó. Ãëàäèòü òîëüêî ñ âíóòðåííåé ñòîðîíû. Êîìáèíåçîíû. Ìîäíûå êîìáèíåçîíû èìåþò ìíîæåñòâî øíóðêîâ, ðåìåøêîâ è çàìêîâ, êîòîðûå ìîãóò ïîâðåäèòü áàðàáàí ñòèðàëüíîé ìàøèíû. Ìåëêèå äåòàëè îäåæäû âî âðåìÿ ñòèðêè ðåêîìåíäóåòñÿ ïîìåñòèòü â îòäåëüíûé ìåøî÷åê èëè ïîëîæèòü âî âíóòðåííèé êàðìàí. Îòïóñê: âûêëþ÷èòå ýëåêòðîïðèáîðû. Åñëè âû íå ñîáèðàåòåñü ïîëüçîâàòüñÿ ñòèðàëüíîé ìàøèíîé äîñòàòî÷íî äîëãîå âðåìÿ (íàïðèìåð, âî âðåìÿ îòïóñêà), òî âûêëþ÷èòå åå èç ýëåêòðîñåòè, ïåðåêðîéòå êðàí ïîäà÷è âîäû è îñòàâüòå äâåðöó ñëåãêà ïðèîòêðûòîé, ÷òîáû âíóòðè ìàøèíû íå ñêàïëèâàëñÿ íåïðèÿòíûé çàïàõ. Øåðñòü Äëÿ äîñòèæåíèÿ íàèëó÷øèõ ðåçóëüòàòîâ ðåêîìåíäóåì íå çàãðóæàòü áîëåå 1 êã áåëüÿ è èñïîëüçîâàòü ñïåöèàëüíûå ïîðîøêè äëÿ ñòèðêè øåðñòÿíûõ èçäåëèé. Ñòèðàòü ìîæíî ïðàêòè÷åñêè âñå Çàíàâåñêè è øòîðû. Çàíàâåñêè è øòîðû îáû÷íî ñèëüíî ìíóòñÿ. ×òîáû ýòîãî èçáåæàòü, ñëîæèòå èõ àêêóðàòíî è ïîëîæèòå â íàâîëî÷êó. Ñòèðàéòå îòäåëüíî, óáåäèâøèñü, ÷òî âåñ íå ïðåâûøàåò ïîëîâèíû ðåêîìåíäóåìîé íîðìû çàãðóçêè. Íàïîìèíàåì, ÷òî ñóùåñòâóåò ïðîãðàììà 9, êîòîðàÿ àâòîìàòè÷åñêè èñêëþ÷àåò ðåæèì îòæèìà. Ñòåãàíûå îäåÿëà è âåòðîíåïðîíèöàåìûå êóðòêè.  ìàøèíå ìîæíî ñòèðàòü ïóõîâûå îäåÿëà è êóðòêè, ïðè ýòîì íå ñëåäóåò çàãðóæàòü áîëåå 2-3 êã èçäåëèé ñðàçó. Ïîëîñêàíèå âûïîëíèòå 1-2 ðàçà, îòæèì ïðîèçâîäèòå íà ïîíèæåííîé ñêîðîñòè. Ïàðóñèíîâûå òóôëè. Ïàðóñèíîâûå òóôëè ïðåäâàðèòåëüíî î÷èñòèòå îò ãðÿçè è ñòèðàéòå ñ ïðî÷íûìè òêàíÿìè èëè äæèíñàìè, åñëè ïîçâîëÿåò öâåò. Íå ñòèðàéòå ñ áåëûìè âåùàìè. Ðóêîâîäñòâî ïî óñòàíîâêå è ýêñïëóàòàöèè 54 Äëÿ êà÷åñòâà ñòèðêè ýòî âàæíî Ñåêðåòû ðàñïðåäåëèòåëÿ ìîþùèõ ñðåäñòâ Ïåðâûé ñåêðåò ñàìûé ïðîñòîé ðàñïðåäåëèòåëü îòêðûâàåòñÿ íàðóæó. Ðåêîìåíäóåìàÿ äîçèðîâêà Æèäêîå ìîþùåå ñðåäñòâî çàìîþùèõ ñðåäñòâ è äîáàâîê ëèâàåòñÿ â îòäåëåíèå 2 çà íåïîñîáû÷íî óêàçûâàåòñÿ èçãî- ðåäñòâåííî ïåðåä ïóñêîì òîâèòåëåì íà óïàêîâêå ïðîäóê- ìàøèíû. öèè. Ïðè çàïîëíåíèè ðàñïðåäå- Ïîìíèòå, ÷òî æèäêèå ìîþùèå ëèòåëÿ ìîþùèõ ñðåäñòâ ñðåäñòâà ïðèãîäíû äëÿ ñòèðêè ñëåäóåò ó÷èòûâàòü îáúåì ïðåä- ïðè òåìïåðàòóðå äî 60°Ñ è äëÿ ñòîÿùåé ñòèðêè, æåñòêîñòü ïðîãðàìì, íå ïðåäóñìàòðèâàþâîäû è ñòåïåíü çàãðÿçíåííîñòè ùèõ ïðåäâàðèòåëüíóþ ñòèðêó. áåëüÿ.  äàëüíåéøåì, ïðèîáðå- Ñóùåñòâóþò ïîðîøêè è æèäêèå òÿ íåêîòîðûé îïûò, Âû ñìîæå- ìîþùèå ñðåäñòâà â ñïåöèàëüòå ñàìè îïðåäåëÿòü, êàêîå êîëè- íûõ êîíòåéíåðàõ, êîòîðûå ÷åñòâî ìîþùèõ ñðåäñòâ è çàêëàäûâàþòñÿ ïðÿìî â áàðàáàí. äîáàâîê òðåáóåòñÿ â òîì èëè Äåéñòâóéòå ñîãëàñíî èíîì ñëó÷àå. Ýòî óæå áóäåò âàø èíñòðóêöèè íà óïàêîâêå ýòèõ ñîáñòâåííûé ñåêðåò. ñðåäñòâ. Ïåðåä çàïîëíåíèåì ìîþùèì Íå ïîëüçóéòåñü ñðåäñòâàìè, ñðåäñòâîì îòäåëåíèÿ ïðåäâàðè- ïðåäíàçíà÷åííûìè òîëüêî äëÿ òåëüíîé ñòèðêè 1 óáåäèòåñü, ÷òî ðó÷íîé ñòèðêè, ïîñêîëüêó îòäåëåíèå 4 äëÿ îòáåëèâàòåëÿ â îáèëüíîå ïåíîîáðàçîâàíèå ìîíåì íå óñòàíîâëåíî. æåò âûâåñòè èç ñòðîÿ ñòèðàëüÍå ïåðåïîëíÿéòå îïîëàñêèâàòå- íóþ ìàøèíó. ëÿìè îòäåëåíèå 3 âûøå  ñêîðîì âðåìåíè îæèäàåòñÿ ðåøåòêè. ïîÿâëåíèå ìîþùèõ ñðåäñòâ, Äåéñòâóÿ ïî ïðîãðàììå, ìàøè- ïðåäíàçíà÷åííûõ è äëÿ ðó÷íîé, íà ñàìà ïîäàåò äîáàâêè è äëÿ ìàøèííîé ñòèðêè. ìîþùèõ ñðåäñòâ â âîäó.  çàêëþ÷åíèå åùå îäèí ñåêðåò: ïðè ñòèðêå â õîëîäíîé âîäå óìåíüøàéòå êîëè÷åñòâî ìîþùåãî ñðåäñòâà, òàê êàê â õîëîäíîé âîäå îíî ðàñòâîðÿåòñÿ ëó÷øå, ÷åì â òåïëîé. Îòäåëåíèå 1: ìîþùåå ñðåäñòâî äëÿ ïðåäâàðèòåëüíîé ñòèðêè (ïîðîøîê) 4 1 2 3 Îòáåëèâàíèå è êíîïêà «Óäàëåíèå ïÿòåí» Ëîòîê 4 äëÿ îòáåëèâàòåëÿ âñòàâëÿåòñÿ â îòäåëåíèå 1 ðàñïðåäåëèòåëÿ ìîþùèõ ñðåäñòâ. Íå çàïîëíÿéòå ëîòîê 4 âûøå îòìåòêè max (ñì. ðèñóíîê). Ïðè îòáåëèâàíèè ðåæèì ïðåäâàðèòåëüíîé ñòèðêè íå òðåáóåòñÿ. Îáû÷íûé îòáåëèâàòåëü ïðèìåíÿþò ïðè ñòèðêå ïðî÷íûõ áåëûõ òêàíåé; äåëèêàòíûé îòáåëèâàòåëü ìîæíî èñïîëüçîâàòü äëÿ öâåòíûõ, ñèíòåòè÷åñêèõ è øåðñòÿíûõ òêàíåé. Îòáåëèâàíèå íå ïðèìåíÿåòñÿ â ïðîãðàììàõ ñòèðêè øåëêîâûõ òêàíåé è â ñïåöèàëüíûõ ïðîãðàììàõ (ñì. ñ. 52). Ýêîíîìíàÿ ýêñïëóàòàöèÿ áûòîâûõ ïðèáîðîâ íå íàíîñèò óùåðáà îêðóæàþùåé ñðåäå. ÌÀÊÑÈÌÀËÜÍÀß ÇÀÃÐÓÇÊÀ Ñòàðàéòåñü ìàêñèìàëüíî çàãðóæàòü ìàøèíó, ýòèì âû ñýêîíîìèòå ýëåêòðîýíåðãèþ, âîäó, ìîþùèå ñðåäñòâà è âðåìÿ. Íàïðèìåð, ïðè ïîëíîé çàãðóçêå ðàñõîä ýëåêòðîýíåðãèè áóäåò íà 50% ìåíüøå, ÷åì ïðè çàãðóçêå íàïîëîâèíó. ÍÓÆÍÀ ËÈ ÏÐÅÄÂÀÐÈÒÅËÜÍÀß ÑÒÈÐÊÀ? Ïðîãðàììû ïðåäâàðèòåëüíîé ñòèðêè íóæíû òîëüêî äëÿ ñèëüíî çàãðÿçíåííîãî áåëüÿ! Îòêàç îò ïðåäâàðèòåëüíîé ñòèðêè ñáåðåæåò ìîþùèå ñðåäñòâà, âîäó è çàòðàòû ýëåêòðîýíåðãèè íà 5-15%, íå ãîâîðÿ óæå î âàøåì ëè÷íîì âðåìåíè. ÒÀÊ ËÈ ÍÅÎÁÕÎÄÈÌÀ ÃÎÐß×Àß ÂÎÄÀ? Ïåðåä ñòèðêîé çàìî÷èòå áåëüå, îáðàáîòàéòå ïÿòíà ñïåöèàëüíûìè ñðåäñòâàìè, è âàì íå ïîòðåáóåòñÿ ñëèøêîì ãîðÿ÷àÿ âîäà. Ñòèðêà ïðè 60 °Ñ ñïîñîáíà ñýêîíîìèòü äî 50% ýëåêòðîýíåðãèè. ÏÅÐÅÄ ÂÛÁÎÐÎÌ ÏÐÎÃÐÀÌÌÛ ÑÓØÊÈ ... Ïîñëå îòæèìà áåëüÿ íà âûñîêèõ îáîðîòàõ ñóøêà áåëüÿ ïîéäåò áûñòðåå. 55 Ðóêîâîäñòâî ïî óñòàíîâêå è ýêñïëóàòàöèè Îòäåëåíèå 3: Äîáàâêè (ñìÿã÷èòåëè, àðîìàòèçàòîðû è ïð.) Îòäåëåíèå 4: Îòáåëèâàòåëü è äåëèêàòíûé îòáåëèâàòåëü Äëÿ òîãî, ÷òîáû ïîìûòü ðàñïðåäåëèòåëü ìîþùèõ ñðåäñòâ, ïîòÿíèòå åãî íà ñåáÿ, êàê óêàçàíî íà ðèñóíêå. Çàòåì îñòàâüòå åãî ïîä ñòðóåé âîäû íà íåñêîëüêî ìèíóò. Êàê ñíèçèòü ðàñõîäû Îòäåëåíèå 2: ìîþùåå ñðåäñòâî äëÿ ñòèðêè (ïîðîøîê èëè æèäêîå) Ïðè îòáåëèâàíèè ïîëüçóéòåñü êíîïêîé óäàëåíèÿ ïÿòåí. Åñëè îòáåëèâàíèå âûïîëíÿåòñÿ êàê îòäåëüíûé öèêë, çàïîëíèòå îòäåëåíèå 4 îòáåëèâàòåëåì, íàæìèòå êíîïêó Í (óäàëåíèå ïÿòåí), âêëþ÷èòå ìàøèíó, çàòåì âûáåðèòå , ñîîòîäèí èç ñèìâîëîâ âåòñòâóþùèé òèïó òêàíè. Åñëè îòáåëèâàíèå âêëþ÷åíî â îáû÷íûé öèêë ñòèðêè, çàïîëíèòå îòäåëåíèÿ ìîþùèì ñðåäñòâîì è äîáàâêàìè, íàæìèòå êíîïêó Í (óäàëåíèå ïÿòåí), óñòàíîâèòå íåîáõîäèìóþ ïðîãðàììó è âêëþ÷èòå ìàøèíó. M Íåèñïðàâíîñòè è èõ óñòðàíåíèå Ðàçáåðèòåñü ñ ïðîáëåìîé ñàìè... Âîçìîæíî âàì ïðèäåòñÿ ñòîëêíóòüñÿ ñ êàêîé-ëèáî íåèñïðàâíîñòüþ, íî íå òîðîïèòåñü âûçûâàòü ìàñòåðà. Âî ìíîãèõ ñëó÷àÿõ âû ñàìè ìîæåòå ðåøèòü âîçíèêøèå ïðîüáëåìû Ìàøèíà íå âêëþ÷àåòñÿ. n Âñòàâëåíà ëè âèëêà â ðîçåòêó? Âû ìîãëè âûêëþ÷èòü ìàøèíó íà âðåìÿ ÷èñòêè. n Íå îòêëþ÷åíî ëè ýëåêòðè÷åñòâî? Èç-çà ïåðåãðóçêè ìîã ñðàáîòàòü àâòîìàò ýëåêòðîñåòè. Íå èñêëþ÷åíî, ÷òî â âàøåì ðàéîíå ïðîèçîøëà êàêàÿ-òî àâàðèÿ. n Çàêðûòà ëè äâåðöà ìàøèíû? Ñòèðàëüíàÿ ìàøèíà íå ìîæåò áûòü âêëþ÷åíà, åñëè äâåðöà îòêðûòà. Ýòî ñäåëàíî èç ñîîáðàæåíèé áåçîïàñíîñòè. n Íàæàòà ëè êíîïêà âêëþ- ÷åíèÿ/âûêëþ÷åíèÿ? Åñëè êíîïêà íàæàòà, íî ìàøèíà âñå æå íå âêëþ÷àåòñÿ, òî, çíà÷èò, áûë çàäàí ïðîãðàììíûé ïóñê (ïî òàéìåðó). n Ïðàâèëüíî ëè óñòàíîâëåíà ðó÷êà ïðîãðàììíîãî ïóñêà? Ïðîâåðüòå (íà òåõ ìàøèíàõ, ãäå òàêàÿ ðó÷êà åñòü). n Îòêðûò ëè êðàí ïîäà÷è âîäû? Ìàøèíà, íå çàïîëíåííàÿ âîäîé, íå ìîæåò âêëþ÷èòüñÿ. Ýòî ñäåëàíî èç ñîîáðàæåíèé áåçîïàñíîñòè. ÏÐÀÂÈËÜÍÎ ÍÅÏÐÀÂÈËÜÍÎ Çàêðûâàéòå êðàí ïîñëå êàæäîé ñòèðêè. Îãðàíè÷üòå èñïîëüçîâàíèå ãèäðàâëè÷åñêîé ñèñòåìû ìàøèíû, êîãäà íèêîãî íåò äîìà ýòèì âû óìåíüøèòå îïàñíîñòü ïðîòå÷êè. Îñòàâëÿéòå äâåðöó â ïðèîòêðûòîì ïîëîæåíèè, ÷òîáû â ìàøèíå íå ñêàïëèâàëñÿ íåïðèÿòíûé çàïàõ. Âíåøíèå ïàíåëè ìàøèíû ïðîòèðàéòå ñ áîëüøîé îñòîðîæíîñòüþ. Êîðïóñ ìàøèíû è ðåçèíîâûå äåòàëè ïðîòèðàéòå ÷èñòîé òêàíüþ, ñìî÷åííîé â òåïëîé âîäå ñ ìûëîì. Ïðè ÷èñòêå îñòàâüòå ñòèðàëüíóþ ìàøèíó ïîäêëþ÷åííîé ê ñåòè. Âî âðåìÿ îáñëóæèâàíèÿ ìàøèíà âñåãäà äîëæíà áûòü îòêëþ÷åíà îò ñåòè. Èñïîëüçóéòå ðàñòâîðèòåëè è àêòèâíûå àáðàçèâû. Íèêîãäà íå ïðèìåíÿéòå ðàñòâîðèòåëè èëè àáðàçèâû äëÿ ÷èñòêè âíåøíèõ è ðåçèíîâûõ ÷àñòåé ñòèðàëüíîé ìàøèíû. Íå çàáîòüòåñü î ðàñïðåäåëèòåëå ìîþùèõ ñðåäñòâ. Ñúåìíûé ðàñïðåäåëèòåëü ìîæíî ëåãêî ïðîìûòü ïîä ïðîòî÷íîé âîäîé. Óåçæàÿ íàäîëãî, íå âñïîìíèòå î ìàøèíå. Ïåðåä îòúåçäîì âñåãäà ïðîâåðÿéòå, ÷òî ñòèðàëüíàÿ ìàøèíà îòêëþ÷åíà è çàêðûò êðàí ïîäà÷è âîäû. Ãäå æå âîäà â ìàøèíå? Ïðîñòî: ñ íîâîé òåõíîëîãèåé Indesit âû çàòðàòèòå âîäû äâà ðàçà ìåíüøå, à ýôôåêò îò ñòèðêè áóäåò â äâà ðàçà âûøå! Âîò ïî÷åìó âû íå ìîæåòå âèäåòü âîäó ÷åðåç äâåðöó: åå î÷åíü ìàëî. Ýòî çàáîòà îá îêðóæàþùåé ñðåäå áåç îòêàçà îò ìàêñèìàëüíîé ÷èñòîòû. È âäîáàâîê êî âñåìó, âû ýêîíîìèòå ýëåêòðè÷åñòâî. l, çàòåì âêëþ÷èòå ìàøèíó. Åñëè âðàùåíèå ïåðåêëþ÷àòåëÿ íå ïðåêðàùàåòñÿ, îáðàòèòåñü â ñåðâèñíûé öåíòð çà ïîìîùüþ. Ìàøèíà íå çàëèâàåò âîäó. n Ïðàâèëüíî ëè ïîäñîåäèíåí øëàíã? n Íå ïåðåêðûòà ëè ïîäà÷à âîäû â äîìå? Âîçìîæíî, â âàøåì äîìå èëè ïîáëèçîñòè âåäåòñÿ ðåìîíò è âîäîñíàáæåíèå âðåìåííî îòêëþ÷åíî. n Äîñòàòî÷íî ëè äàâëåíèå â âîäîïðîâîäå? Âîçìîæíî, íåèñïðàâåí àâòîêëàâ. n Íå çàñîðåí ëè ôèëüòð? Ôèëüòð íà çàëèâíîì øëàíãå ìîæåò áûòü çàáèò èçâåñòêîâûìè ÷àñòèöàìè èëè ìóñîðîì, îñòàâøèìñÿ ïîñëå ðåìîíòà âîäîïðîâîäà. n Íå ïåðåæàò ëè øëàíã ïîäà÷è âîäû? Ïðîñëåäèòå, êàê ïðîëîæåí øëàíã, íåò ëè èçãèáîâ è ïåðåëîìîâ. Âðàùàåòñÿ ïåðåêëþ÷àòåëü ïðîãðàìì. n Ïîäîæäèòå, ïîêà íàñîñ îòêà÷àåò âîäó, âûêëþ÷èòå ìàøèíó,âûáåðèòå îäèí èç ñèìâîëîâ Îñòàíîâ/ïóñê Ìàøèíà çàëèâàåò è ñëèâàåò âîäó îäíîâðåìåííî. n Íå ñëèøêîì ëè íèçêî ðàñïîëîæåí ñëèâíîé øëàíã? Êîíåö øëàíãà äîëæåí íàõîäèòñÿ íà âûñîòå 60100 ñì. n Íå îêàçàëñÿ ëè êîíåö øëàíãà â âîäå? n Èìååòñÿ ëè îòâîäíàÿ òðóáêà â ñëèâíîé ñèñòåìå? n Åñëè ïîïûòêè óñòðàíèòü íåèñïðàâíîñòü íå óâåí÷àëèñü óñïåõîì, âûêëþ÷èòå ìàøèíó, ïåðåêðîéòå âîäó è îáðàòèòåñü â ñåðâèñíûé öåíòð çà ïîìîùüþ. n Íà âåðõíèõ ýòàæàõ çäàíèé ìîæåò ñêàçàòüñÿ òàê íàçûâàåìûé ñèôîííûé ýôôåêò. Äëÿ åãî óñòðàíåíèÿ óñòàíàâëèâàþò ñïåöèàëüíûé àíòèñèôîí. Ðóêîâîäñòâî ïî óñòàíîâêå è ýêñïëóàòàöèè 56 n Íå ïåðåæàò ëè ñëèâíîé Ïðîáëåìû ïðè ñëèâå âîäû è îòæèìå. n Ïðåäïîëàãàåò ëè âûáðàííàÿ ïðîãðàììà àâòîìàòè÷åñêèé ñëèâ?  íåêîòîðûõ ïðîãðàììà ñëèâ âûïîëíÿåòñÿ âðó÷íóþ. n Âêëþ÷åí ëè ðåæèì îñòàíîâêè ñ âîäîé â ìàøèíå? Ýòà ôóíêöèÿ ïðåäïîëàãàåò ðó÷íîé ñëèâ âîäû èç ìàøèíû. n Íå çàñîðåí ëè ñëèâíîé íàñîñ? Äëÿ ïðîâåðêè çàêðîéòå êðàí, âûêëþ÷èòå ìàøèíó èç ñåòè, äàëåå ñì. èíñòðóêöèè íà ñ. 59. Ïðè íåîáõîäèìîñòè âûçîâèòå ñïåöèàëèñòà ñåðâèñíîãî öåíòðà. Íå ïîëüçóéòåñü óñëóãàìè ëèö, íå óïîëíîìî÷åííûõ Ïðîèçâîäèòåëåì. Ïðè ðåìîíòå òðåáóéòå èñïîëüçîâàíèÿ îðèãèíàëüíûõ çàïàñíûõ ÷àñòåé. øëàíã? Ïðîñëåäèòå, êàê ïðîëîæåí øëàíã, íåò ëè èçãèáîâ è ïåðåëîìîâ. n Íåò ëè çàñîðîâ â êàíàëèçàöèè?  êàêîì ñîñòÿíèè óäëèíèòåëü ñëèâíîãî øëàíãà? Íåñòàíäàðòíûé óäëèíèòåëü ìîæåò çàäåðæèâàòü âîäó. Ñèëüíàÿ âèáðàöèÿ ïðè îòæèìå. n Ñíÿòû ëè òðàíñïîðòèðîâî÷íûå îãðàíè÷èòåëè? Ñì. èíñòðóêöèè ïî óñòàíîâêå ìàøèíû íà ñëåäóþùåé ñòðàíèöå. n Õîðîøî ëè âûðîâíåíà ìàøèíà? Ðåãóëÿðíî ïðîâåðÿéòå ãîðèçîíòàëüíîñòü óñòàíîâêè ìàøèíû. Îòðåãóëèðóéòå ïîëîæåíèå íîæåê ìàøèíû. n Äîñòàòî÷åí ëè çàçîð ìåæäó ìàøèíîé, ñòåíîé è îêðóæàþùèìè ïðåäìåòàìè? Åñëè ýòî íå âñòðàèâàåìàÿ ìîäåëü, òî åé íåîáõîäèìî îáåñïå÷èòü íåêîòîðîå ïðîñòðàíñòâî (íåñêîëüêî ñàíòèìåòðîâ) äëÿ ïåðåìåùåíèé âî âðåìÿ îòæèìà. Ïðîòå÷êè. n Ïëîòíî ëè çàòÿíóòî ìåòàëëè÷åñêîå êîëüöî íà êîíöå çàëèâíîãî øëàíãà? Çàêðîéòå êðàí, âûêëþ÷èòå ìàøèíó èç ñåòè, ïîäòÿíèòå êîëüöî ðóêàìè áåç îñîáûç óñèëèé. n Íåò ëè çàñîðà â ðàñïðåäåëèòåëå ìîþùèõ ñðåäñòâ? Èçâëåêèòå ðàñïðåäåëèòåëü è ïðîìîéòå åãî â ïðîòî÷íîé âîäå. n Íàäåæíî ëè çàêðåïëåí ñëèâíîé øëàíã? Çàêðîéòå êðàí, âûêëþ÷èòå ìàøèíó èç ñåòè, ïîäòÿíèòå ñîåäèíåíèå. Òåõíè÷åñêèå õàðàêòåðèñòèêè ìîäåëü W 125 TX ðàìåðû øèðèíà 59,5 ñì âûñîòà 85 ñì ãëóáèíà 53,5 ñì çàãðóçêà îò 1 äî 5,5 êã ýëåêòðè÷åñêèå ïàðàìåòðû íàïðÿæåíèå 220/230, ÷àñòîòà 50 Ãö max ïîòðåáëÿåìàÿ ìîùíîñòü 1850 Âò ãèäðàâëè÷åñêèå ïàðàìåòðû max äàâëåíèå 1 MÏa (10 áað) min äàâëåíèå 0,05 MÏa (0,5 áað) îáúåì áàðàáàíà 46 ë ñêîðîñòü îëòæèìà äî 1200 îá/ìèí Ñîîòâåòñòâèå ïðîãðàìì óïðàâëåíèÿ íîðìàì IEC 456 èñïûòàíû ïðè çàãðóçêå 5 êã Èçáûòî÷íîå ïåíîîáðàçîâàíèå. n Ïîäõîäèò ëè ìîþùåå ñðåäñòâî äëÿ äàííîé ìàøèíû? Ïðîâåðüòå, åñòü óïàêîâêå íàäïèñü: Äëÿ ìàøèííîé ñòèðêè èëè Äëÿ ðó÷íîé è ìàøèííîé ñòèðêè. n Ïðàâèëüíî ëè âû äîçèðóåòå ìîþùåå ñðåäñòâî? Ïåðåäîçèðîâêà ìîþùåãî íå òîëüêî óõóäøàåò êà÷åñòâî ñòèðêè, íî è ìîæåò ïðèâåñòè ê ïîëîìêå ìàøèíû. Åñëè ïîñëå ïðîâåðêè ìàøèíà ïðîäîëæàåò ðàáîòàòü íå äîëæíûì îáðàçîì, ñâÿæèòåñü ñ ñåðâèñíûì öåíòðîì, îáñëóæèâàþùèì ïðîäóêöèþ ìàðêè Ariston, è íå çàáóäüòå ñîîáùèòü ñëåäóþùóþ èíôîðìàöèþ: õàðàêòåð íåèñïðàâíîñòè; ìîäåëü ñòèðàëüíîé ìàøèíû (Mod. ...); çàâîäñêîé íîìåð (S/N...). Ýòè äàííûå óêàçàíû â òàáëè÷êå íà çàäíåé ñòåíêå âàøåé ñòèðàëüíîé ìàøèíû. Ìàøèíà ñîîòâåòñòâóåò ñëåäóþùèì äèðåêòèâàì: -73/23 ÅÅÑ îò 19.02.73 (íèçêîãî íàïðÿæåíèÿ) è ïîñëåäóþùèå ìîäèôèêàöèè -89/336 ÅÅÑ îò 03.05.89 (ýëåêòðîìàãíèòíîé ñîâìåñòèìîñòè) è ïîñëåäóþùèå ìîäèôèêàöèè 57 Ðóêîâîäñòâî ïî óñòàíîâêå è ýêñïëóàòàöèè M Ðàñïàêîâêà è óñòàíîâêà Ðàñïàêîâêà è óñòàíîâêà Ïîçàáîòüòåñü î ïðàâèëüíîé óñòàíîâêå ñòèðàëüíîé ìàøèíû, è ó âàñ íå áóäåò ìíîãèõ ïðîáëåì. Ðàñïàêóéòå ìàøèíó. Óáåäèòåñü â îòñóòñòâèè âíåøíèõ ïîâðåæäåíèé. Åñëèóâàñâîçíèêëèêàêèå-òîñîìíåíèÿ,íåâêëþ÷àéòåìàøèíóíåìåäëåííîñâÿæèòåñüñêâàëèôèöèðîâàííûìóïîëíîìî÷åííûìñïåöèàëèñòîì. Íàâðåìÿòðàíñïîðòèðîâêèïîäâèæíûåóçëûìàøèíûêðåïÿòñÿ÷åòûðüìÿâèíòàìè÷åðåççàäíþþñòåíêó. Òðàíñïîðòèðîâî÷íûå âèíòû äîëæíû áûòü óäàëåíû äî òîãî, êàê âû íà÷íåòåïîëüçîâàòüñÿìàøèíîé.Îáðàçîâàâøèåñÿ îòâåðñòèÿ çàêðîéòå ïëàñòèêîâûìè çàãëóøêàìè (âõîäÿò â êîìïëåêò ïîñòàâêè ìàøèíû). Âíèìàíèå! Çàêóïîðèòå ïðîáêîé (âõîäÿùåé â êîìïëåêò) 3 îòâåðñòèÿ, â êîòîðûõ áûëà ðàçìåùåíà âèëêà è êîòîðûå ðàñïîëîæåíû íà çàäíåé ÷àñòè ñòèðàëüíîé ìàøèíû, ñíèçó. A Äåòàëü À íå óäàëÿåòñÿ Âûðàâíèâàíèå Ïðàâèëüíîå âûðàâíèâàíèå î÷åíü âàæíî äëÿ ðàáîòû ìàøèíû. Ïîñëå óñòàíîâêè ìàøèíû íà ìåñòî, îòðåãóëèðóéòå åå óñòîé÷èâîå ïîëîæåíèå ïóòåì âðàùåíèÿ ïåðåäíèõ íîæåê. Ïðîâåðüòå ïî óðîâíþ ãîðèçîíòàëüíîñòü âåðõíåé êðûøêè êîðïóñà. Îòêëîíåíèå îò ãîðèçîíòàëè íå äîëæíî áûòü áîëåå 2°. Åñëè ìàøèíà óñòàíîâëåíà íà êîâðîâîì ïîêðûòèè, ïðîâåðüòå, íå ïåðåêðûòû ëè âåíòèëÿöèîííûå îòâåðñòèÿ â äíèùå ìàøèíû. Ñîõðàíÿéòå áëîêèðóþùèå âèíòû è âòóëêè, êîòîðûå ìîãóò îïÿòü ïîíàäîáèòüñÿ ïðè òðàíñïîðòèðîâêå ìàøèíû. Ðåãóëèðóåìûå ïåðåäíèå íîæêè. Ïîäêëþ÷åíèå ê âîäîïðîâîäíîé ñåòè Äàâëåíèå âîäû â âîäîïðîâîäå äîëæíî íàõîäèòüñÿ â ïðåäåëàõ, óêàçàííûõ â èíôîðìàöèîííîé òàáëè÷êå íà çàäíåé ïàíåëè ñòèðàëüíîé ìàøèíû. Íàâåðíèòå çàëèâíîé øëàíã íà âûâîä âîäîïðîâîäà, èìåþùèé íàðóæíóþ ðåçüáó 3/4 äþéìà, è ïðîâåðüòå íàäåæíîñòü ñîåäèíåíèÿ. Ñîåäèíåíèå óïëîòíÿåòñÿ ðåçèíîâîé ïðîêëàäêîé, ñîâìåùåííîé ñ ôèëüòðîì. Ïðèñîåäèíèòå ñëèâíîé øëàíã ê òðóáîïðîâîäó êàíàëèçàöèîííîé ñèñòåìû èëè ïîâåñüòå åãî êîíåö íà êðàé ðàêîâèíû èëè âàííû. Øëàíã íå äîëæåí ïåðåãèáàòüñÿ. Âåðõíÿÿ òî÷êà ñëèâíîãî øëàíãà äîëæíà ðàñïîëàãàòüñÿ íà âûñîòå 60-100 ñì. Åñëè íåîáõîäèìî çàêðåïèòü êîíåö øëàíãà íà âûñîòå íèæå 60 ñì, òî çàôèêñèðóéòåñëèâíîéøëàíãíàçàäíåé ñòåíêå êîðïóñà ìàøèíû ñ ïîìîùüþ çàæèìà. A Ôèëüòð íà ðåçèíîâîì øëàíãå. Åñëè ìàøèíà ïîäêëþ÷àåòñÿ ê íîâîìó âîäîïðîâîäó èëè ê âîäîïðîâîäó, êîòîðûé äîëãî íå èñïîëüçîâàëñÿ, òî ïåðåä ïîäêëþ÷åíèåì øëàíãà îòêðîéòå êðàí è ñëåéòå ãðÿçíóþ âîäó. Ýòî ïðåäîõðàíèò ìàøèíó îò ïîâðåæäåíèé. Ïðèñîåäèíèòå çàãíóòûé êîíåö øëàíãà ê âîäîïðèåìíèêó ñòèðàëüíîé ìàøèíû. Âîäîïðèåìíèê íàâåðõó, ñïðàâà. Ïîäêëþ÷åíèå ñëèâíîãî øëàíãà Íà çàäíåé ñòåíêå ìàøèíû èìåþòñÿ äâà êðþêà, ïðàâûé è ëåâûé, êîòîðûìè êðåïèòñÿ ñëèâíîé øëàíã. Êðþê, èñïîëüçóåìûé äëÿ êðåïëåíèÿ øëàíãà íà âûñîòå íèæå 60 ñì. Åñëè øëàíã âñòàâëÿåòñÿ â ñëèâ ðàêîâèíû èëè âàííîé, èñïîëüçóéòå ïëàñòèêîâóþ íàïðàâëÿþùóþ, êîòîðàÿ áóäåò äåðæàòü êîíåö øëàíãà ñòðîãî âíèç è ïðåäîòâðàòèò ðàçáðûçãèâàíèå âîäû. Ïëàñòèêîâàÿ íàïðàâëÿþùàÿ è êðåïëåíèå øëàíãà â ñëèâå âàííîé (ðàêîâèíû). Êîíåö øëàíãà íè ïðè êàêèõ óñëîâèÿõ íå äîëæåí íàõîäèòüñÿ â âîäå. Äîïóñêàåòñÿ íàðàùèâàíèå ñëèâíîãî øëàíãà äðóãèì øëàíãîì ñ òàêèì æå äèàìåòðîì è äëèíîé äî 150 ñì. Åñëè ñëèâíîé øëàíã âñòðîåí â êà- íàëèçàöèþ, íà âåðõíèõ ýòàæàõ ìîæåò ñîçäàòüñÿ ñèôîííûé ýôôåêò ìàøèíà îäíîâðåìåííî ñëèâàåò è çàëèâàåò âîäó. Äëÿ ïðåäîòâðàùåíèÿ ïîäîáíîãî ýôôåêòà íà ñëèâíîì øëàíãå óñòàíàâëèâàåòñÿ àíòèñèôîí (ïðîäàåòñÿ â õîçÿéñòâåííûõ ìàãàçèíàõ). Ýëåêòðè÷åñêèå ñîåäèíåíèÿ Ïåðåä âêëþ÷åíèåì ìàøèíû â ñåòü óáåäèòåñü, ÷òî: 1) Ðîçåòêà è ïðîâîäêà ñîîòâåòñòâóþò ìàêñèìàëüíîé íàãðóçêå, óêàçàííîé â òàáëè÷êå íà çàäíåé ñòåíêå ìàøèíû, à òàêæå îòâå÷àþò òðåáîâàíèÿì äåéñòâóþùèõ ñòàíäàðòîâ. 2) Íàïðÿæåíèå ïèòàíèÿ íàõîäèòñÿ â ïðåäåëàõ, óêàçàííûõ â òàáëè÷êå íà çàäíåé ñòåíêå ìàøèíû. 3) Ðîçåòêà è âèëêà äîëæíû áûòü îäíîãî òèïà.  ïðîòèâíîì ñëó÷àå çàìåíèòå ðîçåòêó èëè âèëêó, íî íè â êîåì ñëó÷àå íå ïîëüçóéòåñü ïåðåõîäíèêàìè. 4) Âñå ýëåêòðè÷åñêèå äîìàøíèå ïðèáîðû èìåþò íàäåæíîå çàçåìëåíèå.âûçâàííûé íåñîáëþäåíèåì óêàçàííûõ íîðì óñòàíîâêè. Âíèìàíèå! Ôèðìà ñíèìàåò ñ ñåáÿ âñÿêóþ îòâåòñòâåííîñòü, â ñëó÷àå íåñîáëþäåíèÿ ýòèõ ïðàâèë. Öåëëîôàíîâûå ïàêåòû, ïåíîïëàñòû, ãâîçäû è äðóãèå êîìïîíåíòû óïàêîâêè íå ïîäõîäÿò äëÿ äåòñêèõ èãð, ïîñêîëüêó ÿâëÿþòñÿ ïîòåíöèàëüíûì èñòî÷íèêîì îïàñíîñòè. . Ðóêîâîäñòâî ïî óñòàíîâêå è ýêñïëóàòàöèè 58 Óõîä è îáñëóæèâàíèå ýòî ïðîñòî Ïðè õîðîøåì îáðàùåíèè Còèðàëüíàÿ ìàøèíà ñòèðàëüíàÿ ìàøèíà íàäåæíûé ñïóòíèê è âàø äðóã íà äîëãèå ãîäû Âàøà ïîìîùíèê â äîìå. Âàæíî òîëüêî ñëåäèòü, ÷òîáû ìàøèíà âñåãäà áûëà â íàäëåæàùåé ôîðìå. Âàøà ìàøèíà ïðåäíàçíà÷åíà äëÿ îáåñïå÷åíèÿ áåçîïàñíîé ðàáîòû â òå÷åíèå ìíîãèõ ëåò. Îò âàñ òðåáóåòñÿ ñîâñåì íå ìíîãîå, ÷òîáû ïîääåðæèâàòü èñïðàâíîå ñîñòîÿíèå ìàøèíû. Âî-ïåðâûõ, ïîñëå êàæäîé ñòèðêè îáÿçàòåëüíî çàêðûâàéòå âîäîïðîâîäíûé êðàí, òàê êàê ïîñòîÿííûé íàïîð âîäû ìîæåò ïðèâåñòè ê êîðîáëåíèþ íåêîòîðûõ äåòàëåé ìàøèíû. Êðîìå òîãî, ýòèì âû ñíèçèòå ðèñê ïîÿâëåíèÿ ïðîòå÷åê. Åñëè âîäà â âàøåé ìåñòíîñòè ñëèøêîì æåñòêàÿ, ïîëüçóéòåñü ñðåäñòâàìè, óäàëÿþùèìè èçâåñòü. (Æåñòêàÿ âîäà îáû÷íî îñòàâëÿåò áåëåñûå ñëåäû íà êðàíàõ è ñëèâíûõ îòâåðñòèÿõ. Îáðàòèòåñü â æèëèùíîýêñïëóàòàöèîííóþ êîíòîðó, åñëè õîòèòå ïîëó÷èòü áîëåå ïîäðîáíóþ èíôîðìàöèþ î êà÷åñòâå âîäû â âàøåé ìåñòíîñòè.) Ïåðåä ñòèðêîé îäåæäû óäàëèòå èç êàðìàíîâ âñå ìåëêèå, òâåðäûå è îñòðûå ïðåäìåòû. Êîðïóñ ìàøèíû ìîéòå òåïëîé âîäîé ñ ìûëîì. Âàæíî ðåãóëÿðíî ïðîìûâàòü ðàñïðåäåëèòåëü ìîþùèõ ñðåäñòâ. ×òîáû ïðåäîòâðàòèòü ïðèñûõàíèå îñòàòêîâ ñòèðàëüíîãî ïîðîøêà, ïîìåñòèòå íà íåñêîëüêî ìèíóò ðàñïðåäåëèòåëü ïîä ñòðóþ âîäû. Íå ïðåâûøàéòå ðåêîìåíäîâàííûå äîçû ìîþùèõ ñðåäñòâ.  ñîñòàâ âñåõ ñðåäñòâ, ïðåäíàçíà÷åííûõ äëÿ ñòèðàëüíûõ ìàøèí, âõîäèò àíòèíàêèïèí. Åñëè âîäà â âàøåé ìåñòíîñòè îòëè÷àåòñÿ îñîáîé æåñòêîñòüþ, òî êðîìå èñïîëüçîâàíèÿ ñìÿã÷èòåëÿ âîäû ïðè êàæäîé ñòèðêå, èçðåäêà ïðîèçâîäèòå î÷èñòêó, ïóñòèâ ìàøèíó íà âûïîëíåíèå ïðîãðàììû ñòèðêè áåç áåëüÿ è ìîþùåãî ñðåäñòâà ñ îäíèì ëèøü óäàëèòåëåì íàêèïè. Íå èñïîëüçóéòå ñëèøêîì ìíîãî ìîþùèõ ñðåäñòâ è äîáàâîê, òàê êàê ýòî ïðèâîäèò ê îáðàçîâàíèþ èçáûòî÷íîé ïåíû, íàêèïè è, â êîíöå êîíöîâ, ìîæåò ïîâðåäèòü ìàøèíó. Íå çàáóäüòå ïðîâåðèòü âñå êîðìàíû: ìàëåíüêèå ïðåäìåòû ìîãóò ïîâðåäèòü âàøåìó äðóãó Còèðàëüíàÿ ìàøèíà. Ïðè íåîáõîäèìîñòè ïðîâåðÿéòå íàñîñ è ðåçèíîâûé øëàíã Ñòèðàëüíàÿ ìàøèíà îñíàùåíà íàñîñîì ñàìîî÷èùàþùåãîñÿ òèïà, êîòîðûé íå òðåáóåò ñïåöèàëüíîé ÷èñòêè. Îäíàêî ìåëêèå ïðåäìåòû (ìîíåòû, ïóãîâèöû è ïð.) ìîãóò ñëó÷àéíî ïîïàñòü â íàñîñ. Äëÿ èõ èçâëå÷åíèÿ íàñîñ îáîðóäîâàí óëîâèòåëåì, èëè ôèëüòðîì, äîñòóï ê êîòîðîìó çàêðûò íèæíåé ïåðåäíåé ïàíåëüþ. Ñ ïîìîùüþ îòâåðòêè îòêðîéòå ïàíåëü (ðèñ. 1), ïîâåðíèòå êðûøêó ïðîòèâ ÷àñîâîé ñòðåëêè (ðèñ. 2) è èçâëåêèòå ôèëüòð. Îñìîòðèòå ôèëüòð. Ðåçèíîâûé øëàíã Ïðîâåðÿéòå øëàíã íå ðåæå îäíîãî ðàçà â ãîä. Ïðè ëþáûõ ïðèçíàêàõ òå÷è èëè ïîâðåæäåíèÿ íåìåäëåííî çàìåíèòå øëàíã. Íåèñïðàâíûé øëàíã, íàõîäÿùèéñÿ ïîä äàâëåíèåì, ìîæåò âíåçàïíî ëîïíóòü âî âðåìÿ ðàáîòû ìàøèíû. Ðèñ. 1 Ðèñ. 2 Âíèìàíèå: Ïåðåä òåì êàê îòêðûòü ïàíåëü è âûíóòü ôèëüòð, à òàêæå ïåðåä âûïîëíåíèåì ëþáûõ îïåðàöèé ïî òåõíè÷åñêîìó îáñëóæèâàíèþ, óáåäèòåñü, ÷òî ìàøèíà çàêîí÷èëà öèêë ñòèðêè, è âûêëþ÷èòå ìàøèíó èç ñåòè. Âî âðåìÿ èçâëå÷åíèÿ ôèëüòðà ìîæåò âûëèòüñÿ íåìíîãî âîäû ýòî íîðìàëüíîå ÿâëåíèå. Óñòàíîâèòå ôèëüòð íà ìåñòî è ïëîòíî çàêðîéòå êðûøêó. Ïðîñëåäèòå, ÷òîáû êðþêè â íèæíåé ÷àñòè âîøëè â ñîîòâåòñòâóþùèå îòâåðñòèÿ. 59 Ðóêîâîäñòâî ïî óñòàíîâêå è ýêñïëóàòàöèè M Íå ïðîñòî âàæíî, à ñâåðõâàæíî Âàøà ñîáñòâåííàÿ áåçîïàñíîñòü ìàøèíà ñêîíñòðóèðîâàíà è èçãîòîâëåíà â ñîîòâåòñòâèè ñ ñàìûìè è áåçîïàñíîñòü âàøèõ äåòåé Còèðàëüíàÿ ñòðîãèìè ìåæäóíàðîäíûìè íîðìàìè è ñòàíäàðòàìè, ÷òîáû âû è âàøà ñåìüÿ ÷óâñòâîâàëè ñåáÿ çàùèùåííûìè. Âíèìàòåëüíî ïðî÷èòàéòå ýòîò ðàçäåë. Îí ñîäåðæèò èíôîðìàöèþ, êàñàþùóþñÿ Âàøåé ëè÷íîé áåçîïàñíîñòè ïðè óñòàíîâêå, ýêñïëóàòàöèè è òåõíè÷åñêîì îáñëóæèâàíèè ñòèðàëüíîé ìàøèíû. 1. Ìàøèíà ïðåäíàçíà÷åíà äëÿ óñòàíîâêè â ïîìåùåíèè. Íè ïðè êàêèõ îáñòîÿòåëüñòâàõ íå èñïîëüçóéòå ìàøèíó íà óëèöå, õîòÿ áû è ïîä íàâåñîì (îñîáåííî îïàñíî âî âðåìÿ äîæäÿ è ãðîçû). 2. Ìàøèíà ïðåäíàçíà÷åíà äëÿ âçðîñëûõ ïîëüçîâàòåëåé è òîëüêî äëÿ áûòîâîé ñòèðêè ïðè ñòðîãîì ñîáëþäåíèè èíñòðóêöèé è ïðàâèë, èçëîæåííûõ â íàñòîÿùåì äîêóìåíòå. 3. Ìàøèíà îáëàäàåò áîëüøèì âåñîì. Ïåðåäâèãàéòå ìàøèíó î÷åíü îñòîðîæíî è òîëüêî ñ ïîìîùüþ äâóõòðåõ ÷åëîâåê. 4. Ïåðåä çàãðóçêîé íîâîé ïîðöèè áåëüÿ ïðîâåðÿéòå, íå îñòàëîñü ëè â ìàøèíå ÷òî-ëèáî îò ïðåäûäóùåé ñòèðêè. 5. Íå êàñàéòåñü ðàáîòàþùåé ìàøèíû, åñëè âàøè ðóêè èëè íîãè ìîêðûå èëè ñûðûå; íå ïîëüçóéòåñü ìàøèíîé áîñèêîì. 6. Íå ïîëüçóéòåñü óäëèíèòåëÿìè èëè òðîéíèêàìè ýòî îïàñíî, îñîáåííî â ñðåäå ñ ïîâûøåííîé âëàæíîñòüþ. Óáåäèòåñü â îòñóòñòâèè ïåðåãèáîâ, èçëîìîâ è èíûõ ïîâðåæäåíèé íà êàáåëå ýëåêòðîïèòàíèÿ. 7. Íå ïîëüçóéòåñü ìîþùèìè ñðåäñòâàìè äëÿ ðó÷íîé ñòèðêè, òàê êàê ïîâûøåííîå ïåíîîáðàçîâàíèå, õàðàêòåðíîå äëÿ ýòèõ ñðåäñòâ, ìîæåò ïðèâåñòè ê ïîëîìêå ìàøèíû. Òîëüêî êâàëèôèöèðîâàííûé ñïåöèàëèñò è òîëüêî ïîäëèííûå çàïàñíûå äåòàëè Indesit! 8. Íå òÿíèòå ïðîâîä, ÷òîáû âûíóòü âèëêó èç ðîçåòêè: ýòî î÷åíü îïàñíî. 9. Áóäüòå îñòîðîæíû: âîäà, ñëèâàåìàÿ èç ðàáîòàþùåé ìàøèíû, ìîæåò áûòü î÷åíü ãîðÿ÷åé. Äâåðöà ìàøèíû â ïðîöåññå ðàáîòû òàêæå ðàçîãðåâàåòñÿ. Ñëåäèòå, ÷òîáû äåòè íå ïîäõîäèëè ê ðàáîòàþùåé ìàøèíå è íå ïðèêàñàëèñü ê äâåðöå. Íå ïûòàéòåñü ñ ñèëîé îòêðûòü äâåðöó, òàê êàê ýòî ïðèâåäåò ê ïîëîìêå ìåõàíèçìà çàìêà. 10. Åñëè âû çàìåòèëè ÷òî-òî íåîáû÷íîå â ðàáîòå ìàøèíû, ïåðåêðîéòå êðàí ïîäà÷è âîäû è âûíüòå âèëêó èç ðîçåòêè. Íå ïûòàéòåñü ñàìîñòîÿòåëüíî âñêðûòü è îòðåìîíòèðîâàòü ìàøèíó. Êàê çàìåíèòü ïèòàþùèé êàáåëü Ñòèðàëüíàÿ ìàøèíà îñíàùåíà ñïåöèàëüíûì ïèòàþùèì êàáåëåì, êîòîðûé ìîæíî ïðèîáðåñòè òîëüêî â àâòîðèçîâàííîì Öåíòðå òåõíè÷åñêîãî îáñëóæèâàíèÿ. Çàìåíà êàáåëÿ ýëåêòðîïèòàíèÿ âûïîëíÿåòñÿ ñëåäóþùèì îáðàçîì: 1. Âûêëþ÷èòå ìàøèíó èç ýëåêòðîñåòè. 2. Îòâåðíèòå äâà âèíòà I, ñíèìèòå êðûøêó (ðèñ. 3). 3. Îòñîåäèíèòå ïðîâîäà îò ïîäàâèòåëÿ ðàäèîïîìåõ F (ðèñ. 4). Îáðàòèòå âíèìàíèå íà öâåò è ðàñïîëîæåíèå ïðîâîäîâ: ñèíèé = ïðîâîä N, êîðè÷íåâûé = ïðî- âîä L. Ïîñëåäíèì îòñîåäèíèòå . ïðîâîä çàçåìëåíèÿ Ïðèìå÷àíèå: Ñèìâîëû L, N è íàíåñåíû íà êîðïóñå áëîêà ïîäàâëåíèÿ ðàäèîïîìåõ. 4. Íà çàäíåé ñòåíêå ñëåãêà âûäâèíüòå êàáåëüíûé ââîä è äâèæåíèåì ââåðõ âûòàùèòå ïèòàþùèé êàáåëü (ðèñ. 5). Íîâûé êàáåëü ýëåêòðîïèòàíèÿ óñòàíàâëèâàåòñÿ â îáðàòíîì ïîðÿäêå. Ïîëîæèòå âåðõíþþ êðûøêó íà ìàøèíó (ðèñ. 6) è ïîäâèíüòå åå âïåðåä òàê, ÷òîáû çàìêè âîøëè â îòâåðñòèÿ. Çàêðåïèòå êðûøêó âèíòàìè. I N L F Ðèñ. 3 Ðèñ. 4 Ðèñ. 5 Ðèñ. 6 Ðóêîâîäñòâî ïî óñòàíîâêå è ýêñïëóàòàöèè 60 Merloni Elettrodomestici Leader for young Europe 10/2000 - 195028196.00 - XEROX BUSINESS SERVICES - DOCUTECH Viale Aristide Merloni 47 60044 Fabriano Italy Tel +39 0732 6611 Fax +39 0732 662501 www.merloni.com