1
RN 450 FM “U.S”
Volts 230*/460/60 TRIFASE
Matricola - Serial Number
01/ ___________
Manuale Uso e Manutenzione
Operations and Maintenance manual
Conservare per riferimenti futuri
Keep for future reference
Optionals - Extras
01_90 0290 14 43 61_02
RN 450 FM “U.S.”
Pag.
3
4
4
5
6
7
9
15
17
18
20
21
23
24
25
25
26
27
29
30
35
36
36
37
38
39
41
45
47
49
56
58
01_90 0290 14 43 61_02
Volts 230*/460/60 TRIFASE
ITALIANO
ENGLISH
INDICE
CONTENTS
Descrizione
Indice generale.
Informazioni generali.
Durata e smaltimento della macchina.
Leggere attentamente.
Vocabolario grafico.
Imballaggio.
Assemblaggio della macchina.
Montaggio della lama.
Identificazione della macchina.
Descrizione della macchina.
Caratteristiche tecniche.
Capacità di taglio.
Uso della macchina.
Rilevamento del rumore emesso.
Sollevamento e spostamento della macchina.
Predisposizioni.
Dimensioni.
Norme di sicurezza.
Marcatura di sicurezza.
Dispositivi di sicurezza.
Collegamento elettrico.
Impugnatura di comando.
Arresto normale
Regolazione altezza braccio
Regolazione angolazione del braccio.
Regolazione inclinazione lama.
Utilizzo della macchina
Operazione di manutenzione.
Sostituzione della lama.
Controlli di assetto.
Schema elettrico.
Parti di ricambio.
Pag.
3
4
4
5
6
7
9
15
17
18
20
21
23
24
25
25
26
27
29
30
35
36
36
37
38
39
41
45
47
49
56
58
Contents
Contents.
General information.
Service life and disposal of the machine.
Read carefully.
Key to the graphic symbols.
Packaging.
Machine assembly.
Assembly of the blade.
Machine identification.
Description of the machine.
Technical specifications.
Cutting capacity.
Operating the machine.
Noise emission measurements.
Lifting and shifting the machine.
Positioning requrements.
Overall dimensions.
Safty rules.
Safty marking.
Safty devices.
Electrical connections.
Control handgrip.
Normal stopping
Adjusting the height of the arm.
Adjusting the angle of the arm.
Adjusting the inclinaion of the blade
Using the machine.
Operation the maintenance.
Replacing the blade.
Set-Up checks.
Electrical wiring diagrams.
Spare parts.
Pag. 3
RN 450 FM “U.S.”
01_90 0290 14 43 61_02
ITALIANO
ENGLISH
INFORMAZIONI GENERALI
La OMGA S.p.A. non potrà essere ritenuta responsabile degli eventuali danni, che risulteranno da un
utilizzo non descritto, in questo manuale, o da una manutenzione effettuata non correttamente.
Tutti i diritti sono riservati alla OMGA S.p.A.
Tutti i dati, descrizioni ed illustrazioni del presente libretto, non sono impegnativi. La OMGA S.p.A. si
riserva il diritto di apportare senza preavviso, tutte le modifiche che riterrà opportune, per esigenze
tecniche o migliorative.
Per qualsiasi necessità o consiglio d’uso, rivolgeteVi al Concessionario di zona.
GENERAL INFORMATION
OMGA S.p.A. shall not be held responsible for possible mistakes contained in this manual.
OMGA S.p.A. shall not be held responsible for any mistakes which might result from a use other than
that described in this manual or caused by improper maintenance.
All rights reserved by
OMGA S.p.A.
All data, descriptions and pictures in this manual are not binding. OMGA S.p.A. reserves the right to
carry out, without prior notice all the modifications which will be considered as necessary for
technical reasons or for the purpose of improving the machine. For any requirement or advice please
GARANZIA
La macchina è garantita per un periodo di 6 mesi per le parti meccaniche e 3 mesi per le parti elettriche
a partire dalla data della fattura di acquisto. Essa consiste nella sostituzione gratuita, di tutte le parti
meccaniche, che presentano difetto di materiale o di fabbricazione. Inoltre, non sono coperti i guasti
o difetti dovuti a fattori esterni, errori di manutenzione, utilizzo improprio della macchina, uso della
stessa in condizioni di sovraccarico, usura naturale, errori di montaggio, o altre cause a noi non
imputabili. La spedizione in sostituzione, è intesa franco nostro stabilimento. La macchina resa, anche
se in garanzia, dovrà essere spedita in porto franco.
Per avvalersi del diritto di garanzia nei confronti della OMGA S.p.A. è necessario fornire
le seguenti informazioni:
1. Modello macchina.
2. Numero di matricola.
3. Tensione e frequenza della macchina.
4. Nominativo del Concessionario presso il quale è stata acquistata.
5. Descrizione dell’eventuale difetto riscontrato.
6. Descrizione del tipo di lavorazione eseguita.
7. Ore di utilizzo giornaliere
Volts 230*/460/60 TRIFASE
WARRANTY
The mechanical parts of the machine are guaranteed for 6 months and the electrical ones for 3,
starting from the date of the invoice. The guarantee covers the replacement free of charge of all
mechanical parts which feature defects determined by the use of faulty material or by improper
workmanship. Breakdowns and defects arising out of external reasons, incorrect maintenance or
improper use of the machine, use of the machine overloaded, normal wear and tear, assembly errors
and other causes, which we are not responsible for, do not fall within the scope of the guarantee.
Machines returned to us, even under the guarantee, must be shipped on a free port basis.
To make use of the OMGA S.p.A. guarantee, it is essential to provide the following information:
1.
2.
3.
4.
5.
6.
7.
Machine model
Serial number
Voltage and frequency of the machine
Name of the dealer from which the machine was purchased
Description of the fault
Description of the work the machine is used for
Daily hours of work
Should any of the information listed be lacking, we will not be able to carry out the guarantee
In mancanza dei sopracitati dati anche in maniera parziale non sarà possibile dare corso alla proce- procedures.
dura di eventuale garanzia.
Send to:
Inviare a:
OMGA INC.
OMGA INC.
3705 WILLIAM RICHARDSON DRIVE
3705 WILLIAM RICHARDSON DRIVE
SOUTH BEND.
SOUTH BEND.
INDIANA 46628 U.S.A
INDIANA 46628 U.S.A
E-mail: [email protected]
E-mail: [email protected]
Web: www.omgainc.com
Web: www.omgainc.com
La macchina è stata costruita nel rispetto dei requisiti essenziali di sicurezza. La sostituzione di pezzi The machine has been built in accordance to the essential safety requirements. Replacement of parts
deve pertanto essere effettuata solo con pezzi adeguati richiesti a OMGA Inc. E’ proibito l’impiego di must be effected using only suitable spares ordered from OMGA Inc. The use of similar parts that
have not been supplied directly by OMGA Inc. is prohibited.
pezzi simili non forniti direttamente da OMGA Inc.
Utilizzare pezzi simili, non forniti da OMGA Inc. o non seguire le indicazioni contenute in questo The use of similar parts that have not been supplied directly by OMGA Inc. or failure to follow the
instructions given in this handbook will forfeit the guarantee and relieve OMGA S.p.A from each and
manuale fa cessare automaticamente la responsabilità di OMGA S.p.A.
Tutte le nostre macchine subiscono in stabilimento un collaudo. Eventuali danni riscontrati al momento every responsibility.
del disimballo devono essere notificati immediatamente al vettore.
Controllare inoltre, la presenza di tutti gli accessori ed opzionali, che compaiono nel documento di
accompagnamento.
SMALTIMENTO DELLA MACCHINA
Una volta cessata l’attività operativa della macchina, lo smaltimento della stessa deve
avvenire tramite un normale centro di raccolta e smaltimento di rifiuti industriali.
Pag. 4
DISPOSAL OF THE MACHINE
When the machine’s service life has come to an end, it must be disposed of through
an industrial waste collection and disposal centre.
RN 450 FM “U.S.”
01_90 0290 14 43 61_02
Volts 230*/460/60 TRIFASE
ITALIANO
ENGLISH
LEGGERE ATTENTAMENTE
READ CAREFULLY
La sicurezza presuppone l’osservanza delle norme antinfortunistiche vigenti in ogni
Paese del mondo.
L’Utilizzatore si farà carico dell’istruzione del personale che opererà con questa
macchina.
Prima di ogni collegamento a qualsiasi fonte di energia elettrica e pneumatica e
prima di attivare la macchina, l’Operatore dovrà leggere attentamente le norme descritte in questo manuale .
All’interno di questo manuale, in ogni capitolo che descriva modalità di operare o di
manutenzione che comportino anche una minima possibilità di rischio, sono inseriti
simboli grafici che richiamano l’attenzione dell’Operatore.
Ogni simbolo grafico è chiaramente commentato a pagina 6 nel “VOCABOLARIO
GRAFICO”.
For safety purposes it is necessary to observe the accident-prevention standards in
force in the country where the machine is operated.
The user is responsible for training the personnel who are to use this machine.
Before connecting to any electrical or pneumatic energy source and before starting
the machine, the operator must read carefully the rules described in this
manual.
All chapters in this manual which describe operating or maintenance procedures
involving even the slightest risk contain graphic symbols to draw the operator’s attention
to the risk.
The meanings of the graphic symbols are explained clearly on pages 6 in the section
“KEY TO GRAPHIC SYMBOLS“.
Pag. 5
RN 450 FM “U.S.”
Symbol
01_90 0290 14 43 61_02
ITALIANO ITALIANO
Vocabolario
grafico
Pag. 6
ENGHISH
Key
to graphic
Symbol
Volts 230*/460/60 TRIFASE
ITALIANO
ENGHISH
ENGLISH
Vocabolario
grafico
Key
to graphic
Divieto di procedere senza aver
letto il paragrafo precedente
It is forbidden to proceed without
reading the corresponding section
Attenzione generico
Operazioni vietate
Prohibited operations
Attenzione al collegamento all’impian- Pay attention to dust extraction
to di aspirazione
system connection
Obbligo di indossare occhiali di
protezione
Safety glasses must be
worn
Obbligo di indossare guanti di
protezione
Protective gloves must be
worn
Obbligo di indossare calzature
idonee
Suitable footwear must be
worn
Obbligo di indossare cuffie di
protezione dal rumore
Ear defenders must be
worn
Pericolo generico
Generic danger
Pericolo di scarica elettrica e/o
presenza di tensione
Danger of electrical
discharge and/or presence of
live parts
Attenzione al collegamento
elettrico
Pay attention to the
electrical connection
Attenzione al collegamento
pneumatico
Pay attention to the
pneumatic connection
Generic danger
Indossare grembiule protettivo di
cuoio
Protective leather apron must be
worn
Dotarsi di mezzi di estinzione di
incendio
Fire-fighting equipment must be
readily available
Dotarsi di cassetta di pronto soccorso
First-aid kit must be readily available
Assunzione di informazioni
Information
RN 450 FM “U.S.”
01_90 0290 14 43 61_02
Volts 230*/460/60 TRIFASE
ITALIANO
ENGLISH
IMBALLAGGIO
PACKAGING
L’imballaggio è costituito da un cartone rigido di dimensioni CM 106 x 41 con un’altezza
di 76 Fig. 1. Il cartone deve presentarsi chiuso dalle apposite graffette, integro e senza
ammaccature derivanti dal trasporto o da manomissione di terzi. La macchina all’interno del cartone è smontata in varie parti. Ogni parte è imballata con nylon o in cartone.
Accertarsi durante il disimballo che non vi siano nylon strappati o cartoni danneggiati.
Per eseguire il corretto disimballo seguire le seguenti istruzioni:
1. Aprire superiormente il cartone ed assicurarsi che l’interno si
presenti come inFig.2.Rimuovere i vari spessori in polistirolo e cartone (1) e la
busta contenente il manuale uso e manutenzione (2).
2. Sfilare dal cartone il tavolo da (3);il banco di appoggio (4)e il cartone contenente i 4
piedi (5). Fig. 3.
3. Tramite un paranco di adeguata portata, sollevare il braccio portante (6) della
macchina. Controllare che sotto al braccio ci sia imballata la sponda di appoggio
e il controtavolo (7). Fig. 4.
4. Rimuovere dall’imballo la confezione contenente il gruppo operante (8) Fig. 4.
5. All’interno della confezione contenente il gruppo operante si troveranno le seguenti parti: Fig. 5 e 6.
a) Gruppo operante.
b) Testata anteriore.
c) Protezione regolabile e bocca di aspirazione.
d) Carter coprilama.
e) Busta chiavi di dotazione.
f) Molla di ritorno automatico.
6. Controllare che all’interno della confezione (e) vi siano i seguenti pezzi:
·
Antenna portacavo.
·
Rondella comune tranciata 8x24x2.
·
Vite Testa esagonale 8x16.
·
Chiave fissa CH 27/32.
·
Chiave fissa CH 17/19.
·
Chiave fissa CH 10.
·
Cacciavite.
·
Chiave a tubo 17 più asta.
·
Chiave a tubo 13.
·
Chiavi Allen 4/5/6/8 speciale.
·
10 viti 10 x 25.
·
10 rondelle ø 10mm.
·
2 dadi zincati.
·
Lamina 0,2 mm.
Eventuali reclami per la mancanza dei materiali sopra descritti, vengono accettati solose:
1. Segnalati immediatamente entro 7 giorni dal disimballo della macchina.
2. Solo se accompagnati da fotocopia del talloncino riportante il numero del nostro
operatore che ha curato l’imballo stesso. Detto talloncino è applicato sulla busta
dove era contenuto il manuale uso e manutenzione.
Packaging is made up by a heavy duty cardboard measuring 106 x 41 centimeters and 76
centimeters of high (see Fig. 1.) The cardboard box should be sealed from the factory
with the appropriate staples in good conditions and without dents caused by miss handling.
The machine inside is made up by several disassembled components. Each component
is protected by plastic bags and card board. It is very important to make sure during the
unpacking that plastic bags and protective cardboard are tear free. To unpack the machine
in the correct manner proceed as follows:
1. Open the top lid to the cardboard box and make sure the content is as per Fig. 2.
Remove the Styrofoam and cardboard supports (1) and the envelope containing the
instruction manual (2).
2. From the box, pull up the wooden table (3) , the metal frame (4) and the compartment
box containing the 4 legs (5). See Fig. 3.
3. Using an appropriately sized jack, lift the arm (6) of the machine. Verify that the wooden
fence and the counter-table are wrapped inside the arm (7). See Fig. 4.
4. Remove the operating unit (8) from its own box. See Fig. 4
5. Inside the box containing the operating unit you will find the following components:
see Fig 5 and 6
a) Operating Unit
b) Plastic end cover for arm
c) Ripping guard with dust chute (not on all model)
d) Blade guard
e) Spanner set
f) Automatic head return device
6. Verify that package (e) contains the following:
·
Wire holder
·
8x24x2 mm washer
·
8x6 mm bolt
·
CH 27/32 wrench
·
CH 17/19 wrench
·
CH 10 wrench
·
Screw driver
·
17mm closed end wrench with pulling rod
·
13mm closed end wrench
·
4/5/6/8 special Allen wrench
·
Quantity of 10. 10x25mm screws
·
Quantity of 10, 10mm washers
·
Quantity of 2 nuts
·
0.2mm shim
Any complaints concerning missing material will only be accepted if:
1. Notified within 7 days from unpacking the machine;.
2. Accompanied by a photocopy of the slip bearing the number of our operator in charge
of packaging. You will find this slip on the envelope containing the use and maintenance manual.
Pag. 7
RN 450 FM “U.S.”
CM
Volts 230*/460/60 TRIFASE
01_90 0290 14 43 61_02
ITALIANO
ENGLISH
IMBALLAGGIO
PACKAGING
A
B
H
106
41
76
5
4
1
3
H
2
A
B
Fig. 1
Fig. 3
Fig. 2
a
b
c
d
6
8
7
e
Fig. 4
Pag. 8
Fig. 5
Fig. 6
f
RN 450 FM “U.S.”
Volts 230*/460/60 TRIFASE
01_90 0290 14 43 61_02
ITALIANO
ENGLISH
ASSEMBLAGGIO DELLA MACCHINA
MACHINE ASSEMBLY
Dopo aver provveduto a disimballare la macchina, si dovrà procedere all’assemblaggio della stesa: After you have unpacked the machine; assemble it in accordance to the following instructions:
ATTENZIONE: Non procedere all’assemblaggio, se la macchina manca anche solo di una parte ATTENTION: do not assemble the machine if any of the items described in the previous chapter
are missing.
descritta nel capitolo precedente.
1.
2.
3.
Estrarre i 4 piedi di sostegno dalla propria confezione.
Prendere il banco di appoggio e posizionarlo di lato a terra. Fig. 1.
Fissare i 4 piedi al banco, ognuno dei quali necessita di 2 viti 10x25 zincate e 2 rondelle ø10 (2),
Per fare questa operazione utilizzare la chiave CH 17 (1) in dotazione. Al termine il banco di
appoggio si deve presentare come in Fig. 1.
4. Sollevare il banco e metterlo parallelo al terreno. Fig. 2.
5. Disimballare la terza guida laterale (3) agganciata al banco. Svitare i 2 dadi dai prigionieri e infilare
su di essi la guida. Fig. 2.
6. Disimballare il braccio portante e staccare la sponda di appoggio e il controtavolo legata sotto di
esso, il braccio portante della macchina e la colonna sono agganciati al fondo della gabbia tramite
due viti con relativi controdadi (4). Fig. 3. Svitarli con chiave CH 17.
7. Tramite un paranco di adeguata portata sollevare il braccio portante e con un martello battere le
teste delle due spine (5) finché la loro parte superiore non sarà a filo del supporto colonna. Fig.
3.
8. Accoppiare il supporto colonna con la base di appoggio sul banco in modo che le due spine (5)
vadano all’interno delle sedi (6) predisposte. Fig. 4.
9. Avvitare a fondo le quattro viti 10x30 mm con le relative rondelle ø 10 mm utilizzando una chiave
CH 17. Fig. 4.
10. Alla fine di queste operazioni la macchina si deve presentare come in Fig. 5.
11. Tramite la chiave a tubo da 13, smontare i 6 dadi presenti sulle guide del tavolo e le relative
rondelle. Smontare le rimanenti 3 viti e le rondelle con il cacciavite a stella. Fig. 5.
12. Prendere il piano di lavoro e montarlo, infilando i prigionieri sporgenti dalle guide, negli appositi fori
Fig. 6. ATTENZIONE: Posizionare il tavolo di lavoro (7) con gli angoli smussati verso l’esterno
rispetto al supporto colonna. Fig. 7.
13. Tramite la chiave a tubo da 13 (8) rimontare avvitando a fondo i 6 dadi e le rondelle precedentemente smontati (raffigurati con le frecce) Fig. 7.
14. Tramite il cacciavite a stella (9) rimontare le rimanenti 3 viti e rondelle Fig. 8.
15. Disimballare la sponda di appoggio in modo da avere i due pezzi che la compongono: la sponda
e il controtavolo. Montare la sponda di appoggio (10) e il controtavolo (11) appoggiandoli a
contatto del tavolo di lavoro come mostrato in Fig. 9. Fissarli al tavolo tramite la chiusura dei due
pomelli (12).
16. Inserire il gruppo operante nelle guide situate all’interno delle braccio portante. Nell’eseguire
questa operazione fare molta attenzione alla posizione dei raschia polveri. Una posizione
sbagliata può rovinare tale elemento rendendolo inefficace. Fig. 10.
17. Aprire la confezione (b) e procedere al montaggio della leva di sbloccaggio braccio (13). Inserire
il tirante (14) nel foro appositamente predisposto. Fig. 11.
18. Montare la testata anteriore (15) fissandola al braccio portante per mezzo delle due viti trovate
nella confezione utilizzando la chiave Allen 4 mm. (16) Fig. 12.
1.
2.
3.
4.
5.
6.
7.
8.
9.
10.
11.
12.
13.
14.
15.
16.
17.
18.
Take the four feet out of their pack.
Place the work bench on the floor and tip it on its side (Fig. 1).
Secure the four feet to the bench, using two galvanised 10x25 screws and two diameter 10
washers (2) for each foot. For this operation use the CH 17 wrench (1) supplied. After this
operation, the bench must have the appearance illustrated in Fig. 1.
Tip the bench back up, so that it rests on its four feet (Fig. 2).
Unpack the third side guide (3) fastened to the bench. Unscrew the two nuts from their stud bolts
and fit the guide onto them. Fig. 2.
Unpack the arm and remove the fence and counter table from the wrap.The supporting arm of the
machine and the colum are fixed to the bottom of the cage by means of two screws and the relevant locknuts (4). Fig. 3 Unscrew them with the CH 17 wrench.
Using a hoist with a suitable load bearing capacity, lift the support arm and, using a hammer, tap
the two heads of the pins (5) until their top part is level with the column support. Fig. 3.
Couple the column support with the supporting base of the bench by fitting the two pins (5) into
the seats provided for this purpose (6). Fig. 4.
Wrench the 10x30 mm screws down with their diameter 10 mm washers, using a CH 17 wrench.
Fig. 4.
After these operations, the machine must have the appearance illustrated in Fig. 5.
Using the size 13 socket wrench, remove the 6 nuts and relevant washers from the guides of the
table. Remove the 3 remaining screws and washers with the screwdriver. Fig. 5.
Assemble the wooden table by letting the bolts mounted on the rail, through the correspondent
holes on the table see Fig. 6. WARNING: The wooden table (7) must be positioned with the
two rounded corners facing the operator opposite the column support. Fig. 7.
Using the size 13 socket wrench (8) refit the 6 nuts and washers previously removed
(identified by the arrows) Fig. 7.
Using the screwdriver (9) refit the remaining 3 screws and washers Fig. 8.
Unpack the fence in order to obtain the two pieces that compose it: the fence and the countertable.
Assemble the fence (10) and the countertable (11) by placing them up against the work bench,
as shown in Fig. 9. Secure them to the bench by tightening the two knobs (12).
Fit the cutting unit into the guides located inside the supporting arm. When you are carrying out
this operation, pay particular attention to dust scraper. An incorrect position can damage this
part and render it ineffective. Fig. 10.
Open up the pack (b) and fit the arm release lever (13). Fit the tie-rod (14) into its hole. Fig. 11.
Mount the front head (15) by securing it to the support arm by means of the two screws you
have found in the pack and the 4 mm Allen wrench (16) Fig. 12.
Pag. 9
RN 450 FM “U.S.”
01_90 0290 14 43 61_02
Volts 230*/460/60 TRIFASE
ITALIANO
ENGLISH
ASSEMBLAGGIO DELLA MACCHINA
MACHINE ASSEMBLY
19.Smontare le viti (17) poste sul banco di sostegno. Aprire il coperchio del
salvamotore svitando le viti (18). Fig. 13.
20.Posizionare il salvamotore sul banco di sostegno come raffigurato in Fig. 14 e
fissarlo dall’interno con le 2 viti (17) nei punti (19). Richiudere il salvamotore.
21.Montare l’antenna portacavo (20) sul braccio portante tramite una vite 8x16 ed
una rondella. Avvitare il tutto con una chiave CH 17. Fig. 15.
22.Aprire la confezione della molla di ritorno (e). Smontare i due dadi di bloccaggio
(21) in modo da dividere il supporto molla dalla molla stessa. Avvitare il supporto
molla (22) al braccio portante per mezzo delle due viti 6x16 mm e di una chiave
Allen 4 mm (23). Fig. 16.
23.La molla di ritorno si deve presentare come in Fig. 17, con le due viti 6x40 a sx
(24), 6x50 a dx (25) montate, e il distanziale molla (26) infilato negli appositi fori.
Procedere al montaggio della molla sul supporto molla per mezzo delle due viti
(24) e (25) e dei due dadi (21). Montare il tutto con una chiave Allen 4 mm (27)
e una CH 10 (28). Avvitare a fondo. Fig. 17 e 18.
24.Portare il gruppo operante in posizione di riposo (gruppo a fine corsa verso la
colonna portante) e collegare l’occhiello terminale della molla di ritorno al gancio
predisposto (29) sul gruppo operante. Fig. 18.
25.Prendere il carter coprilama (30). Fig. 19.
26.Asportare tramite una chiave a tubo da 17 (31), il dado e la rondella (32). Fig. 20.
27.Inserire il carter coprilama sul perno di supporto (33) come in Fig. 21.
28.Rimontare la rondella e il dado e fissare il tutto con chiave a tubo da 17. Fig. 21.
29.Al termine delle operazioni sopra descritte la macchina si deve presentare come
in Fig. 22.
30.Si raccomanda di mettere subito in bolla la macchina. Per far ciò in dotazione
sono date 2 viti 10x25 e 2 dadi da montare su uno o due piedi. Qualora si dovesse ricorrere a tale regolazione, montare le viti e i dadi come in Fig. 23.
19. Remove the screws (17) from the table support. Open the lid to the
transformer box by loosening the plastic screws (18) see Fig. 13.
20. Position the thermal overload on the frame of the machine as seen in Fig. 14
and secure it from the inside with the 2 screws (17) through the holes (19).
Close the lid to the thermal overload box.
21. Mount the cable carrying rod (20) onto the supporting arm by means of a 8x16
screw and a washer. Screw down using a CH 17 wrench. Fig. 15.
22. Open up the reversal spring package (e). Remove the two fixing nuts (21) in
order to divide the spring from its mount. Screw the spring mount (22) onto the
arm by means of the two 6x16 mm screws and a 4 mm Allen wrench (23). Fig.
16.
23. The reversal spring must have the appearance of the illustration in Fig. 17 i.e.
with the two 6x40 screws fitted on the left (24), the 6x50 on the right (25) and the
spring spacer (26) inserted into the right holes. Mount the spring onto its mount
by means of the two screws (24 and 25) and the two nuts (21). Tighten them
down with a 4 mm Allen wrench (27) and a CH 10 (28). Wrench hard. Fig. 17
and 18.
24. Move the cutting unit to idle position (the unit must be moved to the end of its
stroke towards the column) and connect the last coil of the reversal spring to
the appropriate hook (29) on the cutting unit. Fig. 19.
25. Take the blade guard (30). See Fig. 19.
26. Remove the nut and washer (31) with a size 17 socket wrench (32), Fig. 20.
27. Insert the the blade casing into its support pin (33) as shown in Fig. 21.
28. Refit the nut and washer and tighten down with a size 17 socket wrench. Fig.
21.
29. After these operations, the machine must have the appearance of Fig. 22.
30. You can now level off the machine. For this operation, you are provided with two
10x25 screws and 2 nuts to fit onto one or two feet. If adjustments are needed,
fit the nuts and screws as shown in Fig. 23.
Pag. 10
01_90 0290 14 43 61_02
RN 450 FM “U.S.”
Volts 230*/460/60 TRIFASE
ITALIANO
ENGLISH
ASSEMBLAGGIO DELLA MACCHINA
MACHINE ASSEMBLY
1
3
4
4
2
5
Fig. 1
Fig. 2
Fig. 3
6
Fig. 4
Fig. 5
Fig. 6
Pag. 11
RN 450 FM “U.S.”
01_90 0290 14 43 61_02
Volts 230*/460/60 TRIFASE
ITALIANO
ENGLISH
ASSEMBLAGGIO DELLA MACCHINA
MACHINE ASSEMBLY
10
11
9
7
8
12
Fig. 7
Fig. 8
Fig. 9
14
15
16
13
Fig. 10
Pag. 12
Fig. 11
Fig. 12
RN 450 FM “U.S.”
01_90 0290 14 43 61_02
Volts 230*/460/60 TRIFASE
ITALIANO
ENGLISH
ASSEMBLAGGIO DELLA MACCHINA
MACHINE ASSEMBLY
17
18
19
Fig. 14
Fig. 13
24
20
22
23
25
26
21
27
24
25
28
Fig. 15
Fig. 16
Fig. 17
Pag. 13
RN 450 FM “U.S.”
Volts 230*/460/60 TRIFASE
01_90 0290 14 43 61_02
ITALIANO
ENGLISH
ASSEMBLAGGIO DELLA MACCHINA
MACHINE ASSEMBLY
27
28
29
31
32
30
Fig. 18
Fig. 19
Fig. 20
33
Fig. 21
Pag. 14
Fig. 22
Fig. 23
RN 450 FM “U.S.”
Volts 230*/460/60 TRIFASE
01_90 0290 14 43 61_02
ITALIANO
ENGLISH
MONTAGGIO DELLA LAMA
ASSEMBLY OF THE BLADE
Per eseguire il corretto montaggio della lama procedere come descritto di seguito:
1. Rimuovere l’anello benzing (1) tramite il cacciavite, in modo da separare le 2 protezioni laterali dx Fig. 1.
2. Con chiave a tubo CH 17 asportare il dado di bloccaggio e la rondella che tengono
fissato il carter coprilama al motore. Fig. 2. Asportare il carter coprilama.
3. Con chiave CH 32 (2) e Allen 8 mm (3), smontare il dado di serraggio, il distanziale e
la flangia esterna. Fig. 3/4.
4. Inserire la lama sul mandrino. Inserire la flangia esterna ed il dado di serraggio.
ATTENZIONE: La faccia del dado di serraggio a contatto con la flangia esterna deve
essere sempre la stessa. Ribloccare a fondo il tutto. Fig. 5.
To correctly assemble the blade:
1. Remove the Benzing ring (1) by means of the screwdriver, in order to separate the 2
right hand guards, Fig. 1.
2. Using a CH 17 socket wrench remove the nut and washer that secure the blade casing
to the motor. Fig. 2. Remove the blade casing.
3. Using a CH 32 wrench (2) and an 8 mm Allen wrench (3), remove the fixing nut, the
spacer and outer flange. Fig. 3/4.
4. Fit the blade onto the chuck. Fit the outer flange and fixing nut. ATTENTION: the
surface of the nut coming into contact with the outer flange must always be the same.
Wrench down. Fig. 5.
L’utensile utilizzato deve avere la caratteristiche descritte a pagina 20. Si raccomanda
l’utilizzo di guanti di protezione durante l’esecuzione dell’operazione di montaggio lama.
Accertarsi del corretto inserimento, relativamente al senso di rotazione, come indicato
dalla freccia presente sul carter coprilama.
The tool used must have the features described on page 20. The use of protective gloves
during the blade fitting operations is highly recommended. Make sure the blade has been
correctly fitted and that it runs in the right direction, as indicated by the arrow on the blade
casing.
ATTENZIONE: Prima di eseguire il montaggio della flangia esterna verificare l’assoluta
pulizia della stessa. Verificare l’assenza di grasso oppure di lubrificante tra la lama e le
due flange di bloccaggio.
5. Rimontare il carter coprilama sul perno di sostegno.
6. Rimontare la rondella e con chiave a tubo CH 17 rimontare il dado di bloccaggio del
carter coprilama. Bloccare il tutto a fondo. Fig.5
7. Riagganciare le 2 protezioni laterali dx tramite il relativo perno e l’anello benzing. Fig.
6.
IMPORTANT: before fitting the outer flange, make sure it is perfectly clean. Make sure
there are no traces of grease or lubricant between the blade and the fixing flanges.
5. Refit the blade casing into the pin.
6. Refit the washer and, with a CH 17 socket wrench, refit the blade casing fixing nut.
Wrench down. Fig. 5
7. Refit the 2 right hand side guards with the pin and the Benzing ring. Fig. 6.
Pag. 15
RN 450 FM “U.S.”
Volts 230*/460/60 TRIFASE
01_90 0290 14 43 61_02
ITALIANO
ENGLISH
MONTAGGIO DELLA LAMA
ASSEMBLY OF THE BLADE
2
3
1
Fig. 1
Fig. 4
Pag. 16
Fig. 2
Fig. 5
Fig. 3
Fig. 6
RN 450 FM “U.S.”
Volts 230*/460/60 TRIFASE
01_90 0290 14 43 61_02
ITALIANO
ENGLISH
IDENTIFICAZIONE DELLA MACHINA
MACHINE IDENTIFICATION
L’identificazione nominativa della macchina è possibile tramite la targhetta (1). Sulla The name of the machine can be read on the printed plate (1). The following information
is given on the front name plate (2):
targhetta (2) appaiono i seguenti dati:
1. Address of the manufacturer.
1. Indirizzo del costruttore.
2. Machine model.
2. Modello della macchina.
3. Serial number.
3. Numero di matricola.
4. Year of manufacture.
4. Anno di costruzione.
5. Frequency in Hertz.
5. Frequenza in Hertz.
6. Total power installed in kW.
6. Potenza totale installata in kWatt.
7. Current draw in Amperes.
7. Assorbimento in Ampere.
8. Voltage in Volts.
8. Voltaggio in Volt.
9. Maximum diameter of the blade in inch.
9. Diametro massimo della lama in pollici.
10.Diameter of the blade hole in inch.
10.Diametro del foro in pollici.
11. Minimum diameter of the blade in inch.
11. Diametro minimo della lama in pollici.
12.Overall weight of the machine in N.
12.Peso complessivo della macchina in N.
1
2
RN 450 FM U.S.
0160
2,9
12”
11” 3/4
2001
9
230
1 ”
1000
Pag. 17
RN 450 FM “U.S.”
01_90 0290 14 43 61_02
ITALIANO
ENGLISH
DESCRIZIONE DELLA MACCHINA
DESCRIPTION OF THE MACHINE
Le parti principali della squadratrice radiale RN 450 FM “US” sono:
1. Leva bloccaggio rotazione braccio portante.
2. Leva sollevamento braccio portante.
3. Braccio portante.
4. Carter fisso coprilama.
5. Riga millimetrata.
6. Leva sbloccaggio rotazione braccio.
7. Piano di lavoro.
8. Impugnatura di comando.
9. Sponda di appoggio.
10. Bloccaggio angolazioni autocentranti.
11. Bloccaggio angolazioni intermedie.
12. Leva di bloccaggio rotazione gruppo operante.
13. Bloccaggio di sicurezza corsa gruppo operante.
14. Molla di ritorno automatico del gruppo operante.
15. Salvamotore magnetotermico con bobina di minima tensione.
1
2
3
4
5
The main parts of the RN 450 FM “US” radial saw are:
1. Support arm locking lever.
2. Support arm lifting lever.
3. Support arm.
4. Fixed blade casing.
5. Ruler.
6. Support arm release lever.
7. Work bench.
8. Control handle.
9. Fence.
10. Self-centring angle locking device.
11. Intermediate angle locking device.
12. Operation group locking lever.
13. Cutting unit safety lock.
14. Automatic cutting unit reversal spring.
15. Thermal overload protection with no-volt coil.
6
7
Pag. 18
Volts 230*/460/60 TRIFASE
8
9
10
11
12
13
14
15
RN 450 FM “U.S.”
01_90 0290 14 43 61_02
Volts 230*/460/60 TRIFASE
ITALIANO
ENGLISH
DESCRIZIONE DELLA MACCHINA
DESCRIPTION OF THE MACHINE
Le principali caratteristiche della squadratrice radiale modello RN 450 FM “US”
sono:
1. Guide riportate ed intercambiabili in acciaio.
2. Scorrimento del gruppo di taglio su otto cuscinetti contrapposti protetti da raschia polvere.
3. Bloccaggio autocentrante sulle posizione a 90°, 45° dx e sx del braccio. Possibilità di bloccaggio manuale nelle altre angolazioni intermedie.
4. Bloccaggio autocentrante del motore a 90°, 45°, con possibilità di bloccaggio
manuale nelle altre posizioni intermedie.
5. Rotazione del gruppo operante per permettere l’operazione di rifilatura.
6. Sbloccaggio dell’angolazione del braccio in posizione anteriore.
7. Salvamotore magnetotermico con bobina di minima tensione.
8. Ritorno automatico nella posizione di riposo del gruppo operante.
9. Carter lama comprendente: protezioni laterali dx e sx e asta controritorno pezzo.
The main features of the RN 450 FM “US” radial saw are:
1. Reinforced and interchangeable steel guides.
2. Movement of the cutting unit on eight bearings protected by dust scrapers.
3. Self-centring locking at 90°, 45° angles to the left and right of the arm. Manual
locking at intermediate angles.
4. Self-centring locking of the motor at 90°, 45° and manual locking in intermediate
positions.
5. Rotation of the operating unit to allow ripping.
6. Releasing of the arm in front position.
7. Thermal magnetic overload cut-out with undervoltage release coil.
8. Automatic return of the cutting unit to idle position.
9. Blade guard including: LH and RH
Pag. 19
RN 450 FM “U.S.”
01_90 0290 14 43 61_02
Volts 230*/460/60 TRIFASE
ITALIANO
ENGLISH
CARATTERISTICHE TECNICHE
TECHNICAL SPECIFICATIONS
SPECIFICHE ELETTRICHE
TENSIONE ALIMENTAZIONE:
ELECTRICAL SPECIFICATIONS
230*/460/60 TRIFASE
2,9 KW
POTENZA TOTALE INSTALLATA:
SUPPLY VOLTAGE:
230*/460/60 THREE PHASE
TOTAL INSTALLED POWER:
2,9 KW
UTENSILE
TOOLS
LAMA ø MAX
ø 305 mm
BLADE:
FORO
ø 25,4 mm
EXTERNAL DIAMETER:
72
NUMERO DI DENTI Z=
3400 rpm
VELOCITÀ ROTAZIONE LAMA
TEMPERATURA DI IMMAGAZZINAMENTO
UMIDITA’ SENZA CONDENSA
Pag. 20
ø1“
72
NO.OF TEETH Z=:
3400 rpm
BLADE ROTATION SPEED:
AMBIENT CONDITIONS
SPECIFICHE CLIMATICHE
TEMPERATURA DI LAVORO OTTIMALE
ø 12”
5° ÷ 45° C
OPTIMAL OPETATING TEMPERATURE:
-25° ÷ 55° C
STORAGE TEMPERATURE:
5% ÷ 85 %
HUMIDITY (WITHOUT CONDENSATION):
37° F÷ 77° F
7° F÷ 87° F
5% ÷ 85 %
RN 450 FM “U.S.”
01_90 0290 14 43 61_02
Volts 230*/460/60 TRIFASE
ITALIANO
ENGLISH
CAPACITÁ DI TAGLIO
CUTTING CAPACITY
BRACCIO 90°
ARM 90°
RIPORTO 48 mm
FILLING MATERIAL 1” 57/64
TRONCATURA
CUTTING
L1 = 445 mm.
H1 = 40 mm.
L1 = 17 “ 33/64
H1 = 1” 37/64
L2 = 390 mm.
H2 =90 mm.
L2 = 15” 23/64
H2 = 3” 35/64
MOTORE 45°
L1 = 445 mm.
H1 = 22 mm.
L2 = 395 mm (Con riporto di 48 mm sulla sponda)
H2 = 90 mm (Con riporto di 48 mm sulla sponda)
ALTEZZA MOTORE
H MAX = 255 mm
H MIN = 130 mm
MOTOR 45°
L1 = 17” 33/64
H1 =59/64”
L2 = 15” 35/64 (With 1” 57/64 filling matewrisl on the fence)
H2= 3” 35/64 (With 1” 57/64 filling matewrisl on the fence)
HEIGHT OF THE MOTOR
H MAX = 10” 3/64
H MIN = 5” 1/8
Pag. 21
RN 450 FM “U.S.”
01_90 0290 14 43 61_02
ITALIANO
ENGLISH
CAPACITÁ DI TAGLIO
CUTTING CAPACITY
BRACCIO 45° DX
TRONCATURA
L1 = 340 mm
H1 = 40 mm
L2 = 290 mm (Con riporto di 48 mm sulla sponda)
H2 = 90 mm (Con riporto di 48 mm sulla sponda)
BRACCIO 45° SX
ARM 45° RT
CUTTING
L1 = 13” 25/64
H1 = 1” 37/64
L2 = 11” 27/64(With 1” 57/64 filling matewrisl on the fence)
H2 = 3” 35/64(With 1” 57/64 filling matewrisl on the fence)
ARM 45° LT
TRONCATURA
CUTTING
L = 100 mm
H = 40 mm
L = 3” 59/64
H = 1” 37/64
TAGLIO DI RIFILATURA
L1 MAX. = 272 mm
L2 MIN. = 113 mm
L2 MAX. = 592 mm
Pag. 22
Volts 230*/460/60 TRIFASE
SAW BLADE TURNED
L1 MAX. = 10” 45/64
L2 MIN. = 4” 29/64
L2 MAX. = 23” 19/64
RN 450 FM “U.S.”
01_90 0290 14 43 61_02
Volts 230*/460/60 TRIFASE
ITALIANO
ENGLISH
USO DELLA MACCHINA
USING THE MACHINE
UTILIZZO
La squadratrice radiale può essere utilizzata per tagli trasversali in molteplici posizioni. Infatti grazie alla sua grande possibilità di orientamento ed inclinazione sull’asse verticale e orizzontale è l’ideale per la realizzazione di tagli semplici e composti. Il suo utilizzo e molto semplice in quanto basta regolare l’altezza della macchina e delle protezioni sul carter in funzione dello spessore del pezzo e del tipo di
taglio che si desidera eseguire. Successivamente si DEVE appoggiare il pezzo a
ridosso della sponda. Quando la lavorazione lo permette, appoggiare la base maggiore sul piano di lavoro. Fatto questo è possibile iniziare l’operazione di taglio mettendo in moto la lama e sbloccando il gruppo operante tramite l’apposita leva. Tirare
verso di se il gruppo operante, per iniziare il taglio. Al completamento dell’operazione, riaccompagnare in posizione di riposo il gruppo operante. Spegnere il motore.
USE
The radial saw is suitable for transverse cuts in a variety of positions. Thanks to the
possibility of adjusting and tilting the position of the cutting unit with respect to its
vertical and horizontal axes, it is ideal for both simple and composite cuts. It is very
easy to use: simply adjust the height of the machine and of its guards in accordance to the thickness of the workpiece and type of cut to execute. Then it is ESSENTIAL to rest the workpiece against the fence. When the kind of operation allows, rest the wider surface of the workpiece on the work bench. You can now start
the cutting operation by starting up the blade and releasing the cutting unit with the
release lever. Pull the cutting unit towards yourself and start cutting. After the cut
has been completed, move the cutting unit to its idle position. Turn off the motor.
UTILIZZI NON CONSENTITI
1. La macchina non deve venire utilizzata per la troncatura di materiale ferroso ad 1.
esempio acciaio e ghisa.
2. Uso in ambienti esterni o atmosfera esplosiva.
2.
3. La macchina non deve venire utilizzata in operazioni diverse da quelle esplicita- 3.
mente indicate in questo Manuale Uso & Manutenzione, salvo approvazione scritta formale della OMGA S.p.A.
4. La macchina non deve venire utilizzata per il taglio di sezioni maggiori di quelle 4.
indicate nel Manuale Uso & Manutenzione.
5. Non utilizzare la macchina se non é appoggiata in modo stabile su di una super- 5.
ficie che ne garantisca la necessaria sicurezza di utilizzo.
NON - PERMITTED USES
The machine must not be used for cutting ferrous materials such as steel or cast
iron.
It must not be used outdoors or in an explosive atmosphere.
The machine must not be used for operations that differ from those specifically
stated in this Operation and Maintenance Manual without the formal written
permission of OMGA S.p.A.
The machine must not be used for cutting workpieces with cross-sections larger
than those specified in this Operation and Maintenance Manual.
Do not use the machine if it is not fixed securely and in a stable manner to a flat
surface that assures adequate safety.
Pag. 23
RN 450 FM “U.S.”
01_90 0290 14 43 61_02
ITALIANO
ENGLISH
RILEVAMENTO DEL RUMORE EMESSO
NOISE EMISSION MEASUREMENTS
LIVELLO DI PRESSIONE ACUSTICA CONTINUA Lp
CONTINUOUS SOUND PRESSURE LEVEL
POS. “A” .… Lpa = 84,85 dB (A)
POS. “A” .… Lpa = 84,85 dB (A)
LIVELLO DI POTENZA SONORA Lw
SOUND POWER LEVEL
POS. “A” .…
LWA = 100,9 dB (A)
I valori riportati sono livelli di emissione sonora e non necessariamente livelli operativi sicuri. Sebbene
vi sia una correlazione tra i livelli di emissione sonora ed i livelli di esposizione, questo fatto non puó
essere utilizzato per determinare se sia richiesto l’uso o meno di ulteriori misure preventive di sicurezza. I fattori che influenzano il reale livello di esposizione dell’operatore includono sia la durata dell’esposizione che le caratteristiche del luogo di lavoro, il numero della macchine e gli altri tipi di
lavorazione effettuate nelle immediate vicinanze. Inoltre, i livelli di esposizione sonora consentiti possono variare da paese a paese. Queste informazioni, tuttavia, potranno essere di utilità all’utente per
valutare rischi e pericoli derivati da esposizione al rumore.
POS. “A” .… LWA = 100,9 dB (A)
The values given are noise emission levels and do not necessarily correspond to safe operating
levels. Although noise emission levels and exposure levels are related, it is not possible to determine
from the above values alone whether further safety measures are required. The true level of operator
exposure can only be calculated by taking into account the duration of exposure, the acoustic
characteristics of the work place, the number of machines and the other types of processing operations
performed in the immediate vicinity. Moreover, permissible noise exposure levels vary from country to
country. Nevertheless, this information may help the user to evaluate the noise exposure risks and
hazards associated with the use of this machine.
TEST CONDITIONS (SUMMARY)
CONDIZIONI DI PROVA (SINTESI)
La prova é stata eseguita secondo le norme ISO 7960 all. N. Il tipo di apparecchiatura utilizzata é un
fonometro tipo PULSAR 38 P (marca I.S.C. Milano) avente classe di precisione 2.
É stato utilizzato legno di abete in varie lunghezze, avente sezione pari a 40 x 80 mm. , utilizzando degli
utensili nuovi. Essendo una macchina manuale, abbiamo pensato ad una successione di tagli ripetitivi
ogni 10 secondi, ipotizzando un ciclo tipo di lavoro.
É stata identificata una superficie di inviluppo della macchina corrispondente ad una parallelepipedo
rettangolo, che comprende la massima superficie di ingombro della macchina stessa. É stata individuata, poi, la superficie prescritta, corrispondente ad un parallelepipedo rettangolo che contenga la
superficie di inviluppo, con facce parallele ad essa e distanti 1 metro. Il microfono é stato posizionato
su questa superficie in corrispondenza del posto operatore “A” all’altezza di 1,5 metri.
Pag. 24
Volts 230*/460/60 TRIFASE
The tests were conducted in accordance with ISO 7960 annex N standards. The instrument used
was a PULSAR 38 P sound-level meter (manufactured by I.S.C. Milan) with a class 2 accuracy rating.
40 x 80 mm spruce stock of various lengths were cut using brand new tools. Being a manual
machine, repetitive cycles were performed every 10 seconds, considering this to represent a typical
working cycle.
An envelope surface of the machine corresponding to a rectangular parallelepiped was identified,
containing the largest surface of the machine. The prescribed surface was then identified,
corresponding to a rectangular parallelepiped containing the envelope surface, with faces parallel to
it at a distance of 1 metre. The microphone was positioned on this surface at operator position “A” at
a height of 1.5 metres.
POSIZIONE
“A”
POSITION
“A”
RN 450 FM “U.S.”
01_90 0290 14 43 61_02
Volts 230*/460/60 TRIFASE
ITALIANO
ENGLISH
SOLLEVAMENTO E SPOSTAMENTO DELLA MACCHINA
LIFTING AND POSITIONING THE MACHINE
Per il peso e le dimensioni della macchina, il trasporto deve necessariamente essere eseguito usando The weight and dimensions of the machine call for it to be lifted and transported using suitable gear,
mezzi di adeguata portata ad esempio carrelli elevatori. Per maggior sicurezza di trasporto si consiglia such as a fork lift truck for instance. For greater safety during transport, we recommend you to place
di appoggiare la macchina su di un piano in legno Es. pallet.
the machine on a wooden platform, such as a pallet.
Non sollevare o forzare la macchina, agganciandosi ai dispositivi
di comando o al braccio portante.
Do not hook lifting implements onto the control devices or arm.
PREDISPOSIZIONI
POSITIONING REQUIREMENTS
La macchina deve essere installata in un’area sufficientemente grande ed illuminata. Nello schema a
lato è indicata la distanza minima rispetto un altro oggetto o ad una parete che si deve rispettare nel
posizionare la macchina. Essa deve inoltre trovarsi in un locale sufficientemente illuminato. L’illuminazione deve garantire una buona visibilità in ogni punto, non creare riflessi pericolosi e consentire una
chiara lettura delle targhette di identificazione e dei comandi della macchina in ogni momento.
In merito consultare la normativa vigente.
The machine must be installed in a sufficiently large and luminous area. The diagram belove indicates
the minimum distance at which the machine must be kept from other objects or walls. The machine
must be installed in a room with sufficient lighting. The lighting must grant good visibility over every
part of the machine, without dazzling the operator. It must enable all identification plates to be clearly
read and all machine controls to be perfectly visible.
On this behalf, consult the relevant standards.
PESO KG 90
882 N
WEIGHT KG90
882 N
Pag. 25
RN 450 FM “U.S.”
01_90 0290 14 43 61_02
Volts 230*/460/60 TRIFASE
ITALIANO
ENGLISH
DIMENSIONI
DIMENSIONS
La macchina è stata progettata per essere utilizzata da un solo operatore che deve occu- The machine is designed for use by one operator only, who must stand in the position
pare la posizione indicata.
DIMENSIONI
I
GB
A = 800 MM
C = 1530MM
(H. MAX.)
A = 31” 31/64
C = 60” 15/64
(H. MAX.)
A = 870 MM
C = 820MM
B = 34” 31/64
C = 32” 9/64
POSIZIONE OPERATORE
OPERATOR POSITION
Pag. 26
RN 450 FM “U.S.”
01_90 0290 14 43 61_02
Volts 230*/460/60 TRIFASE
ITALIANO
ENGLISH
NORME DISICUREZZA
SAFETY RULES
La gestione della squadratrice radiale modello RN 450 FM “US” da parte di personale che non sia The RN 450 FM “US” radial saw must never be run by unqualified personnel. It is very dangerous.
stato adeguatamente istruito, é altamente rischioso. Si raccomanda di non attivare le funzioni della Do not attempt to operate the machine until you have acquired a thorough knowledge of the operating,
macchina fino a che non si siano apprese completamente tutte le procedure di ciclica, di regolazione, setting, adjustment and maintenance procedures described in this Operation and Maintenance manual.
di taratura, di manutenzione e uso generale descritte in questo manuale.
Gli allacciamenti: Elettrico, dovrà essere effettuati da personale specializzato, il quale dovrà accer- The electrical system connection must be made by specialised personnel, who must also make sure
tare che nel luogo di installazione della macchina sia presente un idoneo impianto di messa a terra. that there is an efficient earthing circuit at the site where the machine is to be installed.
Utensili incrinati, saldati e non equilibrati non dovranno essere riutilizzati sulla macchi- Cracked, unbalanced or welded tools MUST NOT be used.
na.
TUTTI I SISTEMI DI SICUREZZA TASSATIVAMENTE NON DEVONO ESSERE
RIMOSSI O BY – PASSATI.
Durante l’uso della macchina si raccomanda di indossare sempre le protezioni consuete previste
dalla generalità delle norme antinfortunistiche:
Guanti - Occhiali - Scarpe - Cuffie antirumore.
Togliere capi di abbigliamento pericolosi, ad esempio sciarpe, cravatte. Togliere, inoltre, anelli, orologi
o altra bigiotteria. I polsini devono essere elastici o abbottonati, inoltre i capelli, se lunghi, devono
essere coperti da un cappello.
Non cercare di fare funzionare la macchina mentre siete soggetti a qualsiasi forma di condizionamento
che possa ridurre la vostra attenzione.
Prima di effettuare la lavorazione verificare che tutte le leve oppure pomelli siano bloccati.
Non avvicinarsi mai a parti mobili (utensili, pressori di bloccaggio) durante l’esecuzione del ciclo di
lavoro.
NONE OF THE AFETY SYSTEMS MUST BE REMOVED OR BYPASSED.
When using the machine all the usual safety equipment prescribed by general safety standards must
be worn, including protective gloves, safety glasses, safety footwear, ear defenders.
Remove all potentially dangerous items of clothing, such as scarves or ties. Remove rings, watches
or any other jewellery. Cuffs must be elasticated or buttoned up. Long hair must be worn under a cap.
Do not attempt to operate the machine whilst in a state of reduced attention.
Before machining, check that all levers and knobs are tightened and in place.
Never approach the moving parts (tools or clamping elements) during a work cycle.
!
Gli interventi di manutenzione, di pulizia generale della macchina e sostituzione di utensili devono
essere intrapresi soltanto quando tutte le parti mobili si siano arrestate e dopo che siano state
scollegate o disinserite le fonti di energia elettrica .
Mantenere pulita l’area circostante la macchina, la segatura può rendere sdrucciolevole il pavimento.
Non lasciare incustodita la macchina durante le fasi di lavoro.
Segnalare con un cartello l’eventuale sosta forzata della macchina (sostituzione di utensili o altro).
Maintenance, machine cleaning and tool replacement operations must be performed with all moving
parts stopped and after the electrical energy sources have been disconnected or turned off.
Keep the area around the machine clean. Sawdust can make the floor slippery.
Never leave the machine unattended whilst in operation.
Affix a notice to the machine when it is stopped for tool replacement or other reason to ensure that
it is not started up accidentally.
Pag. 27
RN 450 FM “U.S.”
01_90 0290 14 43 61_02
Volts 230*/460/60 TRIFASE
ITALIANO
ENGLISH
NORME DI SICUREZZA
SAFETY RULES
Si raccomanda di tenere nei pressi del luogo di lavoro ove è situata la macchina idonei mezzi di Suitable fire-fighting equipment must be kept close to near where the machine is being used.
estinzione di incendio.
If there are signs of fire (smoke or smell of burning), immediately stop the dust extraction system and
Ove si manifestino inizi di combustione (tracce di fumo oppure odori), oltre all’arresto immediato close all the valves in order to suffocate the fire as quickly as possible.
dell’impianto di aspirazione si dovranno chiudere tutte le valvole in modo da soffocare il più presto
possibile il focolaio di incendio.
E’ consigliabile tenere nei pressi del luogo di lavoro ove è situata la macchina una cassetta di pronto
soccorso dotata di presidi sanitari in corso di validità e idonei a semplici interventi di emergenza.
It is advisable to keep a first-aid kit containing disinfectant and materials for simple first-aid work near
to where the machine is being used.
Le modalità di avvicinamento alla macchina del materiale da lavorare, così come la raccolta e lo
spostamento del materiale di scarto possono rappresentare rischi che rientrano sotto le responsabilità del Cliente e dell’Operatore.
Le sezioni massime del materiale da tagliare sono indicate pag. 21/22.
Gli utensili utilizzabili su questa macchina devono essere conformi a quanto contemplato nelle norme
EN 847.1.
Non è consentito l’impiego di utensili aventi caratteristiche inferiori, incrinati, non equilibrati e saldati.
The operations of moving the workpiece towards the machine and collecting and removing waste can
create risks which are the responsibility of the customer and the operator.
The maximum cross-sections of the workpiece are indicated in page 21/22.
The tools which can be used on this machine must comply with the provisions of draft standards N
847.1.
It is not permitted to use tools which have inferior characteristics or are cracked, unbalanced or
welded.
La sostituzione di parti meccaniche, elettriche, elettroniche, deve essere effettuato esclusivamente Mechanical, electrical, electronic components must be replaced exclusively with parts ordered from
con parti da richiedere al Costruttore il quale declina assolutamente qualsiasi tipo di responsabilità nel the manufacturer. If this requirement is not observed the manufacturer will accept no responsibility
for consequent:
caso si contravvenga a questa disposizione che, se non rispettata, può generare:
1. Personal injury.
1. Incidenti alla persona.
2. Damage to the machine.
2. Danneggiamenti alla macchina.
3. And the warranty will be immediately invalidated.
3. Decadimento immediato di ogni garanzia.
Conservare con cura questo manuale Uso & Manutenzione sia per fare riferimento alle istruzioni
iniziali e di installazione, ma anche per il costante riferimento dell’utente per le necessità future che
potranno manifestarsi durante la durata della vita della macchina.
Per ogni e qualsiasi informazione che si rendesse necessaria, contattare il Servizio Assistenza
OMGA Inc.
Keep this operation and maintenance manual with care. It will be needed not only for the initial
installation and start-up instructions but also for future reference and for any necessity that arises
during use of the machine.
For any further information contact the OMGA Inc. Service Department.
PER QUALSIASI RICHIESTA DI ASSISTENZA TECNICA E FORNITURA DI PEZZI DI RICAMBIO FOR TECHNICAL INFORMATION AND/OR WHEN ORDERING SPARE PARTS, ALWAYS QUOTE THE
RIFERIRSI SEMPRE AL NUMERO DI MATRICOLA ED ALL’ANNO DI FABBRICAZIONE RIPORTATI SERIAL NUMBER AND YEAR OF MANUFACTURE MARKED ON THE NAME PLATE.
SULLA TARGHETTA DI IDENTIFICAZIONE.
Pag. 28
RN 450 FM “U.S.”
01_90 0290 14 43 61_02
Volts 230*/460/60 TRIFASE
ITALIANO
ENGLISH
MARCATURA DI SICUREZZA
SAFETY MARKING
SEGNALETICA DI RIFERIMENTO
CODICE 22591: TARGA INFORMAZIONI
SAFETY SIGNS
CODE 22591 : INFORMATION NAMEPLATE
NEL CASO CHE LE TARGHETTE DI AVVERTIMENTO RISULTINO ILLEGGIBILI OPPURE SIANO STATE IF THE SAFETY LABELS BECOME UNREADABLE OR ARE REMOVED, REPLACE THEM IMMEDIATELY.
RIMOSSE, SOSTITUIRLE IMMEDIATAMENTE. NON UTILIZZARE LA MACCHINA SE MANCANTE DI UNA THE MACHINE MUST NOT BE USED IF ANY OF THE SAFETY LABELS ARE MISSING.
O PIÙ TARGHETTE.
COD.
22591
Pag. 29
RN 450 FM “U.S.”
1.
2.
3.
4.
01_90 0290 14 43 61_02
Volts 230*/460/60 TRIFASE
ITALIANO
ENGLISH
DISPOSITIVI DI SICUREZZA
SAFETY DEVICES
Salvamotore magnetotermico con bobina di minima tensione.
Freno motore.
Molla di ritorno automatico in posizione di riposo del gruppo operante.
Carter fisso comprendente protezioni laterali.
1
2
1.
2.
3.
4.
Thermal overload and no volt protection.
Motor braking device.
Automatic reversal spring to move the cutting unit to idle position.
Fixed casing with side and front blade guards.
3
4
Se anche solo uno dei dispositivi sopracitati non è in perfetta efficienza, è vietato l’uso If even one of the above mentioned devices is not in perfect working order, the machine
della macchina. Si dovrà procedere immediatamente alla manutenzione o sostituzione cannot be used. Immediately repair or replace the faulty device and hang a perfectly
del dispositivo non funzionante e segnalare tramite un cartello ben visibile il divieto visible and readable sign prohibiting the use of the machine on the machine itself.
assoluto di utilizzo della macchina.
Pag. 30
RN 450 FM “U.S.”
01_90 0290 14 43 61_02
Volts 230*/460/60 TRIFASE
ITALIANO
ENGLISH
DISPOSITIVI DI SICUREZZA
SAFETY DEVICES
SALVAMOTORE MAGNETOTERMICO CON BOBINA DI MINIMA TENSIONE
THERMAL OVERLOAD AND NO-VOLT PROTECTION
Il salvamotore magnetotermico con bobina di minima tensione (1) è un dispositivo di The thermal magnetic overload cut-out with undervoltage release coil (1) is a device that
interruzione automatica di alimentazione elettrica al motore. Questo interviene in due automatically cuts off electrical power to the motor. This occurs when:
casi:
1.
The motor consumes too much current.
1. Eccessivo assorbimento di corrente da parte del motore.
2.
The mains power is cut off.
2. Interruzione dell’alimentazione elettrica della rete.
In both cases, to resume the power supply, turn the red knob (2) on the overload cut-out
In entrambi i casi per il ripristino dell’alimentazione ruotare in posizione 0 e quindi in first to 0 and then to 1.
posizione 1 l’interruttore rotativo rosso (2) posto sul salvamotore.
Should the machine not be used for a long period of time, it is recommended to isolate
Per lunghi periodi di inattività della macchina si consiglia d’interrompere l’alimentazione the motor from the power supply by turning the red knob (2) on the overload cut-out to its
elettrica al motore ruotando in posizione 0 l’interruttore rotativo rosso (2) sul salvamotore. 0 position.
1
2
Pag. 31
RN 450 FM “U.S.”
01_90 0290 14 43 61_02
Volts 230*/460/60 TRIFASE
ITALIANO
ENGLISH
DISPOSITIVI DI SICUREZZA
SAFETY DEVICES
DISPOSITIVO DI FRENATURA DEL MOTORE
MOTOR BRAKE DEVICE
Il motore è equipaggiato con un freno di tipo elettromeccanico (1); il quale interviene a
bloccare la rotazione del motore con il cessare dell’alimentazione elettrica. Nel caso si
dovesse notare una perdita di prestazioni del freno è necessario procedere alla sua
regolazione o manutenzione. In merito vedere pag. 55.
The electrical motor of the machine is equipped with a electromagnetic brake (1)
which is intended to stop the spinning of the saw blade when the motor is switched
of. If a noticeable decrease in the performance of the brake occurs, proceed to its
fine tuning. See page . 55.
1
Pag. 32
1
RN 450 FM “U.S.”
01_90 0290 14 43 61_02
Volts 230*/460/60 TRIFASE
ITALIANO
ENGLISH
DISPOSITIVI DI SICUREZZA
SAFETY DEVICES
FIXED CASING WITH SIDE BLADE GUARDS END ANTI-KICKBACK ROD
CARTER FISSO CON PROTEZIONI LATERALI E ASTA CONTRORITORNO
Il carter fisso coprilama, ha montate sia lateralmente che frontalmente delle particolari
protezioni (1) che garantiscono sempre la totale copertura dell’utensile. Esse hanno lo
scopo di evitare il possibile contatto con la lama non interessata al taglio. Controllare
periodicamente tali protezioni, se si dovesse notare anche una parziale rottura, procedere immediatamente alla loro sostituzione.
Sul carter frontalmente, si trova montata l’asta controritorni (2) che funge da protezione
contro accidentali ritorni del pezzo in fase di taglio.
E’ assolutamente vietato usare la macchina senza tali protezioni.
The fixed blade casing features, on both sides and at the front special guards (1) that
allow for the blade to be fully covered. They prevent contact with parts of the blade that
are not actually executing the cut. Check these guards regularly and if you notice they are
damaged, replace them immediately.
On the front side of the blade guard, it is fitted the anti-kickback rod (2) which protects
against accidental kick back of the workpiece during cutting operation.
It is prohibited to use the machine without these protections.
1
2
Pag. 33
RN 450 FM “U.S.”
01_90 0290 14 43 61_02
Volts 230*/460/60 TRIFASE
ITALIANO
ENGLISH
DISPOSITIVI DI SICUREZZA
SAFETY DEVICES
MOLLA DI RITORNO AUTOMATICO IN POSIZIONE
DI RIPOSO DEL GRUPPO OPERANTE
AUTOMATIC REVERSAL SPRING TO MOVE
THE CUTTING UNIT TO IDLE POSITION
Particolare attenzione deve essere prestata all’efficienza della molla di richiamo del gruppo operante in posizione di riposo (1). Per posizione di riposo si intende che il gruppo
operante sia a fine corsa verso la colonna portante del braccio. Un parziale ritorno da
parte del gruppo può essere causato da i seguenti fattori:
1. La molla interna del dispositivo di richiamo (1) ha perso parzialmente la sua forza. E’
possibile ripristinarla tramite il pomello (2) ruotandolo in senso orario di alcuni giri.
2. Rottura della molla interna del dispositivo di richiamo.
3. Rottura del cavo di traino del gruppo operante.
Pay particular attention to the efficiency of the cutting unit idle position reversal spring (1).
‘Idle position’ means that the cutting unit is at the end of its stroke towards the column.
Failure of the cutting unit to reach the end of its stroke to idle position can be caused by any
of the following situations:
1. The spring inside the reversal device (1) has lost part of its efficiency. You can restore
it to operating condition by turning the knob (2) clockwise a few times.
2. The spring inside the reversal device has broken.
3. The cutting unit cable has broken.
In tutti questi casi è proibito utilizzare la macchina.
In all cases, it is prohibited to use the machine.
1
Pag. 34
2
RN 450 FM “U.S.”
01_90 0290 14 43 61_02
Volts 230*/460/60 TRIFASE
ITALIANO
ENGLISH
COLLEGAMENTO ELETTRICO
ELECTRICAL CONNECTIONS
L’installazione della macchina deve essere eseguita da personale espressamente qualificato, eseguendo tutte le
istruzioni indicate in questo manuale Uso e Manutenzione. La macchina richiede alimentazione con tensione e
frequenza come indicato dalla targhetta applicata sul braccio portante.
Prima di collegare la macchina alla rete di alimentazione elettrica accertarsi che la linea di alimentazione sia provvista
di una messa a terra efficiente. Il punto di collegamento alla fonte di energia dovrà garantire l’esistenza di tutte le
protezioni previste dalle vigenti disposizioni legislative.
The machine must be installed by qualified personnel in accordance to the instructions given in this Use and
Maintenance Manual. The machine’s voltage and frequency requirements, indicated on the nameplate, must
correspond with those of the supply line.
Before connecting the machine to the mains, make sure the power supply line is appropriately earthed. The point of
connection to the source of electric energy must be equipped with all the electrical protections as provided for by
the regulations in force in the country where the machine is installed.
Il cavo di alimentazione della macchina non è fornito di presa di corrente, sarà perciò cura
The power supplycord has no socket; the User must provodea suitable one.
dell’utilizzatore installarne una idonea.
Se fosse necessario l’uso di prolunghe elettriche, controllare che la sezione dei cavi utilizzati sia idonea a sopportare
l’intensità di corrente assorbita dalla macchina, é consigliabile sempre utilizzare prolunghe elettriche più corte
possibile.
If you need to use extension cords, make sure their cross-section is sufficient to withstand the power draw of the
machine. Use as short an extension cord as possible.
Never leave the machine UNATTENDED when it is connected to the mains.
Non lasciare MAI INCUSTODITA la macchina con la presa di corrente collegata alla rete di alimentazione
VERSIONE TRIFASE
THREE-PHASE VERSION
Verificare il corretto senso di rotazione dell’utensile, avviando per un solo istante il motore lama. Il senso corretto di
rotazione dell’utensile é indicato dalla freccia presente sul carter fisso coprilama. Immediatamente dopo, premere
l’interruttore arresto motore lama. Tale operazione deve essere effettuata rapidamente, per evitare che il dado di
bloccaggio si allenti, nel caso di senso di rotazione errato. Qualora si riscontri un errore di cablaggio, invertire due dei
tre fili di collegamento (escluso il file giallo – verde di terra) nel cavo elettrico utilizzato per l’alimentazione dalla rete
alla macchina.
Check that the tool turns in the correct direction by starting the blade motor briefly. The correct direction of rotation
of the tool is shown by the arrow on the blade guard. Press the blade motor stop switch immediately. This operation
must be performed rapidly to prevent the lock nut from slackening if the direction of rotation is incorrect. If a wiring
error is found, swap over two of the three connecting wires (not the yellow/green earth wire).
SPINA DI COLLEGAMENTO ELETTRICO
ELECTRICAL CONNECTING PLUG
Pag. 35
RN 450 FM “U.S.”
01_90 0290 14 43 61_02
Volts 230*/460/60 TRIFASE
ITALIANO
ENGLISH
IMPUGNATURA DI COMANDO
CONTROL HANDGRIP
L’impugnatura di comando è composta da un interruttore a bilanciare con le posizioni
marcia (I) e arresto (O). Fig.1.
The control handle is made up by one 2 position switch where ON is (I) and OFF is
(O).Fig.1.
MANTENERE L’IMPUGNATURA DI COMANDO SEMPRE PULITA, ASCIUTTA ED ESENTE
DA GRASSO O SPORCIZIA.
ALWAYS KEEP THE CONTROL HANDGRIP CLEAN AND DRY WITHOUT GREASE OR DIRT
RESIDUES.
ARRESTO NORMALE
NORMAL STOPPING
L’arresto normale della macchina avviene premendo l’interruttore nella posizione (0). Per
riavviare il motore è necessario premere l’interruttore nella posizione (I).
L’arresto improvviso della macchina è dovuto a due fattori:
1. Black-out elettrico: al ritorno dell’alimentazione per riavviare la macchina è necessa
rio ruotare l’interruttore rotativo (1) prima in posizione 0 e quindi in posizione 1. Fig.2
2. Sovraccarico di tensione è dovuto all’intervento del salvamotore. Il ripristino dell’ali
mentazione elettrica alla macchina si ha ruotando l’interruttore rotativo (1) in posizio
ne 1. Fig.2. Se si dovesse creare questa condizione, si consiglia di verificare i motivi
che hanno causato il sovraccarico.
A normal stop occurs when the switch is flipped to the OFF position (0). To restart the
motor the switch must be flipped back to the ON position (I).
An unforeseen stopping of the machine is due to two factors:
1. Power failures (black-outs): when the power supply returns, to restart the machine
first turn the rotary switch (1) to 0 and then to 1. Fig.2.
2. Voltage overload, caused by the thermal protection tripping. To reset the machine turn
the rotari switch (1) in position 1. Fig. 2. It is also reccomended that possible causes
are investigated
1
0
Fig. 1
Pag. 36
1
Fig. 2
RN 450 FM “U.S.”
01_90 0290 14 43 61_02
Volts 230*/460/60 TRIFASE
ITALIANO
ENGLISH
REGOLAZIONE ALTEZZA BRACCIO
ADJUSTING THE HEIGHT OF THE ARM
Per regolare l’altezza del braccio portante, ruotare la leva di sollevamento (1) in sen- To adjust the height of the support arm, turn the lifting level (1) clockwise or antiso orario o in senso antiorario.
clockwise.
1
Pag. 37
RN 450 FM “U.S.”
01_90 0290 14 43 61_02
Volts 230*/460/60 TRIFASE
ITALIANO
ENGLISH
REGOLAZIONE ANGOLAZIONE DEL BRACCIO
ADJUSTING THE ANGLE OF THE ARM
Per posizionarsi sull’angolazione voluta, allentare la leva a scatto (1) e premere la leva di
sbloccaggio (2) e ruotare il braccio. Un settore graduato inciso sulla copertura telescopica (3) permette di verificare l’angolazione raggiunta nella rotazione. Le posizioni a 0°,
45° dx e 45° sx sono di tipo meccanico autocentrante, mentre tutte le altre angolazioni
sono ottenute tramite il bloccaggio della leva a scatto (1). Al termine della regolazione
ribloccare la leva (1). ATTENZIONE:Prima di iniziare un ciclo di lavoro assicurarsi sempre che la leva a scatto (1) sia sempre bloccata a fondo.
To obtain the correct angle, loosen the spring lever (1), press the release lever (2) and
turn the arm. A scaled sector that is engraved on the telescopic cover (3) allows you to
check the position you have reached. The 0° and 45° positions on the right and the 45° on
the left are of the self-centring kind, whereas all the other positions are obtained by
locking the spring lever(1). After adjusting relock the spring lever (1). ATTENTION: before starting a cutting cycle, make sure the lever (1) is firmly locked.
1
3
Pag. 38
2
RN 450 FM “U.S.”
01_90 0290 14 43 61_02
Volts 230*/460/60 TRIFASE
ITALIANO
ENGLISH
REGOLAZIONE INCLINAZIONE LAMA
ADJUSTING THE INCLINATION OF THEBLADE
La lama può assumere una inclinazione rispetto al piano di lavoro da: 0° e 45° sx e tutte
le angolazioni intermedie. Le angolazioni a 0°, e a 45° sono di tipo autocentrante, mentre
per quelle intermedie è necessario bloccare la leva a scatto (1). Per regolarne l’inclinazione allentare la leva a scatto (1), tirare la leva (2). Ruotare il motore – lama sull’angolo
voluto visibile sul settore graduato (3). Ribloccare la leva a scatto (1).
ATTENZIONE: Prima di iniziare un ciclo di lavoro assicurarsi sempre che la leva a scatto
(1) sia sempre bloccata a fondo.
The blade can have the following inclinations with respect to the work bench: 0° and 45°
on the left and all intermediate angles. The 0° and 45° positions are of the self-centring
type; whereas to obtain the intermediate ones you will have to lock the lever (1). To adjust
the inclination, loosen the spring lever (1), pull the release lever (2). Turn the blade motor
unit to the requested position that can be checked on the scaled sector (3). Relock the
lever (1).
ATTENTION: before starting a cutting cycle, make sure the lever (1) is firmly locked.
2
1
3
Pag. 39
RN 450 FM “U.S.”
01_90 0290 14 43 61_02
Volts 230*/460/60 TRIFASE
ITALIANO
ENGLISH
REGOLAZIONE ROTAZIONE GRUPPO OPERANTE
ROTATING THE CUTTING UNIT
Il gruppo operante può ruotare rispetto al braccio portante sia dx che a sx. In questo modo
si può lavorare in posizione di rifilatura, avendo come riferimento longitudinale la sponda
di appoggio. Tale riferimento è leggibile sulla riga graduata in pollici situata sul braccio
portante. Per ruotare il gruppo tirare verso di se la leva (1) in modo da sganciare il gruppo
dalla slitta. Spingere verso il basso la leva (2) e ruotare il gruppo a dx (posizione di
rifilatura esterna) o a sx (posizione di rifilatura interna). Il bloccaggio è autocentrante su
entrambe le angolazioni. Al termine della regolazione ribloccare la leva (1).
The cutting unit can be rotated 90 degrees toward the left or the right. This is to allow the
ripping position to have a cross reference with respect to the fence. The reference position
can be read on the inch scale on the side of the arm. To rotate the unit pull lever (1) to
unlock the unit from the bearing slide. Push down on lever (2) and rotate the unit clock or
counterclockwise. The positive stop will automatically lock the motor in place when it
reaches perpendicularity with the fence. At the end of the rotation lock lever (1) back in
place.
I
RIFILATURA ESTERNA
GB SAW BLADE TURNED OUTSIDE
1
2
Pag. 40
RIFILATURA INTERNA
SAW BLADE TURNED INSIDE
RN 450 FM “U.S.”
01_90 0290 14 43 61_02
Volts 230*/460/60 TRIFASE
ITALIANO
ENGLISH
UTILIZZO DELLA MACCHINA
USING THE MACHINE
CONTROLLI PRELIMINARI GENERALI
GENERAL PRELIMINARY CHECKS
Prima di iniziare il ciclo di lavoro è necessario verificare i seguenti punti:
Before starting the work cycle, carry out the following checks:
1.
2.
3.
4.
5.
6.
1.
2.
3.
4.
5.
6.
L’effettivo collegamento elettrico della macchina.
Verificare la corretta angolazione del braccio portante.
Verificare la corretta inclinazione del gruppo motore.
Verificare la corretta altezza di taglio.
Assicurarsi che tutte le leve di bloccaggio manuale siano serrate.
Assicurarsi dell’effettiva affilatura della lama.
Make sure that the machine is correctly connected to the electrical power supply.
Check the correct angle of the support arm.
Make sure the inclination of the motor unit is correct.
Make sure the cutting height is correct.
Make sure all locking levers are tightened.
Make sure the blades are sharpened.
UTILIZZO PER TAGLI TRASVERSALI
CROSS CUTTING
Eseguiti i controlli preliminari procedere come segue:
1. Appoggiare il pezzo da tagliare a ridosso della sponda di appoggio (1) Fig. 1, possibilmente con il lato maggiore a contatto con il tavolo di lavoro.
2. Premere l’interruttore di accensione motore – lama (2). Fig. 1
3. Tirare verso di se il gruppo operante fino al completamento dell’operazione di taglio.
ATTENZIONE: Una maggior trazione sull’impugnatura di comando non provoca una
maggior velocità di taglio. Si deve mantenere salda la presa sull’impugnatura in modo
che sia la forza del braccio dell’operatore a dare la giusta velocità di avanzamento.
Altrimenti la rotazione della lama, combinata con l’avanzamento può provocare il
bloccaggio della lama nel taglio stesso.
4. Finita l’operazione di taglio accompagnare il gruppo operante in posizione di riposo.
Fig. 3.
5. Premere l’interruttore (2) per arrestare motore.
6. Rimuovere i pezzi tagliati e procedere ad un’altra lavorazione.
After carrying out these checks, proceed as follows:
1. Place the piece to cut against the fence (1) Fig. 1. Its wider surface should preferably be
resting on the work bench.
2. Press the switch blade motor start button (2) Fig. 2
3. Pull the cutting unit towards yourself until the cut is complete. ATTENTION: pulling the
control handle more does not increase the cutting speed. Keep a firm hold of the handle
to guide the cutting unit forward and obtain a correct working speed, otherwise the
spinning movement of the blade combined with the movement forwards may cause
the blade to block.
4. After the cut has been completed, guide the cutting unit to its idle position. Fig. 4.
5. Press switch (2) for stop the blade-motor (4), Fig. 3.
6. Remove the cut pieces and start another cut.
IMPORTANT:
IMPORTANTE:
PER PERIODI DI INATTIVITÀ, ANCHE SOLAMENTE DI POCHE ORE, SI CONSIGLIA DI ISOLARE LA
DURING INACTIVITY PERIODS IT IS RECOMMENDED TO INSULATE THE MACHINE FROM THE MAIN
MACCHINA DAL CIRCUITO DI ALIMENTAZIONE ELETTRICA E L’INSERIMENTO DEL BLOCCAGGIO
LINE POWER AND TO UTILIZE THE MANUAL LOCKING SYSTEM OF THE OPERATING UNIT. SEE PAGE
MANUALE GRUPPO OPERANTE. PAG. 18 N.12
18 N.12
Pag. 41
RN 450 FM “U.S.”
01_90 0290 14 43 61_02
Volts 230*/460/60 TRIFASE
ITALIANO
ENGLISH
UTILIZZO DELLA MACCHINA
USING THE MACHINE
1
Fig. 1
2
Fig. 2
Pag. 42
Fig.3
RN 450 FM “U.S.”
01_90 0290 14 43 61_02
Volts 230*/460/60 TRIFASE
ITALIANO
ENGLISH
UTILIZZO DELLA MACCHINA
USING THE MACHINE
UTILIZZO PER TAGLI LONGITUDINALI
USING FOR RIPPING CUTTING
I tagli longitudinali possono avvenire con il gruppo operante in posizione di rifilatura Boards might be ripped with the saw blade turn inside or outside depending on the
esterna o interna a seconda delle larghezze che si vogliono eseguire.
ripping width.
Rifilatura interna: Permette di avere tagli fino ad un massimo di 10” e 45/64
Rifilatura esterna: Tramite questa rifilatura si possono eseguire tagli da un minimo di 4”
e 29/64 ad un massimo di 23” e 19/64.
Se si volessero raggiungere lunghezze di taglio maggiori, è possibile spostare la sponda
di appoggio (6) Fig.6 dalla posizione A alla posizione B. In questo caso si aumenta di 5”
5/16 la misura indicata sulla riga posta sul braccio portante. Per spostare la sponda
allentare i due pomelli (8), Togliere la sponda (6) e spingere il controtavolo (7) verso il
tavolo di lavoro. Posizionare la sponda come in Fig. 6 B e serrare a fondo i pomelli (8).
Saw blade turned inside: This position allows for a maximum cutting width of 10” 45/64
Saw blade turned outside: In this position the ripping width might be between 4” 29/64
and 23” 19/64 .
Per eseguire un taglio longitudinale seguire le istruzioni:
For cross ripping operation, follow these instructions:
1. Execute all the preliminary controls as per page 41.
2. Pull the lever (1) Fig. 1. Now the operating unit is free to move
3. Push down on lever (2) and turn the motor clockwise or counterclockwise
depending if you want to have the saw blade toward the inside or outside.
4. Position the operating unit on the desired ripping width. WARNING: the ripping width
can be read on the inch scale on the side of the arm. This scale is split in two
sections. The top section is to be used if the saw blade has been turned toward the
inside (fence) and the bottom section if the saw blade has been turned toward the
outside (operator). See also Fig. 3.
5. Lock the knob (3) Fig 4. and adjust the side guards (4) Fig. 3
6. Push the ON switch (4 Fig. 5.
7. Insert the piece to be cut against saw blade rotation and push it uniformly till cut is
completed.
8. Push the OFF switch (5) Fig. 5. Repeat steps 1 trough 8 for the next cutting cycle
1.
2.
3.
4.
5.
6.
7.
8.
Eseguire i controlli preliminari generali di pag. 41.
Tirare verso di se la leva (1) Fig. 1. In questo modo si libera il gruppo motore dalla
slitta.
Spingere verso il basso la leva (2) e ruotare il motore a dx o sx secondo se si vuole
eseguire un taglio di rifilatura interna o esterna. Fig. 5.
Posizionare il gruppo operante sulla misura voluta. ATTENZIONE: La misura del
taglio la si può leggere sulla riga graduata in pollici posta sul braccio portante. Tale
riga è divisa in due parti: quella superiore che identifica le misure eseguite con il
gruppo operante in posizione di rifilatura interna e quella inferiore che identifica le
misure eseguite con il gruppo in posizione di rifilatura esterna. Fig. 3.
Bloccare il pomello (3) Fig. 4 .
Premere il pulsante marcia motore-lama (4). Fig. 5.
Inserire il pezzo da tagliare in senso opposto alla rotazione della lama ed accompagnarlo fino alla fine del taglio tramite un attrezzo spingilegno (non in dotazione).
Premere il pulsante arresto motore-lama (5) Fig. 5 e ripetere le operazioni per un
altro ciclo di lavoro.
Should larger widths are required it is possible to reposition the fence (6) see Fig 6
from position A to position B. This way the reference on the inch scale on the arm will be
lost. To reposition the fence loosen the two knobs (8), remove the fence (6) and push
the counter table against the main wooden table. Position the fence as per Fig. 6B and
tighten the two knobs (8).
IMPORTANT:
IMPORTANTE:
PER PERIODI DI INATTIVITÀ, ANCHE SOLAMENTE DI POCHE ORE, SI CONSIGLIA DI ISOLARE LA
DURING INACTIVITY PERIODS IT IS RECOMMENDED TO INSULATE THE MACHINE FROM THE MAIN
MACCHINA DAL CIRCUITO DI ALIMENTAZIONE ELETTRICA E L’INSERIMENTO DEL BLOCCAGGIO
LINE POWER AND TO UTILIZE THE MANUAL LOCKING SYSTEM OF THE OPERATING UNIT. SEE PAGE
MANUALE GRUPPO OPERANTE. PAG. 18 N.12
18 N.12
Pag. 43
RN 450 FM “U.S.”
Volts 230*/460/60 TRIFASE
01_90 0290 14 43 61_02
ITALIANO
ENGLISH
UTILIZZO DELLA MACCHINA
USING THE MACHINE
2
1
Fig. 1
Fig. 2
Fig. 3
7
A
3
4
B
5
Fig. 4
Pag. 44
Fig. 5
2
Fig. 6
8
9
RN 450 FM “U.S.”
Volts 230*/460/60 TRIFASE
01_90 0290 14 43 61_02
ITALIANO
ENGLISH
OPERAZIONI DI MANUTENZIONE
MAINTENANCE OPERATIONS
UTENSILI
TOOLS
La perdita di prestazioni di taglio negli utensili é da imputare principalmente a tre importanti fattori,
quali:
1. Le incrostazioni superficiali.
2. Le alterazioni della forma e della struttura del tagliente.
3. L’usura normale del tagliente.
Le incrostazioni superficiali sono causate da resine presenti nel legno e che, per surriscaldamento
aderiscono alla superficie del tagliente formando una patina che integra i trucioli, impedendone il loro
deflusso regolare. Si rende cosi necessario eseguire almeno ogni settimana la pulizia delle lame
utilizzando solventi capaci di ammorbidire questi grumi. Si consiglia di ricorrere il meno possibile ad
interventi meccanici di scrostatura mediante l’utilizzo di lamine metalliche, spatole o abrasivi di
qualsiasi genere. Liquidi idonei allo scopo si trovano in commercio, si può utilizzare anche una
soluzione di acqua e soda caustica (molto diluita). Non si faccia mai ricorso a soluzioni acide, che
possono sviluppare vapori infiammabili oppure vapori tossici.
Le alterazioni della forma e della struttura del tagliente sono dovute principalmente a rotture localizzate, piccole incrinature o deformazioni localizzate. Bisogna prestarvi molta attenzione poiché
pregiudicano l’idoneità dell’utensile a proseguire la lavorazione.
L’usura normale del tagliente é causata da un arrotondamento dovuto al ripetersi continuo di penetrazioni
nel legno. Per risolvere questo problema é necessario procedere senza indugiare all’operazione di
affilatura. Essa ha lo scopo di ripristinare la geometria esatta del tagliente.
VERIFICHE QUOTIDIANE
There are three main factors which impair cutting performance:
1. Surface encrustation.
2. Alteration of the shape or structure of the cutting edges.
3. Normal wear.
Surface encrustation is caused by the presence of resin in the wood which, when heated by the
action of the blade, forms a patina to which wood particles become stuck. Blades should be cleaned
at least once a week using solvents capable of softening this patina. The use of mechanical means
to remove the encrustation, such as metal blades, spatulas or abrasives of any type, should be
avoided if possible. Commercial cleaning liquids specifically for this purpose are available; alternatively
a weak solution of water and caustic soda may be used. Never use acid solutions, as they can
produce flammable and toxic vapours.
Alterations to the shape or structure of the cutting edges are mainly due to local fractures, small
cracks or local deformation. Tools with any such defects must not be used.
The normal wear of the cutting edge is caused by rounding through the repeated penetration of the
tool in the wood. Worn tools must be sharpened correctly to restore the correct geometry of the
cutting edges.
DAILY CHECKS
1. Clean the seat of the tool.
1. Pulizia dell’alloggiamento dell’utensile.
PERSONNEL:
PERSONALE:
Qualified operator.
Operatore specializzato.
2. Pulizia generale del piano di lavoro.
2. General cleaning of the table.
PERSONALE:
PERSONNEL:
Operatore macchina.
Machine operator.
3. Verifica dell’efficienza dei dispositivi di sicurezza (vedi pag. 30).
3. Check the efficiency of the safety devices (pag. 30).
PERSONALE:
PERSONNEL:
Operatore specializzato.
Qualified operator.
4. Accertarsi che, al ritorno dell’energia elettrica, la macchina non si rimetta in moto senza comandi 4. Make sure that when the power supply returns the machine does not start unless a voluntary
volontari.
command has been provided.
PERSONALE:
PERSONNEL:
Operatore specializzato.
Qualified operator.
5. Controllo del tagliente della lama.
5. Check the blade.
PERSONALE:
PERSONNEL:
Qualified operator.
Operatore specializzato.
Pag. 45
RN 450 FM “U.S.”
01_90 0290 14 43 61_02
ITALIANO
ENGLISH
OPERAZIONI DI MANUTENZIONE
MAINTENANCE OPERATIONS
VERIFICHE MENSILI
MONTHLY CHECKS
1. Sostituzione della lama.
PERSONALE:
Operatore specializzato.
2. Pulizia con getto d’aria o pennello asciutto delle lamine di scorrimento e dei cuscinetti per il moto
trasversale del gruppo motore.
PERSONALE:
Operatore specializzato.
3. Controllo cavo di alimentazione elettrica.
PERSONALE:
Operatore specializzato.
4. Controllo efficienza del freno motore.
PERSONALE:
Operatore specializzato.
VERIFICHE SEMESTRALI
1. Controllo a vista dello stato dei dispositivi elettrici e loro pulizia generale.
PERSONALE:
Operatore specializzato.
Pag. 46
Volts 230*/460/60 TRIFASE
1. Replacing blade.
PERSONNEL:
Qualified operator.
2. Clean the guides and bearings for the transverse movements of the motor unit with air or a
clean paintbrush.
PERSONNEL:
Qualified operator.
3. Checking electric power supply cable.
PERSONNEL:
Qualified operator.
4. Checking the brake motor.
PERSONALE:
Qualified operator.
EVERY SIX MONTHS
1. Carry out a visual check of the electrical devices and clean them.
PERSONNEL:
Qualified operator.
RN 450 FM “U.S.”
01_90 0290 14 43 61_02
Volts 230*/460/60 TRIFASE
ITALIANO
ENGLISH
SOSTITUZIONE LAMA
REPLACING THE BLADE
!
Per eseguire il corretto montaggio della lama procedere come descritto di seguito:
1. Rimuovere l’anello benzing (1) tramite il cacciavite, in modo da separare le 2 protezioni laterali dx Fig. 1.
2. Con chiave a tubo CH 17 asportare il dado di bloccaggio e la rondella che tengono
fissato il carter coprilama al motore. Fig. 2. Asportare il carter coprilama.
3. Con chiave CH 32 (2) e Allen 8 mm (3), smontare il dado di serraggio e la flangia
esterna. Fig. 3.
4. Inserire la lama sul mandrino. Inserire la flangia esterna ed il dado di serraggio.
ATTENZIONE: La faccia del dado di serraggio a contatto con la flangia esterna deve
essere sempre la stessa. Ribloccare a fondo il tutto. Fig. 4.
To correctly assemble the blade:
1. Remove the Benzing ring (1) by means of the screwdriver, in order to separate the 2
right hand guards, Fig. 1.
2. Using a CH 17 socket wrench remove the nut and washer that secure the blade
casing to the motor. Fig. 2. Remove the blade casing.
3. Using a CH 32 wrench (2) and an 8 mm Allen wrench (3), remove the fixing nut and
outer flange. Fig. 3.
4. Fit the blade onto the chuck. Fit the outer flange and fixing nut.
ATTENTION: the
surface of the nut coming into contact with the outer flange must always be the same.
Wrench down. Fig. 4.
L’utensile utilizzato deve avere la caratteristiche descritte a pagina 20. Si raccomanda
l’utilizzo di guanti di protezione durante l’esecuzione dell’operazione di inserimento lama.
Accertarsi del corretto inserimento, relativamente al senso di rotazione, come indicata
dalla freccia presente sul carter coprilama.
The tool used must have the features described on page 20. The use of protective gloves
during the blade fitting operations is highly recommended. Make sure the blade has
been correctly fitted and that it runs in the right direction, as indicated by the arrow on the
blade casing.
ATTENZIONE: Prima di eseguire il montaggio della flangia esterna verificare l’assoluta
pulizia della stessa. Verificare l’assenza di grasso oppure di lubrificante tra la lama e le
due flange di bloccaggio.
5. Rimontare la rondella e con chiave a tubo CH 17 rimontare il dado di bloccaggio del
carter coprilama. Bloccare il tutto a fondo.
6. Riagganciare le 2 protezioni laterali dx tramite il relativo perno e l’anello benzing. Fig.
6.
Si raccomanda l’utilizzo di guanti di protezione durante l’esecuzione dell’operazione di
inserimento lama. Quando si rimonta la lama accertarsi del corretto inserimento, relativamente al senso di rotazione, come indicato nell’apposita freccia presente sul carter
coprilama. Controllare, inoltre, tassativamente che il diametro esterno e il diametro interno dell’utensile corrispondano a quelli indicati nella apposita targa. Verificare che l’albero
portautensile e la flangia di serraggio esterna siano esenti da grasso e/o olio.
IMPORTANT: before fitting the outer flange, make sure it is perfectly clean. Make sure
there are no traces of grease or lubricant between the blade and the fixing flanges.
5. Refit the washer and, with a CH 17 socket wrench, refit the blade casing fixing nut.
Wrench down.
6. Refit the 2 right hand side guards with the pin and the Benzing ring. Fig. 6.
Operators must wear protective gloves when they are fitting tools. Make sure the tool
isproperly fitted and that it turns in the right direction, as shown by the arrow on the blade
guard. Furthermore, ensure that the outer and inner diameters of the tool correspond to
those indicated on the plate. Make sure the arbor and outer fixing flange are free of
grease and/or oil.
Pag. 47
RN 450 FM “U.S.”
Volts 230*/460/60 TRIFASE
01_90 0290 14 43 61_02
ITALIANO
ENGLISH
MONTAGGIO DELLA LAMA
ASSEMBLY OF THE BLADE
2
3
1
Fig. 1
Fig. 4
Pag. 48
Fig. 2
Fig. 5
Fig. 3
Fig. 6
RN 450 FM “U.S.”
Volts 230*/460/60 TRIFASE
01_90 0290 14 43 61_02
ITALIANO
ENGLISH
CONTROLLI DI ASSETTO
SET-UP CHECKS
PARALLELISMO TRA LE CORSIE DI SCORRIMENTO E LA LAMA
PARALLELISM BETWEEN THE GUIDES AND BLADE
ATTENZIONE: Questi controlli devono essere eseguiti, IN ASSENZA DI ALIMENTAZIONE ELET- ATTENTION: These checks must be effected WITH THE POWER SUPPLY DISCONNECTED.
TRICA.
This check is carried out by putting a test piece onto the work bench and letting the cutting unit run from
Questo controllo si esegue ponendo sul piano di lavoro un riscontro in prossimità della lama; e facendo one end of the test piece to the other. Fig. 1. If you notice a difference between points 1 and 2, loosen
scorrere il gruppo operante da un’estremità all’altra del riscontro stesso. Fig. 1. Se si rileva una the lever (1) Fig. 2. Use the CH 32 wrench to loosen the locknut (2). Adjust by means of the eccentric
differenza tra i punti 1 e 2, allentare la leva (1) Fig. 2. Utilizzando una chiave CH 32 allentare il bushing (3); turn it in one direction or the other until the difference between the two points has been
controdado (2). Procedere alla regolazione tramite la boccola eccentrica (3) ruotandola in un senso o eliminated. Fig. 1. If the blade is not parallel to the guides it goes subject to a considerable friction that
nell’altro fino ad annullare la differenza fra i due punti. Fig. 1. Se la lama non è parallela alle corsie di compromises its efficiency and adversely affects the quality of the cut. After adjusting retighten the
scorrimento è sottoposta ad un notevole attrito, che ne pregiudica il buon funzionamento e, di conse- locknut (2) and the lever (1).
guenza la qualità del taglio effettuato. Finita la regolazione Ribloccare a fondo il controdado (2) e la leva
(1).
2
Fig. 1
3
1
Fig. 2
Pag. 49
RN 450 FM “U.S.”
01_90 0290 14 43 61_02
Volts 230*/460/60 TRIFASE
ITALIANO
ENGLISH
CONTROLLI DI ASSETTO
SET-UP CHECKS
REGOLAZIONE ANGOLO LAMA 45°
ATTENZIONE: Questi controlli devono essere eseguiti, IN ASSENZA DI ALIMENTAZIONE ELETTRICA.
Allentare la leva a scatto (1). Mantenendo in trazione la levetta (2) inclinare il motore sull’angolazione
a 45° Fig. 1 e 2. Rilasciando la levetta (2) il motore rimarrà bloccato in questa posizione. Tagliare due
listelli e verificare con una squadretta a 90° l’angolo ottenuto Fig. 3. Se si dovessero riscontrare delle
anomalie si dovrà procedere alla regolazione: allentare il controdado (3) Fig. 2 con chiave CH 32 e
ruotare la boccola eccentrica (4) (chiave CH 32) in un senso o nell’altro fino ad ottenere l’esatta
regolazione. A regolazione ultimata riavvitare il controdado (3).
45° BLADE ADJUSTMENT
ATTENTION: These checks must be effected WITH THE POWER SUPPLY DISCONNECTED.
Loosen the spring lever (1). While pulling the small lever (2) tilt the motor to its 45° position, Fig. 1 and
2. Release the small lever (2) and the motor will stay locked in this position. Cut two strips and using
a 90° square check the angle obtained, Fig. 3. If you notice it is not correct, you will have to make the
necessary adjustments: loosen the locknut (3), Fig. 2, with the CH 32 wrench and turn the eccentric
bushing (4) (CH 32 wrench) in one direction or the other until the adjustment has been made. After
adjusting, retighten the locknut (3).
Prima di effettuare l’inclinazione della lama sollevare il braccio portante.
1
Fig. 1
Pag. 50
2
Before tilting the blade, raise the support arm.
4
Fig. 2
3
Fig. 3
RN 450 FM “U.S.”
01_90 0290 14 43 61_02
Volts 230*/460/60 TRIFASE
ITALIANO
ENGLISH
CONTROLLI DI ASSETTO
SET-UP CHECKS
PERPENDICOLARITÀ DELLA LAMA SUL PIANO DI LAVORO
PERPENDICULARITY OF THE BLADE WITH RESPECT TO THE WORK BENCH
ATTENZIONE: Questi controlli devono essere eseguiti, IN ASSENZA DI ALIMENTAZIONE ELETTRICA.
Posizionare una squadretta a 90° a contatto della lama e verificarne la perpendicolarità. Fig. 1. Se
fosse necessario fare delle regolazioni allentare la vite (1) tramite chiave Allen 4 mm. Fig. 2. Tramite
un punteruolo con diametro non superiore a 4 mm inserirlo nel foro (2). Così facendo si ha la
possibilità; muovendo a destra o a sinistra il punteruolo di regolare il tamburino (3) Fig. 3. situato
all’interno della carcassa motore; fino al raggiungimento dell’esatta perpendicolarità. Eseguita la
regolazione, è necessario riavvitare a fondo la vite (1).
ATTENTION: these checks must be effected WITH THE POWER SUPPLY DISCONNECTED.
Place a 90° square against the blade and check its perpendicularity. Fig. 1. If you need to make any
adjustments, loosen the screw (1) with the 4 mm Allen wrench. Fig. 2. Insert a punch with a diameter
of 4 mm at the most into the hole (2). Turn the punch rightwards or leftwards to adjust the drum (3)
Fig. 3, located inside the motor frame until the blade is perpendicular to the work bench. After
adjusting, firmly tighten down the screw (1).
3
2
1
Fig. 1
Fig. 2
Fig. 3
Pag. 51
RN 450 FM “U.S.”
01_90 0290 14 43 61_02
Volts 230*/460/60 TRIFASE
ITALIANO
ENGLISH
CONTROLLI DI ASSETTO
SET-UP CHECKS
REGISTRAZIONE DEL BRACCIO RISPETTO ALLA SPONDA DI APPOGGIO
90° ADJUSTMENT OF THE ARM WITH RESPECT TO THE FENCE
ATTENZIONE: Questi controlli devono essere eseguiti, IN ASSENZA DI ALIMENTAZIONE ELET- ATTENTION: These checks must be effected WITH THE POWER SUPPLY DISCONNECTED.
TRICA.
To check whether the arm forms a right angle with the fence, use a 90° square. Place the square as
Per verificare l’ortogonalità del braccio rispetto alla sponda di appoggio, è necessario usare come shown in Fig. 1. Loosen the spring lever (1) and the screw (2) and lower the telescopic cover (3).
riscontro una squadretta di controllo a 90°. Appoggiare la squadretta come in Fig. 1. Allentare la leva Loosen the screw (4) and turn the arm until you obtain the right position but do not use the release
a scatto (1) e la vite (2) ed abbassare la copertura telescopica (3). Allentare la vite (4) e ruotare il lever (page 18 N. 6). Adjust and retighten the screw (4); refit the telescopic cover (3) paying attention
braccio fino ad ottenere la posizione corretta senza utilizzare la leva di sbloccaggio (pag. 18 N. 6). to match the “0” with the arrow engraved on the arm connection.
Effettuata la regolazione, riavvitare la vite (4) e rimontare la protezione telescopica (3) avendo cura
di posizionare lo “0” di essa in corrispondenza della freccia incisa sull’attacco braccio.
1
4
3
2
Fig. 1
Pag. 52
Fig. 2
Fig. 3
RN 450 FM “U.S.”
01_90 0290 14 43 61_02
Volts 230*/460/60 TRIFASE
ITALIANO
ENGLISH
CONTROLLI DI ASSETTO
SET-UP CHECKS
REGISTRAZIONE DEL GRUPPO OPERANTE SULLE CORSIE DI SCORRIMENTO
ADJUSTING THE POSITION OF THE CUTTING UNIT ON THE GUIDES
ATTENZIONE: Questi controlli devono essere eseguiti, IN ASSENZA DI ALIMENTAZIONE ELETTRICA.
Questo tipo di regolazione va effettuato qualora si dovesse notare un taglio non rettilineo
nella massima larghezza.
Il gruppo operante scorre su otto cuscinetti, i quali sono montati su altrettanti perni. Per
avere una regolazione del gioco esistente tra il gruppo operante e le corsie di scorrimento, le 4 sedi dei cuscinetti inferiori sono eccentriche, in modo da poter essere regolate. Per
eliminare l’eventuale gioco esistente, procedere come segue:
1. Togliere la testa anteriore (1) svitando le due viti di fissaggio (2) tramite chiave da 4
mm. Fig.1
2. Sollevare il tirante (3) ed estrarre la leva sbloccaggio braccio (4). Fig. 2.
3. Estrarre il gruppo operante ed allentare le viti (5) tramite una chiave Allen 3 mm. (non
in dotazione). Fig. 3.
4. Inserire nuovamente il gruppo operante nelle corsie di scorrimento e ruotare i perni (6)
con chiave Allen 6 mm in un senso o nell’altro fino ad ottenere lo scorrimento ottimale
del gruppo Fig. 4 e 5. Una eccessiva resistenza allo scorrimento può causare una
rapida usura delle lamine o una rottura dei cuscinetti. Mentre la presenza di notevole
gioco ne compromette la precisione di lavorazione.
5. Al termine della regolazione estrarre di nuovo il gruppo operante per ribloccare le viti
(5). Fig. 3.
6. Inserire di nuovo il gruppo operante nelle corsie di scorrimento e rimontare la leva di
sbloccaggio braccio (4). Rimontare la testa anteriore (1) e riavvitare le due viti (2). Fig.
6.
Eseguire un taglio di massima larghezza e verificarne se le ondulazioni sono scomparse.
ATTENTION: these checks must be effected WITH THE POWER SUPPLY DISCONNECTED.
This type of adjustment must be carried out if you notice that the cut does not run straight
along the whole width of the piece.
The cutting unit runs on eight bearings that are in turn mounted on eight pins. To adjust
the clearance between the cutting unit and guide, the four bearing seats are eccentric to
enable adjustment. To eliminate any clearance, proceed as follows:
1. Remove the front head (1) by loosening the two fixing nuts (2) with a 4 mm Allen
wrench. Fig. 1
2. Lift tie-rod (3) and remove the arm release lever (4). Fig. 2.
3. Remove the cutting unit and loosen the screws (5) with a 3 mm Allen wrench (not
supplied). Fig. 3.
4. Fit the cutting unit back into the guides and turn the pins (6) with a 6 mm Allen wrench
in one direction or the other until the unit is running smoothly, Fig. 4 and 5. An excessive resistance to the sliding movement may cause the guides to wear out rapidly or
break the bearings. Whereas an excessive clearance can compromise accuracy.
5. After adjusting take the cutting unit out again to tighten the screws (5). Fig. 3.
6. Fit the cutting unit back into the guides and refit the arm locking lever (4). Refit the front
head (1) and fit back the two screws (2). Fig. 6.
Carry out a cut on the widest board possible and check if the cut is straight.
Pag. 53
RN 450 FM “U.S.”
01_90 0290 14 43 61_02
Volts 230*/460/60 TRIFASE
ITALIANO
ENGLISH
CONTROLLI DI ASSETTO
SET-UP CHECKS
REGISTRAZIONE DEL GRUPPO OPERANTE SULLE CORSIE
DI SCORRIMENTO
ADJUSTING THE POSITION OF THE CUTTING UNIT
ON THE GUIDES
1
3
2
4
6
5
Fig. 1
Fig. 2
Fig. 3
1
4
6
6
Fig. 4
Pag. 54
Fig. 5
Fig. 6
RN 450 FM “U.S.”
01_90 0290 14 43 61_02
ITALIANO
ENGLISH
CONTROLLI DI ASSETTO
SET-UP CHECKS
REGOLAZIONE DEL FRENO ELETTROMECCANICO
ADJUSTING THE ELECTROMAGNETIC MOTOR BRAKE.
ATTENZIONE: Questi controlli devono essere eseguiti, IN ASSENZA DI ALIMENTAZIONE ELETTRICA.
Questa regolazione va effettuata qualora il freno elettromeccanico presenti i seguenti difetti:
1. Il tempo di frenatura del motore è maggiore di 10 sec.
2. In fase di avviamento il freno non si sgancia in modo completo, bloccando la libera rotazione del
motore.
In entrambi i casi procedere come descritto:
1. Asportare la calotta ventola del motore (1), smontando le tre viti presenti su di essa tramite il
cacciavite in dotazione.
2. Inserire la lamina 0,2 mm presente nella busta chiavi tra l’elettromagnete (2) e l’ancora mobile (3)
in corrispondenza di uno dei tre dadi (5). Avvitare
tale dado fino a quando la lamina rimane inserita tra i due corpi senza gioco. Rifare l’operazione per i restanti due dadi. Controllare,
con il motore avviato, che il disco ferodo (4) ruoti agevolmente senza toccare sulle pareti
adiacenti ad esso.
3. Rimontare la calotta ventola e le tre viti.
4
3
Volts 230*/460/60 TRIFASE
ATTENTION: these checks must be effected WITH THE POWER SUPPLY DISCONNECTED.
This procedure is only necessary if the brake presents the following inefficiencies:
1. After switch OFF, the saw blade takes longer than 10 seconds to come to a complete stop
2. When the motor is switched ON the brake does not unlatch completely preventing the free
rotation of the saw blade.
In both cases proceed as follows:
1. Remove the motor fan cover (1) by loosening the 3 screws with a Philips screw driver.
2. Insert the 0.2 mm shim (included) between the magnetic coil (2) and the movable latch (3) on
one of the 3 jam nuts (5). Jam the shim by tightening the nut. Repeat the operation for the 2
remaining nuts. Verify, with the motor running, that the brake rotor (4) spins freely.
3. Return the fan cover to its original location and secure it with the 3 screws.
2
5
1
Pag. 55
RN 450 FM “U.S.”
01_90 0290 14 43 61_02
Volts 230*/460/60 TRIFASE
ITALIANO
ENGLISH
SCHEMA ELETTRICO 230/60 TRI
ELECTRICAL DIAGRAM 230/60 TRI
Se si volesse cambiare il votaggio a 230/460*/60 TRI vedere PAG. 58
If you wish to change voltage into 230/460*/60 Hz 3 phase see page 58:
La macchina collegata a 23*/460/60 TRI monta:
- Salvamotore magnetotermico da 9 - 14 Amps, regolato a 9,5 Amps
- Bobina di minima tensione da 230 V.
The machine connected 230*/460/60 3 phase is complete with:
- 9-14 Amps thermal overload and no volt motor protection, set at 9,5 Amps
- 230 V coil of minimum tension
Pag. 56
RN 450 FM “U.S.”
01_90 0290 14 43 61_02
Volts 230*/460/60 TRIFASE
ITALIANO
ENGLISH
SCHEMA ELETTRICO 460/60 TRI
ELECTRICAL DIAGRAM 460/60 TRI
Per cambiare il voltaggio da 230/60 a 460/60 procedere come segue:
1.
Cambiare secondo lo schema sottostante i collegamenti della scatola morsettiera.
2.
Installare il trasformatore cd. 82082069000 come mostrato in figura 1 , scollegare il diodo
dalla scatola morsettiera nei punti R eT (Vedi schema a pagina 57), ricollegarlo nei punti 1 e 2
del traformatore (Vedi schema sottostante).
3.
Collegare i punti R, T della morsettiera con i punti U,W del trasformatore.
4.
Sostituire il salvamotore magnetotermico e la bobina di minima tensione con:
- Salvamotore magnetotermico da 4– 6 Amps, Regolato a 4,5 Amps.
- Bobina di minima tensione da 460 V.
To change voltage from 230/60 into 460/60, proceed as follows:
1. Change connections into the terminal board according the below mentioned diagram
2. Fit capacitor cod 82082069000 as shown in picture n. 1, disconnect the diode into
the terminal board connected at pins R end T (see diagram at page 57) and
connect it to pins 1 and 2 of the transformer (see below mentioned diagram)
3. Connect pins R and T inside the terminal board with pins U and W of the transformer
4. replace the thermal overload and no volt motor protection and the coil of minimum tension
by:
- 4-6Amps thermal overload and no volt motor protection, set at 4,5 Amps
- 460 V coil of minimum tension.
cod. 820820690000
Fig. 1
Pag. 57
RN 450 FM “U.S.”
01_90 0290 14 43 61_02
PARTI DI RICAMBIO
SPARE PARTS
Pag. 58
Volts 230*/460/60 TRIFASE
RN 450 FM “U.S.”
01_90 0290 14 43 61_02
Volts 230*/460/60 TRIFASE
ITALIANO
ENGLISH
PARTI DI RICAMBIO
SPARE PARTS
In ogni pagina del capitolo “Parti di ricambio” sono individuate le parti principali d’ogni
gruppo della macchina. Tali parti sono indicate univocamente da un numero progressivo. Nella tabella sottostante le fotografie, sono indicati tali numeri, i codici e una
breve descrizione delle parti corrispondenti ai numeri menzionati nelle fotografie. Al
momento dell’ordine di una qualsiasi parte di ricambio dovranno essere inviati
alla OMGA Inc. i seguenti dati:
1. Codice della macchina (in copertina sotto il logo OMGA).
2. Modello della macchina.
3. Codice della/e parte/i di ricambio.
4. Quantità.
Each page of the “Spare parts” section illustrates one of the main units of the machine.
Each part of a unit is identified by a progressive number. The table under the photograph
contains these numbers, the relevant identification codes and a short description of
the part. When ordering spare parts from OMGA Inc , always quote the following
information:
1. Machine code number (on the cover under the OMGA logo).
2. Machine model.
3. Code(s) of the spare part(s).
4. Quantity
Orders not including the above information will not be accepted.
Non saranno accettati ordini senza i dati sopracitati.
Pag. 59
RN 450 FM “U.S.”
01_90 0290 14 43 61_02
Volts 230*/460/60 TRIFASE
ITALIANO
ENGLISH
PARTI DI RICAMBIO
SPARE PARTS
1
2
3
4
5
6
7
8
9
ENGLISH
ITALIANO
Nº
CODE
1
1401001600
2
DESCRIZIONE
DESCRIPTION
LEVA SBLOCCAGGIO ROTAZIONE BRACCIO
ARM RELEASE LEVER
5067
TESTA POSTERIORE
REAR HEARD
3
542
POMOLO SOLLEVAMENTO
LIFTING KNOB
4
411
LEVA SOLLEVAMENTO
LIFTING LEVER
5
17058
VITE SOLLEVAMENTO
LIFTING SCREW
6
5066
COPERTURA SUPERIORE
TOP HEAD
7
17150
BRACCIO PORTANTE
SUPPORT ARM
8
5084
LEVA SBLOCCAGGIO ROTAZIONE BRACCIO
ARM RELEASE LEVER
9
17061
TESTATA ANTERIORE
HEIGHT HEAD
Pag. 60
RN 450 FM “U.S.”
01_90 0290 14 43 61_02
Volts 230*/460/60 TRIFASE
ITALIANO
ENGLISH
PARTI DI RICAMBIO
SPARE PARTS
1
2
3
4
7
5
8
6
9
ITALIANO
ENGHISH
DESCRIZIONE
DESCRIPTION
Nº
CODE
1
17060
ATTACCO BRACCIO
ARM CONNECTION
2
17055
PERNO DI BLOCCAGGIO
ADJUSTMENT FLANGE
3
5263
MOLLA DI BLOCCAGGIO
4
5097
FLANGIA REGISTRAZIONE
LOCKING SPRING
5
5078
COLONNA
COLUMN
6
1702
SUPPORTO COLONNA
COLUMN SUPPORT
7
5096
COPERTURA TELESCOPICA SUPERIORE
TOP TELESCOPIC COVER
8
5095
COPERTURA TELESCOPICA CENTRALE
CENTRE TELESCOPIC COVER
9
5094
COPERTURA TELESCOPICA INFERIORE
BOTTOM TELESCOPIC COVER
LOCKING PIN
Pag. 61
RN 450 FM “U.S.”
01_90 0290 14 43 61_02
1
Volts 230*/460/60 TRIFASE
ITALIANO
ENGLISH
PARTI DI RICAMBIO
SPARE PARTS
2
4
3
ITALIANO
ENGLISH
DESCRIZIONE
DESCRIPTION
Nº
CODE
1
720020530000
GRUPPO RITORNO AUTOMATICO
AUTOMATIC REVERSAL UNIT
2
660040010000
BILANCIATORE
BALANCING DEVICE
3
61034
SUPPORTO BILANCIATORE
BALANCING DEVICE SUPPORT
4
128
LEVA BLOCCAGGIO FORCELLA
YOKE LOCKING LEVER
Pag. 62
RN 450 FM “U.S.”
01_90 0290 14 43 61_02
Volts 230*/460/60 TRIFASE
ITALIANO
ENGLISH
PARTI DI RICAMBIO
SPARE PARTS
1
5
2
4
6
7
3
Nº
CODE
1
701000800000
2
ITALIANO
ENGLISH
DESCRIZIONE
DESCRIPTION
CARTER PROTEZIONE LAMA
BLADE GUARD
182
CARTER CIRCOLARE
BLADE GUARD
3
2488
PROTEZIONE LATERALE
LATERAL GUARD
4
20922
IMPUGNATURA
HANDGRIP
5
20923
MOSTRINA IMPUGNATURA
HANDGRIP BADGE
6
0500102500
INTERRUTORE A BILANCERE
TRIGGER SWITCH
7
143
ASTA CONTRORITORNI
ANTI-KICKBACK ROD
Pag. 63
RN 450 FM “U.S.”
01_90 0290 14 43 61_02
Volts 230*/460/60 TRIFASE
ITALIANO
ENGLISH
PARTI DI RICAMBIO
SPARE PARTS
3
1
4
5
6
8
7
9
10
11
12
2
Nº
CODE
1
630590144361
2
18161
3
ITALIANO
ENGLISH
DESCRIZIONE
DESCRIPTION
GRUPPO OPERANTE
CUTTING UNIT
FORCELLA
FORK
1315
DADO CIRCOLARE
CIRCULAR NUT
4
9906
DISTANZIALE
SPECER
5
9910
FLANGIA SX
LH FLANGE
6
9909
FLANGIA DX
RH FLANGE
7
9907
DISTANZIALE
SPECER
8
0703002200
GUAINA IN PVC SPIRALE
SPIRAL PVC SHEATH
9
081200700
LEVETTA
LEVEL
10
161
BOCCOLA
BUSH
11
160
PERNO
PIN
12
5069
DADO
NUT
13
628
MOLLA
SPRING
14
449
FRECCIA
ARROW
15
1401001600
LEVA A SCATTO
SPRING LEVER
Pag. 64
13
14
15
RN 450 FM “U.S.”
01_90 0290 14 43 61_02
Volts 230*/460/60 TRIFASE
ITALIANO
ENGLISH
PARTI DI RICAMBIO
SPARE PARTS
4
5
6
7
8
9
10
12
13
1
2
11
3
Nº
CODE
ITALIANO
ENGHISH
DESCRIZIONE
DESCRIPTION
1
520050144361
GRUPPO MOTORE
MOTOR UNIT
2
165
CALOTTA MOTORE
MOTOR COVER
3
830700989900
ALBERO ROTORE
ROTOR SHAFT
4
377
CALOTTA MORSETTIERA
TERMINAL BOARD
5
0503400400
DIODO
DIODE
6
0600200600
CUSCINETTO A TENUTA STAGNA
DUST - TIGHT BEARING
7
0600206000
CUSCINETTO A TENUTA STAGNA
DUST - TIGHT BEARING
8
1500400543
STATORE TRIFASE
THREE - PHASE STATORE
9
6744
CARCASSA MOTORE
MOTOR CASING
10
6747
CALOTTA VENTOLA
FAN COVER
11
154
VENTALA
FAN
GRUPPO FRENO MECCANICO
BRAKE GRUP
FERODO
BRAKE LINING
12
531061120000
13
0508032800
Pag. 65
RN 450 FM “U.S.”
01_90 0290 14 43 61_02
Volts 230*/460/60 TRIFASE
ITALIANO
ENGLISH
PARTI DI RICAMBIO
SPARE PARTS
6
2
1
3
4
8
7
10
9
5
Nº
CODE
1
580010080000
2
0801000800
3
ITALIANO
ENGLISH
DESCRIZIONE
DESCRIPTION
GRUPPO SLITTA
SLIDE GROUP
VOLANTINO
HANDWHELL
175
PRESSORE BLOCCAGGIO SLITTA
SLIDE CLAMP
4
5801
SLITTA
SLIDE
5
941
RASCHIA POLVERE
DUST SCRAPER
6
0600100300
CUSCINETTI
BEARINGS
7
17152
PERNO ECCENTRICO
ECCENTRIC PIN
8
47
PARACOLPO
BUFFER
9
16940
LAMINA
PLATE
10
17671
PROFILO DI RITEGNO
FIXING PROFILE
Pag. 66
RN 450 FM “U.S.”
01_90 0290 14 43 61_02
Volts 230*/460/60 TRIFASE
ITALIANO
ENGLISH
PARTI DI RICAMBIO
SPARE PARTS
1
2
3
5
4
6
Nº
CODE
ITALIANO
ENGLISH
DESCRIZIONE
DESCRIPTION
1
5687
SPONDA DI APPOGGIO
2
5686
TAVOLO DI LAVORO
WORK BENCH
3
5688
CONTROTAVOLO
COUNTER TABLE
4
512
PIEDE
FOOT
5
5685
BANCO
FRAME
6
720132220119
SALVAMOTORE MAGNETOTERMICO CON BOBINA DI MINIMA
TENSIONE
FENCE
THERMAL MAGNETIC OVERLOAD CUT-OUT WITH UNDERVOLTAGE
RELEASE COIL
Pag. 67
S.p.A
Via Carpi-Ravarino, 146 - 41010 LIMIDI DI SOLIERA (MO) - ITALY
Tel. (059) 897333 - Fax. (059) 565000 - Fax Intl. Line ++39 59 850276
E-Mail: [email protected]


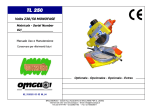


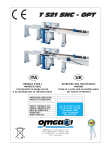


![PLAS A O ]-OR](http://vs1.manualzilla.com/store/data/005852706_1-5db0b7ed584537f0e62af161fb124638-150x150.png)