1
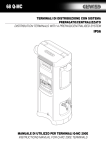
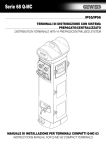
68 Q-MC
TERMINALI DI DISTRIBUZIONE CON SISTEMA
PREPAGATO/CENTRALIZZATO
DISTRIBUTION TERMINALS WITH A PREPAID/CENTRALISED SYSTEM
IP55/IP56
MANUALE DI UTILIZZO PER TERMINALI COMPATTI Q-MC 63
INSTRUCTIONS MANUAL FOR Q-MC 63 COMPACT TERMINALS
INDICE
CONSIDERAZIONI SULLA SICUREZZA...................4
Note e Avvertenze Generali .....................................4
Personale addetto al terminale ...............................6
Documentazione.....................................................6
6.
6.1
6.2
6.3
MANUTENZIONE ..................................................18
Norme di sicurezza ...............................................18
Manutenzione ordinaria ........................................18
Manutenzione straordinaria ..................................18
2. SPECIFICHE TECNICHE ..........................................8
7.
7.1
7.2
7.3
7.4
7.5
RICERCA GUASTI.................................................20
Manca tensione su una presa ...............................20
La lampada non si accende ..................................20
Mancanza acqua in un rubinetto...........................20
Problematiche hardware.......................................22
Problemi software. ...............................................22
SAFETY CONSIDERATIONS ...................................5
Notes and General Instructions..............................5
Personnel working with the terminal......................7
Documentation ......................................................7
6.
6.1
6.2
6.3
MAINTENANCE.....................................................19
Safety standards ..................................................19
Routine maintenance............................................19
Special maintenance ............................................19
2. TECHNICAL SPECIFICATIONS................................9
7.
7.1
7.2
7.3
7.4
7.5
FAULT FINDING....................................................21
No power at a socket ............................................21
The lamp does not come on .................................21
No water in a tap ..................................................21
Hardware problems..............................................23
Software problems ...............................................23
1.
1.1
1.2
1.3
3. INDIRIZZAMENTO TORRETTE..............................10
4. ATTIVAZIONE........................................................14
5.
5.1
5.2
5.3
5.4
5.5
UTILIZZO DEL TERMINALE ..................................14
Servizi disponibili .................................................14
Attivazione dei servizi ...........................................16
Disattivazione dei servizi ......................................16
Messaggi sul display ............................................16
Disconnessione utenza elettrica ...........................16
CONTENTS
1.
1.1
1.2
1.3
3. INDIRIZZAMENTO TORRETTE..............................11
4. START-UP ............................................................15
5.
5.1
5.2
5.3
5.4
5.5
USING THE TERMINAL ........................................15
Available services .................................................15
Service activation .................................................17
Stopping the services...........................................17
Messages on the display ......................................17
Disconnecting the electricity supply .....................17
3
1. CONSIDERAZIONI SULLA SICUREZZA
1.1 Note e Avvertenze Generali
• PRIMA DI ACCENDERE L’APPARECCHIATURA, l'eventuale terminale di terra protettiva dell’unità deve essere collegato
al conduttore di terra del cavo di alimentazione (da rete elettrica).
• L’azione di protezione non deve essere resa inefficace dall’utilizzo di cavo privo di conduttore di terra. La messa a terra
del Neutro non costituisce una protezione sufficiente.
• Le istruzioni di Assistenza Tecnica sono fornite per uso da parte di personale addestrato a tale scopo. Per evitare shock
pericolosi da scarica elettrica, non effettuare alcuna assistenza tecnica se non mediante un tecnico qualificato.
• Qualsiasi interruzione del conduttore di protezione (terra), sia internamente che esternamente all’apparecchiatura,
costituirà una potenziale causa di pericolo di shock che potrebbe risultare un’ingiuria personale.
In qualsiasi momento si constati che la protezione sia stata disattivata, l’apparecchiatura deve essere resa inoperativa e
salvaguardata da uso non consentito.
• Non operare sull’apparecchiatura in presenza di gas o vapori infiammabili.
L’utilizzo di qualsiasi apparato elettrico in tali circostanze costituisce un rischio per la sicurezza.
• Non installare parti di ricambio non originali e non apportare qualsiasi modifica non autorizzata all’apparecchiatura.
• Qualsiasi messa a punto, manutenzione e riparazione dell’apparecchiatura aperta sotto tensione deve essere evitata per
quanto possibile e, quando inevitabile, deve essere eseguita da persona esperta che sia cosciente dei rischi conseguenti.
• I condensatori all’interno dell’apparecchiatura potrebbero essere ancora carichi anche se l’apparecchiatura è stata
scollegata dalla sorgente di alimentazione.
Questa energia, presente in diversi punti, potrebbe provocare ingiuria personale se contattata accidentalmente.
• Per le operazioni di pulizia esterna NON utilizzare idropulitrici che potrebbero danneggiare le guarnizioni di tenuta delle
apparecchiature di protezione elettrica causando corto circuiti con conseguenti danni alle persone.
• Prima di effettuare lavori di manutenzione elettrica a bordo del natante, assicurarsi di aver disinserito la spina
dalla presa posta sulla torretta.
4
1. SAFETY CONSIDERATIONS
1.1 Notes and General Instructions
• BEFORE THE EQUIPMENT IS SWITCHED ON, the unit’s possible protective earth terminal must be connected to the
earth conductor of the power supply cable (from the electricity network).
• The protective action must not be compromised by using a cable without an earth conductor. Earthing Neutral does
not give sufficient protection.
• The Technical Assistance instructions are supplied for use by personnel trained for this purpose. To prevent dangerous
electric shocks, do not carry out any technical assistance unless qualified to do so.
• Any interruption of the protection conductor (earth), both inside and outside the equipment, constitutes a potential
electric shock hazard that could result an personal injury.
If, at any time, it is discovered that the protection has been disactivated, the equipment must be made inoperable and
guarded against unauthorised use.
• Do not work on the equipment in the presence of gases or flammable vapours.
The use of any electrical apppliance in these circumstances is a safety risk.
• Do not install non-original spare parts and do not make any unauthorised modification to the equipment.
• Any fine-tuning, maintenance and repairs to the equipment open and under power must be avoided as much as
possible and, when inevitable, must be done by an expert person aware of the consequent risks.
• The condensers inside the equipment could still be live even if the equipment has been disconnected from the
power supply.
This power, present at several points, could cause personal injury if touched accidentally.
• Do NOT use liquid cleaners for external cleaning operations, they could damage the sealing gaskets of the electrical
protection equipment causing short circuits with consequent injuries to people.
• Before carrying out any electrical maintenance jobs aboard the vessel, ensure that the plug has been
disconnected from the socket on the turret.
5
1.2 Personale addetto al terminale
Il personale addetto al terminale può essere differenziato per grado di preparazione e responsabilità in:
OPERATORE:
Personale addestrato all’uso ordinario del terminale, come ad esempio: ripristino organi di
protezione, operazioni di manutenzione ordinaria (pulizia, apertura portello, sostituzione
della lampada di illuminazione).
TECNICO QUALIFICATO:
Personale addetto alle operazioni più complesse di installazione, manutenzione e
riparazione.
Occorre che ciascun addetto non compia interventi al di fuori del proprio campo di conoscenze e responsabilità e che:
• sia provvisto di manuale di installazione, uso e manutenzione in originale
• legga tutta la documentazione attentamente e segua le prescrizioni con cura.
1.3 Documentazione
• Allegato al presente documento la dichiarazione di conformità.
• La redazione del presente manuale tiene conto delle direttive comunitarie per l’armonizzazione delle norme di sicurezza
e per la libera circolazione dei prodotti industriali in ambito UE.
• Il presente manuale ha lo scopo di portare a conoscenza del personale addetto, con figure e testi, le prescrizioni
fondamentali ed i criteri da seguire nell’uso e nella manutenzione.
• Il manuale è parte integrante del terminale e perciò deve essere letto, tenuto con cura ed a portata di mano.
• Le istruzioni riportate sul manuale devono sempre essere rispettate per un uso sicuro.
In caso di dubbi consultare direttamente il SAT (Servizio Assistenza Tecnica Gewiss).
Tel. +39 035 9461111 o [email protected].
6
1.2 Personnel working with the terminal
The personnel working with the terminal can be graded, by level of training and responsibility, into:
OPERATOR:
Personnel trained for normal use of the terminal such as, for example, replacing
the guards and routine maintenance operations (cleaning, opening the hatch,
replacing the lighting lamp).
QUALIFIED TECHNICIAN:
Personnel authorised for more complex installation, maintenance and repair operations.
The personnel must not make interventions outside their area of knowledge and responsibility and must:
• be provided with an original copy of the installation, use and maintenance manual
• carefully read all the documentation and follow the instructions with attention.
1.3 Documentation
• The Conformity Declaration is attached to this manual.
• The preparation of this manual takes account of the EU Directives for standardising safety regulations and for free
circulation of industrial products within the EU.
• The purpose of this manual is to inform the personnel involved of the basic instructions and criteria to be followed for
use and maintenance using figures and texts.
• The manual is an integral part of the terminal and so must be read and carefully kept close at hand.
• The instructions given in the manual must always be respected for safe use.
In case of doubt consult the SAT (Gewiss Technical Assistance Service) directly.
Tel. +39 035 9461111 or [email protected].
7
2. SPECIFICHE TECNICHE
• TERMINALE
Costruzione:
secondo normativa CEI EN 60439 per quanto applicabile
Materiale involucro esterno:
tecnopolimero ad alta densità / acciaio inox AISI 316L
Accesso interno:
tramite porte e coperture con serratura
Fissaggio:
piastra Inox o ancoranti M8 in acciaio per calcestruzzo
• ILLUMINAZIONE
Tipo:
n° 1 lampada fluorescente 16W/230V - 50Hz
• IMPIANTO ELETTRICO
Alimentazione:
230V 50/60Hz
Contenitore modulo elettrico:
termoplastico
Morsettiere:
per giunzione di linea: connessione tramite morsettiere entra/esci 5 poli per
conduttori RSTN PE
Morsettiere installabili:
morsetto per cavo 16 mm2
morsetto a perno filettato per capicorda: 35 - 70 mm2
Prese disponibili:
prese conformi alla norma EN 60309 1/2 con e senza interruttore di blocco
16-32-63-125A 230-400V 50/60Hz IP44-55-67
Grado di protezione:
IP56 (involucro vuoto) e
• DISTRIBUZIONE ACQUA
4 rubinetti a sfera
1/2” lucchettabili
Connessione rete idrica:
attacco con manicotto filettato G1/2”
Filtro
Temperatura ambientale: 2°C - 70°C
Pressione di esercizio: 0.2 - 10 bar
Elettrovalvola con flussostato
Alimentazione: +/- 6VDC
Assorbimento: 10mA Max
Pressione di esercizio: 0 - 10 bar
• CONDIZIONI AMBIENTALI
Temperatura:
- 5°C + 65°C
Umidità:
fino 98%
Luogo:
per uso all’aperto con grado di protezione IP44/IP56 (a seconda delle prese)
Resistenza agli urti:
IK10 (involucro)
IK09 (componenti installati)
Resistenza al calore ed al fuoco:
Glow Wire Test (°C)
850° (parti attive)
650° (parti passive)
8
2. TECHNICAL SPECIFICATIONS
• TERMINAL
Manufactured:
according to standard CEI EN 60439 where applicable
External enclosure material:
high density technopolymer / Stainless steel AISI 316L
Internal access:
through doors and covers with locks
Connection:
Stainless Steel plate or M8 steel anchors for concrete
• LIGHTING
Type:
N° 1 fluorescent lamp 16W/230V – 50 Hz
• ELECTRICAL SYSTEM
Power supply:
230V 50/60Hz
Electric module container:
Terminal blocks for line joints:
thermoplastic
connection using a 5-pole in/out terminal board
for RSTN PE conductors
Installable terminal blocks:
terminal for 16 mm cable
threaded pin terminal for cable ends: 35-70 mm2
Available sockets:
sockets compliant to EN 60309 1/2 Standard with or without interlock switch
16-32-63-125A 230-400V 50/60Hz IP44-55-67
Protection rating:
IP 56 (empty housing) e
• WATER DISTRIBUTION
4 lockable
1/2” ball taps
Water mains connection:
coupling with G1/2” threaded sleeve
Filter
Ambient temperature: 2°C -70°C
Operating pressure: 0.2 -10 bar
Solenoid valve with flowmeter
Power supply: +/- 6VDC
Absorption: 10mA Max
Operating pressure: 0 -10 bar
• ENVIRONMENTAL CONDITIONS
Temperatures:
- 5°C + 65°C
Humidity:
up to 98%
Place:
for open-air use with protection rating IP44/IP56 (depending on the sockets)
Impact resistance:
IK10 (case)
IK09 (installed components)
Heat and fire resistance:
Glow Wire Test (°C)
850° (active parts)
650° (passive parts)
9
3. INDIRIZZAMENTO TORRETTE
All’accensione sul display compare, tra le informazioni relative al modello e versione hardware/software della scheda,
anche il codice seriale della torretta.
Quest’ultimo dovrà essere annotato ed impostato all’atto della configurazione del sistema.
Tramite l'applicativo software sarà poi possibile associare il codice seriale, che è unico, di quella torretta ad un codice
torretta più comodo, ad esempio indicativo della postazione nel molo/campeggio.
Nel caso di sistema centralizzato, la programmazione dell’indirizzo Modbus viene effettuata tramite l’apposito TAG RESET
che dovrà essere avvicinato alla torretta entro i primi 5 secondi dall’accensione della stessa.
In questa fase, al primo passaggio del TAG transponder è possibile incrementare le unità; al secondo passaggio le decine
e al terzo le centinaia.
N.B.: Mantenendo il TAG RESET vicino alla zona sensibile il numero corrispondente viene incrementato.
Se il TAG RESET non viene avvicinato entro i 5 secondi, si esce dal menù indirizzamento torrette e si riprende dalla
schermata riassuntiva.
10
3. TURRET ADDRESSING
When the display is switched on, the turret serial number is also displayed along with information on the board
hardware/software model and version.
It should be jotted down as it is used when configuring the system.
Using the software program it will also be possible to match the serial number of that turret, which is unique, to a more
convenient turret number, for instance at a harbour/camping station.
When using a centralised system, the programming of the Modbus address is performed using the relative RESET TAG,
that must be approached to the turret within 5 seconds from when it is switched on.
During this phase, the first passage of the TAG transponder can increase the units; the second passage can increase the
tens and the third the hundreds.
N.B.: Keeping the RESET TAG close to the sensitive zone, the corresponding number is increased.
If the RESET TAG is not approached within 5 seconds, the turret addressing menu will close and the main settings
screen will be displayed.
11
SOSTITUZIONE SERRATURA / REPLACING THE LOCK
2
1
GW 68 776
(Non in dotazione / Not supplied)
4
3
12
SOSTITUZIONE LAMPADA / REPLACING THE LAMP
ATTENZIONE
Aprire il portafusibile sezionatore prima di
effettuare la sostituzione della lampada.
WARNING
Open the fuse-carrier disconnector before changing the lamp.
1
Sostituire la lampada fluorescente
Replace the fluorescent lamp
16W/835 2 Pin GR8
Lampada di emergenza
Emergency lamp
16W/835 4 Pin GR10q
1
13
4. ATTIVAZIONE
Alimentando il terminale verrà visualizzato sul display la versione del firmware (Software installato a bordo scheda) in
uso e successivamente lo stato delle utenze del terminale.
Ora si possono attivare le varie funzioni del terminale.
Se non succede niente, spegnere il terminale e fare riferimento al capitolo Ricerca Guasti (vedere alla fine di questo
manuale).
5. UTILIZZO DEL TERMINALE
Come sistema di identificazione, per l’uso dei servizi, viene utilizzato un sistema senza contatto (transponder) che viene
configurato in diversi modi: con sistema prepagato, normalmente usato dagli utenti in transito e con contabilizzazione
centralizzata rilasciato ai vari proprietari dei posti barca o delle piazzuole campeggio.
N.B.: Il terminale di servizi QMC comprende, per ogni servizio abilitato, due contatori: totale e parziale.
Per attivare / disattivare i servizi si deve seguire questa procedura:
1) Avvicinare il transponder al lettore.
2) Attendere che il dispositivo confermi l’avvenuta operazione con un suono acustico (beep).
3) Allontanare il transponder.
Un solo beep corrisponde all’operazione avvenuta senza errori.
5.1 Servizi disponibili
Nel menù di scelta dei servizi sono rappresentate nell’ordine le icone corrispondenti ai seguenti servizi:
- Informazioni
: rappresentata da una porta di uscita con simbolo i permette di ottenere in due schermate
informazioni relative al codice cliente attribuito, all’importo totale caricato sul TAG, all’importo trasferito in quel
momento sull’utenza occupata, ai consumi totali e parziali di energia e acqua;
- Attivazione energia ed acqua
: rappresentata da una spina e da un rubinetto, permette l’attivazione dell’energia e
dell’acqua, trasferendo all’utenza selezionata l’importo impostato precedentemente dal gestore;
- Attivazione energia
: rappresentata da una spina, permette l’attivazione dell’energia elettrica, trasferendo
all’utenza selezionata l’importo impostato precedentemente dal gestore;
- Attivazione acqua
: rappresentata da un rubinetto permette l’attivazione dell’acqua, trasferendo all’utenza
selezionata l’importo impostato precedentemente dal gestore;
- Spegnimento e rilascio utenza: rappresentata da una scritta OFF permette di interrompere la fornitura sia di energia
elettrica che di acqua, lasciando libera l’utenza occupata;
14
4. ACTIVATION
When the terminal is powered up the VDU displays the version of the firmware (software installed on the board) in use
and then the status of the terminal’s services.
The various terminal functions can now be started up.
If nothing happens, switch the terminal off and refer to the Fault Finding chapter at the end of this manual.
5. USING THE TERMINAL
A contact-free (transponder) System is used as an identification System for using thè services, which is configured in
various ways: with a prepaid System, normally used by users in transit and with centralised accounting issued to the
various owners of the boat moorings or the camping sites.
N.B.: The QMC services terminal includes two counters for each service enabled: total and centralised accounting.
The following procedure should be followed to start / stop the services:
1) Bring the transponder close to the reader.
2) Wait for the device to confirm the operation with an audible signal (beep).
3) Remove the transponder.
One single beep indicates the operation has been completed successfully
5.1 Available services
The service menu indicates the icons corresponding to the following services:
- Information
represented by an output port with an i symbol which provides information on two different
windows on the assigned client code, the total amount recharged on the TAG, the amount transferred to the utility
being used, plus total and partial consumptions of power and water;
- Start power and water
represented by a plug and tap, used to start the power and water supply, transferring the
amount previously entered by the manager to the utility;
- Start power
represented by a plug, used to start the power supply, transferring the amount previously entered by
the manager to the utility;
- Start water
represented by a tap, used to start the water supply, transferring the amount previously entered by
the manager to the utility;
- Stop and disconnect utility: represented by the word OFF, this stops both the power and water supplies, leaving the
utility free for further use;
15
5.2 Attivazione dei servizi
L’attivazione dell’utenza può essere effettuata quando sul display è visualizzato “utenza libera”.
La chiave transponder (TAG) viene avvicinata nell’area di lettura posizionata sul display ed identificata con un cerchio blu,
il sistema riconosce il transponder emettendo un segnale acustico e visualizzando le utenze del terminale.
Selezionata l’utenza è necessario allontanando il TAG dall’area di lettura e riavvicinarlo entro 2 secondi. Selezionata
l’utenza si procede alla selezione dei servizi mediante avvicinamento del TAG e scorrimento delle icone:
1) Attivazione energia e acqua;
2) Attivazione energia;
3) Attivazione acqua;
Selezionato il servizio desiderato è necessario allontanare il TAG e l’icona scelta verrà visualizzata sul display
singolarmente insieme ad una richiesta di conferma che dovrà essere operata entro 2 secondi con il riposizionamento del
TAG, l’abilitazione avviene mediante segnale acustico. Nel caso in cui questa operazione non sia avvenuta correttamente,
viene riproposta una schermata in cui viene richiesto di riposizionare il TAG, associata ad un segnale acustico alternato
con relativa icona del transponder lampeggiante
.
5.3 Disattivazione dei servizi
Per disattivare l’utenza è necessario posizionare il TAG nell’area di lettura, si entra direttamente nel menù servizi e si
fanno scorrere le icone sino a che non si raggiunge l’icone OFF.
Allontanando il TAG viene richiesta la conferma dell’operazione la quale deve avvenire entro 2 secondi riposizionando il
TAG.
Con lo spegnimento dell’utenza si recupera il credito trasferito direttamente sul TAG, la corretta operazione avviene
mediante segnale acustico.
5.4 Messaggi sul display
1) Utenza libera
2) Tempo residuo (solo prepagato)
3) TERMICO
4) Icona spina
5) Icona rubinetto
6) Icona spina/rubinetto
7) Credito finito
8) Rotella consumo attivo
Visualizzazione messaggi (prevista solo con PC di supervisione)
Un eventuale messaggio, proveniente dal sistema centrale di supervisione, viene visualizzato nel display al momento
dell’allontanamento del transponder ed è segnalato da un'apposita icona a forma di busta a fianco dell'utenza
.
N.B.: il messaggio viene sempre riproposto fino a quando il gestore decide di mantenerlo.
5.5 Disconnessione utenza elettrica
Ruotare in senso antiorario l’interruttore della presa ed estrarre la spina.
Essendo del tipo ad interblocco, non è possibile estrarre la presa prima di aver ruotato in posizione di "0" l'interruttore.
16
5.2 Service activation
The service can be enabled when the words “utility available” is displayed on the screen.
The TAG must be approached to the reading area on the display and identified by a blue circle, the system will recognise
the transponder and beep before displaying the terminal utilities on the screen.
Select the required utility, remove the TAG from the reading area and then approach it again within 2 seconds. After
selecting the utility, select the services by approaching the TAG and scrolling the icons:
1) Start power and water supplies;
2) Start power supply;
3) Start water supply;
On selecting the required service, remove the TAG and the selected icon will be displayed on its own on the screen
together with a request for confirmation, which must be given within 2 seconds, by approaching the TAG; a beep will
confirm the start process.
If this operation is not performed correctly, a new window will appear requesting the client to re position the TAG,
together with an alternating beep and a flashing transponder icon
.
5.3 Stopping the services
To disconnect the utility, position the TAG on the reading area to view the services menu; now scroll the icons until you
find the OFF icon.
On removing the TAG you will be required to confirm the operation by repositioning the TAG within 2 seconds.
When the utility service has been terminated, the credit transferred to the TAG will be recovered; a beep will indicate
when this has been successfully completed.
5.4 Messages on the display
1) Utility available
2) Time left (prepaid only)
3) THERMAL SWITCH
4) Plug icon
5) Tap icon
6) Plug/tap icon
7) No credit left
8) Service in progress knob
Viewing messages (foreseen on monitoring PC only)
A message sent by the main monitoring system is displayed on the screen when the transponder is removed and is
indicated by an icon with an envelope next to the utility
.
N.B.: the message is always displayed for as long as the manager decides to display it.
5.5 Disconnecting the electricity supply
Turn the socket switch anticlockwise and take out the plug.
As the socket is an interlock type, it is not possible to remove the plug without turning the switch to "0" .
17
5.6 Procedura di manovra dei terminali
Al fine di salvaguardare la sicurezza e la funzionalità della scheda elettronica di controllo è necessario rispettare le
seguenti procedure di manovra:
1.Intervento/azionamento dell’interruttore di protezione della scheda
1.1. Posizionare gli interruttori di protezione delle prese in posizione di OFF;
1.2. Armare I’interruttore di protezione della scheda elettronica;
1.3. Armare in sequenza tutti gli interruttori di protezione delle prese;
2. Intervento/azionamento dell’interruttore di protezione della presa:
2.1 Nel caso di scatto dell’interruttore di protezione della singola presa operare un successivo riarmo dopo la
segnalazione del corrispondente “Termico” sul display;
6. MANUTENZIONE
6.1 Norme di sicurezza
• Non utilizzare idropulitrice ad alta pressione per il lavaggio del terminale.
• Non lavare il terminale con il portello di ispezione aperto.
• Assicurarsi che il tappo delle prese, in assenza della spina, sia chiuso e bloccato tramite rotazione della relativa ghiera.
• In caso di temperatura ambientale inferiore a 0° C è necessario provvedere allo svuotamento completo degli impianti
idrici onde evitare rotture dovute all’espansione dell’acqua durante il congelamento.
• Le operazioni di mantuenzione e ripristino devono essere effettuate da personale specializzato
• In caso di fermo prolungato dell’impianto, non coprire i terminali con involucri non traspiranti i quali possono causare
la formazione di condensa al proprio interno;
6.2 Manutenzione ordinaria
• Per la pulizia del terminale in tecnopolimero utilizzare acqua con detergenti per parti in plastica o comunque non
abrasivi e senza solventi.
• Per la pulizia del terminale in acciaio inox AISI 316L utilizzare prodotti specifici solitamente utilizzati per il vetro, che
non contengono cloruri.
• Per macchie resistenti di olio o grasso utilizzare:
- acqua e aceto (20% aceto, 80% acqua);
- alcool denaturato;
- evitare assolutamente l'uso di pagliette metalliche, sostanze abrasive e detersivi che ne intacchino la superficie.
Si consiglia una pulizia di routine (sporco leggero): ogni 6 mesi, per condizioni particolari (ambienti pesantemente
aggressivi): ogni 3 mesi.
• Controllare periodicamente (ogni mese) il funzionamento di ogni interruttore differenziale tramite la pressione
dell’apposito pulsante di test situato su ogni singolo interruttore.
• Controllare visivamente il buono stato delle prese e dei rubinetti che possono essere soggetti a danneggiamenti da
parte degli utenti.
• Pulire il filtro dell’acqua ogni 30/45 giorni;
• In caso di fermo prolungato dei terminali provvedere allo svuotamento dell’impianto idrico.
6.3 Manutenzione straordinaria
La manutenzione straordinaria deve essere effettuata solo da un tecnico qualificato.
18
5.6 Terminal handling procedures
To ensure the electronic control board functions are protected, please follow the instructions below during handling
procedures:
1. Using/enabling the board protection switch
1.1. Turn the socket protection switches to OFF;
1.2. Enable the electronic circuit board protection switch;
1.3. Enable in turn all the socket protection switches;
2. Using/enabling the socket protection switch
2.1 If the protection switch trips on one single socket, enable it again after the “Thermal Switch” warning has been
displayed on the screen;
6. MAINTENANCE
6.1 Safety standards
• Do not use high pressure jets of water for washing the terminal.
• Do not wash the terminal with the inspection hatch open.
• When there is no plug, ensure that the socket cap is closed and locked by rotation of the relative ring-nut.
• When the ambient temperature falls below 0°C, the water systems must be completely emptied to prevent breakages
due to the water expanding while it is freezing.
• Maintenance and repair operations must be done by specialised personnel
• If the system is shut down for some time, do not cover the terminals with non-breathable covers as this can cause
condensation to form inside;
6.2 Routine maintenance
• For cleaning the plastic parts of the terminal in technopolymer use water with non-abrasive detergents or, in any case,
without solvents.
• When cleaning the stainless steel AISI 316L parts of the terminal, use specific products generally used to clean glass,
checking they do not contain chlorides.
• To clean oil and grease stains try using:
- vinegar and water (20% vinegar, 80% water);
- denatured alcohol;
- never use metal pads, abrasive cleaners or substances as they will ruin the surfaces.
Routine cleansing is recommended (for light dirt): every 6 months, in particular conditions (more aggressive
environments): every 3 months.
• Periodically (each month) check the operation of every differential switch by pressing the special test button found on
each individual switch.
• Visually check the proper condition of the sockets and taps, which can be subject to damage by users.
• Clean the water filter every 30/45 days;
• If the terminals are shut down for some time, empty the water supply system.
6.3 Special maintenance
Special maintenance must only be done by a qualified technician.
19
7. RICERCA GUASTI
La ricerca dei guasti deve essere effettuata solo da un tecnico qualificato.
7.1 Manca tensione su una presa
Controlli:
• Controllare che il terminale sia alimentato (il display deve essere attivo).
• Controllare che il cavo di prolunga sia efficiente.
• Assicurarsi che l’interruttore della presa sia nella posizione “ON” / “1” .
• Assicurarsi che il display indichi che la presa è in condizione di “on” o con un importo maggiore di “0”.
• Controllare che non sia intervenuto il dispositivo di protezione magnetotermico differenziale.
• Nel caso tutti i controlli precedenti abbiano dato esito positivo ma permane il malfunzionamento è necessario
l’intervento dell’assistenza.
7.2 La lampada non si accende
Controlli:
• Procedere alla sostituzione della lampada.
• Nel caso il problema permanga, sostituire il fusibile situato all’interno del quadro elettrico dopo aver aperto il
sezionatore (posizione “0” / “OFF”).
7.3 Mancanza acqua in un rubinetto
Controlli:
• Controllare che la condotta principale sia in pressione.
• Controllare che la valvola di sezionamento della colonnina sia aperta.
• Controllare che il terminale sia alimentato (il display deve essere attivo).
• Assicurarsi che il display indichi che il rubinetto sia attivo ovvero con l’icona del rubinetto visibile nel display e che
l’utenza indichi la condizione di “on” o con un importo maggiore di “0”.
• Nel caso tutti i controlli precedenti abbiano dato esito positivo ma permane il malfunzionamento è necessario
l’intervento dell’assistenza.
La sostituzioni di componenti elettrici ed idraulici deve essere effettuata da personale specializzato che operi nelle
condizioni di sicurezza previste dalle norme vigenti in materia.
20
7. FAULT FIGHTING
Fault finding must only be done by a qualified technician.
7.1 No power at a socket
Checks:
• Check that the terminal is powered up (the VDU must be active).
• Check that the extension cable is efficient.
• Ensure that the socket switch is in position “ON” / “1” .
• Ensure that the VDU shows that the socket is in the “ON” condition or displays an amount greater than “0”.
• Check that the differential magnetothermal protection device has not been triggered;
• If all the above checks gave a positive result but the malfunction persists the intervention of the assistance service is
required.
7.2 The lamp does not come on
Checks:
• Replace the bulb.
• If the problem persists, replace the fuse inside the electric panel after having opened the knife switch (position “0” / “OFF”).
7.3 No water in a tap
Checks:
• Check that the main water pipe is under pressure.
• Check that the column sectioning valve is open.
• Check that the terminal is powered up (the VDU must be active).
• Ensure that the VDU shows that the tap is active, namely with the tap icon displayed on the VDU, and that the utility is
in the “ON” condition or displays an amount greater then “0”.
• If all the above checks gave a positive result but the malfunction persists the intervention of the assistance service is
required.
Replacement of electrical and hydraulic components must be done by specialised personnel working in the safety
conditions prescribed by the laws in force on the subject.
21
7.4 Problematiche hardware
1.
2.
3.
Nel caso in cui il display non visualizzi correttamente le icone/dati effettuare i seguenti controlli:
Verificare che l’interruttore generale o di protezione della scheda elettronica sia in posizione di “ON”;
Verificare che la torretta sia alimentata;
Verificare che i conduttori tra scheda principale e scheda display-transponder siano correttamente connessi;
- Nel caso in cui la torretta non riconoscesse la chiave transponder effettuare i seguenti controlli:
1. Verificare che i conduttori tra scheda principale e scheda display- transponder siano correttamente connessi;
2. Verificare che la chiave transponder sia correttamente programmata e nel caso riprogrammarla con il codice torretta e
utenza corretto;
3. Operare un reset al sistema tramite disattivazione interruttore generale e successivo riarmo;
- Nel caso in cui la torretta non decrementi il credito caricato nonostante fosse attivato il carico in uscita effettuare
i seguenti controlli:
1. Verificare che l’interruttore di protezione, l’eventuale interruttore rotativo o il rubinetto dell’utenza idrica sia in
posizione di “ON”;
2. Verificare che la chiave transponder sia stata correttamente programmata;
3. Verificare che la chiave transponder sia stata programmata come utente prepagato e non come utente abbonato;
4. Verificare la corretta connessione dei trasformatori amperometrici. TA.
- Nel caso in cui attivando l’utenza elettrica il carico non è alimentato verificare che l’interruttore di protezione o
l’eventuale interruttore rotativo sia in posizione di “ON”;
1.
2.
3.
4.
Nel caso in cui attivando l’utenza idrica non vi sia uscita di acqua effettuare i seguenti controlli:
Verificare che il rubinetto generale della torretta sia in posizione di “Aperto”;
Verificare che vi sia presenza di acqua nel circuito principale dell’impianto;
Verificare che l’interruttore di protezione delle elettrovalvole sia in posizione di “ON”;
Verificare che le elettrovalvole siano alimentate;
- Nel caso in cui le torrette non comunichino correttamente verificare che la linea di comunicazione sia collegata e
non presenti dei corto circuiti.
7.5 Problemi software
Le torrette non comunicano:
1. Verificare che le torrette siano state indirizzate sulla linea ModBus in maniera corretta;
2. Verificare che il led a bordo del convertitore RS-485/USB lampeggi ad impulsi.
3. Verificare la connessione del bus delle singole torrette.
22
7.4 Hardware problems
1.
2.
3.
If the correct icons/information is not displayed on the screen, proceed as follows:
Check that the main switch or the electronic board protection is set to "ON";
Check that the turret is powered up;
Check that the conductors between the main board and the display-transponder board are all correctly connected;
- If the turret does not recognise the transponder key, proceed as follows:
1. Check that the conductors between the main board and the display-transponder board are all correctly connected;
2. Check that the transponder key has been programmed correctly and, where necessary, reprogram it with the correct
turret and utility code;
3. Reset the system by disconnecting and reconnecting the main power switch;
- If the turret does not deduct the credit despite the utility service is in progress, proceed as follows:
1. Check that the protection switch, the knob switch or water supply tap are all set to "ON";
2. Check that the transponder key has been programmed correctly;
3. Check that the transponder key has been programmed in prepaid user mode and not in account user mode;
4. Check the amperometric transformers are connected correctly. TA.
- If the electricity supply is enabled and there is no power, check that the protection switch, or a knob switch are
all set to "ON";
- If there is no water supply after enabling the service, proceed as follows:
1. Check that the main tap on the turret is set to “Open”;
2. Check that there is water in the main water supply system;
3. Check that the solenoid valve protection switch is set to "ON";
4. Check that the solenoid valves are all powered up;
- If the turrets do not communicate correctly, check that the communication line is connected and nothing has
short-circuited.
7.5 Software problems
The turrets do not communicate:
1. Check that the turrets are addressed correctly on the ModBus line;
2. Check that the RS-485/USB converter led blinks in pulse mode.
3. Check the bus connection on each turret.
23
Cod. 7.55.3.885.0
+39 035 946 111
8.30 - 12.30 / 14.00 - 18.00
lunedì ÷ venerdì - monday ÷ friday
24h
+39 035 946 260
[email protected]
www.gewiss.com
ULTIMA REVISIONE 04/2012
Ai sensi dell’articolo R2 comma 6 della Decisione 768/2008/CE si informa che responsabile dell’immissione del prodotto sul mercato Comunitario è:
According to article R2 paragraph 6 of the Decision 768/2008/EC, the responsible for placing the apparatus on the Community market is:
GEWISS S.p.A Via A. Volta, 1 - 24069 Cenate Sotto (BG) Italy Tel: +39 035 946 111 Fax: +39 035 945 270 E-mail: [email protected]