1
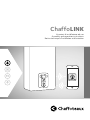
ChaffoLINK
Istruzioni di installazione ed uso
Assembly and operation instructions
Notice technique d’installation et d’entretien
CHAFFOLINK
Indice
2
1.
Generalità ........................................................................................................3
2.
Norme di sicurezza .......................................................................................4
3.
Caratteristiche tecniche .............................................................................6
4.
Descrizione del prodotto ...........................................................................8
5.
Installazione di Chaffolink .......................................................................10
6.
Prima accensione e collegamento ad internet.................................18
7.
Attivazione dei servizi internet .............................................................21
8.
Status funzionamento gateway ...........................................................22
1. GENERALITÀ
Vi preghiamo di leggere attentamente il
presente libretto di installazione contenente importanti indicazioni riguardanti
l’installazione, l’uso e la manutenzione di
Chaffolink.
All’interno della confezione è presente
inoltre una pratica guida rapida a colori
dedicata agli utenti finali, attraverso il
quale potranno scoprire tutte le novità
che Chaffoteaux ha pensato per loro.
CHAFFOLINK
Grazie per avere scelto Chaffolink, il sistema ideato e prodotto da Chaffoteaux
per fornire una nuova esperienza d’uso
del proprio sistema di riscaldamento domestico.
L’architettura di Chaffolink permette di
controllare la caldaia e altri prodotti di
riscaldamento, anche da dispositivi internet quali pc o smartphone, per garantirvi sempre il massimo del comfort e
della sicurezza.
3
2. NORME DI SICUREZZA
ATTENZIONE
Il seguente manuale costituisce parte integrante ed essenziale del prodotto, va
conservato con cura e deve sempre essere allegato al prodotto, anche in caso di
trasferimento presso altro proprietario o utilizzatore, o in caso di impiego presso
una differente applicazione.
CHAFFOLINK
Non è consentito utilizzare il prodotto con finalità differenti da quelle specificate nel presente manuale. Il produttore non potrà essere ritenuto responsabile di eventuali danni
causati da un uso improprio del prodotto o dal mancato adeguamento dell’installazione
alle istruzioni fornite in questo manuale.
Tutte le operazioni di manutenzione sul prodotto devono essere effettuate esclusivamente da personale qualificato e mediante l’utilizzo esclusivo di ricambi originali. Il produttore
non potrà essere ritenuto responsabile di eventuali danni correlati al mancato rispetto di
questa indicazione, il quale potrebbe compromettere la sicurezza dell’installazione.
2.1 Norme di sicurezza
LEGENDA SIMBOLI:
Il mancato rispetto dell’avvertenza comporta rischio di lesioni, in determinate circostanze
anche mortali, per le persone
Il mancato rispetto dell’avvertenza comporta rischio di danneggiamenti, in determinate
circostanze anche gravi, per oggetti, piante o animali.
Il produttore non potrà essere ritenuto responsabile di eventuali danni causati da un uso
improprio del prodotto o dal mancato adeguamento dell’installazione alle istruzioni fornite in questo manuale
4
Non effettuare operazioni che implichino la rimozione dell’apparecchio dalla sua
installazione.
Danneggiamento dell’apparecchio.
Non salire su sedie, sgabelli, scale o supporti instabili per effettuare la pulizia
dell’apparecchio.
Lesioni personali per la caduta dall’alto o per cesoiamento (scale doppie).
Non utilizzare insetticidi, solventi o detersivi aggressivi per la pulizia dell’apparecchio.
Danneggiamento delle parti in materiale plastico o verniciate.
Non utilizzare l’apparecchio per scopi diversi da quello di un normale uso domestico.
Danneggiamento dell’apparecchio per sovraccarico di funzionamento.
Danneggiamento degli oggetti indebitamente trattati.
Non fare utilizzare l’apparecchio da bambini o persone inesperte.
Danneggiamento dell’apparecchio per uso improprio.
Durante i lavori di pulizia, manutenzione e connessione è necessario isolare l’apparecchio dalla rete di alimentazione staccando la spina dalla presa.
Lesioni personali da folgorazione
I bambini devono essere sorvegliati per sincerarsi che non giochino con l’apparecchio e
con tutti i materiali di imballaggio del prodotto (punti metallici, buste in plastica, protezioni
in polistirolo etc.
La rimozione dei pannelli di protezione del prodotto e tutte le operazioni di manutenzione
e collegamento delle parti elettriche, non dovrebbero mai essere effettuate da personale
non qualificato.
CHAFFOLINK
L’apparecchio non è destinato a essere utilizzato da persone (bambini compresi) le cui
capacità fi siche, sensoriali o mentali siano ridotte, oppure con mancanza di esperienza o di
conoscenza, a meno che esse abbiano potuto beneficiare, attraverso l’intermediazione di
una persona responsabile della loro sicurezza, di una sorveglianza o di istruzioni riguardanti
l’uso dell’apparecchio.
PRODOTTO CONFORME ALLA DIRETTIVA EU
2012/19/EU- D.Lgs.49/2014
riguardante il trattamento dei Rifiuti di Apparecchiature Elettriche ed
Elettroniche (RAEE).
Il significato del simbolo del cestino barrato riportato sull’apparecchio indica che il prodotto non deve essere buttato nella spazzatura indifferenziata (cioè insieme ai “rifiuti
urbani misti”), ma deve essere gestito separatamente, allo scopo di sottoporlo ad apposite operazioni per il suo riutilizzo o di trattamento, per rimuovere e smaltire in modo
sicuro le eventuali sostanze pericolose per l’ambiente ed estrarre e riciclare le materie
prime che possono essere riutilizzate. L’utente è responsabile del conferimento dell’apparecchio a fine vita alle appropriate strutture di raccolta.
Questi tipi di apparecchi:
- non vanno mai buttati nella spazzatura indifferenziata
- devono essere consegnati ai Centri di Raccolta (chiamati anche isole ecologiche, piattaforme ecologiche) allestiti dai Comuni o dalle Società di igiene urbana.
- quando si acquista un nuovo apparecchio, si può consegnare il vecchio al negoziante,
che è tenuto a ritirarlo gratuitamente (ritiro “uno contro uno”).
Per ulteriori informazioni, sulla corretta dismissione delle apparecchiature, gli utenti potranno rivolgersi al servizio pubblico preposto o ai rivenditori.
5
3. CARATTERISTICHE TECNICHE
GATEWAY
Conformità
CHAFFOLINK
Standard
Installazione prodotto
Temperature operative
Temperature di stoccaggio
Alimentazione
Consumo
Classe di sicurezza
Classe ambientale
Massa
Grado di protezione
2006/95/EC “LVD” 2004/108/EC “EMC”
1999/05/EC “R&TTE”
EN 60950 - ETSI EN 300328
ETSI EN 301511 - ETSI EN 301489
Fisso a muro o su qualsiasi superficie liscia
-25°C/55°C
-40°C/70°C
220V AC-240VAC; -10% / +10%
10W e/o 200mA
II
3
0,58 kg
IP X4D
EXPERT CONTROL
Alimentazione elettrica
Assorbimento elettrico
Temperatura di funzionamento
BUS
max. < 0,5W
Temperatura di stoccaggio
Lunghezza e sezione cavo bus
-20 ÷ 70°C
NOTA:
PER EVITARE PROBLEMI DI INTERFERENZE, UTILIZZARE UN CAVO
SCHERMATO O UN DOPPINO TELEFONICO.
Memoria tampone
Comformità
Interferenze elettromagnetiche
Emissioni elettromagnetiche
comformità standard
Grado di risoluzione
Caratteristiche ERP
(solo con caldaia BUS)
6
-10 ÷ 60°C
max. 50 m
ø min. 0.5 mm²
2h
LVD 2006/95/EC EMC 2004/108/EC
EN 60730-1
0,1°C
Classe: V
Contributo riscaldamento: +3%
Aggiungendo sonda esterna Chaffoteaux:
Classe: VI
Contributo riscaldamento: 4%
Gateway
180 mm
47 mm
134 mm
16 mm
CHAFFOLINK
180 mm
Expert Control
96 mm
7
4. DESCRIZIONE DEL PRODOTTO
CHAFFOLINK
4. 1 Descrizione della confezione
All’interno della confezione si trova:
• Gateway con cavo di alimentazione
• Piastrina di fissaggio gateway
• Accessorio di termoregolazione
(Chaffoteaux Expert Control)
• Wall-plate di installazione accessorio
• Cavo di collegamento 2 poli
• Busta con 3 tasselli per piastrina di
fissaggio a muro
• Busta con 2 tasselli per accessorio di
termoregolazione
• Busta con 4 connettori e biadesivo
per piastrina di fissaggio a muro
• Libretto di installazione
• Quick guide per utenti finali
5
4
3
2
4.2 Descrizione gateway
1. Tasto ON/OFF
2. LED BUS
3. LED seriale (solo per caldaie senza
protocollo BUS)
4. LED connessione internet
5. Tasto configurazione iniziale
6. Connettore 230 V AC
7. Connettore LAN
8. Connettore seriale*
9. Connettore per antenna esterna
(versione GPRS)
10. Connettore TA*
11. Connettori BUS
1
9
220V
TA1
6
BUS
B
BUS
T B
T
7 8
10 11
* Non necessario per l’installazione
con Chaffoteaux Expert Control
8
1
4.3 Descrizione Expert Control
1. tasto indietro
(visualizzazione precedente)
2. manopola
3. tasto OK
(conferma l’operazione
o accede al menu principale)
4. DISPLAY
OK
Simboli display:
-(
)
Estate
3
4
OFF sistema spento
-(
) Programmazione oraria
) Funzionamento manuale
)
Indicazione presenza fiamma
)
Temperatura ambiente desiderata
- (
)
Temperatura ambiente rilevata
-(
)
Temperatura ambiente desiderata deroga
-(
)
- (SRA)
CHAFFOLINK
)
-(
-(
2
) Inverno
-(
-(
-(
1
Temperatura esterna
Funzione SRA attiva
-(
)
Funzione VACANZA attiva
-(
)
Riscaldamento attivo
-(
)
Sanitario attivo
-(
)
Segnalazione errore
- (COMFORT) Funzione comfort attiva
- (1.3 bar) Pressione impianto
-(
)
Presenza fiamma
-(
)
Solare attivo (ove presente)
-(
)
Menu completo:
-(
)
Impostazioni riscaldamento
-(
)
Impostazioni acqua calda
-(
)
Prestazioni sistema
-(
)
Opzioni schermo
9
5. INSTALLAZIONE DI CHAFFOLINK
CHAFFOLINK
Nel seguente capitolo viene descritto come effettuare l’installazione del sistema Chaffolink. Sì consiglia di iniziare la procedura realizzando prima la connessione del gateway
con l’accessorio di termoregolazione, quindi di effettuarne il collegamento con il prodotto di riscaldamento Chaffoteaux. Solo dopo aver realizzato tutti i precedenti passi,
sarà possibile collegare il Gateway all’alimentazione elettrica ed effettuarne il fissaggio
a parete tramite l’apposita piastrina di fissaggio.
IMPORTANTE:
l’installazione di Chaffoteaux Expert Control è possibile solo con prodotti di riscaldamento compatibili con protocollo Bus. Con prodotti privi di tale protocollo di comunicazione, utilizzare il kit Chaffolink nella versione con accessorio Chaffoteaux Zone
Control (paragrafo 5.3).
Se è presente nel sistema un vecchio termostato, è necessario rimuoverlo seguendo
le istruzioni riportate nel relativo manuale istruzioni e scollegare il cavo due poli dal
connettore TA1 sulla scheda caldaia.
ATTENZIONE!
L’installazione deve essere eseguita da personale tecnico qualificato.
Prima del montaggio disattivare l’alimentazione della caldaia. Il cavo BUS è polarizzato: per evitare problemi di avvio del sistema rispettare la polarità (T con T , B con
B) tra tutti i componenti del sistema.
5.1 Tipologie di installazioni realizzabili
A scopo puramente esemplicativo, si riportano nel seguente paragrafo alcuni principali schemi di impianto realizzabili utilizzando Chaffolink ed altri accessori già presenti nella
gamma prodotti Chaffoteaux, nonché le tipologie di servizio attivabili con tali configurazioni.
Con il termine “Telediagnostica” (TD) si intende di seguito il servizio orientato al Centro
Assistenza Tecnica, attreverso il quale vengono abilitate tuttwe le funzioni di assistenza del
prodotto da remoto di Chaffolink.
10
Con “Telecontrollo” (TC) si intende invece il servizio orientato all’utente finale, tramite il
quale egli può utilizzare la App per smartphone o il portale web per monitorare e impostare
il suo prodotto Chaffoteaux.
Per maggiori informazioni e dettagli sugli schemi installativi di seguito riportati, vi invitiamo
a contattare il Centro di Consulenza Tecnica Chaffoteaux.
Tipologia 1
Attivazione di TD e TC in un sistema
di riscaldamento base. (fig.1)
Sistema dove il prodotto Chaffoteaux
è collegato esclusivamente ad un unico accessorio di termoregolazione ON/
OFF ed in cui si vuole andare ad attivare
i servizi di Telecontrollo e Telediagnostica
Chaffolink.
fig.1
TERMOSTATO
TA
Azioni necessarie (fig.2):
- Rimuovere l’accessorio ON/OFF e
scollegare il cavo bipolare dall’ingresso
TA della caldaia
- installare Chaffoteaux Expert Control
- Installare il gateway Chaffolink
fig.2
EXPERT CONTROL
BUS
Tipologia 2
Attivazione della sola TD in un sistema di riscaldamento base. (fig.3)
Sistema in cui si va ad attivare la sola
Telediagnostica per il Centro Assistenza,
senza installare l’accessorio Chaffoteaux
Expert Control.
Azioni necessarie (fig.4):
In questa configurazione è possibile lasciare installato un accessorio di termoregolazione ON/OFF già presente nell’abitazione. Pertanto è sufficiente:
- Installare il gateway Chaffolink
- Collegare il gateway al prodotto di riscaldamento Chaffoteaux utilizzando
la connessione BUS
CHAFFOLINK
GATEWAY
fig.3
TERMOSTATO
TA
fig.4
11
GATEWAY
TERMOSTATO
BUS
TA
Tipologia 3
Attivazione di TD e TC in un sistema con 2 o più zone idrauliche controllato da
dispositivi BUS. (fig.5)
Sistema in cui è presente un modulo idraulico multizona Chaffoteaux, a cui sono collegati accessori di gestione delle zone BUS quali Chaffoteaux Expert Control e/o Chaffoteaux Sonda Ambiente.
Azioni necessarie (fig.6):
- Rimuovere tutti gli accessori Chaffoteaux Sensore Ambiente presenti nel sistema e
sostituirli con Chaffoteaux Expert Control
- Installare il gateway Chaffolink e collegarlo tramite connessione BUS al sistema di
riscaldamento
CHAFFOLINK
fig.5
EXPERT
CONTROL
BUS
BUS
MODULO
IDRAULICO
ZONE
CONTROL
fig.6
GATEWAY
EXPERT CONTROL
BUS
BUS
MODULO
IDRAULICO
Tipologia 4
Attivazione di TD e TC in un sistema con 2 o più zone idrauliche, controllato
da dispositivi ON/OFF. (fig.7)
Sistema in cui sono presenti dispositivi di gestione delle zone controllati da accessori
di termoregolazione ON/OFF.
12
Azioni necessarie (fig.8):
In questa configurazione è possibile lasciare installato un accessorio di termoregolazione ON/OFF già presente nell’abitazione. Pertanto è sufficiente:
- Rimuovere gli accessori ON/OFF presenti e sostituirli con Chaffoteaux Expert Control
- Installare Chaffoteaux Kit Multifunzione in una posizione opportuna
- Installare il gateway Chaffolink e collegarlo tramite connessione BUS al sistema di
riscaldamento
fig.7
fig.8
GATEWAY
TERMOSTATO
TA1
EXPERT
CONTROL
KIT
MULTIFUNZIONALE
BUS
CHAFFOLINK
TA2
5.2 Installazione di Expert Control
La seguente procedura deve essere eseguita per effettuare l’installazione dell’ accessorio fornito con Chaffolink e per sostituire un vecchio termostato eventualmente
presente nell’abitazione.
Posizionamento
L’accessorio rileva la temperatura ambiente, quindi nella scelta della posizione di
installazione vanno tenuti presenti alcuni accorgimenti.
Posizionarlo lontano da fonti di calore (radiatori, raggi solari, caminetti, ecc.) e lontano
da correnti d’aria o aperture verso l’esterno, le quali potrebbero influenzarne la
rilevazione. Installarlo a circa 1,50 m di altezza dal pavimento.
13
5.3 Installazione Expert Control
CHAFFOLINK
Installazione a parete
- collegare la coppia di fili al connettore,
- aprire i fori necessari per il fissaggio
(fig.1)
- fissare la base dell’apparecchio alla
scatola sulla parete, usando le viti
fornite nel kit (fig.2),
- posizionare l’interfaccia di sistema
sulla base, spingendola delicatamente verso il basso (fig.3).
B T
BUS
B T
fig. 1
NOTA:
Per evitare problemi di interferenze,
utilizzare un cavo schermato.
Le seguenti versioni software di
Chaffoteaux Expert Control non
sono compatibili con Chaffolink:
-01.00.00
-01.00.04
In tal caso si prega di sostituire la
Expert Control esistente con quella
fornita nel kit Chaffolink.
fig. 2
fig. 3
14
Una volta effettuata l’installazione
dell’accessorio di termoregolazione, è
possibile effettuarne il collegamento con
il gateway Chaffolink.
Procedere con il collegamento nel modo
seguente:
1. Aprire il pannello frontale del gateway
svitando le due viti di chiusura poste
nella parte inferiore dell’apparecchio
(1.) ruotare leggermente verso di sè
il coperchio (2.) e tirarlo verso il basso (3.).
2. Collegare l’altra estremità del cavo
bipolare precedentemente connesso
all’accessorio Chaffoteaux ad un ingresso BUS del gateway, utilizzando
uno dei connettori forniti in dotazione.
1.
3.
2.
1.
CHAFFOLINK
5.4 Collegamento del Gateway
con accessorio di termoregolazione Chaffoteaux
BUS
B
220V
TA1
BUS
B
T
BUS
T B
T
15
Collegamento del gateway con accessorio Chaffoteaux Expert Control
5.5 Collegamento del gateway
al prodotto di riscaldamento Chaffoteaux
• Collegare il cavo bipolare fornito in
dotazione ad uno degli ingressi BUS
del gateway
• Collegare l’altra estremità del cavo
al connettore BUS del prodotto di
riscaldamento Chaffoteaux presente
nell’abitazione.
220V
TA1
TA2
SE
TNK
SOL
TA1
CN19
B FLOOR
BUS
CN1
T
BUS
B
N L
16
N L
4
1CN14 1
CHAFFOLINK
1
FLAME
BUS
T B
T
Realizzate tutte le connessioni elettriche tra Gateway, accessorio di termoregolazione e prodotto di riscaldamento Chaffoteaux, è possibile concludere
l’installazione effettuando il fissaggio del
gateway ad una parete o base di appoggio.
Il gateway ha ottenuto la certificazione
IP X4D, tuttavia se ne sconsiglia l’installazione in posizioni poco protette o
soggette ad intemperie ed altri agenti
esterni che ne potrebbero provocare il
danneggiamento.
E’ possibile effettuare l’installazione su di
una superficie liscia utilizzando il biadesivo o installarlo a parete tramite i tasselli forniti nella confezione.
CHAFFOLINK
5.6 Fissaggio del gateway alla parete
Nota: prima di fissare il gateway si
consiglia di effettuare tutti i collegamenti, l’accensione e la sua configurazione.
ATTENZIONE!
Prima di applicare il biadesivo, si
consiglia di pulire bene la superficie
con solventi e riascugare bene.
17
6. PRIMA ACCENSIONE
E COLLEGAMENTO AD INTERNET
Di seguito viene descritto come collegare Chaffolink ad internet, attraverso due procedure differenti a seconda che venga utilizzato un gateway ADSL o GPRS.
CHAFFOLINK
6.1 Collegamento tramite Gateway ADSL
18
Chaffolink è in grado di utilizzare una
connessione LAN o Wi-Fi, per collegarsi
ad un router ADSL. Nel caso si utilizzasse una connessione WiFi, passare direttamente al punto 2 della seguente procedura di configurazione.
1. Con Chaffolink spento e non collegato alla rete elettrica, aprire il pannello
frontale svitando le due viti e collegare il cavo LAN al relativo connettore (A). Collegare l’altra estremità del
cavo al router ADSL, quindi richiudere
il pannello frontale.
2. Alimentare il gateway e premere il tasto ON/OFF.
Per alcuni minuti il gateway effettua
una procedura di avvio, durante la
quale tutti i led lampeggiano in sequenza di colore blu. Alla sua conclusione, il led WEB resta rosso fisso,
mentre il led BUS rimane verde ( così
come il led Serial quando collegato
con caldaia priva di protocollo BUS).
3. Dopo aver verificato che il router
ADSL sia in funzione, tenere premuto
il tasto di configurazione iniziale (per
almeno 5 secondi) finché il led WEB
diventa verde lampeggiante.
A questo punto il gateway ha creato
una nuova rete WiFi che rimarrà attiva per 10 minuti, trascorsi i quali sarà
necessario ripetere la procedura.
220V
TA1
BUS
B
BUS
T B
T
A
NOTA:
Chaffolink supporta le seguenti
crittografie per le reti Wi-Fi:
- WEP
- WPA/WPA2 Personal
Nota:
In caso di insuccesso (led WEB rosso
accesso) ripetere la procedura precedentemente descritta partendo
dal punto 3 di questo capitolo.
La procedura deve essere ripetuta
ogni qual volta si effettui una modifica alla rete internet dell’abitazione
o si decida di passare dalla WiFi alla
connesione LAN o viceversa
CHAFFOLINK
4. Aprire le impostazioni di rete del proprio dispositivo internet (smartphone, PC, Tablet...) ed effettuare una
ricerca delle reti Wi-Fi disponibili.
Selezionare la rete Remote GW
Thermo.
5. Aprire il web browser (Internet Explorer, Safari, Chrome, etc...) del dispositivo e digitare il link 192.168.1.1
nella barra degli indirizzi.
6. Seguire passo passo le indicazioni
fino all’ultimo step.
7. Una volta giunti all’ultimo step della procedura sul web browser, se la
procedura è andata a buon fine il led
WEB inizierà a lampeggiare verde velocemente per poi diventare fisso. A
questo punto la procedura è conclusa.
Suggerimento:
In caso di segnale WiFi debole è possibile utilizzare dei ripetitori di segnale facilmente reperibili in commercio.
19
CHAFFOLINK
6.2 Collegamento tramite GPRS
Utilizzando un gateway GPRS, è possibile collegare Chaffolink ad internet attraverso
la seguente procedura
1. Alimentare il gateway. Premere il tasto ON/OFF.
Per alcuni minuti il gateway effettua una procedura di avvio, durante la quale tutti
i led lampeggiano in sequenza di colore blu.
2. Una volta conclusa la procedura di avvio, il led WEB visualizzerà un’informazione
sull’intensità del segnale GPRS:
a. Blu fisso → massima intensità
b. Blu lampeggiante → media intensità
c. Rosso lampeggiante → bassa intensità
d. Rosso fisso → assenza di campo
Si consiglia di posizionare il gateway in modo che, durante questa fase di attivazione, possa sempre visualizzare una luce blu. In alternativa è possible collegare il
gateway al kit antenna esterna (codice 3318892).
3. Tenere premuto il pulsante di configurazione iniziale per 5 secondi, finché il led
WEB inizierà ad emettere una luce lampeggiante verde.
4. Se la procedura è andata a buon fine il led WEB di connessione ad internet resta
verde fisso.
A questo punto la procedura è conclusa.
Nota: in caso di insuccesso, ripetere la procedura precedentemente descritta
dal punto 3.
NOTA:
Eseguire le procedure di collegamento ai servizi internet solo dopo aver collegato il BUS.
Nel caso si tenti di avviare le procedure con BUS scollegato, il led WEB non
lampeggia verde e la procedura non viene finalizzata.
20
7. ATTIVAZIONE DEI SERVIZI INTERNET
7.1 Centri Assistenza Chaffoteaux
I Centri Assistenza Chaffoteaux possono accedere alla piattaforma di telediagnostica
inserendo le proprie credenziali sul portale Chaffolink.
https://www.chaffolink.remotethermo.com
Per ulteriori informazioni sul servizio contattare il numero verde del Centro di Consulenza Tecnica Chaffoteaux Thermo.
7.2 Utenti finali
Per ulteriori informazioni, consultare la quick guide utente compresa nella confezione
o contattare (solo per l’Italia) il Servizio Clienti Chaffoteaux al numero 199.176.060*,
opzione 4.
CHAFFOLINK
Le funzioni di telecontrollo per utente finale sono raggiungibili scaricando l’APP ufficiale Chaffolink su Apple Store o Google Play o accedendo da web browser al portale
Chaffolink.
www.chaffolink.remotethermo.com
21
* Costo della chiamata da telefono fisso senza scatti alla risposta: 14,49 centesimi al minuto in fascia oraria intera e 5,67
centesimi al minuto in fascia oraria ridotta (Iva inclusa). Per chiamate da rete mobile: costo massimo 48,80 centesimi al
minuto con scatto alla risposta di 15,25 centesimi.
8. STATUS FUNZIONAMENTO GATEWAY
I tre led posti nella facciata frontale del gateway permettono di avere un feedback
immediato relativo allo stato di funzionamento del prodotto. Nelle seguenti tabelle
sono riportate le diverse codifiche colori che si possono avere con il gateway in versione ADSL e GPRS.
CODIFICA LED IN VERSIONE ADSL
CHAFFOLINK
Led WEB (collegamento ad internet)
Spento
Gateway non alimentato o spento
Verde Fisso
Gateway correttamente configurato e
connesso ad internet
Verde Lampeggiante
Gatewaty in attesa di essere configurato
Rosso Fisso
Assenza di connessione al servizio o
gateway non configurato
Led SERIAL (connessione caldaia tramite seriale ove necessario)
Spento
Gateway spento o
cavo seriale non collegato
Led BUS (collegamento con la piattaforma BUS)
Spento
Gateway spento
Verde Fisso
Collegamento BUS funzionante
Rosso Fisso
Errore BUS o cavo Bus non collegato
TUTTI i Led
22
Spenti
Gateway spento
Blu lampeggio sequenziale
Avvio del gateway
CODIFICA LED IN VERSIONE GPRS
Led WEB (collegamento ad internet)
Spento
Gateway spento
Verde fisso
Gateway configurato correttamente
Verde lampeggiante
Configurazione Gateway in corso
Blu fisso
Segnale GPRS alto
Blu lampeggiante
Segnale GPRS medio
Rosso lampeggiante
Segnale GPRS basso
Rosso fisso
Segnale GPRS scadente o assente
Led SERIAL (connessione caldaia tramite seriale ove necessario)
Spento
Gateway spento o con cavo seriale non collegato
Spento
Gateway spento
Verde Fisso
Cavo BUS collegato e
funzionante
Rosso Fisso
Errore BUS o
cavo Bus non collegato
CHAFFOLINK
Led BUS (collegamento con la piattaforma BUS)
TUTTI i led
Spento
Gateway spento
Blu lampeggiante
Avvio del gateway
23
CHAFFOLINK
Index
24
1.
Overview ......................................................................................................25
2.
Safety regulations......................................................................................26
3.
Technical features ......................................................................................28
4.
Product description...................................................................................30
5.
Chaffolink installation ...............................................................................32
6.
First start and internet connection .....................................................40
7.
Internet Services Activation ..................................................................43
8.
Gateway status ..........................................................................................44
1. OVERVIEW
Thank you for choosing Chaffolink, the
new service designed and manufactured by Chaffoteaux to provide a new
user experience for their heating systems.
Together with Chaffolink we provide
also a colour quick guide dedicated to
end users, useful for discover all the
new services that Chaffoteaux prepared for them.
CHAFFOLINK
Through this new service it will be possible to control Chaffoteaux heating
products using internet devices such as
personal computers and smartphones,
in order to bring the heating comfort to
a new level of quality and efficiency.
25
2. SAFETY REGULATIONS
ATTENTION
This manual constitutes an integral and essential part of the product: carefully
read the instructions and warnings contained in it, since they provide important
notices concerning the operation and maintenance of the device itself.
Please carefully store this manual in a safe place and keep it attached to the product in case of transfer to another owner or employment with a different application
CHAFFOLINK
It is not allowed to use this product for purposes other than those specified in this manual.
The manufacturer cannot be held responsible for any damage caused by improper use or
the failure to adapt the installation to the instructions provided in this manual.
All installation, maintenance and any other interventions must be performed by fully qualified personnel, in conformity with all applicable regulations and the instructions provided
by the manufacturer, always using original spare parts. Before cleaning the outer parts,
switch off the appliance.
2.1 Safety regulations
SYMBOL LEGEND:
Failure to comply with this warning implies the risk of personal injury, which in some circumstances may even be fatal.
Failure to comply with this warning implies the risk of potentially serious damage to objects and
plants or harm to animals.
Do not perform operations that involve removing the device from its housing.
Damage to the device.
Do not climb onto chairs, stools, ladders or unstable supports to clean the device.
Personal injury caused by falling from heights or shearing (stepladders shutting accidentally).
Do not use insecticides, solvents or aggressive detergents to clean the device.
Damage to plastic or painted parts.
26
Do not use the device for any purpose other than normal household operation.
Damage to the device caused by operation overload.
Damage to objects caused by improper use.
Do not allow children or inexperienced persons to operate the device.
Damage to the device caused by improper use.
THIS PRODUCT CONFORMS TO EU DIRECTIVE EU 2012/19/EU
CHAFFOLINK
CAUTION!
The device is not intended for use by persons (including children) with reduced physical, sensory or
mental abilities, or that lack the necessary experience and knowledge, unless they are supervised or
have been adequately trained in device operation by a person responsible for their safety.
Children must be supervised at all times to ensure that they do not play with the device.
IThe barred dustbin symbol appearing on the device indicates that the product must be disposed
of separately from household waste once it reaches the end of its lifespan, and transferred to a
waste disposal site for electric and electronic equipment, or returned to the dealer when purchasing a new device of the same kind.
The user is responsible for delivering the decommissioned device to a suitable waste disposal site.
Proper separated collection of the decommissioned device and its subsequent eco-compatible
recycling, treatment and disposal helps to prevent negative effects on the environment and
health, besides encouraging the reuse of the materials comprising the product.
For further details on the available waste collection systems, contact your local waste disposal
office, or the dealer from which the product was purchased.
27
3. TECHNICAL FEATURES
Conformity
Standards
CHAFFOLINK
Product installation
Operating temperature
Storage temperature
Power supply
Electrical absorption
IEC protection class
Environmental class
Weight
International Protection Marking
GATEWAY
2006/95/EC “LVD” 2004/108/EC “EMC”
1999/05/EC “R&TTE”
EN 60950 - ETSI EN 300328
ETSI EN 301511 - ETSI EN 301489
On the wall or on the product’s chassis, when
possible
-25°C/55°C
-40°C/70°C
220V AC-240VAC; -10% / +10%
10W e/o 200mA
II
3
0,58 kg
IP X4D
Power supply
Electrical absorption
Operating temperature
Storage temperature
Bus wire length and cross-sectional area
NOTE:
TO AVOID INTERFERENCE PROBLEMS, USE A SHIELDED CABLE OR
TWISTED PAIR CABLE.
Buffer memory
Conformity
Electromagnetic interference
Electromagnetic emissions
Conformity to standards
Resolution degree
28
ERP features
(only with BUS boilers)
EXPERT CONTROL
BUS
max. < 0,5W
-10 ÷ 60°C
-20 ÷ 70°C
max. 50 m
ø min. 0.5 mm²
2h
LVD 2006/95/EC EMC 2004/108/EC
EN 60730-1
0,1°C
Class: V
Heating contribution: +3%
Adding an Chaffoteaux outdoor sensor:
Class: VI Heating contribution: +4%
Gateway
180 mm
47 mm
134 mm
16 mm
CHAFFOLINK
180 mm
Expert Control
96 mm
29
4. PRODUCT DESCRIPTION
CHAFFOLINK
4. 1 Package description
Contents supplied within the Chaffolink
package:
• Gateway with power cable
• Gateway wall plate
• Thermoregulation accessory (Chaffoteaux Expert Control or Chaffoteaux Zone Control)
• Expert Control wall plate (only with
Chaffoteaux Expert Control)
• 2 pole connection cable
• Cable for serial communication (only
for boilers without BUS protocol)
• Envelope with 3 wall plugs for gateway wall plate
• Envelope with 2 wall plugs for thermoregulation accessory
• Envelope with 4 connectors and 1
sticker
• Installation manual
• Quick guide for end users
5
4
3
2
1
4.2 Gateway description
30
1. On/Off button
2. BUS LED
3. Serial communication LED (only for
boilers without BUS protocol)
4. Internet communication LED
5. First Configuration button
6. 230V AC connector
7. LAN port
8. Serial port*
9. External antenna port
(only for GPRS version)
10. TA port*
11. BUS port
* Not to be used
9
220V
TA1
6
BUS
B
BUS
T B
T
7 8
10 11
1
4.3 Expert Control description
Buttons and Display:
1. back button
(previous screen)
2. knob
3. OK button
(to confirm operation
or access main menu)
4. DISPLAY
Display symbols:
-(
)
2
3
4
) Winter
)
OFF, system off
-(
)
Time program
-(
)
Manual operation
)
Flame present indication
)
Desired room temperature
- (
Room temperature detected
-(
)
-(
)
- (SRA)
CHAFFOLINK
-(
-(
1
Summer
-(
-(
OK
Desired room temperature override
Outdoor temperature
Thermoregulation function enabled
-(
)
HOLIDAY function enabled
-(
)
Central heating active
-(
)
Domestic hot water active
-(
)
Error indication
- (COMFORT) Comfort function enabled
- (1.3 bar)
System pressure
-(
)
Flame present
-(
)
Solar heating system active (where present)
-(
)
Complete menu
-(
)
CH settings
-(
)
DHW settings
-(
)
System performance
-(
)
Screen setting
31
5. CHAFFOLINK INSTALLATION
This chapter describes the installation procedure of Chaffolink. We recommend to start
up the procedure making first the gateway connection with the thermoregulation accessory and with the heating product. After that, it will be possible to connect the
gateway to the power supply and to fasten it to the wall through the wall plate.
CHAFFOLINK
Important:
The installation of Chaffoteaux Expert Control is possible only with Chaffoteaux products running the BUS protocol. If there is an existing thermostat connected to the
heating system replace as follows: Remove the existing room thermostat following
the procedure described it its installation manual, the 2 core cable has to be unplugged
from the TA1 connector on the boiler.
CAUTION!
The installation must be performed by qualified personnel. Before its assembly,
switch off the power supply of the boiler. The BUS cable is polarized: to avoid any
communication issue respect the polarity between all the products in the heating
system.
5.1 Possible installation architectures
With the intent to give several examples to lead the installation of Chaffoteaux Net,
in the following paragraph are reported some major system diagrams that could be
realized through Chaffoteaux net and other accessories already in the Chaffoteaux
products range. With each example, is also specified which services can be activated.
The term “Remote Diagnostics” (RD) refers to the utility dedicated to Service Centers,
through which all the assistance features of Chaffoteaux Net are enabled.
“Remote Control” (RC) refers instead to the service oriented to the end user, through
which he can use the Chaffoteaux Net smartphone app or web portale to monitor and
set its Chaffoteaux products.
For further info and details on the installation diagrams shown below, please contact
the Chaffoteaux Technical Center of your Country.
32
Type 1
Activation of RD and RC in a basic heating system. (fig.1)
Basic system where the Chaffoteaux product is only linked to one ON/OFF thermoregulation accessory and both Remote
Diagnostic and Control services have to
be activated.
fig.1
THERMOSTAT
TA
Required actions (fig.2):
- Remove the ON/OFF accessory and
unplug the 2-wires cable from the TA
port of the boiler
- Install Chaffoteaux Expert Control
- Install the Chaffoteaux Net gateway
fig.2
EXPERT
CONTROL
BUS
Type 2
RD activation only in a basic heating
system. (fig.3)
Basic system where only Remote Diagnostic service has to be activated and
therefore the installation of Chaffoteaux
Expert Control is not required.
Required actions (fig.4)
In this configuration it is possible to keep
installed the old ON/OFF thermoregulation accessory. Therefore it is necessary
to:
- Install the Chaffoteaux Net gateway
- Link the gateway to the Chaffoteaux
heating product using BUS connection
.
CHAFFOLINK
GATEWAY
fig.3
BASIC CONTROL
TA
fig.4
33
GATEWAY
BASIC CONTROL
BUS
TA
Type 3
Activation of RD and RC in a 2 or more hydraulic zones system, controlled through BUS thermoregulation accessories. (fig.5)
System with an Chaffoteaux Hydraulic Module (eg: MGm II Evo) linked to BUS accessories like Chaffoteaux Expert Control and Chaffoteaux Zone Control.
Required actions (fig.6):
- Remove all Chaffoteaux Zone Controls
accessories in the system and replace
them with Chaffoteaux Expert Control
- Install the Chaffoteaux Net gateway
and plug to the heating system using
the BUS connection.
CHAFFOLINK
fig.5
EXPERT CONTROL
BUS
BUS
HYDRAULIC
MODULE
34
ZONE
CONTROL
fig.6
GATEWAY
EXPERT CONTROL
BUS
BUS
HYDRAULIC
MODULE
Type 4
Activation of RD and RC in a 2 or more hydraulic zones system, controlled through ON/OFF accessories. (fig.7)
System where are installed zones management devices controlled through ON/OFF
thermoregulation accessories.
Required actions (fig.8):
- Remove all ON/OFF accessories in the system and replace with Chaffoteaux Expert
Control
- Install the Chaffoteaux Multifunctional Kit
- Install the Chaffoteaux Net gateway and link to the heating system through the BUS
connection
fig.7
fig.8
GATEWAY
THERMOSTAT
MULTIFUNCTIONAL
KIT
BUS
TA2
CHAFFOLINK
TA1
EXPERT
CONTROL
5.2 Installation Chaffoteaux Expert Control
The following procedure has to be made in order to install the thermoregulation accessory supplied in the Chaffoteaux Net package and to replace an old thermostat that may
be already in the dwelling.
Positioning
The device detects the room temperature, therefore several factors should be taken
into account when choosing an installation position. Keep it away from sources of heat
(radiators, sunlight, fireplaces, etc.) and from draughts, doorways and windows which
could affect the temperature measurement. We recommend to install it approximately
1.50 metres above the floor level.
35
5.2 Expert Control installation
Installation
- connect the pair of wires to the connector
(fig. 1);
- open up the holes required for fixing;
- f ix the base of the device to the box
on the wall using the screws supplied in
the kit (fig. 2);
- position the system interface on the base,
pushing it gently downwards (fig. 3).
CHAFFOLINK
NOTE: To avoid interference problems
when connecting the ZONE CONTROL
and boiler, use a shielded cable or twisted pair cable.
The following software versions of
Chaffoteaux Expert Control are not
compatible with Chaffolink:
- 01.00.00
- 01.00.04
In this case, please replace the old Expert Control with the one provided
with Chaffolink.
B T
BUS
B T
fig. 1
fig. 2
fig. 3
36
Once the installation of the thermoregulation accessory is done, it is possible
to link it with the Chaffolink gateway.
Proceed as follows:
1. Open the front panel of the gateway
by removing the two locking screws
placed at the bottom of the device (fig. 1), slightly rotate the cover
(fig.2) and pull it down (fig. 3).
2. Connect the two core cable previously linked to the thermoregulation accessory to one of the BUS
ports using one of the orange connectors supplied in the kit.
1.
CHAFFOLINK
5.3 Gateway installation with the
thermoregulation accessory
3.
2.
1.
BUS
B
220V
TA1
BUS
B
T
BUS
T B
T
37
Connection of the gateway with Chaffoteaux Expert Control or Zone Control
5.4 Gateway link to the heating product
• Connect the two-core cable supplied
in the package to the BUS port of the
gateway, using 1 orange connector
also supplied.
• Connect the other end of the cable
to the BUS port of the heating product, using another orange connector.
220V
TA1
TA2
SE
TNK
SOL
TA1
CN19
B FLOOR
BUS
CN1
T
BUS
B
N L
38
N L
4
1CN14 1
CHAFFOLINK
1
FLAME
BUS
T B
T
Once all the electrical connections
between the gateway, the thermoregulation accessory and the Chaffoteaux
heating product is made,it is possible to
finish the installation by attaching the
gateway to a wall or to other vertical
supports. The gateway is water protected IP X4D, however it is not recommended to install in weathered positions
or subject to other external factors that
could cause damage. The gateway can
be installed on a smooth surface using
the adhesive or, alternatively, using the
supplied screws for the wall plate.
Note: before fixing the gateway
to the wall, we recommend that all
electric connections and the product
configuration have to be completed.
CHAFFOLINK
5.5 Gateway fixing on a flat surface
ATTENTION!
Before applying the biadhesive, we
recommend to carefully clean the
support.
39
6. FIRST START AND INTERNET CONNECTION
In this chapter it is described how to connect the Chaffolink system to internet, through
two different procedures depending on whether a ADSL or GPRS gateway version is used.
CHAFFOLINK
6.1 Internet connection through ADLS router
40
Chaffolink can communicate with an
ADSL router using a LAN cable or Wi-Fi
connection.
In the latter case, please skip to step 2
of the following procedure.
1. With Chaffolink switched OFF and
not connected to the power line,
open the front panel, connect the
LAN cable to its connector and close
the panel.
2. Power supply the gateway and press
the ON/OFF button. For few minutes the gateway performs its startup
procedure, during all LEDs will flash a
blue sequence. At its conclusion, the
WEB led remains fixed red, while the
BUS (and SERIAL, depending on the
installation) remains fixed green.
3. Press and hold the start-up button
for at least 5 seconds, until the WEB
led start to flash a green light. At this
point the gateway has created a new
Wi-Fi access point that will be kept
active for 10 minutes. After this time
elapsed, it will be possible – if necessary – to repeat the procedure.
4. Open the network settings of your
personal internet device (smartphone, pc, tablet..) and search for new
Wi-Fi networks available. Select the
Remote GW Thermo network.
5. Once your device is connected to
this network, open the web browser
(Explorer, Chrome, Firefox...) and go
220V
TA1
BUS
B
BUS
T B
T
A
NOTE:
Chaffolink is compatible with the
following Wi-Fi security settings:
- WEP
- WPA/WPA2 Personal
Note:
in case of failure (WEB led red), repeat the above procedure starting
from point 3. The process must
be repeated any time a change has
made on the Wi-Fi line present in the
dwelling, or in case there is a switch
between Wi-Fi and ADSL connection.
Suggestion:
If the Wi-Fi signal is weak and is not
possible to use a LAN communication, it is possible to use a Wi-Fi repeater, available on many consumer
electronics stores
CHAFFOLINK
to the following link: 192.168.1.1
6. Follow each step of the directions given in the web browser to connect
Chaffolink with ADSL router.
7. Wait until the WEB led on the gateway make a quick green flash. If the
procedure has been successful, the
WEB led will remains green and the
process is complete.
41
CHAFFOLINK
6.2 Connection through GPRS gateway
When using a GPRS gateway, please follow the procedure below to connect Chaffolink to internet.
1. Power on the gateway and press the ON/OFF button. For few minutes the gateway performs its startup procedure, during which all LEDs will flash a blue sequence. At its conclusion, the WEB led remains off, while the BUS (and SERIAL,
depending on the installation”) remains on.
2. Once the procedure is done, the WEB led will show the strength of the GPRS
signal as follows
a. Steady blue Ð Max signal strength
b. Flashing blue Ð Medium strength
c. Flashing red Ð Low strength
d. Steady red Ð No line
Note: we suggest to place the gateway so that the Max intensity of the GPRS
signal is reached. Moreover, it is possible to use the external antenna kit, provided
by Chaffoteaux (code 3318892).
3. Press and hold the start-up button until the WEB led starts to flash a green light:
the gateway is now trying to SRAmatically connect to the Chaffoteaux server.
4. If the procedure has been successful, the WEB led will remain green and the process is complete
Note:
in case of failure (WEB led red), repeat the above procedure starting from
point 3.
Important:
please begin the previously described procedure once the gateway has been
linked to the thermoregulation accessories through the BUS protocol, otherwise the gateway won’t be able to connect to internet.
42
7. INTERNET SERVICES ACTIVATION
7.1 Chaffoteaux Service Centres
Service Centres certified by Chaffoteaux can access to Chaffolink platform typing
their log-in credentials on page:
https://www.chaffolink.remotethermo.com
For further information, please contact the official Chaffoteaux Service Centres.
7.2 End users
CHAFFOLINK
End users can control their Chaffoteaux products through their smartphones downloading the Chaffolink App on Apple Store or Google Play. Furthermore, it is also
possible to use any internet device accessing the Chaffolink page at:
www.https://www.chaffolink.remotethermo.com
43
8. GATEWAY STATUS
The three LEDs on the front cover of the gateway will allow you to receive a continuous feedback regarding the status of the whole Chaffolink platform. The following
tables describe the meaning of each different colour that the three LEDs could show:
ADSL GATEWAY
CHAFFOLINK
WEB led
OFF
Gateway OFF or not powered
Steady green
Gateway properly configured and connected
Flashing green
Gateway waiting to be set up
Steady red
Gateway not configured, or ADSL connection
not available
SERIAL led
OFF
Gateway OFF or serial cable not used
BUS led
OFF
Gateway OFF
Steady green
BUS working correctly
Steady red
BUS error or cable not connected
ALL THREE LEDs TOGETHER
44
OFF
Gateway OFF
Flashing blue
Gateway startup procedure ongoing
LED CODE GPRS VERSION
WEB led
OFF
Gateway OFF
Steady green
Gateway properly configured
Flashing green
Gateway waiting to be set up
Steady Blue
High GPRS signal
Flashing blue
Medium GPRS signal
Flashing red
Low GPRS signal
Steady red
Weak or no GPRS signal
SERIAL led
OFF
Gateway OFF or serial cable not used
OFF
Gateway OFF
Steady green
BUS working correctly
Steady red
BUS error or cable not connected
ALL THREE LEDs TOGETHER
OFF
Gateway OFF
Flashing blue
Gateway startup procedure ongoing
CHAFFOLINK
BUS led
45
CHAFFOLINK
Table des matières
46
1.
Généralités ...................................................................................................47
2.
Consignes de sécurité ..............................................................................48
3.
Caractéristiques techniques .................................................................50
4.
Description du produit .............................................................................52
5.
Installation d'Chaffolink ..........................................................................54
6.
Premier démarrage et connexion à internet ...................................62
7.
Activation des services internet .........................................................65
8.
État de fonctionnement passerelle ....................................................66
1. GÉNÉRALITÉS
Veuillez lire attentivement cette notice
d'installation qui contient des informations importantes concernant l'installation, l'utilisation et l'entretien d'Chaffolink.
Vous trouverez dans l'emballage un
guide pratique et rapide en couleurs
dédié aux utilisateurs finals, à travers
lequel vous pourrez découvrir toutes les
nouveautés qu'Chaffoteaux a imaginé
pour vous.
CHAFFOLINK
Merci d'avoir choisi Chaffolink, le système conçu et produit par Chaffoteaux
pour fournir une nouvelle expérience
d'utilisation de votre système de chauffage domestique.
L'architecture d'Chaffolink permet de
contrôler la chaudière et les autres systèmes de chauffage, à partir de terminaux
internet tels que l'ordinateur ou le smartphone, en garantissant un maximum de
confort et de sécurité.
47
2. CONSIGNES DE SÉCURITÉ
ATTENTION
Cette notice est partie intégrante et essentielle du produit. Elle doit être soigneusement conservée et doit toujours être jointe au produit, même en cas de
transfert à un autre propriétaire ou utilisateur, ou dans le cas de l'utilisation avec
une autre application.
CHAFFOLINK
Interdiction d'utiliser l'appareil à des fins autres que celles prévues dans la présente notice.
Le fabricant ne peut en aucun cas être tenu pour responsable des dommages éventuels
dus à un usage impropre du produit ou au non-respect des consignes d'installation fournies par la présente notice.
Toutes les opérations d'entretien du produit doivent être effectuées uniquement par un
personnel qualifié, en utilisant exclusivement des pièces détachées d'origine. Le fabricant
ne peut en aucun cas être tenu pour responsable de tout dommage dérivant du non-respect de cette consigne, qui risque de compromettre la sécurité de l'installation.
2.1 Consignes de sécurité
LÉGENDE DES SYMBOLES :
Le non-respect des avertissements comporte un risque de blessures, pouvant même
entraîner la mort, des personnes.
Le non-respect des avertissements de danger peut porter atteinte et endommager,
gravement dans certains cas, les biens, les plantes ou blesser les animaux.
Le fabricant ne peut en aucun cas être tenu pour responsable des dommages éventuels
dus à un usage impropre du produit ou au non-respect des consignes d'installation fournies par la présente notice.
48
N'effectuer aucune opération exigeant la dépose de l'appareil.
Dommages causés à l’appareil.
Ne pas grimper sur des chaises, des tabourets, des échelles ou des supports instables pour nettoyer l'appareil.
Blessures provoquées par la chute d'une hauteur élevée ou par coupure (échelle pliante).
Ne pas utiliser d'insecticides, de solvants ou de produits de nettoyage agressifs
pour l'entretien de l'appareil.
Endommagement des parties peintes ou en plastique.
Ne pas utiliser l'appareil pour des usages autres qu'un usage domestique habituel.
Endommagement de l'appareil du fait d'une surcharge de fonctionnement.
Endommagement des objets indûment manipulés.
Ne pas permettre aux enfants ou aux personnes inexpérimentées d'utiliser l'appareil.
Endommagement de l'appareil dû à un usage impropre.
Pendant le nettoyage, l'entretien et la connexion, il faut débrancher l'appareil du
secteur en retirant la fiche de la prise de courant.
Blessures par choc électrique
Les enfants doivent être surveillés pour s’assurer qu’ils ne jouent pas avec l’appareil et
avec tous les éléments d'emballage du produit (agrafes, sachets en plastique, polystyrène
etc.)
La dépose des panneaux de protection du produit ainsi que toutes les opérations d'entretien et de raccordement des parties électriques ne doivent jamais être effectuées par un
personnel non qualifié.
CHAFFOLINK
Cet appareil n'est pas destiné à être utilisé par des personnes (enfants compris) dont
les capacités physiques, sensorielles ou mentales sont réduites ou qui ne disposent pas
des connaissances ou de l'expérience nécessaires, à moins qu'elles n'aient été formées et
encadrées pour l'utilisation de cet appareil par une personne responsable de leur sécurité.
LE PRODUIT EST CONFORME À LA DIRECTIVE UE
2012/19/EU - Décret législatif 49/2014
concernant le traitement des déchets d'équipements électriques et
électroniques (DEEE).
La signification du symbole de la poubelle barrée sur l'appareil indique que le produit ne
doit pas être jeté dans les ordure ménagères (c'est-à-dire avec les déchets municipaux
mixtes), mais doit être traité séparément afin de le soumettre à des opérations spéciales
pour sa réutilisation ou de traitement, pour enlever ou supprimer en toute sécurité
les substances dangereuses pour l'environnement et extraire et recycler les matières
premières qui peuvent être réutilisées. Il relève de la responsabilité de l’utilisateur de
déposer l'appareil en fin de vie dans les points de collecte appropriés.
Ces types d'appareils :
- ne doivent jamais être jetés avec les ordures ménagères.
- doivent être remis à des centres de tri gérés par les municipalités ou les organismes
d'entretien urbain.
- lorsque vous achetez un nouvel appareil, l'ancien peut être remis au vendeur, qui doit
le retirer gratuitement (retrait un contre un).
Pour en savoir plus sur l'élimination appropriée de l'équipement, les utilisateurs peuvent
contacter le service public préposé ou les revendeurs.
49
3. CARACTÉRISTIQUES TECHNIQUES
GATEWAY
Conformité
CHAFFOLINK
Standard
Installation du produit
Températures de fonctionnement
Températures de stockage
Alimentation
Consommation
Classe de protection
Classe environnementale
Masse
Indice de protection
2006/95/CE « DBT » 2004/108/CE « CEM »
1999/05/CE « R & TTE »
EN 60950 - ETSI EN 300328
ETSI EN 301511 - ETSI EN 301489
Fixé au mur ou sur toute surface lisse
-25°C/55°C
-40°C/70°C
220V CA-240VCA ; -10% / +10%
10W et/ou 200mA
II
3
0,58 kg
IP X4D
EXPERT CONTROL
Alimentation électrique
Puissance électrique absorbée
Température de fonctionnement
Température de stockage
Longueur et section du câble Bus
REMARQUE :
POUR ÉVITER LES PROBLÈMES D'INTERFÉRENCES, UTILISER UN CÂBLE
BLINDÉ OU UN CÂBLE DE TÉLÉPHONE À DEUX FILS.
Mémoire tampon
Conformité
Interférences électromagnétiques
Émissions électromagnétiques
conformité standard
Indice de résolution
Fonctionnalités ERP
(uniquement avec chaudière BUS)
50
BUS
maxi. < 0,5W
de -10 à 60°C
de -20 à 70°C
jusqu'à 50 mètres
ø min. 0,5 mm²
2 heures
DBT 2006/95/CE - CEM 2004/108/CE
EN 60730-1
0,1°C
Classe : V :
Contribution au réchauffement : +3%
En ajoutant une sonde externe Chaffoteaux :
Classe : VI
Contribution au réchauffement : 4%
Gateway
180 mm
47 mm
134 mm
16 mm
CHAFFOLINK
180 mm
Expert Control
96 mm
51
4. DESCRIPTION DU PRODUIT
CHAFFOLINK
4. 1 Description de la boîte
La boîte contient :
• Passerelle avec cordon d'alimentation
• Plaque de fixation de la passerelle
• Accessoire de thermorégulation
(Chaffoteaux Expert Control ou capteur d'ambiance)
• Plaque pour le montage mural accessoire (uniquement avec Chaffoteaux
Expert Control)
• Câble de branchement 2 pôles
• Câble de téléphone à deux fils pour
connexion série (uniquement pour les
chaudières sans protocole BUS)
• Sachet avec 3 chevilles pour plaque
de fixation murale
• Sachet avec 2 chevilles pour accessoire de thermorégulation
• Sachet avec 4 connecteurs et ruban
adhésif double-face pour plaque de
fixation murale
• Livret d'installation
• Guide rapide pour l'utilisateur final
5
4
3
2
1
4.2 Description de la passerelle
52
1. Touche ON/OFF
2. LED BUS
3. LED série (uniquement pour les
chaudières sans protocole BUS)
4. LED connexion internet
5. Touche configuration initiale
6. Connecteur 230 V CA
7. Connecteur LAN
8. Connecteur série*
9. Connecteur pour antenne externe
(version GPRS)
10. Connecteur TA*
11. Connecteurs BUS
9
220V
TA1
6
BUS
T B
T
7 8
10 11
1
* Pas nécessaire
BUS
B
4.3 Description de Expert Control
1. touche en arrière
(affichage précédent)
2. bouton
3. touche OK
(confirmer l'opération
ou accéder au menu principal)
4. AFFICHEUR
OK
Légende des symboles de l'afficheur :
)
Été
) Hiver
-(
)
-(
-(
) Programmation horaire
-(
) Fonctionnement manuel
-(
)
Indication de présence de flamme
-(
)
-(
)
Température ambiante détectée
-(
)
Température ambiante désirée dérogation
-(
)
Température ambiante désirée
- (SRA)
1
2
3
4
OFF système éteint
CHAFFOLINK
-(
Température extérieure
Fonction SRA active
-(
)
Fonction VACANCES active
-(
)
Chauffage activé
-(
)
Eau chaude sanitaire active
-(
)
Signalement d'erreur
- (CONFORT) Fonction confort active
- (1,3 bar) Pression de l'installation
-(
)
Présence de flamme
-(
)
Solaire activé (ou présent)
-(
)
Menu complet :
-(
)
Réglages du chauffage
-(
)
Réglages de l'eau chaude
-(
)
Performances du système
-(
)
Options de l'écran
53
5. INSTALLATION CHAFFOLINK
CHAFFOLINK
Le chapitre suivant décrit comment effectuer l’installation du système Chaffoteaux
NET. Nous conseillons de débuter la procédure en réalisant tout d’abord le raccordement de la passerelle avec l’accessoire de thermorégulation, puis d’effectuer le raccordement avec le produit de chauffage Chaffoteaux. Seulement après avoir terminé
toutes les étapes précédentes, vous serez en mesure de raccorder la passerelle à l’alimentation électrique et d’effectuer la fixation au mur à l’aide de la plaque de fixation
prévue à cet effet.
Important :
l’installation d’Chaffoteaux Expert Control est uniquement possible avec des produits compatibles avec le protocole BUS. Alternativement.
Si un vieux thermostat est présent dans le système, il faut le supprimer en suivant les instructions dans le mode d’emploi et déconnecter le câble bipolaire du connecteur TA1 sur la
carte de la chaudière.
ATTENTION !
L’installation doit être effectuée par un technicien qualifié.
Avant le montage, couper l’alimentation électrique de la chaudière. Le câble BUS
est polarisé. Pour éviter les problèmes de démarrage du système, respecter la
polarité (T avec T, B avec B) entre tous les produits.
5.1 Possibles architectures d’installation
Avec l’intention de donner plusieurs exemples pour mener l’installation d’Chaffoteaux Net,
dans le paragraphe suivant sont rapportés certains schémas de principe du système qui
pourraient être réalisées grace à Chaffoteaux net et autres accessoires déjà dans la gamme
des produits Chaffoteaux. Avec chaque exemple, est également précisé quels services
peuvent être activés.
Le terme «diagnostic à distance» (DD) se réfère à l’utilisation dédié à des prestataires de
services, à travers lequel toutes les caractéristiques d’assistance de Chaffoteaux Net sont
activés.
54
«Control à distance» (CD) se réfère à l’application pour l’utilisateur final, à travers laquelle
il peut utiliser le Chaffoteaux net ou le portal web pour controler et commander ses produits Chaffoteaux.
Pour plus d’infos et de détails sur les schémas d’installation ci-dessous, nous vous prions de
prendre contact avec le Centre Technique Chaffoteaux de votre Pays.
Type 1
Activation de la DD et CD dans un
système de chauffage de base. (fig.1)
Système de base où le produit Chaffoteaux ne est liée à une ON / OFF accessoire
de thermorégulation et les services de
diagnostic et de contrôle à distance doivent être activées.
fig.1
THERMOSTAT
TA
Actions requises (fig.2):
- Retirez l’accessoire ON / OFF et
débranchez le câble 2-fils du port TA
de la chaudière
- Installer Chaffoteaux Expert Control
- Installez la passerelle Chaffoteaux Net
fig.2
EXPERT CONTROL
BUS
Type 2
Activation de DD dans un système
de chauffage de base. (fig.3)
Système de base où seul service de diagnostic à distance doit être activé et donc
l’installation d’Chaffoteaux Expert Control
ne est pas nécessaire.
Actions requises (Fig.4)
Dans cette configuration, il est possible de conserver l’ancien installé ON /
OFF accessoire de thermorégulation. Par
conséquent, il est nécessaire de:
- Installez la passerelle Chaffoteaux Net
- Lier la passerelle au produit de chauffage Chaffoteaux en utilisant la connexion BUS.
CHAFFOLINK
GATEWAY
fig.3
THERMOSTAT
TA
fig.4
55
GATEWAY
THERMOSTAT
BUS
TA
Type 3
Activation de DD et CD dans un système deux ou plusieurs zones hydrauliques, contrôlée par les accessoires de thermorégulation BridgeNet. (fig.5)
Système avec un module hydraulique Chaffoteaux (par exemple: MGM II Evo) liée aux accessoires BUS comme Chaffoteaux Expert Control et Chaffoteaux Room Sensor.
Actions requises (Fig.6):
- Retirez tous les accessoires Chaffoteaux Room Sensor dans le système et les remplacer par Chaffoteaux Expert Control
- Installez le Chaffoteaux passerelle Net et brancher au système de chauffage utilisant
la connexion BUS.
CHAFFOLINK
fig.5
EXPERT CONTROL
BUS
BUS
HYDRAULIC
MODULE
56
ZONE
CONTROL
fig.6
GATEWAY
EXPERT CONTROL
BUS
BUS
HYDRAULIC
MODULE
Type 4
Activation de DD et CD dans un système avec deux ou plusieurs zones hydrauliques, contrôlée par les accessoires ON / OFF. (fig.7)
Système où sont installés des dispositifs de gestion des zones contrôlées par accessoires
de thermorégulation ON / OFF.
Actions requises (fig.8):
- Retirez tous les accessoires ON / OFF dans le système et remplacer avec Chaffoteaux
Expert Control
- Installez le Chaffoteaux Multifunctional Kit
- Installez la passerelle Chaffoteaux net et un lien vers le système de chauffage à travers la connexion Bus.
fig.7
fig.8
GATEWAY
THERMOSTAT
KIT
MULTIFUNCTIONAL
BUS
TA2
CHAFFOLINK
TA1
EXPERT
CONTROL
5.2 Installation Chaffoteaux Expert Control
La procédure suivante doit être effectuée pour installer l’accessoire fourni avec Chaffoteaux
Net et pour remplacer un ancien thermostat qui peut être présent dans votre maison.
Positionnement
Cet appareil détecte la température ambiante. Il faut par conséquent tenir compte de plusieurs facteurs lors du choix de son emplacement.
Il faut le placer loin de sources de chaleur (radiateurs, rayons solaires, cheminées, etc.) et à
l’abri des courants d’air ou d’ouvertures vers l’extérieur qui pourraient influencer son fonctionnement. Il faut l’installer à environ 1m50 au-dessus du sol.
57
5.2 Installation Expert Control
CHAFFOLINK
Installation murale
- connecter la paire de fils sur le
connecteur.
- ouvrir les trous nécessaires à la fixation (fig.1).
- fixer la base de l'appareil au boîtier
mural, à l'aide des vis fournies dans le
kit (fig.2).
- installer l'interface de système sur
la base en la poussant délicatement
vers le bas (fig.3).
B T
BUS
B T
Fig. 1
REMARQUE :
Pour éviter toute interférence, utiliser un câble blindé.
Les versions suivantes des logiciels
Chaffoteaux Expert Control ne sont
pas compatibles avec Chaffolink :
-01.00.00
-01.00.04
Remplacer le modèle Expert Control
existant avec celui fourni dans le kit
Chaffolink.
Fig. 2
Fig. 3
58
Une fois que l'accessoire de thermorégulation a été installé, il est possible
d'effectuer le raccordement à la passerelle Chaffolink.
Procéder au raccordement de la manière
suivante :
1. Ouvrir le panneau de façade de la
passerelle, en retirant les deux vis de
blocage placées au bas de l'appareil
(1). Tourner légèrement vers soi le
couvercle (2) et tirer vers le bas (3).
2. Raccorder l'autre extrémité du câble
bipolaire, précédemment raccordé à
l'accessoire Chaffoteaux à une entrée
BUS de la passerelle, en utilisant l'un
des connecteurs fournis.
1.
3.
2.
1.
CHAFFOLINK
5.4 Raccordement de la passerelle avec
accessoire de thermorégulation Chaffoteaux
BUS
B
220V
TA1
BUS
B
T
BUS
T B
T
59
Raccordement de la Gateway avec l'accessoire
Chaffoteaux Expert Control.
5.5 Raccordement de la passerelle
au produit de chauffage Chaffoteaux
• Raccorder le câble bipolaire fourni à
l'une des entrées BUS de la passerelle.
• Raccorder l'autre extrémité du câble
au connecteur BUS du produit de
chauffage Chaffoteaux présent dans
l'habitation.
220V
TA1
TA2
SE
TNK
SOL
TA1
CN19
B FLOOR
BUS
CN1
T
BUS
B
N L
60
N L
4
1CN14 1
CHAFFOLINK
1
FLAME
BUS
T B
T
Après avoir effectué tous les raccordements électriques entre la passerelle, l'accessoire de thermorégulation
et le produit de chauffage Chaffoteaux,
l'installation se conclue en effectuant la
fixation de la passerelle à un mur ou à la
base d'appui.
La passerelle est certifié IP X4D, mais
nous en déconseillons l'installation dans
des positions peu protégées ou soumises aux intempéries et à d'autres facteurs externes qui pourraient l'endommager.
L'installation peut être effectuée sur une
surface lisse, en utilisant l'adhésif double
face ou l'installer au mur à l'aide des
chevilles fournies dans l'emballage.
CHAFFOLINK
5.6 Fixation de la passerelle au mur
Remarque : avant de fixer la passerelle, il est recommandé d'effectuer
tous les raccordements, l'allumage
et la configuration.
ATTENTION !
Avant d'appliquer l'adhésif double
face, nous conseillons de bien nettoyer la surface où il sera appliqué.
61
6. PREMIER ALLUMAGE ET
CONNEXION À INTERNET
La description suivante indique comment connecter Chaffolink à Internet, à travers deux
procédures différentes, soit en utilisant une passerelle ADSL soit GPRS.
CHAFFOLINK
6.1 Connexion via passerelle ADSL
62
Chaffolink est en mesure d'utiliser un
réseau LAN ou Wi-Fi pour se connecter
à un routeur ADSL. Dans ce dernier cas,
passer directement à l'étape 2 de la procédure de configuration suivante.
1. Avec Chaffolink éteint et non raccordé au secteur, ouvrir le panneau
de façade en retirant les deux vis et
connecter le câble LAN au connecteur
correspondant (A). Connecter l'autre
extrémité du câble au routeur ADSL,
puis refermer le panneau de façade.
2. Alimenter la passerelle et appuyer sur
la touche ON/OFF.
La passerelle effectue pendant
quelques minutes une procédure de
démarrage, au cours de laquelle tous
les voyants clignotent en bleu, à intervalles réguliers. À la fin de la procédure,
le led WEB est rouge fixe, tandis que le
voyant BUS ou Série est vert fixe.
3. Maintenir appuyée la touche de configuration initiale pendant au moins 5
secondes, jusqu'à ce que le voyant de
connexion à internet devienne vert
clignotant.
À ce stade, la passerelle a créé un
nouveau réseau WiFi qui restera actif
pendant 10 minutes, après quoi il faudra répéter la procédure.
4. Ouvrir les paramètres du réseau du
dispositif Internet et effectuer une recherche des réseaux Wi-Fi disponibles.
220V
TA1
BUS
B
BUS
T B
T
A
REMARQUE :
Chaffolink supporte les cryptographies suivantes pour les réseaux
Wi-Fi :
- WEP
- WPA/WPA2 Personal
Remarque :
En cas d'échec (voyant rouge allumé),
répéter la procédure susmentionnée
en partant de l'étape 3 du présent
chapitre.
La procédure doit être répétée à
chaque fois qu'une modification au
réseau Internet de l'habitation est
apportée, ou si l'on passe du WiFi à la
connexion LAN et vice versa.
CHAFFOLINK
Sélectionner le réseau Remote GW
Thermo.
5. Ouvrir le navigateur Web du dispositif
et aller sur le lien 192.168.1.1
6. Suivre étape par étape les indications
jusqu'à l'étape final.
7. Une fois arrivé à l'étape final de la
procédure sur le navigateur Web, le
voyant WEB se met à clignoter rapidement en vert. Si la procédure a
réussi, le voyant de connexion à Internet est vert fixe.
La procédure est terminée.
Conseil :
Dans le cas d'un signal WiFi faible, il
est possible d'utiliser des répéteurs
de signal disponibles dans le commerce.
63
CHAFFOLINK
6.2 Connexion via GPRS
En utilisant une passerelle GPRS, il est possible de connecter Chaffolink à Internet via la
procédure suivante.
1. Alimenter la passerelle. Appuyer sur la touche ON/OFF.
La passerelle effectue pendant quelques minutes une procédure de démarrage, au
cours de laquelle tous les voyants clignotent en bleu, à intervalles réguliers.
2. Une fois le processus de démarrage conclu, le voyant WEB affichera une information sur la puissance du signal GPRS :
a. Bleu fixe → puissance maximale
b. Bleu clignotant → puissance moyenne
c. Rouge clignotant → faible puissance
d. Rouge fixe → absence de champ
Il est conseillé de placer la passerelle de sorte que, au cours de cette phase d'activation, elle puisse toujours afficher une lumière bleue. Alternativement, il est possible de connecter la passerelle au kit d'antenne externe (code 3318892).
3. Maintenir appuyée la touche de configuration initiale pendant 5 secondes jusqu'à
ce que le voyant WEB commence à émettre une lumière verte clignotante.
4. Si la procédure a réussi, le voyant de connexion à Internet est vert fixe.
La procédure est terminée.
Remarque : en cas d'échec, répéter la procédure susmentionnée à partir de
l'étape 3.
REMARQUE :
Effectuer les procédures de connexion aux services Internet seulement après
avoir raccordé le BUS.
Si les procédures sont lancées avec le BUS déconnecté, le voyant de connexion
à Internet ne clignote pas en vert et la procédure n'est pas conclue.
64
7. ACTIVATION DES SERVICES INTERNET
7.1 Centres d'assistance Chaffoteaux
Les Centres d'assistance Chaffoteaux peuvent accéder à la plateforme de diagnostic
à distance, en saisissant leurs identifiants sur le portail Chaffolink.
https://www.chaffolink.remotethermo.com
Pour en savoir plus sur ce service, contacter le numéro vert du Centre de conseils
techniques Chaffoteaux Thermo.
7.2 Utilisateurs finals
CHAFFOLINK
Les fonctions de contrôle à distance pour l'utilisateur final peuvent être obtenues en
téléchargeant l'application officielle sur Apple Store ou Google Play ou en accédant
depuis le navigateur Web au portail Chaffolink.
https://www.chaffolink.remotethermo.com
65
8. ÉTAT DE FONCTIONNEMENT DE LA PASSERELLE
Les trois voyants situés sur la façade de la passerelle permettent d'avoir un feed-back
instantané de l'état de fonctionnement du produit. Les tableaux suivants présentent
les différents codages de couleurs qui peuvent être présents avec la passerelle en
version ADSL et GPRS.
CODAGE LED EN VERSION ADSL
Led WEB (connexion à internet)
CHAFFOLINK
Arrêt
Passerelle éteinte
Vert fixe
Passerelle correctement configurée
Vert clignotant
Passerelle en attente d'être configurée
Rouge fixe
Gateway ne est pas configuré ou pas de
connexion au service
Led SÉRIE (connexion chaudière via série si nécessaire)
Arrêt
Passerelle éteinte ou câble série non connecté
Led BUS (connexion à la plateforme BUS)
Arrêt
Passerelle éteinte
Vert fixe
Connexion BUS Bus en service
Rouge fixe
Erreur BUS ou câble Bus non connecté
TOUS LES VOYANTS
66
éteints
Passerelle éteinte
Bleu clignotant en séquence
Démarrage de la passerelle
CODAGE LED EN VERSION GPRS
Led WEB (connexion à internet)
Arrêt
Passerelle éteinte
Vert fixe
Passerelle configurée correctement
Vert clignotant
Passerelle en attente d'être configurée
Bleu fixe
Signal GPRS fort
Bleu clignotant
Signal GPRS moyen
Rouge clignotant
signal GPRS faible
Rouge fixe
Aucun ou faible signal GPRS
Led SÉRIE (connexion chaudière via série si nécessaire)
Arrêt
Passerelle éteinte ou câble série non connecté
Arrêt
Passerelle éteinte
Vert fixe
Câble BUS connecté et fonctionnant
Rouge fixe
Erreur BUS ou câble Bus non connecté
TOUS LES LEDS
Arrêt
Passerelle éteinte
Bleu clignotant
Démarrage de la passerelle
CHAFFOLINK
Led BUS (connexion à la plateforme BUS)
67
CHAFFOTEAUX
Le Carré Pleyel - 5, rue Pleyel
93521 Saint-Denis - France
Tél : 33 (0)1 55 84 94 94
fax : 33 (0)1 55 84 96 10
www. chaffoteaux.fr
420010593400 - 04/2015
Chaffoteaux Thermo SpA
Viale Aristide Merloni 45
60044 Fabriano (AN) Italy
Telefono 0732 6011
Fax 0732 602331
www.chaffoteaux.com