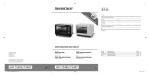
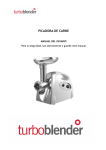
1
GRILL- UND BACKAUTOMAT SGB 1380 B2
GRILL- UND BACKAUTOMAT
MINI FOUR / GRIL
Bedienungsanleitung
Mode d’emploi
FORNO ELETTRICO CON GRILL
GRILL- EN BAKAUTOMAAT
Istruzioni per l’uso
Gebruiksaanwijzing
ELECTRIC OVEN & GRILL
Operating instructions
IAN 66725/66726
1
Klappen Sie vor dem Lesen die Seite mit den Abbildungen aus und machen Sie sich anschließend mit allen
Funktionen des Gerätes vertraut.
Avant de lire le mode d‘emploi, ouvrez la page contenant les illustrations et familiarisez-vous ensuite avec
toutes les fonctions de l‘appareil.
Prima di leggere aprire la pagina con le immagini e prendere confidenza con le diverse funzioni
dell’apparecchio.
Vouw vóór het lezen de pagina met de afbeeldingen open en maak u vertrouwd met alle functies van het
apparaat.
Before reading, unfold the page containing the illustrations and familiarise yourself with all functions of
the device.
DE / AT / CH
FR / CH
IT / CH
NL
GB
Bedienungsanleitung
Mode d’emploi
Istruzioni per l’uso
Gebruiksaanwijzing
Operating instructions
Seite
Page
Pagina
Pagina
Page
1
15
29
43
57
A
1
2
3
4
5
6
B
7
8
9
INHALTSVERZEICHNIS
SEITE
Bestimmungsgemäßer Gebrauch
2
Lieferumfang
2
Beschreibung
2
Technische Daten
2
Sicherheitshinweise
3
Aufstellen
4
Erste Inbetriebnahme
4
Ausschalten und transportieren
5
Ausschalten . . . . . . . . . . . . . . . . . . . . . . . . . . . . . . . . . . . . . . . . . . . . . . . . . . . . . . . . . . . . . . . . .5
Transportieren . . . . . . . . . . . . . . . . . . . . . . . . . . . . . . . . . . . . . . . . . . . . . . . . . . . . . . . . . . . . . . .5
Bedienen
5
Grillen und Backen . . . . . . . . . . . . . . . . . . . . . . . . . . . . . . . . . . . . . . . . . . . . . . . . . . . . . . . . . . .5
Grillen und Backen mit Umluft . . . . . . . . . . . . . . . . . . . . . . . . . . . . . . . . . . . . . . . . . . . . . . . . . . .7
Zubereitungstipps und Rezepte
7
Muffins . . . . . . . . . . . . . . . . . . . . . . . . . . . . . . . . . . . . . . . . . . . . . . . . . . . . . . . . . . . . . . . . . . . . .7
Hawaiitoast . . . . . . . . . . . . . . . . . . . . . . . . . . . . . . . . . . . . . . . . . . . . . . . . . . . . . . . . . . . . . . . . .7
Tiefgefrorene Pizza backen . . . . . . . . . . . . . . . . . . . . . . . . . . . . . . . . . . . . . . . . . . . . . . . . . . . . .8
Spritzgebäck . . . . . . . . . . . . . . . . . . . . . . . . . . . . . . . . . . . . . . . . . . . . . . . . . . . . . . . . . . . . . . . .8
Brötchen . . . . . . . . . . . . . . . . . . . . . . . . . . . . . . . . . . . . . . . . . . . . . . . . . . . . . . . . . . . . . . . . . . . .8
Baiser . . . . . . . . . . . . . . . . . . . . . . . . . . . . . . . . . . . . . . . . . . . . . . . . . . . . . . . . . . . . . . . . . . . . . .9
Buttercroutons . . . . . . . . . . . . . . . . . . . . . . . . . . . . . . . . . . . . . . . . . . . . . . . . . . . . . . . . . . . . . . . .9
Hackfleisch-Baguettes . . . . . . . . . . . . . . . . . . . . . . . . . . . . . . . . . . . . . . . . . . . . . . . . . . . . . . . . .9
Blumenkohl (überbacken) . . . . . . . . . . . . . . . . . . . . . . . . . . . . . . . . . . . . . . . . . . . . . . . . . . . . .10
Blätterteigtaschen mit Lachsfüllung . . . . . . . . . . . . . . . . . . . . . . . . . . . . . . . . . . . . . . . . . . . . . .10
Leuchtmittel wechseln
11
Reinigen
11
Fehlfunktionen beseitigen
12
Entsorgen
12
Garantie und Service
13
Importeur
13
-1-
Grill- und Backautomat
Beschreibung
Herzlichen Glückwunsch zum Kauf Ihres neuen
Gerätes.
Der Grill- und Backautomat dient zum Erhitzen,
Garen und Grillen von Speisen. Die Umluftfunktion
sorgt für eine gleichmäßige und schnelle Verteilung
der Wärme im Gerät.
Sie haben sich damit für ein hochwertiges Produkt
entschieden. Die Bedienungsanleitung ist Bestandteil dieses Produkts. Sie enthält wichtige Hinweise
für Sicherheit, Gebrauch und Entsorgung. Machen
Sie sich vor der Benutzung des Produkts mit allen
Bedien- und Sicherheitshinweisen vertraut. Benutzen
Sie das Produkt nur wie beschrieben und für die angegebenen Einsatzbereiche. Händigen Sie alle
Unterlagen bei Weitergabe des Produkts an Dritte
mit aus.
Abbildung A:
1 Kontrollleuchte (Power)
Leuchtet während des Betriebs
2 Temperaturregler
Stufenlose Einstellung der
Temperatur von 100° C bis 230° C
3 Funktionsschalter für
OFF (Aus),
Oberhitze,
Unterhitze,
Unter- und Oberhitze
4 Kippschalter für Umluft
5 Zeitschaltuhr
Einstellung der gewünschten Back-/Grillzeit
von 0–60 min.
6 Schienen für Backblech oder Gitterrost
Bestimmungsgemäßer Gebrauch
Der Grill- und Backautomat dient ausschließlich
dem Erhitzen, Garen und Grillen von Speisen.
Dieses Gerät ist ausschließlich für die Benutzung in
privaten Haushalten bestimmt. Nutzen Sie es nicht
gewerblich.
Jede andere Verwendung gilt als nicht bestimmungsgemäß und kann zu Sachschäden oder sogar zu
Personenschäden führen. Kompernaß übernimmt
keine Haftung für Schäden, die durch nicht
bestimmungsgemäßen Gebrauch entstehen.
Abbildung B:
7 Gitterrost
8 Backblech
9 Griff für Gitterrost/Backblech
Technische Daten
Lieferumfang
Netzspannung:
220 - 240 V ~/50 Hz
Nennleistung:
1380 W
Innenraumvolumen: 15 Liter
Die Verpackung beinhaltet
• den Grill- und Backautomaten
• ein Gitterrost
• ein Backblech
• einen Griff für Gitterrost/Backblech
• Bedienungsanleitung
Leuchtmittel:
-2-
240 V, 15 W, E 14, 300°C
Sicherheitshinweise
•
Gefahr!
•
•
•
•
•
•
•
Dieses Gerät ist nicht dafür bestimmt, durch
Personen (einschließlich Kinder) mit eingeschränkten physischen, sensorischen oder
geistigen Fähigkeiten oder mangels Erfahrung
und/oder mangels Wissen benutzt zu werden,
es sei denn, sie werden durch eine für ihre
Sicherheit zuständige Person beaufsichtigt
oder erhielten von ihr Anweisungen, wie das
Gerät zu benutzen ist.
Kinder sollten beaufsichtigt werden, um sicherzustellen, dass sie nicht mit dem Gerät spielen.
Sie dürfen das Gerätegehäuse des Grill- und
Backautomaten nicht öffnen oder reparieren.
In diesem Falle ist die Sicherheit nicht gegeben
und die Gewährleistung erlischt. Lassen Sie
den defekten Grill- und Backautomat nur vom
Händler oder autorisiertem Fachpersonal
reparieren.
Lassen Sie beschädigte Netzstecker oder Netzkabel sofort von autorisiertem Fachpersonal
oder dem Kundenservice austauschen, um
Gefährdungen zu vermeiden.
Lassen Sie keine Flüssigkeiten in das Gerätegehäuse des Grill- und Backautomaten gelangen.
Sie dürfen das Gerät keiner Feuchtigkeit aussetzen und nicht im Freien benutzen. Darüber
hinaus dürfen Sie keine mit Flüssigkeiten gefüllten Gegenstände, wie z. B. Vasen auf dem
Gerät abstellen. Es besteht Brandgefahr und
Gefahr eines elektrischen Schlags! Falls doch
einmal Flüssigkeit in das Gerätegehäuse gelangt, ziehen Sie sofort den Netzstecker des
Geräts aus der Netzsteckdose und lassen Sie
es reparieren.
Berühren Sie niemals die Heizstäbe oder das
Sichtfenster während des Betriebs oder bevor
der Grill- und Backautomat abgekühlt ist.
Fassen Sie während des Betriebs nicht in den
Grill- und Backraum. Warten Sie bis das Gerät
abgekühlt ist. Sie könnten sich andernfalls
verbrennen.
•
Lassen Sie den Grill- und Backautomaten
nach Gebrauch erst abkühlen, bevor Sie ihn
transportieren.
Fassen Sie Gerät, Netzkabel und -Stecker nie
mit nassen Händen an. Es besteht sonst die Gefahr eines elektrischen Schlags.
Verlegen Sie das Netzkabel so, dass niemand
darauf treten oder darüber stolpern kann.
Achtung! Heiße Oberfläche.
Berühren Sie niemals die Glastür oder das Gehäuse während der Benutzung, da diese sehr
heiß werden.
Verwenden Sie zum Öffnen der Glastür einen
Topflappen o.ä., um Verbrennungen zu vermeiden!
Achtung!
•
•
•
•
•
•
-3-
Legen Sie niemals Gegenstände, Lebensmittel,
Schalen, das Backblech 8, den Gitterrost 7
oder sonstige Behälter direkt auf den Boden
des Backraumes! Der dadurch entstehende Hitzestau beschädigt das Gerät! Legen Sie Lebensmittel, Schalen oder sonstige Behälter immer auf
das Backblech 8 oder den Gitterrost 7 und
schieben Sie diese in eine der 3 Schienen 6.
Lassen Sie das Gerät während des Betriebs
niemals unbeaufsichtigt.
Es dürfen sich während des Betriebs keine leicht
brennbaren Materialien in unmittelbarer Umgebung des Grill- und Backautomaten befinden
(z. B. Geschirrhandtuch, Topflappen etc.).
Trocknen Sie niemals Textilien oder Gegenstände auf, über oder im Gerät.
Es besteht Brandgefahr.
Ziehen Sie das Netzkabel stets am Stecker
aus der Steckdose, ziehen Sie nicht am Kabel
selbst.
Knicken oder quetschen Sie das Netzkabel
nicht.
Sie dürfen keine Verlängerungskabel
verwenden.
•
•
Brandgefahr!
Wenn Sie Ihren Grill- und Backautomaten über
einen längeren Zeitraum nicht nutzen, müssen
Sie ihn vom Stromnetz trennen. Nur wenn Sie
den Netzstecker aus der Netzsteckdose ziehen, ist er vollständig stromfrei.
Benutzen Sie keine externe Zeitschaltuhr oder
ein separates Fernwirksystem, um das Gerät zu
betreiben.
Stellen Sie den Grill- und Backautomaten unbedingt
auf eine feste, ebene und hitzebeständige Unterlage. Andernfalls besteht Brandgefahr und das
Gerät kann beschädigt werden. Der Bereich unter
dem Geräteboden kann sich verfärben und beschädigt werden. Darüber hinaus können bei einem weichen Untergrund dauerhafte Abdrücke in der Unterlage entstehen.
Erläuterung der Sicherheitshinweise
In der Bedienungsanleitung finden Sie folgende
Kategorien von Sicherheitshinweisen:
Gefahr eines Stromschlags!
Stellen Sie das Gerät nicht in unmittelbarer Nähe
von Wasser auf, z. B. an Spülbecken, Waschwannen oder in feuchten Kellerräumen. Andernfalls
besteht die Gefahr eines Stromschlags.
Gefahr!
Hinweise mit dem Wort GEFAHR warnen vor
möglichen Personenschäden.
Stützen Sie sich nicht auf der Glastür ab. Stellen
Sie keine Gegenstände auf die Glastür. Das
führt zu Beschädigungen an den Scharnieren.
Achtung!
Hinweise mit dem Wort ACHTUNG warnen vor
möglichen Sach- oder Umweltschäden.
Diese Hinweise enthalten besondere Angaben
zum wirtschaftlichen Gebrauch des Grill- und
Backautomatens.
Aufstellen
➩
Erste Inbetriebnahme
Achtung!
Stellen Sie das Gerät auf einem festen, ebenen
und hitzebeständigen Untergrund (z.B. Edelstahlarbeitsplatten oder Natursteinarbeitsplatten wie
Granit) auf. Sorgen Sie für ausreichende Belüftung rund um das Gerät.
Legen Sie niemals Gegenstände, Lebensmittel, Schalen, das Backblech 8, den Gitterrost 7 oder sonstige Behälter direkt auf den Boden des Backraumes!
Der dadurch entstehende Hitzestau beschädigt das
Gerät! Legen Sie Lebensmittel, Schalen oder sonstige Behälter immer auf das Backblech 8 oder den
Gitterrost 7 und schieben Sie diese in eine der 3
Schienen 6.
Brandgefahr!
Der Abstand zwischen Geräte-Rückseite und Wand
sollte mindestens 10 cm, nach oben mindestens
10 cm und seitlich jeweils 5 cm betragen. Daher
darf das Gerät z. B. nicht in Schränke o. ä. gestellt
werden. Andernfalls ist keine ausreichende Belüftung des Grill- und Backautomaten möglich und er
könnte einen Brand verursachen oder beschädigt
werden.
Bevor Sie das Gerät jedoch benutzen, verfahren Sie
wie folgt beschrieben:
➩
-4-
Nehmen Sie den elektrischen Grill- und
Backautomaten und alle Zubehörteile aus
der Transportverpackung.
Quetschgefahr!
➩
Greifen Sie beim Öffnen oder Schließen der Tür
nicht in die Türscharniere. Sie könnten sich sonst
die Hand quetschen.
➩
➩
➩
➩
➩
➩
Ausschalten und transportieren
Vor der ersten Inbetriebnahme müssen Sie das
Gerät und alle Zubehörteile von eventuellen
Verpackungsrückständen reinigen. Reinigen Sie
die Zubehörteile mit einer handwarmen, milden
Seifenlauge und trocknen Sie sie anschließend ab.
Wischen Sie das Gerätegehäuse mit einem
leicht mit Wasser angefeuchteten Tuch ab und
trocknen Sie es anschließend sorgfältig.
Wenn das Gerät innen und außen
vollständig trocken ist, stecken Sie den Netzstecker in eine entsprechende Netzsteckdose
(220 - 240 V~/50 Hz) in der Wand.
Schalten Sie jetzt das Gerät ohne eingelegtes
Zubehör und ohne Grill- bzw. Backgut ein.
Lassen Sie die Tür des Geräts vollständig
geöffnet.
Wählen Sie mit dem Temperaturregler 2
230° C. Stellen Sie den Funktionsschalter 3
auf Ober- und Unterhitze.
Stellen Sie die Zeitschaltuhr 5 auf
15 Minuten ein.
Ausschalten
➩
➩
➩
➩
Wenn Sie den Grill- und Backautomaten transportieren möchten, lassen Sie ihn zunächst abkühlen.
Ziehen Sie das Netzkabel aus der
Netzsteckdose.
Wickeln Sie das Netzkabel um die
Abspannhaken auf der Geräterückseite.
Bedienen
Grillen und Backen
➩
➩
Da die Heizelemente leicht eingefettet sind,
kann es bei dieser ersten Inbetriebnahme zu
leichter Geruchsbildung kommen. Diese ist
unschädlich und hört nach kurzer Zeit auf.
Öffnen Sie das Fenster und sorgen Sie für
genug Belüftung.
➩
Stellen Sie den Funktionsschalter 3 und die
Zeitschaltuhr 5 auf OFF (Aus). Ziehen Sie den
Netzstecker aus der Steckdose.
Transportieren
Das Gerät lässt sich nur mit der Zeitschaltuhr 5
einschalten. Sobald die Zeitschaltuhr 5 eingestellt ist, leuchtet die Kontrollleuchte 1.
➩
Säubern Sie den Grill- und Backraum anschließend mit einem leicht mit Wasser befeuchteten
Tuch und trocknen ihn ab.
Wenn sich das Gerät automatisch abgeschaltet
hat, stellen Sie den Funktionsschalter 3 auf
OFF (Aus).
Ziehen Sie den Netzstecker aus der Netzsteckdose und warten Sie, bis das Gerät abgekühlt ist.
-5-
Nehmen Sie den Gitterrost 7 und das
Backblech 8 aus dem Gerät. Legen Sie
diese gegebenenfalls mit Backpapier aus
bzw. bestreichen Sie das Backblech 8 mit
Butter oder Öl.
Lassen Sie das Gerät ca. 10 Minuten (je nach
Temperatureinstellung) auf die gewünschte
Temperatur aufheizen:
- Wählen Sie die gewünschte Temperatur mit
dem Temperaturregler 2. Im Grillbetrieb
müssen Sie stets die höchste Temperaturstufe
(230° C) wählen.
- Anschließend wählen Sie mit dem Funktionsschalter 3 zwischen Oberhitze (z. B. zum
Überbacken), Unterhitze (z. B. für Kuchen)
oder Ober- und Unterhitze (z. B. für Pizza).
Wenn Sie grillen möchten, drehen Sie den
Funktionsschalter 3 stets auf Oberhitze.
➩
- Stellen Sie mit der Zeitschaltuhr 5 die
Vorheizzeit ein (ca. 10 Minuten).
- Schließen Sie die Glastür.
Stellen Sie mit der Zeitschaltuhr 5 die
gewünschte Grill- bzw. Backzeit ein.
Die maximale Grill- bzw. Backzeit beträgt 60 Minuten.
➩
Ist die Zeit abgelaufen, legen Sie das Grillbzw. Backgut auf den Gitterrost 7 bzw. das
Backblech 8 und schieben Sie es in eine der
Schienen 6. Achten Sie dabei auf einen ausreichenden Abstand des Grill- bzw. Backguts
zu den Innenwänden und den Heizelementen
des Geräts.
➩
Die Kontrollleuchte 1 zeigt an, dass Ihr Grill- und
Backautomat eingeschaltet ist. Der Schalter der
Zeitschaltuhr 5 bewegt sich nun gegen den Uhrzeigersinn auf OFF (Null) zu.
Achtung!
Legen Sie niemals Gegenstände, Lebensmittel, Schalen, das Backblech 8, den Gitterrost 7 oder sonstige Behälter direkt auf den Boden des Backraumes!
Der dadurch entstehende Hitzestau beschädigt das
Gerät! Legen Sie Lebensmittel, Schalen oder sonstige Behälter immer auf das Backblech 8 oder den
Gitterrost 7 und schieben Sie diese in eine der 3
Schienen 6.
Hat Ihr Grill- und Backautomat die von Ihnen
eingestellte Temperatur erreicht, schalten sich
die Heizelemente zeitweise ab, um die eingestellte Temperatur zu halten.
➩
Wenn Sie stark tropfendes Grillgut auf dem Gitterrost 7 zubereiten, dann schieben Sie das
Backblech 8 in die unterste Schiene. So wird
z.B. herunter tropfendes Fett aufgefangen und
das Gerät ist später leichter zu reinigen.
Die gleichmäßigsten Backergebnisse erzielen
Sie, wenn Sie das Backblech 8 bzw. den Gitterrost 7 in die mittlere Schiene einschieben
und die Umluft einstellen.
➩
Wenn die Garzeit Ihres Grill- bzw. Backguts
weniger als 25 Minuten beträgt, stellen Sie die
Zeitschaltuhr 5 zunächst auf 60 Minuten und
dann zurück auf die gewünschte Grill- bzw.
Backzeit.
Das Gerät schaltet sich nach Ablauf der
eingestellten Zeit automatisch ab. Wenn Sie
das Gerät vorzeitig ausstellen möchten,
drehen Sie die Zeitschaltuhr 5 zurück auf
OFF. Stellen Sie den Funktionsschalter 3
auf die Position OFF und ziehen Sie den
Netzstecker aus der Steckdose.
Sie hören ein Klingelzeichen und die Kontrollleuchte
1 erlischt.
Nachdem sich das Gerät abgeschaltet hat,
kann die Zeitschaltuhr 5 noch eine kurze Zeit
weiterlaufen.
Schließen Sie die Glastür, bevor Sie den GrillBackvorgang starten.
Wenn Sie besonders fetthaltige Speisen zubereiten, kann es zu erhöhter Rauchentwicklung
kommen. Schließen Sie in diesem Fall die
Glastür nicht ganz, sondern lassen Sie sie einen
Spalt breit offen stehen: Wenn Sie die Tür vorsichtig zuklappen, rastet sie kurz vor dem
Schließen in dieser Position ein.
-6-
➩
Zubereitungstipps und Rezepte
Benutzen Sie zum Herausziehen des Gitterrosts 7 bzw. Backblechs 8 immer den mitgelieferten Griff 9. Um den Gitterrost 7 heraus
zu heben, müssen Sie die kleinen Haken des
Griffs 9 von oben in das Gitter einhaken.
Um das Backblech 8 aus dem Gerät zu
heben, müssen die großen Haken des Griffs 9
am vorderen Rand des Backblechs 8 eingehakt werden.
In diesem Kapitel geben wir Ihnen einige Beispiele
für die Zubereitung von Speisen. Diese Beispiele
sind Empfehlungen. Die Zubereitungsdauer kann
variieren.
Beachten Sie Zubereitungshinweise auf der Verpackung der Lebensmittel.
Muffins
Zutaten für vier Personen:
• 1 Tasse Mehl
• 1 Teelöffel Backpulver
• 1 Ei
• 1 Esslöffel geschmolzene Butter
• 1 Tasse Milch
• 3 Esslöffel Zucker
• Salz
• für verschiedene Varianten zusätzlich Nüsse,
zerkleinerte Bananen oder Schokoflocken
➩
Schalten Sie nach dem Grillen oder Backen
den Funktionsschalter 3 auf OFF (Aus). Ziehen Sie den Netzstecker aus der Steckdose.
Lassen Sie das Gerät abkühlen, bevor Sie es
reinigen oder erneut benutzen.
Beachten Sie die Zubereitungshinweise in Rezepten
bei Verwendung von Umluft.
Zubereitung:
➩ Vermischen Sie in einer Schale Mehl, Backpulver, Ei, Milch, Salz und Zucker langsam
nacheinander.
➩ Die Butter in einem Topf schmelzen und mit
dem Teig verrühren.
➩ Je nach Geschmack mit Nüssen, Schokoflocken oder zerdrückten Bananen mischen.
➩ Den fertigen Teig in typische Muffin-Formen
geben und diese auf das Backblech 8 stellen.
➩ Das Backblech bei 200° C mit Oberhitze und
Umluft etwa 15 Minuten auf der unteren Schiene backen.
➩
Hawaiitoast
Grillen und Backen mit Umluft
Falls Sie mit Umluft backen oder grillen, können
Sie in der Regel auf ein Vorheizen des Grill- und
Backraums verzichten. Das Gar- und Bräunungsergebnis ist bei Verwendung von Umluft gleichmäßiger.
Drücken Sie auf den Kippschalter 4 für die
Umluft, bis er in Position „-“ einrastet.
Zutaten für 4 Toast:
• 4 Scheiben Toast
• 1–2 Esslöffel Remoulade
• 120 g gekochter Schinken
• 1/2 Dose Ananas
• 4 Scheiben Käse zum Überbacken
• Curry
Der Ventilator im Grill- und Backraum arbeitet.
Die übrige Bedienung entspricht dem Grillen und
Backen ohne Umluft.
-7-
Zubereitung:
➩ Die Butter schaumig schlagen.
➩ Den Zucker, den Vanillinzucker, die
Zitronenschale und die Eier dazugeben.
➩ Das Mehl, das Backpulver und das Salz
mischen und mit einem Rührlöffel unter den
Teig rühren.
➩ Teig ca. 10 Minuten ruhen lassen.
➩ Den Teig in die gewünschte Form, z. B. mit
Hilfe von Fleischwolf, Ausstechformen oder
Spritzbeutel, bringen.
➩ Das Spritzgebäck auf das mit Backpapier
ausgelegte Backblech 8 legen.
➩ Das Spritzgebäck im vorgeheizten Backofen
bei 180°C Ober- und Unterhitze, ca. 10–15
Minuten auf der mittleren Schiene, goldgelb
backen.
Zubereitung:
➩ Die Toastscheiben vortoasten.
➩ Anschließend dünn mit Remoulade bestreichen
und mit dem gekochten Schinken belegen.
➩ Jeweils eine Scheibe Ananas auf den belegten
Toast legen. Mit Curry würzen.
➩ Danach jeweils eine Scheibe Käse oben auf
die Ananas legen.
➩ Die Hawaiitoasts auf den Gitterrost 7 legen
und im Grill- und Backautomaten auf der
mittleren Schiene bei ca. 180 °C, Oberhitze
und Umluft ca. 8 Minuten überbacken.
Tiefgefrorene Pizza backen
Zubereitung:
➩ Schieben Sie den Gitterrost 7 in die mittlere
Schiene des Grill- und Backraums.
➩ Legen Sie die tiefgefrorene Pizza ohne
Verpackung auf den Gitterrost 7.
➩ Backen Sie die Pizza bei Ober- und Unterhitze
und eingeschalteter Umluft ca. 20 Minuten.
➩ Bitte beachten Sie die Verpackungsangaben.
Die Teigmenge reicht für mehrere
Backbleche 8.
Brötchen
Zutaten:
• 300 g Mehl (oder Vollkornmehl)
• gut 2 Teelöffel Backpulver
• 200 g Leinsamen
• 1 Ei
• 500 g Quark
• 1 Teelöffel Salz
• je nach Geschmack Kümmel, Zwiebeln, Speck ...
Spritzgebäck
Zutaten:
• 125 g Butter
• 125 g Zucker
• 1 Päckchen Vanillinzucker
• 1 Prise Salz
• 1 Ei
• 1 Eiweiß
• 250 g Mehl (Typ 405)
• 1 Teelöffel Backpulver
• abgeriebene Schale einer halben Zitrone
Zubereitung:
➩ Alles gut durchkneten und kleine Brötchen
daraus formen.
➩ Die Brötchen auf das mit Backpapier
ausgelegte Backblech 8 legen.
➩ Bei ca. 180° C Oberhitze und Umluft ungefähr 30 Minuten auf der mittleren Schiene
backen.
Die Teigmenge reicht für
mehrere Backbleche 8.
-8-
➩
Baiser
Zutaten:
• 1 Eiweiß
• Salz
• 45 g Zucker
Backen Sie die Toastbrot-Würfel bei ca.
150°C (Umluft) auf er mittleren Schiene, bis
Sie goldbraun sind (ca. 15 - 20 Minuten).
Sie können auch Kräuter- oder Knoblauchbutter
anstatt der normalen Butter verwenden. Die
Backzeit verringert sich dann um ca. 5 Minuten.
Zubereitung:
➩ Das gekühlte Eiweiß in eine fettfreie Rührschüssel geben. Es darf kein Eigelb damit
vermischt werden, sonst wird der Eischnee nicht
fest.
➩ Das Eiweiß auf langsamer Stufe anschlagen,
damit sich keine zu großen Blasen im Eischnee
bilden.
➩ Mit einer kleinen Prise Salz würzen.
➩ Die Hälfte des Zuckers nach und nach
zufügen, wenn der Eischnee anfängt fest
zu werden.
➩ Dann auf höchster Stufe steif schlagen.
➩ Den restlichen Zucker zufügen. Dadurch
erhält die Baisermasse die nötige Festigkeit.
➩ Das Baiser in einen Spritzbeutel mit großer
Sternentülle füllen und mit wenig Abstand
Rosetten, Zungen oder sonstige Formen auf
das mit Backpapier belegte Bachblech spritzen.
➩ Den Grill- und Backautomaten auf
ca. 100° C Umluft vorheizen.
➩ Das Baiser auf der mittleren Schiene bei
ca. 100° C Umluft ca. 2 Stunden backen lassen.
Hackfleisch-Baguettes
Zutaten:
• 2 Baguette-Brötchen
• 250 g Hackfleisch (halb und halb)
• 2 Tomaten
• 1 Zwiebel (gewürfelt)
• 2 EL Tomatenmark
• 40 g geriebenen Parmesan
• 4 Scheiben Käse
• Salz und Pfeffer
Zubereitung:
➩ Schneiden Sie die Baguettes auf und höhlen
Sie sie aus.
➩ Vermengen Sie das Gehackte, das Tomatenmark, die Zwiebel, den Parmesan, etwas Salz
und etwas Pfeffer.
➩ Formen Sie das Hackfleisch zu 4 gleich großen, möglichst flachen, Frikadellen und legen
Sie sie auf die Baguette-Hälften.
➩ Schneiden Sie die Tomate in Scheiben und verteilen Sie sie auf den Baguettes.
➩ Verteilen Sie den Käse auf den Baguettes.
➩ Legen Sie die Baguettes auf ein Backblech 8
und backen Sie sie bei ca. 225°C im vorgeheizten Backofen bei Ober- und Unterhitze für
ca. 20 Minuten auf der unteren Schiene.
Buttercroutons
Zutaten:
• 2 Scheiben Toastbrot
• 1 EL Butter
Sie können die Gehacktes-Masse auch mit Basilikum, Chili oder anderen Gewürzen
abschmecken.
Zubereitung:
➩ Schneiden Sie das Toastbrot in kleine Würfel.
➩ Schmelzen Sie die Butter bei sanfter Hitze in einem Topf und mischen Sie das Toastbrot unter.
➩ Legen Sie ein Backblech 8 mit Backpapier
aus und verteilen Sie die Toastbrot-Würfel
gleichmäßig darauf.
-9-
Blumenkohl (überbacken)
Blätterteigtaschen mit Lachsfüllung
Zutaten:
• 1/2 Kopf Blumenkohl (ca. 250 g)
• 3 Zitronenscheiben
• 1 EL Butter
• 1 gehäufter TL Mehl
• 1 EL Zitronensaft
• 1 EL Mandelstifte
• 2 EL Gratinkäse (gerieben)
• Salz, Pfeffer, Muskat
Zutaten:
• 1 Pck. Blätterteigplatten (ca. 8 Stück)
• 1 Pck. Lachs, geräuchert, in Scheiben
(ca. 200 g)
• 1 Zitrone
• 1 Zwiebel
• 1 Pck. Frischkäse (200 g)
frischer Dill
Salz und Pfeffer
1 Eigelb
Zubereitung:
➩ Teilen Sie den Blumenkohl in Röschen und waschen Sie diese.
➩ Garen Sie den Blumenkohl mit den Zitronenscheiben in kochendem Salzwasser für 8-10
Minuten, so dass der Blumenkohl bissfest ist.
Fangen Sie beim Abgießen ca. 150 ml des
Kochwassers auf.
➩ Lassen Sie in einem Topf die Butter schmelzen
und schwitzen Sie das Mehl unter ständigem
Rühren ca. 1 Minute an.
Gießen Sie unter ständigem Rühren das Kochwasser des Blumenkohls hinzu und lassen Sie
es ca. 2 Minuten kochen. Wird die Mehlschwitze zu fest, geben Sie nach und nach noch etwas Wasser hinzu, bis eine sämige Konsistenz
entsteht. Mit Zitronensaft, Salz, Pfeffer und Muskat würzen.
➩ Geben Sie den Blumenkohl in eine Auflaufform
(ca. 14 cm Durchmesser) und gießen Sie die
Sauce gleichmäßig darüber.
➩ Streuen Sie den Käse und die Mandelstifte darüber.
➩ Stellen Sie die Auflaufform auf ein Backblech
8.
➩ Überbacken Sie den Auflauf bei ca. 200°C im
vorgeheizten Backofen bei Ober- und Unterhitze für ca. 20 Minuten auf der unteren Schiene.
Zubereitung:
➩ Nehmen Sie die Blätterteigplatten auseinander
und lassen Sie sie gegebenenfalls auftauen.
➩ Vermischen Sie den Frischkäse mit Salz, Pfeffer
und dem Saft einer Zitrone.
➩ Schneiden Sie die Zwiebel in feine Würfel.
➩ Geben Sie die Hälfte des Lachses und die
Zwiebeln zu der Frischkäsemasse und pürieren
Sie alles grob mit einem Stabmixer.
➩ Schneiden Sie den restlichen Lachs in feine
Streifen.
➩ Geben Sie den Lachs und den Dill zu der Masse hinzu und vermischen Sie alles.
➩ Geben Sie je einen Esslöffel mit der Masse auf
eine Blätterteigplatte und klappen Sie diese zusammen.
➩ Bestreichen Sie die entstandene Tasche mit Eigelb.
➩ Legen Sie die Blätterteigtaschen auf das
Backblech 8. Lassen Sie genügend Abstand
zwischen den einzelnen Taschen, da der Blätterteig auf geht.
➩ Die Blätterteigtaschen auf der unteren Schiene
bei ca. 200° C Umluft ca. 25-30 Minuten
backen lassen. Der Blätterteig sollte sich leicht
braun färben.
Die angegebene Menge reicht für
mehrere Backbleche 8.
- 10 -
Achtung!
Rezepte ohne Gewähr. Alle Zutaten- und Zubereitungsangaben sind Anhaltswerte. Ergänzen Sie
diese Rezeptvorschläge um Ihre persönlichen
Erfahrungswerte. Wir wünschen Ihnen auf jeden
Fall gutes Gelingen und guten Appetit.
Benutzen Sie keine Haushaltsreiniger oder scharfe
bzw. spitze Gegenstände, um Verschmutzungen
zu entfernen. Dadurch könnten Sie den Grill- und
Backautomat und seine speziell beschichteten
Innenwände beschädigen.
Leuchtmittel wechseln
➩
Gefahr!
Warten Sie immer erst, bis sich das Gerät abgekühlt
hat, bevor Sie das Leuchtmittel wechseln. Ansonsten
besteht die Gefahr von Verbrennungen!
Wechseln Sie das Leuchtmittel nur durch ein
Leuchtmittel gleichen Typs aus (siehe Kapitel
“Technische Daten”).
➩
➩
➩
➩
Öffnen Sie die Glastür.
Drehen Sie die im Innenraum hinten rechts befindliche Glasabdeckung des Leuchtmittels ab.
Drehen Sie das Leuchtmittel heraus und setzen
Sie das neue Leuchtmittel ein.
Schrauben Sie die Glasabdeckung handfest
auf.
Reinigen
➩
Sollten dennoch einmal Verschmutzungen auftreten, können Sie den Grill- und Backautomaten mit einem weichen Tuch, das leicht mit einer
milden Seifenlauge getränkt ist, reinigen. Bei
hartnäckigeren Verschmutzungen oder eingebranntem Schmutz legen Sie ein mit milder
Seifenlauge getränktes Tuch auf die Verschmutzung. Warten Sie, bis die Verschmutzung aufgeweicht ist und entfernen Sie sie dann!
Reinigen Sie das Backblech 8 und den Gitterrost 7 in einer Spülmittellauge. Hartnäckige
Verschmutzungen lassen Sie einweichen.
Spülen Sie die Spülmittelreste mit klarem
Wasser ab.
Gefahr eines elektrischen Schlags!
Bevor Sie das Gerät nach der Reinigung wieder
benutzen, muss es vollständig trocken sein.
Lassen Sie daher nach der Reinigung die Tür
des Gerätes geöffnet.
Gefahr eines elektrischen Schlags!
Ziehen Sie immer den Netzstecker aus der Netzsteckdose bevor Sie den Grill- und Backautomaten
reinigen. Es besteht die Gefahr eines elektrischen
Schlags!
Gefahr eines elektrischen Schlags!
Tauchen Sie das Gerät bei der Reinigung
keinesfalls in Wasser. Es besteht die Gefahr
eines elektrischen Schlags!
- 11 -
Fehlfunktionen beseitigen
Symptom
Der Grill- und
Backautomat
heizt nicht auf.
Symptom
Mögliche Ursache
und Abhilfe
Die Zeitschaltuhr 5
steht auf OFF. Stellen Sie
die Zeitschaltuhr 5 auf
eine Zeit von größer
0 Minuten (OFF) ein.
Eine Haushaltsicherung
ist defekt.
Überprüfen Sie die
Haushaltssicherungen
und erneuern Sie diese
gegebenenfalls.
Die Netzsteckdose ist
defekt. Probieren Sie
eine andere Netzsteckdose aus.
Der Grill- und Backautomat ist möglicherweise
defekt. Lassen Sie den
Grill- und Backautomaten von Fachpersonal
überprüfen.
Der Funktionsschalter 3
befindet sich auf der
Position OFF.
Mögliche Ursache
und Abhilfe
Der Lüfter für
die Umluft
funktioniert
nicht.
Der Schalter für die
Umluft 4 steht in der
Position „O“.
Stellen Sie den Kippschalter für die Umluft
in die Position „-“.
Der Grill- und Backautomat ist möglicherweise defekt. Lassen Sie
den Grill- und Backautomaten von Fachpersonal überprüfen.
Das Türglas ist
gebrochen
oder weist Risse auf.
Lassen Sie den Grill- und
Backautomaten von Fachpersonal reparieren.
Sollte sich eine Fehlfunktion trotzdem nicht beseitigen lassen, wenden Sie sich bitte an Ihren Fachhändler oder den Hersteller.
Entsorgen
Werfen Sie das Gerät keinesfalls in den
normalen Hausmüll. Dieses Produkt
unterliegt der europäischen Richtlinie
2002/96/EC.
Abschalten des
Grill- und Backautomaten ist
nicht möglich.
Ein elektronisches Bauteil ist
defekt.
Ziehen Sie den Netzstecker
aus der Netzsteckdose und
lassen Sie den Grill- und
Backautomaten von Fachpersonal überprüfen.
Entsorgen Sie das Gerät über einen zugelassenen
Entsorgungsbetrieb oder über Ihre kommunale
Entsorgungseinrichtung.
Beachten Sie die aktuell geltenden Vorschriften.
Setzen Sie sich im Zweifelsfall mit Ihrer Entsorgungseinrichtung in Verbindung.
Führen Sie alle Verpackungsmaterialien
einer umweltgerechten Entsorgung zu.
- 12 -
Garantie und Service
Sie erhalten auf dieses Gerät 3 Jahre Garantie ab
Kaufdatum. Das Gerät wurde sorgfältig produziert
und vor Anlieferung gewissenhaft geprüft.
Bitte bewahren Sie den Kassenbon als Nachweis
für den Kauf auf. Bitte setzen Sie sich im Garantiefall mit Ihrer Servicestelle telefonisch in Verbindung.
Nur so kann eine kostenlose Einsendung Ihrer Ware
gewährleistet werden.
Die Garantieleistung gilt nur für Material- oder
Fabrikationsfehler, nicht aber für Transportschäden,
Verschleißteile oder für Beschädigungen an zerbrechlichen Teilen, z. B. Schalter oder Akkus. Das
Produkt ist lediglich für den privaten und nicht für
den gewerblichen Gebrauch bestimmt.
Bei missbräuchlicher und unsachgemäßer Behandlung, Gewaltanwendung und bei Eingriffen, die
nicht von unserer autorisierten Service-Niederlassung vorgenommen wurden, erlischt die Garantie.
Ihre gesetzlichen Rechte werden durch diese
Garantie nicht eingeschränkt.
Die Garantiezeit wird durch die Gewährleistung
nicht verlängert. Dies gilt auch für ersetzte und reparierte Teile. Eventuell schon beim Kauf vorhandene
Schäden und Mängel müssen sofort nach dem
Auspacken gemeldet werden, spätestens aber zwei
Tage nach Kaufdatum. Nach Ablauf der Garantiezeit anfallende Reparaturen sind kostenpflichtig.
Service Deutschland
Tel.: 0800 5435 111
E-Mail: [email protected]
IAN 66725/66726
Service Österreich
Tel.: 0820 201 222 (0,15 EUR/Min.)
E-Mail: [email protected]
IAN 66725/66726
Service Schweiz
Tel.: 0842 665566 (0,08 CHF/Min.,
Mobilfunk max. 0,40 CHF/Min.)
E-Mail: [email protected]
IAN 66725/66726
Erreichbarkeit Hotline:
Montag bis Freitag von 8:00 Uhr – 20:00 Uhr (MEZ)
Importeur
KOMPERNASS HANDELS GMBH
BURGSTRASSE 21
44867 BOCHUM
GERMANY
www.kompernass.com
- 13 -
- 14 -
SOMMAIRE
PAGE
Usage conforme
16
Accessoires fournis
16
Description
16
Caractéristiques techniques
16
Consignes de sécurité
17
Installation
18
Première mise en service
18
Sécurisation et transport
19
Arrêt . . . . . . . . . . . . . . . . . . . . . . . . . . . . . . . . . . . . . . . . . . . . . . . . . . . . . . . . . . . . . . . . . . . . . .19
Transport . . . . . . . . . . . . . . . . . . . . . . . . . . . . . . . . . . . . . . . . . . . . . . . . . . . . . . . . . . . . . . . . . .19
Opération
19
Cuisson . . . . . . . . . . . . . . . . . . . . . . . . . . . . . . . . . . . . . . . . . . . . . . . . . . . . . . . . . . . . . . . . . . .19
Cuisson avec chaleur tournante (convection forcée) . . . . . . . . . . . . . . . . . . . . . . . . . . . . . . . .21
Recettes et conseils
21
Muffins . . . . . . . . . . . . . . . . . . . . . . . . . . . . . . . . . . . . . . . . . . . . . . . . . . . . . . . . . . . . . . . . . . . .21
Toast Hawaii . . . . . . . . . . . . . . . . . . . . . . . . . . . . . . . . . . . . . . . . . . . . . . . . . . . . . . . . . . . . . . .21
Pizza congelée . . . . . . . . . . . . . . . . . . . . . . . . . . . . . . . . . . . . . . . . . . . . . . . . . . . . . . . . . . . . .22
Pâtisserie type biscuit "Spritzgebäck" . . . . . . . . . . . . . . . . . . . . . . . . . . . . . . . . . . . . . . . . . . . .22
Petits pains . . . . . . . . . . . . . . . . . . . . . . . . . . . . . . . . . . . . . . . . . . . . . . . . . . . . . . . . . . . . . . . . .22
Meringue . . . . . . . . . . . . . . . . . . . . . . . . . . . . . . . . . . . . . . . . . . . . . . . . . . . . . . . . . . . . . . . . . .23
Croûtons au beurre . . . . . . . . . . . . . . . . . . . . . . . . . . . . . . . . . . . . . . . . . . . . . . . . . . . . . . . . . .23
Baguettes à la viande hachée . . . . . . . . . . . . . . . . . . . . . . . . . . . . . . . . . . . . . . . . . . . . . . . . .23
Gratin de chou-fleur . . . . . . . . . . . . . . . . . . . . . . . . . . . . . . . . . . . . . . . . . . . . . . . . . . . . . . . . .24
Friands farcis au saumon . . . . . . . . . . . . . . . . . . . . . . . . . . . . . . . . . . . . . . . . . . . . . . . . . . . . . .24
Changer les ampoules
25
Nettoyage
25
Réparer les dysfonctionnements
26
Mise au rebut
26
Garantie & service après-vente
27
Importateur
27
- 15 -
Mini four/gril
Description
Toutes nos félicitations pour l'achat de votre nouvel
appareil.
Le mini-four est destiné au réchauffage ou à la cuisson
d'aliments. Le dispositif à chaleur tournante (convection forcée) assure une distribution rapide et uniforme
de la chaleur.
Vous avez choisi un produit de grande qualité. Le
mode d'emploi fait partie de ce produit. Il contient
des remarques importantes concernant la sécurité,
l'utilisation et la mise au rebut. Veuillez vous familiariser avec l'ensemble des consignes d'opération et
de sécurité avant l'usage du produit. N'utilisez le
produit que conformément aux consignes et pour
les domaines d'utilisation prévus. En cas de transfert
du produit à un tiers, remettez-lui également tous les
documents.
Usage conforme
Le four gril automatique sert exclusivement à réchauffer, cuire et griller des plats. Cet appareil
est exclusivement réservé à une utilisation dans un
cadre domestique. Evitez de l'utiliser à des fins
professionnelles.
La responsabilité de Kompernaß GmbH ne saurait
être engagée en cas d'utilisation non conforme à
la destination normale de l'appareil.
Accessoires fournis
Contenu de la fourniture
• le mini four/gril
• un grill
• un plateau
• une poignée pour grille et plateau
• une notice
Illustration A :
1 Témoin lumineux (Power)
allumé en cours d'opération
2 Thermostat
Réglage en continu de la
température de 100° C à 230° C
3 Sélecteur pour
OFF (arrêt),
Chaleur "haut",
Chaleur "bas",
Chaleur "haut + bas"
4 Commutateur à bascule pour "chaleur tournante"
5 Minuterie
Réglage du temps de cuisson souhaité entre
0 et 60 min.
6 Glissières pour plateau ou grille
Illustration B :
7 Grille
8 Plateau
9 Poignée pour grille/plateau
Caractéristiques techniques
Tension du secteur : 220 - 240 V ~/50 Hz
Puissance nominale : 1380 W
Volume intérieur :
15 litres
Ampoules :
- 16 -
240 V, 15 W, E 14, 300°C
Consignes de sécurité
•
•
Danger !
•
•
•
•
•
•
Cet appareil n'est pas prévu pour des personnes (y compris des enfants) dont les capacités
physiques, sensorielles ou mentales ou dont le
manque d'expérience ou de connaissances
les empêchent d'assurer un usage sûr des appareils, s'ils n'ont pas été surveillés ou initiés au
préalable.
Les enfants doivent être surveillés afin d'éviter
qu'ils ne jouent avec l'appareil.
Il est absolument interdit d'ouvrir le boîtier de
l'appareil ou de chercher à réparer. Dans ce
cas, la sécurité n'est pas assurée et la garantie
prend fin. Pour toute réparation, amener l'appareil chez le revendeur ou chez un professionnel
agréé.
Faites remplacer immédiatement les fiches secteur ou les cordons d'alimentation endommagés
des techniciens spécialisés autorisés ou par le
service clientèle pour éviter tout risque.
Eviter toute introduction de fluide dans le boîtier
de l'appareil. L'appareil ne doit pas être exposé
à l'humidité et ne doit pas être utilisé à l'extérieur. Evitez également de poser l'appareil sur
des récipients contenant un liquide (vases, etc.)
Risque d'incendie ou d'électrocution ! Si toutefois
du liquide devait pénétrer dans le boîtier de
l'appareil, débranchez immédiatement la fiche
de la prise de courant et confier
l'appareil à un atelier spécialisé pour vérification.
Ne jamais toucher les barreaux chauffants ou
la vitre en cours de fonctionnement : attendre
que le four gril soit refroidi. Ne pas mettre la
main dans l'enceinte de chauffe en cours de
fonctionnement. Attendre que l'appareil soit
refroidi. Sinon risque de brûlure.
•
Laissez d'abord refroidir le four gril automatique
après usage, avant de le transporter.
Ne jamais saisir avec des mains humides
l'appa-reil ou le câble ou la fiche. Risque
d'électrocution.
Acheminez le cordon d'alimentation de telle
manière que personne ne puisse marcher ou
trébucher dessus.
Attention ! Surface chaude.
Ne touchez jamais la porte en verre ou le
boîtier, en cours d'utilisation, car ils peuvent
devenir très chauds.
Pour ouvrir la porte en verre, utilisez une manique ou une protection similaire pour éviter
les brûlures !
Attention !
•
•
•
•
•
•
- 17 -
Ne posez jamais d'objets, d'aliments, de saladiers, le plateau 8, la grille 7 ou d'autres
récipients directement sur le fond de l'enceinte
de chauffe ! L'accumulation de chaleur qui en
résulte risque d'endommager l'appareil ! Posez
toujours les aliments, les saladiers ou d'autres
récipients sur le plateau 8 ou la grille 7 que
vous glisserez ensuite dans l'une des 3 glissières 6.
Pendant l'exploitation, ne laissez jamais l'appareil sans surveillance.
Eviter toute présence de matériau inflammable
à proximité de l'appareil lorsqu'il est en marche
(par ex. torchon, manique, etc.).
Ne jamais utiliser l'appareil pour sécher des
textiles ou un objet quelconque, que ce soit en
posant l'objet à sécher sur ou dans le mini-four.
Danger d'incendie !
Tirez toujours le cordon d'alimentation de la
prise secteur au niveau de la fiche, ne tirez
pas sur le cordon en tant que tel.
Evitez de plier ou de coincer le cordon d'alimentation.
L'utilisation d'une rallonge est interdite.
•
•
Si le mini-four doit rester inutilisé pour une longue période, le débrancher de la prise secteur.
Pour être totalement hors tension, vous devez
débrancher la fiche de la prise secteur.
Ne pas utiliser de minuterie externe ou de
dispositif de commande à distance pour faire
fonctionner l'appareil.
Signification des mises en garde au titre de la
sécurité
Cette notice contient différents avis au titre de la
sécurité :
Risque d'incendie !
Poser impérativement l'appareil sur une surface stable et plane, résistante à la chaleur. Sinon il y a un
risque d'incendie et l'appareil peut être endommagé. La zone sous le fond peut se décolorer et être
endommagé. D'autre part éviter d'installer l'appareil
sur un support en matériau souple, ce qui risquerait
de laisser des marques.
Risque de choc électrique !
Ne pas mettre l'appareil à proximité immédiate d'objets
ou d'endroits humides tels que évier, bassine, etc.
Sinon risque d'électrocution.
Danger !
Ne pas prendre appui sur la porte vitrée. De
même ne pas mettre d'objet sur la porte vitrée.
Risque de dommage sur les charnières.
Les avis avec le mot DANGER mettent en garde
devant des risques d'accident.
Attention !
Les avis avec le mot ATTENTION mettent en garde
devant des risques de dommages matériels.
Ces avis donnent des indications utiles pour
une utilisation économique du mini-four.
Première mise en service
Installation
➩
Attention !
Posez l'appareil sur un support stable, plat et
résistant à la chaleur (par ex. plans de travail
en inox ou plans de travail en pierre naturelle
comme le granit). Vérifier qu'il y a un espace
suffisant autour de l'appareil pour la ventilation.
Risque d'incendie !
Prévoir un espace d'au moins 10 cm entre l'arrière
de l'appareil et le mur, au moins 10 cm d'espace
libre au dessus et 5 cm sur les côtés. Ne pas installer
l'appareil dans un buffet, une armoire ou tout espace
confiné. En effet un espace libre suffisant doit être
aménagé autour du mini-four pour la ventilation (sinon
risque de surchauffe ou d'incendie).
Ne posez jamais d’objets, d’aliments, de saladiers,
la plaque de cuisson 8, la grille 7 ou d’autres
récipients directement sur le fond de l'enceinte de
chauffe ! La chaleur qui s’accumule à ce moment-là
risque d’endommager l'appareil ! Posez toujours les
aliments, les saladiers ou d'autres récipients sur le
plateau 8 ou la grille 7 que vous glisserez ensuite
dans l'une des 3 glissières 6.
Avant d'utiliser l'appareil, veuillez procéder comme
décrit :
➩
- 18 -
Sortir l'appareil et ses accessoires de son emballage.
Sécurisation et transport
Risque de blessure !
Ne pas mettre la main sur les charnières en ouvrant
ou en fermant la porte. Risque d'accident aux mains.
➩
➩
➩
➩
➩
➩
Arrêt
➩
Avant la première mise en service, enlever les
éléments d'emballage éventuellement encore
présents. Nettoyer les accessoires avec une lessive alcaline diluée et légèrement chaude, puis
sécher.
Passer un chiffon humidifié avec de l'eau sur le
boîtier de l'appareil, puis essuyer soigneusement.
Lorsque l'appareil est complètement sec à l'intérieur et à l'extérieur, brancher le connecteur
dans une prise secteur (220 - 240 V~/50 Hz).
Mettre l'appareil sous tension sans les accessoires et sans aliment. Ouvrir complètement la
porte de l'appareil.
Mettre le thermostat 2 à 230 °C. Mettre le
sélecteur 3 sur "haut + bas".
Mettre la minuterie 5 sur 15 minutes.
Le mini-four ne peut être mis en route qu'avec le
minuterie 5. Dès que la minuterie 5 est en
route, le témoin lumineux 1 s'allume.
Transport
➩
➩
➩
➩
➩
Si le mini-four doit être déplacé, le laisser d'abord
refroidir.
Retirer le cordon d'alimentation de la prise.
Enrouler le cordon autour du support à l'arrière
de l'appareil.
Opération
Cuisson
➩
➩
Les éléments chauffants étant légèrement graissés,
une légère odeur peut se dégager lors de la
première mise en service. Elle n'est pas dangereuse et se dissipe rapidement. Ouvrir la fenêtre et aérer.
➩
Mettre le sélecteur 3 et la minuterie 5 sur
OFF (arrêt). Débrancher la fiche du cordon d'alimentation de la prise secteur.
Lorsque l'appareil s'arrête automatiquement,
mettre le sélecteur 3 sur OFF (arrêt).
Avant le nettoyage, débranchez la fiche secteur et attendre que l'appareil soit complètement refroidi.
Puis faire le nettoyage avec un chiffon légèrement humidifié et sécher.
- 19 -
Sortir de l'appareil la grille 7 et le plateau 8.
Disposer le cas échéant une feuille de papier
sulfurisé ou enduire le plateau 8 de beurre
ou d'huile.
Mettre l'appareil en chauffe 10 minutes environ
(selon le réglage de température) jusqu'à la
température souhaitée:
- Sélectionner la température souhaitée avec
le thermostat 2. En mode "grill" (grillade)
toujours choisir le niveau de température le
plus élevé (230° C).
- Puis mettre le sélecteur 3 sur "haut" (pour dorer
et gratiner, etc.), ou "bas" (pour une préparation
pâtissière, etc.) ou "haut + bas" (pour une pizza,
etc.). Pour une cuisson en mode grillade, tourner
le sélecteur 3 sur chauffage "haut".
➩
- Régler la minuterie 5 sur le temps voulu de
préchauffe (environ 10 minutes).
- Refermer la porte vitrée.
Mettre la minuterie 5 sur le temps de cuisson
souhaité.
Le temps maximal de la minuterie est de 60 minutes.
➩
Le délai écoulé, mettre le plat ou la préparation
sur la grille 7 ou le plateau 8 et mettre en
place dans l'une des glissières 6 du four. Vérifier qu'il y a un espace suffisant entre le plat et
les parois du four d'une part, et les éléments
chauffants d'autre part.
Attention !
Ne posez jamais d'objets, d'aliments, de saladiers,
le plateau 8, la grille 7 ou d'autres récipients
directement sur le fond de l'enceinte de chauffe !
L'accumulation de chaleur qui en résulte risque d'endommager l'appareil ! Posez toujours les aliments,
les saladiers ou d'autres récipients sur le plateau 8
ou la grille 7 que vous glisserez ensuite dans l'une
des 3 glissières 6.
➩
Le témoin lumineux 1 signale que le mini-four est en
marche. Le bouton de la minuterie 5 se déplace
maintenant dans le sens horaire inverse vers OFF (fin).
Lorsque le mini-four a atteint la température
fixée au départ, les éléments chauffants fonctionnent de façon intermittente pour maintenir
la température à la valeur fixée.
➩
Si vous préparez des aliments qui gouttent fortement sur la grille 7, alors faites glisser le
plateau 8 dans le rail inférieur. La graisse qui
s'égoutte est récupérée et l'appareil est ensuite
plus facile à nettoyer.
Pour une cuisson la plus uniforme et régulière
possible, il est recommandé de disposer le plateau 8 ou la grille 7 dans les guides du milieu et d'activer la fonction "chaleur tournante".
➩
Lorsque le temps de cuisson pour la préparation du plat est en dessous de 25 minutes,
mettre la minuterie 5 d'abord sur 60 minutes,
puis la mettre sur le temps de cuisson normal
ement prévu.
L'appareil s'arrête automatiquement lorsque le
temps de la minuterie s'est écoulé. Tourner le
bouton de la minuterie 5 sur OFF pour arrêter
la cuisson avant le délai initialement prévu.
Mettre le sélecteur 3 sur la position OFF et
débrancher le connecteur de la prise secteur.
Un bref signal sonore est émis et le témoin lumineux 1
s'éteint.
La minuterie 5 peut continuer à tourner un
bref instant après arrêt de l'appareil.
Refermer la porte vitrée avant de lancer
la cuisson.
Des fumées peuvent apparaître lors de la cuisson
de préparations ayant une forte teneur en corps
gras. Dans ce cas ne pas fermer complètement
la porte vitrée , mais laisser entrouvert : en refermant la porte doucement, la porte présente
une légère résistance sur cette position avant
fermeture complète.
- 20 -
➩
Pour retirer la grille 7 ou le plateau 8 toujours
utiliser la poignée 9.fournie avec l'appareil
Pour sortir la grille 7, engager le petit crochet
de la poignée 9 par le dessus dans la grille.
Pour sortir le plateau 8, engager le grand
crochet de la poignée 9 sur le bord avant du
plateau 8.
Recettes et conseils
Ce chapitre vous présente quelques exemples de recettes. Ces exemples ne sont que des recommandations. Les temps de préparation peuvent varier.
Noter les conseils donnés sur les emballages
des produits alimentaires.
Muffins
➩
A la fin du temps de cuisson remettre le sélecteur 3 sur OFF (arrêt). Débrancher la fiche
(connecteur) de la prise secteur. Laisser l'appareil se refroidir avant de le nettoyer ou de
le réutiliser.
Cuisson avec chaleur tournante
(convection forcée)
Pour une cuisson avec chaleur tournante, un préchauffage de l'appareil est en général inutile. Le degré
de dorage et la cuisson sont plus homogènes en
utilisant la chaleur tournante.
Noter les conseils donnés dans les recettes pour
l'utilisation de la chaleur tournante.
Recette pour quatre personnes :
• 1 tasse de farine
• 1 cuillère à café de levure en poudre
• 1 oeuf
• 1 cuillère à soupe de beurre fondu
• 1 tasse de lait
• 3 cuillères à soupe de sucre
• sel
• et pour différentes variantes des noisettes, des
petits morceaux de banane ou de chocolat
Préparation :
➩ Mélanger lentement dans un bol la farine, la
levure, l'oeuf, le lait, le sel et le sucre.
➩ Fondre du beurre dans une casserole et agiter
avec la pâte.
➩ et ajouter selon les goûts des noisettes, des
petits morceaux de banane ou de chocolat.
➩ Mettre la pâte dans des moules à muffin typiques
et les placer sur la plaque de cuisson 8.
➩ Faire cuire à 200° C à chaleur supérieure et
chaleur tournante pendant env. 15 minutes sur
la glissière inférieure.
Toast Hawaii
➩
Actionner le commutateur à bascule 4 pour
le mettre en position “-” (chaleur tournante).
Le ventilateur dans le mini-four se met en marche.
Le reste des opérations est identique à une cuisson
sans chaleur tournante.
Ingrédients pour 4 toasts :
• 4 tranches de toast
• 1 ou 2 cuillères à soupe de rémoulade
• 120 g de jambon blanc
• 1/2 boîte d' ananas
• 4 tranches de fromage pour gratiner
• curry
- 21 -
Préparation :
➩ Préchauffer les tranches de toast.
➩ Puis mettre une fine couche de rémoulade et
garnir avec le jambon.
➩ Mettre une tranche d'ananas sur le toast. Assaisonner avec du curry.
➩ Puis disposer une tranche de fromage sur la
tranche d'ananas.
➩ Placer les toasts hawaii sur la grille 7 de la
plaque du milieu du four-grill et les faire
gratiner à env. 180 °C, chaleur supérieure et
chaleur tournante pendant env. 8 minutes.
Pizza congelée
Préparation :
➩ Engager la grille 7 dans les guides du milieu
du mini-four.
➩ Disposer la pizza congelée sans son emballage
sur la grille 7.
➩ Chauffer la pizza pendant environ 20 minutes
avec la fonction "haut + bas" et la chaleur tournante.
➩ Noter les conseils donnés sur l'emballage.
Pâtisserie type biscuit "Spritzgebäck"
Ingrédients :
• 125 g de beurre
• 125 g de sucre
• 1 petit sachet de sucre vanillé
• 1 pincée de sel
• 1 oeuf
• 1 blanc d'oeuf
• 250 g de farine (type 405)
• 1 cuillère à café de levure en poudre
• zeste râpé d'un demi-citron
Préparation :
➩ Battre le beurre en mousse.
➩ Mettre le sucre, le sucre vanillé, les zestes de
citron et l'oeuf.
➩ Mélanger la farine, la levure en poudre et le
sel et remuer avec une spatule sous la pâte.
➩ Laisser reposer la pâte environ 10 minutes.
➩ Mettre la pâte dans la forme souhaitée à l'aide
d'un hachoir, d'un moule ou d'une poche à
douille.
➩ Disposer la pâtisserie "Spritzgebäck" sur le
plateau avec du papier sulfurisé 8 .
➩ Faire cuire les biscuits de Noël dans un four
préchauffé à 180° C à chaleur supérieure et
inférieure pendant 10– env. 15 minutes sur la
glissière du milieu jusqu'à obtenir une belle
couleur dorée.
La quantité de pâte suffit pour plusieurs
plateaux 8.
Petits pains
Ingrédients :
• 300 g de farine (ou de farine complète)
• 2 bonnes cuillères à café de levure en poudre
• 200 g de graines de lin
• 1 oeuf
• 500 g de fromage blanc
• 1 cuillère à café de sel
• plus selon les goûts du cumin, des oignons,
du lard ...
Préparation :
➩ Bien pétrir le tout et former des petits pains.
➩ Disposer les petits pains avec du papier sulfurisé
sur le plateau 8.
➩ Faire cuire sur la glissière du milieu à env.
180° C de chaleur supérieure et de chaleur
tournante pendant env. 30 minutes.
La quantité de pâte suffit pour plusieurs
plateaux 8.
- 22 -
Meringue
➩
Ingrédients :
• 1 blanc d'oeuf
• sel
• 45 g de sucre
Préparation :
➩ Mettre le blanc d'oeuf frais dans un récipient
type saladier, sans gras. Ne pas mélanger de
jaune d'oeuf, sinon le blanc d'oeuf ne montera
pas en neige.
➩ Battre le blanc d'oeuf doucement, pour éviter
la formation de grosses bulles dans la neige.
➩ Assaisonner avec une pincée de sel.
➩ Ajouter à petites doses la moitié du sucre lorsque
la neige commence à prendre de la consistance.
➩ Puis fouetter plus énergiquement.
➩ Ajouter le reste du sucre. La masse de meringue prend une consistance ferme.
➩ Remplir de meringue une boîte à douille avec
un grand bec verseur et verser sur le plateau
recouvert de papier sulfurisé en formant des
rosettes, des langues ou tout autre motif.
➩ Chauffer le mini-four à environ 100° C avec
la fonction "chaleur tournante".
➩ Faire cuire environ 2 heures les meringues dans
la position du milieu dans le four à environ
100° C, en mode "chaleur tournante".
Croûtons au beurre
Ingrédients :
• 2 tranches de pain de mie
• 1 CS de beurre
Préparation :
➩ Coupez le pain de mie en petits dés.
➩ Faites fondre le beurre à feu doux dans une
casserole et ajoutez les dés de pain de mie.
➩ Placez du papier sulfurisé sur la plaque de
cuisson 8 et répartissez-y les dés de pain de
mie de manière uniforme.
Faites cuire les dés de pain de mie à env.
150°C (chaleur tournante) sur la glissière du
milieu jusqu'à obtenir une jolie couleur dorée
(env. 15 à 20 minutes).
Vous pouvez également utiliser du beurre aux
herbes ou du beurre à l'ail au lieu de beurre
nature. Le temps de cuisson se réduit alors
d'env. 5 minutes.
Baguettes à la viande hachée
Ingrédients :
• 2 petits pains façon "baguette"
• 250 g de viande hachée
(moitié porc et moitié veau)
• 2 tomates
• 1 oignon (coupé en dés)
• 2 c. à soupe de concentré de tomate
• 40 g de parmesan râpé
• 4 tranches de fromage
• Sel et poivre
Préparation :
➩ Coupez les baguettes en deux et retirez la mie.
➩ Mélangez la viande hachée, le concentré de
tomates, les oignons, le parmesan, un peu de
sel et un peu de poivre.
➩ Formez quatre boulettes de viande hachée
de taille similaire, les plus plates possibles et
posez-les sur les moitiés de baguettes.
➩ Coupez la tomate en tranches et répartissez-la
sur les baguettes.
➩ Placez le fromage sur les baguettes.
➩ Placez les baguettes sur la plaque de cuisson 8
et faites-les cuire pendant env. 225°C dans le
four préchauffé à chaleur supérieure et inférieure pendant env. 20 minutes sur la glissière
du bas.
N'hésitez pas à assaisonner la viande hachée
à l'aide de basilic, de chili ou d'autres épices.
- 23 -
Gratin de chou-fleur
Friands farcis au saumon
Ingrédients :
• 1/2 tête de chou-fleur (env. 250 g)
• 3 tranches de citron
• 1 CS de beurre
• 1 CC arasée de farine
• 1 CS de jus de citron
• 1 CS d'amandes effilées
• 2 CS de fromage à gratin (râpé)
• Sel, poivre, noix de muscade
Ingrédients :
• 1 paquet de feuilles de pâte feuilletée
(env. 8 pièces)
• 1 paquet de saumon fumé en tranches
(env. 200 g)
• 1 citron
• 1 oignon
• 1 paquet de fromage frais à tartiner (200 g)
De l'aneth fraîche
Sel et poivre
1 jaune d'œuf
Préparation :
➩ Détachez les fleurs du chou-fleur et lavez-les.
➩ Faites cuire le chou-fleur avec les tranches de
citron dans l'eau bouillante salée pendant 8
à 10 minutes, jusqu'à ce que le chou-fleur soit
bien ferme. Réservez env. 150 ml de l'eau de
cuisson.
➩ Faites fondre le beurre dans une casserole et
réalisez un roux en remuant la farine constamment pendant env. 1 minute.
En remuant constamment, ajoutez l'eau de cuisson du chou-fleur et faites bouillir pendant env.
2 minutes. Si le roux devient trop ferme, ajoutez
progressivement encore un peu d'eau jusqu'à
obtenir une consistance veloutée. Assaisonner
d'un jus de citron, de sel, de poivre et de noix
de muscade.
➩ Mettez le chou-fleur dans un moule à gratin
(d'un diamètre d'env. 14 cm) et nappez-le
uniformément de sauce.
➩ Parsemez de fromage et d'amandes effilées.
➩ Placez le moule à gratin sur une plaque de
cuisson 8.
➩ Faites cuire le gratin à env. 200°C dans un four
préchauffé à chaleur supérieure et inférieure
pendant env. 20 minutes sur la glissière du
bas.
Préparation :
➩ Séparez les feuilles de pâte feuilletée et le cas
échéant, laissez-les décongeler.
➩ Mélangez le fromage frais avec du sel, du
poivre et le jus d'un citron.
➩ Coupez l'oignon en dés fins.
➩ Ajoutez la moitié du saumon et les oignons au
fromage frais et hachez le tout grossièrement
à l'aide d'un pied mixeur.
➩ Coupez le reste du saumon en fines lamelles.
➩ Ajoutez le saumon et l'aneth à la préparation
et mélangez le tout.
➩ Mettez une cuillère à soupe remplie de préparation sur une feuille de pâte feuilletée et rabattez
les bords.
➩ Badigeonnez le friand ainsi obtenu de jaune
d'œuf.
➩ Posez les friands sur la plaque de cuisson 8.
Laissez suffisamment d'écart entre les différents
friands, car la pâte feuilletée gonflera.
➩ Faire cuire les friands sur la glissière du bas à
env. 200° C de chaleur tournante pendant
env. 25-30 minutes. La pâte feuilletée devrait
légèrement brunir.
Les quantités indiquées suffisent pour plusieurs
plaques de cuisson 8.
- 24 -
Recettes sans garantie. Toutes les indications relatives
aux ingrédients et aux préparations sont des valeurs
d'orientation. Complétez ces propositions de recette
avec vos expériences personnelles. Nous vous souhaitons dans tous les cas de réussir et un bon appétit.
Changer les ampoules
Attention !
Ne pas utiliser de produit de nettoyage domestique
ou d'objet coupant ou pointu pour éliminer les saletés.
En effet il y aurait un risque d'endommager le revêtement spécial à l'intérieur de l'appareil.
➩
Danger !
Attendez jusqu'à ce que l'appareil se soit refroidi,
avant de remplacer les ampoules. Sinon, il y a un
risque de brûlures !
➩
Remplacez l'ampoule uniquement par une
ampoule du même type (voir le chapitre
"Caractéristiques techniques").
Si des dépôts néanmoins se forment, nettoyer
le four avec un chiffon doux légèrement imprégné d'eau savonneuse douce. En cas de saletés tenaces ou de dépôts incrustrés et cuits,
posez un chiffon imbibé d'eau savonneuse
douce sur les dépôts. Attendez que les dépôts
se soient ramollis avant de les retirer !
Nettoyer le plateau 8 et la grille 7 avec
un produit pour lessive. Eliminer peu à peu les
dépôts adhérents. Rincer ensuite à l'eau claire.
Risque de choc électrique !
➩
➩
➩
➩
Ouvrez la porte en verre.
Tournez le couvercle en verre de l'ampoule qui
se trouve à l'intérieur, vers l'arrière, à droite.
Dévissez l'ampoule et insérez la nouvelle ampoule.
Vissez le nouveau couvercle en verre.
Avant de réutiliser l'appareil après nettoyage, attendre
qu'il soit complètement sec. Laisser donc la porte de
l'appareil ouverte après le nettoyage.
Nettoyage
Risque de choc électrique !
Avant de nettoyer l'appareil, toujours retirer la fiche
de la prise secteur. Risque d'électrocution !
Risque de choc électrique !
Ne plonger l'appareil en aucun cas dans l'eau
pour le nettoyer. Risque d'électrocution !
- 25 -
Réparer les dysfonctionnements
Symptôme
Cause possible et remède
Le minifour ne
chauffe pas.
La minuterie 5 est
sur OFF. Mettre la minuterie 5 sur une durée
plus longue que 0 minute
(OFF).
Un fusible de l'installation électrique est défectueux.
Vérifiez les fusibles de
l'installation et remplacezles si nécessaire.
La prise de courant est
défectueuse. Essayez
d'utiliser une autre prise
de courant.
Le mini-four est probablement défectueux. Faire
contrôler le mini-four par
un professionnel.
Le sélecteur 3 se trouve
sur la position OFF.
Symptôme
Cause possible et remède
Le ventilateur
pour la chaleur tournante
(convection)
ne fonctionne
pas.
Le commutateur 4 pour
la commande de chaleur
tournante est en position
"O". Mettre ce commutateur sur la position position "-".
Le mini-four est probablement défectueux.
Faire contrôler le minifour par un professionnel.
La porte vitrée
est brisée ou
présence de
fêlure.
Faire réparer le minifour par
un professionnel.
En cas de dysfonctionnement persistant, s'adresser
au distributeur ou au fabricant.
Mise au rebut
L’appareil ne doit jamais être jeté dans
la poubelle domestique normale. Ce produit est soumis à la directive européenne
2002/96/EC.
Mise en marche impossible
du mini-four.
Un composant électronique
est défectueux.
Retirer la fiche secteur de
la prise et faire contrôler le
mini-four par un technicien.
Eliminez l’appareil par l’intermédiaire d’une entreprise de traitement des déchets autorisée ou via le
service de recyclage de votre commune.
Veuillez respecter les règlements actuellement en
vigueur. En cas de doutes, contactez votre
organisation de recyclage.
Procédez à une élimination des matériaux
d’emballage respectueuse de
l’environnement.
- 26 -
Garantie & service
après-vente
Service France
Tel.: 0800 919270
E-Mail: [email protected]
Cet appareil bénéficie de 3 ans de garantie à compter
de la date d'achat. L'appareil a été fabriqué avec
soin et consciencieusement contrôlé avant sa distribution.
Veuillez conserver le ticket de caisse en guise de
preuve d'achat. Si la garantie devait s'appliquer,
contactez par téléphone votre interlocuteur du service
après-vente. Cette condition doit être respectée pour
assurer l'expédition gratuite de votre marchandise.
La prestation de garantie s'applique uniquement
pour les erreurs de matériaux et de fabrication, pas
pour les dommages de transport, les pièces d'usure
ou les dommages subis par les pièces fragiles, comme
par ex. les interrupteurs ou les batteries. Le produit est
exclusivement destiné à un usage privé et non commercial.
La garantie est annulée en cas de manipulation
incorrecte et inappropriée, d'utilisation brutale et en
cas d'intervention qui n'aurait pas été réalisée par notre centre de service après-vente agréé. Cette garantie
ne constitue pas une restriction de vos droits légaux.
La durée de la garantie n'est pas prolongée par la
garantie du fabricant. Ceci vaut également pour les
pièces remplacées et réparées. Tous dommages et
défauts présents dès l'achat doivent être notifiés dès
que le produit est déballé, et au plus tard deux jours
après la date d'achat. Toutes réparations survenant
après la période sous garantie ne seront pas prises
en charge.
IAN 66725/66726
Service Suisse
Tel.: 0842 665566 (0,08 CHF/Min.,
mobile max. 0,40 CHF/Min.)
E-Mail: [email protected]
IAN 66725/66726
Heures de service de notre hotline :
du lundi au vendredi de 8 h à 20 h (HEC)
Importateur
KOMPERNASS HANDELS GMBH
BURGSTRASSE 21
44867 BOCHUM
GERMANY
www.kompernass.com
- 27 -
- 28 -
INDICE
PAGINA
Utilizzo conforme alla norma
30
Volume di fornitura
30
Descrizione
30
Dati tecnici
30
Avvertenze di sicurezza
31
Installazione
32
Prima messa in funzione
32
Spegnimento e trasporto
33
Spegnimento . . . . . . . . . . . . . . . . . . . . . . . . . . . . . . . . . . . . . . . . . . . . . . . . . . . . . . . . . . . . . . .33
Trasporto . . . . . . . . . . . . . . . . . . . . . . . . . . . . . . . . . . . . . . . . . . . . . . . . . . . . . . . . . . . . . . . . . .33
Comandi
33
Cottura al grill e cottura al forno . . . . . . . . . . . . . . . . . . . . . . . . . . . . . . . . . . . . . . . . . . . . . . .33
Cottura al grill e cottura al forno ventilata . . . . . . . . . . . . . . . . . . . . . . . . . . . . . . . . . . . . . . . .35
Consigli per la preparazione e ricette
35
Muffin . . . . . . . . . . . . . . . . . . . . . . . . . . . . . . . . . . . . . . . . . . . . . . . . . . . . . . . . . . . . . . . . . . . .35
Toast Hawaii . . . . . . . . . . . . . . . . . . . . . . . . . . . . . . . . . . . . . . . . . . . . . . . . . . . . . . . . . . . . . . .35
Cottura al forno della pizza surgelata . . . . . . . . . . . . . . . . . . . . . . . . . . . . . . . . . . . . . . . . . . .36
Spritzgebäck (tipo di biscotti) . . . . . . . . . . . . . . . . . . . . . . . . . . . . . . . . . . . . . . . . . . . . . . . . . .36
Panini . . . . . . . . . . . . . . . . . . . . . . . . . . . . . . . . . . . . . . . . . . . . . . . . . . . . . . . . . . . . . . . . . . . . .36
Meringhe . . . . . . . . . . . . . . . . . . . . . . . . . . . . . . . . . . . . . . . . . . . . . . . . . . . . . . . . . . . . . . . . . .37
Crostini al burro . . . . . . . . . . . . . . . . . . . . . . . . . . . . . . . . . . . . . . . . . . . . . . . . . . . . . . . . . . . . .37
Baguette alla carne tritata . . . . . . . . . . . . . . . . . . . . . . . . . . . . . . . . . . . . . . . . . . . . . . . . . . . . .37
Cavolfiore (gratinato) . . . . . . . . . . . . . . . . . . . . . . . . . . . . . . . . . . . . . . . . . . . . . . . . . . . . . . . .38
Tasche di pastasfoglia con ripieno di salmone . . . . . . . . . . . . . . . . . . . . . . . . . . . . . . . . . . . .38
Sostituzione della lampadina
39
Pulizia
39
Soluzioni in caso di malfunzionamenti
40
Smaltimento
40
Garanzia & assistenza
41
Importatore
41
- 29 -
Forno elettrico con grill
Descrizione
Congratulazioni per l'acquisto del nuovo apparecchio.
Lei ha scelto un prodotto di alta qualità. Il manuale
di istruzioni è parte integrante del presente prodotto.
Esso contiene importanti indicazioni per la sicurezza, l'uso e lo smaltimento. Prima di utilizzare il prodotto, si familiarizzi con tutte le indicazioni relative ai
comandi e alla sicurezza.Utilizzi il prodotto solo come
descritto e per i campi di impiego indicati. In caso di
cessione del prodotto a terzi, consegni anche tutta la
documentazione relativa.
Il forno elettrico con grill serve per scaldare, cuocere e grigliare pietanze. La funzione cottura ventilata
favorisce una ripartizione rapida e uniforme del calore nell'apparecchio.
Utilizzo conforme alla norma
Il forno elettrico con grill serve esclusivamente a
scaldare, cuocere e grigliare pietanze. Questo
apparecchio è destinato esclusivamente all'uso in
ambienti domestici privati. Non utilizzarlo per fini
commerciali.
Qualsiasi altro impiego viene considerato non conforme e può dare luogo a danni a cose o a persone.
Kompernaß non si assume alcuna responsabilità
per eventuali danni derivanti da uso non conforme.
Volume di fornitura
La confezione comprende
• il forno elettrico con grill
• una griglia
• una teglia forno
• una pinza per prelevare griglia/teglia forno
• istruzioni per l'uso
Figura A:
1 Spia di controllo (Power)
Si accende durante il funzionamento
2 Regolatore di temperatura
Regolazione continua della temperatura da
100° C a 230° C
3 Interruttore di funzione per
OFF (spento),
Superiore,
Inferiore,
Inferiore e superiore
4 Interruttore a bilico per funzione cottura ventilata
5 Timer
Impostazione del tempo richiesto di
cottura/cottura al grill da 0 a 60 min.
6 Guide per teglia per forno o griglia
Figura B:
7 Griglia
8 Teglia forno
9 Pinza per prelevare griglia/teglia forno
Dati tecnici
Tensione di rete:
Potenza nominale:
Capacità interna:
220 - 240 V ~/50 Hz
1380 W
15 litri
Lampadina:
240 V, 15 W, E 14, 300° C
- 30 -
Avvertenze di sicurezza
•
•
Pericolo!
•
•
•
•
•
•
Questo apparecchio non è indicato per l'uso
da parte di persone (inclusi bambini) con
limitate capacità fisiche, sensoriali o mentali o
prive dell'esperienza e/o della conoscenza
necessaria, a meno che tali persone non vengano
sorvegliate da un responsabile per la sicurezza
o abbiano ricevuto indicazioni sull'impiego
dell'apparecchio.
Sorvegliare i bambini per assicurarsi che non
giochino con l'apparecchio.
Non aprire né riparare personalmente l'alloggiamento del forno elettrico con grill. Aprendolo
ci si espone a pericoli e la garanzia decade.
Far riparare il forno elettrico con grill guasto
esclusivamente dal rivenditore o da personale
specializzato autorizzato.
Fare sostituire immediatamente la spina o il cavo
di rete danneggiato da personale specializzato
autorizzato o dal centro di assistenza ai clienti,
per evitare possibili danni.
Evitare che possano penetrare liquidi nell'alloggiamento del forno elettrico con grill. Non esporre
l'apparecchio ad umidità e non utilizzarlo all'aperto. Non collocare, inoltre, sull'apparecchio
oggetti pieni di liquidi, come ad es. vasi. Sussiste
pericolo di incendio e di scossa elettrica! In caso
di infiltrazioni di liquidi nell'alloggiamento
dell'apparecchio, staccare subito la spina dalla presa di rete e farlo riparare.
Non toccare mai gli elementi riscaldanti o
l'apertura d'ispezione nello sportello durante
il funzionamento o prima che il forno elettrico
con grill si sia raffreddato. Durante il funzionamento non introdurre le mani nel vano interno
del forno. Attendere il completo raffreddamento
dell'apparecchio. In caso contrario sussiste il
rischio di ustioni.
•
Dopo l'uso, far raffreddare il forno elettrico
con grill prima di trasportarlo.
Non afferrare mai l'apparecchio, il cavo di
rete e la spina di rete con le mani umide. In
caso contrario sussiste il pericolo di scossa
elettrica.
Collocare il cavo di rete in modo che non
venga calpestato o costituisca intralcio.
Attenzione! Superficie bollente.
Non toccare mai durante l'utilizzo lo sportello
di vetro o l'involucro, in quanto diventano molto
caldi. Per aprire lo sportello di vetro usare
una presina o simili per evitare scottature!
Attenzione!
•
•
•
•
•
•
- 31 -
Non posare mai oggetti, generi alimentari, terrine, la teglia per forno 8, la griglia 7 o altri
contenitori direttamente sul fondo del vano
interno del forno! L’accumulo di calore che in
tal modo si genera, danneggia l’apparecchio!
Posare generi alimentari, terrine o altri contenitori
sempre sulla teglia per forno 8 o sulla griglia 7
e poi inserirla in una delle 3 guide 6.
Non lasciare mai l'apparecchio incustodito
durante l'uso.
Durante il funzionamento non devono trovarsi
materiali facilmente infiammabili nelle immediate vicinanze del forno elettrico con grill (ad
es. canovaccio da cucina, presine etc.).
Non asciugare mai tessuti né oggetti sopra
o dentro l'apparecchio. Sussiste pericolo di
incendio.
Per disinserire la spina dalla presa tirare sempre dalla spina, mai dal cavo.
Non piegare o schiacciare il cavo di rete.
Non usare prolunghe.
•
•
Pericolo d'incendio!
In caso di mancato utilizzo del forno elettrico
con grill per un periodo prolungato, è necessario
staccarlo dalla rete elettrica. L'apparecchio è
completamente privo di alimentazione elettrica
solo se la spina è scollegata dalla rete elettrica.
Non utilizzare un timer esterno né un sistema
di telecomando separato per azionare l'apparecchio.
Collocare il forno elettrico con grill su una base stabile, piana e termoresistente. Altrimenti sussiste il pericolo di incendio e l'apparecchio può subire danni.
L'area sotto il fondo dell'apparecchio può scolorirsi
e danneggiarsi. Inoltre, se il sottofondo è morbido,
possono verificarsi impronte durature sul sottofondo.
Pericolo di scosse elettriche!
Non collocare l'apparecchio nelle immediate vicinanze di acqua, ad es. di lavelli, vaschette o in cantine
umide. In caso contrario sussiste pericolo di scossa
elettrica.
Descrizione delle avvertenze di sicurezza
Nel manuale di istruzioni per l'uso figurano le
seguenti categorie di avvertenze di sicurezza:
Pericolo!
Non poggiarsi sullo sportello in vetro. Non
poggiare oggetti sullo sportello in vetro.
Ciò provoca danni alle cerniere.
Le avvertenze contrassegnate dalla parola PERICOLO
indicano possibili danni a persone.
Attenzione!
Le avvertenze contrassegnate dalla parola ATTENZIONE indicano possibili danni materiali o ambientali.
Queste avvertenze contengono particolari
indicazioni relative all'utilizzo proficuo del
forno elettrico con grill.
Prima messa in funzione
Installazione
➩
Attenzione!
Collocare l'apparecchio su una superficie
stabile, piana e termoresistente (per es. piani
di lavoro in acciaio inox o piani di lavoro in
pietra naturale come granito). Provvedere affinché l'apparecchio sia sufficientemente ventilato
lungo tutto il suo perimetro.
Pericolo d'incendio!
La distanza tra il retro dell'apparecchio e la parete
dovrebbe essere pari ad almeno 10 cm, la distanza
dall'alto ad almeno 10 cm e lateralmente a 5 cm.
Per questa ragione l'apparecchio non può essere
collocato in armadi o similari. In caso contrario non
è possibile ventilare adeguatamente il forno e quest'ultimo potrebbe provocare un incendio o subire danni.
Non posare mai oggetti, generi alimentari, terrine, la
teglia per forno 8, la griglia 7 o altri contenitori
direttamente sul fondo del vano interno del forno!
L’accumulo di calore che in tal modo si genera,
danneggia l’apparecchio! Posare generi alimentari,
terrine o altri contenitori sempre sulla teglia per forno
8 o sulla griglia 7 e poi inserirla nelle 3 guide 6.
Prima di utilizzare l'apparecchio, comunque, si
prega di procedere come descritto qui di seguito:
➩
- 32 -
Estrarre il forno elettrico con grill e tutti gli accessori dalla confezione adoperata per il trasporto.
Pericolo di schiacciamento!
➩
Durante l'apertura o la chiusura dello sportello non
introdurre le mani nelle cerniere dello sportello. In
caso contrario ci si potrebbe schiacciare la mano.
➩
➩
➩
➩
➩
➩
Spegnimento e trasporto
Prima della prima messa in funzione occorre
pulire l'apparecchio e tutti gli accessori da eventuali residui dell'imballaggio. Pulire gli accessori
con acqua saponata tiepida, non aggressiva
e, infine, asciugarli.
Pulire l'alloggiamento dell'apparecchio con un
panno leggermente inumidito con acqua e poi
asciugarlo con cura.
Non appena l'apparecchio è completamente
asciutto sia all'interno che all'esterno, inserire
la spina in una presa (220 - 240 V ~/50 Hz)
nella parete.
Accendere quindi l'apparecchio senza accessori
e senza alcuna pietanza da portare a cottura.
Lasciare lo sportello dell'apparecchio completamente aperto.
Selezionare con il regolatore di temperatura 2
230° C. Posizionare l'interruttore di funzione 3
su Superiore e inferiore.
Impostare il timer 5 su 15 minuti.
Spegnimento
➩
➩
➩
➩
Lasciare raffreddare il forno elettrico con grill
prima di trasportarlo.
Staccare la spina dalla presa di corrente.
Avvolgere il cavo di rete intorno agli appositi
ganci sul retro dell'apparecchio.
Comandi
Cottura al grill e cottura al forno
➩
➩
Poiché gli elementi riscaldanti sono leggermente
ingrassati, durante questa prima messa in funzione si può verificare una lieve formazione di
odore. Si tratta di fumi innocui che scompaiono
dopo breve tempo. Aprire la finestra per provvedere ad una buona ventilazione.
➩
Posizionare l'interruttore di funzione 3 e il
timer 5 su OFF (spento). Staccare la spina
dalla presa di corrente.
Trasporto
L'apparecchio può essere acceso soltanto con
il timer 5. Non appena il timer 5 è impostato, si accende la spia di controllo 1.
➩
Pulire quindi il vano interno del forno elettrico
con grill con un panno leggermente inumidito
e quindi asciugarlo.
Una volta che l'apparecchio si è spento automaticamente, posizionare l'interruttore di funzione 3
su OFF (spento).
Staccare la spina dalla presa e attendere il completo raffreddamento dell'apparecchio.
- 33 -
Estrarre la griglia 7 e la teglia forno 8 dall'apparecchio. Coprire eventualmente la griglia
con carta forno oppure imburrare o oliare la
teglia 8.
Far riscaldare l'apparecchio per circa 10 minuti
(in funzione della temperatura impostata) fino
al raggiungimento della temperatura desiderata:
- Selezionare la temperatura desiderata con il
regolatore di temperatura 2. Nella cottura
con grill è sempre necessario selezionare la
temperatura massima (230° C).
- Selezionare quindi con il selettore di funzione 3
tra Superiore (ad es. per gratinare la pietanza),
Inferiore (ad es. per i dolci) oppure Superiore
e inferiore (ad es. per la pizza). Per azionare
la cottura al grill, ruotare sempre l'interruttore
di funzione 3 su Superiore.
➩
- Con il timer 5 impostare la durata di preriscaldamento (circa 10 minuti).
- Chiudere lo sportello di vetro.
Con il timer impostare 5 il tempo richiesto di
cottura al forno e al grill.
Il tempo max di cottura al forno e al grill è di 60 minuti.
➩
Una volta trascorso il tempo impostato, posizionare la pietanza da grigliare o cuocere sulla griglia 7 o nella teglia 8 e spingerla in una delle guide 6. Prestare attenzione che vi sia una
distanza sufficiente degli alimenti da cuocere
al forno o grigliare dalle pareti interne e dagli
elementi riscaldanti dall'apparecchio.
Attenzione!
Non posare mai oggetti, generi alimentari, terrine,
la teglia per forno 8, la griglia 7 o altri contenitori
direttamente sul fondo del vano interno del forno!
L’accumulo di calore che in tal modo si genera, danneggia l’apparecchio! Posare generi alimentari, terrine o altri contenitori sempre sulla teglia per forno 8
o sulla griglia 7 e poi inserirla nelle 3 guide 6.
➩
La spia di controllo 1 indica che il forno elettrico
con grill è acceso. L'interruttore del timer 5 si sposta
quindi in senso antiorario su OFF (zero).
Una volta che il forno elettrico con grill ha raggiunto la temperatura da voi impostata, gli elementi riscaldanti si spengono periodicamente
per mantenere la temperatura impostata.
➩
Se si preparano alimenti gocciolanti sulla griglia 7, inserire la teglia forno 8 nella guida
più in basso. In tal modo, ad esempio, il grasso
che gocciola verrà raccolto e in seguito sarà
più facile pulire l'apparecchio.
Si ottengono risultati più uniformi della cottura
al forno spingendo la teglia forno 8 o la griglia 7 nella guida intermedia e impostando
la funzione cottura ventilata.
➩
Se il tempo di cottura della pietanza è inferiore
a 25 minuti, impostare dapprima il timer 5 su
60 minuti e poi tornare indietro al tempo di
cottura al forno/al grill desiderato.
Al temine del periodo di tempo impostato,
l'apparecchio si spegne automaticamente.
Per spegnere in anticipo l'apparecchio, ruotare
indietro il timer 5 su OFF. Posizionare l'interruttore di funzione 3 su OFF e staccare la spina dalla presa.
Si sente un campanello e la spia di controllo 1 si
spegne.
Una volta che l'apparecchio si è spento, il timer 5
può rimanere ancora brevemente in funzione.
Chiudere lo sportello di vetro prima di
avviare la cottura al forno/al grill.
In caso di cottura di alimenti grassi, si può
sviluppare un quantitativo di fumo piuttosto
cospicuo. In tal caso, non chiudere completamente lo sportello di vetro, ma lasciare un'ampia fessura: Quando si chiude lo sportello con
cautela, questo scatta automaticamente in questa posizione poco prima della chiusura.
- 34 -
➩
Per estrarre la griglia 7 o la teglia forno 8 utilizzare sempre la pinza fornita in dotazione 9.
Per estrarre la griglia 7 sollevandola, si devono
agganciare dall'alto i gancetti della pinza 9
nella griglia. Per sollevare la teglia 8 dall'apparecchio, si devono agganciare i ganci più
grandi della pinza 9 al margine anteriore
della teglia 8.
Consigli
per la preparazione e ricette
In questo capitolo forniremo alcuni esempi per la preparazione di pietanze. Questi esempi rappresen-tano
dei consigli. La durata di preparazione può variare.
Prestare attenzione alle avvertenze per la
preparazione riportate sulla confezione degli
alimenti.
Muffin
➩
Al termine della cottura al forno o al grill posizionare l'interruttore di funzione 3 su OFF
(spento). Staccare la spina dalla presa.
Lasciare raffreddare l'apparecchio prima di
pulirlo o di utilizzarlo di nuovo.
Ingredienti per quattro persone:
• 1 tazza di farina
• 1 cucchiaino di lievito in polvere
• 1 uovo
• 1 cucchiaio di burro sciolto
• 1 tazza di latte
• 3 cuccchiai di zucchero
• sale
• in alternativa si possono utilizzare anche noci,
banane a pezzetti o fiocchi di cioccolato
In caso di cottura ventilata, prestare attenzione alle
avvertenze per la preparazione di ricette.
Preparazione:
➩ Mescolare lentamente in una ciotola farina,
lievito in polvere, uovo, latte, sale e zucchero.
➩ Sciogliere il burro in un pentolino e incorporarlo
all'impasto.
➩ A seconda del gusto personale, incorporare
noci, fiocchi di cioccolato o banane schiacciate.
➩ Versare l'impasto pronto nelle apposite formine
per muffin e collocarle sulla piastra di cottura 8.
➩ Collocare la piastra da forno nella parte inferiore del forno, con temperatura di 200°C,
calore superiore e inferiore, per circa 15 minuti.
➩
Toast Hawaii
Cottura al grill e
cottura al forno ventilata
In caso di cottura al grill e cottura al forno ventilata, di
solito non è necessario preriscaldare il forno elettrico
con grill. Il risultato di cottura e doratura è più uniforme con l'impiego della ventilazione.
Premere l'interruttore a bilico 4 per la cottura
ventilata fino a quando questo scatta in posizione “-“.
La ventola nel vano interno del forno funziona.
Le altre funzioni corrispondono a quelle della
cottura al forno o con grill senza ventilazione.
Ingredienti per 4 toast:
• 4 fette di pan carré
• 1–2 cucchiai di salsa Remoulade
• 120 g di prosciutto cotto
• 1/2 scatola di ananas
• 4 fette di formaggio per la gratinatura
• Curry
- 35 -
Preparazione:
➩ Pretostare le fette di pan carré.
➩ Spalmare quindi con salsa Remoulade e farcire
con il prosciutto cotto.
➩ Mettere una fetta d'ananas su ciascun toast
imbottito. Insaporire con curry.
➩ Quindi mettere una fetta di formaggio sull'ananas.
➩ Collocare il toast Hawaiit sulla griglia 7 e
gratinarlo nel grill/tostapane sul piano intermedio a circa 180° C, calore superiore e ventilazione, per circa 8 minuti.
Cottura al forno della pizza surgelata
Preparazione:
➩ Spingere la griglia 7 nella guida intermedia
del vano interno del forno.
➩ Collocare la pizza surgelata sulla griglia,
dopo averla estratta dalla confezione 7.
➩ Infornare la pizza dopo aver impostato la funzione
Superiore e Inferiore e con cottura ventilata inserita
per ca. 20 minuti.
➩ Prestare attenzione alle indicazioni riportate sulla
confezione.
Spritzgebäck (tipo di biscotti)
Ingredienti:
• 125 g di burro
• 125 g di zucchero
• 1 bustina di zucchero vanigliato
• 1 pizzico di sale
• 1 uovo
• 1 albume
• 250 g di farina (tipo 405)
• 1 cucchiaino di lievito in polvere
• buccia grattugiata di mezzo limone
Preparazione:
➩ Montare a neve il burro.
➩ Aggiungere lo zucchero, lo zucchero vanigliato,
la buccia di limone e le uova.
➩ Mescolare la farina, il lievito in polvere e il
sale e mescolare l'impasto con un cucchiaio
grande.
➩ Lasciare riposare l'impasto per ca. 10 minuti.
➩ Dare all'impasto la forma richiesta, ad es. con
l'ausilio di un tritacarne, di formine o di una
sacca a poche.
➩ Collocare i biscottini sulla teglia rivestita di carta
forno 8.
➩ Cuocere i pasticcini inserendoli al centro nel
forno preriscaldato a 180°C con calore superiore e inferiore, per circa10–15 minuti, fino
a quando non assumono un colore dorato.
La quantità di impasto è sufficiente per diverse
teglie 8.
Panini
Ingredienti:
• 300 g di farina (oppure farina di grano intero)
• 2 cucchiaini abbondanti di lievito in polvere
• 200 g di semi di lino
• 1 uovo
• 500 g di ricotta
• 1 cucchiaino di sale
• a seconda del gusto individuale usare cumino,
cipolle, speck ...
Preparazione:
➩ Impastare bene gli ingredienti e formare dei
panini.
➩ Collocare i panini sulla teglia forno rivestita di
carta forno 8.
➩ Cuocere al centro a circa 180° C con calore
superiore e ventilazione per circa 30 minuti.
La quantità di impasto è sufficiente per diverse
teglie 8.
- 36 -
➩
Meringhe
Ingredienti:
• 1 albume
• sale
• 45 g di zucchero
Cuocere i dadini di pane a circa 150° C (ventilazione) al centro del forno, fino a quando
non diventano di colore bruno-dorato (circa
15 - 20 minuti).
Invece del semplice burro è possibile anche utilizzare burro aromatizzato alle erbe o all'aglio.
Il tempo di cottura si ridurrà in tal caso di circa
5 minuti.
Preparazione:
➩ Versare l'albume freddo in una ciotola senza
grassi. Non lasciare tracce di tuorlo, altrimenti
l'uovo montato a neve non acquisisce la giusta
consistenza.
➩ Battere l'albume a ridotta velocità per evitare
la formazione di bolle troppo grandi nell'albume montato a neve.
➩ Insaporire con un pizzico di sale.
➩ Incorporare gradualmente metà zucchero
quando l'albume montato a neve comincia ad
acquisire consistenza.
➩ Montare quindi a maggiore velocità.
➩ Aggiungere lo zucchero rimanente. In tal
modo la massa delle meringhe acquisisce la
consistenza necessaria.
➩ Riempire con la meringa una sacca a poche
con un beccuccio grande a stella e spruzzare
a breve distanza rosette, lingue o altre forme
sulla teglia rivestita di carta forno.
➩ Preriscaldare il forno elettrico con grill a ca.
100 °C selezionando la funzione cottura
ventilata.
➩ Far cuocere la meringa sulla guida intermedia
a ca. 100 °C con funzione cottura ventilata per
ca. 2 ore.
Baguette alla carne tritata
Ingredienti:
• 2 panini tipo baguette
• 250 g di carne tritata (mista)
• 2 pomodori
• 1 cipolla (a dadini)
• 2 cucchiai di concentrato di pomodoro
• 40 g di parmigiano grattugiato
• 4 fette di formaggio
• sale e pepe
Preparazione:
➩ Affettare le baguette e svuotarle.
➩ Mescolare la carne tritata, il concentrato di
pomodoro, le cipolle, il parmigiano, un po'
di sale e un po' di pepe.
➩ Modellare la carne tritata formando 4 polpette
piatte di grandezza uniforme e collocarle sulle
baguette a metà.
➩ Tagliare i pomodori a fette e collocarli sulle
baguette.
➩ Distribuire il formaggio sulle baguette.
➩ Collocare le baguette sulla piastra di cottura 8
e cuocerle a circa 225° C in forno preriscaldato con calore superiore e inferiore per circa
20 minuti nella parte inferiore del forno.
Crostini al burro
Ingredienti:
• 2 fette di pane per toast
• 1 cucchiaio di burro
Preparazione:
➩ Tagliare a dadini il pane per toast.
➩ Sciogliere il burro a calore moderato in un
tegame e mescolarvi i dadini di pane.
➩ Preparare la piastra di cottura 8 con carta da
forno e distribuirvi su i dadini di pane uniformemente.
- 37 -
Al tritato si può anche aggiungere basilico,
chili o altre spezie.
Cavolfiore (gratinato)
Tasche di pastasfoglia
con ripieno di salmone
Ingredienti:
• 1/2 cavolfiore (circa 250 g)
• 3 fette di limone
• 1 cucchiaio di burro
• 1 cucchiaino raso di farina
• 1 cucchiaio di succo di limone
• 1 cucchiaio di mandorle tagliate a bastoncino
• 2 cucchiai di formaggio per gratin (grattugiato)
• sale, pepe, noce moscata
Preparazione:
➩ Tagliare il cavolfiore a mazzetti e lavarlo.
➩ Cuocere il cavolfiore con le fette di limone in
acqua bollente per 8-10 minuti, il cavolfiore
deve essere al dente. Conservare circa 150 ml
di acqua di cottura,
➩ Fare sciogliere il burro in un tegame e cuocervi
la farina per un minuto, mescolando costantemente.
Mescolando costantemente, versare l'acqua di
cottura del cavolfiore e fare cuocere per circa
2 minuti. Se l'impasto con la farina diviene
troppo solido, aggiungere ancora acqua, fino
a ottenere una consistenza densa. Condire con
succo di limone, sale, pepe e noce moscata.
➩ Collocare il cavolfiore in una teglia (circa 14 cm
di diametro) e versarvi su la salsa in modo uniforme.
➩ Cospargere con il formaggio e le mandorle.
➩ Collocare la teglia su una piastra di cottura 8.
➩ Gratinare a circa 200° C in forno preriscaldato
con calore superiore e inferiore, inserendo la
teglia nella parte inferiore del forno, per
circa 20 minuti.
Ingredienti:
• 1 confezione di fogli di pastasfoglia
(circa 8 pezzi)
• 1 confezione di salmone, affumicat a fette
(circa 200 g)
• 1 limone
• 1 cipolla
• 1 confezione di formaggio fresco (200 g)
aneto fresco
sale e pepe
1 tuorlo
Preparazione:
➩ Separare i fogli di pastafrolla e se necessario
farli scongelare.
➩ Mescolare il formaggio fresco con sale, pepe
e succo di limone.
➩ Affettare le cipolle e tagliarle a dadini.
➩ Aggiungere la metà del salmone e delle cipolle
al formaggio fresco e ridurre tutto in purea
grossolana con un mixer ad asta.
➩ Tagliare il resto del salmone a striscioline.
➩ Aggiungere il salmone e l'aneto all'impasto e
mescolare tutto.
➩ Collocare un cucchiaio di impasto su ogni foglio
di pasta sfoglia e chiudere il foglio.
➩ Pennellare la tasca così ottenuta con giallo
d'uovo.
➩ Collocare le tasche di pasta sfoglia sulla piastra
di cottura 8. Lasciare spazio sufficiente fra le
singole tasche, poiché la pastasfoglia si espande durante la cottura.
➩ Fare cuocere le tasche di pastasfoglia nella
parte inferiore del forno a circa 200°C con
ventilazione, per circa 25-30 minuti. La pastasfoglia deve colorarsi leggermente.
La quantità di impasto è sufficiente per diverse
teglie 8.
- 38 -
Ricette senza garanzia di riuscita. Tutti i dati relativi
a ingredienti e preparazione sono indicativi. Integrare questi suggerimenti di ricette con i propri valori derivanti dall'esperienza. Vi auguriamo comunque una buona riuscita e buon appetito.
Sostituzione della lampadina
Attenzione!
Non utilizzare detergenti domestici o oggetti taglienti
o appuntiti per rimuovere lo sporco. In tal modo si
potrebbero danneggiare il forno elettrico con grill
e le sue pareti interne con rivestimento speciale.
➩
Pericolo!
Prima di sostituire la lampadina attendere sempre che
l'apparecchio si sia raffreddato. In caso contrario sussiste il pericolo di ustioni!
Sostituire la lampadina solo con un'altra
lampadina dello stesso tipo (v. capitolo
"Dati tecnici").
➩
➩
➩
➩
Aprire lo sportello in vetro.
Svitare la copertura in vetro della lampadina,
situata in basso sulla destra nel vano interno.
Svitare la lampadina e sostituirla con una nuova.
Riavvitare la copertura in vetro.
Pulizia
➩
Se, tuttavia, dovessero esservi tracce di sporco
ostinato, è possibile pulire il forno elettrico con
grill con l'ausilio di un panno morbido, leggermente imbevuto di acqua saponata. In caso di
sporco più ostinato o bruciato, collocare un
panno imbevuto di soluzione saponosa delicata sullo sporco. Attendere che lo sporco si sia
ammorbidito e quindi rimuoverlo!
Pulire la teglia forno 8 e la griglia 7 con
acqua saponata. Le tracce ostinate di sporco
possono essere rimosse lasciando teglia e
griglia in ammollo. Rimuovere le tracce di
sapone con acqua pulita.
Pericolo di scossa elettrica!
Prima di utilizzare di nuovo l'apparecchio dopo la
pulizia, questo deve essere completamente asciutto.
Dopo la pulizia lasciare dunque aperta la porta
dell'apparecchio.
Pericolo di scossa elettrica!
Staccare sempre la spina dalla presa prima di pulire
il forno elettrico con grill. Vi è pericolo di scossa
elettrica!
Pericolo di scossa elettrica!
Per la pulizia non immergere in nessun caso
l'apparecchio in acqua. Vi è pericolo di scossa
elettrica!
- 39 -
Soluzioni in caso di
malfunzionamenti
Problema
Possibili cause e soluzioni
L'interruttore per la funzione cottura ventilata 4
si trova in posizione "O".
Posizionare l'interruttore
a bilico per la cottura
ventilata su "-".
Il forno elettrico con grill
potrebbe essere guasto.
Fare svolgere un controllo al forno elettrico con
grill da personale specializzato.
Far riparare il forno elettrico
con grill da personale specializzato.
Problema
Possibili cause e soluzioni
La ventola per
la funzione cottura ventilata
non funziona.
Il forno elettrico con grill
non riscalda.
Il timer 5 è su OFF.
Impostare il timer 5 su
un tempo superiore a
0 minuti (OFF) .
Un fusibile è guasto.
Controllare i fusibili e,
se necessario, sostituirli.
La presa di corrente è
guasta. Provare a utilizzare un'altra presa di
corrente.
Il forno elettrico con
grill potrebbe essere
guasto. Fare svolgere
un controllo al forno
elettrico con grill da
personale specializzato.
L'interruttore di funzione
3 si trova in posizione
OFF.
Il vetro dello
sportello è rotto
o incrinato.
Se, tuttavia, non fosse possibile rimuovere un'anomalia,
rivolgersi al proprio rivenditore specializzato o al
costruttore.
Smaltimento
Non è possibile spegnere il
forno elettrico
con grill.
Una componente elettronica
è guasta.
Estrarre la spina dalla presa
e far controllare il forno elettrico con grill da personale
specializzato.
Non gettare per alcun motivo l’apparecchio insieme ai normali rifiuti
domestici. Questo prodotto sottostà
alla direttiva europea 2002/96/EC.
Smaltire l’apparecchio presso un’azienda autorizzata o presso l’ente comunale di smaltimento.
Rispettare le norme attualmente in vigore. In caso di
dubbi, contattare l’azienda di smaltimento
competente.
Smaltire tutti i materiali d’imballo in conformità alle norme per il rispetto dell’ambiente.
- 40 -
Garanzia & assistenza
Questo apparecchio è garantito per tre anni a
partire dalla data di acquisto. L'apparecchio è stato
prodotto con cura e debitamente collaudato prima
della consegna.
Conservare lo scontrino come prova d'acquisto. In
caso di interventi in garanzia, contattare telefonicamente il proprio centro di assistenza. Solo in questo
modo è possibile garantire una spedizione gratuita
della merce.
La garanzia vale solo per i difetti di materiale o fabbricazione, non per i danni da trasporto, parti soggette a usura o danni a parti fragili come ad es.
interruttori o accumulatori. Il prodotto è destinato esclusivamente all'uso domestico e non a quello commerciale.
La garanzia decade in caso di impiego improprio o
manomissione, uso della forza e interventi non eseguiti dalla nostra filiale di assistenza autorizzata.
Questa garanzia non costituisce alcun limite ai diritti
legali del consumatore. Il periodo di garanzia non
viene prolungato in caso di un intervento in garanzia.
Ciò vale anche per le componenti sostituite e riparate. I danni e difetti presenti già all'acquisto devono
essere comunicati immediatamente dopo il disimballaggio, e non oltre due giorni dalla data di acquisto. Le riparazioni effettuate dopo la scadenza del
periodo di garanzia sono a pagamento.
Assistenza Italia
Tel.: 02 36003201
E-Mail: [email protected]
IAN 66725/66726
Assistenza Svizzera
Tel.: 0842 665566 (0,08 CHF/Min.,
telefonia mobile max. 0,40 CHF/Min.)
E-Mail: [email protected]
IAN 66725/66726
Raggiungibilità della hotline:
dal lunedì al venerdì, dalle 8.00 alle 20.00 (CET)
Importatore
KOMPERNASS HANDELS GMBH
BURGSTRASSE 21
44867 BOCHUM
GERMANY
www.kompernass.com
- 41 -
- 42 -
INHOUDSOPGAVE
BLADZIJDE
Gebruik in overeenstemming met gebruiksdoel
44
Inhoud van het pakket
44
Beschrijving
44
Technische gegevens
44
Veiligheidsvoorschriften
45
Plaatsen
46
Eerste ingebruikname
46
Uitschakelen en vervoeren
47
Uitschakelen . . . . . . . . . . . . . . . . . . . . . . . . . . . . . . . . . . . . . . . . . . . . . . . . . . . . . . . . . . . . . . . .47
Vervoeren . . . . . . . . . . . . . . . . . . . . . . . . . . . . . . . . . . . . . . . . . . . . . . . . . . . . . . . . . . . . . . . . .47
Bediening
47
Grillen en bakken . . . . . . . . . . . . . . . . . . . . . . . . . . . . . . . . . . . . . . . . . . . . . . . . . . . . . . . . . . .47
Grillen en bakken met circulatielucht . . . . . . . . . . . . . . . . . . . . . . . . . . . . . . . . . . . . . . . . . . . .49
Bereidingstips en recepten
49
Muffins . . . . . . . . . . . . . . . . . . . . . . . . . . . . . . . . . . . . . . . . . . . . . . . . . . . . . . . . . . . . . . . . . . . .49
Hawaiitosties . . . . . . . . . . . . . . . . . . . . . . . . . . . . . . . . . . . . . . . . . . . . . . . . . . . . . . . . . . . . . . .49
Diepvriespizza bakken . . . . . . . . . . . . . . . . . . . . . . . . . . . . . . . . . . . . . . . . . . . . . . . . . . . . . . .50
Spritskoekjes . . . . . . . . . . . . . . . . . . . . . . . . . . . . . . . . . . . . . . . . . . . . . . . . . . . . . . . . . . . . . . .50
Broodjes . . . . . . . . . . . . . . . . . . . . . . . . . . . . . . . . . . . . . . . . . . . . . . . . . . . . . . . . . . . . . . . . . . .50
Meringues . . . . . . . . . . . . . . . . . . . . . . . . . . . . . . . . . . . . . . . . . . . . . . . . . . . . . . . . . . . . . . . . .51
Botercroutons . . . . . . . . . . . . . . . . . . . . . . . . . . . . . . . . . . . . . . . . . . . . . . . . . . . . . . . . . . . . . . .51
Gehaktbaguettes . . . . . . . . . . . . . . . . . . . . . . . . . . . . . . . . . . . . . . . . . . . . . . . . . . . . . . . . . . . .51
Gegratineerde bloemkool . . . . . . . . . . . . . . . . . . . . . . . . . . . . . . . . . . . . . . . . . . . . . . . . . . . . .52
Bladerdeegpakketjes met zalmvulling . . . . . . . . . . . . . . . . . . . . . . . . . . . . . . . . . . . . . . . . . . .52
Lamp vervangen
53
Schoonmaken
53
Storingen verhelpen
54
Milieurichtlijnen
54
Garantie & service
55
Importeur
55
- 43 -
Grill- en bakautomaat
Beschrijving
Gefeliciteerd met de aankoop van uw nieuwe apparaat.
De grill- en bakautomaat dient voor het verhitten,
garen en grillen van etenswaren. De circulatiefunctie
zorgt voor een gelijkmatige en snelle verdeling van
de hitte in het apparaat.
U hebt hiermee gekozen voor een hoogwaardig
product. De bedieningshandleiding maakt deel uit
van dit product. Deze bevat belangrijke aanwijzingen voor veiligheid, gebruik en afvoeren. Maak
uzelf voorafgaand aan het gebruik van het product
vertrouwd met alle bedienings- en veiligheidsvoorschriften. Gebruik het product uitsluitend op de
voorgeschreven wijze en voor de aangegeven doeleinden. Geef alle documenten mee als u het product doorgeeft aan een derde.
Gebruik in overeenstemming
met gebruiksdoel
De grill- en bakautomaat dient uitsluitend voor het
opwarmen, garen en grillen van etenswaren. Dit
apparaat is uitsluitend bestemd voor huishoudelijk
gebruik, dus privé. Gebruik het apparaat derhalve
niet bedrijfsmatig.
Elk ander gebruik geldt als niet in overeenstemming
met de bestemming en kan resulteren in materiële
schade of zelfs lichamelijk letsel. Kompernaß
GmbH wijst aansprakelijkheid voor beschadigingen
die door gebruik in strijd met de bestemming ontstaan
van de hand.
Inhoud van het pakket
De verpakking bevat
• de grill- en bakautomaat
• een grillrooster
• een bakblik
• een greep voor grillrooster/bakblik
• gebruiksaanwijzing
Afbeelding A:
1 Indicatielampje (power)
Brandt tijdens het bedrijf
2 Temperatuurregelaar
Traploze instelling van de temperatuur van
100° C tot 230° C
3 Functieschakelaar voor
OFF (uit),
Bovenwarmte,
Onderwarmte,
Boven- en onderwarmte
4 Tuimelschakelaar voor circulatielucht
5 Tijdschakelklok
Instelling van de gewenste bak-/grilltijd
van 0–60 min.
6 Geleidingen voor bakblik of grillrooster
Afbeelding B:
7 Grillrooster
8 Bakblik
9 Greep voor grillrooster/bakblik
Technische gegevens
Netspanning:
220 - 240 V ~/50 Hz
Nominaal vermogen: 1380 W
Oveninhoud:
15 liter
Lamp:
- 44 -
240 V, 15 W, E 14, 300°C
Veiligheidsvoorschriften
•
Gevaar!
•
•
•
•
•
•
•
Dit apparaat is niet bedoeld voor gebruik door
personen (met inbegrip van kinderen) met beperkte fysieke, zintuiglijke of geestelijke vermogens of met gebrek aan ervaring en/of gebrek
aan kennis, tenzij ze onder toezicht staan van
een voor hun veiligheid verantwoordelijke persoon of van die persoon aanwijzingen krijgen
voor het gebruik van het apparaat.
Bij kinderen is supervisie noodzakelijk om ervoor te zorgen dat ze niet met het apparaat
spelen.
U mag de apparaatbehuizing van de grill- en
bakautomaat niet openen of repareren. In dit
geval is de veiligheid niet gegarandeerd en
vervalt de garantie. Laat de defecte grill- en
bakautomaat uitsluitend door de leverancier
of bevoegd vakpersoneel repareren.
Laat beschadigde netstekkers of netsnoeren
onmiddellijk door geautoriseerd deskundig
personeel of door de klantenservice vervangen,
om gevaarlijke situaties te vermijden.
Voorkom dat er vloeistof in de apparaatbehuizing
van de grill- en bakautomaat komt. Stel het
apparaat niet bloot aan vocht en gebruik het
niet in de open lucht. Bovendien mag u geen
met vloeistof gevulde voorwerpen, zoals bijv.
vazen, op het apparaat plaatsen. Er bestaat
brandgevaar en gevaar voor een stroomschok!
Mocht er toch vloeistof in de apparaatbehuizing komen, haal dan meteen de netstekker
van het apparaat uit het stopcontact en laat
het apparaat repareren.
Raak nooit de verwarmingsijzers of het kijkvenster
aan als het apparaat in bedrijf is of voordat de
grill- en bakautomaat is afgekoeld. Kom tijdens
het bedrijf niet met uw handen in de grill- en
bakruimte. Wacht tot het apparaat is afgekoeld.
Anders kunt u zich verbranden.
•
Laat de grill- en bakautomaat na gebruik eerst
afkoelen voordat u deze vervoert.
Pak het apparaat, netsnoer en netstekker nooit
met natte handen vast. Er bestaat anders gevaar voor een elektrische schok!
Leg het netsnoer zodanig dat er niemand op
kan gaan staan of over kan struikelen.
Let op! Heet oppervlak.
Raak het glasdeurtje of de behuizing nooit aan
tijdens het gebruik, het wordt immers zeer heet.
Gebruik een pannenlap of iets dergelijks om
de glasdeur te openen om verbrandingen te
vermijden!
Let op!
•
•
•
•
•
•
- 45 -
Leg nooit voorwerpen, levensmiddelen, schotels, het bakblik 8, het grillrooster 7 of andere
kommen of bakjes rechtstreeks op de bodem
van de bakruimte! De daardoor opgebouwde
hitte beschadigt het apparaat! Plaats de levensmiddelen, schotels of andere kommen of bakjes
altijd op het bakblik 8 of op het grillrooster 7
en schuif dat in een van de 3 geleidingen 6.
Laat het apparaat zolang het in bedrijf is nooit
onbeheerd achter.
Tijdens het bedrijf mogen zich geen licht brandbare materialen in de onmiddellijke omgeving
van de grill- en bakautomaat bevinden (bijv.
vaatdoeken, ovenwanten, enz.).
Droog nooit textiel of voorwerpen boven of
in het apparaat. Er bestaat brandgevaar!
Haal het netsnoer altijd bij de stekker uit het
stopcontact, trek niet aan het snoer zelf.
Knik of plet het netsnoer niet.
Gebruik van verlengsnoeren is niet toegestaan.
•
•
Wanneer u de grill- en bakautomaat langere tijd
niet gebruikt, moet u deze loskoppelen van het
lichtnet. Alleen wanneer u de stekker uit het stopcontact haalt, is het toestel geheel spanningsvrij.
Gebruik geen externe tijdschakelklok of een
apart afstandsbedieningsysteem om het apparaat te bedienen.
Verklaring van de veiligheidsvoorschriften
In de bedieningshandleiding vindt u de volgende
categorieën veiligheidsvoorschriften:
Brandgevaar!
Plaats de grill- en bakautomaat beslist op een stevige, vlakke en hittebestendig ondergrond. Anders
bestaat er brandgevaar en kan het apparaat beschadigd raken. De zone onder de bodem van het
apparaat kan verkleuren en beschadigd raken. Bovendien kunnen bij een zachte ondergrond permanente afdrukken in de ondergrond ontstaan.
Gevaar voor stroomschokken!
Plaats het apparaat niet in de onmiddellijke nabijheid
van water, bijv. bij een gootsteen, een badkuip of in
vochtige kelderruimtes. Anders bestaat er gevaar
voor een stroomschok.
Gevaar!
Voorschriften met het woord GEVAAR waarschuwen voor mogelijk persoonlijk letsel.
Leun niet op de glasdeur. Plaats geen voorwerpen
op de glasdeur. Hierdoor raken de scharnieren
beschadigd.
Let op!
Voorschriften met de tekst LET OP waarschuwen
voor mogelijke materiële schade of schade voor
het milieu.
Deze voorschriften bevatten speciale informatie
voor een economisch gebruik van de grill- en
bakautomaat.
Plaatsen
➩
Eerste ingebruikname
Let op!
Plaats het apparaat op een stevige, vlakke
en hittebestendige ondergrond (bijv. op een
werkblad van roestvrij staal of natuursteen als
graniet). Zorg voor voldoende ventilatie rondom het apparaat.
Brandgevaar!
De afstand tussen de achterkant van het apparaat en
de wand moet minstens 10 cm, naar boven minstens
10 cm en aan de zijkanten minstens 5 cm bedragen.
Het apparaat mag dus niet in bijv. een kast of iets
dergelijks worden geplaatst. Anders is een voldoende
ventilatie van de grill- en bakautomaat niet mogelijk
en kan er brand ontstaan of kan het apparaat beschadigd raken.
Leg nooit voorwerpen, levensmiddelen, schotels,
bakplaat 8, rooster 7 of andere kommen of bakjes
rechtstreeks op de bodem van de bakruimte! De geconcentreerde hitte die daardoor ontstaat zal het apparaat beschadigen! Plaats de levensmiddelen,
schotels of andere kommen of bakjes altijd op het
bakblik 8 of op het grillrooster 7 en schuif dat in
de 3 geleidingen 6.
Ga als volgt te werk voor u het apparaat gebruikt:
➩
- 46 -
Haal de elektrische grill- en bakautomaat en
alle toebehoren uit de transportverpakking.
Letselgevaar!
➩
Grijp bij het openen of sluiten van de deur niet in
de deurscharnieren. Anders kunt u uw hand kneuzen.
➩
➩
➩
➩
➩
➩
➩
➩
Voor de eerste ingebruikname moet u het apparaat en alle toebehoren ontdoen van eventuele
verpakkingsrestanten. Reinig de toebehoren met
handwarm, mild zeepsop en droog ze daarna af.
Veeg de apparaatbehuizing schoon met een
licht met water bevochtigde doek en droog
deze daarna zorgvuldig af.
Wanneer het apparaat van binnen en buiten
volledig droog is, steekt u de netstekker in een
wandstopcontact (220 - 240 V ~/50 Hz).
Zet het apparaat aan zonder bevestigde toebehoren en zonder grill- resp. bakgoed. Laat
de deur van het apparaat volledig open staan.
Kies met de temperatuurregelaar 2 230° C.
Zet de functieschakelaar 3 op boven- en onderwarmte.
Stel de tijdschakelklok 5 in op 15 minuten.
Maak de grill- en bakruimte daarna schoon
met een licht met water bevochtigde doek en
droog deze daarna af.
Uitschakelen en vervoeren
Uitschakelen
➩
Zet de functieschakelaar 3 en de tijdschakelklok 5 op OFF (uit). Haal de netstekker uit het
stopcontact.
Vervoeren
➩
➩
➩
Wanneer u de grill- en bakautomaat wilt vervoeren, laat u deze eerst afkoelen.
Haal het netsnoer uit het stopcontact.
Wikkel het netsnoer om de haken aan de achterkant van het apparaat.
Bediening
Het apparaat kan alleen worden ingeschakeld
met de tijdschakelklok 5. Zodra de tijdschakelklok 5 is ingesteld, brandt het indicatielampje 1.
Grillen en bakken
Omdat de verwarmingselementen licht zijn ingevet, kan er bij deze eerste ingebruikname
een lichte reuk ontstaan. Dit is gewoon en gaat
na korte tijd over. Open het raam en zorg voor
voldoende ventilatie.
➩
➩
Wanneer het apparaat automatisch is uitgeschakeld, zet u de functieschakelaar 3 op OFF (uit).
Haal de netstekker uit het stopcontact en wacht
tot het apparaat is afgekoeld.
- 47 -
Haal het grillrooster 7 en het bakblik 8 uit
het apparaat. Leg er eventueel bakpapier op
resp. bestrijk het bakblik 8 met boter of olie.
Laat het apparaat ca. 10 minuten (al naar gelang de temperatuurinstelling) op de gewenste
temperatuur heet worden:
- Kies de gewenste temperatuur met de temperatuurregelaar 2. In de grillstand moet u altijd
de hoogste temperatuur (230° C) kiezen.
- Daarna kiest u met de functieschakelaar 3
voor bovenwarmte (bijv. voor gratineren),
onderwarmte (bijv. voor taart) of boven- en
onderwarmte (bijv. voor pizza). Om te grillen,
zet u de functieschakelaar 3 altijd op bovenwarmte.
➩
- Stel met de tijdschakelklok 5 de voorverwarmingstijd in (ca. 10 minuten).
- Sluit de glasdeur.
Stel met de tijdschakelklok 5 de gewenste
grill- resp. baktijd in.
De maximale grill- resp. baktijd bedraagt 60 minuten.
➩
Als de tijd verstreken is, legt u het grill- resp. bakgoed op het grillrooster 7 resp. het bakblik 8
en schuift u het in een van de geleidingen 6.
Let daarbij op voldoende afstand tussen het
grill- resp. bakgoed en de binnenwanden en
verwarmingselementen van het apparaat.
➩
Let op!
Leg nooit voorwerpen, levensmiddelen, schotels, het
bakblik 8, het grillrooster 7 of andere kommen of
bakjes rechtstreeks op de bodem van de bakruimte!
De daardoor opgebouwde hitte beschadigt het
apparaat! Plaats de levensmiddelen, schotels of andere kommen of bakjes altijd op het bakblik 8 of
op het grillrooster 7 en schuif dat in een van de 3
geleidingen 6.
➩
Wanneer de garingstijd van uw grill- resp.
bakgoed minder dan 25 minuten bedraagt,
zet u de tijdschakelklok 5 eerst op 60 minuten
en daarna terug op de gewenste grill- resp.
baktijd.
Het indicatielampje 1 geeft aan dat de grill- en
bakautomaat is ingeschakeld. De schakelaar van
de tijdschakelklok 5 beweegt nu tegen de wijzers
van de klok in naar OFF (nul).
Als de grill- en bakautomaat de door u ingestelde temperatuur heeft bereikt, gaan de
verwarmingselementen nu en dan uit om de
ingestelde temperatuur te handhaven.
Als u sterk druppelende levensmiddelen op het
grillrooster 7 klaarmaakt, dan schuift u het
bakblik 8 in de onderste geleiding. Zodoende wordt bijv. neerdruppelend vet opgevangen
en is het apparaat nadien gemakkelijker
schoon te maken.
➩
De meest gelijkmatige bakresultaten bereikt u
wanneer u het bakblik 8 resp. het grillrooster 7
in het middelste niveau plaatst en de circulatielucht instelt.
U hoort een belletje en het indicatielampje 1
gaat uit.
Het apparaat gaat na het verstrijken van de
ingestelde tijd automatisch uit. Wanneer u het
apparaat voor die tijd wilt uitschakelen, draait
u de tijdschakelklok 5 terug op OFF. Zet de
functieschakelaar 3 op de stand OFF en haal
de netstekker uit het stopcontact.
Nadat het apparaat is uitgeschakeld, kan de
tijdschakelklok 5 nog korte tijd doorlopen.
Sluit de glasdeur voordat u het grillen/
bakken start.
Wanneer u voedsel met veel vet bereidt, kan
er meer rookontwikkeling ontstaan. Sluit in dat
geval de glasdeur niet helemaal, maar laat
deze op een kier openstaan: wanneer u de
deur voorzichtig dichtdoet, blijft deze kort voor
het sluiten in deze stand staan.
- 48 -
Gebruik voor het uitnemen van het grillrooster 7 resp. bakblik 8 altijd de meegeleverde
greep 9. Om het grillrooster 7 uit te nemen,
haakt u de kleine haak van de greep 9 van
boven af in het rooster. Om het bakblik 8 uit
het apparaat te halen, haakt u de grote haak
van de greep 9 in de voorrand van het bakblik 8.
Bereidingstips en recepten
In dit hoofdstuk geven we een paar voorbeelden
van de bereiding van etenswaren. Deze voorbeelden
zijn suggesties. De bereidingstijd kan variëren.
Neem de bereidingsaanwijzingen op de
verpakking van de levensmiddelen in acht.
Muffins
Ingrediënten voor vier personen:
• 1 kop meel
• 1 theelepel bakpoeder
• 1 ei
• 1 eetlepel gesmolten boter
• 1 kop melk
• 3 eetlepels suiker
• zout
• voor verschillende varianten daarnaast noten,
bananenpartjes of chocovlokken
➩
Zet na het grillen of bakken de functieschakelaar 3 op OFF (uit). Haal de netstekker uit het
stopcontact. Laat het apparaat afkoelen voordat u het schoonmaakt of opnieuw gebruikt.
Neem de bereidingsaanwijzingen in recepten in
acht bij gebruik van circulatielucht.
Bereiding:
➩ Meng in een schaal meel, bakpoeder, ei, melk,
zout en suiker langzaam door elkaar.
➩ De boter in een pan smelten en door het deeg
roeren.
➩ Naar smaak mengen met noten, chocovlokken
of geprakte bananen.
➩ Doe het bereide deeg in hiervoor bestemde
muffinvormpjes en zet deze op de bakplaat 8.
➩ De muffins 200° C met bovenwarmte en hetelucht ca. 15 minuten op het onderste niveau
bakken.
➩
Hawaiitosties
Grillen en bakken met circulatielucht
Wanneer u bakt of grillt met circulatielucht, kunt u
in de regel afzien van voorverwaming van de grillen bakruimte. Het kook- en bruiningsresultaat is bij
gebruik van circulatielucht gelijkmatiger.
Druk op de tuimelschakelaar 4 voor de circulatielucht, tot deze vastklikt op stand “-”.
De ventilator in de grill- en bakruimte werkt.
De verdere bediening is hetzelfde als bij grillen
en bakken zonder circulatielucht.
Ingrediënten voor 4 tosties:
• 4 plakjes brood
• 1–2 eetlepels remoulade
• 120 g gekookte ham
• 1/2 blikje ananas
• 4 plakken kaas om te gratineren
• curry
- 49 -
Bereiding:
➩ De plakjes brood roosteren.
➩ Daarna dun met remoulade bestrijken en beleggen met de gekookte ham.
➩ Op elke belegde boterham een schijf ananas
leggen. Met curry kruiden.
➩ Daarna op elke schijf ananas een plak kaas
leggen.
➩ De Hawaï-tosties op het grillrooster 7 leggen
en in de grill- en bakautomaat op de middelste
geleider bij ca. 180 °C, bovenhitte en circulatielucht ca. 8 minuten gratineren.
Diepvriespizza bakken
Bereiding:
➩ Schuif het grillrooster 7 in het middelste niveau
van de grill- en bakruimte.
➩ Leg de diepvriespizza zonder verpakking op
het grillrooster 7.
➩ Bak de pizza bij boven- en onderwarmte en
ingeschakelde circulatielucht ca. 20 minuten.
➩ Neem de aanwijzingen op de verpakking in
acht.
Spritskoekjes
Ingrediënten:
• 125 g boter
• 125 g suiker
• 1 pakje vanillesuiker
• 1 snufje zout
• 1 ei
• 1 eiwit
• 250 g meel (type 405)
• 1 theelepel bakpoeder
• geraspte schil van een halve citroen
Bereiding:
➩ De boter schuimig kloppen.
➩ De suiker, vanillesuiker, citroenschil en eieren
toevoegen.
➩ Het meel, bakpoeder en zout mengen en met
een spatel onder het deeg roeren.
➩ Deeg ca. 10 minuten laten rusten.
➩ Het deeg in de gewenste vorm brengen, bijv.
met behulp van een vleeswolf, uitsteekvormpjes of
een spuitzak.
➩ De spritskoekjes op het met bakpapier beklede
bakblik 8 leggen.
➩ De spritsen in de voorverwarmde oven bij
180° C boven- en onderwarmte ca. 10–
15 minuten op het middelste niveau goudbruin
bakken.
De hoeveelheid deeg is voldoende voor meerdere bakblikken 8.
Broodjes
Ingrediënten:
• 300 g meel (of volkorenmeel)
• 2 theelepels bakpoeder
• 200 g lijnzaad
• 1 ei
• 500 g kwark
• 1 theelepel zout
• naar smaak karwijzaad, uien, spek ...
Bereiding:
➩ Alles goed door elkaar kneden en er kleine
broodjes van maken.
➩ De broodjes op het met bakpapier beklede
bakblik 8 leggen.
➩ Bij ca. 180° C bovenwarmte en hetelucht
ongeveer 30 minuten op het middelste niveau
bakken.
De hoeveelheid deeg is voldoende voor meerdere bakblikken 8.
- 50 -
➩
Meringues
Ingrediënten:
• 1 eiwit
• zout
• 45 g suiker
Bereiding:
➩ Het afgekoelde eiwit in een vetvrije roerkom
doen. Er mag geen eigeel bijkomen, anders
wordt het eierschuim niet stevig.
➩ Het eiwit op een langzame stand kloppen, zodat er geen grote luchtbellen in het eierschuim
ontstaan.
➩ Met een snufje zout kruiden.
➩ De helft van de suiker beetje bij beetje toevoegen
wanneer het eierschuim stevig begint te worden.
➩ Daarna op de hoogste stand stijfkloppen.
➩ De rest van de suiker toevoegen. Daardoor
krijgt het meringueschuim de benodigde stevigheid.
➩ Het meringueschuim in een spuitzak met een
grote stervormige spuitmond doen en op korte
afstand roosjes, tongen of andere vormen op
het met bakpapier beklede bakblik spuiten.
➩ De grill- en bakautomaat op ca. 100° C circulatielucht voorverwarmen.
➩ De meringues op het middelste niveau bij ca.
100° C circulatielucht ca. 2 uur laten bakken.
Botercroutons
Ingrediënten:
• 2 plakjes witbrood
• 1 EL boter
Bak de blokjes witbrood bij ca. 150°C (hetelucht) op het middelste niveau, tot ze goudbruin
zijn (ca. 15 - 20 minuten).
U kunt ook kruiden- of knoflookboter gebruiken
in plaats van gewone boter. De baktijd is dan
ca. 5 minuten korter.
Gehaktbaguettes
Ingrediënten:
• 2 kleine baguettes
• 250 g gehakt (half-om-half)
• 2 tomaten
• 1 ui (gesnipperd)
• 2 EL tomatenpuree
• 40 g geraspte Parmezaanse kaas
• 4 plakken kaas
• Zout en peper
Bereiding:
➩ Snijd de baguettes open en hol ze uit.
➩ Meng het gehakt, de tomatenpuree, de ui, de
Parmezaanse kaas, een beetje zout en een
beetje peper door elkaar.
➩ Maak van het gehaktmengsel 4 even grote,
zo plat mogelijke schijven en leg die op de
baguettehelften.
➩ Snijd de tomaten in plakjes en verdeel ze over
de baguettes.
➩ Verdeel de kaas over de baguettes.
➩ Leg de baguettes op een bakplaat 8 en bak
ze bij ca. 225°C in de voorverwarmde oven
met boven- en onderwarmte ca. 20 minuten
op het onderste niveau.
Bereiding:
➩ Snijd het witbrood in kleine blokjes.
➩ Smelt de boter bij laag vuur in een pan en
meng het witbrood erdoor.
➩ Bedek een bakplaat 8 met bakpapier en verdeel de blokjes witbrood er gelijkmatig over.
U kunt het gehaktmengsel verder op smaak
brengen met basilicum, chilipoeder of andere
kruiden.
- 51 -
Gegratineerde bloemkool
Bladerdeegpakketjes met zalmvulling
Ingrediënten:
• 1/2 bloemkool (ca. 250 g)
• 3 schijfjes citroen
• 1 EL boter
• 1 grote TL bloem
• 1 EL citroensap
• 1 EL geschaafde amandel
• 2 EL gratinkaas (geraspt)
• Zout, peper, nootmuskaat
Ingrediënten:
• 1 pak bladerdeegvellen (ca. 8 stuks)
• 1 pak zalm, gerookt, in plakken (ca. 200 g)
• 1 citroen
• 1 ui
• 1 pakje roomkaas (200 g)
Verse dille
Zout en peper
1 dooier
Bereiding:
➩ Snij de bloemkool in roosjes en was deze.
➩ Kook de bloemkool met de citroenschijfjes in
kokend water met zout 8-10 minuten, zodat de
bloemkool beetgaar is. Vang bij het afgieten
ca. 150 ml van het kookwater op.
➩ Laat in een pan de boter smelten en bak de
bloem al roerend ca. 1 minuut.
Voeg al roerend het kookwater van de bloemkool toe en laat het ca. 2 minuten koken. Als
het bloemmengsel te dik wordt, voegt u beetje
bij beetje nog wat water toe, tot er een romig
mengsel ontstaat. Kruiden met zout, peper en
nootmuskaat.
➩ Leg de bloemkool in een ovenschaal (ca. 14 cm
doorsnede) en giet de saus er gelijkmatig overheen.
➩ Strooi de kaas en de geschaafde amandel
erover.
➩ Zet de ovenschaal op een bakplaat 8.
➩ Gratineer de ovenschaal bij ca. 200°C in de
voorverwarmde oven met boven- en onderwarmte ca. 20 minuten op het onderste niveau.
Bereiding:
➩ Haal de bladerdeegvellen los en laat ze eventueel ontdooien.
➩ Meng de roomkaas met zout, peper en het sap
van een citroen.
➩ Snipper de ui.
➩ Voeg de helft van de zalm en de ui toe aan het
roomkaasmengsel en pureer alles grof met een
staafmixer.
➩ Snijd de rest van de zalm in dunne reepjes.
➩ Voeg de zalm en de dille toe aan het mengsel
en meng alles door elkaar.
➩ Leg steeds een eetlepel van het mengsel op
een bladerdeegvel en vouw het dicht.
➩ Bestrijk het gevouwen pakketje met eigeel.
➩ Leg de bladerdeegpakketjes op de bakplaat 8.
Laat voldoende afstand tussen de pakketjes,
omdat het bladerdeeg rijst.
➩ Bak de bladerdeegpakketjes op het onderste
niveau bij ca. 200° C hetelucht ca. 25-30 minuten. Het bladerdeeg moet een lichtbruine
kleur krijgen.
De aangegeven hoeveelheid is voldoende voor
meerdere bakplaten 8.
- 52 -
Let op!
Geen aansprakelijkheid voor recepten. Alle gegevens
m.b.t. ingrediënten en bereiding zijn richtwaarden.
Vul deze receptsuggesties aan met uw persoonlijke
bevindingen. Wij wensen u een geslaagde en lekker
maaltijd toe.
Gebruik geen huishoudelijke schoonmaakmiddelen
of scherpe resp. spitse voorwerpen om vuil te verwijderen. Daardoor kunnen de grill- en bakautomaat en
de binnenwanden met hun speciale coating beschadigd raken.
Lamp vervangen
➩
Gevaar!
Wacht altijd eerst, totdat het apparaat afgekoeld is,
voordat u de lamp vervangt. Anders bestaat het gevaar voor verbrandingen!
Vervang de lamp altijd alleen door een lamp
van hetzelfde type (zie hoofdstuk “Technische
gegevens”).
➩
➩
➩
➩
➩
Open de glasdeur.
Draai de in het interieur achter rechts zittende
glazen afdekking van de lamp eraf.
Draai de lamp eruit en zet er een nieuwe lamp in.
Schroef de glazen afdekking er stevig op.
Mocht het apparaat desondanks vuil worden,
dan kunt u de grill- en bakautomaat schoonmaken met een zachte doek die licht in mild zeepsop is gedrenkt. In geval van meer hardnekkige vervuilingen of ingebrand vuil, legt u een
doek gedrenkt in mild zeepsop op de vervuiling. Wacht totdat de vervuiling week geworden is en verwijder deze dan!
Maak het bakblik 8 en de grillrooster 7
schoon in een oplossing met afwasmiddel.
Hardnekkig vuil laat u inweken. Spoel de
afwasmiddelresten af met schoon water.
Gevaar voor elektrische schok!
Alvorens het apparaat na het schoonmaken weer
in gebruik te nemen, moet het helemaal droog zijn.
Laat daarom na het schoonmaken de deur van het
apparaat openstaan.
Schoonmaken
Gevaar voor elektrische schok!
Haal altijd de netstekker uit het stopcontact voordat
u de grill- en bakautomaat reinigt. Er bestaat gevaar
voor een elektrische schok!
Gevaar voor elektrische schok!
Dompel het apparaat bij het schoonmaken
in geen geval onder in water. Er bestaat gevaar voor een elektrische schok!
- 53 -
Storingen verhelpen
Symptoom
De grill- en
bakautomaat
wordt niet
heet.
Symptoom
Mogelijke oorzaak en
oplossing
De tijdschakelklok 5
staat op OFF. Zet de tijdschakelklok 5 op een
tijd van meer dan
0 minuten (OFF) .
Een zekering in de stoppenkast is defect.
Controleer de zekeringen in de stoppenkast
en vervang een eventueel
defect exemplaar.
Het stopcontact is defect. Probeer een ander
stopcontact.
De grill- en bakautomaat
is mogelijk defect.
De functieschakelaar 3
staat op de stand OFF.
Mogelijke oorzaak
en oplossing
De ventilator
voor de circulatielucht werkt
niet.
De tuimelschakelaar
voor de circulatielucht 4
staat op de stand “O”.
Zet de schakelaar voor
de circulatielucht op de
stand “-”.
De grill- en bakautomaat
is mogelijk defect. Laat
de grill- en bakautomaat
nakijken door deskundig
personeel.
Het deurglas
is gebroken
of vertoont
barsten.
Laat de grill- en bakautomaat
repareren door deskundig
personeel.
Mocht u een storing toch niet kunnen verhelpen,
neem dan contact op met uw vakhandel of met de
fabrikant.
Milieurichtlijnen
Deponeer het apparaat in geen geval
bij het normale huisvuil. Dit product is
onderhevig aan de Europese richtlijn
2002/96/EC.
De grill- en bakautomaat kan
niet worden uitgeschakeld.
Een elektronische component
is defect.
Trek de stekker uit het stopcontact en laat de grill- en
bakautomaat door erkende
vakmensen nakijken.
Voer het apparaat af via een erkend afvalverwerkingsbedrijf of via uw gemeentereiniging.
Neem de bestaande voorschriften in acht. Neem in
geval van twijfel contact op met de gemeentelijke
reinigingsdienst.
Voer alle verpakkingsmaterialen op een
milieuvriendelijke manier af.
- 54 -
Garantie & service
U heeft op dit apparaat 3 jaar garantie vanaf de
aankoopdatum. Het apparaat is met de grootst mogelijke zorg vervaardigd en voorafgaand aan de
levering nauwkeurig gecontroleerd.
Bewaar a.u.b. de kassabon als aankoopbewijs.
Als u aanspraak wilt maken op garantie, neem dan
a.u.b. telefonisch contact op met uw servicefiliaal.
Alleen op die manier is een kostenloze verzending
van uw product gegarandeerd.
De garantie geldt alleen voor materiaal- of fabricagefouten, echter niet voor transportschade, of voor
onderdelen die aan slijtage onderhevig zijn, of voor
beschadigingen aan breekbare delen, bijv. schakelaars of accu's. Het product is uitsluitend bestemd
voor privé-gebruik en niet voor bedrijfsmatige doeleinden.
Bij verkeerd gebruik en ondeskundige behandeling,
bij gebruik van geweld en bij reparaties die niet
door ons geautoriseerd servicefiliaal zijn uitgevoerd, vervalt de garantie. Uw wettelijke rechten
worden door deze garantie niet beperkt.
De garantieperiode wordt niet verlengd door de
aansprakelijkheid. Dit geldt eveneens voor vervangen en gerepareerde onderdelen. Schade en gebreken die mogelijk reeds bij de aankoop aanwezig zijn,
moeten direct na het uitpakken worden gemeld, uiterlijk echter twee dagen na de dag van aankoop.
Na verstrijken van de garantieperiode moeten alle
voorkomende reparaties vergoed worden.
Service Nederland
Tel.: 0900 0400223 (0,10 EUR/Min.)
E-Mail: [email protected]
IAN 66725/66726
Bereikbaarheid hotline:
Maandag t/m vrijdag van 8:00 tot 20:00 uur (CET)
Importeur
KOMPERNASS HANDELS GMBH
BURGSTRASSE 21
44867 BOCHUM
GERMANY
www.kompernass.com
- 55 -
- 56 -
CONTENT
PAGE
Intended use
58
Items supplied
58
Description
58
Technical data
58
Safety information
59
Setup
60
Preparation for use
60
Switching off and transportation
61
Switching off . . . . . . . . . . . . . . . . . . . . . . . . . . . . . . . . . . . . . . . . . . . . . . . . . . . . . . . . . . . . . . .61
Transporting . . . . . . . . . . . . . . . . . . . . . . . . . . . . . . . . . . . . . . . . . . . . . . . . . . . . . . . . . . . . . . . .61
Operation
61
Grilling and baking . . . . . . . . . . . . . . . . . . . . . . . . . . . . . . . . . . . . . . . . . . . . . . . . . . . . . . . . . .61
Grilling and baking with circulating air . . . . . . . . . . . . . . . . . . . . . . . . . . . . . . . . . . . . . . . . . .63
Tips for preparation and recipes
63
Muffins . . . . . . . . . . . . . . . . . . . . . . . . . . . . . . . . . . . . . . . . . . . . . . . . . . . . . . . . . . . . . . . . . . . .63
Hawaii toast . . . . . . . . . . . . . . . . . . . . . . . . . . . . . . . . . . . . . . . . . . . . . . . . . . . . . . . . . . . . . . . .63
Baking deep-frozen pizza . . . . . . . . . . . . . . . . . . . . . . . . . . . . . . . . . . . . . . . . . . . . . . . . . . . . .64
Biscuits . . . . . . . . . . . . . . . . . . . . . . . . . . . . . . . . . . . . . . . . . . . . . . . . . . . . . . . . . . . . . . . . . . . .64
Rolls . . . . . . . . . . . . . . . . . . . . . . . . . . . . . . . . . . . . . . . . . . . . . . . . . . . . . . . . . . . . . . . . . . . . . .64
Meringue . . . . . . . . . . . . . . . . . . . . . . . . . . . . . . . . . . . . . . . . . . . . . . . . . . . . . . . . . . . . . . . . . .65
Buttered croutons . . . . . . . . . . . . . . . . . . . . . . . . . . . . . . . . . . . . . . . . . . . . . . . . . . . . . . . . . . . .65
Minced meat baguettes . . . . . . . . . . . . . . . . . . . . . . . . . . . . . . . . . . . . . . . . . . . . . . . . . . . . . .65
Cauliflower (overbaked) . . . . . . . . . . . . . . . . . . . . . . . . . . . . . . . . . . . . . . . . . . . . . . . . . . . . .66
Puff pastry pouches (Bourekas) filled with salmon . . . . . . . . . . . . . . . . . . . . . . . . . . . . . . . . . .66
Changing the bulb
67
Cleaning
67
Troubleshooting
68
Disposal
68
Warranty & Service
69
Importer
69
- 57 -
Electric Oven & Grill
Description
Congratulations on the purchase of your new
appliance.
You have clearly decided in favour of a quality
product. These operating instructions are a part of
this product. They contain important information in
regard to safety, use and disposal. Before using the
product, familiarise yourself with all of these operating and safety instructions. Use the product only
as described and only for the specified areas of
application. In addition, pass these documents on,
together with the product, to any future owner.
The Oven with Grill automat is intended for the heating,
cooking and grilling of food. The air circulation system
provides for an equable and rapid distribution of
heat in the appliance.
Intended use
The Oven and Grill automat is intended for the
heating, cooking and grilling of food. This appliance is
intended exclusively for use in domestic households.
Do not use it for commercial applications.
All other uses are deemed to be improper and may
result in property damage or even in personal injury.
Kompernaß GmbH accepts no liability for damage
caused by improper use of the appliance.
Items supplied
The package contains
• Electric Oven & Grill
• a roasting grill
• a baking tray
• a handle for the roasting grills/baking tray
• operating instructions
Illustration A:
1 Control lamp (Power)
Glows during operation
2 Temperature regulator
Stepless adjustment of the temperature from
100° C to 230° C
3 Function switch for
OFF,
Upper heat,
Lower heat,
Upper and lower heat
4 Rocker switch for air circulation
5 Timer switch
Adjustment of the required baking/grilling time
from 0 – 60 min.
6 Rails for baking tray or roasting grille
Illustration B:
7 Roasting grill
8 Baking tray
9 Handle for roasting grill/baking tray
Technical data
Mains voltage: 220 - 240 V ~/50 Hz
Nominal power: 1380 W
Capacity:
15 Litres
Bulb:
- 58 -
240 V, 15 W, E 14, 300°C
Safety information
•
•
Danger!
•
•
•
•
•
•
This appliance is not intended for use by individuals (including children) with restricted physical,
physiological or intellectual abilities or deficiences in experience and/or knowledge unless they
are supervised by a person responsible for
their safety or receive from this person instruction in how the appliance is to be used.
Children should be supervised to ensure that
they do not play with the appliance.
You may not open the housing of the appliance
or carry out any repairs. Should you do so,
the safety concept of the appliance may be
compromised and the warranty becomes
void.Arrange for defects on the appliance to
be repaired only by the dealer or authorised
specialists.
Arrange for defective power plugs and/or
cables to be replaced at once by qualified
technicians or our Customer Service Department.
Ensure that fluids cannot permeate into the
housing of the appliance. Do not expose the
appliance to humidity and do not use it outdoors. Additionally, DO NOT place fluid-filled
receptacles such as flower vases on the appliance. This would increase the risk of fire and of
receiving an electric shock! Should liquids permeate into the housing, unplug the appliance
immediately and arrange for it to be repaired
by a qualified technician.
NEVER touch the heating rods or the viewing
window when the appliance is in use, or before it
has cooled down completely. Do not reach in
to the cooking area when the appliance is in
use. Wait until the appliance has cooled down.
Otherwise, you could be burnt.
•
After use, allow the Oven and Grill automat to
cool down completely before transporting it.
NEVER grasp the appliance, power cable or
power plug with wet hands. There is the risk of
receiving an electric shock.
Lay the power cable in such a way that no one
can tread on or trip over it.
Caution! Hot surfaces.
NEVER touch the glass door or the housing
during use as these become very hot.
To open the glass door use oven gloves or
something similar, so as to avoid being burnt!
Caution!
•
•
•
•
•
•
- 59 -
NEVER place objects, food, bowls, the baking
tray 8, the roasting grille 7 or other containers
directly on the bottom of the oven! The resulting
heat accumulation will damage the appliance!
ALWAYS place food, bowls or other containers
on the baking tray 7 or the roasting grille 7,
and slide these into one of the 3 rails 6.
NEVER leave the appliance unattended when
it is in use.
When the Oven and Grill automat is in use
ensure that there are no lightly inflammable
materials close to it (e. g.dishcloths, oven
cloths, etc.).
NEVER dry textiles or other objects on or
above the appliance.
There is a risk of fire.
To disconnect, always pull the plug itself from the
power socket, do not pull on the power cable.
Do not fold or crush the power cable.
Do not use extension cables.
•
•
If you do not intend to use the appliance for
an extended period, you must disconnect it from
the power source. The appliance is completely
free of electrical power only when you unplug it.
Do not use an external timing switch or a
separate remote control system to operate the
appliance.
Clarification of the safety warnings
In the operating instructions there are the following
categories of safety warning:
Risk of fire!
Ensure the appliance is placed on a firm, level and
heat-resistant surface. Failure to do so increases the
risk of fire or of it being damaged. The area under
the base of the appliance could become discoloured and damaged. Additionally, if placed on a soft
upper surface, the appliance could cause permanent damage to it due to pressure indentations.
Risk of electric shock!
Do not place the appliance immediately adjacent
to sources of water, e.g. sinks or basins, or in damp
cellar areas. Otherwise, there is a risk of receiving
an electric shock.
Danger!
A warning with the word DANGER refers to possible
personal physical damage.
Do NOT support yourself on the glass door.
Do NOT place objects on the glass door. This
would cause damage to the hinges.
Important!
A warning with the word CAUTION refers to possible
property or environmental damage.
These warnings contain specific indications for
the economic use of the appliance.
Setup
➩
Preparation for use
Place the device on a solid, level and heatresistant surface (e.g. stainless steel worktops
or natural stone worktops such as granite).
Ensure there is sufficient ventilation around the
appliance.
Take note!
Risk of fire!
The distance between the appliance rear side and
the wall should be at least 10 cm, with at least a
clear 10 cm above the appliance and 5 cm to each
side. For this reason the appliance may not be used,
for example, in cupboards or similar. Should it be so
used, there is likely to be insufficient ventilation for
the appliance, increasing both the risk of fire or of it
being damaged.
Never place objects, food, bowls, baking tray 8,
the grill 7 or other containers on the floor of the
backing area! The resulting accumulation of heat
will damage the appliance! ALWAYS place food,
bowls or other containers on the baking tray 8 or
the roasting grille 7, and slide these into one of the
3 rails 6.
Before using the appliance, however, proceed as
described in the following:
➩
- 60 -
Take the electrical oven with grill and all
accessories from the packaging.
Switching off and transportation
Risk of crush injuries!
When opening and closing the door, do not place
your fingers/hand between the door hinges. They
could be crushed.
➩
➩
➩
➩
➩
➩
Switching off
➩
Before using the appliance for the first time, it
and all of the accessories must be cleaned free
of possible packaging residues. Clean the accessories with a handwarm and mild detergent
solution and then dry them ab.
Wipe the appliance housing with a cloth lightly
moistened with water and then dry it carefully.
When the appliance is completely dry inside
and out, insert the plug into a suitable power
socket (220 - 240 V ~/50 Hz).
Now switch the appliance on, without the accessories and without foodstuffs. Leave the appliance door completely open.
Select the setting 230° C with the temperature
regulator 2. Place the function switch 3 to
upper and lower heat.
Place the time switch 5 at 15 minutes.
Transporting
➩
➩
➩
Grilling and baking
➩
➩
As the heating elements are lightly greased, a
slight smell may occur when first putting them
into operation. This is harmless and stops after
a short time. Open a window and provide for
sufficient ventilation.
➩
➩
If you wish to transport the appliance, first allow
it to cool down.
Remove the plug from the power socket.
Wrap the power cable around the retaining
hooks on the rear of the appliance.
Operation
The appliance allows itself to be switched on
with the time switch 5. As soon as the time
switch 5 is set the control lamp 1 glows.
➩
Place the function switch 3 and the time switch 5
at OFF. Unplug the power plug from the socket.
When the appliance has switched itself off automatically, place the function switch 3 to OFF .
Remove the plug from the power socket and wait
until the appliance has cooled itself down.
Then clean the grill and baking area with a
cloth lightly moistened with water and then
dry it carefully.
- 61 -
Remove the roasting grill 7 and baking tray 8
from the appliance. If required, cover these with
baking paper resp. smear the baking tray 8
with butter or oil.
Allow the appliance to heat up for ca. 10 minutes
(dependant on the setting) to the required temperature:
- Select the required temperature with the temperature regulator 2.
For grilling, you must always select the highest
temperature setting (230° C).
- Then, select with the function switch 3 either
upper heat (e.g. for toppings), lower heat (e.g.
for cakes) or upper and lower heat (e.g. for Pizza). If you want to grill, always select the setting
upper heat with the function switch 3.
➩
- With the time switch 5 set the pre-heat time
(ca. 10 minutes).
- Close the glass door.
Adjust the time switch 5 to the required grilling or baking time.
The maximum grilling or baking time is 60 minutes.
➩
When the warm-up period is finished, place
the foodstuffs on the roasting grill 7 resp. the
baking tray 8 and slide it in on one of the
rails 6. Ensure that there is sufficient space
between the foodstuffs and the inner walls/
heating elements of the appliance.
➩
Attention!
NEVER place objects, food, bowls, the baking tray 8,
the roasting grille 7 or other containers directly
on the bottom of the oven! The resulting heat accumulation will damage the appliance! ALWAYS place
food, bowls or other containers on the baking tray 8
or the roasting grille 7, and slide these into one of
the 3 rails 6.
The control lamp 1 indicates that your Oven with
Grill is switched on. The switch of the time switch 5
now rotates itself anti-clockwise towards OFF.
When your Oven with Grill has reached the set
temperature, the heating elements switch themselves off at intervals, to ensure that the temperature is maintained.
➩
If you wish to prepare food on the roasting grill 7
that drips excessively, then slide the baking tray 8
into the bottom rail. By doing this, dripping fat
for example will be caught and the appliance
is then easier to clean.
The most uniform baking results are obtained
when the baking tray 8 resp. the roasting grill 7
are placed on the central runner and the air
circulation is switched on.
➩
If the cooking time for the foodstuff amounts to
less than 25 minutes, first of all place the time
switch 5 at 60 minutes and then turn it back
to the required grilling or baking time.
The appliance switches itself off automatically
on completion of the programmed time. If you
wish to switch the appliance off prematurely,
turn the time switch 5 back to OFF. Place the
function switch 3 at the position OFF and remove the plug from the power socket.
You will hear a signal sound and the control lamp 1
extinguishes.
Close the glass door before starting the grill or
baking process.
If you are cooking especially fatty foodstuffs,
an increased smoke development can occur.
In this case, do not close the glass door completely, instead, allow it to be slightly open: If
you carefully push the door to, it comes into this
position shortly before closing.
- 62 -
After the appliance has switched itself off, the
time switch 5 can continue to run for a short
period.
➩
To remove the roasting grill 7 resp. baking
tray 8, ALWAYS use the provided handle 9.
To lift the roasting grill 7 out, you must engage
the small hook of the handle 9 in the grill from
above. To lift the baking tray 8 out of the appliance, the large hooks of the handle 9 must engage with the front edge of the baking tray 8.
Tips for preparation and recipes
In this chapter we provide you with various examples
for the preparation of foods. These examples are recommendations. The preparation periods can vary.
Take note of the preparation details given on
the packaging of the foodstuff .
Muffins
Ingredients for four people:
• 1 Cup of flour
• 1 Teaspoon of baking powder
• 1 Egg
• 1 Tablespoon of melted butter
• 1 Cup of milk
• 3 Tablespoons of sugar
• Salt
• for variations, additionally nuts, chopped
bananas or chocolate flakes
➩
After grilling or baking, place the function
switch 3 in the position OFF. Remove the plug
from the power socket. Allow the appliance to
cool down before cleaning it or switching it
back on.
Grilling and baking with circulating air
As a general rule, if you are baking or grilling with
air circulation vou can dispense with a pre-heating
of the cooking space. The cooking and browning
results are more even with the use of circulating air.
Take note of the instructions given in the recipes
when using air circulation.
➩
Press the rocker switch 4 for air circulation
until it engages in position "-".
The aerator in the grill and baking space starts to
rotate.
The methods of operation are then the same as for
grilling and baking without air circulation.
Preparation:
➩ Mix together in a bowl, slowly and one after
the other, the flour, baking powder, egg, milk,
salt and sugar.
➩ Melt the butter in a pan and mix it into the pastry.
➩ Subject to taste, blend in the nuts, chocolate
flakes or chopped bananas.
➩ Place the prepared pastry into typical muffin
moulds and place them on the baking tray 8.
➩ Bake the baking sheet at 200° C for about
15 minutes on the bottom rail with top heat
and convection air.
Hawaii toast
Ingredients for 4 toasts:
• 4 Slices of toast
• 1–2 Tablespoons of remoulade
• 120 g cooked ham
• 1/2 Tin of pineapples
• 4 Slices of cheese for melting
• Curry
- 63 -
Preparation:
➩ Toast the toast slices.
➩ Spread the remoulade thinly over the toasts
and lay the slices of cooked ham on them.
➩ Lay one slice of pineapple on each of the
garnished toasts. Spice with curry.
➩ Then place a slice of cheese over each of the
pineapple slices.
➩ Lay the Hawaiian toasts on the grill 7 and
then bake them for about 8 minutes on the
middle level of the grill and baking machine,
at approx. 180°C with upper heat and air
circulation.
Baking deep-frozen pizza
Preparation:
➩ Place the roasting grill 7 on the middle runner
in the cooking area.
➩ Lay the deep-frozen pizza without packaging
onto the roasting grill 7.
➩ Bake the pizza with upper and lower heating
and switched on air circulation for ca.20 minutes.
➩ Take heed of the details given on the packaging.
Biscuits
Ingredients:
• 125 g butter
• 125 g sugar
• 1 Packet of vanilla sugar
• 1 Pinch of salt
• 1 Egg
• 1 Egg white
• 250 g Plain flour
• 1 Teaspoon of baking powder
• Scraped peel of half a lemon
Preparation:
➩ Beat the butter until foamy.
➩ Add the sugar, vanilla sugar, lemon peel and
the eggs.
➩ Mix together the flour, baking powder and
salt, then blend them into the mixture with a
mixing spoon.
➩ Allow the pastry to stand for ca. 10 minutes.
➩ Bring the pastry into the desired shape, e.g.
with the assistance of a mincer, biscuit shaper
or a shaping bag with nozzle.
➩ Place the biscuits onto the baking tray 8, this
being first covered with baking paper.
➩ Bake the biscuits on the middle rail in a preheated oven at 180° C, with top and bottom
heat, for about 10–15 minutes, until they
are golden brown.
The pastry volume is sufficient for several
baking trays 8.
Rolls
Ingredients:
• 300 g Flour (or wholemeal flour)
• good 2 Teaspoons of baking powder
• 200 g Linseeds
• 1 Egg
• 500 g Curds
• 1 Teaspoon of salt
• Subject to taste, caraway seeds, onions,
cubed bacon ...
Preparation:
➩ Knead everything together well and then
shape it into small rolls.
➩ Place the biscuits onto the baking tray 8 this
being first covered with baking paper.
➩ Bake at about 180° C, with top heat and
convection air, for approximately 30 minutes
on the middle rail.
The pastry volume is sufficient for several
baking trays 8.
- 64 -
➩
Meringue
Ingredients:
• 1 Egg white
• Salt
• 45 g Sugar
Preparation:
➩ Place the cooled egg white into a fat-free mixing
bowl. It may not contain any egg yolk, otherwise the meringue will not be firm.
➩ Beat the egg white at a slow speed, so that the
bubbles formed in the meringue are not too large.
➩ Add a pich of salt to taste.
➩ Gradually add in a half of the sugar when the
meringue starts to firm up.
➩ Then beat it at the highest speed until stiff.
➩ Add the remaining sugar. With this the meringue
attains the required solidity.
➩ Fill the meringue mixture into a squeezing bag
with large star nozzles and, with a little space
between them, shape rosettes, tongues and
other designs on the backing tray, this being
first covered with baking paper.
➩ Pre-heat the Oven with Grill to ca. 100° C
with air circulation.
➩ Bake the meringues with air circulation at ca.
100° C for about 2 hours.
Buttered croutons
Ingredients:
• 2 slices of toast bread
• 1 tbsp. Butter
Bake the toast bread cubes at 150°C (convection) on the middle rail until golden brown
(approx. 15-20 minutes).
You can also use herb or garlic butter instead of
regular butter. The baking time is then reduced
by about 5 minutes.
Minced meat baguettes
Ingredients:
• 2 Baguette rolls
• 250 g Minced meat (half and half)
• 2 Tomatoes
• 1 Onion (diced)
• 2 tbsp. Tomato paste
• 40 g grated Parmesan cheese
• 4 slices of cheese
• Salt and pepper
Preparation:
➩ Slice the baguettes and hollow them out.
➩ Combine the minced meat, tomato paste,
onion, parmesan, some salt and some pepper.
➩ Shape the minced meat to 4 equal-sized, flat
as possible, meat patties and place them on
the baguette halves.
➩ Cut the tomato into slices and distribute them
onto the baguettes.
➩ Distribute the cheese slices onto the baguettes.
➩ Place the baguettes on a baking tray 8 and
then bake them on the bottom rail at about
225°C in a preheated oven with top and
bottom heat for about 20 minutes.
Preparation:
➩ Cut the toast bread into small cubes.
➩ Melt the butter over low heat in a saucepan
and mix in the cubed toast bread.
➩ Cover a baking tray 8 with baking paper and
spread the toast bread cubes evenly on it.
You can also season the minced meat mixture
with basil, chili and other spices.
- 65 -
Cauliflower (overbaked)
Ingredients:
• 1/2 head cauliflower (about 250 g)
• 3 Lemon slices
• 1 tbsp. Butter
• 1 heaped tsp Flour
• 1 tbsp. lemon juice
• 1 tbsp slivered Almonds
• 2 tbsp Gratin cheese (grated)
• salt, pepper, nutmeg
Preparation:
➩ Divide the cauliflower into florets and wash
them.
➩ Cook the cauliflower with the lemon slices in
boiling salted water for 8-10 minutes, until the
cauliflower is al dente. Retain about 150 ml
of the cooking water before pouring the rest
away.
➩ Melt the butter in a saucepan and then brown
the flour, with constant stirring, for about 1 minute.
Under constant stirring pour in the cauliflower
water and let it cook for about 2 minutes.
Should the roux be too hard, gradually add
more water until a creamy consistency is achieved. Flavour with lemon juice, nutmeg, salt and
pepper.
➩ Place the cauliflower in a baking dish (about
14 cm in diameter) and pour the sauce evenly
over it.
➩ Sprinkle the cheese and almond slivers over it.
➩ Place the baking dish on a baking tray 8.
➩ Bake the prepared dish at 200°C in a preheated oven, with top and bottom heat, for
about 20 minutes on the bottom rail.
Puff pastry pouches (Bourekas) filled
with salmon
Ingredients:
• 1 pack Puff pastry sheets (about 8 pieces)
• 1 Pack Smoked salmon, sliced (about 200 g)
• 1 Lemon
• 1 Onion
• 1 Pack Cottage cheese (200 g)
fresh Dill
Salt and pepper
1 Egg yolk
Preparation:
➩ Take the puff pastry sheets apart and, if necessary, allow them to thaw.
➩ Combine the Cottage cheese with salt, pepper
and the juice of one lemon.
➩ Finely dice the onion.
➩ Add half of the salmon and the onion to the
cottage cheese mixture and mix it all coarsely
with a hand blender.
➩ Cut the remaining salmon into thin strips.
➩ Add the salmon and the dill to the mass and
mix everything together.
➩ Place a tablespoon of the mixture on a puff
pastry sheet and fold it over.
➩ Coat the resulting pouch with egg yolk.
➩ Place the bourekas on a baking tray 8.
Leave sufficient space between the individual
pouches, because the puff pastry will expand.
➩ Bake the bourekas on the lower rail at about
200° C with convection for approx. 25-30 minutes. The puff pastry should gain a light brown
colour.
The given pastry volume is sufficient for several
baking trays 8.
- 66 -
These recipes are provided without guarantee. All
ingredients and preparation information are guiding
values. Expand these recipe suggestions based on
your personal experiences. We hope you enjoy
the recipes and wish you "bon appetit".
Important!
Do not use household detergents or sharp/pointed
objects to remove soiling. They could damge the special coatings on the inner walls of the Oven with Grill.
➩
Changing the bulb
Danger!
Always wait until until the appliance has cooled
down before changing the bulb. Otherwise, there is
a risk of being burnt!
➩
Replace the bulb only with a bulb of the same
type (see chapter "Technical data ").
Should soiling occur, the Oven with Grill can
be cleaned with a soft cloth lightly moistened
with a mild soapy solution. For stubborn staining or baked-on soiling, place a cloth soaked
with a mild detergent on the contamination.
Wait until the contamination has softened and
then remove it!
Clean the baking tray 8 and the roasting grill 7
in a detergent solution. Allow stubborn soiling
to be softened. Rinse them off with clear water.
Risk of electric shock!
➩
➩
➩
➩
Open the glass door.
Unscrew the glass cover of the light bulb
located at the right rear of the interior.
Unscrew the defective bulb and replace it with
the new bulb.
Screw the glass cover back on hand-tight.
The Oven with Grill must be completely dry before
using it again after cleaning. Therefore, after cleaning
leave the appliance door open.
Cleaning
Risk of electric shock!
Before you clean the Oven with Grill, you must
always remove the plug from the power socket.
There is a risk of receiving an electric shock!
Risk of electric shock!
When cleaning it, under no circumstances
may the appliance be submersed in water.
There is a risk of receiving an electric shock!
- 67 -
Troubleshooting
Symptom
The appliance
does not heat
up.
Symptom
Possible cause and
solution
The time switch 5 is
showing OFF. Adjust the
time switch 5 to a time
greater than 0 minutes
(OFF).
A domestic fuse is defect.
Check the domestic fuses
and, if necessary, renew
the defective one.
The power socket is
defective. Try another
wall socket.
The appliance is possibly
defective. Arrange for
the appliance to be
checked by specialists.
The function switch 3
is at the position OFF.
Possible cause and
solution
The aerator for
the air circulation does not
function.
The switch for air circulation 4 is in the position
"O". Move the rocker
switch for air circulation
to the position "-".
The appliance is possibly
defective. Arrange for
the appliance to be
checked by specialists.
The door
glass is broken
or showing
cracks.
Arrange for the appliance
to be checked/repaired by
specialists.
Should a defect not allow itself to be eliminated,
please contact your dealer or the manufacturer.
Disposal
Do not dispose of the appliance in your
normal domestic waste. This product is
subject to the European guideline
2002/96/EC.
It is not possible
to switch the
appliance off.
An electronic component is
defective.
Remove the plug from the
wall socket and arrange for
the appliance to be checked
by specialists.
Dispose of the appliance through an approved disposal centre or at your community waste facility.
Observe the currently applicable regulations.
In case of doubt, please contact your waste disposal
centre.
Dispose of all packaging materials in an
environmentally responsible manner.
- 68 -
Warranty & Service
Importer
The warranty for this appliance is for 3 years from
the date of purchase. The appliance has been manufactured with care and meticulously examined before
delivery.
Please retain your receipt as proof of purchase. In the
event of a warranty claim, please make contact by
telephone with our Service Department. Only in this
way can a post-free despatch for your goods be assured.
The warranty covers only claims for material and
maufacturing defects, but not for transport damage,
for wearing parts or for damage to fragile components, e.g. buttons or batteries. This product is for private use only and is not intended for commercial use.
The warranty is void in the case of abusive and improper handling, use of force and internal tampering
not carried out by our authorized service branch. Your
statutory rights are not restricted in any way by this
warranty.
The warranty period will not be extended by repairs
made under warranty. This applies also to replaced
and repaired parts. Any damage and defects extant
on purchase must be reported immediately after unpacking the appliance, at the latest, two days after
the purchase date. Repairs made after the expiration
of the warranty period are subject to payment.
KOMPERNASS HANDELS GMBH
BURGSTRASSE 21
44867 BOCHUM
GERMANY
www.kompernass.com
Service Great Britain
Tel.: 0871 5000 720 (£ 0.10/Min.)
E-Mail: [email protected]
IAN 66725/66726
Hotline availability:
Monday to Friday 08:00 - 20:00 (CET)
- 69 -
KOMPERNASS HANDELS GMBH
BURGSTRASSE 21
44867 BOCHUM
DEUTSCHLAND / GERMANY
www.kompernass.com
Stand der Informationen · Version des informations
Versione delle informazioni · Stand van de informatie
Last Information Update: 06 / 2013 · Ident.-No.: SGB1380B2-02/11-V3
IAN 66725/66726
1