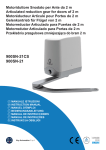
Download Motoriduttore interrato Under grounded gear motor
Transcript
Motoriduttore interrato Under grounded gear motor Motoreducteur enterré Unrterflur-Drehtorantrieb Motorreductor interrado Motorredutor interrado Podziemny motoreduktor Onder geaard uitrustingsmotor UNDER IT GB F D E P PL NL MANUALE ISTRUZIONI INSTRUCTION MANUAL MANUEL D'EMPLOI BEDIENUNGSANLEITUNG MANUAL DE INSTRUCCIONES MANUAL DE INSTRUÇÕES INSTRUKCJA OBSŁUGI INSTRUCTIE HANDBOEK Keyautomation S.p.A ITALIANO INDICE AVVERTENZE IMPORTANTI 2 CARATTERISTICHE TECNICHE 3 OPERAZIONI PRELIMINARI 3 DIMENSIONI D’INGOMBRO3 POSIZIONAMENTO DELLA CASSA DI FONDAZIONE 4 INSTALLAZIONE DEL MOTORIDUTTORE 5 INSTALLAZIONE DEI FERMI FINECORSA 5 COLLEGAMENTI ELETTRICI 6 SCHEMA DI INSTALLAZIONE 7 SBLOCCO DI EMERGENZA 7 MANUTENZIONE 8 SMALTIMENTO 8 AVVERTENZE IMPORTANTI Per chiarimenti tecnici o problemi di installazione Key Automation S.p.A. dispone di un servizio di assistenza clienti attivo durante le ore di ufficio TEL. (+39) 0421 307456 Key Automation S.p.A. si riserva il diritto di apportare eventuali modifiche al prodotto senza preavviso; inoltre declina ogni responsabilità per danni a persone o cose dovuti ad un uso improprio o ad un’errata installazione. Leggere attentamente il seguente manuale di istruzioni prima di procedere con l'installazione. • Il presente manuale di istruzioni è destinato solamente a personale tecnico qualificato nel campo delle installazioni di automazioni. • Nessuna delle informazioni contenute all'interno del manuale può essere interessante o utile per l'utilizzatore finale. • Qualsiasi operazione di manutenzione o di programmazione deve essere eseguita esclusivamente da personale qualificato. L’AUTOMAZIONE DEVE ESSERE REALIZZATA IN CONFORMITÀ VIGENTI NORMATIVE EUROPEE: EN 60204-1 (Sicurezza del macchinario, equipaggiamento elettrico delle macchine, parte 1: regole generali). EN 12445 (Sicurezza nell'uso di chiusure automatizzate, metodi di prova). EN 12453 (Sicurezza nell'uso di chiusure automatizzate, requisiti). • L'installatore deve provvedere all'installazione di un dispositivo (es. interruttore magnetotermico) che assicuri il sezionamento onnipolare del sistema dalla rete di alimentazione. La normativa richiede una separazione dei contatti di almeno 3 mm in ciascun polo (EN 60335-1). • Per la connessione di tubi rigidi e flessibili o passacavi utilizzare raccordi conformi al grado di protezione IP44 o superiore. • L’installazione richiede competenze in campo elettrico e meccanico; deve essere eseguita solamente da personale qualificato in grado di rilasciare la dichiarazione di conformità di tipo A sull’installazione completa (Direttiva macchine 2006/42/CEE, allegato IIA). • E’ obbligo attenersi alle seguenti norme per chiusure veicolari automatizzate: EN 13241-1, EN 12453, EN 12445 ed alle eventuali prescrizioni nazionali. • Anche l’impianto elettrico a monte dell’automazione deve rispondere alle vigenti normative ed essere eseguito a regola d’arte. • La regolazione della forza di spinta dell’anta deve essere misurata con apposito strumento e regolata in accordo ai valori massimi ammessi dalla normativa EN 12453. • Consigliamo di utilizzare un pulsante di emergenza da installare nei pressi dell’automazione (collegato all’ingresso STOP della scheda di comando) in modo che sia possibile l’arresto immediato del cancello in caso di pericolo. • L’apparecchiatura non deve essere utilizzata da bambini o persone con disabilità fisiche o psichiche, senza la dovuta conoscenza o supervisione da parte di una persona competente. • Controllare i bambini in modo che non giochino con l’apparecchiatura. Prima di effettuare qualsiasi intervento sull’impianto, togliere l’alimentazione elettrica e scollegare le batterie. 2 900INT 900INT-24 900INT-OIL Motoriduttore per cancelli a battente ( montaggio interrato ) 230 Vac Motoriduttore per cancelli a battente ( montaggio interrato ) 24 Vdc Motoriduttore per cancelli a battente ( montaggio interrato ) 230 Vac bagno d’olio DATI TECNICI 900INT (CT-2/CT-201)* 230 Vac 230 W 1A 10 µF 67 IP 300 Nm 108° Max 30 % 150° C 20 sec -20° +70°C 11 Kg centralina consigliata alimentazione potenza assorbita assorbimento motore condensatore grado di protezione coppia apertura anta servizio temporaneo termoprotezione tempo di apertura temperatura di esercizio peso 900INTOIL (CT-2/CT-201)* 230 Vac 230 W 1A 10 µF 67 IP 300 Nm 108° Max 80 % 150° C 20 sec -20° +70°C 11 Kg 900INT-24 (CT-824S)* 24 Vdc 120 W 5A 67 IP 250 Nm 108° Max 80 % 21 sec -20° +70°C 10,8 Kg Peso max. anta (kg) La serie di attuatori UNDER, è stata studiata per automatizzare cancelli a battente con ante fino a 600 Kg di peso, lunghe fino a 3 m. Prima di procedere con l’installazione è fondamentale assicurarsi che il vostro cancello si apra e si chiuda liberamente e verificare scrupolosamente i seguenti punti: • Cardini e perni in ottimo stato e opportunamente ingrassati. • Nessun ostacolo deve impedire il movimento. • Nessun attrito con il suolo e tra le ante deve essere presente. • Il vostro cancello deve essere equipaggiato di fermo centrale e fermi laterali questi sono indispensabili per un buon funzionamento del sistema. 600 500 400 300 200 100 1 2 Lunghezza max. anta (m) 2,5 DIMENSIONI D’INGOMBRO 3 3 ITALIANO MODELLI E CARATTERISTICHE ITALIANO POSIZIONAMENTO DELLA CASSA DI FONDAZIONE E DEL SISTEMA LEVE COMANDO E SBLOCCO > 63mm 1. Eseguire in base alle dimensioni d’ingombro, uno scavo di fondazione (si consiglia di prevedere un buon drenaggio in modo da evitare il ristagno dell’acqua). 2. Collocare la cassa all’interno dello scavo, con il perno allineato all’asse della cerniera. 3. Prevedere un condotto per i cavi elettrici ed uno per il drenaggio. 4. Annegare nel calcestruzzo la cassa di fondazione, curandone la messa in bolla ed il livello. ATTENZIONE: Prima di procedere con i seguenti punti rispettare i tempi di rappresa del calcestruzzo. 5. Inserire la sfera E nell’apposito foro dopo averla ingrassata 6. Inserire sul perno della cassa B la staffa di comando A. 7. Fissare con saldatura robusta l’anta del cancello sulla leva di sblocco C. 8. Ingrassare mediante apposito ugello ingrassatore D. C D E A B 4 ITALIANO INSTALLAZIONE DEL MOTORIDUTTORE 1. Collocare il motoriduttore all’interno della cassa di fondazione. 2. Fissare il motoriduttore alla cassa di fondazione serrando i 4 dadi. 3 4 2 1 3. Montare la leva motore (1) sull’albero motore e fissare la vite con la rondella di finecorsa (2). 4. Collegare la leva motore (1) alla staffa di comando (3) tramite la leva lunga (4) e fissarle tra di loro con le apposite viti M6x10 e rondelle dati in dotazione. 5. Collegare il motore alla centrale di comando seguendo le indicazioni riportate nel manuale di installazione della scheda. INSTALLAZIONE DEI FERMI FINECORSA CHIUSURA 1. Portare il cancello in posizione di massima chiusura, quindi regolare la rondella finecorsa come riportato in figura e serrare la vite M10x35.. APERTURA 2. Portare il cancello in posizione di massima apertura, quindi montare il dado finecorsa come riportato in figura e serrare la vite M10x20. 5 ITALIANO ATTENZIONE: Il vostro cancello deve essere equipaggiato di fermo centrale e fermi laterali; questi sono indispensabili per un buon funzionamento del sistema. A SX DX B B COLLEGAMENTI ELETTRICI UNDER 230V (900INT-900INT-OIL) COLORE CAVO MOTORE Motore DX Nero Apertura Grigio Comune Marrone Chiusura Giallo/Verde Messa a terra Motore SX Chiusura Comune Apertura Messa a terra ATTENZIONE: Per il funzionamento dei motori 230V è indispensabile collegare il condensatore di rifasamento tra nero e marrone del motoriduttore. UNDER 24V (900INT-24) COLORE CAVO MOTORE Blu Marrone Nero Giallo/Verde Grigio Motore DX Apertura Chiusura + encoder S encoder - encoder Motore SX Chiusura Apertura + encoder S encoder - encoder ATTENZIONE: Per il funzionamento degli encoder è indispensabile che entrambe le ante in posizione di chiusura si appoggino a un fermo meccanico. ATTENZIONE: Collegare sempre il cavo di terra al sistema di terra della rete di alimentazione. Utilizzare cavo con sezione minima di 2,5 mm2 6 1Motoriduttore. 2Lampeggiante. 3Antenna. 4 Selettore a chiave. 5Fotocellula. 6Colonnina. 7 Cassa di fondazione 8 Cartello di avvertenza. 9 Box centralina 4 9 5 5 8 6 1 7 5 3 2 7 5 6 1 SBLOCCO DI EMERGENZA In caso di mancanza di corrente elettrica, il cancello può essere sbloccato meccanicamente agendo sulla staffa motore. Inserire la leva di sblocco in dotazione con la maniglia rivolta verso il centro del cancello e ruotare di 180° in senso antiorario. Il ripristino dell’automazione avverrà automaticamente al primo azionamento del motore. 7 ITALIANO QUADRO D’INSIEME ITALIANO MANUTENZIONE PERICOLO: per qualsiasi tipo di manutenzione, togliere l’alimentazione. Il motoriduttore viene fornito con lubrificazione permanente a grasso o a olio e quindi non necessita di manutenzioni. RACCOMANDAZIONI FINALI 1) Eseguire la messa a terra. 2) Tenere sempre separati i cavi di alimentazione dai cavi di comando. 3) Dotare l’impianto di dispositivi di sicurezza come: fotocellule, limitatori di coppia, costola sensibile Quando l’impianto dà su pubblica via, bisogna installare almeno due dei suddetti dispositivi (scelti fra tre tipi o anche dello stesso tipo). 4) Ai fini dello sbloccaggio è necessario che il cancello, una volta chiuso, non spinga sulle battute di arresto. 5) Realizzare l’impianto secondo le norme vigenti. 6) Il controllo della forza di spinta deve essere dato dalla presenza di un regolatore di coppia nell’impianto. 7) E’ assolutamente necessario che prima dell’installazione del motoriduttore, il cancello sia dotato delle battute di arresto. 8) Per il controllo della taratura, servirsi di un dinamometro. 9) Tutti gli interventi di manutenzione, riparazione e regolazione devono essere eseguiti da personale qualificato. SMALTIMENTO DELL’IMBALLO I componenti dell’imballo (cartone, plastiche etc.) sono assimilabili ai rifiuti solidi urbani e possono essere smaltiti senza alcuna difficoltà, semplicemente effettuando la raccolta differenziata per il riciclaggio. Prima di procedere è sempre opportuno verificare le normative specifiche vigenti nel luogo d’installazione. NON DISPERDERE NELL’AMBIENTE! SMALTIMENTO DEL PRODOTTO I nostri prodotti sono realizzati con materiali diversi. La maggior parte di essi (alluminio, plastica, ferro, cavi elettrici) è assimilabile ai rifiuti solidi e urbani. Possono essere riciclati attraverso la raccolta e lo smaltimento differenziato nei centri autorizzati. Altri componenti (schede elettroniche, batterie dei radiocomandi etc.) possono invece contenere sostanze inquinanti. Vanno quindi rimossi e consegnati a ditte autorizzate al recupero e allo smaltimento degli stessi. Prima di procedere è sempre opportuno verificare le normative specifiche vigenti nel luogo di smaltimento. NON DISPERDERE NELL’AMBIENTE! 8 NOTEANMERKUNGEN NOTES NOTA NOTES OBSERVAÇÕES ENGLISH IMPORTANT REMARKS TECHNICAL DATA PREPARATORY STEPS OVERALL DIMENSIONS POSITIONING THE FOUNDATION BOX INSTALLING THE MOTOR REDUCER GEAR UNIT INSTALLATION OF THE STOP LIMIT SWITCHES ELECTRICAL CONNECTIONS INSTALLATION LAYOUT EMERGENCY UNBLOCKING MAINTENANCE DISPOSAL INDEX 10 11 11 11 12 13 13 14 15 15 16 16 IMPORTANT REMARKS For any installation problems please contact Key Automation S.p.A. TEL. (+39) 0421 307456 has the right to modify the product without previous notice; it also declines any responsibility to damage or injury to people or things caused by improper use or wrong installation. Please read this instruction manual very carefully before installing and programming your control unit. • This instruction manual is only for qualified technicians, who specialize in installations and automations. • The contents of this instruction manual do not concern the end user. • Every programming and/or every maintenance service should be done only by qualified technicians. AUTOMATION MUST BE IMPLEMENTED IN COMPLIANCE WITH THE EUROPEAN REGULATIONS IN FORCE: EN 60204-1 (Machinery safety. electrical equipment of machines, part 1: general rules) EN 12445 (Safe use of automated locking devices, test methods) EN 12453 (Safe use of automated locking devices, requirements) • The installer must provide for a device (es. magnetotermical switch) ensuring the omnipolar sectioning of the equipment from the power supply. The standards require a separation of the contacts of at least 3 mm in each pole (EN 60335-1). • The plastic case has an IP55 insulation; to connect flexible or rigid pipes, use pipefittings having the same insulation level. • Installation requires mechanical and electrical skills, therefore it shall be carried out by qualified personnel only, who can issue the Compliance Certificate concerning the whole installation (Machine Directive 2006/42/CEE, Annex IIA). • The automated vehicular gates shall comply with the following rules: EN 13241-1, EN 12453, EN 12445 as well as any local rule in force. • Also the automation upstream electric system shall comply with the laws and rules in force and be carried out workmanlike. • The door thrust force adjustment shall be measured by means of a proper tool and adjusted according to the max. limits, which EN 12453 allows. • We recommend to make use of an emergency button, to be installed by the automation (connected to the control unit STOP input) so that the gate may be immediately stopped in case of danger. • The appliance is not to be used by children or persons with reduced physical, sensory or mental capabilities, or lack of experience and knowledge, unless they have been given supervision or instruction. • Children being supervised do not play with the appliance. 10 TYPES AND CHARACTERISTICS 230 Vac Under grounded gear motor, with grease, with opening and closing limit 24 Vdc Under grounded gear motor, with grease with opening and closing limit 230 Vac Under grounded gear motor, lubricated in oil bath, with opening and closing limit. TECHNICAL DATA 900INT (CT-2/CT-201)* 230 Vac 230 W 1A 10 µF 67 IP 300 Nm 108° Max 30 % 150° C 20 sec -20° +70°C 11 Kg Suggested control unit Power supply Maximum power Idling current Capacitor Protection Maximum torque Shutter opening Working cycle Thermal protection Opening time (90°) Working temperature Motor weight 900INTOIL (CT-2/CT-201)* 230 Vac 230 W 1A 10 µF 67 IP 300 Nm 108° Max 80 % 150° C 20 sec -20° +70°C 11 Kg 900INT-24 (CT-824S)* 24 Vdc 120 W 5A 67 IP 250 Nm 108° Max 80 % 21 sec -20° +70°C 10,8 Kg The series of actuators UNDER, has been devised to serve gates up to 600 Kg with leaf up to 3 meters wide (look at the table technical data). Before proceeding with the installation, please make sure that your gate opens and closes freely, and that: Max. leaf weight (kg) • Hinges and pins are in optimum condition and properly greased. • No obstacles are within the moving area. • There is no friction with the ground or between the leaves. • Your gate shall be equipped with central and side stops, which are fundamental for the good system operation. 600 500 400 300 200 100 1 2 Max. leaf lenght (m) 2,5 OVERALL DIMENSIONS 11 3 ENGLISH 900INT 900INT-24 900INT-OIL POSITIONING THE FOUNDATION BOX AND THE LEVER CONTROL AND BLOCKING SYSTEM > 63mm ENGLISH 1. Depending on the dimensions, dig a suitably sized foundation ditch (it is recommended to provide adequate drainage in order to avoid water pooling). 2. Place the foundation box inside the trench, with the support pivot aligned with the hinge axis. 3. Install a conduit for the electrical cables, and another for drainage. 4. Embed the foundation box in concrete, ensuring it is level and plumb. WARNING: ensure that the concrete used is properly cured prior to proceeding with the following steps. 5. Insert the ball E into the special hole after having greased it 6. Insert the control rod A over the foundation box supporting pivot B. 7. Fix with a strong welding the wing of the gate on the release lever C, then put everything on the driving bracket A 8. Grease the mechanism using the appropriate grease nipple D. 12 C D E A B 3 4 2 1 3. Assemble the lever engine (1) on the motor shaft and tighten the screw with washer switch (2). 4. Connect the lever engine (1) command to the bracket (3) through the long lever (4) and secure them together with screws M6x10 and washers supplied data. 5. Connect the motor to the control panel following the instructions in the manual installation of the card. INSTALLATION OF THE LIMIT SWITCHES 1. Move the gate in a position fully closed, then adjust the washer as shown below and fasten the screw M10x35 . 2. Place the gate in the maximum open position, and then attach the limit switch nut as shown in the figure, and tighten the screw. 13 ENGLISH INSTALLING THE MOTOR REDUCER 1. Place the motor reducer gear unit inside the foundation box. 2. Fix the motor reducer in place inside the foundation box by tightening the 4 nuts. WARNING: Your gate shall be equipped with central and side stops, which are fundamental for the good system operation. A ENGLISH SX DX B B ELECTRICAL CONNECTIONS UNDER 230V (900INT-900INT-OIL) COLOR CABLE Right Black Opening Gray Common Brown Closing Yellow/Green GND Left Closing Common Opening GND CAUTION: To operate the engine 230V is essential to connect the capacitor between black and brown of the motor. UNDER 24V (900INT-24) COLOR CABLE Blu Brown Black Yellow/Green Gray Right Opening Closing + encoder S encoder - encoder Left Closing Opening + encoder S encoder - encoder ATTENTION: For encoder operation, when in the closed position, both gate panels must rest against a mechanical stop. WARNING: Always connect the earth cable to the mains power earth system with a cable minimum cross sectional area of 2.5 mm2 14 1 UNDER actuator 2 Blinker 3 Aerial 4 Key or digital selector 5Photocells 6Column 7Housing 8 Warning board 9 Control unit 4 9 5 5 8 6 1 7 5 3 2 7 5 6 1 EMERGENCY UNBLOCKING In the case of a power failure, the gate can be unblocked mechanically by operating the motor. Insert the supplied unblocking lever and rotate 180° clockwise. Automation will be automatically restored the first time the motor is operated. 15 ENGLISH INSTALLATION LAYOUT DANGER: MAINTENANCE ENGLISH For any kind of maintenance, disconnect the power supply. The reduction grease is supplied with permanent lubrication grease and therefore does not require maintenance. For the correct maintenance of the system where the reduction gear is operative, proceed as follows: Clean and clear from debris periodically the rail and its wheels. In the event of malfunction, the system must not be used. Contact specialized personnel. DISPOSAL Dispose of materials in compliance with current standards GENERAL WARNINGS Attach labels that warn against crushing in a highly visible place or near the fixed controls; • Permanently attach the labels concerning manual release and place them near the manoeuvre device; • Markings must be visible even after the device has been installed. If markings are hidden after installation, this must be indicated in the instructions. • The movement motors must be provided with a label that instructs to keep children away from the moving door, or place the appropriate symbol (ISO 3864, see symbol) FINAL RECOMMENDATIONS Keep the remote control out of the reach of children and do not let them play with the control devices. • Supply the system with security systems such as photocells, sensitive frame, torque limiter. When the system is in proximity of a public street it is necessary to install at least two of the aforementioned devices (choose among three types or even of the same type). • Realize the system in compliance with current standards. • Always keep the supply cables separate from the control cables. • Carry out grounding. • It is absolutely necessary for the door to be provided with check stops prior to installation of the reduction gear. • In order to unlock it is necessary for the gate, once it is closed, not to push on the stop bead. • Control over the thrust force must be given by a torque limiter in the system. • All maintenance, repair and adjustment must be carried out by qualified personnel. • Motors with pressure-sensitive systems must be equipped with a label that says ATTENTION: RISK OF CRUSHING. 16 NOTEANMERKUNGEN NOTES NOTA NOTES OBSERVAÇÕES CONSEILS IMPORTANTS CARACTÉRISTIQUES TECHNIQUES OPÉRATIONS PRÉLIMINAIRES DIMENSIONS TOTALES POSITIONNEMENT DE LA CAISSE DE FONDATION MISE EN PLACE DU MOTORÉDUCTEUR MISE EN PLACE DES ARRÊTS DE FIN DE CORSE CONNEXIONS ÉLECTRIQUES SCHÉMA D’INSTALLATION DÉVERROUILLAGE D’URGENCE MAINTENANCE ÉLIMINATION INDEX 18 19 19 19 20 21 21 22 23 23 24 24 FRANÇAIS CONSEILS IMPORTANTS Pour tout précision technique ou problème d’installation Key Automation S.p.A. dispose d’un service d’assistance clients actif pendant les horaires de bureau TEL. (+39) 0421 307456 Key Automation S.p.A. se réserve le droit d’apporter d’éventuelles modifications au produit sans préavis; elle décline en outre toute responsabilité pour tous types de dommages aux personnes ou aux choses dus à une utilisation impropre ou à une mauvaise installation. Avant de proceder avec l’installation et la programmation, lire attentivement les notices. • Ce manuel d’instruction est destiné à des techniciens qualifiés dans le domaine des automatismes. • Aucune des informations contenues dans ce livret pourra être utile pour le particulier. • Tous opérations de maintenance ou programmation doivent être faites à travers de techniciens qualifiés. L’AUTOMATION DOIT ÊTRE RÉALISÉE CONFORMÉMENT AUX DISPOSITIFS NORMATIFS EUROPÉENS EN VIGUEUR: EN 60204-1 (Sécurité de la machinerie. Équipement électrique des machines, partie 1: réglés générales). EN 12445 (Sécurité dans l’utilisation de fermetures automatisées, méthodes d’essai). EN 12453 (Sécurité dans l’utilisation de fermetures automatisées, conditions requises). • L’installateur doit pourvoir à l’installation d’un dispositif (ex. interrupteur magnéto thermique) qui assure la coupure omnipolaire de l’équipement du réseau d’alimentation. La norme requiert une séparation des contacts d’au moins 3 mm pour chaque pôle (EN 60335-1). • L’enveloppe en plastique de la carte possède une protection IP55, pour la connexion de tubes rigides ou flexibles utiliser des raccordements possédant le même niveau de protection. • L’installation requiert des compétences en matière d’électricité et mécaniques; doit être faite exclusivement par techniciens qualifiés en mesure de délivrer l’attestation de conformité pour l’installation (Directive 2006/42/CEE, - IIA). • Il est obligatoire se conformer aux normes suivantes pour fermetures véhiculaires automatisées: EN 13241-1, EN 12453, EN 12445 et à toutes éventuelles prescriptions nationales. • Même l’installation électrique ou on branche l’automatisme doit répondre aux normesen vigueur et être fait à règles de l’art. • La régulation de la force de poussée du vantail doit être mesurée avec outil spécial et réglée selon les valeurs maxi admis par la norme EN 12453. • Nous conseillons d’utiliser un poussoir d’urgence à installer près de l’automatisme (branché à l’entrée STOP de l’armoire de commande de façon qui soit possible l’arrêt immédiat du portail en cas de danger. • L’appareillage ne doit pas être utilisé par des enfants ou des personnes affectés d’handicaps physiques et/ou psychiques, sans la nécessaire connaissance ou supervision de la part d’une personne compétente. • Veillez à ce que les enfants ne puissent jouer avec l’appareillage. 18 MODÈLES ET CARACTÉRISTIQUES 230 Vac Moteur à engrenages fixé à la partie inférieure, graissé, avec une limite d’ouverture et de fermeture. 24 Vdc Moteur à engrenages fixé à la partie inférieure, graissé, avec une limite d’ouverture et de fermeture. 230 Vac Moteur à engrenages fixé à la partie inférieure, lubrifié dans un bain d’huile, avec une limite d’ouverture et de fermeture. FICHE TECHNIQUE 900INT (CT-2/CT-201)* 230 Vac 230 W 1A 10 µF 67 IP 300 Nm 108° Max 30 % 150° C 20 sec -20° +70°C 11 Kg Unité de contrôle suggérée Alimentation Puissance maximum Absorption à vide Condensateur Protection Couple maximum Ouverture volet Cycle de travail Protection thermique Temps d’ouverture Température de service Poids moteur 900INTOIL (CT-2/CT-201)* 230 Vac 230 W 1A 10 µF 67 IP 300 Nm 108° Max 80 % 150° C 20 sec -20° +70°C 11 Kg 900INT-24 (CT-824S)* 24 Vdc 120 W 5A 67 IP 250 Nm 108° Max 80 % 21 sec -20° +70°C 10,8 Kg Poids maxi du battant (kg) Ce série des opérateurs électromécaniques UNDER, a été crée pour automatiser portails à battant jusqu’à 600 Kg de poids et vantail de 3m selon les models (voir tableau caractéristiques techniques). Avant de procéder à l’installation il est fondamental de s’assurer que votre portail s’ouvre et se referme sans problème et de vérifier scrupuleusement les points suivants: • Gonds et tourillons en très bon état et graissés opportunément. • Aucune entrave ne doit empêcher le mouvement. • Aucun frottement contre le sol et entre les vantaux. • Votre portail doit être équipé d’arrêts central et latéraux : ceux-ci sont indispensables pour un bon fonctionnement du système. 600 500 400 300 200 100 1 2 Longuer maxi du battant (m) 2,5 DIMENSIONS TOTALES 19 3 FRANÇAIS 900INT 900INT-24 900INT-OIL POSITIONNEMENT DE LA CAISSE DE FONDATION ET DU SYSTÈME DE LEVIERS DE COMMANDE ET DÉBLOCAGE > 63mm FRANÇAIS 1. Effectuer, suivant les mesures d’encombrement, un trou de fondation en ayant soin de prévoir un drainage efficace de manière à éviter la stagnation d’eau. 2. Placer la caisse à l’intérieur du trou, avec le pivot dans l’axe de la charnière du portail. 3. Prévoir un conduit pour les câbles électriques et un pour le drainage. 4. Couler le ciment sur la caisse de fondation en veillant à la correcte mise à niveau. ATTENTION: avant de procéder avec les points suivants respecter les temps de prise du béton utilisé 5. Insérer la bille E dans le spécial trou après l’avoir graissée 6. Insérer sur le pivot de la caisse B la bride de commande A 7. Fixer avec une soudure forte le vantail du portail sur le levier de déverrouillage C, ensuite positionner tout sur l’étrier de commande A en correspondance du trou 8. Graisser au moyen d’un bec graisseur D prévu à cet effet 20 C D E A B MISE EN PLACE DU MOTORÉDUCTEUR 1. Placer le motoréducteur à l’intérieur de la caisse de fondation. 2. Fixer le motoréducteur à la caisse de fondation en serrant les 4 écrous. 3 4 1 3. Assemblez le mécanisme du levier (1) l'axe du moteur et serrez la vis avec sa rondelle (2). 4. Connectez la commande du mécanisme du levier (1) à l'équerre (3) via le levier (4) et fixez-les ensemble avec des vis M6x10 et les rondelles fournies. 5. Connectez le moteur au tableau de bord en suivant les instructions du manuel d'installation de la carte. INSTALLATION DES BAGUETTES DE BLOCAGE 1. Placez la porte en position totalement fermée, puis réglez la rondelle comme montré ci-dessous et resserrez l'écrou M10x35. 2. Placez la porte en position ouverte au maximum, puis attachez l'écrou de la baguette de blocage comme montré sur l'image, puis resserrez la vis. 21 FRANÇAIS 2 ATTENTION: Votre portail doit être équipé d’arrêts central et latéraux : ceux-ci sont indispensables pour un bon fonctionnement du système. A FRANÇAIS SX DX B B CONNEXIONS ÉLECTRIQUES UNDER 230V (900INT-900INT-OIL) CÂBLE MOTEUR Moteur DX Noir Ouverture Gris Commun Marron Fermeture Vert/Jaune GND Moteur SX Fermeture Commun Ouverture GND ATTENTION: Pour le bon fonctionnement des moteurs 230V, il est indispensable de connecter le condensateur de refroidissement aux parties noires et marrons du moteur. UNDER 24V (900INT-24) CÂBLE MOTEUR Bleu Marron Noir Vert/Jaune Gris Moteur DX Ouverture Fermeture + encoder S encoder - encoder Moteur SX Chiusura Fermeture + encoder S encoder - encoder ATTENTION: Pour le fonctionnement des encodeur, il est indispensable qu’en position de fermeture chaque vantail soit en appui sur une butée mécanique ATTENTION: Relier toujours le câble de terre au système de terre du réseau d’alimentation. Utiliser un câble avec section minimum de 2,5 mm2 22 SCHÉMA D’INSTALLATION 1 Actuateur UNDER. 2Clignotant 3 Antenne radio 4 Sélecteur à clé ou digital 5Photocellules 6Colonne 7 Caisse de fondation 8 Panneau d’avertissement 9 Armoire de commande 4 9 5 5 6 1 7 5 3 2 7 5 6 1 DÉVERROUILLAGE D’URGENCE En cas d’absence de courant électrique, le portail peut être également déverrouillé mécaniquement en agissant sur le moteur. Insérer le levier de déblocage déjà fourni et tourner de 180° dans le sens anti-horaire. Le rétablissement de l’automation arrivera automatiquement lors du premier actionnement du moteur. 23 FRANÇAIS 8 DANGER : MAINTENANCE Avant d’effectuer toute opération de maintenance, toujours couper l’alimentation électrique. Le motoréducteur fourni est à graissage permanent et ne nécessite donc d’aucune maintenance. Pour effectuer une bonne maintenance de l’installation équipée du motoréducteur, procéder comme suit : • Nettoyer et retirer périodiquement les éventuels corps étrangers des galets et du rail de guidage. En cas de mauvais fonctionnement, ne pas utiliser le système et contacter le personnel spécialisé. MISE AU REBUT Le matériel doit être éliminé en respectant les normes en vigueur. FRANÇAIS AVERTISSEMENTS GÉNÉRAUX • Fixer les étiquettes d’avertissement du risque d’écrasement en un endroit bien visible ou à proximité de commandes fixes ; • Fixer de manière permanente les étiquettes concernant l’ouverture manuelle et les apposer près de l’organe de manœuvre ; • Les marquages doivent être visibles même après l’installation du dispositif. Si le marquage résulte caché après l’installation, il doit être reporté dans les instructions. • Les moteurs d’activation doivent être munis d’une étiquette indiquant d’éloigner les enfants de la porte pendant les manœuvres d’ouverture et fermeture, ou reporter le symbole (ISO 3864, voir symbole) RECOMMANDATIONS FINALES Conserver la télécommande hors de la portée des enfants et ne pas leur permettre de jouer avec les dispositifs de commande. • Équiper l’installation de dispositifs de sécurité tels que : photocellule, bord sensible et limiteur de couple. Si la porte donne directement sur la voie publique, il faut installer au moins deux des dispositifs de sécurité indiqués plus haut (de même type ou de types différents). • Réaliser l’installation conformément aux normes en vigueur. • Séparer toujours les câbles d’alimentation des câbles de commande • Effectuer la mise à la terre. • Il est absolument nécessaire d’équiper la porte de butées d’arrêt avant l’installation du motoréducteur. • Aux fins du déblocage, il est nécessaire que la porte fermée ne puisse comprimer les butées d’arrêt. • Le contrôle de la force de poussée doit être effectué en utilisant le régulateur de couple de l’installation. • Toutes les opérations de maintenance, de réparation et de réglage doivent être effectuées par du personnel qualifié. • Les moteurs à système sensible au contact doivent être munis d’une étiquette reportant : ATTENTION RISQUE D’ÉCRASEMENT. 24 NOTEANMERKUNGEN NOTES NOTA NOTES OBSERVAÇÕES INHALTSVERZEICHNIS WICHTIGE HINWEISE FÜR DEN INSTALLATEUR TECHNISCHE DATEN VORBEREITNDE ARBEITSSCHRITTE AUSSENABMESSUNGEN POSITIONIERUNG DES FUNDAMENTKASTENS INSTALLATION DES GETRIEBEMOTORS INSTALLATION DER FESTSTELLER AM ENDANSCHLAG ELEKTRISCHE ANSCHLÜSSE INSTALLATIONSPLAN NOTFALLFREIGABE WARTUNG ENTSORGUNG 26 27 27 27 28 29 29 30 31 31 32 32 DEUTSCH WICHTIGE HINWEISE Für technische Erläuterungen oder Installations probleme verfügt die Firma Key Automation S.p.A. über einen Kundendienst, der zu Bürozeiten unter der Telefonnummer TEL. (+39) 0421 307456 erreicht werden kann. Die Firma Key Automation S.p.A. behält sich das Recht vor, das Produkt ohne vorherige Ankündigungen abzuändern; die Übernahme der Haftung für Schäden an Personen oder Sachen, die auf einen unsachgemäßen Gebrauch oder eine fehlerhafte Installation zurückzuführen sind, wird abgelehnt. Um die Steuerung fehlerfrei zu installieren und programmieren zu können, lesen Sie bitte diese Bedienungsanleitung sehr aufmerksam durch. • Diese Bedienungsanleitung ist nur für Fachtechniker, die auf Installationen und Automationen von Toren. • Keine Information dieser Bedienungsanleitung ist für den Endbenutzer nützlich. • Jede Programmierung und/oder jede Wartung sollte nur von geschulten Technikern vorgenommen werden. DIE AUTOMATISIERUNG MUSS IN ÜBEREINSTIMMUNG MIT DEN GELTENDEN EUROPÄISCHEN NORMEN ERFOLGEN: EN 60204-1 (Sicherheit der Maschine elektrische Ausrüstungen von Maschinen,Teil 1: allgemeine Anforderungen) EN 12445 (Nutzungssicherheit kraftbetätigter Tore Prüfverfahren) EN 12453 (Nutzungssicherheit kraftbetätigter Tore Anforderungen) • Der Installateur muss eine Vorrichtung (z.B. thermomagn. Schalter) anbringen, die Trennung aller Pole des Geräts zum Versorgungsnetz garantiert. Die Norm verlangt eine Trennung der Kontakte von mindestens 3 mm an jedem Pol (EN 60335-1). • Für den Anschluss von Rohren und Schläuchen oder Kabeldurchgängen sind Verbindungen zu verwenden, die dem Sicherungsgrad IP55 entsprechen. • Die Installation erfordert Kenntnisse auf den Gebieten der Elektrik und Mechanik; sie darf ausschließlich von kompetentem Personal durchgeführt werden, welches berechtigt ist, eine vollständige Konformitätserklärung vom Typ A auszustellen (Maschinenrichtlinie 2006/42/CEE, Anlage IIA). • Für automatisch betriebene Rolltore ist die Einhaltung der folgenden Normen obligatorisch: EN 13241-1, EN 12453, EN 12445 und alle eventuell geltenden, regionalen Vorschriften. • Auch die elektrische Anlage der Automatik muss den geltenden Normen genügen, und fachgerecht installiert werden. • Die Schubkraft des Torflügels muss mit Hilfe eines geeigneten Instruments gemessen, und entsprechend den in Richtlinie EN 12453 definierten Höchstwerten eingestellt werden. • Es wird empfohlen, in der Nähe der Automatik einen Notaus- Schalter zu installieren (mit Anschluss an en Eingang STOP der Steuerkarte), so dass bei Gefahr ein unverzügliches Halten des Tors bewirkt werden kann. • Das Gerät darf nicht von körperlich oder psychisch behinderten Kindern oder Personen ohne entsprechende Kenntnisse oder Aufsicht seitens einer kompetenten Person betätigt werden. • Kinder so beaufsichtigen, dass sie nicht mit dem Gerät spielen. 26 MODELLE UND EIGENSCHAFTEN 230 V AC Unterflur-Drehtorantrieb, geschmiert, mit Endschalter beim Öffnen und Schließen 24 V AC Unterflur-Drehtorantrieb, geschmiert, mit Endschalter beim Öffnen und Schließen 230 V AC Unterflur-Drehtorantrieb, in Ölbad geschmiert, mit Endschalter beim Öffnen und Schließen. TECHNISCHE DATEN 900INT (CT-2/CT-201)* 230 Vac 230 W 1A 10 µF 67 IP 300 Nm 108° Max 30 % 150° C 20 sec -20° +70°C 11 Kg Empfohlener Betriebssteuerung Versongung Maximale Leistung Stromaufnahme ohne Belastung Kondensator Schutzart Maximales Moment Turflugeloffnung Arbeitszyklus Wärmeschutz Öffnungszeit (90°) Betriebstemperatur Motorgewicht 900INTOIL (CT-2/CT-201)* 230 Vac 230 W 1A 10 µF 67 IP 300 Nm 108° Max 80 % 150° C 20 sec -20° +70°C 11 Kg 900INT-24 (CT-824S)* 24 Vdc 120 W 5A 67 IP 250 Nm 108° Max 80 % 21 sec -20° +70°C 10,8 Kg Max. Torflügelgewicht(kg) Die Serie von Antrieben UNDER ist „geboren“ um Flügeltore bis 600 Kg und mit Tor-Flügeln bis 3 Meter Länge zu führen. (Bitte sehen Sie in die Tafel mit den technischen Daten). Vor der Installation muss sichergestellt werden, dass sich das Tor hindernisfrei öffnen und schließen lässt, ferner ist es auf folgendeVoraussetzungen zu prüfen: • Angeln und Stifte müssen sich in einwandfreiem Zustand befinden und hinreichend geschmiert sein. • Kein Hindernis darf die Bewegung beeinträchtigen. • Es darf keine Reibung zwischen den Torflügeln und dem Grund bestehen. • Ihr Tor muss mit zentralen und seitlichen Stoppern ausgerüstet sein: Diese sind für die korrekte Funktion des Systems unentbehrlich. 600 500 400 300 200 100 1 2 Max. Torflügelweite (m) 2,5 AUSSENABMESSUNGEN 27 3 DEUTSCH 900INT 900INT-24 900INT-OIL POSITIONIERUNG DES FUNDAMENTKASTENS UND DES HEBELSYSTEMS FÜR STEUERUNG UND FREIGABE > 63mm DEUTSCH 1. Je nach Raumbedarf ein Fundament ausheben (eine gute Drainage ist empfehlenswert, um Wasserstau zu vermeiden). 2. Den Kasten in die ausgehobene Grube einsetzen, wobei der Stift mit der Scharnierachse ausgerichtet sein muss. 3. Einen Gang für die elektrischen Kabel und einen für die Drainage anlegen. 4. Den Fundamentkasten im Zement auf die richtige Höhe versenken und mit der Wasserwaage ausrichten. ACHTUNG: vor der Weiterarbeit die Härtungszeiten des verwendeten Zements abwarten. 5. Die Kugel E ins entsprechenden Loch einführen, nachdem ist die geschmiert worden 6. Auf den Stift des Kastens B den Steuerbügel A einführen. 7. Bei eine starke Schweißung, auf den Freigabehebel C den Torflügel befestigen, dann auf den entsprechenden Loch des Steuerbügel A das Ganze legen. 8. Mit entsprechender D Schmierdüse schmieren. 28 C D E A B INSTALLATION DES GETRIEBEMOTORS 1. Getriebemotor im Inneren des Fundamentkastens positionieren. 2. Getriebemotor am Fundamentkasten durch Anziehen der 4 Muttern befestigen. 3 4 2 DEUTSCH 1 3. Setzen Sie die Motorschaltung (1) auf die Antriebswelle und ziehen Sie die Schraube zusammen mit der Unterlegscheibe fest (2). 4. Verbinden Sie den Kontrollhebel der Motorschaltung (1), mit Hilfe des langen Hebels (4) mit den Bremsen (3) und befestigen Sie diese mit den beiliegenden M6x10-Schrauben und Unterlegscheiben aneinander. 5. Schließen Sie den Motor an die Systemsteuerung an und folgen Sie der Anleitung im Handbuch. EINBAU DER VERSCHLUSSSCHALTER 1. Schließen Sie den Schieber komplett, dann justieren Sie die Unterlegscheibe, wie unten beschrieben und ziehen Sie die M10x35-Schrauben fest. 29 2. Bringen Sie den Schieber in die maximal geöffnete Position, fügen Sie die Verschlussschaltermutter, wie in der Abbildung dargestellt, hinzu und ziehen Sie die Schraube fest. ACHTUNG: Ihr Tor muss mit zentralen und seitlichen Stoppern ausgerüstet sein: Diese sind für die korrekte Funktion des Systems unentbehrlich. A SX DX B B DEUTSCH ELEKTRISCHE ANSCHLÜSSE UNDER 230V (900INT-900INT-OIL) MOTOR Motor DX Sschwarz Öffnung Grau Gemeinsam Braun Schließen Grun/Gelb GND Motor SX Schließen Gemeinsam Öffnung GND ACHTUNG: Für den Betrieb der 230V-Motoren muss der Parallelkondensator unbedingt zwischen schwarz und braun des Getriebes angeschlossen werden. UNDER 24V (900INT-24) MOTOR Blau Braun Sschwarz Grun/Gelb Grau Motor DX Öffnung Schließen + encoder S encoder - encoder Motor SX Schließen Öffnung + encoder S encoder - encoder ACHTUNG: Für den Betrieb des Encoders ist es unerlässlich, dass beide sich ingeschlossener Position befindenden Torflügel an einem mechanischen Feststeller anliegen. ACHTUNG: stets das Erdungskabel an das Erdungssystem des Versorgungsnetzes anschließen. Dazu das spezielle in der Abbildung aufgeführte Faston und ein Kabel mit Mindestquerschnitt von 2,5 mm2 verwenden 30 INSTALLATIONSPLAN 1 Stellantrieben UNDER 2Blinkvorrichtung 3Antenne 4 Schlüssel- oder Digitalwähler 5Lichtschranke 6Standsäule 7Fundamentkasten 8Hinweisschild 9Motorsteuerung 4 9 5 5 8 6 1 7 3 2 DEUTSCH 5 7 5 6 1 NOTFALLFREIGABE Bei elektrischem Stromausfall kann man durch Betätigen des Motors die mechanische Freigabe des Tors bewirken. Mitgelieferten Freigabehebel einführen und gegen den Uhrzeigersinn um 180° drehen. Die Wiederherstellung des Automatismus erfolgt automatisch beim nächsten Betätigen des Motors. 31 WARTUNG GEFAHR: Bei allen Wartungsarbeiten den Strom abstellen. Der Antrieb wird mit einer Dauerfettschmierung geliefert und bedarf daher keinerlei Wartung. Für die ordnungsgemäße Wartung der Anlage, in die der Antrieb eingebaut ist, wie folgt vorgehen: • Die Führungsschiene und die Laufräder regelmäßig von Schmutz befreien und reinigen. Bei Auftreten von Betriebsstörungen darf das System nicht benutzt werden. Wenden Sie sich an befugtes Fachpersonal. ENTSORGUNG Die Materiale sind gemäß der geltenden Bestimmungen zu entsorgen. ALLGEMEINE HINWEISE DEUTSCH • Die Etiketten mit dem Hinweis auf die Einklemmgefahr an einer gut sichtbaren Stelle oder in der Nähe der fest eingebauten Steuerschalter befestigen. • Die Etiketten für die manuelle Freigabe dauerhaft in der Nähe der Betätigungsvorrichtung anbringen. • Die Markierungen müssen auch nach der Installation der Vorrichtung sichtbar sein. Sollte die Markierung nach der Installation verdeckt sein, muss dies in den Bedienungsanweisungen vermerkt werden. • Die Antriebsmotoren müssen mit einer Warnetikette versehen sein, die darauf hinweist, Kinder von dem in Bewegung befindlichen Tor fernzuhalten. Als Alternative kann das entsprechende Symbol (ISO 3864, siehe Symbol) angebracht werden. ABSCHLIESSENDE EMPFEHLUNGEN Die Fernbedienung außer Reichweite von Kindern aufbewahren und das Spielen mit den Steuervorrichtungen verbieten. • Die Anlage mit Sicherheitsvorkehrungen ausstatten: Lichtschranken, Sicherheitsleiste, Drehmomentbegrenzer. Wenn sich die Anlage an einer öffentlichen Straße befindet, muss man mindestens zwei der vorgenannten Vorrichtungen anbringen (unter drei Typen auswählbar oder auch vom selben Typ). • Die Anlage gemäß den geltenden Bestimmungen ausführen. • Die Versorgungskabel immer von den Steuerkabeln getrennt halten • Die Erdung vornehmen. • Vor dem Einbau des Antriebs muss das Tor unbedingt mit den Endanschlägen ausgerüstet sein. • Zur Entriegelung des geschlossenen Tors darf es nicht auf die Anschläge drücken. • Die Steuerung der Schubkraft muss durch einen Drehmomentregler der Anlage erfolgen. • Alle Wartungs-, Reparatur- und Einstellungsarbeiten dürfen nur von Fachpersonal ausgeführt werden. • Die Motoren mit einem druckempfindlichen System müssen mit einer Etikette mit folgender Aufschrift versehen sein: ACHTUNG EINKLEMMGEFAHR. 32 NOTEANMERKUNGEN NOTES NOTA NOTES OBSERVAÇÕES ADVERTENCIAS IMPORTANTES DATOS TÉCNICOS OPERACIONES PRELIMINARES DIMENSIONES TOTALES UBICACIÓN DE LA CAJA DE CIMENTACIÓN INSTALACIÓN DEL MOTORREDUCTOR INSTALACIÓN DE LOS TOPES DE DETENCIÓN CONEXIONES ELÉCTRICAS ESQUEMA DE INSTALACIÓN DESBLOQUEO DE EMERGENCIA MANTENIMIENTO ELIMINACIÓN ÍNDICE 34 35 35 35 36 37 37 38 39 39 40 40 ADVERTENCIAS IMPORTANTES Por cualquier problema técnico ponerse en contacto con el servicio asistencia Key Automation S.p.A. TEL. (+39) 0421 307456 Key Automation S.p.A. se reserva el derecho de aportar eventuales modificaciones al producto sin previo aviso; además, no se hace responsable de daños a personas o cosas debidos a un uso impropio o a una instalación errónea. Antes de proceder a la instalación y programación es aconsejable leer bien las instrucciones. • Dicho manual está destinado exclusivamente a técnicos calificados en las instalaciones de automatismos. • Ninguna de las informaciones contenidas en dicho manual puede ser de utilidad para el usuario final. • Cualquier operación de mantenimiento y programación tendrá que ser hecha por técnicos calificados en las instalaciones de automatismos. ESPAÑOL LA AUTOMATIZACIÓN DEBE SER REALIZADA EN CONFORMIDAD A LAS VIGENTES NORMATIVAS EUROPEAS: EN 60204-1 (Seguridad de la maquinaria. Equipamiento eléctrico de las máquinas, partes 1: reglas generales). EN 12445 (Seguridad en el uso de cierres automatizados, métodos de prueba) EN 12453 (Seguridad en el uso de cierres automatizados, requisitos) • El instalador debe proveer la instalación de un dispositivo (ej. interruptor magnetotérmico) que asegure el seccionamiento omnipolar del aparato de la red de alimentación. La normativa requiere una separación de los contactos de mínimo 3 mm en cada polo (EN 60335-1). • Para la conexión de tubos rígidos o flexibles y pasacables, utilizar manguitos conformes al grado de protección IP55 como la caja de plástico que contiene la placa. • La instalación requiere competencias en el campo eléctrico y mecánico; debe ser realizada únicamente por personal cualificado en grado de expedir la declaración de conformidad en la instalación (Directiva máquinas 2006/42/ CEE, anexo IIA). • Es obligatorio atenerse a las siguientes normas para cierres automatizados con paso de vehículos: EN 13241-1, EN 12453, EN 12445 y a las eventuales prescripciones nacionales. • Incluso la instalación eléctrica antes de la automatización debe responder a las vigentes normativas y estar realizada correctamente. • La regulación de la fuerza de empuje de la hoja debe medirse con un instrumento adecuado y regulada de acuerdo con los valores máximos admitidos por la normativa EN 12453. • El equipo no debe ser utilizado por infantes o personas con discapacidades físicas o psíquicas, sin el debido conocimiento o supervisión por parte de una persona competente. • Vigile a los niños de modo que no jueguen con el equipo. 34 MODELOS Y CARACTERÍSTICAS 900INT 900INT-24 900INT-OIL 230 Vac Motorreductor enterrado, con grasa, con límite de apertura y cierre 24 Vdc Motorreductor enterrado, con grasa, con límite de apertura y cierre 230 Vac Motoreductor enterrado, lubricado en baño de aceite, con límite de apertura y cierre. DATOS TÉCNICOS 900INT (CT-2/CT-201)* 230 Vac 230 W 1A 10 µF 67 IP 300 Nm 108° Max 30 % 150° C 20 sec -20° +70°C 11 Kg Unidad de control sugerida Alimentacion Potencia nominal Absorcion en vacio Condensator Protección Par máximo Abertura puerta Ciclo de trabajo Termoproteccion Tiempo de apertura (90°) Temperatura de servicio Peso operador 900INTOIL (CT-2/CT-201)* 230 Vac 230 W 1A 10 µF 67 IP 300 Nm 108° Max 80 % 150° C 20 sec -20° +70°C 11 Kg 900INT-24 (CT-824S)* 24 Vdc 120 W 5A 67 IP 250 Nm 108° Max 80 % 21 sec -20° +70°C 10,8 Kg Peso máx. hoja (kg) • Bisagras y pernios en estado óptimo y oportunamente lubricados. • Ningún obstáculo debe impedir el movimiento. • Ningún roce entre el suelo y las hojas. • Su cancela ha de estar equipada de topes centrales y laterales estos son indispensables para un buen funcionamiento del sistema. 600 500 400 300 200 100 1 2 Longitud máx. hoja (m) 2,5 DIMENSIONES TOTALES 35 3 ESPAÑOL La serie de operadores UNDER ha sido estudiada para automatizar cancelas batientes pesadas hasta 600 Kg, con longitud de hoja hasta 3m según las versiones (ver tabla características técnicas). Antes de proceder con la instalación, es fundamental asegurarse de que vuestra cancela abra y cierre libremente y verificar los siguientes puntos: UBICACIÓN DE LA CAJA DE CIMENTACIÓN Y DEL SISTEMA DE PALANCA DE MANDO Y DESBLOQUEO > 63mm ESPAÑOL 1. Ejecutar con base a las dimensiones del obstáculo, una excavación de cimiento (se aconseja preveer un buen drenaje a modo de evitar el estancamiento del agua). 2. Coloque la caja en el interior de la excavación, con el perno alineado al eje de la bisagra. 3. Prevea un conducto para los cables eléctricos y uno para el drenaje. 4. Anegue en el hormigón la caja de cimentación, atendiendo la nivelación y el nivel. ATENCIÓN: antes de proceder con los siguientes puntos respete los tiempos de maduración del hormigón utilizado. 5. Introducir la esfera E en el agujero espreso después de haberla engrasada 6. Inserte sobre el perno de la caja B la abrazadera de mando A 7. Fijar con una buena soldadura la hoja de la cancela en la palanca de desbloqueo C, después posicionar todo sobre el soporte de comando A en correspondencia del agujero 8. Engrase mediante el adecuado rociador engrasador D. 36 C D E A B INSTALACIÓN DEL MOTORREDUCTOR 1. Coloque el motorreductor en el interior de la caja de cimiento. 2. Fije el motorreductor a la caja de cimentación apretando los cuatro dados. 3 4 2 1 3. Monte la palanca (1) sobre el eje del motor y apriete el tornillo con la arandela interruptor (2). ESPAÑOL 4. Conecte el mando de la palanca (1) al soporte (3) mediante la palanca larga (4) y asegúrelos con tornillos M6x10 y arandelas suministrados. 5. Conecte el motor al panel de control siguiendo las instrucciones que aparecen en el manual de instalación de la tarjeta. INSTALACIÓN DE LOS TOPES DE DETENCIÓN 1. Mueva la puerta hacia la posición completamente cerrada, luego ajuste la arandela como se muestra a continuación y asegure el tornillo M10x35 . 37 2. Coloque la puerta en la posición de apertura máxima, y luego sujete la tuerca del interruptor de límite como se muestra en la figura, y apriete el tornillo ATENCIÓN: Su cancela ha de estar equipada de topes centrales y laterales estos son indispensables para un buen funcionamiento del sistema. A SX DX B B CONEXIONES ELÉCTRICAS ESPAÑOL UNDER 230V (900INT-900INT-OIL) MOTOR Motor DX Negro Abertura Gris Comun Marron Cierre Amarillo/Verde GND Motor SX Cierre Comun Abertura GND ATENCIÓN: Para hacer funcionar el motor 230V es indispensable conectar el condensador entre el negro y el marrón del motor. UNDER 24V (900INT-24) MOTOR Azul Marron Negro Amarillo/Verde Gris Motor DX Abertura Cierre + encoder S encoder - encoder Motor SX Cierre Abertura + encoder S encoder - encoder ATENCIÓN: Para el funcionamiento de los codificadores es indispensable que ambas puertas en posición de cierre se apoyen en un seguro mecánica. ATENCIÓN: Conecte siempre el cable de tierra al sistema de masa de la red de alimentación Utilice la terminal adecuada indicada en la figura y un cable con una sección mínima de 2,5 mm2 38 ESQUEMA DE INSTALACIÓN 1 Actuador UNDER 2 Lámpara de señalización 3Antena. 4 Selector a llave o digital 5Fotocélulas 6Columna 7 Asiento (caja) 8 Letrero de aviso 9 Cuadro de maniobras 4 9 5 5 8 6 1 7 5 3 2 7 5 1 DESBLOQUEO DE EMERGENCIA En caso de ausencia de la corriente eléctrica, la cancela se puede desbloquear mecánicamente actuando sobre el motor. Inserte la palanca de desbloqueo incluido y gírela 180° en sentido contrario a las manecillas del reloj. El restablecimiento de la automatización ocurrirá automáticamente con el primer impulso del motor. 39 ESPAÑOL 6 MANTENIMIENTO PELIGRO: para cualquier tipo de mantenimiento, cortar la alimentación. El motorreductor se suministra con lubricación permanente de grasa, por lo tanto no necesita mantenimiento. Para un mantenimiento correcto de la instalación donde se ha aplicado el motorreductor, proceder como a continuación: periódicamente limpiar y liberar de los desechos el riel de guía y las ruedas relativas. ELIMINACIÓN Para cualquier defecto de funcionamiento, para reparaciones, mantenimientos o regulaciones se recomienda valerse de personal cualificado. La eliminación de los materiales debe realizarse respetando las normas vigentes RECOMENDACIONES FINALES ESPAÑOL 1. Efectuar la puesta a tierra. 2. Mantener siempre separados los cables de alimentación de los cables de mando. 3. Equipar la instalación con dispositivos de seguridad como: - fotocélulas. - limitadores de par - perfil de seguridad sensible Cuando la instalación da a una calle pública, es necesario instalar al menos dos de los dispositivos arriba citados (elegidos entre tres tipos o también del mismo tipo). 4. Para el desbloqueo es necesario que la reja, luego de haberse cerrado, no empuje en los topes. 5. Realizar la instalación según las normas vigentes. 6. El control de la fuerza de empuje debe ser realizada por la presencia de un regulador de par en la instalación. 7. Es absolutamente necesario que antes de la instalación del motorreductor, la reja esté equipada con los topes. 8. Según las normas vigentes, la fuerza de empuje de la reja no debe superar los 15 daN. Para el control del calibrado utilizar un dinamómetro. 9. Todas las intervenciones de mantenimiento, reparación y regulación deben ser efectuados por personal calificado. 40 NOTEANMERKUNGEN NOTES NOTA NOTES OBSERVAÇÕES AVISOS IMPORTANTES CARACTERÍSTICAS TÉCNICAS OPERAÇÕES PRELIMINARES DIMESÕES GLOBIS POSICIONAMENTO DA CAIXA DE FUNDAÇÃO INSTALAÇÃO DO MOTORREDUTOR INSTALAÇÃO DOS TRAVÕES DE FIM DE CURSO LIGAÇÕES ELÉCTRICAS ESQUEMA DE INSTALAÇÃO DESBLOQUEIO DE EMERGÊNCIA MANUTENÇÃO ELIMINAÇÃO SUMÁRIO 42 43 43 43 44 45 45 46 47 47 48 48 AVISOS IMPORTANTES Para esclarecimentos técnicos ou problemas de instalação a Key Automation S.p.A. dispõe de um serviço de assistência clientes activo em horário de abertura. TEL. (+39) 0421 307456 Key Automation S.p.A. reserva-se o direito de efectuar eventuais alterações ao produto sem aviso prévio; declina ainda qualquer responsabilidade pelos danos a pessoas ou coisas originados por uso impróprio ou instalação errada. LER ATENTAMENTE O SEGUINTE MANUAL DE INSTRUÇÕES ANTES DE PROCEDER À INSTALAÇÃO. • O presente manual de instruções destina-se exclusivamente ao pessoal técnico qualificado no sector das instalações de automações. • Nenhuma das informações contidas no manual pode ser interessante o útil ao utilizador final. • Qualquer operação de manutenção ou de programação deve ser realizada exclusivamente por pessoal qualificado. A AUTOMAÇÃO DEVE SER REALIZADA EM CONFORMIDADE COM AS NORMAS EUROPEIAS VIGENTES: EN 60204-1 (Segurança das máquinas, equipamento eléctrico das máquinas, parte 1: regras gerais). EN 12445 (Segurança nos cerramentos automatizados, métodos de teste). EN 12453 (Segurança no uso de cerramentos automatizados, requisitos). PORTUGUÊS • O instalador deve instalar um dispositivo (ex. interruptor térmico magnético), que assegure o seccionamento de todos os pólos do sistema da rede de alimentação. As normas exigem uma separação dos contactos de pelo menos 3 mm em cada polo (EN 60335-1). • Para a conexão dos tubos rijos e flexíveis ou passador de cabos, utilizar junções conformes ao grau de protecção IP55 ou superior. • A instalação requer competências no sector eléctrico e mecânico; só deve ser efectuada por pessoal qualificado habilitado a passar a declaração de conformidade de tipo A para a instalação completa (Directriz máquinas 2006/42/ CEE, apenso IIA). • É obrigatório respeitar as seguintes normas para cerramentos veiculares automatizados: EN 13241-1, EN 12453, EN 12445 e as eventuais prescrições nacionais. • A instalação a montante da automação também deve respeitar as normas vigentes e ser realizadas conforme as regras da arte. • A regulação da força de impulso da folha deve medir-se com ferramenta própria e ser regulada conforme os valores máximos admitidos pela norma EN 12453. • Aconselhamos utilizar um botão de emergência, a ser instalado nas proximidades da automação, (conectado com a entrada STOP da placa de comando) de maneira que seja possível parar imediatamente o portão no caso de perigo. • A aparelhagem não deve ser utilizada por crianças ou pessoas com deficiências físicas ou psíquicas sem o devido conhecimento ou supervisão de pessoa competente. • Não deixe as crianças brincarem com a aparelhagem. 42 MODELOS E CARACTERÍSTICAS 900INT 230 Vac Motor de engrenagem subterrâneo , com graxa, e com limite de abertura e fechamento 900INT-24 24 Vdc Motor de engrenagem subterrâneo, com graxa, e com limite de abertura e fechamento 900INT-OIL 230 Vac Motor de engrenagem subterrâneo , lubricado com banho de óleo, e com limite de abertura e fechamento. 900INT 900INTOIL 900INT-24 CARACTERÍSTICAS TÉCNICAS Sugestão de unidade de controle Energia Eléctrica Absorção a vácuo Absorção a vácuo Condensador Grau de protecção Impulso máximo Comprimento máximo porta Ciclo de trabalho Protecção térmica Tempo de abertura Température de fonctionnement Peso motor (CT-2/CT-201)* 230 Vac 230 W 1A 10 µF 67 IP 300 Nm 108° Max 30 % 150° C 20 sec -20° +70°C 11 Kg (CT-2/CT-201)* 230 Vac 230 W 1A 10 µF 67 IP 300 Nm 108° Max 80 % 150° C 20 sec -20° +70°C 11 Kg (CT-824S)* 24 Vdc 120 W 5A 67 IP 250 Nm 108° Max 80 % 21 sec -20° +70°C 10,8 Kg A série de actuadores UNDER foi estudada para automatizar portões a batente com peso de até 600 Kg, com folhas de até 3 m de comprimento, consoante os modelos (ver tabela características técnicas). Antes de iniciar a instalação é fundamental apurar que o portão se abre e fecha livremente e verificar escrupulosamente os seguintes pontos: 600 500 400 300 200 100 1 2 2,5 Comprimento máximo da folha (m) DIMESÕES GLOBIS 43 3 PORTUGUÊS Peso máximo da folha (kg) • Dobradiças e pinos em óptimo estado e bem lubrificados. • Não deve existir nenhum empecilho a impedir o movimento. • Não deve haver nenhum atrito com o solo e entre as folhas. • O portão deve ser dotado de paragem central e paragens laterais : estas são indispensáveis para um bom POSICIONAMENTO DA CAIXA DE FUNDAÇÃO E DO SISTEMA DE ALAVANCAS DE COMANDO E DESBLOQUEIO > 63mm PORTUGUÊS 1. Fazer uma escavação de acordo com as medidas da caixa (recomenda-se uma boa drenagem de forma a evitar a estagnação da água). 2. Colocar a caixa dentro da escavação realizada, de forma a que o perno fique alinhado com o eixo da dobradiça. 3. Instalar uma conduta para os cabos eléctricos e uma para a drenagem. 4. Mergulhar a caixa de fundação no betão, verificando o prumo e o nível. ATENÇÃO: antes de dar seguimento às etapas seguintes, respeitar a fase de endurecimento do betão. 5. Após ter lubrificado a esfera E, inseri-la no orifício apropriado 6. Introduzir o perno B da caixa no estribo de comando A. 7. Soldar bem a folha do portão na alavanca de desbloqueio C, em seguida posicionar todas as peças no estribo de comando A no orifício correspondente. 8. Lubrificar o mecanismo utilizando o respectivo bocal lubrificante D. 44 C D E A B INSTALAÇÃO DO MOTORREDUTOR 1. Colocar o motorredutor dentro da caixa de fundação. 2. Fixar o motorredutor à caixa de fundação apertando as 4 porcas. 3 4 2 1 3. Montar o motor da alavanca (1) no eixo do motor e aperte o parafuso com interruptor arruela (2). 4. Ligue a alavanca de comando do motor (1) com o suporte (3) através da alavanca longa (4) e fixe-os juntos com parafusos M6x10 e arruelas fornecidas. INSTALAÇÃO DOS TRAVÕES DE FIM DE CURSO 1. Mova o portão para uma posição completamente fechada, em seguida, ajuste a arruela, como mostrado abaixo e aperte o parafuso M10x35. 45 2. Coloque o portão na posição de abertura máxima, e depois coloque a porca do interruptor de limite, como mostrado na figura, e aperte o parafuso. PORTUGUÊS 5. Ligue o motor ao painel de controle seguindo as instruções do manual de instalação da placa. ATENÇÃO: O portão deve ser dotado de paragem central e paragens laterais : estas são indispensáveis para um bom A SX DX B B LIGAÇÕES ELÉCTRICAS UNDER 230V (900INT-900INT-OIL) MOTOR Motor DX Preto Abertura Cinzento Comum Castanho Fecho Amarelo/Verde GND Motor SX Fecho Comum Abertura Messa a terra ATENÇÃO: Para operar o motor 230V é essencial ligar o capacitador entre o preto e o vermelho do motor. PORTUGUÊS UNDER 24V (900INT-24) MOTOR Azul Castanho Preto Amarelo/Verde Cinzento Motor DX Abertura Fecho + codificadores S codificadores - codificadores Motor SX Fecho Abertura + codificadores S codificadores - codificadores ATENÇÃO: Para o funcionamento dos codificadores é indispensável que as duas folhas na posição de fechadura encostem numa paragem mecânica. ATENÇÃO: Ligar sempre o cabo de terra ao sistema da rede de alimentação. Utilizar o respectivo terminal de tipo faston indicado na figura e um cabo com secção mínima de 2,5 mm2 46 ESQUEMA DE INSTALAÇÃO 1 Actuador UNDER 2 Intermitência 3Antena. 4 Selector com chave ou digital 5 Células fotoeléctricas 6Pilar 7 Caixa de alojamento 8 Cartaz de aviso 9 Caixa da unidade de controlo 4 9 5 5 8 6 1 7 5 3 2 7 5 6 1 Em caso de falta de energia eléctrica, o portão pode ser desbloqueado mecanicamente actuando no motor. Introduzir a alavanca de desbloqueio fornecida e rodá-la 180° no sentido contrário aos ponteiros do relógio. A automação será automaticamente restabelecida no primeiro arranque do motor. 47 PORTUGUÊS DESBLOQUEIO DE EMERGÊNCIA MANUTENÇÃO PERIGO: desligue o dispositivo da alimentação eléctrica para efectuar qualquer tipo de operação de manutenção. O motorredutor é fornecido com lubrificação permanente mediante massa lubrificante, pelo que não necessita de operações de manutenção. Para efectuar a manutenção correcta do equipamento onde o motorredutor está instalado, proceda conforme indicado a seguir: - limpe periodicamente os carris de guia e as relativas rodas, removendo os detritos deles. ELIMINAÇÃO Para qualquer anomalia de funcionamento, para reparações, serviços de manutenção ou regulações, recomendamos servir-se de pessoal qualificado. Os materiais devem ser eliminados de acordo com as prescrições das normas em vigor. RECOMENDAÇÕES FINAIS PORTUGUÊS 1 > Faça a ligação à terra. 2 > Mantenha sempre separados os cabos de alimentação dos cabos de comando. 3 > Instale no equipamento dispositivos de segurança, tais como: - fotocélulas - limitadores de binário - dorso de segurança Se o sistema der para uma via pública, será preciso instalar ao menos dois dos referidos dispositivos (escolhidos entre os três tipos ou também do mesmo tipo). 4 > Para poder desbloquear o sistema é necessário que o portão, uma vez fechado, não exerça pressão nos batentes de paragem. 5 > Faça a instalação respeitando as normas em vigor. 6 > O controlo da força de impulso deve ser dado pela presença de um regulador de binário no equipamento. 7 > É absolutamente necessário que, antes da instalação do motorredutor, o portão seja munido de batentes de paragem. 8 > Em conformidade com as normas vigentes, a força de impulso do portão não deve ultrapassar 15 daN. Utilize um dinamómetro para controlar a calibração. 9 > Todos os serviços de manutenção, reparação e regulação devem ser feitos por pessoal qualificado. 48 NOTEANMERKUNGEN NOTES NOTA NOTES OBSERVAÇÕES WAŻNE UWAGI DANE TECHNICZNE PRZYGOTOWANIE CAŁKOWITE WYMIARY USTAWIENIE PODSTAWY INSTALACJA JEDNOSTKI MOTOREDUKTORA INSTALACJA WŁĄCZNIKÓW OGRANICZNIKA POŁĄCZENIA ELEKTRYCZNE PLAN INSTALACJI ODBLOKOWANIE AWARYJNE KONSERWACJA USUWANIE SPIS TREŚCI 50 51 51 51 52 53 53 54 55 55 56 56 WAŻNE UWAGI Przy problemach z instalacją, skontaktuj się z Key Automation S.p.A TEL. (+39) 0421 307456 Keyautomation S.p.A zastrzega sobie prawo do modyfikowania produktu bez uprzedniego powiadomienia; odrzuca także wszelką odpowiedzialność za szkody lub okaleczenia wyrządzone osobom lub rzeczom wskutek niewłaściwego korzystania lub nieprawidłowej instalacji. Przeczytaj uważnie niniejszą instrukcję obsługi przed instalacją lub programowaniem układu sterowania. • Niniejsza instrukcja obsługi skierowana jest wyłącznie do wykwalifikowanych techników specjalizujących się w instalacjach i automatyzacjach. • Treść niniejszej instrukcji obsługi nie dotyczy użytkownika końcowego. • Wszelkie czynności programowania i/lub konserwacyjne powinny być wykonywane wyłącznie przez wykwalifikowanych techników. AUTOMATYZACJA MUSI BYĆ WPROWADZANA ZGODNIE Z OBOWIĄZUJĄCYMI PRZEPISAMI EUROPEJSKIMI: EN 60204-1 (Bezpieczeństwo maszyn. wyposażenie elektryczne maszyn, część 1: wymagania ogólne) EN 12445 (Bezpieczeństwo użytkowania zamknięć automatycznych, metody testowania) EN 12453 (Bezpieczeństwo użytkowania zamknięć automatycznych, wymagania) POLSKI • Instalator powinien dostarczyć urządzenie (np. wyłącznik magnetotermiczny) zapewniające omnipolarne odcięcie sprzętu od zasilania. Standardy wymagają odseparowania styków na co najmniej 3 mm w każdym biegunie (EN 60335-1). • Plastikowa obudowa posiada izolację IP55; korzystaj z instalacji rur o tym samym poziomie izolacji, aby podłączyć rury elastyczne lub sztywne. • Instalacja wymaga umiejętności technicznych i mechanicznych, w związku z czym powinna być wykonywana wyłącznie przez wykwalifikowany personel, mogący wydać Certyfikat Zgodności dotyczący całej instalacji (Dyrektywa maszynowa 2006/42/CEE, Aneks IIA). • Automatyczne bramy drogowe powinny być zgodne z następującymi normami: EN 13241-1, EN 12453, EN 12445 jak również wszelkimi obowiązującymi przepisami lokalnymi. • Również instalacja elektryczna, do której podłączana jest automatyka, musi odpowiadać obowiązującym normom i przepisom i musi być solidnie wykonana. • Ustawienie siły pchającej skrzydło bramy musi być zmierzone za pomocą odpowiedniego narzędzia i ustawione zgodnie z maksymalnymi limitami, jakie dopuszcza norma EN 12453. • Zaleca się wykorzystanie przycisku awaryjnego, zainstalowanego w automatyce (połączonego z wejściem STOP jednostki sterującej), tak aby brama mogła być natychmiastowo zatrzymana w razie niebezpieczeństwa. • Z urządzenia nie powinny korzystać dzieci i osoby o ograniczonych zdolnościach fizycznych, zmysłowych i umysłowych oraz nieposiadające doświadczenia lub wiedzy, jeśli nie otrzymały odpowiedniego nadzoru lub instrukcji. • Dzieci będące pod nadzorem nie powinny bawić się urządzeniem. 50 TYPY I CHARAKTERYSTYKI 900INT 900INT-24 900INT-OIL 230 Vac Podziemny motoreduktor , ze smarem, z limitem otwierania i zamykania 24 Vdc Podziemny motoreduktor, ze smarem z limitem otwierania i zamykania 230 Vac Podziemny motoreduktor , smarowany w kąpieli olejowej, z limitem otwierania i zamykania. DANE TECHNICZNE 900INT (CT-2/CT-201)* 230 Vac 230 W 1A 10 µF 67 IP 300 Nm 108° Maks 30 % 150° C 20 sek -20° +70°C 11 Kg Sugerowane jednostki kontrolne Zasilanie Maksymalna moc Prąd jałowy Kondensator Zabezpieczenie Maksymalny moment obrotowy Rozwarcie zamknięcia Cykl pracy Zabezpieczenie termiczne Czas otwarcia (90°) Temperatura funkcjonowania Waga silnika 900INTOIL (CT-2/CT-201)* 230 Vac 230 W 1A 10 µF 67 IP 300 Nm 108° Maks 80 % 150° C 20 sek -20° +70°C 11 Kg 900INT-24 (CT-824S)* 24 Vdc 120 W 5A 67 IP 250 Nm 108° Maks 80 % 21 sek -20° +70°C 10,8 Kg Seria siłowników PONIŻEJ została opracowana do pracy z bramami do 600 Kg, ze skrzydłem długości do 3 metrów (sprawdź tabelę z danymi technicznymi). Przed przystąpieniem do instalacji, upewnij się że twoja brama otwiera i zamyka się bez problemu, oraz: 600 500 400 300 200 100 1 2 Maks. długość skrzydła (m) 2,5 3 CAŁKOWITE WYMIARY POLSKI Maks. waga skrzydła (kg) • Zawiasy i trzpienie są w idealnym stanie i są odpowiednio nasmarowane. • Nie ma przeszkód w rejonie pracy. • Nie występuje tarcie z podłożem lub pomiędzy skrzydłami. • Twoja brama powinna być wyposażona w środkowe i boczne stopery, które są fundamentalne dla dobrej pracy systemu. 51 > 63mm USTAWIANIE PODSTAWY I DŹWIGNI KONTROLNEJ I SYSTEMU BLOKUJĄCEGO 1. W zależności od rozmiarów, wykop odpowiedni wykop fundamentowy (zalecane jest, aby zapewnić odpowiedni odpływ, aby uniknąć zalewania wodą). 2. Umieść podstawę w wykopie, z trzpieniem ustawionym w linii z osią zawiasu. 3. Zainstaluj kanał na kable elektryczne i kolejny na odpływ. 4. Osadź podstawę w betonie, upewniając się, że jest wypoziomowana i w pionie. POLSKI UWAGA: upewnij się, że beton jest odpowiednio przygotowany przed przystąpieniem do kolejnych kroków. 5. Włóż gałkę E w specjalny otwór, po uprzednim nasmarowaniu smarem. 6. Włóż pręt kontrolny A ponad pudłem podstawy podtrzymującej trzpień B. 7. Umocuj mocnym spawem skrzydło bramy z dźwignią zwalniającą C, następnie umieść wszystko na wsporniku A. 8. Nasmaruj mechanizm używając odpowiedniej złączki smarowej D. 52 C D E A B INSTALOWANIE MOTOREDUKTORA 1. Umieść jednostkę motoreduktora w podstawie. 2. Umocuj motoreduktor w podstawie przy pomocy 4 nakrętek. 3 4 2 1 3. Zamontuj silnik dźwigni (1) na wale motoru i dokręć śrubę do wyłącznika podkładki (2). 4. Połącz przewód silnika dźwigni (1) z konsolą (3) przez długą dźwignię(4) i zabezpiecz razem przy użyciu śrub M6x10 i dostarczonymi podkładkami. 5. Połącz silnik do panelu kontrolnego, zgodnie z instrukcjami zawartymi w podręczniku instalacji karty. INSTALACJA WŁĄCZNIKÓW OGRANICZNIKA 1. Przesuń bramę do pozycji w pełni zamkniętej, wyreguluj podkładkę tak jak pokazano poniżej i dokręć śrubę M10x35. POLSKI 2. Ustaw bramę w maksymalnie otwartej pozycji, i przymocuj nakrętkę ogranicznika jak pokazano na wykresie i dokręć śrubę. 53 OSTRZEŻENIE: Twoja brama powinna być wyposażona w środkowe i boczne stopery, które są fundamentalne dla dobrej pracy systemu. A SX DX B B PODŁĄCZENIA ELEKTRYCZNE PONIŻEJ 230V (900INT-900INT-OIL) KOLOROWY KABEL Prawy Czarny Otwarcie Szary WSPÓLNY Brązowy Zakończenie Żółty/Zielony GND Lewy Zakończenie WSPÓLNY Otwarcie GND OSTRZEŻENIE: Do działania silnika 230V jest niezbędnym podłączenie kondensatora pomiędzy czarnym i brązowym silnika. POLSKI PONIŻEJ 24V (900INT-900INT-OIL) KOLOROWY KABEL Prawy Niebieski Otwarcie Brązowy Zakończenie Czarny + koder Żółty/Zielony S koder Szary - koder Lewy Zakończenie Otwarcie + koder S koder - koder UWAGA: Do operacji kodera, w pozycji zamkniętej, oba skrzydła bramy muszą spoczywać na mechanicznym stoperze. OSTRZEŻENIE: Zawsze podłącz uziemienie do systemu zasilania kablem o minimalnym przekroju 2,5 mm2 54 PLAN INSTALACJI 1 2 POD siłownikiem Migacz 3Antena 4 Selektor numeryczny lub cyfrowy 5Fotokomórki 6Filar 7Obudowa 8 Tablica ostrzegawcza 9 Jednostka kontrolna 4 9 5 5 8 6 1 7 5 3 2 7 5 6 1 ODBLOKOWANIE AWARYJNE W wypadku braku zasilania, brama może zostać odblokowana mechanicznie przy użyciu silnika. POLSKI Włóż dostarczoną dźwignię odblokowującą i i przekręć o 180° zgodnie z ruchem wskazówek zegara. Automatyzacja zostanie samoczynnie przywrócona przy pierwszym użyciu silnika. 55 NIEBEZPIECZEŃSTWO: KONSERWACJA Przy wszelkiego typu konserwacji, odłącz zasilanie. Smarowanie reduktora jest zapewnione dzięki trwałemu smarowi, i z tego powodu nie wymaga konserwacji. W celu odpowiedniej konserwacji systemu, gdzie reduktor jest czynny, postępuj zgodnie z następującym: Czyść okresowo z brudu szynę i kółka. W wypadku awarii, system nie może być używany. Skontaktuj się z wykwalifikowanym personelem. USUWANIE Usuń materiały zgodnie z obowiązującymi standardami. OGÓLNE OSTRZEŻENIA Umieść etykietki ostrzegające przed zgnieceniem w dobrze widocznym miejscu lub przy jednostkach kontrolnych; • Na stałe umieść etykiety odnoszące się do manualnego operowania w pobliżu urządzenia sterującego; • Oznakowania muszą być widoczne także po zainstalowaniu urządzenia. Jeśli oznakowania są ukryte po zainstalowaniu, musi być to zaznaczone w instrukcjach. • Silniki ruchu muszą być oznaczone etykietą, instruującą o trzymaniu dzieci z dala od skrzydeł bramy w ruchu, lub musi zostać umieszczony odpowiedni symbol (ISO 3864, zobacz symbol). ZALECENIA KOŃCOWE POLSKI Trzymaj urządzenie sterujące poza zasięgiem dzieci i nie pozwól im bawić się urządzeniem kontrolnym. • Zaopatrz system w systemy bezpieczeństwa, takie jak fotokomórki, delikatną ramę, ogranicznik momentu obrotowego. Gdy system jest w sąsiedztwie drogi publicznej, konieczne jest zainstalowanie co najmniej dwóch z uprzednio wspomnianych urządzeń (wybierz pomiędzy trzema typami lub z tego samego typu). • Wykonaj system zgodnie z obowiązującymi standardami. • Zawsze trzymaj kable zasilające osobno z kablami kontrolnymi. • Wykonaj uziemienie. • Jest absolutnie konieczne dla bramy, aby miała zapewnione ograniczniki stopu przed instalacją przekładni redukcyjnej. • W celu otwarcia bramy, gdy jest zamknięta, nie może ona napierać na listwę stopującą. • Kontrola nad siłą napędową musi być zapewniona przy pomocy systemu ogranicznika momentu obrotowego. • Wszelka konserwacja, naprawy i zmiany muszą być wykonywane przez wykwalifikowany personel. • Silniki z systemami wrażliwymi na nacisk muszą być wyposażone w etykiety z napisem UWAGA: RYZYKO ZGNIECENIA. 56 NOTEANMERKUNGEN NOTES NOTA NOTES OBSERVAÇÕES INDEX BELANGRIJKE OPMERKINGEN TECHNISCHE GEGEVENS VOORBEREIDENDE STAPPEN TOTALE DIMENSIES PLAATSEN VAN DE START BOX INSTALLEREN VAN DE MOTOR REDUCER UITRUSTINGEENHEID INSTALLATIE VAN DE STOP LIMIT SCHAKELAARS ELEKTRISCHE AANSLUITINGEN INSTALLATIE INDELING NOOD OPENING ONDERHOUD BESCHIKBAAR 10 11 11 11 12 13 13 14 15 15 16 16 BELANGRIJKE OPMERKINGEN Voor installatieproblemen contacteer alstublieft Key Automation S. p. A. TEL. (+39) 0421 307456 Heeft het recht om het product zonder enig bericht te wijzigen; het weigerd ook alle verantwoordelijkheden voor beschadigingen of verwondingen aan mensen of dingen die door ongepast gebruik of verkeerde installatie worden veroorzaakt. Lees alstublieft deze handleiding heel voorzichtig vooraleer de controle-eenheid te installeren en programmeren. • Deze handleiding is enkel voor gekwalificeerde technici, die in installaties en automatiseringen zijn gespecialiseerd. • De inhoud van deze handleiding heeft geen betrekking tot de eindgebruiker. • Iedere programmering en/of iedere onderhoudsdienst zou enkel door gekwalificeerde technici moeten gedaan worden. AUTOMATISERING MOET UITGEVOERD WORDEN IN OVEREENKOMST MET DE REGULIERE EUROPESE VOORSCHRIFTEN : IN 60204-1 (Machine veiligheid. Elektrische uitrusting van machines, deel 1: hoofdregels) IN 12445 (Veilig gebruik van geautomatiseerde sluitende apparaten, testmethoden) IN 12453 (Veilig gebruik van geautomatiseerde sluitende apparaten, vereisten) NEDERLANDSE • De installateur moet voor een apparaat (bvb. magnetotermical schakelaar) verzekeren van de omnipolar sectionering van de uitrusting van de netvoeding zorgen. De standaarden vereisen een scheiding van de contacten van ten minste 3 Mm in elke stang (IN 60335-1). • Het plastic omhulsel heeft een IP55 isolatie; om soepele of onbuigzame pijpen, gebruik pipefittings te verbinden te dezelfde isolatieniveaus hebben. • Installatie vereist mechanische en elektrische vaardigheden, daarom zal het enkel uitgevoerd worden door gekwalificeerd personeel, die het bekwaamheid certificaat aangaande de hele installatie (Machinale Richtlijn 2006/42/CEE, Aanhangsel IIA) kunnen uitgeven. • De geautomatiseerde van voertuigen poorten zullen aan de volgende regels voldoen: IN 13241-1 IN 12453, IN 12445 evenals plaatselijke regels in macht. • Ook zal het automatisering stroomopwaarts gelegen elektrische systeem aan de wetten en regels in macht voldoen en wordt workmanlike uitgevoerd. • De regeling van de deurstootmacht zal door middel van een gepast werktuig gemeten worden en zal geregeld worden volgens het max. Limieten, die EN 12453 toestaat. • Wij raden aan gebruik te maken van een nood knop, om door de automatisering geïnstalleerd te worden (aangesloten aan de controle-eenheid EINDE input) zodat de poort onmiddellijk gestopt kan worden In geval van gevaar. • Het toestel mag niet door kinderen of personen met verminderde lichamelijke, zintuiglijke of geestelijke capaciteiten of tekort van ervaring en kennis worden gebruikt, tenzij zij toezicht of instructie zijn gegeven. • Kinderen onder begeleiding spelen niet met het toestel. 58 TYPEN EN KENMERKEN 900INT 230 Vac Onder geaarde uitrustings motor, met vet, met opening- en sluiting limiet 900INT-24 24 Vdc Onder geaarde uitrustingsmotor, met vet met het openen en sluiten beperk 900INT SMEER 230 Vac Onder geaarde uitrustings motor, gesmeerd in een oliebad, met opening en sluitingslimiet TECHNISCHE GEGEVENS Aanbevolen controle-eenheid Aandrijving Maximale stroom Gelijkstroom Condensator Bescherming Maximale torsie sluiteropening Werkingscyclus Thermische bescherming Openingstijd (90°) Werkingstemperatuur Motorgewicht 900INT (CT-2/CT-201)* 230 Vac 230 W 1A 10 µF 67 IP 300 Nm 108° Max 30 % 150° C 20 sec -20° +70°C 11 Kg 900INTOIL (CT-2/CT-201)* 230 Vac 230 W 1A 10 µF 67 IP 300 Nm 108° Max 80 % 150° C 20 sec -20° +70°C 11 Kg 900INT-24 (CT-824S)* 24 Vdc 120 W 5A 67 IP 250 Nm 108° Max 80 % 21 sec -20° +70°C 10,8 Kg De serie van aandrijvingsmechanismen ONDER, is uitgedacht voor poorten tot 600 Kg met bladeren tot 3 meter wijd (kijk tabel: technische gegevens) te dienen. Voordat men met de installatie doorgaat, vergewis je alstublieft ervan dat je poort vrij opent en sluit en dat: 600 500 400 300 200 100 1 2 Maxe blad lenght (m) 2,5 3 TOTALE AFMETING NEDERLANDSE Max bladgewicht (kg) • Scharnieren en spelden in optimale voorwaarde en goed ingevet zijn. • Geen hindernissen binnen het bewegende gebied zijn. • Er geen frictie met het terrein is of tussen de bladen. • Je poort zal met centrale en zijdelingse eindes uitgerust worden, die fundamenteel zijn voor een goede werking van het systeem . 59 POSITIONERING VAN DE STICHTING DOOS EN DE HEFBOOM CONTROLE EN BELEMMEREN VAN SYSTEEM > 63mm 63 Mm 1. Hangt van de afmeting af, graaf een geschikt grote stichtingssloot (het wordt aangeraden geschikte drainage te verzorgen om water ophoping te vermijden). 2. Plaats de stichtingsdoos in de geul, met de steunspil uitgelijnd met de scharnieras. 3. Installeer een buis voor de elektrische kabels en een andere voor drainage. 4. Zet de stichtingsdoos in beton vast, verzeker dat het vlak en loodrecht is. WAARSCHUWING: verzeker dat het beton goed gedroogd word voor het doorgaan met de volgende stappen. NEDERLANDSE 5. Voeg de bal E in het speciale gat in nadat het ingevet is 6. Voeg de controlestaaf A in over de stichtingsdoos zodat die spil B. steunt. 7. Repareer met een sterke las de vleugel van de poort op de opening van hefboom C, zet dan alles op de stuwende steun A 8. Vet het mechanisme in met de geschikte vet nipple D. 60 C D E A B INSTALLEREN VAN DE MOTOR REDUCER 1. Plaats de motor reducer uitrustingseenheid in de stichtingsdoos. 2. Zet de motor reducer op zijn plaats in de stichtingsdoos door het aanhalen van de 4 noten. 3 4 2 1 3. Assembleer de hefboommotor (1) op de motorschacht en haal de schroef met sluitringsschakelaar (2) aan. 4. Verbind de hefboommotor (1) bevel naar de steun (3) door de lange hefboom (4) en beveilig hen samen met schroeven M6x10 en sluitringen d.m.v. bijgeleverde gegevens. 5. Verbind de motor naar het bedieningspaneel d.m.v. de instructies in de handinstallatie van de kaart te volgen. 2. Plaats de poort in de maximaal geopende positie en bevestig dan de limietschakelaars bout zoals getoond in het cijfer en haal de schroef aan. NEDERLANDSE INSTALLATIE VAN DE LIMIET SCHAKELAARS 1. Beweeg de poort in een helemaal gesloten positie, regel dan de sluitring zoals hieronder getoond en maak de schroef M10x 35 vast 61 WAARSCHUWING: Je poort zal met centrale en zijdelingse eindes uitgerust worden, die fundamenteel zijn voor een goede werking van het systeem . A SX DX B B ELEKTRISCHE AANSLUITINGEN ONDER 230V (900INT-900INT-OIL) KLEUR KABEL Rechts Zwart Opening Grijs Voorkomend Bruin Sluiting geel/groen GND Links Sluiting Voorkomend Opening GND WAARSCHUWING: De motor te bedienen die 230V essentieel is de condensator tussen zwart te verbinden en bruin van de motor. ONDER 24V (900INT-24) KLEUR KABEL Blu Bruin Zwart geel/groen Grijs Rechts Opening Sluiting + Codeur S codeur - Codeur Links Sluiting Opening + Codeur S codeur - Codeur AANDACHT: Voor codeuroperatie, wanneer in de gesloten positie, beide poortpanelen moeten tegen een mechanisch einde rusten. NEDERLANDSE WAARSCHUWING: Verbind altijd de aardekabel naar het hoofdaardingsysteem met een minimum kruiskabel gelede gebied van 2,5 mm2 62 INSTALLATIE INDELING 1 2 ONDER aandrijvingsmechanisme Oogkleppen 3Lucht 4 Hoofd of digitale keuzeschakelaar 5Fotocellen 6Kolom 7Behuizing 8 Waarschuwings bord 9Controle-eenheid 4 9 5 5 8 6 1 7 5 3 2 7 5 6 1 NOODSITUATIE VRIJMAKEN Met betrekking tot een stroomstoring kan de poort mechanisch door het bedienen van de motor vrijgemaakt worden. NEDERLANDSE Voeg het geleverde vrijmaak hefboom in en roteer 180° rechtsdraaiend. Automatisering zal automatisch de eerste keer hersteld worden als de motor bediend word. 63 GEVAAR: ONDERHOUD Voor enig soort van onderhoud koppel de netvoeding los. Het reductievet is met permanent smerenvet geleverd en vereist daarom geen onderhoud. Voor het correcte onderhoud van het systeem waar de reductieuitrusting doeltreffend is, ga als volgt tewerk: reinig en maak de rail en zijn wielen regelmatig vrij van puin. In het geval van defect mag het systeem niet gebruikt worden. Contacteer gespecialiseerd personeel. BESCHIKKING Ontdoe je van materialen overeenkomstig met de huidige standaarden ALGEMENE WAARSCHUWINGEN Bevestig etiketten in een zeer zichtbare plaats die waarschuwen tegen het verpletteren of nabij de geplande controles; • Bevestig permanent de etiketten aangaande manuele openingen en plaats hen nabij het manoeuvreapparaat; • Tekeningen moeten zichtbaar zijn zelfs nadat het apparaat geïnstalleerd is. Indien tekeningen na installatie verborgen zijn moet die in de instructies aangeduid worden. • De bewegingsmotoren moeten van een etiket voorzien worden dat erop wijst kinderen van de bewegende deur weg te houden of plaats het geschikte symbool (ISO 3864, zie symbool) LAATSTE AANBEVELINGEN NEDERLANDSE Houd de afstandsbediening uit het bereik van kinderen laat hen niet spelen met de controleapparaten . • Lever het systeem met veiligheidssystemen zoals fotocellen, gevoelige omlijsting, torsiebeperker. Wanneer het systeem in nabijheid is van een openbare straat is het noodzakelijk ten minste twee van de bovengenoemde apparaten te installeren (kies uit de drie types of uit dezelfde type). • Besef dat het systeem overeenkomstig is met huidige standaarden. • Houd altijd de aanvoerkabels gescheiden van de controlekabels. • Voer aarding uit. • Het is absoluut noodzakelijk voor de deur om van controle stops te worden voorzien voor installatie van de reductieuitrusting. • Om het open te maken van de poort is het noodzakelijk, zodra het gesloten is, niet te duwen op de stop kraal. • Controleer over de stootmacht moet gegeven worden door een torsiebeperker in het systeem. • Alle onderhouden, herstellingen en regelingen moeten door gekwalificeerd personeel uitgevoerd worden. • Motoren met druk-gevoelige systemen moeten met een etiket uitgerust worden dat dit vermeld AANDACHT: RISICO VOOR VERPLETTING. 64 NOTEANMERKUNGEN NOTES NOTA NOTES OBSERVAÇÕES CERTIFICATO DI GARANZIA GUARANTEE CERTIFICATE Key Automation si congratula con Lei per la scelta effettuata, al fine di avere una durata massima dell’impianto Le ricordiamo di utilizzare solamente accessori, ricambi e componenti Key Automation. Il presente certificato dovrà essere letto accuratamente, compilato in tutte le sue parti e conservato pena l’annullamento della garanzia. La garanzia decorre dalla data di acquisto/installazione dell’impianto ed ha validità 24 mesi. Ricordiamo all’utente che per attivare la garanzia è necessario rispedire il tagliando relativo all’azienda costruttrice a mezzo raccomandata presso: Key Automation congratulates with you for the excellent choice. We would like to remind our customers that in order to obtain the maximum operation of the system it is necessary to use only accessories, spare parts and components sold by Key Automation. This certificate should be read carefully, filled in all its parts and preserved to avoid the guarantee to become invalid. The guarantee takes effect from the date of purchase/installation of the system and it lasts for 24 months. We remind users that products will be covered by guarantee only if the coupon concerning the producing company is sent back through certified mail to: (In riferimento all’articolo 1519 bis ss. cc..) Key Automation S.p.A. Via A.Volta, 30 30020 Noventa di Piave (VE) Key Automation S.p.A. Via A.Volta, 30 30020 Noventa di Piave (VE) Key Automation ensures that its products are flawless and that they underwent quality and functionality tests. Key Automation technical service will decide whether the guarantee is to be applied and its judgement will be incontrovertible. The guarantee is no longer valid in the following cases: • Products sent back after more than 24 months from purchase/ installation; • Installation/use not in compliance with given instructions; • Disregard, inappropriate repair or damage caused during transport; • Repairs carried out by not authorized personnel or inadequate; • It is clear that the product was damaged and disassembled without technical assistance; • Natural phenomena, fraud or external causes for which Key Automation is not responsible; • The guarantee coupon and/or the receipt/invoice has not been preserved; • The enclosed coupon has not been filled in and sent it back. Key Automation declines every responsability for possible direct or indirect damage to things, people or animals caused by the non-compliance of all or some of the prescriptions and instructions enclosed to the product and by the lack of compliance with directives of installations in force. We would also remind customers to preserve the receipt or invoice in order to be able to submit it, if technical interventions are needed. In our web site www.keyautomation.it, customers can find useful addresses and telephone numbers, in case they need to contact their nears centre of assistance. CAP - CAP - TAGLIANDO DI GARANZIA - GUARANTEE COUPON DATI APPARECCHIO - TECHNICALDATAOFDEVICE: MODELLO - MODEL: N° MATRICOLA - NUMBER: DATA ACQUISTO - PURCHASING DATE: DATA INSTALLAZIONE - INSTALLATION DATE: FAX DATI DELL’UTILIZZATORE / USER’S DETAILS: COGNOME/NOME - SURNAME/NAME : VIA - STREET . N° POST CODE CITTÀ - CITY/TOWN PROV TEL LUOGO INSTALLAZIONE - INSTALLATION SITE CITTÀ - CITY/TOWN TEL DATI DELL’INSTALLATORE - DETAIL OF THE INSTALLING COMPANY : COGNOME / RAG.SOCIALE - SURNAME / NAME OF THE COMPANY VIA - STREET N° POST CODE PROV P.IVA - VAT NUMBER Firma installatore per accettazione delle clausole, condizioni generali di garanzia e trattamento dati personali, (legge 675 del 31/12/1996), l’installatore dichiara inoltre di aver compilato la garanzia impianto per quanto di propria competenza e responsabilità. FIRMA IN ORIGINALE TIMBRO INSTALLATORE - STAMP OF THE INSTALLING COMPANY: ORIGINAL SIGNATURE TIMBRO RIVENDITORE - RETAILER’S STAMP Key Automation garantisce che i suoi prodotti sono esenti da difetti di produzione e sono stati sottoposti a test di qualità e funzionalità. Il giudizio sull’applicabilità della garanzia è delegato al servizio tecnico di Key Automation ed è insindacabile. La garanzia perde di validità qualora: • Siano passati i termini previsti di 24 mesi dalla data di acquisto/ installazione; • Installazione e/o uso non conforme alle istruzioni; • Manomissioni, negligenza o danni da trasporto; • Manutenzione non conforme o effettuata da personale non autorizzato; • Sia evidente che il prodotto è stato alterato o smontato senza assistenza tecnica; • Fenomeni naturali, dolo o traumi esterni non imputabili a Key Automation; • Mancata presentazione di tagliando di garanzia e/o scontrino/fattura fiscale; • Mancata compilazione e spedizione del tagliando allegato. Key Automation declina ogni responsabilità per eventuali danni diretti od indiretti a cose, persone o animali derivanti dalla inosservanza di tutte o parti delle prescrizioni ed istruzioni allegate al prodotto e alla mancata osservanza delle direttive di installazioni vigenti. Ricordiamo inoltre al cliente di conservare lo scontrino o la ricevuta fiscale per poterlo esibire ogni qualvolta si renda necessario un intervento tecnico. Qualora il cliente desiderasse contattare il centro assistenza più vicino potrà visitare il nostro sito www.keyautomation.it, dove troverà indirizzi e numeri di telefono utili. DICHIARAZIONE “CE” DI CONFORMITA’ Il costruttore: The manufacturer: Key Automation S.p.A Indirizzo: Address: Via Alessandro Volta, 30 Noventa di Piave (Ve) DICHIARA CHE IL SEGUENTE APPARATO DECLARES THAT THE FOLLOWING EQUIPMENT Descrizione: Motoriduttore interrato per cancelli ad ante battenti con anta fino a 3m Description: Under grounded gear motor for swing gates with leaves up to 3m Modello: Model: UNDER Codice: Code: 900INT, 900INT-OIL, 900INT-24 Risulta conforme a quanto previsto dalle seguenti direttive comunitarie: Appears to be in conformity with the following community (EC) regulations: Direttiva macchine / Machinery Directive 2006/42/EC Direttiva bassa tensione / Low Voltage Directive 2006/95/EC Direttiva compatibilità elettromagnetica / EMC Directive 2004/108/EC Risulta conforme a quanto previsto dalle seguenti norme armonizzate: Appears to be in conformity with the following harmonized standards regulations: EN 55014-1 + EN 55014-2 EN 61000-3-2 + EN 61000-3-3 EN 60335-1 + EN 60335-2 EN 55022 Inoltre dichiara che non è consentita la messa in servizio prima che la macchina in cui il prodotto stesso è incorporato non sia dichiarata conforme alla direttiva macchine 2006/42/CE. He declares, moreover, that is not allowed to use the above mentioned product until the machine, in which this product is incorporated, has been identified and declared in conformity with the regulation 2006/42/EC. Noventa di Piave (VE), 07/01/10 Noventa di Piave 07/01/2009 Il Rappresentante legale The legal Representative Nicola Michelin Key Automation S.p.A Società con unico socio Via Alessandro Volta, 30 30020 Noventa di Piave (Ve) Italia T. +39 0421.307.456 F. +39 0421.656.98 [email protected] P.IVA 03627650264 C.F. 03627650264 Capitale Sociale Euro 400.000,00 i.v. Reg. Imprese di Venezia n. 03627650264 REA VE326953 www.keyautomation.it KEY - POLSKA SP. Z.o.o. ul. Gierdziejewskiego 7 Wejscie IV, LOK 12 Warszawa 02-495 - Polska T. +48 224.782266 F. +48 224.782267 [email protected] www.key-polska.pl KEY AUTOMATION (HANGZHOU) CO., LTD No. 385, Road No.18, Economic & Technology Development Zone, Hangzhou, P.R.China - P.C. 310018 T. +86 571.86703900 F. +86 571.86703901 Дэнис ® 580ISINT rev06


