1
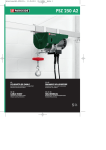
P ARANCO SOLLEVATORE PSZ 250 B2 PARANCO SOLLEVATORE I ndicazioni per l’uso e per la sicurezza T raduzione delle istruzioni d’uso originali CABLE WINCH O peration and Safety Notes T ranslation of original operation manual SEILHEBEZUG B edienungs- und Sicherheitshinweise Originalbetriebsanleitung IAN 100684 100684_par_Seilhebelzug_cover_IT.indd 3 18.06.14 15:43 Prima di leggere aprire le due pagine con le immagini e prendere confidenza con le diverse funzioni dell’apparecchio. Before reading, unfold both pages containing illustrations and familiarise yourself with all functions of the device. Klappen Sie vor dem Lesen die beiden Seiten mit den Abbildungen aus und machen Sie sich anschließend mit allen Funktionen des Gerätes vertraut. IT / MT GB / MT DE / AT / CH Indicazioni per l’uso e per la sicurezza Operation and Safety Notes Bedienungs- und Sicherheitshinweise 100684_par_Seilhebelzug_cover_IT.indd 4 Pagina 5 Page 13 Seite 21 18.06.14 15:43 1 14 1 9 2 3 8 4 5 13 6 7 A 8 A 9 10 11 15 12 16 B C 1 1 100684_par_Seilhebelzug_cover_IT.indd 5 18.06.14 15:43 D E 6 15 15 6 16 16 F 15 G 2 8 4 6 5 7 15 16 H 16 I 9 10 11 100684_par_Seilhebelzug_cover_IT.indd 8 18.06.14 15:43 Indice Introduzione Utilizzo conforme............................................................................................................................. Pagina6 Descrizione dei componenti............................................................................................................ Pagina6 Contenuto della confezione............................................................................................................ Pagina6 Dati tecnici........................................................................................................................................ Pagina6 Importanti indicazioni di sicurezza........................................................................ Pagina7 Avvertenze di sicurezza specifiche per l‘apparecchio.......................... Pagina7 Prima della messa in funzione Montaggio....................................................................................................................................... Pagina8 Impostazione funzione carrucola................................................................................................... Pagina8 Uso Messa in funzione del paranco...................................................................................................... Pagina8 Utilizzo del paranco........................................................................................................................ Pagina8 Pulizia, manutenzione e ordinazione dei pezzi di ricambio Pulizia............................................................................................................................................... Pagina9 Manutenzione.................................................................................................................................. Pagina9 Smaltimento............................................................................................................................... Pagina10 Garanzia / Servizio di assistenza clienti............................................................ Pagina10 Ordinazione parti di ricambio........................................................................................................ Pagina11 Dichiarazione di conformità......................................................................................... Pagina11 IT/MT 100684_par_Seilhebelzug_content_IT.indd 5 5 02.07.14 12:41 Introduzione … Paranco sollevatore PSZ 250 B2 Introduzione Prima di metterlo in funzione e di utilizzarlo per la prima volta, prendere dimestichezza con l‘apparecchio. A questo scopo leggere attentamente le seguenti istruzioni d‘uso e le indicazioni di sicurezza importanti. Utilizzare l‘apparecchio solo come descritto e per i campi di applicazione indicati. Conservare bene queste istruzioni. Consegnare l‘intera documentazione relativa a questo dispositivo nel caso di cessione a terzi. Utilizzo conforme Il paranco serve per il sollevamento e deposizione di carichi in ambienti chiusi e adatti al carico sopportato dall‘apparecchio. L‘apparecchio può essere utilizzato solo come qui descritto. Qualsiasi altro impiego è da considerare improprio. Per qualsivoglia danno che ne consegua è ritenuto responsabile l‘utilizzatore e non il produttore. Si prega di notare che l‘apparecchio non è destinato all‘uso commerciale, artigianale o industriale. Non rilasciamo alcuna garanzia riguardo l‘utilizzo del dispositivo in ambito artigianale, commerciale e industriale, o attività simili. Descrizione dei componenti 1 Staffa di fissaggio 2 Apertura per il fissaggio del gancio sulla 13 Cavo di comando 14 Motore 15 Rullo carrucola 16 Gancio aggiuntivo Contenuto della confezione 1 Paranco 2 Staffe di fissaggio con materiale di montaggio (fig. C) 1 Rullo per carrucola con gancio aggiuntivo e materiale di montaggio (vedi fig. D) 1 Manuale di istruzioni Dati tecnici Tensione: 230 V∼ 50 Hz Corrente nominale: 2,2 A Assorbimento di potenza: 500 W Tipo d‘esercizio: S3 20 % 10 min Carico nominale: 125/250 kg (senza rullo carrucola) Altezza di sollevamento 11,5 / 5,7 m (senza rullo carrucola) Velocità nominale: 8 / 4 m / min (senza rullo carrucola) Diametro della catena in acciaio: 3,0 mm Resistenza della catena in acciaio: 1870 N / mm2 Classe di isolamento: B Classe di protezione: IP54 Classe del motore: M1 Peso netto: 9,3 kg Bruttogewicht: 10,5 kg carrucola 3 Tamburo 4 Leva per lunghezza max. della catena 5 Leva del meccanismo di arresto automatico 6 Catena in acciaio 7 Peso di disinserimento 8 Gancio 9 Interruttore di arresto di emergenza 10 Pulsante 11 Telecomando 12 Cavo di alimentazione 6 Tipo di funzionamento 3–20 % - 10 min: S3 = funzionamento intermittente senza influsso dell‘avviamento. All‘interno di un arco di tempo di 10 min. il tempo max. di funzionamento è del 20 % 2 min. Il gruppo meccanico è M1. La potenza nominale dell‘apparecchio non varia a seconda della posizione o del carico. Il valore delle emissioni sonore con classificazione A in posizione di funzionamento è inferiore a 70 dB. IT/MT 100684_par_Seilhebelzug_content_IT.indd 6 02.07.14 12:41 … / Importanti indicazioni … / Avvertenze di sicurezza specifiche per l‘apparecchio Utilizzare il paranco a temperatura ambiente tra 0 °C e 40 °C con relativo tasso di umidità inferiore all‘85 %. Altezza sul livello del mare max. 1000 m. Per il trasporto e la conservazione la temperatura deve essere compresa tra i -25 °C e i 55 °C. La temperatura massima consentita è di 70 °C. Importanti indicazioni di sicurezza Leggere tutte le istruzioni e indicazioni di sicurezza. Negligenze nell’attenersi alle istruzioni di sicurezza e alle altre istruzioni possono avere come conseguenza scossa elettrica, incendi e / o gravi ferite. Conservare le indicazioni di sicurezza e le istruzioni d‘uso per il futuro! Controllare sempre che la tensione di rete corrisponda a quella indicata sulla targhetta. Una tensione di rete non adatta può provocare un funzionamento anomalo dell‘apparecchio e danni alle persone. L‘alimentazione della corrente deve essere dotata di messa a terra e protetta da un interruttore salvavita. È vietato sollevare carichi superiori al valore nominale indicato. Utilizzare l‘apparecchio solo per lo scopo previsto. Non tentare mai di sollevare persone con il paranco. Non utilizzare il cavo per estrarre la spina dalla presa. Tenere il cavo lontano da calore, olio, spigoli acuti. Non tentare mai di sollevare carichi fissati o bloccati. Dopo ogni utilizzo togliere la spina dalla presa. Tenere i bambini e altre persone non autorizzate fuori dalla portata dell‘apparecchio. È vietato sollevare carichi lateralmente o da un lato. Evitare le oscillazioni del carico. Assicurarsi che il gancio 8 si sposti nella stessa direzione indicata sul pulsante 10 . Controllare regolarmente la presenza di danni sul paranco. Il pulsante 10 deve essere in buono stato. Fare eseguire lavori di riparazione e manutenzione solamente da un elettricista specializzato in officine autorizzate. Le riparazioni possono essere effettuate solamente da un elettricista specializzato, in caso contrario potrebbero verificarsi infortuni per l‘utilizzatore. Evitare di accendere e spegnere l‘apparecchio velocemente (utilizzo a intermittenza). Essere sempre prudenti mentre si utilizza il paranco. Non sostare o lavorare sotto al carico sospeso. È vietato sollevare carichi fissati o inceppati. Staccare sempre la spina, prima di regolare il dispositivo. Il paranco non è adatto al trasporto di oggetti caldi o fusi; inoltre l‘apparecchio non è adatto all‘utilizzo a basse temperature e in ambienti dall‘atmosfera intensa (vedi dati tecnici). La durata di utilizzo del paranco è di ca. 8000 cicli (parti d‘usura escluse). Una volta esauriti gli 8000 cicli, controllare e revisionare tutte le parti meccaniche. Leggere e comprendere le istruzioni d‘uso prima di utilizzare il paranco. Assicurarsi che l‘utilizzatore sappia come funziona l‘apparecchio e come questo debba essere utilizzato. L‘utilizzatore deve agire sempre in conformità con le istruzioni d‘uso. Il paranco non è adatto ad un utilizzo prolungato. Il tipo di funzionamento è: funzionamento intermittente senza influsso dell‘avviamento. Dopo aver aperto la confezione controllare la presenza di danni dovuti al trasporto sull‘apparecchio, sulla catena in acciaio, sul gancio e sulla leva del meccanismo d‘arresto automatico. vvertenze di sicurezza A specifiche per l‘apparecchio L‘utilizzatore non deve sollevare carichi da terra a velocità minima. La catena deve essere tesa mentre si solleva un carico. IT/MT 100684_par_Seilhebelzug_content_IT.indd 7 7 02.07.14 12:41 Avvertenze di sicurezza specifiche … / Prima della messa in funzione / Uso Il paranco elettrico a catena non dispone di limiti di potenza nominale. Perciò non cercare ulteriormente di sollevare il carico se la protezione da surriscaldamento limita il funzionamento. In questo caso il carico supera la potenza nominale del paranco. Non lasciare carichi sospesi senza supervisione e senza aver preso le dovute precauzioni di sicurezza. Assicurare l‘apparecchio con una protezione 10 A o con un interruttore salvavita 10 A per proteggere il ciclo di corrente. Non utilizzare la leva 4 / 5 come abituale dispositivo di arresto. Essa serve solo in caso di emergenza. Prima di cominciare, assicurarsi che la corda in acciaio 6 sia avvolta correttamente al tamburo 3 e che la distanza tra gli avvolgimenti sia inferiore alla catena (fig. B). Prima della messa in funzione Montaggio (vedi fig. C) Fissare il paranco ad un tubo quadrato / braccio orientabile per mezzo delle due staffe di fissaggio 1 . Le misure del tubo quadrato / braccio orientabile devono essere adatte alla grandezza delle staffe di fissaggio 1 e entrambi devono poter sostenere il doppio del carico nominale. Nota: consigliamo in questo caso di contattare un tecnico specializzato. Avvitare le staffe di fissaggio 1 al paranco (vedi anche fig. C). Fissare saldamente tutte le viti. Nota: prima di mettere in funzione l‘apparecchio un tecnico qualificato dovrebbe controllare il fissaggio del tubo quadrato / braccio orientabile. Nota: il motore 14 del paranco è dotato di interruttore termostato. Durante il funzionamento del paranco può accadere che il motore 14 si fermi; questo riprenderà a funzionare automaticamente quando l‘apparecchio si sarà raffreddato. 8 Impostazione funzione carrucola (vedi fig. D–G) Il paranco è dotato di un rullo per carrucola 15 e di un gancio aggiuntivo 16 . Se utilizzato in modo corretto il paranco può sollevare un carico doppio. Montare il rullo carrucola 15 e il gancio aggiuntivo 16 come rappresentato nelle figure D–G. Appendere il gancio 8 montato saldamente alle aperture per il fissaggio 2 (vedi fig. G). Il carico sarà sollevato adesso tramite le due catene in acciaio e così il paranco può sollevare un carico doppio. Uso Messa in funzione del paranco L‘utilizzatore non deve sollevare carichi da terra a velocità minima. La catena deve essere tesa mentre si solleva un carico. Assicurare l‘apparecchio con una protezione 10 A o con un interruttore salvavita 10 A per proteggere il ciclo di corrente. Prima di cominciare, assicurarsi che la corda in acciaio 6 sia avvolta correttamente al tamburo 3 e che la distanza tra gli avvolgimenti sia inferiore alla catena (fig. B). Prima di utilizzare il prodotto per la prima volta rimuovere il nastro adesivo dal tamburo 3 . Assicurarsi che il carico sia fissato saldamente al gancio 8 così come al gancio aggiuntivo 16 durante l‘utilizzo in funzione carrucola e mantenere sempre una distanza dal carico e dalla catena in acciaio 6 . Utilizzo del paranco Controllare che l‘interruttore di arresto d‘emergenza 9 sia premuto. Girare l‘interruttore di arresto di emergenza 9 in senso orario per sbloccarlo. Premere il pulsante in direzione ▲ 10 per sollevare il carico (vedi fig. H). IT/MT 100684_par_Seilhebelzug_content_IT.indd 8 02.07.14 12:41 Uso / Pulizia, manutenzione e ordinazione dei pezzi di ricambio Nota: si consiglia di pulire l‘apparecchio direttamente dopo ogni utilizzo. Premere il pulsante in direzione ▼ 10 per calare il carico (vedi fig. H). Leva del meccanismo di arresto automatico 5 Quando si raggiunge l‘altezza massima di sollevamento, il peso di disinserimento 7 spinge la leva 5 verso il basso. In questo modo viene azionato l‘interruttore finale e il carico non può essere sollevato ulteriormente. Leva per lunghezza max. della catena 4 Quando il carico raggiunge la posizione più bassa possibile, viene azionato l‘interruttore finale rendendo impossibile un ulteriore calo del carico. Questo interruttore finale impedisce anche un funzionamento del paranco nella direzione sbagliata (il gancio in direzione opposta alla direzione indicata sul pulsante 10 ). ATTENZIONE! In caso di bisogno azionare immediatamente l‘interruttore di arresto di emergenza 9 e arrestare il paranco. Una volta azionato tale interruttore non è più possibile utilizzare l‘apparecchio. Pulizia, manutenzione e ordinazione dei pezzi di ricambio Pulizia ATTENZIONE! Prima di tutti i lavori di pulizia, tirare la spina dalla presa. Non utilizzare nessun detersivo o solvente, potrebbero essere aggressivi per le parti in plastica dell‘apparecchio. Assicurarsi che non penetri acqua all‘interno dell‘apparecchio. Mantenere quanto più possibile protezioni, fessure per l‘aria e alloggiamento del motore privi di polvere e sporco. Strofinare l‘apparecchio con un panno pulito o soffiarci dentro aria compressa con una bassa pressione. Pulire l‘apparecchio regolarmente con un panno umido e sapone tenero. Manutenzione ATTENZIONE! Assicurarsi sempre che l‘apparecchio non sia collegato alla corrente elettrica durante i lavori di pulizia. Seguente: un ciclo corrisponde a un movimento verso l‘alto e uno verso il basso di un carico. Un controllo periodico corrisponde a una verifica di 100 cicli. Controllare periodicamente che l‘interruttore finale del paranco funzioni regolarmente (prova da effettuare senza carico). Il controllo avviene come segue: quando la catena raggiunge l‘altezza massima di sollevamento, la leva del meccanismo di arresto automatico 5 verrà attivata. Il motore 14 si fermerà. Quando la catena in acciaio 6 si abbassa quanto più possibile, la leva per la lunghezza massima della catena 4 verrà attivita. Il motore 14 si fermerà. Controllare periodicamente il cavo di alimentazione 12 e il cavo di comando 13 . Lubrificare la catena in acciaio 6 e il rullo carrucola 15 ogni 200 cicli. Ogni 30 cicli controllare se la catena 6 è interamente in buono stato, come illustrato in figura I. In caso presentasse danni, deve essere sostituita con una catena in acciaio che corrisponda ai dati tecnici. Ogni 1000 cicli controllare che le viti delle staffe di fissaggio 1 e il rullo carrucola 15 siano ben fissati. Verificare ogni 1000 cicli che il gancio 8 / 16 e il rullo per carrucola 15 siano in buono stato. Prima di ogni utilizzo del paranco controllare se l‘interruttore di arresto d‘emergenza 9 e il pulsante 10 siano in perfettamente funzionanti. Controllare il sistema di arresto ogni 1000 cicli. Se il motore 14 emette rumori insoliti o se non può sollevare il carico nominale, è possibile che il limite del sistema di arresto venga superato. - Sostituire pezzi danneggiati o usurati e conservare le relative istruzioni di manutenzione. IT/MT 100684_par_Seilhebelzug_content_IT.indd 9 9 02.07.14 12:41 Pulizia, manutenzione … / Smaltimento / Garanzia / Servizio di assistenza clienti - Per lavori di manutenzione non previsti dalle misure indicate rivolgersi ad un servizio assistenza autorizzato. Smaltimento Questo apparecchio è consegnato in una confezione per proteggerlo da possibili danni di trasporto. La confezione è in materia naturale e pertanto può essere riutilizzata o riciclata. L‘apparecchio e i relativi accessori sono composti da diversi materiali, come ad es. metallo e plastica. Smaltire i pezzi danneggiati nei contenitori per rifiuti pericolosi. Chiedere informazioni a riguardo in negozi specializzati all‘amministrazione comunale. Non gettare gli utensili elettrici nei rifiuti domestici! In base alla norma europea 2012 / 19 / EU relativa agli apparecchi elettrici ed elettronici usati, ed in applicazione delle norme nazionali, gli apparecchi elettrici usati devono essere raccolti separatamente e condotti ad un loro riutilizzo non dannoso per l’ambiente. Alternativa al riciclaggio con invito alla restituzione: Il proprietario dell‘apparecchio elettrico può restituire il prodotto dopo un adeguato utilizzo in alternativa è obbligato dall‘abbandono di proprietà. L‘apparecchio vecchio può perciò essere lasciato in un posto di ritiro designato, dove si provvederà alla sua rimozione ai sensi della legge sulla gestione a ciclo chiuso dei prodotti e dei rifiuti (KrW- / AbfG). Non si riferisce agli apparecchi vecchi annessi accessori e mezzi di ausilio sprovvisti di componenti elettrici. Garanzia / Servizio di assistenza clienti La garanzia non vale: · In caso di danni causati da un uso improprio. · Per i componenti soggetti a usura. · Per guasti di cui il cliente era a conoscenza al momento dell‘acquisto. · In caso di responsabilità da parte del cliente. I diritti dell’acquirente ai sensi di legge derivanti dalla prestazione di garanzia non vengono lesi dalla presente garanzia. Per rivendicare la garanzia entro il suo periodo di validità, il cliente deve comprovarne l‘avvenuto acquisto. La garanzia deve essere resa valida entro 3 anni dalla data di acquisto. In caso di prestazione di garanzia, l’acquirente ha il diritto alla riparazione della merce presso le nostre officine o presso quelle da noi autorizzate. L’apparecchio non può essere aperto per nessun motivo – in caso di apertura o di modifica il diritto di garanzia viene a decadere. Al cliente non vengono concessi altri diritti (in base alla garanzia). In molti casi, la presentazione di reclami è motivata da situazioni spiegabili con errori di comando. Essi potrebbero facilmente essere risolti telefonicamente o per e-mail. Si prega di rivolgersi alla hotline di assistenza istituita per ricevere le domande degli acquirenti prima di presentare reclami presso il produttore. Hertz s.r.l Via delle Valli 156/158 24125 Bergamo ( BG ) T: +39-035-341047 IAN 100684 Per tutte le richieste si prega di conservare lo scontrino ed il codice dell‘ articolo (p.e. IAN 12345) a prova dell‘avvenuto acquisto. Il prodotto è coperto da garanzia di 3 anni a partire dalla data di acquisto in caso di difetti di materiale e di fabbricazione del prodotto. 10 IT/MT 100684_par_Seilhebelzug_content_IT.indd 10 02.07.14 12:41 i Garanzia / Servizio di assistenza clienti / Dichiarazione di conformità Ordinazione parti di ricambio Modifiche tecniche nel senso dello sviluppo rimangono riservate. Per ordinare le parti di ricambio è necessario avere i seguenti dati: - tipo di apparecchio - codice prodotto dell‘apparecchio - numero identificativo dell‘apparecchio Dichiarazione di conformità La presente, MATRIX GMBH, responsabile per la documentazione: Sig Joachim Lichtl, POSTAUER STR. 26, 84109 WÖRTH / ISAR, GERMANIA, dichiara qui che questo prodotto è conforme alle seguenti norme, normative, documenti normativi e direttive CE: 2006 / 42 / CE 2006 / 95 / CE 2004 / 108 / CE 2011 / 65 / UE Norme utilizzate ed armonizzate EN 14492-2+A1 EN 60204-32 EN 55014-1 EN 55014-2 EN 61000-3-2 EN 61000-3-3 Marchio / Descrizione della macchina: Paranco sollevatore PSZ 250 B2 Anno di produzione: 2014 Wörth / Isar, 31.05.2014 Joachim Lichtl - Amministratore - IT/MT 100684_par_Seilhebelzug_content_IT.indd 11 11 02.07.14 12:41 12 100684_par_Seilhebelzug_content_IT.indd 12 02.07.14 12:41 Table of contents Introduction Intended use.........................................................................................................................................Page14 Parts description...................................................................................................................................Page14 Scope of delivery.................................................................................................................................Page14 Technical Data.....................................................................................................................................Page14 Important safety instructions..........................................................................................Page15 Safety notices specific to the device..........................................................................Page15 Before using Mounting..............................................................................................................................................Page16 Setting up the pulley function..............................................................................................................Page16 Operation Putting the cable hoist into service......................................................................................................Page16 Operating the cable hoist....................................................................................................................Page16 Cleaning, maintenance and ordering spare parts Cleaning...............................................................................................................................................Page17 Maintenance........................................................................................................................................Page17 Disposal.............................................................................................................................................Page17 Warranty / Service centre Ordering spare parts...........................................................................................................................Page18 Declaration of conformity..................................................................................................Page18 GB/MT 100684_par_Seilhebelzug_content_IT.indd 13 13 02.07.14 12:41 Introduction Cable winch PSZ 250 B2 Introduction Please familiarise yourself with the appliance before preparing it for use and using it for the first time. To do so, please carefully read the following operating instructions and the important safety information. Use the product only as described and for the indicated purpose. Keep these instructions in a safe place. If you pass the device on to anyone else, please ensure that you also pass on all the documentation. Intended use The cable hoist is used to hoist and lower loads in indoor spaces in accordance with the equipment power. Only use the device as described. Any other use is not intended. The user / operator, not the manufacturer, is liable for damages or any type of injury resulting from any other use. Please note that our devices were not constructed for commercial, manual, or industrial use. We do not accept any warranty liability if the device is used for commercial, manual, or industrial operations, or activities similar to these. Parts description 1 Mounting bracket 2 Mounting opening for hook in deflection operation 3 Hoisting drum 4 Maximum cable length lever 5 Auto-stop mechanism lever 6 Steel cable 7 Shut-off weight 8 Hook 9 Emergency stop switch 10 Push button 11 Remote control unit 12 Mains lead 13 Control lead 14 Motor 14 15 Deflection pulley 16 Additional hook Scope of delivery 1 Cable hoist 2 Mounting bracket with mounting materials (Fig. C) 1 Deflection pulley with additional hook and mounting materials (see Fig. D) 1 Set of instructions for use Technical Data Voltage: 230 V~ 50 Hz Rated current: 2.2 A Power input: 500 W Duty type: S3 20 % 10 min Rated load: 125 / 250 kg (without / with deflection pulley) Hoisting height: 11.5 / 5.7 m (without / with deflection pulley) Rated speed: 8 / 4 m / min (without / with deflection pulley) Steel cable diameter: 3.0 mm Steel cable tensile strength: 1870 N / mm2 Insulating level: B Degree of protection: IP54 Power unit class: M1 Net weight: 9.3 kg Gross weight: 10.5 kg Duty type 3–20 % - 10 min: S3 = Intermittent duty without the effect of starting. During a 10 min period the max. operating time is 20 % (2 min). Mechanical group M1. The rated power of the device does not vary with the position of the load. The value of the A-rated noise emission in the operator position is less than 70 dB. The cable hoist must be operated at ambient temperatures from 0 °C to 40 °C and a relative humidity below 85 %. Height above sea level: max. 1000 m. GB/MT 100684_par_Seilhebelzug_content_IT.indd 14 02.07.14 12:41 Introduction / Important safety instructions / Safety notices specific to the device During transport and storage the temperature may be between -25 °C and 55 °C. The maximum permissible temperature is 70 °C. Important safety instructions Please read all safety information and instructions. Failure to observe the safety information and instructions can result in electric shock, fire and / or serious injury. Keep all safety instructions and directions for future use! Always verify the mains voltage matches the voltage on the nameplate. If the mains voltage is not suitable, abnormal device operation and personal injury may result. The power supply must have earthing and be protected by an earth leakage circuit breaker. Hoisting loads exceeding the rated load is prohibited. Only use the device for the intended purpose. Never hoist persons with the cable hoist. Do not unplug from the socket by the cable. Keep the cable away from heat, oil, and sharp edges. Never attempt to hoist fixed or blocked loads. Remove the mains plug from the socket after every use. Keep children and other unauthorised persons away from the device. Pulling loads sideways or from one side is prohibited. Prevent the load from swinging. Ensure the hook 8 moves in the direction shown on the push button 10 . Regularly check the cable hoist for damage. The push button 10 must be in good condition. Always have repairs and maintenance performed by an electrician at an authorised specialist workshop. repairs must be performed by an electrician to prevent operator accidents. Avoid rapid start-up and powering off (inching mode). Always be attentive whilst operating the cable hoist. Never stand or work below the hoisted load. Hoisting stuck or jammed loads is prohibited. Always pull the mains plug before executing settings on the device. The cable hoist is not suitable for transporting hot and / or molten materials; the cable hoist is further not suitable for use in low temperatures or in environments with severe weather (see Technical Data). The service life of the cable hoist is approx. 8000 cycles (excl. wear parts). Once the hoist has reached 8000 cycles all mechanical parts must be inspected and overhauled. Read and understand the operating instructions before using the cable hoist. Ensure the operator is familiar with the functionality of the device and how it should be operated. The user must always operate the device in accordance with the operating instructions. The hoist is not intended for continuous operation. The duty type is: Intermittent duty without the effect of starting. After opening the packaging, please inspect the device, the steel cable, the hooks, the maximum cable length lever and the auto-stop mechanism lever for transport damage. Safety notices specific to the device The user must hoist the load from the ground at the slowest possible speed. The cable must be tightened when the load is being hoisted. The electric cable hoist is not equipped with a rated power limit. Therefore do not continue attempting to hoist the load if the overheat protection limits operation. In this event the load exceeds the rated power of the cable hoist. Do not leave suspended loads unattended without taking the appropriate safety precautions. Secure the device with a 10 A fuse or a 10 A earth leakage circuit breaker to protect the electric circuit. Do not use the lever 4 / 5 as a routine stop. These are only intended as emergency stopping devices. GB/MT 100684_par_Seilhebelzug_content_IT.indd 15 15 02.07.14 12:41 Safety notices specific to the device / Before using / Operation Before beginning, verify the steel cable 6 is wound around the drum 3 correctly and the clearance between the turns is smaller than the steel cable (Fig. B). Before using Mounting (see Fig. C) Secure the cable hoist to a square pipe / boom using the 2 mounting brackets 1 . The dimensions of the square pipe / boom must correspond with the size of the mounting bracket 1 and must be able to bear double the rated load. Note: We recommend contact a qualified technician for this purpose. Screw the mounting brackets 1 to the cable hoist (also see Fig. C). Tighten all screws. Note: A qualified technician should inspect the anchor of the square tube / boom before putting the device into service. Note: The cable hoist motor 14 is equipped with a thermostat switch. The motor 14 may therefore stop whilst operating the cable hoist; it will automatically restart once it has cooled down. Setting up the pulley function (see Fig. D–G) The cable hoist is equipped with a pulley 15 and an additional hook 16 . When used correctly, the cable hoist can lift double the load. Install the pulley 15 and additional hook 16 as shown in figures D–G. Hook the fixed hook 8 into the fixing opening 2 (see Fig. G). The load will now be lifted with two steel cables and the cable hoist can therefore lift double the load. 16 Operation Putting the cable hoist into service The user must hoist the load from the ground at the slowest possible speed. The cable must be tightened when the load is being hoisted. Secure the device with a 10 A fuse or a 10 A earth leakage circuit breaker to protect the electric circuit. Before beginning, verify the steel cable 6 is wound around the drum 3 correctly and the clearance between the turns is smaller than the steel cable (Fig. B). Remove the adhesive tape from the cable drum 3 prior to first use. Ensure the load is properly secured to the hook 8 or, for pulley operation, the additional hook 16 , and always maintain a distance to the load and the steel cable 6 . Operating the cable hoist Check if the emergency stop switch 9 is pressed. Turn the emergency stop switch 9 clockwise to release. Press the push button ▲ 10 to hoist the load (see Fig. H). Press the push button ▼ 10 to lower the load (see Fig. H). Auto-stop mechanism lever 5 When the maximum hoisting height has been reached, the shut-off weight 7 will push the lever 5 upward. This engages a limit switch and the load can no longer be hoisted. Maximum cable length lever 4 When the load reaches the lowest possible position, an end switch is activated, preventing the load from being lowered further. This end switch also prevents the cable hoist from being operated in the wrong direction (hook moving opposite of the direction indicated on the push button 10 ). GB/MT 100684_par_Seilhebelzug_content_IT.indd 16 02.07.14 12:41 Operation / Cleaning, maintenance and ordering spare parts / Disposal ATTENTION! In the event of an emergency, immediately activate the emergency stop switch 9 to stop the cable hoist. The cable hoist cannot be operated if the emergency stop switch has been activated. Cleaning, maintenance and ordering spare parts Cleaning ATTENTION! Unplug the mains plug from the socket before cleaning. Do not use cleaners or solvents; these could affect the plastic parts of the device. Ensure water cannot penetrate the housing. Keep safety devices, venting slots and the motor housing as dust and dirt free as possible. Rub the device down with a clean cloth or blow out with compressed air at a low pressure setting. Regularly clean the device with a damp cloth and a little soft soap. Note: We recommend cleaning the device immediately after every use. Maintenance ATTENTION! Verify the device is not connected to the mains when performing care. Below: A cycle corresponds to moving a load up and down once. Periodic inspection corresponds to an inspection after 100 cycles. Periodically check the end switches on the cable hoist are working properly (check without load). Test as follows: When the cable reaches the maximum hoisting height the auto-stop mechanism lever 5 is activated. The motor 14 must now stop. When the steel cable 6 is unwound as far as possible, the maximum cable length lever 4 is activated. The motor 14 must now stop. Periodically check the power cable 12 and the control lead 13 . Lubricate the steel cable 6 and pulley 15 every 200 cycles. Every 30 cycles verify the entire steel cable 6 is in good working order in accordance with Figure I. If damaged, it must be replaced with a steel cable corresponding with the technical data. Every 1000 cycles check the screws on the mounting bracket 1 and pulley 15 are tight. Every 1000 cycles verify the hooks 8 / 16 and the pulley 15 are in good condition. Verify the emergency stop switch 9 and push buttons 10 are in good condition before every use. Check the brake system every 1000 cycles. If the motor 14 emits unusual noises or is unable to hoist the rated load, the brake system may need to be overhauled: - Replace damaged or worn parts and keep the associated maintenance documentation. - Please contact an authorised service centre for unscheduled maintenance work. Disposal The device is packaged to protect it from transport damage. This packaging is a raw material and therefore reusable or may be recycled. The device and its accessories are made from various materials, e.g. metal and plastics. Dispose of defective components through toxic waste disposal. Contact the speciality retailer or your municipal government for information! Do not dispose of power tools in household waste! In accordance with European Directive 2012 / 19 / EU on waste electrical and electronic equipment and its implementation into national legislation, worn out power tools must be collected separately and recycled in an environmentally friendly fashion. GB/MT 100684_par_Seilhebelzug_content_IT.indd 17 17 02.07.14 12:41 Disposal / Warranty / Service centre / Declaration of conformity Alternate recycling option for return request: The owner of the electrical equipment is alternatively obligated to contribute to proper recycling in place of a return in the case of abandonment. For this purpose the used equipment may also be taken to a collection site disposing within the terms of the national Closed Substance Cycle Waste Management Act. This does not apply to accessories attached to the used equipment and implements without electrical components. Warranty / Service centre We provide a 3-year warranty covering faults in materials or manufacture of the device from the purchase date. The warranty does not cover: · Damage from improper use. · Wear parts. · Defects the customer was aware of at the time of purchase. · Damage caused by the customer. This warranty does not affect the customer‘s legal rights. The customer must provide proof of purchase in order for any warranty claims within the warranty period to be honoured. Warranty claims must be filed within 3 years from the date of purchase. In the event of a warranty claim, the customer has the right to have the goods repaired by our own workshop or a workshop authorised by us. The device must not be opened for any reason. Opening or modifying the device invalidates the warranty. This warranty does not grant any additional rights to the customer (based on the warranty). Complaints are often initiated by difficulties encountered during use. Many of these complaints can be resolved by telephone or email. Please contact our Service Hotline in the first instance, before you return the device to the manufacturer. 18 Unit 55 Romsey Industrial Estate, Romsey GB - Hampshire SO51 OHR T: +44 845 0766158 F: +44 1794 514882 IAN 100684 Please have your receipt and the article number (e.g. IAN 12345) ready as your proof of purchase when enquiring about your product. Ordering spare parts When ordering replacement parts you should give the following information: - Device model - Device item number - device ID number Declaration of conformity We, MATRIX GMBH, officer responsible for documentation: Mr. Joachim Lichtl, POSTAUER STR. 26, 84109 WÖRTH / ISAR, GERMANY, hereby declare this product to comply with the following standards, normative documents and EC directives: 2006 / 42 / EC 2006 / 95 / EC 2004 / 108 / EC 2011 / 65 / EU applicable harmonised standards EN 14492-2+A1 EN 60204-32 EN 55014-1 EN 55014-2 EN 61000-3-2 EN 61000-3-3 Type / Description of product: Cable winch PSZ 250 B2 GB/MT 100684_par_Seilhebelzug_content_IT.indd 18 02.07.14 12:41 Declaration of conformity Year of manufacture: 2014 Wörth / Isar, 31.05.2014 Joachim Lichtl - Managing Director We reserve the right to make technical modifications in the course of product development. GB/MT 100684_par_Seilhebelzug_content_IT.indd 19 19 02.07.14 12:41 20 100684_par_Seilhebelzug_content_IT.indd 20 02.07.14 12:41 Inhaltsverzeichnis Einleitung Bestimmungsgemäßer Gebrauch........................................................................................................Seite22 Teilebeschreibung................................................................................................................................Seite22 Lieferumfang.........................................................................................................................................Seite22 Technische Daten.................................................................................................................................Seite22 Wichtige Sicherheitshinweise.........................................................................................Seite23 Gerätespezifische Sicherheitshinweise..................................................................Seite24 Vor der Inbetriebnahme Montage...............................................................................................................................................Seite24 Flaschenzugfunktion einrichten...........................................................................................................Seite24 Bedienung Seilhebezug in Betrieb nehmen..........................................................................................................Seite24 Seilzug bedienen.................................................................................................................................Seite25 Reinigung, Wartung und Ersatzteilbestellung Reinigung..............................................................................................................................................Seite25 Wartung...............................................................................................................................................Seite25 Entsorgung......................................................................................................................................Seite26 Garantie / Service......................................................................................................................Seite26 Ersatzteilbestellung...............................................................................................................................Seite27 Konformitätserklärung........................................................................................................Seite27 DE/AT/CH 100684_par_Seilhebelzug_content_IT.indd 21 21 02.07.14 12:41 Einleitung Seilhebezug PSZ 250 B2 Einleitung Machen Sie sich vor der Inbetriebnahme und dem ersten Gebrauch mit dem Gerät vertraut. Lesen Sie hierzu aufmerksam die nachfolgende Bedienungsanleitung und die wichtigen Sicherheitshinweise. Benutzen Sie das Gerät nur wie beschrieben und für die angegebenen Einsatzbereiche. Bewahren Sie diese Anleitung gut auf. Händigen Sie alle Unterlagen bei Weitergabe des Geräts an Dritte ebenfalls mit aus. Bestimmungsgemäßer Gebrauch Der Seilhebezug dient zum Heben und Absenken von Lasten in geschlossenen Räumen entsprechend der Geräteleistung. Das Gerät darf nur wie beschrieben verwendet werden. Jede weitere darüber hinausgehende Verwendung ist nicht bestimmungsgemäß. Für daraus hervorgerufene Schäden oder Verletzungen aller Art haftet der Benutzer/Bediener und nicht der Hersteller. Bitte beachten Sie, dass unsere Geräte bestimmungsgemäß nicht für den gewerblichen, handwerklichen oder industriellen Einsatz konstruiert wurden. Wir übernehmen keine Gewährleistung, wenn das Gerät in Gewerbe-, Handwerks- oder Industriebetrieben sowie bei gleichzusetzenden Tätigkeiten eingesetzt wird. Teilebeschreibung 1 Befestigungsbügel 2 Befestigungsöffnung für Haken bei Umlenkbetrieb 3 Seiltrommel 4 Hebel für maximale Seillänge 5 Hebel des automatischen Stoppmechanismus 6 Stahlseil 7 Abschaltgewicht 8 Haken 9 Not-Aus-Schalter 10 Drucktaster 11 Fernbedienung 22 12 Netzkabel 13 Steuerleitung 14 Motor 15 Umlenkrolle 16 Zusatzhaken Lieferumfang 1 Seilhebezug 2 Befestigungsbügel mit Montagematerial (Abb. C) 1 Umlenkrolle mit Zusatzhaken und Montagematerial (s. Abb. D) 1 Bedienungsanleitung Technische Daten Spannung: 230 V ~ 50 Hz Nennstrom: 2,2 A Leistungsaufnahme: 500 W Betriebsart: S3 20 % 10 min Nennlast: 125 / 250 kg (ohne / mit Umlenkrolle) Hebehöhe: 11,5 / 5,7 m (ohne / mit Umlenkrolle) Nenngeschwindigkeit: 8 / 4 m / min (ohne / mit Umlenkrolle) Durchmesser des Stahlseiles: 3,0 mm Zugfestigkeit des Stahlseils: 1870 N/ mm2 Isolationsklasse: B Schutzart: IP54 Triebwerksklasse: M1 Nettogewicht: 9,3 kg Bruttogewicht: 10,5 kg Betriebsart 3–20 % - 10 min: S3 = Aussetzbetrieb ohne Einfluss des Anlaufvorganges. Während eines Zeitraums von 10 min beträgt die max. Betriebszeit 20 % (2 Min). Mechanische Gruppe ist M1. Die Nennleistung des Geräts variiert nicht mit der Position der Belastung. Der Wert der A-bewerteten Lärmemission an der Betreiberposition ist niedriger als 70 dB. DE/AT/CH 100684_par_Seilhebelzug_content_IT.indd 22 02.07.14 12:41 Einleitung / Wichtige Sicherheitshinweise Der Seilhebezug ist bei Umgebungstemperaturen zwischen 0 °C und 40 °C relative Luftfeuchtigkeit unter 85 % zu betreiben. Höhe über dem Meeresspiegel: max. 1000 m. Für Transport und Lagerung darf die Temperatur zwischen -25 °C und 55 °C betragen. Die höchste zulässige Temperatur ist 70 °C. Wichtige Sicherheitshinweise Lesen Sie alle Sicherheitshinweise und Anweisungen. Versäumnisse bei der Einhaltung der Sicherheitshinweise und Anweisungen können elektrischen Schlag, Brand und/oder schwere Verletzungen zur Folge haben. Bewahren Sie alle Sicherheitshinweise und Anweisungen für die Zukunft auf! Kontrollieren Sie stets ob die Netzspannung der Spannung auf dem Typenschild entspricht. Für den Fall, dass die Netzspannung nicht geeignet ist, kann dies zu abnormalem Arbeiten des Geräts und zu Personenschäden führen. Die Stromversorgung muss eine Erdung besitzen und mit einem Fehlerstrom-Schutzschalter abgesichert sein. Es ist verboten, Lasten die die Nennlast überschreiten, anzuheben. Verwenden Sie das Gerät nur für den vorgesehenen Zweck. Nie Personen mit dem Seilhebezug anheben. Benutzen Sie das Kabel nicht, um den Stecker aus der Steckdose zu ziehen. Halten Sie das Kabel fern von Hitze, Öl, scharfen Kanten. Versuchen Sie nie, feste oder blockierte Lasten anzuheben. Ziehen Sie nach jedem Gebrauch den Netzstecker aus der Steckdose. Halten Sie Kinder und andere nicht autorisierte Personen vom Gerät fern. Es ist verboten Lasten seitwärts oder von einer Seite zu ziehen. Vermeiden Sie ein Schwingen der Last. Stellen Sie sicher, dass sich der Haken 8 in dieselbe Richtung wie auf dem Drucktaster 10 angezeigt bewegt. Kontrollieren Sie den Seilhebezug regelmäßig auf Beschädigungen. Der Drucktaster 10 muss in gutem Zustand sein. Lassen Sie Reparaturen und Wartungsarbeiten nur in autorisierten Fachwerkstätten durch einen Elektrofachmann durchführen. Reparaturen dürfen nur von einer Elektrofachkraft ausgeführt werden, andernfalls können Unfälle für den Betreiber entstehen. Vermeiden Sie schnelles Ein- und Ausschalten (Tippbetrieb). Seien Sie bei der Bedienung des Seilhebezuges stets aufmerksam. Stehen oder arbeiten Sie nicht unter der gehobenen Last. Es ist unzulässig, festsitzende oder verklemmte Lasten anzuheben. Ziehen Sie immer den Netzstecker, bevor Sie Einstellungen am Gerät vornehmen. Der Seilhebezug ist nicht für den Transport von heißen und / oder geschmolzenen Massen geeignet, des Weiteren ist der Seilhebezug nicht für den Einsatz bei niedrigen Temperaturen und in witterungsintensiver Umgebung geeignet (s. Technische Daten). Die Nutzungsdauer des Seilhebezuges ist ca. 8000 Zyklen (exkl. Verschleißteile). Wenn der Zug 8000 Zyklen durchlaufen hat, müssen alle mechanischen Teile kontrolliert und überholt werden. Lesen und verstehen Sie die Bedienungsanleitung, bevor Sie den Seilhebezug benutzen. Stellen Sie sicher, dass die Bedienperson weiß, wie das Gerät funktioniert, und wie es betrieben werden sollte. Der Nutzer muss immer in Übereinstimmung mit der Bedienungsanleitung operieren. Der Hebezug ist nicht für den Dauereinsatz vorgesehen. Die Betriebsart ist: Aussetzbetrieb ohne Einfluss des Anlaufvor ganges. Nach dem Öffnen der Verpackung inspizieren Sie bitte das Gerät, das Stahlseil, die Haken, den Hebel für die maximale Seillänge und den Hebel des automatischen Stoppmechanismus auf mögliche Transportschäden. DE/AT/CH 100684_par_Seilhebelzug_content_IT.indd 23 23 02.07.14 12:41 Gerätespezifische Sicherheitshinweise / Vor der Inbetriebnahme / Bedienung Gerätespezifische Sicherheitshinweise Der Nutzer muss die Last vom Boden mit der geringsten möglichen Geschwindigkeit anheben. Das Seil muss gestrafft sein, wenn die Last angehoben wird. Der elektrische Seilhebezug ist nicht mit einem Nennleistungsbegrenzer ausgestattet. Deshalb, nicht weiter versuchen die Last anzuheben, wenn der Überhitzungsschutz den Betrieb begrenzt. Die Last überschreitet in diesem Fall die Nennleistung des Seilhebezuges. Lassen Sie keine hängenden Lasten unbeaufsichtigt ohne entsprechende Sicherheitsvorkehrungen getroffen zu haben. Sichern Sie das Gerät mit einer 10 A Sicherung oder einem 10 A Fehlerstrom-Schutzschalter ab um den Stromkreis zu schützen. Verwenden Sie die Hebel 4 / 5 nicht als Routine-Stoppvorrichtung. Diese dienen nur als Stoppvorrichtung für den Notfall. Bevor Sie beginnen, stellen Sie sicher, dass das Stahlseil 6 korrekt um die Trommel 3 gewickelt ist und der Abstand zwischen den Windungen kleiner als das Stahlseil ist (Abb. B). Vor der Inbetriebnahme Montage (s. Abb. C) Befestigen Sie den Seilhebezug mit den 2 Befestigungsbügeln 1 an einem Vierkantrohr / Schwenkarm. Die Abmessungen des Vierkantrohres / Schwenkarms müssen in Übereinstimmung mit der Größe der Befestigungsbügel 1 sein und es / er muss die zweifache Nennlast tragen können. Hinweis: Wir empfehlen Ihnen, hierzu Kontakt mit einem qualifizierten Techniker aufzunehmen. Verschrauben Sie die Befestigungsbügel 1 am Seilhebezug (s. auch Abb. C). Ziehen Sie alle Schrauben fest an. Hinweis: Vor der Inbetriebnahme sollte ein qualifizierter Techniker die Verankerung des Vierkantrohrs / Schwenkarms überprüfen. 24 Hinweis: Der Motor 14 des Seilhebezuges ist mit einem Thermostatschalter ausgestattet. Während des Betriebes des Seilhebezuges kann es daher zum Stoppen des Motors 14 kommen, dieser läuft automatisch wieder an wenn er abgekühlt ist. Flaschenzugfunktion einrichten (s. Abb. D–G) Der Seilhebezug ist mit einer Umlenkrolle 15 und einem Zusatzhaken 16 ausgestattet. Bei richtiger Verwendung kann der Seilhebezug die doppelte Last heben. Montieren Sie Umlenkrolle 15 und Zusatzhaken 16 wie in den Abbildungen D–G dargestellt. Hängen Sie den fest montierten Haken 8 an der Befestigungsöffnung 2 ein (s. Abb. G). Die Last wird nun mit Hilfe von zwei Stahlseilen angehoben, der Seilhebezug kann somit die doppelte Last anheben. Bedienung Seilhebezug in Betrieb nehmen Der Nutzer muss die Last vom Boden mit der geringsten möglichen Geschwindigkeit anheben. Das Seil muss gestrafft sein, wenn die Last angehoben wird. Sichern Sie das Gerät mit einer 10 A Sicherung oder einem 10 A Fehlerstrom-Schutzschalter ab um den Stromkreis zu schützen. Bevor Sie beginnen, stellen Sie sicher, dass das Stahlseil 6 korrekt um die Trommel 3 gewickelt ist und der Abstand zwischen den Windungen kleiner als das Stahlseil ist (Abb. B). Entfernen Sie vor der ersten Benutzung das Klebeband von der Seiltrommel 3 . Stellen Sie sicher, dass die Ladung ordnungsgemäß am Haken 8 beziehungsweise bei Flaschenzugbetrieb dem Zusatzhaken 16 gesichert ist und halten Sie stets Abstand zur Last und dem Stahlseil 6 . DE/AT/CH 100684_par_Seilhebelzug_content_IT.indd 24 02.07.14 12:41 Bedienung / Reinigung, Wartung und Ersatzteilbestellung Seilzug bedienen Überprüfen Sie, ob der Not-Aus-Schalter 9 gedrückt ist. Drehen Sie den Not-Aus- Schalter 9 im Uhrzeigersinn um ihn zu entriegeln. Drücken Sie den Drucktaster in Richtung ▲ 10 zum Anheben der Last (s. Abb H). Drücken Sie den Drucktaster in Richtung ▼ 10 zum Senken der Last (s. Abb H). Hebel des automatischen Stoppmechanismus 5 Wenn die maximale Hebehöhe erreicht ist, drückt das Abschaltgewicht 7 den Hebel 5 nach oben. Dadurch wird ein Endschalter betätigt und die Last kann nicht weiter angehoben werden. Hebel für maximale Seillänge 4 Wenn die Last die niedrigste mögliche Position erreicht hat, wird ein Endschalter betätigt, der ein weiteres Absenken der Last unmöglich macht. Dieser Endschalter verhindert auch einen Betrieb des Seilhebezuges in falscher Richtung (Haken bewegt sich entgegengesetzt zur am Drucktaster 10 angezeigten Richtung). ACHTUNG! Im Falle eines Notfalls sofort NotAus- Schalter 9 betätigen um den Seilhebezug anzuhalten. Die Bedienung des Seilhebezuges ist nicht möglich, wenn der Not-Aus-Schalter betätigt wurde. Reinigung, Wartung und Ersatzteilbestellung Reinigung ACHTUNG! Ziehen Sie vor allen Reinigungsarbeiten den Netzstecker aus der Steckdose. Verwenden Sie keine Reinigungs- oder Lösungsmittel; diese könnten die Kunststoffteile des Gerätes angreifen. Achten Sie darauf, dass kein Wasser in das Geräteinnere gelangen kann. Halten Sie Schutzvorrichtungen, Luftschlitze und Motorengehäuse so staub- und schmutzfrei wie möglich. Reiben Sie das Gerät mit einem sauberen Tuch ab oder blasen Sie es mit Druckluft bei niedrigem Druck aus. Reinigen Sie das Gerät regelmäßig mit einem feuchten Tuch und etwas Schmierseife. Hinweis: Es wird empfohlen, das Gerät direkt nach jeder Nutzung zu reinigen. Wartung ACHTUNG! Stellen Sie stets sicher, dass das Gerät nicht mit dem Stromnetz verbunden ist, wenn Sie es pflegen. Nachstehend: Ein Zyklus entspricht einer Aufund Abwärtsbewegung einer Last. Periodische Prüfung entspricht einer Prüfung nach 100 Zyklen. Überprüfen Sie periodisch, dass die Endschalter des Seilhebezugs ordnungsgemäß funktionieren (ohne Last prüfen). Die Prüfung erfolgt folgendermaßen: Wenn das Seil die maximale Hebehöhe erreicht, wird der Hebel des automatischen Stoppmechanismus 5 betätigt. Der Motor 14 muss nun stoppen. Wenn das Stahlseil 6 so weit wie möglich abgewickelt ist, wird der Hebel für maximale Seillänge 4 betätigt. Der Motor 14 muss nun stoppen. Prüfen Sie periodisch das Netzkabel 12 und die Steuerleitung 13 . Schmieren Sie alle 200 Zyklen Stahlseil 6 und Umlenkrolle 15 . Kontrollieren Sie alle 30 Zyklen, ob das gesamte Stahlseil 6 in gutem Zustand ist. Falls es beschädigt ist (s. Abb. I), muss es durch ein den technischen Daten entsprechendes Stahlseil ersetzt werden. Alle 1000 Zyklen prüfen, ob die Schrauben der Befestigungsbügel 1 und Umlenkrolle 15 gut angezogen sind. DE/AT/CH 100684_par_Seilhebelzug_content_IT.indd 25 25 02.07.14 12:41 Reinigung, Wartung und Ersatzteilbestellung / Entsorgung / Garantie / Service Alle 1000 Zyklen prüfen, ob die Haken 8 / 16 und die Umlenkrolle 15 in gutem Zustand sind. Kontrollieren Sie vor jeder Benutzung des Seilhebezuges, ob Not-Aus-Schalter 9 und Drucktaster 10 in einwandfreiem Betriebszustand sind. Alle 1000 Zyklen das Bremssystem überprüfen. Wenn der Motor 14 ungewöhnliche Geräusche macht oder die Nennlast nicht anheben kann, ist es möglich, dass das Bremssystem überholt werden muss: - Ersetzen Sie beschädigte oder abgenutzte Teile, und bewahren Sie die dazugehörige Wartungsdokumentation auf. - Für außerplanmäßige Instandhaltungsarbeiten wenden Sie sich bitte an ein autorisiertes Servicecenter. Entsorgung Das Gerät befindet sich zum Schutz vor Transportschäden in einer Verpackung. Diese Verpackung ist Rohstoff und ist somit wieder verwendbar oder kann dem Rohstoffkreislauf zurückgeführt werden. Das Gerät und dessen Zubehör bestehen aus verschiedenen Materialien, wie z.B. Metall und Kunststoffe. Führen Sie defekte Bauteile der Sondermüllentsorgung zu. Fragen Sie im Fachgeschäft oder in der Gemeindeverwaltung nach! Werfen Sie Elektrowerkzeuge nicht in den Hausmüll! Gemäß Europäischer Richtlinie 2012 / 19 / EU über Elektro- und Elektronik-Altgeräte und Umsetzung in nationales Recht müssen verbrauchte Elektrowerkzeuge getrennt gesammelt und einer umweltgerechten Wiederverwertung zugeführt werden. 26 Recycling-Alternative zur Rücksendeaufforderung: Der Eigentümer des Elektrogerätes ist alternativ anstelle Rücksendung zur Mitwirkung bei der sachgerechten Verwertung im Falle der Eigentumsaufgabe verpflichtet. Das Altgerät kann hierfür auch einer Rücknahmestelle überlassen werden, die eine Beseitigung im Sinne der nationalen Kreislaufwirtschafts- und Abfallgesetze durchführt. Nicht betroffen sind den Altgeräten beigefügte Zubehörteile und Hilfsmittel ohne Elektrobestandteile. Garantie / Service Wir leisten 3 Jahre Garantie ab Kaufdatum für Material- und Fabrikationsfehler des Geräts. Die Garantie gilt nicht: · Im Falle von Schäden, die auf unsachgemäßer Bedienung beruhen. · Für Verschleißteile. · Für Mängel, die dem Kunden bereits bei Kauf bekannt waren. · Bei Eigenverschulden des Kunden. Die gesetzlichen Gewährleistungen des Kunden bleiben durch die Garantie unberührt. Für Geltendmachung eines Garantiefalles innerhalb der Garantiezeit ist durch den Kunden der Nachweis des Kaufes zu führen. Die Garantie ist innerhalb eines Zeitraumes von 3 Jahren ab Kaufdatum geltend zu machen. Der Kunde hat im Garantiefall das Recht zur Reparatur der Ware bei unseren eigenen oder bei von uns autorisierten Werkstätten. Das Gerät aus keinem Grund öffnen – im Falle von Öffnung oder Veränderung erlischt der Garantieanspruch. Weitergehende Rechte werden dem Kunden (aufgrund der Garantie) nicht eingeräumt. In vielen Fällen liegt der Grund für Reklamationen in Bedienungsfehlern. Diese könnten ohne Weiteres telefonisch oder per E-Mail behoben werden. Bitte wenden Sie sich an die für Sie eingerichtete Service-Hotline, bevor Sie das Gerät beim Hersteller reklamieren. DE/AT/CH 100684_par_Seilhebelzug_content_IT.indd 26 02.07.14 12:41 Garantie / Service / Konformitätserklärung DE: Matrix GmbH Service Postauer Str. 26 D – 84109 Wörth/Isar Germany Tel.: +49 (0) 1806/841090 Fax: +49 (0) 8702/45338 98 E-mail: [email protected] AT: Magedon Bildstöcklstraße 18 AT - 9500 Villach T: +43 720 11 6465 F: +43 720 11 6464 E: [email protected] CH: Winkler Arnold AG ($) Technischer Großhandel Madetswilerstr. 18 CH – 8332 Russikon T: +41 449548383 F: +41 449548384 E: [email protected] Konformitätserklärung Wir, MATRIX GMBH, Dokumentenverantwortlicher: Herr Joachim Lichtl, POSTAUER STR. 26, 84109 WÖRTH / ISAR, DEUTSCHLAND, erklären hiermit, dass dieses Produkt mit den folgenden Normen, normativen Dokumenten und EG-Richtlinien übereinstimmt: 2006 / 42 / EC 2006 / 95 / EC 2004 / 108 / EC 2011 / 65 / EU angewandte harmonisierte Normen EN 14492-2+A1 EN 60204-32 EN 55014-1 EN 55014-2 EN 61000-3-2 EN 61000-3-3 Typ / Gerätebezeichnung: Seilhebezug PSZ 250 B2 Baujahr: 2014 IAN 100684 Wörth / Isar, 31.05.2014 Bitte halten Sie für alle Anfragen den Kassenbon und die Artikelnummer (z. B. IAN 12345) als Nachweis für den Kauf bereit. Ersatzteilbestellung Bei der Ersatzteilbestellung sollten folgende Angaben gemacht werden: - Typ des Gerätes - Artikelnummer des Gerätes - Ident-Nummer des Gerätes Joachim Lichtl - Geschäftsführer Technische Änderungen im Sinne der Weiterentwicklung sind vorbehalten. DE/AT/CH 100684_par_Seilhebelzug_content_IT.indd 27 27 02.07.14 12:41 28 100684_par_Seilhebelzug_content_IT.indd 28 02.07.14 12:41 MATRIX GMBH Postauer Str. 26 D-84109 Wörth / Isar Germany Versione delle informazioni · Last Information Update · Stand der Informationen: 06 / 2014 · Ident.-No.: PSZ250B2062014-IT IAN 100684 100684_par_Seilhebelzug_cover_IT.indd 2 18.06.14 15:43