1
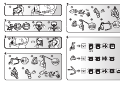
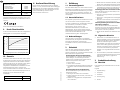
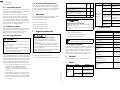
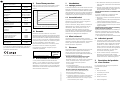
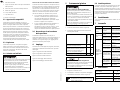
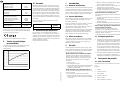
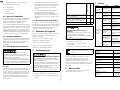
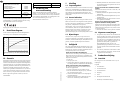
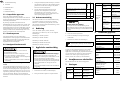
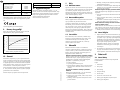
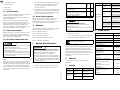
3.2 Compatible devices The mask can be used with all therapy devices which are not for life-sustaining treatment of patients with sleep apnea or ventilatory insufficiency. With some combinations of devices, the actual pressure in the mask will not correspond to the prescribed therapy pressure, even if the therapy device is displaying the correct pressure. Have the combination of devices adjusted by a physician or specialist dealer so that the actual pressure in the mask corresponds to therapy pressure. 3.5 Pressure measurement port Action The mask has a pressure measurement port which can be used for measuring pressure or supplying oxygen. If you are not using this, close it with the plug for pressure measurement port to reach therapy pressure. 4 Wash mask components with warm water and a mild detergent. Operation The following figures show you how to apply, adjust, remove, dismantle and assemble the mask: Figure 5: Assembling the mask 5 Hygienic preparation X Replace mask cushion. Tube system is leak- Check connection and ing. fit of tubes. Therapy presClose pressure measure is not Air is escaping from surement port with reached. pressure measureplug (included in scope ment port. of supply). Technical data Product class according to 93/42/EEC Dimensions (W x H x D) Discolorations of mask components do not impair the functionality of the mask. Weight IIa 96 mm x 115 mm x 83 mm 87 g Therapy pressure range 4 hPa - 30 hPa Hose connection: Cone according to EN ISO 5356-1 Ø 22 mm (male) Pressure measurement port Ø 4 mm 5.2 Change of patient Width of headgear clips 24 mm You must subject the mask to a hygienic preparation in the event of a change of patient. For information on hygienic preparation in the event of a change of patient, please refer to our Internet brochure at www.weinmann-medical.com. If you do not have Internet access, please contact Weinmann. Temperature range: Operation Storage Flow resistance at 50 l/min at 100 l/min 0.05 hPa 0.28 hPa 6 Anti-asphyxia valve flow resistance Inspiration at 50 l/min: Exhalation at 50 l/min: 0.5 hPa 0.5 hPa Switching pressure for anti-asphyxia valve • Open: • Close: 1 hPa 2 hPa 1. Dismantle the mask (see figure 4). 2. Clean mask in accordance with the table below: 8 5. Perform a visual inspection. r 5.1 Cleaning the mask Anti-asphyxia valve Replace anti-asphyxia defective. valve. 4. Allow all parts to air-dry. 7. Assemble the mask (see figure 5). Risk of injury from inadequate cleaning! Residues may congest the mask, impair the integrated exhalation system, and jeopardize therapy success. For patients with a compromised immune system or particular background of illness, disinfect mask components daily following consultation with the physician. Thoroughly clean the contact surfaces between the elbow and the rotating sleeve. Disposal You can dispose of all parts in domestic waste. 7 As long as the therapy device is in operation, the air flow forces the membrane against the opening to the atmosphere and seals it completely. The patient breathes through the therapy device. If the therapy device fails or if the device is not connected, the membrane is in the rest position, in other words the opening to the atmosphere is free. The patient breathes ambient air through this opening. Wash headgear by hand. 6. If necessary: Replace damaged parts. Faults Fault Facial pressure pain. WM 68036 08/2014 EN • X Material damage due to abrasion! Rubbing the mask cushion and forehead cushion can damage the coating. Do not rub the mask cushion and forehead cushion dry. 3.4 Anti-asphyxia valve • Mask cushion is damaged. When washing mask parts (exception: mask cushion and forehead cushion), clean thoroughly with a cloth or a soft brush. Remedy Anti-asphyxia valve Fit anti-asphyxia valve incorrectly fitted. correctly (see figure 5). Figure 3: Removing the mask The mask has an integrated exhalation system. The retaining ring and mask body are shaped in such a way that a gap forms between these parts. The exhaled air can escape through this gap. The anti-asphyxia valve has an opening to the atmosphere through which the patient can inhale ambient air if the therapy device fails. This significantly reduces the risk of breathing CO2 back in and thus also the risk of asphyxia. Inside the anti-asphyxia valve is a membrane which can adopt one of two positions: Cause Mask is not adjust- Re-adjust mask (see ed correctly. figure 2). X 3. Rinse all parts with clear water. Figure 2: Adjusting the mask Figure 4: Dismantling the mask Safety function of the anti-asphyxia valve Fault Figure 1: Applying the mask 3.3 Exhalation system Risk of asphyxia if anti-asphyxia valve not working properly! Residues may block the mask and jeopardize the success of therapy. Check before each use that the anti-asphyxia valve is working properly. Clean contact surfaces between the elbow and the rotating sleeve thoroughly. Weekly 12. Mask cushion Daily 11. Headgear clip Draft in the eyes. Cause Remedy Mask fits too tightLoosen headgear. ly. Mask fits too looseTighten headgear. ly. Mask does not fit. Contact your authorized dealer. +5°C to + 40°C -20°C to +70°C