1
SYMBOLS
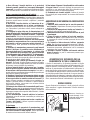
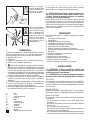
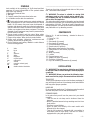
Look carefully at the symbology of fig.B stored and their
meanings. A correct interpretation of the symbols allows
safer use of the machine.
1 Model and Technical Data
2 Warning!
3 Carefully read all the instructions before use
4 Lot Number and/or date of manufacture
5
Electric and electronic waste may contain substances
that are dangerous for the environment and for human
health. For this reason they must never be disposed of
together with domestic waste, but collected separately in
specific collection centres or returned to the retailer when
similar new equipment has been purchased. The illegal
disposal of such equipment may result in prosecution to
the full extent of the law.
6 Danger launch material and high noise. Wear safety
glasses to protect the eyes and protective headphones.
7 Danger sharp edges. Wear gloves to protect hands.
8 Before each operation, inspection, maintenance and
cleaning, disconnect the power plug.
9 Risk of pinching and cutting. Maintain a safe distance
from all moving parties.
V
Hz ~
A
W
kg nO mm s min-1 dB Volts
Hertz
AC
Amperes
Watts
kilograms
no-load speed
millimeters
second
round per minute (rpm)
decibel
double electrical insulation
___________________________________________
Thank you for giving us the preferred choice of this power
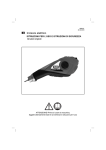
tool , hereinafter called blender .
!!
WARNING! The mixer is suitable for mixing fluid
substances such as paint, varnish, mortar, plaster, glue.
It is forbidden the use of hazardous materials in areas
with a risk of fire/explosion.
This instruction guide contains information and as deemed
necessary for the proper use, the knowledge and the normal
maintenance of the tool. They do not report information on
mixing techniques , the user will find more news about books
and publications or by attending courses.
COMPONENTS
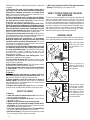
Refer to fig . A and the following , attached to these instructions.
1 Power On / Off
2 Handle
3 Side handle (if present)
4 Rear handle (if present)
5 Screw attachment (if present)
6 Speed control (if present)
7 Mechanical speed selector (if present)
8 Safety button or lock-switch (if present)
9 Spindle
10 Whip (if present)
11 Louvers
12 Plug and power cord
13 Adapter for whips (if present)
14 Chuck key (if present)
15 Key/s for mounting accessories (if present)
INSTALLATION
!!
WARNING! The manufacturer disclaims any liability
for any direct and/or indirect damages caused by improper
connection.
WARNING! Before you perform the following steps,
make sure that the plug is disconnected from the mains.
!!
TRANSPORT
To carry the tool always use his or her briefcase packaging (if
any) and this will preserve it from bumps, dust and moisture
that may affect proper operation.
HANDLING
Firmly grasp the handle (pos.7) without pressing the switch
after use and place it to the side without dash it.
COMMISSIONING
In the place that you will use the power tool you should
consider :
- That the area is not damp and is sheltered from the
elements.
- Which is provided around a large working area free from
obstructions.
- That there is good lighting.
- Which is used in the vicinity of the main switch with
differential (for the charger).
- That the fuel system is equipped with a grounding in
accordance with the rules (only if the tool is in class I,
equipped with a plug with ground wire) .
- 9 -