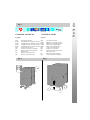
1
FARO S.p.A.
Società
Indirizzo
Via Faro 15, 20060 Ornago (MI) -Italy
Telefono
+ 39 039 68781
fax +39 039 6010540
Dichiara sotto la propria responsabilità che il prodotto
Mirella Plus
DICHIARAZIONE DI CONFORMITA’
Lavastrumenti Mirella Plus
soddisfa i rquisiti essenziali delle Direttive
95/06
2006/95/CE sulla Bassa Tensione
2004/108/CE sulla Compatibilita elettromagnetica
ed è conforme alle Norme
EN 60335-1
EN60335-2-58
EN 61000-3-2
EN 61000-3-3
EN 55014-1
EN 55014-2
1
Mirella Plus
DECLARATION OF CONFORMITY CE
Society
FARO S.p.A.
Address
Via Faro 15, 20060 Ornago (MI) -Italy
Telephone
+ 39 039 68781
fax +39 039 6010540
Declares under it’is own responsability that the product
Lavastrumenti Mirella Plus
it satisfies requirement essential of the Directives
95/06
2006/95/ CE
2004/108/ CE
DBT /LVD Low voltage Directive
EMC Electromagnetic Compatibility
It complies with the following technical standars:
EN 60335-1
EN60335-2-58
EN 61000-3-2
EN 61000-3-3
EN 55014-1
EN 55014-2
2
Norme di sicurezza................................................................pag. 4-5
Caratteristiche.......................................................................pag. 6-7
Istruzioni d’uso...................................................................... pag. 8-9-10-11-12
Manutenzione......................................................................... pag. 13-14
Guida ai problemi...................................................................pag. 15-16
Specifiche tecniche................................................................pag. 17
Mirella Plus
INDICE
Le figure relative alle descrizione comandi e alle istruzioni sono
riportate sulle ultime pagine.
ITALIANO. ............................................................. Pagina
ENGLISH. .............................................................. Page
SIMBOLOGIE
PERICOLO
I paragrafi contrassegnati con questo simbolo, contengono istruzioni che
devono essere eseguite attentamente per evitare danni al dispositivo, all’operatore ed eventualmente al paziente.
AVVERTENZE
Queste istruzioni avvisano che bisogna porre molta attenzione per evitare
situazioni che potrebbero danneggiare il dispositivo.
DIVIETO
Questa icona mette in evidenza cosa non si deve fare per evitare danni al
dispositivo.
SUGGERIMENTI
Con questa icona, viene fornita un’informazione che permette di usare il
dispositivo in modo più efficace.
Smaltire il dispositivo attenendosi alle norme per la raccolta differenziata del
materiale elettrico
3
Mirella Plus
NORME DI SICUREZZA
Prima di procedere alla messa in funzione della macchina l’operatore dovrà
aver letto con cura la presente pubblicazione ed avere acquisito una profonda
conoscenza delle specifiche tecniche e dei comandi macchina.
Prima d’installare la macchina, controllare che l’area adibita sia compatibile con le
dimensioni d’ingombro della stessa.
Nel caso si debba installare o rimuovere parte della macchina, usare solo mezzi di
sollevamento e movimentazione adeguati al peso.
- Non permettere a personale non autorizzato di mettere in funzione, regolare, condurre
o riparare la macchina.
Far riferimento inoltre a questo manuale per le operazioni necessarie.
-
Le parti meccaniche ed i componenti elettrici/elettronici situati all'interno della macchina
sono protetti da pannelli interamente chiusi.
Prima di procedere alla pulizia e/o alla manutenzione della macchina, accertarsi che
l’interruttore generale sia in posizione di “OFF” O , in modo da togliere
l’alimentazione elettrica alla macchina durante l’intervento dell’operatore.
- L’impianto di alimentazione elettrica deve essere provvisto di un sistema di sgancio
automatico a monte dell’interruttore generale della macchina e di un idoneo impianto di
messa a terra che risponda a tutti i requisiti delle norme industriali per la prevenzione degli
infortuni.
- Nel caso si debba intervenire sull’interruttore generale o nelle sue vicinanze, togliere
tensione alla linea a cui é allacciato l’interruttore generale.
- Tutti i controlli e le operazioni di manutenzione che richiedono la rimozione delle
protezioni di sicurezza vengono effettuati sotto la completa responsabilità dell’utente.
Si raccomanda pertanto di far eseguire queste operazioni esclusivamente a personale
tecnico specializzato ed autorizzato.
- Controllare che tutti i dispositivi antinfortunistici di sicurezza (barriere, protezioni,
carter, microinterruttori, ecc.) non siano stati manomessi e che siano perfettamente
funzionanti prima di operare, in caso contrario provvedere alla loro sistemazione.
- Non rimuovere i dispositivi di sicurezza.
- Onde evitare rischi personali, utilizzare solo attrezzi elettrici che siano correttamente
connessi alla presa di terra e conformi ai regolamenti nazionali di sicurezza.
- Non manomettere per nessun motivo l’impianto elettrico o qualunque altro meccanismo.
- Non usare mai le mani o strumenti non adatti per localizzare eventuali perdite dai vari
tubi. Aria, fluidi in pressione od irritanti potrebbero causare danni gravi alle persone e/o
alle cose.
4
Non utilizzare le mani al posto di adeguati utensili per operare sulla macchina
Non utilizzare le mani od altri oggetti per arrestare parti in movimento
PRESTARE LA MASSIMA ATTENZIONE ALLE TARGHETTE PRESENTI
SULLA MACCHINA OGNI VOLTA CI SI APPRESTI A OPERARE SULLA
STESSA O NELLE SUE VICINANZE.
Mirella Plus
NORME DI SICUREZZA
- E’ fatto obbligo all’utente di mantenere tutte le targhette leggibili.
- Non salire sullo sportello e sulla parte superiore della macchina.
- E’ inoltre fatto obbligo all’utente di sostituire tutte le targhette che per qualunque motivo
si siano deteriorate o che non siano chiaramente visibili, richiedendo quelle nuove al
Servizio Ricambi .
- Nel caso di malfunzionamenti della macchina o danni ai componenti contattare il
responsabile alla manutenzione, senza procedere con ulteriori interventi di riparazione.
- E’ fatto assoluto divieto a chiunque di utilizzare la macchina per usi diversi da quelli
espressamente previsti e documentati.
L’uso della macchina dovrà avvenire sempre nei modi, tempi e luoghi previsti dalle norme
di buona tecnica, di legge vigenti in ogni nazione, anche se nel paese specifico non
esistessero apposite norme per regolare il settore.
- Il costruttore declina ogni responsabilità per eventuali incidenti o danni a persone
o cose insorgenti dalla mancata osservanza sia delle prescrizioni relative alla
sicurezza che delle norme qui riportate.
- Tali prescrizioni, unitamente alle norme relative all’installazione della macchina e agli allacciamenti elettrici costituiscono, del resto, parte integrante delle
Regolamentazioni Industriali Antinfortunistiche di ogni singolo paese.
- QUESTE NORME DI SICUREZZA INTEGRANO E NON SOSTITUISCONO LE
NORME DI SICUREZZA IN VIGORE LOCALMENTE
- Non eseguire MAI riparazioni affrettate o di fortuna che potrebbero compromettere il buon funzionamento della macchina.
- IN CASO DI DUBBIO RICHIEDERE SEMPRE L’INTERVENTO DI PERSONALE
SPECIALIZZATO.
QUALSIASI MANOMISSIONE DA PARTE DELL’UTENTE SOLLEVA LA
DITTA COSTRUTTRICE DA OGNI RESPONSABILITÀ E RENDE L’UTEN
TE STESSO UNICO RESPONSABILE VERSO GLI ORGANI COMPETEN
TI PER LA PREVENZIONE DEGLI INFORTUNI.
5
Mirella plus
CARATTERISTICHE
DESCRIZIONE GENERALE
La cabina a doppia parete garantisce un migliorato risparmio energetico. L'interno vasca è
totalmente arrotondato e privo di interstizi in modo da evitare il ristagno di sporco. Le potenze
applicate e la studiata conformazione degli allestimenti di lavaggio e risciacquo, offrono la
migliore garanzia in quanto a risultati di lavaggio ed igiene.
La struttura, a doppia parete, è realizzata in acciaio inox AISI 304 finemente satinato. I filtri
e le aste di lavaggio e risciacquo sono facilmente asportabili per le operazioni di pulizia. Il
funzionamento è totalmente automatico.
Tutte le componenti interne sono raggiungibili dal fronte macchina rendendo così, le
operazioni di manutenzione facili ed economiche da eseguire.
TIPO D'UTILIZZO E CONTROINDICAZIONI D'USO
Le macchine sono state progettate, costruite per la pulizia di strumenti collocati in appositi
cestelli, mediante l'uso di detersivo e brillantante.
• É consentito l'uso di tutti i detersivi e brillantanti specifici per lavastrumenti per uso
industriale normalmente in commercio.
Qualsiasi utilizzo per usi impropri della stessa solleva la ditta
costruttrice da ogni responsabilità per incidenti a cose o a persone e fa
decadere le condizioni di garanzia.
TRASPORTO, SPEDIZIONE E STOCCAGGIO. (Fig. 2)
-
La macchina normalmente viene spedita dentro una scatola di cartone chiusa da regge.
Per il trasporto della macchina imballata utilizzare un carrello elevatore o un transpallet,
posizionando la scatola sulle relative forche.
La spedizione e lo stoccaggio della macchina deve essere effettuato esclusi
vamente al riparo degli agenti atmosferici.
CONTROLLO AL RICEVIMENTO
Al ricevimento della fornitura, verificare che gli imballi siano integri e
visivamente non siano danneggiati.
Se il tutto è integro, rimuovere l'imballo (salvo nei casi di istruzioni differenti comunicate dalla
ditta costruttrice ) e verificare che la macchina sia esente da danneggiamenti dovuti al trasporto.
Verificare, quindi, eventuali danni alla struttura, schiacciamenti della struttura, rotture.
Qualora si riscontrino danneggiamenti o imperfezioni:
1- Avvertire immediatamente il trasportatore, sia telefonicamente che tramite comunicazione scritta a mezzo di R.R.;
2- Informare, per conoscenza, la ditta costruttrice previo raccomandata (R.R.),
La comunicazione di eventuali danneggiamenti o anomalie deve essere
tempestiva e comunque deve pervenire entro 3 giorni dalla data di ricevimento
della macchina.
6
SBALLAGGIO (Figg. 2-3-4)
Per togliere la macchina dall'imballo eseguire le seguenti operazioni:
1. Tagliare le regge (7) che bloccano il cartone.
2. Togliere il cartone (8) sollevandolo verso l'alto.
3. Togliere la pellicola di protezione dalla macchina.
4. Togliere la macchina dal fondo sollevandola dalla parte inferiore della carcassa (Fig. 4).
5. Tutti gli elementi dell'imballaggio devono essere raccolti e non lasciati alla portata dei
bambini, in quanto fonti di pericolo, per lo smaltimento sono prodotti assimilati ai rifiuti
solidi urbani.
Mirella plus
CARATTERISTICHE
Una volta sballata la macchina non utilizzare MAI per il sollevamento la
cassetta componenti elettrici.
Sollevare la macchina alzandola dalla parte inferiore della carcassa,per il
trasporto, posizionarla sulle forche di un carrello.
IDENTIFICAZIONE DELLA MACCHINA (Fig. 5)
- Il numero di matricola e i dati relativi alla macchina sono scritte sulle targhette (9)
posizionata sulla parte laterale destra della macchina.
Nelle eventuali richieste di assistenza tecnica o nelle ordinazione delle
parti di ricambio citare sempre il modello e il due numeri di matricola della
macchina.
DESCRIZIONE SICUREZZE
• Il modello Mirella plus è dotato di microinterruttore di sicurezza che blocca la pompa
•
•
•
di lavaggio in caso di apertura accidentale dello sportello accesso vasca.
Parti elettriche chiuse da pannelli bloccati con viti.
Dispersore elettrico di terra equipotenziale.
Troppopieno (21) Fig.10 di sicurezza per impedire il trabocco dell'acqua.
7
Mirella Plus
ISTRUZIONI D’USO
FASI DI LAVAGGIO
Macchina spenta
A macchina spenta sul display verrà visualizzata la scritta “OFF”:
Mirella
plus
Accensione e Preparazione macchina
Per accendere la macchina premere l’interruttore “Q1”.
LAMPEGGIA il led riferito all’ultimo ciclo selezionato
(LC1 - LC2 - LC3 - LC4).
In caso di prima accensione LAMPEGGIA il led LC2.
Automaticamente inizia il carico del boiler e successivamente
della vasca.
Quando la macchina sta caricando il display indica “F2”.
A livello ottenuto, si inseriscono le resistenze per il riscaldamento prima dell’acqua del boiler
poi della vasca.
Il display indica la temperatura della vasca.
E' consigliabile, alla prima accensione , attendere che sul display venga
indicata la temperatura di 55°C.
SELEZIONE CICLO
Premere il pulsante “S9 CYCLE” per selezionare il ciclo di lavaggio tra 4 diversi cicli
(BREVE, MEDIO, LUNGO, INTENSIVO) e in particolare:
LC 1: CICLO CORTO
LC 2: CICLO MEDIO
LC 3: CICLO LUNGO
LC 4: CICLO INTENSIVO
* escluso risciacquo
8
= * 242 sec.
= * 420 sec.
= * 544 sec.
= * 720 sec.
AVVIAMENTO CICLO DI LAVAGGIO M ANUALE
Per effettuare l'avvio del ciclo in modo MANUALE, tenere premuto il pulsante “S3” di
START per circa 2 sec.
Mirella plus
ISTRUZIONI D’USO
I led del display si accendono in
sequenza, lampeggerà il dato presente sul display (indicando che il
ciclo è in corso) e LAMPEGGIA il
led di ciclo pre-selezionato (per
esempio LC2);
AVVIAMENTO CICLO DI LAVAGGIO AUTOMATICO
Per effettuare la partenza del ciclo di lavaggio in modo AUTOMATICO (con
l'apertura e chiusura della porta) é necessario cambiare la modalità di partenza ciclo.
Tenere premuto il pulsante “S3 START” fino a quando il led ciclo pre-selezionato
rimane acceso FISSO (circa 10 sec.) , con la chiusura della porta si dà
AUTOMATICAMENTE avvio al ciclo di lavaggio.
CONSIGLI DURANTE IL CICLO
Indicazioni a display
1) Durante la fase di lavaggio viene
visualizzata la temperatura della
vasca e i led del display si accendono
in sequenza
2) Durante la fase di sgocciolamento si
accendono i soli led del display
3) Durante la fase di risciacquo viene visualizzata la temperatura del
boiler e i led del display si accendono in sequenza;
Riprendendo il pulsante “S3 START” si avvia un nuovo ciclo di lavaggio
9
Mirella plus
ISTRUZIONI D’USO
D’USO
ISTRUZIONI
L’utilizzo della macchina permette di ottenere sempre il risciacquo alla temperatura
ideale ai fini igienici; infatti se questa non è sufficiente il lavaggio viene automaticamente prolungato affinché ci siano le condizioni necessarie per un risciacquo ottimale
a 85°C. Il prolungamento dell'attesa raggiungimento temperatura ottimale può
arrivare ad un tempo massimo di 8 minuti .
Interruzione del ciclo
1) E’ possibile interrompere momentaneamente il ciclo di
lavaggio con l’apertura della porta fungendo da EMERGENZA;
sul display comparirà la scritta “F1” ;
Le operazioni riprenderanno richiudendo la porta.
2) SPEGNENDO la macchina tramite l’interruttore “Q1” si
interrompe il ciclo.
3) Alla riaccensione della macchina, si illumina il led relativo
all’ultimo ciclo selezionato e sul display comparirà l’allarme
“A1” che andrà a scomparire quando ripartirà un nuovo ciclo.
Al termine del ciclo di lavaggio estrarre il cestello e scuoterlo leggermente in modo
da far cadere le ultime gocce rimaste sugli strumenti lavati.
Lasciare asciugare gli strumenti, toglierli dal cestello con mani pulite.
Riporre il tutto su piani igienici e sicuramente stabili.
Autolavaggio e Scarico
Alla fine delle operazioni di lavaggio SPEGNERE la macchina
premendo l’ interruttore “Q1” .
Chiudere la porta di accesso vasca, premere il pulsante “S3
START” (circa 5 sec.), attendere la visualizzazione sul display
della scritta “C1” e rilasciare il pulsante “S3 START” .
Avrà inizio il ciclo di Autolavaggio e Scarico, indicato dall'
accensione in sequenza dei led del display, con l’attivazione della
pompa di scarico ; la fine della fase descritta viene segnalato dalla
comparsa sul display della scritta “OFF”.Durata max 2 1/2
min.
10
Scarico Manuale
E' possibile svuotare la vasca avviando il ciclo di scarico manuale durante il quale rimane attiva
solo la pompa di scarico.
L’esecuzione del ciclo è possibile solo lasciando la macchina ACCESA e
a vasca piena d'acqua.
Mirella plus
ISTRUZIONI D’USO
Chiudere la porta di accesso vasca e premere il pulsante
“S9” o CYCLE (circa 5 sec.); attendere la visualizzazione
sul display della scritta “ C2” e rilasciare il pulsante “ S9”
o CYCLE (circa 5 sec.).
Avrà inizio il ciclo di Scarico , indicato dall' accensione in
sequenza dei led del display; la fine della fase descritta
viene segnalata dalla comparsa sul display della scritta
“OFF”. Durata max 1 min.
Premendo il pulsante “ S9” o CYCLE si può interrompere il ciclo di scarico prima del tempo
prestabilito.
Lettura delle TEMPERATURE
In qualsiasi momento, a macchina ACCESA o SPENTA,
premendo il pulsante “SI” è possibile visualizzare in
sequenza le temperature REALI e PROGRAMMATE
dell’acqua in vasca (t1) e dell’acqua contenuta nel boiler
(t2).
- Premendo una volta il pulsante “SI” sul display viene
visualizzata la scritta “t1”;
- Premendo una seconda volta il pulsante “SI” viene
visualizzata la temperatura REALE rilevata dell’acqua in
vasca;
- Premendo una volta ancora il pulsante “SI” verrà
visualizzata la temperatura PROGRAMMATA dell’acqua in vasca (per il ciclo selezionato);
- Alla successiva pressione del pulsante “SI” viene
visualizzato il codice “t2” relativo al boiler;
- Premendo nuovamente “ SI” viene visualizzata la temperatura REALE dell’acqua contenuta nel boiler;
11
Mirella Plus
ISTRUZIONI D’USO
- Alla nuova pressione di “SI” viene visualizzata la temperatura PROGRAMMATA dell’acqua nel boiler (per il
ciclo selezionato);
- Premendo nuovamente “S I” si ritorna allo stato di partenza.
Le operazioni sopraelencate NON POSSONO ESSERE ESEGUITE
DURANTE UN CICLO.
Spegnimento a fine giornata
Alla fine della giornata lavorativa SPEGNERE la lavastrumenti premendo il pulsante “ Q1”.
Disinserire l’interruttore generale a monte della macchina e chiudere i rubinetti di alimentazione idrica.
AVVERTENZE DURANTE IL FUNZIONAMENTO
1) Controllare che la temperatura di lavaggio si mantenga intorno ai 55-60° C.
2) Evitare di immergere le mani nude nell’acqua detersivata; se ciò dovesse accadere
risciacquare subito ed abbondantemente con acqua corrente.
3) Utilizzare solo detersivi antischiumogeni ad azione clorattiva specifica per macchine
industriali.
4) Disattivare l’apparecchiatura in caso di guasto o di cattivo funzionamento.
Per l’eventuale riparazione, rivolgersi ad un centro di assistenza tecnica autorizzato dal
costruttore richiedendo l’utilizzo di ricambi originali.
5) In nessun caso, cambiare la programmazione delle temperature (t1 e t2) senza prima aver
consultato il centro di assistenza tecnica autorizzato dal costruttore.
Il mancato rispetto di quanto sopra descritto può compromettere la sicurezza della
lavastrumenti.
Consigli utili per ottenere un risultato ottimale nel lavaggio
Un eventuale risultato insoddisfacente nel lavaggio è visibile quando sugli strumenti
rimangono tracce di sporco; eventuali aloni possono essere causati da un risciaquo insufficiente.
In tal caso controllare che gli ugelli di risciacquo (27) siano puliti e che vi sia pressione nella
rete idrica.
In caso che vi sia dello sporco controllare che:
- I filtri (22) (23) siano puliti ;
- la temperatura dell’acqua di lavaggio sia intorno ai 60°C;
- la posizione degli strumenti nel cestello sia corretta;
- gli ugelli di lavaggio siano puliti (26);
- i mulinelli (24) (25) ruotino liberamente.
12
PULIZIA (Fig. 10)
Generalità
La scrupolosa osservanza delle norme di manutenzione contenute in questa sezione garantisce
la buona conservazione ed il soddisfacente funzionamento della macchina e diminuisce di gran
lunga la necessità di effettuare riparazioni.
In caso di irregolarità o di mancato funzionamento di qualsiasi componente
della macchina INANZITUTTO CONTROLLARE che nel suo impiego siano
state osservate le istruzioni fornite nei paragrafi precedenti.
Gli interventi devono essere eseguiti tempestivamente al primo insorgere di
anomalie al fine di evitare il peggioramento dell' inconveniente e il danneggiamento di ulteriori parti.
Mirella plus
MANUTENZIONE
Operazioni quotidiane da eseguire a lavoro ultimato, con la macchina
SPENTA, l’interruttore generale disinserito, i rubinetti di alimentazione
idrica chiusi e la vasca di lavaggio vuota.
1.
2.
3.
4.
Pulire accuratamente l’interno della macchina.
Togliere la protezione (23)
Estrarre il filtro (22) dal fondo della macchina, sganciando il troppo pieno (21).
Lavare i filtri in acqua corrente e rimontarli correttamente nella propria sede.
Controllare e pulire con frequenza i mulinelli, estraendo i medesimi dalle
colonnine e rimuovendo detriti e incrostazioni. La frequenza di tale operazione sarà suggerita dalla quantità dei residui o dai non soddisfacenti risultati
del lavaggio. Per la pulizia esterna della macchina non usare prodotti corrosivi
quali ipoclorito di sodio (candeggina o varechina) ed acido cloridrico (acido
muriatico), pagliette o spazzole d'acciaio.
MANUTENZIONE PREVENTIVA (Fig. 10)
Le operazioni di manutenzione preventiva con la macchina SPENTA, l’interruttore generale
disinserito, i rubinetti di alimentazione idrica chiusi e la vasca di lavaggio vuota.
Controllo e pulizia mulinelli e ugelli (Fig. 10).
Controllare periodicamente che il mulinello inferiore di lavaggio/ risciacquo (24/25) e i relativi
ugelli (26/27) non siano otturati.
Pulizia gruppo inferiore/superiore:
1. Svitare la ghiera (28) e sollevare i mulinelli (24/25).
2. Lavare i mulinelli di lavaggio e risciacquo.
Nel caso vi siano degli ugelli (26/27) otturati smontarli svitandoli e pulirli badando a non
deformare la sagoma dell'ugello, quindi rimontarli esattamente nella posizione originale.
3. Rimontare il tutto procedendo in senso inverso.
13
Mirella Plus
MANUTENZIONE
DISINCROSTAZIONE
In presenza di acque dure all’interno della macchina e sulgli strumenti si formano depositi di
calcare che per ragioni igieniche e di funzionamento devono essere rimossi attraverso un azione
disincrostante.
Le procedure operative nonchè la frequenza di tale intervento vengono solitamente consigliate
dal fornitore del detersivo, il quale dispone di opportuni prodotti.
Al fine di non danneggiare la macchina, non eccedere nei dosaggi, attenendosi scupolosamente
alle indicazioni del produttore del detersivo e, ultimate le operazioni, risciacquare abbondantemente.
MESSA FUORI SERVIZIO TEMPORANEA.
In caso di fermo prolungato per qualche settimana è consigliabile prima della chiusura
riempire di acqua pulita la vasca e fare qualche ciclo a vuoto, poi da scaricare onde evitare
la formazione di odori ed evitare che lo sporco rimanga nella pompa.
Se necessario ripetere tale operazione più volte sino a quando dopo il lavaggio a vuoto
l’acqua sia ben pulita.
Se il periodo di ferma risultasse molto lungo è consigliabile oliare le superfici in acciaio
inox con olio di vaselina e scaricare l’acqua dal boiler e dall’elettropompa.
DEMOLIZIONE e SMALTIMENTO.
Nel momento in cui si intende procedere alla rottamazione della macchina, occorre scaricare
l'acqua dalla vasca e dal boiler, come indicato nei punti precedenti e scollegare la macchina dalle
reti di alimentazione idrica ed elettrica, quindi procedere allo smaltimento dei componenti
seguendo quanto prescritto dalle normative vigenti in materia nel rispetto dei regolamenti
nazionali, locali, vigenti in materia di ecologia-ambiente, avendo cura di differenziare le parti
come segue:
- parti metalliche: carrozzeria, pianali, pannelli, filtri;
- parti elettriche: motori, teleruttori,microinterruttori, cablaggi;
- parti in plastica: raccordi, cestelli;
- parti in gomma: tubi, manicotti.
La ditta costruttrice declina ogni responsabilità per eventuali errori di stampa
contenuti nel presente libretto.
Le istruzioni, i disegni, le tabelle e quant'altro è contenuto nel presente fascicolo
sono di natura tecnica riservata e, per questo, ogni informazione non può essere
riprodotta nè completamente nè parzialmente e non può essere comunicata a terzi
senza l'autorizzazione scritta della FARO S.p.A. che ne è la proprietaria esclusiva
e che si riserva il diritto di apportare senza preavviso tutte quelle modifiche che
riterrà opportune.
14
TABELLA RIASSUNTIVA ALLARMI DISPLAY
Mirella plus
GUIDA AI PROBLEMI
TABELLA RIASSUNTIVA SEGNALAZIONI DISPLAY
15
Mirella Plus
GUIDA AI PROBLEMI
ANOMALIA
CAUSA
Non si accende Interruttore generale
la macchina. disinserito.
Non carica
acqua
Rubinetto dell'acqua chiuso.
Filtro tubo di carico sporco.
Ugelli di risciacquo intasati.
Tubo troppopieno non
correttamente inserito
ALLARME A4:
Mancanza acqua in vasca
SEGNALAZIONE F1:
Porta Aperta
Inserire interruttore.
Aprire il rubinetto.
Staccare il tubo di carico (12 Fig.6/7) e
pulire il filtro .
Svitare e pulire gli ugelli (27 Fig. 10) in
acqua corrente
Controllare il corretto inserimento del
tubo troppopieno (21 Fig. 10).
Controllare presenza acqua di rete;
Spegnere e riaccendere la macchina
Controllare perfetta chiusura porta e/o
livellamento macchin a
Lavaggio
Ugelli di lavaggio otturati.
insufficiente.
Filtro di lavaggio sporco.
Mulinello di lavaggio
bloccato
Insufficienza o mancanza di
prodotto detergente.
Condizioni di lavaggio
insufficienti
ALLARME H3:
Temperatura lavaggio
insufficiente
ALLARME A3:
Sonda scollegato o interrotta
Pulire gli ugelli del mulinello (26 Fig. 10)
di lavaggio.
Pulire i filtri (22 e 23 Fig. 10).
Smontare e pulire il mulinello (25 Fig. 10)
Risciacquo
Ugelli di risciacquo otturati.
insufficiente.
Intasamento di calcare del
boiler.
Scarsa pressione idrica di rete
meno di 2 bar. - 200 Kpa.
Svitare e pulire gli ugelli (27 Fig. 10) in
acqua corrente
Rivolgersi al Servizio Assistenza.
Temperatura insufficiente.
Posizione degli ugelli non
ottimale o ugelli rovinati.
ALLARME H1:
Temperatura risciacquo
insufficiente
ALLARME A3:
Sonda scollegato o interrotta
ALLARME A5:
Mancato riscaldamento del boiler
16
RIMEDIO
ALLARME H2:
Mancato svuotamento vasca
Ripristinare il detergente nella tanica e
verificare la concentrazione.
Controllare che la fase di lavaggio si
svolga correttamente.
Attendere che la temperatura vasca
sia a regime.
Rivolgersi al Servizio Assistenza.
Attendere il ripristino della pressione o
acquistare una pompa di pressione.
Rivolgersi al Servizio Assistenza.
Controllare che gli ugelli siano nella
corretta posizione per quelli danneggiati
procedere alla loro sostituzione.
Attendere che la temperatura boiler
sia a regime.
Rivolgersi al Servizio Assistenza.
Rivolgersi al Servizio Assistenza.
Verificare la pulizia delle conduttture di
scarico e/o il corretto funzionamento
Tensione di alimentazione
Potenza totale
Resistenza boler
Resistenza vasca
Pompa lavaggio
:
:
:
:
:
230V - 50Hz
3000W
2650W
225 W
400W
Alimentazione idrica
Temperatura max entrata acqua
Consumo acqua per ciclo
Temperatura di lavaggio
Temperatura di risciacquo
Capacità boiler
Produzione cestelli per ciclo
Dimensioni cestello
Raccordo di scarico
: 200 ÷ 400 kPa ∅ 3,4”G
: 50°C
: 3,5 ÷ 4 l
: 50° ÷ 60°C
: 80° ÷ 90°C
: 6l
: 15/8/6/5
: 350x350 mm
: ∅ 28
Durata cicli (escluso risciacquo)
Ciclo breve
Ciclo medio
Ciclo lungo
Ciclo intensivo
:
:
:
:
Livello di rumorosità
Peso netto
Peso con imballo
: < 70dB (A)
: 45 Kg
: 51 Kg
Mirella Plus
SPECIFICHE TECNICHE
242 sec
420 sec
544 sec
720 sec
Condizioni ambientali per utilizzo
Temperatura di funzionamento
: 5° ÷ 40°C
stoccaggio
Umidità relativa
: 20% al 90%
17
Mirella Plus
CONTENTS
Safety regulations................................................................pag. 19-20
Characteristics.....................................................................pag. 21-22
Instructions for use..............................................................pag. 23-24-25-26-27
Maintenance.........................................................................pag. 28-29
Guide to problems ................................................................pag. 30-31
Technical specifications.................................................... pag. 32
The illustrations concerning these instructions are on the inside
of the back cover
SYMBOLS
DANGER
Paragraphs marked with this symbol contain instructions that must be
followed carefully to prevent damage occurring to the device, the operator and
possibly the patient
WARNING
These instructions warn thate great care must be taken to avoid situations
that could damage the device
PROHIBITION
This icon high lights what must be avoided to prevent damage occurring to the
device
SUGGERIMENTI
With this icon, information is supplied that enables the device to be used in a
more efficient way.
Disposal container: Dispose the device observing the standars about the
differentiated collection of elettrical material
18
Do not operate the machine without having become fully familiar with the contents
of this manual and without having acquired a comprehensive knowledge of the
specific techniques and machine controls.
Check that the area in which the machine is to be installed is compatible with the
dimensions of the machine itself before installing this latter.
Mirella Plus
SAFETY REGULATIONS
Only use lifting and handling means that are suited to the weight of the machine
when this must be installed or removed either completely or in part.
-
Never allow unauthorized or unqualified personnel to start, adjust, operate or repair the
machine. Always refer to this manual for the necessary operations.
-
The mechanical parts and electrical/electronic components situated inside the machine
are protected by entirely closed panels.
Always ensure that the main switch has been set to the “OFF” position before
cleaning and/or servicing the machine. This will disconnect the power source during
the operator’s intervention.
-
The electrical powering system must be equipped with an automatic release system prior
to the main machine switch and with a suitable grounding system that complies with all
the requisites established by industrial provisions for the prevention of accidents.
-
Always disconnect the power source if work must be carried out on the main switch or
in its vicinity.
-
All inspections and maintenance operations requiring removal of the safety guards are
carried out under the complete responsibility of the users.
These operations should therefore only be carried out by specialized and authorized
technical personnel.
-
Make sure that none of the accident preventing safety devices (barriers, guards, casings,
microswitches, etc.) have been tampered with and that they are all perfectly functional
before operating. These devices should be repaired if this is not the case.
-
Never remove the safety devices.
-
To prevent personal risks, only use power tools that are correctly connected to the
grounding tap and that conform to the national safety regulations.
-
Never ever tamper with the electrical system or with any other mechanism.
-
Never ever use the hands or unsuitable instruments to locate leaks from pipes. Air,
fluids under pressure or irritants could cause serious damage to both persons and/or
property.
19
Mirella Plus
SAFETY REGULATIONS
Never use the hands instead of adequate tools when operating the machine.
Never use the hands or other objects to stop moving parts.
PAY THE UTMOST ATTENTION TO THE DATA PLATES AFFIXED TO
THE MACHINE WHENEVER WORKING ON THIS OR IN THEIR NEAR
VICINITY.
-
The user is obliged to keep all the data plates and stickers in a legible condition.
-
Never climb on to the door or on to the top of the machine.
-
It is essential for the user to replace all data plates and stickers that may have deteriorated
for any reason or that are not clearly visible, ordering new ones from the Spares Service.
-
Contact the person in charge of maintenance in the event of malfunctions or damage to
the machine components without proceeding with further repairs.
-
It is absolutely forbidden for anyone to use the machine for purposes other than those
explicitly established and documented. The machine must always be used in the ways,
times and places dictated by common sense and the laws in force in each country, even
when there are no specific provisions to govern the sector in the particular country of
use.
-
The manufacturer declines all responsibility for accidents or damage to either
persons or property as may arise following failure to comply with either the
relative safety provisions or the instructions herein.
-
These instructions, together with the provisions governing machine installation
and electrical connections form an integral part of the Accident Preventing
Industrial regulations in force in each individual country.
-
THESE SAFETY PROVISIONS INTEGRATE AND DO NOT SUBSTITUTE THE
SAFETY PROVISIONS LOCALLY IN FORCE.
-
NEVER ever make hurried or inaccurate repairs that could jeopardize the correct
operation of the machine.
-
ALWAYS ASK FOR HELP FROM SPECIALIZED PERSONNEL IN CASE OF
DOUBT.
ANY TAMPERING BY THE USER RELIEVES THE MANUFACTURER
FROM ALL LIABILITY, THE USER BEING IN THIS CASE SOLELY
RESPONSIBLE TOWARDS THE COMPETENT ACCIDENT
PREVENTION AUTHORITIES.
20
GENERAL DESCRIPTION.
The double-walled cabinet ensures improved energy savings.
The tub interior is totally rounded and free from gaps where dirt could collect. The power
ratings and researched conformation of the washing and rinsing accessories offer the utmost
guarantee when it comes to washing results and hygiene.
The double-walled structure is made of finely satin-finished AISI 304 stainless steel. The
filters and rinsing rods can be easily removed for cleaning. Operation is totally automatic.
All internal components can be reached from the front of the machine, thus making all
maintenance operations easy and economical to carry out.
Mirella Plus
CHARACTERISTICS
TYPE OF USE AND IMPROPER USE
These machines have been designed and built to wash crockery placed in special
baskets and using detergent and rinsing agent.
• Use of specific detergents and rinsing agents for industrial purposes normally available
in the shops is permitted.
Any improper use of the machine relieves the manufacturer from all and
every responsibility for accidents or damage to persons and property, also
voiding all conditions of guarantee.
TRANSPORT, SHIPMENT AND STORAGE (Fig. 2)
-
The machine is normally shipped in a cardboard box closed by straps.
When transporting the packed machine, use a lift truck or transpallet, positioning the box
on the relative forks.
The machine must be sheltered from the weather when shipped and
stored.
INSPECTIONS ON ARRIVAL
When the machine arrives, check that the packaging is in a perfect condition and that there
is no visible damage.
If everything is in order, remove the packaging (unless other instructions have been received
from the manufacturer) and check that the machine is free from damage caused by transport.
Now check whether there has been any damage to the structure, crushing or breakages.
If damage or imperfections are discovered:
1 - Immediately notify the haulage contractor both by phone and in writing by registered
letter with return receipt attached;
2 - Inform the manufacturer by registered letter (with return receipt attached).
Notification of damage or faults must be immediate, in any case within 3
days from the date on which the machine is received.
21
Mirella Plus
CHARACTERISTICS
UNPACKING (Figs 2-3-4)
Proceed in the following way in order to remove the packing:
1. Cut the straps (7) that hold the cardboard in place.
2. Remove the box (8) by lifting it upwards.
3. Remove the protective film from the machine.
4. Remove the machine from the base by lifting it from the lower part of the casing (Fig. 4).
5. All packing must be collected and not left within children’s reach since it could become
a source of danger. The packing can be disposed of in the same way as solid urban waste.
Once the machine has been unpacked, NEVER ever use the box containing
the electrical components for lifting purposes.
Lift the machine by raising it from the lower part of the casing. Set it on
the forks of a truck when transporting.
MACHINE IDENTIFICATION (Fig. 5)
-
The serial number and machine data are stamped on the data plate (9) affixed to the right
part of the machine it self.
Always state the model and serial number of the machine when requesting
technical assistance or ordering spare parts.
DESCRIPTION OF THE SAFETY DEVICES
•
•
•
•
22
Models Mirella plus are equipped with a safety microswitch that blocks the washing
pump if the tub access door is accidentally opened.
The electrical parts are enclosed by panels locked by screws.
The machine is fitted with an equipotential ground conductor.
Safety overflow (21) to prevent water from spilling.
Mirella Plus
INSTRUCTIONS FOR USE
WASHING PHASES
Machine OFF
When the machine is switched OFF the display will read “OFF”:
Mirella
plus
Switching on and preparing the machine
To switch the machine on, press the “Q1” button.
The LED representing the last cycle selected wil
FLASH (LC1 - LC2 - LC3 - LC4).
When switching on for the first time, the LC2 light
will FLASH.
First the boiler then the tank will begin to fill automatically.
While the machine is filling up the display will read
“F2”.
Once filled, the water-heating elements will be activated, first in the boiler then in the
tank. The display will give the tank temperature;
It is advisable, when first switching on, to wait until the display reads 55°C.
Cycle selection
Press the “S9” or CYCLE button to select the washing cycle required from the 4
different cycles available (SHORT, MEDIUM, LONG, INTENSIVE) and specifically:
LC 1: SHORT CYCLE
= * 242 sec.
LC 2: MEDIUM CYCLE
= * 420 sec.
LC 3: LONG CYCLE
= * 544 sec.
LC 4: INTENSIVE CYCLE = * 720 sec.
* without rinsing
23
Mirella Plus
INSTRUCTION FOR USE
STARTING UP THE WASHING CYCLE MANUALLY
To start up the cycle MANUALLY, press and hold the START “S3” button for approx.
2 sec.
The LEDs of the display will light
on in sequence and the message
shown on the display will blink
(indicating that the cycle is
underway) at the LED for the
selected cycle will FLASH (e.g.,
LC2);
STARTING UP THE WASHING CYCLE AUTOMATICALLY
To start up the cycle AUTOMATICALLY (by opening and closing the door), you
will need to change the cycle start-up mode. Press and hold the “START S3”
button until the pre-selected cycle LED remains CONSTANTLY LIT (approx. 10
sec.) and the washing cycle will then start up AUTOMATICALLY when the door is
closed.
INSTRUCTIONS DURING THE WASHING CYCLE
Display information
1) During washing, the tank temperature is indicated and the
display leds light up in sequence.
2) During drip-drying, only the
display leds light up.
3) During rinsing, the boiler temperature is indicated and the
display LEDs light up in
sequence;
By pressing the “START S3” button again, a new washing cycle will begi
24
This machine guarantees rinsing at temperatures ideal for hygienic purposes;
indeed, if this is not sufficient, the washing cycle is automatically extended so as to
provide the necessary conditions for optimum rinsing at 85°C.
The waiting time required to attain optimum temperature can extend to a maximum of
8 minutes.
Interrupting the cycle
Mirella Plus
INSTRUCTION FOR USE
1) It is possible to pause the washing cycle in case of
EMERGENCY, by opening the door; the message “F1” will appear
on the display;
normal operations will resume on closing the door.
2 ) The cycle will also be interrupted by SWITCHING OFF the
machine using the “Q1” button.
3) On switching the machine back on, the LED indicating the last
cycle selected will light up, and the alarm message “A1” will appear
on the display; this will disappear when a new cycle is begun.
At the end of the washing cycle, take out the basket and shake it gently so as to
remove the last drops left on the washed items.
Allow items to dry and remove them from the basket with clean hands.
Store all items on hygienic and completely stable surfaces.
Self-washing and Draining
At the end of the washing operations, TURN OFF the machine
pushing the “Q1” button .
Close the machine’s door, press the START button “S3” (approx. 5
sec.) and keep it pressed until the message “C1” appears on the
display, then release the “S3” button;
The self cleaning and draining cycle will start, confirmed by the
flashing Leds on the display, with the activation of the drain pump;
the end of the phase will be confirmed by the appearing of the
message “OFF” on the display. Maximum duration 2 1/2 min
25
Mirella Plus
INSTRUCTION FOR USE
Manual draining
It is possible to empty the tank by carrying out the manual draining cycle, during which
only the drainage pump remains active.
This cycle can only be carried out by leaving the machine SWITCHED ON and
the tank full of water.
Close the machine’s door and press the “S9” or
CYCLE button (approx. 5 sec.). Keep it pressed until
the message “C2” appears on the display, then release
the “S9” or CYCLE button (approx. 5 sec.);
The Drain cycle will start, confirmed by the flashing
Leds on the display; the end of the phase is confirmed
by the appearing of the message “OFF” on the
display. Maximum duration 1 min.
By pressing the “S9” or CYCLE button you can interrupt the drainage cycle before the
preset time is up.
Reading the TEMPERATURES
At any time, with the machine switched ON or OFF,
by pressing the “SI” button you can read, in sequence,
the REAL and PROGRAMMED temperatures for the
water in the tank (t1) and in the boiler (t2).
- Pressing the “SI” button once, the message “t1” will
be displayed.
Pressing the “SI” button a second time, the REAL
temperature of the water in the tank will be displayed.
Pressing the “SI” button a third time, the
PROGRAMMED temperature of the water in the
tank (for the selected cycle) will be displayed.
Pressing the “SI” button a fourth time, the message “ t2”
will be displayed, indicating the boiler.
Pressing the “SI” button a fifth time, the REAL temperature of the water in the boiler will be displayed.
26
Pressing the “SI” button a sixth time, the
PROGRAMMED temperature of the water in the
boiler (for the selected cycle) will be displayed;
- Pressing the “SI” button a seventh time, the machine will return to its initial status.
The operations listed above CANNOT BE CARRIED OUT DURING A
CYCLE.
Mirella Plus
INSTRUCTION FOR USE
Switching off the washer at the end of the day
At the end of the working day SWITCH OFF the washing machine by pressing the
“Q1” button. Switch off the mains switch feeding the machine and close the water
supply taps.
WARNINGS DURING OPERATION
1) Ensure that the washing temperature remains at approx. 55-60°C.
2) Avoid immersing bare hands in the detergent-filled water; if this should happen, rinse
immediately and thoroughly with running water.
3) Use only anti-foaming detergents with chlorine-active agents, specific for use in industrial
machines.
4) Deactivate the machine in case of break-down or malfunction.
For any repairs, contact only assistance centres authorised by the manufacturer, and insist
on the use of original parts.
5) In no case should you change the programmed temperatures (t1 and t2) without first
consulting an authorised assistance centre.
Failure to follow the above warnings may compromise the safety of the washing
machine.
Useful advice for better washing results
Any unsatisfactory results from washing can be seen when traces of dirt are left on dishes
or other items; any water marks may be caused by insufficient rinsing.
In this case, ensure that the rinsing nozzles (27) are clean and that there is pressure in the
water system.
If there are traces of waste, ensure that:
- The filters (22) (23) are clean;
- the water temperature is around 60°C;
- items are correctly positioned in the basket;
- the washing nozzles are clean (26);
- the wash arms (24) (25) rotate freely.
27
Mirella Plus
MAINTENANCE
CLEANING (Fig. 10)
General information
Strict compliance with the maintenance instructions in this section will keep your machine
in a good working condition and will notably reduce the need for repairs.
If any machine component becomes faulty, FIRST CHECK that all the
instructions given in the previous paragraphs have been complied with
during use.Repairs must be carried out immediately, as soon as the
fault occurs. This will prevent the trouble from becoming worse and
damaging other parts.
Daily operations to carry out when work has ended, with the machine
OFF , the main circuit-breaker disconnected, the water cocks off and
the washing tub empty.
1.
2.
3.
4.
Thoroughly clean the inside parts of the machine.
Remove the suction protection (23).
Remove the filter (22) from the bottom of the machine by releasing the overflow (21).
Wash the filters under running water and fit them correctly back in their housings.
Frequently check and clean the spraying units, removing them from
their housings and eliminating any dirt and fouling. The frequency
with which this operation must be carried out depends on the quantity
of dirt or on the unsatisfactory washing results. Never use corrosive
products like sodium hypochlorite (bleach) or hydrochloric acid, wire
wool or steel brushes to clean either the inside or outside parts of the
machine.
PREVENTION MAINTENANCE (Fig. 10)
The preventive maintenance operations must be carried out with the machine OFF, the main
circuit-breaker disconnected, the water delivery cocks off and the washing tub empty.
Checking and cleaning the spray arms and nozzles (Fig. 10)
Periodically check to make sure that the lower washing arm and rinsing arm (24/25) and their
relative nozzles are not clogged (26/27).
Cleaning the lower/upper unit
1. Unscrew the ring nut (28) and lift the arm (24/25).
2. Wash the washing and rinsing arm.
If the nozzles (26/27) are clogged, unscrew them to demount and clean, taking care to
prevent the shape of the nozzle from being deformed. After cleaning, fit the nozzles
exactly back in their original positions.
3. Remount all parts by complying with the above instructions in reverse.
28
DESCALING
Where hard water is present lime scale deposits will for in the machine and on dishes, which
must, for reasons of hygiene, be removed by descaling. Advice on operation procedures and
frequency for this treatment are generally given by the detergent supplier, who can provide
suitable products. In order to avoid damaging the machine, do not exceed recommended
doses, follow the detergent producer’s directions scrupulously and, having finished
operations, rinse thoroughly.
Mirella Plus
MAINTENANCE
TEMPORARY STOPPAGE
If the machine is to be left inactive for a period of some weeks, it is advisable beforehand to
load the tank and run a few empty cycles with clean water then drain, so as to avoid the
formation of unpleasant odours.If necessary, repeat the process several times until the
water is still clean after washing.If the stoppage is to be very long, it is advisable to drain the
water from the boiler and from the electric pump.
DEMOLITION and DISPOSAL
When the machine is to be scrapped, drain the water from the tank and from the boiler, as
indicated in the points above, and disconnect the machine from the water and electricity
supply networks, then dispose of the components according to current regulations,
respecting national and local ecological and environmental legislation, and taking care to
separate the parts as follows:
- metallic parts: body work, surfaces, panels, filters;
- electrical parts: motors, remote switches, micro-switches, cabling;
- plastic parts: connectors, baskets;
- rubber parts: tubes, couplings
The producer declines all responsibility for any printing errors contained in this booklet.
The instructions, drawings, tables and everything else in this manual are of a
confidential technical nature. For this reason, none of the information may be either
completely or partially duplicated or disclosed to third parties without prior written
authorization from FARO S.p.A. which is the sole proprietor and which reserves the
right to make any modifications as may be considered necessary without advance
warning.
29
Mirella Plus
GUIDE TO PROBLEMS
SUMMARY TABLE OF ALARM MESSAGES DISPLAYED
SUMMARY TABLE OF OTHER MESSAGES DISPLAYED
30
PROBLEMS
CAUSES
SOLUTIONS
The machine
fails to turn on.
Main switch disconnected.
Turn on the switch.
The machine
does not fill with
water.
Water cock shut.
Dirty fill pipe filter.
Rinsing nozzle clogged.
Turn on the clock.
Detach the fill pipe (12 Fig. 6/7) and
clean the filter.
Unscrew and clean the nozzles (27
Fig.10) under running water.
Overflow pipe not well
connected.
ALARM A4:
Lack of water in tank
MESSAGE F1:
DOOR OPEN
Check the right con. of the overfl. pipe
(21 Fig.10)
Check presence of water in system;
Switch machine off and back on
Check that the door is perfectly closed
and/or the machine is properly levelled
Clogged washing nozzles.
Dirty washing filter.
Clogged washing blade.
No detergent.
Clean the washing blade (26 Fig. 10).
Clean the filters (22 e 23 Fig. 10).
Remove and clean the balde (25 Fig. 10)
Add detergent and fill the dispenser.
Insufficient
washing.
Mirella Plus
GUIDE TO PROBLEMS
Wait for tank to reach correct temperature
ALARM H3:
Insufficient wash temperature
Contact Assistance Centre
ALARM A3:
Probe disconnectedor
Check the correct washing phase.
interrupted
Insufficient washing
conditions.
Insufficient
rinse.
Clogged rinsing nozzles.
Clogged boiler by limestone.
Low main pressure
(less than 2 bar. - 200 Kpa).
Insufficient temperature.
Bad location of the nozzles
or damaged nozzles.
ALARM H1:
Insufficient rinse temperature
ALARM A3:
Probe disconnected or
interrupted
ALARM A5:
Boiler heating failure
ALARM H2:
Non-draining of the tank.
Unscrew and clean the nozzles (27 Fig.
10) under running water.
Call after-sales service.
Wait pressure recovery or purchase a
new pressure pump.
Call after-sales service.
Check the right location of the nozzles
and replace damaged ones.
Wait for boiler to reach correct temperature
Contact Assistance Centre.
Contact Assistance Centre.
Check the cleaning of the draining water
pipes and/or the correct function of drain
pump.
31
Mirella Plus
TECHNICAL SPECIFICATIONS
Power voltage
Total power
Boiler heating
Tank heating
Wash pump
:
:
:
:
:
230V - 50Hz
3000W
2650W
225 W
400 W
Water supply
Water consumpionts for cycle
Wash temperature
Rinse temperature
Boiler capacity
Output in baskets/hour
Basket dimensions
Drain pipe fitting
: 50°C
: 3,5 ÷ 4 l
: 50° ÷ 60°C
: 80° ÷ 90°C
: 6l
: 15/8/6/5
: 350x350 mm
: ∅ 28
Cycle length (without rising)
Cycle Short
Cycle Medium
CycleLong
Cycle Intensive
:
:
:
:
Noise level
Net weight
Weight of packed
: < 70dB (A)
: 45 Kg
: 51 Kg
242 sec
420 sec
544 sec
720 sec
Condizioni ambientali per utilizzo
Temperatura di funzionamento e
: 5° ÷ 40°C
stoccaggio
Relative humidity
: 20% al 90%
32
Mirella
plus
COMANDI PANNELLO
Legenda
Q1)
LC1)
LC2)
LC3)
LC4)
S9)
S3)
SI)
t1)
t2)
CONTROL PANEL
Legend
Interruttore ON/OFF
Lampada led ciclo CORTO (azzurro)
Lampada led ciclo MEDIO (azzurro)
Lampada led ciclo LUNGO (azzurro)
Lampada led ciclo LUNGO (azzurro)
Tasto selezione CICLO
Tasto AVVIO CICLO (START)
Pulsante Selezione temperatura
Boiler/Vasca
Display temperatura vasca
Display temperatura boiler
Fig. 2
Q1)
LC1)
LC2)
LC3)
LC4)
S9)
S3)
SI)
t1)
t2)
Line button ON/OFF
SHORT cycle led light (blue)
MEDIUM cycle led light (blue)
LONG cycle led light (blue)
LONG cycle led light (blue)
CYCLE selection button
START CYCLE button
BOILER/TANK Temperature
Selection button
Tank temperature (display)
Boiler temperature (display)
Fig. 3
Mirella plus
Fig.1
Fig. 5
9
Lift
Lift
10
Fig. 6
Fig. 7
12
14
12
13
15
14
11
Mirella plus
Fig. 4
Mirella plus
Fig. 8
brillantante-brightener
19
18
16
17
detersivo-detergent
Fig. 9
Fig. 10
21
23
22
26
27
28
24
25
Mirella plus
DIMENSIONI
OVERALL DIMENSIONS
Model
Mirella Plus
A
430
B
530
C
694
D
860
E
280
CERTIFICATO DI GARANZIA
La Faro concede al cliente fi nale una garanzia di 12 mesi a partire dalla data di
acquisto. La riparazione in garanzia deve essere effettuata presso la FARO; spese e
rischi di trasporto sono a rischio dell’acquirente.La riparazione in garanzia è
ritenuta valida solo quando: il certificato è stato compilato in tutte le sue parti
e inviato anticipatamente alla FARO tramite Fax ( 039.6010540).
La garanzia risponde dei guasti dovuti alla cattiva qualità del materiale o a difetti di
fabbricazione, in caso di fondato reclamo la garanzia consente la riparazione o la
sostituzione gratuita. E’ esclusa la possibilità di ottenere risarcimento di danni e/o
di interessi. La garanzia non è ritenuta valida, a insindacabile giudizio della FARO, in
caso di manomissione, danneggiamento, di scorretta utilizzazione, di cattiva
manutenzione o di normale usura
GUARANTEE CERTIFICATE
FARO offers the fi nal customer a 12 month guarantee starting from the date of purchase.
Repairs under guarantee must be performed at FARO; expenses and transport risks are at
the risk of the purchaser. Repair under guarantee is considered valid only when: - all
sections of the certifi cate have been fi lled in and sent in advance to FARO by Fax
(039.6010540).
The guarantee covers faults due to the bad quality of the material or manufacturing
defects; in the case of valid claims, the guarantee covers free repair or replacement.
Claims for damages and/or interest are excluded. The guarantee is not considered
valid, at the sole discretion of FARO, if the fault is dueto tampering, damage, incorrect
use, improper maintenance and normal wear and tear.
12 mesi-months
nome-namenombre
cognome-surnameapellido
indirizzo-address-
città-town-
SN
data d’acquisto-purchase
CS
Mirella Plus
versione-version-
Mirella plus
13
MANUALE D’USO
Mirella Plus
MANUALE D’USO
INSTRUCTION MANUAL
Cod. 988278
Rev. 0
Ed. 05/09
- FARO S.p.A. si riserva il diritto di modificare, senza preavviso, le caratteristiche indicate nel presente manuale.
- FARO S.p.A. reserves the right to change the specifications of this equipment without notice.
FARO S.p.A.
Via Faro, 15
20060 Ornago (MI) Italia
Tel.
: 039 / 6878.1 (r.a.)
Fax
: 039 / 6010540
Internet: http://www.faro.it