1
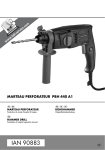
TRAPANO BATTENTE PBH 440 A1
TRAPANO BATTENTE
MARTELO PERFURADOR
Traduzione delle istruzioni d'uso originali
Tradução do manual de instruções original
HAMMER DRILL
BOHRHAMMER
Translation of original operation manual
Originalbetriebsanleitung
IAN 90883
Prima di leggere aprire la pagina con le immagini e prendere confidenza con le diverse funzioni
dell'apparecchio.
Antes de começar a ler abra na página com as imagens e, de seguida, familiarize-se com todas as
funções do aparelho.
Before reading, unfold the page containing the illustrations and familiarise yourself with all functions of
the device.
Klappen Sie vor dem Lesen die Seite mit den Abbildungen aus und machen Sie sich anschließend mit allen
Funktionen des Gerätes vertraut.
IT / MT
PT
GB / MT
DE / AT / CH
Traduzione delle istruzioni d'uso originali
Tradução do manual de instruções original
Translation of original operation manual
Originalbetriebsanleitung
Pagina 1
Página 9
Page
17
Seite
25
A
B
Indice
IT
MT
Introduzione . . . . . . . . . . . . . . . . . . . . . . . . . . . . . . . . . . . . . . . . . . . . . . . . . . . . . 2
Uso conforme . . . . . . . . . . . . . . . . . . . . . . . . . . . . . . . . . . . . . . . . . . . . . . . . . . . . . . . . . . . . . . .
Componenti illustrati . . . . . . . . . . . . . . . . . . . . . . . . . . . . . . . . . . . . . . . . . . . . . . . . . . . . . . . . . .
Dotazione . . . . . . . . . . . . . . . . . . . . . . . . . . . . . . . . . . . . . . . . . . . . . . . . . . . . . . . . . . . . . . . . . .
Dati tecnici . . . . . . . . . . . . . . . . . . . . . . . . . . . . . . . . . . . . . . . . . . . . . . . . . . . . . . . . . . . . . . . . .
2
2
2
2
Indicazioni generali di sicurezza per elettroutensili . . . . . . . . . . . . . . . . . . . . . 3
1. Sicurezza del luogo di lavoro . . . . . . . . . . . . . . . . . . . . . . . . . . . . . . . . . . . . . . . . . . . . . . . .
2. Sicurezza elettrica . . . . . . . . . . . . . . . . . . . . . . . . . . . . . . . . . . . . . . . . . . . . . . . . . . . . . . . . .
3. Sicurezza delle persone. . . . . . . . . . . . . . . . . . . . . . . . . . . . . . . . . . . . . . . . . . . . . . . . . . . . .
4. Uso e trattamento dell'elettroutensile . . . . . . . . . . . . . . . . . . . . . . . . . . . . . . . . . . . . . . . . . .
5. Assistenza . . . . . . . . . . . . . . . . . . . . . . . . . . . . . . . . . . . . . . . . . . . . . . . . . . . . . . . . . . . . . . .
Indicazioni di sicurezza specifiche per trapani battenti . . . . . . . . . . . . . . . . . . . . . . . . . . . . . . .
Accessori originali / apparecchi addizionali . . . . . . . . . . . . . . . . . . . . . . . . . . . . . . . . . . . . . . .
3
3
4
4
5
5
5
Messa in funzione . . . . . . . . . . . . . . . . . . . . . . . . . . . . . . . . . . . . . . . . . . . . . . . . . 5
Regolazione dell'impugnatura supplementare . . . . . . . . . . . . . . . . . . . . . . . . . . . . . . . . . . . . . . 5
Battuta di profondità . . . . . . . . . . . . . . . . . . . . . . . . . . . . . . . . . . . . . . . . . . . . . . . . . . . . . . . . . 5
Utensili/mandrini per trapani con corpo circolare . . . . . . . . . . . . . . . . . . . . . . . . . . . . . . . . . . . 6
Funzionamento . . . . . . . . . . . . . . . . . . . . . . . . . . . . . . . . . . . . . . . . . . . . . . . . . . . 6
Selezionare la funzione con l'interruttore di selezione funzione . . . . . . . . . . . . . . . . . . . . . . . . 6
Selezionare il senso di rotazione . . . . . . . . . . . . . . . . . . . . . . . . . . . . . . . . . . . . . . . . . . . . . . . . 6
Accensione e spegnimento. . . . . . . . . . . . . . . . . . . . . . . . . . . . . . . . . . . . . . . . . . . . . . . . . . . . . 6
Manutenzione e pulizia . . . . . . . . . . . . . . . . . . . . . . . . . . . . . . . . . . . . . . . . . . . . 7
Smaltimento . . . . . . . . . . . . . . . . . . . . . . . . . . . . . . . . . . . . . . . . . . . . . . . . . . . . . 7
Assistenza . . . . . . . . . . . . . . . . . . . . . . . . . . . . . . . . . . . . . . . . . . . . . . . . . . . . . . . 7
Importatore. . . . . . . . . . . . . . . . . . . . . . . . . . . . . . . . . . . . . . . . . . . . . . . . . . . . . . 7
Dichiarazione di conformità / produttore . . . . . . . . . . . . . . . . . . . . . . . . . . . . . . 8
PBH 440 A1
1
IT
MT
TRAPANO BATTENTE
PBH 440 A1
Introduzione
Dotazione
1 trapano battente PBH 440 A1
1 impugnatura supplementare
1 mandrino con adattatore (vedi fig. A)
Congratulazioni per l'acquisto del nuovo
apparecchio. È stato acquistato un prodotto
di alta qualità. Il manuale di istruzioni è
parte integrante del presente prodotto. Esso contiene
importanti indicazioni per la sicurezza, l'uso e lo
smaltimento. Prima di utilizzare il prodotto, familiarizzarsi con tutte le indicazioni relative ai comandi e
alla sicurezza. Utilizzare l'apparecchio solo come
descritto e per i campi d'impiego indicati. In caso
di cessione del prodotto a terzi, consegnare anche
tutta la documentazione relativa.
3 punte (vedi fig. B)
Uso conforme
Numero di giri vuoto:
n0 0 - 1.650 / min
Il trapano battente PBH 440 A1 (nel seguito
denominato "apparecchio") è adatto per:
Numero di battute:
0 - 7.500 / min
Forza della battuta:
1,2 Joule
▯ trapanare in laterizio, calcestruzzo e pietra
▯ scalpellare il calcestruzzo, pietra e intonaco
1 scalpello piatto (vedi fig. B)
1 battuta di profondità
1 valigetta
1 manuale di istruzioni per l'uso
Dati tecnici
Potenza assorbita
nominale:
440 W
Tensione nominale:
230 V ∼ 50 Hz
Diametro della punta
del trapano:
▯ perforare in pietra, legno e metallo
Qualunque altro impiego e qualunque modifica
dell'apparecchio è da considerarsi non conforme
alla destinazione e comporta il rischio di infortuni.
max. 13 mm per
acciaio
max. 24 mm per
legno
max. 19 mm per
calcestruzzo
II /
Il produttore non si assume alcuna responsabilità
per i danni derivanti da uso non conforme.
Classe di protezione:
L'apparecchio non è destinato all'uso commerciale.
Informazioni sul rumore e sulle vibrazioni:
Componenti illustrati
Valore misurato per i rumori determinato secondo
EN 60745. Il livello di rumore classificato con A
dell'elettroutensile è tipicamente:
Vite ad alette
Interruttore rotazione verso destra/verso sinistra
Interruttore On/Off
Tasto di arresto per interruttore On/Off
Interruttore di selezione funzione
Tasto di sbloccaggio per l'interruttore
di selezione funzione
Trapanatura:
Livello di pressione sonora: 84,78 dB(A)
Livello di potenza sonora:
95,78 dB(A)
Fattore di convergenza K:
3 dB
Scalpellatura:
Impugnatura supplementare
Livello di pressione sonora: 90,26 dB(A)
Alloggiamento per gli utensili
Livello di potenza sonora:
101,26 dB(A)
Bussola di bloccaggio
Fattore di convergenza K:
3 dB
Battuta di profondità
Indossare i paraorecchi!
2
PBH 440 A1
Valori totali di vibrazione (somma dei vettori di tre
direzioni) rilevati ai sensi della norma EN 60745:
Impugnatura principale
Trapanatura in calcestruzzo:
ah(HD) = 10,139 m/s2, K = 1,5 m/s2
Impugnatura supplementare
Trapanatura in calcestruzzo:
ah(HD) = 7,468 m/s2, K = 1,5 m/s2
Impugnatura principale
Scalpellatura:
ah(CHeq) = 7,024 m/s2, K = 1,5 m/s2
Impugnatura supplementare
Scalpellatura:
ah(CHeq) = 5,060 m/s2, K = 1,5 m/s2
AVVERTENZA!
► Il livello di vibrazioni indicato nelle presenti
istruzioni è stato misurato secondo un procedimento di misurazione conforme alla norma
EN 60745 e può essere usato per il confronto
dell'apparecchio. Il coefficiente di emissione
delle vibrazioni può anche essere usato per
una stima introduttiva dell'esposizione.
Il livello di vibrazioni cambia in base all'uso
dell'elettroutensile e in alcuni casi può essere
superiore al valore indicato nelle presenti
istruzioni. Il carico di vibrazione potrebbe
essere sottostimato se l'elettroutensile viene
utilizzato regolarmente in tal modo.
AVVERTENZA
► Per una stima precisa del carico d vibrazione
durante un dato lasso di tempo di lavoro si
dovrebbero tenere conto anche i tempi nei
quali l'apparecchio viene spento o gira ma
non è effettivamente in funzione. Questo può
ridurre chiaramente il carico di vibrazioni per
tutto il periodo di lavoro.
PBH 440 A1
Indicazioni generali
di sicurezza per
elettroutensili
IT
MT
AVVERTENZA!
► Leggere tutte le indicazioni di sicurezza e le
istruzioni. L'errata applicazione delle indicazioni di sicurezza può dare luogo a scosse
elettriche, incendi e / o gravi lesioni.
Conservare le indicazioni di sicurezza e le
istruzioni per il futuro.
Il termine "elettroutensile" utilizzato nelle indicazioni
di sicurezza si riferisce a elettroutensili collegabili
alla rete elettrica (con cavo di rete) e a elettroutensili a batteria (senza cavo di rete).
1. Sicurezza del luogo di lavoro
a) Mantenere l'area di lavoro pulita e ben illuminata. Il disordine e la scarsa illuminazione dell'area di lavoro possono dare luogo a infortuni.
b) Non lavorare con elettroutensili in ambienti
a rischio di esplosione, in cui siano presenti
liquidi, gas o polveri infiammabili. Gli elettroutensili generano scintille che possono dare
fuoco alla polvere o ai vapori.
c) Tenere lontani i bambini e altre persone
durante l'uso dell'elettroutensile. In caso di
distrazione, si potrebbe perdere il controllo
dell'apparecchio.
2. Sicurezza elettrica
a) La spina dell'elettroutensile deve essere idonea
all'inserimento nella presa. La spina non dev'essere assolutamente modificata. Non utilizzare
adattatori insieme a elettroutensili con messa
a terra. Le spine non modificate e le prese
idonee riducono il rischio di scosshe elettriche.
b) Evitare il contatto corporeo con superfici
conduttive, come tubi, termosifoni, stufe e
frigoriferi. Quando il corpo è a diretto contatto
con la terra sussiste un maggiore pericolo di
scosse elettriche.
3
IT
MT
c) Tenere gli elettroutensili lontano dalla pioggia
o dall'umidità. La penetrazione di acqua in
un apparecchio elettrico aumenta il rischio di
scosse elettriche.
d) Non utilizzare il cavo elettrico a fini non conformi, come ad es. per trasportare l'elettroutensile, per appenderlo o per scollegare la
spina dalla presa. Tenere il cavo lontano dal
calore, dall'olio, da angoli acuminati o da
parti dell'apparecchio in movimento. I cavi o
le spine danneggiati o ingarbugliati aumentano
il rischio di scosse elettriche.
e) Se si lavora all'aperto con un elettroutensile,
utilizzare solo una prolunga adatta anche
per esterni. L'utilizzo di una prolunga idonea
all'uso esterno riduce il rischio di scosse elettriche.
f) Se è inevitabile l'uso dell'elettroutensile in un
ambiente umido, utilizzare un salvavita. L'uso
di un salvavita evita il rischio di scosse elettriche.
3. Sicurezza delle persone
a) Prestare sempre attenzione controllando le
operazioni in corso e procedere con cura
quando si lavora con un elettroutensile. Non
utilizzare l'elettroutensile se non si è concentrati o riposati a sufficienza, o se si è sotto
l'influsso di droghe, alcol o farmaci. Un solo
momento di disattenzione nell'uso dell'elettroutensile può dare luogo a gravi lesioni.
b) Indossare un'attrezzatura personale di
protezione e sempre occhiali di protezione.
L'uso di dispositivi personali di protezione come
mascherina antipolvere, scarpe antiscivolo, casco
protettivo o protezione per l'udito, a seconda
dell'uso e dell'impiego dell'elettroutensile, riduce
il rischio di lesioni.
c) Evitare l'accensione involontaria. Accertarsi
che l'elettroutensile sia spento prima di collegarlo all'alimentazione, sollevarlo o movimentarlo. Se si tiene il dito sull'interruttore On/
Off mentre si sposta l'elettroutensile o si collega
l'apparecchio alla rete elettrica con l'interruttore
su on, si possono verificare infortuni.
4
d) Rimuovere gli utensili di regolazione o le
chiavi per dadi prima di accendere l'elettroutensile. Un utensile o una chiave lasciati in una
parte dell'apparecchio in movimento possono
provocare lesioni.
e) Evitare posizioni innaturali. Provvedere a una
posizione sicura e mantenere sempre l'equilibrio.
In tal modo si può controllare meglio l'elettroutensile, soprattutto in situazioni impreviste.
f) Indossare un abbigliamento idoneo. Non
indossare abiti ampi od ornamenti. Tenere
lontani i capelli, gli abiti e i guanti dalle parti
in movimento. Gli abiti ampi e pendenti, gli
ornamenti o i capelli lunghi possono impigliarsi
nelle parti mobili.
g) Se è possibile montare aspiratori per polvere
e trucioli, accertarsi che siano collegati e
vengano utilizzati correttamente. L'uso di un
aspiratore per polvere può ridurre i pericoli
associati alla polvere.
4. Uso e trattamento dell'elettroutensile
a) Non sovraccaricare l'apparecchio. Utilizzare
l'elettroutensile idoneo al proprio lavoro. Con
l'elettroutensile adatto si lavora meglio e con
maggiore sicurezza nell'intervallo di potenza
indicato.
b) Non utilizzare elettroutensili con interruttore
difettoso. Un elettroutensile che non si riesce
più a spegnere o ad accendere è pericoloso e
dev'essere riparato.
c) Staccare la spina dalla presa di corrente prima
di eseguire impostazioni dell'apparecchio,
sostituire gli accessori o riporre l'apparecchio.
Questa misura precauzionale impedisce l'avvio
involontario dell'elettroutensile.
d) Conservare gli elettroutensili non utilizzati
fuori della portata dei bambini. Non consentire
l'uso dell'apparecchio a persone inesperte
o che non hanno letto le presenti istruzioni.
Gli elettroutensili sono pericolosi se utilizzati
da persone inesperte.
PBH 440 A1
e) Trattare gli elettroutensili con cura. Controllare
che le parti mobili dell'apparecchio funzionino
perfettamente e non si inceppino, che non vi
siano elementi rotti o danneggiati al punto da
compromettere la funzione dell'elettroutensile.
Fare riparare le parti danneggiate prima di
utilizzare l'apparecchio. Molti infortuni derivano
da una cattiva manutenzione degli elettroutensili.
f) Mantenere gli utensili di taglio ben affilati e
puliti. Gli utensili di taglio trattati con cura e
con angoli di taglio affilati si inceppano meno
spesso e sono più facili da controllare.
g) Utilizzare elettroutensili, accessori, utensili,
ecc. conformi a queste istruzioni. Tenere conto
delle condizioni di lavoro e dell'attività da
eseguire. L'uso di elettroutensili per applicazioni
diverse da quelle previste può dare luogo a
situazioni di pericolo.
■ Indossare una mascherina antipolvere.
IT
MT
AVVERTENZA! POLVERI TOSSICHE!
► La lavorazione di polveri dannose/tossiche
rappresenta un pericolo per la salute dell'utente o di persone presenti nell'ambiente di
lavoro.
■ ATTENZIONE CAVI! PERICOLO!
Accertarsi di non intercettare linee di corrente,
condutture di gas o acqua, mentre si lavora
con l'elettroutensile. Controllare eventualmente
con un rilevatore di linee, prima di perforare o
fendere una parete.
Accessori originali / apparecchi
addizionali
■ Utilizzare solo accessori e apparecchi originali indicati nel manuale o il cui supporto è
compatibile con l'apparecchio.
5. Assistenza
a) Fare riparare l'elettroutensile solo da personale qualificato specializzato e solo con
ricambi originali. In tal modo si garantisce la
sicurezza dell'elettroutensile.
Indicazioni di sicurezza specifiche per
trapani battenti
■ Indossare un paraorecchi. Il forte rumore
potrebbe provocare la perdita dell'udito.
■ Utilizzare le impugnature supplementari fornite
in dotazione con l'apparecchio. La perdita del
controllo potrebbe provocare incidenti.
■ Afferrare sempre l'apparecchio dal manico
isolato quando si eseguono lavori nei quali
l’elettroutensile potrebbe urtare cavi elettrici
nascosti o il proprio cavo di alimentazione.
Il contatto con una linea che conduce tensione
può mettere sotto tensione anche le parti dell'apparecchio di metallo e causare così una
scossa elettrica.
Messa in funzione
Regolazione dell'impugnatura
supplementare
♦ La posizione di presa dell'impugnatura supplementare può essere modificata. Ruotare la
vite ad alette in senso antiorario e portare
l'impugnatura supplementare nella posizione
desiderata.
♦ Le posizioni di innesto garantiscono che l'impugnatura supplementare non possa ruotare.
♦ Stringere di nuovo la vite ad alette
.
Battuta di profondità
♦ Aprire la vite ad alette
.
♦ Inserire la battuta di profondità
supplementare .
nella maniglia
♦ Badare che la dentatura sulla battuta di profondità sia rivolta verso l'alto.
♦ Estrarre la battuta di profondità fino a quando
la distanza tra la punta del trapano e la punta
della battuta di profondità non corrisponde alla
profondità di foratura desiderata.
♦ Stringere la vite ad alette
PBH 440 A1
.
5
IT
MT
Utensili/mandrini per trapani con
corpo circolare
Regolazione della posizione di scalpellatura:
Inserimento dell'utensile/del mandrino:
con questa funzione si può ruotare l'utensile per
l'operazione di scalpellatura per portarlo nella
posizione necessaria.
♦ Tirare all'indietro la bussola di bloccaggio
e inserire l'utensile.
♦ Spostare l'interruttore di selezione funzione
nella posizione
.
♦ Lasciar andare la bussola di bloccaggio .
In tal modo l'alloggiamento viene bloccato.
Verificare il perfetto bloccaggio tirando l'utensile.
L'utensile, per ragioni legate al sistema, ha un
gioco radiale.
♦ Ruotare l'utensile che si trova nell'alloggiamento
portandolo nella posizione necessaria.
♦ Per l'operazione di scalpellatura ruotare l'interruttore di selezione funzione nella posizione .
Estrazione dell'utensile/del mandrino:
Selezionare il senso di rotazione
♦ Tirare indietro la bussola di bloccaggio
dell'utensile.
♦ Selezionare il senso di rotazione agendo
sull'interruttore di rotazione verso destra/verso
sinistra .
AVVERTENZA!
► Non utilizzare il mandrino per trapani con
corpo circolare nella funzione di trapanatura
o di scalpellatura!
Funzionamento
Selezionare la funzione con l'interruttore di selezione funzione
♦ Premere e tenere premuto il tasto di sbloccaggio
per l'interruttore di selezione funzione e ruotare quest'ultimo in modo tale che il simbolo
desiderato si innesti al relativo punto indicato
dalla freccia.
Le funzioni sono contrassegnate come segue:
AVVERTENZA!
► L'utilizzo / l'azionamento dell'interruttore di
rotazione verso destra/verso sinistra deve
avvenire esclusivamente quando l'apparecchio
è fermo.
Accensione e spegnimento
Accensione dell'apparecchio:
♦ Premere l'interruttore On/Off
.
Spegnimento dell'apparecchio:
♦ Rilasciare l'interruttore On/Off
.
Attivazione del funzionamento continuato:
Perforare / avvitare
♦ Premere l'interruttore On/Off e tenendolo
premuto bloccarlo con il tasto di arresto per
l'interruttore On/Off .
Trapanare
Disattivazione del funzionamento continuato:
Scalpellare
♦ Premere l'interruttore On/Off
nuovamente.
Funzione
Simbolo
e rilasciarlo
Regolazione della
posizione di scalpellatura
6
PBH 440 A1
Manutenzione e pulizia
ATTENZIONE! PERICOLO DI LESIONI!
Prima di qualsiasi lavoro sull'apparecchio, spegnere l'apparecchio e staccare la
spina.
■ L'apparecchio dev'essere sempre pulito, asciutto
ed esente da olio o grassi lubrificanti.
■ Per la pulizia dell'alloggiamento, utilizzare un
panno asciutto.
■ Pulire periodicamente l'alloggiamento per gli
utensili .
AVVERTENZA!
■ Se è necessario sostituire il cavo di alimentazione, fare eseguire l'operazione dal produttore o da un suo rappresentante per evitare
di compromettere la sicurezza.
Smaltimento
Assistenza
IT
MT
Assistenza Italia
Tel.: 02 36003201
E-Mail: [email protected]
IAN 90883
Assistenza Malta
Tel.: 80062230
E-Mail: [email protected]
IAN 90883
Raggiungibilità della hotline:
dal lunedì al venerdì, dalle 8.00 alle 20.00 (CET)
Importatore
KOMPERNASS HANDELS GMBH
BURGSTRASSE 21
44867 BOCHUM
GERMANY
www.kompernass.com
L'imballaggio è composto di materiali
ecocompatibili, che possono essere
smaltiti tramite gli appositi centri di
raccolta e riciclaggio.
Non smaltire gli elettroutensili
insieme ai normali rifiuti domestici!
In base alla direttiva europea 2002/96/EC, gli
apparecchi elettrici usati devono essere raccolti
separatamente e inviati a un centro per il riciclaggio
ecologico.
Per lo smaltimento dell'apparecchio usato, informarsi
presso l'amministrazione comunale o municipale.
PBH 440 A1
7
IT
MT
Dichiarazione di conformità /
produttore
La KOMPERNASS HANDELS GMBH, responsabile
della documentazione: Sig. Semi Uguzlu,
BURGSTR. 21, 44867 BOCHUM, Germania,
dichiara con la presente che questo prodotto è
conforme alle seguenti norme, ai documenti
normativi e alle direttive CE:
Direttiva macchine
(2006 / 42 / EC)
Direttiva UE bassa tensione
(2006 / 95 / EC)
Compatibilità elettromagnetica
(2004 / 108 / EC)
Direttiva RoHS
(2011 / 65 / EU)
Norme armonizzate utilizzate:
EN 60745-1:2009 + A11
EN 60745-2-6:2010
EN 55014-1:2006 + A1 + A2
EN 55014-2:1997 + A1 + A2
EN 61000-3-2:2006 + A1 + A2
EN 61000-3-3:2008
Denominazione della macchina:
Trapano battente PBH 440 A1
Anno di produzione: 05 - 2013
Numero di serie: IAN 90883
Bochum, 23/07/2013
Semi Uguzlu
- Direttore qualità Con riserva di modifiche tecniche volte al miglioramento del prodotto.
8
PBH 440 A1
Índice
Introdução . . . . . . . . . . . . . . . . . . . . . . . . . . . . . . . . . . . . . . . . . . . . . . . . . . . . . . 10
Utilização correta . . . . . . . . . . . . . . . . . . . . . . . . . . . . . . . . . . . . . . . . . . . . . . . . . . . . . . . . . . .
Componentes ilustrados . . . . . . . . . . . . . . . . . . . . . . . . . . . . . . . . . . . . . . . . . . . . . . . . . . . . . .
Conteúdo da embalagem . . . . . . . . . . . . . . . . . . . . . . . . . . . . . . . . . . . . . . . . . . . . . . . . . . . .
Dados técnicos . . . . . . . . . . . . . . . . . . . . . . . . . . . . . . . . . . . . . . . . . . . . . . . . . . . . . . . . . . . . .
10
10
10
10
PT
Indicações gerais de segurança para ferramentas elétricas . . . . . . . . . . . . . 11
1. Segurança no local de trabalho . . . . . . . . . . . . . . . . . . . . . . . . . . . . . . . . . . . . . . . . . . . . .
2. Segurança elétrica . . . . . . . . . . . . . . . . . . . . . . . . . . . . . . . . . . . . . . . . . . . . . . . . . . . . . . . .
3. Segurança de pessoas. . . . . . . . . . . . . . . . . . . . . . . . . . . . . . . . . . . . . . . . . . . . . . . . . . . . .
4. Utilização e conservação da ferramenta elétrica . . . . . . . . . . . . . . . . . . . . . . . . . . . . . . . .
5. Assistência técnica . . . . . . . . . . . . . . . . . . . . . . . . . . . . . . . . . . . . . . . . . . . . . . . . . . . . . . . .
Indicações de segurança específicas do aparelho para martelos perfuradores . . . . . . . . . . .
Acessórios/aparelhos adicionais originais . . . . . . . . . . . . . . . . . . . . . . . . . . . . . . . . . . . . . . .
11
11
12
12
13
13
13
Colocação em funcionamento . . . . . . . . . . . . . . . . . . . . . . . . . . . . . . . . . . . . . . 13
Deslocar o punho adicional . . . . . . . . . . . . . . . . . . . . . . . . . . . . . . . . . . . . . . . . . . . . . . . . . . . 13
Limitador de profundidade . . . . . . . . . . . . . . . . . . . . . . . . . . . . . . . . . . . . . . . . . . . . . . . . . . . . 13
Ferramenta ou mandril para broca de haste arredondada . . . . . . . . . . . . . . . . . . . . . . . . . . . 14
Operação . . . . . . . . . . . . . . . . . . . . . . . . . . . . . . . . . . . . . . . . . . . . . . . . . . . . . . 14
Selecionar uma função com seletor de função . . . . . . . . . . . . . . . . . . . . . . . . . . . . . . . . . . . . 14
Selecionar sentido de rotação . . . . . . . . . . . . . . . . . . . . . . . . . . . . . . . . . . . . . . . . . . . . . . . . . 14
Ligar e desligar. . . . . . . . . . . . . . . . . . . . . . . . . . . . . . . . . . . . . . . . . . . . . . . . . . . . . . . . . . . . . 14
Manutenção e limpeza . . . . . . . . . . . . . . . . . . . . . . . . . . . . . . . . . . . . . . . . . . . . 15
Eliminação . . . . . . . . . . . . . . . . . . . . . . . . . . . . . . . . . . . . . . . . . . . . . . . . . . . . . . 15
Assistência técnica . . . . . . . . . . . . . . . . . . . . . . . . . . . . . . . . . . . . . . . . . . . . . . . 15
Importador . . . . . . . . . . . . . . . . . . . . . . . . . . . . . . . . . . . . . . . . . . . . . . . . . . . . . 15
Declaração de conformidade / fabricante . . . . . . . . . . . . . . . . . . . . . . . . . . . . 16
PBH 440 A1
9
MARTELO PERFURADOR
PBH 440 A1
Introdução
PT
Conteúdo da embalagem
1 martelo perfurador PBH 440 A1
1 punho adicional
1 mandril porta-brocas com adaptador (ver figura A)
Parabéns pela compra do seu novo
aparelho. Optou por um produto de
elevada qualidade. O manual de instruções
faz parte deste produto. Este contém indicações
importantes para a segurança, utilização e eliminação. Antes de utilizar o produto, familiarize-se com
todas as indicações de operação e segurança.
Utilize o produto apenas como descrito e nas áreas
de aplicação indicadas. Ao transferir o produto para
terceiros, entregue todos os respetivos documentos.
3 brocas (ver figura B)
Tensão nominal:
230 V ∼ 50 Hz
Utilização correta
Rotação ao ralenti:
n0 0 - 1.650 / min.
O martelo perfurador PBH 440 A1 (a seguir
designado "aparelho") é apropriado para:
Frequência de percussão: 0 - 7.500 / min.
▯ Furar com percussão em tijolo, betão e pedra
▯ Cinzelar em betão, pedra e reboco
1 cinzel chato (ver figura B)
1 limitador de profundidade
1 mala
1 manual de instruções
Dados técnicos
Consumo nominal:
Força de percussão:
Capacidade de
perfuração:
▯ Furar pedra, madeira e metal
Qualquer outra utilização ou alteração do aparelho é considerada incorreta e acarreta perigo de
acidentes graves.
O fabricante não se responsabiliza por quaisquer
danos causados por uma utilização incorreta.
Classe de proteção:
440 W
1,2 Joule
máx. 13 mm para aço
máx. 24 mm para madeira
máx. 19 mm para betão
II /
Informações sobre ruído e vibração:
Este aparelho não foi concebido para a utilização
comercial.
Valor de medição para ruído, determinado de
acordo com a Norma EN 60745. Por norma, o
nível de ruído, avaliado com A, da ferramenta
elétrica é:
Componentes ilustrados
Furar com percussão:
Parafuso de orelhas
Nível de pressão sonora:
84,78 dB(A)
Interruptor sentido direita/esquerda
Nível de potência sonora:
95,78 dB(A)
Interruptor ligar/desligar
Incerteza K:
3 dB
Botão de fixação para interruptor
LIGAR/DESLIGAR
Cinzelar:
Seletor de função
Nível de pressão sonora:
90,26 dB(A)
Botão de desbloqueio para seletor de função
Nível de potência sonora:
101,26 dB(A)
Punho adicional
Incerteza K:
3 dB
Encabadouro da ferramenta
Bucha de bloqueio
Usar proteção auditiva!
Limitador de profundidade
10
PBH 440 A1
Valores totais de oscilação (soma vetorial de três
direções) determinados de acordo com a Norma
EN 60745:
Punho principal
Perfuração em betão
Betão: ah(HD) = 10,139 m/s2, K = 1,5 m/s2
Punho adicional
Perfuração em betão
Betão: ah(HD) = 7,468 m/s2, K = 1,5 m/s2
Punho principal
Cinzelagem:
ah(CHeq) = 7,024 m/s2, K = 1,5 m/s2
Punho adicional
Cinzelagem:
ah(CHeq) = 5,060 m/s2, K = 1,5 m/s2
Indicações gerais
de segurança para
ferramentas elétricas
AVISO!
PT
► Leia todas as indicações de segurança e instruções. A inobservância das indicações de
segurança e instruções pode causar choque
elétrico, incêndio e/ou ferimentos graves.
Guarde todas as indicações de segurança e
instruções para futuras consultas.
O conceito “ferramenta elétrica”, utilizado nas
indicações de segurança, refere-se a ferramentas
elétricas operadas pela rede elétrica (com cabo
de alimentação elétrica) e a ferramentas elétricas
operadas pela bateria (sem cabo de alimentação
elétrica).
1. Segurança no local de trabalho
AVISO!
► Os níveis de vibração indicados nestas instruções foram medidos de acordo com um processo de medição normalizado pela norma
EN 60745 e podem ser utilizados para
a comparação de aparelhos. O valor da
emissão de vibração indicado também pode
ser utilizado para uma avaliação preliminar
do período de suspensão.
O nível de vibração altera-se de acordo com
a utilização da ferramenta elétrica e pode,
em alguns casos, exceder o valor indicado
nestas instruções. O grau de vibração pode
ser subestimado, caso a ferramenta seja
utilizada frequentemente desta forma.
NOTA
► Para uma avaliação exata do grau de vibração durante um determinado período de
trabalho, devem também ter-se em consideração os períodos de tempo em que o
aparelho está desligado ou está ligado, mas
não está a ser utilizado. Isto pode reduzir significativamente o grau de vibração durante o
período total de trabalho.
PBH 440 A1
a) Mantenha o seu local de trabalho limpo e bem
iluminado. Desarrumação e áreas de trabalho
pouco iluminadas podem causar acidentes.
b) Não trabalhe com a ferramenta elétrica em
ambientes potencialmente explosivos, onde
se encontram líquidos, gases ou poeiras inflamáveis. Ferramentas elétricas originam faíscas
que podem inflamar poeiras e vapores.
c) Durante a utilização da ferramenta elétrica,
mantenha crianças e outras pessoas afastadas. Em caso de distração pode perder o
controlo do aparelho.
2. Segurança elétrica
a) A ficha de ligação da ferramenta elétrica tem
de ser adequada à tomada. A ficha não pode,
de forma alguma, ser alterada. Não utilize
quaisquer fichas de adaptadores juntamente
com ferramentas elétricas com proteção de
ligação à terra. Fichas inalteradas e tomadas
adequadas reduzem o risco de choque elétrico.
b) Evite o contacto físico com superfícies ligadas
à terra, como tubos, aquecimentos, fogões e
frigoríficos. Existe um risco maior de choque
elétrico se o seu corpo estiver ligado à terra.
11
PT
c) Mantenha as ferramentas elétricas afastadas
de chuva ou humidade. A infiltração de água
num aparelho elétrico aumenta o risco de
choque elétrico.
d) Retire as ferramentas de ajuste ou a chave de
parafusos antes de ligar a ferramenta elétrica.
Uma ferramenta ou uma chave numa parte
rotativa do aparelho pode causar ferimentos.
d) Não utilize o cabo para um fim diferente do
previsto, p. ex. para transportar a ferramenta
elétrica ou para puxar a ficha da tomada.
Mantenha o cabo afastado de calor, óleo,
arestas afiadas ou partes do aparelho móveis.
Cabos danificados ou enrolados aumentam o
risco de choque elétrico.
e) Evite uma postura corporal incorreta. Assegure
uma posição estável e mantenha sempre o
equilíbrio. Desta forma, consegue controlar
melhor a ferramenta elétrica em situações
inesperadas.
e) Se trabalhar com uma ferramenta elétrica ao
ar livre, utilize apenas extensões que também
sejam adequadas para áreas exteriores.
A utilização de uma extensão adequada para
o exterior diminui o risco de choque elétrico.
f) Se não for possível evitar a utilização da
ferramenta elétrica num ambiente húmido,
utilize um disjuntor diferencial residual.
A utilização de um disjuntor diferencial residual
reduz o risco de choque elétrico.
3. Segurança de pessoas
a) Esteja sempre atento, preste atenção ao que
está a fazer e utilize a ferramenta elétrica
de forma sensata. Não utilize o aparelho se
estiver desconcentrado, com sono ou sob influência de drogas, álcool ou medicamentos.
Um momento de distração durante a utilização
da ferramenta elétrica pode causar ferimentos
graves.
b) Use o equipamento de proteção pessoal e
sempre óculos de proteção. O uso do equipamento de proteção pessoal, como máscaras de
proteção contra pó, calçado de segurança antiderrapante, capacete de proteção ou proteção
auditiva, de acordo com o tipo de aplicação da
ferramenta elétrica, reduz o risco de ferimentos.
c) Evite uma colocação em funcionamento involuntária. Certifique-se de que a ferramenta
elétrica se encontra desligada antes de a
ligar à fonte de alimentação, elevar ou transportar. Se, durante o transporte da ferramenta
elétrica, tiver o dedo no interruptor ou ligar o
aparelho a uma fonte de alimentação quando
este já se encontra ligado, poderão ocorrer
acidentes.
12
f) Use vestuário adequado. Não use roupas
largas ou jóias. Mantenha o cabelo, vestuário e luvas afastados das peças móveis.
Vestuário solto, jóias ou cabelos compridos
podem ser recolhidos pelas peças móveis.
g) Se existir a possibilidade de montar dispositivos de aspiração ou recolha de poeiras,
certifique-se de que são ligados e utilizados
corretamente. A utilização de um dispositivo
de aspiração pode reduzir eventuais perigos
devido a poeiras.
4. Utilização e conservação da
ferramenta elétrica
a) Não sobrecarregue o aparelho. Utilize a
ferramenta elétrica apropriada para o seu
trabalho. Com a ferramenta elétrica adequada,
trabalhará melhor e de forma mais segura na
respetiva área de trabalho.
b) Não utilize qualquer ferramenta elétrica, cujo
interruptor esteja avariado. Uma ferramenta
elétrica que não se consegue ligar nem desligar
constitui perigo e tem de ser reparada.
c) Retire a ficha da tomada antes de realizar
ajustes no aparelho, substituir acessórios ou se
não estiver a utilizar o aparelho. Esta medida
de segurança impede o arranque involuntário
do aparelho.
d) Guarde as ferramentas elétricas que não estão
a ser utilizadas fora do alcance das crianças.
Não autorize a utilização do aparelho por
pessoas que não estejam familiarizadas com
o mesmo ou que não tenham lido estas instruções. As ferramentas elétricas são perigosas,
caso sejam utilizadas por pessoas inexperientes.
PBH 440 A1
e) Manuseie as ferramentas elétricas com cuidado. Verifique se as peças móveis funcionam
corretamente e não se encontram encravadas,
se estão partidas ou danificadas a ponto de
interferir no bom funcionamento da ferramenta
elétrica. Antes de utilizar o aparelho, as peças
danificadas devem ser reparadas. Muitos
acidentes ocorrem devido à má manutenção
das ferramentas elétricas.
f) Mantenha as ferramentas de corte afiadas e
limpas. Ferramentas de corte bem conservadas
e afiadas encravam muito menos e são mais
fáceis de conduzir.
g) Utilize a ferramenta elétrica, os acessórios,
ferramentas de aplicação, etc., de acordo
com estas instruções. Tenha em consideração
as condições de trabalho e a atividade a
exercer. A utilização de ferramentas elétricas
para outras utilizações diferentes das previstas
pode levar a situações perigosas.
■ Use uma máscara antipoeira.
AVISO! POEIRAS TÓXICAS!
► Trabalhar poeiras tóxicas/nocivas representa
um perigo para a saúde, para o operador da
máquina e para as pessoas que se encontrem
na proximidade.
■ ATENÇÃO TUBOS/CABOS! PERIGO!
Certifique-se de que não entra em contacto
com cabos de eletricidade, tubos de gás ou
água quando estiver a trabalhar com uma
ferramenta elétrica. Se necessário, verifique
com um localizador de tubos/cabos antes de
perfurar ou abrir uma parede.
Acessórios/aparelhos adicionais
originais
■ Utilize apenas acessórios e aparelhos adicionais indicados no manual de instruções
ou cuja montagem seja compatível com o
aparelho.
5. Assistência técnica
a) A sua ferramenta elétrica só pode ser reparada
por técnicos especializados e com peças de
substituição de origem. Desta forma, é garantida
a segurança da sua ferramenta elétrica.
Indicações de segurança específicas do
aparelho para martelos perfuradores
■ Use proteção auditiva. A exposição ao ruído
pode provocar perda de audição.
■ Utilize os punhos adicionais fornecidos com
o aparelho. A perda de controlo pode causar
ferimentos.
■ Segure no aparelho apenas pelas superfícies
isoladas do punho quando realizar trabalhos
em que a ferramenta elétrica possa atingir
cabos elétricos escondidos ou o próprio cabo
do aparelho. O contacto com um cabo condutor de tensão também pode colocar peças
metálicas do aparelho sob tensão, causando
assim um choque elétrico.
Colocação em funcionamento
Deslocar o punho adicional
♦ A posição para agarrar no punho adicional
pode ser alterada. Rode o parafuso de orelhas
no sentido contrário ao dos ponteiros do relógio
e desloque o punho adicional para a posição pretendida.
♦ Através das posições de encaixe, o punho
adicional está protegido contra rotação.
♦ Aperte novamente o parafuso de orelhas
Limitador de profundidade
♦ Desenrosque o parafuso de orelhas
♦ Coloque o limitador de profundidade
punho adicional .
.
no
♦ Certifique-se de que os dentes no limitador de
profundidade estão voltados para cima.
♦ Retire o limitador de profundidade até que
a distância entre a ponta da broca e a ponta
do limitador de profundidade corresponda à
profundidade de perfuração pretendida.
♦ Enrosque o parafuso de orelhas
PBH 440 A1
.
.
13
PT
Ferramenta ou mandril para broca
de haste arredondada
Utilizar a ferramenta / o mandril:
PT
♦ Puxe a bucha de bloqueio
a ferramenta.
para trás e insira
♦ Solte a bucha de bloqueio . Assim, o encabadouro é bloqueado. Verifique o bloqueio
correto, puxando a ferramenta. A ferramenta
tem uma folga radial própria do sistema.
Retirar a ferramenta / o mandril:
♦ Puxe a bucha de bloqueio
para trás.
da ferramenta
AVISO!
► Não utilize o mandril para broca de haste
arredondada durante a perfuração com
percussão ou cinzelagem!
Operação
Com esta função pode rodar a ferramenta para o
processo de cinzelagem para a posição necessária.
♦ Rode o seletor de função
para a posição
.
♦ Rode a ferramenta no encabadouro da ferramenta para a posição necessária.
♦ Rode o seletor de função para o processo de
cinzelagem para a posição .
Selecionar sentido de rotação
♦ Selecione o sentido de rotação, ajustando o
interruptor sentido direita/esquerda .
AVISO!
► A utilização / o ajuste do interruptor sentido
direita/esquerda apenas pode ocorrer
com o aparelho imobilizado.
Ligar e desligar
Ligar o aparelho:
Selecionar uma função com seletor
de função
♦ Prima e mantenha premido o botão de desbloqueio para o seletor de função e rode o
seletor de função até que o símbolo pretendido encaixe na marcação da seta.
As funções estão identificadas da seguinte forma:
Função
Ajustar posição do cinzel:
Símbolo
♦ Prima o interruptor LIGAR/DESLIGAR
.
Desligar o aparelho:
♦ Solte o interruptor LIGAR/DESLIGAR
.
Ligar o funcionamento contínuo:
♦ Prima o interruptor LIGAR/DESLIGAR e fixe-o
na posição premida com o botão de fixação
para o interruptor LIGAR/DESLIGAR .
Furar / aparafusar
Desligar o funcionamento contínuo:
Furar com percussão
♦ Prima o interruptor LIGAR/DESLIGAR
a soltá-lo.
e volte
Cinzelar
Ajuste da posição do
cinzel
14
PBH 440 A1
Manutenção e limpeza
AVISO! PERIGO DE FERIMENTOS!
Antes de realizar quaisquer trabalhos
no aparelho, desligue-o e retire a ficha da
tomada.
■ O aparelho deve estar sempre limpo, seco e
livre de óleos ou lubrificantes.
Assistência técnica
Assistência Portugal
Tel.: 70778 0005 (0,12 EUR/Min.)
E-Mail: [email protected]
IAN 90883
PT
■ Utilize um pano seco para limpar a estrutura.
Horário de atendimento da linha de apoio:
Segunda a sexta das 8:00 horas – 20:00 horas
(HEC)
■ Limpe regularmente o encabadouro da ferramenta .
Importador
AVISO!
■ A substituição de um cabo de ligação deverá
ser realizada pelo fabricante ou pelo seu
representante, a fim de prevenir riscos para
a segurança.
KOMPERNASS HANDELS GMBH
BURGSTRASSE 21
44867 BOCHUM
GERMANY
www.kompernass.com
Eliminação
A embalagem é composta por materiais
recicláveis, que pode depositar nos
ecopontos locais.
Não deite ferramentas elétricas no
lixo doméstico!
Em conformidade com a Diretiva Europeia
2002/96/EC, as ferramentas elétricas usadas têm
de ser recolhidas separadamente e submetidas a
reciclagem.
Relativamente à possibilidade de eliminação do
aparelho usado, informe-se junto da junta de
freguesia ou câmara municipal da sua área de
residência.
PBH 440 A1
15
Declaração de conformidade /
fabricante
PT
Nós, a KOMPERNASS HANDELS GMBH,
responsável pela documentação: Sr. Semi Uguzlu,
BURGSTR. 21, 44867 BOCHUM, ALEMANHA,
declaramos que este produto cumpre as seguintes
normas, os documentos normativos e diretivas CE:
Diretiva Máquinas
(2006 / 42 / EC)
Diretiva Baixa Tensão da CE
(2006 / 95 / EC)
Compatibilidade Eletromagnética
(2004 / 108 / EC)
Diretiva RoHS
(2011 / 65 / EU)
Normas harmonizadas aplicadas:
EN 60745-1:2009 + A11
EN 60745-2-6:2010
EN 55014-1:2006 + A1 + A2
EN 55014-2:1997 + A1 + A2
EN 61000-3-2:2006 + A1 + A2
EN 61000-3-3:2008
Designação de tipo da máquina:
Martelo perfurador PBH 440 A1
Ano de fabrico: 05 - 2013
Número de série: IAN 90883
Bochum, 23.07.2013
Semi Uguzlu
- Gestor de qualidade Reservado o direito a alterações técnicas no âmbito da evolução técnica.
16
PBH 440 A1
Table of contents
Introduction . . . . . . . . . . . . . . . . . . . . . . . . . . . . . . . . . . . . . . . . . . . . . . . . . . . . . 18
Intended Usage . . . . . . . . . . . . . . . . . . . . . . . . . . . . . . . . . . . . . . . . . . . . . . . . . . . . . . . . . . . .
Depicted components. . . . . . . . . . . . . . . . . . . . . . . . . . . . . . . . . . . . . . . . . . . . . . . . . . . . . . . .
Scope of delivery . . . . . . . . . . . . . . . . . . . . . . . . . . . . . . . . . . . . . . . . . . . . . . . . . . . . . . . . . . .
Technical details . . . . . . . . . . . . . . . . . . . . . . . . . . . . . . . . . . . . . . . . . . . . . . . . . . . . . . . . . . . .
18
18
18
18
GB
MT
General safety instructions for electric tools . . . . . . . . . . . . . . . . . . . . . . . . . . 19
1. Workplace safety . . . . . . . . . . . . . . . . . . . . . . . . . . . . . . . . . . . . . . . . . . . . . . . . . . . . . . . . . 19
2. Electric safety . . . . . . . . . . . . . . . . . . . . . . . . . . . . . . . . . . . . . . . . . . . . . . . . . . . . . . . . . . . . 19
3. Safety of personnel . . . . . . . . . . . . . . . . . . . . . . . . . . . . . . . . . . . . . . . . . . . . . . . . . . . . . . . 20
4. Use and handling of the electric tool . . . . . . . . . . . . . . . . . . . . . . . . . . . . . . . . . . . . . . . . . . . . . .20
5. Service . . . . . . . . . . . . . . . . . . . . . . . . . . . . . . . . . . . . . . . . . . . . . . . . . . . . . . . . . . . . . . . . . 21
Appliance-specific safety instructions for hammer drills . . . . . . . . . . . . . . . . . . . . . . . . . . . . . . 21
Original accessories / ancillary equipment . . . . . . . . . . . . . . . . . . . . . . . . . . . . . . . . . . . . . . . 21
Initial operation . . . . . . . . . . . . . . . . . . . . . . . . . . . . . . . . . . . . . . . . . . . . . . . . . 21
Swivelling the additional handle . . . . . . . . . . . . . . . . . . . . . . . . . . . . . . . . . . . . . . . . . . . . . . . 21
Depth stop . . . . . . . . . . . . . . . . . . . . . . . . . . . . . . . . . . . . . . . . . . . . . . . . . . . . . . . . . . . . . . . . 21
Tools and chucks for round shaft bits.. . . . . . . . . . . . . . . . . . . . . . . . . . . . . . . . . . . . . . . . . . . . 21
Operation . . . . . . . . . . . . . . . . . . . . . . . . . . . . . . . . . . . . . . . . . . . . . . . . . . . . . . 22
Selecting a function using the function selector switch . . . . . . . . . . . . . . . . . . . . . . . . . . . . . . . 22
Select direction of rotation . . . . . . . . . . . . . . . . . . . . . . . . . . . . . . . . . . . . . . . . . . . . . . . . . . . . 22
Switching on and off . . . . . . . . . . . . . . . . . . . . . . . . . . . . . . . . . . . . . . . . . . . . . . . . . . . . . . . . 22
Maintenance and Cleaning . . . . . . . . . . . . . . . . . . . . . . . . . . . . . . . . . . . . . . . . 22
Disposal . . . . . . . . . . . . . . . . . . . . . . . . . . . . . . . . . . . . . . . . . . . . . . . . . . . . . . . . 23
Service . . . . . . . . . . . . . . . . . . . . . . . . . . . . . . . . . . . . . . . . . . . . . . . . . . . . . . . . . 23
Importer . . . . . . . . . . . . . . . . . . . . . . . . . . . . . . . . . . . . . . . . . . . . . . . . . . . . . . . 23
Declaration of Conformity/Manufacturer . . . . . . . . . . . . . . . . . . . . . . . . . . . . 23
PBH 440 A1
17
HAMMER DRILL PBH 440 A1
Introduction
GB
MT
Congratulations on the purchase of your
new product. You have decided to purchase
a high-quality product. The operating
instructions are a constituent of this product. They
contain important information with regard to safety,
use and disposal. Before using the product, familiarise
yourself with all operating and safety instructions.
Use this appliance only as described and only for
the specified areas of application. Please also pass
these operating instructions on to any future owner(s).
Intended Usage
Scope of delivery
1 hammer drill PBH 440 A1
1 additional handle
1 drill chuck with adapter (see fig. A)
3 drill bits (see fig. B)
1 flat chisel (see fig. B)
1 depth stop
1 carrying case
1 operating manual
Technical details
Nominal power
consumption:
440 W
The PBH 440 A1 hammer drill (in the following
appliance) is suitable for:
Rated voltage:
230 V ∼ 50 Hz
Idle speed:
▯ Hammer drilling into brickwork, concrete and
stone
n0 0 - 1.650 / min
Hammer frequency:
0 - 7.500 / min
▯ Chiselling into concrete, stone and plaster
▯ Drilling into stone, wood and metal
Any other usage of or modification to the appliance
is deemed to be improper usage and carries the
risk of serious personal injury.
The manufacturer declines to accept responsibility
for damage(s) arising out of usage contrary to the
instructions specified below.
Impact energy:
1.2 Joules
Drilling capacity:
max. 13 mm for steel
max. 24 mm for wood
max. 19 mm for concrete
Protection class:
II /
Noise and vibration information:
The appliance is not meant for commercial use.
Noise measurement determined in accordance
with EN 60745 The A-rated noise level of the
electric tool is typically:
Depicted components
Hammer drilling:
Wing bolt
Noise level:
84.78 dB(A)
Right/left rotation switch
Acoustic power level:
95.78 dB(A)
On/Off switch
Uncertainty K:
3 dB
Locking button for ON/OFF switch
Chiselling:
Function selector switch
Noise level:
90.26 dB(A)
Unlocking button for function selector switch
Acoustic power level:
101.26 dB(A)
Additional handle
Uncertainty K:
3 dB
Tool holder
Locking sleeve
Depth stop
18
Wear hearing protection!
PBH 440 A1
Total vibration values (vector total of three directions)
determined in accordance with EN 60745:
Main handle
Hammer drilling in
Concrete: ah(HD) = 10.139 m/s2, K = 1.5 m/s2
Additional handle
Hammer drilling in
General safety instructions for electric tools
WARNING!
► Please read all of the safety instructions.
Failure to follow the safety instructions listed
below can result in electric shock, fire and/or
serious injuries.
Concrete: ah(HD) = 7.468 m/s2, K = 1.5 m/s2
Keep all safety instructions and other instructions for future use.
Main handle
The term “electric tools” which is used in the safety
instructions relates to mains-operated electric tools
(with power cable) and battery-operated electric
tools (without power cable).
Chiselling: ah(CHeq) = 7.024 m/s2, K = 1.5 m/s2
Additional handle
Chiselling: ah(CHeq) = 5.060 m/s2, K = 1.5 m/s2
WARNING!
► The vibration level specified in these instructions has been measured in accordance with
the measuring procedure that has been standardised in EN 60745 and can be used to
make equipment comparisons. The specified
vibration emission value can also be used to
make an initial exposure estimate.
The vibration level varies in accordance with
the use of the electric tool and may be higher
than the value specified in these instructions
in some cases. The vibration load could be
underestimated if the electric tool is regularly
used in such a way.
NOTE
► For an accurate estimate of the vibration load
during a certain working period, the times
during which the appliance is switched off or
is running but not actually being used must
also be taken into consideration. This can
significantly reduce the vibration load over
the total working period.
PBH 440 A1
1. Workplace safety
a) Keep your workplace clean and well-lit.
Untidy and poorly-lit working areas can lead to
accidents.
b) Do not work with the electric tool in potentially
explosive areas in which flammable liquids,
gases or dust are located. Electric tools produce
sparks which could ignite the dust or vapours.
b) Keep children and other persons a safe
distance away when using electrical tools.
Should you become distracted, you could lose
control over the appliance.
2. Electric safety
a) The appliance connecting plug must fit into the
plug socket. The plug may not be altered in
any way. Do not use adapter plugs together
with earthed appliances. Unmodified plugs
and suitable wall sockets reduce the risk of
electric shock.
b) Avoid bodily contact with earthed surfaces,
such as pipes, radiators, ovens and refrigerators. There is an increased risk of electric shock
if your body is earthed.
c) Keep electric tools away from rain and moisture. If water or moisture penetrates an electric
tool the risk of electric shock increases.
19
GB
MT
d) Do not misuse the electrical cable, e.g. to
carry the appliance, suspend it in storage
or to pull the plug from the socket. Keep the
cable away from heat, oil, sharp edges and
moving appliance components. Damaged or
tangled cords and defective plugs increase the
risk of electric shock.
GB
MT
better control over the electric tool, especially in
unexpected situations.
f) Wear suitable clothing. Do not wear loose
clothing or jewellery. Keep hair, clothing and
gloves away from moving parts. Loose clothing, jewellery and long hair can be caught by
moving parts.
e) If you are working with an electric tool outdoors, only use extension cables that are also
approved for use outdoors. The use of an
extension cord certified for outdoor use reduces
the risk of electric shock.
g) If dust extraction and collecting equipment
can be fitted, ensure that it is attached and
used properly. The use of an extraction system
can reduce hazards caused by dust.
f) If the use of the electric tool in a humid environment is unavoidable, use a fault current
circuit breaker. The use of a fault current circuit
breaker reduces the risk of electric shock.
4. Use and handling of the electric tool
3. Safety of personnel
a) Be alert at all times, pay attention to what
you are doing and act sensibly when you are
using an electric tool. Do not use an electric
tool if you are tired or under the influence of
drugs, alcohol or medication. Even a simple
lapse of attention while using an electrical hand
tool is sufficient to lead to serious injuries.
b) Wear personal protection equipment, and
always wear a pair of protective goggles.
Wearing personal protective equipment such as
a dust mask, non-slip safety shoes, protective
gloves, helmet or hearing protection, depending
on the type and use of the electrical tool, reduces
the risk of injuries.
c) Avoid unintentional operation of the appliance.
Ensure that the electric tool is switched off before connecting it to the power supply, picking
it up or carrying it. Carrying the electric tool
with your finger on the ON/OFF switch or connecting the appliance to the mains supply whilst
it is switched on can lead to serious accidents.
d) Remove any adjusting tools or spanners
before switching on the appliance. A tool or
wrench in a rotating appliance component can
cause serious injuries.
e) Avoid adopting an unusual posture. Ensure
that you position yourself securely and you
are balanced at all times. This gives you much
20
a) Do not overload the appliance. Use the correct
electrical tool for your work. With the correct
electrical tool, you will work better and more
safely within the specified performance range.
b) Never use a handheld electrical tool with a
defective switch. An electrical tool that can no
longer be switched on or off is dangerous and
must be repaired.
c) Remove the plug from the socket before making adjustments to the appliance, changing
accessories or putting the appliance into
storage. These precautionary measures prevent
accidental starting of the appliance.
d) Store unused electric tools out of the reach of
children Do not allow persons who are not
familiar with the appliance or who have not
read these instructions to operate the appliance.
Electrical tools are dangerous if used by
inexperienced persons.
e) Look after electric tools with care. Check
to see whether moving parts are functioning
correctly and are not jamming, whether
parts are broken or damaged and that the
functioning of the electric tool is not impaired.
Arrange for damaged components to be
repaired before using the appliance. Many
accidents are caused by poorly maintained
electrical tools.
f) Keep cutting tools sharp and clean. Carefully
maintained cutting tools with sharp cutting
edges jam less often and are easier to control.
PBH 440 A1
g) Use the electric tools, accessories, insertion
tools etc. in accordance with these instructions. Take heed of the operating conditions
and the activities to be performed. The use
of electrical tools for purposes other than their
intended applications can result in dangerous
situations.
5. Service
a) Only allow qualified specialists with original
spare parts to repair your electric tool. This
ensures that your electric tool remains safe.
Appliance-specific safety instructions
for hammer drills
■ Wear hearing protection. The effect of noise
can lead to hearing loss.
Initial operation
Swivelling the additional handle
♦ The gripping position of the additional handle
can be varied. Turn the wing bolt anticlockwise and swivel the additional handle to the
required position.
♦ The snap-in position ensures that the additional
handle is firmly in place and cannot turn.
♦ Tighten the wing bolt
again afterwards.
Depth stop
♦ Open the wing bolt
♦ Insert the depth stop
handle .
.
into the additional
■ Use the additional handles supplied with the
appliance. Loss of control can lead to injuries.
♦ Ensure that the toothing on the depth stop
facing upwards.
■ Hold the appliance by the insulated handles
when you are carrying out work during which
the insertion tool may come into contact with
concealed power cables or its own power
cable. Contact with a live cable may also make
metal parts of the appliance live and lead to
electric shock.
♦ Pull the depth stop out far enough for the
distance between the tip of the drill and the tip
of the depth stop to correspond with the required
drilling depth.
■ Wear a dust mask.
Use tool / chuck:
WARNING! TOXIC DUST!
► Working with harmful / toxic dusts results in
health hazards for the person operating the
appliance and for other persons in the area.
■ ATTENTION - SERVICE LINES! DANGER!
Take steps to ensure that you do not hit any service lines (electricity, gas, water) when working
with the electric tool. If necessary, check with a
service line detector before you start to cut or
drill into a surface.
Original accessories / ancillary
equipment
♦ Tighten the wing bolt
is
again.
Tools and chucks for round shaft bits.
♦ Pull the locking sleeve
the tool.
backwards and insert
♦ Release the locking sleeve . This locks the
holder. Check that the tool is properly locked
by pulling it. The system has radial play because of the design.
Remove tool / chuck:
♦ Pull the locking sleeve
on the tool backwards.
WARNING!
► Do not use the chuck for round shaft bits for
hammer drilling or chiselling!
■ Only use accessories and additional appliances that are specified in the operating
instructions and are compatible with the
appliance.
PBH 440 A1
21
GB
MT
GB
MT
Operation
Switching on and off
Selecting a function using the function
selector switch
Switching the appliance on:
♦ Press and hold the unlocking button for function selector switch and rotate the function
selector switch so that the required symbol
engages at the arrow mark.
The functions are marked as follows:
Function
♦ Press the ON/OFF switch
.
Switching the appliance off:
♦ Release the ON/OFF switch
.
Switching to continuous operation:
♦ Press the ON/OFF switch and lock it in
this position with the ON/OFF switch locking
button .
Symbol
Drilling / screwdriving
Switching off continuous operation:
Hammer drilling
♦ Press the ON/OFF switch
again.
Chiselling
and release it
Maintenance and Cleaning
Chisel position
adjustment
WARNING! RISK OF INJURY! Switch
the appliance off and remove the
power plug before starting any work.
Adjust chisel position:
You can rotate the tool to the required position for
chiselling using this function.
♦ Rotate the function selector switch
position .
to
♦ Rotate the tool into the tool holder
required position.
to the
♦ Rotate the function selector switch to
position for the chiselling function.
Select direction of rotation
■ The appliance must always be clean, dry and
free from oil or grease.
■ To clean the casing, use a soft cloth.
■ Regularly clean the tool holder
.
WARNING!
■ If the connecting cable needs to be replaced,
this must be carried out by the manufacturer
or his representative in order to avoid hazardous situations.
♦ Select the direction of rotation by adjusting the
right/left rotation switch .
WARNING!
► The right/left running switch may only
be used / adjusted if the appliance is at a
standstill.
22
PBH 440 A1
Disposal
The packaging is made from environmentally-friendly material and can be disposed
off at your local recycling plant.
Do not dispose of electrical tools in
your normal domestic waste!
Declaration of Conformity/
Manufacturer
We, KOMPERNASS HANDELS GMBH, Custodian
of Documents: Mr. Semi Uguzlu, BURGSTR. 21,
44867 BOCHUM, GERMANY, hereby declare
that this product complies with the following
standards, normative documents and the EC
directives:
As required by European Guideline 2002/96/EC,
worn-out electrical tools must be collected separately and fed into an environmentally compatible
recycling process.
Machinery directive
(2006 / 42 / EC)
Your local communal or municipal authorities can
provide information on how to dispose of the wornout appliance.
EMC (Electromagnetic Compatibility)
(2004 / 108 / EC)
Service
EU Low Voltage Regulations
(2006 / 95 / EC)
RoHS Directive
(2011 / 65 / EU)
Service Great Britain
Tel.: 0871 5000 720 (£ 0.10/Min.)
E-Mail: [email protected]
IAN 90883
Related harmonised standards:
Service Malta
Tel.: 80062230
E-Mail: [email protected]
IAN 90883
EN 55014-2:1997 + A1 + A2
EN 60745-1:2009 + A11
EN 60745-2-6:2010
EN 55014-1:2006 + A1 + A2
EN 61000-3-2:2006 + A1 + A2
EN 61000-3-3:2008
Hotline availability: Monday to Friday 08:00 20:00 (CET)
Type designation of machine:
Importer
Year of manufacture: 05 - 2013
KOMPERNASS HANDELS GMBH
Serial number: IAN 90883
Hammer drill PBH 440 A1
BURGSTRASSE 21
44867 BOCHUM
Bochum, 23.07.2013
GERMANY
www.kompernass.com
Semi Uguzlu
- Quality Manager Subject to technical changes in the course of
further developments.
PBH 440 A1
23
GB
MT
24
PBH 440 A1
Inhaltsverzeichnis
Einleitung . . . . . . . . . . . . . . . . . . . . . . . . . . . . . . . . . . . . . . . . . . . . . . . . . . . . . . . 26
Bestimmungsgemäßer Gebrauch . . . . . . . . . . . . . . . . . . . . . . . . . . . . . . . . . . . . . . . . . . . . . . .
Abgebildete Komponenten . . . . . . . . . . . . . . . . . . . . . . . . . . . . . . . . . . . . . . . . . . . . . . . . . . .
Lieferumfang . . . . . . . . . . . . . . . . . . . . . . . . . . . . . . . . . . . . . . . . . . . . . . . . . . . . . . . . . . . . . . .
Technische Daten . . . . . . . . . . . . . . . . . . . . . . . . . . . . . . . . . . . . . . . . . . . . . . . . . . . . . . . . . . .
26
26
26
26
Allgemeine Sicherheitshinweise für Elektrowerkzeuge . . . . . . . . . . . . . . . . . . 27
1. Arbeitsplatz-Sicherheit . . . . . . . . . . . . . . . . . . . . . . . . . . . . . . . . . . . . . . . . . . . . . . . . . . . . .
2. Elektrische Sicherheit . . . . . . . . . . . . . . . . . . . . . . . . . . . . . . . . . . . . . . . . . . . . . . . . . . . . . .
3. Sicherheit von Personen . . . . . . . . . . . . . . . . . . . . . . . . . . . . . . . . . . . . . . . . . . . . . . . . . . . .
4. Verwendung und Behandlung des Elektrowerkzeugs . . . . . . . . . . . . . . . . . . . . . . . . . . . . .
5. Service . . . . . . . . . . . . . . . . . . . . . . . . . . . . . . . . . . . . . . . . . . . . . . . . . . . . . . . . . . . . . . . . .
Gerätespezifische Sicherheitshinweise für Bohrhämmer . . . . . . . . . . . . . . . . . . . . . . . . . . . . . .
Originalzubehör / -zusatzgeräte . . . . . . . . . . . . . . . . . . . . . . . . . . . . . . . . . . . . . . . . . . . . . . .
27
27
28
28
29
29
29
DE
AT
CH
Inbetriebnahme . . . . . . . . . . . . . . . . . . . . . . . . . . . . . . . . . . . . . . . . . . . . . . . . . 29
Zusatz-Handgriff schwenken . . . . . . . . . . . . . . . . . . . . . . . . . . . . . . . . . . . . . . . . . . . . . . . . . . 29
Tiefenanschlag . . . . . . . . . . . . . . . . . . . . . . . . . . . . . . . . . . . . . . . . . . . . . . . . . . . . . . . . . . . . . 29
Werkzeuge bzw. Bohrfutter für Rundschaftbohrer . . . . . . . . . . . . . . . . . . . . . . . . . . . . . . . . . . 30
Bedienung . . . . . . . . . . . . . . . . . . . . . . . . . . . . . . . . . . . . . . . . . . . . . . . . . . . . . . 30
Funktion auswählen mit Funktions-Wahlschalter . . . . . . . . . . . . . . . . . . . . . . . . . . . . . . . . . . . . 30
Drehrichtung auswählen . . . . . . . . . . . . . . . . . . . . . . . . . . . . . . . . . . . . . . . . . . . . . . . . . . . . . . 30
Ein- und ausschalten . . . . . . . . . . . . . . . . . . . . . . . . . . . . . . . . . . . . . . . . . . . . . . . . . . . . . . . . . 30
Wartung und Reinigung . . . . . . . . . . . . . . . . . . . . . . . . . . . . . . . . . . . . . . . . . . . 31
Entsorgung . . . . . . . . . . . . . . . . . . . . . . . . . . . . . . . . . . . . . . . . . . . . . . . . . . . . . 31
Service . . . . . . . . . . . . . . . . . . . . . . . . . . . . . . . . . . . . . . . . . . . . . . . . . . . . . . . . . 31
Importeur . . . . . . . . . . . . . . . . . . . . . . . . . . . . . . . . . . . . . . . . . . . . . . . . . . . . . . 31
Konformitätserklärung / Hersteller . . . . . . . . . . . . . . . . . . . . . . . . . . . . . . . . . . 32
PBH 440 A1
25
BOHRHAMMER PBH 440 A1
Einleitung
DE
AT
CH
Wir beglückwünschen Sie zum Kauf Ihres
neuen Gerätes. Sie haben sich damit für
ein hochwertiges Produkt entschieden. Die
Bedienungsanleitung ist Teil dieses Produkts. Sie
enthält wichtige Hinweise für Sicherheit, Gebrauch
und Entsorgung. Machen Sie sich vor der Benutzung
des Produkts mit allen Bedien- und Sicherheitshinweisen vertraut. Benutzen Sie das Produkt nur wie
beschrieben und für die angegebenen Einsatzbereiche. Händigen Sie alle Unterlagen bei Weitergabe
des Produkts an Dritte mit aus.
Bestimmungsgemäßer Gebrauch
Der Bohrhammer PBH 440 A1 (nachfolgend Gerät)
ist geeignet zum:
▯ Hammerbohren in Ziegel, Beton und Gestein
▯ Meißeln in Beton, Gestein und Verputz
Lieferumfang
1 Bohrhammer PBH 440 A1
1 Zusatz-Handgriff
1 Bohrfutter mit Adapter (siehe Abb. A)
3 Bohrer (siehe Abb. B)
1 Flachmeißel (siehe Abb. B)
1 Tiefenanschlag
1 Tragekoffer
1 Bedienungsanleitung
Technische Daten
Nennaufnahmeleistung: 440 W
Nennspannung:
230 V ∼ 50 Hz
Leerlaufdrehzahl:
n0 0 - 1.650 / min
Schlagfrequenz:
0 - 7.500 / min
Schlagenergie:
1,2 Joule
Bohrleistung:
max. 13 mm für Stahl
max. 24 mm für Holz
max. 19 mm für Beton
Schutzklasse:
II /
▯ Bohren in Gestein, Holz und Metall
Jede andere Verwendung oder Veränderung des
Gerätes gilt als nicht bestimmungsgemäß und birgt
erhebliche Unfallgefahren.
Geräusch- und Vibrationsinformationen:
Für aus bestimmungswidriger Verwendung entstandene Schäden übernimmt der Hersteller keine
Haftung.
Messwert für Geräusch ermittelt entsprechend
EN 60745. Der A-bewertete Geräuschpegel des
Elektrowerkzeugs beträgt typischerweise:
Das Gerät ist nicht für den gewerblichen Einsatz
bestimmt.
Bohrhämmern:
Abgebildete Komponenten
Schallleistungspegel:
95,78 dB(A)
Unsicherheit K:
3 dB
Flügelschraube
Schalter Rechts-/Linkslauf
Ein-/Aus-Schalter
Feststelltaste für EIN-/AUS-Schalter
Funktions-Wahlschalter
Entriegelungstaste für Funktions-Wahlschalter
Schalldruckpegel:
84,78 dB(A)
Meißeln:
Schalldruckpegel:
90,26 dB(A)
Schallleistungspegel:
101,26 dB(A)
Unsicherheit K:
3 dB
Zusatz-Handgriff
Werkzeugaufnahme
Gehörschutz tragen!
Verriegelungshülse
Tiefenanschlag
26
PBH 440 A1
Schwingungsgesamtwerte (Vektorsumme dreier
Richtungen) ermittelt entsprechend EN 60745:
Hauptgriff
Bohrhämmern in
Beton: ah(HD) = 10,139 m/s2, K = 1,5 m/s2
Allgemeine
Sicherheitshinweise
für Elektrowerkzeuge
WARNUNG!
► Lesen Sie alle Sicherheitshinweise und Anweisungen. Versäumnisse bei der Einhaltung der
Sicherheitshinweise und Anweisungen können
elektrischen Schlag, Brand und/oder schwere
Verletzungen verursachen.
Zusatzgriff
Bohrhämmern in
Beton: ah(HD) = 7,468 m/s2, K = 1,5 m/s2
Hauptgriff
Meißeln: ah(CHeq) = 7,024 m/s2, K = 1,5 m/s2
Bewahren Sie alle Sicherheitshinweise und
Anweisungen für die Zukunft auf.
Zusatzgriff
Der in den Sicherheitshinweisen verwendete Begriff
„Elektrowerkzeug“ bezieht sich auf netzbetriebene
Elektrowerkzeuge (mit Netzkabel) und auf akkubetriebene Elektrowerkzeuge (ohne Netzkabel).
2
2
Meißeln: ah(CHeq) = 5,060 m/s , K = 1,5 m/s
WARNUNG!
► Der in diesen Anweisungen angegebene
Schwingungspegel ist entsprechend einem
in EN 60745 genormten Messverfahren gemessen worden und kann für den Gerätevergleich verwendet werden. Der angegebene
Schwingungsemissionswert kann auch zu
einer einleitenden Einschätzung der Aussetzung verwendet werden.
Der Schwingungspegel wird sich entsprechend
dem Einsatz des Elektrowerkzeugs verändern
und kann in manchen Fällen über dem in diesen
Anweisungen angegebenen Wert liegen. Die
Schwingungsbelastung könnte unterschätzt
werden, wenn das Elektrowerkzeug regelmäßig in solcher Weise verwendet wird.
HINWEIS
► Für eine genaue Abschätzung der Schwingungsbelastung während eines bestimmten
Arbeitszeitraumes sollten auch die Zeiten
berücksichtigt werden, in denen das Gerät
abgeschaltet ist oder zwar läuft, aber nicht
tatsächlich im Einsatz ist. Dies kann die
Schwingungsbelastung über den gesamten
Arbeitszeitraum deutlich reduzieren.
PBH 440 A1
1. Arbeitsplatz-Sicherheit
a) Halten Sie Ihren Arbeitsbereich sauber und
gut beleuchtet. Unordnung und unbeleuchtete
Arbeitsbereiche können zu Unfällen führen.
b) Arbeiten Sie mit dem Elektrowerkzeug nicht in
explosionsgefährdeter Umgebung, in der sich
brennbare Flüssigkeiten, Gase oder Stäube
befinden. Elektrowerkzeuge erzeugen Funken, die
den Staub oder die Dämpfe entzünden können.
c) Halten Sie Kinder und andere Personen während der Benutzung des Elektrowerkzeugs fern.
Bei Ablenkung können Sie die Kontrolle über
das Gerät verlieren.
2. Elektrische Sicherheit
a) Der Anschlussstecker des Elektrowerkzeuges
muss in die Steckdose passen. Der Stecker
darf in keiner Weise verändert werden.
Verwenden Sie keine Adapterstecker gemeinsam mit schutzgeerdeten Elektrowerkzeugen.
Unveränderte Stecker und passende Steckdosen
verringern das Risiko eines elektrischen Schlages.
b) Vermeiden Sie Körperkontakt mit geerdeten
Oberflächen, wie von Rohren, Heizungen,
Herden und Kühlschränken. Es besteht ein
erhöhtes Risiko durch elektrischen Schlag, wenn
Ihr Körper geerdet ist.
27
DE
AT
CH
c) Halten Sie Elektrowerkzeuge von Regen oder
Nässe fern. Das Eindringen von Wasser in ein
Elektrogerät erhöht das Risiko eines elektrischen
Schlages.
DE
AT
CH
d) Zweckentfremden Sie das Kabel nicht, um
das Elektrowerkzeug zu tragen, aufzuhängen
oder um den Stecker aus der Steckdose zu
ziehen. Halten Sie das Kabel fern von Hitze,
Öl, scharfen Kanten oder sich bewegenden
Geräteteilen. Beschädigte oder verwickelte Kabel
erhöhen das Risiko eines elektrischen Schlages.
e) Wenn Sie mit einem Elektrowerkzeug im
Freien arbeiten, verwenden Sie nur Verlängerungskabel, die auch für den Außenbereich
zugelassen sind. Die Anwendung eines für den
Außenbereich geeigneten Verlängerungskabels
verringert das Risiko eines elektrischen Schlages.
f) Wenn der Betrieb des Elektrowerkzeuges in
feuchter Umgebung nicht vermeidbar ist, verwenden Sie einen Fehlerstromschutzschalter.
Der Einsatz eines Fehlerstromschutzschalters vermindert das Risiko eines elektrischen Schlages.
3. Sicherheit von Personen
a) Seien Sie stets aufmerksam, achten Sie darauf,
was Sie tun und gehen Sie mit Vernunft an die
Arbeit mit einem Elektrowerkzeug. Benutzen
Sie kein Elektrowerkzeug, wenn Sie müde sind
oder unter dem Einfluss von Drogen, Alkohol
oder Medikamenten stehen. Ein Moment der
Unachtsamkeit beim Gebrauch des Elektrowerkzeuges kann zu ernsthaften Verletzungen führen.
b) Tragen Sie persönliche Schutzausrüstung und
immer eine Schutzbrille. Das Tragen persönlicher
Schutzausrüstung wie Staubmaske, rutschfeste
Sicherheitsschuhe, Schutzhelm oder Gehörschutz,
je nach Art und Einsatz des Elektrowerkzeuges,
verringert das Risiko von Verletzungen.
c) Vermeiden Sie eine unbeabsichtigte Inbetriebnahme. Vergewissern Sie sich, dass das Elektrowerkzeug ausgeschaltet ist, bevor Sie es
an die Stromversorgung anschließen, es aufnehmen oder tragen. Wenn Sie beim Tragen
des Elektrowerkzeuges den Finger am Schalter
haben oder das Gerät bereits eingeschaltet an
die Stromversorgung anschließen, kann dies zu
Unfällen führen.
28
d) Entfernen Sie Einstellwerkzeuge oder Schraubenschlüssel, bevor Sie das Elektrowerkzeug
einschalten. Ein Werkzeug oder Schlüssel, der
sich in einem drehenden Geräteteil befindet,
kann zu Verletzungen führen.
e) Vermeiden Sie eine abnormale Körperhaltung.
Sorgen Sie für einen sicheren Stand und halten
Sie jederzeit das Gleichgewicht. Dadurch können Sie das Elektrowerkzeug in unerwarteten
Situationen besser kontrollieren.
f) Tragen Sie geeignete Kleidung. Tragen Sie
keine weite Kleidung oder Schmuck. Halten
Sie Haare, Kleidung und Handschuhe fern
von sich bewegenden Teilen. Lockere Kleidung,
Schmuck oder lange Haare können von sich
bewegenden Teilen erfasst werden.
g) Wenn Staubabsaug- und -auffangeinrichtungen montiert werden können, vergewissern
Sie sich, dass diese angeschlossen sind und
richtig verwendet werden. Die Verwendung
einer Staubabsaugung kann Gefährdungen
durch Staub verringern.
4. Verwendung und Behandlung des
Elektrowerkzeugs
a) Überlasten Sie das Gerät nicht. Verwenden
Sie für Ihre Arbeit das dafür bestimmte
Elektrowerkzeug. Mit dem passenden Elektrowerkzeug arbeiten Sie besser und sicherer im
angegebenen Leistungsbereich.
b) Benutzen Sie kein Elektrowerkzeug, dessen
Schalter defekt ist. Ein Elektrowerkzeug, das
sich nicht mehr ein- oder ausschalten lässt, ist
gefährlich und muss repariert werden.
c) Ziehen Sie den Stecker aus der Steckdose,
bevor Sie Geräteeinstellungen vornehmen,
Zubehörteile wechseln oder das Gerät weglegen. Diese Vorsichtsmaßnahme verhindert den
unbeabsichtigten Start des Elektrowerkzeuges.
d) Bewahren Sie unbenutzte Elektrowerkzeuge
außerhalb der Reichweite von Kindern auf.
Lassen Sie Personen das Gerät nicht benutzen,
die mit diesem nicht vertraut sind oder diese
Anweisungen nicht gelesen haben. Elektrowerkzeuge sind gefährlich, wenn sie von
unerfahrenen Personen benutzt werden.
PBH 440 A1
e) Pflegen Sie Elektrowerkzeuge mit Sorgfalt.
Kontrollieren Sie, ob bewegliche Teile einwandfrei funktionieren und nicht klemmen, ob Teile
gebrochen oder so beschädigt sind, dass die
Funktion des Elektrowerkzeuges beeinträchtigt ist. Lassen Sie beschädigte Teile vor dem
Einsatz des Gerätes reparieren. Viele Unfälle
haben ihre Ursache in schlecht gewarteten
Elektrowerkzeugen.
f) Halten Sie Schneidwerkzeuge scharf und
sauber. Sorgfältig gepflegte Schneidwerkzeuge
mit scharfen Schneidkanten verklemmen sich
weniger und sind leichter zu führen.
g) Verwenden Sie Elektrowerkzeug, Zubehör,
Einsatzwerkzeuge usw. entsprechend diesen
Anweisungen. Berücksichtigen Sie dabei die
Arbeitsbedingungen und die auszuführende
Tätigkeit. Der Gebrauch von Elektrowerkzeugen
für andere als die vorgesehenen Anwendungen
kann zu gefährlichen Situationen führen.
5. Service
a) Lassen Sie Ihr Elektrowerkzeug nur von qualifiziertem Fachpersonal und nur mit OriginalErsatzteilen reparieren. Damit wird sichergestellt, dass die Sicherheit des Elektrowerkzeugs
erhalten bleibt.
Gerätespezifische Sicherheitshinweise
für Bohrhämmer
■ Tragen Sie Gehörschutz. Die Einwirkung von
Lärm kann Gehörverlust bewirken.
■ Benutzen Sie mit dem Gerät gelieferte Zusatzhandgriffe. Der Verlust der Kontrolle kann zu
Verletzungen führen.
■ Halten Sie das Gerät an den isolierten Griffflächen, wenn Sie Arbeiten ausführen, bei
denen das Einsatzwerkzeug verborgene Stromleitungen oder das eigene Netzkabel treffen
kann. Der Kontakt mit einer spannungsführenden
Leitung kann auch metallene Geräteteile unter
Spannung setzen und zu einem elektrischen
Schlag führen.
■ Tragen Sie eine Staubschutzmaske.
WARNUNG! GIFTIGE STÄUBE!
► Das Bearbeiten von schädlichen / giftigen
Stäuben stellt eine Gesundheitsgefährdung
für die Bedienperson oder in der Nähe
befindliche Personen dar.
■ ACHTUNG LEITUNGEN! GEFAHR!
Vergewissern Sie sich, dass Sie nicht auf Strom-,
Gas- oder Wasserleitungen stoßen, wenn Sie
mit dem Elektrowerkzeug arbeiten. Prüfen Sie
ggf. mit einem Leitungssucher, bevor Sie in eine
Wand bohren bzw. diese aufschlitzen.
Originalzubehör / -zusatzgeräte
■ Benutzen Sie nur Zubehör und Zusatzgeräte,
die in der Bedienungsanleitung angegeben
sind bzw. deren Aufnahme mit dem Gerät
kompatibel ist.
Inbetriebnahme
Zusatz-Handgriff schwenken
♦ Die Greifposition des Zusatz-Handgriffes
kann verändert werden. Drehen Sie die Flügelschraube entgegen dem Uhrzeigersinn und
schwenken Sie den Zusatz-Handgriff in die
gewünschte Position.
♦ Durch die Einrastpositionen ist der Zusatz-Handgriff verdrehsicher.
♦ Drehen Sie die Flügelschraube
Tiefenanschlag
♦ Öffnen Sie die Flügelschraube
♦ Setzen Sie den Tiefenanschlag
Zusatz-Handgriff ein.
.
in den
♦ Achten Sie darauf, dass die Zahnung am Tiefenanschlag nach oben zeigt.
♦ Ziehen Sie den Tiefenanschlag so weit heraus,
dass der Abstand zwischen der Spitze des Bohrers
und der Spitze des Tiefenanschlags der gewünschten Bohrtiefe entspricht.
♦ Drehen Sie die Flügelschraube
PBH 440 A1
wieder fest.
fest.
29
DE
AT
CH
Werkzeuge bzw. Bohrfutter für
Rundschaftbohrer
DE
AT
CH
Meißelposition verstellen:
Werkzeug / Bohrfutter einsetzen:
Sie können mit dieser Funktion das Werkzeug für
den Meißelvorgang in die erforderliche Position
drehen.
♦ Ziehen Sie die Verriegelungshülse nach
hinten und setzen Sie das Werkzeug ein.
♦ Drehen Sie den Funktions-Wahlschalter
die Position .
♦ Lassen Sie die Verriegelungshülse los.
Dadurch wird die Aufnahme verriegelt. Überprüfen Sie durch Ziehen des Werkzeugs die
einwandfreie Verriegelung. Das Werkzeug hat
systembedingt ein radiales Spiel.
♦ Drehen Sie das Werkzeug in der Werkzeugaufnahme in die erforderliche Position.
in
♦ Drehen Sie für den Meißelvorgang den
Funktions-Wahlschalter in die Position .
Werkzeug / Bohrfutter entnehmen:
Drehrichtung auswählen
♦ Ziehen Sie die Verriegelungshülse
zeugs nach hinten.
♦ Wählen Sie die Drehrichtung durch Verstellen
des Schalters Rechts-/Linkslauf .
des Werk-
WARNUNG!
WARNUNG!
► Benutzen Sie das Bohrfutter für Rundschaftbohrer nicht im Hammerbohr- oder Meißelbetrieb!
► Die Benutzung / Verstellung des Schalters
Rechts-/Linkslauf darf nur bei Stillstand
des Gerätes erfolgen.
Bedienung
Ein- und ausschalten
Funktion auswählen mit FunktionsWahlschalter
Gerät einschalten:
♦ Drücken und halten Sie die Entriegelungstaste
für den Funktionswahlschalter gedrückt und
Drehen Sie den Funktions-Wahlschalter so,
dass die gewünschte Symbolik an der PfeilMarkierung einrastet.
Gerät ausschalten:
Die Funktionen sind wie folgt gekennzeichnet:
Funktion
Symbol
♦ Drücken Sie den EIN-/AUS-Schalter
♦ Lassen Sie den EIN-/AUS-Schalter
.
los.
Dauerbetrieb einschalten:
♦ Drücken Sie den EIN-/AUS-Schalter und
stellen Sie ihn im gedrückten Zustand mit der
Feststelltaste für EIN-/AUS-Schalter fest.
Bohren / Schrauben
Dauerbetrieb ausschalten:
Hammerbohren
♦ Drücken Sie den EIN-/AUS-Schalter
lassen Sie ihn wieder los.
und
Meißeln
MeißelpositionVerstellung
30
PBH 440 A1
Wartung und Reinigung
WARNUNG! VERLETZUNGSGEFAHR!
Schalten Sie vor allen Arbeiten am
Gerät das Gerät aus und ziehen Sie den
Netzstecker.
■ Das Gerät muss stets sauber, trocken und frei
von Öl oder Schmierfetten sein.
■ Verwenden Sie zum Reinigen des Gehäuses ein
trockenes Tuch.
■ Säubern Sie regelmäßig die Werkzeugaufnahme .
WARNUNG!
■ Wenn ein Ersatz der Anschlussleitung erforderlich ist, dann ist dies vom Hersteller oder
seinem Vertreter auszuführen, um Sicherheitsgefährdungen zu vermeiden.
Entsorgung
Die Verpackung besteht aus umweltfreundlichen Materialien, die Sie über die örtlichen
Recyclingstellen entsorgen können.
Werfen Sie Elektrowerkzeuge nicht
in den Hausmüll!
Service
Service Deutschland
Tel.: 0800 5435 111
E-Mail: [email protected]
IAN 90883
Service Österreich
Tel.: 0820 201 222 (0,15 EUR/Min.)
E-Mail: [email protected]
IAN 90883
DE
AT
CH
Service Schweiz
Tel.: 0842 665566 (0,08 CHF/Min.,
Mobilfunk max. 0,40 CHF/Min.)
E-Mail: [email protected]
IAN 90883
Erreichbarkeit Hotline: Montag bis Freitag von
8:00 Uhr – 20:00 Uhr (MEZ)
Importeur
KOMPERNASS HANDELS GMBH
BURGSTRASSE 21
44867 BOCHUM
GERMANY
www.kompernass.com
Gemäß Europäischer Richtlinie 2002/96/EG
müssen verbrauchte Elektrowerkzeuge getrennt
gesammelt und einer umweltgerechten Wiederverwertung zugeführt werden.
Möglichkeiten zur Entsorgung des ausgedienten
Gerätes erfahren Sie bei Ihrer Gemeinde- oder
Stadtverwaltung.
PBH 440 A1
31
Konformitätserklärung /
Hersteller
Wir, KOMPERNASS HANDELS GMBH, Dokumentenverantwortlicher: Herr Semi Uguzlu, BURGSTR. 21,
44867 BOCHUM, Deutschland, erklären hiermit,
dass dieses Produkt mit den folgenden Normen,
normativen Dokumenten und EG-Richtlinien
übereinstimmt:
DE
AT
CH
Maschinenrichtlinie
(2006 / 42 / EC)
EG-Niederspannungsrichtlinie
(2006 / 95 / EC)
Elektromagnetische Verträglichkeit
(2004 / 108 / EC)
RoHS Richtlinie
(2011 / 65 / EU)
Angewandte harmonisierte Normen:
EN 60745-1:2009 + A11
EN 60745-2-6:2010
EN 55014-1:2006 + A1 + A2
EN 55014-2:1997 + A1 + A2
EN 61000-3-2:2006 + A1 + A2
EN 61000-3-3:2008
Typbezeichnung der Maschine:
Bohrhammer PBH 440 A1
Herstellungsjahr: 05 - 2013
Seriennummer: IAN 90883
Bochum, 23.07.2013
Semi Uguzlu
- Qualitätsmanager Technische Änderungen im Sinne der Weiterentwicklung sind vorbehalten.
32
IB_90883_PBH440A1_LB5.indb 32
PBH 440 A1
05.08.13 10:45
KOMPERNASS HANDELS GMBH
BURGSTRASSE 21
44867 BOCHUM
DEUTSCHLAND / GERMANY
www.kompernass.com
Versione delle informazioni · Estado das informações
Last Information Update · Stand der Informationen:
08 / 2013 · Ident.-No.: PBH440A1-042013-2
IAN 90883
5