1
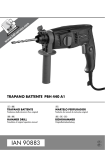
MARTEAU PERFORATEUR PBH 440 A1
MARTEAU PERFORATEUR
BOHRHAMMER
Traduction du mode d‘emploi d‘origine
Originalbetriebsanleitung
HAMMER DRILL
Translation of original operation manual
IAN 90883
Avant de lire le mode d'emploi, ouvrez la page contenant les illustrations et familiarisez-vous ensuite avec
toutes les fonctions de l'appareil.
Klappen Sie vor dem Lesen die Seite mit den Abbildungen aus und machen Sie sich anschließend mit allen
Funktionen des Gerätes vertraut.
Before reading, unfold the page containing the illustrations and familiarise yourself with all functions of
the device.
FR / BE
DE / AT / CH
GB
Traduction du mode d'emploi d'origine
Originalbetriebsanleitung
Translation of original operation manual
Page
Seite
Page
1
9
17
A
B
Table des matières
FR
BE
Introduction . . . . . . . . . . . . . . . . . . . . . . . . . . . . . . . . . . . . . . . . . . . . . . . . . . . . . . 2
Usage conforme . . . . . . . . . . . . . . . . . . . . . . . . . . . . . . . . . . . . . . . . . . . . . . . . . . . . . . . . . . . . .
Composants représentés . . . . . . . . . . . . . . . . . . . . . . . . . . . . . . . . . . . . . . . . . . . . . . . . . . . . . .
Matériel livré . . . . . . . . . . . . . . . . . . . . . . . . . . . . . . . . . . . . . . . . . . . . . . . . . . . . . . . . . . . . . . .
Caractéristiques techniques . . . . . . . . . . . . . . . . . . . . . . . . . . . . . . . . . . . . . . . . . . . . . . . . . . . .
2
2
2
2
Consignes de sécurité générales pour les outils électriques . . . . . . . . . . . . . . . 3
1. Sécurité sur le poste de travail . . . . . . . . . . . . . . . . . . . . . . . . . . . . . . . . . . . . . . . . . . . . . . . .
2. Sécurité électrique . . . . . . . . . . . . . . . . . . . . . . . . . . . . . . . . . . . . . . . . . . . . . . . . . . . . . . . . .
3. Sécurité personnelle . . . . . . . . . . . . . . . . . . . . . . . . . . . . . . . . . . . . . . . . . . . . . . . . . . . . . . . .
4. Utilisation et traitement de l'outil électrique . . . . . . . . . . . . . . . . . . . . . . . . . . . . . . . . . . . . . .
5. Service après-vente . . . . . . . . . . . . . . . . . . . . . . . . . . . . . . . . . . . . . . . . . . . . . . . . . . . . . . . .
Consignes de sécurité spécifiques aux marteaux perforateurs . . . . . . . . . . . . . . . . . . . . . . . . .
Accessoires / équipements supplémentaires d'origine . . . . . . . . . . . . . . . . . . . . . . . . . . . . . . . .
3
3
4
4
5
5
5
Mise en service . . . . . . . . . . . . . . . . . . . . . . . . . . . . . . . . . . . . . . . . . . . . . . . . . . . 5
Pivotement de la poignée supplémentaire . . . . . . . . . . . . . . . . . . . . . . . . . . . . . . . . . . . . . . . . . 5
Butée de profondeur . . . . . . . . . . . . . . . . . . . . . . . . . . . . . . . . . . . . . . . . . . . . . . . . . . . . . . . . . 6
Outils ou mandrins pour forets à queue cylindrique. . . . . . . . . . . . . . . . . . . . . . . . . . . . . . . . . . 6
Commande . . . . . . . . . . . . . . . . . . . . . . . . . . . . . . . . . . . . . . . . . . . . . . . . . . . . . . 6
Sélection d'une fonction à l'aide du sélecteur de fonction . . . . . . . . . . . . . . . . . . . . . . . . . . . . . 6
Sélection du sens de rotation . . . . . . . . . . . . . . . . . . . . . . . . . . . . . . . . . . . . . . . . . . . . . . . . . . . 6
Mise en marche et à l'arrêt. . . . . . . . . . . . . . . . . . . . . . . . . . . . . . . . . . . . . . . . . . . . . . . . . . . . . 6
Maintenance et nettoyage . . . . . . . . . . . . . . . . . . . . . . . . . . . . . . . . . . . . . . . . . . 7
Mise au rebut . . . . . . . . . . . . . . . . . . . . . . . . . . . . . . . . . . . . . . . . . . . . . . . . . . . . 7
Service après-vente . . . . . . . . . . . . . . . . . . . . . . . . . . . . . . . . . . . . . . . . . . . . . . . 7
Importateur. . . . . . . . . . . . . . . . . . . . . . . . . . . . . . . . . . . . . . . . . . . . . . . . . . . . . . 7
Déclaration de conformité / fabricant . . . . . . . . . . . . . . . . . . . . . . . . . . . . . . . . . 8
PBH 440 A1
1
FR
BE
MARTEAU PERFORATEUR
PBH 440 A1
Introduction
Matériel livré
1 marteau perforateur PBH 440 A1
1 poignée supplémentaire
1 mandrin avec adaptateur (voir fig. A)
Toutes nos félicitations pour l’achat de
votre nouvel appareil. Ainsi, vous venez
d’opter pour un produit de grande qualité.
Le mode d’emploi fait partie de ce produit. Il contient
des remarques importantes concernant la sécurité,
l’usage et la mise au rebut. Avant l’usage, veuillez
vous familiariser avec toutes les consignes d’opération et de sécurité. N’utilisez le produit que conformément aux consignes et pour les domaines d’utilisation prévus. Si vous cédez le produit à un tiers,
remettez-lui également tous les documents.
3 forets (voir fig. B)
Tension nominale :
230 V ∼ 50 Hz
Usage conforme
Régime à vide :
n0 0 - 1.650 / min
Le marteau perforateur PBH 440 A1 (ci-après
dénommé l'appareil) se prête :
Fréquence de frappe :
0 - 7.500 / min
Énergie de frappe :
1,2 Joule
▯ au perçage à percussion dans la brique, le
béton et la pierre
▯ au burinage dans le béton, la pierre et le plâtre
▯ au perçage dans la pierre, le bois et le métal
Toute autre utilisation ou modification de l'appareil
est considérée comme étant non conforme et s'accompagne de risques d'accident non négligeables.
Le fabricant décline toute responsabilité en cas de
dommages résultant d'une utilisation non conforme.
L'appareil n'est pas conçu pour un usage commercial.
Composants représentés
Vis à ailettes
Interrupteur marche à droite/à gauche
Interrupteur marche/arrêt
1 burin plat (voir fig. B)
1 butée de profondeur
1 mallette de transport
1 mode d'emploi
Caractéristiques techniques
Puissance nominale
absorbée :
440 W
Puissance de perçage : 13 mm max. pour l'acier
24 mm max. pour le bois
19 mm max. pour le béton
Classe de protection : II /
Informations relatives aux bruits et aux
vibrations :
Valeur de mesure du bruit déterminée conf. à la
norme EN 60745. Le niveau de bruit A pondéré
typique de l'outil électrique est de :
Perçage :
Niveau de pression acoustique :
84,78 dB(A)
Niveau de puissance acoustique : 95,78 dB(A)
Incertitude K :
3 dB
Touche de blocage pour interrupteur
MARCHE/ARRÊT
Burinage :
Sélecteur de fonction
Niveau de puissance acoustique : 101,26 dB(A)
Touche de déverrouillage pour sélecteur de
fonction
Incertitude K :
Poignée supplémentaire
Porte-outil
Niveau de pression acoustique :
90,26 dB(A)
3 dB
Porter un casque de protection
auditive !
Bague de verrouillage
Butée de profondeur
2
PBH 440 A1
Valeurs totales des vibrations (somme vectorielle
triaxiale) déterminées selon la norme EN 60745 :
Poignée principale
Perçage dans le béton :
ah(HD) = 10,139 m/s2, K = 1,5 m/s2
Poignée supplémentaire
Perçage dans le béton :
ah(HD) = 7,468 m/s2, K = 1,5 m/s2
Poignée principale
Burinage :
ah(CHeq) = 7,024 m/s2, K = 1,5 m/s2
Poignée supplémentaire
Burinage :
ah(CHeq) = 5,060 m/s2, K = 1,5 m/s2
AVERTISSEMENT !
► Le niveau de vibrations indiqué dans ces
instructions a été mesuré conformément
aux méthodes de mesure décrites dans la
norme EN 60745 et peut être utilisé pour la
comparaison d'appareils. La valeur d'émission des vibrations mentionnée peut aussi être
utilisée pour une évaluation préliminaire à
l'exposition.
Le niveau des vibrations varie en fonction
de l'usage de l'outil électrique et peut, dans
certains cas, excéder les valeurs indiquées
dans ces instructions. La sollicitation due aux
vibrations pourrait être sous-estimée si l'outil
électrique est utilisé régulièrement de cette
manière.
REMARQUE
► Afin d'obtenir une estimation précise de la
sollicitation due aux vibrations pendant un
certain temps de travail, il convient également
de tenir compte des périodes pendant lesquelles l'appareil est éteint ou allumé, mais
n'est pas effectivement utilisé. Ceci peut considérablement réduire la sollicitation due aux
vibrations pendant toute la durée du travail.
PBH 440 A1
Consignes de sécurité
générales pour les
outils électriques
FR
BE
AVERTISSEMENT !
► Lire toutes les consignes de sécurité et instructions. Tout manquement aux consignes de
sécurité et instructions peut causer une électrocution, un incendie et/ou de graves blessures.
Conserver toutes les consignes de sécurité
et instructions pour pouvoir vous y reporter
ultérieurement.
Le terme "outil électrique" utilisé dans les consignes
de sécurité se réfère aux outils électriques qui fonctionnent sur secteur (avec cordon secteur) et aux
outils électriques qui fonctionnent sur batterie (sans
cordon secteur).
1. Sécurité sur le poste de travail
a) Maintenir votre poste de travail dans un état
propre et bien éclairé. Les postes de travail en
désordre et mal éclairés peuvent être la cause
d'accidents.
b) Ne pas travailler avec l'outil électrique dans
une atmosphère explosive contenant des
liquides, des gaz ou des poussières inflammables. Les outils électriques produisent des
étincelles qui peuvent faire exploser la poussière
ou les gaz.
c) Tenir les enfants et les autres personnes à
l'écart lors de l'utilisation de cet outil électrique. Toute distraction peut faire perdre le
contrôle de l'appareil.
2. Sécurité électrique
a) La fiche de branchement secteur de l'outil
électrique doit s'enficher aisément dans la
prise de courant. La fiche ne doit en aucun
cas être modifiée. Ne pas utiliser d'adaptateur avec des outils électriques reliés à
la terre. Des fiches intactes et des prises de
courant adéquates permettent de réduire les
risques d'électrocution.
3
FR
BE
b) Éviter tout contact physique avec les surfaces
reliées à la terre, telles que celles de tuyaux,
de chauffages, de fours et de réfrigérateurs.
Risque élevé d'électrocution lorsque vous êtes
relié à la terre.
c) Ne pas exposer les outils électriques à la
pluie, ni à l'humidité. L'infiltration d'eau dans
un appareil électrique augmente les risques
d'électrocution.
d) Ne jamais utiliser le câble pour porter l'outil
électrique ou le suspendre, ou pour débrancher la fiche secteur de la prise de courant.
Tenir le câble à l'écart de toute source de
chaleur, d'huile, d'arêtes coupantes ou de
pièces mobiles de l'appareil. Les câbles
endommagés ou emmêlés augmentent les
risques d'électrocution.
c) Éviter toute mise en marche involontaire. Vérifier que l'outil électrique est bien éteint avant
de le raccorder à l'alimentation électrique, de
le déplacer ou de le transporter. Si, lors du
transport de l'outil électrique, votre doigt est placé
sur l'interrupteur ou l'appareil est déjà en marche,
le risque d'accidents n'est alors pas exclu.
d) Avant de mettre l'outil électrique en marche,
il convient de retirer les outils de réglage ou
les clés à vis. La présence d'un outil ou d'une
clé dans une partie mobile de l'appareil peut
provoquer des blessures.
e) Éviter toute position inhabituelle. Veiller à
adopter une position stable et à toujours
garder l'équilibre. Ceci permet une meilleure
maîtrise de l'outil électrique, surtout en cas de
situations inattendues.
e) En cas de travail avec un outil électrique
effectué en plein air, utiliser uniquement une
rallonge homologuée pour une utilisation en
extérieur. L'utilisation d'une rallonge homologuée pour un usage en extérieur réduit les
risques d'électrocution.
f) Porter des vêtements adéquats. Ne pas porter
de vêtements amples, ni de bijoux.
Tenir les cheveux, vêtements et gants à l'écart
des pièces mobiles. Les vêtements amples,
les bijoux ou les cheveux longs peuvent être
happés par les pièces en mouvement.
f) Si l'utilisation de l'outil électrique s'impose
en environnement humide, il convient alors
d'utiliser un interrupteur de protection contre
les courants de court-circuit. L'utilisation d'un
tel interrupteur permet de réduire les risques
d'électrocution.
g) S'il est possible de monter des dispositifs d'aspiration et de récupération des poussières, il
convient alors de s'assurer que ceux-ci sont
bien raccordés et correctement utilisés. L'utilisation d'un dispositif d'aspiration des poussières
peut réduire les risques causés par la poussière.
3. Sécurité personnelle
4. Utilisation et traitement de
l'outil électrique
a) Rester toujours vigilant, surveiller ses gestes
et faire toujours preuve de bon sens lors de
travaux effectués avec un outil électrique. Ne
pas utiliser d'outil électrique en cas de fatigue
ou sous l'influence de drogues, d'alcool ou de
médicaments. Tout moment d'inattention lors de
l'utilisation de l'outil électrique peut causer de
sérieuses blessures.
b) Toujours porter une tenue de protection personnelle et des lunettes de protection. Le port
d'équipement de protection personnelle tel
qu'un masque anti-poussières, des chaussures
de sécurité antidérapantes, un casque ou une
protection auditive, permet de réduire le risque
de blessures selon le type et l'utilisation faite de
l'outil électrique.
4
a) Ne pas surcharger l'appareil. Utiliser l'outil
électrique adapté aux travaux que vous souhaitez réaliser. L'outil électrique adéquat vous
permet de mieux travailler et en toute sécurité
dans la plage de puissance prescrite.
b) Ne pas utiliser un outil électrique si son interrupteur est défectueux. Un outil électrique dont
l'allumage et l'extinction ne fonctionnent plus
correctement est dangereux et doit être réparé.
c) Débrancher la fiche électrique de la prise de
courant avant de procéder à des réglages, de
changer des accessoires ou de ranger l'appareil. Cette mesure de précaution empêche toute
remise en marche involontaire de l'outil électrique.
PBH 440 A1
d) Ranger les outils électriques inutilisés hors
de portée des enfants. Ne jamais laisser des
personnes sans expérience ou qui n'ont pas
lu ces instructions utiliser l'appareil. Les outils
électriques sont dangereux lorsqu'ils sont
manipulés par des personnes inexpérimentées.
e) Entretenir les outils électriques avec soin.
Contrôler si les parties mobiles fonctionnent
parfaitement et ne coincent pas, si des pièces
sont cassées ou endommagées, si bien qu'elles
empêchent le bon fonctionnement de l'outil
électrique. Faire réparer les pièces endommagées avant de réutiliser l'appareil. Les outils
électriques mal entretenus sont à l'origine de
nombreux accidents.
f) Veiller à ce que les outils de coupe soient
toujours tranchants et propres. Des outils
de coupe bien entretenus avec des arêtes
tranchantes sont moins sujets aux coincements
et sont plus faciles à guider.
g) Utiliser l'outil électrique, les accessoires, les
outils d'usinage, etc. conformément à ces instructions. Tenir compte des conditions de travail et de la tâche à exécuter. L'usage d'outils
électriques à des fins autres que celles prévues
peut être à l'origine de situations dangereuses.
■ Tenir l'outil au niveau de ses surfaces de préhension isolées en cas d'exécution de travaux
où l'outil peut entrer en contact avec des câbles
électriques dissimulés ou son propre cordon.
Le contact avec une ligne sous tension peut également mettre les parties métalliques de l'appareil
sous tension et provoquer un choc électrique.
■ Porter un masque anti-poussières.
AVERTISSEMENT !
POUSSIÈRES TOXIQUES !
► Le traitement de poussières nocives / toxiques
représente un danger pour la santé de l'utilisateur ou des personnes proches.
■ ATTENTION CÂBLES ! DANGER !
Veiller à ne pas entrer en contact avec des
conduites électriques, de gaz ou d'eau lors de
travaux effectués avec l'outil électrique.
Si nécessaire, consulter un détecteur de ligne
avant de percer un mur ou de l'entailler.
Accessoires / équipements
supplémentaires d'origine
■ Utiliser uniquement des accessoires et des
équipements supplémentaires qui sont
spécifiés dans le mode d'emploi ou dont la
puissance est compatible avec l'appareil.
5. Service après-vente
a) Confier la réparation de vos outils électriques
à un personnel qualifié utilisant exclusivement
de pièces de rechange d'origine. La sécurité
de l'outil électrique est ainsi garantie.
Consignes de sécurité spécifiques
aux marteaux perforateurs
■ Porter une protection auditive. L'exposition au
bruit peut provoquer une perte auditive.
■ Utiliser les poignées supplémentaires fournies
avec l'appareil. La perte de contrôle peut
entraîner des blessures.
PBH 440 A1
Mise en service
Pivotement de la poignée
supplémentaire
♦ La position de préhension de la poignée supplémentaire peut être modifiée. Tourner la
vis à ailettes dans le sens antihoraire et faire
pivoter la poignée supplémentaire dans la
position désirée.
♦ Grâce aux positions d'encliquetage, la poignée
supplémentaire est sûre de ne pas tourner.
♦ Resserrer la vis à ailettes
.
5
FR
BE
FR
BE
Les fonctions sont caractérisées comme suit :
Butée de profondeur
♦ Ouvrir la vis à ailettes
.
♦ Insérer la butée de profondeur
poignée supplémentaire .
Fonction
dans la
Percer / visser
♦ S'assurer que la denture de la butée de profondeur soit orientée vers le haut.
Percer au marteau
perforateur
♦ Extraire la butée de profondeur jusqu'à ce
que la distance entre la pointe du foret et la
pointe de la butée de profondeur corresponde
à la profondeur de perçage désirée.
Buriner
♦ Serrer la vis à ailettes
Symbole
Ajustement de la
position du burin
.
Outils ou mandrins pour forets à
queue cylindrique
Insertion de l'outil/du mandrin :
♦ Tirer la bague de verrouillage
et insérer l'outil.
vers l'arrière
♦ Relâcher la bague de verrouillage . Cela
permet de verrouiller le logement. Vérifier que
le verrouillage est parfait en tirant l'outil. L'outil
a un jeu radial lié au système.
Cette fonction permet de tourner l'outil dans la
position nécessaire pour procéder au burinage.
♦ Tourner le sélecteur de fonction
position
dans la
♦ Tourner l'outil dans le porte-outil
position nécessaire.
dans la
♦ Tourner le sélecteur de fonction dans la
position pour procéder au burinage.
Sélection du sens de rotation
Retrait de l'outil/du mandrin :
♦ Tirer la bague de verrouillage
l'arrière.
Ajuster la position du burin :
de l'outil vers
♦ Sélectionner le sens de rotation en réglant
l'interrupteur marche à droite/à gauche .
AVERTISSEMENT !
AVERTISSEMENT !
► Ne pas utiliser le mandrin pour foret à queue
cylindrique en mode de perçage ou de
burinage !
Commande
Sélection d'une fonction à l'aide
du sélecteur de fonction
♦ Appuyer et maintenir enfoncée la touche de
déverrouillage pour sélecteur de fonction et
tourner ce dernier de sorte que le symbole
désiré s'enclenche au niveau du repère fléché.
6
► L'utilisation/le réglage de l'interrupteur marche
à droite/à gauche doit uniquement avoir
lieu lorsque l'appareil est à l'arrêt.
Mise en marche et à l'arrêt
Allumer l'appareil :
♦ Actionner l'interrupteur MARCHE/ARRÊT
.
Éteindre l'appareil :
♦ Relâcher l'interrupteur MARCHE/ARRÊT
.
PBH 440 A1
Activation du mode de fonctionnement
continu :
♦ Appuyer sur l'interrupteur MARCHE/ARRÊT
et le bloquer à l'état enfoncé avec la touche de
blocage pour interrupteur MARCHE/ARRÊT .
Désactivation du mode de fonctionnement
continu :
♦ Appuyer sur l'interrupteur MARCHE/ARRÊT
et le relâcher à nouveau.
Maintenance et nettoyage
AVERTISSEMENT ! RISQUE DE
BLESSURES! Éteindre et débrancher
l'appareil avant d'y effectuer des travaux.
■ L'appareil doit toujours être propre, sec et
exempt d'huile ou de graisse.
■ Utiliser un chiffon sec pour nettoyer le boîtier.
■ Nettoyer régulièrement le porte-outil
.
Service après-vente
FR
BE
Service France
Tel.: 0800 919270
E-Mail: [email protected]
IAN 90883
Service Belgique
Tel.: 070 270 171 (0,15 EUR/Min.)
E-Mail: [email protected]
IAN 90883
Assistance téléphonique : du lundi au vendredi
de 8 h à 20 h (HEC)
Importateur
KOMPERNASS HANDELS GMBH
BURGSTRASSE 21
44867 BOCHUM
GERMANY
www.kompernass.com
AVERTISSEMENT !
■ S'il s'avère nécessaire de remplacer le cordon
d'alimentation, s'adresser alors au fabricant
ou à son représentant afin de ne pas compromettre la sécurité.
Mise au rebut
L'emballage se compose de matériaux
écologiques qu'il est possible de confier
aux centres de recyclage locaux en vue
de les éliminer.
Ne pas jeter les appareils électriques
dans les ordures ménagères !
Conformément à la directive européenne
2002/96/EC, les outils électriques usagés doivent
faire l'objet d'un tri et d'un recyclage respectueux
de l'environnement.
Se renseigner auprès de votre mairie ou des services
de votre commune pour connaître les possibilités
de mise au rebut de votre appareil usagé.
PBH 440 A1
7
FR
BE
Déclaration de conformité /
fabricant
Nous soussignés, KOMPERNASS HANDELS GMBH,
responsable du document : M. Semi Uguzlu,
BURGSTR. 21, 44867 BOCHUM, ALLEMAGNE,
déclarons par la présente que ce produit est
conforme aux normes, documents normatifs et
directives CE suivants :
Directive Machines
(2006 / 42 / EC)
Directive européenne sur les basses tensions
(2006 / 95 / EC)
Compatibilité électromagnétique
(2004 / 108 / EC)
Directive RoHS
(2011 / 65 / EU)
Normes harmonisées appliquées :
EN 60745-1:2009 + A11
EN 60745-2-6:2010
EN 55014-1:2006 + A1 + A2
EN 55014-2:1997 + A1 + A2
EN 61000-3-2:2006 + A1 + A2
EN 61000-3-3:2008
Désignation du modèle de la machine :
Marteau perforateur PBH 440 A1
Année de construction : 05 - 2013
Numéro de série : IAN 90883
Bochum, le 23.07.2013
Semi Uguzlu
- Responsable qualité Sous réserve de modifications techniques à des fins
d'amélioration.
8
PBH 440 A1
Inhaltsverzeichnis
Einleitung . . . . . . . . . . . . . . . . . . . . . . . . . . . . . . . . . . . . . . . . . . . . . . . . . . . . . . . 10
Bestimmungsgemäßer Gebrauch . . . . . . . . . . . . . . . . . . . . . . . . . . . . . . . . . . . . . . . . . . . . . . .
Abgebildete Komponenten . . . . . . . . . . . . . . . . . . . . . . . . . . . . . . . . . . . . . . . . . . . . . . . . . . .
Lieferumfang . . . . . . . . . . . . . . . . . . . . . . . . . . . . . . . . . . . . . . . . . . . . . . . . . . . . . . . . . . . . . . .
Technische Daten . . . . . . . . . . . . . . . . . . . . . . . . . . . . . . . . . . . . . . . . . . . . . . . . . . . . . . . . . . .
10
10
10
10
DE
AT
CH
Allgemeine Sicherheitshinweise für Elektrowerkzeuge . . . . . . . . . . . . . . . . . . 11
1. Arbeitsplatz-Sicherheit . . . . . . . . . . . . . . . . . . . . . . . . . . . . . . . . . . . . . . . . . . . . . . . . . . . . .
2. Elektrische Sicherheit . . . . . . . . . . . . . . . . . . . . . . . . . . . . . . . . . . . . . . . . . . . . . . . . . . . . . .
3. Sicherheit von Personen . . . . . . . . . . . . . . . . . . . . . . . . . . . . . . . . . . . . . . . . . . . . . . . . . . . .
4. Verwendung und Behandlung des Elektrowerkzeugs . . . . . . . . . . . . . . . . . . . . . . . . . . . . .
5. Service . . . . . . . . . . . . . . . . . . . . . . . . . . . . . . . . . . . . . . . . . . . . . . . . . . . . . . . . . . . . . . . . .
Gerätespezifische Sicherheitshinweise für Bohrhämmer . . . . . . . . . . . . . . . . . . . . . . . . . . . . . .
Originalzubehör / -zusatzgeräte . . . . . . . . . . . . . . . . . . . . . . . . . . . . . . . . . . . . . . . . . . . . . . .
11
11
12
12
13
13
13
Inbetriebnahme . . . . . . . . . . . . . . . . . . . . . . . . . . . . . . . . . . . . . . . . . . . . . . . . . 13
Zusatz-Handgriff schwenken . . . . . . . . . . . . . . . . . . . . . . . . . . . . . . . . . . . . . . . . . . . . . . . . . . 13
Tiefenanschlag . . . . . . . . . . . . . . . . . . . . . . . . . . . . . . . . . . . . . . . . . . . . . . . . . . . . . . . . . . . . . 13
Werkzeuge bzw. Bohrfutter für Rundschaftbohrer . . . . . . . . . . . . . . . . . . . . . . . . . . . . . . . . . . 14
Bedienung . . . . . . . . . . . . . . . . . . . . . . . . . . . . . . . . . . . . . . . . . . . . . . . . . . . . . . 14
Funktion auswählen mit Funktions-Wahlschalter . . . . . . . . . . . . . . . . . . . . . . . . . . . . . . . . . . . . 14
Drehrichtung auswählen . . . . . . . . . . . . . . . . . . . . . . . . . . . . . . . . . . . . . . . . . . . . . . . . . . . . . . 14
Ein- und ausschalten . . . . . . . . . . . . . . . . . . . . . . . . . . . . . . . . . . . . . . . . . . . . . . . . . . . . . . . . . 14
Wartung und Reinigung . . . . . . . . . . . . . . . . . . . . . . . . . . . . . . . . . . . . . . . . . . . 15
Entsorgung . . . . . . . . . . . . . . . . . . . . . . . . . . . . . . . . . . . . . . . . . . . . . . . . . . . . . 15
Service . . . . . . . . . . . . . . . . . . . . . . . . . . . . . . . . . . . . . . . . . . . . . . . . . . . . . . . . . 15
Importeur . . . . . . . . . . . . . . . . . . . . . . . . . . . . . . . . . . . . . . . . . . . . . . . . . . . . . . 15
Konformitätserklärung / Hersteller . . . . . . . . . . . . . . . . . . . . . . . . . . . . . . . . . . 16
PBH 440 A1
9
BOHRHAMMER PBH 440 A1
Einleitung
DE
AT
CH
Wir beglückwünschen Sie zum Kauf Ihres
neuen Gerätes. Sie haben sich damit für
ein hochwertiges Produkt entschieden. Die
Bedienungsanleitung ist Teil dieses Produkts. Sie
enthält wichtige Hinweise für Sicherheit, Gebrauch
und Entsorgung. Machen Sie sich vor der Benutzung
des Produkts mit allen Bedien- und Sicherheitshinweisen vertraut. Benutzen Sie das Produkt nur wie
beschrieben und für die angegebenen Einsatzbereiche. Händigen Sie alle Unterlagen bei Weitergabe
des Produkts an Dritte mit aus.
Bestimmungsgemäßer Gebrauch
Der Bohrhammer PBH 440 A1 (nachfolgend Gerät)
ist geeignet zum:
▯ Hammerbohren in Ziegel, Beton und Gestein
▯ Meißeln in Beton, Gestein und Verputz
Lieferumfang
1 Bohrhammer PBH 440 A1
1 Zusatz-Handgriff
1 Bohrfutter mit Adapter (siehe Abb. A)
3 Bohrer (siehe Abb. B)
1 Flachmeißel (siehe Abb. B)
1 Tiefenanschlag
1 Tragekoffer
1 Bedienungsanleitung
Technische Daten
Nennaufnahmeleistung: 440 W
Nennspannung:
230 V ∼ 50 Hz
Leerlaufdrehzahl:
n0 0 - 1.650 / min
Schlagfrequenz:
0 - 7.500 / min
Schlagenergie:
1,2 Joule
Bohrleistung:
max. 13 mm für Stahl
max. 24 mm für Holz
max. 19 mm für Beton
Schutzklasse:
II /
▯ Bohren in Gestein, Holz und Metall
Jede andere Verwendung oder Veränderung des
Gerätes gilt als nicht bestimmungsgemäß und birgt
erhebliche Unfallgefahren.
Geräusch- und Vibrationsinformationen:
Für aus bestimmungswidriger Verwendung entstandene Schäden übernimmt der Hersteller keine
Haftung.
Messwert für Geräusch ermittelt entsprechend
EN 60745. Der A-bewertete Geräuschpegel des
Elektrowerkzeugs beträgt typischerweise:
Das Gerät ist nicht für den gewerblichen Einsatz
bestimmt.
Bohrhämmern:
Abgebildete Komponenten
Schallleistungspegel:
95,78 dB(A)
Unsicherheit K:
3 dB
Flügelschraube
Schalter Rechts-/Linkslauf
Ein-/Aus-Schalter
Feststelltaste für EIN-/AUS-Schalter
Funktions-Wahlschalter
Entriegelungstaste für Funktions-Wahlschalter
Schalldruckpegel:
84,78 dB(A)
Meißeln:
Schalldruckpegel:
90,26 dB(A)
Schallleistungspegel:
101,26 dB(A)
Unsicherheit K:
3 dB
Zusatz-Handgriff
Werkzeugaufnahme
Gehörschutz tragen!
Verriegelungshülse
Tiefenanschlag
10
PBH 440 A1
Schwingungsgesamtwerte (Vektorsumme dreier
Richtungen) ermittelt entsprechend EN 60745:
Hauptgriff
Bohrhämmern in
Beton: ah(HD) = 10,139 m/s2, K = 1,5 m/s2
Allgemeine
Sicherheitshinweise
für Elektrowerkzeuge
WARNUNG!
► Lesen Sie alle Sicherheitshinweise und Anweisungen. Versäumnisse bei der Einhaltung der
Sicherheitshinweise und Anweisungen können
elektrischen Schlag, Brand und/oder schwere
Verletzungen verursachen.
Zusatzgriff
Bohrhämmern in
Beton: ah(HD) = 7,468 m/s2, K = 1,5 m/s2
Hauptgriff
Meißeln: ah(CHeq) = 7,024 m/s2, K = 1,5 m/s2
Bewahren Sie alle Sicherheitshinweise und
Anweisungen für die Zukunft auf.
Zusatzgriff
Der in den Sicherheitshinweisen verwendete Begriff
„Elektrowerkzeug“ bezieht sich auf netzbetriebene
Elektrowerkzeuge (mit Netzkabel) und auf akkubetriebene Elektrowerkzeuge (ohne Netzkabel).
2
2
Meißeln: ah(CHeq) = 5,060 m/s , K = 1,5 m/s
WARNUNG!
► Der in diesen Anweisungen angegebene
Schwingungspegel ist entsprechend einem
in EN 60745 genormten Messverfahren gemessen worden und kann für den Gerätevergleich verwendet werden. Der angegebene
Schwingungsemissionswert kann auch zu
einer einleitenden Einschätzung der Aussetzung verwendet werden.
Der Schwingungspegel wird sich entsprechend
dem Einsatz des Elektrowerkzeugs verändern
und kann in manchen Fällen über dem in diesen
Anweisungen angegebenen Wert liegen. Die
Schwingungsbelastung könnte unterschätzt
werden, wenn das Elektrowerkzeug regelmäßig in solcher Weise verwendet wird.
HINWEIS
► Für eine genaue Abschätzung der Schwingungsbelastung während eines bestimmten
Arbeitszeitraumes sollten auch die Zeiten
berücksichtigt werden, in denen das Gerät
abgeschaltet ist oder zwar läuft, aber nicht
tatsächlich im Einsatz ist. Dies kann die
Schwingungsbelastung über den gesamten
Arbeitszeitraum deutlich reduzieren.
PBH 440 A1
1. Arbeitsplatz-Sicherheit
a) Halten Sie Ihren Arbeitsbereich sauber und
gut beleuchtet. Unordnung und unbeleuchtete
Arbeitsbereiche können zu Unfällen führen.
b) Arbeiten Sie mit dem Elektrowerkzeug nicht in
explosionsgefährdeter Umgebung, in der sich
brennbare Flüssigkeiten, Gase oder Stäube
befinden. Elektrowerkzeuge erzeugen Funken, die
den Staub oder die Dämpfe entzünden können.
c) Halten Sie Kinder und andere Personen während der Benutzung des Elektrowerkzeugs fern.
Bei Ablenkung können Sie die Kontrolle über
das Gerät verlieren.
2. Elektrische Sicherheit
a) Der Anschlussstecker des Elektrowerkzeuges
muss in die Steckdose passen. Der Stecker
darf in keiner Weise verändert werden.
Verwenden Sie keine Adapterstecker gemeinsam mit schutzgeerdeten Elektrowerkzeugen.
Unveränderte Stecker und passende Steckdosen
verringern das Risiko eines elektrischen Schlages.
b) Vermeiden Sie Körperkontakt mit geerdeten
Oberflächen, wie von Rohren, Heizungen,
Herden und Kühlschränken. Es besteht ein
erhöhtes Risiko durch elektrischen Schlag, wenn
Ihr Körper geerdet ist.
11
DE
AT
CH
DE
AT
CH
c) Halten Sie Elektrowerkzeuge von Regen oder
Nässe fern. Das Eindringen von Wasser in ein
Elektrogerät erhöht das Risiko eines elektrischen
Schlages.
d) Zweckentfremden Sie das Kabel nicht, um
das Elektrowerkzeug zu tragen, aufzuhängen
oder um den Stecker aus der Steckdose zu
ziehen. Halten Sie das Kabel fern von Hitze,
Öl, scharfen Kanten oder sich bewegenden
Geräteteilen. Beschädigte oder verwickelte Kabel
erhöhen das Risiko eines elektrischen Schlages.
e) Wenn Sie mit einem Elektrowerkzeug im
Freien arbeiten, verwenden Sie nur Verlängerungskabel, die auch für den Außenbereich
zugelassen sind. Die Anwendung eines für den
Außenbereich geeigneten Verlängerungskabels
verringert das Risiko eines elektrischen Schlages.
f) Wenn der Betrieb des Elektrowerkzeuges in
feuchter Umgebung nicht vermeidbar ist, verwenden Sie einen Fehlerstromschutzschalter.
Der Einsatz eines Fehlerstromschutzschalters vermindert das Risiko eines elektrischen Schlages.
3. Sicherheit von Personen
a) Seien Sie stets aufmerksam, achten Sie darauf,
was Sie tun und gehen Sie mit Vernunft an die
Arbeit mit einem Elektrowerkzeug. Benutzen
Sie kein Elektrowerkzeug, wenn Sie müde sind
oder unter dem Einfluss von Drogen, Alkohol
oder Medikamenten stehen. Ein Moment der
Unachtsamkeit beim Gebrauch des Elektrowerkzeuges kann zu ernsthaften Verletzungen führen.
b) Tragen Sie persönliche Schutzausrüstung und
immer eine Schutzbrille. Das Tragen persönlicher
Schutzausrüstung wie Staubmaske, rutschfeste
Sicherheitsschuhe, Schutzhelm oder Gehörschutz,
je nach Art und Einsatz des Elektrowerkzeuges,
verringert das Risiko von Verletzungen.
c) Vermeiden Sie eine unbeabsichtigte Inbetriebnahme. Vergewissern Sie sich, dass das Elektrowerkzeug ausgeschaltet ist, bevor Sie es
an die Stromversorgung anschließen, es aufnehmen oder tragen. Wenn Sie beim Tragen
des Elektrowerkzeuges den Finger am Schalter
haben oder das Gerät bereits eingeschaltet an
die Stromversorgung anschließen, kann dies zu
Unfällen führen.
12
d) Entfernen Sie Einstellwerkzeuge oder Schraubenschlüssel, bevor Sie das Elektrowerkzeug
einschalten. Ein Werkzeug oder Schlüssel, der
sich in einem drehenden Geräteteil befindet,
kann zu Verletzungen führen.
e) Vermeiden Sie eine abnormale Körperhaltung.
Sorgen Sie für einen sicheren Stand und halten
Sie jederzeit das Gleichgewicht. Dadurch können Sie das Elektrowerkzeug in unerwarteten
Situationen besser kontrollieren.
f) Tragen Sie geeignete Kleidung. Tragen Sie
keine weite Kleidung oder Schmuck. Halten
Sie Haare, Kleidung und Handschuhe fern
von sich bewegenden Teilen. Lockere Kleidung,
Schmuck oder lange Haare können von sich
bewegenden Teilen erfasst werden.
g) Wenn Staubabsaug- und -auffangeinrichtungen montiert werden können, vergewissern
Sie sich, dass diese angeschlossen sind und
richtig verwendet werden. Die Verwendung
einer Staubabsaugung kann Gefährdungen
durch Staub verringern.
4. Verwendung und Behandlung des
Elektrowerkzeugs
a) Überlasten Sie das Gerät nicht. Verwenden
Sie für Ihre Arbeit das dafür bestimmte
Elektrowerkzeug. Mit dem passenden Elektrowerkzeug arbeiten Sie besser und sicherer im
angegebenen Leistungsbereich.
b) Benutzen Sie kein Elektrowerkzeug, dessen
Schalter defekt ist. Ein Elektrowerkzeug, das
sich nicht mehr ein- oder ausschalten lässt, ist
gefährlich und muss repariert werden.
c) Ziehen Sie den Stecker aus der Steckdose,
bevor Sie Geräteeinstellungen vornehmen,
Zubehörteile wechseln oder das Gerät weglegen. Diese Vorsichtsmaßnahme verhindert den
unbeabsichtigten Start des Elektrowerkzeuges.
d) Bewahren Sie unbenutzte Elektrowerkzeuge
außerhalb der Reichweite von Kindern auf.
Lassen Sie Personen das Gerät nicht benutzen,
die mit diesem nicht vertraut sind oder diese
Anweisungen nicht gelesen haben. Elektrowerkzeuge sind gefährlich, wenn sie von
unerfahrenen Personen benutzt werden.
PBH 440 A1
e) Pflegen Sie Elektrowerkzeuge mit Sorgfalt.
Kontrollieren Sie, ob bewegliche Teile einwandfrei funktionieren und nicht klemmen, ob Teile
gebrochen oder so beschädigt sind, dass die
Funktion des Elektrowerkzeuges beeinträchtigt ist. Lassen Sie beschädigte Teile vor dem
Einsatz des Gerätes reparieren. Viele Unfälle
haben ihre Ursache in schlecht gewarteten
Elektrowerkzeugen.
f) Halten Sie Schneidwerkzeuge scharf und
sauber. Sorgfältig gepflegte Schneidwerkzeuge
mit scharfen Schneidkanten verklemmen sich
weniger und sind leichter zu führen.
g) Verwenden Sie Elektrowerkzeug, Zubehör,
Einsatzwerkzeuge usw. entsprechend diesen
Anweisungen. Berücksichtigen Sie dabei die
Arbeitsbedingungen und die auszuführende
Tätigkeit. Der Gebrauch von Elektrowerkzeugen
für andere als die vorgesehenen Anwendungen
kann zu gefährlichen Situationen führen.
5. Service
a) Lassen Sie Ihr Elektrowerkzeug nur von qualifiziertem Fachpersonal und nur mit OriginalErsatzteilen reparieren. Damit wird sichergestellt, dass die Sicherheit des Elektrowerkzeugs
erhalten bleibt.
Gerätespezifische Sicherheitshinweise
für Bohrhämmer
■ Tragen Sie Gehörschutz. Die Einwirkung von
Lärm kann Gehörverlust bewirken.
■ Benutzen Sie mit dem Gerät gelieferte Zusatzhandgriffe. Der Verlust der Kontrolle kann zu
Verletzungen führen.
■ Halten Sie das Gerät an den isolierten Griffflächen, wenn Sie Arbeiten ausführen, bei
denen das Einsatzwerkzeug verborgene Stromleitungen oder das eigene Netzkabel treffen
kann. Der Kontakt mit einer spannungsführenden
Leitung kann auch metallene Geräteteile unter
Spannung setzen und zu einem elektrischen
Schlag führen.
■ Tragen Sie eine Staubschutzmaske.
WARNUNG! GIFTIGE STÄUBE!
► Das Bearbeiten von schädlichen / giftigen
Stäuben stellt eine Gesundheitsgefährdung
für die Bedienperson oder in der Nähe
befindliche Personen dar.
■ ACHTUNG LEITUNGEN! GEFAHR!
Vergewissern Sie sich, dass Sie nicht auf Strom-,
Gas- oder Wasserleitungen stoßen, wenn Sie
mit dem Elektrowerkzeug arbeiten. Prüfen Sie
ggf. mit einem Leitungssucher, bevor Sie in eine
Wand bohren bzw. diese aufschlitzen.
Originalzubehör / -zusatzgeräte
■ Benutzen Sie nur Zubehör und Zusatzgeräte,
die in der Bedienungsanleitung angegeben
sind bzw. deren Aufnahme mit dem Gerät
kompatibel ist.
Inbetriebnahme
Zusatz-Handgriff schwenken
♦ Die Greifposition des Zusatz-Handgriffes
kann verändert werden. Drehen Sie die Flügelschraube entgegen dem Uhrzeigersinn und
schwenken Sie den Zusatz-Handgriff in die
gewünschte Position.
♦ Durch die Einrastpositionen ist der Zusatz-Handgriff verdrehsicher.
♦ Drehen Sie die Flügelschraube
wieder fest.
Tiefenanschlag
♦ Öffnen Sie die Flügelschraube
♦ Setzen Sie den Tiefenanschlag
Zusatz-Handgriff ein.
.
in den
♦ Achten Sie darauf, dass die Zahnung am Tiefenanschlag nach oben zeigt.
♦ Ziehen Sie den Tiefenanschlag so weit heraus,
dass der Abstand zwischen der Spitze des Bohrers
und der Spitze des Tiefenanschlags der gewünschten Bohrtiefe entspricht.
♦ Drehen Sie die Flügelschraube
PBH 440 A1
DE
AT
CH
fest.
13
Werkzeuge bzw. Bohrfutter für
Rundschaftbohrer
DE
AT
CH
Meißelposition verstellen:
Werkzeug / Bohrfutter einsetzen:
Sie können mit dieser Funktion das Werkzeug für
den Meißelvorgang in die erforderliche Position
drehen.
♦ Ziehen Sie die Verriegelungshülse nach
hinten und setzen Sie das Werkzeug ein.
♦ Drehen Sie den Funktions-Wahlschalter
die Position .
♦ Lassen Sie die Verriegelungshülse los.
Dadurch wird die Aufnahme verriegelt. Überprüfen Sie durch Ziehen des Werkzeugs die
einwandfreie Verriegelung. Das Werkzeug hat
systembedingt ein radiales Spiel.
♦ Drehen Sie das Werkzeug in der Werkzeugaufnahme in die erforderliche Position.
in
♦ Drehen Sie für den Meißelvorgang den
Funktions-Wahlschalter in die Position .
Werkzeug / Bohrfutter entnehmen:
Drehrichtung auswählen
♦ Ziehen Sie die Verriegelungshülse
zeugs nach hinten.
♦ Wählen Sie die Drehrichtung durch Verstellen
des Schalters Rechts-/Linkslauf .
des Werk-
WARNUNG!
WARNUNG!
► Benutzen Sie das Bohrfutter für Rundschaftbohrer nicht im Hammerbohr- oder Meißelbetrieb!
► Die Benutzung / Verstellung des Schalters
Rechts-/Linkslauf darf nur bei Stillstand
des Gerätes erfolgen.
Bedienung
Ein- und ausschalten
Funktion auswählen mit FunktionsWahlschalter
Gerät einschalten:
♦ Drücken und halten Sie die Entriegelungstaste
für den Funktionswahlschalter gedrückt und
Drehen Sie den Funktions-Wahlschalter so,
dass die gewünschte Symbolik an der PfeilMarkierung einrastet.
Gerät ausschalten:
Die Funktionen sind wie folgt gekennzeichnet:
Funktion
Symbol
♦ Drücken Sie den EIN-/AUS-Schalter
♦ Lassen Sie den EIN-/AUS-Schalter
.
los.
Dauerbetrieb einschalten:
♦ Drücken Sie den EIN-/AUS-Schalter und
stellen Sie ihn im gedrückten Zustand mit der
Feststelltaste für EIN-/AUS-Schalter fest.
Bohren / Schrauben
Dauerbetrieb ausschalten:
Hammerbohren
♦ Drücken Sie den EIN-/AUS-Schalter
lassen Sie ihn wieder los.
und
Meißeln
MeißelpositionVerstellung
14
PBH 440 A1
Wartung und Reinigung
WARNUNG! VERLETZUNGSGEFAHR!
Schalten Sie vor allen Arbeiten am
Gerät das Gerät aus und ziehen Sie den
Netzstecker.
■ Das Gerät muss stets sauber, trocken und frei
von Öl oder Schmierfetten sein.
■ Verwenden Sie zum Reinigen des Gehäuses ein
trockenes Tuch.
■ Säubern Sie regelmäßig die Werkzeugaufnahme .
WARNUNG!
■ Wenn ein Ersatz der Anschlussleitung erforderlich ist, dann ist dies vom Hersteller oder
seinem Vertreter auszuführen, um Sicherheitsgefährdungen zu vermeiden.
Entsorgung
Die Verpackung besteht aus umweltfreundlichen Materialien, die Sie über die örtlichen
Recyclingstellen entsorgen können.
Werfen Sie Elektrowerkzeuge nicht
in den Hausmüll!
Service
Service Deutschland
Tel.: 0800 5435 111
E-Mail: [email protected]
IAN 90883
DE
AT
CH
Service Österreich
Tel.: 0820 201 222 (0,15 EUR/Min.)
E-Mail: [email protected]
IAN 90883
Service Schweiz
Tel.: 0842 665566 (0,08 CHF/Min.,
Mobilfunk max. 0,40 CHF/Min.)
E-Mail: [email protected]
IAN 90883
Erreichbarkeit Hotline: Montag bis Freitag von
8:00 Uhr – 20:00 Uhr (MEZ)
Importeur
KOMPERNASS HANDELS GMBH
BURGSTRASSE 21
44867 BOCHUM
GERMANY
www.kompernass.com
Gemäß Europäischer Richtlinie 2002/96/EG
müssen verbrauchte Elektrowerkzeuge getrennt
gesammelt und einer umweltgerechten Wiederverwertung zugeführt werden.
Möglichkeiten zur Entsorgung des ausgedienten
Gerätes erfahren Sie bei Ihrer Gemeinde- oder
Stadtverwaltung.
PBH 440 A1
15
Konformitätserklärung /
Hersteller
DE
AT
CH
Wir, KOMPERNASS HANDELS GMBH, Dokumentenverantwortlicher: Herr Semi Uguzlu, BURGSTR. 21,
44867 BOCHUM, Deutschland, erklären hiermit,
dass dieses Produkt mit den folgenden Normen,
normativen Dokumenten und EG-Richtlinien
übereinstimmt:
Maschinenrichtlinie
(2006 / 42 / EC)
EG-Niederspannungsrichtlinie
(2006 / 95 / EC)
Elektromagnetische Verträglichkeit
(2004 / 108 / EC)
RoHS Richtlinie
(2011 / 65 / EU)
Angewandte harmonisierte Normen:
EN 60745-1:2009 + A11
EN 60745-2-6:2010
EN 55014-1:2006 + A1 + A2
EN 55014-2:1997 + A1 + A2
EN 61000-3-2:2006 + A1 + A2
EN 61000-3-3:2008
Typbezeichnung der Maschine:
Bohrhammer PBH 440 A1
Herstellungsjahr: 05 - 2013
Seriennummer: IAN 90883
Bochum, 23.07.2013
Semi Uguzlu
- Qualitätsmanager Technische Änderungen im Sinne der Weiterentwicklung sind vorbehalten.
16
PBH 440 A1
Table of contents
Introduction . . . . . . . . . . . . . . . . . . . . . . . . . . . . . . . . . . . . . . . . . . . . . . . . . . . . . 18
Intended Usage . . . . . . . . . . . . . . . . . . . . . . . . . . . . . . . . . . . . . . . . . . . . . . . . . . . . . . . . . . . .
Depicted components. . . . . . . . . . . . . . . . . . . . . . . . . . . . . . . . . . . . . . . . . . . . . . . . . . . . . . . .
Scope of delivery . . . . . . . . . . . . . . . . . . . . . . . . . . . . . . . . . . . . . . . . . . . . . . . . . . . . . . . . . . .
Technical details . . . . . . . . . . . . . . . . . . . . . . . . . . . . . . . . . . . . . . . . . . . . . . . . . . . . . . . . . . . .
18
18
18
18
GB
General safety instructions for electric tools . . . . . . . . . . . . . . . . . . . . . . . . . . 19
1. Workplace safety . . . . . . . . . . . . . . . . . . . . . . . . . . . . . . . . . . . . . . . . . . . . . . . . . . . . . . . . . 19
2. Electric safety . . . . . . . . . . . . . . . . . . . . . . . . . . . . . . . . . . . . . . . . . . . . . . . . . . . . . . . . . . . . 19
3. Safety of personnel . . . . . . . . . . . . . . . . . . . . . . . . . . . . . . . . . . . . . . . . . . . . . . . . . . . . . . . 20
4. Use and handling of the electric tool . . . . . . . . . . . . . . . . . . . . . . . . . . . . . . . . . . . . . . . . . . . . . .20
5. Service . . . . . . . . . . . . . . . . . . . . . . . . . . . . . . . . . . . . . . . . . . . . . . . . . . . . . . . . . . . . . . . . . 21
Appliance-specific safety instructions for hammer drills . . . . . . . . . . . . . . . . . . . . . . . . . . . . . . 21
Original accessories / ancillary equipment . . . . . . . . . . . . . . . . . . . . . . . . . . . . . . . . . . . . . . . 21
Initial operation . . . . . . . . . . . . . . . . . . . . . . . . . . . . . . . . . . . . . . . . . . . . . . . . . 21
Swivelling the additional handle . . . . . . . . . . . . . . . . . . . . . . . . . . . . . . . . . . . . . . . . . . . . . . . 21
Depth stop . . . . . . . . . . . . . . . . . . . . . . . . . . . . . . . . . . . . . . . . . . . . . . . . . . . . . . . . . . . . . . . . 21
Tools and chucks for round shaft bits.. . . . . . . . . . . . . . . . . . . . . . . . . . . . . . . . . . . . . . . . . . . . 21
Operation . . . . . . . . . . . . . . . . . . . . . . . . . . . . . . . . . . . . . . . . . . . . . . . . . . . . . . 22
Selecting a function using the function selector switch . . . . . . . . . . . . . . . . . . . . . . . . . . . . . . . 22
Select direction of rotation . . . . . . . . . . . . . . . . . . . . . . . . . . . . . . . . . . . . . . . . . . . . . . . . . . . . 22
Switching on and off . . . . . . . . . . . . . . . . . . . . . . . . . . . . . . . . . . . . . . . . . . . . . . . . . . . . . . . . 22
Maintenance and Cleaning . . . . . . . . . . . . . . . . . . . . . . . . . . . . . . . . . . . . . . . . 22
Disposal . . . . . . . . . . . . . . . . . . . . . . . . . . . . . . . . . . . . . . . . . . . . . . . . . . . . . . . . 23
Service . . . . . . . . . . . . . . . . . . . . . . . . . . . . . . . . . . . . . . . . . . . . . . . . . . . . . . . . . 23
Importer . . . . . . . . . . . . . . . . . . . . . . . . . . . . . . . . . . . . . . . . . . . . . . . . . . . . . . . 23
Declaration of Conformity/Manufacturer . . . . . . . . . . . . . . . . . . . . . . . . . . . . 23
PBH 440 A1
17
HAMMER DRILL PBH 440 A1
Introduction
GB
Congratulations on the purchase of your
new product. You have decided to purchase
a high-quality product. The operating
instructions are a constituent of this product. They
contain important information with regard to safety,
use and disposal. Before using the product, familiarise
yourself with all operating and safety instructions.
Use this appliance only as described and only for
the specified areas of application. Please also pass
these operating instructions on to any future owner(s).
Intended Usage
Scope of delivery
1 hammer drill PBH 440 A1
1 additional handle
1 drill chuck with adapter (see fig. A)
3 drill bits (see fig. B)
1 flat chisel (see fig. B)
1 depth stop
1 carrying case
1 operating manual
Technical details
Nominal power
consumption:
440 W
The PBH 440 A1 hammer drill (in the following
appliance) is suitable for:
Rated voltage:
230 V ∼ 50 Hz
Idle speed:
▯ Hammer drilling into brickwork, concrete and
stone
n0 0 - 1.650 / min
Hammer frequency:
0 - 7.500 / min
▯ Chiselling into concrete, stone and plaster
▯ Drilling into stone, wood and metal
Any other usage of or modification to the appliance
is deemed to be improper usage and carries the
risk of serious personal injury.
The manufacturer declines to accept responsibility
for damage(s) arising out of usage contrary to the
instructions specified below.
Impact energy:
1.2 Joules
Drilling capacity:
max. 13 mm for steel
max. 24 mm for wood
max. 19 mm for concrete
Protection class:
II /
Noise and vibration information:
The appliance is not meant for commercial use.
Noise measurement determined in accordance
with EN 60745 The A-rated noise level of the
electric tool is typically:
Depicted components
Hammer drilling:
Wing bolt
Noise level:
84.78 dB(A)
Right/left rotation switch
Acoustic power level:
95.78 dB(A)
On/Off switch
Uncertainty K:
3 dB
Locking button for ON/OFF switch
Chiselling:
Function selector switch
Noise level:
90.26 dB(A)
Unlocking button for function selector switch
Acoustic power level:
101.26 dB(A)
Additional handle
Uncertainty K:
3 dB
Tool holder
Locking sleeve
Depth stop
18
Wear hearing protection!
PBH 440 A1
Total vibration values (vector total of three directions)
determined in accordance with EN 60745:
Main handle
General safety instructions for electric tools
WARNING!
Hammer drilling in
Concrete: ah(HD) = 10.139 m/s2, K = 1.5 m/s2
Additional handle
Hammer drilling in
► Please read all of the safety instructions.
Failure to follow the safety instructions listed
below can result in electric shock, fire and/or
serious injuries.
Concrete: ah(HD) = 7.468 m/s , K = 1.5 m/s
Keep all safety instructions and other instructions for future use.
Main handle
The term “electric tools” which is used in the safety
instructions relates to mains-operated electric tools
(with power cable) and battery-operated electric
tools (without power cable).
2
2
Chiselling: ah(CHeq) = 7.024 m/s2, K = 1.5 m/s2
Additional handle
Chiselling: ah(CHeq) = 5.060 m/s2, K = 1.5 m/s2
WARNING!
► The vibration level specified in these instructions has been measured in accordance with
the measuring procedure that has been standardised in EN 60745 and can be used to
make equipment comparisons. The specified
vibration emission value can also be used to
make an initial exposure estimate.
The vibration level varies in accordance with
the use of the electric tool and may be higher
than the value specified in these instructions
in some cases. The vibration load could be
underestimated if the electric tool is regularly
used in such a way.
NOTE
► For an accurate estimate of the vibration load
during a certain working period, the times
during which the appliance is switched off or
is running but not actually being used must
also be taken into consideration. This can
significantly reduce the vibration load over
the total working period.
PBH 440 A1
1. Workplace safety
a) Keep your workplace clean and well-lit.
Untidy and poorly-lit working areas can lead to
accidents.
b) Do not work with the electric tool in potentially
explosive areas in which flammable liquids,
gases or dust are located. Electric tools produce
sparks which could ignite the dust or vapours.
b) Keep children and other persons a safe
distance away when using electrical tools.
Should you become distracted, you could lose
control over the appliance.
2. Electric safety
a) The appliance connecting plug must fit into the
plug socket. The plug may not be altered in
any way. Do not use adapter plugs together
with earthed appliances. Unmodified plugs
and suitable wall sockets reduce the risk of
electric shock.
b) Avoid bodily contact with earthed surfaces,
such as pipes, radiators, ovens and refrigerators. There is an increased risk of electric shock
if your body is earthed.
c) Keep electric tools away from rain and moisture. If water or moisture penetrates an electric
tool the risk of electric shock increases.
19
GB
d) Do not misuse the electrical cable, e.g. to
carry the appliance, suspend it in storage
or to pull the plug from the socket. Keep the
cable away from heat, oil, sharp edges and
moving appliance components. Damaged or
tangled cords and defective plugs increase the
risk of electric shock.
GB
better control over the electric tool, especially in
unexpected situations.
f) Wear suitable clothing. Do not wear loose
clothing or jewellery. Keep hair, clothing and
gloves away from moving parts. Loose clothing, jewellery and long hair can be caught by
moving parts.
e) If you are working with an electric tool outdoors, only use extension cables that are also
approved for use outdoors. The use of an
extension cord certified for outdoor use reduces
the risk of electric shock.
g) If dust extraction and collecting equipment
can be fitted, ensure that it is attached and
used properly. The use of an extraction system
can reduce hazards caused by dust.
f) If the use of the electric tool in a humid environment is unavoidable, use a fault current
circuit breaker. The use of a fault current circuit
breaker reduces the risk of electric shock.
4. Use and handling of the electric tool
3. Safety of personnel
a) Be alert at all times, pay attention to what
you are doing and act sensibly when you are
using an electric tool. Do not use an electric
tool if you are tired or under the influence of
drugs, alcohol or medication. Even a simple
lapse of attention while using an electrical hand
tool is sufficient to lead to serious injuries.
b) Wear personal protection equipment, and
always wear a pair of protective goggles.
Wearing personal protective equipment such as
a dust mask, non-slip safety shoes, protective
gloves, helmet or hearing protection, depending
on the type and use of the electrical tool, reduces
the risk of injuries.
c) Avoid unintentional operation of the appliance.
Ensure that the electric tool is switched off before connecting it to the power supply, picking
it up or carrying it. Carrying the electric tool
with your finger on the ON/OFF switch or connecting the appliance to the mains supply whilst
it is switched on can lead to serious accidents.
d) Remove any adjusting tools or spanners
before switching on the appliance. A tool or
wrench in a rotating appliance component can
cause serious injuries.
e) Avoid adopting an unusual posture. Ensure
that you position yourself securely and you
are balanced at all times. This gives you much
20
a) Do not overload the appliance. Use the correct
electrical tool for your work. With the correct
electrical tool, you will work better and more
safely within the specified performance range.
b) Never use a handheld electrical tool with a
defective switch. An electrical tool that can no
longer be switched on or off is dangerous and
must be repaired.
c) Remove the plug from the socket before making adjustments to the appliance, changing
accessories or putting the appliance into
storage. These precautionary measures prevent
accidental starting of the appliance.
d) Store unused electric tools out of the reach of
children Do not allow persons who are not
familiar with the appliance or who have not
read these instructions to operate the appliance.
Electrical tools are dangerous if used by
inexperienced persons.
e) Look after electric tools with care. Check
to see whether moving parts are functioning
correctly and are not jamming, whether
parts are broken or damaged and that the
functioning of the electric tool is not impaired.
Arrange for damaged components to be
repaired before using the appliance. Many
accidents are caused by poorly maintained
electrical tools.
f) Keep cutting tools sharp and clean. Carefully
maintained cutting tools with sharp cutting
edges jam less often and are easier to control.
PBH 440 A1
g) Use the electric tools, accessories, insertion
tools etc. in accordance with these instructions. Take heed of the operating conditions
and the activities to be performed. The use
of electrical tools for purposes other than their
intended applications can result in dangerous
situations.
5. Service
a) Only allow qualified specialists with original
spare parts to repair your electric tool. This
ensures that your electric tool remains safe.
Appliance-specific safety instructions
for hammer drills
■ Wear hearing protection. The effect of noise
can lead to hearing loss.
Initial operation
Swivelling the additional handle
♦ The gripping position of the additional handle
can be varied. Turn the wing bolt anticlockwise and swivel the additional handle to the
required position.
♦ The snap-in position ensures that the additional
handle is firmly in place and cannot turn.
♦ Tighten the wing bolt
again afterwards.
Depth stop
♦ Open the wing bolt
♦ Insert the depth stop
handle .
.
into the additional
■ Use the additional handles supplied with the
appliance. Loss of control can lead to injuries.
♦ Ensure that the toothing on the depth stop
facing upwards.
■ Hold the appliance by the insulated handles
when you are carrying out work during which
the insertion tool may come into contact with
concealed power cables or its own power
cable. Contact with a live cable may also make
metal parts of the appliance live and lead to
electric shock.
♦ Pull the depth stop out far enough for the
distance between the tip of the drill and the tip
of the depth stop to correspond with the required
drilling depth.
■ Wear a dust mask.
Use tool / chuck:
WARNING! TOXIC DUST!
► Working with harmful / toxic dusts results in
health hazards for the person operating the
appliance and for other persons in the area.
■ ATTENTION - SERVICE LINES! DANGER!
Take steps to ensure that you do not hit any service lines (electricity, gas, water) when working
with the electric tool. If necessary, check with a
service line detector before you start to cut or
drill into a surface.
Original accessories / ancillary
equipment
♦ Tighten the wing bolt
is
again.
Tools and chucks for round shaft bits.
♦ Pull the locking sleeve
the tool.
backwards and insert
♦ Release the locking sleeve . This locks the
holder. Check that the tool is properly locked
by pulling it. The system has radial play because of the design.
Remove tool / chuck:
♦ Pull the locking sleeve
on the tool backwards.
WARNING!
► Do not use the chuck for round shaft bits for
hammer drilling or chiselling!
■ Only use accessories and additional appliances that are specified in the operating
instructions and are compatible with the
appliance.
PBH 440 A1
21
GB
GB
Operation
Switching on and off
Selecting a function using the function
selector switch
Switching the appliance on:
♦ Press and hold the unlocking button for function selector switch and rotate the function
selector switch so that the required symbol
engages at the arrow mark.
The functions are marked as follows:
Function
♦ Press the ON/OFF switch
.
Switching the appliance off:
♦ Release the ON/OFF switch
.
Switching to continuous operation:
♦ Press the ON/OFF switch and lock it in
this position with the ON/OFF switch locking
button .
Symbol
Drilling / screwdriving
Switching off continuous operation:
Hammer drilling
♦ Press the ON/OFF switch
again.
Chiselling
and release it
Maintenance and Cleaning
Chisel position
adjustment
WARNING! RISK OF INJURY! Switch
the appliance off and remove the
power plug before starting any work.
Adjust chisel position:
You can rotate the tool to the required position for
chiselling using this function.
♦ Rotate the function selector switch
position .
to
♦ Rotate the tool into the tool holder
required position.
to the
♦ Rotate the function selector switch to
position for the chiselling function.
Select direction of rotation
■ The appliance must always be clean, dry and
free from oil or grease.
■ To clean the casing, use a soft cloth.
■ Regularly clean the tool holder
.
WARNING!
■ If the connecting cable needs to be replaced,
this must be carried out by the manufacturer
or his representative in order to avoid hazardous situations.
♦ Select the direction of rotation by adjusting the
right/left rotation switch .
WARNING!
► The right/left running switch may only
be used / adjusted if the appliance is at a
standstill.
22
PBH 440 A1
Disposal
The packaging is made from environmentally-friendly material and can be disposed
off at your local recycling plant.
Do not dispose of electrical tools in
your normal domestic waste!
Declaration of Conformity/
Manufacturer
We, KOMPERNASS HANDELS GMBH, Custodian
of Documents: Mr. Semi Uguzlu, BURGSTR. 21,
44867 BOCHUM, GERMANY, hereby declare
that this product complies with the following
standards, normative documents and the EC
directives:
As required by European Guideline 2002/96/EC,
worn-out electrical tools must be collected separately and fed into an environmentally compatible
recycling process.
Machinery directive
(2006 / 42 / EC)
Your local communal or municipal authorities can
provide information on how to dispose of the wornout appliance.
EMC (Electromagnetic Compatibility)
(2004 / 108 / EC)
Service
Service Great Britain
Tel.: 0871 5000 720 (£ 0.10/Min.)
E-Mail: [email protected]
IAN 90883
Hotline availability:
Monday to Friday 08:00 - 20:00 (CET)
EU Low Voltage Regulations
(2006 / 95 / EC)
RoHS Directive
(2011 / 65 / EU)
Related harmonised standards:
EN 60745-1:2009 + A11
EN 60745-2-6:2010
EN 55014-1:2006 + A1 + A2
EN 55014-2:1997 + A1 + A2
EN 61000-3-2:2006 + A1 + A2
Importer
EN 61000-3-3:2008
KOMPERNASS HANDELS GMBH
Type designation of machine:
BURGSTRASSE 21
Hammer drill PBH 440 A1
44867 BOCHUM
GERMANY
www.kompernass.com
Year of manufacture: 05 - 2013
Serial number: IAN 90883
Bochum, 23.07.2013
Semi Uguzlu
- Quality Manager Subject to technical changes in the course of
further developments.
PBH 440 A1
23
GB
KOMPERNASS HANDELS GMBH
BURGSTRASSE 21
44867 BOCHUM
DEUTSCHLAND / GERMANY
www.kompernass.com
Version des informations · Stand der Informationen
Last Information Update: 08 / 2013 · Ident.-No.: PBH440A1-042013-2
IAN 90883
2