1
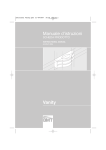
onsen
B A T H R O O M
F U R N I T U R E
www.onsen.it
Maya
ITA
Manuale di montaggio e schede tecniche
ENG
Assembling handbook and technical sheet
GER
Montage-Handbuch und technischer Steckbrief
FRA
Manuel de montage et fiche technique
DAN
Monterings vejledning samt tekniske data
SCM-36 Rev. 3
ITA INDICE
ENG INDEX
FRA INDEX
DAN INDEKS
GER INHALTSVERZEICHNIS
n
Posizione
scarichi - Position of drain pipes - Position der Abflussrohre Position des tuyaux de décharge - Positionering af afløbsrør
pag. 3
n
Estrazione
pag. 4
n
Base
pag. 5
n
Fissaggio
pag. 7
n
Lavabo
pag. 8
n
Foratura
pag. 9
n
Attacchi
pag. 10
n
Elemento
pag. 12
n
Cambio
pag. 13
n
Colonna
pag. 14
n
Istruzioni
pag. 15
n
Scheda
pag. 16
cassetti - Pull-out of drawers - Auszug der Schubladen Extraction du tiroirs - Afmonter skuffe
portalavabo - Washbasin base unit - Waschbeckenunterschrank Base porte-lavabo - Underskab
lavabi - Fixing of washbasins - Befestigung der Waschbecken Fixation des lavabos - Montering af underskab
sottopiano - Undercounter washbasin - Unterbauwaschbecken Lavabo sous-plan - Underlimet vask
maniglia - Drilling for handles - Lochbohrung für Griffe Percement pour poignées - Boring for håndtag
- Hanging brackets - Schrankaufhänger Supports pour l'accrochage - Justering af vægbeslag
ammortizzatore - Shock-absorber - Stoßdämpfer Amortisseur - Softclose beslag
anta - Change of the door - Wechsel der Öffnungsrichtung der Tür Échange du vers d'ouverture de la porte - Ændring af døråbning (højre/venste)
girevole - Rotating tall unit - Drehbarer Hochschrank Colonne tournante - Roterbart skab - Roterbart skab
per l’uso, la manutenzione e la pulizia
Instructions for use, maintenance and cleaning
Anleitung für die Bedienung, Instandhaltung u. Reinigung
Mode d’emploi, d’entretien et de nettoyage
prodotto - Product sheet - Produkt-Steckbrief Fiche de produit - Produktblad
2
ITA POSIZIONE SCARICHI
ENG POSITION OF DRAIN PIPES
FRA POSITION DES TUYAUX DE DÉCHARGE
DAN POSITIONERING AF AFLØBSRØR
GER POSITION DER ABFLUSSROHRE
n
LAVABO MINERALMARMO 2 VASCHE
n
TOP VETRO LAVABO SOPRA-PIANO
n
DOUBLE MINERALMARMO WASHBASIN
n
GLASSTOP WITH OVERCOUNTER WASHBASIN
n
DOPPELWASCHBECKEN AUS MINERALMARMO
n
GLASWASCHTISCHPLATTE MIT VORBAUWASCHTISCH
n
LAVABO DOUBLE EN MINERALMARMO
n
SURFACE EN VERRE AVEC LAVABO DESSUS-PLAN
n
FORMSTØBT DOBBELTVASK AF STØBEMARMOR
n
GLASPLADE MED OVAL FRITSTÅENDE VASK
7,5 7,5
85
7,5 7,5
7,5 7,5
81
56
62,5
62,5
55
55
30
30
n
LAVABO MINERALMARMO
n
TOP MARMO LAVABO SOTTO-PIANO
n
MINERALMARMO WASHBASIN
n
MARBLETOP WITH UNDERCOUNTER WASHBASIN
n
WASCHBECKEN AUS MINERALMARMO
n
MARMORWASCHTISCHPLATTE MIT UNTERBAUWASCHBECKEN
n
LAVABO EN MINERALMARMO
n
SURFACE EN MARBRE AVEC LAVABO SOUS-PLAN
n
FORMSTØBT VASK AF STØBEMARMOR
n
BORDPLADE AF STØBEMARMOR MED UNDERLIMET VASK
7,5 7,5
85
7,5 7,5
82
62,5
55
62,5
55
30
30
3
ITA ESTRAZIONE CASSETTI
ENG PULL-OUT OF DRAWERS
FRA EXTRACTION DU TIROIRS
DAN AFMONTER SKUFFE
GER AUSZUG DER SCHUBLADEN
n
- Sganciare i relativi cassetti agendo sulla ferramenta del fondo
(Leva A)
- Se necessario in fase di montaggio regolare la luce tra i cassetti
(Leva B)
n
- Unhook the relevant drawers acting on the ironware on the bottom
(Lever A)
- If necessary, during assembling adjust the aperture between the drawers
(Lever B)
n
- Die entsprechenden Schubladen durch die Betätigung der Eisenwaren
auf der Unterseite loshaken
(Hebel A)
- Falls nötig kann während der Montage die Öffnung zwischen den
Schubladen reguliert werden
(Hebel B)
n
- Décrochez les relatives tiroirs en agent sur la quincaillerie dans le fond
(Levier A)
- S'il est nécessaire, pendant le montage on y peut régler l'aperture entre
les tiroirs
(Levier B)
n
- Afmontering af skufferne fra skuffegliderne gøres ved at trykke på
(Løftestang A)
- Således at de kommer til at sidde perfekt over hinanden. Hvis nødvendigt,
under opsætning af møblet justeres skufferne op og ned på
(Løftestang B)
B
A
n
IMPORTANTE:
non sollevare la base porta lavabo facendo presa dai
cassetti e non usare gli stessi come punti d’ appoggio per raggiungere
parti superiori.
n
IMPORTANT: do not lift the base unit holding it on the drawers and do
not use the same as supporting point in order to reach higher parts.
n
WICHTIG: den Unterschrank nicht an den Schubladen hochheben und
dieselben nicht als Stützpunkt benutzen um höhere Teile zu erreichen.
n
IMPORTANT: ne soulevez pas le meuble en le tenant sur les tiroirs et
n'usez pas les mêmes comme points d'appui pour rattraper parties
supérieures.
n
VIGTIGT: Løft ikke op I møblet ved at holde i skufferne ligesom de heller
ikke må bruges som stige el. støtte til at nå høje ting.
4
ITA BASE PORTALAVABO
ENG WASHBASIN BASE UNIT
FRA BASE PORTE-LAVABO
DAN UNDERSKAB
GER WASCHBECKENUNTERSCHRANK
PRECAUZIONI
- Il montaggio deve essere effettuato da personale tecnico competente
- Data la dimensione e il peso del mobile sono necessarie due persone per il corretto posizionamento
MONTAGGIO
- Posizionare la barra metallica a 30 cm. da terra fissandola con i tasselli a vite in dotazione.
N.B.: si consiglia di utilizzare un livello per mettere in piano la barra metallica e di estrarre i cassetti per facilitare il
montaggio della base portalavabo
- Appoggiare il mobile sulla barra metallica e segnare sul muro i fori “F” degli angolari.
- Togliere il mobile, effettuare i fori sul muro ed inserire i quattro tasselli (Ø 10 x 50 mm.)
- Posizionare il mobile sopra la barra e fissarlo al muro con le quattro viti in dotazione (Ø 6 x 60 mm.)
- Ultimare il fissaggio inserendo le viti (Ø 3,5 x 16 mm.) negli appositi fori “V” della barra metallica.
F
F
F
F
V
V
V
30 cm.
F
F
45
ITA BASE PORTALAVABO
ENG WASHBASIN BASE UNIT
FRA BASE PORTE-LAVABO
DAN UNDERSKAB
GER WASCHBECKENUNTERSCHRANK
ASSEMBLING INSTRUCTIONS WASHBASIN BASE UNIT
PRECAUTIONS
- The assembling must be carried out by competent technical personnel.
- Considering the dimension and the weight of the furniture, two people are necessary to position it correctly.
ASSEMBLING
- Position the metallic bar at 30 cm from the floor fixing it with the provided universal frame fixings.
N.B.: we recommend the use of a level to place the metallic bar horizontally. Pull out the drawers to facilitate the assembling of the
washbasin base unit.
- Rest the furniture on the metallic bar and mark the position of the holes “F” of the hanging brackets.
- Take the furniture away, drill the holes in the wall and insert the four frame fixings (Ø 10 x 50 mm).
- Position the furniture on the metallic bar and fix it to the wall with the four provided screws (Ø 6 x 60 mm).
- Complete the fixing inserting the screws (Ø 3,5 x 16 mm) into the foreseen holes “V” of the metallic bar.
BAUANLEITUNG WASCHBECKENUNTERSCHRANK
VORSICHTSMAßNAHMEN
- Die Montage muss von sachkundigem technischen Personal ausgeführt werden.
- Angesicht des Ausmaßes und des Gewichts sind zwei Personen für die korrekte Positionierung des Möbelstücks erforderlich.
MONTAGE
- Positionieren Sie die Metallstange 30 cm vom Fußboden und befestigen Sie sie mit den ausgestatteten UniversalRahmendübeln.
N.B.: wir empfehlen eine Wasserwaage zu benutzen um die Metallstange gerade zu befestigen. Ziehen Sie die Schubladen
heraus um die Montage des Waschbeckenunterschranks zu erleichtern.
- Stellen Sie das Möbelstück auf die Metallstange und markieren Sie an der Wand die Löcher „F“ der Schrankaufhänger.
- Entfernen Sie das Möbelstück, bohren Sie die Löcher in die Wand und stecken Sie die vier Rahmendübel ein (Ø 10 x 50 mm).
- Positionieren Sie das Möbelstück auf die Metallstange und fixieren Sie es an die Wand mit den vier ausgestatteten Schrauben
(Ø 6 x 60 mm).
- Vervollständigen Sie die Montage indem Sie die Schrauben (Ø 3,5 x 16 mm) in die vorgesehenen Löcher “V” einfügen.
MODE DE MONTAGE BASE PORTE-LAVABO
PRÉCAUTIONS
- Le montage doit être effectué par personnel technique compétent.
- Vu la dimension et le poids du meuble, deux personnes sont nécessaires pour le correct positionnement.
MONTAGE
- Positionner la barre en métal à 30 cm au-dessus du sol en la fixant avec les tasseaux à vis en dotation.
N.B. : nous conseillons d'utiliser un niveau pour mettre en équilibre la barre en métal et d'extraire les tiroirs pour faciliter le montage
de la base porte-lavabo.
- Appuyer le meuble sur la barre en métal et marquer sur le mur les trous «F» des supports pour l'accrochage.
- Enlever le meuble, effectuer les trous sur le mur et insérer les quatre tasseaux (Ø 10 x 50 mm).
- Positionner le meuble sur la barre en métal et fixer le même sur le mur avec les quatre vis en dotation (Ø 6 x 60 mm).
- Achever la fixation en insérant les vis (Ø 3,5 x 16 mm) dans les trous spéciaux «V» de la barre en métal.
MONTERINGS VEJLEDNING
FORBEREDELSE
- Monteringen skal udføres af autoriseret montør.
- Grundet vægt, samt størrelse på møblet bør man være 2 til at montere dette møbel.
MONTERINGS
- Placer metal skinnen så det passer med at møblet inkl. vask får en højde på 30 cm. og monter den med de medfølgende
skruer og rawplugs. Vi anbefaler at der bruges et vaterpas for at sikre at skinnen sidder 100 % vandret.
- Placer møblet på metal skinnen og marker hvor hullerne skal bores i væggen til ophængs beslagene
- Tag nu møblet væk, bor hullerne og monter 4 rawplugs (Ø10 x 50 mm)
- Hæng nu møblet på beslagene og skru det fast i væggen med de 4 skruer (ø6 x 60 mm)
- Skru nu de små (ø 3,5 x 16 mm) op i underskabet nede fra metalskinnen.
6
ITA FISSAGGIO LAVABI
ENG FIXING OF WASHBASINS
FRA FIXATION DES LAVABOS
DAN MONTERING AF UNDERSKAB
GER BEFESTIGUNG DER WASCHBECKEN
n
Kit di
fissaggio compreso solo per lavabo in ceramica curvo
set included only with curved ceramics washbasin
n
Befestigungssatz nur bei gebogenem Keramik-Waschbecken
inbegriffen
n
Set de fixation compris seulement pour le lavabo courbe en
céramique
n
Fastgørelses sæt er kun inkluderet til den buede
porcelænsvask
n
Fixing
A B
A
B
n
Siliconatura
dei lavabi/top con prodotti non acetici, poggiare il lavabo e siliconare il bordo del fianco per evitare infiltrazioni
d’acqua
n
Fixing of the washbasin/top with non acetic products (silicone), place the washbasin and fix the rims of the furniture sides
with silicone in order to avoid water infiltrations.
n
Befestigung der Waschbecken/Waschtischplatten mit nicht-essighaltigen Produkten (Silikon), positionieren Sie das
Waschbecken und befestigen Sie die Kanten der Seiten des Möbels mit Silikon um Wasserinfiltrationen zu vermeiden.
n
Fixation des lavabos/surfaces avec produits non-acétique (silicone), positionnez le lavabo et fixez les bords des côtés du
meuble avec du silicone pour éviter les infiltrations de l'eau.
n
Fastgørelse af vasken / bordpladen skal ske med syrefri silikone, placer håndvasken i den ønskede position og fug
derefter med silikone imellem væg og sider af møblet for at undgå at vand kan trænge ind.
7
ITA LAVABO SOTTOPIANO
ENG UNDERCOUNTER WASHBASIN
FRA LAVABO SOUS-PLAN
DAN UNDERLIMET VASK
GER UNTERBAUWASCHBECKEN
n
E' consigliabile
Top marmo
Marble top
Marmor Waschtischplatte d
Surface en marbre
Bordplade af støbemarmor c
b
a
mettere del
silicone tra top e lavabo.
n
We suggest to use silicon
between the top and the
washbasin.
n
Wir empfehlen Silikon
zwischen der
Waschtischplatte und dem
Waschbecken zu benutzen.
n
Nous conseillons de mettre du
silicone entre la surface en
marbre et le lavabo.
n
Vi anbefaler at bruge silikone
mellem bordpladen og den
underlimede vask.
Lavabo
Washbasin
Waschbecken
Underlimet vask
n
Avvitare
il bullone (a) sul top
per massimo 5/6 mm.
n
Screw the bolt (a) on the top
for a maximum of 5/6 mm
n
Schrauben Sie den Bolzen (a)
auf die Waschtischplatte für
maximal 5/6 mm.
n
Vissez le boulon (a) sur la
surface en marbre pour tout
au plus 5/6 mm.
n
Skru bolten (a) i bordpladen
med maksimalt 5/6 mm.
d
c
b
a
n
Avvitare
il dado (b) tenendo
fermo il bullone (a).
n
Screw the nut (b) holding the
bolt (a) still.
n
Schrauben Sie die
Schraubenmutter (b) während
Sie den Bolzen (a) stillhalten.
n
Vissez l'écrou (b) en tenant
ferme le boulon (a).
n
Drej møtrikken (b) mens
bolten holdes fast (a).
a
b
a
8
ITA FORATURA MANIGLIA
ENG DRILLING FOR HANDLES
GER LOCHBOHRUNG FÜR GRIFFE
FRA PERCEMENT POUR POIGNÉES
DAN BORING FOR HÅNDTAG
n
Verificare
il verso di apertura dell’ anta (destra o sinistra) prima di effettuare i fori.
Forare con una punta da Ø5 applicando un tassello di legno nel lato opposto per non scheggiare l’anta.
n
Check the opening verso of the door (right or left) before drilling the holes.
Use a Ø5 point placing a wooden plug on the opposite side in order to avoid chipping the door.
n
Überprüfen Sie die Öffnungsrichtung der Türe (rechts oder links) bevor Sie die Löcher bohren.
Benutzen Sie eine Spitze Ø5 während Sie die andere Seite der Tür mit einem Holzstück vor einer Absplitterung schützen.
n
Vérifiez le vers d'ouverture de la porte (droite ou gauche) avant de effectuer les trous.
Usez une pointe Ø5 en appliquant un tampon de ligne sur le côté opposé pour non ébrécher la porte.
n
Tjek døråbningen (højre eller venstre) før der bores huller.
Brug et Ø5 mm. bor og placer et stykke træ på den modsatte side for at undgå at døren sprækker
2
1
ITA ATTACCHI
ENG HANGING BRACKETS
3
GER SCHRANKAUFHÄNGER
FRA SUPPORTS POUR L'ACCROCHAGE
DAN JUSTERING AF VÆGBESLAG
n
Disponibile
solo su alcuni modelli
only on some models
n
Nur bei manchen Modellen erhältlich
n
Disponible seulement sur certaines modèles
n
Findes kun på nogle modeller
n
Available
9
ITA ATTACCHI
ENG HANGING BRACKETS
GER SCHRANKAUFHÄNGER
FRA SUPPORTS POUR L'ACCROCHAGE
DAN JUSTERING AF VÆGBESLAG
5-7 mm.
30 cm.
n
Agire
con un giravite per regolare l’attaccaglia in profondità (A) ed in altezza (B).
a screwdriver in order to adjust the hanging brackets in depth (A) and height (B).
n
Benutzen Sie einen Schraubenzieher um die Schrankaufhänger in der Tiefe (A) und in der Höhe (B) einzustellen.
n
Usez un tournevis pour ajuster les supports pour l'accrochage en profondeur (A) et en hauteur (B).
n
Brug en skruetrækker for at justere vægbeslagene i dybden (A) og højden (B).
n
Use
A
B
10
ITA ATTACCHI
ENG HANGING BRACKETS
GER SCHRANKAUFHÄNGER
FRA SUPPORTS POUR L'ACCROCHAGE
DAN JUSTERING AF VÆGBESLAG
3,5x16
n
Per il
montaggio utilizzare tasselli a gancio compatibili
con il tipo di parete.
n
For the mounting use frame fixings with square hook
which are right for the kind of wall.
n
Verwenden Sie für die Montage Rahmendübel mit
Winkelhaken die für den Wandtyp geeignet sind.
n
Usez pour le montage des tasseaux à crochet indiqués
pour le type de mur.
n
Ved montering bruges ophængsbeslagene med
vinkelkrog vær opmærksom på hvilken vægtype de
passer til.
11
ITA ELEMENTO AMMORTIZZATORE
ENG SHOCK-ABSORBER
FRA AMORTISSEUR
DAN SOFTCLOSE BESLAG
n
Ferramenta
n
Per il
n
Ironware
presente nella busta:
in the bag:
n
Eisenwaren in der Tüte:
n
Quincaillerie dans l’étui:
n
Indhold i posen:
n
The
GER STOßDÄMPFER
montaggio è necessaria la seguente attrezzatura:
following equipment is necessary for the assembling:
n
Das folgende Werkzeug wird für den Einbau benötigt:
n
Le suivant outillage est nécessaire pour le montage:
n
Følgende værktøj er nødvendig for montering:
4 x 16
X2
X1
n
Posizionare
l’ammortizzatore vicino alla cerniera; il centro foro deve essere a 37 mm. dal filo fianco mobile
the shock-absorber near the hinge; the middle of the hole must be at 37 mm. from the side of the furniture
n
Setzen Sie den Stoßdämpfer neben die Scharniere; die Mitte des Lochs muss sich 37 mm. entfernt von der Seite des
Möbelstückes befinden
n
Placez le amortisseur près de la charnière; le centre du trou doit être à 37 mm. de distance du côté du meuble
n
Fastgør soft-close beslaget nær hængslet; midten af hullet skal være 37 mm. fra siden af møblet.
n
Position
4x16
12
37
ITA CAMBIO ANTA
ENG CHANGE OF THE DOOR
GER WECHSEL DER ÖFFNUNGSRICHTUNG DER TÜR
FRA ÉCHANGE DU VERS D'OUVERTURE DE LA PORTE
DAN ÆNDRING AF DØRÅBNING (HØJRE/VENSTE)
1
2
3
4
n
1) Inserire
i tasselli in plastica sul lato opposto (passo 1 e 2).
the plastic dowels on the opposite side (step 1 and 2).
n
1) Setzen Sie die Plastikdübel auf die entgegengesetzte Seite (Schritt 1 und 2).
n
1) Positionnez les tasseaux en plastique sur le côté opposé (pas 1 et 2).
n
1) Fastgør plastikdyvlerne på den modsatte side (step 1 & 2).
n
1) Insert
n
2) Svitare
le viti delle basi in metallo sorreggendo l’anta (passo 3 e 4).
the screws of the metal mounting plates supporting the door (step 3 and 4).
n
2) Drehen Sie die Schrauben der Metallplatte auf während Sie die Türe halten (Schritt 3 und 4).
n
2) Dévissez les vis de la plaque en métal en soutenant la porte (pas 3 et 4).
n
2) Skru skruerne af metalbeslaget (step 3 & 4).
n
2) Unscrew
n
3) Montare
l’anta sul lato opposto.
the door on the opposite side.
n
3) Montieren Sie die Tür auf die entgegengesetzte Seite.
n
3) Montez la porte sur le côté opposé.
n
3) Monter døren på den modsatte side.
n
3) Mount
13
ITA COLONNA GIREVOLE
ENG ROTATING TALL UNIT
FRA COLONNE TOURNANTE
DAN ROTERBART SKAB
GER DREHBARER HOCHSCHRANK
25 mm
Ø8 mm
862 mm
Ø8 mm
25 mm
14
ITA ISTRUZIONI PER L’USO, LA MANUTENZIONE E LA PULIZIA
ENG ISTRUCTION FOR USE, MAINTENANCE AND CLEANING
SICUREZZA
SAFETY
n
I pensili, le specchiere, l’impianto elettrico e quello idraulico devono
essere installati e/o collegati da personale specializzato;
n
Non apportare modifiche al mobile tali da compromettere la stabilità della
struttura;
n
Non appesantire i ripiani con carichi eccessivi (è consigliabile considerare
come carico massimo 2 kg);
n
Non usare i ripiani come punti d’appoggio per raggiungere parti superiori.
n
The wall units, the mirror units, the electric and the hydraulic wiring have
to be installed or connected by skilled personnel;
n
Do not bring changes to the furniture which could compromise the stability
of the structure;
n
Do not weigh down the shelves with excessive loads (it is advisable to
consider 2 kg as maximum load);
n
Do not use the shelves as supporting point in order to reach higher parts.
MONTAGGIO
MOUNTING
n
Far installare i mobili da personale specializzato, usare tasselli ad
espansione di portata adeguata e specifici per il tipo di muratura
esistente. Accertarsi se la muratura è adatta a ricevere mobili sospesi
(es. cartongesso).
n
Get the furniture installed by skilled personnel, use expansion anchors of
an adequate capacity which are specific for the existing type of masonry.
Make sure that the masonry is suitable to hold wall-mounted furniture (for
example plaster)
MANUTENZIONE
MAINTENANCE
n
Accompagnare sempre la chiusura delle ante e dei cassetti;
n
Interporre una protezione fra la superficie del mobile ed eventuali sorgenti
di calore;
n
Evitare il contatto diretto di acqua sulle parti in legno del mobile;
n
Evitare l’elevata umidità dell’aria nella stanza dove è presente il mobile
per non incorrere nel fenomeno di espansione del legno ed evitare il
distacco dei bordi;
n
Il legno esposto alla luce può subire variazioni di tonalità del colore;
n
Non apporre sul mobile scritte e non incollare poster o adesivi di ogni
genere.
n
Always accompany the closure of the doors and the drawers;
n
Put a protection between the surface of the furniture and possible sources
of heat;
n
Avoid direct contact of water on the wooden parts of the furniture;
n
Avoid high air humidity in the room where the furniture is placed to not
incur in the phenomenon of wood expansion and to avoid the detachment
of the edges;
n
Wood exposed to sunlight can undergo changes of the colour tonality;
n
Do neither write on the furniture nor glue posters or stickers of any kind on
it.
PULIZIA
CLEANING
n
Prestare attenzione e cura nella scelta dei prodotti per la pulizia del
mobile (non usare agenti chimici o solventi, si raccomanda di utilizzare
solo un panno umido e sapone neutro).
n
In casi particolari fare sempre una prova in punti non in vista
n
Pay attention and care in the choice of the cleansing products for the
forniture (do not use chemical agents or solvents, please use only a
humid cloth and neutral soap).
n
In particular cases always make first a test on a not visible point.
FRA MODE D’ EMPLOI, D’ ENTRETIEN ET DE NETTOYAGE
GER ANLEITUNG FÜR DIE BEDIENUNG, INSTANDHALTUNG U. REINIGUNG
SICHERHEIT
SECURITÈ
n
Hängeschränke, Spiegelschränke, die elektrische und die
Wasserversorgungs-Anlage müssen von sachkundigem Personal
eingebaut und/oder verbunden werden;
n
Das Möbelstück nicht umändern, um die Standfestigkeit der Struktur nicht
zu gefährden;
n
Die Regale nicht mit übermäßigem Gewicht beschweren (wir empfehlen 2
kg als maximales Gewicht zu betrachten);
n
Die Regale nicht als Stützpunkt benutzen um höhere Teile zu erreichen.
n
Les armoires suspendues, les miroirs conteneurs, l'installation électrique
et cette hydraulique doivent être installés et/ou connectés par personnel
spécialisé;
n
Ne apportez pas modifications au meuble qui pourraient compromettre la
stabilité de la structure;
n
Ne alourdiez les rayons avec des charges excessives (il est conseillable
considérer comme charge maximale 2 kg);
n
Ne utilisez pas les rayons comme points d'appui pour rattraper parties
supérieures.
MONTAGE
MONTAGE
n
Die Möbel von sachkundigem Personal einbauen lassen,
Faites installer les meubles par personnel spécialisé, usez des tasseaux
Expansionsdübel einer geeigneten Höchstbelastung für die vorhandenen n
à expansion d'une portée appropriée et spécifiques pour le type de
Mauern benutzen.Vergewissern Sie sich, ob die Mauern für die Montage
maçonnerie existant. Assurez vous que la maçonnerie est indiquée pour
hängender Möbel geeignet sind (z.B. Gipspappe).
recevoir des meubles suspendus (ex. caton-pâte).
INSTANDHALTUNG
ENTRETIEN
n
Begleiten Sie immer den Verschluss der Türen und Schubladen;
n
Setzen Sie einen Schutz zwischen die Oberfläche des Möbelstücks und
möglichen Wärmequellen;
n
Vermeiden Sie den direkten Kontakt mit Wasser auf den Holzteilen des
Möbelstücks;
n
Vermeiden Sie hohe Luftfeuchtigkeit im Raum wo sich das Möbelstück
befindet, es könnte ansonsten dem Phänomen der Holzausdehnung und
der Loslösung der Kanten ausgesetzt sein;
n
Dem Licht ausgesetztes Holz kann Änderungen des Farbtons erleiden;
n
Setzen Sie keine Schriften auf das Möbelstück und kleben Sie keine
Poster oder Aufkleber jeder Art darauf.
n
Accompagnez toujours la fermeture des portes et des tiroirs;
n
Interposez une protection entre la surface du meuble et éventuelles
sources de chaleur;
n
Évitez le contact direct de l'eau sur les parties en bois du meuble;
n
Évitez la humidité élevée de l'air dans la salle où le meuble est présent
pour ne pas encourir le phénomène d'expansion du bois et éviter le
décollement des bords;
n
Le bois exposé à la lumière peut subir variations de la tonalité de couleur
n
Ne apposez pas inscriptions sur le meuble et ne collez pas poster ou
adhésifs de toute sorte.
REINIGUNG
NETTOYAGE
n
Achten Sie auf die Wahl der Reinigungsprodukte für das Möbelstück
(benutzen Sie keine chemischen Wirkstoffe oder Lösungsmittel, wir
empfehlen nur ein feuchtes Tuch und neutrale Seife zu verwenden).
n
In besonderen Fällen testen Sie zuerst eine nicht sichtbare
Stelle.
n
Prêtez attention et soin dans le choix des produits pour le nettoyage du
meuble (ne usez pas agents chimiques ou solvants, on conseille d'user
seulement un drap humide et du savon neutre).
n
En cas particuliers faites toujours une épreuve d'abord dans un
point pas visible.
15
ITA SCHEDA PRODOTTO
ENG PRODUCT SHEET
FRA FICHE DE PRODUIT
DAN PRODUKTBLAD
GER PRODUKT-STECKBRIEF
SCHEDA GENERALE PRODOTTO
(D.Lg s 6 set tembre 2005, n.206 “Codice del Cons umat ore” e DM n. 101 dell’8 febbraio 1997)
SCP-02 7 gennaio 2007 Rev. 2
Denominazione l egale e merceologica del prodotto
Mobili da bagn o
Produttore
Falegnam eria Adriatica S .r.l.
Contra da San Mauro, 5
63030 Ste lla di Monsampolo del Tronto (AP)
ATTENZIONE: il p roduttore si riserva il diritto di apportare qu alsiasi modifica senza alcu n p reavviso
CARATTERISTICHE DEI MATERIALI
CARATTERISTICHE DELLA FERRAMENTA
STRU TTU RE E SCOCCHE
MATERIALE:
tutte l e strutture sono realizza te in MDF,
truciolare,truciolare idrofugo o m ultistrato di
pioppo
SPESSORE:
mm. 12, 16, 18, 19, 20 o 25
BORDO:
melaminico laccato, ABS, legno o retro
FINITURA:
rivestimento melaminico, laccato o impiallacciato
con tranciato precomposto
CERNIERE E BASETTE
Sono in metallo con e ventuali parti in ABS. Regola bili in due o tre
direzioni.
CASSETTI
Possono essere in truciolare rivestito in polipropile ne oppure in
metallo calandra to o scatolato con protezione epossidica. Hanno
l’estrazione parziale o totale (in questo ca so con richiamo
automatico incorpora to nella guida).
L’estrazione parziale è s corre vole su ruote.
L’estrazione totale è montata su guida qu adro a sfere con portata
max. 30 kg.
FRONTALI (ante e cassett i)
MATERIALE:
tutti i frontali sono rea lizzati in MDF, truciolare,
truciolare idrof ugo legno o multistrato di pioppo
SPESSORE:
mm. 12, 16, 18, 19, 20 o 25
BORDO:
melaminico laccato, ABS, legno o retro
FINITURA:
rivestimento melaminico, laccato, impiallacciato
con tranciato precomposto o PVC
ANTE A VETRO
MATERIALE:
SPESSORE:
FINITURA:
ATTACCAGLIE PER PENSILI E SPECCHIERE
Possono essere esterne in meta llo non regola bili o ppure i nterne in
metallo con copertura in ABS e re golazione micrometrica in
entrambe le dire zioni.
vetro temperato
mm. 4 e 5
satinato, serigrafato o stampato
POMOLI E MANIGLIE
Sono in metallo, con trattamento galvanico, nelle varie finiture.
Oppure sono in metallo verniciato alle polveri epossidiche o in
plastica stampa ta.
RIPIANI E MENS OLE A VETRO
MATERIALE:
vetro
SPESSORE:
da 3 a 12 mm.
SCHIENE
MATERIALE:
SPESSORE:
FINITURA:
LAVABI
Possono essere in ceramica, mineralmarm o, resina, vetro o acciaio
porcella nato.
sono rea lizzate in MDF
mm. 2,5 o 3
un lato verniciato e un lato grezzo
ZOCCOLI
Costruiti in PVC e rive stiti con carte protette da resine poliestere. Gli
accessori sono in materiale plastico vario (ABS, Polistirolo, Nylon ecc.).
VERNICE
Verniciatura UV o poliureta nica. I prodotti verniciati subiscono una
prova di aderenza della vernice (“Prova di quadrettatura” UNI EN ISO
2409:1996) e una prova di durezza (“Dete rminazione della durezza –
Metodo delle matite” UNI EN ISO 10782:1999).
TUTTI I PRODOTTI SONO CONFORMI ALLA
DIRETTIVA EU ROPEA RoHS 200 2/95 /EC
SMALTIMENTO DEI MATERIALI
Al fine di un corretto riciclo dei materiali, non disperdere il prodotto
nell’ambiente, bensì avvertire l’AZIENDA COMUNALE per la raccolta
dei rifiuti, ave ndo cura preventivam ente di separare i componenti
per tipologie di materiale (raccolta differenziata).
16