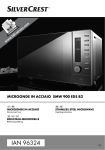
1
MICROONDE IN ACCIAIO SMW 900 EDS B2
MICROONDE IN ACCIAIO
MICRO-ONDAS EM AÇO INOXIDÁVEL
STAINLESS STEEL MICROWAVE
EDELSTAHL-MIKROWELLE
Istruzioni per l‘uso
Operating instructions
IAN 73194
Manual de instruções
Bedienungsanleitung
Prima di leggere aprire la pagina con le immagini e prendere confidenza con le diverse funzioni
dell’apparecchio.
Antes de começar a ler abra na página com as imagens e, de seguida, familiarize-se com todas as
funções do aparelho.
Before reading, unfold the page containing the illustrations and familiarise yourself with all functions of
the device.
Klappen Sie vor dem Lesen die Seite mit den Abbildungen aus und machen Sie sich anschließend mit allen
Funktionen des Gerätes vertraut.
IT / MT
PT
GB / MT
DE / AT / CH
Istruzioni per l‘uso
Manual de instruções
Operating instructions
Bedienungsanleitung
Pagina 1
Página 25
Page
49
Seite
73
A
B
C
INDICE
PAGINA
Introduzione
Uso conforme
Volume della fornitura
Descrizione dell'apparecchio
Dati tecnici
Importanti indicazioni di sicurezza
Prima di cominciare
3
3
3
3
3
4
7
Principi basilari per la cottura a microonde ..................................................................................7
Uso delle stoviglie di cottura idonee..............................................................................................7
Prima messa in funzione
8
Installazione dell'apparecchio ........................................................................................................8
Preparazione dell'apparecchio.......................................................................................................9
Inserimento del piatto girevole .......................................................................................................9
Uso
9
Impostazione dell'ora ......................................................................................................................9
Modalità Standby..........................................................................................................................10
Impostazione timer da cucina ......................................................................................................10
Sicurezza bambini .........................................................................................................................10
Funzioni di interrogazione ............................................................................................................10
Interruzione/arresto del procedimento di cottura o scongelamento........................................11
Bollitura e cottura
11
Modalità microonde......................................................................................................................11
Funzione Grill .................................................................................................................................12
Combinazione procedimento di cottura "Grill" ..........................................................................13
Funzionamento ad aria calda ......................................................................................................14
Funzionamento ad aria calda con preriscaldamento................................................................14
Combinazione-procedimento di cottura "Aria calda"................................................................15
Menu automatico
15
Avvio del menu automatico ..........................................................................................................15
Cottura della pizza........................................................................................................................18
-1-
Scongelamento
19
Scongelamento in base al peso...................................................................................................19
Scongelamento in base al tempo ................................................................................................20
Ricette
20
Polpette............................................................................................................................................20
Doratura di panini pronti surgelati ..............................................................................................20
Patate gratinate ..............................................................................................................................21
Muffin ..............................................................................................................................................21
Pulizia e cura
Guasti e possibili rimedi
Smaltimento
Garanzia e assistenza
Importatore
22
22
23
24
24
-2-
Microonde in acciaio
Descrizione dell'apparecchio
Figura A:
1 Display
2 Tasto Apertura porta
3 Piatto girevole
4 Rotelle
5 Feritoie di aerazione
Introduzione
Congratulazioni per l'acquisto del nuovo apparecchio.
È stato acquistato un prodotto di alta qualità. Il manuale di istruzioni è parte integrante del presente
prodotto. Esso contiene importanti indicazioni per
la sicurezza, l'uso e lo smaltimento. Prima di utilizzare il
prodotto, familiarizzarsi con tutte le indicazioni relative ai comandi e alla sicurezza. Utilizzare il prodotto
solo come descritto e per i campi d'impiego indicati.
In caso di cessione del prodotto a terzi, consegnare
anche tutta la documentazione relativa.
Figura B:
6 Tasto Microonde
7 Tasto Grill
8 Tasto Combinazione microonde grill
9 Tasto Combinazione microonde aria bollente
0 Tasto Aria bollente
q Tasto Ora
w Tasto TIMER (timer cucina)
e Tasto Stop/sicurezza bambini
r Regolatore / Tasto Start/avvio rapido
Uso conforme
Questo apparecchio è previsto per il riscaldamento
e la preparazione di alimenti secondo il procedimento prescritto.
Ogni modifica dell'apparecchio viene considerata
non conforme alla destinazione e comporta considerevoli rischi d'infortunio. Il produttore non si assume
alcuna responsabilità per i danni derivanti da uso
non conforme.
Questo apparecchio è destinato esclusivamente
all'uso domestico.
Esso non è destinato all'uso industriale, commerciale
o nei laboratori!
Figura C:
t Griglia
Dati tecnici
Tensione nominale:
Volume della fornitura
Microonde in acciaio
Piatto girevole
Base grill
Istruzioni per l'uso
Brevi informazioni (2 pezzi)
-3-
230 - 240 V ~,
50 Hz
Assorbimento
di potenza massimo
Microonde:
Grill:
Aria bollente:
1400 W
1500 W
1950 W
Emissione massima di tensione
Microonde:
Frequenza microonde:
900 W +/- 10%
2450 - MHz
Importanti indicazioni
di sicurezza
• Questo apparecchio non è indicato per l'uso da
parte di persone (inclusi bambini) con limitate
capacità fisiche, sensoriali o mentali o prive dell'esperienza e/o della conoscenza necessaria, a
meno che tali persone non vengano sorvegliate
da un responsabile per la sicurezza o abbiano
ricevuto indicazioni sull'impiego dell'apparecchio.
Sorvegliare i bambini per assicurarsi che non
giochino con l'apparecchio.
Leggere attentamente le avvertenze di sicurezza prima
del primo utilizzo e conservarle per il successivo
impiego.
Attenzione!
Avvertenze relative a eventuali danneggiamenti
dell'apparecchio.
Pericolo! /
• I bambini possono utilizzare l'apparecchio di
cottura senza sorveglianza solo se sono stati
precedentemente istruiti in modo da utilizzare
l'apparecchio di cottura in piena sicurezza e
comprendere pienamente i rischi di un uso errato.
icolo di lesioni!
Avviso di pericolo di lesioni e scossa elettrica!
Pericolo d'incendio!
• Utilizzare questo apparecchio solo per l'uso
conforme a quanto descritto nel presente manuale.
In questo apparecchio, non utilizzare sostanze
chimiche o vapori corrosivi. Questo forno a
microonde è stato costruito specificamente per
riscaldare, cuocere, grigliare, o asciugare
alimenti.
Esso non è stato progettato per l'uso in ambienti
industriali o laboratori.
Avviso di pericolo d'incendio.
Avvertenza!
Suggerimenti e consigli per l'uso del forno a microonde.
Misure di prevenzione per evitare un'esposizione
eccessiva all'energia a microonde
• Non tentare di far funzionare l'apparecchio con
lo sportello aperto, poiché il funzionamento con
lo sportello aperto può dare luogo a un'esposizione alle microonde in quantità nociva per la
salute. È inoltre importante non manomettere e
non manipolare le chiusure di sicurezza.
• Non attaccare alcun oggetto fra il fronte dell'apparecchio e lo sportello e impedire il depositarsi dello sporco o di resti di detergente sulle
superfici isolanti.
• Non utilizzare il forno a microonde in caso di
danni alla spina/cavo di rete. Fare sostituire la
spina/il cavo danneggiato da personale specializzato qualificato, per evitare rischi.
• Tenere i bambini lontano dallo sportello del
microonde mentre esso è in funzione. Pericolo
di ustioni!
• Non rimuovere assolutamente l'alloggiamento
del microonde.
Pericolo di lesioni!
• Fare sostituire la lampadina all'interno del microonde solo da personale specializzato qualificato.
• In caso di danni allo sportello o alle guarnizioni
dello sportello, smettere immediatamente di
utilizzare il forno a microonde. Fare eseguire
subito le riparazioni da personale specializzato
qualificato.
• Non toccare mai lo sportello del microonde,
l'alloggiamento, le aperture di aerazione, gli
accessori o le stoviglie subito dopo il procedimento di grill, combinazione o menu automatico. Tali parti sono soggette a surriscaldamento.
Farle raffreddare prima di pulirle.
• Non tentare mai di riparare l'apparecchio autonomamente. La rimozione dell'alloggiamento può
liberare energia a microonde. Fare eseguire le
riparazioni solo da personale specializzato
qualificato.
• Assicurarsi che la spina dell'apparecchio sia
sempre facilmente raggiungibile, in modo da
riuscire rapidamente a staccarla dalla presa
di corrente in caso di emergenza.
-4-
Pericolo d'incendio!
• I portatori di pace-maker devono informarsi
presso il medico di fiducia prima di cominciare
a utilizzare un microonde, per conoscere gli
eventuali pericoli collegati all'uso dell'apparecchio.
• Non lasciare il microonde incustodito mentre si
riscaldano gli alimenti in confezioni di plastica
o di carta.
• Non lasciare mai il cavo appeso sul tavolo o sul
piano di lavoro. I bambini potrebbero tirarlo.
• Non collocare materiali infiammabili nelle vicinanze
del microonde o delle aperture di aerazione.
• Dopo il riscaldamento di barattoli, buste di popcorn ecc., aprire le confezioni tenendo sempre
l'apertura lontana dal corpo. Il vapore in fuoriuscita può dare luogo a ustioni.
• Rimuovere tutte le chiusure metalliche dalle
confezioni degli alimenti che si desiderano
riscaldare. Pericolo di incendio!
• Per la preparazione di pop-corn, utilizzare solo
buste di pop-corn idonee per il microonde.
• Non collocarsi mai direttamente davanti al microonde mentre si apre lo sportello. Il vapore in
fuoriuscita può dare luogo a ustioni.
• Non utilizzare il forno a microonde per riscaldare
cuscini pieni di granaglie, noccioli di ciliegie o
gel. Pericolo di incendio!
• Non eseguire fritture nel forno a microonde.
L'olio bollente può danneggiare gli elementi
dell'apparecchio e gli utensili, oltre a provocare
ustioni.
• Non utilizzare il microonde per depositare
alimenti o altri oggetti.
• Non superare mai i tempi di cottura indicati dal
produttore.
• Agitare o mescolare sempre i biberon o le bottigliette per bambini dopo averle riscaldate nel
microonde! Il contenuto potrebbe essersi riscaldato
in modo disomogeneo e il bambino potrebbe riportare ustioni. Controllare in ogni caso la temperatura prima di somministrare l'alimento al
bambino!
• Non collocare oggetti sul forno a microonde in
funzione. Le aperture di aerazione verrebbero
ostruite!
• Non collocare il microonde nelle vicinanze di
altri apparecchi che emettono calore, come ad
esempio forni.
• Non modificare il microonde.
• Pulire accuratamente il microonde dopo aver
riscaldato cibi grassi, soprattutto se scoperchiati.
Fare raffreddare completamente l'apparecchio
prima di pulirlo. Rimuovere i residui, come ad
es. il grasso, dalle resistenze del grill. I residui
potrebbero surriscaldarsi e incendiarsi.
• Le radiazioni a microonde sono pericolose! Fare
eseguire i lavori di manutenzione o riparazione
che prevedano la rimozione delle coperture di
protezione dal contatto con i raggi a microonde
solo da personale specializzato.
• Prima del consumo, controllare la temperatura,
per evitare scottature che potrebbero dimostrarsi
letali per i bambini piccoli.
Gli utensili di cottura, a causa del calore rilasciato
dagli alimenti riscaldati, potrebbero diventare
bollenti ed essere maneggiabili solo con le
presine. Controllare l'idoneità degli utensili di
cottura all'uso con il forno a microonde.
• Non scongelare oli o grassi surgelati nel microonde. Gli oli o i grassi potrebbero incendiarsi.
• Non utilizzare timer esterni o un sistema di telecomando separato per azionare l'apparecchio.
Attenzione! Superficie bollente!
-5-
Attenzione! Danni all'apparecchio!
Consigli di sicurezza
• Non mettere mai in funzione il forno a microonde
vuoto. L'unica eccezione a tale regola è costituita
dalla prima messa in funzione (v. capitolo "Prima
messa in funzione").
• Per minimizzare il rischio d'incendio nel forno
a microonde: tenere sempre d'occhio il forno a
microonde, se si riscaldano alimenti in contenitori
di carta o plastica, per intervenire prima che si
infiammino.
• Non inserire oggetti nelle aperture di aerazione
o nei blocchi di sicurezza dello sportello.
• Nel riscaldare bevande nel forno a microonde,
si potrebbe verificare una bollitura ritardata.
Manipolare il contenitore con cautela. Per evitare
bolliture improvvise:
- Se possibile, inserire un bastoncino di vetro nel
liquido durante il riscaldamento.
• Non utilizzare utensili metallici, che riflettono le
microonde e possono provocare la formazione
di scintille. Non collocare barattoli di metallo
nel forno a microonde.
• Non inserire contenitori in plastica nel microonde
subito dopo un procedimento di grill, combinazione o menu automatico. La plastica potrebbe
sciogliersi.
- Dopo il riscaldamento, lasciare il liquido nel
microonde per 20 secondi, per evitare schizzi
imprevisti.
• Il microonde non dev'essere collocato in luoghi
ad alta umidità ambientale o concentrazione di
umidità.
• Punzecchiare la buccia delle patate, la pelle
delle salsicce e simili. In caso contrario, tali cibi
potrebbero esplodere.
• Non riscaldare liquidi e altri alimenti in contenitori a tenuta stagna, poiché questi possono
esplodere e danneggiare l'apparecchio.
• Agire con cautela nel riscaldare i liquidi. Utilizzare solo contenitori aperti, per consentire la
fuoriuscita delle bolle d'aria.
• Non poggiarsi sullo sportello del microonde.
• In presenza di fumo, spegnere l'apparecchio
o staccare la spina e tenere lo sportello chiuso,
per soffocare eventuali fiamme.
• La pulizia insufficiente dell'apparecchio di cottura
può provocare la distruzione delle superfici,
influenzando la durata di utilizzo e creando
circostanze di pericolo.
• Le uova nel guscio e le uova sode non devono
essere riscaldate nel forno a microonde, poiché
possono esplodere anche dopo il termine del
riscaldamento nel forno a microonde.
Prima della cottura, punzecchiare gli alimenti
con la buccia spessa, come ad esempio patate,
zucche intere, mele e castagne.
Pericolo!
• Non immergere mai il cavo o la spina in acqua
o altri liquidi.
• Non spostare il microonde mentre è in funzione.
• Tenere il cavo lontano dalle fonti di calore. Non
collocarlo davanti allo sportello del microonde.
Il calore può danneggiare il cavo.
• Non versare mai liquidi nelle aperture di aerazione o nei blocchi di sicurezza dello sportello.
In caso di penetrazione di liquidi, spegnere immediatamente il microonde e staccare subito la
spina dalla presa. Fare controllare il microonde
da personale specializzato qualificato.
-6-
Prima di cominciare
Messa a terra/installazione conforme
Il presente apparecchio dev'essere provvisto di messa
a terra. Questo apparecchio dev'essere collegato
solo a una presa di corrente installata a norma e
provvista di messa a terra. Si consiglia di utilizzare
un circuito elettrico proprio, destinato ad alimentare
unicamente il forno a microonde.
Principi basilari per la cottura a
microonde
•
•
•
Pericolo: l'uso non conforme della messa a terra
può comportare il rischio di scossa elettrica.
Avviso: in caso di domande relative alla messa
a terra o a istruzioni riguardanti la parte elettrica,
rivolgersi a un elettricista o manutentore.
•
Né il produttore né il rivenditore si assumono responsabilità per danneggiamenti all'apparecchio o
danni personali derivanti dal mancato rispetto delle
indicazioni relative alla procedura di collegamento
alla rete elettrica.
•
•
•
Interferenze con altri apparecchi
L'uso del forno a microonde può dare luogo a interferenze con apparecchi radiofonici, televisivi e simili.
In caso di presenza di tali interferenze, è possibile
ridurle o eliminarle, ricorrendo ai seguenti provvedimenti:
• Pulire lo sportello e le superfici isolanti.
• Orientare diversamente la radio o il televisore.
• Collocare il forno a microonde su un posto
diverso da quello del ricevitore.
• Allontanare il forno al microonde dal ricevitore.
• Collegare il forno a microonde a un'altra presa
di corrente. Il forno a microonde e il ricevitore
dovrebbero utilizzare due diversi circuiti elettrici.
Disporre i cibi in modo appropriato.
Collocare le parti più spesse ai bordi.
Rispettare il tempo di cottura. Selezionare il
tempo di cottura più breve e prolungarlo in caso
di necessità. I cibi cotti troppo a lungo possono
cominciare a emettere fumo o a bruciarsi.
Durante la cottura, coprire i cibi con un coperchio
idoneo per il forno a microonde. Il coperchio
trattiene gli spruzzi e contribuisce a una cottura
uniforme dei cibi.
Durante la preparazione nel microonde, girare
i cibi una volta, per permettere la cottura rapida
di alimenti come polli o hamburger.
Girare almeno una volta i pezzi di cibo più
grandi, come ad esempio le costate.
Trascorsa la prima metà del tempo di cottura,
ridisporre i cibi, come ad esempio le polpette,
in modo completamente diverso. Girarle e
spostarle dal centro al margine.
Uso delle stoviglie di cottura idonee
•
-7-
Il materiale ideale per un forno a microonde
è permeabile alle microonde, cioè permette il
passaggio dell'energia attraverso il contenitore,
per riscaldare i cibi.
Le microonde non riescono a penetrare i metalli.
Per tale motivo, non utilizzare recipienti e stoviglie
in metallo.
•
•
Pericolo d'incendio!
Per riscaldare i cibi nel forno a microonde non
utilizzare prodotti a base di carta riciclata.
Tali prodotti potrebbero contenere minuscoli
frammenti metallici, in grado di produrre scintille
e/o provocare incendi.
Si consiglia di utilizzare stoviglie rotonde/ovali
invece che con spigoli/oblunghe, poiché i cibi
cuociono troppo negli angoli.
La seguente lista è da intendersi come una
guida generale per la selezione delle stoviglie
corrette.
Stoviglie di
cottura
Microonde
Grill
Non utilizzare mai la base grill o altri oggetti metallici se si usa il microonde in modalità microonde o
procedimento combinato di cottura. Il metallo riflette
la radiazione a microonde e provoca la formazione
di scintille. Ciò può dare luogo a un incendio e danneggiare l'apparecchio irreparabilmente!
Prima messa in funzione
CombiAria
naziocalda
ne
Vetro
resistente al
calore
Sì
Sì
Sì
Sì
Vetro non
resistente al
calore
No
No
No
No
Installazione dell'apparecchio
Pericolo d'incendio!
Questo microonde non è indicato per l'installazione
in un mobile da cucina chiuso. Nei mobili chiusi non
è garantita una sufficiente aerazione. L'apparecchio
può essere danneggiato e sussiste il pericolo d'incendio!
•
Ceramica
resistente al
calore
Sì
Sì
Sì
Sì
Posate in
plastica idonee
all'uso con
forno a
microonde
Sì
No
No
No
Carta da
cucina
Sì
•
No
No
No
•
Vassoio /piatto
in metallo
No
Sì
Sì
No
Base grill
No
Sì
Sì
No
Pellicola di
alluminio &
contenitore
No
Sì
Sì
No
•
-8-
Selezionare una superficie piana che consenta
uno spazio sufficiente per l'aerazione dell'apparecchio.
È assolutamente necessario lasciare una distanza minima fra apparecchio e pareti di almeno
10 cm. Assicurarsi che lo sportello del forno si
apra liberamente senza incontrare ostacoli.
Al di sopra del forno a microonde dev'essere
garantito uno spazio libero di almeno 20 cm.
Provvedere a un collocamento accessibile della
spina di rete, per poterla raggiungere e staccare
facilmente in caso di pericolo.
Non rimuovere i piedini di supporto situati sul
lato inferiore del forno a microonde.
Non bloccare le aperture di aerazione 5. In
caso contrario, si possono verificare danni all'apparecchio.
•
Collocare l'apparecchio il più possibile lontano
da apparecchi radiofonici e televisivi. L'accensione del forno a microonde può dare luogo
a interferenze nella ricezione dei segnali radiofonici e televisivi.
•
Attenzione:
•
•
non posizionare il forno a microonde su un fornello
da cucina o su altri apparecchi che producono
calore. Ciò può provocare danni all'apparecchio e
conseguente estinzione della garanzia.
•
Premere il tasto Grill 7
. Nel display
compare "Gr 1".
Ruotare il regolatore r
, fino alla comparsa di "Gr 3" e dei simboli
e
nel
display e confermare la selezione premendo
sul tasto Start/avvio rapido r
.
Con il regolatore r
impostare un tempo
di cottura di 10 minuti.
Premere il tasto Start/avvio rapido r
,
per avviare il procedimento di grigliatura.
Avvertenza:
Preparazione dell'apparecchio
•
durante la prima messa in funzione può verificarsi
una leggera formazione di fumi e odori, dovuti ai
resti di lavorazione del prodotto. Si tratta di un
evento innocuo. Provvedere a una sufficiente aerazione. Aprire ad esempio una finestra.
Rimuovere il materiale di imballaggio e la
pellicola applicata sul pannello e sul tasto
Apertura porta 2.
non rimuovere la placca di copertura
grigio-chiaro in mica, applicata per
proteggere i tubi a campi magnetici
nel vano di cottura.
•
•
• Inserire la spina in una presa di corrente. Utilizzare una presa di rete da 230 - 240 V, 50 Hz,
con un fusibile da 16 A. Si consiglia di utilizzare un unico circuito destinato esclusivamente al
microonde. Se non si è sicuri delle modalità di
collegamento del microonde, affidarsi ai consigli
di un esperto.
Dopo 10 minuti l'apparecchio si spegne automaticamente. Attendere fino al suo completo
raffreddamento.
Staccare la spina dalla presa e quindi pulire
l'apparecchio dall'interno con un panno umido
e asciugarlo accuratamente.
Inserimento del piatto girevole 3
•
Prima dell'uso del microonde, è necessario riscaldare
l'apparecchio a vuoto per vaporizzare i residui di
lavorazione.
Collocare il piatto girevole 3 al centro sull'asse
sul vano di cottura. Controllare che esso scivoli
completamente sull'asse e sia posizionato saldamente.
Uso
Impostazione dell'ora
Dopo aver inserito la spina nella presa di rete, aprire
una volta la porta del microonde premendo il tasto
Apertura porta 2.
Dopo aver inserito la spina nella presa di rete, aprire
una volta lo sportello del forno a microonde.
Il display 1 mostra "1:00".
Accendere l'apparecchio senza alimenti e senza
accessori (piatto girevole 3 e griglia t) nella
modalità Grill:
1. Premere il tasto Ora q
compare "Hr 12".
-9-
. Nel display 1
2. Ruotando il regolatore r
selezionare la
modalità desiderata (Hr 24 o Hr 12) e confermare
la selezione premendo sul tasto Start/avvio
rapido r
.
Premere il tasto Start/avvio rapido r
.
Verrà emesso un segnale acustico. Il tempo
scorre a ritroso. Dopo circa 3 secondi viene
nuovamente visualizzato l'orario normale.
Il timer da cucina continua a scorrere in sottofondo. Se nel frattempo si desidera controllare
il tempo del timer da cucina, premere il tasto
TIMER w. Comparirà per breve tempo il timer
da cucina.
Non appena il tempo impostato scade risuoneranno
dei segnali acustici.
3.
Avvertenza:
solo al termine della rotazione del regolatore r
compare l'indicazione dell'orario e si possono impostare le ore.
3. Ruotando il regolatore r
selezionare l'ora
desiderata e confermare la selezione premendo
sul tasto Start/avvio rapido r
.
4. Ruotando il regolatore r
selezionare i
minuti desiderati e confermare la selezione premendo sul tasto Start/avvio rapido r
.
Adesso l'ora è impostata.
Sicurezza bambini
Per leggere l'orario corrente mentre il microonde è
in funzione, premere il tasto Orario q
; l'orario
viene quindi visualizzato nel display 1 dopo qualche
secondo.
Modalità Standby
Il microonde passa automaticamente alla modalità
Standby e viene visualizzato l'orario se per un periodo di tempo prolungato non viene premuto alcun
tasto. Pochi secondi dopo il passaggio alla modalità
Standby si smorza anche l'illuminazione del display.
Impostazione timer da cucina
Il forno a microonde dispone di un timer di cottura
utilizzabile indipendentemente dal forno a microonde.
1. Premere il tasto TIMER w, con l'apparecchio
in standby. Nel display 1 compare "0:00" e
il simbolo
.
2. Impostare quindi il tempo desiderato con il
regolatore r.
Si possono eseguire impostazioni del tempo
da un minimo di 10 secondi a un massimo di
95 minuti.
Attivare questa impostazione per evitare una messa
in funzione involontaria del forno a microonde da
parte di bambini o altre persone non autorizzate
all'utilizzo del forno.
Il simbolo della sicurezza bambini
compare nel
display 1, e l'apparecchio non può essere messo
in funzione fino a quando tale funzione resta attiva.
• Premere il tasto Stop/Sicurezza bambini e
e tenerlo premuto fino a quando non risuonerà un
segnale acustico e non comparirà il simbolo Sicurezza bambini
nel display 1. I tasti e il
regolatore del microonde non hanno più alcuna
funzione.
• Per disattivare la sicurezza bambini, premere il
tasto Stop/Sicurezza bambini e
e tenerlo
premuto fino a quando non risuonerà un segnale
acustico e non scomparirà il simbolo Sicurezza
bambini
nel display .
Funzioni di interrogazione
Richiesta dell'ora durante il funzionamento
Durante il procedimento di cottura, premere il tasto
Ora q
. L'orario viene quindi visualizzato nel
display 1 per qualche secondo.
Richiesta del livello di potenza durante il
funzionamento
Durante il procedimento di cottura, premere il tasto
Microonde 6
. Il livello di potenza attivato
viene quindi visualizzato nel display 1 per qualche
secondo.
- 10 -
Interruzione/arresto del procedimento
di cottura o scongelamento
•
•
Premere una volta il tasto Stop e
, per
interrompere il procedimento di cottura o scongelamento. L'apparecchio interrompe il procedimento e arresta il conto del tempo rimanente.
Premere il tasto Start/avvio rapido r
,
per riavviare il procedimento.
Premere due volte il tasto Stop e
, per
interrompere un procedimento di cottura.
L'apparecchio ritorna alla modalità standby.
Selezione della potenza
1. Premere il tasto Microonde 6
. Nel display 1 compare "900" (potenza 900 Watt).
2. Con l'aiuto del regolatore r
impostare
la potenza desiderata.
3. Premere il tasto Start/avvio rapido r
,
per confermare la potenza impostata.
Impostazione del tempo di cottura
Dopo aver selezionato la potenza, impostare il
tempo di cottura desiderato:
• Ruotare il regolatore r
fino a impostare
il tempo di cottura desiderato.
Bollitura e cottura
I livelli per il tempo di impostazione del
regolatore r
sono i seguenti:
• da 0 sec. a 5 min: in passi di 10 sec.
• da 5 a 10 min: in passi di 30 sec.
• da 10 a 30 min: in passi di 1 min.
• da 30 a 95 min: in passi di 5 min.
Avvertenza
Questo microonde è provvisto di una funzione di
raffreddamento: dopo un procedimento di cottura
o grigliatura che duri almeno 2 minuti, la ventola
dell'apparecchio funziona ancora per circa 3 minuti.
Non si tratta di un malfunzionamento dell'apparecchio! Il raffreddamento più rapido aiuta a prolungare la durata di vita dell'apparecchio.
Annullamento/termine del procedimento di
immissione
Premere una volta il tasto Stop e
per interrompere o terminare un procedimento. L'apparecchio
ritorna alla modalità standby.
Modalità microonde
Avvertenza
Sulla porta del microonde o sull'alloggiamento,
durante il procedimento di cottura, possono formarsi
gocce d'acqua. Si tratta di un fenomeno normale,
e non di un malfunzionamento del microonde.
Asciugare l'umidità con un panno asciutto dopo
aver atteso il raffreddamento del forno.
Pericolo d'incendio!
Non utilizzare mai la base grill t o altri oggetti
metallici se si usa il microonde in modalità microonde. Il
metallo riflette la radiazione a microonde e provoca
la formazione di scintille. Ciò può dare luogo a un
incendio e danneggiare l'apparecchio irreparabilmente!
Avvio del procedimento di cottura
Se si è impostata la potenza e il tempo di cottura,
si può avviare il procedimento:
Premere il tasto Start/avvio rapido r
per
avviare il procedimento di cottura.
Nel display 1 compare il simbolo della modalità
Microonde
. Il tempo impostato scorre a ritroso .
Se il tempo impostato è scaduto, alla fine compaiono
alternativamente i due messaggi "End" e "Hot" nel
display 1. Un segnale acustico risuona più volte
consecutivamente.
- 11 -
Sono a disposizione 3 funzioni Grill:
• Funzione Grill "Calore superiore" (Gr 1):
con questa funzione il calore viene solo dall'alto.
Solo il grill superiore è attivato. Pertanto tale
funzione è ottimale per sandwich con copertura
da gratinare e gratin.
• Funzione Grill "Calore inferiore" (Gr 2):
con questa funzione il calore viene solo dal
basso. Solo il grill inferiore è attivato. Pertanto
questa funzione grill è adatta per ricette o alimenti
che devono essere cotti o grigliati dal basso.
• Funzione Grill "Calore superiore e inferiore" (Gr 3):
con questa funzione il calore proviene dal basso e
dall'alto. Viene attivato il grill superiore e inferiore. Pertanto questa funzione Grill si può
utilizzare per fette sottili di carne, bistecche,
polpette, salsicce o pezzi di pollo.
Avvio rapido 1
In modalità Standby ruotare il regolatore r
a destra e impostare la durata desiderata di cottura.
Avviare il procedimento di cottura con una potenza
di 900 W premendo il tasto Start/Avvio rapido r
.
Avvio rapido 2
Con questa funzione si può cominciare immediatamente la cottura per 30 secondi (o più a lungo,
fino a 95 minuti) con potenza di 900 W.
• Premere il tasto Start/avvio rapido r
.
Nel display 1 compare il simbolo per la modalità Microonde
, e "00:30". Il microonde
avvia il procedimento di cottura per 30 secondi.
Il tempo scorre a ritroso.
Se si desidera cuocere più a lungo di 30 secondi,
premere il tasto Start/avvio rapido r
fino
a ottenere il tempo di cottura desiderato.
I livelli di tempo si dividono come segue:
• da 30 sec. a 5 min.: in passi di 30 sec.
• da 5 min. a 95 min.: in passi di 1 min.
1.
2.
Funzione Grill
Avvertenza:
Per grigliare utilizzare sempre la base grill t.
In tal modo si ottiene un risultato ottimale. Poggiare
la base grill t sempre sul piatto girevole 3.
3.
Pericolo d'incendio!
Utilizzando la funzione Grill, non utilizzare assolutamente coperchi o stoviglie non resistenti al calore,
poiché essi potrebbero sciogliersi o causare un
incendio!
4.
Per grigliare premere il tasto Grill
7 una
volta, al fine di attivare la funzione Grill.
Nel display 1 compare il simbolo per la funzione Grill "Calore superiore"
e "Gr 1".
Impostare la funzione Grill desiderata con il
regolatore r
:
"Gr 1" per il calore superiore,
"Gr 2" per il calore inferiore,
"Gr 3" per il calore superiore e inferiore.
Confermare la selezione premendo il tasto
Start/avvio rapido r
.
Impostare quindi il tempo di cottura desiderato
con il regolatore r
. Il tempo di cottura
massimo è pari a 95 minuti.
Premere il tasto Start/avvio rapido r
per avviare la funzione Grill.
Nel display 1 compare il simbolo della modalità
Grill
/
/
selezionata. Il tempo impostato
scorre a ritroso. Se il tempo impostato è scaduto, alla
fine compaiono alternativamente i due messaggi
"End" e "Hot" nel display 1. Un segnale acustico
risuona più volte consecutivamente.
- 12 -
Combinazione procedimento di
cottura "Grill"
• Combinazione 4 (C 4):
con la combinazione 4, la potenza del microonde viene usata per il 55% e la potenza del grill
per il 45% del tempo di cottura. Tale combinazione è indicata ad esempio per ricette a base
di pollame. Si utilizza la funzione microonde e
la funzione grill "Calore superiore e inferiore".
Questa funzione combina la funzione grill con il
normale funzionamento a microonde. Durante il
procedimento combinato, un determinato periodo di
tempo viene utilizzato per la cottura, e il restante per
la grigliatura, il tutto automaticamente e in un unico
procedimento. Un leggero clic indica la commutazione dell'apparecchio da un procedimento all'altro.
1.
Pericolo d'incendio!
Non utilizzare mai la base grill t o altri oggetti
metallici se si usa il microonde in modalità procedimento di cottura combinato. Il metallo riflette la
radiazione a microonde e provoca la formazione
di scintille. Ciò può dare luogo a un incendio e
danneggiare l'apparecchio irreparabilmente!
Utilizzando la funzione "Grill" con procedimento
di cottura combinato, non utilizzare assolutamente
coperchi o stoviglie non resistenti al calore, poiché
essi potrebbero sciogliersi o causare un incendio!
Sono a disposizione 4 combinazioni:
• Combinazione 1 (C 1):
con la combinazione 1, la potenza del microonde
viene usata per il 30% e la potenza del grill per
il 70% del tempo di cottura. Tale combinazione
è ad es. indicata per il pesce o piatti gratinati.
Si utilizza la funzione microonde e la funzione
grill "Calore superiore".
• Combinazione 2 (C 2):
con la combinazione 2, la potenza del microonde
viene usata per il 55% e la potenza del grill per
il 45% del tempo di cottura. Tale combinazione
è ad es. indicata per omelette, budini o lasagne.
Si utilizza la funzione microonde e la funzione
grill "Calore superiore".
• Combinazione 3 (C 3):
con la combinazione 3, la potenza del microonde
viene usata per il 30% e la potenza del grill per
il 70% del tempo di cottura. Tale combinazione
è indicata ad esempio per le patate. Si utilizza
la funzione microonde e la funzione grill "Calore
superiore e inferiore".
Premere il tasto combinazione Microonde Grill 8
una volta, per attivare la combinazione 1 (C 1). Nel display 1 compare
,
, e "C 1".
2. Impostare la combinazione desiderata con il
regolatore r
"C 1" per la combinazione 1,
"C 2" per la combinazione 2,
"C 3" per la combinazione 3,
"C 4" per la combinazione 4.
Confermare la selezione premendo il tasto
Start/avvio rapido r
.
3. Impostare quindi il tempo di cottura desiderato
con il regolatore r
. Il tempo di cottura
massimo è pari a 95 minuti.
4. Premere il tasto Start/avvio rapido r
per
avviare il procedimento.
Nel display 1 compare il simbolo per il procedimento di combinazione "Grill"
. Il tempo
impostato scorre a ritroso. Se il tempo impostato è
scaduto, alla fine compaiono alternativamente i due
messaggi "End" e "Hot" nel display 1. Un segnale
acustico risuona più volte consecutivamente.
- 13 -
Funzionamento ad aria calda
Nel corso della cottura con aria calda, l'aria calda
circola nel vano di cottura. L'aria calda è particolarmente indicata per la preparazione di sformati o
alimenti croccanti. Si può impostare una temperatura
da 110°C - 200°C per una durata massima di
95 minuti.
Premere il tasto Aria bollente 0
. Nel
display compare "200C" (= 200°C) e il
simbolo per la modalità Aria bollente
.
2. Ruotando il regolatore r
selezionare la
temperatura desiderata e confermare la selezione premendo il tasto Start/avvio rapido r
.
3. Impostare quindi il tempo di cottura desiderato
con il regolatore r
.
4. Premere il tasto Start/avvio rapido r
per
avviare il procedimento di cottura.
Nel display 1 compare il simbolo per la modalità
Aria bollente
. Il tempo impostato scorre a ritroso.
Se il tempo impostato è scaduto, alla fine compaiono
alternativamente i due messaggi "End" e "Hot" nel
display 1. Un segnale acustico risuona più volte
consecutivamente.
1.
Funzionamento ad aria calda con
preriscaldamento
Il microonde si può anche preriscaldare prima di
avviare un procedimento di cottura:
1. Selezionare la temperatura desiderata premendo
una volta il tasto Aria bollente 0
e impostare la temperatura con il regolatore r
.
NON confermare questa impostazione premendo il tasto Start/avvio rapido r
.
2. Per avviare il preriscaldamento premere il tasto
Aria bollente 0
. Nel display 1 compare
"30:00" e il simbolo per la modalità Aria bollente
lampeggia. Il tempo scorre a ritroso.
Non appena viene raggiunta la temperatura
impostata, risuonano dei segnali acustici e il
tempo si ferma.
3. Aprire la porta e inserire l'alimento da cuocere.
4. Ruotando il regolatore r
impostare la
temperatura desiderata e confermare la temperatura premendo il tasto Start/avvio rapido r
.
5. Impostare quindi il tempo di cottura desiderato
con il regolatore r
. Il tempo di cottura
massimo è pari a 95 minuti.
6. Premere il tasto Start/avvio rapido r
per
avviare il procedimento.
Nel display 1 compare costantemente il simbolo
per la modalità Aria bollente
. Il tempo impostato
scorre a ritroso. Se il tempo impostato è scaduto,
alla fine compaiono alternativamente i due messaggi
"End" e "Hot" nel display 1. Un segnale acustico
risuona più volte consecutivamente.
- 14 -
Combinazione-procedimento di
cottura "Aria calda"
Menu automatico
Questa funzione combina la funzione Aria calda
con il normale funzionamento a microonde. In tal
modo, ad esempio, la carne viene succosa, morbida
e nel contempo croccante.
Per gli alimenti preparati in modalità Menu automatico non è necessario impostare la durata del procedimento di cottura e il livello di potenza. È sufficiente
inserire il tipo e il peso dell'alimento che si deve
cuocere/bollire.
Pericolo d'incendio!
Non utilizzare mai la base grill t o altri oggetti
metallici se si usa il microonde in modalità procedimento di cottura combinato. Il metallo riflette la
radiazione a microonde e provoca la formazione
di scintille. Ciò può dare luogo a un incendio e
danneggiare l'apparecchio irreparabilmente!
Pericolo d'incendio!
Per i programmi con funzione grill attivata (A-01,
A-02, A-03, A-04, A-05) non utilizzare assolutamente
dei coperchi o stoviglie non resistenti al calore, poiché
potrebbero sciogliersi o provocare un incendio!
Avvertenza:
1.
Premere il tasto combinazione Microonde Aria bollente 9
. Nel display 1
compare la temperatura preimpostata "200C"
e i simboli
e
.
2. Con l'aiuto del regolatore r
selezionare
la temperatura desiderata: 110°C, 140°C,
170°C o 200°C. Confermare la selezione
premendo il tasto Start/avvio rapido r
.
3. Impostare quindi il tempo di cottura desiderato
con il regolatore r
. Il tempo di cottura
massimo è pari a 95 minuti. Confermare il
tempo di cottura impostato premendo il tasto
Start/avvio rapido r
.
Il procedimento di cottura si avvia. Nel display 1
compare il simbolo per il procedimento di combinazione "Aria bollente"
. Il tempo impostato
scorre a ritroso. Se il tempo impostato è scaduto, alla
fine compaiono alternativamente i due messaggi
"End" e "Hot" nel display 1. Un segnale acustico
risuona più volte consecutivamente.
Il microonde calcola il tempo/il livello di potenza
per gli alimenti freschi. Gli alimenti surgelati non
cuociono con i tempi preindicati dal microonde
(escluso il programma automatico "Pizza").
È necessario scongelare prima gli alimenti surgelati
con il programma di scongelamento (v. capitolo
"Scongelamento").
Avvio del menu automatico
1.
Ruotare lentamente a sinistra il regolatore r
(in modalità Standby) per richiamare la
modalità Menu automatico. Nel display 1
compare un numero (ad es. "A - 02" per il programma automatico 2 (maiale)) e il simbolo
"Maiale". Ruotando il regolatore r
selezionare il menu automatico per il proprio
alimento.
Avvertenza:
Se si è arrivati alla modalità Menu automatico tramite
la rotazione a sinistra del regolatore r
, ruotando a destra è possibile selezionare i menu automatici con la sequenza A01, A02, A03... .
- 15 -
Display
Simbolo
Alimento
Peso
2.
3.
A-01
Manzo
200 - 1400 g
A-02
Maiale
200 - 1400 g
A-03
Pollame
400 - 1400 g
A-04
Pesce
200 - 1200 g
A-05
Pizza
*P1 150-450 g
P2 150-450 g
P3 150-450 g
Confermare la selezione premendo il tasto
Start/avvio rapido r
.
Impostare il peso con l'aiuto del regolatore r
e confermarlo premendo il tasto Start/
avvio rapido r
. Il procedimento di cottura
viene avviato e il tempo raggiunto scorre a
ritroso.
Avvertenza:
Per ottenere una cottura uniforme, è necessario
girare alcuni cibi a 2/3 del tempo di cottura. Il microonde si ferma automaticamente allo scadere del
tempo, risuonano 4 segnali acustici e nel display 1
compare "Turn".
Display
Alimento
girare
dopo...
A-01
Manzo
2/3 del
tempo
Simbolo
A-06
Frutta/
verdura
100 - 1000 g
A-07
Patate
100 - 800 g
A-02
Maiale
2/3 del
tempo
A-08
Riscaldamento
300 - 700 g
A-03
Pollame
2/3 del
tempo
A-09
Bevande
200 - 500 ml
A-04
Pesce
2/3 del
tempo
A-10
Antipasti
300 - 500 g
A-11
A-12
Scongelamento in
base al
peso
Scongelamento in
base al
tempo
-
• Girare gli alimenti. Procedere con cautela con
le vivande che potrebbero essere bollenti.
• Premere il tasto Start/avvio rapido r
per riavviare il procedimento di cottura.
,
Avvertenza:
-
Se non si vogliono girare gli alimenti, attendere la
cessazione dei segnali acustici. L'apparecchio prosegue il procedimento di cottura automaticamente.
Consigliamo di girare comunque i cibi. In tal modo
si ottiene una cottura uniforme.
*Per ulteriori informazioni sui programmi Pizza
leggere il capitolo "Cottura della pizza".
- 16 -
A-07
Patate
Funzionamento
microonde
con 900 W
di potenza
A-08
Riscaldamento
Funzionamento
microonde
con 900 W
di potenza
Bevande
Funzionamento
microonde
con 900 W
di potenza
A-10
Antipasti
Funzionamento
microonde
con 900 W di
potenza
A-11
Scongela- Funzionamento
mento
microonde
in base
con 100 W
al peso
di potenza
A-12
Scongela- Funzionamento
mento
microonde
in base
con 100 W
al tempo
di potenza
Avvertenza:
Se la vivanda non si è cotta correttamente al termine
del Menu automatico, continuare a cuocerla come
segue:
• Utilizzare il procedimento di cottura indicato
nella tabella. Avviarlo per qualche minuto e
controllare il risultato.
• Per la continuazione della cottura di una pizza
con l'ausilio del Menu automatico "P2" interrompere il procedimento di cottura premendo il
tasto Stop/sicurezza bambini
, non
appena la pizza si è cotta a sufficienza.
Display
A-01
A-02
A-03
A-04
A-05
A-06
Simbolo
Alimento
Manzo
A-09
Cottura finale
con...
Combinazione
procedimento di
cottura
"Grill" - C3
Maiale
Combinazione
procedimento di
cottura
"Grill" - C3
Pollame
Combinazione
procedimento di
cottura
"Grill" - C3
Pesce
Combinazione
procedimento di
cottura
"Grill" - C3
Pizza
Menu automatico
"Pizza" - P2
Frutta/
verdura
Funzionamento
microonde
con 900 W
di potenza
Pericolo di lesioni!
Il piatto girevole 3 è bollente dopo il procedimento
di cottura con il grill! Utilizzare pertanto sempre
presine o guanti resistenti al calore per prelevarlo
dal vano di cottura.
Avvertenza:
ricordare che le dimensioni, la forma e i tipi di
alimenti contribuiscono al risultato di cottura.
Esempio di impiego 1:
procedere come segue, se si desidera cuocere
400 g di verdura o frutta:
1. Ruotare il regolatore r
(in modalità
Standby) lentamente a sinistra fino alla comparsa di "A-06" nel display 1 e confermare
la selezione premendo il tasto Start/avvio
rapido r
.
- 17 -
2.
3.
Impostare quindi il peso "400" con il regolatore r
.
Premere il tasto Start/avvio rapido
r,
per avviare il procedimento di cottura.
•
•
Esempio di impiego 2:
procedere come segue, se si desidera riscaldare
300 ml di acqua:
1. Ruotare il regolatore r
(in modalità Standby) lentamente a sinistra fino alla comparsa di
"A-09" nel display 1 e confermare la selezione
premendo il tasto Start/avvio rapido r
.
2. Impostare quindi il peso "300" con il regolatore r
3. Premere il tasto Start/avvio rapido r
,
per avviare il procedimento di cottura.
4.
5.
"P-02" per la pizza refrigerata,
temperatura ca. 5 gradi peso 150 g–450 g
(nel display 1 compare "P-02").
"P-03" per la pizza fresca,
temperatura ca. 20 gradi peso 150 g–450 g
(nel display 1 compare "P-03").
Confermare la selezione premendo il tasto
Start/avvio rapido r
.
Selezionare il peso desiderato con il regolatore r
e confermarlo premendo il tasto
Start/ avvio rapido r
. Il procedimento
di cottura si avvia.
Avvertenza:
Se si prepara la pizza, è possibile collocarla direttamente sul piatto rotante 3. In tal modo sarà particolarmente croccante. Assicurarsi che i bordi della
pizza non tocchino le pareti del vano di cottura
durante il procedimento di cottura.
Esempio di impiego 3:
procedere come segue, se si desidera riscaldare
300 g di antipasto:
1. Ruotare il regolatore r
(in modalità Standby) lentamente a sinistra fino alla comparsa di
"A-10" nel display 1 e confermare la selezione
premendo il tasto Start/avvio rapido r
.
2. Quando compare "300" come prima selezione,
premere il tasto Start/avvio rapido r
,
per avviare il procedimento di cottura.
Cottura della pizza
Con il programma automatico "Pizza" si possono
preparare croccanti pizze nel forno a microonde.
Qui è possibile selezionare fra i programmi per la
cottura della pizza "P-01" (pizza surgelata), "P-02"
(pizza refrigerata) e "P-03" (pizza fresca).
1. Ruotare lentamente a sinistra il regolatore r
(in modalità Standby) fino a ottenere nel
display 1 il messaggio "A-05".
2. Premere il tasto Start/avvio rapido r
.
3. Con l'aiuto del regolatore r
selezionare
il programma adatto per la cottura della pizza:
• "P-01" per la pizza surgelata,
temperatura ca. -18 gradi peso 150 g–450 g
(nel display 1 compare "P-01").
Esempio di impiego:
procedere come segue, se si desidera cuocere una
pizza surgelata da 450 g:
1. Ruotare lentamente a sinistra il regolatore r
(in modalità Standby) fino a ottenere
nel display 1 il messaggio "A-05".
2. Premere il tasto Start/avvio rapido r
.
3. Con l'aiuto del regolatore r
selezionare
il programma "P-01".
4. Premere il tasto Start/avvio rapido
r.
5. Selezionare il peso "450" con il regolatore r
6.
- 18 -
.
Premere il tasto Start/avvio rapido r
,
per avviare il procedimento di cottura. L'apparecchio calcola automaticamente il tempo
necessario.
Scongelamento
Si possono impostare i seguenti pesi:
"d-01"/
/ "Manzo"
100 - 1800 g
"d-02"/
/ "Maiale"
100 - 1800 g
collocare i cibi da scongelare sempre su stoviglie
idonee per il microonde, mai direttamente sul piatto
girevole 3!
"d-03"/
/ "Pollame"
100 - 1800 g
"d-04"/
/ "Pesce"
100 - 1800 g
Con questa funzione si può scongelare senza problemi la carne, il pollame, il pesce, la frutta/verdura
e la pizza. Il tempo di scongelamento e il livello di
potenza vengono calcolati e impostati automaticamente inserendo il peso.
1. In modalità Standby ruotare il regolatore r
in senso antiorario, fino alla comparsa
nel display 1 del messaggio lampeggiante
"A-11"
(vedere il capitolo "Menu automatico").
2. Premere il tasto Start/avvio rapido
r.
3. Ruotando il regolatore r
selezionare
l'alimento da scongelare.
Nel display 1 compare:
"d-05"/
/ "Pizza"
100 - 900 g
"d-06"/
/ "Frutta/verdura"
100 - 900 g
"d-07"/
/ "Patate"
100 - 900 g
Scongelamento in base al peso
Avvertenza:
"d-01" e
per "Manzo"
"d-02" e
per "Maiale"
"d-03" e
per "Pollame"
"d-04" e
per "Pesce"
"d-05" e
per "Pizza"
"d-06" e
per "Frutta/verdura"
"d-07" e
per "Patate"
4.
5.
5.
Quando il peso desiderato compare nel display 1, premere il tasto Start/avvio rapido
r
. L'apparecchio calcola automaticamente il peso di scongelamento necessario.
Avvertenza:
per garantire uno scongelamento ottimale, è necessario girare gli alimenti durante il procedimento di
scongelamento. L'apparecchio emette dei segnali
acustici per ricordare che è necessario girare gli
alimenti e sul display 1 compare la scritta "turn".
Aprire lo sportello dell'apparecchio, girare l'alimento
e richiudere lo sportello dell'apparecchio. Premere
il tasto Start/avvio rapido r
, per proseguire
il procedimento di scongelamento.
Se non si vogliono girare gli alimenti, attendere la
cessazione dei segnali acustici. L'apparecchio prosegue il procedimento di scongelamento automaticamente. Consigliamo di girare comunque i cibi. In
tal modo si ottiene uno scongelamento uniforme.
Quando nel display 1 compare l'alimento desiderato, premere il tasto Start/avvio rapido r
.
Impostare quindi il peso ruotando il regolatore r
.
- 19 -
Scongelamento in base al tempo
Ricette
Avvertenza:
collocare i cibi da scongelare sempre su stoviglie
idonee per il microonde, mai direttamente sul piatto
girevole 3!
Polpette
1.
•
2.
3.
4.
Per lo scongelamento, in modalità Standby
ruotare il regolatore r
in senso antiorario, fino alla comparsa nel display 1 del messaggio "A -12" e
.
Premere il tasto Start/avvio rapido
r.
Impostare quindi il tempo desiderato con il
regolatore r
.
Premere il tasto Start/avvio rapido r
,
per avviare il procedimento di scongelamento.
Il tempo scorre a ritroso.
Avvertenza:
per garantire uno scongelamento ottimale, è necessario girare gli alimenti durante il procedimento di
scongelamento. L'apparecchio emette dei segnali
acustici per ricordare che è necessario girare gli
alimenti e sul display 1 compare la scritta "turn".
Aprire lo sportello dell'apparecchio, girare l'alimento
e richiudere lo sportello dell'apparecchio. Premere
il tasto Start/avvio rapido r
, per proseguire
il procedimento di scongelamento.
Se non si vogliono girare gli alimenti, attendere la
cessazione dei segnali acustici. L'apparecchio prosegue il procedimento di scongelamento automaticamente. Consigliamo di girare comunque i cibi.
In tal modo si ottiene uno scongelamento uniforme.
•
Creare ogni polpetta con circa 125 g di carne
tritata di manzo (diametro circa 75 mm, altezza
ca. 35 mm).
Distribuire le polpette uniformemente sul piatto
girevole 3.
Preparazione
Il migliore risultato si ottiene utilizzando alternativamente la funzione Aria bollente e la funzione Microonde. Attendere che sia terminato ogni volta il procedimento di cottura impostato e quindi avviare il
procedimento successivo.
1.
2.
3.
Aria bollente 200° C, 4:00 min.
Microonde 900 W di potenza, 5:30 min.
Aria bollente 200° C, 2:00
min. (in base ai gusti personali, si può scegliere
anche un tempo massimo di 4:00 min.).
Doratura di panini pronti surgelati
• Per la cottura di panini selezionare la funzione
Aria bollente.
• Collocare 3-4 panini sul piatto girevole 3.
Non è necessario preriscaldare il microonde.
Selezionare la seguente impostazione per il procedimento di cottura:
• Aria bollente 170° C, durata: 12 minuti
Se si desidera continuare con la doratura di altri
panini, ridurre il tempo di circa 1-2 minuti, poiché
l'apparecchio è già preriscaldato.
- 20 -
Patate gratinate
Muffin
Ingredienti
• 750 g di patate pelate a pasta gialla
• 300 g di panna
• 100 g di formaggio grattugiato con contenuto di
grasso compreso fra il 25% e il 30% nella massa
secca.
• Spezie a piacere (ad es. sale/pepe)
Utilizzare un tegame rotondo idoneo all'uso nel
microonde, con coperchio, con un'altezza di 5 6 cm e un diametro di circa 22 cm.
Ingredienti
La ricetta produce circa 10 - 20 muffin.
• Margarina per panificazione (80% di contenuto
di grassi) o burro salato
• 170 g zucchero semolato (granulazione
max. 0,3 mm)
• 3 uova (55 - 60 g con guscio/dimensione M)
• 225 g farina di frumento
• 7 g polvere lievitante
• 0,25 g di sale
Preparazione
• Tagliare le patate in fette spesse circa 3 – 4 mm.
• Collocare circa la metà delle patate nello stampo.
• Ricoprire le patate con circa la metà del formaggio.
• Aggiungere la metà delle spezie e circa 150 g
di panna.
• Collocare il resto delle patate tagliate al di sopra.
• Distribuire il resto del formaggio sulle patate e
versarvi su il resto della panna.
• Cospargere il gratin con il resto delle spezie.
• Coprire il tegame con il coperchio e collocarlo
centralmente sul piatto girevole 3.
Preparazione
Il migliore risultato si ottiene utilizzando alternativamente la funzione Aria bollente e la funzione Microonde. Attendere che sia terminato ogni volta il procedimento di cottura impostato e quindi avviare il
procedimento successivo.
1. Microonde 900 W di potenza, 10:00 min.
2. Aria bollente 200° C, 13:00 min.
3. Microonde 900 W di potenza, 10:00 min.
Preparazione
• Mescolare bene tutti gli ingredienti.
• Versare l'impasto per muffin nelle apposite formine
di carta reperibili in commercio (diametro circa
45 mm, altezza ca. 28 mm)
• Riscaldare il microonde con la funzione Aria
calda a 170° C.
Avviso:
se fossero necessari vari procedimenti di cottura
a causa del numero di muffin, il preriscaldamento è necessario solo la prima volta.
•
Distribuire quindi uniformemente i muffin sul
piatto girevole 3.
•
Selezionare la seguente impostazione per il
procedimento di cottura:
Aria calda 170° C, durata: 12 minuti
Non è necessario preriscaldare il microonde.
- 21 -
Pulizia e cura
•
Pericolo di lesioni!
Prima di pulire il forno a microonde, spegnerlo e
disconnetterlo dalla presa di corrente. In caso
contrario sussiste il rischio di scossa elettrica!
•
•
Non immergere assolutamente l'apparecchio
in acqua o altri liquidi! Potrebbe derivarne
pericolo di morte a causa di scosse elettriche
e l'apparecchio potrebbe subire danni.
•
•
Tenere sempre pulito l'interno del forno a
microonde.
• Rimuovere con un panno inumidito le pareti
imbrattate da spruzzi o da liquidi versati.
• Utilizzare un detergente delicato in caso di
sporco resistente nel forno a microonde.
• Evitare l'utilizzo di spray detergenti e di altri
utensili di pulizia acuminati, che potrebbero
creare macchie, striature o opacizzare la
superficie dello sportello.
Pulire le pareti esterne con un panno umido.
• Per evitare il danneggiamento dei componenti
funzionali all'interno del forno a microonde, impedire la penetrazione di acqua nelle aperture
di aerazione 5.
• Rimuovere regolarmente gli spruzzi o la sporcizia. Ripulire lo sportello, la finestra di ispezione
da entrambi i lati, le guarnizioni e le parti circostanti con un panno inumidito. Non utilizzare
agenti abrasivi.
•
Se sulla superficie all'interno o all'esterno dello
sportello si formasse del vapore, asciugarlo con
un panno morbido. Ciò si verifica se il forno a
microonde viene fatto funzionare in presenza
di forte umidità.
Pulire regolarmente anche il piatto girevole 3.
Lavare il piatto in una soluzione di acqua calda
e sapone.
Pulire la base grill t in acqua saponata calda
e farla asciugare bene.
Eliminare regolarmente gli odori. A tal fine,
posizionare nel forno una ciotola profonda
adatta al forno a microonde, riempita con una
tazza di acqua, il succo e la buccia di un limone.
Riscaldare per 5 minuti. Pulire a fondo e asciugare con un panno morbido.
Se dovesse rendersi necessaria la sostituzione
della lampadina del forno a microonde, farla
sostituire dal rivenditore o dai nostri centri di
assistenza autorizzati.
Guasti e possibili rimedi
Il display 1 non mostra niente.
• La spina di rete non è inserita nella presa.
Controllare la spina.
• La presa di rete è guasta. Provare a utilizzare
un'altra presa di rete.
• Il display 1 è difettoso. Contattare il centro
di assistenza.
L'apparecchio non reagisce alla pressione dei
tasti.
• La protezione bambini è attivata. Disattivare
la protezione bambini (v. capitolo „Uso“).
L'apparecchio non avvia il procedimento di
cottura.
• Lo sportello non è chiuso correttamente.
Chiudere lo sportello correttamente.
- 22 -
Il piatto girevole 3 fa rumore mentre ruota.
• Il piatto girevole 3 non è collocato correttamente sull'asse. Collocare correttamente il
piatto girevole 3 nel vano di cottura.
• Le rotelle 4 e/o il fondo del vano di cottura
sono sporchi. Pulire le rotelle 4 e il fondo del
vano di cottura.
Il display 1 mostra "E01" e risuonano dei
segnali acustici.
• Il microonde è surriscaldato. interrompere immediatamente il programma in corso. Staccare
la spina di rete, aprire lo sportello del microonde
e fare raffreddare l'apparecchio.
Smaltimento
Non smaltire per alcun motivo l'apparecchio insieme ai normali rifiuti domestici. Questo prodotto è soggetto alla
Direttiva Europea 2002/96/EC.
Smaltire l'apparecchio attraverso un'azienda di
smaltimento autorizzata o attraverso l'ente di
smaltimento comunale.
Rispettare le prescrizioni attualmente in vigore.
In caso di dubbi mettersi in contatto con l'ente di
smaltimento competente.
Smaltire tutti i materiali dell'imballaggio in
modo ecocompatibile.
Il display 1 mostra "E02" e risuonano dei
segnali acustici.
• Si è verificato un errore del sensore. Interrompere il programma e fare raffreddare l'apparecchio. Riavviare quindi il microonde. Se
l'errore si verificasse nuovamente, rivolgersi
al servizio clienti.
• Si è verificato un errore nel riscaldamento dell'apparecchio. Interrompere il programma e
fare raffreddare l'apparecchio. Riavviare quindi il
microonde. Se l'errore si verificasse nuovamente,
rivolgersi al servizio clienti.
Il display 1 mostra "E03" e risuonano dei
segnali acustici.
• Il microonde è passato alla funzione di protezione dai guasti a causa di un cortocircuito
o di una caduta di tensione. Interrompere il
programma e staccare la spina dalla presa di
corrente. Se possibile, rimuovere il problema,
ad es. metallo nel vano di cottura, che può
aver provocato l'errore sopra indicato durante
l'uso della funzione microonde. Altrimenti rivolgersi all'assistenza clienti.
- 23 -
Garanzia e assistenza
Importatore
Questo apparecchio è garantito per tre anni a
partire dalla data di acquisto. L'apparecchio
è stato prodotto con cura e debitamente collaudato
prima della consegna.
Conservare lo scontrino come prova d'acquisto. In
caso di interventi in garanzia, contattare telefonicamente il proprio centro di assistenza. Solo in questo
modo è possibile garantire una spedizione gratuita
della merce.
La garanzia vale solo per i difetti di materiale o
fabbricazione, non per i danni da trasporto, parti
soggette a usura o danni a parti fragili come ad es.
interruttori o accumulatori. Il prodotto è destinato
esclusivamente all'uso domestico e non a quello
commerciale.
La garanzia decade in caso di impiego improprio o
manomissione, uso della forza e interventi non eseguiti dalla nostra filiale di assistenza autorizzata.
Questa garanzia non costituisce alcun limite ai
diritti legali del consumatore. Il periodo di garanzia
non viene prolungato in caso di un intervento in garanzia.
Ciò vale anche per le componenti sostituite e riparate. I danni e difetti presenti già all'acquisto devono
essere comunicati immediatamente dopo il disimballaggio, e non oltre due giorni dalla data di acquisto. Le riparazioni effettuate dopo la scadenza del
periodo di garanzia sono a pagamento.
KOMPERNASS GMBH
BURGSTRASSE 21
44867 BOCHUM, GERMANY
www.kompernass.com
Assistenza Italia
Tel.: 02 36003201
E-Mail: [email protected]
IAN 73194
Assistenza Malta
Tel.: 80062230
E-Mail: [email protected]
IAN 73194
- 24 -
ÍNDICE
PÁGINA
Introdução
Utilização correta
Volume de fornecimento
Descrição do aparelho
Dados técnicos
Indicações de segurança importantes
Antes de começar
27
27
27
27
27
28
31
Princípios básicos ao cozinhar no microondas ..........................................................................31
Utilizar louça adequada ...............................................................................................................31
Primeira colocação em funcionamento
32
Instalar o aparelho ........................................................................................................................32
Preparar o aparelho......................................................................................................................33
Colocar prato rotativo...................................................................................................................33
Utilização
33
Acertar a hora................................................................................................................................33
Modo standby................................................................................................................................34
Regular temporizador de cozinha ...............................................................................................34
Proteção de crianças.....................................................................................................................34
Funções de consulta ......................................................................................................................35
Interromper/desativar processos de descongelação ................................................................35
Cozinhar
35
Funcionamento de micro-ondas....................................................................................................35
Função grill .....................................................................................................................................36
Processo de cozedura combinado "Grill"...................................................................................37
Funcionamento com ar quente .....................................................................................................38
Funcionamento de ar quente com pré-aquecimento..................................................................38
Combinação processo de cozedura "Ar quente“......................................................................39
Menu automático
39
Início do menu automático ...........................................................................................................39
Cozinhar pizza ..............................................................................................................................42
- 25 -
Descongelar
43
Descongelar por peso...................................................................................................................43
Descongelar por tempo ................................................................................................................44
Receitas
44
Hambúrgueres................................................................................................................................44
Tostar pães congelados pré-cozinhados ....................................................................................44
Gratinado de batata .....................................................................................................................45
Muffins ............................................................................................................................................45
Limpeza e tratamento
Resolução de problemas
Eliminação
Garantia e assistência técnica
Importador
46
46
47
48
48
- 26 -
Micro-ondas em
aço inoxidável
Descrição do aparelho
Figura A:
1 Display
2 Botão de abertura de porta
3 Prato rotativo
4 Rodas
5 Ranhuras de ventilação
Introdução
Parabéns pela compra do seu novo aparelho.
Optou por um produto de elevada qualidade.
O manual de instruções é parte integrante deste
produto. Este contém indicações importantes para
a segurança, utilização e eliminação. Antes de utilizar o produto, familiarize-se com todas as indicações de operação e segurança. Utilize o produto
apenas como descrito e nas áreas de aplicação
indicadas. Ao entregar o produto a terceiros, entregue
também todos os documentos.
Utilização correta
Este aparelho destina-se a aquecer e a preparar alimentos, de acordo com os procedimentos descritos.
Qualquer alteração no aparelho é considerada incorreta e inclui riscos consideráveis de acidentes.
O fabricante não se responsabiliza por quaisquer
danos causados por uma utilização incorreta.
Este aparelho destina-se exclusivamente à utilização no âmbito privado.
Não utilize para fins comerciais em áreas industriais
ou laboratoriais!
Figura B:
6 Botão micro-ondas
7 Botão grill
8 Botão combinação micro-ondas grill
9 Botão combinação micro-ondas ar quente
0 Botão ar quente
q Botão relógio
w Botão TEMPORIZADOR
(temporizador de cozinha)
e Botão stop/proteção de criança
r Botão rotativo / botão início/início rápido
Figura C:
t Suporte do grelhador
Dados técnicos
Tensão nominal:
Volume de fornecimento
Micro-ondas
Prato rotativo
Suporte do grelhador
Manual de instruções
Informação breve (2 unidades)
230 - 240 V ~,
50 Hz
Consumo de energia máximo
Micro-ondas:
Grill:
Ar quente:
1400 W
1500 W
1950 W
Débito máximo de potência
Micro-ondas:
Frequência do micro-ondas:
900 W +/- 10%
2450 MHz
- 27 -
Indicações de segurança
importantes
Leia atentamente as indicações de segurança e o
manual de instruções antes da primeira utilização
e guarde-o para consulta posterior.
Atenção!
Risco de danos no aparelho.
Perigo! /
Perigo de ferimentos!
Risco de ferimentos e choque eléctrico!
Perigo de incêndio!
Risco de incêndio.
Nota:
Indicações e dicas acerca do manuseamento do
microondas.
Medidas de segurança para impedir um possível
contacto excessivo com a energia das microondas
• Não tente colocar o aparelho em funcionamento com a porta aberta pois tal pode provocar
o contacto com uma dose nociva de radiação
de microondas. Também é importante não partir
ou manipular os bloqueios de segurança.
• Não coloque nada entre a frente do aparelho
e a porta e tenha cuidado para não deixar
acumular sujidade ou vestígios de detergentes
de limpeza nas superfícies vedantes.
Perigo de ferimentos!
• Caso a porta ou as vedações da mesma se
encontrem danificadas não continue a utilizar o
microondas. Solicite a um técnico especializado
que as repare de imediato.
• Nunca tente reparar o aparelho por si mesmo.
Retirando a caixa, as radiações de microondas
são libertadas. As reparações devem ser executadas exclusivamente por técnicos qualificados.
• Este aparelho não é adequado para a utilização por pessoas (incluindo crianças) com capacidades físicas, sensoriais ou mentais limitadas
ou falta de experiência e/ou de conhecimento,
a não ser que estas sejam supervisionadas por
uma pessoa responsável pela sua segurança
ou que desta recebam instruções acerca do
funcionamento do aparelho As crianças devem
ser supervisionadas, de modo a garantir que
não brincam com o aparelho.
• Só deve ser permitida a utilização do aparelho
a crianças sem supervisão, caso estas tenham
sido instruídas, de modo a que sejam capazes
de utilizar o aparelho de modo seguro e de
compreender os perigos de uma utilização incorrecta.
• Utilize este aparelho apenas para a utilização
prescrita e de acordo com este manual. Não
utilize neste aparelho quaisquer químicos ou
vapores corrosivos. O microondas foi construído
especialmente para aquecer, cozinhar, grelhar
ou secar alimentos.
Ele não foi concebido para o uso em áreas
industriais ou laboratoriais.
• Não utilize o microondas caso o cabo de alimentação/ficha de rede esteja danificado(a).
O cabo de alimentação/ficha de rede deve ser
substituído(a) por técnicos qualificados para
evitar riscos .
• Mantenha as crianças afastadas da porta do
microondas durante o funcionamento do mesmo.
Perigo de queimaduras!
• Não retire a caixa do microondas sob quaisquer
circunstâncias.
• A lâmpada no interior do microondas só deve
ser substituída por técnicos especializados.
• Nunca toque directamente na porta do microondas, na caixa do microondas, nas ranhuras
de ventilação, nos acessórios ou na louça após
um processo de grelhar, combinado ou menu
automático. As peças ficam muito quentes.
Deixe-as arrefecer antes de as limpar.
- 28 -
Perigo de incêndio
• Certifique-se de que a ficha de rede esteja sempre
bem acessível, para que, em caso de emergência,
esta possa ser rapidamente desligada da corrente.
• Nunca deixe o microondas sem vigilância quando
estiver a aquecer alimentos em embalagens
plásticas ou de papel.
• Pessoas portadoras de pacemakers deveriam
consultar o seu médico de família acerca de
possíveis riscos antes de colocar o microondas
em funcionamento.
• Não coloque materiais inflamáveis próximos
do microondas ou das ranhuras de ventilação.
• Retire todos os fechos metálicos que existam
nas embalagens dos alimentos que pretende
aquecer. Perigo de incêndio!
• Nunca deixe o cabo de alimentação pendurado
sobre a mesa ou o balcão de cozinha. As
crianças poderiam puxá-lo.
• Para fazer pipocas, utilize apenas pacotes de
pipocas que se adequem ao uso no microondas.
• Abra sempre as latas, pacotes de pipocas, etc.
depois de aquecidos, de modo que a abertura
não fique voltada para si. A libertação de vapor
pode provocar queimaduras.
• Não utilize o microondas para aquecer bolsas
com cereais, caroços de cereja ou gel. Perigo
de incêndio!
• Não utilize o microondas para o armazenamento de alimentos ou outros objectos.
• Nunca se coloque directamente em frente ao
microondas, quando abrir a porta. A libertação de vapor pode provocar queimaduras.
• Nunca ultrapasse os tempos de cozedura
predefinidos pelo fabricante.
• Não frite no microondas. O óleo quente pode
danificar as peças do aparelho e os utensílios
e provocar até queimaduras da pele.
• Não coloque objectos sobre o microondas,
enquanto este se encontra em funcionamento.
As ranhuras de ventilação ficam cobertas!
• Agite ou misture sempre biberões ou boiões
aquecidos! O conteúdo pode ter aquecido de
forma irregular e o bebé pode queimar-se com
o conteúdo. Verifique sempre a temperatura
antes de alimentar o seu bebé!
• Não coloque o microondas próximo de outros
aparelhos que emitam calor, como por exemplo
um forno.
• Não modifique o microondas.
• As radiações de microondas são perigosas!
Os trabalhos de manutenção ou reparação,
nos quais seja necessário remover coberturas,
que protegem contra um contacto com as radiações de microondas, devem ser efectuadas apenas
por técnicos especializados.
• Antes do consumo, verifique sempre a temperatura dos alimentos, de forma a evitar queimaduras
que, nos bebés, podem ser fatais.
Os utensílios de cozinha podem ficar quentes
devido ao calor transmitido pelos alimentos
aquecidos, de forma que deve tocar-lhes apenas
com pegas de cozinha. Deve verificar se os
utensílios de cozinha se adequam à utilização
no microondas.
• Limpe bem o microondas depois de aquecer
alimentos gordurosos, principalmente se estes
não estivessem tapados. Deixe o aparelho arrefecer totalmente antes de o limpar. Os elementos de aquecimento do grelhador não
podem conter resíduos, como por exemplo
gordura. Esta poderia sobreaquecer e inflamar.
• Não descongele gordura congelada ou óleo
no microondas. A gordura ou óleo podem inflamar-se.
• Não utilize temporizadores externos ou telecomandos independentes para comandar o
aparelho.
Atenção! Danos no aparelho!
• Não utilize o microondas vazio. A excepção
é a primeira colocação em funcionamento (ver
capítulo "Primeira colocação em funcionamento").
Atenção! Superfície quente!
- 29 -
• Não introduza quaisquer objectos nas ranhuras
de ventilação ou nos bloqueios de segurança
da porta.
• Não utilize utensílios metálicos que reflictam
microondas e conduzam à formação de faíscas.
Não coloque latas no microondas.
• Não coloque recipientes de plástico no microondas imediatamente após o processo de grelhar,
combinado ou menu automático. O plástico
pode derreter.
• O microondas não deve ser colocado em locais
com humidade do ar elevada ou locais onde se
acumule humidade.
• Os líquidos e outros alimentos não podem ser
aquecidos em recipientes hermeticamente fechados, visto que estes podem explodir e danificar
o aparelho.
• Não se apoie na porta do microondas.
• A limpeza insuficiente do aparelho pode provocar
danos na superfície, que por sua vez influenciam o
tempo de utilização e podem originar situações
perigosas.
Perigo
• Nunca mergulhe o cabo de alimentação ou a
ficha em água ou outros líquidos.
• Mantenha o cabo de alimentação afastado
de fontes de calor. Não o passe pela frente da
porta do microondas. O calor pode danificar o
cabo.
• Nunca verta líquidos nas ranhuras de ventilação
ou nos bloqueios de segurança da porta. Caso,
ainda assim, se infiltre líquido, desligue imediatamente o microondas e retire a ficha de rede
da tomada. O microondas deve ser verificado
por técnicos especializados.
Dicas de segurança
• De modo a diminuir o risco de incêndio no
microondas: Mantenha-se atento ao microondas,
caso aqueça alimentos em recipientes de plástico
ou papel, pois os materiais podem inflamar-se.
• Ao aquecer bebidas no microondas, pode
gerar-se uma efervescência retardada, caso
a bebida ferva. Seja, por isso, prudente ao
manusear o recipiente. Para evitar uma ebulição
repentina:
- Coloque, se possível, um tubo de vidro dentro
do líquido, enquanto é aquecido.
- Depois de aquecido, deixe o líquido durante
20 segundos no microondas para evitar um
transbordo inesperado.
• Pique a pele de batatas, salsichas ou alimentos
semelhantes. Caso contrário, eles podem explodir.
• Proceda com precaução ao aquecer líquidos.
Utilize apenas recipientes abertos para que as
bolhas de ar resultantes desse processo possam
libertar-se.
• Caso se aperceba da formação de fumo, desligue
o aparelho ou retire a ficha e mantenha a porta
fechada, de modo a travar eventuais chamas.
• Ovos crus e ovos cozidos não podem ser aquecidos no microondas, uma vez que estes podem
explodir, mesmo depois de terminar o aquecimento.
Furar os alimentos com casca grossa, como
batatas, abóboras, maças e castanhas antes
de os cozinhar.
• Não mova o aparelho enquanto este se encontra
em funcionamento.
- 30 -
Indicações para a ligação à terra/instalação
correcta
O aparelho tem de ser ligado à terra. Este aparelho
só deve ser ligado a tomadas devidamente ligadas
à terra. Recomenda-se a utilização de um circuito
eléctrico que alimente apenas o microondas.
Perigo: O manuseamento indevido da ficha
de terra pode provocar o risco de um choque
eléctrico.
Nota: Se tiver dúvidas acerca da ligação à
terra ou das instruções relativas ao sistema
eléctrico, consulte um electricista ou técnico
de manutenção.
Nem o fabricante nem o comerciante assumem
responsabilidade por danos no microondas ou danos
pessoais provocados pela inobservância das indicações de procedimento relativas à ligação eléctrica.
Interferência em outros aparelhos
O funcionamento do microondas pode causar interferências no seu rádio, televisor ou aparelhos
semelhantes.
Se ocorrerem tais interferências, reduza-as ou
exclua-as totalmente com a ajuda das seguintes
medidas:
• Limpar a porta e vedação do microondas.
• Orientar novamente a antena de recepção
do rádio ou do televisor.
• Colocar o microondas noutro local que não
o do receptor.
• Afastar o microondas do receptor.
• Ligar o microondas noutra tomada. O microondas e o receptor devem recorrer a diferentes
derivações do circuito eléctrico.
Antes de começar
Princípios básicos ao cozinhar no
microondas
•
•
•
•
•
•
•
Distribua os alimentos de forma ordenada.
Os pontos mais espessos devem estar nos
bordos.
Tenha em consideração o tempo de cozedura.
Seleccione o menor tempo de cozedura e prolongue-o se necessário. Alimentos demasiado
cozinhados podem começar a fumegar ou incendiar-se.
Durante a cozedura, tape os alimentos com
uma tampa própria para microondas. A tampa
evita salpicos e contribui para que os alimentos sejam cozinhados de forma uniforme.
Vire os alimentos durante a preparação no
microondas, para que os pratos como frango
ou hambúrgueres cozam mais depressa e na
totalidade.
As grandes porções de alimentos, como alguns assados, têm de ser viradas pelo menos
uma vez.
Vire completamente os alimentos, como por
exemplo almôndegas, depois de passado
metade do tempo de cozedura. Vire e desloque
as almôndegas do centro do prato para a beira.
Utilizar louça adequada
•
- 31 -
O material ideal para um microondas deve ser
permeável às microondas, ou seja, deixar
entrar a energia através do recipiente, para
aquecer os alimentos.
As microondas não conseguem penetrar o
metal. Por esse motivo não devem ser utilizados
recipientes nem louça em metal.
•
•
Ao aquecer alimentos no microondas, não
utilize produtos de papel reciclado. Estes
podem conter fragmentos metálicos minúsculos, que podem provocar faíscas e/ou fogos.
Recomenda-se louça redonda/oval em vez de
quadrada/longa, pois os alimentos cozinham
demasiado nos cantos.
A lista seguinte é uma ajuda geral para a
selecção da louça mais adequada.
Louça de
cozinha
GreMicrolhaondas
dor
Ar
Combiquennação
te
Perigo de incêndio!
Nunca utilize o suporte de grelhador ou outros
objectos metálicos durante o funcionamento do microondas em modo de microondas ou no processo de
cozedura combinado. O metal reflecte a radiação
das microondas, provocando a formação de faíscas.
Tal pode provocar um incêndio e danificar o aparelho irreparavelmente!
Primeira colocação em
funcionamento
Vidro resistente
ao calor
Sim
Sim
Sim
Sim
Instalar o aparelho
Vidro não resistente ao calor
Não
Não
Não
Não
Cerâmica resistente ao
calor
Sim
Sim
Sim
Sim
Este microondas não é adequado para embutir
num armário de cozinha. Em armários fechados
não é possível garantir uma ventilação suficiente
do aparelho. O aparelho pode ficar danificado
e existe o perigo de um incêndio!
Perigo de incêndio!
•
Louça de
plástico adequada para
microondas
Sim
Não
Não
Não
Papel de
cozinha
Sim
Não
Não
Não
Tabuleiro/placa metálico(a)
Não
Sim
Sim
Não
Suporte do
grelhador
Não
Sim
Sim
Não
Película de
alumínio e
depósito da
película
Não
Sim
Sim
Não
•
•
•
- 32 -
Escolha uma superfície plana, com espaço
suficiente para a ventilação do aparelho:
Respeite a distância mínima de 10 cm entre
o aparelho e as paredes à volta deste.
Certifique-se de que é possível abrir a porta
do microondas sem obstruções.
Mantenha uma distância mínima de 20 cm
acima do microondas.
A ficha de rede deve encontrar-se num local
de fácil acesso, para que em caso de perigo
possa ser alcançada e puxada sem qualquer
problema.
Não remova as bases do microondas.
Não bloqueie os ranhuras de ventilação 5.
Caso contrário, pode provocar danos no aparelho.
•
Coloque o aparelho o mais afastado possível
de rádios e televisores. O funcionamento do
microondas pode provocar interferências na
recepção de rádio ou da televisão.
•
•
Atenção:
•
Não coloque o microondas sobre um fogão ou
outro aparelho produtor de calor. Isso poderia provocar danos no aparelho e a perda de validade
da garantia.
•
Nota:
Preparar o aparelho
•
Retire o material da embalagem e a película
de proteção colocada no painel e no botão
de abertura da porta 2.
Durante a primeira colocação em funcionamento
pode ocorrer uma ligeira formação de fumo e odores
devido a resíduos resultantes da produção. Tal é
inofensivo. Certifique-se de que existe uma ventilação suficiente. Abra, por exemplo, uma janela.
Não retire a placa de cobertura
em mica cinzenta clara, que está
colocada para proteger os cabos
do campo magnético.
•
• Insira a ficha de rede numa tomada de rede.
Utilize uma tomada de rede de 230 -240 V,
50 Hz, com um fusível de 16 A . Recomenda-se
um circuito de corrente própria para a alimentação do micro-ondas. Se não tiver a certeza de
como ligar o micro-ondas, aconselhe-se com um
técnico.
Antes de utilizar o micro-ondas este deve ser primeiro
aquecido vazio, de forma a eliminar quaisquer resíduos resultantes da produção.
Depois de inserir a ficha na tomada, abra uma
vez a porta do micro-ondas premindo o botão de
abertura da porta 2.
Comute o aparelho, sem alimentos e sem acessórios,
(prato rotativo 3 e suporte do grelhador t) para
o modo de funcionamento grill:
Prima o botão grill 7
. No visor surge
"Gr 1".
Rode o botão rotativo r
até que surjam
"Gr 3" e os símbolos
e
no visor e
confirme a seleção premindo o botão
início/início rápido r
.
Regule com o botão rotativo r
um
período de cozedura de 10 minutos.
Prima o botão início/início rápido r
para iniciar o processo grill.
•
Após 10 minutos, o aparelho desliga-se automaticamente. Aguarde até este arrefecer na
totalidade.
Desligue a ficha de rede da tomada e limpe
o aparelho de seguida no interior com um
pano húmido, secando-o bem de seguida.
Colocar prato rotativo 3
•
Coloque o prato rotativo 3 no centro do eixo
dentro do espaço de cozedura. Certifique-se
de que este desliza e assenta totalmente no
eixo.
Utilização
Acertar a hora
Depois de ligar a ficha na tomada, abra uma vez
a porta do micro-ondas. O visor 1 mostra "1:00".
1. Prima o botão relógio q
surge "Hr 12".
- 33 -
. No visor 1
2. Selecione, rodando o botão rotativo r
,o
modo pretendido (Hr 24 ou Hr 12) e confirme
a sua seleção premindo o botão início/início
rápido r
.
Prima o botão início/início rápido r
.
Soa um sinal de aviso. Começa a contagem
decrescente. Após cerca de 3 segundos é
novamente indicada a hora normal.
O temporizador de cozinha continua a funcionar
em segundo plano. Se pretende controlar de
vez em quando o temporizador de cozinha,
prima o botão TEMPORIZADOR w. Surge
durante alguns momentos o temporizador de
cozinha.
Logo que o tempo ajustado terminar, soam sinais de
aviso.
3.
Nota:
Só depois de rodar o botão rotativo
r surge
a indicação da hora e é possível regular a hora.
3. Regule, rodando o botão rotativo r
,a
hora pretendida e confirme a sua seleção premindo o botão início/início rápido r
.
4. Regule, rodando o botão rotativo r
, os
minutos pretendidos e confirme a sua seleção
premindo o botão início/início rápido r
.
A hora está agora totalmente ajustada.
Proteção de crianças
Para fazer a leitura da hora atual, enquanto o microondas se encontra em funcionamento, prima o
botão relógio q
; a hora é assim visualizada
por breves segundos no visor 1.
Modo standby
O micro-ondas comuta automaticamente para o
modo standby e a hora é visualizada, se, durante
algum tempo, não seja premido qualquer botão.
Poucos segundos após a comutação para o modo
standby, a iluminação do visor escurece.
Regular temporizador de cozinha
O micro-ondas possui um temporizador de cozinha,
que pode regular independentemente do funcionamento do micro-ondas.
1. Prima o botão TEMPORIZADOR w, quando
o aparelho estiver no modo standby.
No visor 1 surge "0:00" e o símbolo
.
2. Regule agora com o botão rotativo r
o tempo pretendido.
Pode regular o tempo de 10 segundos a
95 minutos.
Ative esta definição para impedir uma colocação
em funcionamento sem vigilância do micro-ondas
por parte de crianças e outras pessoas não familiarizadas com o seu funcionamento.
O símbolo para a proteção de crianças
surge
no visor 1 e o aparelho não pode ser utilizado
enquanto esta função estiver ativa.
• Prima o botão stop/proteção de crianças e
e mantenha-o premido até que surja
um sinal acústico e o símbolo da proteção de
crianças
no visor 1. Os botões e o dispositivo de regulação do micro-ondas deixam de
funcionar.
• Para desativar a proteção de crianças, prima o
botão stop/proteção de crianças e
e
mantenha o botão premido até que soa um sinal
acústico e o símbolo da proteção de crianças
apague.
- 34 -
Perigo de incêndio!
Funções de consulta
Consultar a hora durante o funcionamento
Prima durante o processo de cozedura o botão
relógio q
. No visor 1 surge por alguns
segundos a hora.
Consultar o nível de potência durante o funcionamento
Prima durante o processo de cozedura o botão
micro-ondas 6
. No visor 1 surge por alguns
segundos o nível de potência ativo.
Interromper/desativar processos de
descongelação
•
•
Prima uma vez o botão stop e
para
interromper um processo de cozedura ou descongelação. O aparelho interrompe o processo
e para o tempo restante. Prima o botão início/
início rápido r
para reiniciar o processo.
Prima duas vezes o botão stop e
, para
interromper um processo de cozedura.
O aparelho retrocede para o modo standby.
Cozinhar
Nota:
Este micro-ondas está equipado com uma função
de refrigeração. Ou seja, após cada processo
de cozedura ou de grelhar, que dure no mínimo
2 minutos, o ventilador do aparelho funciona ainda
aprox. 3 minutos. Isto não é nenhuma anomalia
do aparelho! A refrigeração mais rápida ajuda a
prolongar a vida útil do aparelho.
Funcionamento de micro-ondas
Nota:
Na porta do micro-ondas ou no interior podem-se
formar, durante o processo de cozedura, gotas de
água. Isso é normal, não se trata de uma anomalia
do micro-ondas. Seque a humidade com um pano
seco após o aparelho arrefecer.
Nunca utilize o suporte de grelhar t ou outros
objetos metálicos durante o funcionamento do microondas no modo de micro-ondas. O metal reflete a
radiação das micro-ondas, provocando a formação
de faíscas. Tal pode provocar um incêndio e danificar
o aparelho irreparavelmente!
Selecionar a potência
1. Prima o botão micro-ondas 6
. No
visor 1 surge "900" (900 watt potência).
2. Regule com ajuda do botão rotativo r
a potência pretendida.
3. Prima o botão início/início rápido r
para confirmar a potência regulada.
Ajustar o tempo de cozedura
Após selecionar a potência, ajuste o tempo de
cozedura pretendido:
• Rode o botão rotativo r
até que o período
de cozedura pretendido esteja regulado.
Os níveis do tempo de regulação do botão
rotativo r
são os seguintes:
• de 0 seg. a 5 min: em intervalos de 10 seg.
• de 5 a 10 min: em intervalos de 30 seg.
• de 10 a 30 min: em intervalos de 1 min.
• de 30 a 95 min: em intervalos de 5 min.
Cancelar/concluir processo de introdução
Prima uma vez o botão stop e
para interromper ou finalizar um processo de introdução.
O aparelho retrocede para o modo Standby.
Iniciar processo de cozedura
Quando tiver regulado a potência e o tempo de
cozedura, pode iniciar o processo de cozedura:
Prima, para iniciar o processo de cozedura, o
botão início/início rápido r
.
No visor 1 surge o símbolo para o funcionamento
do micro-ondas
. O tempo regulado conta em
sentido decrescente. Após o decorrer do período
regulado, surge alternadamente "End" e "Hot" no
visor 1. Ouve-se um sinal sonoro repetidamente.
- 35 -
Estão disponíveis 3 funções grill:
• Função grill "Aquecimento superior" (Gr 1):
Nesta função o calor sai apenas da parte superior. Apenas o grill superior está ativo. Por isso,
esta função grill é apropriada para sanduiches
e gratinados com cobertura.
• Função grill "Aquecimento inferior" (Gr 2):
Nesta função o calor sai apenas da parte inferior.
Apenas o grill inferior está ativo. Por isso, esta
função grill é apropriada para receitas ou alimentos, que têm de ser cozidos/grelhados por
baixo.
• Função grill "Aquecimento superior e inferior"
(Gr 3):
Nesta função o calor sai por cima e por baixo.
O grill superior e inferior estão ativos. Por isso,
esta função grill é apropriada para fatias de
carne finas, steaks, almôndegas, salsichas ou
pedaços de frango.
Início rápido 1
Rode no modo standby o botão rotativo r
para a direita e regule a duração de cozedura
pretendida. Inicie o processo de cozedura com
900 W de potência premindo o botão início/
início rápido r
.
Início rápido 2
Com esta função pode iniciar, imediatamente por
30 segundos (ou mais, até 95 minutos) a 900 W
de potência, a cozedura.
• Prima uma vez o botão início/início rápido r
.
No visor 1 surge o símbolo para o funcionamento do micro-ondas
, bem como,
"00:30". O micro-ondas inicia o processo de cozedura em 30 segundos. Começa a contagem
decrescente.
Se pretende cozinhar por mais de 30 segundos,
prima as vezes necessárias no botão início/início
rápido r
até que o tempo pretendido seja
alcançado.
Os níveis de tempo dividem-se da seguinte forma:
• de 30 seg. a 5 min: em intervalos de 30 seg.
• de 5 min. a 95 min: em intervalos de 1 min.
1.
2.
Função grill
Nota:
Para grelhar utilize sempre o suporte de grelhar t.
Desta modo, conseguirá grelhados óptimos.
Coloque o suporte de grelhar t sempre em cima
do prato rotativo 3.
Perigo de incêndio!
Na utilização das funções grill nunca deve utilizar
coberturas ou loiças que não sejam resistente ao
calor, visto que podem derreter ou provocar um
incêndio!
3.
4.
Prima o botão grill
7 uma vez para ativar
a função grill.
No visor 1 surge o símbolo para a função
grill "Aquecimento superior"
e "Gr 1".
Regule com o botão rotativo r
a função
grill pretendida:
"Gr 1" para aquecimento superior,
"Gr 2" para aquecimento inferior,
"Gr 3" para aquecimento superior e inferior.
Confirme a sua seleção premindo o botão início/início rápido r
.
Regule com o botão rotativo r
o tempo
de cozedura pretendido. O tempo de cozedura
máximo é de 95 minutos.
Para iniciar a função grill prima o botão início/
início rápido r
.
No visor 1 surge o símbolo para a função grill
selecionada
/
/
. O tempo regulado
conta em sentido decrescente. Após o decorrer do
período regulado, surge alternadamente "End" e
"Hot" no visor 1. Ouve-se um sinal sonoro repetidamente.
- 36 -
Processo de cozedura
combinado "Grill"
• Combinação 4 (C 4):
Na combinação 4 a potência do micro-ondas é
de 55 % e a potência grill é de 45 % do tempo
de cozedura. Esta é adequada por exemplo
para pratos com frango. É utilizada a função
de micro-ondas e grill "Aquecimento superior
e inferior“.
Esta função combina a função grill com o modo
normal do micro-ondas. Durante o processo combinado é executado automaticamente e num único
processo um determinado tempo para cozinhar e
o tempo restante para grelhar. Pode aperceber-se
do momento de comutação do aparelho através
de um leve clique.
Prima o botão combinação micro-ondas- grill 8
uma vez para ativar a combinação
1 (C 1). No visor 1 surgem
,
bem
como, "C 1“.
2. Regule com o botão rotativo r
a
combinação pretendida:
"C 1" para combinação 1,
"C 2" para combinação 2,
"C 3" para combinação 3,
"C 4" para combinação 4.
Confirme a sua seleção premindo o botão início/
início rápido r
.
3. Regule com o botão rotativo r
o tempo
de cozedura pretendido. O tempo de cozedura
máximo é de 95 minutos.
4. Prima, para iniciar o botão início/início
rápido r
.
No visor 1 surge o símbolo para o processo combinado “grill”
. Começa a contagem decrescente do tempo ajustado. Após o decorrer do
período regulado, surge alternadamente "End“ e
"Hot“ no visor 1. Ouve-se um sinal sonoro repetidamente.
1.
Perigo de incêndio!
Nunca utilize o suporte de grelhar t ou outros
objetos metálicos durante o funcionamento do
micro-ondas no processo de cozedura combinado.
O metal reflete a radiação das micro-ondas, provocando a formação de faíscas. Tal pode provocar um
incêndio e danificar o aparelho irreparavelmente!
Na utilização dos processos de cozedura "grill"
nunca deve utilizar coberturas ou loiças que não
sejam resistente ao calor, visto que podem derreter
ou provocar um incêndio!
Estão disponíveis 4 combinações:
• Combinação 1 (C 1):
Na combinação 1 a potência do micro-ondas
é de 30 % e a potência do grill é de 70 % do
tempo de cozedura. Isto é, por exemplo, apropriado para peixe ou gratinados. É utilizada a
função de micro-ondas e o "Aquecimento superior".
• Combinação 2 (C 2):
Na combinação 2 a potência do micro-ondas
é de 55 % e a potência do grill é de 45 % do
tempo de cozedura. Isto é, por exemplo, apropriado para omletes, pudins ou lasanha. É utilizada a função de micro-ondas e o "Aquecimento
superior".
• Combinação 3 (C 3):
Na combinação 3 a potência do micro-ondas
é de 30 % e a potência do grill é de 70 % do
tempo de cozedura. Esta é adequada, por
exemplo, para batatas. É utilizada a função
de micro-ondas e grill "Aquecimento superior
e inferior".
- 37 -
Funcionamento com ar quente
Funcionamento de ar quente com
pré-aquecimento
Durante a cozedura com ar quente circula ar quente
dentro do micro-ondas. O ar quente é especialmente
adequado para a preparação de empadões ou
alimentos crocantes. Pode regular uma temperatura
de 110°C - 200°C e uma duração de no máx.
95 minutos.
1.
2.
3.
4.
Prima o botão ar quente 0
. No visor
surge “200C” (= 200°C) e o símbolo para
funcionamento ar quente
.
Regule com o botão rotativo r
a temperatura pretendida e confirme a seleção premindo
o botão início/início rápido r
.
Regule com o botão rotativo r
o tempo
de cozedura pretendido.
Prima, para iniciar o processo de cozedura,
o botão início/início rápido r
. No visor 1
surge o símbolo para o funcionamento ar
quente
. Começa a contagem decrescente
do tempo ajustado. Após o decorrer do período
regulado, surge alternadamente "End“ e "Hot“
no visor 1. Ouve-se um sinal sonoro repetidamente.
Também pode pré-aquecer o micro-ondas, antes
de iniciar um processo de cozedura:
1. Selecione a temperatura pretendida premindo
uma vez o botão ar quente 0
e regulando
com o botão rotativo r
a temperatura.
NÃO confirme esta configuração premindo
o botão início/início rápido r
.
2. Prima, para iniciar o pré-aquecimento, o botão
ar quente 0
. No visor 1 surge "30:00"
e o símbolo para o funcionamento ar quente
está intermitente. O tempo decorre em
contagem decrescente. A partir do momento
em que a temperatura regulada seja alcançada, soam sinais de aviso e o tempo para.
3. Abra a porta e coloque o alimento a ser cozinhado.
4. Regule a temperatura rodando o botão rotativo r
e confirme a temperatura premindo
o botão início/início rápido r
.
5. Regule com o botão rotativo r
o tempo
de cozedura pretendido. O tempo de cozedura
máximo é de 95 minutos.
6. Prima, para iniciar o botão início/início rápido
r
.
No visor 1 surge o símbolo para o funcionamento ar
quente
permanentemente. Começa a contagem
decrescente do tempo ajustado. Após o decorrer
do período regulado, surge alternadamente "End"
e "Hot" no visor 1. Ouve-se um sinal sonoro repetidamente.
- 38 -
Combinação processo de cozedura
"Ar quente“
Menu automático
Esta função combina a função grill com o modo
normal do micro-ondas. Com esta função fica por
exemplo a carne suculenta, tenra e mesmo assim
crocante.
Para refeições, que devem ser preparadas no modo
do menu automático, não é necessário inserir a
duração do processo de cozedura e o nível de
potência. Basta introduzir o tipo de alimento a ser
cozinhado, assim como o peso deste alimento.
Perigo de incêndio!
Perigo de incêndio!
Nunca utilize o suporte de grelhar t ou outros
objetos metálicos durante o funcionamento do microondas no processo de cozedura combinado.
O metal reflete a radiação das micro-ondas, provocando a formação de faíscas. Tal pode provocar
um incêndio e danificar o aparelho irreparavelmente!
Nunca utilize em programas com funções grill adicionais (A-01, A-02, A-03, A-04, A-05) tampas
ou loiça não resistente ao calor, visto que estes
podem derreter ou incendiar-se!
Nota:
1.
Prima o botão combinação micro-ondas-ar
quente 9
. No visor 1 surgem a
temperatura pré-regulada "200C" e os símbolos
e
.
2. Selecione a temperatura pretendida com
ajuda do botão rotativo r
: 110°C,
140°C, 170°C ou 200°C. Confirme a
sua seleção premindo o botão início/início
rápido r
.
3. Regule com o botão rotativo r
o tempo
de cozedura pretendido. O tempo máximo de
cozedura é de 95 minutos. Confirme o tempo
de cozedura regulado premindo o botão início/
início rápido r
.
O processo combinado inicia. No visor 1 surge o
símbolo para o processo de cozedura combinado
"ar quente"
. Começa a contagem decrescente
do tempo ajustado. Após o decorrer do período
regulado, surge alternadamente "End" e "Hot“ no
visor 1. Ouve-se um sinal sonoro repetidamente.
O micro-ondas calcula o tempo/nível de potência
para alimentos frescos. Alimentos congelados não
cozinham nos períodos indicados pelo micro-ondas
(com exceção do programa automático "Pizza").
Se necessário, descongele previamente os alimentos
congelados, utilizando o programa Descongelar
(ver capítulo "Descongelar").
Início do menu automático
1.
Rode o botão rotativo r
(no funcionamento standby) lentamente para a esquerda
para consultar o modo do menu automático.
No visor 1 surge um número (p.ex. "A - 02"
para programa automático 2 (porco)) e o
símbolo "porco". Selecione, rodando o botão
rotativo r
, o menu automático adequado
para a sua refeição.
Nota:
Se ao rodar o botão rotativo r
para a esquerda
passar para o modo do menu automático, ao rodar
para a direita de seguida pode selecionar o menu
automático na sequência A01, A02, A03...
- 39 -
Visor
Símbolo
Alimento
Peso
A-01
Vitela
200 - 1400 g
A-02
Porco
200 - 1400 g
2.
Confirme a sua seleção premindo o botão
início/início rápido r
.
3. Regule o peso com ajuda do botão rotativo r
e confirme-o premindo o botão início/
início rápido r
.
O processo de cozedura é iniciado e o tempo calculado começa a contar em sentido decrescente.
Nota:
A-03
Aves
400 - 1400 g
A-04
Peixe
200 - 1200 g
A-05
Pizza
*P1 150-450g
P2 150-450g
P3 150-450g
A-06
Fruta/
legumes
100 - 1000 g
A-07
A-08
A-09
Batatas
Aquecer
Bebidas
Para conseguir uma cozedura uniforme os alimentos
devem ser virados depois de 2/3 do tempo. O microondas para após este período automaticamente,
soam 4 sons de aviso e surge "Turn" no visor 1.
Visor
Símbolo
Alimento
Virar após...
A-01
Vitela
2/3 do tempo
A-02
Porco
2/3 do tempo
A-03
Aves
2/3 do tempo
A-04
Peixe
2/3 do tempo
100 - 800 g
300 - 700 g
200 - 500ml
• Vire as refeições. Proceda com cuidado com
os alimentos que podem estar já quentes.
A-10
Entradas
300 / 500g
A-11
Descongelar por peso
-
A-12
Descongelar por
tempo
-
• Prima o botão início/início rápido r
reiniciar o processo de cozedura.
para
Nota:
Caso não pretenda virar os alimentos, espere após
um sinal sonoro. O aparelho continua o processo
de cozedura automaticamente. Recomendamos
que vire os alimentos. Assim atinge uma cozedura
uniforme.
*Para mais informações sobre os programas pizza
leia o capítulo "Cozinhar pizza".
- 40 -
Batatas
Funcionamento
do micro-ondas
com 900 W
de potência
Aquecer
Funcionamento
do micro-ondas
com 900 W
de potência
Bebidas
Funcionamento
do micro-ondas
com 900 W
de potência
Nota:
A-07
Se a refeição, após a finalização do menu automático, não estiver bem cozinhada, proceda com
a seguinte pós-cozedura:
• Para pós-cozedura utilize o processo de cozedura indicado na tabela. Inicie-o por breves
minutos e controle o resultado de cozedura.
A-08
• Na pós-cozedura de uma pizza com ajuda do
menu automático "P2" interrompe o processo
de cozedura premindo o botão stop/proteção
de crianças
, logo que a pizza esteja
suficientemente cozida.
Visor
A-01
A-02
A-03
A-04
A-05
A-06
Símbolo
A-09
Alimento
Pós-cozedura
com...
A-10
Vitela
Processo de
cozedura
combinado
"Grill" - C3
A-11
Porco
Processo de
cozedura
combinado
"Grill" - C3
Aves
Processo de
cozedura
combinado
"Grill" - C3
Peixe
Processo de
cozedura
combinado
"Grill" - C3
Pizza
Menu automático
"Pizza" - P2
Fruta/
legumes
Funcionamento
do micro-ondas
com 900 W de
potência
A-12
Funcionamento
do micro-ondas
Entradas
com 900 W
de potência
Funcionamento
Desconge- do micro-ondas
lar por peso com 100 W
de potência
Funcionamento
Descondo micro-ondas
gelar
com 100 W
por tempo
de potência
Perigo de ferimentos!
O prato rotativo 3 está após um processo de cozedura com grill muito quente! Por isso deve utilizar
uma pega de cozinha ou luvas resistentes ao calor
ao retirar o prato do micro-ondas.
Nota:
Tenha em atenção que o tamanho, forma e tipos de
alimentos influenciam o resultado da cozedura.
Exemplo de aplicação 1:
Quando pretender cozinhar 400 g de legumes ou
fruta proceda da seguinte forma:
1. Rode o botão rotativo r
(no modo standby) lentamente para a esquerda até surgir
"A-06" no visor 1 e confirme a seleção premindo o botão início/início rápido r
.
- 41 -
2.
3.
Regule com o botão rotativo r
o peso
"400".
Prima o botão início/início rápido r
para iniciar o processo de cozedura.
•
•
Exemplo de aplicação 2:
Se pretende aquecer 300 ml de água, proceda
da seguinte forma:
1. Rode o botão rotativo r
(no modo standby) lentamente para a esquerda até surgir
"A-09" no visor 1 e confirme a seleção premindo o botão início/início rápido r
.
2. Regule com o botão rotativo r
"300".
3. Prima o botão início/início rápido r
para iniciar o processo de cozedura.
4.
5.
"P-02" para pizza congelada,
temperatura aprox. 5 graus,
peso 150 g–450 g
("P-02" surge no visor 1).
"P-03" para pizza fresca,
temperatura aprox. 20 graus,
peso 150 g–450 g
("P-03" surge no visor 1).
Confirme a sua seleção premindo o botão
início/início rápido r
.
Selecione agora o peso pretendido com o
botão rotativo r
e confirme-o premindo
o botão início/início rápido r
. O processo de cozedura inicia.
Nota:
Exemplo de aplicação 3:
Caso pretenda aquecer 300 g de acepipes, proceda
do seguinte modo:
1. Rode o botão rotativo r
(no modo stand by) lentamente para a esquerda até surgir
"A-10" no visor 1 e confirme a seleção premindo o botão início/início rápido r
.
2. Como "300" surge como primeira opção no
visor, prima o botão início/início rápido r
, para iniciar o processo de cozedura.
Cozinhar pizza
Com o programa automático "Pizza“ pode preparar
pizza no micro-ondas. Aqui tem a escolha entre os
programas pizza "P-01" (pizza ultracongelada),
"P-02" (pizza congelada) e "P-03" (pizza fresca).
1. Rode o botão rotativo r
(no modo standby) lentamente para a esquerda até surgir
"A-05" no visor 1.
2. Prima o botão início/início rápido r
.
3. Selecione com ajuda o botão rotativo r
o programa pizza adequado:
• "P-01" para pizza ultracongelada,
temperatura aprox. -18 graus
peso 150 g–450 g
("P-01" surge no visor 1).
Quando estiver a preparar pizza, pode colocá-la
diretamente em cima do prato rotativo 3. Assim
fica especialmente crocante. Certifique-se de que
a margem da pizza não toca, durante o processo
de cozedura, nas paredes do micro-ondas.
Exemplo de aplicação:
Caso pretenda cozinhar uma pizza congelada
de 450 g, proceda da seguinte forma:
1. Rode o botão rotativo r
((no modo
standby) lentamente para a esquerda até
surgir "A-05" no visor 1.
2. Prima o botão início/início rápido r
.
3. Selecione com ajuda o botão rotativo r
o programa "P-01".
4. Prima o botão início/início rápido r
.
5. Selecione com o botão rotativo r
o
peso "450".
6. Prima o botão início/início rápido r
para
iniciar o processo de cozedura. O aparelho
calcula automaticamente o tempo necessário.
- 42 -
Descongelar
É possível ajustar os seguintes pesos:
"d-01"/
/ "vitela"
100 - 1800 g
"d-02"/
/ "porco"
100 - 1800 g
Coloque os alimentos a descongelar sempre em loiça
adequada para micro-ondas. Nunca diretamente
no prato rotativo 3!
"d-03"/
/ "aves"
100 - 1800 g
"d-04"/
/ "peixe"
100 - 1800 g
Com esta função pode descongelar sem problemas
carne, aves, peixe, fruta/legumes e pizza. O tempo
de descongelação e o nível de potência são calculados e regulados automaticamente após a introdução do peso.
1. Rode no modo standby o botão rotativo r
em sentido contrário dos ponteiros do relógio até que surja no visor 1 "A-11“ e
pisque (ver capítulo "Menu automático").
2. Prima o botão início/início rápido r
.
3. Selecione agora rodando o botão rotativo r
o alimento a ser descongelado.
No visor 1 surge:
"d-05"/
/ "pizza"
100 - 900 g
"d-06"/
/"fruta/legumes" 100 - 900 g
"d-07"/
/ "batatas"
Descongelar por peso
Nota:
"d-01" e
para "vitela"
"d-02" e
para "porco"
"d-03" e
para "aves"
"d-04" e
para "peixe"
"d-05" e
para "pizza"
"d-06" e
para "fruta/legumes"
"d-07" e
para "batatas“
4.
5.
5.
100 - 900 g
Quando surgir o peso pretendido no visor 1
prima o botão início/início rápido r
.
O aparelho calcula automaticamente o tempo
de descongelação necessário.
Nota:
Para garantir uma descongelação ideal, é necessário virar os alimentos durante o processo de descongelação. O aparelho recorda-o para virar os alimentos soando sons de aviso e surge no visor 1
"turn“. Abra a porta do aparelho, vire os alimentos
e feche novamente a porta do aparelho. Prima o
botão início/início rápido r
para continuar
o processo de descongelação.
Caso não pretenda virar os alimentos, espere após
um sinal sonoro. O aparelho continua automaticamente o processo de descongelação. Recomendamos
que vire os alimentos. Assim atinge uma descongelação uniforme.
Quando surgir o alimento pretendido no visor 1
prima o botão início/início rápido r
.
Regule o peso rodando o botão rotativo r
.
- 43 -
Receitas
Descongelar por tempo
Nota:
Hambúrgueres
Coloque os alimentos a descongelar sempre em loiça
adequada para micro-ondas. Nunca diretamente
no prato rotativo 3!
1.
2.
3.
4.
•
Rode, no modo standby, o botão rotativo r
em sentido contrário dos ponteiros do relógio até que surja no visor 1 "A-12“ e
.
Prima o botão início/início rápido r
.
Regule o tempo pretendido com o botão
rotativo r
.
Prima o botão início/início rápido r
para iniciar o processo de descongelação.
Começa a contagem decrescente.
•
Preparação
Consegue o melhor resultado se utilizar alternadamente ar quente e a função do micro-ondas.
Aguarde, até que o processo de cozedura tenha
finalizado e regule o próximo processo.
Nota:
Para garantir uma descongelação ideal, é necessário
virar os alimentos durante o processo de descongelação. O aparelho recorda-o para virar os alimentos
soando sons de aviso e surge no visor 1 "turn".
Abra a porta do aparelho, vire os alimentos e feche
novamente a porta do aparelho. Prima o botão início/início rápido r
para continuar o processo
de descongelação.
Caso não pretenda virar os alimentos, espere após
um sinal sonoro. O aparelho continua automaticamente o processo de descongelação. Recomendamos que vire os alimentos. Assim atinge uma descongelação uniforme.
Forme aprox. 125 g de carne picada de vitela
numa almôndega (diâmetro aprox. 75mm,
altura aprox. 35 mm).
Distribua as almôndegas uniformemente no
prato rotativo 3.
1.
2.
3.
Ar quente 200°C, 4:00 min.
Micro-ondas 900 W potência , 5:30 min.
Ar quente 200°C, 2:00 min
(de acordo com o pretendido é possível um
período de até 4:00 min.)
Tostar pães
congelados pré-cozinhados
• Para cozer pães selecione a função ar quente.
• Coloque 3-4 pães no prato rotativo 3.
Um pré-aquecimento do micro-ondas não é necessário.
Selecione o seguinte ajuste para o processo de
tostar:
• Ar quente 170°C, duração: 12 minutos
Se pretende tostar mais pães de seguida, reduza
o tempo durante cerca de 1-2 minutos, visto que o
aparelho já está pré-aquecido.
- 44 -
Gratinado de batata
Muffins
Ingredientes
• 750 g de batatas descascadas
• 300 g de natas
• 100 g de queijo ralado com percentagem de
gordura de 25% a 30 % i. Tr.
• especiarias a gosto (p.ex. sal/pimenta)
Utilize loiça adequada para micro-ondas, redonda
com tampa, com uma altura de 5 a 6 cm e um diâmetro de cerca de 22 cm.
Ingredientes
A receita equivale a cerca de 10 a 20 muffins.
Preparação
• Corte as batatas em rodelas de aprox. 3 –
4 mm de espessura.
• Coloque aproximadamente metade das batatas
de forma imbricada na assadeira.
• Pulverize as batatas com aprox. metade do
queijo.
• Adicione metade das especiarias, bem como,
aprox. 150 g natas.
• Coloque as restantes batatas cortadas de forma
imbricada por cima.
• Distribua o restante queijo sobre as batatas e
espalhe as restantes natas por cima.
• Pulverize as restantes especiarias por cima do
gratinado.
• Cubra a assadeira com a tampa e coloque-a
no centro do prato rotativo 3.
• Margarina para cozinhar (80% teor de gordura)
ou manteiga com sal
• 170 g de açúcar (granulado máx. 0,3 mm)
• 3 ovos (55 - 60 g com casca/tamanho M)
• 225 g de farinha de trigo
• 7 g de fermento em pó
• 0,25 g de sal
Preparação
• Misture todos os ingredientes muito bem.
• Coloque a massa de muffin em formas de papel
convencionais (diâmetro cerca de 45 mm, altura
cerca de 28 mm)
• Pré-aqueça o microondas com a função de ar
quente para 170 °C.
Nota:
Caso seja necessário vários processos de cozedura devido ao número de muffins, é apenas
necessário pré-aquecer uma vez.
•
Distribua os muffins uniformemente no prato
rotativo 3.
•
Seleccione o seguinte ajuste para o processo
de cozedura:
Ar quente 170 °C, duração: 12 minutos
Preparação
Consegue o melhor resultado se utilizar alternadamente ar quente e a função do micro-ondas.
Aguarde, até que o processo de cozedura tenha
finalizado e regule o próximo processo.
1. Micro-ondas 900 W potência, 10:00 min.
2. Ar quente 200 °C, 13:00 min.
3. Micro-ondas 900 W potência, 10:00 min.
Não é necessário um pré-aquecimento.
- 45 -
Limpeza e tratamento
•
Perigo de ferimentos!
•
Antes de limpar o microondas, desligue-o e retire
a ficha de rede da tomada. Caso contrário, existe
perigo de choque eléctrico!
•
Em caso algum o aparelho deve ser mergulhado
em água ou outros líquidos. Daqui poderia
resultar perigo de morte por choque eléctrico
e o aparelho poderia ficar danificado.
•
Mantenha o interior do microondas sempre
limpo.
• Se os salpicos dos alimentos ou líquidos vertidos
aderirem às paredes do microondas, limpe-os
com um pano húmido.
• Utilize um produto de limpeza suave, caso o
microondas apresente sujidade incrustada.
• Evite a utilização de sprays de limpeza e outros
produtos de limpeza agressivos, pois estes
podem provocar manchas, riscos ou opacidades
na superfície da porta.
Limpe as paredes exteriores com um pano húmido.
• Para evitar danos das peças no interior do microondas, não deixe entrar água para as ranhuras de ventilação 5.
• Remova regularmente salpicos e sujidade. Limpe
a porta, a janela de visualização de ambos
os lados, as vedações da porta e as peças
adjacentes com um pano húmido. Não utilize
detergentes abrasivos.
•
•
Caso se acumule vapor no ou em torno do
exterior da porta, limpe-o com um pano macio.
Isto sucede quando o microondas é operado
sob elevadas condições de humidade.
Limpe regularmente também o prato rotativo 3.
Lave este numa solução quente de sabão.
Limpe o suporte do grelhador t em água
quente e seque-o.
Elimine regularmente odores. Coloque um prato
fundo no microondas com uma chávena de
água, sumo e casca de limão. Aqueça-o durante
5 minutos .Limpe profundamente e seque com
um pano macio.
Caso seja necessária uma substituição da lâmpada do microondas, esta deve ser efectuada
por um vendedor ou consulte a nossa Assistência
Técnica.
Resolução de problemas
O visor 1 não mostra nada.
• A ficha de rede não está inserida na tomada.
Verifique a ficha de rede.
• A tomada está avariada. Experimente outra
tomada.
• O visor 1 está avariado. Contacte a assistência.
O aparelho não reage ao premir dos botões.
• O bloqueio para crianças está activo. Desactive
o bloqueio para crianças (ver capítulo "Funcionamento").
O aparelho não inicia o processo de cozedura.
• A porta não está bem fechada. Feche correctamente a porta .
- 46 -
O prato rotativo 3 emite ruídos ao rodar.
• O prato rotativo 3 não está correctamente
colocado no eixo. Coloque o prato rotativo 3
correctamente dentro do microondas.
• As pequenas rodas 4 e/ou o chão do interior
do microondas estão sujos. Limpe as rodas 4
e o chão.
No visor 1 surge "E01“ e ouvem-se sinais
sonoros.
• O microondas está sobreaquecido. Interrompa
de imediato o programa. Retire a ficha de
rede, abra a porta do microondas e deixe
o aparelho arrefecer.
Eliminação
Nunca deposite o aparelho no lixo doméstico comum. Este produto está em
conformidade com a Directiva Europeia 2002/96/EC.
Elimine o aparelho através de uma instituição de
recolha de resíduos autorizada ou através da instituição de recolha do seu município.
Tenha atenção aos regulamentos actualmente em
vigor.
Em caso de dúvida, entre em contacto com a entidade
de eliminação de resíduos.
No visor 1 surge "E02“ e ouvem-se sinais
sonoros.
• Existe um erro no sensor. Interrompa o programa
e deixe o aparelho arrefecer. Reinicie o microondas. Caso o erro surja novamente, entre em
contacto com os serviços pós-venda.
• Existe um erro durante o aquecimento do aparelho. Interrompa o programa e deixe o aparelho arrefecer. Reinicie o microondas. Caso o
erro surja novamente, entre em contacto com
o serviço de apoio ao cliente.
Elimine todos os materiais da embalagem
de modo ecológico.
No visor 1 surge "E03“ e ouvem-se sinais
sonoros.
• O microondas entrou em modo de protecção
contra anomalias, devido a um curto-circuito
ou uma tensão em circuito aberto. Interrompa
o programa e retire a ficha da tomada. Se
possível resolva o problema, p.ex. metal no
interior do microondas, que pode provocar o
problema descrito acima na utilização da função do microondas. Caso contrário entre em
contacto com o serviço de apoio ao cliente.
- 47 -
Garantia e assistência técnica
Este aparelho tem 3 anos de garantia a partir da
data de compra. Este aparelho foi fabricado com
o máximo cuidado e escrupulosamente testado
antes da sua distribuição.
Guarde o talão como comprovativo da compra. Em
caso de reclamação de garantia, entre em contacto
com o seu ponto de assistência técnica por telefone.
Apenas deste modo pode ser garantido um envio
gratuito do seu produto.
A garantia abrange apenas defeitos de material e
de fabrico, mas não danos devido ao transporte,
peças de desgaste ou danos em peças frágeis, por
ex. interruptores ou baterias. O produto foi concebido
apenas para uso privado e não para uso comercial.
A garantia extingue-se no caso de utilização incorrecta e de intervenções que não foram efectuadas
pelo nossa filial de assistência técnica autorizada.
Os seus direitos legais não são limitados por esta
garantia.
A garantia não é prolongada pela reclamação de
garantia. Isto também é válido para peças substituídas
e reparadas. Danos e avarias já existentes na altura
da compra têm de ser comunicados de imediato
após a desembalagem, o mais tardar após dois
dias a partir da data de compra. Após a expiração
da garantia as reparações têm custos.
Assistência Portugal
Tel.: 70778 0005 (0,12 EUR/Min.)
E-Mail: [email protected]
IAN 73194
Importador
KOMPERNASS GMBH
BURGSTRASSE 21
44867 BOCHUM, GERMANY
www.kompernass.com
- 48 -
INDEX
PAGE
Introduction
Intended Usage
Scope of delivery
Appliance description
Technical details
Important safety instructions
Before you begin
51
51
51
51
51
52
55
Basic principles of microwave cookery .......................................................................................55
Use suitable cookware ..................................................................................................................55
Commissioning
56
Installation of the appliance .........................................................................................................56
Preparing the appliance................................................................................................................57
Place the turntable inside ..............................................................................................................57
Operation
57
Setting the Clock ............................................................................................................................57
Standby mode ...............................................................................................................................58
Setting the kitchen timer ...............................................................................................................58
Child lock........................................................................................................................................58
Query functions..............................................................................................................................58
Interrupt/cancel cooking or defrosting processes ......................................................................59
Heating and cooking
59
Microwave operation ....................................................................................................................59
Grill function ...................................................................................................................................60
Combination cooking process "Grill"...........................................................................................61
Convection operation ....................................................................................................................62
Convection operation with preheating ........................................................................................62
Combination cooking process "Convection"...............................................................................63
Auto menu
63
Starting the Auto menu..................................................................................................................63
Baking pizza ..................................................................................................................................66
- 49 -
Defrosting
67
Defrosting by weight......................................................................................................................67
Defrosting by time ..........................................................................................................................68
Recipes
68
Meat patty ......................................................................................................................................68
Baking frozen ready-made bread rolls .......................................................................................68
Potato gratin ...................................................................................................................................69
Muffins ............................................................................................................................................69
Cleaning and Care
Troubleshooting
Disposal
Warranty and Service
Importer
70
70
71
71
72
- 50 -
Stainless Steel
Microwave
Appliance description
Figure A:
1 Display
2 Door opener button
3 Turntable
4 Rollers
5 Ventilation slot
Introduction
Congratulations on the purchase of your new appliance.
You have decided to purchase a high-quality product. The operating instructions are a constituent
of this product. They contain important information
regarding safety, use and disposal. Before using the
product, familiarise yourself with all operating and
safety instructions. Use this appliance only as described
and only for the specified areas of application.
Please also pass these operating instructions on to
any future owner(s).
Figure B:
6 Microwave button
7 Grill button
8 Combination microwave - grill button
9 Combination microwave convection button
0 Convection button
q Clock button
w TIMER button (kitchen timer)
e Stop/child lock button
r Rotary knob / Start/quick start button
Intended Usage
This appliance is intended for the heating up and
preparation of foods in accordance with the described
procedures.
Any modification to the appliance shall be deemed
to be improper use and entails considerable accident
hazards. The manufacturer accepts no responsibility
for damages arising from usage contrary to the instructions specified below.
This appliance is intended exclusively for use in
domestic households!
Do not use it in/for commercial, industrial or laboratory
areas/applications!
Figure C:
t Grill stands
Maximum power consumption
Microwave:
Grill:
Convection:
1400 W
1500 W
1950 W
Scope of delivery
Maximum power delivery
Microwave:
Microwave frequency:
900 W +/- 10%
2450 MHz
Stainless Steel Microwave
Turntable
Grill stand
Operating instructions
Concise information (2 no.)
Technical details
Nominal voltage:
- 51 -
230 - 240 V ~,
50 Hz
Important safety instructions
Carefully read these safety and operating instructions
before the first use and preserve them for future reference.
Attention!
Warnings regarding damages to the appliance.
Danger! /
Risk of injury!
Warning about physical injuries and electric shock!
Risk of fire!
Warning about risks of fire.
Notice!
Note – Hints and tips for using the microwave.
Safety precautions for the avoidance of excessive contact with microwave energy
• Do not try to operate the appliance while the
door is open, as this can lead to you coming
into contact with a potentially harmful dose of
microwave radiation. It is also important not to
break open or manipulate the safety locks .
• Do not jam anything between the front of the
appliance and the door, and make sure that
there is no residual food or cleaning agent
on the seals.
Risk of injury!
• If the door or the door seal is damaged, UNDER
NO CIRCUMSTANCES may you continue to
use the appliance. Arrange for it to be repaired
as soon as possible by qualified specialists.
• Never attempt to repair the appliance yourself.
Removal of the appliance housing could cause
the release of microwave energy. Arrange for
the repair to be carried out only by qualified
specialists.
• This appliance is not intended for use by individuals
(including children) with restricted physical, physiological or intellectual abilities or deficiences in
experience and/or knowledge unless they are
supervised by a person responsible for their
safety or receive from this person instruction in
how the appliance is to be used. Children
should be supervised to ensure that they do
not play with the appliance.
• Children may only be allowed to use the appliance without supervision if appropriate instructions have been given that have provided
the child with the knowledge to use the cooker
in a safe manner and to understand the risks
of improper use.
• Only use this appliance for its intended purpose as
described in this manual. Do not use any caustic
chemicals or vapours in this appliance. This microwave oven is especially designed for the heating,
cooking, grilling or drying of foodstuffs.
It is not designed for use in industrial or laboratory areas.
• Do not operate the microwave oven if the power
cable or plug are damaged. To avoid the risk of
injury, arrange for damaged power cables or
plugs to be exchanged by qualified specialists.
• Keep children well away from the microwave
oven when it is in use. Risk of Burns!
• UNDER NO CIRCUMSTANCES should you
remove the microwave oven housing.
• Should the lamp in the interior of the microwave
oven need replacing, arrange for this to be
done by a qualified specialist.
• NEVER touch the microwave oven door, housing,
ventilation openings, accessories or the dinnerware directly after the grill, combi or automatic
menu process. The parts will be very hot. Allow
them to cool down before cleaning them.
• Ensure that the plug is at all times easily accessible,
so that it can be quickly removed in the event of
an emergency.
- 52 -
Risk of fire
• People fitted with a heart pacemaker should
consult their doctor about the possible risks of
using a microwave oven before taking one into
use.
• NEVER leave the microwave oven unattended
if you are heating foodstuffs packed in plastics
or paper.
• Do not allow the power cable to hang from a
table or work surface. Children could pull on it.
• NEVER place flammable materials close to the
microwave oven or the ventilation openings.
• After they have been warmed up, always open
containers, popcorn-bags etc. with the opening
pointing away from your body. Escaping steam
could lead to scalds.
• Remove ALL metallic closures from the packaging
of the foodstuff that you intend to warm up.
Risk of fire!
• When making popcorn, use only popcorn-bags
suitable for microwave ovens.
• NEVER stand directly against the microwave
oven when opening the door. Escaping steam
could lead to scalds.
• Do not use the microwave oven to warm up
cushions filled with kernels, cherry stones or
gels. Risk of fire!
• Do not fry in the microwave. Hot oil can damage
parts of the appliance and utensils and even
cause skin burns.
• Do not use the microwave oven for storing foodstuffs or other objects.
• ALWAYS shake-up or stir warmed up baby glasses
or bottles! The contents could have heated up
unevenly and the baby could be burned/scalded
by them. AT ALL EVENTS, check their temperature
BEFORE feeding them to the baby!
• Do not modify the microwave oven.
• Microwave radiation is dangerous! Maintenance
and repairs requiring the removal of access covers, which are intended for protection against
contact with microwave radiation, are to be
carried out by trained specialists only.
• Before feeding babies, check the temperature
of the foodstuff/drink so as to avoid potentially
lethal burns or scalds.
Cooking utensils may become hot from the heat
emitted by the food, therefore you may require
oven gloves to touch them. In this case, a check
should also be made to ensure that the cooking
utensils are suitable for use with the microwave
oven.
• Do not exceed the cooking times detailed by
the manufacturer.
• Do not place any objects on the microwave
oven when it is in use. The ventilation openings
would be blocked!
• Do not place the microwave oven adjacent to
other appliances discharging heat, for example,
an oven.
• Clean the microwave oven thoroughly after
warming up greasy foods, especially if they
were not covered. Allow the appliance to cool
down completely before cleaning it. Residues
such as fat or grease cannot be allowed to
collect on the heating elements of the grill.
They could possibly ignite.
• Do not thaw frozen fat or oil in the microwave
oven. The fat or oil could ignite.
• Do not use an external timing switch or a separate
remote control system to operate the appliance.
Attention! Hot surfaces!
- 53 -
Attention! Appliance Damage!
Safety tips
• Do not use the microwave oven when it is empty.
The only exception is for the initial commissioning
(see chapter "Commissioning").
• NEVER insert foreign objects into the ventilation
openings or the door safety locks.
• Do not use metallic utensils which reflect microwaves and lead to sparking. Do not place tins
in the microwave oven.
• Do not place plastic containers in the microwave
oven immediately after a grill, combi or automatic menu process. The plastic could melt.
• To minimize the risk of fire in the microwave:
When heating food in plastic or paper containers,
always keep an eye on the microwave oven
when it is in operation, as these materials can
easily catch fire.
• When heating drinks in the microwave, bubbling may be delayed when the drink boils. Therefore, be careful when handling the container.
To avoid sudden simmering:
- If possible, place a glass rod in the fluid for as
long as it is being heated.
• This microwave oven may not be located in areas
with high humidity or where moisture could
collect.
Liquids and other foods must not be heated in airtight
containers, as these may explode and damage the
appliance.
• Do not lean on the microwave oven door.
• Insufficient cleanliness of the appliance could
lead to the destruction of the upper surfaces,
which themselves influence its useful lifespan
and could possibly also lead to dangerous
situations.
Danger
• NEVER submerse the appliance, the power
cable or the plug in water or other fluids.
• Keep the power cable away from hot surfaces.
Do not lead it in front of the microwave oven
door. The heat could damage the cable.
• NEVER pour fluids into the ventilation openings
or the safety locks. Should fluids ever enter them,
IMMEDIATELY switch the microwave oven off
and remove the plug from the mains power
socket. Arrange for the microwave oven to be
checked by qualified specialists.
- To avoid an unexpected reboiling, leave the
fluid to stand in the microwave oven for ca.
20 seconds after being warmed up.
• Puncture the skins of potatoes, sausages or
similar. Otherwise, they could explode.
• Proceed with caution when warming up fluids.
Use only open containers, so that any air bubbles
produced can escape.
• Should you notice smoke, switch the appliance
off or remove the plug from the socket and keep
the door closed to suffocate any possible flames.
• Eggs in their shells and hard-boiled eggs should
not be heated in the microwave oven as they could
explode, even on completion of the heating process.
Food with thick skins, such as potatoes, whole
pumpkins, apples and chestnuts must be pricked
before cooking.
• Do not transport the microwave oven when it is
in use.
- 54 -
Earthing information/correct installation
This appliance must be earthed. This appliance is
to be connected only to a correctly earthed power
socket. An individual circuit, solely for the connection of the microwave oven, is recommended.
Danger: Improper use of the earthing connector
could increase the risk of an electric shock.
Take note: Should have any questions about
earthing or the instructions on the use of this
electrical appliance, please consult an electrician or a maintenance technician.
Before you begin
Basic principles of microwave cookery
•
•
•
•
•
Neither the manufacturer nor the dealer can accept
liability for damage to the microwave oven or injury
to persons resulting from failure to comply with the
instructions for electrical connection.
•
•
Interference with other appliances
The operation of the microwave may cause interference on your radio, television or similar appliances.
If such interferences should occur, they may be reduced
or corrected by the following remedial measures:
• Clean the door and the seal of the microwave.
• Re-align the receiver antenna of your radio or
television.
• Position the microwave in a different place to
the receiver.
• Move the microwave away from the receiver.
• Plug the microwave into another wall socket.
The microwave and the receiver should be
connected to different circuits.
Arrange the food with consideration.
The thickest parts near the edges.
Pay attention to the cooking time. Select the
shortest possible stated cooking time and increase as required. Food that is cooked too
long can begin to smoke or catch fire.
Cover the food during cooking with a lid suitable
for microwave cookery. The lid prevents splashing
and helps in the even cooking of the food.
While cooking, turn the food in the microwave
once so that items such as chicken or hamburgers
are cooked more quickly.
Large pieces of food, such as joints of meat,
must be turned at least once.
Completely re-arrange foods such as meatballs
after half the cooking time. Turn them and
move the meatballs from the middle of the
cookware to the edge.
Use suitable cookware
•
- 55 -
The ideal material for a microwave oven is
microwave-permeable, allowing the energy
to penetrate the container to heat the food.
Microwaves cannot permeate metal. For this
reason metal containers and cookware may
not be used.
•
•
When using the microwave for heating do not
use products made of recycled paper. These
can contain minute fragments of metal, which
can generate sparks and/or fires.
We recommend the use of round/oval cookware instead of square or oblong containers,
as food in corner areas tends to overcook.
The following list provides general hints to
assist you in selecting the correct cookware.
Cookware
Microwave
oven
Grill
ConCombivecnation
tion
Risk of fire!
NEVER use the grill stand or other metallic objects
when you are using the appliance in the microwave
mode or in the combination cooking process.
Metals reflect the microwave radiation and it leads
to the generation of sparks. This could cause a fire
and irreparably damage the appliance!
Commissioning
Installation of the appliance
Heat-resistant
glass
Yes
Yes
Yes
Yes
Non-heatresistant glass
No
No
No
No
Heat-resistant
ceramics
Yes
Yes
Yes
Yes
Plastic crockery
suitable for
microwave
Yes
No
No
No
Kitchen roll
Yes
No
No
No
Metal
tray/plate
No
Yes
Yes
No
Grill stand
No
Yes
Yes
No
Alufoil & Foil
containers
No
Yes
Yes
No
Risk of fire!
This microwave oven is not suitable for installation
in a kitchen cabinet. In closed cabinets sufficient
ventilation for the appliance cannot be assured.
The appliance could be damaged and there would
be the additional risk of a fire!
•
•
•
•
- 56 -
Select an even surface offering sufficient space
for the adequate ventilation of the appliance:
Ensure that you maintain a minimum distance
of 10 cm from neighbouring walls/surfaces.
Make sure that the door of the microwave
oven can be opened easily.
Maintain a gap of at least 20 cm above the
microwave oven.
Ensure that the electrical plug is accessible
without problem, so that in case of danger it
can be easily reached and removed.
Do not remove the pads underneath the microwave oven.
Do not block the ventilation openings 5. If you
do, it could cause damage to the appliance.
•
Install the appliance as far away as possible
from radios and televisions. The operation of
the microwave oven can cause malfunctions of
radio and televsision reception.
•
•
Warning:
Press the Grill button 7
. "Gr 1" will
appear in the display.
Turn the rotary knob r
, as far as "Gr 3"
and the
and
symbols appear in the
display, then confirm the selection by pressing
the Start/quick start button r
.
Use the rotary knob r
to set a cooking
time of 10 minutes.
Press the Start/quick start button r
to
start the grill process.
Do not install the microwave above a cooker or any
other appliance generating heat. Installation at such
a location could cause damage to the appliance
and thereby a subsequent lapse of the warranty
provisions.
•
Preparing the appliance
Light smoke generation and a slight smell can occur
on first usage, this is due to production residues.
These are not harmful. Provide sufficient ventilation.
For example, open a window.
•
Note:
•
Remove the packaging material and the protective film applied to the panel and the door
opener button 2.
Do not remove the light grey flimmer
cover plate, which is mounted in the
cooking compartment to protect the
magnetron.
•
•
After 10 minutes the appliance will switch itself
off automatically. Wait until it has cooled down
completely.
Remove the plug from the mains power socket
then, after cleaning the appliance with a moist
cloth, dry it carefully.
• Insert the plug into a mains power socket. Use a
230 -240 V, 50 Hz, mains power socket with a
16 A fuse. We recommend that the microwave
is powered by its own mains circuit. If you are
unsure about how to connect the microwave
oven, consult a specialist.
Place the turntable 3 inside
Before the first regular usage of the microwave oven
the appliance must be heated up to remove any remaining production residues.
Operation
Once you have plugged the plug into the socket,
open the microwave door once by pressing the
Door opener button 2.
Switch the appliance on in grill operating mode
without foods and without accessories (turntable 3
and grill stands t):
•
Place the turntable 3 centrally over the axle in
the cooking compartment. Ensure that it slides
completely onto the axle and is firmly seated.
Setting the Clock
After inserting the mains plug into the socket, open
the microwave door once. The display 1 shows
"1:00".
1. Press the Clock button q
in the display 1.
- 57 -
. "Hr 12" appears
Press the Start/quick start button r
.
The appliance emits an acoustic signal. The
countdown begins. After approx. 3 seconds
the current time is shown once again. The
kitchen timer will continue to run in the background. If you want to check the kitchen timer
inbetween times, press the TIMER button w.
The kitchen timer appears for a moment.
As soon as the set time period has expired, signal
tones sound.
2. Select the required mode (Hr 24 or Hr 12) by
turning the rotary knob r
and then confirm
your selection by pressing the Start/quick start
button r
.
3.
Note:
The time display will only appear once you turn the
rotary knob
r again, which enables you to
set the hour.
3. Select the required hour by turning the rotary
knob r
and confirm your selection by
pressing the Start/quick start button r
.
4. Select the required minutes by turning the rotary
knob r
and confirm your selection by
pressing the Start/quick start button r
.
The time display is now programmed.
Child lock
To read the current time while the microwave is in
operation, press the Clock button q
; the time
is then shown in the display 1 for a few seconds.
Standby mode
The microwave automatically switches over to standby mode, and the time is displayed, if no button is
pressed for a longer period. The display illumination also dims a few seconds after switching over
to standby mode.
Engage this setting to prevent accidental activation
by children and other persons not familiar with the
operation of the appliance.
The symbol for the child lock
appears in the
display 1 , which means that the appliance cannot
be operated as long as this function is activated.
• Press the Stop/child lock button e
and
hold it down until a signal tone is sounded and
the symbol for the child lock
appears in
the display 1. The buttons and the control dial
now no longer have a function.
• To deactivate the child lock, press the Stop/child
lock button e
and hold it down until
a signal tone is sounded and the symbol for the
child lock
goes out.
Query functions
Setting the kitchen timer
The microwave oven is provided with a kitchen timer
which you can use independently of the microwave
operation.
1. Press the TIMER button w while the appliance
is in standby mode. "0:00" is shown in the
display 1 along with symbol
.
2. Now set the required time using the rotary knob
r
. You can select any time range from
10 seconds to 95 minutes.
Query the time during operation
During the cooking process, press the Clock
button q
. The time will appear for a few
seconds in the display 1.
Query the power level operation
During the cooking process, press the Microwave
button 6
. The activated power level will
appear for a few seconds in the display 1.
- 58 -
Interrupt/cancel cooking or defrosting
processes
•
•
Press the Stop button e
, once in order
to interrupt a cooking or defrosting process. The
appliance interrupts the process and stops countdown of the remaining time. Press the Start/quick
start button r
to continue the process.
Press the Stop button e
twice to cancel
a cooking process. The appliance reverts to
standby mode.
Heating and cooking
Selecting the operation level
1. Press the Microwave button 6
. "900"
(900 W power) appears in the display 1.
2. Now set the required power level using the
rotary knob r
.
3. Press the Start/quick start button r
to confirm the power level you have set.
Programming the cooking time
After you have selected the power level, programme in
the desired cooking time:
• Turn the rotary knob r
until the required
cooking time has been set.
The stages for the rotary knob r
setting
times are as follows:
• from 0 sec to 5 min: in 10 second increments
• from 5 to 10 min: in 30 second increments
• from 10 to 30 min: in 1 minute increments
• from 30 to 95 min: in 5 minute increments
Note
This microwave is equipped with a cooling function.
This means that the machine fan continues running
for about 3 minutes after a cooking or grill process
which takes at least two minutes. This is not a malfunction of the appliance! The rapid cooling helps
to prolong the life of the appliance.
Aborting/stopping an input process
Press the Stop button e
once to cancel
and exit an input process. The appliance reverts to
standby mode.
Microwave operation
Note
During the cooking process, drops of water can
form on the oven door or on the housing. This is
normal and is not an indication of a malfunction.
When the appliance has cooled down, wipe the
moisture off with a dry cloth.
Fire hazard!
NEVER use the grill stand t or other metallic objects when you are using the appliance in the microwave mode. Metals reflect the microwave radiation
and it leads to the generation of sparks. This could
cause a fire and irreparably damage the appliance!
Starting the cooking process
When you have set the power and cooking time,
you can start the cooking process:
Press the Start/quick start button r
to start
the cooking process.
The symbol for microwave operation
appears
in the display 1. The set time will now count down
backwards. Once the set time has expired, "End"
and "Hot" are shown alternating in the display 1.
A signal tone is heard repeatedly.
- 59 -
Quick start 1
When in standby mode, turn the rotary knob r
to the right and set the required cooking period.
Start the cooking process with 900 W power by
pressing the Start/quick start button r
.
Quick start 2
You can use this function to start cooking immediately
for 30 seconds (or longer, up to 95 min) at 900 W
power.
• Press the Start/quick start button r
once.
The symbol for microwave operation
appears in the display 1 in addition to "00:30".
The microwave starts the cooking process for
30 seconds. The countdown begins.
If you want to cook for longer than 30 seconds, press
the Start/quick start button r
several times until
the required time has been set.
The time levels are apportioned as follows:
• from 30 sec to 5 min: in 30 second increments
• from 5 min to 95 min: in 1 minute increments
3 grill functions are available:
• "Top heat" grill function (Gr 1):
With this function, the heat only comes from
above. Only the top grill is activated. This grill
function is therefore suitable for grilled sandwiches and gratins.
• "Bottom heat" grill function (Gr 2):
With this function, the heat only comes from below. Only the bottom grill is activated. This grill
function is therefore suitable for meals or foods
which need to be cooked or grilled from below.
• "Top and bottom heat" grill function (Gr 3):
With this function, the heat comes from above
and below. The top and the bottom grills are
activated. This grill function is therefore suitable
for thin slices of meat, steaks, hamburgers,
sausages or chicken pieces.
1.
Grill function
2.
Note
Always use the grill stands t when grilling.
This achieves an optimal grilling result. Always
placed the grill stands t on the turntable 3.
Fire hazard!
When using the grill functions, under no circumstances
should you use any form of covering or cookware that
is not heat-resistant, as these could melt or ignite
themselves!
3.
4.
Press the Grill button 7
once to activate
the grill function.
The symbol for the "Top heat" grill function
appears in the display 1
along with
"Gr 1".
Now set the required grill function using the
rotary knob r
:
"Gr 1" for top heat,
"Gr 2" for bottom heat,
"Gr 3" for top and bottom heat.
Confirm your selection by pressing the
Start/quick start button r
.
Now set the required cooking time using the
rotary knob r
. The maximum possible
cooking time setting is 95 minutes.
To start grill function, press the Start/quick
start button r
.
The symbol for the selected grill function
/
/
appears in the display 1. The set time will
now count down backwards. Once the set time has
expired, "End" and "Hot" are shown alternating in
the display 1. A signal tone is heard repeatedly.
- 60 -
Combination cooking process "Grill"
• Combination 4 (C 4):
For Combination 4, the microwave power is
55% and the grill power is 45% of the cooking
time. This is suitable for poultry dishes, for example.
The microwave function and the grill functions
"top and bottom heat" are used.
This function combines the grill function and the
normal microwave operation. During the combination
mode, a certain amount of time for cooking and the
remaining time for grilling is carried out automatically
and in one process. You may notice a quiet clicking
noise when the oven is switching between modes.
1.
Fire hazard!
Never use the grill stand t or other metallic objects
when you are using the microwave for combined
cooking processes. Metals reflect the microwave
radiation and it leads to the generation of sparks.
This could cause a fire and irreparably damage
the appliance!
When using the "Grill" combined cooking functions,
under no circumstances should you use any form
of covering or cookware that is not heat-resistant,
as these could melt or ignite themselves!
4 combinations are available:
• Combination 1 (C 1):
For Combination 1, the microwave power is
30% and the grill power is 70% of the cooking
time. This is suitable for fish or gratins, for example.
The microwave function and the grill function
"top heat" are used.
• Combination 2 (C 2):
For Combination 2, the microwave power is
55% and the grill power is 45% of the cooking
time. This is suitable for puddings, omelets or
lasagne, for example. The microwave function
and the "top heat" grill function are used.
• Combination 3 (C 3):
For Combination 3, the microwave power is
30% and the grill power is 70% of the cooking
time. This is suitable for potatoes, for example.
The microwave function and the grill functions
"top and bottom heat" are used.
2.
Press the Combination microwave-grill button
8
once to activate Combination 1
(C 1).
,
, and "C 1" are shown in the
display 1.
Now set the required combination using the
rotary knob r
:
"C 1" for combination 1,
"C 2" for combination 2,
"C 3" for combination 3,
"C 4" for combination 4.
Confirm your selection by pressing the Start/quick
start button r
.
3. Now set the required cooking time using the
rotary knob r
. The maximum possible
cooking time setting is 95 minutes.
4. Press the Start/quick start button r
to
start the process.
The symbol for the "Grill" combination process
appears in the display 1. The programmed time
counts backwards. Once the set time has expired,
"End" and "Hot" are shown alternating in the display 1. A signal tone is heard repeatedly.
- 61 -
Convection operation
Convection operation with preheating
When cooking with convection, hot air circulates in
the cooking compartment. Convection is especially
recommended for cooking souffles or crunchy foods.
You can set a temperature of between 110°C and
200°C and a duration of max. 95 min.
You can also preheat your microwave before you
start a cooking process:
1. Select the required temperature by pressing the
Convection button 0
and use the rotary
knob r
to set the temperature. You do
NOT need to confirm this setting by pressing
the Start/quick start button r
.
2. To start preheating, press the Convection button 0
. "30:00" appears in the display 1
and the symbol for convection operation
flashes. The countdown begins. Assumes the
set temperature is reached, signal tones will
sound and the time will stop.
3. Open the door and place the foods to be
cooked inside.
4. Turn the rotary knob r
to set the temperature and confirm the temperature by pressing
the Start/quick start button r
.
5. Now set the required cooking time using the
rotary knob r
. The maximum possible
cooking time setting is 95 minutes.
6. Press the Start/quick start button r
to
start the process.
The symbol for convection operation
appears
in the display 1 permanently. The programmed time
counts backwards. Once the set time has expired,
"End" and "Hot" are shown alternating in the display 1. A signal tone is heard repeatedly.
Press the Convection button 0
. "200C"
(= 200°C) appears in the display along with
the symbol for convection operation
.
2. Use the rotary knob r
to set the required
temperature and confirm your selection by
pressing the Start/quick start button r
.
3. Now set the required cooking time using the
rotary knob r
.
4. Press the Start/quick start button r
to
start the cooking process.
The symbol for convection operation
appears
in the display 1. The programmed time counts backwards. Once the set time has expired, "End" and
"Hot" are shown alternating in the display 1.
A signal tone is heard repeatedly.
1.
- 62 -
Combination cooking process
"Convection"
Auto menu
This function combines the convection function
with the normal microwave operation. With this,
for example, meat is juicy and tender but still crisp.
For foods to be prepared in automatic menu mode,
it is not necessary to enter the cooking time or power
setting. It is quite sufficient to enter which type of
food is to be cooked/boiled, and its weight.
Fire hazard!
Never use the grill stand t or other metallic objects
when you are using the microwave for combined
cooking processes. Metals reflect the microwave
radiation and it leads to the generation of sparks.
This could cause a fire and irreparably damage
the appliance!
Fire hazard!
Under NO circumstances may you use covers or
non-heat-resistant dishes for programmes with enabled
Grill function (A-01, A-02, A-03, A-04, A-05), as
they can melt or catch fire!
Note
1.
Press the Combination microwave-convection
button 9
. The preset temperature
"200C" and the symbols
and
appear
in the display 1.
2. Now set the required temperature using the
rotary knob r
: 110°C, 140°C, 170°C
or 200°C. Confirm your selection by pressing
the Start/quick start button r
.
3. Now set the required cooking time using the
rotary knob r
. The maximum cooking
time is 95 minutes. Press the Start/quick start
button r
to confirm the set cooking time.
The combination process starts. The symbol for the
"Convection" combination cooking
process
appears in the display 1. The programmed time
counts backwards. Once the set time has expired,
"End" and "Hot" are shown alternating in the display 1. A signal tone is heard repeatedly.
The microwave will calculate the time/power level for
fresh foods. Deep-frozen foods will not be cooked
properly using the times specified by the microwave
(with the exception of the "Pizza" automatic programme).
If needs be, defrost frozen foods with the defrost
programme beforehand (see section "Defrosting").
Starting the Auto menu
1.
Turn the rotary knob r
(in standby
mode) slowly to the left to call up the automatic menu mode. A number (e.g. "A - 02" for
automatic programme 2 (pork)) and the "Pork"
symbol appear in the display 1. Turn the
rotary knob r
to select the appropriate
automatic menu for your food.
Note
If you have entered automatic menu mode by turning
the rotary knob r
to the left, you can turn
the rotary knob to the right afterwards to select the
automatic menus in the sequence of A01, A02,
A03... .
- 63 -
Display
Symbol
Food
Weight
A-01
Beef
200 - 1400g
A-02
Pork
200 - 1400g
2.
Confirm your selection by pressing the
Start/quick start button r
.
3. Turn the rotary knob r
to set the weight,
and then confirm this by pressing the
Start/quick start button r
.
The cooking process is started and the calculated
time will countdown backwards.
Note
To obtain uniform warming or cooking, some foods
should be turned after 2/3 of the cooking
process duration. The microwave automatically
stops after this time, 4 signal tones sound and
"Turn" appears in the display 1.
A-03
Poultry
400 - 1400g
A-04
Fish
200 - 1200g
A-05
Pizza
*P1 150-450g
P2 150-450g
P3 150-450g
Display
A-06
Fruit/
vegetables
100 - 1000g
A-07
Potatoes
100 - 800g
A-08
Warming
300 - 700g
A-09
Beverages
200 - 500ml
A-10
Entrees
300 / 500g
A-11
A-12
Defrosting
by weight
Defrosting
by time
Food
Turn over
after...
A-01
Beef
2/3 of the
time
A-02
Pork
2/3 of the
time
A-03
Poultry
2/3 of the
time
A-04
Fish
2/3 of the
time
Symbol
• Turn the food over. Proceed cautiously with food
which may already be hot.
• Press the Start/quick start button r
continue the cooking process.
to
Note
If you do not want to turn the food, just wait for the
signal tones to stop. The appliance will automatically
continue the cooking process. We recommend that
you do turn the food. This will ensure even cooking.
-
*Please refer to the chapter entitled "Baking pizzas"
for more information on the pizza programme.
- 64 -
Note
A-09
Beverages
• Use the cooking process stated in the table for
re-cooking. Start this process for a few minutes,
and check the cooking result.
A-10
Entrees
• When re-cooking a pizza using automatic menu
"P2", interrupt the cooking process by pressing
the Stop/child lock button
as soon as
the pizza has been cooked enough.
A-11
Defrosting
by weight
A-12
Defrosting
by time
If the meal is not completely cooked after the automatic menu has finished, proceed as follows:
Display
Symbol
Food
Re-cook
with ...
Microwave
operation with
900 W power
Microwave
operation with
900 W power
Microwave
operation with
100 W power
Microwave
operation with
100 W power
Risk of injury!
"Grill" combination cooking
process - C 3
"Grill" combination cooking
process - C 3
The turntable 3 is always very hot after a cooking
process using the grill! You should therefore always
use an oven cloth or heat-resistant oven gloves when
removing it from the cooking compartment.
Poultry
"Grill" combination cooking
process - C 3
Please note that the size, shape and the type of foodstuff determines the result of the cooking process.
A-04
Fish
"Grill" combination cooking
process - C 3
A-05
Pizza
"Pizza" automatic menu - P2
A-01
Beef
A-02
Pork
A-03
A-06
A-07
A-08
Microwave
Fruit/
operation with
vegetables
900 W power
Microwave
Potatoes operation with
900 W power
Microwave
Warming operation with
900 W power
Note:
Example 1:
Proceed as follows to cook 400 g vegetables or
fruit:
1. Turn the rotary knob r
to the left (when
in standby mode) until "A-06" appears in the
display 1 and then confirm your selection by
pressing the Start/quick start button r
.
2. Now set a weight of "400" using the rotary
knob r
.
3. Press the Start/quick start button r
to
start the cooking process.
- 65 -
•
Example 2:
To heat 300 ml water, proceed as follows:
1. Turn the rotary knob r
to the left (when
in standby mode) until "A-09" appears in the
display 1 and then confirm your selection by
pressing the Start/quick start button r
.
2. Now set a weight of "300" using the rotary
knob r
.
3. Press the Start/quick start button r
to
start the cooking process.
•
4.
5.
Example 3:
To heat 300 g of appetizers, proceed as follows:
1. Turn the rotary knob r
to the left (when
in standby mode) until "A-10" appears in the
display 1 and then confirm your selection by
pressing the Start/quick start button r
.
2. Since "300" is always the first selection in the
display, press the Start/quick start button
r
to start the cooking process.
"P-02" for refrigerated pizza, temperature
approx. 5°, weight 150g–450g ("P-02"
appears in the display 1).
"P-03" for fresh pizza, temperature approx.
20°, weight 150g–450g ("P-03" appears
in the display 1).
Confirm your selection by pressing the
Start/quick start button r
.
Turn the rotary knob r
to set the required
weight, and then confirm this by pressing the
Start/quick start button r
.
The cooking process starts.
Note
If you are cooking pizza, you can place this directly
on the turntable 3. It will be very crispy. Ensure that
the edge of the pizza does not extend up to the
walls of the cooking compartment during cooking.
Baking pizza
With the automatic programme "Pizza" you can
prepare delicious pizzas in the microwave. In this
case you can select between pizza programmes "P-01"
(deep-frozen pizza), "P-02" (refrigerated pizza) and
"P-03" (fresh pizza).
1. Turn the rotary knob r
slowly to the left
(when in standby mode) until "A-05" appears
in the display 1.
2. Press the Start/quick start button r
.
3. Now set the required pizza programme using
the rotary knob r
:
• "P-01" for deep-frozen pizza, temperature
approx. -18°, weight 150g–450g ("P-01"
appears in the display 1).
Example:
Proceed as follows to cook a deep-frozen pizza
weighing 450 g:
1. Turn the rotary knob r
slowly to the left
(when in standby mode) until "A-05" appears
in the display 1.
2. Press the Start/quick start button r
.
3. Now set the programme "P-01" using the
rotary knob r
:
4. Press the Start/quick start button r
.
5. Now set a weight of "450" using the rotary
knob r
.
6. Press the Start/quick start button r
to
start the cooking process. The appliance
calculates the time required automatically.
- 66 -
Defrosting
The following weights can be set:
"d-01"/
/ "beef"
100 - 1800g
"d-02"/
/ "pork"
100 - 1800g
Always place the food to be defrosted on dishes
suitable for use in a microwave oven. Never place
it directly on the turntable 3!
"d-03"/
/ "poultry"
100 - 1800g
"d-04"/
/ "fish"
100 - 1800g
You can use this function to defrost. The defrosting
time and the power level are calculated and set
automatically once you have entered the weight.
1. When in standby mode, turn the rotary knob r
anticlockwise until "A-11" appears in the
display 1 and
flashes (see chapter
"Automatic menu").
2. Press the Start/quick start button r
.
3. Now select the food to be defrosted by turning
the rotary knob r
.
The following appears in the display 1 :
"d-05"/
/ "pizza"
100 - 900g
"d-06"/
/"fruit/vegetables " 100 - 900g
"d-07"/
/ "potatoes"
Defrosting by weight
Note:
"d-01" and
for "pork"
"d-03" and
for "poultry"
"d-04" and
for "fish"
"d-05" and
for "pizza"
"d-06" and
for "fruit/vegetables"
"d-07" and
for "potatoes"
5.
When the required weight appears in the display 1, press the Start/quick start button r
. The appliance will then automatically
calculate the required defrosting time.
Note:
for "beef"
"d-02" and
4.
5.
100 - 900g
To ensure optimum defrosting, it is necessary to turn
the food during the defrosting process. The appliance will remind you to turn the food over by sounding
a signal tone and showing "turn" in the display 1.
Open the appliance door, turn the food and then reclose the door. Press the Start/quick start button r
to continue the defrosting process.
If you do not want to turn the food, just wait for the
signal tones to stop. The appliance will automatically
continue the defrosting process. We recommend that
you do turn the food. This will ensure even defrosting.
When the required food appears in the display 1, press the Start/quick start button r
.
Turn the rotary knob r
to set the weight.
- 67 -
Recipes
Defrosting by time
Note:
Meat patty
Always place the food to be defrosted on dishes
suitable for use in a microwave oven. Never place
it directly on the turntable 3!
1.
2.
3.
4.
•
When in standby mode, turn the rotary knob r
anticlockwise until 1 "A-12" and
appear in the display.
Press the Start/quick start button r
.
Now set the required time using the rotary
knob r.
Press the Start/quick start button r
to
start the defrosting process. The countdown
begins.
•
Preparation
You will achieve the best results if you alternate
between the convection and microwave functions.
Always wait until the set cooking process has completed before setting the next process.
Note:
To ensure optimum defrosting, it is necessary to turn
the food during the defrosting process. The appliance
will remind you to turn the food over by sounding
a signal tone and showing "turn" in the display 1.
Open the appliance door, turn the food and then reclose the door. Press the Start/quick start button r
to continue the defrosting process.
If you do not want to turn the food, just wait for the
signal tones to stop. The appliance will automatically
continue the defrosting process. We recommend
that you do turn the food. This will ensure an even
defrosting.
Use around 125 g of minced beef to form
each patty (diameter approx. 75 mm, height
approx. 35mm).
Distribute the patties evenly around the
turntable 3.
1.
2.
3.
Convection 200°C, 4:00 min.
Microwave 900 W power, 5:30 min.
Convection 200°C, 2:00 min.
(depending on personal taste, a time of up to
4:00 min can also be used).
Baking frozen ready-made bread rolls
• Select the convection function to bake bread
rolls.
• Place 3-4 bread rolls on the turntable 3.
Pre-heating of the microwave is not required.
Select the following settings for the baking process:
• Convection 170°C, duration: 12 minutes
If you wish to bake additional rolls directly afterwards, shorten the baking time for these by about
1-2 minutes, as the appliance is now already preheated.
- 68 -
Potato gratin
Muffins
Ingredients
• 750 g waxy potatoes, peeled
• 300 g cream
• 100 g grated cheese with a fat content of 25%
to 30 % fat in dry matter.
• Spices to taste (e.g., salt/pepper)
Use a microwave-proof, round dish with a lid, height
5-6 cm and a diameter of about 22 cm.
Ingredients
This recipe yields 10 to 20 muffins.
Preparation
• Cut the potatoes into slices around 3 - 4 mm
thick.
• Place around half of the potato slices in the
baking dish in "roofing tile" formation.
• Sprinkle the potatoes with around half of the
cheese.
• Add half of the spices in addition to approx.
150 g of cream.
• Now place the rest of the potato slices in
"roofing tile" formation over the first layer.
• Sprinkle the rest of the cheese over the potatoes
and pour the rest of the cream over this.
• Sprinkle the remaining spices over the gratin.
• Cover the dish with the cover and place it in
the centre of the turntable 3.
Preparation
You will achieve the best results if you alternate
between the convection and microwave functions.
Always wait until the set cooking process has completed before setting the next process.
1. Microwave 900 W power, 10:00 min.
2. Convection 200°C, 13:00 min.
3. Microwave 900 W power, 10:00 min.
• Baking margarine (80% fat content) or salted
butter
• 170 g granulated sugar (up to 0.3 mm grain
size)
• 3 eggs (55-60 g with shell/Size M)
• 225 g wheat flour
• 7 g baking powder
• 0,25 g salt
Preparation
• Mix all ingredients well.
• Fill the muffin pastry into commercial paper baking
cases (diameter 45 mm, height 28 mm)
• Preheat the oven with the convection function to
170°C.
Take note:
Should, due to the number of muffins, multiple
baking operations be necessary, preheating is
required only once.
•
Distribute the muffins evenly on the turntable 3.
•
Select the following settings for the baking
process:
Convection 170°C, Duration: 12 Minutes
Pre-heating is not required.
- 69 -
Cleaning and Care
•
Risk of injury!
Before cleaning, switch the microwave oven off and
remove the plug from the mains power socket.
Otherwise, there is the great risk of receiving an
electric shock!
•
UNDER NO CIRCUMSTANCES should you
immerse the appliance in water or other liquids.
This could result in you receiving a fatal electric
shock and the appliance could be damaged.
•
Regularly eliminate odours. Place a deep microwave bowl with a cup of water and the juice
and peel of a lemon into the microwave oven.
Heat it up for 5 minutes. Wipe off thoroughly
and rub dry with a cloth.
Should replacement of the bulb in the microwave be necessary, arrange for it to be exchanged by a dealer or consult our Service
Department.
Troubleshooting
Always keep the interior of the microwave
oven clean.
• If splashes of food or spilt liquids stick to the
walls of the microwave, wipe them off with a
damp cloth.
• Use a mild detergent if the microwave is more
heavily soiled.
• Avoid using cleaning sprays and other aggressive cleaning agents, as they can cause stains,
stripes or a blurring of the door surface.
Clean the external walls with a damp cloth.
• To avoid damage to the functional components
in the interior of the microwave, do not let liquids
to seep in through the ventilation slits 5.
• Regularly remove splashes or contaminants. Clean the door, both sides of the viewing window,
door seals and adjacent components with a
damp cloth. Do not use abrasive cleaning
agents.
• Should steam collect on or around the outside
of the appliance door, wipe it off with a soft
towel. This can happen if the microwave is
operated in extremely humid conditions.
• Clean the turntable 3 regularly. Clean the
plate in warm soapy water.
• Clean the grill stand t in warm dishwater
and dry it well.
The display 1 indicates nothing.
• The plug is not inserted into a power socket.
Check the plug.
• The mains power socket is defective.
Try another mains power socket.
• The display 1 is defective. Contact our
Customer Services Department.
The appliance does not respond to pressing
the buttons.
• The Child safety facility is activated. Deactivate
the Child safety facility (see chapter "Operation“).
The appliance does not start the cooking/
warming process.
• The door is not properly closed. Close the
door correctly.
The turntable 3 generates loud noise when
revolving.
• The turntable 3 is not correctly positioned on
the axle. Insert the turntable 3 correctly into
the cooking area.
• The small rollers 4 and/or the floor of the
cooking area are unclean. Clean the rollers 4
and the floor of the cooking area.
- 70 -
The display 1 indicates "E01" and signal tones
sound.
• The microwave is overheated. Terminate the current programme immediately. Remove the plug
from the mains power socket, open the microwave door and allow the appliance to cool down.
Disposal
The display 1 indicates "E02" and signal tones
sound.
• There is an error on the sensor. Interrupt the
programme and let the appliance cool down.
Then restart the microwave. If the error occurs
again, contact Customer Support.
• There is an error during the heating up of the
appliance. Interrupt the programme and let the
appliance cool down. Then restart the microwave. If the error occurs again, contact Customer
Support.
Dispose of the appliance through an approved disposal centre or at your community waste facility.
Observe the currently applicable regulations.
In case of doubt, please
contact your waste disposal centre.
The display 1 indicates "E03" and signal tones
sound.
• Due to a short circuit or open circuit voltage,
the microwave has switched into fault protection.
Stop the programme and remove the power
plug. If possible, eliminate the problem, e.g.
metals in the cooking area, which can lead to
the above problem when using the microwave
function. Otherwise, please contact our Customer
Support.
You receive a 3-year warranty for this appliance
as of the purchase date. This appliance has been
manufactured with care and meticulously examined
before delivery.
Please retain your receipt as proof of purchase. In
the case of a warranty claim, please make contact
by telephone with our service department. Only in
this way can a post-free despatch for your goods
be assured.
The warranty covers only claims for material and
manufacturing defects, not for transport damages,
worn parts or for damage to fragile components,
e.g. buttons or batteries. This product is for private
use only and is not intended for commercial applications.
In the event of misuse and improper handling, use
of force and interference not carried out by our
authorized service branch, the warranty will become void.. Your statutory rights are not restricted
in any way by this warranty.
Do not dispose of this appliance in your
normal domestic waste. This product is
subject to the provisions of European
Directive 2002/96/EC.
Dispose of all packaging materials in an environmentally friendly manner.
Warranty and Service
- 71 -
The warranty period is not extended by repairs effected under warranty. This applies also to replaced
and repaired parts. Damages or defects discovered
after purchase are to be reported directly after unpacking, at the latest two days after the purchase
date. Repairs carried out after lapse of the warranty
period are subject to charge.
Service Great Britain
Tel.: 0871 5000 720 (£ 0.10/Min.)
E-Mail: [email protected]
IAN 73194
Service Ireland
Tel.: 1890 930 034
(0,08 EUR/Min., (peak))
(0,06 EUR/Min., (off peak))
E-Mail: [email protected]
IAN 73194
Importer
KOMPERNASS GMBH
BURGSTRASSE 21
44867 BOCHUM, GERMANY
www.kompernass.com
- 72 -
INHALTSVERZEICHNIS
SEITE
Einleitung
Bestimmungsgemäßer Gebrauch
Lieferumfang
Gerätebeschreibung
Technische Daten
Wichtige Sicherheitshinweise
Bevor Sie beginnen
75
75
75
75
75
76
79
Grundprinzipien beim Kochen in der Mikrowelle ......................................................................79
Geeignetes Kochgeschirr verwenden..........................................................................................79
Erste Inbetriebnahme
80
Gerät aufstellen..............................................................................................................................80
Gerät vorbereiten...........................................................................................................................81
Drehteller einsetzen .......................................................................................................................81
Bedienen
81
Uhr einstellen..................................................................................................................................81
Standby-Modus ..............................................................................................................................82
Küchentimer einstellen ...................................................................................................................82
Kindersicherung..............................................................................................................................82
Abfragefunktionen..........................................................................................................................82
Gar- oder Auftauvorgänge unterbrechen/abbrechen ...............................................................83
Kochen und Garen
83
Mikrowellenbetrieb........................................................................................................................83
Grill-Funktion...................................................................................................................................84
Kombinations-Garvorgang „Grill“................................................................................................85
Heißluftbetrieb................................................................................................................................86
Heißluftbetrieb mit Vorheizen .......................................................................................................86
Kombinations-Garvorgang „Heißluft“..........................................................................................87
Automatik-Menü
87
Automatik-Menü starten.................................................................................................................87
Pizza backen ..................................................................................................................................90
- 73 -
Auftauen
91
Auftauen nach Gewicht.................................................................................................................91
Auftauen nach Zeit ........................................................................................................................92
Rezepte
92
Frikadellen ......................................................................................................................................92
Aufbacken von Tiefkühlfertigbrötchen ........................................................................................92
Kartoffelgratin.................................................................................................................................93
Muffins ............................................................................................................................................93
Reinigung und Pflege
Fehlerbehebung
Entsorgen
Garantie und Service
Importeur
94
94
95
96
96
- 74 -
Edelstahl-Mikrowelle
Einleitung
Herzlichen Glückwunsch zum Kauf Ihres neuen
Gerätes.
Sie haben sich damit für ein hochwertiges Produkt
entschieden. Die Bedienungsanleitung ist Bestandteil dieses Produkts. Sie enthält wichtige Hinweise
für Sicherheit, Gebrauch und Entsorgung. Machen
Sie sich vor der Benutzung des Produkts mit allen
Bedien- und Sicherheitshinweisen vertraut. Benutzen
Sie das Produkt nur wie beschrieben und für die angegebenen Einsatzbereiche. Händigen Sie alle
Unterlagen bei Weitergabe des Produkts an Dritte
mit aus.
Bestimmungsgemäßer
Gebrauch
Dieses Gerät ist zum Erhitzen und Zubereiten von
Lebensmitteln gemäß den beschriebenen Vorgehensweisen vorgesehen.
Jede Veränderung des Gerätes gilt als nicht bestimmungsgemäß und birgt erhebliche Unfallgefahren.
Für aus bestimmungswidriger Verwendung entstandene Schäden übernimmt der Hersteller keine
Haftung.
Dieses Gerät ist ausschließlich für die Benutzung in
privaten Haushalten bestimmt!
Benutzen Sie es nicht gewerblich, in Industrie- oder
Laborbereichen!
Lieferumfang
Gerätebeschreibung
Abbildung A:
1 Display
2 Taste Türöffner
3 Drehteller
4 Rollen
5 Lüftungsschlitze
Abbildung B:
6 Taste Mikrowelle
7 Taste Grill
8 Taste Kombination Mikrowelle - Grill
9 Taste Kombination Mikrowelle - Heißluft
0 Taste Heißluft
q Taste Uhr
w Taste TIMER (Küchentimer)
e Taste Stop/Kindersicherung
r Drehregler / Taste Start/Schnellstart
Abbildung C:
t Grillständer
Technische Daten
Nennspannung:
230 - 240 V ~,
50 Hz
Maximale Leistungsaufnahme
Mikrowelle:
Grill:
Heißluft:
1400 W
1500 W
1950 W
Maximale Leistungsabgabe
Mikrowelle:
Mikrowellen-Frequenz:
900 W +/- 10%
2450 MHz
Edelstahl-Mikrowelle
Drehteller
Grillständer
Bedienungsanleitung
Kurzinformation (2 Stück)
- 75 -
Wichtige Sicherheitshinweise
• Dieses Gerät ist nicht dafür bestimmt, durch Personen (einschließlich Kinder) mit eingeschränkten physischen, sensorischen oder geistigen Fähigkeiten oder mangels Erfahrung und/oder
mangels Wissen benutzt zu werden, es sei denn,
sie werden durch eine für ihre Sicherheit zuständige Person beaufsichtigt oder erhielten von ihr
Anweisungen, wie das Gerät zu benutzen ist.
Kinder sollten beaufsichtigt werden, um sicherzustellen, dass sie nicht mit dem Gerät spielen.
Lesen Sie die Sicherheitshinweise und die
Bedienungsanleitung vor der ersten Verwendung
aufmerksam durch und heben Sie diese für den späteren Gebrauch auf.
Achtung!
Warnungen vor Beschädigungen am Gerät.
Gefahr! /
Verletzungsgefahr!
Warnung vor Verletzungen und elektrischem Schlag!
Brandgefahr!
Warnung vor Brandgefahr.
Hinweis!
Hinweise und Tipps zur Handhabung der Mikrowelle.
Vorsichtsmaßnahmen zur Vermeidung eines
möglichen übermäßigen Kontaktes mit Mikrowellenenergie
• Versuchen Sie nicht, das Gerät bei geöffneter
Tür zu betreiben, da der Betrieb bei geöffneter
Tür zum Kontakt mit einer schädlichen Dosis
Mikrowellenstrahlung führen kann. Wichtig ist
hierbei auch, nicht die Sicherheitsverriegelungen
aufzubrechen oder zu manipulieren.
• Klemmen Sie nichts zwischen Gerätefront und
Tür und sorgen Sie dafür, dass sich keine Verschmutzungen oder Reinigungsmittelrückstände
auf den Dichtflächen ansammeln.
Verletzungsgefahr!
• Wenn die Tür oder die Türdichtungen beschädigt sind, betreiben Sie die Mikrowelle auf keinen Fall weiter. Lassen Sie sie sofort von qualifiziertem Fachpersonal reparieren.
• Versuchen Sie nie das Gerät selber zu reparieren. Durch das Abnehmen des Gehäuses kann
Mikrowellenenergie freigesetzt werden. Lassen
Sie Reparaturen nur von qualifiziertem Fachpersonal durchführen.
• Kindern darf die Benutzung des Kochgerätes
ohne Aufsicht nur erlaubt werden, wenn eine angemessene Anweisung gegeben wurde, die das
Kind in die Lage versetzt, das Kochgerät in sicherer Weise zu benutzen und die Gefahren einer falschen Bedienung zu verstehen.
• Verwenden Sie dieses Gerät nur zum bestimmungsgemäßen Gebrauch gemäß Beschreibung
in diesem Handbuch. Verwenden Sie in diesem
Gerät keine ätzenden Chemikalien oder Dämpfe. Diese Mikrowelle ist speziell für Erhitzen, Kochen, Grillen, oder Trocknen von Nahrungsmitteln konstruiert.
Sie ist nicht für eine Nutzung im Industrieoder Laborbereich konzipiert.
• Betreiben Sie die Mikrowelle nicht, wenn
Netzkabel/Netzstecker beschädigt sind. Lassen
Sie Netzkabel/Netzstecker von qualifiziertem
Fachpersonal austauschen, um Gefährdungen
zu vermeiden.
• Halten Sie Kinder von der Mikrowellentür fern,
während diese in Betrieb ist. Verbrennungsgefahr!
• Entfernen Sie unter keinen Umständen das
Mikrowellengehäuse.
• Lassen Sie die Lampe im Inneren der Mikrowelle nur von qualifiziertem Fachpersonal austauschen.
• Berühren Sie nie die Mikrowellentür, das Mikrowellengehäuse, die Lüftungsöffnungen, Zubehörteile oder das Essgeschirr direkt nach dem
Grill-, Kombi- oder Automatikmenü-Vorgang.
Die Teile werden sehr heiß. Berühren Sie nur die
Taste Türöffner, um die Mikrowelle zu öffnen.
Lassen Sie vor dem Reinigen die Teile abkühlen.
- 76 -
• Achten Sie darauf, dass der Netzstecker immer
gut zu erreichen ist, damit Sie diesen im Notfall
schnell vom Stromnetz trennen können.
• Personen, die einen Herzschrittmacher tragen,
sollten sich vor Inbetriebnahme der Mikrowelle,
bei Ihrem Hausarzt über mögliche Risiken informieren.
Brandgefahr
• Lassen Sie die Mikrowelle nie unbeaufsichtigt,
wenn Sie Lebensmittel in Plastik- oder Papierverpackungen erhitzen.
• Stellen Sie keine brennbaren Materialien in der
Nähe der Mikrowelle oder der Lüftungsschlitze
auf.
• Lassen Sie das Netzkabel nie über den Tisch
oder die Arbeitsplatte hängen. Kinder könnten
daran ziehen.
• Entfernen Sie alle metallischen Verschlüsse
der Verpackungen der Lebensmittel, die Sie
erhitzen wollen. Brandgefahr!
• Öffnen Sie Dosen, Popcorntüten etc. nach dem
Erhitzen immer so, dass die Öffnung von Ihrem
Körper weg zeigt. Austretender Dampf kann zu
Verbrühungen führen.
• Benutzen Sie zur Herstellung von Popcorn nur
mikrowellengeeignete Popcorn-Tüten.
• Stellen Sie sich nie direkt vor die Mikrowelle,
wenn Sie die Tür öffnen. Austretender Dampf
kann zu Verbrühungen führen.
• Frittieren Sie nicht in der Mikrowelle. Heißes Öl
kann Geräteteile und Utensilien beschädigen
und sogar Hautverbrennungen hervorrufen.
• Benutzen Sie die Mikrowelle nicht, um mit
Körnern, Kirschkernen oder Gel gefüllte Kissen
zu erhitzen. Brandgefahr!
• Benutzen Sie die Mikrowelle nicht zur Lagerung
von Lebensmitteln oder anderen Dingen.
• Überschreiten Sie nie die vom Hersteller angegebenen Garzeiten.
• Schütteln oder rühren Sie aufgewärmte Babygläschen oder Babyfläschchen auf jeden Fall
um! Der Inhalt kann sich ungleichmäßig erhitzt
haben und das Baby kann sich am Inhalt verbrennen. Kontrollieren Sie auf jeden Fall die
Temperatur, bevor Sie Ihr Baby füttern!
• Stellen Sie keine Gegenstände auf die Mikrowelle, während diese in Betrieb ist. Die Lüftungsöffnungen werden verdeckt!
• Bauen Sie die Mikrowelle nicht um.
• Reinigen Sie die Mikrowelle nach dem Erhitzen
von fetthaltigen Speisen, insbesondere wenn diese nicht abgedeckt waren, gründlich. Lassen Sie
das Gerät vollständig abkühlen, bevor Sie es
reinigen. Auf den Heizelementen des Grills dürfen sich keine Rückstände, wie zum Beispiel Fett
befinden. Dieses könnte überhitzen und sich entzünden.
• Mikrowellenstrahlen sind gefährlich! Lassen Sie
Wartungs- oder Reparaturarbeiten, bei denen
Abdeckungen zu entfernen sind, die vor einem
Kontakt mit Mikrowellenstrahlen schützen, nur
von geschultem Fachpersonal durchführen.
• Überprüfen Sie vor dem Verzehr die Temperatur, um für Babys u. U. lebensgefährliche Verbrennungen zu vermeiden.
Kochutensilien können durch die von den
erhitzten Speisen abgegebene Hitze heiß
werden, so dass sie sich eventuell nur mit Topflappen anfassen lassen. Die Kochutensilien müssen daraufhin geprüft werden, ob sie mikrowellengeeignet sind.
• Stellen Sie die Mikrowelle nicht in der Nähe von
anderen Hitze absondernden Geräten, wie zum
Beispiel einem Backofen, auf.
• Tauen Sie kein gefrorenes Fett oder Öl in der
Mikrowelle auf. Das Fett oder Öl kann sich
entzünden.
• Benutzen Sie keine externe Zeitschaltuhr oder
ein separates Fernwirksystem, um das Gerät zu
betreiben.
Achtung! Heiße Oberfläche!
- 77 -
Achtung! Geräteschäden!
Sicherheitstipps
• Betreiben Sie die Mikrowelle nicht im Leerzustand. Ausgenommen ist die erste Inbetriebnahme (siehe Kapitel „Erste Inbetriebnahme“).
• Um das Brandrisiko in der Mikrowelle zu
minimieren: Behalten Sie, wenn Sie Speisen
in Kunststoff- oder Papierbehältern erhitzen,
die Mikrowelle immer im Auge, da sich die Materialien eventuell entzünden können.
• Stecken Sie keine Gegenstände in die Lüftungsöffnungen oder die Sicherheits-Türverriegelungen.
• Beim Erhitzen von Getränken in der Mikrowelle
kann es zu einem zeitlich verzögerten Sprudeln
kommen, wenn das Getränk kocht. Seien Sie
deshalb vorsichtig beim Hantieren mit dem
Gefäß. Um plötzliches Sieden zu vermeiden:
• Benutzen Sie keine metallischen Utensilien, die
Mikrowellen reflektieren und zu Funkenbildung
führen. Stellen Sie keine Blechdosen in die
Mikrowelle.
• Stellen Sie keine Plastikbehälter sofort nach
einem Grill-, Kombi- oder AutomatikmenüVorgang in die Mikrowelle. Das Plastik kann
schmelzen.
– Stellen Sie, wenn möglich, einen Glasstab in
die Flüssigkeit, solange es erhitzt wird.
– Lassen Sie die Flüssigkeit nach dem Erhitzen
20 Sekunden in der Mikrowelle stehen, um
unerwartetes Aufbrodeln zu vermeiden.
• Die Mikrowelle darf nicht an Orten mit hoher
Luftfeuchtigkeit, oder wo sich Feuchtigkeit
sammelt, aufgestellt werden.
• Durchstechen Sie die Haut von Kartoffeln,
Würstchen, oder ähnlichem. Sie können sonst
explodieren.
• Flüssigkeiten und sonstige Nahrungsmittel dürfen nicht in luftdicht verschlossenen Behältern erhitzt werden, da diese explodieren und das Gerät beschädigen können.
• Seien Sie vorsichtig beim Erhitzen von Flüssigkeiten. Benutzen Sie nur offene Gefäße, damit entstehende Luftblasen entweichen können.
• Lehnen Sie sich nicht auf die Mikrowellentür.
• Mangelhafte Sauberkeit des Kochgerätes kann
zu einer Zerstörung der Oberfläche führen, die
ihrerseits die Gebrauchsdauer beeinflusst und
möglicherweise zu gefährlichen Situationen
führt.
• Sollte Ihnen Rauch auffallen, schalten Sie das
Gerät aus oder ziehen Sie den Stecker und halten Sie die Tür geschlossen, um eventuelle Flammen zu ersticken.
Gefahr
• Tauchen Sie nie das Netzkabel oder den Netzstecker in Wasser oder andere Flüssigkeiten.
• Halten Sie das Netzkabel von Hitzequellen fern.
Führen Sie es nicht vor der Mikrowellentür her.
Die Hitze kann das Kabel beschädigen.
• Schütten Sie niemals Flüssigkeiten in die Lüftungsöffnungen oder die Sicherheits-Türverriegelungen. Sollte doch Flüssigkeit hineingelangen, stellen Sie die Mikrowelle sofort
aus und ziehen Sie den Netzstecker aus der
Netzsteckdose. Lassen Sie die Mikrowelle
von qualifiziertem Fachpersonal überprüfen.
• Eier in der Schale und hart gekochte Eier dürfen
nicht in der Mikrowelle erhitzt werden, da sie
selbst noch nach der Beendigung des Erhitzens
in der Mikrowelle explodieren können.
Nahrungsmittel mit dicker Schale, wie etwa Kartoffeln, ganze Kürbisse, Äpfel und Kastanien vor
dem Kochen einstechen.
• Bewegen Sie die Mikrowelle nicht, während sie
in Betrieb ist.
- 78 -
Bevor Sie beginnen
Erdungshinweise/ordnungsgemäße
Installation
Das vorliegende Gerät muss geerdet sein. Dieses
Gerät ist nur an eine vorschriftsmäßig geerdete
Steckdose anzuschließen. Es wird empfohlen,
einen eigenen Stromkreis zu verwenden, der nur
die Mikrowelle versorgt.
Grundprinzipien beim Kochen in der
Mikrowelle
•
•
•
Gefahr: Unsachgemäßer Umgang mit dem Erdungsstecker kann das Risiko eines elektrischen
Schlages nach sich ziehen.
Hinweis: Sollten Sie Fragen zum Erden oder
den Anweisungen in Sachen Elektrik haben, fragen Sie eine Elektro- oder Wartungsfachkraft.
Weder der Hersteller noch der Händler können die
Haftung für eine Beschädigung der Mikrowelle
oder für Personenschäden übernehmen, die auf
eine Nichtbeachtung der Verfahrenshinweise für
den Elektroanschluss zurückgehen.
•
•
•
Funkstörungen bei anderen Geräten
Der Betrieb der Mikrowelle kann Störungen bei Ihrem
Radio, Fernseher oder ähnlichen Geräten hervorrufen.
Falls solche Interferenzen auftreten sollten, lassen
sie sich mit Hilfe der folgenden Maßnahmen
vermindern oder ausschalten:
• Tür und Dichtfläche der Mikrowelle säubern.
• Empfangsantenne des Radios oder Fernsehers
neu ausrichten.
• Mikrowelle an einen anderen Ort stellen als
den, an dem der Empfänger steht.
• Entfernen Sie die Mikrowelle vom Empfänger.
• Stecken Sie die Mikrowelle in eine andere
Steckdose ein. Mikrowelle und Empfänger
sollten einen unterschiedlichen Zweig des
Stromkreises in Anspruch nehmen.
•
Ordnen Sie die Speisen wohlbedacht an.
Die dicksten Stellen kommen in Randnähe.
Achten Sie auf die Garzeit. Wählen Sie die
kürzeste angegebene Garzeit und verlängern
Sie diese bei Bedarf. Massiv zu lange gekochte Speisen können zu rauchen beginnen oder
sich entzünden.
Versehen Sie die Speisen während des Garens
mit einem für die Mikrowelle geeigneten Deckel.
Der Deckel verhindert ein Spritzen und trägt
außerdem dazu bei, dass Speisen gleichmäßig
gar werden.
Wenden Sie die Speisen während der Zubereitung in der Mikrowelle einmal, damit Gerichte
wie Hähnchen oder Hamburger schneller
„durch“ sind.
Große Lebensmittelstücke wie etwa Braten
müssen mindestens einmal gewendet werden.
Sortieren Sie Lebensmittelteile wie etwa Hackbällchen nach der halben Garzeit komplett um.
Wenden Sie sie, und platzieren Sie die Bällchen von der Mitte des Geschirrs an den Rand.
Geeignetes Kochgeschirr verwenden
•
- 79 -
Das ideale Material für einen Mikrowellenherd
ist mikrowellendurchlässig, lässt also die Energie durch den Behälter hindurch, um die
Speise zu erwärmen.
Mikrowellen sind nicht in der Lage, Metall zu
durchdringen. Aus diesem Grund dürfen keine
Metallgefäße und kein Metallgeschirr verwendet werden.
•
•
Verwenden Sie beim Erhitzen in der Mikrowelle keine Erzeugnisse aus Recyclingpapier.
Diese können winzige Metallfragmente enthalten, die Funken und/oder Brände erzeugen
können.
Es empfiehlt sich eher rundes/ovales Geschirr
statt eckiges/längliches, da Speisen im Eckbereich leicht verkochen.
Die nachstehende Liste versteht sich als allgemeine Hilfe für die Wahl des korrekten Geschirrs.
Kochgeschirr
MikroHeiß- KombiGrill
welle
luft nation
Brandgefahr!
Benutzen Sie niemals den Grillständer oder andere
metallische Gegenstände, wenn Sie die Mikrowelle
im Mikrowellenbetrieb oder im KombinationsGarvorgang verwenden. Metall reflektiert die
Mikrowellenstrahlung und führt so zu Funkenbildung. Das kann zu einem Brand führen und das
Gerät irreparabel beschädigen!
Erste Inbetriebnahme
Gerät aufstellen
Hitzebeständiges Glas
Ja
Nicht hitzebeNein
ständiges Glas
Ja
Ja
Nein Nein
Ja
Nein
Hitzebeständige Keramik
Ja
Mikrowellengeeignetes
Plastikgeschirr
Ja
Nein Nein
Nein
Küchenpapier
Ja
Nein Nein
Nein
Metalltablett/
-platte
Nein
Ja
Ja
Nein
Grillständer
Nein
Ja
Ja
Nein
Ja
Ja
Brandgefahr!
Diese Mikrowelle ist nicht für den Einbau in einen
Küchenschrank geeignet. In geschlossenen
Schränken ist die Belüftung des Gerätes nicht ausreichend gewährleistet. Das Gerät kann beschädigt
werden und es besteht die Gefahr eines Brandes!
Ja
•
•
•
•
Alufolie &
Folienbehälter
Nein
Ja
Ja
Nein
- 80 -
Wählen Sie eine ebene Fläche, die genug
Abstand für die Be- und Entlüftung des Gerätes
lässt:
Halten Sie zwischen Gerät und den angrenzenden Wänden einen Mindestabstand von
10 cm unbedingt ein. Stellen Sie sicher,
dass sich die Tür der Mikrowelle einwandfrei
öffnen lässt.
Halten Sie über der Mikrowelle einen Abstand
von mindestens 20 cm.
Sorgen Sie dafür, dass der Netzstecker
problemlos zugänglich ist, damit er im Fall von
Gefahren mühelos erreicht und gezogen
werden kann.
Entfernen Sie nicht die Füße unter dem Mikrowellengerät.
Blockieren Sie nicht die Lüftungsschlitze 5. Andernfalls kann es zu Beschädigungen des Geräts kommen.
•
Stellen Sie das Gerät möglichst weit entfernt
von Radio- und Fernsehgeräten auf. Der
Betrieb der Mikrowelle kann Störungen des
Radio- oder Fernsehempfangs hervorrufen.
•
•
Achtung:
Stellen Sie die Mikrowelle nicht über einem Küchenherd oder einem sonstigen Hitze erzeugenden Gerät auf. Eine Aufstellung an einem solchen Ort könnte zur Beschädigung des Gerätes und damit auch
zum Erlöschen der Garantie führen.
•
•
Hinweis:
Gerät vorbereiten
•
Entfernen Sie das Verpackungsmaterial und
die auf dem Panel und der Taste Türöffner 2
angebrachte Schutzfolie.
Bei der ersten Inbetriebnahme kann es durch fertigungsbedingte Rückstände zu leichter Rauch- und
Geruchsentwicklung kommen. Dieses ist unschädlich.
Sorgen Sie für eine ausreichende Belüftung. Öffnen
Sie zum Beispiel ein Fenster.
Entfernen Sie nicht die hellgraue
Glimmer-Abdeckplatte, die zum
Schutz der Magnetfeldröhre im
Garraum angebracht ist.
•
• Stecken Sie den Netzstecker in eine Netzsteckdose. Benutzen Sie eine 230 - 240 V,
50 Hz, Netzsteckdose mit einer 16 A Sicherung. Es wird empfohlen, dass ein eigener Stromkreis die Mikrowelle versorgt. Wenn Sie sich
nicht sicher sind, wie Sie die Mikrowelle anschließen sollen, ziehen Sie einen Fachmann zu
Rate.
Vor dem Verwenden der Mikrowelle muss das Gerät zunächst leer aufgeheizt werden, damit fertigungsbedingte Rückstände verdampfen können.
•
Nach 10 Minuten schaltet sich das Gerät automatisch aus. Warten Sie, bis es vollständig abgekühlt ist.
Ziehen Sie den Netzstecker aus der Steckdose
und reinigen Sie das Gerät anschließend innen
mit einem feuchten Tuch und trocknen Sie es
sorgfältig ab.
Drehteller 3 einsetzen
•
Setzen Sie den Drehteller 3 mittig auf die Achse im Garraum. Achten Sie darauf, dass er
komplett auf die Achse rutscht und fest sitzt.
Bedienen
Nachdem Sie den Stecker in die Steckdose gesteckt
haben, öffnen Sie einmal die Tür der Mikrowelle
durch Drücken der Taste Türöffner 2.
Schalten Sie das Gerät ohne Lebensmittel und ohne
Zubehör (Drehteller 3 und Grillständer t) in der
Betriebsart Grillen ein:
Drücken Sie die Taste Grill 7
. Im Display
erscheint “Gr 1”.
Drehen Sie den Drehregler r
, bis “Gr
3” und die Symbole
und
im Display
erscheinen und bestätigen Sie die Auswahl
durch Drücken auf die Taste Start/Schnellstart
r
.
Stellen Sie mit dem Drehregler r
eine
Garzeit von 10 Minuten ein.
Drücken Sie die Taste Start/Schnellstart r
, um den Grillvorgang zu starten.
Uhr einstellen
Nachdem Sie den Stecker in die Steckdose gesteckt
haben, öffnen Sie die Tür der Mikrowelle einmal.
Das Display 1 zeigt "1:00" an.
1. Drücken Sie die Taste Uhr q
Display 1 erscheint „Hr 12“.
- 81 -
. Im
2. Wählen Sie durch Drehen am Drehregler r
den gewünschten Modus (Hr 24 oder Hr
12) und bestätigen Sie Ihre Auswahl durch
Drücken auf die Taste Start/Schnellstart r
.
Hinweis:
Erst beim anschließendem Drehen des Drehreglers
r, erscheint die Anzeige der Uhrzeit und man
kann die Stunde einstellen.
3. Stellen Sie durch Drehen am Drehregler r
die gewünschte Stunde ein und bestätigen Sie
Ihre Auswahl durch Drücken auf die Taste
Start/Schnellstart r
.
4. Stellen Sie durch Drehen am Drehregler r
die gewünschten Minuten ein und bestätigen Sie
Ihre Auswahl durch Drücken auf die Taste
Start/Schnellstart r
.
Die Uhrzeit ist nun eingestellt.
Drücken Sie die Taste Start/Schnellstart r
. Ein Signalton ertönt. Die Zeit zählt
rückwärts herunter. Nach ca. 3 Sekunden wird
die normale Uhrzeit wieder angezeigt. Der
Küchentimer läuft im Hintergrund weiter.
Wenn Sie zwischendurch die Zeit des Küchentimers kontrollieren wollen, drücken Sie die Taste
TIMER w. Es erscheint für kurze Zeit der Küchentimer.
Sobald die eingestellte Zeit abgelaufen ist, ertönen
Signaltöne.
3.
Kindersicherung
Um die aktuelle Tageszeit abzulesen, während die
Mikrowelle in Betrieb ist, drücken Sie die Taste Uhr
q
; die Uhrzeit wird dann einige Sekunden im
Display 1 angezeigt.
Standby-Modus
Die Mikrowelle schaltet automatisch in den Standby-Modus und die Uhrzeit wird angezeigt, wenn für
längere Zeit keine Taste gedrückt wird. Wenige Sekunden nach der Umstellung in den Standby-Modus
wird auch die Displaybeleuchtung gedimmt.
Aktivieren Sie diese Einstellung, um eine unbeaufsichtigte Inbetriebnahme der Mikrowelle durch
Kleinkinder und andere nicht mit der Bedienung
vertraute Personen zu verhindern.
Das Symbol für die Kindersicherung
erscheint
im Display 1 , und das Gerät kann solange, wie
diese Funktion aktiviert ist, nicht in Betrieb genommen werden.
• Drücken Sie die Taste Stop/Kindersicherung e
und halten Sie sie solange gedrückt, bis
ein Signalton ertönt und das Symbol für die Kindersicherung
im Display 1 erscheint. Die
Tasten und der Regler der Mikrowelle haben nun
keine Funktion mehr.
• Um die Kindersicherung zu deaktivieren,
drücken Sie die Taste Stop/Kindersicherung e
und halten Sie sie solange gedrückt bis
ein Signalton ertönt und das Symbol für die Kindersicherung
erlischt.
Küchentimer einstellen
Die Mikrowelle verfügt über einen Küchentimer, den
Sie unabhängig vom Mikrowellenbetrieb einsetzen
können.
1. Drücken Sie die Taste TIMER w, wenn das
Gerät im Standby-Betrieb ist. Im Display 1 erscheint „0:00“ und das Symbol
.
2. Stellen Sie nun mit dem Drehregler r
die
gewünschte Zeit ein.
Sie können Zeiteinstellungen von 10 Sekunden
bis 95 Minuten vornehmen.
Abfragefunktionen
Uhrzeit während des Betriebs abfragen
Drücken Sie während des Garvorgangs die Taste
Uhr q
. Im Display 1 erscheint für einige
Sekunden die Uhrzeit.
Leistungsstufe während des Betriebs abfragen
Drücken Sie während des Garvorgangs die Taste
Mikrowelle 6
. Im Display 1 erscheint für
einige Sekunden die aktivierte Leistungsstufe.
- 82 -
Gar- oder Auftauvorgänge
unterbrechen/abbrechen
•
•
Drücken Sie einmal die Taste Stop e
,
um einen Gar- oder Auftauvorgang zu unterbrechen. Das Gerät unterbricht den Vorgang und
stoppt die noch verbleibende Zeit. Drücken Sie
die Taste Start/Schnellstart r
, um den Vorgang wieder fortzusetzen.
Drücken Sie zweimal die Taste Stop e
,
um einen Garvorgang abzubrechen. Das Gerät schaltet wieder in den Standby-Betrieb zurück.
Kochen und Garen
Hinweis
Diese Mikrowelle ist mit einer Abkühlfunktion ausgestattet. D.h., dass nach einem Gar- oder Grillvorgang, der mindestens 2 Minuten dauert, der Lüfter
des Gerätes noch für etwa. 3 Minuten nachläuft.
Das ist keine Fehlfunktion des Gerätes! Das schnellere Abkühlen hilft, die Lebensdauer des Gerätes zu
verlängern.
Mikrowellenbetrieb
Leistung auswählen
1. Drücken Sie die Taste Mikrowelle 6
. Im
Display 1 erscheint “900” (900 Watt
Leistung).
2. Stellen Sie mit Hilfe des Drehreglers r
die gewünschte Leistung ein.
3. Drücken Sie die Taste Start/Schnellstart r
, um die eingestellte Leistung zu bestätigen.
Garzeit einstellen
Nachdem Sie die Leistung ausgewählt haben, stellen Sie die gewünschte Garzeit ein:
• Drehen Sie den Drehregler r
, bis die gewünschte Garzeit eingestellt ist.
Die Stufen für die Einstellungszeit des
Drehreglers r
sind wie folgt:
• von 0 Sek. bis 5 Min: in 10-Sek.-Schritten
• von 5 bis 10 Min: in 30-Sek.-Schritten
• von 10 bis 30 Min: in 1-Min.-Schritten
• von 30 bis 95 Min: in 5-Min.-Schritten
Eingabevorgang abbrechen/beenden
Drücken Sie einmal die Taste Stop e
, um
einen Eingabevorgang abzubrechen und zu
beenden. Das Gerät schaltet wieder in den StandbyBetrieb zurück.
Hinweis
Auf der Mikrowellentür oder dem Gehäuse
können sich während eines Garvorgangs Wassertropfen bilden. Das ist normal und kein Zeichen für
eine Fehlfunktion der Mikrowelle. Wischen Sie die
Feuchtigkeit nachdem sie abgekühlt ist mit einem
trockenen Tuch ab.
Brandgefahr!
Benutzen Sie niemals den Grillständer t oder andere metallische Gegenstände, wenn Sie die Mikrowelle im Mikrowellenbetrieb verwenden. Metall
reflektiert die Mikrowellenstrahlung und führt so zu
Funkenbildung. Das kann zu einem Brand führen
und das Gerät irreparabel beschädigen!
Garvorgang starten
Wenn Sie die Leistung und die Garzeit eingestellt
haben, können Sie den Garvorgang starten:
Drücken Sie zum Starten des Garvorgangs die
Taste Start/Schnellstart r
. Im Display 1 erscheint das Symbol für Mikrowellenbetrieb
.Die
eingestellte Zeit zählt rückwärts herunter. Wenn die
eingestellte Zeit abgelaufen ist, erscheint abwechselnd „End“ und „Hot“ im Display 1. Ein Signalton
ertönt mehrmals hintereinander.
- 83 -
Schnellstart 1
Drehen Sie im Standby-Modus den Drehregler r
nach rechts und stellen Sie die gewünschte
Dauer des Garens ein. Starten Sie den Garvorgang
mit 900 W Leistung durch Drücken der Taste
Start/Schnellstart r
.
Schnellstart 2
Mit dieser Funktion können Sie unverzüglich für
30 Sekunden (oder länger, bis zu 95 Minuten) bei
900 W Leistung mit dem Garen beginnen.
• Drücken Sie einmal die Taste Start/Schnellstart
r
. Im Display 1 erscheint das Symbol
für Mikrowellenbetrieb
, sowie „00:30“.
Die Mikrowelle startet den Garvorgang für 30
Sekunden. Die Zeit zählt rückwärts herunter.
Wenn Sie länger als 30 Sekunden garen wollen,
drücken Sie so oft auf die Taste Start/Schnellstart
r
, bis die gewünschte Zeit erreicht ist.
Die Zeit-Stufen teilen sich wie folgt auf:
• von 30 Sek. bis 5 Min: in 30-Sek.-Schritten
• von 5 Min. bis 95 Min: in 1-Min.-Schritten
Es stehen Ihnen 3 Grill-Funktionen zur Verfügung:
• Grill-Funktion „Oberhitze“ (Gr 1):
Die Hitze kommt bei dieser Funktion nur von
oben. Nur der obere Grill ist aktiviert. Daher eignet sich diese Grill-Funktion für überbackene
Sandwiches und Gratins.
• Grill-Funktion „Unterhitze“ (Gr 2):
Die Hitze kommt bei dieser Funktion nur von
unten. Nur der untere Grill ist aktiviert. Daher
eignet sich diese Grill-Funktion für Gerichte oder
Lebensmittel, die von unten gegart/gegrillt werden müssen.
• Grill-Funktion „Ober- und Unterhitze“ (Gr 3):
Die Hitze kommt bei dieser Funktion von oben
und von unten. Der obere und der untere Grill
sind aktiviert. Daher eignet sich diese Grill-Funktion für dünne Scheiben Fleisch, Steaks,
Frikadellen, Würstchen oder Hähnchenteile.
1.
Grill-Funktion
2.
Hinweis
Benutzen Sie zum Grillen immer den Grillständer
t. So erzielen Sie ein optimales Grillergebnis. Stellen Sie den Grillständer t immer auf den Drehteller
3.
Brandgefahr!
3.
Benutzen Sie bei Verwendung der Grill-Funktionen
auf keinen Fall Abdeckungen oder nicht hitzebeständiges Geschirr, da diese schmelzen oder in Brand
geraten können!
4.
Drücken Sie die Taste Grill
7 einmal, um
die Grill-Funktion zu aktivieren.
Im Display 1 erscheint das Symbol für die
Grill-Funktion „Oberhitze“
und „Gr 1“.
Stellen Sie mit dem Drehregler r
die
gewünschte Grill-Funktion ein:
„Gr 1” für Oberhitze,
„Gr 2” für Unterhitze,
„Gr 3” für Ober- und Unterhitze.
Bestätigen Sie Ihre Auswahl durch Drücken der
Taste Start/Schnellstart r
.
Stellen Sie mit dem Drehregler r
die
gewünschte Garzeit ein. Die maximal
einstellbare Garzeit beträgt 95 Minuten.
Drücken Sie zum Starten der Grill-Funktion die
Taste Start/Schnellstart r
.
Im Display 1 erscheint das Symbol für die ausgewählte Grill-Funktion
/
/
.Die eingestellte Zeit zählt rückwärts herunter. Wenn die eingestellte Zeit abgelaufen ist, erscheint abwechselnd
„End“ und „Hot“ im Display 1. Ein Signalton ertönt
mehrmals hintereinander.
- 84 -
Kombinations-Garvorgang „Grill“
• Kombination 4 (C 4):
Bei der Kombination 4 beträgt die Mikrowellenleistung 55 % und die Grill-Leistung 45 % der
Garzeit. Dies eignet sich beispielsweise für Geflügelgerichte. Es wird die Mikrowellenfunktion
und die Grill-Funktion „Ober- und Unterhitze“
benutzt.
Diese Funktion vereint die Grill-Funktion mit dem
normalen Mikrowellenbetrieb. Während des Kombinationsvorgangs wird eine bestimmte Zeit für
Garen und die übrige Zeit für Grillen automatisch
und in einem Vorgang ausgeführt. Den Umschaltzeitpunkt des Gerätes können Sie durch ein leises
Klicken wahrnehmen.
1.
Brandgefahr!
Benutzen Sie niemals den Grillständer t oder andere metallische Gegenstände, wenn Sie die Mikrowelle im Kombinations-Garvorgang verwenden.
Metall reflektiert die Mikrowellenstrahlung und führt
so zu Funkenbildung. Das kann zu einem Brand führen und das Gerät irreparabel beschädigen!
Benutzen Sie bei Verwendung der KombinationsGarvorgängen “Grill” auf keinen Fall Abdeckungen
oder nicht hitzebeständiges Geschirr, da diese
schmelzen oder in Brand geraten können!
Es stehen Ihnen 4 Kombinationen zur Verfügung:
• Kombination 1 (C 1):
Bei der Kombination 1 beträgt die Mikrowellenleistung 30 % und die Grill-Leistung 70 % der
Garzeit. Dies ist z. B. geeignet für Fisch oder
Gratins. Es wird die Mikrowellenfunktion und die
Grill-Funktion „Oberhitze“ benutzt.
• Kombination 2 (C 2):
Bei der Kombination 2 beträgt die Mikrowellenleistung 55 % und die Grill-Leistung 45 % der
Garzeit. Dies ist z. B. geeignet für Omelettes,
Puddings oder Lasagne. Es wird die Mikrowellenfunktion und die Grill-Funktion „Oberhitze“
benutzt.
• Kombination 3 (C 3):
Bei der Kombination 3 beträgt die Mikrowellenleistung 30 % und die Grill-Leistung 70 % der
Garzeit. Dies eignet sich beispielsweise für Kartoffeln. Es wird die Mikrowellenfunktion und die
Grill-Funktion „Ober- und Unterhitze“ benutzt.
Drücken Sie die Taste Kombination MikrowelleGrill 8
einmal, um die Kombination
1 (C 1) zu aktivieren. Im Display 1 erscheinen
,
, sowie „C 1“.
2. Stellen Sie mit dem Drehregler r
die
gewünschte Kombination ein:
„C 1” für Kombination 1,
„C 2” für Kombination 2,
„C 3” für Kombination 3,
„C 4” für Kombination 4.
Bestätigen Sie Ihre Auswahl durch Drücken der
Taste Start/Schnellstart r
.
3. Stellen Sie mit dem Drehregler r
die
gewünschte Garzeit ein. Die maximal einstellbare Garzeit beträgt 95 Minuten.
4. Drücken Sie zum Starten die Taste
Start/Schnellstart r
.
Im Display 1 erscheint das Symbol für den Kombinationsvorgang “Grill”
. Die eingestellte
Zeit zählt rückwärts herunter. Wenn die eingestellte
Zeit abgelaufen ist, erscheint abwechselnd „End“
und „Hot“ im Display 1. Ein Signalton ertönt mehrmals hintereinander.
- 85 -
Heißluftbetrieb
Heißluftbetrieb mit Vorheizen
Beim Garen mit Heißluft zirkuliert heiße Luft im Garraum. Heißluft ist besonders zum Zubereiten von
Aufläufen oder knusprigen Lebensmitteln zu empfehlen. Sie können eine Temperatur von 110°C 200°C einstellen und eine Dauer von max. 95 Minuten.
Sie können Ihre Mikrowelle auch vorheizen, bevor
Sie einen Garvorgang starten:
1. Wählen Sie die gewünschte Temperatur, indem
Sie die Taste Heißluft 0
einmal drücken
und mit dem Drehregler r
die Temperatur einstellen. Bestätigen Sie diese Einstellung
NICHT durch Drücken der Taste Start/Schnellstart r
.
2. Drücken Sie, um das Vorheizen zu starten, die
Taste Heißluft 0
. Im Display 1 erscheint
„30:00“ und das Symbol für Heißluftbetrieb
blinkt. Die Zeit zählt herunter. Sobald die
eingestellte Temperatur erreicht ist, erklingen
Signaltöne und die Zeit stoppt.
3. Öffnen Sie die Tür und stellen Sie das zu garende Lebensmittel hinein.
4. Stellen Sie die Temperatur durch Drehen des
Drehreglers r
ein und bestätigen Sie die
Temperatur durch Drücken der Taste
Start/Schnellstart r
.
5. Stellen Sie mit dem Drehregler r
die
gewünschte Garzeit ein. Die maximal einstellbare Garzeit beträgt 95 Minuten.
6. Drücken Sie zum Starten die Taste
Start/Schnellstart r
.
Im Display 1 erscheint das Symbol für Heißluftbetrieb
dauerhaft. Die eingestellte Zeit zählt
rückwärts herunter. Wenn die eingestellte Zeit abgelaufen ist, erscheint abwechselnd „End“ und „Hot“
im Display 1. Ein Signalton ertönt mehrmals hintereinander.
Drücken Sie die Taste Heißluft 0
. Im
Display erscheint “200C” (= 200°C) und das
Symbol für Heißluftbetrieb
.
2. Stellen Sie mit dem Drehregler r
die gewünschte Temperatur ein und bestätigen Sie
die Auswahl durch Drücken auf die Taste
Start/Schnellstart r
.
3. Stellen Sie mit dem Drehregler r
die gewünschte Garzeit ein.
4. Drücken Sie zum Starten des Garvorgangs die
Taste Start/Schnellstart r
.
Im Display 1 erscheint das Symbol für Heißluftbetrieb
. Die eingestellte Zeit zählt rückwärts herunter. Wenn die eingestellte Zeit abgelaufen ist, erscheint abwechselnd „End“ und „Hot“ im Display 1.
Ein Signalton ertönt mehrmals hintereinander.
1.
- 86 -
Automatik-Menü
Kombinations-Garvorgang „Heißluft“
Diese Funktion vereint die Heißluft-Funktion mit dem
normalen Mikrowellenbetrieb. Dadurch wird zum
Beispiel Fleisch saftig, zart und trotzdem knusprig.
Brandgefahr!
Benutzen Sie niemals den Grillständer t oder andere metallische Gegenstände, wenn Sie die Mikrowelle im Kombinations-Garvorgang verwenden.
Metall reflektiert die Mikrowellenstrahlung und führt
so zu Funkenbildung. Das kann zu einem Brand führen und das Gerät irreparabel beschädigen!
1.
Drücken Sie die Taste Kombination MikrowelleHeißluft 9
. Im Display 1 erscheinen
die voreingestellte Temperatur „200C“ und die
Symbole
und
.
2. Wählen Sie die gewünschte Temperatur mit
Hilfe des Drehreglers r
: 110°C,
140°C, 170°C oder 200°C. Bestätigen Sie
Ihre Auswahl durch Drücken der Taste
Start/Schnellstart r
.
3. Stellen Sie mit dem Drehregler r
die gewünschte Garzeit ein. Die maximale Garzeit
beträgt 95 Minuten. Bestätigen Sie die eingestellte Garzeit durch Drücken der Taste
Start/Schnellstart r
.
Der Kombinationsvorgang startet. Im Display 1 erscheint das Symbol für den Kombinations-Garvorgang “Heißluft”
. Die eingestellte Zeit zählt
rückwärts herunter. Wenn die eingestellte Zeit abgelaufen ist, erscheint abwechselnd „End“ und „Hot“
im Display 1. Ein Signalton ertönt mehrmals hintereinander.
Für Speisen, die im Automatik-Menümodus zubereitet werden sollen, ist es nicht notwendig, die Dauer
des Garvorgangs und die Leistungsstufe einzugeben. Es reicht vielmehr aus, wenn Sie eingeben,
welche Art Lebensmittel gegart/gekocht werden
soll, sowie das Gewicht dieses Lebensmittels.
Brandgefahr!
Benutzen Sie bei Programmen mit zugeschalteter
Grillfunktion (A-01, A-02, A-03, A-04, A-05) auf
keinen Fall Abdeckungen oder nicht hitzebeständiges Geschirr, da diese schmelzen oder in Brand geraten können!
Hinweis
Die Mikrowelle berechnet die Zeit/Leistungsstufe für
frische Lebensmittel. Tiefgekühlte Lebensmittel werden mit den von der Mikrowelle vorgegebenen Zeiten nicht gar (ausgenommen Automatik-Programm
„Pizza“).
Tauen Sie ggf. tiefgekühlte Lebensmittel mit dem Auftau-Programm vorher auf (siehe Kapitel „Auftauen“).
Automatik-Menü starten
1.
Drehen Sie den Drehregler r
(im Standby-Betrieb) langsam nach links, um den Automatik-Menümodus aufzurufen. Im Display 1
erscheint eine Nummer (z. B. „A - 02“ für Autoprogramm 2 (Schwein)) und das Symbol
„Schwein“. Wählen Sie durch Drehen des
Drehreglers r
das passende AutomatikMenü zu Ihrer Speise aus.
Hinweis
Wenn Sie durch eine Linksdrehung des Drehreglers
r
in den Automatik-Menümodus gelangt sind,
können Sie durch anschließendes Drehen nach
Rechts die Automatik-Menüs in der Reihenfolge
A01, A02, A03... auswählen.
- 87 -
Display
Lebensmittel
Gewicht
A-01
Rind
200 - 1400g
A-02
Schwein
200 - 1400g
A-03
Geflügel
400 - 1400g
A-04
Fisch
200 - 1200g
A-05
Pizza
*P1 150-450g
P2 150-450g
P3 150-450g
Symbol
Obst/
Gemüse
100 - 1000g
A-07
Kartoffeln
100 - 800g
A-08
Aufwärmen
300 - 700g
A-09
Getränke
200 - 500ml
A-10
Vorspeise
300 / 500g
A-11
Auftauen
nach Gewicht
-
A-12
Auftauen
nach Zeit
-
A-06
*Für weitere Informationen über die Pizza-Programme lesen Sie das Kapitel “Pizza backen”.
2.
Bestätigen Sie Ihre Auswahl durch Drücken der
Taste Start/Schnellstart r
.
3. Stellen Sie das Gewicht mit Hilfe des Drehreglers r
ein und bestätigen Sie dieses
durch Drücken der Taste Start/Schnellstart r
.
Der Garvorgang wird gestartet und die errechnete
Zeit läuft rückwärts herunter.
Hinweis
Um ein gleichmäßiges Kochen oder Garen zu erreichen, sollten einige Speisen nach 2/3 der Garzeit
gewendet werden. Die Mikrowelle stoppt nach
dieser Zeit automatisch, 4 Signaltöne erklingen und
„Turn“ erscheint im Display 1.
Display
Lebensmittel
Wenden
nach...
A-01
Rind
2/3 der Zeit
A-02
Schwein
2/3 der Zeit
A-03
Geflügel
2/3 der Zeit
A-04
Fisch
2/3 der Zeit
Symbol
• Wenden Sie die Speisen. Gehen Sie vorsichtig mit
den eventuell schon heißen Speisen um.
• Drücken Sie die Taste Start/Schnellstart r
um den Garvorgang wieder fortzusetzen.
,
Hinweis
Wenn Sie die Speisen nicht wenden wollen, warten
Sie nach den Signaltönen einfach ab. Das Gerät
setzt den Garvorgang automatisch fort. Wir empfehlen das Wenden der Speisen. Damit erreichen Sie
ein gleichmäßiges Garen.
- 88 -
Hinweis
A-09
Wenn das Gericht nach dem Beenden des Automatik-Menüs nicht richtig durchgegart ist, garen Sie es
wie folgt nach:
A-10
• Benutzen Sie zum Nachgaren den in der Tabelle angegebene Garvorgang. Starten Sie diesen
für jeweils wenige Minuten und kontrollieren Sie
das Garergebnis.
A-11
• Bei dem Nachgaren einer Pizza mit Hilfe des
Automatikmenüse “P2” unterbrechen Sie den
Garvorgang durch Drücken der Taste Stop/Kindersicherung
, sobald die Pizza genug
nachgegart ist.
A-12
MikrowellenbeGetränke trieb mit 900 W
Leistung
MikrowellenbeVorspeise trieb mit 900 W
Leistung
Auftauen Mikrowellenbenach Ge- trieb mit 100 W
wicht
Leistung
MikrowellenbeAuftauen
trieb mit 100 W
nach Zeit
Leistung
Verletzungsgefahr!
Display
A-01
Symbol
Lebensmittel
Rind
Nachgaren
mit...
KombinationsGarvorgang
“Grill” - C3
KombinationsGarvorgang
“Grill” - C3
A-02
Schwein
A-03
Geflügel
KombinationsGarvorgang
“Grill” - C3
A-04
Fisch
KombinationsGarvorgang
“Grill” - C3
A-05
Pizza
Automatikmenü
“Pizza” - P2
A-06
A-07
A-08
Mikrowellenbetrieb mit 900 W
Leistung
MikrowellenbeKartoffeln trieb mit 900 W
Leistung
MikrowellenbeAufwärmen trieb mit 900 W
Leistung
Obst/
Gemüse
Der Drehteller 3 ist nach einem Garvorgang mit
Grill sehr heiß! Benutzen Sie daher unbedingt Topflappen oder hitzebeständige Handschuhe wenn Sie
ihn aus dem Garraum entnehmen.
Hinweis:
Bitte beachten Sie, dass Größe, Form und die
Sorten der Lebensmittel das Kochergebnis mitbestimmen.
Anwendungsbeispiel 1:
Gehen Sie wie folgt vor, wenn Sie 400 g Gemüse
oder Obst garen wollen:
1. Drehen Sie den Drehregler r
(im Standby-Betrieb) langsam nach links, bis „A-06“ im
Display 1 erscheint und bestätigen Sie die
Auswahl durch Drücken der Taste
Start/Schnellstart r
.
2. Stellen Sie mit dem Drehregler r
das
Gewicht “400” ein.
3. Drücken Sie die Taste Start/Schnellstart r
, um den Garvorgang zu starten.
- 89 -
•
Anwendungsbeispiel 2:
Gehen Sie wie folgt vor, wenn Sie 300 ml Wasser
erhitzen wollen:
1. Drehen Sie den Drehregler r
(im Standby-Betrieb) langsam nach links, bis „A-09“ im
Display 1 erscheint und bestätigen Sie die
Auswahl durch Drücken der Taste
Start/Schnellstart r
.
2. Stellen Sie mit dem Drehregler r
“300”
ein.
3. Drücken Sie die Taste Start/Schnellstart r
, um den Garvorgang zu starten.
•
4.
5.
Anwendungsbeispiel 3:
Gehen Sie wie folgt vor, wenn Sie 300 g Vorspeise
erhitzen wollen:
1. Drehen Sie den Drehregler r
(im Standby-Betrieb) langsam nach links, bis „A-10“ im
Display 1 erscheint und bestätigen Sie die
Auswahl durch Drücken der Taste
Start/Schnellstart r
.
2. Da “300” als erste Auswahl im Display erscheint, drücken Sie die Taste Start/Schnellstart
r
, um den Garvorgang zu starten.
Pizza backen
Mit dem Automatik-Programm „Pizza“ können Sie
knusprige Pizza in der Mikrowelle zubereiten. Hierbei haben Sie die Auswahl zwischen den PizzaProgrammen “P-01” (tiefgefrorene Pizza), “P-02”
(gekühlte Pizza) und “P-03” (frische Pizza).
1. Drehen Sie den Drehregler r
(im Standby-Betrieb) langsam nach links, bis „A-05“ im
Display 1 erscheint.
2. Drücken Sie die Taste Start/Schnellstart r
.
3. Wählen Sie mit Hilfe des Drehreglers r
das passende Pizza-Programm:
• „P-01“ für tiefgefrorene Pizza,
Temperatur ca. -18 Grad
Gewicht 150 g–450 g
(„P-01“ erscheint im Display 1).
„P-02“ für gekühlte Pizza,
Temperatur ca. 5 Grad,
Gewicht 150 g–450 g
(„P-02“ erscheint im Display 1).
„P-03“ für frische Pizza,
Temperatur ca. 20 Grad,
Gewicht 150 g–450 g
(„P-03“ erscheint im Display 1).
Bestätigen Sie Ihre Auswahl durch Drücken der
Taste Start/Schnellstart r
.
Wählen Sie nun das gewünschte Gewicht mit
dem Drehregler r
und bestätigen Sie
dieses durch Drücken der Taste Start/Schnellstart r
. Der Garvorgang startet.
Hinweis
Wenn Sie Pizza zubereiten, können Sie diese direkt
auf den Drehteller 3 legen. So wird sie besonders
knusprig. Achten Sie darauf, dass der Rand der Pizza während des Garvorganges nicht bis an die
Wände des Garraumes ragt.
Anwendungsbeispiel:
Gehen Sie wie folgt vor, wenn Sie eine tiefgefrorene, 450 g schwere Pizza garen wollen:
1. Drehen Sie den Drehregler r
(im Standby-Betrieb) langsam nach links, bis „A-05“ im
Display 1 erscheint.
2. Drücken Sie die Taste Start/Schnellstart r
.
3. Wählen Sie mit Hilfe des Drehreglers r
das Programm „P-01“.
4. Drücken Sie die Taste Start/Schnellstart r
.
5. Wählen Sie mit dem Drehregler r
das
Gewicht „450“.
6. Drücken Sie die Taste Start/Schnellstart r
, um den Garvorgang zu starten. Das Gerät errechnet automatisch die benötigte Zeit.
- 90 -
Auftauen
Es lassen sich folgende Gewichte einstellen:
„d-01“/
/ „Rind“
100 - 1800g
„d-02“/
/ „Schwein“ 100 - 1800g
Legen Sie die aufzutauenden Lebensmittel immer auf
für Mikrowellen geeignetes Geschirr. Niemals direkt
auf den Drehteller 3!
„d-03“/
/ „Geflügel“ 100 - 1800g
„d-04“/
/ „Fisch“
100 - 1800g
Mit dieser Funktion können Sie problemlos Fleisch,
Geflügel, Fisch, Obst/Gemüse und Pizza auftauen.
Die Auftauzeit und die Leistungsstufe werden nach
Eingabe des Gewichts automatisch errechnet und
eingestellt.
1. Drehen Sie im Standby-Modus den Drehregler
r
gegen den Uhrzeigersinn, bis im Display 1 „A-11“ erscheint und
blinkt (siehe Kapitel “Automatik-Menü”).
2. Drücken Sie die Taste Start/Schnellstart r
.
3. Wählen Sie nun durch Drehen des Drehreglers
r
das aufzutauende Lebensmittel.
Im Display 1 erscheint:
„d-05“/
/ „Pizza“
100 - 900g
„d-06“/
/„Obst/Gemüse“ 100 - 900g
„d-07“/
/ „Kartoffeln“ 100 - 900g
Auftauen nach Gewicht
Hinweis:
„d-01“ und
für „Rind“
„d-02“ und
für „Schwein“
„d-03“ und
für „Geflügel“
„d-04“ und
für „Fisch“
„d-05“ und
für „Pizza“
„d-06“ und
für „Obst/Gemüse“
„d-07“ und
für „Kartoffeln“
4.
5.
5.
Wenn das gewünschte Gewicht im Display 1
erscheint, drücken sie die Taste Start/Schnellstart r
. Das Gerät errechnet die benötigte Auftauzeit automatisch.
Hinweis:
Um ein optimales Auftauen zu gewährleisten, ist es
nötig die Speisen während des Auftauvorganges zu
wenden. Das Gerät erinnert Sie an das Wenden, indem Signaltöne erklingen und auf dem Display 1
„turn“ erscheint. Öffnen Sie die Gerätetür, wenden
Sie die Speise und schließen Sie die Gerätetür wieder. Drücken Sie die Taste Start/Schnellstart r
, um den Auftauvorgang fortzuführen.
Wenn Sie die Speisen nicht wenden wollen, warten
Sie nach den Signaltönen einfach ab. Das Gerät
setzt den Auftauvorgang automatisch fort. Wir empfehlen das Wenden der Speisen. Damit erreichen
Sie ein gleichmäßiges Auftauen.
Wenn das gewünschte Lebensmittel im Display
1 erscheint, drücken Sie die Taste
Start/Schnellstart r
.
Stellen Sie durch Drehen des Drehreglers r
das Gewicht ein.
- 91 -
Rezepte
Auftauen nach Zeit
Hinweis:
Legen Sie die aufzutauenden Lebensmittel immer auf
für Mikrowellen geeignetes Geschirr. Niemals direkt
auf den Drehteller 3!
Frikadellen
1.
•
2.
3.
4.
Drehen Sie im Standby-Modus den Drehregler
r
gegen den Uhrzeigersinn, bis im
Display 1 „A-12“ und
erscheint.
Drücken Sie die Taste Start/Schnellstart r
.
Stellen Sie die gewünschte Zeit mit dem Drehregler r
ein.
Drücken Sie die Taste Start/Schnellstart r
, um den Auftauvorgang zu starten. Die
Zeit zählt rückwärts herunter.
Hinweis:
Um ein optimales Auftauen zu gewährleisten, ist es
nötig die Speisen während des Auftauvorganges zu
wenden. Das Gerät erinnert Sie an das Wenden, indem Signaltöne erklingen und auf dem Display 1
„turn“ erscheint. Öffnen Sie die Gerätetür, wenden
Sie die Speise und schließen Sie die Gerätetür wieder. Drücken Sie die Taste Start/Schnellstart r
, um den Auftauvorgang fortzuführen.
Wenn Sie die Speisen nicht wenden wollen, warten
Sie nach den Signaltönen einfach ab. Das Gerät
setzt den Auftauvorgang automatisch fort. Wir empfehlen das Wenden der Speisen. Damit erreichen
Sie ein gleichmäßiges Auftauen.
•
Formen Sie je ca. 125g Rinderhackfleisch zu
einer Frikadelle
(Durchmesser ca. 75mm, Höhe ca. 35mm).
Verteilen Sie die Frikadellen gleichmäßig auf
dem Drehteller 3.
Zubereitung
Das beste Ergebnis erzielen Sie wenn Sie Heißluft
und Mikrowellen-Funktion abwechselnd benutzen.
Warten Sie jeweils ab, bis der eingestellte Garvorgang beendet ist und stellen Sie den nächsten Vorgang ein.
1.
2.
3.
Heißluft 200°C, 4:00 Min.
Mikrowelle 900 W Leistung , 5:30 Min.
Heißluft 200°C, 2:00 Min
(je nach persönlichem Geschmack kann auch
eine Zeit von bis zu 4:00 Min. möglich sein).
Aufbacken von Tiefkühlfertigbrötchen
• Zum Aufbacken von Brötchen wählen Sie die
Heißluftfunktion.
• Legen Sie 3-4 Brötchen auf den Drehteller 3.
Ein Vorheizen der Mikrowelle ist nicht erforderlich.
Wählen Sie folgende Einstellung für den Backvorgang:
• Heißluft 170°C, Dauer: 12 Minuten
Wenn Sie direkt im Anschluss weitere Brötchen aufbacken möchten, verkürzen Sie die Zeit um ca. 1-2
Minuten, da das Gerät nun bereits vorgeheizt ist.
- 92 -
Kartoffelgratin
Muffins
Zutaten
• 750 g festkochende geschälte Kartoffeln
• 300 g Sahne
• 100 g geriebener Käse mit einem Fettgehalt von
25% bis 30 % Fett i. Tr.
• Gewürze je nach Geschmack (z.B. Salz/Pfeffer)
Benutzen Sie ein mikrowellenfestes, rundes Geschirr
mit Deckel, mit einer Höhe von 5 bis 6 cm und einem Durchmesser von ca. 22 cm.
Zutaten
Das Rezept ergibt ca. 10 bis 20 Muffins.
Zubereitung
• Schneiden Sie die Kartoffeln in ca. 3 – 4 mm
dicke Scheiben.
• Legen Sie ungefähr die Hälfte der Kartoffeln
dachziegelartig in die Auflaufform.
• Bestreuen Sie die Kartoffeln mit ca. der Hälfte
des Käses.
• Geben Sie die Hälfte der Gewürze hinzu sowie
ca. 150 g Sahne.
• Legen Sie den Rest der geschnittenen Kartoffeln
ebenfalls dachziegelartig darüber.
• Verteilen Sie den restlichen Käse über den Kartoffeln und schütten Sie die restliche Sahne darüber.
• Streuen Sie die restlichen Gewürze über das
Gratin.
• Decken Sie das Geschirr mit dem Deckel ab und
stellen Sie es mittig auf den Drehteller 3.
• Backmargarine (80% Fettgehalt) oder gesalzene
Butter
• 170 g Kristallzucker (max. Körnung 0,3 mm)
• 3 Eier (55 - 60 g mit Schale/Größe M)
• 225 g Weizenmehl
• 7 g Backpulver
• 0,25 g Salz
Zubereitung
• Mischen Sie alle Zutaten gut durch.
• Füllen Sie den Muffinteig in handelsübliche Papier-Backförmchen (Durchmesser ca. 45 mm,
Höhe ca. 28 mm)
• Heizen Sie die Mikrowelle mit der Heißluft-Funktion auf 170°C vor.
Hinweis:
Sollten Sie bedingt durch die Anzahl der Muffins mehrere Backvorgänge benötigen, ist das
Vorheizen nur einmal erforderlich.
•
Verteilen Sie nun die Muffins gleichmäßig auf
dem Drehteller 3.
•
Wählen Sie folgende Einstellung für den
Backvorgang:
Heißluft 170°C, Dauer: 12 Minuten
Zubereitung
Das beste Ergebnis erzielen Sie wenn Sie Heißluft
und Mikrowellen-Funktion abwechselnd benutzen.
Warten Sie jeweils ab, bis der eingestellte Garvorgang beendet ist und stellen Sie den nächsten Vorgang ein.
1. Mikrowelle 900 W Leistung, 10:00 Min.
2. Heißluft 200 °C, 13:00 Min.
3. Mikrowelle 900 W Leistung, 10:00 Min.
Ein Vorheizen ist nicht erforderlich.
- 93 -
Reinigung und Pflege
•
Verletzungsgefahr!
Schalten Sie vor dem Säubern die Mikrowelle ab
und ziehen Sie den Netzstecker aus der Netzsteckdose. Ansonsten besteht die Gefahr eines elektrischen Schlages!
•
•
•
•
•
•
•
•
•
Auf keinen Fall darf das Gerät in Wasser oder
andere Flüssigkeiten getaucht werden. Hierdurch kann Lebensgefahr durch elektrischen
Schlag entstehen und das Gerät kann beschädigt werden.
•
Halten Sie das Innere der Mikrowelle stets
sauber.
Sollten Speisespritzer oder verschüttete Flüssigkeiten an den Wänden der Mikrowelle haften,
wischen Sie diese mit einem feuchten Tuch ab.
Verwenden Sie ein mildes Spülmittel, sollte die
Mikrowelle stärkere Verschmutzungen aufweisen.
Vermeiden Sie die Benutzung von Reinigungssprays und anderen scharfen Putzmitteln, da
diese Flecken, Streifen oder eine Trübung der
Türoberfläche hervorrufen können.
Säubern Sie die Außenwände mit einem feuchten Tuch.
Um eine Beschädigung der Funktionsteile im
Innern der Mikrowelle zu vermeiden, lassen
Sie kein Wasser in die Lüftungsschlitze 5 einsickern.
Entfernen Sie regelmäßig Spritzer oder Verunreinigungen. Reinigen Sie Tür, Sichtfenster
beidseitig, Türdichtungen und benachbarte
Teile mit einem feuchten Tuch. Verwenden
Sie keine Scheuermittel.
•
Sollte sich in oder um die Außenseite der Tür
Dunst ablagern, wischen Sie ihn mit einem weichen Tuch ab. Hierzu kommt es, wenn die
Mikrowelle unter hohen Feuchtigkeitsbedingungen betrieben wird.
Reinigen Sie auch den Drehteller 3 regelmäßig. Spülen Sie ihn in warmer Seifenlauge.
Reinigen Sie den Grillständer t in warmen
Spülwasser und trocknen Sie ihn gut ab.
Beseitigen Sie regelmäßig Gerüche. Stellen
Sie eine tiefe Mikrowellenschüssel mit einer
Tasse Wasser, Saft und Haut einer Zitrone
gefüllt in die Mikrowelle. Erhitzen Sie diese
für 5 Minuten. Gründlich abwischen und mit
einem weichen Lappen trockenreiben.
Sollte ein Auswechseln der Lampe in der
Mikrowelle erforderlich werden, lassen Sie
diese bitte von einem Händler ersetzen oder
fragen Sie unseren Service.
Fehlerbehebung
Das Display 1 zeigt nichts an.
• Der Netzstecker steckt nicht in der Netzsteckdose. Kontrollieren Sie den Netzstecker.
• Die Netzsteckdose ist defekt. Probieren Sie
eine andere Netzsteckdose.
• Das Display 1 ist defekt. Kontaktieren Sie den
Service.
Das Gerät reagiert nicht auf das Drücken der
Tasten.
• Die Kindersicherung ist aktiviert. Deaktivieren
Sie die Kindersicherung (siehe Kapitel „Bedienen“).
Das Gerät startet den Gar-/Kochvorgang nicht.
• Die Tür ist nicht richtig verschlossen. Schließen
Sie die Tür richtig.
- 94 -
Entsorgen
Der Drehteller 3 erzeugt beim Drehen laute
Geräusche.
• Der Drehteller 3 liegt nicht richtig auf der
Achse. Legen Sie den Drehteller 3 korrekt in
den Garraum ein.
• Die kleinen Rollen 4 und/oder der Boden des
Garraumes sind verschmutzt. Reinigen Sie die
Rollen 4 und den Boden.
Werfen Sie das Gerät keinesfalls in den
normalen Hausmüll. Dieses Produkt
unterliegt der europäischen Richtlinie
2002/96/EC.
Entsorgen Sie das Gerät über einen zugelassenen
Entsorgungsbetrieb oder über Ihre kommunale
Entsorgungseinrichtung.
Beachten Sie die aktuell geltenden Vorschriften.
Setzen Sie sich im Zweifelsfall mit Ihrer Entsorgungseinrichtung in Verbindung.
Das Display 1 zeigt „E01“ an und Signaltöne
erklingen.
• Die Mikrowelle ist überhitzt. Brechen Sie sofort
das laufende Programm ab. Ziehen Sie den
Netzstecker, öffnen Sie die Mikrowellentür und
lassen Sie das Gerät abkühlen.
Führen Sie alle Verpackungsmaterialien
einer umweltgerechten Entsorgung zu.
Das Display 1 zeigt „E02“ an und Signaltöne
erklingen.
• Es liegt ein Fehler am Sensor vor. Unterbrechen
Sie das Programm und lassen Sie das Gerät
abkühlen. Starten Sie dann die Mikrowelle erneut. Sollte der Fehler wiederholt auftreten,
wenden Sie sich an den Kundendienst.
• Es liegt ein Fehler beim Aufheizen des Gerätes
vor. Unterbrechen Sie das Programm und lassen Sie das Gerät abkühlen. Starten Sie dann
die Mikrowelle erneut. Sollte der Fehler
wiederholt auftreten, wenden Sie sich an den
Kundendienst.
Das Display 1 zeigt „E03“ an und Signaltöne
erklingen.
• Die Mikrowelle ist, aufgrund eines Kurzschlusses oder einer Leerlaufspannung, in den Fehlfunktion-Schutz gewechselt. Unterbrechen Sie
das Programm und ziehen Sie den Netzstecker. Beheben Sie, falls möglich das Problem, z.B. Metall im Garraum, welches bei
Nutzung der Mikrowellenfuktion zu oben genannten Problem führen kann. Ansonsten wenden Sie sich bitte an den Kundendienst.
- 95 -
Garantie und Service
Sie erhalten auf dieses Gerät 3 Jahre Garantie ab
Kaufdatum. Das Gerät wurde sorgfältig produziert
und vor Anlieferung gewissenhaft geprüft.
Bitte bewahren Sie den Kassenbon als Nachweis
für den Kauf auf. Bitte setzen Sie sich im Garantiefall mit Ihrer Servicestelle telefonisch in Verbindung.
Nur so kann eine kostenlose Einsendung Ihrer Ware
gewährleistet werden.
Die Garantieleistung gilt nur für Material- oder
Fabrikationsfehler, nicht aber für Transportschäden,
Verschleißteile oder für Beschädigungen an zerbrechlichen Teilen, z. B. Schalter oder Akkus. Das
Produkt ist lediglich für den privaten und nicht für
den gewerblichen Gebrauch bestimmt.
Bei missbräuchlicher und unsachgemäßer Behandlung, Gewaltanwendung und bei Eingriffen, die
nicht von unserer autorisierten Service-Niederlassung vorgenommen wurden, erlischt die Garantie.
Ihre gesetzlichen Rechte werden durch diese
Garantie nicht eingeschränkt.
Die Garantiezeit wird durch die Gewährleistung
nicht verlängert. Dies gilt auch für ersetzte und reparierte Teile. Eventuell schon beim Kauf vorhandene
Schäden und Mängel müssen sofort nach dem
Auspacken gemeldet werden, spätestens aber zwei
Tage nach Kaufdatum. Nach Ablauf der Garantiezeit anfallende Reparaturen sind kostenpflichtig.
Service Deutschland
Tel.: 01805 772 033 (0,14 EUR/Min. aus dem dt.
Festnetz, Mobilfunk max. 0,42 EUR/Min.)
E-Mail: [email protected]
IAN 73194
Service Österreich
Tel.: 0820 201 222 (0,15 EUR/Min.)
E-Mail: [email protected]
IAN 73194
Service Schweiz
Tel.: 0842 665566 (0,08 CHF/Min.,
Mobilfunk max. 0,40 CHF/Min.)
E-Mail: [email protected]
IAN 73194
Importeur
KOMPERNASS GMBH
BURGSTRASSE 21
44867 BOCHUM, DEUTSCHLAND
www.kompernass.com
- 96 -
KOMPERNASS GMBH
BURGSTRASSE 21
44867 BOCHUM
DEUTSCHLAND / GERMANY
www.kompernass.com
Versione delle informazioni · Estado das informações
Last Information Update · Stand der Informationen:
03 / 2013 · Ident.-No.: SMW900EDSB2012013-3
IAN 73194
5