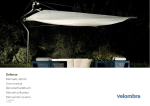
1
Pergotenda® Flux
Manuale utente
User manual
Benutzerhandbuch
Manuel utilisateur
Manual del usuario
0 - 03.2012 Cod. 04827
grazie per aver scelto un prodotto Corradi. In questo Manuale Utente sono illustrate le caratteristiche tecniche dei componenti e la
manutenzione necessaria a PERGOTENDA®FLUX per essere sempre il luogo ideale in cui trascorrere i tuoi momenti di relax all’aria
aperta.
Il Manuale è la guida di riferimento per il mantenimento di PERGOTENDA®FLUX, ti raccomandiamo quindi di leggerlo attentamente in
ogni sua parte e di conservarlo, ricordando che il buon funzionamento di PERGOTENDA®FLUX, e quindi anche la tua sicurezza, è
garantita solo alle condizioni riportate nelle pagine seguenti.
Avvertenze e precauzioni
Come si manovra PERGOTENDA®FLUX
Versioni e motorizzazioni
PERGOTENDA®FLUX 2 guide
PERGOTENDA®FLUX 3 guide
PERGOTENDA®FLUX 4 guide
Risoluzione dei problemi con comando elettrico
Caratteristiche prodotti
Manutenzione
Tabelle
Garanzia
Marcatura CE
Dichiarazione di conformità
Regolazione comandi (interventi a carico di un
tecnico specializzato)
Corradi Spa
Alberto Corradi
20
ESPAÑOL
N.B. Corradi Spa si riserva il diritto di modificare i suoi prodotti in qualsiasi momento, a sua sola discrezione e senza preavviso. Qualsiasi
intervento personale, o di terzi, non autorizzato da Corradi (manomissioni, modifiche tecniche, ecc.) effettuato su PERGOTENDA®FLUX o sui
suoi componenti nel periodo di garanzia comporta l’istantaneo decadimento della garanzia stessa; in questo caso e in queste condizioni,
Corradi sarà esclusa da ogni responsabilità e da ogni obbligo diretto o indiretto derivanti dall’intervento non autorizzato.
2
3
4
5
6
7
8
9
13
14
16
18
19
DEUTSCH
INDICE
FRANÇAIS
GENTILE CLIENTE,
ENGLISH
ITALIANO
BENVENUTO
0 - 03.2012
CORRADI S.P.A. - MANUALE UTENTE - PERGOTENDA®FLUX
1 di 119
AVVERTENZE E PRECAUZIONI
CONTROLLO PRELIMINARE
Al ricevimento della merce imballata, nel caso l’operazione di
montaggio non sia effettuata dal rivenditore, controllare
l’integrità del materiale e la presenza di tutti i componenti
necessari.
In caso di anomalie contattare il Rivenditore autorizzato.
SMALTIMENTO IMBALLI MATERIALE
Suddividere i vari imballi secondo il materiale di composizione
(cartone, nylon, polistirolo, ecc.) e procedere al loro
smaltimento in modo differenziato, in base alle normative
vigenti.
AVVERTENZE GENERALI
Prima di effettuare qualsiasi operazione di montaggio, manutenzione o pulizia del prodotto, accertarsi di aver compreso
quanto descritto nel presente manuale.
Ogni prodotto Corradi ha una sua specifica funzione descritta
nel presente manuale; ogni utilizzo diverso e non previsto da
quello indicato, l’utilizzo di componenti non originali, qualsiasi
manomissione e/o modifica tecnica non autorizzata, sollevano Corradi Spa dalle responsabilità ai danni di persone,
cose o animali derivanti dall’intervento.
PRECAUZIONI DI SICUREZZA
È buona norma tenere sempre presente che ogni organo in
movimento può costituire un pericolo.
Durante tutte le operazioni di manutenzione, riparazione o
registrazione del prodotto è sempre obbligatorio togliere la
tensione elettrica. Si consiglia inoltre di apporre un cartello di
segnalazione sull’interruttore generale di alimentazione
elettrica con riportata la seguente indicazione:
“NON TOCCARE: personale di assistenza in servizio”.
DEMOLIZIONE
All’atto della demolizione è necessario separare le parti in
materiale plastico e la componentistica elettrica, che devono
essere inviate a raccolte differenziate nel rispetto delle
normative vigenti.
Per quanto concerne la massa metallica della tenda, è
sufficiente la suddivisione tra le parti acciaiose e quelle in altri
metalli o leghe, per un corretto invio al riciclaggio per fusione.
Accertarsi che nessun operatore si trovi in prossimità della
tenda prima di riattivarla dopo un intervento di manutenzione.
Verificare sempre il funzionamento e l’efficienza dei comandi
manuali ed elettrici dopo la manutenzione, in caso di anomalie
arrestare immediatamente le manovre e contattare l’assistenza
tecnica Corradi.
Il personale addetto all’installazione del prodotto (montatori
ed elettricisti) deve essere dotato delle specifiche competenze
nonché dei requisiti attitudinali e psicofisici necessari allo
svolgimento delle proprie mansioni; deve inoltre rispettare
scrupolosamente le normative antinfortunistiche in vigore.
2 di 119
CORRADI S.P.A. - MANUALE UTENTE - PERGOTENDA®FLUX
0 - 03.2012
Stop
Discesa telo
Salita telo
Led
Indica lo stato
della batteria
(rosso funziona)
Sostituzione della batteria
Per sostituire la batteria togliere la vite sul retro del
radiocomando e sostituirla con un modello analogo ( alcalina
da 12 Vdc mod. 23 A).
Attenzione a non invertire le polarità.
Attenzione a non utilizzare un modello non corretto.
Smaltire la batteria usata negli appositi contenitori.
Discesa telo
0 - 03.2012
CORRADI S.P.A. - MANUALE UTENTE - PERGOTENDA®FLUX
ENGLISH
Salita telo
DEUTSCH
RADIOCOMANDO
Se la PERGOTENDA®FLUX è dotata di radiocomando, per i
movimenti di salita, discesa e arresto del telo si utilizzano i
rispettivi pulsanti (vedi figura).
FRANÇAIS
COMANDO ELETTRICO
Se la PERGOTENDA®FLUX è dotata di pulsante a muro, per fare
scendere il telo premere il pulsante nella zona inferiore, per
fare salire il telo in quella superiore. Il rilascio del pulsante
determina l’arresto della movimentazione nel punto in cui il
telo si trova.
ESPAÑOL
PERGOTENDA®FLUX
È progettata e costruita su misura per il committente allo
scopo di proteggere dal sole e dalle intemperie, con
esclusione del carico neve; PERGOTENDA®FLUX dovrà essere
fissata ad una parete di sostegno adeguata e ne sarà
consentito l’impiego in caso di vento fino al grado 8 della scala
Beaufort come da tabella 1 (pag. 14).
ITALIANO
COME SI MANOVRA PERGOTENDA®FLUX
3 di 119
VERSIONI E MOTORIZZAZIONI
PERGOTENDA®FLUX 2 GUIDE
ELETTRICO TIPO 1
motore PLAN
1 LARGHEZZA
2 SPORGENZA
3 ALTEZZA SUPPORTI A PARETE
4 ALTEZZA PILASTRI
Motoriduttore a 220 volt - 218 W completo di fine corsa a pulsante per
salita e discesa. Per tende fino a 3 guide con una sporgenza massima di
350 cm.
PERGOTENDA®FLUX 3 GUIDE
PERGOTENDA®FLUX
ELETTRICO TIPO 2
motore SLOPE
centralina MONO
Motoriduttore a 220 volt - 218 W con centralina dotata di
microprocessore di controllo della tensione e di ricevitore per comando
a distanza in radiofrequenza (433,92 MHz), con emettitore a due canali.
Ideale per tende a 2 o 3 guide per garantire sempre ad ogni manovra
una corretta tensione del telo che può cambiare in funzione delle
dilatazioni del tessuto o delle guide dovute alle escursioni
termiche.
4
PERGOTENDA®FLUX 4 GUIDE
ELETTRICO TIPO 3
motore 1 SLOPE (di comando)
motore 2 PLUS
centralina TANDEM
Motoriduttori a 220 volt- 218+218 W con centralina dotata di
microprocessore di controllo della tensione e per il funzionamento sullo
stesso asse di due motori in serie, munito di ricevitore per comando a
distanza in radiofrequenza (433,92 MHz), con emettitore a due canali.
Ideale per tende a 4 guide per garantire sempre ad ogni manovra una
corretta tensione del telo che può cambiare in funzione delle dilatazioni
del
tessuto
o
delle
guide
dovute
alle
escursioni
termiche.
4 di 119
CORRADI S.P.A. - MANUALE UTENTE - PERGOTENDA®FLUX
0 - 03.2012
COMANDO ELETTRICO TIPO 1
00775-1 Motoriduttore PLAN
0 - 03.2012
CORRADI S.P.A. - MANUALE UTENTE - PERGOTENDA®FLUX
COMANDO ELETTRICO TIPO 2
00775-2 Motoriduttore SLOPE
00749
Centralina MONO
5 di 119
ESPAÑOL
FRANÇAIS
DEUTSCH
ENGLISH
ITALIANO
PERGOTENDA®FLUX 2 GUIDE
PERGOTENDA®FLUX 3 GUIDE
COMANDO ELETTRICO TIPO 1
00775-1 Motoriduttore PLAN
6 di 119
CORRADI S.P.A. - MANUALE UTENTE - PERGOTENDA®FLUX
COMANDO ELETTRICO TIPO 2
00775-2 Motoriduttore SLOPE
00749
Centralina MONO
0 - 03.2012
COMANDO ELETTRICO TIPO 1
00775-1 Motoriduttore PLAN
0 - 03.2012
CORRADI S.P.A. - MANUALE UTENTE - PERGOTENDA®FLUX
COMANDO ELETTRICO TIPO 3
00775-2 Motoriduttore SLOPE (di comando)
00775-3 Motoriduttore PLUS
00757
Centralina TANDEM
7 di 119
ESPAÑOL
FRANÇAIS
DEUTSCH
ENGLISH
ITALIANO
PERGOTENDA®FLUX 4 GUIDE
RISOLUZIONE DEI PROBLEMI CON COMANDO ELETTRICO
POSSIBILE CAUSA
VERIFICHE E RIMEDI
Dato il comando, il motore non si avvia.
Manca tensione nella rete.
Accertarsi che sia disponibile corrente nell’impianto di casa.
Spina corrente non collegata alla rete.
Accertarsi che la spina sia correttamente collegata
ad una presa valida.
Surriscaldamento del motore, il led sulla centralina si accende.
Attendere 5-10 minuti per permettere il raffreddamento
del motore. Se il problema persiste, regolare il finecorsa.
Pile radiocomando scariche.
Cambiare la pila al radiocomando.
Fusibile rotto.
Aprire la centralina e sostituire il fusibile.
Il motore si avvia ma la tenda non scorre.
Possibilità di cinghie rotte o di albero motore scollegato.
Contattare il rivenditore.
La tenda si muove a scatti.
Guide di scorrimento sporche o non perfettamente allineate.
Pulire le guide (vedi cap. Manutenzione).
PERGOTENDA®FLUX
CON CENTRALINA
INCONVENIENTE
8 di 119
CORRADI S.P.A. - MANUALE UTENTE - PERGOTENDA®FLUX
0 - 03.2012
CARATTERISTICHE PRODOTTO
NON CONFORMITA' / DIFETTO
AVVERTENZE
I difetti devono essere segnalati entro 8 giorni dalla data di
installazione dal cliente (fa riferimento la data indicata nel
certificato di corretta posa rilasciato all'utente finale dall'installatore). Vedi condizioni generali di vendita.
GENERALE
ITALIANO
CARATTERISTICHE PRODOTTI
La struttura non è a tenuta stagna. In caso di temporali particolarmente violenti con vento forte è
possibile la comparsa di infiltrazioni d'acqua.
ENGLISH
In caso di superamento del valore di vento indicato sulla dichiarazione di corretta posa è necessario chiudere la tenda. E' possibile impiegare un anemometro opportunamente tarato.
Il prodotto non garantisce il carico neve. In presenza di nevicate, anche di intensità modesta, la
tenda deve essere impacchettata.
Per avere la garanzia sul prodotto è OBBLIGATORIA la compilazione del certificato di corretta posa.
Una copia deve essere rilasciata al cliente finale ed una copia deve essere inviata a Corradi SpA. Il
ricevimento del certificato correttamente compilato attiva la garanzia sul prodotto.
DEUTSCH
Ogni variazione sul prodotto non autorizzata espressamente da Corradi SpA porta al decadimento
della garanzia.
AUTOPORTANTI
Applicando un carico laterale sul pilastro è possibile generare una oscillazione nella struttura. Tale
movimento non è indice di debolezza strutturale, ma è considerato normale per la tipologia di
struttura. La struttura è stata calcolata da ingegneri abilitati impiegando gli Eurocodici ed è
garantita al vento fino al grado indicato nella certificazione CE e nella Dichiarazione di corretta
posa.
TELO
In funzione delle condizioni di installazione è possibile che il telo si sporchi (agenti inquinanti,
fumo da canne fumarie, smog, ecc.). In tal caso può essere necessario pulire il telo come indicato
nel paragrafo manutenzione con maggiore frequenza.
FRANÇAIS
Le strutture inserite in un contesto urbano sono sottoposte ad agenti inquinanti (smog, piogge
acide), fumi da canne fumarie, fumi di cucina, ed intemperie in genere. Pertanto è normale che il
telo e la struttura stessa si sporchino. Le strutture ed il telo NON SONO autopulenti.
Il telo non è immune da bruciature dovute a mozziconi di sigaretta, ecc.
In particolari situazioni di uso della struttura è possibile la formazione di condensa nella parte
interna del telo. Per limitare tale condizione procedere con una adeguata areazione del locale.
La presenza di pieghe sul telo subito dopo la prima installazione può essere dovuta all'imballaggio. E' necessario mantenere il telo in posizione per almeno 10 giorni, e valutare la qualità del
prodotto dopo tale lasso di tempo.
0 - 03.2012
ESPAÑOL
La comparsa di muffe nella goffratura del telo è dovuta alla presenza di umidità sul telo che favorisce la formazione di microorganismi. E' pertanto necessario pulire il telo ad intervalli regolari, più
frequenti dove necessario.
La presenza di pieghe dopo i 10 gg è da
considerare difetto.
CORRADI S.P.A. - MANUALE UTENTE - PERGOTENDA®FLUX
9 di 119
CARATTERISTICHE PRODOTTI
CARATTERISTICHE PRODOTTO
NON CONFORMITA' / DIFETTO
CONTROSOFFITTO
In particolari situazioni di uso della struttura è possibile la formazione di condensa nella zona tra telo e controsoffitto.
Questo può causare sporcizia e/o muffe nella zona intermedia. Smontare il controsoffitto e lavarlo.
GRONDA
E' necessario controllare periodicamente che i tubi di scarico della gronda ed i pluviali siano puliti.
Eliminare foglie ed altri detriti che possono occludere i fori di scarico.
In caso di precipitazioni molto abbondanti è possibile che la gronda non riesca a scaricare l'acqua. Questo potrebbe
causare infiltrazioni d'acqua.
Il convogliamento dell'acqua a terra non è controllabile da Corradi SpA ma è a cura del cliente finale. Le condizioni di installazione, pendenze ed eventuali pozzetti di raccolta, sono di esclusiva responsabilità del cliente finale.
LAMPADE
Per mantenere in buona efficienza le guarnizioni, garantendo in tal modo il grado di protezione IP del prodotto (riportato
nel manuale), è necessario eseguire le operazioni di manutenzione indicate nel manuale.
VELA
La presenza di pieghe sulla vela è dovuta al prolungato avvolgimento della tela sul tubo avvolgitore. Per limitare tale
fenomeno e per avere la garanzia è obbligatorio l'impiego del coprivela.
La presenza di pieghe sulla vela subito dopo la prima installazione può essere dovuta all'imballaggio. Le pieghe scompariranno completamente dopo circa 6 mesi dall'installazione.
TESSUTI VELOMBRA
I tessuti sono “tinti in pezza”: questo può causare una non perfetta uniformità ed omogeneità dei colori.
LEGNO
ATTENZIONE: è bene ricordare che ogni specie legnosa posizionata all’esterno, e direttamente esposta alle intemperie, è
comunque destinata ad assumere, anche dopo un lasso di tempo relativamente breve, un aspetto “vissuto”, che si manifesta essenzialmente con:
• decolorazione della superficie (con degrado variabile in funzione del grado di umidità al quale il legno è sottoposto)
• con l'irregolarità della superficie, dovuta ai fenomeni ciclici di gonfiamento e ritiro e all'eventuale usura meccanica della
superficie stessa.
Poiché il legno è un materiale naturale, esistono differenze cromatiche e di fibratura che rendono tutti gli elementi differenti tra di loro. Inoltre a seconda dell'angolo visivo l'aspetto differisce a causa della natura cangiante del materiale stesso.
Le campionature o le riproduzioni fotografiche sono pertanto da intendersi come indicative e non vincolanti.
Il distacco di una lamella dalle travi è da considerare un difetto.
Il legno è sottoposto ad un trattamento protettivo eseguito in autoclave che permette di ottenere una migliore resistenza
all'attacco di funghi e muffe. Tale trattamento è di colore verde (dovuto ai sali di impregnazione impiegati), e viene eseguito prima della verniciatura delle travi. E' normale, in caso di colori chiari, la comparsa di striature verdi sul legno a seguito
del dilavamento della vernice di finitura ad opera delle intemperie. In tal caso è necessario procedere con la manutenzione
come indicato nel manuale.
Sulle travi possono essere presenti bande verticali di tonalità differenti. Ciò è normale ed è dovuto all'impilaggio che
avviene all'interno dell'autoclave durante il trattamento di impregnazione (le travi vengono distanziate tra loro tramite travetti trasversali).
L'eventuale presenza di resina è una caratteristica del legno di conifera.
E' normale una variazione dimensionale a seguito dell'esposizione dei prodotti in legno all'umidità. L'umidità di riferimento
per la misurazione è 12% (definita nella UNI EN390:1997).
10 di 119
CORRADI S.P.A. - MANUALE UTENTE - PERGOTENDA®FLUX
0 - 03.2012
CARATTERISTICHE PRODOTTI
PAVIMENTI
NON CONFORMITA' / DIFETTO
ITALIANO
CARATTERISTICHE PRODOTTO
Il pavimento si può ammaccare per urti o cadute di oggetti e per l'applicazione di carichi concentrati su di una piccola
superficie, quali sedie con ruote non idonee, tacchi a spillo e scale da lavoro.
Il pavimento si può graffiare a seguito di contatto con piccoli oggetti quali chiodi o sassolini presenti sotto le suole delle
scarpe.
Al momento della fornitura il pavimento può essere differente da quello delle campionature a seguito dell'esposizione alla
luce che causa una modifica del colore del legno.
MOBILI
Nel periodo invernale devono essere protetti dalle intemperie. E' necessario pulirli prima di ricoverarli per l'inverno.
ENGLISH
Se i mobili sono impiegati in ambiente marino è necessario lavare periodicamente con acqua dolce per eliminare tracce di
salsedine.
Caratteristiche Inox vedi voce ACCIAIO INOX
MOTORI
Impianto elettrico: deve essere realizzato da un elettricista abilitato che deve rilasciare certificato di conformità dell'impianto elettrico.
L'impianto deve avere un grado di protezione adeguato essendo installato all'esterno. Un elettricista abilitato è in grado di
dimensionare correttamente l'impianto e scegliere i componenti adeguati (grado IP adeguato).
ACCIAIO INOX
I componenti in acciaio inox (AISI 304) non necessitano di alcuna manutenzione. La comparsa di micro-ossidazioni, più frequente in ambienti marittimi caratterizzati da nebbia salina, non pregiudica la qualità e la durata del prodotto tali ossidazioni sono da ritenersi normali. In caso fosse necessario eliminare tali punti ossidati è possibile impiegare una paglietta o
una spazzola con setole metalliche (in acciaio inox). Il film protettivo di ossido di cromo (autopassivazione) si ripristinerà in
maniera naturale con la sola esposizione all'aria, senza alcun intervento da parte dell'utente.
ALLUMINIO
La presenza di segni e graffi è considerata difetto solo se visibile ad una distanza di 2 metri.
DEUTSCH
Eventuali cali di tensione o interferenze radio possono far perdere i finecorsa ai motori. In tal caso è necessario procedere
con una nuova programmazione come indicato nel Manuale.
Se i segni e/o le ammaccature sono visibili ad una distanza di 2 metri è da
considerarsi difetto.
Buccia d'arancia: la superficie del film di vernice si presenta non omogenea
con aspetto simile a buccia di arancia.
VERNICIATURA
Blistering: rigonfiamenti sulla superficie del film di vernice di varie dimensioni e frequenza.
Colature dello strato esterno: Accumuli irregolari di prodotti vernicianti localizzati e ben definiti, sottoforma di bordature arrotondate e poco profonde
che interessano lo strato esterno.
FRANÇAIS
Non impiegare acidi per la pulizia delle parti in alluminio verniciato ma solo acqua e sapone neutro.
Porosità – Schivature: Piccoli fori simili a crateri o intaccature nella superficie
del film, di dimensioni variabili da piccoli fori di spillo sino a diametri di 1 cm.
Impurità negli strati esterni ed interni: il film di vernice presenta una superficie ruvida e irregolare, facilmente percepibile al tatto.
Scrostature per interferenza: il film di vernice presenta danni e lesioni di
diversa profondità ed estensione in funzione della causa.
0 - 03.2012
CORRADI S.P.A. - MANUALE UTENTE - PERGOTENDA®FLUX
11 di 119
ESPAÑOL
Distacco – Sfogliatura: il film di vernice si solleva dal supporto sottostante
sotto forma di piccole scaglie.
CARATTERISTICHE PRODOTTI
CARATTERISTICHE PRODOTTO
NON CONFORMITA' / DIFETTO
VETRATE
Per gli infissi in alluminio si faccia riferimento alla voce Alluminio.
ERMETIKA
Nel periodo estivo, in caso di esposizione diretta alla luce solare, la temperatura all'interno del cassonetto può raggiungere
valori molto elevati. Questo può causare l'incollatura del telo nel caso in cui la tenda non venga movimentata per lunghi
periodi. Si consiglia di aprire e chiudere la tenda con una certa frequenza per evitare questo problema.
Se il telo rimane arrotolato per periodi lunghi è possibile la comparsa di pieghe e grinze sul telo. Il telo è in PVC e per sua
natura non è paragonabile ad un vetro. E' necessario mantenere la tenda stesa per almeno 48 h per attenuare le pieghe e
le grinze.
In caso di installazione in zone caratterizzate dalla presenza di polvere e vento (es. spiaggia fronte mare) è possibile che il
telo si rovini perdendo la trasparenza a causa dell'azione combinata del vento e della sabbia.
Per mantenere in buona efficienza la tenda ed il sistema di bloccaggio è necessario mantenere pulite le guide di scorrimento verticale come indicato nel capitolo manutenzione.
Verificare che non siano presenti ostacoli che possano impedire il corretto movimento della tenda. Questo può causare
malfunzionamenti ai dispositivi di bloccaggio della tenda.
In caso di presenza di ghiaccio/neve è necessario pulire accuratamente le guide prima di azionare la tenda.
GUIDE
12 di 119
Dopo qualche tempo dall'installazione e nel caso in cui non venga eseguita la manutenzione periodica sulle guide, come
indicato nel manuale, possono presentarsi rumori nelle guide e nei carrelli.
CORRADI S.P.A. - MANUALE UTENTE - PERGOTENDA®FLUX
Rumori sulle guide subito dopo l'installazione sono difetti.
0 - 03.2012
ENGLISH
GUIDE
Ogni anno, in condizioni d’uso normali, o una volta al mese, se
esposte alla salsedine, le guide vanno lavate bene con un
getto d’acqua al loro interno e possibilmente, utilizzando una
spazzola, si deve asportare ogni traccia di sporco e/o
incrostazione di sale, come descritto nella fig. 1.
Attenzione: non lubrificare mai, per nessun motivo, le guide di
scorrimento.
FERRAMENTA
La ferramenta è in acciaio inox (AISI 304) e non necessita
pertanto di alcuna manutenzione.
La comparsa di micro-ossidazioni sulle staffe non pregiudica la
qualità e la durata delle stesse; tali ossidazioni sono da ritenersi
normali.
TELO
La manutenzione del telo è ridotta alla pulizia.
Se si desidera mantenere come nuova la parte esposta alle
intemperie, è necessario lavarla 2 o 3 volte l’anno in modo da
evitare che la polvere o lo smog che si depositano sul telo si
fissino su di esso attraverso l’azione del sole.
Per lavare il telo procedere spruzzando acqua e sapone neutro
sullo stesso, aspettare qualche minuto per far si che il prodotto
abbia il tempo di agire, dopodichè, mediante l’utilizzo di una
spugna, rimuovere lo sporco senza però fare eccessiva
pressione meccanica, ripetere se necessario, e sciacquare
abbondantemente.
DEUTSCH
PREMESSA
PERGOTENDA®FLUX è un prodotto unico nel quale le soluzioni
costruttive ed i materiali utilizzati sono al massimo livello per
qualità e durata.
La manutenzione ordinaria è ridotta al minimo, consentendovi
così, con poche operazioni, di mantenere, nel tempo, la tenda
perfettamente funzionante e bella.
Riportiamo qui sotto le poche e semplici regole a cui attenersi:
ITALIANO
MANUTENZIONE
1
ESPAÑOL
FRANÇAIS
ATTENZIONE:
NON LUBRIFICARE MAI,
PER NESSUN MOTIVO, LE GUIDE DI SCORRIMENTO.
0 - 03.2012
CORRADI S.P.A. - MANUALE UTENTE - PERGOTENDA®FLUX
13 di 119
TABELLE
TABELLA 1 - INTENSITÀ ED EFFETTI DEL VENTO SECONDO LA SCALA BEAUFORT
Grado Classe*
Carico (N/mq)
Nodi
Km/h
m/s
Situaz. ambientale
Effetti del vento
0
0
< 40
0-1
0-1
< 0,3
calma
bonaccia, il fumo sale verticale
1
0
< 40
1-3
1-5
0,3-1,5
bava di vento
la direzione del vento è indicata dal fumo, ma non dalla banderuola
2
0
< 40
4-6
6-11
1,6-3,3
brezza leggera
si sente il vento in faccia e la banderuola si muove
3
0
< 40
7-10
12-19
3,4-5,4
brezza tesa
le foglie e i piccoli rami si muovono
4
1
40
11-16
20-28
5,5-7,9
vento moderato
si sollevano la carta, la polvere, si muovono i rami più sottili
5
2
70
17-21
29-38
8-10,7
vento teso
incominciano ad oscillare i piccoli alberi
6
3
110
22-27
39-49
10,8-13,8
vento fresco
si muovono i grossi rami, è difficile usare l’ombrello
7
>3
> 110
28-33
50-61
13,9-17,1
vento forte
si muovono i grossi rami, è molto difficile camminare contro vento
8
>3
> 110
34-40
62-74
17,2-20,7
burrasca
si rompono i rami degli alberi, è molto difficile camminare all’aperto
9
>3
> 110
41-47
75-88
20,8-24,4
burrasca forte
cadono le tegole dai tetti
10
>3
> 110
48-55
89-102
24,5-28,4
tempesta
sradicamento degli alberi
11
>3
> 110
56-63
103-117
28,5-32,6
tempesta violenta
danni gravi ai fabbricati
12
>3
> 110
>64
>118
> 32,7
uragano
danni ingentissimi
* Classe di resistenza al vento secondo UNI EN 13561
T A B E L L A 2 - D I M E N S I O N I M A S S I M E cm
Larghezza
Sporgenza
2 guide
500
650
3 guide
900
650
4 guide
1300
650
14 di 119
CORRADI S.P.A. - MANUALE UTENTE - PERGOTENDA®FLUX
0 - 03.2012
Sporgenza (cm)
LARGHEZZA
200
250
300
350
400
450
500
550
600
650
700
750
800
850
900
950
1000
1050
1100
1150
1200
1250
1300
300
28
32
35
39
43
47
56
60
64
68
72
76
80
83
87
64
67
69
72
75
77
80
82
350
31
35
40
44
48
53
63
67
72
76
80
85
89
93
98
72
75
78
81
84
86
89
92
400
34
39
44
49
53
58
70
74
79
84
89
94
99
103
108
80
83
86
89
93
96
99
102
450
37
42
48
53
58
64
76
81
87
92
97
103
108
113
119
87
91
94
98
102
105
109
112
500
40
46
52
58
63
69
83
89
94
100
106
112
118
123
129
95
99
103
107
111
114
118
122
550
43
50
56
62
69
75
89
96
102
108
115
121
127
133
140
103
107
111
115
120
124
128
132
600
47
53
60
67
74
80
96
103
110
116
123
130
137
143
150
111
115
120
124
129
133
138
142
650
50
57
64
71
79
86
103
110
117
124
132
139
146
153
161
118
123
128
133
138
142
147
152
3 GUIDE
4 GUIDE
DEUTSCH
2 GUIDE
ENGLISH
TABELLA 4 - Carico massimo in daN (1 daN ≈ 1 kg) sul singolo tassello (considerando 2 tasselli per ogni supporto) a trazione e taglio (non combinati) per una velocità massima del vento di
_49 km/h (Scala Beaufort 6 - Classe 3 secondo EN 13561)
ITALIANO
TABELLE
TABELLA 5 - Carico massimo in daN (1 daN ≈ 1 kg) sul singolo tassello (considerando 2 tasselli per ogni supporto) a trazione e taglio (non combinati) per una velocità massima del vento di
74 km/h (Scala Beaufort 8 - oltre la Classe 3 secondo EN 13561)
250
300
350
400
450
500
550
600
650
700
750
800
850
900
950
1000
1050
1100
1150
1200
1250
1300
40
47
54
61
68
75
88
95
102
109
116
123
130
137
144
104
109
114
118
123
128
132
137
350
46
54
62
70
78
86
100
108
116
124
132
140
148
156
164
119
124
129
135
140
145
151
156
400
51
60
69
78
87
96
112
121
130
139
148
157
166
175
184
133
139
145
151
157
163
169
175
450
56
66
76
86
96
106
123
133
144
154
164
174
184
194
204
147
154
161
167
174
181
187
194
500
61
72
83
94
105
117
135
146
157
168
179
191
202
213
224
162
169
176
184
191
198
206
213
550
67
79
91
103
115
127
147
159
171
183
195
207
219
232
244
176
184
192
200
208
216
224
232
600
72
85
98
111
124
137
159
172
185
198
211
224
237
250
263
190
199
208
216
225
234
243
251
650
77
91
105
119
133
147
171
185
199
213
227
241
255
269
283
205
214
223
233
242
252
261
270
2 GUIDE
0 - 03.2012
3 GUIDE
CORRADI S.P.A. - MANUALE UTENTE - PERGOTENDA®FLUX
4 GUIDE
15 di 119
FRANÇAIS
200
300
ESPAÑOL
Sporgenza (cm)
LARGHEZZA
GARANZIA
ART. 1 - IMPIEGO:
PERGOTENDA®FLUX è un pergolato completo di tenda
scorrevole per copertura di aree esterne quali giardini, balconi,
attici, cortili, ecc.
PERGOTENDA®FLUX ed i componenti nel suo insieme sono
progettati e brevettati da Corradi Spa con sede a Bologna,
Italia, e sono realizzati nel rispetto delle norme tecniche di
riferimento applicabili.
Le garanzie di seguito specificate saranno valide se la posa in
opera e l’impiego della tenda saranno conformi alle
caratteristiche indicate nei successivi articoli e tabelle. Per la
costruzione dei componenti di PERGOTENDA®FLUX sono stati
utilizzati materiali di prima qualità adatti all’uso in esterno.
PERGOTENDA®FLUX è progettata e costruita, su misura per il
committente, per la protezione dal sole e dalle precipitazioni
con resistenza a sacche d’acqua oltre la classe 2 (56 lt/ora x mq)
della normativa EN 13561 con esclusione del carico neve e con
resistenza al vento oltre la classe 3 (49 km/ora) della normativa
EN 13561.
ART. 2 - VERSIONI:
PERGOTENDA®FLUX dovrà essere fissata ad una parete di
sostegno adeguata e ne sarà consentito l’impiego in caso di
vento fino al grado 8 della scala Beaufort come indicato
nella tabella 1.
ART. 3 - POSA IN OPERA:
PERGOTENDA®FLUX dovrà essere sempre fissata ad una
struttura di sostegno adeguata (parete o soffitto); dovranno
essere rispettate tutte le condizioni indicate nella tabella 2
“Dimensioni Massime”, tabella 3 “Freccia”, tabella 4 - 5 “Carico
massimo”, tabella 6 “Pendenze Minime”.
16 di 119
Il rivenditore dovrà rilasciare il “Manuale Utente” .
inferiore al 5% del valore nominale (norma CEI 2-3 Luglio 1988)
ART. 4 - VALIDITA’ DELLA GARANZIA:
La garanzia è valida se vengono rispettate le condizioni di
installazione ed utilizzo indicati nell’art. 3.
La garanzia comporta la riparazione o la sostituzione integrale
gratuita (manodopera esclusa) di tutti i componenti che
dovessero risultare non conformi o comunque difettosi,
comprese le spese di trasporto. Non saranno riconosciuti danni
da mancato godimento di PERGOTENDA®FLUX per il periodo
di eventuale inutilizzo prima e durante la riparazione.
Nessun risarcimento può essere richiesto per “danno
emergente o lucro cessante”.
Le garanzie di cui sopra saranno efficaci unicamente all’interno
dello stato in cui il rivenditore o concessionario ha la propria
sede operativa.
ART. 7 - DURATA DELLA GARANZIA:
ANNI 5 (cinque):
Per la struttura, il sistema di movimentazione ed il tessuto
ECLISSI con esclusione dei tessuti CRISTAL.
ANNI 2 (due):
Tessuto CRISTAL per la realizzazione di eventuali chiusure
perimetrali (teli avvolgibili, teli scorrevoli, teli con cerniere
lampo, ecc.); la loro resistenza al vento è in funzione della
soluzione adottata e sarà certificata, su richiesta, per ogni
singolo lavoro .
ART. 5 - DECORRENZA DELLA GARANZIA:
La garanzia decorre dalla data di fine lavori riportata nella
Dichiarazione di Corretta Installazione, di cui una copia deve
essere inviata alla Corradi, debitamente compilata in ogni sua
parte della Dichiarazione di Corretta Installazione, sottoscritta
sia dall’acquirente finale che dal Rivenditore Autorizzato.
ART. 6 - ESCLUSIONI DALLA GARANZIA:
La garanzia non è valida nei casi di seguito elencati a titolo
esemplificativo e non esaustivo:
a) Per danni derivati da urti o cause naturali straordinarie
(fulmini, alluvioni, terremoti, grandine, etc…)
b) Per danni effettuati da interventi di persone o tecnici non
autorizzati da Corradi Spa;
c) Se la tensione elettrica ha una variazione superiore o
CORRADI S.P.A. - MANUALE UTENTE - PERGOTENDA®FLUX
ART. 8 - RECLAMI
In base all’art. 1495 c. 1 e 1511 c. 1 del Codice Civile, ogni
eventuale e presunto vizio apparente della merce potrà essere
comunicato dal cliente al rivenditore unicamente in forma
scritta ed entro e non oltre 8 (otto) giorni dal ricevimento della
merce. In base all’art. 1495 c. 1 del Codice Civile, ogni eventuale
e presunto vizio non apparente della merce potrà essere
comunicato dal cliente al rivenditore unicamente in forma
scritta ed entro e non oltre 8 (otto) giorni dalla data di scoperta,
fornendo prova fotografica del presunto vizio. Entrambe le
azioni legali del compratore verso il rivenditore si prescrivono
in un anno dal ricevimento/installazione della merce (Art. 1495 c. 2).
In base all’art. 1512 del Codice Civile, ogni eventuale e
presunto difetto di funzionamento potrà essere comunicato in
forma scritta dal cliente al rivenditore unicamente in forma
scritta ed entro e non oltre 15 (quindici) giorni dalla scoperta
pena la decadenza dalla garanzia.
0 - 03.2012
ITALIANO
GARANZIA
ENGLISH
L’azione legale del compratore verso il rivenditore si prescrive
in sei mesi dalla scoperta (Art. 1512 c. 1) .
Ogni eventuale e presunta non conformità disciplinata dagli
articoli da 128 a 134 del D. Lvo 206 / 2005 (Codice del
Consumo) potrà essere comunicata dal cliente al rivenditore
unicamente in forma scritta ed entro e non oltre 2 (due) mesi
dal giorno della scoperta. L’azione legale del compratore verso
il rivenditore si prescrive entro 26 mesi decorrenti dal giorno
della scoperta denunciata nei termini (Art 132 c. 4 Codice del
Consumo).
ESPAÑOL
FRANÇAIS
DEUTSCH
ART. 9 - ESTENSIONE TERRITORIALE DELLA GARANZIA
Le garanzie di cui sopra saranno efficaci unicamente nello
stato in cui il cliente ha la propria sede legale, con esclusione di
ogni altro stato in cui il cliente, direttamente o indirettamente,
venderà, installerà, concederà in comodato la tenda fornita da
Corradi.
0 - 03.2012
CORRADI S.P.A. - MANUALE UTENTE - PERGOTENDA®FLUX
17 di 119
MARCATURA CE
MARCATURA CE PER VERSIONI 2-3 GUIDE
Corradi Spa - Via G. Brini, 39 - 40128 Bologna Italy
Modello: PERGOTENDA® FLUX
2 guide
Matricola: 00000/00
Anno di produzione: 0000
Alimentazione: 230 V ~
Potenza: 218 W
Numero fasi: 2
Frequenza: 50 Hz
Resistenza al vento: Classe 3
EN 13561
Pericolo di schiacciamento
A CE
ATUR
MARC
MARCATURA CE PER VERSIONE 4 GUIDE
Corradi Spa - Via G. Brini, 39 - 40128 Bologna Italy
Modello: PERGOTENDA® FLUX
Pericolo di scossa
Anno di produzione: 0000
Alimentazione: 230 V ~
Potenza: 218 + 218 W
Numero fasi: 2
Frequenza: 50 Hz
Resistenza al vento: Classe 3
18 di 119
CORRADI S.P.A. - MANUALE UTENTE - PERGOTENDA®FLUX
4 guide
Matricola: 00000/00
EN 13561
0 - 03.2012
La presente Dichiarazione di Conformità CE è subordinata al rispetto dei vincoli e delle indicazioni previste nella garanzia di prodotto, nonchè alla corretta installazione da parte del soggetto incaricato
in rispondenza alle istruzioni di installazione e posa in opera definite da Corradi Spa.
Con la presente l’azienda dichiara sotto la propria responsabilità, che il prodotto suindicato soddisfa
le Direttive indicate a lato:
DIRETTIVE DI RIFERIMENTO applicabili alla presente Dichiarazione di Conformità CE
Direttiva Prodotti da Costruzione 89/106/CEE;
Direttiva Compatibilità Elettromagnetica 2004/108/CEE(*);
Direttiva Macchine 2006/42/CE(*);
Direttiva Bassa Tensione 2006/95/CE(*);
ENGLISH
Descrizione del prodotto:
Modello:
Numero di matricola:
Anno di fabbricazione:
Destinazione d’uso:
Corradi Spa
Via G. Brini, 39 - 40128 Bolgna Italy
PERGOTENDA®FLUX
PERGOTENDA®FLUX 2 - 3 - 4 guide
(vedi Marcatura CE apposta sul prodotto)
(vedi Marcatura CE apposta sul prodotto)
(vedi Manuale utente - Istruzioni Originali e relativa Garanzia)
La conformità è stata verificata con l’ausilio delle seguenti norme:
- Requisiti prestazionali compresa la sicurezza UNI EN 13561:2009
- Classe di resistenza al vento: Classe 3(**) (metodo secondo UNI EN 1932: 2002);
INDICAZIONE / CONDIZIONI A CUI È SOGGETTO L'UTILIZZO DEL PRODOTTO:
Il prodotto CORRADI è soggetto ad attività di installazione presso il Cliente.
L’Installatore Autorizzato deve predisporre e fornire all’Utilizzatore apposita DICHIARAZIONE DI CORRETTA INSTALLAZIONE E CLASSIFICAZIONE DELLA RESISTENZA AL VENTO attestante la corretta
installazione secondo le istruzioni fornite dal Costruttore applicate secondo lo stato e la morfologia del luogo di installazione e rispondente alle condizioni di utilizzo per le quali è stata realizzata.
FRANÇAIS
L’installatore deve attenersi alle istruzioni di riferimento contenute all’interno del documento “MANUALE DI POSA” e “MANUALE UTENTE” a sua disposizione.
L’installatore si fa carico di compilare e sottoscrivere la DICHIARAZIONE DI CORRETTA INSTALLAZIONE E CLASSIFICAZIONE DELLA RESISTENZA AL VENTO, conforme al modello contenuto all’interno
del MANUALE UTENTE.
IL COSTRUTTORE
Dichiaro che il prodotto sopra descritto è conforme alle indicazioni e prescrizioni contenute nelle Direttive sopra indicate.
ESPAÑOL
L’AMMINISTRATORE DELEGATO
Ing. Gianmarco Biagi
(*) Direttive applicabili esclusivamente per i prodotti dotati di motorizzazioni e automazioni [vedasi Manuale utente ]
(**) Classe Resistenza al Vento: la CRV è stata verificata utilizzando i supporti per l’installazione aventi caratteristiche di cui alla corrispondente tabella Carichi contenuta nel Manuale di posa
0 - 03.2012
CORRADI S.P.A. - MANUALE UTENTE - PERGOTENDA®FLUX
DEUTSCH
Costruttore:
ITALIANO
DICHIARAZIONE DI CONFORMITÀ CE
19 di 119
ATTENZIONE
La procedura di installazione e regolazione iniziale del
motore è di competenza del tecnico installatore
specializzato.
In presenza di tensione elettrica, eseguire le operazioni
prestando la massima attenzione al rispetto delle normative
vigenti. A struttura montata verificare il corretto collegamento
del sistema di trasmissione: alberi, tubi, alberi laterali, testate
motrici. I carrelli si troveranno tutti impacchettati nella parte
alta della tenda. Prima di procedere al montaggio del telo
procedere come segue:
A* producendo un piccolo avvitamento che determinerà il
bloccaggio del pulsante in posizione premuta. All’avvenuto
bloccaggio del pulsante, si proceda a distendere la tenda fino a
farle raggiungere la corretta posizione di apertura.
Per memorizzare il finecorsa così impostato ed uscire dalla
procedura di regolazione, è sufficiente premere il pulsante A
con un cacciavite effettuando un lieve svitamento, sbloccando
così il pulsante alla posizione premuta.
* Se il pulsante non dovesse muoversi, in conseguenza della
pressione, evitare di insistere ma assicurarsi di aver posizionato il
motore sul finecorsa.
1) REGOLAZIONE DEL PUNTO NEUTRO
Si prema con un cacciavite i pulsanti A e B producendo un
piccolo avvitamento che provoca il bloccaggio del pulsante in
posizione premuta. All’avvenuto bloccaggio dei pulsanti, si
proceda, tramite la pulsantiera ad azione mantenuta, a far
scorrere la tenda verso il basso fino a 3/4 della guida.
Premere i pulsanti A e B con un cacciavite e tramite una lieve
rotazione, svitare i pulsanti, sbloccandoli.
A
B
Pulsantiera
B
A
Motore PLAN 75
230 V/50 Hz
In= 0,97 A
Pn= 218 W
IP= 54
M1
2) MONTARE LA TENDA
Spina maschio in
dotazione aperta
1
Pulsante discesa
isolato 230 V
3
2
DISCESA
Si premerà con un cacciavite il pulsante B* producendo un
piccolo avvitamento che determinerà il bloccaggio del
pulsante in posizione premuta. All’avvenuto bloccaggio del
pulsante, si proceda ad impostare il finecorsa di chiusura con
tenda impacchettata ma non serrata così da lasciare i carrelli
leggermente laschi. Per memorizzare il finecorsa così
impostato ed uscire dalla procedura di regolazione, è
sufficiente premere il pulsante B con un cacciavite e tramite
una lieve rotazione, svitare il pulsante, sbloccandolo.
CAVO TIPO
FG70R 3X1,5 mmq
SALITA
3) REGOLAZIONE FINECORSA DI CHIUSURA TENDA IMPACCHETTATA
3
2
1
Pulsante salita
isolato 230 V
4) REGOLAZIONE DEL FINECORSA DI APERTURA
Aprire la tenda fino a quando questa si ferma
automaticamente, ora premere con un cacciavite il pulsante
20 di 119
CAVO TIPO
FG70R 3X1,5 mmq
CORRADI S.P.A. - MANUALE UTENTE - PERGOTENDA®FLUX
INTERVENTO A CARICO DEL TECNICO
Montare i tubi terminali ed intermedi alla struttura, fissandoli ai
carrelli.
COMUNE
RISERVATO AI TECNICI SPECIALIZZATI
PROCEDURA INSTALLAZIONE MOTORE TIPO 1 - PLAN 75 (SOLO PER INSTALLATORI)
0 - 03.2012
0 - 03.2012
ENGLISH
B
A
M1
3
2
1
CAVO TIPO
FG70R 3X1,5 mmq
Spina maschio in
dotazione aperta
1
3
2
Pulsante discesa
isolato 230 V
Pulsante salita
isolato 230 V
CAVO TIPO
FG70R 3X1,5 mmq
CORRADI S.P.A. - MANUALE UTENTE - PERGOTENDA®FLUX
FRANÇAIS
Motore PLAN 75
230 V/50 Hz
In= 0,97 A
Pn= 218 W
IP= 54
ESPAÑOL
B
DEUTSCH
Pulsantiera
INTERVENTO A CARICO DEL TECNICO
FINECORSA: CHIUSURA (TENDA IMPACCHETTATA)
Dopo aver collegato la pulsantiera al motore si procede alla
salita della tenda che si posizionerà sul finecorsa di chiusura
preimpostato; solo con la tenda in questa posizione si potrà
procedere al settaggio del finecorsa di chiusura.
A
DISCESA
FINECORSA: APERTURA (TENDA STESA)
Per chi ha in dotazione la pulsantiera del KIT POSA, procedere a
collegare la stessa al motore per poterlo manovrare.
N.B. Per chi non ha la pulsantiera si proceda a far realizzare
un impianto da un tecnico specializzato, come da schema
elettrico.
Procedere alla discesa della tenda che si posizionerà sul
finecorsa preimpostato di apertura; solo con la tenda in questa
posizione è possibile impostare il finecorsa di apertura.
Premere con un cacciavite il pulsante A* sul corpo motore,
producendo un lieve avvitamento che determinerà il
bloccaggio del pulsante in posizione premuta e
l’annullamento del finecorsa presente.
All’avvenuto bloccaggio del pulsante in posizione premuta,
intervenire sulla pulsantiera fin quando il telo è posizionato sul
finecorsa desiderato. Per poter memorizzare il finecorsa così
impostato ed uscire dalla procedura di settaggio, basta
premere il pulsante A con un cacciavite effettuando un lieve
svitamento, rilasciando il pulsante.
*Se il pulsante non dovesse muoversi, in conseguenza della
pressione, evitare di insistere ma assicurarsi di aver
posizionato il motore sul finecorsa.
Si prema con un cacciavite il pulsante B* producendo un
piccolo avvitamento con il successivo bloccaggio del pulsante
in posizione premuta.
All’avvenuto bloccaggio del pulsante in posizione premuta,
intervenire sulla pulsantiera fin quando il telo sia posizionato
sul finecorsa desiderato.
Per poter memorizzare il finecorsa così impostato ed uscire
dalla procedura di settaggio basta premere sul pulsante B con
un cacciavite e con una lieve rotazione a svitare, rilasciando il
pulsante.
SALITA
REGOLAZIONE FINECORSA MOTORE PLAN 75
La procedura di regolazione dei finecorsa di seguito illustrata è
quella a cui deve fare riferimento un tecnico specializzato. Tale
procedura differisce dalla regolazione iniziale del motore
predisposta dal tecnico installatore (vedi Manuale di posa).
ITALIANO
COMANDO ELETTRICO TIPO 1 (MOTORE PLAN 75)
COMUNE
RISERVATO AI TECNICI SPECIALIZZATI
REGOLAZIONE COMANDI
21 di 119
COMANDO ELETTRICO TIPO 2 (MOTORE SLOPE 95)
Centralina MONO 00749
Con finecorsa automatico in apertura
e telecomando incorporato.
REGOLAZIONE FINECORSA MOTORE SLOPE 95
Eseguire le operazione prestando la massima attenzione al
rispetto delle normative vigenti.
5
6
3
2
1
Motore SLOPE 95
230 V/50 Hz
In= 0,97 A
Pn= 218 W
IP= 54
M1
Fusibile 250V/200mA
1
2
3
Sintonizzazione nuovo telecomando
Premere il pulsante MEMO (4), il led (5) lampeggia due volte e
mantenendo premuto il pulsante MEMO (4) premere il
pulsante del telecomando; due lampeggi del led (5) indicano
l’avvenuto riconoscimento.
22 di 119
Pulsantiera con pulsanti ad azione
mantenuta, fornita e collegata
dall’elettricista. Posizionata nel campo
di funzionamento della tenda
CORRADI S.P.A. - MANUALE UTENTE - PERGOTENDA®FLUX
3
1
2
COMUNE
Cancellazione telecomandi in memoria
È possibile cancellare dalla memoria interna tutti i codici dei
telecomandi, premendo il pulsante CANC (6) e attendendo
che il led (5) rimanga acceso con luce fissa.
INTERVENTO A CARICO DEL TECNICO
È possibile utilizzare ora il radiocomando in dotazione.
La tensione del telo in apertura è gestita dalla centralina,
mentre il punto di finecorsa della tenda impacchettata è
quello memorizzato con il pulsante di STOP.
Nel caso di arresto del motore (causa un surriscaldamento),
sulla centralina il led ROSSO (2) lampeggia: dopo circa 5 minuti
il led si spegne, è ora possibile azionare nuovamente il motore..
4
Cavo bassa tensione 5V
DISCESA
- Verificare i collegamenti elettrici con i relativi connettori dal
motore alla centralina e da questa alla linea di alimentazione.
Ove non fossero presenti, eseguire i collegamenti come
indicato nello schema elettrico.
- Premere il pulsante START (1) sulla centralina ed attendere
l’accensione del led ROSSO (2), quindi rilasciare il pulsante.
Il telo inizia la discesa; arrivato a fine corsa si arresta per circa 1
secondo, dopodichè inizia la corsa di risalita automaticamente.
- Premere il pulsante STOP (3) nel punto in cui si desidera il
finecorsa di arresto risalita della tenda.
SALITA
RISERVATO AI TECNICI SPECIALIZZATI
REGOLAZIONE COMANDI
0 - 03.2012
ITALIANO
COMANDO ELETTRICO TIPO 3 (MOTORE SLOPE 95 E PLUS 96)
REGOLAZIONE FINECORSA MOTORI SLOPE 95 E PLUS 96
Eseguire le operazioni prestando la massima attenzione al
rispetto delle normative vigenti.
3
2
ENGLISH
6
1
Motore SLOPE 95
230 V/50 Hz
In= 0,97 A
Pn= 218 W
IP= 54
Motore PLUSE 96
230 V/50 Hz
In= 0,97 A
Pn= 218 W
IP= 54
Fusibile 250V/200mA
0 - 03.2012
CORRADI S.P.A. - MANUALE UTENTE - PERGOTENDA®FLUX
SALITA
Pulsantiera con pulsanti ad azione
mantenuta, fornita e collegata
dall’elettricista. Posizionata nel campo
di funzionamento della tenda
COMUNE
CANCELLAZIONE TELECOMANDI IN MEMORIA
È possibile cancellare dalla memoria interna tutti i codici dei
telecomandi, premendo il pulsante CANC (6) e attendendo
che il led (5) rimanga acceso con luce fissa.
Cavo bassa tensione 5V
SINTONIZZAZIONE NUOVO TELECOMANDO
Premere il pulsante MEMO (4), il led (5) lampeggia due volte e
mantenendo premuto il pulsante MEMO (4) premere il
pulsante del telecomando; due lampeggi del led (5) indicano
l’avvenuto riconoscimento.
DEUTSCH
5
FRANÇAIS
4
ESPAÑOL
È possibile utilizzare ora il radiocomando in dotazione.
La tensione del telo in apertura è gestita dalla centralina,
mentre il punto di finecorsa della tenda impacchettata è
quello memorizzato con il pulsante di STOP. In caso di arresto
del motore (causa di un surriscaldamento), sulla centralina il
led ROSSO (2) lampeggia; attendere lo spe-gnimento del led (5
minuti circa) prima di azionare nuovamente il motore.
Centralina TANDEM 00757
Con finecorsa automatico in apertura per due motori e telecomando incluso.
INTERVENTO A CARICO DEL TECNICO
- Verificare i collegamenti elettrici con i relativi connettori dal
motore alla centralina e da questa alla linea di alimentazione.
Ove non fossero presenti, eseguire i collegamenti come
indicato nello schema elettrico.
- Premere il pulsante START (1) sulla centralina ed attendere
l’accensione del led ROSSO (2), quindi, rilasciare il pulsante.
Il telo inizia la discesa; arrivato a fine corsa si arresta per circa 1
secondo, dopodichè inizia la corsa di risalita, automaticamente.
- Premere il pulsante STOP (3) nel punto in cui si desidera il
finecorsa di arresto risalita telo tenda.
DISCESA
RISERVATO AI TECNICI SPECIALIZZATI
REGOLAZIONE COMANDI
23 di 119
Thank you for having chosen a Corradi product. This User Manual illustrates the technical characteristics of the components and the
maintenance required to ensure that PERGOTENDA®FLUX remains the ideal place in which to pass your moments of relaxation in the
open air.
The Manual is the reference guide for the proper maintenance of PERGOTENDA®FLUX and we recommend that you read it carefully
and conserve it for future use, reminding you that the correct operation of PERGOTENDA®FLUX, and therefore your safety, is only
guaranteed at the conditions detailed in the following pages.
Warnings and precautions
How to control PERGOTENDA®FLUX
Versions and motorisations
PERGOTENDA®FLUX with 2 runners
PERGOTENDA®FLUX with 3 runners
PERGOTENDA®FLUX with 4 runners
Resolution of problems with the electric drive mechanism
Products features
Maintenance
Tables
Warranty
CE Marking
Declaration of conformity
Adjusting the commands (intervention done
by a qualified technician)
Corradi Spa
Alberto Corradi
44
ESPAÑOL
N.B. Corradi Spa reserves the right to modify its products at any time, at its own discretion and without prior warning. Any modifications
brought about by the end user or technicians not authorised by Corradi Spa (tampering, technical modifications, etc.) to PERGOTENDA®FLUX
or its components during the warranty period, will render the warranty void immediately; in this case and these conditions Corradi Spa is
excluded of all responsibility and any direct or indirect consequential obligation.
26
27
28
29
30
31
32
33
37
38
40
42
43
DEUTSCH
INDEX
FRANÇAIS
DEAR CLIENT,
ENGLISH
ITALIANO
WELCOME
0 - 03.2012
CORRADI S.P.A. - USER MANUAL - PERGOTENDA®FLUX
25 of 119
WARNINGS AND PRECAUTIONS
PRELIMINARY CHECKS
When you receive the packaged goods, if assembly is not to be
carried out by the dealer, check that all materials are intact and
that no parts are missing.
If you should have any problems, contact the authorised
dealer.
DISPOSING OF PACKAGING
Separate the various packaging materials into their different
categories (cardboard, nylon, polystyrene, etc.) and dispose of
them as local regulations require.
GENERAL WARNINGS
Before carrying out any assembly or maintenance work or
cleaning, make sure that you have understood the instructions
in this manual.
All Corradi products have a specific function as described in
this manual; any use that is improper or different from the one
foreseen, the use of parts that are not genuine, tampering
and/or unauthorised technical modification will free Corradi
Spa from any responsibility for damage to persons, animals or
things.
SAFETY PRECAUTIONS
It is good practice to remember that moving parts can be a
hazard.
During all maintenance and repair operations or product
registration, the electric supply must always be disconnected.
It is also advisable to place a warning sign over the mains
supply switch with the following phrase:
“DO NOT TOUCH: work in progress”.
DEMOLITION
On demolition, the parts should be sorted into plastic material
and electric components, which must be disposed of
separately in accordance with the regulations in force.
The awning’s metal parts only need to be divided into steel
parts and those made of other metals and alloys, in order to be
forwarded to be melted down and recycled.
Check that no one is near the awning before turning it on
again after maintenance work. After maintenance, always
make sure that manual and electric drives are properly
assembled and that they work correctly; should you encounter
any problems stop the awning immediately and contact
Corradi Spa’s technical assistance department.
Installers (fitters and electricians) must have specific expertise
as well as the attitudinal and the physical and mental
requirements to be able to carry out their tasks; they must also
respect the safety regulations in force.
26 of 119
CORRADI S.P.A. - USER MANUAL - PERGOTENDA®FLUX
0 - 03.2012
Stop
Awning going
downwards
Awning going upwards
Led
Indicates the
battery state
(red is working)
Replacement of the battery
In order to replace the battery remove the screw on the back
of the radiocontrol and replace the batteries with a similar
model (alkaline 12 Vdc mod. 23 A).
Beware not to reverse the polarities.
Beware to use the correct model.
Dispose the used battery appropriately.
Awning going
downwards
0 - 03.2012
CORRADI S.P.A. - USER MANUAL - PERGOTENDA®FLUX
ENGLISH
Awning going
upwards
DEUTSCH
RADIOCONTROL
In case of PERGOTENDA®FLUX with a radiocontrol, use the
respective switches to move the awning upwards,
downwards or to stop it (see fig.).
FRANÇAIS
ELECTRIC COMMAND
In case of PERGOTENDA®FLUX with a wall-switch, push the
switch in the low area in order to move the awning
downwards, push it in the up area to move the awning
upwards. Once you release the switch the awning will stop.
ESPAÑOL
PERGOTENDA®FLUX
It is designed and manufactured to customer specifications, to
protect from the sun and elements, snowfall excluded;
PERGOTENDA®FLUX must be fixed to a suitable supporting
wall and may be used in winds of up to force 8 on the Beaufort
scale as shown in chart 1 (page 40).
ITALIANO
HOW TO CONTROL PERGOTENDA®FLUX
27 of 119
VERSIONS AND MOTORISATIONS
PERGOTENDA®FLUX 2 RUNNERS
ELECTRIC DRIVE TYPE 1
PLAN motor
1 WIDTH
2 PROJECTION
3 WALL BEAM HEIGHT
4 PILLAR
220 volt / 218 watt motor reducer complete with limit switch.
with a maximum projection of 350 cm.
PERGOTENDA®FLUX 3 RUNNERS
PERGOTENDA®FLUX
ELECTRIC DRIVE TYPE 2
SLOPE motor
remote computing system exchange MONO
220 volt / 218 watt motor reducer with microchip canvas tension
controlled and a radio command (433.92 MHz). Required for a 2 or 3 runner awning, which guarantees constant correct tension despite
changes in fabric properties caused by differing environmental
circumstances.
4
PERGOTENDA®FLUX 4 RUNNERS
ELECTRIC DRIVE TYPE 3
SLOPE motor 1 (command)
PLUS motor 2
remote computing system exchange TANDEM
220 volt / 218 watt + 218 watt motor reducer with a microchip that
powers 2 motors and controls the canvas tension, a radio command
(433,92 MHz) with 2 channel emitter. Required for a 4 runner awning,
which guarantees constant correct tension despite changes in fabric
properties caused by differing environmental circumstances.
28 of 119
CORRADI S.P.A. - USER MANUAL - PERGOTENDA®FLUX
0 - 03.2012
ITALIANO
PERGOTENDA®FLUX 2 RUNNERS
modular awning protection cover
canvas
DEUTSCH
electric drive
ENGLISH
crossbar 6x12 for protection cover support
pillar 6x12
FRANÇAIS
wall beam (supplement)
supporting runner 6x12
obligatory over projection cm 400
ELECTRIC DRIVE TYPE 1
00775-1 PLAN Motor reducer
0 - 03.2012
CORRADI S.P.A. - USER MANUAL - PERGOTENDA®FLUX
ELECTRIC DRIVE TYPE 2
00775-2 SLOPE Motor reducer
00749
MONO Exchange
29 of 119
ESPAÑOL
frontal beam 6x12 (supplement)
PERGOTENDA®FLUX 3 RUNNERS
canvas
modular awning protection cover
crossbar 6x12 for protection cover support
electric drive
pillar 6x12
wall beam (supplement)
frontal beam 6x12 (supplement)
supporting runner 6x12
obligatory over projection cm 400
ELECTRIC DRIVE TYPE 1
00775-1 PLAN Motor reducer
30 of 119
CORRADI S.P.A. - USER MANUAL - PERGOTENDA®FLUX
ELECTRIC DRIVE TYPE 2
00775-2 SLOPE Motor reducer
00749
MONO Exchange
0 - 03.2012
modular awning protection cover
canvas
ITALIANO
PERGOTENDA®FLUX 4 RUNNERS
ENGLISH
crossbar 6x12 for protection cover support
pillar 6x12
DEUTSCH
frontal beam 6x12 (supplement)
FRANÇAIS
electric drive
obligatory over projection cm 400
wall beam (supplement)
ELECTRIC DRIVE TYPE 1
00775-1 PLAN Motor reducer
0 - 03.2012
CORRADI S.P.A. - USER MANUAL - PERGOTENDA®FLUX
ELECTRIC DRIVE TYPE 3
00775-3 PLUS Motor reducer
00775-2 SLOPE Motor reducer
00757
TANDEM Exchange
31 of 119
ESPAÑOL
supporting runner 6x12
PERGOTENDA®FLUX
With remote computing system exchange
RESOLUTION OF PROBLEMS WITH THE ELECTRIC DRIVE MECHANISM
32 of 119
PROBLEM
CAUSE
CHECKS AND SOLUTIONS
The motor won’t start.
There is no electricity.
Check the electric current.
It is not plugged in.
Check that the plug is correctly connected to a suitable socket.
The motor has overheated and the led on the control panel is
lit.
Wait 5-10 minutes to allow the motor to cool down. If the
problem persist check the limit switch.
Depleted remote control batteries.
Change the remote battery.
Broken fuse.
Open the control panel and change the fuse.
The motor starts but the awning won’t move.
Possibly broken belts, or disconnection from drive shaft.
Contact dealer.
The awning moves erratically.
Dirty runners, runners not properly aligned.
Clean the runners. Follow instructions in chapter on
maintenance. Realign the runners.
CORRADI S.P.A. - USER MANUAL - PERGOTENDA®FLUX
0 - 03.2012
PRODUCTS FEATURES
NON COMPLIANCE/ DEFAULT
WARNINGS
Defaults have to be reported within 8 days starting on
installation date on the customer's site (point of reference is
the date indicated on the declaration of correct installation
issued to the end user by the installer). See general sales
term.
GENERAL
ITALIANO
PRODUCT FEATURES
The structure is not watertight. In case of particularly violent storms with strong winds
water seepage may occur.
ENGLISH
In case wind values should exceed those shown on the statement of correct installation, it
is necessary to close the awning. It is possible to use a properly calibrated anemometer.
The product does not guarantee the snow load. In presence of snow, even of low
intensity, the canvas should be closed.
To have your product warranty the certificate of proper installation is MANDATORY. A
copy must be given to the final customer and a copy shall be sent to Corradi SpA. The
reception of the duly completed certificate will activate the product warranty.
DEUTSCH
Any change to the product not expressly authorized by Corradi SpA leads to loss of warranty.
SELF-SUPPORTING
By applying a lateral load on the pillar an oscillation in the structure may occur. This
movement is not a sign of structural weakness, but is considered normal for the type of
structure. The structure has been calculated by qualified engineers using the Eurocodes
and is guaranteed to wind up to the level indicated in the EC certificate and in the
Declaration of correct installation.
CANVAS
Depending on the installation conditions, it is possible that the cloth gets dirty (pollutants,
smoke from chimneys, smog, etc.). In this case it may be necessary to clean the fabric
more frequently as indicated in the section maintenance.
FRANÇAIS
The structures that are located in an urban environment are subject to pollutants (smog,
acid rain), smoke from chimneys, fumes from cooking, and weather in general. It is normal
for the fabric and the structure to get dirty. The structures and the fabric are NOT selfcleaning.
The cloth is not immune from burns caused by cigarette butts, etc..
In particular situations of use of the structure, condensation may occur on the inside of
the fabric. To limit this condition proceed with an adequate ventilation of the room.
ESPAÑOL
The appearance of mold in the embossing of the fabric is due to the presence of moisture
on the sheet that favores the formation of micro-organisms. It is therefore necessary to
clean the fabric at regular intervals, more frequently if necessary.
The presence of folds on the fabric after the first installation may be due to packaging. It is
The presence of folds on the fabric after 10 days has to
necessary to keep the fabric in position for at least 10 days, and evaluate the quality of the
be considered a default.
product after this period of time.
0 - 03.2012
CORRADI S.P.A. - USER MANUAL - PERGOTENDA®FLUX
33 of 119
PRODUCTS FEATURES
PRODUCT FEATURES
NON COMPLIANCE/ DEFAULT
FALSE CEILING
In particular situations of use the structure may present condensation in the area between the canvas and the ceiling. This may
cause dirt and / or mold in the intermediate zone. Remove the false ceiling and wash it.
GUTTER
Periodically check that the drain pipes of the gutter and downspouts are clean. Discard leaves and other detritus that can clog
the drain holes.
In case of very heavy rainfall it is possible that the gutter is not able to drain the water. This may cause water infiltrations.
The water-conducting to the ground may not be controlled by Corradi SpA, but by the final customer. The installation conditions, slopes and any collection wells, are the sole responsibility of the final customer.
LAMPS
To maintain good efficiency in the seals, thereby ensuring the IP product protection level (shown in the manual), you must do
the maintenance indicated in the manual.
AWNING SAILS
The presence of folds on the sail is due to the long winding of the sail on the roller tube. To limit this phenomenon and to have
the warranty the use of the sailcover is mandatory.
The presence of folds on the sail immediately after the first installation may be due to packaging. The folds will disappear completely after about 6 months of installation.
VELOMBRA FABRICS The fabrics are "dyed in the piece", this can cause a non-perfect uniformity and consistency of color.
WOOD
WARNING: It is good to remember that any kind of wood type placed outside, and directly exposed to weather elements, may
look "lived" even after a relatively short period of time. This manifests itself mainly with:
• discoloration of the surface (the degradation varies depending on the moisture content to which the wood is subject)
• with the irregularity of the surface due to cyclic phenomena of swelling and shrinkage and possible mechanical wear of the
surface.
Since wood is a natural material, there are differences in color and grain and therefore all elements are different. Furthermore,
depending on the viewing angle the aspect is quite different because of the iridescent nature of the material. The samples and
photographic reproductions are thus regarded as indicative and not binding.
The detachment of a slat from the beams is considered a defect.
The wood is placed under a protective treatment performed in autoclaving which allows a better resistance to attack by fungus
and mold. This treatment is green (due to the salts used for impregnation), and is performed before painting the beams. The
appearance of green stripes on the wood as a result of leaching of the paint finish by bad weather is normal in case of bright
colors. In this case you must proceed with the maintenance as indicated in the manual.
The beams may present vertical stripes of different shades. This is normal and is due to stacking that occurs inside the autoclave
during the impregnation treatment (the beams are spaced apart by transverse beams).
The presence of resin is a characteristic of coniferous wood.
A dimensional variation of wood products after exposure to moisture is normal. The reference humidity for the measuring is 12%
(defined in the UNI EN390: 1997).
34 of 119
CORRADI S.P.A. - USER MANUAL - PERGOTENDA®FLUX
0 - 03.2012
PRODUCTS FEATURES
FLOOR
NON COMPLIANCE/ DEFAULT
ITALIANO
PRODUCT FEATURES
The floor may dent in collisions or falling objects and the implementation of concentrated loads on a small area, such as chairs
with wheels, high heels and ladders is not suitable.
The floor can scratch as a result of contact with small objects such as nails or stones present beneath the soles of shoes.
At the time of delivery, the floor may be different from that of the samples after exposure to light which causes a change in the
wood color.
FURNITURE
During the winter it should be protected from the weather. It should be cleaned before being sheltered for the winter.
If the furniture is used in a marine environment it should be washed periodically with fresh water to remove traces of salt.
MOTORS
ENGLISH
Stainless steel features see STAINLESS STEEL voice
Electrical system: it must be performed by a licensed electrician who shall issue a certificate of conformity of the electrical
system.
The system has to have an appropriate degree of protection being installed outside. A licensed electrician is able to properly size
the system and choose the right components (adequate IP protection).
STAINLESS STEEL
The components in stainless steel (AISI 304) require no maintenance. The appearance of micro-oxidation, most frequently in
maritime environments characterized by salt spray, does not affect the quality and durability of the product such oxidations are
believed to be normal. In case you need to remove these oxidized points you can use a steel wool or a metal bristle brush (in
stainless steel). The protective film of chromium oxide (autopassivation) will reset in a natural way with the only exposure to air,
without any intervention by the user.
ALUMINIUM
The presence of marks and scratches is considered a fault only if these are visible at a distance of 2 meters.
If the signs and/or dents are visible at a distance of 2 meters these are to
be considered a defect.
DEUTSCH
Any voltage drop or radio interference may result in loss of the limit switches of the engines. In this case it is necessary to
proceed with a new programming as indicated in the Manual.
Orange peel: the surface of the coating film has an uneven look like orange
peel.
FINISH
Blistering: bumps on the surface of the coating film in various sizes and
frequency.
Sagging of the outer layer: localized and well defined irregular
accumulations of coating products, in the form of rounded edges and
shallow that affect the outer layer.
FRANÇAIS
Do not use acid to clean the painted aluminum, but only mild soap and water.
Porosity - Cissing: Small holes like craters or indentations in the surface of
the coating film, ranging in size: from small pinhole up to a diameter of up
to 1 cm.
Impurities in the outer and inner layers: the coating film has a rough and
irregular surface, easily perceptible to the touch.
Scrapings for interference: the coating film is damaged and
presents lesions of varying depth and extent depending on the cause.
0 - 03.2012
CORRADI S.P.A. - USER MANUAL - PERGOTENDA®FLUX
35 of 119
ESPAÑOL
Posting - Veneer: the coating film lifts from the substrate in
form of small flakes.
PRODUCTS FEATURES
PRODUCT FEATURES
NON COMPLIANCE/ DEFAULT
GLAZING
For aluminum frames refer to the ALUMINIUM voice.
ERMETIKA
The temperature inside the protection hood can reach very high values, if exposed to direct sunlight during the summer. This
may result in bonding of the fabric if the awning is not handled for long periods. It is recommended to open and close the
awning on a frequent basis to avoid this problem.
If the fabric is rolled up for long periods creases and wrinkles may appear on the fabric. The fabric is made of PVC and its
nature is not comparable to a glass. It is necessary to keep the awning stretched for at least 48h to soften creases and
wrinkles.
In case of installation in areas affected by dust and wind (e.g. beach facing the sea) it is possible that the fabric may be
damaged losing the transparency due to the combined action of wind and sand.
To maintain a good efficiency on the awning and the locking device it is necessary to maintain the vertical runners clean as
shown in the maintenance chapter.
Make sure there are no obstructions that may impede the orderly movement of the awning. This may cause malfunction of
the locking devices of the awning.
If there is ice/snow runners should be cleaned thoroughly before operating the awning.
RUNNERS
36 of 119
After some time from the installation and if no periodic maintenance is performed on the runners, as indicated in the manual,
Noise on the runners soon after the installation is is considered a default.
there may be noise in the runners and sliders.
CORRADI S.P.A. - USER MANUAL - PERGOTENDA®FLUX
0 - 03.2012
ENGLISH
RUNNERS
Once a year in normal conditions of use, or once a month
when exposed to sea air, wash the inside of the runners with a
jet of water and if possible use a brush to remove all traces of
dirt and/or incrusted salt, as described in fig. 1.
Warning: the runners should never be lubricated under any
circumstances.
HARDWARE
All of the hardware is manufactured in stainless steel (AISI 304)
and therefore does not require maintenance.
The appearance of micro-oxidation on the brackets does not
compromise their quality and duration and is to be considered
normal.
CANVAS
Canvas maintenance is limited to cleaning.
To keep the part exposed to the elements as good as new,
wash it 2 or three times a year to avoid dust and smog from
being deposited and hardened by the sun.
In order to wash the canvas, spray water and neutral detergent
on it, leave the product to work for a few minutes and then use
a sponge to remove dirt without applying mechanical
pressure, repeat if necessary and rinse well.
DEUTSCH
INTRODUCTION
PERGOTENDA®FLUX is a unique product that offers the highest
quality and longest lifespan thanks to its construction and the
materials used. Routine maintenance is therefore minimal, thus
allowing users to keep the product perfectly functional and
attractive with just a few operations.
The few, simple rules to be followed are given below:
ITALIANO
MAINTENANCE
1
ESPAÑOL
FRANÇAIS
WARNING:
THE RUNNERS SHOULD NEVER BE LUBRICATED UNDER
ANY CIRCUMSTANCES.
0 - 03.2012
CORRADI S.P.A. - USER MANUAL - PERGOTENDA®FLUX
37 of 119
TABLES
TABLE 1 - S T R E N G T H A N D E F F E C T S O F W I N D O N B E A U F O R T S C A L E
Degree Class*
Load (N/mq)
Knots
Km/h
m/s
Envir. conditions
Effects of wind
0
0
< 40
0-1
0-1
< 0,3
Calm
Smoke rises vertically
1
0
< 40
1-3
1-5
0,3-1,5
Light air
Direction of wind shown by smoke drift, but not by weather vanes
2
0
< 40
4-6
6-11
1,6-3,3
Light breeze
Wind felt on face, ordinary vanes moved by wind
3
0
< 40
7-10
12-19
3,4-5,4
Gentle breeze
Leaves and small twigs in constant motion
4
1
40
11-16
20-28
5,5-7,9
Moderate breeze
Raises dust and loose paper; small branches are moved
5
2
70
17-21
29-38
8-10,7
Fresh breeze
Small trees begin to sway
6
3
110
22-27
39-49
10,8-13,8
Strong breeze
Large branches in motion; umbrellas used with difficulty
7
>3
> 110
28-33
50-61
13,9-17,1
Strong wind
Whole trees in motion; inconvenience felt when walking against wind
8
>3
> 110
34-40
62-74
17,2-20,7
Fresh gale
Branches break off trees; generally impedes progress
9
>3
> 110
41-47
75-88
20,8-24,4
Strong gale
Tiles come off roofs
10
>3
> 110
48-55
89-102
24,5-28,4
Whole gale
Trees uprooted
11
>3
> 110
56-63
103-117
28,5-32,6
Storm
Serious damage to buildings
12
>3
> 110
>64
>118
> 32,7
Hurricane
Immense damage
* According to the UNI EN 13561 standard
TABLE 2 - MAXIMUM DIMENSIONS cm
Width
Projection
500
650
3 runners
900
650
4 runners
1300
650
2 runners
38 of 119
CORRADI S.P.A. - USER MANUAL - PERGOTENDA®FLUX
0 - 03.2012
TABLE 4 – Maximum tensile and shear load (not combined) in daN (1 daN ≈ 1 kg) on each bolt (considering 2 bolts for each support) for a maximum wind speed
of 49km/h (Beaufort scale 6 - Class 3 according to EN 13561)
Projection (cm)
Width (cm)
200
250
300
350
400
450
500
550
600
650
700
750
800
850
900
950
1000
1050
1100
1150
1200
1250
1300
300
28
32
35
39
43
47
56
60
64
68
72
76
80
83
87
64
67
69
72
75
77
80
82
350
31
35
40
44
48
53
63
67
72
76
80
85
89
93
98
72
75
78
81
84
86
89
92
400
34
39
44
49
53
58
70
74
79
84
89
94
99
103
108
80
83
86
89
93
96
99
102
450
37
42
48
53
58
64
76
81
87
92
97
103
108
113
119
87
91
94
98
102
105
109
112
500
40
46
52
58
63
69
83
89
94
100
106
112
118
123
129
95
99
103
107
111
114
118
122
550
43
50
56
62
69
75
89
96
102
108
115
121
127
133
140
103
107
111
115
120
124
128
132
600
47
53
60
67
74
80
96
103
110
116
123
130
137
143
150
111
115
120
124
129
133
138
142
650
50
57
64
71
79
86
103
110
117
124
132
139
146
153
161
118
123
128
133
138
142
147
152
3 RUNNERS
4 RUNNERS
DEUTSCH
2 RUNNERS
ENGLISH
ITALIANO
TABLES
TABLE 5 Maximum tensile and shear load (not combined) in daN (1 daN ≈ 1 kg) on each bolt (considering 2 bolts for each support) for a maximum wind speed
of 74km/h (Beaufort scale 8 -over Class 3 according to EN 13561)
250
300
350
400
450
500
550
600
650
700
750
800
850
900
950
1000
1050
1100
1150
1200
1250
1300
40
47
54
61
68
75
88
95
102
109
116
123
130
137
144
104
109
114
118
123
128
132
137
350
46
54
62
70
78
86
100
108
116
124
132
140
148
156
164
119
124
129
135
140
145
151
156
400
51
60
69
78
87
96
112
121
130
139
148
157
166
175
184
133
139
145
151
157
163
169
175
450
56
66
76
86
96
106
123
133
144
154
164
174
184
194
204
147
154
161
167
174
181
187
194
500
61
72
83
94
105
117
135
146
157
168
179
191
202
213
224
162
169
176
184
191
198
206
213
550
67
79
91
103
115
127
147
159
171
183
195
207
219
232
244
176
184
192
200
208
216
224
232
600
72
85
98
111
124
137
159
172
185
198
211
224
237
250
263
190
199
208
216
225
234
243
251
650
77
91
105
119
133
147
171
185
199
213
227
241
255
269
283
205
214
223
233
242
252
261
270
2 RUNNERS
0 - 03.2012
3 RUNNERS
CORRADI S.P.A. - USER MANUAL - PERGOTENDA®FLUX
4 RUNNERS
39 of 119
FRANÇAIS
200
300
ESPAÑOL
Projection (cm)
Width (cm)
WARRANTY
ART. 1 - USE:
PERGOTENDA®FLUX is a pergola with retractable
awning to cover outdoor areas such as gardens, balconies,
rooftop gardens, yards, etc.
PERGOTENDA®FLUX and its components have been designed,
patented and registered as trademarks by Corradi Spa Bologna, Italy - and have been manufactured in accordance
with applicable technical standards.
The warranties hereunder are valid if installation and use of the
awning conform to the specifications indicated in the articles
and tables below. Only the finest materials, suited to outdoor
use, have been used in the manufacture of
PERGOTENDA®FLUX components.
PERGOTENDA®FLUX is designed and manufactured to
customer specifications, to protect from the sun and
precipitations with a resistance to water accumulation over
Class 2 (56 lt/hour x mq) of the UNI EN 13561, snowfall
excluded and a wind resistance over Class 3 (49 km/hour) of
the UNI EN 13561.
ART. 2 - VERSIONS:
PERGOTENDA®FLUX must be fixed to a suitable supporting
wall and may be used in winds of up to force 8 on the Beaufort
scale as shown in table 1.
ART. 3 - INSTALLATION:
PERGOTENDA®FLUX shall always be fixed to a suitable
supporting structure (wall or ceiling): all conditions in table 2
“Maximum size”, table 3 “Deflection “ table 4-5 “Maximum
load”, table 6 “Minimum slope” shall be complied with.
The retailer has to give the “User Manual” to the client.
40 of 119
ART. 4 – WARRANTY VALIDITY:
The warranty is only valid if the installation and utilisation
conditions as specified in art. 3 are observed.
The warranty covers the repair or entire replacement free of
charge (labour excluded) of all components that may be nonconforming or faulty, including transport charges. Damage
from non-enjoyment of PERGOTENDA®FLUX for any period of
non-use before and during the repair shall not be covered.
No compensation may be claimed for “actual damages or lost
profit”.
The above mentioned warranty will be effective only in the
state in which the retailer or the concessionaire has his own
office.
ART. 5 - WARRANTY STARTING POINT:
The warranty starts from the date on completion of works
reported in the “Declaration of Correct Installation”, of which a
copy should be sent to Corradi, duly filled in all its parts and
duly signed by the Final Customer and the Authorized Dealer.
ART. 6 – WARRANTY EXCLUSIONS:
The warranty is not valid in the cases listed below, by way of
illustrative and non-limiting example:
a) For damage arising from impact or extraordinary natural
events (lightning, flooding, earthquake, hail, etc.)
b) For damage caused by the actions of persons or technicians
not authorised by Corradi Spa;
c) If the electrical voltage has a variation above or below 5% of
the rated value (IEC standard 2-3 July 1988)
CORRADI S.P.A. - USER MANUAL - PERGOTENDA®FLUX
ART. 7 - DURATION OF WARRANTY:
5 YEARS (five):
For the structure, the handling system and the ECLISSI fabric,
excluding CRISTAL fabrics.
2 YEARS (two):
CRISTAL fabric for any outer fasteners (roll up canvases, sliding
canvases, canvases with zippers, etc. The wind
resistance of these components depends on the solution
installed and will be certified, upon request, for each single
installation.
ART. 8 - COMPLAINT
According to art. 1495 sub-section 1 and 1511 sub-section 1 of
the Civil Code, the customer may inform the retailer of any
apparent fault found on the goods in writing only and no later
than 8 (eight) days of receiving the goods. According to art.
1495 sub-section 1 of the Civil Code, the customer may inform
the retailer of any non-apparent fault found on the goods in
writing only and no later than 8 (eight) days of the discovery
date, providing photographic proof of the fault. Both legal
actions by the buyer towards the retailer become statutebarred one year after receiving/installing the goods (Art. 1495
sub-section 2).
According to art. 1512 of the Civil Code, the customer may
inform the retailer of any operating fault in writing only and no
later than 15 (fifteen) days of discovery under penalty of
cancellation of the warranty.
0 - 03.2012
ITALIANO
WARRANTY
ENGLISH
The legal action by the buyer towards the retailer becomes
statute-barred six months after discovery (Art. 1512 subsection 1).
The customer may inform the retailer of any non-conformity
covered by articles 128 to 134 of legislative decree 206 / 2005
(Consumers Code) in writing only and no later than 2 (two)
months of discovery. The legal action by the buyer towards the
retailer becomes statute-barred within 26 months of the
discovery date announced in the terms (Art. 132 sub-section 4
Consumers Code).
ESPAÑOL
FRANÇAIS
DEUTSCH
ART. 9 - TERRITORIAL EXTENTION OF THE WARRANTY
The above mentioned warranty will be effective only in the
state in which the client has his own domicile.
Products directly or indirectly sold, installed or granted for
commodate to customers outside the client’s domicile are
specifically excluded from warranty unless agreed in writing by
Corradi Srl.
0 - 03.2012
CORRADI S.P.A. - USER MANUAL - PERGOTENDA® FLUX
41 of 119
CE MARKING
CE MARKING FOR 2-3 RUNNER VERSIONS
Corradi Spa - Via G. Brini, 39 - 40128 Bologna Italy
Model:
PERGOTENDA® FLUX
2 runners
Serial no.: 00000/00
Year of production: 0000
Power supply: 230 V ~
Power:
Number of phases: 2
Frequency: 50 Hz
218 W
Wind resistance: Class 3
EN 13561
Crushing hazard
A CE
ATUR
MARC
CE MARKING FOR 4 RUNNER VERSION
Corradi Spa - Via G. Brini, 39 - 40128 Bologna Italy
Model:
Electric shock hazard
PERGOTENDA® FLUX
Year of production: 0000
Power supply: 230 V ~
Power:
Number of phases: 2
Frequency: 50 Hz
Wind resistance: Class 3
42 of 119
CORRADI S.P.A. - USER MANUAL - PERGOTENDA®FLUX
4 runners
Serial no.: 00000/00
218 + 218 W
EN 13561
0 - 03.2012
The following CE Declaration of Conformity is subordinated to the observance of constraints and indications in the product warranty, as well as the correct installation done by the person in charge
in accordance with the installation and lay-out instructions established by Corradi Spa.
With the following document the company declares on its own responsibility, that the above
mentioned product satisfies the Directives indicated on the side:
REFERENCE DIRECTIVES appliable to the following CE Declaration of Conformity
Construction Production Directive 89/106/CEE;
Electromagnetic Compatibility Directive 2004/108/CEE(*);
Machinery Directive 2006/42/CE(*);
Low Voltage Directive 2006/95/CE(*);
ENGLISH
Product description:
Model:
Serial number:
Production year:
Usage:
Corradi Spa
Via G. Brini, 39 - 40128 Bolgna Italy
PERGOTENDA®FLUX
PERGOTENDA®FLUX 2 - 3 - 4 runners
(see CE marking on product)
(see CE marking on product)
(see User manual - Original Instructions and concerning Warranty)
The conformity has been verified with the aid of the following norms:
- Performance requirements, safety included UNI EN 13561:2009
- Wind resistance class: Class 3(**) (method according to UNI EN 1932: 2002);
INDICATION / CONDITIONS TO WHICH THE USAGE OF THE PRODUCT IS SUBJECT:
The CORRADI product is subject to the installation activity done for the Client.
The Authorized Installer has to draw up and hand over the suitable DECLARATION OF CORRECT INSTALLATION AND CLASSIFICATION OF WIND RESISTANCE to the user, which testifies the correct
installation, in accordance with the instructions supplied by the manufacturer and applied in accordance with the state and morphology of the installation site and corresponding to the using
conditions for which it has been realized.
DEUTSCH
Manufacturer:
ITALIANO
CE DECLARATION OF CONFORMITY
FRANÇAIS
The Installer has to follow the reference instructions in the “INSTALLATION MANUAL” and “USER MANUAL” .
The Installer fills out and signs the DECLARATION OF CORRECT INSTALLATION AND CLASSIFICATION OF WIND RESISTANCE, in accordance with the model in the USER MANUAL.
THE MANUFACTURER
I declare that the above described product conforms to the indications and requirements in the above mentioned Directives.
ESPAÑOL
CHIEF EXECUTIVE OFFICER
Eng. Gianmarco Biagi
(*) Directives exclusively applicable to products with motorizations and automations [see User manual ]
(**) Wind resistance class: the wind resistance class has been verified using installation supports with features as in the Load table in the Installation manual
0 - 03.2012
CORRADI S.P.A. - USER MANUAL - PERGOTENDA®FLUX
43 of 119
* Do not try to force the push-button if it does not move when
pressed, but ensure that the motor is positioned on the limit
switch.
B
A
Panel
A
2) ASSEMBLING THE AWNING
Assemble the end and intermediate tubes to the structure,
securing them to the sliders.
3) ADJUSTING THE CLOSING LIMIT SWITCH, WITH
AWNING RETRACTED
Go back to the neutral position, retracting the awning until it
stops, then press push-button B* with a screwdriver, turning it
slightly in order to secure the push-button. Set the closing limit
switch 5 cm ahead of the neutral position, so that the sliders
are slightly slack. Press push-button B with a screwdriver and
turn slightly to release, to store the limit switch position and
quit the procedure.
4 - PERMANENT ADJUSTMENT OF THE OPENING LIMIT
SWITCH
Open the awning until it stops (temporary opening limit
PLAN 75 Motor
230 V/50 Hz
In= 0,97 A
Pn= 218 W
IP= 54
M1
3
2
1
WIRE TYPE
FG70R 3X1,5 mmq
Open male plug
supplied
1
insulated extend
button 230 V
3
2
insulated retract
button 230 V
WIRE TYPE
FG70R 3X1,5 mmq
44 of 119
CORRADI S.P.A. - USER MANUAL - PERGOTENDA®FLUX
WORK MUST BE CARRIED OUT BY INSTALLER
B
EXTEND
1) TEMPORARY ADJUSTMENT OF THE OPENING LIMIT
SWITCH Press push-button A with a screwdriver, turning it
slightly in order to secure the push-button. Press the pushbutton panel to move the awning to ¾ of the runner. To store
the limit switch and quit the procedure press push-button A
with a screwdriver and turn slightly to release, to store the limit
switch position and quit the procedure.
switch) then press push-button A with a screwdriver, turning it
slightly in order to secure the push-button. Roll down the
awning until it reaches the right opening position. To store the
limit switch and quit the procedure press push-button A with
a screwdriver and turn slightly to release, to store the limit
switch position and quit the procedure..
RETRACT
WARNING
A qualified technician must initially adjust the motor.
When there is an electrical current, proceed with maximum
caution in accordance with the safety regulations in force.
When everything has been assembled, check that the
transmission system is properly connected: shafts, tubes, side
shafts and motor heads, with the sliders stacked at the top of
the awning. The motor is in neutral in this position. Before
assembling the awning proceed as follows:
COMMON
RESERVED FOR QUALIFIED TECHNICIANS
PROCEDURE FOR INSTALLING THE PLAN 75 – TYPE 1 MOTOR (ONLY FOR INSTALLERS)
0 - 03.2012
0 - 03.2012
ENGLISH
A
A
PLAN 75 Motor
230 V/50 Hz
In= 0,97 A
Pn= 218 W
IP= 54
3
2
1
WIRE TYPE
FG70R 3X1,5 mmq
Open male plug
supplied
1
insulated extend
button 230 V
3
2
insulated retract
button 230 V
WIRE TYPE
FG70R 3X1,5 mmq
CORRADI S.P.A. - USER MANUAL - PERGOTENDA®FLUX
FRANÇAIS
M1
ESPAÑOL
B
DEUTSCH
Panel
WORK MUST BE CARRIED OUT BY INSTALLER
LIMIT SWITCH: CLOSING (AWNING RETRACTED)
Connect the panel to the motor. Raise the awning to the preset position for the closing limit switch. The awning must be in
this position to set the closing limit switch. Press push-button
B on the motor body with a screwdriver, turning it slightly in
order to secure the push-button.
When the push-button is pushed inside and secured, operate
B
EXTEND
LIMIT SWITCH: OPENING (AWNING EXTENDED)
If the INSTALLATION KIT panel is present, connect it to the
motor so that it can be manoeuvred.
N.B. For those who don’t have a push-button panel ask a
qualified technician to realize one, as in the wiring
scheme.
Run down the awning to the pre-set position for the opening
limit switch; the awning must be in this position to set the
opening limit switch.
Push the A* button on the motor box using a screwdriver,
making a slight rotation, block the push-button in depressed
position. The actual limit switch will be cancelled.
When the push-button is pushed inside, operate the panel
until the awning is in the right limit switch position. Press pushbutton A with a screwdriver and turn slightly to release, to
store the limit switch position and quit the procedure.
*Do not try to force the push-button if it does not move when
pressed, but ensure that the motor is positioned on the limit
switch.
the panel until the awning is in the right limit switch position.
Press push-button B with a screwdriver and turn slightly to
release, to store the limit switch position and quit the
procedure.
RETRACT
LIMIT STOP ADJUSTMENT PLAN 75 MOTOR
The end user of the product must refer to the limit stop
adjustment procedure described here below. This procedure
differs from the initial adjustment of the motor set by the
technical installer (see Installation Manual).
ITALIANO
ELECTRIC DRIVE TYPE 1 (PLAN 75 MOTOR)
COMMON
RESERVED FOR QUALIFIED TECHNICIANS
ADJUSTING THE COMMANDS
45 of 119
ELECTRIC DRIVE TYPE 2 (SLOPE 95 MOTOR)
MONO 00749 Exchange
With automatic opening limit switch
including a remote control.
LIMIT STOP ADJUSTMENT SLOPE 95 MOTOR
Proceed with maximum caution in accordance with the safety
regulations in force.
46 of 119
6
3
2
1
SLOPE 95 Motor
230 V/50 Hz
In= 0,97 A
Pn= 218 W
IP= 54
M1
Fu 250V/200mA
1
2
3
Push-button panel maintained,
supplied and installed by an electrician.
Positioned within the awning’s
operating field
CORRADI S.P.A. - USER MANUAL - PERGOTENDA®FLUX
3
1
2
WORK MUST BE CARRIED OUT BY INSTALLER
Tuning a new remote control
Press the MEMO button (4), the LED (5) flashes twice, keep the
MEMO button (4) pushed down and press the remote control
button at the same time, the LED (5) flashes twice indicating
that the remote control has been recognised.
Cancelling remote control memory:
You can cancel all the remote control codes by pressing the
CANC button (6) and waiting for the LED (5) to stay
permanently red.
5
5V low voltage wire
RETRACT
It is then possible to use the remote control supplied.
Then proceed with assembly of the awning. The tension of the
canvas when opening is managed by the exchange, whilst the
point at which the stacked awning stops is the point
memorised with the STOP button. If the motor stops (because
of overheating), the red LED (2) flashes: after approximately 5
minutes the light goes off and the motor can be used again.
4
COMMON
- Check that the motor is correctly connected to the exchange
and that the exchange is correctly connected to the mains.
If not present make the connections as indicated in the wiring
scheme.
- Push the START button (1) on the remote computing system
exchange and wait for the led to turn RED (2), and then release the
switch.
The awning starts to descend; once it gets to the limit switch it
will stop for about 1 second and then it will move upwards
automatically.
- Push the STOP button (3) as soon as you reach the point
where you would like to have the limit switch on the upper side.
EXTEND
RESERVED FOR QUALIFIED TECHNICIANS
ADJUSTING THE COMMANDS
0 - 03.2012
ITALIANO
ELECTRIC DRIVE TYPE 3 (SLOPE 95 AND PLUS 96 MOTORS)
LIMIT STOP ADJUSTMENT SLOPE 95 AND PLUS 96 MOTORS
Proceed with maximum caution in accordance with the safety
regulations in force.
1
Motore SLOPE 95
230 V/50 Hz
In= 0,97 A
Pn= 218 W
IP= 54
0 - 03.2012
PLUSE 96 Motor
230 V/50 Hz
In= 0,97 A
Pn= 218 W
IP= 54
Push-button panel maintained,
supplied and installed by an electrician.
Positioned within the awning’s
operating field
CORRADI S.P.A. - USER MANUAL - PERGOTENDA®FLUX
WORK MUST BE CARRIED OUT BY INSTALLER
5V low voltage wire
Fu 250V/200mA
Tuning a new remote control
Press the MEMO button (4), the LED (5) flashes twice, keep the MEMO
button (4) pushed down and press the remote control button at the
same time, the LED (5) flashes twice indicating that the remote control
has been recognised.
Cancelling remote control memory:
You can cancel all the remote control codes by pressing the CANC
button (6) and waiting for the LED (5) to stay permanently red.
ENGLISH
2
DEUTSCH
3
FRANÇAIS
6
ESPAÑOL
5
RETRACT
It is then possible to use the remote control supplied.
Then proceed with assembly of the awning. The tension of the canvas
when opening is managed by the exchange, whilst the point at which
the stacked awning stops is the point memorised with the STOP
button.
If the motor stops (because of overheating), the red LED (2) flashes: after
approximately 5 minutes the light goes off and the motor can be used
again.
4
COMMON
- Check that the motor is correctly connected to the exchange and that
the exchange is correctly connected to the mains.
If not present make the connections as indicated in the wiring scheme.
- Push the START button (1) on the remote computing system
exchange and wait for the led to turn RED (2), and then release the
switch.
The awning starts to descend; once it gets to the limit switch it will stop
for approximately 1 second and then it will move upwards
automatically.
- Push the STOP button (3) as soon as you reach the point where you
would like to have the limit switch on the upper side.
TANDEM 00757 Exchange
With automatic opening limit switch for two motors including a remote control.
EXTEND
RESERVED FOR QUALIFIED TECHNICIANS
ADJUSTING THE COMMANDS
47 of 119
wir bedanken uns dafür, dass Sie sich für ein Corradi-Produkt entschieden haben. In diesem Benutzerhandbuch sind die technischen
Eigenschaften und die notwendigen Instandhaltungsarbeiten für das Produkt PERGOTENDA®FLUX beschrieben.
Dieses Handbuch ist der Leitfaden für die Instandhaltung der PERGOTENDA®FLUX , wir empfehlen Ihnen deshalb, alle Abschnitte
aufmerksam zu lesen und es gut aufzubewahren. Wir weisen darauf hin, dass die einwandfreie Funktion der PERGOTENDA®FLUX und
somit deren Sicherheit nur bei Beachtung der auf den nachfolgenden Seiten genannten Bedingungen gewährleistet sind.
Hinweise und Sicherheitsvorkehrungen
Wie man PERGOTENDA®FLUX betätigt
Versionen und Motorisierungen
PERGOTENDA®FLUX 2 Führungsschienen
PERGOTENDA®FLUX 3 Führungsschienen
PERGOTENDA®FLUX 4 Führungsschienen
Lösung von Problemen mit elektrischem Antrieb
Produkts Eigenschaften
Instandhaltung
Tabellen
Garantie
CE-Zeichen
Konformitätserklärung
Einstellung der Antriebe (Eingriff durch einen
sachkundigen Techniker)
Corradi Spa
Alberto Corradi
68
ESPAÑOL
ACHTUNG: Die Firma Corradi Spa behält sich das Recht vor, ihre Produkte jederzeit nach eigenem Ermessen und ohne Vorankündigung zu
verändern. Jeder von Corradi nicht autorisierte Eingriff an der PERGOTENDA®FLUX oder an ihren Bestandteilen im Laufe der Garantiezeit, sei
es vom Kunden selbst oder von Dritten vorgenommen (unsachgemäße Verwendung, technische Veränderungen, etc.), führt zum
unverzüglichen Verfall jeglichen Garantieanspruchs; in diesem Fall und unter diesen Bedingungen ist jede Verantwortung und jede direkte
oder indirekte Verpflichtung von Corradi, die aus diesem nicht genehmigten Eingriff erwächst, ausgeschlossen.
50
51
52
53
54
55
56
57
61
62
64
66
67
DEUTSCH
INHALTSVERZEICHNIS
FRANÇAIS
VEREHRTER KUNDE,
ENGLISH
ITALIANO
WILLKOMMEN
0 - 03.2012
CORRADI S.P.A. - BENUTZERHANDBUCH - PERGOTENDA®FLUX
49 von 119
HINWEISE UND SICHERHEITSVORKEHRUNGEN
VORABKONTROLLE
Falls die Montagearbeiten nicht durch den Händler ausgeführt
werden sollten, ist das Material bei Erhalt der verpackten Ware
auf Unversehrtheit und Vorhandensein aller erforderlichen
Teile zu überprüfen.
Bei Abweichungen bitte den Autorisierten Fachhändler
kontaktieren.
ENTSORGUNG DES VERPACKUNGSMATERIALS
Die einzelnen Verpackungsarten entsprechend ihrer
Zusammensetzung sortieren (Kartons, Nylon, Polystyrol, etc.)
und gemäß den geltenden Vorschriften getrennt entsorgen.
ALLGEMEINE HINWEISE
Vor Ausführung jeder Montage-, Instandhaltungs- oder
Reinigungsmaßnahme sicherstellen, dass der Inhalt dieses
Handbuchs verstanden wurde.
Alle Corradi-Produkte haben eine bestimmte Funktion, die in
diesem Handbuch beschrieben ist; jede andere Verwendung
als die ursprünglich vorgesehene, die Verwendung von NichtOriginalteilen, sowie nicht genehmigte Eingriffe und/oder
technische Veränderungen, entheben die Firma Corradi Spa
jeglicher Verantwortung von Schäden an Personen, Dingen
oder Tieren, die durch diesen Eingriff entstehen.
SICHERHEITSHINWEISE
Man sollte sich immer vor Augen halten, dass jedes Element in
Bewegung eine Gefahr darstellen kann.
Bei der Durchführung von Instandhaltungs-, Reparatur- oder
Einstellarbeiten am Produkt ist immer der Strom abzuschalten.
Weiterhin empfiehlt sich das Anbringen eines Hinweisschilds
mit der folgenden Aufschrift am elektrischen Hauptstromschalter: “ACHTUNG! NICHT BERÜHREN: Kundendienstpersonal
bei der Arbeit”.
ENTSORGUNG
Bei Verschrottung sind die Plastikteile und die elektrischen
Komponenten zu trennen, die dann unter Berücksichtigung
der geltenden Vorschriften den zuständigen Abfallentsorgungsstellen zuzuführen sind.
Was die Metallteile der Markise anbelangt, so reicht eine
Unterteilung zwischen Stahlteilen und anderen Metallen und
Legierungen, um eine korrekte Zuführung zum Recykeln und
Einschmelzen zu ermöglichen.
Sich vergewissern, dass sich kein Arbeiter in der Nähe der
Markise befindet, bevor diese nach einem Instandhaltungseingriff wieder in Betrieb genommen wird. Nach der
Instandhaltungsarbeit immer die einwandfreie Funktion und
die Wirksamkeit der manuellen Steuerelemente überprüfen.
Bei weiterem Funktionsversagen ist die Arbeit unverzüglich zu
unterbrechen und der technische Kundendienst von Corradi
zu Rate zu ziehen.
Die mit der Montage des Produktes betrauten Personen
(Monteure und Elektriker) müssen über die spezifischen
Sachkenntnisse verfügen und die erforderlichen Verhaltens
und körperlich-geistigen Voraussetzungen für die Ausführung
der Arbeiten besitzen; außerdem sind die geltenden Unfallverhütungsvorschriften strengstens einzuhalten.
50 von 119
CORRADI S.P.A. - BENUTZERHANDBUCH - PERGOTENDA®FLUX
0 - 03.2012
Halt
Markisenabfahrt
Markisenauffahrt
Led
Zeigt den
Batteriestand
an (rot
funktioniert)
Ersetzung der Batterie
Um die Batterie zu ersetzen die Schraube auf der hinteren
Seite der Fernbedienung ausdrehen und die Batterien mit
demselben Modell (12 Vdc Stahlbatterie Mod. 23 A)
ersetzen.
Vorsicht: verwechseln Sie di Pole nicht.
Vorsicht: benutzen Sie das richtige Modell.
Entsorgen Sie die benutzte Batterie im Sondermüll.
Markisenabfahrt
0 - 03.2012
CORRADI S.P.A. - BENUTZERHANDBUCH - PERGOTENDA®FLUX
ENGLISH
Markisenauffahrt
DEUTSCH
FERNBEDIENUNG
Bei PERGOTENDA®FLUX mit Fernbedienung, benutzen Sie
die entsprechenden Schaltknöpfe für die Markisenauffahrt, abfahrt und -halt (siehe Abb.).
FRANÇAIS
ELEKTRISCHER ANTRIEB
Bei PERGOTENDA®FLUX mit Wandschaltknopf, drücken Sie
den Knopf nach unten um die Markise nach unten zu
bewegen, oder oben, um die Markise nach oben zu
bewegen. Sobald Sie den Schaltknopf loslassen, wird die
Markise an dem Punkt wo sie gerade ist anhalten.
ESPAÑOL
PERGOTENDA®FLUX
Die Markise wurde nach Maß für den Auftraggeber angefertigt
und dient dazu, vor Sonne und anderen Wettereinflüssen, zu
schützen (Schneelast ausgeschlossen); PERGOTENDA®FLUX ist
an einer geeigneten Stützwand zu befestigen, die
Verwendung ist bis zu einer Windstärke 8 auf der BeaufortSkala garantiert, entsprechend Tabelle 1 (Seite 66).
ITALIANO
WIE MAN PERGOTENDA®FLUX BETÄTIGT
51 von 119
VERSIONEN UND MOTORISIERUNGEN
PERGOTENDA®FLUX 2 SCHIENEN
ELEKTRISCHER ANTRIEB TYP 1
Antrieb PLAN
1 BREITE
2 AUSLADUNG
3 HÖHE WANDBALKEN
4 HÖHE PFEILER
Getriebemotor 220 Volt - 218 W mit Endlauf-Druckknopf zum Ein- und
Ausfahren der Markise.
Markisen mit bis zu 3 Führungsschienen mit einer maximalen Ausladung
von 350 cm.
PERGOTENDA®FLUX 3 SCHIENEN
PERGOTENDA®FLUX
ELEKTRISCHER ANTRIEB TYP 2
Antrieb SLOPE
Steuereinheit MONO
Getriebemotor 220 Volt - 218 W inclusive Steuereinheit mit
Mikroprozessor zur Kontrolle der Spannung und Empfänger für
Radiofrequenz-Fernbedienung (433,92 MHz).
Ideal für MARKISEN mit 2 oder 3 Führungsschienen, damit bei jeder
Betätigung stets eine korrekte Spannung der Markise gewährleistet ist,
die je nach Ausdehnung von Gewebe, Führungsschienen etc. durch
Temperaturschwankungen wechseln kann.
4
ELEKTRISCHER ANTRIEB TYP 3
Antrieb 1 SLOPE (Komandoeinheit)
Antrieb 2 PLUS
Steuereinheit TANDEM
PERGOTENDA®FLUX 4 SCHIENEN
Getriebemotor 220 Volt - 218 + 218 W inclusive Steuereinheit mit
Mikroprozessor zur Kontrolle der Spannung und zum Betrieb von zwei in
Reihe geschalteter Motoren auf der selben Achse, mit Empfänger für
Radiofrequenz-Fernbedienung (433,92 MHz). Ideal für MARKISEN mit 4
Führungsschienen, damit bei jeder Betätigung stets eine korrekte
Spannung der Markise gewährleistet ist, die je nach Ausdehnung von
Gewebe, Führungsschienen etc. durch Temperaturschwankungen
wechseln kann.
52 von 119
CORRADI S.P.A. - BENUTZERHANDBUCH - PERGOTENDA®FLUX
0 - 03.2012
ITALIANO
PERGOTENDA®FLUX - 2 FÜHRUNGSSCHIENEN
Modularschutzdach
Querprofil 6x12 zur Stützung des Schutzdachs
Gewebe
Pfeiler 6x12
DEUTSCH
ENGLISH
Elektrischer Antrieb
FRANÇAIS
Wandträger (Aufpreis)
Tragende Führungsschiene 6x12
Frontbalken 6x12 (Aufpreis)
ELEKTRISCHER ANTRIEB TYP 1
00775-1 Getriebemotor PLAN
0 - 03.2012
CORRADI S.P.A. - BENUTZERHANDBUCH - PERGOTENDA®FLUX
ELEKTRISCHER ANTRIEB TYP 2
00775-2 Getriebemotor SLOPE
00749
Steuereinheit MONO
53 von 119
ESPAÑOL
vorgeschrieben über Ausladung cm 400
PERGOTENDA®FLUX - 3 FÜHRUNGSSCHIENEN
Gewebe
Querprofil 6x12 zur Stützung des Schutzdachs
Modularschutzdach
Elektrischer Antrieb
Pfeiler 6x12
Wandträger (Aufpreis)
Frontbalken 6x12 (Aufpreis)
Tragende Führungsschiene 6x12
vorgeschrieben über Ausladung cm 400
ELEKTRISCHER ANTRIEB TYP 1
00775-1 Getriebemotor PLAN
54 von 119
CORRADI S.P.A. - BENUTZERHANDBUCH - PERGOTENDA®FLUX
ELEKTRISCHER ANTRIEB TYP 2
00775-2 Getriebemotor SLOPE
00749
Steuereinheit MONO
0 - 03.2012
Modularschutzdach
Gewebe
ITALIANO
PERGOTENDA®FLUX - 4 FÜHRUNGSSCHIENEN
ENGLISH
Querprofil 6x12 zur Stützung des Schutzdachs
Pfeiler 6x12
DEUTSCH
Frontbalken 6x12 (Aufpreis)
FRANÇAIS
Elektrischer Antrieb
vorgeschrieben über Ausladung cm 400
Wandträger (Aufpreis)
ELEKTRISCHER ANTRIEB TYP 1
00775-1 Getriebemotor PLAN
0 - 03.2012
CORRADI S.P.A. - BENUTZERHANDBUCH - PERGOTENDA®FLUX
ELEKTRISCHER ANTRIEB TYP 3
00775-3 Getriebemotor PLUS
00775-2 Getriebemotor SLOPE
00757
Steuereinheit TANDEM
55 von 119
ESPAÑOL
Tragende Führungsschiene 6x12
LÖSUNG VON PROBLEMEN MIT DER FERNBEDIENUNG
MÖGLICHER GRUND
KONTROLLEN UND LÖSUNGSMÖGLICHKEITEN
Motor schaltet sich nicht ein.
Stromausfall.
Überprüfen, ob an der Hausstromanlage Strom anliegt.
Stecker ist nicht am Stromnetz angeschlossen.
Überprüfen, ob der Stecker korrekt an einer funktionsfähigen
Steckdose angeschlossen ist.
Überhitzung des Motors, Led der Steurbüchse leuchtet auf.
5-10 Minuten warten, damit sich der Motor abkühlen kann.
Wenn das Problem erneut auftritt, Endlauf einstellen.
Batterien der Fernbedienung sind leer.
Batterien der Fernbedienung austauschen.
Sicherung defekt.
Steuerbüchse öffnen und Sicherung austauschen.
Möglich, dass die Riemen kaputt sind und die Verbindung zur
Antriebswelle unterbrochen ist.
Den Autorisierten Fachhändler kontaktieren.
Führungsschienen schmutzig, Führungsschienen nicht ganz
gerade ausgerichtet.
Führungsschienen reinigen, siehe Hinweise im Kap. “Wartung”.
CORRADI S.P.A. - BENUTZERHANDBUCH - PERGOTENDA®FLUX
0 - 03.2012
PERGOTENDA®FLUX
MIT STEUEREINHEIT
STÖRUNG
Der Motor schaltet sich ein, aber die Markise
bewegt sich nicht.
Die Markise bewegt sich ruckartig.
56 von 119
PRODUKTEIGENSCHAFTEN
NICHTEINHALTUNG/ MANGEL
WARNUNG
Mängel müssen innerhalb von acht Tagen ab dem
Datum der Installation beim Kunden (bezogen auf das
Datum der Bescheinigung der korrekten Installation, die
der Endbenutzer vom Installateur erhält) gemeldet
werden. Siehe allgemeine Verkaufsbedingungen.
ALLGEMEIN
ITALIANO
PRODUKTS EIGENSCHAFTEN
Die Struktur ist nicht wasserdicht. Im Falle von besonders heftigen Stürmen mit starken Winden ist das
Auftreten von Wassereintritt möglich.
ENGLISH
Falls der in Bescheinigung der korrekten Installation angegebene Windwert überwunden wird, ist es
notwendig, die Markise zu schließen. Ein ordnungsgemäß kalibrierter Anemometer kann hierzu
benutzt werden.
Das Produkt garantiert nicht die Schneelast. In Anwesenheit von Schnee, auch geringer
Intensität, sollte die Markise verpackt werden.
Um Ihre Produktgarantie zu erhalten, ist die Bescheinigung über die ordnungsgemäße Installation
UNERLÄSSLICH. Eine Kopie muss an den Endverbraucher abgegeben werden und eine Kopie muss an
Corradi Spa versendet werden. Nach Erhalt der ordnungsgemäß ausgefüllten Bescheinigung wird die
Produktgarantie aktiviert.
DEUTSCH
Jede Änderung des Produkts, die nicht ausdrücklich von Corradi SpA genehmigt wird, führt zum
Verlust der Garantie.
SELBSTTRAGEND
Durch Anlegen einer seitlichen Belastung des Pfeilers könnte sich eine Schwingung in der Struktur
erzeugen. Diese Bewegung ist nicht ein Zeichen der strukturellen Schwäche, sondern gilt als normal für
diese Art von Struktur. Die Struktur wurde durch qualifizierte Ingenieure mit den Eurocodes berechnet
und ist bis zur Windwiderstandsklasse garantiert, die in der EG-Bescheinigung und in der Erklärung der
korrekten Installation angegeben ist.
GEWEBE
Je nach Installationsbedingung ist es möglich, dass das Tuch verschmutzt wird (Schadstoffe, Rauch aus
Schornsteinen, Smog, usw.) .. In diesem Fall kann es notwendig sein, das Gewebe, wie in Abschnitt
Wartung angegeben, häufiger zu reinigen.
FRANÇAIS
Die Strukturen, die in einem städtischen Umfeld sind, sind Schadstoffen (Smog, saurer Regen), Rauch
aus Schornsteinen, Rauch vom Kochen, und dem Wetter im Allgemeinen unterworfen. Es ist dementsprechend normal, dass das Gewebe und die Struktur schmutzig werden. Die Strukturen und das
Gewebe sind NICHT selbstreinigend.
Das Tuch ist nicht immun gegen Verbrennungen, die durch Zigarettenstummel, usw. verursacht
werden.
ESPAÑOL
In besonderen Situationen der Nutzung der Anlage kann sich Kondenswasser an der Innenseite des
Tuches ansammeln. Zur Begrenzung dieses Zustandes, fahren Sie mit einer angemessenen Belüftung
des Raumes fort.
Das Auftreten von Schimmel in der Prägung des Gewebes wird durch die Anwesenheit von
Feuchtigkeit auf dem Gewebe, dass die Bildung von Mikroorganismen fördert, verursacht. Daher muss
das Tuch in regelmäßigen Abständen und, falls notwendig häufiger als normal, gereinigt werden.
Das Vorhandensein von Falten auf dem Tuch nach der ersten Installation könnte sich durch die
Verpackung ergeben. Das Tuch muss für mindestens 10 Tage in Position gehalten werden, und erst
nach Ablauf dieser Frist kann die Qualität des Produktes bewertet werden.
0 - 03.2012
Das Vorhandensein von Falten auf dem
Tuch nach 10 Tagen ist ein Mangel.
CORRADI S.P.A. - BENUTZERHANDBUCH - PERGOTENDA®FLUX
57 von 119
PRODUKTS EIGENSCHAFTEN
PRODUKTEIGENSCHAFTEN
NICHTEINHALTUNG/ MANGEL
ZWISCHENDACH
In besonderen Situationen der Nutzung der Anlage kann sich Kondenswasser im Bereich zwischen dem Gewebe und dem
Zwischendach ansammeln. Dies kann Schmutz und/oder Schimmel im Zwischenbereich verursachen. Montieren Sie das
Zwischendach ab und waschen Sie es.
REGENRINNE
Es sollte regelmäßig überprüft werden, dass die Rohre der Regenrinne und Fallrohre sauber sind. Blätter und anderer Schmutz, die
die Ablauföffnungen verstopfen könnten, müssen entsorgt werden.
Im Fall von sehr starken Regenfällen ist es möglich, dass die Regenrinne nicht in der Lage ist, das Wasser abtropfen zu lassen. Dies
kann zum Eindringen von Wasser führen.
Die Wasserleitung zum Grund kann nicht durch Corradi SpA kontrolliert werden,sondern durch den Endkunden. Die
Installationsbedingungen, die Neigung und eventuellen Erfassungsbrunnen sind unter der alleinigen Verantwortung des
Kundens.
LAMPEN
Zur Aufrechterhaltung der guten Leistungsfähigkeit der Dichtungen, die den IP-Schutzlevel des Produkts (in der
Bedienungsanleitung) garantieren, müssen Sie die Wartung, wie in der Bedienungsanleitung angegeben, ausführen.
SEGEL
Das Vorhandensein von Falten im Segel ergibt sich durch die lange Wicklung des Gewebes auf dem Wickelrohr. Zur Begrenzung
dieses Phänomens und um die Garantie zu haben, ist die Verwendung von Segelabdeckungen erforderlich.
Das Vorhandensein von Falten im Segel sofort nach der ersten Installation kann sich durch die Verpackung ergeben. Die Falten
werden nach ca. 6 Monaten völlig verschwinden.
GEWEBE VELOMBRA
Die Gewebe, sind "im Stück gefärbt": dies kann zu einer nicht-perfekten Homogenität und Konsistenz der Farbe führen.
HOLZ
ACHTUNG: Es ist gut, sich daran zu erinnern, dass jede Art von Holz, dass außen platziert und direkt der Witterung ausgesetzt wird,
wahrscheinlich schon nach relativ kurzer Zeit "gelebt" aussehen wird. Dies offenbart sich hauptsächlich mit:
• Verfärbung der Oberfläche (die variable Zersetzung hängt vom Feuchtigkeitsgehalt ab, dem das Holz ausgesetzt ist)
• mit der Unregelmäßigkeit der Oberfläche aufgrund zyklischer Phänomene der Quellung und Schwindung und möglicher
mechanischer Abnutzung der Oberfläche.
Da Holz ein natürliches Material ist, gibt es Unterschiede in Farbe und Maserung, sodass alle Elemente verschieden sind.
Außerdem je nach Blickwinkel wirkt es anders, aufgrund der wandelnden Natur des Materials. Die Muster und fotografischen
Reproduktionen sind somit als vorläufig und nicht verbindlich anzusehen.
Die Ablösung einer Lamelle von den Balken wird als Mangel
behandelt.
Das Holz wird einer schützenden Behandlung im Drucckkessel untersetzt, die eine bessere Resistenz gegen Pilze und
Schimmelpilzbefall ermöglicht. Diese Behandlung ist grün (aufgrund der Salze, die zur Imprägnierung verwendet werden), und
wird vor dem Lackieren der Balken ausgeführt. Im Fall von hellen Farben, ist es normal, dass grüne Streifen auf dem Holz als Folge
der Auslaugung der Lackierung durch schlechtes Wetter auftreten. In diesem Fall müssen Sie mit Sorgfalt wie in der Anleitung verfahren.
Auf den Balken können vertikale Streifen mit verschiedenen Schattierungen vorliegen. Das ist normal und ergibt sich aufgrund des
Stapelns im Druckkessel während der Imprägnierung (die Balken werden durch Querbalken auseinander gehalten).
Die Anwesenheit von Harz ist ein Merkmal von Holz von Nadelbäumen.
Eine Maßabweichung nach Einwirkung von Feuchtigkeit in Holz-Produkten ist normal. Die Feuchtigkeit der Messpunkte beträgt
12% (definiert in der UNI EN390: 1997).
58 von 119
CORRADI S.P.A. - BENUTZERHANDBUCH - PERGOTENDA®FLUX
0 - 03.2012
PRODUKTS EIGENSCHAFTEN
FUSSBODEN
NICHTEINHALTUNG/ MANGEL
ITALIANO
PRODUKTEIGENSCHAFTEN
Der Boden kann Dellen aufweisen, die sich durch Stöße oder herabfallende Gegenstände ergeben und unter Anwendung von konzentrierten
Lasten auf einer kleinen Fläche, wie z. Bsp. Stühle mit Rollen, hohe Absätze und Leitern.
Der Boden kann als Folge des Kontakts mit kleinen Objekten wie Nägel oder Steine in den Schuhsohlen zerkratzt werden.
Zum Zeitpunkt der Lieferung kann der Boden anders sein als das Muster, da die Belichtung eine Änderung in der Farbe des Holzes bewirkt.
MÖBEL
Im Winter sollten diese vor dem Wetter geschützt werden. Bevor diese für den Winter weggestellt werden, müssen sie gereinigt werden.
Wenn die Möbel in der Meeresumwelt verwendet werden, sollten sie regelmäßig mit frischem Wasser gewaschen werden, um Spuren von Salz zu
entfernen.
MOTOREN
ENGLISH
Eigenschaften rostfreier Stahl siehe Stimme ROSTFREIER STAHL
Elektrische Anlage: Sie muss von einem zugelassenen Elektriker verwirklicht werden, der ein Zertifikat der Übereinstimmung der elektrischen
Anlage freigibt.
Die Anlage muss über ein angemessenes Schutzmaß verfügen, um außerhalb installiert zu werden. Ein zugelassener Elektriker ist in der Lage, die
richtige Größe des Systems und die Wahl der richtigen Komponenten (IP-Code) auszuführen.
ROSTFREIER
STAHL
Die Komponenten in Edelstahl (AISI 304) erfordern keine Wartung. Die Entstehung von Mikro-Oxidation, die sich am häufigsten in maritimen
Umgebungen aufgrund des Salznebels ergibt, hat keinen Einfluss auf die Qualität und Haltbarkeit des Produktes solche Oxidationen sind normal.
Im Fall, dass Sie diese oxidierten Punkte entfernen wollen, können Sie Stahlwolle verwenden oder eine Metall-Bürste (Edelstahl). Die Schutzfolie aus
Chromoxid (Selbstpassivierung) wird auf natürliche Weise durch den Kontakt mit der Luft wiederhergestellt werden, ohne Eingriff des Benutzers.
ALUMINIUM
Die Anwesenheit von Spuren und Kratzern wird nur als Fehler angesehen, falls diese aus einer Entfernung von 2 Metern sichtbar sind.
Falls Spuren und Kratzer aus einer Entfernung von 2 Metern sichtbar sind, werden
diese als Fehler angesehen.
DEUTSCH
Durch Spannungsabfall oder Funkstörungen können die Motoren den Endlauf verlieren. In diesem Fall ist es notwendig, mit einer neuen
Programmierung, wie in der Anleitung, zu verfahren.
Verwenden Sie keine Säure, um die lackierten Aluminiumteile zu reinigen, sondern nur Wasser und milde Seife.
Blistering: Unebenheiten auf der Oberflächen-Lackierung in verschiedenen Größen
und Frequenz.
Durchhängen der Außenschicht: unregelmäßige, lokalisierte und gut definierte
Schichten, in Form von abgerundeten Kanten und flach, die die äußere Schicht
betreffen.
FRANÇAIS
Orangenhaut: die Oberflächen-Lackierung ist unebenen und sieht wie Orangenhaut
aus.
LACKIERUNG
Porosität - Kriechen: Kleine Löcher wie Kratern oder Vertiefungen in der OberflächenLackierung, in der Größe von einem kleinen Loch bis zu einem Durchmesser von bis
zu 1 cm.
Verunreinigungen in der äußeren und inneren Schicht: der Beschichtungs-Film hat
eine rauhe und unregelmäßige Oberfläche, leicht wahrnehmbar im Griff.
Abschabungen zu Störungen: Die Oberflächen-Lackierung wird beschädigt und
Verletzungen unterschiedlicher Tiefe und Umfang, abhängig von der Ursache, treten
auf.
0 - 03.2012
CORRADI S.P.A. - BENUTZERHANDBUCH - PERGOTENDA®FLUX
59 von 119
ESPAÑOL
Ablösung - Furnier: der Lackschicht hebt sich vom Untergrund in Form von kleinen
Flocken auf.
PRODUKTS EIGENSCHAFTEN
PRODUKTEIGENSCHAFTEN
NICHTEINHALTUNG/ MANGEL
VERGLASUNG
Aluminium-Rahmen finden Sie unter der Stimme Aluminium.
ERMETIKA
Während des Sommers, wenn dem direkten Sonnenlicht ausgesetzt, kann die Temperatur im Inneren des Schutzgehäuses sehr hohe
Werte erreichen. Falls das Gewebe längere Zeit nicht bewegt wird, kann das Gewebe kleben bleiben. Es wird empfohlen, die Markise
regelmäßig zu öffnen und zu schließen, um dies zu vermeiden.
Bleibt das Gewebe längere Zeit aufgerollt, können Falten auftauchen. Das Gewebe besteht aus PVC und seine Natur ist nicht vergleichbar mit einem Glas. Um die Falten zu beseitigen, muss das Gewebe mindestens 48 Std. gestreckt bleiben.
Bei Installation in Gebieten, die von Staub und Wind betroffen sind (z. Bsp. am Strand mit Blick aufs Meer) ist es möglich, dass das
Gewebe durch die kombinierte Wirkung von Wind und Sand beschädigt wird und dementsprechend die Transparenz verliert.
Zur Aufrechterhaltung der guten Leistungsfähigkeit der Markise und des Sperrsystems ist es notwendig, die vertikal-laufenden
Schienen, wie im Kapitel über die Wartung dargestellt, sauber zu halten.
Stellen Sie sicher, dass es keine Hindernisse gibt, die die ordnungsgemäße Bewegung der Markise beeinträchtigen könnten. Dies
kann zu Fehlfunktionen der Verriegelungen der Markise führen.
Falls Eis/Schnee vorhanden sein sollte, müssen die Schienen vor dem Einsatz der Markise gereinigt werden.
SCHIENEN
60 von 119
Einige Zeit nach der Installation und falls keine regelmäßige Wartung der Schienen, wie im Handbuch angegeben, ausgeführt wird
kann es zu Lärm in den Schienen und Wagen kommen.
CORRADI S.P.A. - BENUTZERHANDBUCH - PERGOTENDA®FLUX
Lärm auf den Schienen sofort nach der Installation ist ein Mangel.
0 - 03.2012
FÜHRUNGSSCHIENEN
Unter normalen Nutzungsbedingungen sollten sie einmal im
Jahr bzw., wenn sie salzhaltiger Luft ausgesetzt sind, einmal im
Monat gut abgewaschen werden. Dazu sollte ihr Inneres mit
Wasser ausgespritzt und möglichst unter Verwendung einer
Bürste gesäubert werden, um jede Spur von Schmutz
und/oder Salzverkrustung zu entfernen (Abb. 1).
Achtung: Die Schienen dürfen unter keinen Umständen
geschmiert werden.
ENGLISH
METALLTEILE
Alle Metallteile bestehen aus Edelstahl (AISI 304) und bedürfen
daher keiner Instandhaltung.
Das Auftreten von Mikrooxydationsstellen an den Halterungen
beeinträchtigt die Qualität und Lebensdauer derselben nicht
und ist als normal zu betrachten.
MARKISENGEWEBE
Die Instandhaltung des Gewebes beschränkt sich auf die
Reinigung.
Um die den Wettereinflüssen ausgesetzte Seite des Gewebes
wie neu zu erhalten, sollte es 2 bis 3 Mal im Jahr abgewaschen
werden, damit sich Staub und Smog nicht durch die
Einwirkung der Sonne im Gewebe festsetzen können. Zum
Abwaschen das Gewebe mit Wasser und neutraler Seife,
bespritzen ein paar Minuten warten, damit die Seife einwirken
kann, anschließend mit Hilfe eines Schwamms den Schmutz
beseitigen, ohne dabei aufzudrücken. Falls erforderlich,
wiederholen Sie den Vorgang und spülen es anschließend mit
reichlich Wasser ab.
DEUTSCH
VORBEMERKUNG
Bei der Markise PERGOTENDA®FLUX handelt es sich um ein
einzigartiges Produkt, bei dem sowohl die Konstruktion als
auch die verwendeten Materialen hinsichtlich von Qualität
und Lebensdauer ein Höchstniveau bieten. Die reguläre
Instandhaltung reduziert sich daher auf ein Minimum. Dadurch
haben Sie die Möglichkeit, mit nur wenigen Maßnahmen die
perfekte Funktionstüchtigkeit und das angenehme Aussehen
der Markise zu erhalten. Nachstehend finden Sie die wenigen
einfachen Regeln, die dabei zu beachten sind:
ITALIANO
INSTANDHALTUNG
1
ESPAÑOL
FRANÇAIS
ACHTUNG:
DIE SCHIENEN UNTER KEINEN UMSTÄNDEN SCHMIEREN
0 - 03.2012
CORRADI S.P.A. - BENUTZERHANDBUCH - PERGOTENDA®FLUX
61 von 119
TABELLEN
TABELLE 1 - WINDSTÄRKE UND AUSWIRKUNGEN GEMÄSS BEAUFORT-SKALA
Grad
Klasse*
Last (N/mq)
Knoten
Km/h
m/s
Bezeichnung
0
0
< 40
0-1
0-1
< 0,3
Windstille
Rauch steigt senkrecht auf
1
0
< 40
1-3
1-5
0,3-1,5
Leichter Zug
Windrichtung angezeigt durch den Zug des Rauches, nicht durch Fahne
0
< 40
4-6
6-11
1,6-3,3
Leichte Brise
Wind im gesicht spürbar und Windfahnen bewegen sich
3
0
< 40
7-10
12-19
3,4-5,4
Mäßige Brise
Wind bewegt Blätter und dünne Zweige
4
1
40
11-16
20-28
5,5-7,9
schwacher Wind
Wind bewegt dünnere Äste, hebt Staub und loses Papier
5
2
70
17-21
29-38
8-10,7
Mäßiger Wind
kleine Laubbäume beginnen zu schwanken
6
3
110
22-27
39-49
10,8-13,8
Frischer Wind
Starke Äste schwanken, Regenschirme sind nur schwer zu halten
7
>3
> 110
28-33
50-61
13,9-17,1
Starker Wind
Fühlbare Hemmungen beim Gehen gegen den Wind, große Bäume bewegen sich
8
>3
> 110
34-40
62-74
17,2-20,7
Stürmischer Wind
Zweige brechen von Bäumen, erheblich erschwertes Gehen im Freien
9
>3
> 110
41-47
75-88
20,8-24,4
Sturm
Dachziegel fallen von den Dächern
10
>3
> 110
48-55
89-102
24,5-28,4
Schwerer Sturm
Wind entwurzelt Bäume
11
>3
> 110
56-63
103-117
28,5-32,6
orkanartiger Sturm
schwere Schäden an Gebäuden
12
>3
> 110
>64
>118
> 32,7
Orkan
schwereVerwüstungen
2
Auswirkungen des Windes
* Klasse Windbestätigkeit UNI EN 13561
T A B E L L E 2 - MAXIMALGRÖSSEN cm
Breite
Ausladung
500
650
3 Schienen
900
650
4 Schienen
1300
650
2 Schienen
62 von 119
CORRADI S.P.A. - BENUTZERHANDBUCH - PERGOTENDA®FLUX
0 - 03.2012
Ausladung (cm)
BREITE
200
250
300
350
400
450
500
550
600
650
700
750
800
850
900
950
1000
1050
1100
1150
1200
1250
1300
300
28
32
35
39
43
47
56
60
64
68
72
76
80
83
87
64
67
69
72
75
77
80
82
350
31
35
40
44
48
53
63
67
72
76
80
85
89
93
98
72
75
78
81
84
86
89
92
400
34
39
44
49
53
58
70
74
79
84
89
94
99
103
108
80
83
86
89
93
96
99
102
450
37
42
48
53
58
64
76
81
87
92
97
103
108
113
119
87
91
94
98
102
105
109
112
500
40
46
52
58
63
69
83
89
94
100
106
112
118
123
129
95
99
103
107
111
114
118
122
550
43
50
56
62
69
75
89
96
102
108
115
121
127
133
140
103
107
111
115
120
124
128
132
600
47
53
60
67
74
80
96
103
110
116
123
130
137
143
150
111
115
120
124
129
133
138
142
650
50
57
64
71
79
86
103
110
117
124
132
139
146
153
161
118
123
128
133
138
142
147
152
3 Schienen
4 Schienen
DEUTSCH
2 Schienen
ENGLISH
TABELLE 4 – (Nicht kombinierte) Höchstzug- und Scherlast in daN (1 daN ≈1 kg) auf den einzelnen Dübel (unter Berücksichtigung v on 2 Dübeln) bei einer maximalen Windgeschwindigkeit
von 49 km/h (Beaufort-Skala 6 - Klasse 3 nach EN 1)
ITALIANO
TABELLEN
TABELLE 5 – (Nicht kombinierte) Höchstzug- und Scherlast in daN (1 daN ≈1 kg) auf den einzelnen Dübel (unter Berücksichtigung von 2 Dübeln pro Halterung) bei einer maximalen
Windgeschwindigkeit von 74 km/h (Beaufort-Skala 8 -über Klasse 3 nach EN 1)
250
300
350
400
450
500
550
600
650
700
750
800
850
900
950
1000
1050
1100
1150
1200
1250
1300
40
47
54
61
68
75
88
95
102
109
116
123
130
137
144
104
109
114
118
123
128
132
137
350
46
54
62
70
78
86
100
108
116
124
132
140
148
156
164
119
124
129
135
140
145
151
156
400
51
60
69
78
87
96
112
121
130
139
148
157
166
175
184
133
139
145
151
157
163
169
175
450
56
66
76
86
96
106
123
133
144
154
164
174
184
194
204
147
154
161
167
174
181
187
194
500
61
72
83
94
105
117
135
146
157
168
179
191
202
213
224
162
169
176
184
191
198
206
213
550
67
79
91
103
115
127
147
159
171
183
195
207
219
232
244
176
184
192
200
208
216
224
232
600
72
85
98
111
124
137
159
172
185
198
211
224
237
250
263
190
199
208
216
225
234
243
251
650
77
91
105
119
133
147
171
185
199
213
227
241
255
269
283
205
214
223
233
242
252
261
270
2 Schienen
0 - 03.2012
3 Schienen
CORRADI S.P.A. - BENUTZERHANDBUCH - PERGOTENDA®FLUX
4 Schienen
63 von 119
FRANÇAIS
200
300
ESPAÑOL
Ausladung (cm)
BREITE
GARANTIE
ART. 1 - VERWENDUNG:
PERGOTENDA®FLUX ist eine Pergola mit einer gleitenden
Faltmarkise für die Überdachung von Außenbereichen wie
Gärten, Balkons, Dachwohnungen, Höfen etc.
PERGOTENDA®FLUX und ihre Bestandteile wurden in ihrer
Gesamtheit von der Firma Corradi Spa mit Sitz in Bologna,
Italien, entwickelt und patentiert; sie entsprechen den für
diesen Produkttyp anwendbaren technischen Normen.
Die hier aufgelisteten Garantieleistungen sind nur gültig, wenn
Montage und Gebrauch der Markise unter Beachtung der
nachfolgenden Abschnitte und Tabellen erfolgen.
Zur Herstellung der PERGOTENDA®FLUX-Bauteile wurden
Materialien von höchster Qualität verwendet, die für den
Einsatz in Außenbereichen geeignet sind.
PERGOTENDA®FLUX wird nach Maß für den Auftraggeber
angefertigt und dient zum Schutz vor Sonne und
Niederschlägen
mit
einer
Beständigkeit
gegen
Wassersackbildung über Klasse 2 (56 lt/Stunde x qm) der DIN
EN Norm 13561 (Schneelasten ausgeschlossen) und mit einer
Windbeständigkeit über Klasse 3 (49 km/Stunde) der Norm EN
13561hinaus.
ART. 2 - VERSIONEN:
PERGOTENDA®FLUX-Markisen werden im Auftrag des
Endverbrauchers als Sonnen und Wetterschutz, Belastung
durch Schnee ausgeschlossen, entwickelt und gefertigt. Sie
müssen an einer geeigneten Stützwand befestigt sein und
können bis zur Windstärke 8 der Beaufort-Skala gemäß Tabelle
1 verwendet werden.
Bedingungen sind einzuhalten. Der Wiederverkäufer muß dem
Kunden das “Benutzerhandbuch” aushändigen.
ART. 4 - GÜLTIGKEIT DER GARANTIE:
Die Garantie gilt nur unter Einhaltung der Installations- und
Benutzungsbedingungen, wie in Art. 3 beschrieben.
Die Garantie leistet die vollständige und kostenlose Reparatur
oder Auswechselung (Personalkosten nicht inbegriffen) aller
Komponenten, die sich als nicht konform oder jedenfalls
defekt
erweisen,
einschließlich
Transportkosten.
Schadensersatz für die eventuell ausgebliebene Nutzung der
PERGOTENDA®FLUX vor und während der Reparatur wird nicht
geleistet.
Es ist nicht möglich, eine Entschädigung für “eintretenden
Schaden oder Gewinnausfall” zu fordern.
Die oben aufgeführte Garantie ist nur in dem Staat gültig
indem der Wiederverkäufer oder der Konzessionär sein Büro
hat.
ART. 5 – BEGINN DES GARANTIEZEITRAUMS:
Die Gewährleistung ist ab dem auf dem Formular
angegebenen Datum der Fertigstellung der Bauarbeite gültig.
Die Erklärung zur korrekten Installation soll komplett ausgefüllt
werden, und ist sowohl vom Kunden als auch vom
Wiederverkäufer zu unterschreiben.
ART. 3 - INSTALLATION:
PERGOTENDA®FLUX ist immer an einer geeigneten Stützwand
(Wand oder Decke) zu befestigen; sämtliche in Tabelle 2
“Höchstmaße”, Tabelle 3 “Bogenhöhe”,
Tabelle 4-5
“Höchstzug”,
Tabelle 6 “Mindestgefälle” angegebene
ART. 6 – GARANTIEAUSSCHLÜSSE:
Die Garantie hat in den nachstehend, beispielhaft ohne
Anspruch auf Vollständigkeit, aufgelisteten Fällen keine
Gültigkeit:
a) Schäden durch Stöße oder aufgrund außerordentlicher
natürlicher Ursachen (Blitzschlag, Überschwemmungen,
Erdbeben, Hagel usw.)
b) Schäden durch Eingriffe nicht seitens Corradi SpA
64 von 119
CORRADI S.P.A. - BENUTZERHANDBUCH - PERGOTENDA®FLUX
autorisierter Personen oder Techniker.
c) wenn die Spannung eine Schwankung von 5 % über oder
unter dem Nennwert aufweist (CEI 2-3 Juli 1988);
ART. 7 – GARANTIEDAUER:
5 (fünf ) JAHRE:
Für die Struktur, das Betätigungssystem und das ECLISSI
Gewebe, CRISTAL Gewebe ausgeschlossen.
2 (zwei) JAHRE :
CRISTAL Gewebe für eventuelle Außenverschlüsse
(aufrollbare Markisen, Laufmarkisen, Markisen mit
Reißverschlüssen, etc.). Ihre Windfestigkeit hängt von der
jeweiligen Lösung ab und wird auf Wunsch für jede einzelne
Ausführung entsprechend bescheinigt.
ART. 8 - REKLAMATIONEN
Nach Art. 1495 c. 1 und 1511 c. 1 des Codice
Civile/Bürgerlichen Gesetzbuches ist jeglicher angenommene
und anscheinende Mangel der Ware vom Kunden dem
Verkäufer ausschließlich in schriftlicher Form innerhalb von 8
(acht) Tagen ab Warenerhalt mitzuteilen.
Nach Art. 1495 c. 1 des Codice Civile/Bürgerlichen
Gesetzbuches ist jeglicher angenommene und nicht
anscheinende Mangel der Ware vom Kunden dem Verkäufer
ausschließlich in schriftlicher Form innerhalb von 8 (acht)
Tagen ab dem Datum der Feststellung mitzuteilen. Dabei ist
ein Foto zum Nachweis des angenommenen Schadens
beizulegen. Beide Rechtsmittel des Käufers gegenüber dem
Verkäufer unterliegen der Verjährung nach einem Jahr ab
Erhalt/Installation der Ware (Art. 1495 c. 2).
0 - 03.2012
ITALIANO
GARANTIE
DEUTSCH
ENGLISH
Gemäß Art. 1512 des Codice Civile/Bürgerlichen Gesetzbuches
ist jegliche angenommene Betriebsstörung vom Kunden dem
Verkäufer ausschließlich in schriftlicher Form innerhalb von 15
(fünfzehn) Tagen ab dem Datum der Feststellung mitzuteilen,
andernfalls verfällt die Garantie. Das Rechtsmittel des Käufers
gegenüber dem Verkäufer verjährt innerhalb von sechs
Monaten ab Feststellung (Art. 1512 c. 1).
Jegliche angenommene Nichtkonformität gemäß Artikel 128
bis 134 des Gesetzerlasses D. Lvo/Gesetzesverordnung 206 /
2005 (Codice del Consumo/Verbraucherschutz) ist vom
Kunden dem Verkäufer ausschließlich in schriftlicher Form
innerhalb von 2 (zwei) Monaten ab dem Datum der
Feststellung mitzuteilen. Das Rechtsmittel des Käufers
gegenüber dem Verkäufer verjährt innerhalb von 26 Monaten
ab dem Datum der fristgerecht angezeigten Feststellung (Art.
132 c. 4 Codice del Consumo/Verbraucherschutz).
ESPAÑOL
FRANÇAIS
ART. 9 - GEBIETSAUSDEHNUNG DER GARANITE
Die oben aufgeführte Garantie ist nur in dem Staat gültig
indem der Kunde seinen rechtlichen Sitz hat, ausgeschlossen
ist jeder andere Staat indem der Kunde die Markise, direkt oder
indirekt, verkauft, montiert oder per Leihvertrag gewährt.
0 - 03.2012
CORRADI S.P.A. - BENUTZERHANDBUCH - PERGOTENDA®FLUX
65 von 119
CE-ZEICHEN
CE-ZEICHEN FÜR AUSFÜHRUNGEN MIT 2-3 SCHIENEN
Corradi Spa - Via G. Brini, 39 - 40128 Bologna Italy
Modell:
PERGOTENDA® FLUX
2 Schienen
Serien-Nr.: 00000/00
Baujahr: 0000
Stromversorgung: 230 V ~
Leistung: 218 W
Phasenanzahl: 2
Frequenz: 50 Hz
Windbeständigkeit: Klasse 3
EN 13561
Quetschgefahr
A CE
ATUR
MARC
CE-ZEICHEN FÜR AUSFÜHRUNG MIT 4 SCHIENEN
Corradi Spa - Via G. Brini, 39 - 40128 Bologna Italy
Modell:
Gefahr von elektrischem Schlag
PERGOTENDA® FLUX
Baujahr: 0000
Stromversorgung: 230 V ~
Leistung: 218 + 218 W
Phasenanzahl: 2
Frequenz: 50 Hz
Windbeständigkeit: Klasse 3
66 von 119
CORRADI S.P.A. - BENUTZERHANDBUCH - PERGOTENDA®FLUX
4 Schienen
Serien-Nr.: 00000/00
EN 13561
0 - 03.2012
Die folgende CE Konformitätserklärung hängt von der Beachtung der Einschränkungen und der Angaben, die bei der Produktgarantie vorgesehen sind, ab und von der korrekten Installation, die
durch die verantwortliche Person den, durch Corradi Spa festgelegten, Installationsanleitungen, entsprechend durchgeführt werden muß.
Mit der folgenden erklärt die Firma in eigener Verantwortung, daß das oben beschriebene Produkt
den auf der Seite angegebenen Richtlinien entspricht:
REFERENZ-RICHTLINIEN an die folgende CE Konformitätserklärung anwendbar
Bauprodukte-Richtlinie 89/106/CEE;
Elektromagnetische Kompatibilität Richtlinie 2004/108/CEE(*);
Maschinen Richtlinie 2006/42/CE(*);
Niederspannung Richtlinie 2006/95/CE(*);
ENGLISH
Produktbeschreibung:
Modell:
Matrikelnummer:
Herstellungsjahr:
Verwendung:
Corradi Spa
Via G. Brini, 39 - 40128 Bolgna Italy
PERGOTENDA®FLUX
PERGOTENDA®FLUX 2 - 3 - 4 Schienen
(siehe CE-Kennzeichnung auf dem Produkt)
(siehe CE-Kennzeichnung auf dem Produkt)
(siehe Benutzerhandbuch - Originale Anleitungen und entsprechende Garantie)
Die Konformität wurde mit Hilfe der folgenden Normen nachgeprüft:
- Leistungsanforderungen inklusiv Sicherheit UNI EN 13561:2009
- Windwiderstandsklasse: Klasse 3(**) (Methode nach UNI EN 1932: 2002);
HINWEISE/ BEDINGUNGEN, DENEN DIE PRODUKTBENUTZUNG UNTERLIEGT:
Das CORRADI Produkt unterliegt der Montage beim Kunden.
Der Authorisierte Monteur muß die ERKLÄRUNG DER KORREKTEN MONTAGE UND KLASSIFIZIERUNG DER WINDWIDERSTANDSFÄHIGKEIT vorbereiten und dem Benutzer übergeben; diese bestätigt,
daß die Montage korrekt ausgeführt wurde, daß das Produkt den Anleitungen vom Hersteller, dem Zustand und der Morphologie des Montagestandorts und allen Benutzungsbedingungen wofür es
hergestellt wurde, entspricht.
DEUTSCH
Hersteller:
ITALIANO
CE KONFORMITÄTSERKLÄRUNG
FRANÇAIS
Der Monteur muß die Anleitungshinweise, die im bereitgestellten “BENUTZERHANDBUCH” und “MONTAGEHANDBUCH” enthalten sind, beachten. Der Monteur muß die ERKLÄRUNG DER KORREKTEN
MONTAGE UND KLASSIFIZIERUNG DER WINDWIDERSTANDSFÄHIGKEIT, dem Modell im BENUTZERHANDBUCH entsprechend, ausfüllen und unterschreiben.
DER HERSTELLER
Hiermit erkläre ich, daß das oben beschriebene Produkt mit den Hinweisen und Anforderungen, die in den oben beschriebenen Richtlinien enthalten sind,
übereinstimmt.
(*) Richtlinien, die nur für Produkte mit Motorisierungen und Automatisierung anwendbar sind [siehe Benutzerhandbuch]
(**) Windwiderstandsklasse: diese wurde bei Benutzung der Montage-Halterungen festgestellt mit Eigenschaften, die in der entsprechenden Tabelle der Belastung im Montagehandbuch dargestellt sind.
0 - 03.2012
CORRADI S.P.A. - BENUTZERHANDBUCH - PERGOTENDA®FLUX
67 von 119
ESPAÑOL
BEVOLLMÄCHTIGTER VERWALTER
Ing. Gianmarco Biagi
3) EINSTELLUNG DES ENDLAUFS BEIM EINFAHREN DER
MARKISE
An den Nullpunkt zurückkehren, indem die Markise so weit
eingefahren wird, bis sie einrastet. Jetzt kann mit dem
Schraubenzieher auf Taste B* gedrückt werden, dadurch wird ein
leichtes Einschrauben bewirkt und es kommt zur Blockierung der
Taste in der gedrückten Position. Nach der Blockierung der Taste
den Einfahr-Endlauf auf 5 cm vor dem Nullpunkt einstellen, so dass
die Schlitten ein wenig locker bleiben. Um den so eingestellten
Endlauf zu speichern und den Einstellmodus zu verlassen, reicht es,
die Taste B mit einem Schraubenzieher zu drücken, unter leichter
Drehung entgegen dem Uhrzeigersinn, und die Taste dann
68 von 119
A
Schaltaffel
*Falls die Taste sich durch Druck nicht bewegen sollte, nicht erneut
probieren, sondern prüfen, ob sich der Motor tatsächlich am Endlauf
befindet.
B
A
Motors PLAN 75
230 V/50 Hz
In= 0,97 A
Pn= 218 W
IP= 54
M1
3
2
1
KABEL TYP
FG70R 3X1,5 mmq
Mitgelieferter
Stecker geöffnet
1
2
Taste Ausfahren
isoliert 230 V
3
Taste Einfahren
isoliert 230 V
KABEL TYP
FG70R 3X1,5 mmq
CORRADI S.P.A. - BENUTZERHANDBUCH - PERGOTENDA®FLUX
EINGRIFF DURCH DEN INSTALLATEUR
2) MONTAGE DER MARKISE
Die End- und Mittelrohre durch Befestigung an den Schlitten mit der
Struktur verbinden.
B
AUSFAHREN
1) PROVISORISCHE EINSTELLUNG DES ENDLAUFS BEIM
AUSFAHREN
Mit einem Schraubenzieher auf dem Motorgehäuse die Taste A
drücken, was ein leichtes Einschrauben bewirkt – dadurch wird die
Taste in der gedrückten Stellung blockiert. Nach erfolgter
Blockierung der Taste in der gedrückten Position die Schalttafel
solange betätigen, bis die Markise zu ¾ der Schiene ausgefahren ist.
Zur Speicherung des so eingestellten provisorischen Endlaufs und
zum Verlassen des Einstellmodus reicht es, die Taste A mit einem
Schraubenzieher zu drücken, unter leichter Drehung entgegen dem
Uhrzeigersinn, und die Taste dann loszulassen.
loszulassen.
4) ENDGÜLTIGE EINSTELLUNG DES ENDLAUFS BEIM
AUSFAHREN DER MARKISE
Die Markise so lange ausfahren, bis sie (am provisorischen Endlauf)
einrastet – jetzt kann mit einem Schraubenzieher die Taste A
gedrückt werden, was ein leichtes Einschrauben bewirkt – dadurch
wird die Taste in der gedrückten Stellung blockiert. Nach erfolgter
Blockierung der Taste in der gedrückten Position wird die Markise so
weit ausgefahren, bis sie sich in der korrekt geöffneten Position
befindet.
Zur Speicherung des so eingestellten Endlaufs und zum Verlassen
des Einstellmodus reicht es, die Taste A mit einem Schraubenzieher
zu drücken, unter leichter Drehung entgegen dem Uhrzeigersinn,
und die Taste dann loszulassen.
EINFAHREN
ACHTUNG
Die Anfangseinstellung des Motors muss von einem Fachmann
vorgenommen werden.
Wenn elektrische Spannung anliegt, müssen die gültigen
Vorschriften genauestens beachtet werden. Nach dem Aufbau der
Struktur muss der korrekte Anschluss des Antriebssystems - Wellen,
Rohre, seitliche Wellen, Antriebsköpfe – geprüft werden; die
Schlitten befinden sich alle im oberen Teil der Markise.
In dieser Position befindet sich der Motor an seinem Nullpunkt.
Vor der Montage der Markise folgende Arbeitsschritte ausführen:
GEMEINSAM
NUR FÜR SACHKUNDIGE TECHNIKER
VORGEHENSWEISE BEI DER INSTALLATION DES MOTORS TYP 1 – PLAN 75 (NUR FÜR MONTEURE)
0 - 03.2012
0 - 03.2012
ENGLISH
A
A
M1
3
2
1
KABEL TYP
FG70R 3X1,5 mmq
Mitgelieferter
Stecker geöffnet
1
3
2
Taste Einfahren
isoliert 230 V
Taste Ausfahren
isoliert 230 V
KABEL TYP
FG70R 3X1,5 mmq
CORRADI S.P.A. - BENUTZERHANDBUCH - PERGOTENDA®FLUX
FRANÇAIS
Motors PLAN 75
230 V/50 Hz
In= 0,97 A
Pn= 218 W
IP= 54
ESPAÑOL
B
DEUTSCH
Schalttaffel
EINGRIFF DURCH DEN INSTALLATEUR
ENDLAUF: EINFAHRT DER MARKISE
Nach Verbindung der Schalttafel mit dem Motor die Markise
B
AUSFAHREN
ENDLAUF: AUSFAHRT DER MARKISE (AUSGEFAHRENE
MARKISE)
Falls Sie im Besitz einer Schalttafel aus dem MONTAGEKOFFER
sind, schließen Sie diese zur Betätigung des Motors an diesen
an.
N.B. Falls Sie keine Schalttafel haben sollten, kann ein
sachkundiger Techniker eine Einrichtung nach dem
Schaltbild anlegen.
Die Markise ausfahren. Sie rastet am vorprogrammierten
Endlauf ein; (nur wenn sich die Markise in dieser Position
befindet, kann die Einstellung des Ausfahr-Endlaufs erfolgen).
Drücken Sie mit einer leichten Rechtsdrehung mit dem
Schraubenzieher den A* Knopf auf dem Motorgehäuse um den
Knopf in der gedrückten Position zu blockieren, der vorhandene
Endlauf wird somit gelöscht.
Nach erfolgter Blockierung der Taste, in der gedrückten Position
die Taste der Schalttafel solange betätigen, bis sich die Markise
in der gewünschten Endlaufposition befindet. Zur Speicherung
des so eingestellten Endlaufs und zum Verlassen des
Einstellmodus, die Taste A mit einem Schraubenzieher, unter
leichter Gegendrehung drücken, und die Taste dann loslassen.
*Sollte sich die Taste nicht blockieren lassen, versuchen Sie es
nicht mit Gewalt, sondern vergewissern Sie sich, den Motor
korrekt auf Einstellung “Endlauf” positionert zu haben.
einfahren. Sie rastet am vorprogrammierten Endlauf ein; nur
wenn sich die Markise in dieser Position befindet, kann die
Einstellung des Einfahr-Endlaufs erfolgen. Mit einem
Schraubenzieher durch ein leichtes Einschrauben die Taste B
blockieren. Nach erfolgter Blockierung der Taste die Schalttafel
solange betätigen, bis die Markise an der gewünschten Stellung
positioniert ist. Zur Speicherung des so eingestellten Endlaufs
und zum Verlassen des Einstellvorgangs reicht es, die Taste B,
mit einem Schraubenzieher unter leichter Gegendrehung, zu
drücken und die Taste dann loszulassen.
EINFAHREN
EINSTELLUNG DES ENDLAUFS MOTOR PLAN 75
Der nachstehend abgebildete Vorgang zur Einstellung der
Endläufe ist für die Handhabung durch den Endabnehmer des
Produktes vorgesehen. Dieser Arbeitsgang unterscheidet sich
von der vom Monteur vorgenommenen ursprünglichen
Einstellung des Motors, (siehe Montageanleitung).
ITALIANO
ELEKTRISCHER ANTRIEB TYP 1 (MOTOR PLAN 75)
GEMEINSAM
NUR FÜR SACHKUNDIGE TECHNIKER
EINSTELLUNG DER ANTRIEBE
69 von 119
ELEKTRISCHER ANTRIEB TYP 2 (MOTOR SLOPE 95)
Fernbedienung MONO 00749
Mit automatischem Ausfahr-Endlauf
und eingebauter Fernbedienung
EINSTELLUNG DES ENDLAUFS MOTOR SLOPE 95
Wobei die geltenden Vorschriften genauestens einzuhalten sind.
5
6
3
2
1
Motor SLOPE 95
230 V/50 Hz
In= 0,97 A
Pn= 218 W
IP= 54
M1
1
2
3
Abstimmung auf eine neue Fernbedienung:
Die Taste MEMO (4) drücken, die Led Anzeige (5) blinkt zweimal
und während die MEMO-Taste (4) gehalten wird, den
Fernbedienungsknopf drücken; das zweimalige Blinken der LedAnzeige (5) zeigt an, dass die Fernbedienung erkannt wurde.
Löschen von gespeicherten Fernbedienungen:
Aus dem internen Speicher können sämtliche FernsteuerungsCodes gelöscht werden, indem die CANC-Taste (6) gedrückt
wird, danach warten, bis die Led-Anzeige (5) anhaltend leuchtet.
70 von 119
Schalttafel mit Totmannschaltern,
geliefert und angeschlossen durch den
Elektriker, positioniert im Bereich der
Markise
CORRADI S.P.A. - BENUTZERHANDBUCH - PERGOTENDA®FLUX
3
2
1
EINGRIFF DURCH DEN INSTALLATEUR
Fu 250V/200mA
Kabel Nieder-spannung 5V
AUSFAHREN
Nun kann die mitgelieferte Fernbedienung benutzt werden. Mit
der Montage der Markise fortfahren. Beim Ausfahren erfolgt
durch die Steuereinheit, während die einfahrtposition mit Hilfe
der STOP-Taste gespeichert wurde.
Sollte sich der Motor abschalten (wegen Überhitzung), beginnt
die ROTE Led-Anzeige (2) auf der Steuereinheit zu blinken; nach
etwa 5 Minuten erlischt die Led-Anzeige, danach ist der Motor
erneut betriebsbereit.
4
GEMEINSAM
- Die elektrischen Anschlüsse mit den entsprechenden
Verbindungen vom Motor zum Steuergehäuse und von diesem
zum Stromkabel überprüfen.
Falls die Verbindungen nicht vorhanden sein sollten führen Sie
diese, wie im Schaltbild angegeben, aus.
- Drücken Sie den START Knopf (1) auf der Steuerung und warten
Sie bis die ROTE (2) LED-Anzeige angeht, dann lassen Sie den
Schaltknopf los.
Die Markise beginnt die Abfahrt; wenn diese den Endlauf erreicht
bleibt sie ungefähr 1 Sekunde lang stehen, danach fährt sie
automatisch wieder nach oben.
- Drücken Sie den STOP Knopf (3) an dem Punkt, wo Sie den
Endlauf-Halt der Markisenauffahrt haben wollen.
EINFAHREN
NUR FÜR SACHKUNDIGE TECHNIKER
EINSTELLUNG DER ANTRIEBE
0 - 03.2012
MANUALE UTENTE - PERGOTENDA
ITALIANO
ELEKTRISCHER ANTRIEB TYP 3 (MOTOREN SLOPE 95 UND PLUS 96)
EINSTELLUNG DES ENDLAUFS DER MOTOREN SLOPE 95 UND
PLUS 96
Wobei die geltenden Vorschriften genauestens einzuhalten sind.
2
1
Motor SLOPE 95
230 V/50 Hz
In= 0,97 A
Pn= 218 W
IP= 54
0 - 03.2012
Motor PLUSE 96
230 V/50 Hz
In= 0,97 A
Pn= 218 W
IP= 54
CORRADI S.P.A. - BENUTZERHANDBUCH - PERGOTENDA®FLUX
EINGRIFF DURCH DEN INSTALLATEUR
Schalttafel mit Totmannschaltern,
geliefert und angeschlossen durch den
Elektriker, positioniert im Bereich der
Markise
Kabel Nieder-spannung 5V
AUSFAHREN
Fu 250V/200mA
Abstimmung auf eine neue Fernbedienung:
Die Taste MEMO (4) drücken, die Led-Anzeige (5) blinkt zweimal
und während die MEMO-Taste (4) gehalten wird, den
Fernbedienungsknopf drücken; das zweimalige Blinken der LedAnzeige (5) zeigt an, dass die Fernbedienung erkannt wurde.
Löschen von gespeicherten Fernbedienungen:
Aus dem internen Speicher können sämtliche FernsteuerungsCodes gelöscht werden, indem die CANC-Taste (6) gedrückt wird,
danach warten, bis die Led-Anzeige (5) anhaltend leuchtet.
ENGLISH
3
DEUTSCH
6
FRANÇAIS
5
ESPAÑOL
4
GEMEINSAM
- Die elektrischen Anschlüsse mit den entsprechenden
Verbindungen vom Motor zur Steuereinheit und von dieser zur
Versorgungsleitung überprüfen.
Falls die Verbindungen nicht vorhanden sein sollten führen Sie
diese, wie im Schaltbild angegeben, aus.
- Drücken Sie den START Knopf (1) auf der Steuerung und warten
Sie bis die ROTE (2) LED-Anzeige angeht, dann lassen Sie den
Schaltknopf los.
- Die Markise beginnt die Abfahrt; wenn diese den Endlauf erreicht
hält sie ungefähr 1 Sekunde an, danach fährt sie automatisch nach
oben.
- Drücken Sie den STOP Knopf (3) an dem Punkt, wo Sie den
Endlauf-Halt der Markisenauffahrt haben wollen.
Nun kann die mitgelieferte Fernbedienung benutzt werden. Mit
der Montage der Markise fortfahren. Die Endpositionerung des
Gewebe beim Ausfahren erfolgt durch die Steuereinheit, während
Einfahrtposition mit Hilfe der STOP-Taste gespeichert wurde.
Sollte sich der Motor abschalten (wegen Überhitzung), dann
beginnt die ROTE Led-Anzeige (2) auf der Steuereinheit zu blinken;
das Erlöschen der Led-Anzeige abwarten (nach etwa 5 Minuten),
bevor der Motor erneut in Betrieb genommen werden kann.
Steuereinheit TANDEM 00757
Mit automatischem Endlauf für zwei Motoren und Fernbedienung
EINFAHREN
NUR FÜR SACHKUNDIGE TECHNIKER
EINSTELLUNG DER ANTRIEBE
71 von 119
Merci d’avoir choisi un produit Corradi. Ce Manuel Utilisateur illustre les caractéristiques techniques des composants et la
maintenance nécessaire à la PERGOTENDA®FLUX pour être toujours le lieu idéal où passer vos moments de détente à l’air libre. Ce
Manuel est le guide de référence de la maintenance de la PERGOTENDA®FLUX: nous vous recommandons donc de le lire
attentivement et de le conserver, en vous souvenant que le bon fonctionnement de la PERGOTENDA®FLUX, et par conséquent
également votre sécurité, sont garantis seulement si les conditions reportées dans les pages suivantes sont respectées.
Avertissements et précautions
Comment faire fonctionner la PERGOTENDA®FLUX
Versions et motorisations
PERGOTENDA®FLUX à 2 glissières
PERGOTENDA®FLUX à 3 glissières
PERGOTENDA®FLUX à 4 glissières
Résolution des problèmes de commande électrique
Caracteristiques du produit
Maintenance
Tableaux
Garantie
Marquage CE
Déclaration de conformité
Réglage commandes (interventions réalisées
par un technicien spécialisé)
Corradi Spa
Alberto Corradi
92
ESPAÑOL
N.B.: Corradi Spa se réserve le droit de modifier ses produits à n’importe quel moment, à sa discrétion et sans préavis. Toute intervention
personnelle, ou de tiers, non autorisée par Corradi (altérations, modifications techniques, etc.) effectuée sur la PERGOTENDA®FLUX ou l’un de
ses composants pendant la période de garantie entraînera la déchéance immédiate de celle-ci; dans ce cas et dans ces conditions, Corradi
sera dégagée de toute responsabilité et de toute obligation directe au indirecte découlant de l’intervention non autorisée.
74
75
76
77
78
79
80
81
85
86
88
90
91
DEUTSCH
SOMMAIRE
FRANÇAIS
CHER CLIENT, CHÈRE CLIENTE,
ENGLISH
ITALIANO
BIENVENUE
0 - 03.2012
CORRADI S.P.A. - MANUEL UTILISATEUR - PERGOTENDA®FLUX
73 de 119
AVERTISSEMENTS ET PRECAUTIONS
CONTROLE PRELIMINAIRE
A la réception de la marchandise emballée, au cas où
l’opération de montage ne serait pas effectuée par le
revendeur, contrôler l’intégrité du matériel et la présence de
tous les composants nécessaires.
En cas d’anomalies, contacter le Revendeur autorisé.
MISE AU REBUT DE L’EMBALLAGE DU MATERIEL
Diviser les divers composants de l’emballage selon le matériel
de composition (carton, nylon, polystyrène, etc.) et procéder à
la collecte sélective conformément aux normes en vigueur.
AVERTISSEMENTS GENERAUX
Avant d’effectuer toute opération de montage, de
maintenance ou de nettoyage du produit, vérifier de bien avoir
compris ce qui est décrit dans le présent manuel.
Chaque produit Corradi a une fonction spécifique décrite dans
ce manuel; tout emploi différent et non prévu dans les
instructions, l’emploi de composants non originaux, toute
altération et/ou modification technique non autorisée,
déchargent Corradi Spa de toute responsabilité en cas de
dommages subis par les personnes, les biens ou les animaux.
PRECAUTIONS DE SECURITE
Il est important de prendre en compte que chaque partie en
mouvement peut constituer un danger.
Durant toutes les opérations d’entretien, de réparation ou de
réglage, il est impératif de couper le courant. Il est en outre
conseillé d’apposer un panneau sur l’interrupteur général
d’alimentation électrique portant l’indication suivante:
“ATTENTION! NE PAS TOUCHER – travaux de maintenance en
cours”.
RECYCLAGE
Lors du recyclage, il est nécessaire de séparer les pièces en
plastique des composants électriques, et de procéder à la
collecte sélective conformément aux normes en vigueur.
En ce qui concerne la masse métallique du store, il suffit de
séparer les pièces en acier de celles faites d’autres métaux ou
alliages et de les porter dans une fonderie qui les recyclera.
Il est recommandé de s’assurer qu’aucun opérateur ne se
trouve à proximité du store avant de le remettre en marche
après une intervention d’entretien.
Contrôler systématiquement le fonctionnement et l’efficacité
des commandes manuelles et électriques après la
maintenance; en cas d’anomalie cesser immédiatement toute
intervention et contacter l’assistance technique de Corradi.
Le personnel chargé de l’installation du produit (monteurs et
électriciens) doit posséder les compétences reqiuses ainsi que
les conditions d’aptitude et psychophysiques nécessaires à
l’exercice de ses fonctions; il doit en outre observer
scrupuleusement les normes anti-accidents en vigueur.
74 de 119
CORRADI S.P.A. - MANUEL UTILISATEUR - PERGOTENDA®FLUX
0 - 03.2012
COMMANDE ELECTRIQUE
Si la PERGOTENDA®FLUX est équipée d’un interrupteur mural,
appuyer sur l’interrupteur dans sa partie inférieure pour faire
descendre la toile, appuyer sur la partie supérieure pour faire
remonter la toile. Le fait de relâcher l’interrupteur détermine
le point d’arrêt de la toile qui s’immobilise là où elle se trouve.
TELECOMMANDE RADIO
Si la PERGOTENDA®FLUX est équipée d’une télécommande
radio, on utilise les boutons respectifs pour les mouvements
de remontée, descente et arrêt (voir schéma).
Remontée toile
Stop
ESPAÑOL
Remontée toile
Changement de la batterie
Pour changer la batterie, ôter la vis sur le devant de la
télécommande et la remplacer par un modèle similaire
(alcaline de 12 V. mod. 23A).
Attention à ne pas inverser les polarités
Attention à ne pas utiliser un modèle non-conforme.
Recycler la batterie usagée dans un conteneur
approprié.
Descente toile
0 - 03.2012
CORRADI S.P.A. - MANUEL UTILISATEUR - PERGOTENDA®FLUX
FRANÇAIS
DEUTSCH
Descente toile
Voyant lumineux
Indique l’état de
la batterie
(rouge = en
fonctionnement)
ENGLISH
PERGOTENDA®FLUX
Ce store est conçu et fabriqué sur mesure pour le client final
afin de protéger du soleil et des intempéries, à l’exclusion de la
neige; la PERGOTENDA®FLUX devra être fixée à un mur de
soutien adéquat et pourra être utilisée en cas de vent jusqu’au
degré 8 de l’échelle de Beaufort comme indiqué dans le
tableau 1 (Page 92).
ITALIANO
COMMENT FAIRE FONCTIONNER LA PERGOTENDA®FLUX
75 de 119
VERSIONS ET MOTORISATIONS
PERGOTENDA®FLUX A 2 GLISSIERES
COMMANDE ELECTRIQUE DE TYPE 1
moteur PLAN
1 LARGEUR
2 AVANCÊE
3 HAUTEUR SUPPORTS MURAUX
4 HAUTEUR PILIERS
Motoréducteur de 220 volts - 218 W muni d’une fin de course à bouton
-poussoir pour la montée et descente.
Convient aussi aux storesde max. 3 glissières avec avancée max. de 350
cm.
PERGOTENDA®FLUX A 3 GLISSIERES
PERGOTENDA®FLUX
COMMANDE ELECTRIQUE DE TYPE 2
moteur SLOPE
centrale électrique MONO
Motoréducteur de 220 volts - 218 W muni d’une centrale composée
d’un microprocesseur de contrôle de la tension et d’un récepteur pour
les commandes RTS (433,92 MHZ) avec émetteur fréquences. Idéal pour
les stores à 2 ou 3 glissières. Garantit lors de chaque utilisation une
tension optimale de la toile qui peut varier en fonction du degré
d’allongement du tissu, des glissières, etc. lié aux amplitudes
thermiques.
4
COMMANDE ELECTRIQUE DE TYPE 3
moteur 1 SLOPE
moteur 2 PLUS
centrale électrique TANDEM
PERGOTENDA®FLUX A 4 GLISSIERES
Motoréducteurs de 220 volts - 218 + 218 W munis d’une centrale
composée d’un microprocesseur de contrôle de tension de la toile.
Opération de deux moteurs en série sur le même axe. Le microprocesseur est muni d’un récepteur pour commande RTS (433,92 MHZ)
avec émetteur fréquences. Idéal pour les stores à 4 glissières. Garantit
lors de chaque utilisation une tension optimale de la toile qui peut varier
en fonction du degré d’allongement du tissu, des glissières, etc. lié aux
amplitudes thermiques.
76 de 119
CORRADI S.P.A. - MANUEL UTILISATEUR - PERGOTENDA®FLUX
0 - 03.2012
ITALIANO
PERGOTENDA®FLUX A 2 GLISSIERES
auvent de protection modulaire
poutres transversales 6x12 pour support d’auvent de protection
toile
pilier 6x12
DEUTSCH
ENGLISH
commande de repli électrique
FRANÇAIS
poutre murale (supplément)
glissière porteuse 6x12 de coulissement
poutre frontale 6x12 (supplément)
COMMANDE ELECTRIQUE DE TYPE 1
00775-1 Motoréducteur PLAN
0 - 03.2012
CORRADI S.P.A. - MANUEL UTILISATEUR - PERGOTENDA®FLUX
COMMANDE ELECTRIQUE DE TYPE 2
00775-2 Motoréducteur SLOPE
00749
Centrale MONO
77 de 119
ESPAÑOL
à rajouter au-delà de 400 cm d’avancée
PERGOTENDA®FLUX A 3 GLISSIERES
toile
poutres transversales 6x12 pour support d’auvent de protection
auvent de protection modulaire
commande de repli électrique
pilier 6x12
poutre murale (supplément)
poutre frontale 6x12 (supplément)
glissière porteuse 6x12 de coulissement
à rajouter au-delà de 400 cm d’avancée
COMMANDE ELECTRIQUE DE TYPE 1
00775-1 Motoréducteur PLAN
78 de 119
CORRADI S.P.A. - MANUEL UTILISATEUR - PERGOTENDA®FLUX
COMMANDE ELECTRIQUE DE TYPE 2
00775-2 Motoréducteur SLOPE
00749
Centrale MONO
0 - 03.2012
auvent de protection modulaire
toile
ITALIANO
PERGOTENDA®FLUX A 4 GLISSIERES
ENGLISH
poutres transversales 6x12 pour support d’auvent de protection
commande de repli électrique
poutre murale
(supplément)
glissière porteuse 6x12 de coulissement
COMMANDE ELECTRIQUE DE TYPE 1
00775-1 Motoréducteur PLAN
0 - 03.2012
CORRADI S.P.A. - MANUEL UTILISATEUR - PERGOTENDA®FLUX
COMMANDE ELECTRIQUE DE TYPE 3
00775-3 Motoréducteur PLUS
00775-2 Motoréducteur SLOPE
00757
Centrale TANDEM
79 de 119
ESPAÑOL
poutre frontale 6x12 (supplément)
à rajouter au-delà de 400 cm d’avancée
FRANÇAIS
DEUTSCH
pilier 6x12
PERGOTENDA®FLUX
AVEC BOITIER DE CONTROLE
RÉSOLUTION DES PROBLÈMES DE COMMANDE ÉLECTRIQUE
PROBLÈME
CAUSE
CONTRÔLES ET SOLUTIONS
Manque de tension de réseau.
Manque de tension de réseau.
S’assurer que le courant arrive.
Fiche non branchée au réseau.
S’assurer que la fiche soit branchée à une prise valide.
Le moteur surchauffe et le témoin de la centrale s’allume.
Attendre 5-10 minutes pour permettre au moteur de refroidir.
Si le problème persiste, régler la fin de course.
Le moteur démarre mais le store ne bouge pas.
Pile de la radiocommande usée (seulement pour la
PERGOTENDA®FLUX à télécommande).
Changer la pile de la télécommande.
Fusible grillé.
Ouvrir la centrale et remplacer le fusible.
Possibilité de rupture des courroies, arbre moteur
désassemblé.
Contacter le revendeur.
La store bouge par à coups.
Glissières sales ou mal alignées.
80 de 119
CORRADI S.P.A. - MANUEL UTILISATEUR - PERGOTENDA®FLUX
Nettoyer les glissières. Suivre les instructions du chapitre
Entretien.
0 - 03.2012
CARACTERISTIQUES DU PRODUIT
NON-RESPECT / DEFAUT
MISES EN GARDE
Les défauts doivent être signalés par le client dans les
huit jours à compter de la date d'installation (référencé à
la date indiquée dans le certificat de correcte installation
délivré par l'installateur à l'utilisateur final ).
Voir conditions de vente.
GENERAL
ITALIANO
CARACTERISTIQUES DU PRODUIT
La structure n'est pas étanche.En cas d'orages particuliarment violents avec des vents forts, il
est fortement probables la survenue d'infiltration d'eau.
ENGLISH
Dans le cas ou la valeur du vent soit majeur par rapport à celle indiqué sur le relevé de correcte
installation ,il est nécessaire de fermer la toile.Il est possible d'utiliser un anémomètre étalonné
correctement.
Le produit ne garantit pas la charge de neige.En présence de neige, même de faible intensité,
la toile doit être emballé.
Afin d'avoir la garantie de vos produits,il est OBLIGATOIRE la saisie du certificat de correcte
installation. Une copie doit être remise au client final et une copie doit être envoyée à Corradi
Spa. La réception du certificat dûment rempli active automatiquement la garantie du produit .
DEUTSCH
Toute modification du produit non expressément autorisé par la Corradi Spa conduit à la perte
totale de la garantie.
Les structures qui se trouvent dans un environnement urbain sont soumis à des situations polluants (smog, pluies acides) la fumée des cheminées, fumées de cuisson, et à des conditions
météorologiques en général. Il est donc normal que le tissu de la toile et la structure elle-même
se salissent. Les structures et les toiles en tissu ne sont pas auto-nettoyant.
TOILE
FRANÇAIS
En appliquant une force latérale sur le pilier, vous pouvez générer une oscillation de la
structure.Ce mouvement ce n'est pas un signe de faiblesse structurelle, il est normal pour ce
AUTOPORTANT type de structure.La structure a été calculée par des ingénieurs qualifiés en utilisant les
Eurocodes et elle est donc garanti au vent jusq'au montant indiqué dans le certificat CE et dans
la Déclaration de correcte installation.
Selon les conditions d'installation, il est possible que la toile se salisse (agents polluants comme
la fumée des cheminées, le smog, etc) .Dans ce cas, il est nécessaire de nettoyer la toile plus fréquemment ,comme indiqué dans la section de maintenance.
La toile n'est pas à l'abri des brûlures provoquées par des mégots de cigarettes, etc.
ESPAÑOL
Dans des situations particulières d'utilisation, il peut arriver que de la condensation s'installe à
l'intérieur de la toile.Afin de limiter cette situation, il vaut mieux procéder à une ventilation adéquate de la pièce.
L'apparition de moisissures dans le gaufrage de la toile est due à la présence d 'humidité sur la
toile elle meme qui favorise la formation de micro-organismes.Il est donc nécessaire de nettoyer la toile à des intervalles réguliers, meme plus souvent là ou nécessaire.
La présence de plis sur la toile après la première installation peut être dû à l'emballage.Il est
donc nécessaire maintenir la toile en position tendue pendant au moins 10 jours, et d'évaluer
la qualité du produit après cette période.
0 - 03.2012
La présence de plis après 10 jours doit se considéré
comme un défaut.
CORRADI S.P.A. - MANUEL UTILISATEUR - PERGOTENDA®FLUX
81 de 119
CARACTERISTIQUES DU PRODUIT
CARACTERISTIQUES DU PRODUIT
NON-RESPECT / DEFAUT
FAUX PLAFOND
Dans certaines conditions particulières d'utilisation de la structure, il se peut que de la condensation s'installe entre la toile
et le faux plafond. Cela peut entraîner de la saleté et / ou de moisissures dans la zone intermédiaire. Enlever et laver le faux
plafond.
GOUTTIERE
Il est nécessaire de vérifier régulièrement que les tuyaux d'échappement de la gouttière et les descentes pluviales soient
propres. Jeter les feuilles et d' autres débris qui peuvent obstruer les trous de drainage.
En cas de très fortes pluies, il est possible que la gouttière ne soit pas en mesure de drainer l'eau. Cela peut entraîner des
infiltrations d'eau.
Le contrôle du pompage des eaux souterraines n'est pas à charge de la Corradi Spa, mais du client finalIl ainsi comme le
contrôle des conditions d'installation, des pentes et des puits de captage.
LAMPES
Afin de mantenir un bon rendement des joints, en assurant ainsi la protection des produits IP (indiquée dans le manuel), il
suffit de suivre les indications d'entretien du manuel.
VOILE
La présence de plis sur la voile est une consequence du l'enroulement prolongée de la voile même sur le tube d'enroulement . Pour limiter ce phénomène et avoir la garantie, il est obligatoire l'utilisation du couvre voile.
La présence de plis sur la voile immédiatement après la première installation peut être dû à l'emballage. Les plis disparaissent complètement pendant les 6 mois suivant l'installation.
TISSUS VELOMBRA
Les tissus sont « teints en pièces" :cela peut provoquer une non parfaite uniformité et homogénéité de la couleur.
BOIS
ATTENTION: Il est conseillé de se rappeler que chaque typologie de bois placé à l'extérieur, donc directement exposés aux
intempéries, est susceptible de jouer un look "vécu" même après une période de temps relativement courte, qui se manifeste principalement par:
• décoloration de la surface (avec dégradation variable en fonction de la teneur de l' humidité à laquelle le bois est
soumis)
• avec une surface inégale due à des phénomènes cycliques de gonflement et de retrait,il est possible une usure mécanique de la surface.
Comme le bois est un matériau naturel, il se peut qu'il aie des différences de couleur et de grain qui le caractérisent dans l'
ensemble.De plus, en fonction de l'angle de vision,il peut changer d'aspect en raison de la nature changeante de la
matière.Les échantillons et les reproductions photographiques sont donc à considérées comme indicatives.
Le détachement d'une lamelle à sa poutre, doit se considérée comme un
défaut.
Le bois est soumis à un traitement de protection effectué dans un autoclave qui permet une meilleure résistance aux
attaques de champignons et de moisissures. Ce traitement a la couleur vert (due aux sels utilisés pour l'imprégnation), et il
est appliqué avant la peinture des poutres. Il est donc normal l'apparition de rayures vertes sur le bois dans le cas de couleurs claires, suite à la lixiviation de la peinture par le mauvais temps. Dans ce cas vous devez procéder avec prudence,
comme indiqué dans le manuel.
Sur les poutres peuvent être présents des bandes verticales des couleurs différentes. Ceci est normal et est dû à l'empilement qui se produit à l'intérieur de l'autoclave pendant le traitement d'imprégnation (les poutres sont espacées par des
poutres transversales)
La présence de résine est une caractéristique du bois "de conifera".
Une variation dimensionnelle des produits en bois est normale après une exposition à l'humidité. Le taux d'humidité est du
12% (défini dans UNI EN390:1997)
82 de 119
CORRADI S.P.A. - MANUEL UTILISATEUR - PERGOTENDA®FLUX
0 - 03.2012
CARACTERISTIQUES DU PRODUIT
PLANCHERS
NON-RESPECT / DEFAUT
ITALIANO
CARACTERISTIQUES DU PRODUIT
Le plancher peut se cabosser en cas de collision,de chute d'objets comme aussi pour l'application des charges concentrées sur
une petite surface: tels que chaises avec des roues pas adaptés, des talons hauts ou des échelles.
Le sol peut se griffer à la suite de contact avec de petits objets tels que des clous ou des pierres présentes dans les semelles des
chaussures.
Au moment de la livraison, la couleur du sol peut être différente de celle vu sur l'échantillon,suite à une exposition du bois à la
lumière qui provoque un changement dans la couleur.
MEUBLES
Au cours de l'hiver ils doivent être protégés contre les intempéries.A nettoyér avant la mise de la protection pour l'hiver.
ENGLISH
Si le meuble est utilisé dans un milieu marin, il doit être lavé régulièrement avec de l'eau fraîche pour enlever les traces de sel.
Caractéristiques Inox voir ACIER INOX
MOTEURS
Système électrique: il doit être exécuté par un électricien agréé, qui délivre un certificat de conformité de l'installation électrique.
L' installation doit avoir un degré de protection approprié étant installé à l'extérieur. Un électricien agréé est en mesure de dimensionner correctement le système et de choisir les bons composants (code IP).
ACIER INOX
Les composants en acier inoxydable (AISI 304) ne nécessitent aucun entretien. L'apparition de micro-oxydation, souvent dans des
environnements maritimes caractérisée par le sel, n'affecte pas ni la qualité ni la durabilité du produit: ces oxydations sont à considérées comme normales. Dans le cas où vous avez besoin d'éliminer les points oxydés, vous pouvez utiliser de la laine d'acier ou
une brosse en métal (acier inoxydable). Le film protecteur d'oxyde de chrome se rétablira de façon naturelle avec la seule exposition à l'air, sans aucune intervention de l'utilisateur.
ALUMINIUM
La présence de traces et rayures est considéré comme un défaut seulement si visible à une distance de 2 mètres.
Si les signes et / ou les cabosses sont visibles à une distance de 2 mètres, la
piéce est considéré défectueuse.
DEUTSCH
Toute chute de tension ou des interférences radio peuvent causer la perte de fin de course aux moteurs. Dans ce cas, il est nécessaire de procéder avec une nouvelle programmation, comme indiqué dans le manuel.
La peau d'orange: la surface du film se présente avec des reliefs comme la
peau d'orange.
PEINTURE
Blistering:bosses sur la surface du film de différentes tailles et fréquence.
Coulissements de la couche externe: accumulation irréguliere des produits
localisées et bien définies, sous forme d'arêtes arrondies et peu profondes
qui affectent seulement la couche externe.
FRANÇAIS
Ne pas utiliser de l'acide pour nettoyer l' aluminium peint, mais uniquement du savon neutre e de l'eau.
Détachement - le revêtement du film s'enleve à partir du support au
dessous sous la forme de petits éclat .
Impuretés dans les couches extérieures et intérieures: le film de revêtement
présente une surface rugueuse et irrégulière, facilement perceptible au
toucher.
Décrépions d'interférence: le film de peinture est endommagée par differents blessures plus ou moins profondes avec une étendue en fonction de la
cause.
0 - 03.2012
CORRADI S.P.A. - MANUEL UTILISATEUR - PERGOTENDA®FLUX
83 de 119
ESPAÑOL
Porosité : petits trous comme des cratères ou des marques sur la surface du
film, allant de diamètres comme de petit trou jusqu'à 1 cm.
CARACTERISTIQUES DU PRODUIT
CARACTERISTIQUES DU PRODUIT
NON-RESPECT / DEFAUT
VITREES
Pour les cadres en aluminium, se référer à la voix Alluminium.
ERMETIKA
Pendant l'été, en cas d' expositon aux rayons du soleil, la température à l'intérieur du boîtier peut atteindre des valeurs très
élevées. Cela peut entraîner le collage de la toile quand elle n'est pas mouvmentée pendant de longues périodes. Il est
recommandé d'ouvrir et de fermer la toile régulièrement afin d'éviter ce problème.
Si la toile reste enroulé pour de longues périodes, il est probable la presence des plis et des rides sur la toile. Le tissu est
composé de PVC et sa nature n'est pas comparable à celle du verre. Il est nécessaire de maintenir la tente tendue pendant
au moins 48 h pour adoucir les plis et les rides.
En cas d'installation de la structure dans des zones touchées par la poussière et le vent (par exemple la plage face à la mer) il
est possible que le tissu s' endommage au niveau de la transparence, à cause de l'action combinée du vent et du sable.
Pour garantir une bonne efficacité de la tente et de son systeme de bloccage, il est nécessaire de maintenir propre les coulisses verticales, comme indiqué dans le chapitre sur l'entretien.
Assurez-vous qu'il n'y a aucune obstruction qui pourrait empêcher le bonne mouvement de la toile. Cela peut entraîner un
dysfonctionnement des dispositifs de verrouillage de la tente.
En cas de presence de glaceneige, il est fortement conseille de nettoyér soigneusement les coulisses avant d'actioner la
toile.
COULISSES
84 de 119
Après un certain temps de l'installation, si l'entretien périodique sur les coulisses n'a pas été effectué comme indiqué dans le Les bruit sur les coulisses peu de temps après l'installation, est à considerer
manuel, il peut y avoir du bruit dans les coulisses et le chariots.
comme défaut.
CORRADI S.P.A. - MANUEL UTILISATEUR - PERGOTENDA®FLUX
0 - 03.2012
ENGLISH
GLISSIERES
Tous les ans, dans des conditions d’emploi normales, ou une
fois par mois, en cas d’exposition au sel, bien laver l’intérieur
des glissières au jet d’eau et, si possible, éliminer toute trace de
salissure et/ou d’incrustation de sel avec une brosse comme
décrit dans la figure 1
Attention: ne jamais lubrifier les glissières pour quelque raison
que ce soit.
ZINGUERIE
Toute la zinguerie est en acier INOX (AISI 304) et ne requiert
donc aucun entretien.
L’apparition de micro-oxydations sur les brides est normale et
ne compromet pas la qualité et la durée de celles-ci; une telle
oxydation est en fait normale .
TOILE
La maintenance de la toile est réduite à son nettoyage.
Pour conserver comme neuve la partie exposée aux
intempéries, la laver 2 ou 3 fois par an de manière à éviter que
la poussière ou le smog ne s’y déposent et s’y fixent par l’action
du soleil.
Pour laver la toile, l’asperger d’eau et de savon neutre, attendre
quelques minutes pour que le produit ait le temps d’agir, puis
éliminer délicatement les salissure avec une éponge. Répéter
l’opération si nécessaire et rincer abondamment.
DEUTSCH
INTRODUCTION
La PERGOTENDA®FLUX est un produit conçu pour durer dans
le temps grâce a’ la qualité des matériaux dans lesquels elle est
fabriquée. Son entretien ordinaire est donc réduit au minimum
pour permettre, en quelques opérations, de le conserver en
parfait état esthétique et de fonctionnement.
Voici quelques règles simples à observer:
ITALIANO
MAINTENANCE
1
ESPAÑOL
FRANÇAIS
ATTENTION: NE JAMAIS LUBRIFIER LES GLISSIERES POUR
QUELQUE RAISON QUE CE SOIT.
0 - 03.2012
CORRADI S.P.A. - MANUEL UTILISATEUR - PERGOTENDA®FLUX
85 de 119
TABLEAUX
TABLEAU 1 - FORCE ET EFFETS DU VENT SELON L’ECHELLE DE BEAUFORT
Degré Classe*
Force du vent (N/mq)
Noeuds
Km/h
m/s
Situat.environmentale Effetts du vent
0
0
< 40
0-1
0-1
< 0,3
calme
1
0
< 40
1-3
1-5
0,3-1,5
brise trés légère
la direction du vent est indiquée par la fumée mais pas par la girouette
2
0
< 40
4-6
6-11
1,6-3,3
brise légère
on sent le souffle du vent sur le visage et la girouette bouge
3
0
< 40
7-10
12-19
3,4-5,4
brise soutenue
les feuilles et les petit branches bougent
4
1
40
11-16
20-28
5,5-7,9
vent modéré
le papier et la poussière se soulèvent, les branches les plus fines bougent
5
2
70
17-21
29-38
8-10,7
bon vent
les arbres de petit taille commencent à osciller
6
3
110
22-27
39-49
10,8-13,8
vent soutenue
les grosses branches bougent, il est difficile de se servir d’un parapluie
7
>3
> 110
28-33
50-61
13,9-17,1
vent fort
les gros arbres bougent, il est trés difficile de marcher contre le vent
8
>3
> 110
34-40
62-74
17,2-20,7
bourrasque
les branches des arbres se cassent, il est très difficile de marcher au dehors
9
>3
> 110
41-47
75-88
20,8-24,4
forte bourrasque
les tuiles tombent des toits
10
>3
> 110
48-55
89-102
24,5-28,4
tempête
les arbres se déracinent
11
>3
> 110
56-63
103-117
28,5-32,6
tempête violente
graves dommages aux constructions
12
>3
> 110
>64
>118
> 32,7
ouragan
dommages considérables
calme plat, la fumée monte à la verticale
* Classe de résistance au vent UNI EN 13561
T A B L E A U 2 - DIMENSIONS MAXIMUMS cm
Largeur
Avancée
2 glissières
500
650
3 glissières
900
650
4 glissières
1300
650
86 de 119
CORRADI S.P.A. - MANUEL UTILISATEUR - PERGOTENDA®FLUX
0 - 03.2012
Avancée (cm)
Largeur (cm)
200
250
300
350
400
450
500
550
600
650
700
750
800
850
900
950
1000
1050
1100
1150
1200
1250
1300
300
28
32
35
39
43
47
56
60
64
68
72
76
80
83
87
64
67
69
72
75
77
80
82
350
31
35
40
44
48
53
63
67
72
76
80
85
89
93
98
72
75
78
81
84
86
89
92
400
34
39
44
49
53
58
70
74
79
84
89
94
99
103
108
80
83
86
89
93
96
99
102
450
37
42
48
53
58
64
76
81
87
92
97
103
108
113
119
87
91
94
98
102
105
109
112
500
40
46
52
58
63
69
83
89
94
100
106
112
118
123
129
95
99
103
107
111
114
118
122
550
43
50
56
62
69
75
89
96
102
108
115
121
127
133
140
103
107
111
115
120
124
128
132
600
47
53
60
67
74
80
96
103
110
116
123
130
137
143
150
111
115
120
124
129
133
138
142
650
50
57
64
71
79
86
103
110
117
124
132
139
146
153
161
118
123
128
133
138
142
147
152
3 glissières
4 glissières
DEUTSCH
2 glissières
ENGLISH
TABLEAU 4 - Charge maximale en daN (1 daN ≈ 1 kg) sur une cheville (sur la base de 2 chevilles par support) en traction et en cisaillement (non combinés) pour une vitesse maximale du
vent de 49 km/h (Echelle de Beaufort 6 - Classe 3 selon EN 13561)
ITALIANO
TABLEAUX
TABLEAU 6 - Charge maximale en daN (1 daN ≈ 1 kg) sur une cheville (sur la base de 2 chevilles par support) en traction et en cisaillement (non combinés) pour une vitesse maximale du
vent de 74 km/h (Echelle de Beaufort 8 - au-delà de la Classe 3 selon EN 13561)
250
300
350
400
450
500
550
600
650
700
750
800
850
900
950
1000
1050
1100
1150
1200
1250
1300
40
47
54
61
68
75
88
95
102
109
116
123
130
137
144
104
109
114
118
123
128
132
137
350
46
54
62
70
78
86
100
108
116
124
132
140
148
156
164
119
124
129
135
140
145
151
156
400
51
60
69
78
87
96
112
121
130
139
148
157
166
175
184
133
139
145
151
157
163
169
175
450
56
66
76
86
96
106
123
133
144
154
164
174
184
194
204
147
154
161
167
174
181
187
194
500
61
72
83
94
105
117
135
146
157
168
179
191
202
213
224
162
169
176
184
191
198
206
213
550
67
79
91
103
115
127
147
159
171
183
195
207
219
232
244
176
184
192
200
208
216
224
232
600
72
85
98
111
124
137
159
172
185
198
211
224
237
250
263
190
199
208
216
225
234
243
251
650
77
91
105
119
133
147
171
185
199
213
227
241
255
269
283
205
214
223
233
242
252
261
270
2 glissières
0 - 03.2012
3 glissières
CORRADI S.P.A. - MANUEL UTILISATEUR - PERGOTENDA®FLUX
4 glissières
87 de 119
FRANÇAIS
200
300
ESPAÑOL
Avancée (cm)
Largeur (cm)
GARANTIE
ART. 1 – UTILISATION :
La PERGOTENDA®FLUX est une pergola complète dotée d’un
store déroulant pour la couverture d’espaces extérieurs tels
que jardins, balcons, terrasses, cours, etc...
LA PERGOTENDA®FLUX et l’ensemble de ses composants sont
conçus, brevetés et à marque déposée par la société Corradi
Spa de Bologne, Italie, et sont réalisés conformément aux
normes techniques de références applicables.
Les garanties énumérées ci-dessous s’appliquent si
l’installation et l’utilisation du store sont conformes aux
caractéristiques aux caractéristiques indiquées dans les articles
et tableaux suivants.
La PERGOTENDA®FLUX a été conçue et fabriquée dans le but
de répondre aux demandes spécifiques de chaque client en
terme de protection contre le soleil et les précipitations avec
une résistance aux poches d’eau supérieure à la Classe 2 (56
litres / heure par m²) conformément à la législation EN 13561,
exception faite de la neige mais avec une résistance au vent
supérieure à la Classe 3 (49 km / heure) , conformément à la
législation EN 13561.
ART. 2 – VERSIONS :
LA PERGOTENDA®FLUX devra être fixée à une structure de
soutien adéquate. En cas de vent fort, l’usage en sera consenti
jusqu’au degré 8 de l’échelle Beaufort comme indiqué au
tableau 1.
ART. 3 – MONTAGE :
La PERGOTENDA®FLUX devra être fixée à une structure de
soutien adéquate (mur ou plafond) tout en respectant
l’ensemble des conditions figurant dans le tableau 2 «
Dimensions maximums», tableau 3 «Flèche», tableaux 4-5
«Charge maximale», tableau 6 « Inclinaisons minimales ».
88 de 119
Le Revendeur devra remettre le « Manuel utilisateur » et la
garantie de conformité au client.
ART. 4 - VALIDITE DE LA GARANTIE :
La garantie s’applique uniquement si les conditions
d’installation et d’utilisation décrites à l’article 3 sont
respectées.
La garantie comporte la réparation ou le remplacement
intégral gratuit (main-d'oeuvre comprise) de tous les
composants non conformes ou défectueux, y compris les frais
de transport. Les dommages pour non jouissance de
PERGOTENDA®FLUX pendant la période d'éventuelle
inutilisation avant et pendant la réparation ne seront pas
reconnus.
Aucun dédommagement ne pourra être demandé pour “le
préjudice subi ou le manque à gagner”.
Les garanties indiquées ci-dessus s’appliquent uniquement à
l’intérieur du pays dans lequel le Revendeur ou
concessionnaire a établi son siège social.
ART. 5 – PRISE D'EFFET DE LA GARANTIE:
Le garantie prend effet à la date d’achèvement des travaux
inscrite sur la Déclaration de Correcte Installation, dont une
copie doit être envoyée à Corradi, dûment complétée et
signée par le client final et par le revendeur autorisé.
b) Pour les dommages causés par des interventions de
personnes ou des techniciens non autorisés par Corradi Spa;
c) en cas de mouvement électrique, si la tension présente une
tension supérieure ou inférieure à 5% de la valeur nominale
(norme CEI 2-3 juillet 1988);
ART. 7 – DUREE DE LA GARANTIE:
5 (CINQ) ANS :
Pour tout mécanisme de manoeuvre et pour le tissu ECLISSI à
l’exclusion des tissus CRISTAL.
2 (DEUX) ANS :
Tissu CRISTAL pour la réalisation d’éventuelles fermetures
périmétrales (toiles enroulables, toiles coulissantes, toiles avec
fermetures à glissières, etc...). Leur résistance au vent
est fonction de la solution adoptée et sera certifiée, sur
demande, pour chaque chantier au cas par cas.
ART. 8 - RECLAMATIONS
Aux termes de l'article 1495 alinéa 1 et 1511 alinéa 1 du Code
civil, tout défaut apparent éventuel et présumé de la
marchandise pourra être signalé par le client au revendeur
uniquement sous forme écrite et dans un délai maximum de 8
(huit) jours à compter de la réception de la marchandise.
ART. 6 – EXCLUSIONS DE LA GARANTIE :
La garantie n'est pas valable dans les cas énumérés ci-après à
simple titre d'exemple non exhaustif:
a) Pour les dommages causés par des chocs ou des causes
naturelles extraordinaires (foudre, inondations, tremblements
de terre, grêle etc…)
CORRADI S.P.A. - MANUEL UTILISATEUR - PERGOTENDA®FLUX
0 - 03.2012
ITALIANO
GARANTIE
FRANÇAIS
DEUTSCH
ENGLISH
Aux termes de l'article 1495, alinéa 1 du Code civil, tout défaut
non apparent de la marchandise pourra être signalé au
revendeur uniquement sous forme écrite et dans un délai
maximum de 8 (huit) jours à compter de la date de
découverte, en fournissant une preuve photographique du
défaut présumé. Les deux actions en justice de l'acheteur
envers le revendeur sont prescrites dans un délai d'une année
à compter de la réception/installation de la marchandise (Art.
1495 alinéa 2).
Aux termes de l'article 1512 du Code civil, tout défaut de
fonctionnement éventuel et présumé pourra être
communiqué de façon écrite par le client au revendeur
uniquement sous forme écrite et dans un délai maximum de
15 (quinze) jours à compter de la découverte, sous peine de la
nullité de la garantie.
L'action en justice de l'acheteur envers le revendeur est
prescrite dans un délai de six mois à compter de la découverte
(Art. 1512 alinéa 1) .
Toute non conformité éventuelle et présumée régie par les
articles 128 à 134 du décret législatif 206 / 2005 (Code de la
consommation) pourra être communiquée par le client au
revendeur uniquement sous forme écrite et dans un délai
maximum de 2 (deux) mois à compter de jour de la
découverte. L’action en justice de l'acheteur envers le
revendeur est prescrite dans un délai de 26 mois à compter de
la date de la découverte signalée dans les délais (Art 132 alinéa
4 Code de la consommation)
0 - 03.2012
ESPAÑOL
ART. 9 - EXTENSION TERRITORIALE DE LA GARANTIE
Les garanties indiquées ci-dessus seront efficaces uniquement
dans le pays où le client a son siège social, à l’exclusion de tout
autre pays dans lequel le client, directement ou indirectement,
vendrait, installerait ou concèderait en commodat le store
fourni par Corradi.
CORRADI S.P.A. - MANUEL UTILISATEUR - PERGOTENDA®FLUX
89 de 119
MARQUAGE CE
MARQUAGE CE POUR VERSIONS A 2-3 GLISSIERES
Corradi Spa - Via G. Brini, 39 - 40128 Bologna Italy
Modèle: PERGOTENDA® FLUX
2 glissières
Immatriculation: 00000/00
Année de production: 0000
Alimentation: 230 V ~
Puissance: 218 W
Nombre de phases:
Fréquence: 50 Hz
2
Résistance au vent : classe 3
EN 13561
Danger d’écrasement
A CE
ATUR
MARC
MARQUAGE CE POUR VERSION 4 GLISSIERES
Corradi Spa - Via G. Brini, 39 - 40128 Bologna Italy
Modèle: PERGOTENDA® FLUX
Danger de décharge électrique
Année de production: 0000
Alimentation: 230 V ~
Puissance: 218 + 218 W
Nombre de phases:
Fréquence: 50 Hz
2
Résistance au vent : classe 3
90 de 119
CORRADI S.P.A. - MANUEL UTILISATEUR - PERGOTENDA®FLUX
4 glissières
Immatriculation: 00000/00
EN 13561
0 - 03.2012
La présente Déclaration de Conformité CE est subordonnée au respect des engagements et des indications prévues dans la garantie produit aussi bien qu’à la correcte installation de la part du sujet
qui en est chargé en réponse aux instructions d’installation et de pose définies par la Spa Corradi.
DIRECTIVES DE REFERENCE applicables à la présente Déclaration de Conformité CE
Directive Produits de Construction 89/106/CEE
Directive Compatibilité Electromagnétique 2004/108/CEE(*)
Directive Machines 2006/42/CE(*)
Directive Basse Tension 2006/95/CE(*)
ENGLISH
Corradi Spa
Via G. Brini, 39 - 40128 Bolgna Italy
Description du produit :
PERGOTENDA®FLUX
Modèle :
PERGOTENDA®FLUX 2-3-4 GLISSIERES
Numéro d’immatriculation : (voir Marquage CE appliqué sur le produit)
Année de fabrication :
(voir Marquage CE appliqué sur le produit)
Destination d’usage :
(voir Manuel utilisateur – Instructions Originales et Garantie
correspondante)
Par la présente, la société déclare sous sa propre responsabilité, que le produit indiqué ci-dessus
satisfait aux Directives indiqués ci-contre
La conformité a été vérifiée à l’aide des normes suivantes :
- Conditions de prestations requises incluant la sécurité UNI EN 13561 :2009
- Classe de résistance au vent : Classe 3 (**) (méthode selon UNI EN 1932 :2002)
INDICATION/CONDITIONS AUXQUELLES EST SOUMISE L’UTILISATION DU PRODUIT :
Le produit CORRADI est soumis à activité d’installation auprès du Client.
L’Installateur Agréé doit préparer et fournir à l’Utilisateur la DECLARATION DE CORRECTE INSTALLATION ET CLASSIFICATION DE LA RESISTANCE AU VENT spécifique, attestant de la correcte installation
selon les instructions fournies par le Constructeur, appliquées en fonction de l’état et de la morphologie du lieu d’installation et répondant aux conditions d’utilisation pour lesquelles elle a été
réalisée.
DEUTSCH
Constructeur
ITALIANO
DECLARATION DE CONFORMITE
FRANÇAIS
L’installateur doit se conformer aux instructions de référence contenues à l’intérieur du document « NOTICE D’INSTALLATION » et « MANUEL UTILISATEUR » à sa disposition.
L’installateur s’engage à compiler et soussigner la DECLARATION DE CORRECTE INSTALLATION ET CLASSIFICATION DE LA RESISTANCE AU VENT, conforme au modèle contenu à l’intérieur du MANUEL
UTILISATEUR.
LE CONSTRUCTEUR
Je déclare que le produit décrit ci-dessus est conforme aux indications et prescriptions contenues dans les Directives indiquées ci-dessus.
ESPAÑOL
Le DIRECTEUR GENERAL
Ing. Gianmarco Biagi
(*) Directives applicables exclusivement pour les produits dotés de motorisations et automations (voir Manuel utilisateur)
(**) Classe de Résistance au Vent : la CRV a été vérifiée en utilisant les supports pour l’installation ayant les caractéristiques correspondant au tableau « Charges » du Notice d’installation
0 - 03.2012
CORRADI S.P.A. - MANUEL UTILISATEUR - PERGOTENDA®FLUX
91 de 119
ATTENTION:
La procédure de réglage initial du moteur est de la
compétence du technicien installateur.
En présence de tension électrique, exécuter l’opération en
prêtant une attention maximum au respect des normes en
vigueur. Après avoir monté la structure, vérifier que
l’assemblage du système de transmission est correct: arbres,
tubes, arbres latéraux, têtes motrices. Les chariots se trouvent
alors tous empaquetés dans la partie haute du store.
Dans cette position le moteur se trouve au point neutre.
Avant de procéder au montage de la toile, procéder comme
suit:
bref quart de tour afin de le débloquer.
4) REGLAGE DEFINITIF DE FIN DE COURSE EN OUVERTURE
Ouvrir le store jusqu’à ce qu’il s’immobilise (fin de course
d’ouverture provisoire). Il sera maintenant possible de presser
avec un tournevis sur le bouton A et de le dévisser légèrement
afin de bloquer le bouton en position appuyée. Ceci fait,
détendre le store jusqu’à ce qu’il atteigne la position
d’ouverture correcte. Pour mémoriser cette fin de course et
sortir du menu de réglage, il suffit ensuite de dévisser le
bouton A d’un bref quart de tour afin de le remettre dans sa
position de départ.
A
92 de 119
Clavier de
commande
A
Moteur PLAN 75
230 V/50 Hz
In= 0,97 A
Pn= 218 W
IP= 54
M1
3
2
1
CABLE TYPE
FG70R 3X1,5 mm2
Fiche mâle
ouverte fournie
1
3
2
Bouton de
descente isolé
230 V
Bouton de
montée isolé
230 V
CABLE TYPE
FG70R 3X1,5 mm2
CORRADI S.P.A. - MANUEL UTILISATEUR - PERGOTENDA®FLUX
INTERVENTION A EFFECTUER PAR L’INSTALLATEUR
3) REGLAGE DE FIN DE COURSE DE FERMETURE DU STORE
REPLIE
Retourner au point neutre en repliant le store jusqu’à son
maximum et pousser maintenant avec un tournevis sur le
bouton B* en le vissant légèrement afin de maintenir le
bouton en position appuyée. Procéder ensuite à la
détermination de la fin de course en fermeture 5 cm avant le
point neutre en ayant soin de laisser les chariots légèrement
ballants. Pour mémoriser cette fin de course et sortir du menu
de réglage, il suffit simplement de dévisser le bouton B d’un
B
B
DESCENTE
2) MONTER LE STORE
Monter les tubes d’extrémités et intermédiaires à la structure
en les fixant aux chariots.
* Si jamais le bouton de bougeait pas à cause de la pression, éviter
d’insister et s’assurer d’avoir positionné le moteur sur la fin de
course.
MONTEE
1) REGLAGE PROVISOIRE DE LA FIN DE COURSE
D’OUVERTURE
Pousser avec un tournevis sur le bouton A en effectuant un
quart de tour de serrage de manière à bloquer le bouton en
position appuyée. Faire ensuite descendre le store aux ¾ des
glissières au moyen du bouton poussoir. Pour mémoriser cette
fin de course provisoire et sortir du menu de réglage, il suffit
simplement de dévisser le bouton A d’un bref quart de tour
afin de le remettre dans sa position de départ.
COMMUN
RÉSERVÉ AUX TECHNICIENS SPÉCIALISÉS
PROCEDURE D’INSTALLATION MOTEUR TYPE 1 – PLAN 75 (SEULEMENT POUR INSTALLATEURS)
0 - 03.2012
DEUTSCH
Clavier de
commande
A
Moteur PLAN 75
230 V/50 Hz
In= 0,97 A
Pn= 218 W
IP= 54
CABLE TYPE
FG70R 3X1,5 mm2
Fiche mâle
ouverte fournie
1
3
2
Bouton de
montée isolé
230 V
Bouton de
descente isolé
230 V
CABLE TYPE
FG70R 3X1,5 mm2
CORRADI S.P.A. - MANUEL UTILISATEUR - PERGOTENDA®FLUX
FRANÇAIS
3
2
1
ESPAÑOL
M1
FIN DE COURSE: FERMETURE (STORE EMPAQUETE)
0 - 03.2012
ENGLISH
B
INTERVENTION A EFFECTUER PAR L’INSTALLATEUR
Faites descendre le store qui viendra se placer sur la fin de
course à l’ouverture préréglée; seule cette position permettra
de régler la fin de course à l’ouverture.
Appuyer avec un tournevis dans le bouton A* de la partie
moteur en vissant légèrement afin de déterminer le blocage
du bouton en position appuyée et l’annulation de la fin de
course actuelle.
Le bouton enfoncé et bloqué dans cette position, intervenez
sur le clavier jusqu’à ce que la toile se place sur la fin de course
voulue. Pour pouvoir mémoriser la fin de course ainsi réglée et
quitter la procédure de réglage, il suffit d’appuyer sur le
bouton A avec un tournevis et de le relâcher en le dévissant
légèrement.
* Si le bouton ne réagit pas à la pression, n’insistez pas, mais
assurez-vous d’avoir positionné le moteur sur la fin de
course.
B
A
DESCENTE
FIN DE COURSE: OUVERTURE (STORE TENDU)
Si le clavier Corradi vous a été fourni, raccordez-le au moteur
pour pouvoir le manœuvrer.
N.B. :Pour ceux qui n’ont pas d’interrupteur, il est
nécessaire de faire réaliser une installation par un
technicien spécialisé, comme décrit sur le schéma
électrique.
Le clavier raccordé au moteur, faites monter le store, qui
viendra se placer sur la fin de course à la fermeture préréglée ;
seule cette position permettra de régler la fin de course à la
fermeture.
Avec un tournevis, appuyez sur le bouton B pour le visser
légèrement, puis maintenez le bouton enfoncé et bloquez-le
dans cette position. Le bouton enfoncé et bloqué dans cette
position, intervenez sur le clavier jusqu’à ce que la toile se
place sur la fin de course voulue. Pour pouvoir mémoriser la fin
de course ainsi réglée et quitter la procédure de réglage, il
suffit d’appuyer sur le bouton B avec un tournevis et de le
relâcher en le dévissant légèrement.
MONTEE
REGLAGE DE LA FIN DE COURSE (MOTEUR PLAN 75)
La procédure de réglage de la fin de course illustrée ci-dessous
est celle à laquelle l’utilisateur final du produit doit faire
référence. Cette procédure est différente du réglage initial du
moteur préparé par le technicien installateur (voir Manuel
d’installation).
ITALIANO
COMMANDE ELECTRIQUE DE TYPE 1 (MOTEUR PLAN 75)
COMMUN
RÉSERVÉ AUX TECHNICIENS SPÉCIALISÉS
REGLAGES COMMANDES
93 de 119
COMMANDE ELECTRIQUE DE TYPE 2 (MOTEUR SLOPE 95)
La télécommande fournie peut désormais être utilisée. Procéder
au montage du auvent. La tension de la toile à l’ouverture est
gérée par la centrale, alors que le point de fin de course du
auvent fermé est celui qui est mémorisé via la touche STOP.
En cas d’arrêt du moteur (qui surchauffe), le témoin ROUGE (2)
de la centrale clignote: après 5 minutes environ, le témoin
s’éteint et le moteur peut être remis en marche.
4
5
6
3
2
1
Moteur SLOPE 95
230 V/50 Hz
In= 0,97 A
Pn= 218 W
IP= 54
M1
Fu 250V/200mA
1
2
3
Mémorisation d’une nouvelle télécommande
Appuyer sur la touche MEMO (4); le témoin (5) clignote deux
fois. Tout en maintenant la touche MEMO (4) enfoncée, appuyer
sur la touche de la télécommande; le témoin (5) clignote deux
fois pour indiquer la reconnaissance de la nouvelle
télécommande.
94 de 119
Boîtier de commande avec boutons à
action maintenue, fourni et branché par
l’électricien.
Positionné dans le champ de
fonctionnement du store.
CORRADI S.P.A. - MANUEL UTILISATEUR - PERGOTENDA®FLUX
3
1
2
COMMUN
Effacement des télécommandes mémorisées.
Il est possible d’effacer de la mémoire interne les codes de
toutes les télécommandes en appuyant sur la touche CANC (6)
et en attendant que le témoin (5) reste allumé sans clignoter.
INTERVENTION A EFFECTUER PAR L’INSTALLATEUR
- Vérifier les branchements électriques des connecteurs du
moteur à la centrale et de la centrale à la ligne d’alimentation.
Dans le cas où ils ne seraient pas en place, effectuer les
raccordements comme indiqué dans le schéma électrique.
- Appuyer sur le bouton START (1) de la centrale et attendre
l’allumage du témoin ROUGE (2), puis relâcher le bouton.
La toile commence à descendre. Arrivée en fin de course, elle
s’arrête environ 1 seconde, pour ensuite commencer à remonter
automatiquement.
- Appuyer sur le bouton STOP (3) au point souhaité pour la fin
de course d’arrêt de remontée de la toile.
Centrale MONO 00749
Avec fin de course automatique à l’ouverture
et télécommande incorporée.
Cable basse tension 5V
DESCENTE
REGLAGE DE LA FIN DE COURSE MOTEUR SLOPE 95
Effectuer l’opération en faisant très attention et en observant les
normes en vigueur.
MONTEE
RÉSERVÉ AUX TECHNICIENS SPÉCIALISÉS
REGLAGES COMMANDES
0 - 03.2012
ITALIANO
COMMANDE ELECTRIQUE DE TYPE 3 (MOTEUR SLOPE 95 ET PLUS 96)
REGLAGE DE LA FIN DE COURSE MOTEUR SLOPE 95 ET PLUS
96
Effectuer l’opération en faisant très attention et en observant les
normes en vigueur.
1
Moteur SLOPE 95
230 V/50 Hz
In= 0,97 A
Pn= 218 W
IP= 54
0 - 03.2012
CORRADI S.P.A. - MANUEL UTILISATEUR - PERGOTENDA®FLUX
INTERVENTION A EFFECTUER PAR L’INSTALLATEUR
Boîtier de commande avec boutons à
action maintenue, fourni et branché
par l’électricien.
Positionné dans le champ de
fonctionnement du store.
Cable basse tension 5V
Fu 250V/200mA
Mémorisation d’une nouvelle télécommande
Appuyer sur la touche MEMO (4); le témoin (5) clignote deux
fois. Tout en maintenant la touche MEMO (4) enfoncée, appuyer
sur la touche de la télécommande; le témoin (5) clignote deux
fois pour indiquer la reconnaissance de la nouvelle
télécommande.
Effacement des télécommandes mémorisées.
Il est possible d’effacer de la mémoire interne les codes de toutes
les télécommandes en appuyant sur la touche CANC (6) et en
attendant que le témoin (5) reste allumé sans clignoter.
ENGLISH
2
Moteur PLUSE 96
230 V/50 Hz
In= 0,97 A
Pn= 218 W
IP= 54
DEUTSCH
3
FRANÇAIS
6
ESPAÑOL
5
MONTEE
La télécommande fournie peut désormais être utilisée. Procéder
au montage du store. La tension de la toile à l’ouverture est
gérée par la centrale, alors que le point de fin de course du store
fermé est celui qui est mémorisé via la touche STOP.
En cas d’arrêt du moteur (qui surchauffe), le témoin ROUGE (2)
de la centrale clignote: après 5 minutes environ, le témoin
s’éteint et le moteur peut être remis en marche.
4
COMMUN
- Vérifier les branchements électriques des connecteurs du
moteur à la centrale et de la centrale à la ligne d’alimentation
Dans le cas où ils ne seraient pas en place, effectuer les
raccordements comme indiqué dans le schéma électrique.
- Appuyer sur le bouton START (1) de la centrale et attendre
l’allumage du témoin ROUGE (2), puis relâcher le bouton.
La toile commence à descendre. Arrivée en fin de course, elle
s’arrête environ 1 seconde, pour ensuite commencer à remonter
automatiquement.
- Appuyer sur le bouton STOP (3) au point souhaité pour la fin de
course d’arrêt de remontée de la toile.
Centrale TANDEM 00757
Avec fin de course automatique en ouverture pour deux moteurs et télécommande
incorporée.
DESCENTE
RÉSERVÉ AUX TECHNICIENS SPÉCIALISÉS
REGLAGES COMMANDES
95 de 119
Corradi Spa
Alberto Corradi
98
99
100
101
102
103
104
105
109
110
112
114
115
116
ESPAÑOL
NB Corradi Spa se reserva el derecho de modificar sus productos en cualquier momento, a su propia discreción y sin previo aviso. Cualquier
modificación realizada por el usuario final o técnicos no autorizados por Corradi Spa (manipulación, modificaciones técnicas, etc.) en la
PERGOTENDA®FLUX o en uno de sus componentes durante el período de garantía, hará que la garantía se anule inmediatamente; y en este
caso, y en estas condiciones se excluye Corradi Spa de toda responsabilidad, y de toda obligación directa o indirecta, como consecuencia de la
intervención no autorizada.
Advertencias y precauciones
Cómo hacer funcionar la PERGOTENDA®FLUX
Versiones y motorizaciones
PERGOTENDA®FLUX con 2 guías
PERGOTENDA®FLUX con 3 guías
PERGOTENDA®FLUX con 4 guías
Resolución de problemas del mecanismo eléctrico
Características de los productos
Mantenimiento
Tablas
Garantía
Marcado CE
Declaración de conformidad
Ajuste de los comandos (intervención realizada
por un técnico cualificado)
DEUTSCH
Gracias por haber elegido un producto Corradi. Este Manual del usuario ilustra las características técnicas de los componentes y el
mantenimiento necesario para garantizar que PERGOTENDA®FLUX siga siendo el lugar ideal para pasar sus momentos de relax al aire
libre.
Este manual es la guía de referencia para el buen mantenimiento de PERGOTENDA®FLUX y le recomendamos que lo lea
cuidadosamente y lo conserve para su uso futuro, recordando que el correcto funcionamiento de PERGOTENDA®FLUX, y por tanto, su
seguridad, sólo se garantiza en las condiciones detalladas en las siguientes páginas
FRANÇAIS
ÍNDICE
ESTIMADO CLIENTE,
ENGLISH
ITALIANO
BIENVENIDO
0 - 03.2012
CORRADI S.P.A. - MANUAL DEL USUARIO - PERGOTENDA®FLUX
97 de 119
ADVERTENCIAS Y PRECAUCIONES
CONTROLES PRELIMINARES
Al recibir la mercancía embalada, en el caso de que el montaje
no sea llevado a cabo por el distribuidor, compruebe que
todos los materiales están intactos y que no faltan
componentes.
Si usted tiene algún problema, póngase en contacto con el
Distribuidor autorizado.
ELIMINACIÓN DEL EMBALAJE DEL MATERIAL
Separe los diferentes materiales del embalaje según su
composición (cartón, nylon, poliestireno, etc.) y proceder al
reciclaje selectivo tal conforme a las normas en vigor.
ADVERTENCIAS GENERALES
Antes de empezar la operación de montaje, de mantenimiento
o de limpieza, asegúrese de haber entendido bien las
instrucciones de este manual.
Cada producto Corradi tiene una función específica, tal como
se describe en este manual, y cualquier uso indebido o
diferente de lo previsto, el uso de piezas de repuesto no
originales, la manipulación y/o modificación técnica no
autorizada libera a Corradi Spa de cualquier responsabilidad
por los daños causados en personas, animales o bienes.
PRECAUCIONES DE SEGURIDAD
Es importante recordar que las partes móviles pueden ser una
peligro.
Durante todas las operaciones de mantenimiento, reparación
o regulación, se debe desconectar siempre la corriente
eléctrica.
También es recomendable poner una señal de advertencia
sobre el interruptor general de la red, con la siguiente frase:
"ATENCIÓN! NO TOCAR: trabajos de mantenimiento en proceso".
RECICLAJE
En lo referente al reciclaje, es necesario separar las piezas de
plástico de los componentes eléctricos, que deben ser
reciclados selectivamente por separado, conforme a la
normativa en vigor.
Las partes metálicas del toldo han de ser separadas en acero y
otros metales y aleaciones, con el fin de ser fundidas y
recicladas.
Compruebe que no hay nadie cerca del toldo antes de ponerlo
en marcha de nuevo después de los trabajos de
mantenimiento.
Controlar sistemáticamente el funcionamiento y la eficacia de
los comandos manuales y eléctricos después del
mantenimiento; En caso de anomalía, detener el toldo de
inmediato y contactar con el departamento de asistencia
técnica. Corradi Spa
El personal encargado de la instalación del producto
(instaladores y electricistas) debe tener conocimientos
específicos así como la actitud física y mental necesaria para
poder llevar a cabo sus tareas, Por otra parte, también debe
respetar las normas de seguridad en vigor.
98 de 119
CORRADI S.P.A. - MANUAL DEL USUARIO - PERGOTENDA®FLUX
0 - 03.2012
Stop
Bajada lona
Subida tela
Visor luminoso
que indica el
estado de la
batería
(rojo = en
funcionamiento)
Cambio de la batería
Para cambiar la batería, quitar el tornillo de la parte delantera
del mando y reemplazarla por un modelo similar (alcalina de
12 v. mod. 23A).
Atención: no invertir las polaridades y no utilizar un
modelo incompatible.
Recicle las pilas usadas en un contenedor apropiado para
ello.
Bajada tela
0 - 03.2012
CORRADI S.P.A. - MANUAL DEL USUARIO - PERGOTENDA®FLUX
ENGLISH
Subida lona
DEUTSCH
MANDO A DISTANCIA
Si el toldo PERGOTENDA®FLUX está equipado con un mando a
distancia, podrá utilizar los botones respectivos para los
movimientos de subida, bajada y parada (ver esquema).
FRANÇAIS
INTERRUPTOR ELECTRICO
Si el toldo PERGOTENDA®FLUX está equipado con un
interruptor mural, deberá pulsar sobre su parte inferior para
hacer bajar el toldo, y sobre la parte superior para hacerlo subir.
En el momento de soltar el pulsador, se determinará el punto
de parada de la tela, que se inmovilizará en la posición en que
ésta se encuentre.
ESPAÑOL
PERGOTENDA®FLUX
Este toldo es concebido y fabricado a medida para el cliente
final, a fin de proteger del sol y de la intemperie, excluida la
nieve. El toldo PERGOTENDA®FLUX deberá ser fijado a un muro
de resistencia adecuada y podrá ser utilizado en caso de viento
hasta el grado 8 de la escala de Beaufort, tal y como se indica
en la tabla 1 (página 118).
ITALIANO
FUNCIONAMIENTO DEL TOLDO PERGOTENDA®FLUX
99 de 119
VERSIONES Y MOTORES
PERGOTENDA®FLUX 2 GUIAS
ELECTRICO TIPO 1
Motor PLAN
1 LINEA
2 SALIDA
3 ALTURA SOPORTES MURALES
4 ALTURA COLUMNAS
Moto-reductor de 220 voltios – 218 W con fin de carrera con pulsador
para la subida y bajada. Ideal para los toldos planos de 2, 3 o 4 guías, ya
que la tela no se somete nunca a tensión.
Toldos con un máximo de 3 guías y una salida máxima de 350 cm.
ELECTRICO TIPO 2
Motor SLOPE
Central eléctrica MONO
PERGOTENDA®FLUX 3 GUIAS
PERGOTENDA®FLUX
Moto-reductor de 220 voltios-218 W con central compuesta por un
microprocesador de control de tensión y un receptor para los mandos a
distancia RTS (433,92 MHZ) con emisor de 2 canales. Ideal para toldos de
2 ó 3 guías. Garantiza tras cada uso una tensión óptima de la tela, que
puede variar en función de las dilataciones del tejido y las guías debido a
las variaciones térmicas.
4
ELECTRICO TIPO 3
Motor 1 SLOPE
Motor 2 PLUS
Central eléctrica TANDEM
PERGOTENDA®FLUX 4 GUIAS
Motor-reductores de 220 voltios-218+218 W con una central compuesta
por un microprocesador de control de tensión de la tela y para el funcionamiento de dos motores en serie sobre el mismo eje, dotado con
receptor para mando a distancia en radiofrecuencia (433,92 MHZ), con
emisor de 2 canales. Ideal para toldos de 4 guías para garantizar tras cada
uso una tensión óptima de la tela, que puede variar en función de las
dilataciones del tejido y las guías debido a las variaciones térmicas.
100 de 119
CORRADI S.P.A. - MANUAL DEL USUARIO - PERGOTENDA®FLUX
0 - 03.2012
ITALIANO
PERGOTENDA®FLUX DE 2 GUIAS
travesaño 6x12 soporte tejadillo
mando de movimiento eléctrico
lona
guía portante 6x12 de deslizamiento
viga frontal 6x12 (suplemento)
FRANÇAIS
columna 6x12
viga de pared (suplemento)
DEUTSCH
ENGLISH
tejadillo cubretoldo modular
INTERRUPTOR TIPO 1
00775-1 Moto-reductor PLAN
0 - 03.2012
CORRADI S.P.A. - MANUAL DEL USUARIO - PERGOTENDA®FLUX
INTERRUPTOR TIPO 2
00775-2 Moto-r. SLOPE
00749 Central MONO
101 de 119
ESPAÑOL
obligatoria con salida superior a 400 cm
PERGOTENDA®FLUX DE 3 GUIAS
lona
travesaño 6x12 soporte tejadillo
tejadillo cubretoldo modular
mando de movimiento eléctrico
columna 6x12
viga de pared (suplemento)
viga frontal 6x12 (suplemento)
guía portante 6x12 de deslizamiento
obligatoria con salida superior a 400 cm
INTERRUPTOR TIPO 1
00775-1 Moto-reductor PLAN
102 de 119
CORRADI S.P.A. - MANUAL DEL USUARIO - PERGOTENDA®FLUX
INTERRUPTOR TIPO 2
00775-2 Moto-r. SLOPE
00749 Central MONO
0 - 03.2012
tejadillo cubretoldo modular
lona
ITALIANO
PERGOTENDA®FLUX DE 4 GUIAS
ENGLISH
travesaño 6x12 soporte tejadillo
mando de movimiento eléctrico
viga frontal 6x12 (suplemento)
obligatoria con salida superior a 400 cm
viga de pared
(suplemento)
INTERRUPTOR TIPO 1
00775-1 Moto-reductor PLAN
0 - 03.2012
CORRADI S.P.A. - MANUAL DEL USUARIO - PERGOTENDA®FLUX
ESPAÑOL
guía portante 6x12 de deslizamiento
FRANÇAIS
DEUTSCH
columna 6x12
INTERRUPTOR TIPO 3
00775-2 Moto-r. SLOPE
00775-3 Moto-r. PLUS
00757 Central TANDEM
103 de 119
IDENTIFICACION DE PROBLEMAS CON INTERRUPTOR ELECTRICO
PROBLEMA
POSIBLE CAUSA
COMPROBACIONES Y SOLUCIONES
Mando del motor activado pero no se pone en
marcha.
Falta tensión en la red.
Compruebe que la instalación de la casa disponga de
corriente.
Enchufe no conectado a la red.
PERGOTENDA®FLUX
CON CENTRALITA
Compruebe que esté correctamente enchufado a la red.
Sobrecalentamiento del motor, se enciende el LED de la
centralita.
Pilas del mando a distancia descargadas.
Cambie la pila del mando a distancia.
Fusible roto.
Abra la centralita y sustituya el fusible.
Posibles correas rotas, desconexión del árbol del motor.
El motor se pone en marcha pero el toldo no
corre.
La lona se mueve intermitentemente.
104 de 119
Espere de 5 a 10 minutos para dejar que e enfríe el motor. Si el
problema vuelve a presentarse, regule el final de carrera.
Contacte con el distribuidor.
Guías de deslizamiento sucias, guías incorrectamente
alineadas.
Limpie las guías. Siga las instrucciones del cap. mantenimiento.
CORRADI S.P.A. - MANUAL DEL USUARIO - PERGOTENDA®FLUX
0 - 03.2012
CARACTERISTICAS DEL PRODUCTO
NO CONFORME/DEFECTO
ADVERTENCIAS
Los defectos deben ser comunicados dentro de los 8 días
de la fecha de instalación en el domicilio del cliente (hace
referencia la fecha indicada en el certificado de correcta
instalación de parte del instalador al usuario final. Véanse
las condiciones generales de venta.
GENERAL
ITALIANO
CARACTERÍSTICAS DE LOS PRODUCTOS
La estructura no es a prueba de agua. En caso de temporales particularmente violentos con
fuertes vientos, es posible la aparición de infiltraciones de agua.
ENGLISH
En el caso que se supere el valor del viento indicado en la declaración de correcta instalación, es
necesario cerrar la vela. Es posible la utilización de un anemómetro convenientemente calibrado.
El producto no garantiza la carga de nieve. En presencia de nevadas, aunque de modesta intensidad, el toldo debe ser completamente cerrado o enrollado.
DEUTSCH
Para obtener la garantía del producto es obligatorio la compilación del certificado de correcta
instalación. Una copia tiene que ser entregada al cliente final y otra copia tiene que ser enviada a
Corradi Spa. La recepción del certificado debidamente compilado activa la garantía del producto.
Cada variación del producto no autorizada por Corradi Spa, implica la decadencia de la garantía.
AUTOPORTANTES
Aplicando una carga lateral en la columna es posible generar una oscilación en la estructura. Tal
movimiento no es un índice de debilidad estructural, sino que es considerado normal por el tipo
de estructura. La estructura ha sido calculada por ingenieros habilitados, empleando los
Eurocódigos, y está garantizada contra el viento hasta el grado indicado en el certificado CE y en la
declaración de correcta instalación.
LONA
La lona se podría ensuciar, dependiendo de las condiciones de la instalación (agentes contaminantes, humo de chimeneas, smog, etc). En ese caso podría ser necesario limpiar la lona como
está indicado en el párrafo manutención con mayor frecuencia.
FRANÇAIS
Las estructuras instaladas en un contexto urbano están supeditadas a agentes contaminantes
(smog, lluvias ácidas), humo de chimeneas, humo de cocina, e intemperie en general. Por lo tanto
es normal que la lona y la misma estructura se ensucien. La estructura y la lona no son autolimpiantes.
La lona no es inmune a quemaduras debidas a las colillas de cigarrillos, etc
En situaciones particulares del uso de la estructura, es posible que se forme condensación en la
parte interna de la lona. Para evitar tales condiciones, ventilar correctamente el local.
ESPAÑOL
La aparición de moho en los relieves de la lona se debe a la presencia de humedad en la misma
que favorece la formación de microorganismos. Por lo tanto se recomienda limpiar la lona a intervalos regulares, más frecuentes donde sea necesario.
La presencia de pliegues en la lona aparecidos inmediatamente después de la primer instalación
La presencia de pliegues después de 10 días
puede ser ocasionada por el embalaje. Es necesario mantener la lona en su posición por lo menos
debe considerarse como defecto.
por 10 días, y evaluar la calidad del producto después de ese lapso de tiempo.
0 - 03.2012
CORRADI S.P.A. - MANUAL DEL USUARIO - PERGOTENDA®FLUX
105 de 119
CARACTERÍSTICAS DE LOS PRODUCTOS
CARACTERISTICAS DEL PRODUCTO
FALSO TECHO
CORNISA
NO CONFORME/DEFECTO
En situaciones particulares del uso de la estructura, es posible que se forme condensación en la zona comprendida entre la
lona y el cielo raso. Esto puede provocar suciedad y/o moho en la zona intermedia. Desmontar el cielo raso y lavarlo.
Es necesario controlar periódicamente que los caños de desagüe y la cornisa estén limpios. Eliminar hojas y otros residuos
que puedan obstruir la boca del desagüe.
En caso de precipitaciones muy abundantes es posible que la cornisa no logre desagotar el agua. Esto podría causar infiltraciones de agua.
El transporte del agua al suelo no es responsabilidad de Corradi SpA, sino del cliente final. Las condiciones de instalación,
inclinaciones y eventuales sumideros son responsabilidad exclusiva del cliente final.
LÁMPARAS
Para mantener las juntas en condiciones de eficiencia, garantizando así el grado de protección IP del producto (indicado en
el manual), es necesario realizar las operaciones de mantenimiento indicadas en el manual.
VELA
La presencia de pliegues en la vela se debe al prolongado arrollamiento de la tela en el tubo recogedor. Para limitar este
fenómeno y para contar con la garantía, es obligatorio utilizar el cubrevela.
La presencia de pliegues en la vela inmediatamente después de la primera instalación puede deberse al embalaje. Los
pliegues desaparecen completamente aproximadamente 6 meses después de la instalación.
TEJIDOS VELOMBRA
Los tejidos están teñidos en piezas: esto puede causar una imperfecta uniformidad y homogeneidad de los colores.
MADERA
ATENCIÓN: Es oportuno recordar que, cuando se instalan al aire libre, directamente expuestos a la intemperie, todos los
tipos de madera están destinados a asumir un aspecto “vivido”, incluso en un lapso relativamente breve. Este aspecto se
manifiesta esencialmente a través de las siguientes características:
• decoloración de la superficie (con deterioro variable en función del grado de humedad al que se somete la madera);
• irregularidad de la superficie, debida a los fenómenos cíclicos de hinchazón y contracción, y al eventual desgaste
mecánico de la superficie.
Dado que la madera es un material natural, existen diferencias cromáticas y de textura que vuelven todos los elementos
diferentes entre sí. Además, en función del ángulo visual, el aspecto difiere a causa de la naturaleza cambiante del material.
Por lo tanto, las muestras y reproducciones fotográficas se deben considerar indicativas y no vinculantes.
El desprendimiento de una lámina de las vigas se debe considerar un
defecto.
La madera es sometida a un tratamiento de protección realizado en autoclave, que permite obtener una mayor resistencia
a los hongos y mohos. Este tratamiento es de color verde (debido a las sales de impregnación utilizados) y se realiza antes
de la pintura de las vigas. En caso de colores claros, es normal la aparición de estrías verdes en la madera, como consecuencia del deslavado de la pintura de acabado debido a la intemperie. En este caso, es necesario realizar el mantenimiento según lo indicado en el manual.
En las vigas puede haber bandas verticales de tonos diferentes. Esto es normal y se debe al apilamiento dentro del autoclave durante el tratamiento de impregnación (las vigas están distanciadas entre sí mediante viguetas transversales).
La presencia de resina es una característica de la madera de conífera.
Es normal una variación dimensional como consecuencia de la exposición de los productos de madera a la humedad. La
humedad de referencia para la medición es del 12 % (definida en la norma UNI EN390:1997).
106 de 119
CORRADI S.P.A. - MANUAL DEL USUARIO - PERGOTENDA®FLUX
0 - 03.2012
CARACTERÍSTICAS DE LOS PRODUCTOS
PAVIMENTOS
NO CONFORME/DEFECTO
ITALIANO
CARACTERISTICAS DEL PRODUCTO
El pavimento se puede marcar debido a golpes o caídas de objetos, así como por la aplicación de cargas concentradas en superficies
pequeñas (como sillas con ruedas no idóneas, tacones o escaleras de trabajo).
El pavimento se puede rayar como consecuencia del contacto con pequeños objetos adheridos a las suelas de los zapatos (como clavos
o piedras).
En el momento del suministro, el pavimento puede ser diferente de las muestras como consecuencia de la exposición a la luz, que altera
el color de la madera.
MUEBLES
En el período invernal deben ser protegidos de la intemperie. Es necesario limpiarlos antes de guardarlos para el invierno.
ENGLISH
Si los muebles son utilizados en un ambiente marino, es necesario lavarlos periódicamente con agua dulce para eliminar los restos de
salitre.
Características del acero inoxidable: véase el ítem ACERO INOXIDABLE.
MOTORES
Instalación eléctrica: debe ser realizada por un electricista habilitado, que debe emitir un certificado de conformidad de la instalación
eléctrica.
La instalación debe tener un grado de protección adecuado, dado que está instalada al aire libre. Un electricista habilitado está
capacitado para dimensionar correctamente la instalación y elegir los componentes adecuados (grado IP correcto).
ACERO INOXIDABLE
Los componentes en acero inoxidable (AISI 304) no requieren mantenimiento alguno. La aparición de microoxidaciones, más frecuentes
en ambientes marinos caracterizados por niebla salina, no perjudica la calidad y la duración del producto; estas oxidaciones se deben
considerar normales. Si es necesario eliminar estos puntos oxidados, se puede utilizar una esponja o un cepillo de cerdas metálicas (de
acero inoxidable). La película protectora de óxido de cromo (autopasivación) se restablece en forma natural con la exposición al aire, sin
intervención alguna por parte del usuario.
ALUMINIO
La presencia de marcas y rayas se considera un defecto sólo si es visible a una distancia de 2 metros.
DEUTSCH
Eventuales caídas de tensión o interferencias radio pueden provocar la pérdida de los finales de carrera de los motores. En este caso, es
necesario realizar una nueva programación, según lo indicado en el Manual.
Si las marcas y/o las abolladuras son visibles a una distancia de 2 metros, se deben
considerar defectos.
PINTURA
Cáscara de naranja: la superficie de la película de pintura no es homogénea, con aspecto
similar a la cáscara de naranja.
Formación de ampollas: protuberancias en la superficie de la película de pintura, de
diferentes dimensiones y frecuencia.
Chorreos de la capa externa: acumulaciones irregulares de pinturas localizadas y bien
definidas, en forma de rebordes redondeados y poco profundos que afectan la capa
exterior.
FRANÇAIS
No utilice ácidos para la limpieza de las partes de aluminio pintado, sino sólo agua y jabón neutro.
Porosidad/cráteres: pequeños orificios similares a cráteres o melladuras en la superficie de
la película, de dimensiones variables: desde pequeños orificios de alfiler hasta diámetros
de 1 cm.
Impurezas en las capas externa e interna: la película de pintura presenta una superficie
áspera e irregular, fácilmente perceptible al tacto.
Desconchaduras por interferencia: la película de pintura presenta daños y lesiones de
diferente profundidad y extensión en función de la causa.
0 - 03.2012
CORRADI S.P.A. - MANUAL DEL USUARIO - PERGOTENDA®FLUX
107 de 119
ESPAÑOL
Desprendimiento/caída: la película de pintura se levanta del soporte subyacente en forma
de pequeñas escamas.
CARACTERÍSTICAS DE LOS PRODUCTOS
CARACTERISTICAS DEL PRODUCTO
NO CONFORME/DEFECTO
VENTANALES
Para las aberturas de aluminio se remite al ítem Aluminio.
ERMETIKA
Durante el período estival, en caso de exposición directa a la luz solar, la temperatura dentro del cajón puede alcanzar
valores muy elevados. Esto puede causar la adherencia de la lona si el toldo no es movido por períodos prolongados. Se
recomienda abrir y cerrar el toldo con cierta frecuencia para evitar este problema.
Si la lona permanece enrollada por períodos prolongados, es posible la aparición de pliegues y arrugas. La lona es de PVC
y, por su naturaleza, no es comparable al vidrio. Es necesario mantener el toldo extendido durante al menos 48 h para
atenuar los pliegues y arrugas.
En caso de instalación en zonas caracterizadas por la presencia de polvo y viento (por ejemplo, en la playa, frente al mar)
es posible que la lona se deteriore, perdiendo la transparencia a causa de la acción combinada del viento y la arena.
Para mantener el toldo y el sistema de bloqueo en condiciones de eficiencia, es necesario mantener limpias las guías de
deslizamiento vertical, según lo indicado en el capítulo “Mantenimiento”.
Verifique que no haya obstáculos que puedan impedir el correcto movimiento del toldo. Esto puede causar el incorrecto
funcionamiento de los dispositivos de bloqueo.
En caso de presencia de hielo/nieve, es necesario limpiar meticulosamente las guías antes de accionar el toldo.
GUÍAS
108 de 119
Transcurrido cierto tiempo después de la instalación, si no se ha realizado el mantenimiento periódico de las guías según
lo indicado en el manual, pueden producirse ruidos en las guías y en los carros.
CORRADI S.P.A. - MANUAL DEL USUARIO - PERGOTENDA®FLUX
Los ruidos en las guías, inmediatamente después de la instalación, se deben
considerar defectos.
0 - 03.2012
ACCESORIOS METALICOS
Todos los accesorios de acero (AII 304) no necesitan
mantenimiento. La aparición de pequeñas manchas de óxido
en la bridas no perjudica a la calidad ni a la duración de las
mismas, y debe considerarse normal.
GUIAS
Cada año, en condiciones de uso normales, o una vez al mes, si
están expuestas a salinidad, limpie su interior con un chorro de
agua y, con la ayuda de un cepillo, elimine los restos de
suciedad y/o las incrustaciones de sal, según se describe en la
figura 1.
Atención: no lubrifique nunca las guías de deslizamiento
ENGLISH
LONA
El mantenimiento de la lona se reduce a la limpieza.
Si desea mantener como nueva la parte expuesta a la
intemperie, límpiela 2 ó 3 veces al año para evitar que se
deposite el polvo o contaminación el la lona por la acción del
sol. Para limpiar la lona, rocíela con agua y jabón neutro, espere
unos minutos a que el jabón actúe y a continuación, con la
ayuda de una esponja, elimine la suciedad sin presionar. Repita
el proceso si es preciso y aclare con abundante agua.
DEUTSCH
INTRODUCCION
PERGOTENDA®FLUX es un producto único en el que las
soluciones constructivas y los materiales utilizados son de
primera calidad y ofrecen la máxima duración.
Por consiguiente, el mantenimiento ordinario es mínimo, lo
que le permitirá, con pocas intervenciones, mantenerlo en
perfecto estado de funcionamiento y con una estética
agradable.
A continuación se indican una serie de normas sencillas que
deben cumplirse:
ITALIANO
MANTENIMIENTO
1
ESPAÑOL
FRANÇAIS
ATENCION:
No lubrificar nunca, por ningún motivo, las guías de
deslizamiento.
0 - 03.2012
CORRADI S.P.A. - MANUAL DEL USUARIO - PERGOTENDA®FLUX
109 de 119
TABLAS
TABLA 1 – FUERZA Y EFECTOS DEL VIENTO EN LA ESCALA BEAUFORT
Grado Clase*
Carga (N/mq)
Nudos
Km/h
m/s
Situación ambiental
Efectos del viento
0
0
< 40
0-1
0-1
< 0,3
Calma
Calma, el humo se eleva verticalmente
1
0
< 40
1-3
1-5
0,3-1,5
Viento imperceptible
El humo indica la dirección del viento, pero las veletas no se mueven
2
0
< 40
4-6
6-11
1,6-3,3
Brisa ligera
Se siente el viento en la cara y las veletas se mueven
3
0
< 40
7-10
12-19
3,4-5,4
Brisa media
Se mueven las hojas y las ramas más pequeñas
4
1
40
11-16
20-28
5,5-7,9
Viento moderado
Se levantan los papeles y el polvo, se mueven las ramas delgadas
5
2
70
17-21
29-38
8-10,7
Viento medio
Empiezan a oscilar los árboles más pequeños
6
3
110
22-27
39-49
10,8-13,8
Viento intenso
Se mueven las ramas gruesas y es difícil utilizar el paraguas
7
>3
> 110
28-33
50-61
13,9-17,1
Viento fuerte
Se mueven los árboles grandes y es difícil caminar contra el viento
8
>3
> 110
34-40
62-74
17,2-20,7
Borrasca
Se rompen las ramas de los árboles y es muy difícil caminar por terreno abierto
9
>3
> 110
41-47
75-88
20,8-24,4
Borrasca fuerte
Se caen las tejas de los tejados
10
>3
> 110
48-55
89-102
24,5-28,4
Tempestad
El viento arranca los árboles
11
>3
> 110
56-63
103-117
28,5-32,6
Tempestad violenta
Daños graves a los edificios
12
>3
> 110
>64
>118
> 32,7
huracán
Daños muy graves
* Clase de resistencia al viento según UNI EN 13561
TABLA 2 -DIMENSIONES MÁXIMAS cm
Ancho
Salida
2 guías
500
650
3 guías
900
650
4 guías
1300
650
110 de 119
CORRADI S.P.A. - MANUAL DEL USUARIO - PERGOTENDA®FLUX
0 - 03.2012
TABLA 4 - Carga máxima en daN (1 daN = 1 kg) en cada taco (considerando 2 tacos por cada soporte) de tracción y corte (no combinado)para una velocidad máxima del viento de
49 kilómetros / h (escala Beaufort 6 - Clase 3 según EN 13561)
Salida (cm)
Línea (cm)
200
250
300
350
400
450
500
550
600
650
700
750
800
850
900
950
1000
1050
1100
1150
1200
1250
1300
300
28
32
35
39
43
47
56
60
64
68
72
76
80
83
87
64
67
69
72
75
77
80
82
350
31
35
40
44
48
53
63
67
72
76
80
85
89
93
98
72
75
78
81
84
86
89
92
400
34
39
44
49
53
58
70
74
79
84
89
94
99
103
108
80
83
86
89
93
96
99
102
450
37
42
48
53
58
64
76
81
87
92
97
103
108
113
119
87
91
94
98
102
105
109
112
500
40
46
52
58
63
69
83
89
94
100
106
112
118
123
129
95
99
103
107
111
114
118
122
550
43
50
56
62
69
75
89
96
102
108
115
121
127
133
140
103
107
111
115
120
124
128
132
600
47
53
60
67
74
80
96
103
110
116
123
130
137
143
150
111
115
120
124
129
133
138
142
650
50
57
64
71
79
86
103
110
117
124
132
139
146
153
161
118
123
128
133
138
142
147
152
3 guías
4 guías
DEUTSCH
2 guías
ENGLISH
ITALIANO
TABLAS
TABLA 5 - Carga máxima en daN (1 daN = 1 kg) en cada taco (considerando 2 tacos por cada soporte) de tracción y corte (no combinado)para una velocidad máxima del viento de
74 kilómetros / h (escala Beaufort 8 -mas de Clase 3 según EN 13561)
250
300
350
400
450
500
550
600
650
700
750
800
850
900
950
1000
1050
1100
1150
1200
1250
1300
40
47
54
61
68
75
88
95
102
109
116
123
130
137
144
104
109
114
118
123
128
132
137
350
46
54
62
70
78
86
100
108
116
124
132
140
148
156
164
119
124
129
135
140
145
151
156
400
51
60
69
78
87
96
112
121
130
139
148
157
166
175
184
133
139
145
151
157
163
169
175
450
56
66
76
86
96
106
123
133
144
154
164
174
184
194
204
147
154
161
167
174
181
187
194
500
61
72
83
94
105
117
135
146
157
168
179
191
202
213
224
162
169
176
184
191
198
206
213
550
67
79
91
103
115
127
147
159
171
183
195
207
219
232
244
176
184
192
200
208
216
224
232
600
72
85
98
111
124
137
159
172
185
198
211
224
237
250
263
190
199
208
216
225
234
243
251
650
77
91
105
119
133
147
171
185
199
213
227
241
255
269
283
205
214
223
233
242
252
261
270
2 guías
0 - 03.2012
3 guías
CORRADI S.P.A. - MANUAL DEL USUARIO - PERGOTENDA®FLUX
4 guías
111 de 119
FRANÇAIS
200
300
ESPAÑOL
Salida (cm)
Línea (cm)
GARANTIA
ART.1-USO
PERGOTENDA®FLUX es un cenador con toldo deslizante,
diseñado para cubrir exteriores tales como jardines, balcones,
áticos, patios, etc.
PERGOTENDA®FLUX y sus componentes están diseñados y
patentados por Corradi Spa con sede en Bolonia, Italia. En el
proceso de fabricación se han cumplido todas las normas
técnicas de referencia aplicables.
Las garantías que se indican a continuación sólo son válidas si
la colocación y el uso del toldo se ajustan a las características
indicadas en los artículos y tablas siguientes. Para la fabricación
de los componentes de PERGOTENDA®FLUX se han utilizado
materiales de primera calidad adaptados para el uso en
exteriores.
PERGOTENDA®FLUX está diseñado y construido, a la medida
deseada, para la protección del sol y la lluvia con resistencia a
bolsas de agua superiores a la clase 2 (56 litros/hora por m2)
según la normativa EN 13561 excluyendo la carga de nieve, y
con resistencia al viento superior a la clase 3 (49 km/hora)
según la normativa EN 13561.
ART.2-VERSIONES
PERGOTENDA®FLUX debe fijarse a una pared de apoyo
adecuada. No puede utilizarse con vientos a partir del grado 8
de la escala de Beaufort, según se indica en la tabla 1.
ART.3-INSTALACION
PERGOTENDA®FLUX siempre deberá instalarse en una
estructura de apoyo adecuada (pared o techo), siendo de
obligado cumplimiento todas las condiciones que se indican
en la tabla 2 “Dimensiones máximas”, tabla 3 “Dimensiones
máximas”, tabla 3 “Flecha”, tabla 4-5 “Carga máxima”, y tabla 6
“Pendientes mínimas”.
112 de 119
El usuario final deberá recibir el “manual de uso y
mantenimiento”.
ART. 4 - VALIDEZ DE LA GARANTÍA:
La garantía es válida si se respetan las condiciones de
instalación y uso indicadas en el Art. 3.
La garantía comporta la reparación o la sustitución integral
gratuita (mano de obra excluida) de todos los componentes
que resulten no conformes o defectuosos, incluidos los gastos
de transporte. La garantía no cubre los daños derivados de la
imposibilidad de utilizar PERGOTENDA®FLUX antes y durante la
reparación.
Ninguna indemnización puede ser requerida por “daños
emergentes” o “lucro cesante”.
Las garantías antedichas son eficaces únicamente en el país en
que el revendedor o concesionario tiene su sede operativa.
ART. 5 - DURACIÓN DE LA GARANTÍA:
La garantía comienza desde la fecha en que se finalizan los
trabajos referida en la Declaración de Correcta Instalación, de
la cual, una copia debe ser enviada a Corradi, debitamente
cumplimentada en cada uno de sus apartados y firmada tanto
por el comprador final como por el Distribudor Autorizado.
ART. 6 - EXCLUSIONES DE LA GARANTÍA :
La garantía no es válida en los casos que se enumeran a
continuación (a título enunciativo y no limitativo):
CORRADI S.P.A. - MANUAL DEL USUARIO - PERGOTENDA®FLUX
a) por daños derivados de golpes o causas naturales
extraordinarias (rayos, inundaciones, terremotos, etc.);
b) por daños causados por la intervención de personas o
técnicos no autorizados por Corradi Spa;
c) Si la tensión eléctrica tiene una variación superior o inferior
al 5% del valor nominal (norma CEI 2-3 - julio de 1988)
ART.7-DURACION DE LA GARANTIA
5 (cinco) AÑOS:
Para la estructura, mecanismo y tejido ECLISSI, excluyendo los
tejidos CRISTAL.
2 (dos) AÑOS:
Tejido CRISTAL para la realización de eventuales cierres
perimetrales (lonas enrollables, lonas deslizantes, lonas con
cerramientos con guías, etc). Su resistencia al viento irá en
función de la solución adoptada y será certificada, bajo
solicitud, para cada caso en particular.
ART. 8 - RECLAMACIONES
En base al Art. 1495, apartado 1, y 1511, apartado 1, del Código
Civil, cualquier eventual y presunto defecto aparente de la
mercancía podrá ser comunicado por el cliente al revendedor
únicamente en forma escrita y en el plazo de 8 (ocho) días a
partir de la recepción de la mercancía. En base al Art. 1495,
apartado 1, del Código Civil, cualquier eventual y presunto
defecto no aparente de la mercancía podrá ser comunicado
por el cliente al revendedor únicamente en forma escrita y en
el plazo de 8 (ocho) días a partir de la fecha de su
descubrimiento, enviando prueba fotográfica del presunto
defecto. Ambas acciones legales del comprador contra el
revendedor prescriben en el plazo de un año a partir de la
recepción/instalación de la mercancía (Art. 1495, apartado 2).
0 - 03.2012
ITALIANO
GARANTIA
DEUTSCH
ENGLISH
En base al Art. 1512 del Código Civil, cualquier eventual y
presunto defecto de funcionamiento podrá ser comunicado
en forma escrita por el cliente al revendedor únicamente en
forma escrita y en el plazo de 15 (quince) días a partir de su
descubrimiento, bajo pena de caducidad de la garantía. La
acción legal del comprador contra el revendedor prescribe en
el plazo de seis meses a partir de su descubrimiento (Art. 1512,
apartado 1).
Cualquier eventual y presunta no-conformidad disciplinada
por los artículos del 128 al 134 del Decreto Legislativo
206/2005 (Código del Consumo) podrá ser comunicada por el
cliente al revendedor únicamente en forma escrita y en el
plazo de 2 (dos) meses a partir de la fecha de su
descubrimiento. La acción legal del comprador contra el
revendedor prescribe en el plazo de 26 meses a partir de la
fecha del descubrimiento denunciado en los plazos previstos
(Art. 132, apartado 4, Código del Consumo)
ESPAÑOL
FRANÇAIS
ART. 9 - EXTENSIÓN TERRITORIAL DE LA GARANTÍA
Las garantías indicadas son eficaces exclusivamente en el
estado en que el cliente tiene su sede legal, quedando
excluido cualquier otro estado en el que el cliente —directa o
indirectamente— venda, instale o conceda en comodato el
toldo suministrado por Corradi.
0 - 03.2012
CORRADI S.P.A. - MANUAL DEL USUARIO - PERGOTENDA®FLUX
113 de 119
MARCADO CE
SIMBOLOS CE PARA VERSIONES 2-3 GUIAS
Corradi Spa - Via G. Brini, 39 - 40128 Bologna Italy
2-3 guías
Modelo: PERGOTENDA® FLUX
Número de serie: 00000/00
Año de fabricación: 0000
Tensión de alimentación: 230 V Potencia: 218 W
Frecuencia: 50 Hz
2
Número de fases:
Resistencia al viento: Clase 3
EN 13561
Peligro de aplastamiento
A CE
ATUR
MARC
SIMBOLOS CE PARA VERSIONES 4 GUIAS
Corradi Spa - Via G. Brini, 39 - 40128 Bologna Italy
4 guías
Modelo: PERGOTENDA® FLUX
Número de serie: 00000/00
Peligro componentes con presencia de
tensión eléctrica
Tensión de alimentación: 230 V Potencia: 218 W
Frecuencia: 50 Hz
2
Número de fases:
Resistencia al viento: Clase 3
114 de 119
Año de fabricación: 0000
CORRADI S.P.A. - MANUAL DEL USUARIO - PERGOTENDA®FLUX
EN 13561
0 - 03.2012
Corradi SpaVia G. Brini, 39 a 40128 Bolgna Italia
PERGOTENDA®FLUX
PERGOTENDA®FLUX 2 - 3 - 4 guías
(véase CE colocado en el producto)
(véase CE colocado en el producto)
(Véase el Manual del usuario – Instrucciones Originales y de
Garantía)
Por la presente declara la empresa bajo su responsabilidad, que el producto expuesto
anteriormente satisface las directivas indicadas al lado:
DIRECTIVAS DE REFERENCIA aplicables a esta Declaración de Conformidad CE
Directiva productos para la construcción 89/106/CEE
Directiva Compatibilidad Electromagnética 2004/108/CEE (*)
Directiva “Máquinas” 2006/42/CE(*)
Directiva de Baja Tensión 2006/95/CE (*)
El cumplimiento fue verificado usando las siguientes reglas:
- Requisitos de desempeño de seguridad UNI EN 13561:2009
- Clase de resistencia al viento: Clase 3 (**) (método de acuerdo con UNI EN 1932: 2002);
INDICACIONES / CONDICIONES SUJETAS A LA UTILIZACIÓN DEL PRODUCTO:
El producto CORRADI está sujeto a actividades de instalación en el Cliente.
El instalador autorizado debe preparar y proporcionar al usuario la DECLARACIÓN DE CORRECTA INSTALACIÓN Y CLASIFICACIÓN DE LA RESISTENCIA AL VIENTO que acredite la instalación
satisfactoria de acuerdo con las instrucciones proporcionadas por el fabricante, se aplica de acuerdo con el estado y la morfología del lugar de instalación y que cumpla las condiciones de uso de
que se llevó a cabo.
ENGLISH
Fabricante:
Descripción del producto:
Modelo:
Número de matricula:
Año de fabricación:
Uso previsto:
DEUTSCH
Esta Declaración de conformidad CE está sujeta al cumplimiento de las limitaciones y las indicaciones previstas en la garantía del producto, así como para la instalación correcta de la persona
responsable en el cumplimiento de las instrucciones de instalación y trabajo de instalación definido por Corradi Spa.
ITALIANO
DECLARACIÓN DE CONFORMIDAD CE
EL FABRICANTE:
Declara que el producto descrito anteriormente se ajusta a las directrices y requisitos que figuran en las Directrices arriba indicadas.
EL ADMINISTRADOR DELEGATO
Ing. Gianmarco Biagi
(*) Las Directivas aplicables únicamente para los productos con los motores y la automatización [ver el Manual del usuario]
(**) Resistencia a la clase de viento: el CRV se verificó utilizando los medios para la instalación según las características que figuran en el cuadro correspondiente de cargas que figuran en el Manual de
colocación.
0 - 03.2012
CORRADI S.P.A. - MANUAL DEL USUARIO - PERGOTENDA®FLUX
115 de 119
ESPAÑOL
FRANÇAIS
El instalador debe seguir las instrucciones contenidas en el documento de referencia "MANUAL DE COLOCACIÓN " y "MANUAL DEL USUARIO" a su disposición.
El instalador se hará cargo de completar y firmar la DECLARACIÓN DE CORRECTA INSTALACIÓN Y CLASIFICACIÓN DE LA RESISTENCIA AL VIENTO Correspondiente al modelo descrito en el interior del
MANUAL DE USUARIO.
los carros.
3)REGULACION DEL FIN DE CARRERA DE CIERRE DEL TOLDO
RECOGIDO
Presione con un destornillador el botón B* produciendo un pequeño
enroscado con el siguiente bloqueo del pulsador del botón en
posición presionada. Una vez bloqueado el botón, posicione el tope
de cierre con el toldo recogido pero no totalmente, de modo que los
carros queden ligeramente colgantes. Para memorizar el tope de cierre
y salir del proceso de regulación, bastará con presionar el botón B con
un destornillador y tras una leve rotación, desenrosque el botón,
desbloqueándolo.
116 de 119
A
B
pulsador
B
A
Motore PLAN 75
230 V/50 Hz
In= 0,97 A
Pn= 218 W
IP= 54
M1
3
2
1
cable tipo
FG70R 3X1,5 mmq
clavija macho en
dotación abierta
1
3
2
pulsador bajada
aislado 230 V
pulsador subida
aislado 230 V
cable tipo
FG70R 3X1,5 mmq
CORRADI S.P.A. - MANUAL DEL USUARIO - PERGOTENDA®FLUX
INTERVENCION A EFECTUAR POR EL INSTALADOR
2)MONTAJE DEL TOLDO
Montar los tubos terminales e intermedios a la estructura, fijándolos a
* Si el pulsador no se moviese una vez presionado, evite insistir y
asegúrese primero de que el motor está en posición de final de
carrera.
bajada
1)REGULACION DEL PUNTO NEUTRO
Presione con un destornillador los botones A y B, produciendo
un pequeño enroscado con el siguiente bloqueo del botón en
posición presionada. Cuando se haya bloqueado el botón en
posición presionada, haga bajar el toldo hasta las ¾ partes de
la guía.
Presionar los botones A y B con un destornillador, efectúe una
leve rotación para desenroscar los botones y así
desbloquearlos.
4) REGULACION DEL FIN DE CARRERA DE APERTURA
Abra el toldo hasta que éste se detenga automáticamente.
Presionar con un destornillador el botón A* provocando un
ligero enroscado con el siguiente bloqueo del pulsador del
botón en posición presionada. A continuación desplegar el
toldo hasta que alcance la correcta posición de apertura.
Para memorizar el fin de carrera y finalizar el proceso de
regulación, bastará con presionar el botón A con un
destornillador efectuando un ligero desenrosque,
desbloqueando así el pulsador a su posición inicial.
subida
ATENCION
El procedimiento de instalación y regulación inicial del
motor será competencia del técnico instalador
especializado.
Realice la operación con el máximo cuidado y cumpliendo la
normativa vigente, en presencia de tensión eléctrica.
Tras haber montado toda la estructura y haber efectuado las
conexiones eléctricas, compruebe que la conexión del sistema
de transmisión sea correcta: árboles, tubos, árboles laterales y
culatas motoras. Todos los carros se hallarán empaquetados en
la parte alta del toldo. Antes de proceder al montaje de la lona
proceder según sigue:
común
RESERVADO A LOS TÉCNICOS ESPECIALIZADOS
INSTALACION DEL MOTOR TIPO 1 – PLAN 75 (SOLO PARA INSTALADORES)
0 - 03.2012
0 - 03.2012
ENGLISH
B
A
Motore PLAN 75
230 V/50 Hz
In= 0,97 A
Pn= 218 W
IP= 54
3
2
1
cable tipo
FG70R 3X1,5 mmq
clavija macho en
dotación abierta
1
3
2
pulsador subida
aislado 230 V
pulsador bajada
aislado 230 V
cable tipo
FG70R 3X1,5 mmq
CORRADI S.P.A. - MANUAL DEL USUARIO - PERGOTENDA®FLUX
FRANÇAIS
M1
ESPAÑOL
B
DEUTSCH
pulsador
INTERVENCION A EFECTUAR POR EL INSTALADOR
FINAL DE CARRERA: CIERRE (TOLDO RECOGIDO)
Se conecta el teclado al motor y se empieza a subir el toldo,
que se posicionará en el tope prefijado de cierre, sólo con el
A
bajada
FINAL DE CARRERA: APERTURA (TOLDO EXTENDIDO)
Si se le ha suministrado el pulsador KIT POSA, proceda a
conectarlo al motor para poderlo maniobrar.
Nota: Para quienes no tengan el teclado, manden realizar
una instalación a un técnico especializado igual al esquema
eléctrico del dibujo.
Baje el toldo, el cual se colocará en el tope programado de
apertura: sólo con el toldo en esta posición se podrá realizar el
ajuste del tope de apertura.
Presione con un destornillador el botón A*, en el cuerpo del
motor, produciendo un pequeño enroscado con el siguiente
bloqueo del botón en posición presionada, y la anulación del
fin de carrera actual.
Cuando se haya bloqueado el botón en posición presionada,
intervenga en el teclado hasta que el toldo esté posicionado
en el tope deseado.
Para poder memorizar el tope fijado de este modo y salir del
proceso de ajuste, es suficiente presionar el botón A con un
destornillador y con una leve rotación desenroscar y soltar el
botón.
*Si el pulsador no se moviese una vez presionado, evite
insistir y asegúrese primero de que el motor está en posición
de final de carrera.
toldo en esta posición se podrá realizar el ajuste del tope del
cierre.
Presione con un destornillador el botón B* produciendo un
pequeño enroscado con el siguiente bloqueo del pulsador del
botón en posición presionada.
Cuando haya tenido lugar el bloqueo del botón en posición
presionada, intervenga en el teclado hasta que el toldo esté
posicionado en el tope deseado.
Para poder memorizar el tope fijado de este modo y salir del
proceso de ajuste, es suficiente presionar el botón B con un
destornillador y con una leve rotación desenroscar y soltar el
botón.
subida
REGULACION FINAL DE CARRERA MOTOR PLAN 75
El procedimiento de regulación del final de carrera descrito a
continuación debe ser realizado por un técnico especializado.
Este procedimiento es diferente a la regulación inicial del
motor efectuada por el técnico instalador (ver manual de
instalación).
ITALIANO
MANDO ELECTRICO TIPO 1 (MOTOR PLAN 75)
común
RESERVADO A LOS TÉCNICOS ESPECIALIZADOS
REGULACION DE LOS MANDOS
117 de 119
MANDO ELECTRICO TIPO 2 (MOTOR SLOPE 95)
5
6
3
2
1
Motore SLOPE 95
230 V/50 Hz
In= 0,97 A
Pn= 218 W
IP= 54
M1
fusible 250V/200mA
1
2
3
SINTONIZACION DE UN NUEVO MANDO A DISTANCIA
Pulse el botón MEMO (4); el LED (5) se encenderá dos veces.
Mantenga pulsado el botón MEMO (4) y pulse el botón del
mando a distancia. El LED (5) se encenderá dos veces, lo que
indica que ha reconocido la sintonización.
118 de 119
Pulsador con botones de acción
mantenida, suministrada y conectada
por el electricista. Posicionado en el
campo de funcionamiento del toldo.
CORRADI S.P.A. - MANUAL DEL USUARIO - PERGOTENDA®FLUX
3
1
2
común
CANCELACION DE LOS MANDOS A DISTANCIA EN
MEMORIA
Es posible borrar de la memoria interna todos los códigos de
los mandos a distancia. Para ello pulse el botón CANC (6) y
espere a que el LED (5) se quede encendido con una luz fija.
INTERVENCION A EFECTUAR POR EL INSTALADOR
Puede utilizar el mando a distancia suministrado.
La tensión de la lona abierta es activada por la centralita,
mientras que el punto del tope del toldo recogido es el
memorizado con el pulsador STOP.
En caso de parada del motor (por sobrecalentamiento), se
encenderá el LED rojo (2) de la centralita: al cabo de 5 minutos
el LED se apagará, lo que indica que se puede activar
nuevamente el motor.
4
cable baja tensión 5V
-Compruebe las conexiones eléctricas con los
correspondientes conectores del motor a la centralita y de ésta
a la línea de alimentación. En el caso de que no existan, realizar
las conexiones siguiendo el esquema eléctrico del dibujo.
-Pulse el pulsador START (1) de la centralita y espere a que se
encienda el LED rojo (2), a continuación suelte el pulsador. La
lona iniciará la bajada; una vez llegue al tope se detendrá
durante 1 segundo y posteriormente iniciará la subida
automáticamente.
-Pulse el pulsador STOP (3) cuando desee establecer el tope de
parada de la nueva subida de la lona del toldo.
Central MONO 00749
Con final de carrera automático en apertura y
mando a distancia incorporado.
bajada
REGULACION FINAL DE CARRERA MOTOR SLOPE 95
Realice la operación con el máximo cuidado y cumpliendo la
normativa vigente.
subida
RESERVADO A LOS TÉCNICOS ESPECIALIZADOS
REGULACION DE LOS MANDOS
0 - 03.2012
ITALIANO
MANDO ELECTRICO TIPO 3 (MOTOR SLOPE 95 E PLUS 96)
REGULACION FINAL DE CARRERA MOTORES SLOPE 95 E
PLUS 96
Realice la operación con el máximo cuidado y cumpliendo la
normativa vigente.
ENGLISH
2
1
Motore SLOPE 95
230 V/50 Hz
In= 0,97 A
Pn= 218 W
IP= 54
fusible 250V/200mA
SINTONIZACION DE UN NUEVO MANDO A DISTANCIA
Pulse el botón MEMO (4); el LED (5) se encenderá dos veces.
Mantenga pulsado el botón MEMO (4) y pulse el botón del
mando a distancia. El LED (5) se encenderá dos veces, lo que
indica que ha reconocido la sintonización.
0 - 03.2012
CORRADI S.P.A. - MANUAL DEL USUARIO - PERGOTENDA®FLUX
subida
Pulsador con botones de acción
mantenida, suministrada y conectada
por el electricista. Posicionado en el
campo de funcionamiento del toldo.
común
CANCELACION DE LOS MANDOS A DISTANCIA EN
MEMORIA
Es posible borrar de la memoria interna todos los códigos de
los mandos a distancia. Para ello pulse el botón CANC (6) y
espere a que el LED (5) se quede encendido con una luz fija.
Motore PLUSE 96
230 V/50 Hz
In= 0,97 A
Pn= 218 W
IP= 54
DEUTSCH
3
FRANÇAIS
6
ESPAÑOL
5
INTERVENCION A EFECTUAR POR EL INSTALADOR
Puede utilizar el mando a distancia suministrado.
La tensión de la lona abierta es activada por la centralita,
mientras que el punto del tope del toldo recogido es el
memorizado con el pulsador STOP.
En caso de parada del motor (por sobrecalentamiento), se
encenderá el LED rojo (2) de la centralita: al cabo de 5 minutos
el LED se apagará, lo que indica que se puede activar
nuevamente el motor.
4
cable baja tensión 5V
-Compruebe las conexiones eléctricas con los
correspondientes conectores del motor a la centralita y de ésta
a la línea de alimentación. En el caso de que no existan, realizar
las conexiones siguiendo el esquema eléctrico del dibujo.
-Pulse el pulsador START (1) de la centralita y espere a que se
encienda el LED rojo (2), a continuación suelte el pulsador. La
lona iniciará la bajada; una vez llegue al tope se detendrá
durante 1 segundo y posteriormente iniciará la subida
automáticamente.
-Pulse el pulsador STOP (3) cuando desee establecer el tope de
parada de la nueva subida de la lona del toldo.
Centralina TANDEM 00757
Con finecorsa automatico in apertura per due motori e telecomando incluso.
bajada
RESERVADO A LOS TÉCNICOS ESPECIALIZADOS
REGULACION DE LOS MANDOS
119 de 119
ww
www.corradi.eu
w
ww..corradi.eu