Download WESTmINSTER / AvE mARIA / BIm-BAm PlAyS mElOdy ON hOUR
Transcript
BOOK NO. 67F
Your new Bulova quartz clock incorporates a timekeeping principle, engineered to provide the highest timing
standards in a clock designed for consumer use.
Its timekeeping element is exactly controlled by a vibrating quartz crystal driven by the energy from a standard
battery by means of an electronic circuit.
The vibratory motion of the quartz is converted into rotary motion, to turn the time-of-day hands by a simple and reliable
mechanism. Manufactured to the highest quality specifications, your Bulova quartz clock is engineered to provide more
than a year’s accurate timekeeping on the specified battery.
OPERATING INSTRUCTIONS
Features
Triple Chime - Westminster / Ave Maria / Bim-Bam
Plays Melody on Hour
Counts the Hour
Adjustable Volume Control
No Chimes or Automatic Night Shut-off from 11:00 PM to 5:45 AM
I. To Start The Clock
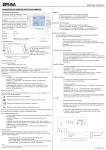
1. If your clock has back cover or door, remove it or open it to access the movement behind the dial.
2. Do not insert batteries. If batteries are in clock, do not remove insulator.
3. Turn the hand set knob, in the rear of movement, counter-clockwise until the time is 5:50 (the hands on the dial will
turn in a clockwise direction). The movement will preset to 5:45AM when the batteries are inserted.
4. Insert a fresh, good quality alkaline “AA” size battery into battery compartment of movement with the polarity as shown.
5. Insert two fresh, good quality alkaline “AA” size batteries into battery compartment of chime I/C control box according to
polarity marking (+) and (-). If batteries are already in clock, please remove insulator and reinsert batteries.
6. Replace batteries if the timekeeping becomes erratic or melody becomes “fuzzy” as this may be an indication of the
batteries exhaustion. When replacing batteries, make sure that all batteries are replaced at the same time and same
grade of batteries is used.
7. If batteries are replaced it is necessary to reset the hourly chime following the steps in this manual.
II. To Set Time
1. Turn the hand-set knob, in rear of movement, counter-clockwise until the desired time is obtained on the dial.
2. If setting PM, go PAST 12 o’clock.
3. Allow at least one hour for the timekeeping to correctly synchronize with the melody.
III. To Select Melody (“SELECT” Switch A)
WESTMINSTER:
AVE MARIA:
BIM-BAM: The clock will play Westminster chime on the hour.
The clock will play Ave Maria chime on the hour.
The clock will play Bim-Bam chime on the hour.
IV. Automatic Night Shut-off Function (“MODE” Switch B)
1. Gently slide the switch to upper position and the night shut-off function will be activated for any melody selected.
The melody will not play between 11:00 PM and 5:45 AM.
2. To turn off the melody, gently slide the switch to lower position - “OFF”.
3. Anytime the melody status is changed from “NIGHT SHUT OFF” to “OFF” or reversed, it is necessary to reset the hourly
chime following the steps in this manual.
BOOK NO. 67F
V. Volume Control (Volume Control Knob C)
Adjust volume by turning Volume Control Knob C
1. To increase the volume, turn the Volume Control Knob C clockwise.
2. To decrease the volume, turn the Volume Control Knob C counter-clockwise.
VI. “SET” Button D
This button is for the alternate time-setting method described below. It should ONLY be utilized with the alternate
time-setting method.
VII. To Operate The Pendulum (If applicable)
If your clock has a rotating pendulum, insert a fresh, good quality alkaline “AA” battery into the battery compartment
(located on the bottom of the clock) with the polarity as shown. Place the rotary pendulum onto the protruding
metal shaft which is located in the base of the clock. On certain models the pendulum may already be attached.
A slight push may be necessary to start the rotation.
If your clock has a swinging pendulum, release the pendulum support from the shipping position by gently
pushing it to the opposite side and letting it hang free. (On certain models the pendulum is operated by a separate
mechanism requiring an additional battery. Insert a good quality alkaline “AA” battery into the battery compartment
of the pendulum mechanism with the polarity as shown.) Hook pendulum on pendulum support so that the
front of the pendulum bob faces the front of the clock.
A slight push may be necessary to start the oscillation.
VIII. Hanging The Clock (If applicable)
Carefully hang the clock on a sturdy nail or screw. Make sure the clock is flat against the wall and hangs vertically
to ensure that the pendulum works properly.
Alternate Time Setting Method (Using “Set” button D)
Each push on the “SET” button D will advance chime by one hour. DO NOT press unless necessary.
If you choose, your clock may be set in the following way:
1. If your clock has a back, remove it
2. Use “SELECT” (Switch A) to choose melody
3. Set the current time, using the hand-setting knob located on the rear of movement
4. Insert two fresh, good quality “C” batteries into the battery compartment being sure to observe correct polarity.
This will return your clock to its pre-programmed start time of 5:45 AM
5. Press “SET” button D the appropriate number of times to reach the time shown on the dial. For example, you will need
to press the “SET” button 17 times to set the time to 10:00 PM or press “SET” button once to set time to 6:00 AM
6. If your clock has a rotating / revolving pendulum, a slight push may be necessary to start the oscillation
General Notes
1. Use a clean, dry, soft cloth to wipe away fingerprints. Do not use any solvents or abrasive cleaner/polish.
2. Do not tape anything to clock surfaces as the adhesive can degrade the finish.
BOOK NO. 67F
Su nuevo reloj de cuarzo Bulova incorpora un principio de cronometraje, ingeniado para proporcionar las normas
de relojería más altas en un reloj diseñado para el uso de consumidores.
Su elernento de cronometraje se controla con precisión mediante un cristal de cuarzo que vibra impulsado por la
energía de una batería estándar mediante un circuito electrónico.
El movimiento vibratorio del cuarzo se convierte en un movimiento giratorio, para hacer girar las manecillas
de las horas mediante un mecanismo sencillo y a la vez fiable. Manufacturado a las especificaciones
de calidad mas altas, su reloj de cuarzo Bulova se ha ingeniado para proporcionar más de un año de cronometraje
preciso cuando usa la batería especificada.
INSTRUCCIONES DE OPERACIÓN
Funciones
CampanillaTriple - Westminster/Ave Maria/Bim Bam
Suena la Melodía en la Hora
Cuenta la Hora
Control Ajustable de Volumen
No Campanilla ni Apagado de Noche Automático desde las11:00 pm
hasta las 5:45 am
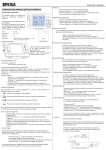
I. Para Poner en Marcha al Reloj
1. Si su reloj dispone de una tapa o puerta posterior, debe quitarla o abrirla para tener acceso al movimiento detrás
de la carátula.
2. No debe introducir las baterías. Si el reloj ya contiene baterías, no debe quitar el aislante.
3. Gire la perilla de ajuste de las manecillas, que se encuentra en la parte posterior del movimiento, en el sentido
contrario a las manecillas del reloj hasta llegar a la hora de 5:50 (las manecillas de la carátula girarán en el sentido
de las manecillas del reloj). El movimiento se volverá a ajustarse en las 5:45 am al introducir las baterías.
4. Introduzca al compartimiento de batería alcalina una batería fresca y de buena calidad de tamaño “AA” respetando la
polaridad indicada.
5. Introduzca al compartimiento de batería de la caja de control de la campanilla I/C dos baterías alcalinas frescas y de
buena calidad de tamaño “AA” de acuerdo a la polaridad marcado con (+) y (-). Si el reloj ya contiene baterías, sírvase
quitar el aislante y vuelva a introducir las baterías.
6. Debe reemplazar las baterías si la marcha de las horas llegue a ser errática o la melodía poco clara ya que puede ser
indicativo del agotamiento de la batería. Cuando reemplace las baterías, asegúrese que todas las baterías se
reemplacerán al mismo tiempo y el mismo grado de baterías deben usarse.
7. Si se reemplacen las baterías, es necesario restablecer la señal horaria siguiendo los pasos de este manual.
II. Para Ajustar la Hora
1. Gire la perilla de ajuste manual, que se encuentra en la parte posterior del movimiento, en el sentido contrario a las
manecillas del reloj hasta llegar a la hora deseada en la carátula.
2. De realizar el ajuste de las horas del P.M., hay que avanzar las manecillas para que PASEN las 12 horas.
3. Permita que pase por lo menos una hora para que el cronometraje sincronice correctamente con la melodía.
III. Para Seleccionar la Melodía (“SELECCIONAR” Interruptor E)
WESTMINSTER:
AVE MARIA:
BIM-BAM:
El reloj sonara la melodía Westminster en la hora.
El reloj sonara la melodía Ave Maria en la hora.
El reloj sonara la melodía Bim-Bam en la hora.
BOOK NO. 67F
IV. La Función Automático de Apagado de Noche (“MODO” Interruptor B)
1. Deslice suavemente el interruptor hasta la posición superior y la función de apagado de noche se activara para
cualquier melodía seleccionada. La melodía no sonara entre las 11:00 pm y las 5:45 am.
2. Para desactivar la melodía. deslice suavemente el interruptor a la posición inferior - “DESACTIVADO”.
3. Si en cualquier momento el estado de la melodía se cambia de ‘APAGADO DE NOCHE” a “DESACTIVADO” o al revés,
es necesario restablecer la señal horaria siguiendo los pasos de este manual.
V. Control de Volumen (Perilla C para Control de Volumen)
Ajuste el volumen al girar la Perilla C para Control de Volumen.
1. Para aumentar el volumen, gire la Perilla C para Control de Volumen en el sentido de las manecillas del reloj.
2. Para reducir el volumen, gire la Perilla C para Control de Volumen en sentido contrario a las manecillas del reloj.
VI. Botón D de”AJUSTE”
Se usa este botón para un método alternado para ajustar la hora según descrito a continuación. Debe utilizarse
ÚNICAMENTE con el método alternado de ajustar la hora.
VII. Para Poner en Operación el Péndulo (Si aplicable)
Si su reloj dispone de un péndulo rotativo, introduzca al compartimiento de batería (situado en la parte inferior del reloj)
una batería alcalina fresca y de buena calidad de tamaño “AA”, respetando la polaridad indicada.
Coloque el péndulo rotativo sobre el eje de metal saliente que se encuentra en la base del reloj. En ciertos modelos,
el péndulo ya puede estar conectado. Es posible que se requiera un impulso suave para iniciar la oscilación del péndulo.
Si su reloj dispone de un péndulo oscilante, suelte el soporte del péndulo de la posición de envió al empujarlo
suavemente al otro lado y al dejarlo colgar libremente. (En algunos modelos, el péndulo se opera mediante un mecanismo
independiente que requiere una batería adicional. Introduzca al compartimiento de batería del mecanismo del péndulo,
una batería alcalina fresca y de buena calidad de tamaño “AA”, respetando la polaridad indicada.) Enganche el péndulo
en el soporte del péndulo de manera que la parte frontal de la masa del péndulo quede hacia la parte delantera del reloj.
Es posible que se requiera un impulso suave para iniciar la oscilación del péndulo.
VIII. Como Colgar el Reloj (Si aplicable)
Cuelgue el reloj cuidadosamente en un clavo o tomillo macizo. Asegúrese que el reloj quede al ras con la pared y que cuelgue
de manera vertical para asegurar que funcione el péndulo correctamente.
Método Alternado para Ajustar la Hora (Usando el Botón D de “Ajuste”)
Cada vez que presione el botón D “AJUSTE la señal horaria se avanzara una hora. NO debe presionarlo a menos que
sea necesario. Si desea, podrá ajustar su reloj de la manera siguiente:
1.
2.
3.
4.
Si su reloj dispone de una tapa posterior, debe quitarla.
Utilice “SELECCIONAR” (Interruptor A) para elegir la melodía.
Ajuste la hora actual, usando la perilla de ajuste de las manecillas que se encuentra en parte posterior del movimiento
Introduzca dos baterías frescas y de buena calidad de tamaño “C al compartimiento de baterías, asegurándose de
respetar la polaridad correcta. Eso hará que su reloj regrese a la hora de inicio pre-prograrnada de 5:45 am.
5. Presione “AJUSTE” (botón D) el numero apropiado de veces para llegar a la hora indicada en la carátula.
Por ejemplo, sera necesario presionar el botón “AJUSTAR” 17 veces para ajustar la hora a las 10:00 pm o presione el
botón “AJUSTAR” una vez para ajustar la hora a las 6:00 am.
6. Si su reloj esta dispuesto con un péndulo giratorio/rotativo, puede ser necesario empujarle suavemente para
comenzar la oscilación.
Notas Generales
1. Utilice un pano limpio, seco y suave para limpiar las huellas digitales. No debe usar solventes ni limpiadores/agentes
pulidores abrasivos.
2. No debe usar cinta adhesiva papa fijar objetos al reloj ya que la goma presenta la posibilidad de estropear el acabado.


