1
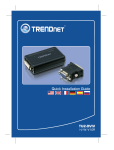
Quick Installation Guide
TU2-DVIV
H/W: V1.0R
Table
of Contents
Table
of Contents
Español ...................................................................................................... 1
1. Antes de iniciar .................................................................................. 1
2. Cómo se instala ................................................................................. 3
Troubleshooting ......................................................................................... 6
Version 06.27.2008
1. Antes de iniciar
Contenidos del paquete
TU2-DVIV
?
?
CD-ROM del controlador
?
Guía de instalación rápida
multilingüe
?
Cable USB Mini-USB a Tipo A
?
Adaptador DVI-I-VGA
Requisitos del sistema
Unidad de CD-ROM
?
USB 1.1 ó 2.0 disponible
?
?
1.2GHz o superior
?
Memoria: 512 MB RAM por monitor
?
Espacio disponible en disco:30 MB
?
Windows 2000 Service Pack 4/XP Service Pack 2/Vista
?
Monitor LCD o proyector con puerto DVI-I o VGA
1
Español
Aplicación
Mirror View (Image repeated over multiple monitors)
A
A
A
USB to DVI/VGA Adapter
(TU2-DVIV)
Extended View (Image divided over multiple monitors)
C
B
A
USB to DVI/VGA Adapter
(TU2-DVIV)
Supported viewing angles
Rotate 90° left
A
Rotate 180°
Rotate 90° right
A
A
2
Español
A
2. Cómo se instala
Nota: No conecte el TU2-DVIV a su PC a menos que se le indique.
1. Inserte el CD-ROM del controlador
en su unidad de CD-ROM.
2. Haga clic en Run autorun.exe
(sólo para Windows Vista).
3. Haga clic en Install Utility &
Driver (Instalar herramienta y
controlador ).
4. Seleccione el idioma deseado, lea
el Acuerdo de licencia para
usuarios finales de Software y
luego haga clic en I Accept
(Acepto).
5. Haga clic en Yes (Sí) para reiniciar
el PC (sólo para Windows
2000/Vista).
3
Español
6. Retire el CD-ROM del controlador
de la unidad de CD-ROM de su
PC.
7. Conecte el extremo del Mini-USB
del cable USB al TU2-DVIV.
8. Conecte el extremo Tipo A del
cable USB a un puerto USB
disponible en su computadora.
9. Repita el paso 7-8 para cada
adaptador adicional. Puede
conectar un máximo de 6
adaptadores.
Cómo conectar a un monitor DVI
1. Conecte el cable del monitor DVI
directamente al puerto DVI en el
TU2-DVIV.
4
Español
Cómo conectar a un monitor VGA
1. Conecte el monitor VGA al
adaptador VGA-DVI.
2. Conecte el adaptador VGA-DVI al
TU2-DVIV.
Configure Display Settings
1. Haga clic derecho en el icono de la
herramienta.
2. Seleccione el parámetro que
desea modificar.
La instalación ha sido completada
Si desea más información sobre la configuración del TU2-DVIV y sus
configuraciones avanzadas, por favor consulte la Guía del usuario del
controlador y el CD-ROM de la Guía del usuario.
Registre su producto
Para asegurar los más altos niveles de servicio y apoyo al cliente, registre su producto
en línea en: www.trendnet.com/register
Gracias por elegir TRENDnet
5
Español
Troubleshooting
Q1: Can I connect or disconnect TU2-DVIV while the computer is on?
A1: Yes, you can connect or disconnect TU2-DVIV while the computer is on
because the USB interface is Plug-and-Play compliant and hot-pluggable.
Q2: Windows is unable to recognize my hardware. What should I do?
A2: First, make sure your computer meets the minimum requirements as specified
in Section 1 of this Quick Installation Guide. Second, try plugging the adapter into
a different USB port.
If you still encounter problems or have any questions regarding the TU2-DVIV, please
refer to the User's Guide included on the Driver CD-ROM or contact TRENDnet's
Technical Support Department.
6
Certifications
This equipment has been tested and found to comply with FCC and CE Rules.
Operation is subject to the following two conditions:
(1) This device may not cause harmful interference.
(2) This device must accept any interference received. Including interference that may
cause undesired operation.
Waste electrical and electronic products must not
be disposed of with household waste. Please
recycle where facilities exist. Check with you Local
Authority or Retailer for recycling advice.
NOTE: THE MANUFACTURER IS NOT RESPONSIBLE FOR ANY RADIO OR TV
INTERFERENCE CAUSED BY UNAUTHORIZED MODIFICATIONS TO THIS
EQUIPMENT. SUCH MODIFICATIONS COULD VOID THE USER’S AUTHORITY TO
OPERATE THE EQUIPMENT.
ADVERTENCIA
En todos nuestros equipos se mencionan claramente las caracteristicas del adaptador de alimentacón
necesario para su funcionamiento. El uso de un adaptador distinto al mencionado puede producir
daños fisicos y/o daños al equipo conectado. El adaptador de alimentación debe operar con voltaje y
frecuencia de la energia electrica domiciliaria existente en el pais o zona de instalación.
Product Warranty Registration
Please take a moment to register your product online.
Go to TRENDnet’s website at http://www.trendnet.com/register
20675 Manhattan Place
Torrance, CA 90501
USA
Copyright ©2008. All Rights Reserved. TRENDnet.