1
Quick Installation Guide
TU-S9
H/W: V1
Table
of Contents
Table
of Contents
Español ...................................................................................................... 1
1. Antes de iniciar .................................................................................. 1
2. Cómo seinstala .................................................................................... 2
Troubleshooting ......................................................................................... 7
Version 02.18.2009
1. Antes de iniciar
Contenidos del paquete
?
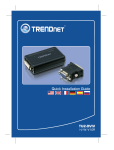
TU-S9
?
CD-ROM del controlador
?
Guía de instalación rápida
multilingüe
Requisitos del sistema
?
Unidad de CD-ROM
?
PC con un puerto USB 1.1 ó 2.0 disponible
?
CPU: 300MHz o superior / 800MHz o superior
[ Windows Vista / Mac OS X (10.1~10.5) ]
?
Memoria: 256MB RAM o superior / 512MB RAM o superior
(Windows Vista)
?
Windows Vista/2003 Server/XP/2000/ME/98SE/Mac OS X (10.1~10.5)
?
Dispositivo RS-232 (Ej. módem)
?
Cable serie RS-232 de macho a hembra (Opcional)
Aplicación
USB to Serial
Converter
(TU-S9)
Serial Modem
Notebook
USB
Serial
1
Español
2. Cómo se instala
Nota: No conecte el adaptador USB TU-S9 hasta que no se le indique.
Windows 98SE/ME/2000/XP/2003 Server/Vista
1. Encienda su PC y espere hasta
que le aparezca el escritorio de
Windows.
2. Inserte el CD-ROM del
controlador en su unidad de
CD-ROM.
3. Haga clic en Run Autorun.exe
(sólo para Windows Vista).
4. Haga clic en Install Driver
(Instalar controlador).
5. Haga clic en Next (Siguiente).
2
Español
6. Haga clic en Finish (Finalizar).
7. Conecte el adaptador a un puerto
USB disponible de su PC.
8. Los controladores se instalarán de
manera automática.
9. Conecte el adaptador a un puerto
USB disponible de su PC.
Mac OS X (10.1 ~ 10.5)
1. Encienda su PC y espere hasta
que le aparezca el escritorio de
Windows.
2. Inserte el CD-ROM del
controlador en su unidad de
CD-ROM.
3. Haga doble clic en el icono de
TU-S9 CD-ROM del escritorio.
3
Español
4. Haga doble clic en la Mac.
PL2303_1.2.1r2.dmg
5. Haga doble clic en el icono
PL2303_1.2.1r2.dmg.
PL2303_1.2.1
6. Haga doble clic en el icono
PL2303_1.2.1.
7. Haga clic en Continue (Continuar).
8. Seleccione
Select a destination
una destinación
and theny click
luego
Continue.
haga
clic en Continue (Continuar).
4
Español
9. Haga clic en Install (Instalar).
10. Cuando aparece la pantalla
Authenticate (Autenticación),
introduzca el Nombre y la
Contraseña en su PC y luego
haga clic en OK.
11. Haga clic en Continue
Installation (Continuar con la
instalación).
12. Haga clic en Restart (Reiniciar).
5
Español
English
13. Conecte el adaptador a un puerto
USB disponible de su PC.
14. Conecte el dispositivo serie al
TU-S9.
La instalación ha sido completada
Para más información sobre la configuración del TU-S9, por favor consulte la
Guía del Usuario que se incluye en el CD-ROM del controlador o en el sitio
Web de TRENDnet en www.trendnet.com
Registre su producto
Para asegurar los más altos niveles de servicio y apoyo al cliente, registre su producto
en línea en: www.TRENDnet.com/register
Gracias por elegir TRENDnet
6
Español
Troubleshooting
Q1: The autorun window does not appear on my Windows PC after I put
in the Driver CD-ROM. What should I do?
A1: Go to Start -> Run, type in E:\autorun.exe and then click OK.
E:\represents the drive letter that is assigned to your CD-ROM drive.
Q2: My computer is unable to recognize my hardware. What should I do?
A2: First, make sure your computer meets the minimum requirements as
specified in Section 1 of this Quick Installation Guide. Second, try
plugging the TU-S9 into a different USB port on your computer.
Q3: Can I use the TU-S9 with my serial keyboard, mouse, or joystick?
A3: The TU-S9 does not support interrupt transfer mode devices. If your
serial keyboard, mouse, or joystick is an HID Device, it is not supported.
Q4: Can I connect or disconnect the USB cables while the computer is
on?
A4: Yes, you can connect or disconnect the USB cable while the
computer is on, because the USB interface is Plug-and-Play and hotpluggable.
Q5: I am installing the TU-S9 on my Mac OS X but I don't remember my
password. What should I do?
A5: If you don't remember your password, you will not be able to install
the TU-S9. An authentication error will appear if you try to continue with
the installation. Go to the following Web page for steps on resetting your
password: http://support.apple.com/kb/HT1274.
If you still encounter problems or have any questions regarding the TU-S9 USB
to Serial Converter, please contact TRENDnet's Technical Support
Department.
7
Troubleshooting
Certifications
This equipment has been tested and found to comply with FCC and CE Rules.
Operation is subject to the following two conditions:
(1) This device may not cause harmful interference.
(2) This device must accept any interference received. Including interference that may
cause undesired operation.
Waste electrical and electronic products must not
be disposed of with household waste. Please
recycle where facilities exist. Check with you Local
Authority or Retailer for recycling advice.
NOTE: THE MANUFACTURER IS NOT RESPONSIBLE FOR ANY RADIO OR TV
INTERFERENCE CAUSED BY UNAUTHORIZED MODIFICATIONS TO THIS
EQUIPMENT. SUCH MODIFICATIONS COULD VOID THE USER’S AUTHORITY TO
OPERATE THE EQUIPMENT.
ADVERTENCIA
En todos nuestros equipos se mencionan claramente las caracteristicas del adaptador de alimentacón
necesario para su funcionamiento. El uso de un adaptador distinto al mencionado puede producir
daños fisicos y/o daños al equipo conectado. El adaptador de alimentación debe operar con voltaje y
frecuencia de la energia electrica domiciliaria existente en el pais o zona de instalación.
Product Warranty Registration
Please take a moment to register your product online.
Go to TRENDnet’s website at http://www.trendnet.com/register
20675 Manhattan Place
Torrance, CA 90501
USA
Copyright ©2009. All Rights Reserved. TRENDnet.