Download Manual

Transcript
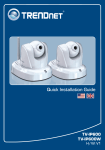
Quick Installation Guide
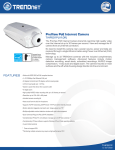
TV-IP501P
TV-IP501W
1.01
TableofofContents
Contents
Table
Español ...................................................................................................... 1
1. Antes de iniciar ................................................................................... 1
2. Inslatación y configuración del Hardware ........................................... 3
3. Instalación Power over Ethernet (PoE) (sólo paraTV-IP501P) ............ 10
Troubleshooting ......................................................................................... 12
Version 07.01.2009
1. Antes de iniciar
Contenidos del paquete
TV-IPIP501P/TV-IP501W
?
CD-ROM (herramienta y guía del
?
usuario)
?
Guía de instalación rápida
multilingüe
?
Cable Ethernet Cat.
(3mts/ 9.8pies)
Adaptador de corriente (5V, 2.5A)
?
?
Kit para montaje de la cámara
Requisitos del sistema
?
Adaptador Ethernet a 10/100Mbps
?
Unidad de CD-ROM
?
CPU: 2GHz processor o superior
?
Memoria: 256MB RAM o superior/ 512MB RAM o superior
(Windows Vista)
?
Windows XP/Vista
?
Resolución VGA: 800 x 600 o superior
?
Web Brower: Internet Explorer (6.0 o superior)
?
Enrutador inalámbrico o punto de acceso inalámbrico (TV-IP501W)
?
Un servidor DHCP disponible, los enrutadores tienen por lo general un
servidor DHCP integrado
Conmutador PoE (Ej. TPE-80WS) (Opcional) (sólo para TV-IP501P)
?
?
Inyector (Ej. TPE-111GI) (Opcional) (sólo para TV-IP501P)
1
Español
Aplicación
ProView Internet Camera
(TV-IP501P)
Power + Data (PoE)
Power + Data (PoE)
24-Port 10/100Mbps Web Smart PoE switch
with 4 Gigabit Ports and 2 Mini-GBIC Slots
(TPE-224WS)
Internet
300Mbps Wireless N
ADSL2/2+ Modem Router
(TEW-635BRM)
ProView Wireless Internet Camera
(TV-IP501W)
ProView Wireless Internet Camera
(TV-IP501W)
ProView Wireless Internet Camera
(TV-IP501W)
Internet
300Mbps Wireless N
ADSL2/2+ Modem Router
(TEW-635BRM)
24-Port 10/100Mbps Web Smart PoE switch
with 4 Gigabit Ports and 2 Mini-GBIC Slots
(TPE-224WS)
Power + Data (PoE)
Power + Data (PoE)
ProView Internet Camera
(TV-IP501P)
ProView Internet Camera
(TV-IP501P)
2
Español
2. Inslatación y configuración del Hardware
Nota:
1. Se recomienda configurar la cámara IP desde un PC por cable.
2. Si desea usar el software IPViewPro 2.0, instale el software mediante un clic
en Install IPView Pro 2.0 (Instalar IPView Pro 2.0) en la ventana Autorun
(Ejecución automática) y consulte la guía del usuario en el CD para más
información.
1. Introduzca el CD-ROM de la
herramienta en la unidad de
CD-ROM
2. Haga clic en Run setup.exe
(sólo para Windows Vista)
3. Haga clic en Setup Winzard.
(Asistente de instalación).
4. Haga clic en Next (Siguiente).
Siga las instrucciones del Setup
Wizard (Asistente de instalación).
3
Español
5. Haga clic en Close(Cerrar).
6. Haga doble clic en el icono de su
escritorio SetupWizard (Asistente
de instalación).
7. Conecte un cable de red RJ-45 del
conmutador/enrutador al puerto
Ethernet de la Cámara IP.
8. Conecte el adaptador eléctrico de
AC al Servidor de cámara de
Internet después a una toma de
corriente.
9. Haga clic en Next (Siguiente).
10. Seleccione la cámara IP y luego
haga clic en Next (Siguiente).
4
Español
11. Introduzca su nombre de usuario
y contraseña. Luego, haga clic
en Next (Siguiente). Por defecto:
Nombre de usuario: admin
Contraseña: admin
12. Configure el Camera Name
(Nombre de la cámara) y el
Camera Time (Tiempo de la
cámara)
13. Si desea cambiar la contraseña
del administrador, haga clic en
Change Password (Cambiar
contraseña), introduzca la nueva
contraseña, vuelva a escribir la
nueva contraseña y luego haga
clic en Next (Siguiente).
14. Seleccione DHCP y luego haga
clic en Next (Siguiente)
Nota: Si tiene el TV-IP501P, pase al paso 17. Si tiene el TV-IP501W, pase al
paso 15.
5
Español
15. Haga clic en I want to use
wireless for the camera (Deseo
usar la conexión inalámbrica para
la cámara) y luego haga clic en
Next (Siguiente).
16. Seleccione su conexión
inalámbrica de la lista
desplegable. Las opciones de
configuración inalámbrica
correspondientes se configurarán
de forma automática. Si tiene
habilitada una encriptación,
introduzca su Clave de
encriptación y luego haga clic en
Next (Siguiente).
17. Haga clic en Next (Siguiente).
18. Espere mientras se guardan las
configuraciones de su cámara.
Nota: Si tiene el TV-IP501P, pase al paso 22. Si tiene el TV-IP501W, pase al
paso 19.
6
Español
19. Seleccione By Using Wireless
(Usar modo inalámbrico) y luego
haga clic en Next (Siguiente)
20. Desconecte el cable RJ-45
Espere un minuto y luego haga
clic en Next (Siguiente).
Nota: El TV-IP501W no funcionará de manera inalámbrica a menos que
desconecte el cable Ethernet de la parte trasera de la cámara.
21. Espere un minuto mientras
conecte la TV-IP501W a su
enrutador inalámbrico o punto de
acceso.
22. Haga clic en la siguiente URL o
enlace para abrir la configuración
del navegador.
7
Español
23. Introduzca el nombre de usuario y
a contraseña, después haga clic
en OK. Por defecto:
Nombre de usuario: admin
Contraseña: admin
24. Haga clic en View Video |
ActiveX o View Video | Java
(Ver video | ActiveX o ver video |
Java).
25. Si hace clic en View Video |
Active X (Ver Video| Active X),
haga clic derecho en la barra de
información de Internet Explorer,
luego seleccione Install ActiveX
Control (Instalar control ActiveX)
26. Haga clic en Install (instalar).
8
Español
27. Le aparecerá el video en tiempo
real.
La instalación ha sido completada
Nota: Para obtener información más detallada sobre la configuración y las
opciones de configuración avanzadas de la TV-IP501P/TV-IP501W, por favor
consulte la sección de resolución de problemas en el CD-ROM de la Guía del
Usuario, o el sitio Web de Trendnet en http://www.trendnet.com.
Registre su producto
Para asegurar los más altos niveles de servicio y apoyo al cliente, registre su producto
en línea en: www.trendnet.com/register
Gracias por elegir TRENDnet
9
Español
3. Instalación Power over Ethernet (PoE) (sólo paraTV-IP501P)
Uso del TV-IP501P con un conmutador PoE
1. Conecte un cable de red RJ-45 del
conmutador PoE (Ej. TPE-80WS)
al puerto LAN del servidor de
cámara de Internet.
2. Compruebe que los LEDs estén
encendidos. Consulte el paso 4 en
la sección de instalación del
Hardware.
10
Español
Uso del TV-IP501P con un Inyector (TPE-111GI)
1. Conecte el cable de alimentación
al inyector. Luego, conecte el
cable de alimentación a una toma
de corriente.
2. Conecte un cable CAT-5e/6 del
conmutador al puerto DATA IN del
TPE-111GI.
3. Conecte un cable CAT-5e/6 del
TV-IP501P al puerto DATA OUT
del TPE-111GI.
4. Compruebe que los LEDs estén
encendidos.
11
Español
Troubleshooting
Q1: SetupWizard is unable to detect my camera. What should I do?
A1: First, verify that you have followed all the steps in the Section 2: Hardware Installation
and Configuration. Second, disable any software firewall programs such as ZoneAlarm or
Norton Internet Security. If you are using Windows XP or Windows Vista, disable the built in
firewall. Third, click on Rescan in the SetupWizard.
Q2: I do not have a DHCP server or DHCP is disabled on my network and I am unable to
configure the TV-IP501P/TV-IP501W. What should I do?
A2: First, go to the TCP/IP settings on your computer and assign a static IP address on your
computer's network adapter in the subnet of 192.168.10.x. Since the default IP address of
the TV-IP501P/TV-IP501W is 192.168.10.30, do not assign a static IP address of
192.168.10.30 on your computer's network adapter. Second, open Internet Explorer and
enter http://192.168.10.30 into the address bar. See the instructions below:
Windows Vista
1. Go into the Control Panel, click Network and
Internet, click Network and Sharing Center, click
Manage Network Connections and then right-click
the Local Area Connection icon and then click
Properties.
2. Click Internet Protocol Version 4(TCP/IPv4)
and then click Properties. Then click on
Use the following IP address, and make
sure you assign your network adapter an IP
address in the subnet of 192.168.10.x.
Windows XP/ 2000
1. Go into the Control Panel, double-click the Network
Connections icon and then right-click the Local Area
Connection icon and then click Properties.
12
2. Click Internet Protocol (TCP/IP) and then
click Properties. Then click on Use the
following IP address, and make sure you
assign your network adapter an IP address in
the subnet of 192.168.10.x.
Q3: The Image is blurry. How can I adjust the focus on the IP Camera?
A3: You can adjust the IP Camera's focus by rotating the lens.
Q4: When I click on View Image | ActiveX mode or View Image | Java Mode, the image does
not load. What should I do?
A4: First, make sure that you are using a browser that supports ActiveX or Java. Second,
make sure that ActiveX or Java is installed and enabled.
Q5: How do I connect the TV-IP501W to my wireless router or access point?
A5: Make sure that you configure the camera to have the same SSID, encryption mode and
key (if enabled). Follow the instructions in section 2: Hardware Installation and
Configuration to configure the camera with the SSID and encryption key.
Q6: After I successfully configured the TV-IP501W to match my wireless network settings, I
can not connect to the camera.
A6: First, verify that the wireless settings match your wireless network settings. Second,
make sure to disconnect the Ethernet cable from the camera and verify that the LNK LED is
blinking red.
Q7: I forgot my password. What should I do?
A7: Take a pin or paperclip and press the reset button on the back of the unit for 15 seconds.
This will return settings back to factory defaults. Open up the SetupWizard program to find
out the IP address of the camera (see step 11 in Section 2: Configure the IP Camera. If
you do not have a DHCP server on your network, the default IP address is 192.168.10.30.
The default administrator ID and password is admin.
If you still encounter problems or have any questions regarding the TV-IP501P/TV-IP501W, please
contact TRENDnet's Technical Support Department.
13
Certifications
This equipment has been tested and found to comply with FCC and CE Rules.
Operation is subject to the following two conditions:
(1) This device may not cause harmful interference.
(2) This device must accept any interference received. Including interference that may
cause undesired operation.
Waste electrical and electronic products must not
be disposed of with household waste. Please
recycle where facilities exist. Check with you Local
Authority or Retailer for recycling advice.
NOTE: THE MANUFACTURER IS NOT RESPONSIBLE FOR ANY RADIO OR TV
INTERFERENCE CAUSED BY UNAUTHORIZED MODIFICATIONS TO THIS
EQUIPMENT. SUCH MODIFICATIONS COULD VOID THE USER’S AUTHORITY TO
OPERATE THE EQUIPMENT.
ADVERTENCIA
En todos nuestros equipos se mencionan claramente las caracteristicas del adaptador de
alimentacón necesario para su funcionamiento. El uso de un adaptador distinto al
mencionado puede producir daños fisicos y/o daños al equipo conectado. El adaptador
de alimentación debe operar con voltaje y frecuencia de la energia electrica domiciliaria
existente en el pais o zona de instalación.
Product Warranty Registration
Please take a moment to register your product online.
Go to TRENDnet’s website at http://www.trendnet.com/register
20675 Manhattan Place
Torrance, CA 90501
USA
Copyright ©2009. All Rights Reserved. TRENDnet.