1
July 12, 2006
Version: 1.0
Scale: 100%
5 Color Print
Nokia 2610
Quick Start Guide
Color Proof
CMYK + PMS 293
Guía Rápida
Quick Start Guide
¡El teléfono Nokia 2610 te da la
bienvenida!
Welcome to the Nokia 2610 phone!
Usa esta guía para:
Use this guide to:
• Review parts of the phone
• Conocer las partes del teléfono
• Install the SIM card and battery
• Instalar la tarjeta SIM y la batería
• Navigate the Mobile Web
• Navegar la red móvil
• Use the calendar
• Usar la agenda
• Explore support options
• Explorar las opciones de soporte
See the complete User Guide for more information and for important safety and maintenance
information. Do not use this document in place of the complete User Guide.
Dirígete a la Guía del Usuario completa para más detalles e información importante de
seguridad y mantenimiento.
No use este documento en sustitución de la Guía del usuario completa.
9251780. Printed in USA. All screen images are simulated.
9251780. Impreso en EUA. Todas las imágenes de pantallas son simuladas.
fold here
fold here
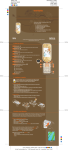
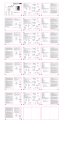
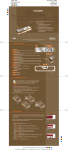
1 VISTO DE CERCA
1 CHECK IT OUT
Tómate un momento para que te familiarices con el teléfono Nokia 2610.
Take a moment to get acquainted with the Nokia 2610 phone.
1. Display
128 x 128 pixels that vividly displays up to 65,144k colors.
1. Pantalla
128 x 128 píxeles que muestran vivamente 65.144 colores.
2. Headset jack
2.5 mm jack compatible with headset, headphones and external speakers.
2. Toma para equipo auricular
Puerto de conexión de 2.5 mm. compatible con un equipo auricular,
audífonos y altavoces externos.
3. Left and right selection keys
Press to activate the menu option shown above the key.
3. Teclas de selección izquierda y derecha
Púlsala para activar la opción del menú que aparece sobre la tecla.
1
4. Send key
Press to call the displayed number or contact.
5. End and power key
Press to end or decline a call. Press and hold to turn the phone on/off.
Press from any screen to return to the idle screen.
3
6. Navigation key
From the idle screen, use the five way scroll key to access these shortcuts:
4
6
5
Press the center to access the Menu
Press up to access Applications
Press right to access Calendar
Press down to access Phonebook
Press left to write a Text Message
TIP!
Press Menu followed by the * to lock the keys. Press
and hold the # key to activate the Silent profile.
1
4. Tecla llamar
Púlsala para realizar una llamada al número telefónico o contacto
que aparece en pantalla.
5. Tecla de encendido y finalizar
Púlsala para terminar o rechazar una llamada. Mantenla pulsada para
encender/apagar el teléfono.
Púlsala desde cualquier pantalla para volver a la pantalla en reposo.
2
4
6
5
6. Tecla de navegación
Desde la pantalla en reposo, usa la tecla de desplazamiento para acceder a los
siguientes atajos:
Pulsa el centro para acceso al Menú
Pulsa hacia arriba para acceso a las Aplicaciones
Pulsa hacia la derecha para acceso a la Agenda
Pulsa hacia abajo para acceso al Directorio telefónico
Pulsa hacia la izquierda para escribir un Mensaje de texto
¡DATO!
Pulsa Menú seguido de * para bloquear el teclado.
Mantén pulsada la tecla # para activar el perfil Silencio.
(on bottom)
3
(en lado inferior)
2
fold here
fold here
2 INSERTA LA TARJETA SIM Y LA BATERÍA
2 INSERT THE SIM CARD AND BATTERY
Your Nokia 2610 phone uses a convenient SIM card, which holds information about
your wireless services and stores contact information. That means you can transfer
your service and contacts to your phone simply by inserting your SIM card!
fig. 2.1
Insert the SIM card
1. With the back of the phone facing you, push down and slide the cover off in the
direction shown (fig. 2.1).
2. Open the SIM card holder by pressing the release button and lifting the holder
up (fig. 2.2).
3. Insert the SIM card with the gold-colored contact area facing down and the
beveled edge pointing towards the top of the phone (fig. 2.3).
4. Close the SIM card holder.
Tu teléfono Nokia 2610 usa una conveniente tarjeta SIM que guarda información
acerca de su servicio inalámbrico, así como también, información de contactos. Esto
significa que puedes transferir tu servicio y contactos a tu teléfono con tan sólo
insertar tu tarjeta SIM.
Inserta la tarjeta SIM
fig. 2.2
1. Con el lado posterior del teléfono frente a ti, empuja suavemente y desliza la
cubierta para retirarla como se demuestra (fig. 2.1).
2. Abre el sujetador de la tarjeta SIM pulsando el botón que lo libera y
levantando el sujetador (fig. 2.2).
3. Inserta la tarjeta SIM con el área de contactos dorados hacia abajo y la esquina
biselada apuntando hacia la parte superior del teléfono (fig. 2.3).
4. Cierra el sujetador de la tarjeta SIM.
TIP!
fig. 2.2
¡DATO!
Save information to your SIM card to fully utilize the
available memory of your Nokia 2610 phone.
Insert and charge the battery
fig. 2.1
Guarda información en tu tarjeta SIM para sacar mejor
provecho de la memoria de tu teléfono Nokia 2610.
fig. 2.3
fig. 2.3
Inserta y carga la batería
1. Align the gold-colored contacts of the battery with the battery compartment
contacts and press the battery into place (fig. 2.4).
2. Replace the back cover by aligning the tabs and sliding the cover until it locks
into place.
3. Plug the Nokia AC-2 charger into a standard AC wall outlet.
4. Connect the charger cable to the bottom of the Nokia 2610 phone.
fig. 2.4
CMYK + PMS 293
MLink Technologies, Inc. / 550 Edmonds, Suite 204 / Lewisville, Texas 75067
1. Alinea los contactos dorados de la batería con los contactos de la misma en el
teléfono y empújala suavemente asegurándola en su sitio (fig. 2.4).
2. Coloca de nuevo la cubierta posterior alineando las guías y deslizando la
cubierta hasta que calce en su sitio.
3. Conecta el cargador Nokia AC-2 en un enchufe estándar AC de pared.
4. Conecta el cable del cargador en la toma ubicada en la parte inferior del
teléfono Nokia 2610.
fig. 2.4
July 12, 2006
Version: 1.0
Scale: 100%
5 Color Print
Nokia 2610
Quick Start Guide
Color Proof
CMYK + PMS 293
July 12, 2006
Version: 1.0
Scale: 100%
5 Color Print
Nokia 2610
Quick Start Guide
Color Proof
CMYK + PMS 293
3 EXPLORA LA RED INTERNET
3 BROWSE THE INTERNET
The WAP 2.0 browser allows you easy access to the Mobile Web. The Nokia 2610 phone gives you access to all
the latest news and information. Plus, you can download tones, pictures and themes.
El navegador WAP 2.0 te permite acceder fácilmente la Red Móvil. El teléfono Nokia 2610 te brinda acceso
a las noticias e información más reciente. Además, puedes descargar timbrados, imágenes y temas.
Download settings
Descarga configuraciones
1. Go to www.nokiausa.com/support/settings on your computer.
2. Click Get standard settings (fig. 3.1).
3. Follow the prompts to accept the terms and learn about
receiving your phone’s settings.
4. Select Nokia 2610 from the drop down list of phone models,
then select Next.
5. Select your service provider from the drop down list, then
click Next.
6. After entering the numbers in the security measure field,
enter your ten-digit phone number. Then select Order
Settings to receive a text message with the settings.
1. Ve a www.nokiausa.com/support/settings desde tu
computador.
2. Haz clic en Obtener configuraciones estándar (fig. 3.1).
3. Sigue las instrucciones para aceptar los términos y aprender
cómo recibir las configuraciones de tu teléfono.
4. Selecciona Nokia 2610 en la lista descendente de modelos de
teléfonos, luego selecciona Seguir.
5. Selecciona tu proveedor de servicio en la lista descendente,
luego haz clic en Seguir.
6. Luego de ingresar los números en el campo de medidas de
seguridad, ingresa los diez dígitos de tu número telefónico.
Luego selecciona Solicitar configuraciones para recibir un
mensaje de texto con las configuraciones.
fig. 3.1
Navigate the Internet
1.
2.
3.
4.
Paso 1: Obtener config. estándar
fig. 3.1
Navega la red Internet
From the idle screen, press Menu. (
)
Scroll to and select Web (fig. 3.2). (
)(
)
Scroll to and select Go to address. (
)(
)
Use the keypad to enter www.nokiausa.com or your
favorite web site (fig. 3.3).
1.
2.
3.
4.
fig. 3.2
Desde la pantalla en reposo, pulsa Menú. (
)
Recorre hasta y selecciona Web (fig. 3.2). (
)(
)
Recorre hasta y selecciona Ir a dirección. (
)(
)
Usa el teclado para ingresar www.nokiausa.com o tu sitio
Web favorito (fig. 3.3).
fig. 3.2
fig. 3.3
fig. 3.3
fold here
fold here
4 PROGRAMA UN EVENTO
4 SCHEDULE AN EVENT
Keep your life moving with the Nokia 2610 phone. It’s easy to keep your active lifestyle organized with
the calendar function. Never miss another meeting, important event or birthday again.
Schedule an event
1. From the idle screen, press the right scroll key. (
)
The current calendar month displays.
2. Scroll to the desired date and select View (fig. 4.1). (
)(
3. Select Add note. (
)
4. Scroll to and select Reminder. (
)(
)
5. Use the keypad to enter a subject and press Next (fig. 4.2). (
6. Enter a date and press Next. (
)
7. Scroll to Alarm and confirm the alarm is on. (
)
8. Scroll to Alarm time and enter a time. (
)
9. Select Options. (
)
10. Select am or pm (fig. 4.3). (
)(
)
11. Scroll to Repeat and select Change. (
)(
)
)(
)
12. Scroll to and select Every week (fig. 4.4). (
13. Scroll to and select Save. (
)(
)
Mantén tu vida en movimiento con el teléfono Nokia 2610. Es fácil mantener tu activo estilo de vida
organizado con la función de la agenda. No olvides ninguna otra reunión, evento importante o
cumpleaños.
Programa un evento
)
)
fig. 4.1
fig. 4.2
fig. 4.3
1. Desde la pantalla en reposo,
pulsa la tecla de desplazamiento a la derecha. (
)
Aparece en pantalla el mes en curso del calendario.
2. Recorre hasta la fecha deseada
y selecciona Ver (fig. 4.1). (
)(
)
3. Selecciona Agregar nota. (
)
4. Recorre hasta y selecciona Recordatorio. (
)(
)
5. Usa el teclado para ingresar el asunto
y pulsa Seguir (fig. 4.2). (
)
6. Ingresa una fecha y pulsa Seguir. (
)
7. Recorre hasta Alarma y confirma que la alarma
esté encendida. (
)
)
8. Recorre hasta Hora de la alarma e ingresa una hora. (
9. Selecciona Opciones. (
)
10. Seleccione am o pm (fig. 4.3). (
)(
)
11. Recorre hasta Repetir y selecciona Cambiar. (
)(
)
12. Recorre hasta y selecciona Cada semana (fig. 4.4). (
)(
13. Recorre hasta y selecciona Guardar. (
)(
)
fig. 4.1
fig. 4.2
)
fig. 4.3
fig. 4.4
fig. 4.4
fold here
fold here
5 EXPLORE SUPPORT OPTIONS
5 EXPLORA TUS OPCIONES DE SOPORTE
Nokia offers a variety of support options to help you learn more about your Nokia 2610 phone.
Nokia ofrece una variedad de opciones de soporte para ayudarte a aprender más acerca de tu
teléfono Nokia 2610.
Nokia 2610 User Guide
Guía del Usuario Nokia 2610
The User Guide offers the most comprehensive details on how to use your new Nokia 2610 phone.
Nokia Support on the Web
Check www.nokiausa.com/support for the latest information and to help you get more from your
new product.
1-888-NOKIA-2U (1-888-665-4228)
Nokia provides toll free customer support, Monday – Friday from 8:00 a.m. to 12:00 a.m. EST and
Saturday – Sunday from 10:00 a.m. to 7:00 p.m. EST. Hours are subject to change.
La Guía del Usuario contiene la información más completa y detallada sobre el uso de tu nuevo
teléfono Nokia 2610.
Soporte Nokia en la Web
Visita www.nokiausa.com/support para obtener la información más reciente y ayudarte a sacar el
mejor provecho de tu nuevo producto.
1-888-NOKIA-2U (1-888-665-4228)
Service Provider
Nokia brinda atención al cliente telefónica gratuita, Lunes – Viernes desde las 8:00 a.m. a las 12:00
a.m. Hora del Este y Sábados – Domingos desde las 10:00 a.m. a las 7:00 p.m. Hora del Este. Horas
sujetas a cambio.
Contact your service provider for questions regarding your wireless services.
Proveedor de Servicio
Contacta tu proveedor de servicio para preguntas relacionadas con tu servicio celular.
TIP!
¡DATO!
Don’t forget to register your new product at www.nokiausa.com (click on Support >
Warranty, then Register Now) so we can better serve your needs if you call a
customer care center or need to have your phone repaired.
© 2006 Nokia. All rights reserved. Nokia and Nokia Connecting People are registered trademarks of Nokia Corporation.
Other product and company names may be trademarks or trade names of their respective owners. Wireless service is
required to use many features. Some networks have limitations that affect how you can use this device. Contact your
service provider about feature support and availability. Screen images are simulated. N4449
CMYK + PMS 293
MLink Technologies, Inc. / 550 Edmonds, Suite 204 / Lewisville, Texas 75067
No olvides registrar tu nuevo producto en www.nokiausa.com (haz clic en
Support > Warranty, luego en Register Now) para poder asistirte mejor en la
eventualidad de una llamada al centro de atención al cliente o si requirieras
mandar a reparar tu teléfono.
© 2006 Nokia. Todos los derechos reservados. Nokia y Nokia Connecting People son marcas comerciales registradas de
Nokia Corporation. Otros nombres de compañías y productos aquí mencionados pueden ser nombres o marcas comerciales
registradas de sus respectivos propietarios. Se requiere servicio inalámbrico para el uso de muchas funciones. Algunas
redes presentan limitaciones que afectan la forma en que puede usar las el dispositivo. Contacte su proveedor de servicio
en relación a la disponibilidad y soporte de las funciones. Las imágenes de pantallas son simuladas. N4449
CMYK + PMS 293
MLink Technologies, Inc. / 550 Edmonds, Suite 204 / Lewisville, Texas 75067