1
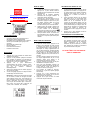
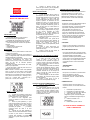
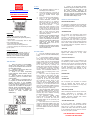
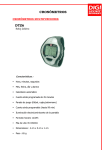
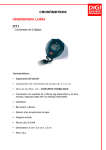
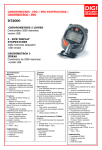
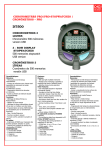
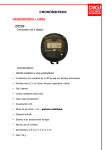
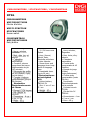
CHRONOMETRES / STOPWATCHES / CRONÓMETROS
DTZ6
CHRONOMETRES
MULTIFONCTIONS
Montre d’arbitre
MULTI-FUNCTION
STOPWATCHES
Soccer watch
CRONÓMETROS
MULTIFUNCIONES
Reloj árbitro
Caractéristiques:
secondes
alarme
automatique
Compte à rebours
programmé du temps
réglementaire de jeu
(45 minutes)
de jeu (football, rugby,
jeu de ballon)
programmable (jusqu’à
99 minutes)
Illumination
électroluminescente
de l’écran
CR2016
5 cm x 1 cm
Features:
12 / 24 hours user
option
Hour, Second,
Month, Date,
Weekday and alarm
Auto calendar
Soccer timer and
stoppage timer keep
track of stoppage
time
Presettable timer
(up to 99 min)
Electroluminesce
nt backlighted
LCD
Lithium battery
CR2016 3V
Size : 4 cm x 5 cm
x 1 cm
Características :
Hora, minutos,
segundos
Mes, fecha, día y
alarma
Calendario
automático
Cuenta atrás
programada de 45
minutos
Parada de juego
(fútbol,
rugby,balonmano)
Cuenta atrás
programable (hasta
99 min)
Iluminación
electroluminiscente
de la pantalla
Formato horario
12/24h
Pila de Litio 3V
CR2016
Dimensiones : 4 cm
x 5 cm x 1 cm
Peso : 65 g
MODE ALARME :
1.
www.digisportinternational.com
MODE D’EMPLOI
MONTRE ARBITRE DTZ6
2.
3.
4.
5.
CARACTERISTIQUES :
-
-
Compte à rebours de 45 minutes pour le
décompte du temps réglementaire
Possibilité de re-programmation du compte à
rebours pour d’autres sports (jusqu’à 99
minutes)
Décompte des arrêts de jeu
Heure et alarme
Ecran électroluminescent
Protection de la sueur.
2.
3.
4.
5.
Appuyer sur C pour accéder au mode heure
et alarme (voir figure).
Appuyer sur B pendant quelques secondes
pour accéder au réglage. Les secondes en
bas à droite de l’écran se mettent à clignoter.
Appuyer sur A pour les remettre à zéro.
Appuyer
sur
C
pour
sélectionner
successivement les heures, minutes, année,
mois, jour et le format 12 ou 24 heures. Le
jour
de
la
semaine
s’affichera
automatiquement.
Après avoir sélectionner les chiffres, appuyer
sur A pour les ajuster.
A la fin du réglage, appuyer sur B pour revenir
à l’affichage normal de l’heure.
Remarque : quand le format horaire est réglé
sur 12 heures, la date sur la ligne du milieu
sera indiquée comme suit : mois, date et jour
de la semaine. Tandis que sur le format 24
heures, l’affichage est comme suit : date,
mois et jour de la semaine (SU = dimanche ;
MO = lundi ; TU= mardi ; WE = mercredi ; TH
= jeudi ; FR = vendredi ; SA = samedi).
Lorsqu’elle est activée, le symbole
apparaît en haut à gauche de l’écran.
Lorsque l’alarme sonne, 30 séries de 2
bips retentissent et la lumière clignote,
appuyer sur n’importe quel bouton pour
l’arrêter.
MODE COMPTE A REBOURS :
1.
MODE HEURE :
1.
A partir de l’affichage normal de l’heure,
appuyer sur C pour afficher l’alarme.
Seules les lignes supérieure et centrale
apparaissent.
Appuyer sur B pendant quelques
secondes afin de régler l’alarme : le
chiffre des heures clignotent.
Appuyer sur A pour les régler et sur C
pour sélectionner les minutes, le mois
et la date. Appuyer toujours sur A pour
les ajuster. Quand la date ou le mois
n’est pas réglé (il reste - - - -), l’alarme
sonnera tous les jours à l’heure définie.
Quand l’heure est réglée, l’alarme est
automatiquement activée. Appuyer sur
A pour l’activer ou la désactiver.
2.
3.
4.
5.
6.
A partir du mode alarme, appuyer sur le
bouton C pour accéder au mode compte
à rebours (voir figure). Sur la ligne du
bas, apparaît l’heure ; la ligne centrale, le
décompte du temps réglementaire de
jeu ; la ligne supérieure, le décompte des
arrêts de jeu. Le décompte du temps de
jeu est réglé sur 45 minutes (peut être
modifié), appuyer sur B pour le lancer ou
l’arrêter.
Trente et quinze minutes avant que la fin
du temps réglementaire de jeu, un bip
retentira. Après avoir atteint 0, le
chronomètre se mettra en marche.
Appuyer quelques secondes sur B pour
réinitialiser le compte à rebours.
Alors qu’il est réinitialisé, appuyer de
nouveau quelques secondes sur B pour
entrer dans le mode de réglage du
compte à rebours (voir figure).
Les minutes se mettent à clignoter,
appuyer sur A pour les ajuster (jusqu’à
99 minutes).
Appuyer sur C pour sélectionner les
secondes et de nouveau sur A pour les
régler (jusqu’à 59 secondes).
Appuyer sur B pour revenir au mode
normal du compte à rebours.
DECOMPTE DES ARRÊTS DE JEU :
1.
2.
3.
Le décompte des arrêts de jeu se fait en
appuyant sur le bouton A, ré appuyer sur
ce même bouton pour l’arrêter. Quand le
décompte des arrêts de jeu est en
marche, les 4 chiffres se mettent à
clignoter.
Trente secondes avant la fin du temps
des arrêts de jeu, le chronomètre fera
retentir 15 séries de 4 bips courts pour
alerter de la fin imminente du jeu.
Lorsque le chronomètre atteint la fin du
temps d’arrêts de jeu, 10 séries de 3 bips
courts retentissent pour indiquer la fin du
temps de jeu. Appuyer sur n’importe quel
bouton pour arrêter la sonnerie. Le
chronomètre continu, appuyer sur B pour
l’arrêter.
Appuyer sur A pour remettre à zéro le
décompte des arrêts de jeu.
AFFICHAGE ELECTROLUMINESCENT :
Appuyer sur D pour éclairer l’affichage.
Cet appareil fonctionne avec une pile
CR2016. Pour changer la pile, enlever la
partie postérieure de la montre,
remplacer la pile et refermer, en faisant
bien attention de remettre correctement
le joint d’étanchéité à sa place.
LA PILE N’EST PAS COUVERTE
PAR LA GARANTIE.
5.
Cuando la alarma resona, dos
series de bips resonan y la luz parpadea,
pulsar cualquier botón para pararla.
MODO CUENTA ATRÁS:
www.digisportinternational.com
MODO DE EMPLEO DTZ6
CARACTERÍSTICAS:
- Cuenta atrás desde 45 minutos para el
descuento del tiempo reglamentario
- Posibilidad de reprogramación de la cuenta
atrás para otros deportes (hasta 99 minutos)
- Cronometraje para la cuenta de las paradas
de juego
- Hora y alarma
- Pantalla electro luminiscente
- Protección del sudor.
MODO HORA:
1.
A partir del modo alarma, pulsar C
para alcanzar el modo cuenta atrás. En la
línea de abajo aparece la hora; en la línea
central, aparece la cuenta atrás del
tiempo reglamentario de juego; en la línea
superior, aparece el descuento de las
paradas de juego. La cuenta atrás del
tiempo de juego está ajustada sobre 45
minutos (se puede modificarla), pulsar el
botón B para poner la cuenta atrás en
marcha o pararla.
2.
Treinta y quince minutos antes del
final del tiempo reglamentario de juego,
un bip resona. Después de haber
alcanzado 0, la cuenta adelante se
pondrá en marcha, es decir el tiempo de
las paradas de juego empezará.
3.
Pulsar unos segundos B para poner
la cuenta atrás a cero.
4.
Cuando está a cero, pulsar B de
nuevo unos segundos para alcanzar el
modo de ajusto de la cuenta atrás. (ver la
figura). Los minutos se ponen a
parpadear, pulsar A para ajustarlos (hasta
99 minutos).
5.
Pulsar C para seleccionar los
segundos y de nuevo A para ajustarlos
(hasta 59 minutos).
6.
Pulsar el botón B para volver al
modo normal de la cuenta atrás.
o Pulsar el botón C para alcanzar el modo hora
y alarma (ver la figura).
o Pulsar B algunos segundos para ajustar la
hora. Los segundos abajo a la derecha sobre la DESCUENTO DE LAS PARADAS DE JUEGO:
pantalla empiezan a parpadear.
1. A partir del modo cuenta atrás,
o Pulsar A para ponerlos a cero. Pulsar C para
pulsar el botón A para poner el
seleccionar sucesivamente las horas, los
descuento de las paradas de juego en
minutos, el año, el mes, el día y el formato 12/24
marcha y pulsar A de nuevo para páralo.
horas. El día de la semana aparece
Cuando el descuento está en marcha,
automáticamente.
las cifras parpadean.
o Después de haber seleccionado las cifras,
2. Treinta segundos antes del final del
pulsar A para ajustarlas.
tiempo de las paradas de juego, 4 series
o Al final del ajusto, pulsar B para volver a la
de 15 bips resonarán para señalar el fin
pantalla normal de la hora.
inminente del juego. Cuando la cuenta
Nota: cuando el formato horario está ajustado
adelante alcanza el fin del tiempo de
sobre 12 horas, la fecha sobre la línea media
juego, 10 series de 3 bips resonan para
será indicada: mes, fecha y día de la semana.
indicar el fin del juego.
Mientras que en el formato 24 horas, será fecha,
3. Pulsar cualquier uno de los botones
mes y día de la semana (SU = domingo; MO =
para pararlo. El cronómetro sigue, pulsar
lunes; TU = martes; WE = miércoles; TH =
B para detenerlo.
4. Pulsar A para poner a cero el
jueves; FR = viernes; SA = sábado)
descuento de las paradas de juego.
CUIDADO POR SU CRONOMETRO
“RESISTENCIA AL AGUA”
El cronómetro esta elaborado para resistir al
contacto accidental con el agua, como
salpicaduras o gotas de lluvia, pero no es
elaborado para utilizarse en el agua. No
pulsar las teclas cuando están húmedas.
“TEMPERATURAS”
No dejar el cronómetro directamente bajo la
luz del sol o con temperaturas muy
importantes durante un tiempo demasiado
importante, la pantalla puede volverse
negra. No dejar el cronómetro con
temperaturas muy bajas porque puede
provocar un desarreglo de la mesura del
tiempo y el cambio de las cifras se vuelve
lento. En estos dos casos las condiciones
más arriba serán corregidas cuando el
cronómetro volverá a temperaturas
normales.
“CHOQUES”
Peligro no hacer derribar el cronómetro o
pegarlo porque puede dañar la mecánica.
“ELECTRICIDAD ESTATICA”
El circuito integrado del cronómetro puede
ser dañado por la electricidad estática. Si la
electricidad estática es demasiado
importante, dañados permanentes pueden
ocurrir. Peligro con la pantalla de todas las
televisiones y con la ropa sintética seca
que puede producir mucha electricidad
estática.
“MAGNETISMO” :
No afectado
“PRODUCTOS QUIMICOS”
No exponer el cronómetro con disolventes
tales como gasolina y alcohol,
proyecciones de productos de belleza,
decapantes, pinturas…Pueden dañar el
cronómetro.
“CAMBIO DE PILA”
MODO ALARMA:
1.
A partir de la pantalla normal de la
hora, pulsar C para ver la alarma. Sólo las
líneas superiores y media aparecen.
2.
Pulsar B unos segundos para
ajustar la alarma: la cifra de las horas
parpadea.
3.
Pulsar A para ajustarlas y C para
seleccionar después los minutos, el mes y
la fecha. Siempre pulsar A para el ajusto.
Cuando la fecha o el mes no están
ajustados (se quedan - - - - -), la alarma
resonará todos los días a la hora
ajustada.
4.
Cuando la hora está ajustada, la
alarma se activa automáticamente. Pulsar
el botón A para activar o desactivarla.
Cuando está activada, el símbolo
aparece en la parte arriba izquierda de la
pantalla.
PANTALLA ELECTROLUMINISCENTE:
1. Pulsa D para activar la pantalla
electro luminiscente.
2. Este aparato funciona con una pila
CR2016. Para cambiar la pila quitar la
tapa posterior del reloj, cambiar la pila y
volver a cerrar la tapa, teniendo mucho
cuidado de volver a colocar la junta de
estanqueidad en su sitio.
Cuando la fijación se vuelve débil o no
soporta el exterior, se necesita cambiar de
batería.
1. Destornille el panel trasero
2. Destornille el contacto de la pila
3. Cambiar con la nueva pila CR2016
4. Antes utilizar la nueva pila,
asegurarse que el contacto triangular
esta en la hendidura triangular bajo la
pila.
5. Utilizar un tweezer o un
destornillador
6. Reatornillar el panel trasero.
LA PILA NO ESTÁ CUBIERTA
POR LA GARANTÍA
ALARM:
www.digisportinternational.com
1.
2.
INSTRUCTION MANUAL
STOPWATCH DTZ6
3.
4.
FEATURES:
5.
- Hour, minute, second, month, date,
weekday, and alarm (user option day alarm)
- Auto calendar
- Soccer timer and stoppage timer to keep
track of stoppage time
- Timer with range 99minutes
- Electro-luminescent back lighted LCD
- 12/24 hour display and month/day reversal
by user option
NORMAL DISPLAY:
The normal display is as shown in Fig. 1. In
this display hour, minute and seconds are
shown on the lower row, month, Date and
weekday on the middle row and the alarm
hour and minutes on the top row.
TIME SETTING:
1.
When the watch is in the NORMAL
display, press and hold B for 2 seconds
will go into the TIME SETTING mode with
the SEC digits flashing.
2.
Pressing A will reset the SEC to 00
and starts again right away.
3.
Press C to select sequentially
HOUR, MINUTE, YEAR, MONTH, DATE,
and 12/24HR.
4.
When the digits are selected they
are flashing, press A to advance these
selected digits.
5.
When setting is completed press B
to complete the TIME SETTING and the
display will return to the NORMAL
DISPLAY. (When the 12/24HR is set to 12
hr, the time will be displayed in 12 hour
system with the middle row displayed in
MONTH, DATE and WEEKDAY. When it
is set to 24hr, the time will be displayed in
24 hour system with the middle row
displayed in DATE, MONTH and
WEEKDAY.)
6.
From NORMAL DISPLAY press C
will display the ALARM time.
Press and hold B for 2 seconds to
go into the ALARM SETTING mode
with the ALARM HOUR digits
flashing.
Press A to set the ALARM HOURS.
Press C to select sequentially
ALARM MINUTES, MONTH and
DATE and press A to advance.
When the digits are selected they
are flashing. When the month or
date is not set (remain - - - - ), the
alarm will sound everyday at the
preset alarm time. When the month
or date is set, the alarm will sound
only at the preset time at that preset
date or month. When the digits
have been advanced the alarm is
automatically armed.
Pressing A in the ALARM mode will
arm or disarm the alarm. When
armed the indicator at the top left
corner of the display is turned ON.
When the normal time matches the
ALARM time the alarm sounds
30X2 short beeps and the EL
backlight flashes.
Pressing any button when the alarm
sounds will stop the sound and the
alarm remains armed.
SOCCER TIMER:
1. From the ALARM time display press
C to go into the SOCCER TIMER display
mode.
2. In the SOCCER TIMER mode the
hour, minute and seconds are displayed
on the lower row, the SOCCER TIMER
on the middle row and the STOPPAGE
TIMER on the upper row. The SOCCER
TIMER is preset to 45 minutes (can be
set to other values by pressing and
holding B for 2 seconds when the timer is
not counting down.) and the countdown
can be started by pressing B once and
release. The STOPPAGE TIMER is a
count-up timer for keeping track of the
stoppage time.
3. Press A to start in stoppage times
and A again to stop when the play
resumes. When the STOPPAGE TIMER
is counting the 4 digits are flashing
together. At 30 and 15 minutes before
the countdown reaches 00:00 00, the
timer will give 1 single beep. After
crossing 0 the SOCCER TIMER will start
counting up. At 30 seconds before the
time of the STOPPAGE TIMER the timer
will give 15X 4 short beeps to alert the
user that the play time is almost up.
4. When the SOCCER TIMER and the
STOPPAGE TIMER matches, the timer
will give 10X3 short beeps to tell the user
that the play time is finished. Pressing
any button will stop the sound.
5. The SOCCER TIMER keeps
running until B is pressed. Press and
hold B for 2 seconds will reset the
SOCCER TIMER to the previously set
countdown time.
6. Press and hold A for 2 seconds will
reset the STOPPAGE TIMER. Press and
hold B for 2 seconds while the SOCCER
TIMER is reset will go into the SET
SOCCER TIMER mode with the MINUTE
digits flashing.
7. Press A to set the timer minutes,
maximum range 99 minutes. Press C to
go to the SET SEC and press A to set
the timer seconds, maximum 59
seconds. When the SOCCER TIMER has
been set, press B to complete the SET
SOCCER TIMER mode and return to the
SOCCER TIMER display mode.
CARE OF YOUR STOPWATCH
*WATER-RESISTANCE
The stopwatch is designed and manufactured
to withstand accidental contact with water
such as splashes or rain, but it is not designed
for swimming or diving.
*TEMPERATURE
Do not leave your stopwatch under direct
sunlight or in very high temperatures for a
long time, or the display may become black.
Do not leave your stopwatch in very low
temperature as this may cause a slight time
loss or gain and the change of digits becomes
slow. In both cases the above conditions will
be corrected when the stopwatch returns to
normal temperature.
*SHOCKS
Be careful not to drop your stopwatch or hit it
against hard surfaces as it may cause
mechanical damages.
*STATIC ELECTRICITY
The integrated circuit in your stopwatch can
be affected by static electricity. If the static
electricity is very strong a permanent damage
can occur. Be careful of the screen of the TV
set and the wearing of clothing made of
synthetic materials in dry weather; in such
cases a very strong static electricity can be
generated.
*MAGNETISM
Not affected.
*CHEMICALS
Do not expose your stopwatch to solvents
such as gasoline and alcohol, spray of
cosmetics, cleaners, paints etc as they may
cause damage to the stopwatch.
*BATTERY CHANGE
When the display becomes dim or turned off,
battery replacement is necessary. We
recommend you to go to your dealer or a
qualified technician. Replace with Lithium
battery CR2016 or equivalent.
*TROUBLESHOOTING
If for any reason the stopwatch display
becomes freeze up, press all 4 buttons at the
same time to reset the stopwatch. If the
problem still exists, take back the stopwatch
to an authorized servicing centre for service.
Do not try to repair it yourself.
THE WARRANTY DOES NOT
COVER THE BATTERY.