1
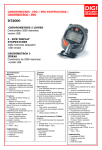
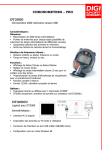
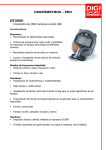
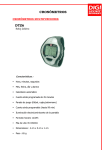
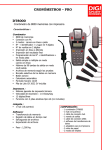
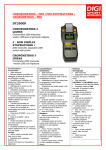
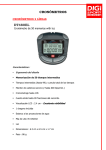
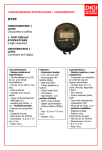
CHRONOMETRES PRO/PRO-STOPWATCHES / CRONÓMETROS – PRO DT500 CHRONOMETRES 3 LIGNES Chronomètre 500 mémoires version USB 3 - ROW DISPLAY STOPWATCHES 500 memories stopwatch USB version CRONÓMETROS 3 LĺNEAS Cronómetro de 500 memorias versión USB Caractéristiques : Mémoires intermédiaires (possibilité de mémoriser les temps intermédiaires de différentes courses) en mémoires le chronométrage Fonctions : Retour/Vitesse 10 sec pour un meilleur suivi des temps ffort/temps de récupération pour un entraînement fractionné alarme En option : - Imprimante DT500P pour impression des données pendant utilisation ou après. - Logiciel pour transfert de données PC/ chronomètre (DT2000U) COMPOSITION : - 1 chronomètre DT500 - 1 housse de protection - 1 dragonne - 1 mode d’emploi Features: Memory 500 dual split recallable memories Multiple event memories (capability to memorize lap times of different races) Selective review during operation Other features : User selectable lap/split or lap/speed chronograph display Average and best lap time display Automatic release of lap time after 10 seconds to allow progress monitoring Base 3 stroke/frecuency Dual timers which start one after another for use in training programs Normal countdown timer if 2nd timer is not set 12/24 hours and European calendar user option Lithium battery CR2032 3V PC upload kit accessory: DT2000U (optional) For transferring data from stopwatch to PC Printer DT500P (optional) For printing data during operation or selectively by race later DT500 Size : 6 cm x 7.5 cm x 2 cm COMPOSITION : - 1 pro-stopwatch DT500 - 1 nylon bag - 1 wrist-strap - 1 instruction manual Características : Memorias : Memorización de 500 tiempos intermedios Archivos de memoria para cada prueba ( posibilidad de memorizar los tiempos intermedios de diferentes carreras) Borramiento selectivo de los datos en memoria Acceso y visualización de los archivos de memoria durante el cronometraje Funciones : Visualización de Vuelta/Tiempo o Vuelta/Velocidad Mejor tiempo y medio tiempo Visualización del tiempo intermedio durante 10 seg para un mejor seguimiento de los tiempos Programación del tiempo de esfuerzo/tiempo de recuperación para un entrenamiento fraccionado Función cuenta atrás Base 3 stroke/frecuencia Formato 12/24h, calendario europeo y alarma Opciones : Impresión directa o diferida mediante la impresora DT500P Se puede transferir los datos al ordenador (ref.DT2000U) Dimensiones del DT500 : 6 cm x 7.5 cm x 2 cm Peso : 130 g COMPOSICIÓN: - 1 cronómetro DT500 - 1 bolsillo de protección - 1 dragona - 1 modo de empleo 5. www.digisportinternational.com l’alarme. Quand l’alarme est enclenchée, l’indicateur s’affiche et elle sonnera à l’heure réglée. Appuyer sur la touche C pour revenir en mode lecture de l’affichage. 9. 1. UTILISATION DU CHRONOMÈTRE : 2. MODE D’EMPLOI CHRONOMETRE DT500 Pour retourner à l’affichage principal, appuyer sur C. AFFICHAGE DES TEMPS FRACTIONNÉS : Pour revenir sur l’affichage des temps fractionnés, appuyer quelques secondes sur B, « SPLIT CHRONO » apparaît. Appuyer sur la touche A pour démarrer le chronomètre et sur B pour afficher le premier temps fractionné et le temps intermédiaire (fig.3). L’affichage se fait comme suit : CARACTÉRISTIQUES : - Mode 1 : HEURE, minutes, secondes, mois, date, jour et sonnerie. L’utilisateur peut choisir entre le mode 12 ou 24H. - Mode 2 : CHRONOMETRAGE/VITESSE AVEC MEMORISATION : - 500 mémoires - Mémorisation des temps sur différentes épreuves - Sélection de l’affichage : temps intermédiaires et fractionnés ou temps fractionnés et vitesse. 1. 2. Ligne supérieure : temps fractionnés Ligne centrale : temps intermédiaire Ligne inférieure : temps total Appuyer sur la touche C pour entrer en mode chronomètre (fig.2). Avant de lancer une mesure, vous pouvez choisir l’affichage des temps fractionnés ou de la vitesse. AFFICHAGE DE LA VITESSE : 1. Pour connaître une vitesse de course, vous devez d’abord régler votre chronomètre : appuyer pendant quelques secondes sur la touche B : SPEED apparaît à l’écran (fig.14). 3. 4. - Affichage temps moyen et meilleur temps - Retour automatique au mode chronomètre au bout de 10 secondes - Impression des données enregistrées grâce à l’imprimante DT500P (En option). - Connexion à un ordinateur via câble et logiciel (en option). - Mode 3 : COMPTE A REBOURS : possibilité d’utiliser 2 compte à rebours - Mode 4 : TRANSFERT SUR IMPRIMANTE OU LOGICIEL. Les données enregistrées par votre chronomètre TIME PRINT DT2000 peuvent être transférées aussi bien sur un ordinateur PC que sur l’imprimante DT500 P. RÉGLAGE DE L’HEURE : 1. Appuyer sur la touche C pour accéder au mode heure (fig.24). 2. Appuyer quelques secondes sur la touche B pour accéder au réglage des différents chiffres. La touche B vous permettra de sélectionner le chiffre à régler, tandis que la touche A vous permet de le régler. 3. Le réglage se fait dans l’ordre suivant : heure de sonnerie, dizaines de minutes, minutes, ON/OFF pour enclencher ou non la sonnerie, année en cours, mois, date, heure actuelle, minutes, secondes, avec sélection du mode 12/24 H. Remarque : en mode 24 H, la ligne centrale se lit : date, mois, année ; en mode 12 H, elle se lit : mois, date, année. 4. Appuyer sur la touche D pour enclencher et pour enlever 5. 6. 2. 3. 4. 5. 6. 7. 8. Le premier chiffre sur la ligne inférieure clignote, elle permet de régler la distance (jusqu’à 9999,999). Sélectionnez les chiffres à régler avec la touche B et les régler à l’aide de la touche A. Lorsque la distance est validée, les lettres « HR » correspondant à « heure », clignotent en haut à gauche de l’écran. Vous pouvez alors choisir l’unité de mesure de temps en m/sec. ; m/min ou m/heure à l’aide de la touche A. Appuyer sur la touche C pour revenir en mode chronométrage (fig.15). Appuyer sur A pour lancer le chronomètre (fig.16). Appuyer sur B pour avoir le premier temps fractionné sur la première ligne, la vitesse sur la deuxième ligne et le temps total sur la troisième (fig.17). Exemple : si la distance est établie à 200 mètres et l’unité de temps est la seconde, la vitesse calculée sur un temps fractionné de 17,09sec. est de 11,70m/sec. En appuyant sur la touche D pendant le chronométrage, vous accédez à la mémoire des temps intermédiaires enregistrés (si le chronomètrage est activé, il n’est pas interrompu). Appuyez successivement sur la touche D pour faire défiler les temps intermédiaires. 7. 8. 9. 10. Après 10 secondes, l’affichage revient automatiquement en mode chronométrage (fig.4). Vous pouvez ainsi suivre le déroulement de la mesure. Appuyer sur la touche B successivement pour déterminer de nouveaux temps. Pour arrêter le chronomètre, appuyer sur la touche A. En fin de mesure, appuyer sur la touche B pour remettre le chronomètre à zéro et ainsi recommencer une course. Le chiffre apparaissant en haut à gauche de l’écran indique la place disponible en mémoire (fig.7). Procéder de la même façon pour enregistrer les données des épreuves suivantes. Les données de la dernière épreuve ne sont pas automatiquement enregistrées. Vous devez donc presser sur la touche B une fois de plus en fin de mesure pour enregistrer ce dernier temps. En appuyant sur la touche D pendant le chronométrage, vous accédez à la mémoire des temps intermédiaires enregistrés (si le chronométrage est activé, il n’est pas interrompu). Appuyez successivement sur la touche D pour faire défiler les temps intermédiaires. Pour retourner à l’affichage principal, appuyer sur C. RAPPEL DES DONNÉES ENREGISTRÉES : 1. En mode chronomètre, compteur nul, appuyer sur la touche D pour revoir les données enregistrées. L’affichage donne d’abord l’identification de l’épreuve enregistrée (fig.8) : RÉGLAGE DU COMPTE À REBOURS : 1. Appuyer sur la touche C pour atteindre le mode compte à rebours indiqué par les lettres « TR » en haut à gauche de l’affichage (fig.18). Ligne supérieure : jour en anglais – exemple : MON (Monday = lundi) Ligne centrale : date Ligne inférieure : M = mode MSP = fractionnés & vitesse (Mode SPEED) MCH = fractionnés & intermédiaires La ligne supérieure indique le premier compte à rebours et la ligne centrale indique le deuxième. 2. 3. 4. 5. Appuyer pendant quelques secondes sur la touche B pour accéder au réglage des différents chiffres. La touche B vous permettra de sélectionner le chiffre, tandis que la touche A vous permet de le régler. En fin de réglage, appuyer une dernière fois sur la touche B. Appuyer sur la touche A pour lancer le premier compte à rebours (fig.19). Lorsque ce dernier s’approche de zéro, une série de 4 bips retentit et le second compte à rebours démarre immédiatement. Lorsque ce dernier approche de zéro, 2 bips retentissent et la ligne inférieure de 4 chiffres affiche automatiquement « 1 ». Remarque : Vous pouvez arrêter le décompte à n’importe quel moment en appuyant sur la touche A. 2. Pour passer en revue les enregistrements des différentes épreuves, appuyer sur la touche B et en appuyant successivement sur D apparaissent : les différents temps fractionnés (fig.9) s’il y en a le temps total le temps fractionné moyen AVE le meilleur temps fractionné BES Remarque : le calcul du temps moyen et du meilleur temps ne prend pas en compte la dernière portion chronométrée avant l’arrêt du chronomètre. 3. Si seulement le premier compte à rebours est réglé, une série de 4 bips retentira 5 fois quand le temps sera terminé comme un ordinaire compte à rebours. En appuyant une nouvelle fois sur D, sur l’affichage apparaîtront les informations sur la course suivante ou bien il reviendra sur la première course s’il n’y en a pas d’autres. Le compteur affichera également « 1 » à la fin du temps. STROKE / FREQUENCE BASE 3 ; 1. 2. 3. 4. 5. Appuyer sur la touche C pour accéder au mode « chronomètre ». Appuyer pendant quelques secondes sur la touche B afin d’accéder au mode « speed ». (cf fig.14). Faire défiler à l’aide de la touche B. Sélectionner les numéros avec la touche A. La distance doit être programmée sur « 180 » (0180.000) et l’unité de temps sur « secondes » (SEC). Puis appuyer sur la touche C pour valider. Démarrer le mode « chronomètre » à l’aide de la touche A. Au bout du 3ème battement seulement, appuyer une nouvelle fois sur la touche A. La ligne du milieu indique alors le nombre de battements par minute. MISE Á ZÉRO DES DONNÉES ENREGISTRÉES : Vous avez la possibilité d’effacer les données une à une, ou l’ensemble des données. En mode chronomètre (la mesure de temps doit être nulle), appuyez sur la touche D accédant ainsi au rappel des données enregistrées : 1. Effacement des données une à une : Choisissez la course à effacez à l’aide de la touche B (numéro de course en bas de l’écran à droite, voir Fig. 8). Appuyer sur la touche A pendant quelques secondes : « CLEAR » s’affiche à l’écran. Lorsque les données sont effacées, un bip long retentit et « CLEARED » s’affiche. Recommencer ainsi l’opération plusieurs fois pour effacer les courses les unes après les autres. 2. Effacement de toutes les données : Maintenez la touche A enfoncée. Vous verrez defiler « CLEAR », « CLEARED », « ALL CLEAR », « ALL CLEARED ». « ALL CLEARED » apparaît à l’écran lorsque toutes les données sont effacées. L’affichage revient en mode chronomètre (fig.2). Remarque : si la capacité mémoire de votre chronomètre DT2000 est entièrement utilisée, le compteur de tours (en haut à gauche de l’écran) se met à clignoter. Un signal sonore (3 bips) retentit, indiquant l’impossibilité d’enregistrer de nouvelles données. Vous pouvez alors effacer toutes les mémoires en procédant de manière successive (ou en appuyant sur les 4 touches en même temps) ou sélectionner les fichiers à effacer comme indiqué précédemment. TÉLÉCHARGEMENT DES DONNÉES SUR UN ORDINATEUR : 1. 2. 3. 4. Appuyer sur le bouton C jusqu’à ce qu’apparaisse « UPLOAD ALL ». Si seule la fonction « PRINT ALL » apparaît, appuyer sur D pour changer la fonction (fig.22). Appuyer sur A pour télécharger toutes les données enregistrées sur l’ordinateur si le chronomètre est correctement branché à l’ordinateur. Lorsque le processus de téléchargement est terminé, sur l’affichage apparaît « UPLOAD END » En appuyant sur la touche B en mode « UPLOAD ALL », vous revenez sur le mode rappel et vous pouvez ainsi choisir la course que vous souhaitez télécharger en les faisant défiler avec le bouton B (fig.23). Ensuite, appuyer sur A pour télécharger la course choisie. Remarque : pour pouvoir télécharger les informations, il faut que le décompte du chronomètre soit arrêté et donc que le chronomètre soit à 0. IMPRESSION DES ENREGISTRÉES : 1. 2. 3. DONNÉES Atteindre la fonction impression « PRINT ALL » en appuyant sur le bouton C. Si seule la fonction « UPLOAD ALL » apparaît, appuyer sur D pour changer la fonction (fig.20). Appuyer sur A pour imprimer toutes les données, si le chronomètre est connecté à l’imprimante. Lorsque l’impression est terminée, l’affichage indique « PRINT END ». - - 4. 5. En appuyant sur le bouton B en étant sur la fonction « PRINT ALL », vous accédez au mode rappel des données et vous pouvez ainsi choisir la course que vous souhaitez imprimer en les faisant défiler avec le bouton B (fig.21). Appuyer sur A pour imprimer la course. Remarque : Pour imprimer, il faut que le chronomètre soit à 0. Appuyer sur C à n’importe quel moment du processus d’impression, arrêtera celui-ci. PRÉCAUTIONS D’UTILISATION : Eviter d’utiliser votre chronomètre DT500 en milieu humide, ne pas manipuler les touches sous l’eau. Eviter le contact avec l’électricité statique. Eviter de soumettre votre chronomètre DT500 à des températures extrêmes S’assurer que l’appareil est bien éteint lorsque vous le rangez. Dans le cas contraire, le maintien sous-tension use prématurément la pile. Un voyant clignotant en bas à droite de l’écran signifie que vous devez changer la pile de votre chronomètre DT 500. Nous vous conseillons de confier cette opération à un horloger. LA PILE N’EST PAS COUVERTE PAR LA GARANTIE. 5. 6. Presione el botón D para activar o quitar la alarma. Presione el botón C para volver a la pantalla de visualización de la hora. AJUSTE DE LOS TIEMPOS FRACCIONADOS: 1. www.digisportinternational.com UTILIZACIÓN DEL CRONÓMETRO : MODO DE EMPLEO DT500 2. Presione el botón C para entrar en la función cronómetro (fig.2). Antes de empezar a cronometrar, puede elegir la visualización de los tiempos fraccionados y de la velocidad. Para volver a la visualización de los tiempos fraccionados, mantener presionado el botón B y “SPLIT CHRONO” aparece en la pantalla. Pulsar A para empezar el cronómetro y B para visualizar el primer tiempo fraccionado y el tiempo intermediario (fig.3). La lectura se hace de la siguiente manera: Línea superior : tiempos fraccionados Línea central : tiempos intermediarios Línea inferior : tiempo total CARACTERÍSTICAS : Función 1: Hora, minutos, segundos , fecha, mes, día, sonido. Opción 12/24 horas. Función 2: Cronometraje/velocidad con memorización • 500 memorias • Memorización de tiempos en diferentes pruebas • Selección de fijación: Tiempos intermedios y fraccionados o Tiempos fraccionados y velocidad • Indicación tiempo medio y mejor tiempo • Vuelta automática al modo cronómetro transcurridos 10 segundos • Impresión de los datos registrados gracias a la impresora DT500P (opcional) • Conexión al ordenador vía un cable y con un software (opcional) Función 3: Cuenta atrás. Posibilidad de utilizar 2 cuentas atrás. Función 4: Traslado de datos a impresora o software. Los datos registrados por su cronómetro TIME PRINT DT2000 pueden ser pasados a un PC o a la impresora DT500P. AJUSTE DE LA VELOCIDAD : 1. 2. 3. 4. Para conocer la velocidad de una carrera, debe primero ajustar su cronómetro: mantenga presionado el botón B: SPEED aparece en pantalla (fig.14). La primera cifra en la línea inferior parpadea, permite ajustar la distancia (hasta 9999,999). Seleccionar la cifra que quiere ajustar con el botón B y ajustarla con en botón A. Cuando la distancia está ajustada, las letras “HR” aparecen en la pantalla parpadeando y corresponden a “Horas”. Ahí puede elegir entre una medida en m/sec; m/min o m/hora con el botón A. Pulsar el botón C para volver a la función cronometraje (fig.15). 3. 4. AJUSTE DE LA HORA : 5. 1. Presione el botón C para acceder a la función hora (fig24). 2. Mantenga presionado el botón B unos segundos para acceder al ajuste de las diferentes cifras. El botón B le permitirá seleccionar la 3. cifra mientras que el botón A le permite el ajuste. 4. El ajuste se realiza en el siguiente orden: hora de alarma, decenas de minutos, minutos, ON-OFF para conectar o no la alarma, año, mes, fecha, hora actual, minutos, segundos, con selección 12/24 horas. Nota: en modo 24H, la línea central se lee: fecha, mes, año; en modo 12 H, se lee: mes, fecha, año. 6. 5. 6. Pulsar el botón A para comenzar el cronometraje (fig.16). Presione B para ver el primer tiempo fraccionado e la primera línea y la velocidad correspondiente en la segunda y el tiempo total en la tercera (fig.17). 7. 8. Tras 10 segundos, se vuelve automáticamente a la función cronometraje (fig.4). Usted puede así seguir el proceso de medida. Pulsar el botón B sucesivamente para determinar nuevos tiempos fraccionados. Pulsar el botón A para parar el cronómetro. Al final de la medida, pulsar el botón B para volver a cero y así medir una nueva carrera. La cifra que aparece en la parte superior izquierda de la pantalla indica el espacio de memoria disponible (fig.7). Proceda de la misma manera para registrar los datos de las pruebas siguientes. Los datos de la última prueba no son registrados automáticamente. Usted debe pulsar B una vez más al fin del cronometraje para registrar este último tiempo. Pulsando el botón D durante el cronometraje, se puede acceder a la memoria de los tiempos intermediarios registrados (si el cronometraje esta activado, no se interrumpe). Pulsar sucesivamente en el botón D para visualizar sucesivamente los tiempos intermediarios. Para volver a la fijación principal, pulsar en C. AJUSTE DE LA CUENTA ATRÁS: 1. Presione el botón C para acceder a la función cuenta atrás, la pantalla indica “TR” en la parte superior izquierda (fig.18). 1. La línea superior indica la primera cuenta atrás y la línea central indica la segunda. Mantener presionado el botón B para poder ajustar las diferentes cifras. El botón B le permitirá seleccionar la cifra a ajustar, mientras que el botón A le permitirá llevar a cabo el ajuste. 3. Cuando haya terminado el ajuste, presione una última vez el botón B. 4. Presionar A para comenzar la primera cuenta atrás (fig.19). 5. Cuando el tiempo se acerca del cero, una serie de 4 bips resona y la segunda cuenta atrás empieza inmediatamente. Cuando esta última se acerca del cero, 2 bips resonan y la línea inferior con 4 cifras indica automáticamente “1”. Notas: Usted puede para el cronómetro cuando lo quiere pulsando el botón A. 2. 2. 3. En el modo cronómetro con las cifras a cero, pulsar el botón D para recordar los datos grabados. La visualización da primero la identificación de la prueba grabada (fig.8) : Línea superior: día de la semana MON (Monday = Lunes) Línea central: fecha Línea inferior: M = modo MSP = fraccionados y velocidad (modo SPEED) MCH = fraccionados e intermediarios Para revisar los datos grabados de las diferentes pruebas, pulsar el botón B y pulsar de manera sucesiva el botón D para hacer desfilar: los diferentes tiempos fraccionados (fig.9) si hay el tiempo total el tiempo fraccionado medio AVE el mejor tiempo fraccionado BES Nota: el cálculo del tiempo medio y del mejor tiempo no toma en cuenta la última parte cronometrada antes del paro del cronómetro. Pulsando de nuevo el botón D, los datos de la carrera siguiente aparecen en la pantalla o la visualización volverá a la primera carrera si no hay otra. Si sólo la primera cuenta atrás está programada, se oye 5 veces une serie de 4 bips cuando el tiempo será acabado como un una cuenta atrás ordinaria. El contador mostrará también “1” en fin de tiempo. STROKE / FRECUENCIA BASE 3 ; 1. Pulsar el botón C para ir al modo « cronómetro ». Pulsar durante algunos segundos el botón B para estar en el modo « speed ». (cf fig.14). 2. Hacer desfilar pulsando el botón B. 3. Seleccionar los números con el botón A. La distancia tiene que estar programada sobre « 180 » (0180.000) y la unidad de tiempo sobre “segundos” (SEC). Pulsar el botón C para validar. Pulsar el botón A para apagar el modo “cronómetro”. Después del tercero golpeteo solamente, pulsar una segunda vez el botón A. La línea en medio indica el número de golpeteos por minuto. los datos están borrados, “ALL CLEARED” aparece para indicar que la operación ha terminado. La pantalla vuelve al modo cronómetro (fig.2). RECORDAR LOS DATOS GRABADOS : PUESTA A CERO DE LOS DATOS GRABADOS: Hay la posibilidad de borrar los datos uno tras el otro, o todos los datos. En modo cronómetro (cifras puestas a cero), pulsar el botón D para acceder a los datos grabados. 1. Para borrar los datos uno a uno: Elegir la carrera que quiere borrar con el botón B (numero de la carrera bajo izquierda, mirar fig.8). Mantener pulsado el botón A, “CLEAR” aparece en la pantalla. Cuando los datos de la carrera están borrados, un largo bip resona y “CLEARED” aparece en la pantalla. Repetir la operación para borrar varias carreras. 2. Para borrar todos los datos: Mantener presionado el botón A. Aparece « CLEAR », « CLEARED », « ALL CLEAR », « ALL CLEARED ». Cuando todos Notas: Cuando la capacidad de memoria de su cronómetro DT2000 ha sido totalmente utilizada, el contador de vueltas (en la parte superior izquierda de la pantalla) se pone a parpadear. Se oye una señal sonora (3 bips) que indica la imposibilidad de grabar nuevos datos. Se puede entonces borrar las memorias, procediendo de manera sucesiva (o presionando los 4 botones al mismo tiempo) o seleccionar los ficheros que quiere borrar como indicado más arriba. TRASLADO DE LOS DATOS SOBRE UN ORDENADOR: 1. Pulsar el botón C hasta que aparezca “UPLOAD ALL”. 2. Si sólo la función “PRINT ALL” aparece, pulsar D para cambiar la función (fig.22). 3. Pulsar el botón A para trasladar todos los datos grabados en el ordenador pero el cronómetro tiene que estar conectado con el ordenador. Cuando el traslado acaba, “UPLOAD END” aparece en la pantalla. 4. Pulsando el botón B en modo “UPLOAD ALL”, se vuelve en el modo de recuerdo de los datos y puede así eligir la carrera que quiere trasladar pasando las diferentes carreras con el botón B. Después, pulsar A para trasladar la carrera elegida. Nota: para poder trasladar los datos, el cronómetro tiene que estar parado. IMPRESIÓN DE LOS DATOS GRABADOS: 1. Alcanzar la función impresión “PRINT ALL” pulsando el botón C. Si sólo la función “UPLOAD ALL” aparece, pulsar el botón D para cambiar la función (fig.20). 4. 2. 3. Pulsar A para imprimir todos los datos pero el cronómetro tiene que estar conectado con la impresora. Cuando la impresión acaba, la pantalla indica “PRINT END”. Pulsando el botón B cuando está sobre la función “PRINT ALL”, se vuelve en el modo de recuerdo de los datos y puede así eligir la carrera que quiere imprimir pasando las diferentes carreras con el botón B (fig.21). Después, pulsar A para imprimir la carrera elegida. Nota: pulsando el botón C en cualquier momento de la impresión, puede pararla. PRECAUCIONES DE USO: Evite utilizar su cronómetro DT500 en un entorno húmedo; no manipule los botones bajo el agua. Evite el contacto con la electricidad estática. Evite someter su cronómetro DT500 a temperaturas extremas. Asegúrese de que el aparato está bien apagado cuando lo guarde. De lo contrario, la pila se gastará antes. Un indicador que parpadea en la parte inferior derecha de la pantalla significa que debe cambiar la pila de su cronómetro DT500. Le aconsejamos confiar esta operación a un relojero. LA PILA NO ESTÁ CUBIERTA POR LA GARANTÍA www.digisportinterntional.com INSTRUCTION MANUAL DT500 FEATURES: - Hour, minute, seconds, month, date, day and alarm 12/24 hour and month/date or date/month display user selectable - 500 memories - Segregated memory (capability to memorize LAP times of different races) - User Selectable LAP/SPLIT or LAP/SPEED display - Average and best lap time display - Automatic release of LAP time after 10 seconds to allow progress monitoring. - Data can be printed by printer (DT 500P optional) at operation or selectively by race later - Data can be uploaded to computer through upload cable with software (cable and software optional) - Dual timers which start one after another for use in training programs - Can be used as ordinary countdown timer if 2nd timer is not set TIME SETTING: 1. Press C to go to the TIME MODE (fig 24). 2. Press and hold B button will go into the TIME SET mode with the AL HOUR blinking. 3. Press A to set the AL HOUR. 4. Press B to select digits in the following sequence: AL HR, AL MIN first digit, AL MIN 2nd digit, AL OFF/ON, YEAR last digit, YEAR 1st digit, MONTH, DATE, 12/24HR selection, HOUR, MIN 1st digit, MIN 2nd digit, and SECONDS. 5. Press A to set the blinking digits. 6. Pressing C any time during this setting sequence will complete the setting procedure and return to the normal TIME display. If 12HR option is selected the calendar will be shown as MONTH/DATE/YEAR and time will be displayed in 12 HOUR system. If 24HR option is selected, the calendar will be displayed as DATE/MONTH/YEAR and time will be displayed in 24HOUR system. The calendar automatically adjusts for weekday and odd and even months including February of leap years up to year 2089. 7. Press D in the TIME mode to arm or disarm the alarm. When the alarm is armed the alarm indicator will be turned on and the alarm will sound at the preset alarm time. 4. After the digits are set press B again to set the TIME unit with the top left corner HR flashing. 5. Use A to set to HR (for /hour), MIN (for /minute) or SEC (for /second). 6. When the distance and time unit are set, press C button to return to the SPEED MODE (Fig. 15). (Pushing C button anytime during the setting will return to the SPEED mode). 7. Press A to start, the display is as shown in Fig.16. 8. Press B to get the 1st LAP time at the top row and the speed at the middle row, as shown in Fig.17. 9. If for example the distance is set to 200 meters and time unit set is in seconds, the speed calculated from a LAP time of 17.09 seconds is 11.70 m/sec. [Using the B button the LAP times and their corresponding speeds can be displayed. Recall operations in the SPEED mode are the same as in the LAP/SPLIT mode.] SPLIT TIME DISPLAY: 1. Press B to get the 1st LAP time. The LAP time is shown at the top row, the SPLIT time at the middle row and the running total time is shown at the lower row, as shown in Fig.3. CHRONOGRAPH OPERATION: 1. Press C to go to the CHRONOGRAPH MODE. The display as shown in Fig. 2. 2. Before start, choose your display SPEED DISPLAY: 1. In the CHRONO MODE before the start of a race, push and hold B for 2 seconds will go to the SPEED SET mode as is shown in Fig.14. 2. The first digit in the lowest row is flashing to indicate setting of the thousandth digit of distance. 3. Push A to set and B to select the next digits. The highest setting for distance is 9999.999. 2. 10 seconds later the display will automatically be released to show the running LAP and SPLIT times to allow the user to keep track of progress, as shown in Fig. 4. 3. Press B to display the 2nd LAP time. 4. Press A to stop. 5. Press B to reset and be ready for the next race, as shown in Fig. 7. The counter at the top left corner displays the memory left for further races. 6. Further races can be recorded by pressing A and B buttons as above. Since 5 memories are used for memorizing the date and number of the race, the memory left will be 1993 as shown below. TIMER OPERATION: count down 1. Press C button until the stopwatch goes to the TIMER mode. The display is as shown in Fig.18. The top row is the display for the 1st timer and the middle row is the display for the 2nd timer. 2. Press and hold B button for 2 seconds to go into the SET TIMER mode with the hour digit of the 1st timer blinking. 3. Press A button to set to desired hour for countdown. 4. Press B to go to the first digit in minutes and press A to set minutes. 5. Similarly by using B and A buttons the desired countdown times for the 1st and 2nd timers can be set. 6. Pressing C button once any time during this TIMER setting sequence will complete the setting and the timer is ready to start upon pressing the A button. 7. Press A to start countdown with the “1 ” at the top right corner blinking and the timer setting counting down. When the 1st timer approaches zero, the timer gives 4 beeps and the 2nd timer starts counting down immediately. When the 2nd timer approaches zero, it gives 2 beeps and the 4 digit counter at the lowest row advances by 1 automatically. 8. At any time during countdown pressing A will stop counting. If only the 1st timer is set the timer is used as an ordinary countdown timer and will give 5 times 4 beeps when the set time is up. The 4 digit counter also advances by 1 automatically when the timer reaches zero. STROKE / FREQUENCE BASE 3 ; 8. Press the button C to go into « chronograph mode ». 9. Press B during few seconds to go into « speed mode » (cf fig.14). 10. Scroll with the button B. 11. Select the numbers with the button A. The distance has to be set up on « 180 » (0180.000) and the time unit on « seconds » (SEC). Then, press C to confirm. 12. Start the « chronograph mode » with the button A. After the third stroke only, press A again. The line in the middle indicates the number of strokes per minute. DATA STORED RECALL: 1. Press D to recall data stored. The display which we call the RACE RECORD is as shown in Fig. 8. 2. The display shows the date in which the race was recorded and MCH-001 (MSP for SPEED mode) stands for the first race 3. Recorded in LAP/SPLIT mode at that date. 4. Press D again to recall the 1st LAP data, as shown in Fig.9. 5. Press D to recall the 2nd LAP data. 6. Press D again shows the stopped time 7. Press D again to show the average LAP time 8. Press D again to show the Best LAP time. 9. The AVERAGE calculation and BEST record do not take into account the last section of time before STOP. Therefore, in order for the stopwatch to keep track of the average and best records of all laps, always use the B button until the end of the race. 10. Pressing D again will go to the next race records or return to the 1st race records (if there is no further race). MEMORY USED UP: You have the possibility to clear the races one by one, or to clear all. From the chronograph mode (time display must be put to zero), press the D button to accede to data stored. 1. Clear the races one by one: Choose the race you want to clear and press B button (race number in the right down corner). Press and hold A button when the stopwatch is displaying the RACE RECORDS will clear the memories in that race record (when the contents in this race record are cleared the display will show “CLEARED” and sounds a long beep, if A is released before ED appears. Repeat the operation to clear races one by one. 2. Clear all races: Press A button during some seconds. « CLEAR », « CLEARED », « ALL CLEAR », « ALL CLEARED » will appear successively. “ALL CLEARED” appears when all data are cleared. The display comes back to the chronograph mode (fig.2) When all the memories have been used the 4 digit LAP counter at the top left corner will start blinking to indicate all memories have been used up. All further LAP memories will not be recorded in the memory unless some memories are cleared as previously indicated. When there is no memory left pressing A to start a race will sound 3 short beeps. Do not leave the stopwatch running if not in use as that drains a higher power from the battery. UPLOAD MODE: 1. In Fig. 20 press D button once will switch to UPLOAD MODE. 2. Pressing A button will UPLOAD ALL recorded memories to computer (if computer is connected). When the stopwatch is in the process of uploading, an indicator moves from right to left. When upload is complete UPLOAD END is displayed. 3. Press D button to return to PRINT MODE. 4. Pressing B at the UPLOAD ALL mode will go to the UPLOAD RACE mode with display. 5. Pressing A in this mode will only upload the memories in this race. 6. Press B to select particular race to upload. 7. Pressing C any time during this uploading process will stop printing immediately. 8. If the chronograph is not reset (i.e. still running or stopped), it will not be possible to upload and the display will show UPLOAD 0, there will not be any action upon pressing A or B. PRINT MODE: 1. Press C button to go to the PRINT ALL mode as shown in Fig.20. 2. Pressing A button will print all recorded memories to the printer (if printer is connected). When the stopwatch is in the process of printing, an indicator moves from right to left. When printing is complete PRINT END is displayed. 3. Pressing B at the PRINT ALL mode will go to the PRINT RACE mode with display as shown in Fig.21. 4. Pressing A in this mode will only print the memories in this race. 5. Press B to select particular race to print. 6. Pressing C any time during this printing process will stop printing immediately. 7. If the chronograph is not reset (i.e. still running or stopped), it will not be possible to upload and the display will show PRINT 0, there will not be any action upon pressing A or B. CARE OF YOUR STOPWATCH: WATER-RESISTANCE The stopwatch is designed to withstand accidental contact with water such as splashes or rain, but it, is not designed for use in water. Do not operate the buttons when the stopwatch is wet. TEMPERATURE Do not leave your stopwatch under direct sunlight or in very high temperatures for a long time, or the display may become black. Do not leave your stopwatch in very low temperature as this may cause a slight time loss or gain and the change of digits becomes slow. In both cases the above conditions will be corrected when the stopwatch returns to normal temperature. SHOCKS Be careful not to drop your stopwatch or hit it against hard surfaces as it may cause mechanical damages. STATIC ELECTRICITY The integrated circuit in your stopwatch can be affected by static electricity. If the static electricity is very strong a permanent damage can occur. Be careful of the screen of the TV set and the wearing of clothing made of synthetic materials in dry weather; in such cases a very strong static electricity can be generated. MAGNETISM Not affected. CHEMICALS Do not expose your stopwatch to solvents such as gasoline and alcohol, spray of cosmetics, cleaners, paints etc as they may cause damage to the stopwatch. BATTERY CHANGE When the battery low indicator lights up, battery replacement is necessary. 4. Before putting in the fresh battery makes sure that the triangular contact is in the triangular slot under the battery. 5. Use a small metal tool (such as a tweezers or screw driver) to momentarily short circuit the AC pad next to the battery. 6. Re-screw the back cover. Trouble shooting If the stopwatch is out of service, such as wrong logic, frozen display etc., a reset may recover the stopwatch. To reset the stopwatch, please press all four buttons simultaneously for about 2 seconds until the display become blank, the stopwatch will return to the default state when you release the buttons. 1. Unscrew and remove the back cover. 2. Unscrew the battery contact. 3. Replace with fresh Lithium battery CR2032 or equivalent. THE WARRANTY DOES NOT COVER THE BATTERY.