1
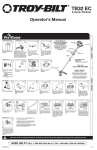
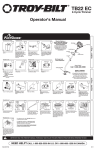
KNOW YOUR UNIT
APPLICATIONS
As a trimmer:
• Cutting grass and light weeds.
• Edging
• Decorative trimming around trees,
fences, etc.
OIL AND FUEL INFORMATION
If unavailable, use a good 2-cycle oil designed for air-cooled engines along with
a fuel additive, such as STA-BIL® Gas Stabilizer or an equivalent. Add 0.8 oz.
(23 ml) of fuel additive per gallon of fuel according to the instructions on the
container. NEVER add fuel additives directly to the unit's fuel tank.
Thoroughly mix the proper ratio of 2-cycle engine oil with unleaded fuel in a
separate fuel can. Use a 40:1 fuel/oil ratio. Do not mix them directly in the
engine fuel tank. See the table for specific gas and oil mixing ratios.
UNLEADED GAS
2 CYCLE OIL
NOTE:
One gallon (3.8 liters) of unleaded fuel mixed with one 3.2 oz. (95 ml)
1 GALLON US
3.2 FL. OZ.
bottle of 2-cycle oil makes a 40:1 fuel/oil ratio.
(3.8 LITERS)
(95 ml)
NOTE:
Dispose of the old fuel/oil mix in accordance with federal, state and
1 LITER
25 ml
local regulations.
MIXING RATIO - 40:1
FUELING THE UNIT
Spark Plug
Starter Rope Grip
Muffler
Fuel Cap
TOOLS REQUIRED:
• Flat head or T-20 screwdriver
• 3/8” socket
Throttle Lock-Out
Air Filter Cover
On/Off Control
WARNING: Gasoline is extremely flammable. Ignited vapors may explode. Always stop the engine
and allow it to cool before filling the fuel tank. Do not smoke while filling the tank. Keep sparks and open
flames at a distance from the area.
Shaft Grip
1. Remove the fuel cap.
WARNING: Remove fuel cap slowly to avoid injury from fuel spray. Never operate the unit without the
fuel cap securely in place.
Throttle Control
WARNING: Add fuel in a clean, level and well ventilated outdoor area. Wipe up any spilled fuel immediately.
Choke Control
Lever
Rapid-Link™
Avoid creating a source of ignition for spilled fuel. Do not start the engine until fuel vapors dissipate.
Primer Bulb
2. Place the gas container’s spout into the fill hole on the fuel tank and fill the tank.
NOTE:
Do not overfill the tank.
3. Wipe up any gasoline that may have spilled.
4. Reinstall the fuel cap.
5. Move the unit at least 30 ft. (9.1 m) from the fueling source and site before starting the engine.
D-Handle
Shaft Housing
STARTING/STOPPING INSTRUCTIONS
WARNING: Operate this unit in a well-ventilated outdoor area.
Start/ On (I)
Stop/ Off (O)
Carbon monoxide exhaust fumes can be lethal in a confined area.
Cutting Head Shield
WARNING: Avoid accidental starting. Make sure you are in the
starting position when pulling the starter rope (Fig. 8). To avoid serious
injury, the operator and unit must be in a stable position while starting.
Throttle
Line Cutting
Blade
Cutting Head
ASSEMBLY INSTRUCTIONS
INSTALL THE CUTTING HEAD SHIELD
WARNING: To prevent serious personal injury, never operate the trimmer without the cutting
attachment shield in place.
1. Place the cutting head shield onto the guard
mount bracket, making sure to align the holes
on the shield with the ones in the guard mount
bracket. (Fig. 1)
2. Take the 4 shield screws and screw each one
into the shield until finger tight.
3. Using a Flat Head or T-20 screw driver, tighten
the screws until the shield is firmly in place.
Screw (4)
Cutting
Head Shield
Guard
Mount
Bracket
D-Handle
6 in.
(15.24 cm)
Minimum
Bolt
Fig. 1
Fig. 2
ADJUSTING THE D-HANDLE
1. Loosen the bolt on the handle just enough to move it (Fig. 2).
2. While holding the unit in the operating position (Fig. 9), move the D-handle to the location that provides the best grip.
3. Tighten the bolt until the D-handle is secure. (Fig. 2)
OPERATING THE RAPID-LINK™ SYSTEM
The Rapid-Link™ system enables the use of these optional Add-Ons.
Trimmer. . . . . . . . . . . . . . . . . . . . . . . . . . . . . . . . . . . . . . . . . . . . . . . . . . . . . . . . . . . . . . . . . . . . . . . . . . . . . . . . . . . AF720
Hedge Trimmer*. . . . . . . . . . . . . . . . . . . . . . . . . . . . . . . . . . . . . . . . . . . . . . . . . . . . . . . . . . . . . . . . . . . . . . . . . . . AH720*
Brushcutter* . . . . . . . . . . . . . . . . . . . . . . . . . . . . . . . . . . . . . . . . . . . . . . . . . . . . . . . . . . . . . . . . . . . . . . . . . . . . . . BC720*
Bladed Pruner . . . . . . . . . . . . . . . . . . . . . . . . . . . . . . . . . . . . . . . . . . . . . . . . . . . . . . . . . . . . . . . . . . . . . . . . . . . . . BP720
Cultivator . . . . . . . . . . . . . . . . . . . . . . . . . . . . . . . . . . . . . . . . . . . . . . . . . . . . . . . . . . . . . . . . . . . . . . . . . . . . . . . . GC720
Lawn Dethatcher . . . . . . . . . . . . . . . . . . . . . . . . . . . . . . . . . . . . . . . . . . . . . . . . . . . . . . . . . . . . . . . . . . . . . . . . . . . LD720
Edger*. . . . . . . . . . . . . . . . . . . . . . . . . . . . . . . . . . . . . . . . . . . . . . . . . . . . . . . . . . . . . . . . . . . . . . . . . . . . . . . . . . . LE720*
Pole Saw . . . . . . . . . . . . . . . . . . . . . . . . . . . . . . . . . . . . . . . . . . . . . . . . . . . . . . . . . . . . . . . . . . . . . . . . . . . . . . . . . PS720
Straight Shaft Trimmer . . . . . . . . . . . . . . . . . . . . . . . . . . . . . . . . . . . . . . . . . . . . . . . . . . . . . . . . . . . . . . . . . . . . . . SS725
Turbo Blower . . . . . . . . . . . . . . . . . . . . . . . . . . . . . . . . . . . . . . . . . . . . . . . . . . . . . . . . . . . . . . . . . . . . . . . . . . . . . . TB720
* Do NOT use this Add-On with an electric powered unit.
REMOVING THE ADD-ON
Rapid-Link™
Primary Hole
Release
Coupler
Button
1. Turn the knob counterclockwise to loosen (Fig. 5).
2. Press and hold the release button (Fig. 3).
3. While firmly holding the upper shaft housing,
pull the lower shaft housing straight out of the
Rapid-Link™ coupler (Fig. 4).
INSTALLING THE ADD-ON
Upper Shaft
Lower Shaft
Housing
Housing
NOTE:
To make installing or removing the addGuide Recess
on easier, place the unit on the ground
Fig. 3
Fig. 4
or on a work bench.
90˚ Edging Hole
(Trimmer Only)
1. Turn knob counterclockwise to loosen (Fig. 5).
2. While firmly holding the add-on, push it straight into the Rapid-Link™ coupler
(Fig. 4).
NOTE:
Aligning the release button with the guide recess will help installation (Fig. 3).
3. Turn the knob clockwise to tighten (Fig. 5).
For decorative trimming/edging with the line cutting head, lock the release button
Knob
into the 90° hole (Fig. 5).
Fig. 5
OIL AND FUEL INFORMATION
IF USING THE OPTIONAL ELECTRIC STARTER OR POWER START BIT™ ACCESSORY
HOW TO START THE UNIT USING THE ELECTRIC STARTER OR POWER START BIT ACCESSORY.
NOTEThis Unit Can Use an Electric Start or Power Start Bit™ Optional Accessory!
Please refer to the Electric Starter or Power Start Bit operator’s manual for proper use of this feature. (Items
Sold Separately! Please refer to page 4 of this manual about purchasing these accessories.)
STARTING INSTRUCTIONS
1. Mix fuel with oil. See Oil and Fuel Mixing Instructions.
2. Fill the fuel tank with fresh, clean fuel mix. Refer to Fueling the Unit.
NOTE:
There is no need to turn the unit on. The On/Off Control is in the ON ( I ) position at all times (Fig. 6).
3. Fully press and release the primer bulb 10 times, slowly. Some amount of fuel should be visible in the primer bulb
(Fig. 7). If fuel cannot be seen in the bulb, press and release the bulb until fuel is visible.
4. Move the choke lever to Position 1 (Fig. 7).
5. Crouch in the starting position (Fig. 8). Place the electric starter or power start bit into the back of the unit. Refer to
the Operation section of the Electric Starter or Power Start Bit operator’s manual.
6. Press the throttle lock-out in and squeeze the throttle control lever. Press and hold the electric starter or drill ON (I)
button for 2 seconds.
7. Move the choke lever to Position 2 (Fig. 7).
8. Press the throttle lock-out in and squeeze the throttle control lever. Press and hold the electric starter or drill ON (I)
button for 2-second intervals until the unit starts.
9. Continue to squeeze the throttle control, remove the electric starter or drill from the unit and allow the engine to
warm up for 30 to 60 seconds.
10. Continue squeezing the throttle control, move the choke lever to Position 3 (Fig. 7) and run the unit for an
additional 60 seconds. The unit may be used during this time.
NOTE:
Unit is properly warmed up when engine accelerates without hesitation.
IF...
the engine hesitates, return the choke lever to Position 2 (Fig. 7) and continue warm-up.
IF...
the engine does not start, go back to step 3.
IF...
the engine fails to start after a few attempts, place the choke lever in Position 3 and squeeze the throttle
control. Press and hold the electric starter or drill ON (I) button for 2-second intervals until the unit starts.
IF WARM... If the engine is already warm, go back to step 7.
STOPPING INSTRUCTIONS
1. Release the throttle control and allow the engine to cool down by idling.
2. Press and hold the On/Off Control switch in the OFF (O) position until the unit comes to a complete stop (Fig. 6).
OIL AND FUEL MIXING INSTRUCTIONS
Old and/or improperly mixed fuel are the main reasons for the unit not running properly. Be sure to use fresh, clean
unleaded fuel. Follow the instructions carefully for the proper fuel/oil mixture.
DEFINITION OF BLENDED FUELS
WARNING: DO NOT USE E85 FUEL IN THIS UNIT. It has been proven that fuel containing greater
than 10% ethanol will likely damage this engine and void the warranty.
Today's fuels are often a blend of gasoline and oxygenates such as ethanol, methanol, or MTBE (ether). Alcoholblended fuel absorbs water. As little as 1% water in the fuel can make fuel and oil separate. It forms acids when
stored. When using alcohol-blended fuel, use fresh fuel (less than 30 days old).
USING BLENDED FUELS
If choosing to use a blended fuel, or its use is unavoidable, follow recommended precautions:
• Always use the fresh fuel mix explained in the operator's manual
• Use the fuel additive STA-BIL® or an equivalent
• Drain the tank and run the engine dry before storing the unit
USING FUEL ADDITIVES
CAUTION: For proper engine operation and maximum reliability, pay strict attention to the oil and fuel
mixing instructions on the 2-cycle oil container. Using improperly mixed fuel can severely damage the engine.
Throttle
Control
Lockout
STARTING INSTRUCTIONS
Fig. 6
1. Mix fuel with oil. See Oil and Fuel Mixing Instructions.
2. Fill the fuel tank with fresh, clean fuel mix. Refer to Fueling the Unit.
Choke Lever
NOTE:
There is no need to turn the unit on. The On/Off Control is in the ON ( I )
position at all times (Fig. 6).
3. Fully press and release the primer bulb 10 times, slowly. Some amount of fuel
should be visible in the primer bulb and fuel lines (Fig. 7). If fuel can not be seen in
the bulb, press and release the bulb until fuel is visible.
Primer Bulb
4. Place the choke lever in Position 1 (Fig. 7).
5. Crouch in the starting position (Fig. 8). Press the throttle lock-out in and squeeze
the throttle control lever. Pull the starter rope 5 times.
Fig. 7
6. Place the choke lever in Position 2 (Fig. 7)
7. Press the throttle lock-out in and squeeze the throttle control. Pull the starter rope
Starter
in a controlled motion 3 to 5 times to start engine.
Rope
8. Keep the throttle squeezed and allow the engine to warm up for 30 to 60 seconds.
9. Continue squeezing the throttle control, move the choke lever to Position 3 (Fig. 7)
and continue warming the engine for an additional 60 seconds. The unit may be
used during this time.
Throttle
NOTE:
Unit is properly warmed up when engine accelerates without hesitation.
Control
IF...
the engine hesitates, return the choke lever to Position 2 (Fig. 7) and
Fig. 8
continue warm-up.
IF...
the engine does not start, go back to step 3.
IF...
the engine fails to start after a few attempts, place the choke lever in Position 3 and squeeze the throttle
control. Pull the starter rope out with a controlled and steady motion 3 to 8 times. The engine should start. If
not, repeat.
IF WARM... If the engine is already warm, go back to step 6.
STOPPING INSTRUCTIONS
1. Release the throttle control and allow the engine to cool down by idling.
2. Press and hold the On/Off Control switch in the OFF (O) position until the unit comes to a complete stop (Fig. 6).
OPERATING INSTRUCTIONS
HOLDING THE UNIT
WARNING: Always wear eye, hearing, foot and body protection to reduce the risk of injury when operating
this unit.
Before operating the unit, stand in the operating position (Fig. 9). Check for the
following:
• The operator is wearing eye protection and proper clothing
• With a slightly-bent right arm, the operator’s hand is holding the shaft grip
• The operator’s left arm is straight, the left hand holding the D-handle
• The unit is at waist level
• The cutting head is parallel to the ground and easily contacts the grass without
the need to bend over
ADJUSTING TRIMMING LINE LENGTH
Fig. 9
WARNING: Do not remove or alter the line cutting blade assembly. Excessive line length will cause
premature engine failure and / or unit damage.
The bottle of 2-cycle oil contains a fuel additive which will help inhibit corrosion and minimize the formation of gum deposits.
It is recommended to use our 2-cycle oil with this unit.
The Bump Head™ cutting head allows the release of trimming line without stopping the engine. To release more line,
lightly tap the cutting head on the ground (Fig. 10) while operating the unit at high speed.
3