1
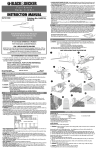
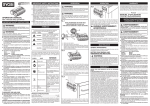
OPERATION INSTALLING/REMOVING THE BATTERY PACK See Figure 2. Set pump switch to the OFF ( O ) position. Press the tab to open the battery compartment latch. Insert the battery pack into the battery port. Make sure the latches on each side of the battery pack snap into place and the battery pack is secured before beginning operation. Close the battery compartment cover and press until it snaps shut. MOUNTING THE MISTING KIT See Figures 3 - 5 WARNING: Install alligator clamps in an area where no electrical wires, utility cables, pipes, or other obstructions are located. Never connect alligator clips to electrical wires or cords. Contact your local utility company or a qualified electrician if you are unsure. Ensure alligator clamps and misting tube are securely installed to prevent falling object or slippery surface hazard. Failure to follow these instructions can result in electrical shock or other serious personal injury. NOTICE: This misting kit is designed to be attached to fabric surfaces, such as umbrellas or fabric awnings, using the included alligator clips. To attach the misting kit to other surfaces, an accessory hanging mount kit must be used. To obtain the best spray area (mist curtain), we recommend the misting tube be secured to an overhead support. Always mount the misting kit in a suitable location away from electrical devices and switches. To mount the misting kit: Set pump switch to the OFF (O) position and remove the battery pack. Use the plastic straps on the alligator clamps to secure the misting tube to the clamps. Squeeze the ends of the clamp to open the clamp mouth and install the misting kit in a suitable location. USING THE MISTING KIT WITH A WATER BUCKET (NOT INCLUDED) See Figures 6 - 8. WARNING: Children can fall into buckets and drown. Keep children away from buckets with even a small amount of liquid. The misting kit is designed to operate on top of a 5-gallon water bucket. NOTE: Clean the bucket with soap and water before each use. Place the bucket on a flat, level surface. Set the pump switch to the OFF ( O ) position. Set the pump’s base securely onto the rim of the bucket, allowing end of the intake tube to go straight down into the bucket. NOTE: The pump cannot be secured to the bucket; they cannot be moved as a single unit. Install the battery pack and close the battery compartment cover. Add ONLY clean, cold water into the bucket. Do not overfill. With the misting kit mounted in your desired location, away from electrical devices and switches, start the pump, and allow the system to pressurize. WARNING: When filling, moving, or emptying bucket, be careful not to spill water and do not overfill bucket. Spilled water can result in a slippery surface, create a slip and fall hazard, and cause property damage. After adequate pressure is reached, water should mist from the nozzles to the surface below. If misting does not occur within 10 seconds, shut off the pump, and refer to the Troubleshooting later in this manual. To move the misting kit to another location: Set the pump switch to the OFF ( O ) position. Allow the the pump to stop running, then lift the pump off the bucket and move as desired. NOTE: The intake tube cannot be removed, but may be stored in the space provided on the unit. USING THE MISTING KIT WITH A GARDEN HOSE (NOT INCLUDED) See Figure 9. WARNING: Always route hoses away from traffic areas to prevent a tripping hazard. NOTE: The pump is not needed when the misting kit is connected to a garden hose. Using the pump unnecessarily may cause additional wear and shorten the life of the unit. Set the pump base on a flat, steady surface, such as a concrete patio or tabletop. 6 — English