1
OWNER'S
E
MANUAL
L
I
®
T
"-------I
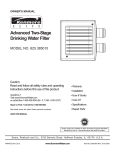
Advanced Two-Stage
Drinking Water
ter
MODEL
...,=====_
,,=___ ]
2!
NO. 625.385010
®
Caution:
Read and follow all safety rules and operating
instructions before first use of this product.
• Warranty
Questions
• How It Works
• Installation
?
Visit www.KenmoreWater.com
or call toll free 1-800-426-9345
• Care Of
(M - F, 7 AM - 6 PM CST)
Repair or Parts ? Call toll free 1o8004694663
• Specifications
See back cover for other Sears service numbers.
• Repair Parts
SAVE THiS MANUAL
®
System tested and certified by NSF International
against NSF/ANSl Standard 42 and 53.
See performance data sheet for details,
Printed on recycled paper
Sears,
PRINTED IN U.S.A.
Roebuck
and Co.,
3333
Beverly
Road
Hoffman
www.KenmoreWater.com
Estates,
IL
60179
Part No. 7294294
U.S.A.
(Rev. E 9/21/09)
KENMORE
ONE YEAR FULL WARRANTY ON THE
ELITE ADVANCED
TWO-STAGE
DRiNKiNG WATER
FILTER
When installed, operated and maintained according to all instructions supplied with the product, if this TwoStage Drinking Water Filter fails due to a defect in material or workmanship within one year from the date of
purchase, call 1=800=4=MY-HOME to arrange for free repair (or replacement if repair proves impossible).
This warranty does not include filter cartridges, which are expendable items.
This warranty applies only while this product is in use in the United States or Canada.
This warranty gives you specific legal rights, and you may have other rights which vary from state to state.
Sears,
Roebuck
and Co., Hoffrnan
Estates,
IL 60179
11-1/2"
-_
Questions?
Call The Kenmore
13"
Water Line 1-800-426-9345
5-1/2
or visit KenmoreWater.com
Unpack and Check Shipment .............................................................................
Plan Your installation
...................................................................................
4
5
Step lqnstall Supply Water Fitting ........................................................................
Step 2qnstall Filtered Water Faucet ........................................................................
Step 3-Connect Tubes ....................................................................................
Maintenance
...........................................................................................
6
7
8
9
Specifications ..........................................................................................
Troubleshooting
.......................................................................................
Exploded View & Parts List .............................................................................
10
10
11
Y Read all steps and guides carefully before installing
and using your Advanced Two-Stage Drinking Water
Filter. Follow all steps exactly to correctly install.
Reading this manual will also help you to get all the
benefits from the Advanced Two-Stage Drinking
Water Filter.
V The Advanced Two-Stage Drinking Water Filter works
on water pressures of 30 psi (minimum) to 125 psi
(maximum).
If your house water pressure is over the
maximum, install a pressure reducing valve in the
water supply pipe to the Advanced Two-Stage
Drinking Water Filter.
V Do not attempt to use this product to make safe
drinking water from non-potable
water sources. Do
not use the system on microbiologically
unsafe water,
or water of unknown
quality without adequate disinfection before or after the system. This system is certified for cyst reduction and may be used on disinfected water that may contain filterable cysts.
V Do not install the Advanced Two-Stage Drinking
Water Filter outside, or in extreme hot or cold temperatures. Temperature of the water supply to the
Advanced Two-Stage Drinking Water Filter must be
between 40°F and 100°F. Do not install on hot water.
Y Check with your local public works department
for
plumbing and sanitation codes. You must follow
their guides as you install the system. Follow your
local codes if they differ with guides in this manual.
in Massachusetts,
plumbing code 248-CMR 3.00 and
10.00 shall be adhered to. Consult with a licensed
plumber.
Questions?
Call The Kenmore
Water Line 1-800-426-9345
or visit KenmoreWater.com
INSPECT
SHIPMENT
Your Advanced Two-Stage Drinking Water Filter is
shipped complete in one carton. Remove all items from
your shipping carton.
Check all items against the packing list below. Note any
items lost or damaged in shipment.
Note any damage to
the shipping carton. Refer to the exploded view and
parts list in the back of the manual for the part names
and numbers of missing or damaged items. If problems
exist, refer to the website or the toll free number listed
throughout this manual.
Keep the small parts in the parts bag until you are ready
to install them.
NOTE: Codes in the state of Massachusetts
installation by a licensed plumber.
require
if you live in the state of Massachusetts,
review plumbing code 248-CMR of the Commonwealth
of
Massachusetts
before proceeding with the installation.
Bag Assembly
Bag Assembly
©
Tee Feed Adaptor
®
Thread Sealing
Tape
©
Coin Battery
®
Advanced
Two-Stage
Questions?
Drinking
Water Filter
Call The Kenmore
Water Line 1-800-426-9345
Faucet & Electronics
Base
or visit KenmoreWater.com
PLAN
YOUR
INSTALLATION
it is recommended
to read through the entire manual
before beginning your installation.
Follow all steps
exactly. Reading this manual will also help you get all
the benefits from your system.
TYPICAL
UNDER
SINK
LOCATION
The Advanced Two-Stage Drinking Water Filter housing
is normally located under the kitchen and/or bathroom
sink, to filter the cold drinking water. See Figure 2.
CHECK SPACE REQUIREMENTS
Check size and position of items for proper
into location chosen.
TOOLS
Tools Needed
Phillips Screwdriver
Adjustable Wrench
installation
NEEDED
Drill & 1-1/4" bit, if required
Review the tools needed list. See Figure 1. Gather needed tools before proceeding with the installation.
Read
and follow the instructions provided with any tools listed here.
IMPORTANT'. A 1-1/4" dia. hole is needed to mount the
Large Adjustable
filtered water faucet. To avoid damaging the sink, consult a qualified plumber or installer for drilling procedures in porcelain or stainless steel.
Typical
Under
Jaw Pliers or Pipe Wrench
Figure
1
Figure
2
Sink Installation
filtered water
blue tubing
WATER OUT
SINK i i
cold water
supply fitting
yellow tubing
WATER IN
cold shutoff
J
Filter Housing may be placed horizontally OR vertically
Questions?
Call The Kenmore
Water Line 1-800-426-9345
or visit KenmoreWater.com
CHOOSE
TYPE OF WATER
SUPPLY
FITTING
Locate the cold water line in the sink cabinet.
TO INSTALL
Check and
NOTE:
comply with local plumbing codes as you plan, and then
install a water supply fitting on the sink's cold water line.
The fitting must provide a leak-tight connection to the
Advanced Two-Stage Drinking Water Filter's 3/8" O.D.
inlet tubing. A typical connection using the included
water supply fitting is shown in Fig. 3. An alternative
connection using standard plumbing fittings (not included) is shown in Fig. 4.
A. WATER
USING
SUPPLY
CONNECTION
INCLUDED
cold water plumbing.
3. Thread the included water supply fitting onto the pipe
and reconnect nut to bottom of fitting.
cold water
faucet stud _
dictate
NOTE: Codes in the state
installation
by a licensed
which
type
of water
of Massachusetts
plumber.
If you live in the state of Massachusetts,
ing code 248-CMR
of the Commonwealth
Massachusetts
before proceeding
with
B. WATER
the nut that connects the cold water faucet to
code may
fit-
ring is used. Consult
a plumber
if you are not familiar
with local codes or plumbing
procedures.
FITTING
1. Close the house main water shutoff valve and open
faucets to drain water from the sink's cold water pipe.
2. Remove
Local
SUPPLY
TYPICAL
USING
COMPRESSION
(PARTS
NOT
require
review plumbof
the installation.
CONNECTION
TYPE FITTING
INCLUDED)
NOTE: Before starting, be sure to turn off water supply
and open a low faucet to drain the pipe.
Complying with plumbing codes, install a fitting on the
cold water pipe to adapt to 3/8" O.D. tubing. A typical
connection is shown in Figure 4. If threaded fittings are
used, be sure to use pipe joint compound or Teflon tape
on outside threads.
included water
supply fitting
3/8" O.D. yellow
tubing to Water
Filter inlet
),,
,,\o
t _
_
bi
f.'
J
threads
with
wrap
outside
Teflon tape
?
OR
l_
cold water
shutoff valve
3/8" compression
/
J-_ /
_@_
cold water
pipe
cold water
shutoff valve
Figure
Questions?
Call The Kenmore
3
Water Line 1-800-426-9345
fitting
insert
/
ferrule
3/8" yellow
tubing to
Water Filter inlet
Figure
or visit KenmoreWater.com
4
MAKE
HOLE
IMPORTANT'.
FOR
FAUCET
faucet base
A 1-1/4" dia. hole is needed to mount
the
filtered water fauceL To avoid damaging the sink, consult a qualified plumber or installer for drilling procedures in porcelain or stainless steel.
1. Select one of the following options to install the faucet.
Make sure there is room underneath
to make the needed connections.
"N,_
rubber gasket _
__
[ .....
s
1-1/4" dia. hole
through sink or
toggle bolts_
o Use an existing sink top hole for spray hose or
soap dispenser (must be 1-1/4" in diameter).
Figure
o Drill a new hole in the sink top.
o Drill a hole in the countertop next to the sink.
2. Check to make sure the filtered water faucet base will
sit flat against the mounting
surface.
3. if drilling is needed, make a 1-1/4" dia. (minimum)
hole for the faucet in the mounting surface.
INSTALL
FAUCET
faucet base
faucetx_
BASE
1. Locate the faucet base (See Fig. 5) and feed the toggle
bolts down through the hole until the faucet base is
square against the mounting surface (sink or countertop). The rubber gasket should be between the faucet
base and mounting surface.
. blue tubing
filter
housing
2. Tighten the toggle bolts until the faucet base is firmly
mounted to the surface. Do not overtighten.
CONNECT
5
BLUE TUBE TO FAUCET
1. Place the Advanced Two-Stage Drinking Water Filter
housing under the sink. it can sit upright or on its side.
2. Locate the blue tube. One end is attached to the filter
housing. Feed the other end up through
hole and faucet base. See Figure 6.
Figure
6
the mounting
3. Refer to the "Cut Tubes to Length" section on Page 8
and cut the blue tube square and to length as needed,
leaving about 6 inches above the faucet base.
4. Locate the faucet.
Refer to the "Connect
Tubes" section
on Page 8 and insert the blue tube all the way into the
3/8" quick connect fitting on the faucet bottom.
5. Pull on the tube to be sure it is held firmly in the fitting.
INSTALL
FAUCET
faucet
ON BASE
1. Lower the faucet onto the base.
See Figure 7.
2. Give the faucet a 1/4 turn clockwise
to the base.
1/4 turn to connect
faucet to base
to attach the faucet
faucet base
3. install battery in faucet base (See "Change Battery" section on Page 9) then continue installation with Step 3
on Page 8.
Questions?
Call The Kenmore
Water Line 1-800-426-9345
Figure
or visit KenmoreWater.com
7
CONNECT
YELLOW
TUBE TO WATER SUPPLY
FITTING
1. Locate the yellow tube. One end is attached to the filter housing. Run the other end to the water supply fitting on the cold water pipe. See Figure 8.
2. Refer to the "Cut Tubes to Length" section, below, and
cut the yellow tube square and to length as needed.
3. Refer to the "Connect Tubes" section, below, and
insert the yellow tube all the way into the 3/8" quick
connect fitting on included water supply fitting
(installed in Step 1).
cold water
supply
fitting
yellow
(_))
tubing
cold water
shutoff
filter
housing
_..-_
4. Pull on the tube to be sure it is held firmly in the fitting.
HOW
TO CUT
AND
CONNECT
®
Figure
8
Figure
9
THE TUBES
Push In Fitting
Your Advanced Two-Stage Drinking Water Filter
includes push-in fittings for quick tubing connection.
Review the following before connecting the tubes.
Cut tubes
Tube
to length
1. Use a sharp cutter or knife to cut the end of tubing.
Always cut the tubing square. See Figure 9.
2. inspect the end (about 1") of the tubing to be sure
there are no nicks, scratches or other rough spots,
needed, cut the tubing again.
Connect
NN4K
Cut tubing square with end of tubing round,
smooth, with no cuts, nicks or flat spots.
Tube Correctly
Cut
if
O-Ring
tubes
1. Push tubing through collet, until it engages the o-ring.
See Figure 10. Continue pushing until the tube bottoms out against the back of the fitting. See Figure 11.
A common mistake is to stop pushing when the tube
engages the o-ring. This will lead to future leaks.
When a 3/8" tube is fully engaged, 3/4" of the tube has
entered the fitting. See Figures 10 & 11.
f
Tube Partially
Engaged
With Fitting
10
Figure
11
Figure
12
O-Ring
2. if using tubing other than tubing supplied with the
system, be sure it is of high quality, exact size and
roundness with a smooth surface.
Disconnect
Figure
Tubes
1. Push the collet inward
with a finger tip. See Figure
12.
Tube Fully Engaged
2. Continue holding collet inward
ing out. See Figure 13.
while pulling
With Fitting
the tub-
Collet (Depress
Remove
to
Tubing)
-"-_1_ (
_-"_
Figure
Questions?
Call The Kenmore
13
Tubing
Disconnect
Water Line 1-800-426-9345
Tubing
or visit KenmoreWater.com
FAUCET
ELECTRONICS
inside the faucet base is a battery
timer. See Figure 14.
An amber LED indicator
operated
is also located
battery
housing
6 month
in the front of
the faucet base. This LED will flash continuously
after 6
months has passed. This indicates that it is time to
replace the battery and filter cartridges.
CHANGE
BATTERY
To change (or install) the battery, complete the following
steps.
1. Loosen the screw on the right side of the faucet base
See Figure 14.
2. Press the battery housing upwards from the front
faucet base until it releases from the faucet base. See
Cover
Figure 14.
3. Replace (or install) the battery (Maxell CR 2032 or
equivalent).
Place battery into the holder with the
positive (+) side facing the back of the holder.
4. When the battery is first replaced it will flash six times
and turn off. This indicates the battery is fully
charged. After the six flashes, the timer enters the 6
month time cycle.
Turn to the left
to remove
Filter
Cartridge
1
NOTE: If the LED repeatedly flashes just two times, it is
not a fully charged battery and will need to be replaced.
5. Re-install
mounting
FILTER
Filter
the timer housing and firmly tighten the
screw. See Figure 14.
CARTRIDGE
1. How much water you use, and
2. How much sediment, taste and/or odor, or other
unwanted
substances, are in the water.
Use the following information
as a guide. However no
matter which type of cartridge you are using, you will
know it is time to replace it when you first notice the
return of unwanted substances in your water.
Kenmore Elite Advanced Two-Stage Drinking Water
Filter model 625.385010 with replacement element pack
42-34381 conforms to NSF/ANSI 42 and 53 for the specific performance
claims as verified and substantiated
by
test data. The rated capacity for this system is 280 gallons (1060 liters) at a rated service flow of 0.5 gpm (gallons per minute).
Call The Kenmore
2
Figure 15
LIFE
it is recommended
to replace the battery and filter cartridges every 6 months of use. There are several variables that determine how long a cartridge will last.
These include:
Questions?
Cartridge
FILTER
Complete
CARTRIDGE
the following
REPLACEMENT
steps to replace
the cartridges:
1. Turn filter cartridge to the left to remove
from the filter heads. See Figure 15.
cartridges
2. Dispose of the old cartridges in a proper manner.
3. install new cartridges, making sure to insert cartridge
1 and 2 into the correct opening (note the printing on
the cover designating
"Cartridge 1" and "Cartridge
2"). Turn cartridges to the right to re-attach to the filter heads.
4. Remove and replace
Battery" above.
Taste
vated
tered
purge
longer
water,
the timer battery.
See "Change
and Odor Cartridges: Filter cartridges contain acticarbon, a black powder. When new, open the filwater faucet and allow fine carbon particles to
from the cartridge.
Close the faucet when you no
see the "fines" (carbon particulates)
in the filtered
or approximately
10 minutes.
Water Line 1-800-426-9345
or visit KenmoreWater.com
9
Supply
water
Supply water
Inlet - Outlet
pressure
limits
.........................................
30-125 psi (207-862
temperature
limits ...........................................
.....................................................
This system conforms
by test data.
to NSF/ANSI
kPa)
40-100 °F (5-40 °C)
3/8" O.D. tubing, included
42 and 53 for the specific performance
claims as verified
and substantiated
Installations In The Commonwealth
Of Massachusetts:
The Commonwealth
of Massachusetts
requires installation be performed by a licensed plumber. Plumbing code 248--CMR of the Commonwealth
of Massachusetts
must be followed in these cases.
Cause:
Tubing not pushed in all the way.
Correction:
Push Tubing all the way into fittings.
Cause:
Tubing not cut square.
Correction:
Cut tubing square. See Page 8.
Cause:
Tubing nicked.
Correction:
Remove tube from connection. Remove nicked portion
by cutting tube to shorter length. Reinsert in connection
See Page 8.
Cause:
Outer tubing surface not smooth.
Correction:
Remove tube from connection. Remove problem area
by cutting tube to shorter length. Reinsert in connection
See Page 8.
Questions?
10
Call The Kenmore
Water
Line 1-800-426-9345
See Page 8.
or visit KenmoreWater.com
1
/
2
3
4
4
5
Manifold Housing
PUSH-IN FITTINGS
collet
10
9
7
Key No.
Part No.
Description
1
7292674
Faucet, with base & electronics
2
7294359
Cover Half, marked "Cartridge l"&
3
7293175
Cover Half, unmarked (order decal below)
[]
7288447
Decal, Kenmore Elite badge
4
7294579
Screw, Cover (4 req.)
5
7280106
Head Assembly
6
7208057
Tubing, 3/8" O.D. x 72" long, Yellow
7
7207962
Tubing, 3/8" O.D. x 72" long, Blue
8
42-34381
Filter Cartridge 1 & 2 set
9
7228536
Tee Feed Adaptor
10
7281013
Push-in Fitting Kit, 3/8" O
[]
7154818
Coin Battery
[]
7294294
Owner's Manual
._
o-ring
seal
"Cartridge 2"
Purchase replacement filter cartridges at your local Sears store, online at
www.sears.com or from Sears Parts at 1-800-469-4663.
•
[]
Questions?
O-ring and cottet kit for replacement in the manifold housing only. Not included.
Not illustrated.
Call The Kenmore
Water Line 1-800-426-9345
or visit
KenmoreWater.com
11
iiiiiiiiiiiiiiiiiiiiiiiiiiiiii!_
....
Your Home
iiiiiiiiiiiiiiiiiiii
iiiiiiiiiiiiiiiiiiiiFor repair - in your home - of all major brand appliances,
lawn and garden equipment, or heating and cooling systems,
iiiiiiiiiiiiiiiiiiii
iiiiiiiiiiiiiiiiiiii no matter who made it, no matter who sold it!
iiiiiiiiiiiiiiiiiiii
For the replacement parts, accessories and
iiiiiiiiiiiiiiiiiiii owner's manuals that you need to do-it-yourself.
iiiiiiiiiiiiiiiiiiii For Sears professional installation of home appliances
iiiiiiiiiiiiiiiiiiii and items like garage door openers and water heaters.
iiiiiiiiiiiiiiiiiiii
iiiiiiiiiiiiiiiiiiii
1-800-4-MY-HOME ® (1-800-469-4663)
iiiiiiiiiiiiiiiiiiii
Call anytime, day or night (U.S.A. and Canada)
iiiiiiiiiiiiiiiiiiii
www.sears.com
www.sears.ca
iiiiiiiiiiiiiiiiiiii For expert home solutions advice: www.managemyhome.com
iiiiiiiiiiiiiiiiiiii
iiiiiiiiiiiiiiiiiiii
Our Home
!!!!!!!!!!!!!!!!!!!!
iiiiiiiiiiiiiiiiiiiiii
For repair of carry-in items like vacuums, lawn equipment,
iiiiiiiiiiiiiiiiiiiiii
and electronics, call or go on-line for the location of your nearest
iiiiiiiiiiiiiiiiiiiiii
Sears Parts & Repair Service
Center
iiiiiiiiiiiiiiiiiiiiii
1-800-488-1222 (U.S.A.)
1-800-469-4663 (Canada)
iiiiiiiiiiiiiiiiiiiiii
Call anytime, day or night
iiiiiiiiiiiiiiiiiiiiii
www.sears.com
www.sears.ca
iiiiiiiiiiiiiiiiiiiiii
iiiiiiiiiiiiiiiiiiiiii
iiiiiiiiiiiiiiiiiiiiii
To purchase a protection agreement on a product serviced by Sears:
iiiiiiiiiiiiiiiiiiiiii
1-800-827-6655 (U.S.A.)
1-800-361-6665 (Canada)
iiiiiiiiiiiiiiiiiiiiii
iiiiiiiiiiiiiiiiiiiiii
Para pedir servicio de reparaci6n
Au Canada pour service en fran(_ais:
iiiiiiiiiiiiiiiiiiiiii
a domicilio, y para ordenar piezas:
1-800-LE-FOYER Mc
iiiiiiiiiiiiiiiiiiiiii1-888-SU-HOGAR ®
(1-800-533-6937)
iiiiiiiiiiiiiiiiiiiiii (1-888-784-6427)
www.sears.ca
iiiiiiiiiiiiiiiiiHH_
,i!i!i!i!i!i!i!i!i!i!i!i!i!i!i!i!i!i!i!i!i!i!i!_
® Registered
Trademark / TMTrademark
/ SMService Mark of Sears Brands, LLC
® Marca Registrada / TMMarca de F_brica / SMMarca de Servicio de Sears Brands,
MCMarque de commerce / MDMarque de deposee
de Sears Brands, LLC
LLC
© Sears Brands, LLC
MANUAL
DEL PROPIETARIO
®
Filtro avanzado
dos etapas para
agua potable
MODELO
2!
No. 625.385010
®
Precauci6n:
Antes de usar este producto por primera
vez, lea y siga todas las reglas de seguridad y las instrucciones de operaci6n.
• Garantia
• Instalaci6n
• C6mo funciona
_.,Tiene preguntas?
Visite el sitio web www.KenmoreWater.com
• C6mo cuidar el producto
o Ilame gratis al 1-800-426-9345
(lun. a vie., de 7 a.m. a 6 p.m., hora del Centro)
• Especificaciones
&Necesita reparacion o repuestos? Llame gratis al 1-800-469-4663
• Piezas de repuesto
Vea otros n_meros de servicio de Sears en la cubierta posterior.
CONSERVE ESTE MANUAL
®
Este sistema ha sido probado y certificado por
NSF International para el cumplimiento de las
Normas NSF/ANSI 42 y 53. Consulte los
detalles en la hoja de datos de rendimiento.
Sears,
Roebuck
IMPRESO EN LOS EE.UU.
and Co.,
3333
Beverly
Impreso en papel reciclado
Road,
Hoffman
www.KenmoreWater.com
Estates,
IL
60179
Pieza No. 7294294
U.S.A.
(Rev. E 9/21/09)
EL FILTRO AVANZADO
DE DOS ETAPAS PARA AGUA POTABLE
VIENE CON UN ANO DE GARANT{A TOTAL
KENMORE
ELITE
Cuando se haya instalado, operado y mantenido conforme a todas las instrucciones suministradas con el
producto, si este filtro de dos etapas para agua potable fallara debido a defectos en materiales o mano de
obra dentro de un a_o a partir de la fecha de compra, Ilame al 1-800=4=MY-HOME para solicitar la
reparaci6n gratuita (o el reemplazo si se demuestra que es imposible repararlo). La presente garanfia no
incluye los cartuchos filtrantes, los cuales son articulos consumibles.
Esta garantia se aplicara solamente mientras el producto se use en los Estados Unidos o Canad&
Esta garantia le otorga derechos legales especificos, yes posible que usted tenga otros derechos, los
cuales varian de una jurisdicci6n a otra.
Sears,
Roebuck
and Co., Hoffrnan
Estates,
IL 60179
11-1/2"
13"
&Tiene
preguntas?
,'--
-_--5-1/2"--_
Llame a la linea de ayuda de Kenmore Water
o visite el sitio web KenmoreWater.com.
al 1=800=426-9345
Desempaque
y revise el envlo ............................................................................
Planee la instalaci6n .....................................................................................
4
5
Paso 1: instale la uni6n para el suministro de agua ..........................................................
Paso 2: Instale el grifo para el agua filtrada .................................................................
Paso 3: Conecte los tubos ................................................................................
Mantenimiento
.........................................................................................
6
7
8
9
Especificaciones
.......................................................................................
Soluci6n de problemas
.................................................................................
Vista detallada y lista de piezas ..........................................................................
10
10
11
V Antes de instalar y usar el filtro avanzado de dos etapas para agua potable, lea atentamente
todos los
pasos y las pautas. Siga exactamente todos los pasos
para lograr la instalaci6n correcta. Leer este manual
tambi_n lo ayudarfi a obtener todos los beneficios del
filtro avanzado de dos etapas para agua potable.
V E1 filtro avanzado de dos etapas para agua potable
funciona con presiones de agua de 30 psi (mlnima) a
125 psi (mSxima). Si la presi6n del agua de su casa
supera la mSxima, instale una v5lvula reductora de
presi6n en la llnea de suministro de agua al filtro
avanzado de dos etapas para agua potable.
V No intente utilizar este producto a fin de potabilizar
agua proveniente
de fuentes no potables. Si el agua es
microbiol6gicamente
impura o si se desconoce su calidad, no use el sistema sin una adecuada desinfecci6n
antes o despu6s del sistema. Este sistema se ha certificado para la reducci6n de quistes y puede usarse con
agua desinfectada que pueda contener quistes filtrables.
V No instale el filtro avanzado de dos etapas fuera de la
casa ni bajo temperaturas
extremadamente
calientes
o frlas. La temperatura
del suministro de agua al filtro
avanzado de dos etapas debe estar entre 40 °F y 100 °F
(4 °C y 38 °C). No lo instale en tuber_as de agua
caliente.
V Consulte los c6digos de plomer_a y sanidad a su
departamento
local de obras ptlblicas. A1 instalar el
sistema deber_ seguir las pautas que le indiquen.
Siga sus c6digos locales si difieren con las pautas del
presente manual. En el Estado de Massachusetts,
se
debe cumplir con los c6digos de plomer_a 248-CMR
3.00 y 10.00. Consulte a un plomero con licencia.
i.,Tiene preguntas?
Llame a la linea de ayuda de Kenmore Water
o visite el sitio web KenmoreWater.com.
al 1-800-426-9345
INSPECCIONE
EL ENVIO
E1 filtro
avanzado
de dos etapas
completo
en una
caja de cart6n.
caja de cart6n
Revise todos
a continuaci6n.
durante
potable
todos
se envla
los arficulos
los artlculos
contra la lista de empaque
Tome nota de todo arficulo
faltante
Consulte
Tome
nota
la vista
en la parte posterior
bres y los nt_meros
Si hubiera
problemas,
telef6nico
gratuito
Conserve
las piezas
hasta
agua
de la
del envlo.
el envk).
envlo.
para
Retire
que est_ listo
de cualquier
detallada
dafio
y la lista
del manual
para tomar
de los arficulos
faltantes
consulte
el sitio web
que figura
en todo
pequefias
dentro
para
este
que figura
o dafiado
en la caja del
de piezas
que est_n
nota de los homo dafiados.
o llame
al nhmero
manual.
de la bolsa
de piezas
instalarlas.
NOTA: Los c6digos del Estado de Massachusetts
un plomero con licencia realice la instalaci6n.
requieren
que
Si vive en Massachusetts,
examine el c6digo de plomerla
248-CMR del Estado de Massachusetts
antes de instalar el producto.
Conjunto
que contiene
la bolsa
Adaptador
mentacidn
Conjunto
que contiene
la bolsa
de alien T
Cinta selladora
para rosca
©
Bater_a plana
®
Filtro
avanzado
&Tiene
de dos etapas
preguntas?
para
agua
potable
Grifo y base de sistema
Llame a la linea de ayuda de Kenmore Water
o visite el sitio web KenmoreWater.com.
electr6nico
al 1-800-426-9345
PLANEE
LA INSTALACION
Herramientas
Se recomienda
leer todo el manual antes de comenzar la instalaci6n. Siga los pasos exactamente
como se indican. Leer este
manual tambi_n lo ayudarfi a obtener todos los beneficios del
sistema.
UBICACION
TIPICA
DEBAJO
necesarias
DEL FREGADERO
La caja del filtro avanzado de dos etapas para agua potable se
ubica normalmente
debajo del fregadero de la cocina o del
ba15o para filtrar agua potable frla. Vea la Figura 2.
destornillador
Phillips
llave ajustable
REVISE LOS REQUISITOS
DE ESPACIO
Revise el tamafio y la posici6n de los artlculos para instalarlos
correctamente
en la ubicaci6n deseada.
HERRAMIENTAS
NECESARIAS
Examine la lista de herramientas
necesarias. Vea la Figura 1.
Refma las herramientas
necesarias antes de comenzar la instalaci6n. Lea y siga las instrucciones proporcionadas
para toda
herramienta
mencionada
aquL
IMPORTANTE:
Se necesita un orificio de 1-1/4 pulg.
(32 ram) para montar el grifo de agua f!ltrada. Consulte a un
plomero o instalador calificado sobre los procedimientos
de
perforaci6n en porcelana o acero inoxidable para evitar dafiar
el fregadero.
Instalaci6n
tipica
debajo
taladro
y mecha
de 1-1/4 pulg., si es necesario
alicates
de extensi6n
grandes
o llave para tubos
Figura
1
Figura
2
del fregadero
grifo de agua
filtrada
SALIDA DE AGUA
(tubo azul)
FREGADERO
uni6n
suministro
de
agua fria
vfilvula de paso
de agua frla
La caja del filtro puede ubicarse
&Tiene
preguntas?
en forma horizontal
O vertical
Llame a la linea de ayuda de Kenmore Water
o visite el sitio web KenmoreWater.com.
al 1-800-426-9345
ESCOJA
EL TIPO
DE UNION
PARA
EL SUMINISTRO
Encuentre la tuberia de agua frla dentro del gabinete del fregadero. A1 planear la instalaci6n, consulte los c6digos locales
de plomeria y cflmplalos; luego instale una uni6n para suministro de agua en la tuberia de agua frla del fregadero. La uni6n
debe proporcionar
una conexi6n a prueba de fugas para el tubo
de entrada de 3/8 pulg. D.E. del filtro avanzado de dos etapas
para agua potable. En la Fig. 3. se ilustra una conexi6n tlpica
con la uni6n para suministro de agua que se incluye. En la Fig.
4. se ilustra una conexi6n alternativa con uniones est_ndar de
plomerla
DE AGUA
A INSTALAR
NOTA: Es posible que el c6digo local determine el tipo de
uni6n de plomeria a usarse. Si no conoce los c6digos o los procedimientos de plomeria locales, consulte a un plomero.
NOTA: Los c6digos del Estado de Massachusetts
requieren que
un plomero con licencia realice la instalaci6n.
Si vive en Massachusetts,
examine el c6digo de plomeria
248-CMR del Estado de Massachusetts
antes de instalar el
producto.
(no incluidas).
A. CONEXION
LA UNION
DEL SUMINISTRO
INCLUIDA
DE AGUA
CON
1. Cierre la vfilvula principal de agua de la casa y abra los grifos para desaguar la tuberia de agua fria del fregadero.
2. Retire la tuerca que conecta
tuberia de agua fria.
el grifo de agua fria con la
3. Enrosque la uni6n (que se incluye) para suministro de agua
fria en el tubo y vuelva a enroscar la tuerca a la parte inferior
de la uni6n.
(NO SE INCLUYEN
DE AGUA
LAS PIEZAS)
NOTA: Antes de comenzm, no olvide cerrar el suministro
agua y abrir un grifo bajo para desaguar la tuberfa.
de
En cumplimiento
de los c6digos de plomeria, instale una uni6n
en la tuberia de agua fria para adaptarla al tubo de 3/8 pulg.
D.E. En la Figura 4 se ilustra una conexi6n tipica. Si se usan
uniones roscadas, no olvide aplicar compuesto para juntas de
tuberia o cinta de Teflon _ en la rosca externa.
uni6n (incluida)
para suministro
esp_rrago
del grifo de
agua fria
,_de
envuelva
B. CONEXION TIPICA DEL SUMINISTRO
CON UNION DE COMPRESION
agua
de 3/8 pulg. D.E.
a la entrada del
tubo amarillo
filtro de agua
la
II
IO
II
II
ii
i,
f'
Ii
rosca
externa
tuberia de _
agua fria
_"
0 BIEN
l_
vfilvula de paso
de agua fria
_
denk35/8delCg).mpresi6n
/
inserto
virola
tuberia de
agua fria
vfilvula de paso
de agua fria
Figura
&Tiene
preguntas?
tubo amarillo
de
_"
3/8 pulg. a la entrada del filtro de
3
Llame a la linea de ayuda de Kenmore Water
o visite el sitio web KenmoreWater.com.
agua
Figura 4
al 1-800-426-9345
HAGA
EL ORIFICIO
PARA EL GRIFO
IMPORTANTE:
Se necesita un orificio de 1-1/4
para montar el grifo de agua f!ltrada. Consulte
instalador
calificado sobre los procedimientos
porcelana o acero inoxidable para evitar dafiar
base del grifo
pulg. (32 ram)
a un plomero o
de peu_oraci6n en
el yS'egadero.
1. Seleccione una de las siguientes opciones para instalar el
grifo. Cerci6rese de que haya suficiente espacio debajo del fregadero para las conexiones necesarias.
® Use un orificio existente para manguera de rociador o
dispensador
de jab6n llquido (debe tener 1-1/4 pulg.
[32 mm] de di_metro).
® Haga un nuevo orificio en la parte superior del fregadero.
,_;_,
--
empaquetadu-
ra c ucho
pernos
de
orificio
de
_._
f._
[ -_--_-_1_ J
_
"_
1-1/4 pulg.
(32 11"11"1"l) de
diamen fre
/
_
-/
gadero o la
encimera
Figura
5
® Haga un orificio en la encimera junto al fregadero.
2. Compruebe
que la base del grifo de agua filtrada quede bien
asentada contra la superficie de montaje.
3. Si es necesario taladrar, haga un orificio de 1-1/4 pulg.
(32 mm) de di_metro, como mlnimo, sobre la superficie
montaje para el grifo.
base del grifo
de
grif°x_
INSTALE LA BASE DEL GRIFO
1. Encuentre la base del grifo (vea la Fig. 5) y haga pasar los pernos de palanca hacia abajo por el orificio hasta que la base del
grifo se apoye horizontalmente
sobre la superficie de montaje
(el fregadero o la encimera).
La empaquetadura
de caucho debe quedar entre la base del
grifo y la superficie de montaje.
2. Apriete los pernos
quede firmemente
excesivamente.
CONECTE
azul
de palanca hasta que la base del grifo
montada sobre la superficie. No apriete
EL TUBO
AZUL
c_a del
filtro
AL GRIFO
1. Coloque la caja del filtro avanzado de dos etapas para agua
potable debajo del fregadero. Puede apoyarse verticalmente
o
sobre un costado.
Figura
6
2. Encuentre el tubo azul. Un extremo se acopla a la caja del illfro. Haga pasar el otro extremo hacia arriba por el orificio de
montaje y la base del grifo. Vea la Figura 6.
3. Consulte la secci6n titulada "Corte los tubos a la medida"
en la p_gina 8, y corte el tubo azul en _ngulo recto yen la longitud necesaria, dejando aproximadamente
6 pulgadas
(15 cm) por encima de la base del grifo.
4. Encuentre el grifo. Consulte la secci6n titulada "Conecte los
tubos" en la p_gina 8 e inserte totalmente el tubo azul en la
uni6n de conexi6n r_pida de 3/8 pulg. de la parte inferior del
grifo.
5. Tire del tubo para comprobar
do a la uni6n.
INSTALE
EL GRIFO
SOBRE
que quede firmemente
grifo
acopla-
LA BASE
1. Apoye el grifo sobre la base. Vea la Figura 7.
2. Haga girar el grifo 1/4 de vueha a la derecha para acoplarlo
la base.
a
gire 1/4 de vueha
para acoplar el grifo
a la base
base del grifo
3. Instale la baterla en la base del grifo. (Consulte la secci6n titulada "Cambie la baterla" en la p5gina 9.) Luego prosiga con el
Paso 3 de la instalaci6n en la p5gina 8.
i.,Tiene preguntas?
Llame a la linea de ayuda de Kenmore Water
o visite el sitio web KenmoreWater.com.
Figura
al 1-800-426-9345
7
CONECTE EL TUBO AMARILLO
SUMINISTRO
DE AGUA
A LA UNION
PARA
1. Encuentre el tubo amarillo. Un extremo se acopla a la caja
del filtro. Tienda el otro extremo hasta la uni6n para suministro de agua en la tuberla de agua frla. Vea la
Figura 8.
FREG_DERO
2. Consulte mils abajo la secci6n titulada "Corte los tubos a la
medida", y corte el tubo amarillo en fingulo recto yen la longitud necesaria.
3. Consulte mils abajo la secci6n titulada "Conecte los tubos",
e inserte totalmente el tubo amarillo en la uni6n de conexi6n
rfipida de 3/8 pulg. de la uni6n para suministro
(instalada en el Paso 1).
4. Tire del tubo para comprobar
do a la uni6n.
COMO
de agua
que quede firmemente
CORTAR Y CONECTAR
FI i
uni6n para suministro
de agua fria
tubo
(@)?amarillo
vfilvula de paso
de agua frla
caja del
filtro
_,_
acopla-
®
LOS TUBOS
Figura
8
Figura
9
uni6n de presi6n
E1 filtro avanzado de dos etapas para agua potable incluye
uniones de presi6n para la conexi6n rlpida de los tubos. Antes
de conectar los tubos, examine las siguientes instrucciones.
tubo ,,aK
NNqK
Corte los tubos a la medida
1. Use un cortador o cuchfllo ffloso para cortar el extremo del
tubo. Siempre corte el tubo en ingulo recto. Vea la Figura 9.
2. Inspeccione el extremo del tubo (aproximadamente
de
1 pulg. o 25 mm) para cerciorarse de que no haya mellas, raspaduras ni ninguna otra secci6n despareja. Si es necesario,
vuelva a cortar el tubo.
Conecte
Corte
quedar
el tubo
en flngulo
redondo
y liso,
Tubo
recto;
sin
el extremo
cortes,
cortado
del
mellas
debe
pianos.
correctamente
los tubos
aro tdrico
1. Haga pasar el tubo por el collarin, hasta que se acople al aro
t6rico. Vea la Figura 10. Siga empujando
el tubo hasta que
sobresalga por la parte posterior de la uni6n. Vea la Figura 11.
Un error comdn es dejar de empujar cuando el tubo se
acopla al aro t6rico. Eso producirl
fugas en el futuro.
Cuando un tubo de 3/8 pulg. estl totalmente acoplado,
3/4 pulg. del tubo ha entrado en la uni6n. Vea las Figuras 10
y11.
Tubo parcialmente
acoplado
2. Si usa algdn tubo que no es el incluido en el sistema, cerci6rese de que sea de alta calidad, de exactamente
el mismo
tamafio y redondez, y que la superficie sea lisa.
Desconecte
mismo
ni perfiles
a la uni6n
Figura
10
Figura
11
Figura
12
aro tdrico
los tubos
1. Empuje el collarln hacia dentro con la punta
Vea la Figura 12.
de un dedo.
2. Siga manteniendo
el collarln apretado hacia dentro
tira del tubo hacia fuera. Vea la Figura 13.
Tubo completamente
mientras
collarln
sell() tdrico
collarln
_@
a la unidn
(apretar para
retirar el tub()) --_--_
unidn
Collarln
&Tiene
acoplado
y sello
t6rico
preguntas?
Figura
13
Desconecte
el tubo
Llame a la linea de ayuda de Kenmore Water
o visite el sitio web KenmoreWater.com.
al 1-800-426-9345
SISTEMA
ELECTRONICO
DEL GRIFO
Dentro de la base del grifo hay un temporizador
6 meses. Vea la Figura 14.
a baterla
para
Tambi_n hay un indicador LED de color 5mbar en el frente de
la base del grifo. Dicho indicador LED destellar5 continuamente cuando hayan transcurrido
6 meses. Esto indica que ya
es tiempo de reemplazar
la baterla y los cartuchos filtrantes.
(o instalar)
baterla,
con el
la bateria,
siga los pasos a continbase del _
1. Afloje el tomillo del lado derecho de la base del grifo. Vea la
Figura 14.
2. Desde el frente de la base del grifo, empuje hacia arriba la
caja de la bateria basra que se desprenda de la base del grifo.
Vea la Figura 14.
grifo
NOTA: Si el indicador LED destella repetidamente
veces, quiere decir que la bateria no est_ totalmente
necesitar_ reemplazarse.
"-____
gire a la izquierda
para retirarlo
f---...
cartucho
filtrante
cartucho
filtrante 2
FILTRANTE
agua se usa, y
Para reemplazar
inde-
Utilice la siguiente informaci6n a modo de gula. Sin embargo,
independientemente
del tipo de cartucho que use, sabr_ que es
tiempo de reemplazarlo
cuando note pot primera vez la presencia de sustancias indeseadas
en el agua.
E1 filtro avanzado de dos etapas para agua potable Kenmore
Elite modelo 625.385010 con el paquete de elementos de reemplazo 42-34381 cumple las normas NSF/ANSI 42 y 53 con
respecto alas afirmackmes
de rendimiento
especificas, las
cuales se han verificado y respaldado
mediante datos de pruebas. La capacidad nominal de este sistema es de
280 galones (1060 litros) a un caudal para servicio nominal de
0.5 gpm (galones pot minuto) (1.9 litros/minuto).
i.,Tiene preguntas?
Figura 15
VIDA UTIL DEL CARTUCHO
Estas incluyen:
2. Cu_nto sedimento, olor o sabot, u otras sustancias
seadas hay en el agua.
1
firme-
Se recomienda
reemplazar la baterla y los cartuchos filtrantes
cada 6 meses de uso. Hay diversas variables que determinar_n
la duraci6n de un cartucho.
1. Cu_nta
14
cubierta
s61o dos
cargada y
la caja del temporizador
y apriete
de montaje. Vea la Figura 14.
VIDA UTIL DEL CARTUCHO
tornillo
Figura
3. Reemplace (o instale) la bateria (una Maxell CR 2032 o
equivalente).
Coloque la baterla dentro del recept_culo con
el lado positivo (+) hacia la parte posterior del recept_culo.
4. Cuando se reemplace la baterla pot primera vez, el indicador
destellar_ seis veces y se apagar_. Eso indica que la bateria
est_ totalmente cargada. Despu6s de los seis destellos, el
temporizador
comenzar_ a contar el ciclo de 6 meses.
5. Vuelva a instalar
mente el tomfllo
d'__@._
ladonegativo(-)
CAMBIE LA BATERIA
Para cambiar
uaci6n.
caja de la
bateria
los cartuchos,
FILTRANTE
siga los pasos a continuaci6n:
1. Gire el cartucho filtrante a la izquierda para retirar los cartuchos de los cabezales del filtro. Vea la Figura 15.
2. Deseche adecuadamente
los cartuchos viejos.
3. Instale los cartuchos nuevos, cerciordndose
de insertar
los
cartuchos 1 y 2 en la cavidad correcta. (Observe la impresi6n
en la cubierta que designa: "Cartridge 1" y "Cartridge 2"
ICartucho 1 y Cartucho 2]). Gire los cartuchos a la derecha
para acoplarlos a los cabezales del filtro.
4. Retire y reemplace la bateria del temporizador.
ci6n titulada "Cambie la bateria" mds arriba.
Vea la sec-
Sabor y olor en los cartuchos: Los cartuchos filtrantes contienen un polvo negro que es carbono activado. Cuando instale
cartuchos nuevos, abra el grifo del agua filtrada y deje que se
purguen las particulas finas de carbono de la unidad. Cierre el
grifo cuando ya no vea particulas finas de carbono en el agua
filtrada, o aproximadamente
despu_s de 10 minutos.
Llame a la linea de ayuda de Kenmore Water
o visite el sitio web KenmoreWater.com.
al 1-800-426-9345
9
Limites
de presi6n
Limites
Entrada
de temperatura
para el agua del suministro
- Salida
........................................
para
el agua
del suministro
.........................
30-125 psi (207-862
..........................
tubo de 3/8 pulg.
Este sistema cumple las normas NSF/ANSI 42 y 53 con respecto alas
las cuales se han vedficado y respaldado mediante datos de pruebas.
afirmaciones
kPa)
40-100 °F (5-40 °C)
D.E., que se incluye
de rendimiento
especfficas,
Instalad6n
en el Estado de Massachusetts:
E1 Estado de Massachusetts
requiere que un plomero con licencia
realice la instalaci6n. En tales casos, se debe cumplir con el c6digo de plomer_a 248-CMR del Estado de
Massachusetts.
Causa:
Filtros anterior y posterior agotados.
Correcci6n:
Reemplace los cartuchos filtrantes. Vea la pbgina 9.
Causa:
Sistema contaminado.
Correcci6n:
Desinfecte el sistema. Llame al 1-800-426-9345
obtener instrucciones.
Causa:
Tubo insertado s6to parcialmente.
Correcci6n:
Inserte totalmente el tubo dentro de las uniones.
Vea la pbgina 8.
Causa:
Tubo no cortado en _ngulo recto,
Correcci6n:
Corte el tubo en _ngulo recto, Vea la pbgina 8.
Causa:
Tubo mellado.
Correcci6n:
Retire el tubo de la conexi6n. Corte el tubo a una Iongitud
mas corta para eliminar la porci6n mellada. Vuelva a
insertarlo en la conexi6n. Vea la pbgina 8.
Causa:
La superficie externa del tubo no es
lisa,
Correcci6n:
Retire el tubo de la conexi6n. Corte el tubo a una Iongitud mas corta para eliminar el area despareja. Vuelva a
insertarlo en la conexi6n. Vea la pbgina 8.
&Tiene
10
preguntas?
Llame a la linea de ayuda de Kenmore Water
o visite el sitio web KenmoreWater.com.
al 1-800-426-9345
para
1
3
4
UNIONES DE
PRESION de la caja
del distribuidor
collarln
sello
tdrico
9
Clave No.
Pieza No.
Descripci6n
1
7292674
Grifo, con base y sistema electr6nico
2
7294359
Media cubierta, con marca de "Cartridge 1" y "Cartridge 2" (cartuchos 1 y 2)
3
7293175
Media cubierta, sin mamas (pida la calcomania
[]
7288447
Calcomania, placa de Kenmore Elite
4
7294579
Tornillo de cubierta (se necesitan 4)
5
7280106
Conjunto del cabezal
6
7208057
Tubo de 3/8 pulg. D.E. x 72 pulg. de largo, amarillo
7
7207962
Tubo de 3/8 pulg. D.E. x 72 pulg. de largo, azul
8
42-34381
Juego de cartuchos filtrantes 1 y 2
9
7228536
Adaptador de alimentaci6n en T
10
7281013
Juego de uni6n a presi6n, 3/8 pulg. •
[]
7154818
Bateria
plana
[]
7294294
Manual
del propietario
mas abajo)
Adcutera cartuchos filtrantes de repuesto en su tienda Sears, en el sitio web www.sears.com
mando a Sears Parts al 1-800-469-4663.
[]
&Tiene
o Ila-
Juego de aro t6rico y cottarin para reemplazar en la caja del distribuidor sotamente. No se incluye.
No se ilustra.
preguntas?
Llame a la linea de ayuda de Kenmore Water al 1-800-426-9345
o visite el sitio web KenmoreWater.com.
11
iiiiiiiiiiiiiiiiiiiiiiiiiiiiii!_
....
Your Home
iiiiiiiiiiiiiiiiiiii
iiiiiiiiiiiiiiiiiiiiFor repair - in your home - of all major brand appliances,
lawn and garden equipment, or heating and cooling systems,
iiiiiiiiiiiiiiiiiiii
iiiiiiiiiiiiiiiiiiii no matter who made it, no matter who sold it!
iiiiiiiiiiiiiiiiiiii
For the replacement parts, accessories and
iiiiiiiiiiiiiiiiiiii owner's manuals that you need to do-it-yourself.
iiiiiiiiiiiiiiiiiiii For Sears professional installation of home appliances
iiiiiiiiiiiiiiiiiiii and items like garage door openers and water heaters.
iiiiiiiiiiiiiiiiiiii
iiiiiiiiiiiiiiiiiiii
1-800-4-MY-HOME ® (1-800-469-4663)
iiiiiiiiiiiiiiiiiiii
Call anytime, day or night (U.S.A. and Canada)
iiiiiiiiiiiiiiiiiiii
www.sears.com
www.sears.ca
iiiiiiiiiiiiiiiiiiii For expert home solutions advice: www.managemyhome.com
iiiiiiiiiiiiiiiiiiii
iiiiiiiiiiiiiiiiiiii
Our Home
!!!!!!!!!!!!!!!!!!!!
iiiiiiiiiiiiiiiiiiiiii
For repair of carry-in items like vacuums, lawn equipment,
iiiiiiiiiiiiiiiiiiiiii
and electronics, call or go on-line for the location of your nearest
iiiiiiiiiiiiiiiiiiiiii
Sears Parts & Repair Service
Center
iiiiiiiiiiiiiiiiiiiiii
1-800-488-1222 (U.S.A.)
1-800-469-4663 (Canada)
iiiiiiiiiiiiiiiiiiiiii
Call anytime, day or night
iiiiiiiiiiiiiiiiiiiiii
www.sears.com
www.sears.ca
iiiiiiiiiiiiiiiiiiiiii
iiiiiiiiiiiiiiiiiiiiii
iiiiiiiiiiiiiiiiiiiiii
To purchase a protection agreement on a product serviced by Sears:
iiiiiiiiiiiiiiiiiiiiii
1-800-827-6655 (U.S.A.)
1-800-361-6665 (Canada)
iiiiiiiiiiiiiiiiiiiiii
iiiiiiiiiiiiiiiiiiiiii
Para pedir servicio de reparaci6n
Au Canada pour service en fran(_ais:
iiiiiiiiiiiiiiiiiiiiii
a domicilio, y para ordenar piezas:
1-800-LE-FOYER Mc
iiiiiiiiiiiiiiiiiiiiii1-888-SU-HOGAR ®
(1-800-533-6937)
iiiiiiiiiiiiiiiiiiiiii (1-888-784-6427)
www.sears.ca
iiiiiiiiiiiiiiiiiHH_
,i!i!i!i!i!i!i!i!i!i!i!i!i!i!i!i!i!i!i!i!i!i!i!_
® Registered
Trademark / TMTrademark
/ SMService Mark of Sears Brands, LLC
® Marca Registrada / TMMarca de F_brica / SMMarca de Servicio de Sears Brands,
MCMarque de commerce / MDMarque de deposee
de Sears Brands, LLC
LLC
© Sears Brands, LLC