1
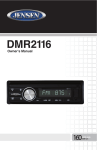
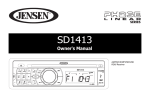
DMR2116i
Owner’s Manual
160
watts peak
40W x 4
Thank you for choosing a Jensen product. We hope you will find the instructions
in this owner’s manual clear and easy to follow. If you take a few minutes to look
through it, you’ll learn how to use all the features of your new Jensen DMR2116i
Mobile Audio System for maximum enjoyment.
“Made for iPod” and “Made for iPhone” means that an electronic accessory has
been designed to connect specifically to iPod or iPhone, respectively, and has
been certified by the developers to meet Apple performance standards. Apple
is not responsible for the operation of this device or its compliance with safety
or regulatory standards. Please note that the use of this accessory with iPod or
iPhone may affect wireless performance.
iPod and iPhone are trademarks of Apple Inc., registered in the U.S. and other
countries.
Made for:
• iPod touch (1st, 2nd, 3rd, and 4th generation)
• iPod nano (3rd, 4th, 5th, and 6th generation)
• iPod Classic
• iPhone 4S
• iPhone 4
• iPhone 3GS
• iPhone 3
• iPhone
WARNING! Stop your vehicle before carrying out any operation that could interfere with
your driving.
WARNING! Never disassemble or adjust the unit. Do not attempt to modify the unit.
Modifying the unit may cause an accident.
WARNING! To prevent injury from shock or fire, never expose this unit to moisture or
water.
WARNING! Do not turn on the unit if the temperature inside the vehicle is
below -4 0F (-20 0C) or above 140 0F (60 0C).
WARNING! When replacing a fuse, the replacement must be the same amperage as shown
on the fuse holder. Never replace a fuse with another fuse of a different value.
Do not use a fuse with a higher amperage rating than the fuse originally
supplied with your unit, otherwise damage to the unit or a fire will result.
2
DMR2116i
CONTENTS
FEATURES�������������������������������������������������������������������������������������������������������������� 4
WARNINGS BEFORE INSTALLATION�������������������������������������������������������������������� 5
INSTALLATION TOOLS������������������������������������������������������������������������������������������ 7
BEFORE YOU INSTALL������������������������������������������������������������������������������������������� 7
Remove the Old Unit from the Dashboard������������������������������������������������������ 8
Mark the Polarity of the Speaker Wires����������������������������������������������������������� 8
INSTALLATION������������������������������������������������������������������������������������������������������� 9
DIN Front Mount��������������������������������������������������������������������������������������������� 10
DIN Rear Mount����������������������������������������������������������������������������������������������� 12
USING THE DETACHABLE FACEPLATE ............................................................... 13
Removing the Faceplate��������������������������������������������������������������������������������� 13
Installing the Faceplate���������������������������������������������������������������������������������� 14
WIRING CONNECTIONS�������������������������������������������������������������������������������������� 15
CONTROLS AND INDICATORS���������������������������������������������������������������������������� 17
BASIC OPERATION���������������������������������������������������������������������������������������������� 20
Turning the Unit On of Off������������������������������������������������������������������������������ 20
Selecting an Audio Source����������������������������������������������������������������������������� 20
Volume������������������������������������������������������������������������������������������������������������� 20
Mute Control���������������������������������������������������������������������������������������������������� 20
System Settings����������������������������������������������������������������������������������������������� 20
Setting the Clock��������������������������������������������������������������������������������������������� 22
RADIO OPERATION��������������������������������������������������������������������������������������������� 23
Choosing a Radio Band����������������������������������������������������������������������������������� 23
Selecting a Frequency Band��������������������������������������������������������������������������� 23
Radio Tune/Seek Function������������������������������������������������������������������������������ 23
Mono/Stereo Reception Control�������������������������������������������������������������������� 23
Local/Distance Control����������������������������������������������������������������������������������� 23
Saving Your Preset Stations��������������������������������������������������������������������������� 24
Automatic Scan and Store������������������������������������������������������������������������������ 24
Radio Data System (RDS) Operation�������������������������������������������������������������� 25
3
USB OPERATION���������������������������������������������������������������������������������������������������27
MP3/WMA Playback�����������������������������������������������������������������������������������������28
MEMORY CARD OPERATION�������������������������������������������������������������������������������30
MP3/WMA Playback�����������������������������������������������������������������������������������������31
iPOD®/iPHONE® OPERATION�������������������������������������������������������������������������������33
SPECIFICATIONS��������������������������������������������������������������������������������������������������35
TROUBLESHOOTING��������������������������������������������������������������������������������������������36
CARE AND MAINTENANCE����������������������������������������������������������������������������������37
COMMON REPLACEMENT PARTS������������������������������������������������������������������������38
NOTES�������������������������������������������������������������������������������������������������������������������39
FEATURES
•
•
•
•
•
•
•
•
4
AM/FM Receiver
RDS/EON Operation
Automatic Memory Storing
Fully Detachable Faceplate
Preset Equalization
USB and SD Card Interface
iPod/iPhone via USB
Auxiliary Input Function
DMR2116i
WARNINGS BEFORE INSTALLATION
Important warnings to take note of BEFORE installing the unit:
Damage caused by incorrect installation or usage is NOT covered
by the warranty. PLEASE take the time to read the installation instructions carefully.
To validate the warranty please ensure that the unit is installed
by a professional, VAT registered car audio installation company.
• To avoid shorts in your vehicle’s electrical system, be sure to disconnect the
battery cable before beginning installation.
• This unit is intended for vehicles with a 12-volt battery and negative grounding.
Before installing the unit in a recreational vehicle, truck, or bus, check that the
battery voltage is 12 volts.
• Remove the two transport screws from the top of the unit before installation.
• The black lead is ground. A good chassis ground requires a tight connection
to ground. The area should be free from rust, paint or any form of dirt. Please
ground this lead separately from the ground of high-current products such as
power amps. If you ground the products together and the ground becomes
detached, there is a risk of damage to the products or fire.
• Be sure to connect the color coded leads according to the wiring diagram.
Incorrect connections may cause the unit to malfunction or damage the
vehicle’s electrical system. Wires for this product and those for other products
may be different colors even if they have the same function. When connecting
this product to another product, refer to the supplied installation manuals of
both products and connect wires that have the same function.
• Be sure to connect the negative (-) speaker leads to the negative (-) speaker
terminal. Never connect the negative (-) speaker leads to chassis ground.
• The unit is only designed for use with 4 speakers. Do not combine outputs
for use with 2 speakers. Do not ground negative speaker leads to the chassis
ground.
• Speakers connected to this unit must be high-power units with a minimum
rating of 45W and impedance of 4 to 8 ohms. Connecting speakers with output
and/or impedance values other than those noted here will result in damage to
the head unit and the speakers. Check the condition of your speakers carefully.
Connecting this unit to old or degraded speakers may result in a fault which will
damage the audio IC and invalidate the warranty.
5
• If this unit is installed in a vehicle that does not have an ACC (accessory) position
on the ignition switch, the red lead of the unit should be connected to a
terminal coupled with ignition switch ON/Off operations. If this is not done, the
vehicle battery may be drained when you are away from the vehicle for several
hours.
• Secure the wiring with cable clamps or adhesive tape. To protect the wiring,
wrap adhesive tape around them where they lie against metal parts. To avoid
short-circuiting, cover all disconnected lead with insulating tape. There is a
possibility of short-circuiting if the leads are not insulated.
• Route and secure all wiring so it cannot touch any moving parts, such as the
gear lever and handbrake. Do not route wiring in places that get hot, such as
near the heater outlet. If the insulation of the wiring melts or gets torn, there is a
danger of the wiring short-circuiting to the vehicle’s body.
• Don’t pass the yellow lead through a hole into the engine compartment to
connect to the battery. This will damage the lead’s insulation and cause a very
dangerous short.
• Do not short any leads. If you do, the protection circuit may fail to work when it
should.
• Never feed power to other equipment by cutting the insulation of the power
supply lead of the unit and tapping into the lead. The current capacity of the
lead will be exceeded, causing overheating.
• Since an unique audio I/C circuit is employed, never wire the unit so the
speaker leads are directly grounded or the left (-) and right (-) speaker leads are
common.
• When this product’s source is switched ON, a control signal is outputted
through the blue lead. Connect to an external power amp’s system remote
control or the car’s Auto-antenna relay control terminal (max. 300mA 12 V DC). If
the car features a glass antenna, connect to the antenna booster power supply
terminal.
• When an external power amp is being used with this system, do not connect
the blue lead to the amp’s power terminal. Likewise, do not connect the blue
lead to the power terminal of the auto-antenna. Such connection could cause
excessive current drain and a major malfunction. Refer to the relevant owner’s
manual for details on connecting the power amp and other units, then make
the connections correctly.
• Do not block any vents or heater panels. Blocking them will cause heat to build
up and may result in fire.
• Make sure that the unit has a good chassis ground. A good ground connection
will eliminate most electrical noise. A good chassis ground requires a tight
connection to the vehicles metal chassis. The area around the ground
connection should be clean, bare metal without rust, paint, plastic or dirt.
6
DMR2116i
• If noise is still experienced when the motor of the vehicle accelerates, a choke
should be placed in line with the power to the unit. The installation company
will know what is required.
• When replacing the fuse(s) the replacement must be of the same amperage as
shown on the fuse holder. Never replace a fuse with another fuse of a different
value. If the fuse blows again please contact your installation company.
• Double check that all wiring and connections are correct before re-connecting
the battery and turning on the unit.
• After completing the installation and before operating the unit, reconnect the
battery, then press the RESET button with a pointed object, such as a ball-point
pen to set the unit to its initial status.
INSTALLATION TOOLS
Two removal wrenches are supplied for taking out the old unit and place with this
brand name car radio. The following tools and supplies may also be needed for
the installation, but are not supplied:
Installation Tools:
• Phillips Screwdrivers
• Wire Stripper
• Wire Cutter
• Hammer
• Pencil
• Electrical Tape
• Electric Drill
Installation Supplies:
• Machine Screws
• Crimp Connectors
• 14 Gauge Wire for Power Connections
• 14-16 Gauge Speaker Wires
BEFORE YOU INSTALL
Automotive audio equipment installations can be troublesome at times, even to
the most experienced of installation technicians. If you are not confident working
with electrical wiring, removing and reinstalling interior panels, carpeting,
dashboards or other components of your vehicle, please call your dealer in order
to have the unit professionally installed.
7
Remove the Old Unit from the Dashboard
1. Remove the outer trim frame.
DIN Front Mount
2. I nsert the keys supplied with the old unit into both sides of the unit as
shown in figure below until they click. Pull to remove the old unit from the
dashboard.
Do not disconnect
wires at this time!
Mark the Polarity of the Speaker Wires
Marking the polarity of the speaker wires will make it easier to connect the
existing speakers to your car radio. Consult the wiring diagram of the existing
head unit before disconnecting any wires. If you are not positive of the polarity of
the existing wires from the speakers to the head unit, install new wires.
1. While the old unit is playing, disconnect the wires from one speaker.
2. Take a length of masking tape and fold it around the wire so it forms a flag.
3. On the masking tape mark the polarity of the speaker wires (+ & - ), as well as
left or right, and front or rear.
4. Double check that you marked the first speaker correctly by checking that the
speaker wires are the same at the head unit.
5. Repeat this procedure for all of the speakers.
6. Mark the power, ground, and any other wires.
8
DMR2116i
INSTALLATION
It’s a good idea to read all of the instructions before beginning the installation.
We recommend having your Jensen DMR2116 Mobile Audio System installed by a
reputable installation shop.
WARNING! Disconnect the negative battery terminal from the battery before
starting installation. Consult the vehicle’s owner’s manual for proper
instructions.
NOTE: Mark the polarity of the existing speaker wires before disconnecting battery.
Notes:
• Choose a mounting location where the unit will not interfere with the driver.
• Before installing the unit, temporarily connect the wiring. Make sure it is
connected up properly and the unit and the system work properly.
• To ensure proper installation, use only parts included with the unit. The use of
unauthorized parts can cause malfunctions.
• Consult with your nearest dealer if installation requires the drilling of holes or
other modifications to the vehicle.
• Install the unit where it does not get in the driver’s way and cannot injure the
passenger if there is a sudden stop, like an emergency stop.
• If the installation angle exceeds 30° from horizontal, the unit might not give its
optimum performance.
30
• Avoid installing the unit where it would be subject to high temperature, such as
from direct sunlight, or hot air from the heater, or where it would be subject to
dust, dirt or excessive vibration.
9
DIN Front/Rear Mount
This unit can be properly installed either from “Front” (conventional DIN Frontmount) or “Rear” (DIN Rear-mount installation, utilizing threaded screw holes
at the sides of the unit chassis). For details, refer to the following illustrated
installation methods.
DIN Front Mount (Method A)
Installation Opening
This unit can be installed in any dashboard having an opening as shown below:
Installing the Unit
Be sure you test all connections first, and then follow these steps to install the unit
1. After removing the old radio and mounting sleeve, insert the supplied
mounting sleeve into opening.
10
DMR2116i
2. B
end the tabs on the mounting sleeve to keep the mounting sleeve firmly in
place.
3. A
ttach the wires from the unit to existing wires. See the wiring connections
diagram. Insert the radio into the dashboard. Then apply the trim frame to the
outside of radio.
4. S upport the radio using the supplied rear mounting bolt and steel bar. See the
parts list.
11
DIN Rear Mount (Method B)
This method of installation uses the screw holes at the sides of the unit and the
holes of the existing vehicle mounting bracket. This is only intended as a general
guide; contact the vehicle’s manufacturer for specific instructions.
NOTE: O
uter trim frame, hook, and mounting sleeve are not used for this
installation.
1. Remove the hooks on both sides.
2. Align the screw holes of the mounting bracket supplied with the car and the
screw holes of the main unit. Tighten the two screws on each side of the unit.
Then fasten the brackets to the car.
3. A
ttach the wires of the unit to the existing speaker wires. See the wiring
diagram.
12
DMR2116i
USING THE DETACHABLE FACEPLATE
Removing the Faceplate
1. Press the
(release) button on the faceplate and pull off the faceplate.
Release Button
Faceplate
2. Keep the faceplate in the protective case.
Protective Case
Faceplate
13
Installing the Faceplate
To install the faceplate, insert the faceplate into the housing and make sure it is
properly installed. Otherwise, the display may appear to be abnormal or some
buttons will not function properly.
Handling Precautions
1. Do not drop the faceplate.
2. Do not put pressure on the display or control buttons when detaching or reinstalling the faceplate.
3. Do not touch the contacts on the faceplate or on the main unit body. It may
result in poor electrical contact.
4. If any dirt or foreign substances adhere to the contacts, they can be removed
with a clean and dry cloth.
5. Do not expose the faceplate to high temperatures or direct sunlight.
6. Keep away any volatile agents (e.g. benzene, thinner, or insecticides) from
touching the surface of the faceplate.
7. Do not attempt to disassemble the faceplate.
14
DMR2116i
WIRING CONNECTIONS
ISO Connector
A
Fuse 10 A
RCA OUT
Left = White
Right = Red
Antenna Socket
B
Connector A
1. Rear right speaker (+) / Purple
2. Rear right speaker (-) / Purple - Black
3. Front right speaker (+) / Grey
4. Front right speaker (-) / Grey - Black
5. Front left speaker (+) / White
6. Front left speaker (-) / White - Black
7. Rear left speaker (+) /Green
8. Rear left speaker (-) / Green -Black
Connector B
1. No connection
2. No connection
3. No connection
4. Battery 12 V (+) / Yellow
5. Antenna power / Blue
6. Panel light / White
7. ACC+ / Red
8. Ground / Black
Speaker Wiring Notes
Follow the above wiring diagram to install the head unit with new or existing
speakers.
• This unit is designed for use with four (4) speakers with an impedance from
4 Ohms to 8 Ohms.
• An impedance load of less than 4 Ohms can damage the unit.
• Never bridge or combine the speaker wire outputs. When not using four
speakers, use electrical tape to tape the ends of the unused speaker outputs to
prevent a short circuit.
• Never ground the negative speaker terminals to chassis ground.
15
Black Ground Wire
Connect the Black Ground wire to the vehicle body/chassis. Make sure that you
have a good chassis ground. Good ground connections will eliminate most
electrical noise from the motor and alternator. A good chassis ground requires
a tight connection to the vehicle’s metal chassis. The area around the ground
connection should be clean, bare metal without rust, paint, plastic, dust or dirt.
Red Accessory/Ignition Wire
Connect the Red Accessory/Ignition wire to a terminal coupled to the ignition
switch’s ACC (accessory) position.
Note: I f this unit is installed in a vehicle that does not have an ACC (accessory)
position on the ignition switch, the red lead of the unit should be connected to
a terminal coupled with ignition switch ON/Off operations.
Yellow Memory Backup Wire
Connect the Yellow Memory Backup wire to an electrical terminal always supplied
with power regardless of ignition switch position.
White Panel Light Wire
Connect the White Panel Light wire to the lighting circuit of vehicle. This will
illuminate the buttons on the display for night time operation. This wire can also
be connected to the Blue Remote wire to activate the buttons when the unit is
powered on. DO NOT JOIN THE WHITE WIRE TO THE LIGHTING CIRCUIT OF THE
VEHICLE IF CONNECTED TO THE BLUE REMOTE WIRE.
Blue Antenna Power Wire
Connect the Blue Antenna Power to an Auto-antenna control wire. Maximum
current 300Ma 12 V DC. (Low Current)
RCA Output Jacks
The RCA Output Jacks are for connecting amplifier, equalizer, or other audio
components that require a pre-amp out connection (Red = Right, White = Left).
Follow the manufacturers instructions for the audio component that you are
connecting.
16
DMR2116i
CONTROLS AND INDICATORS
1
2
3
4
5
i
MENU
17 16
15 14
13
12
19
11
10
9
8
7 6
18
1. M
ute / (Power On/Off) Button
Press this button to turn the unit ON. Press and hold this button to turn the
unit OFF.
When the unit is on, press this button to mute the audio. Press this button
again to unmute the audio.
2. SRC (Mode Select) / TA (Traffic Announcement) Button
Press this button to select radio, auxiliary device, USB, SD or iPod/iPhone play.
USB or SD mode can only be selected when an USB flash memory or SD card
is inserted into the USB port or SD port, respectively. iPod/iPhone mode can
only be selected when an iPod/iPhone is inserted into the USB port.
In radio mode, press and hold this button to turn the traffic announcement
function on or off.
17
3. V
olume Knob (when rotated) / Sound Select Button (when pressed)Rotate the knob to increase or decrease the volume. VOL will appear on the
display panel, followed by the setting number.
When pressed, the knob performs the Select function. This button is used
to select the audio function (bass, treble, balance, fade or loudness) to be
adjusted.
4. Liquid Crystal Display Panel
The Liquid Crystal Display (LCD) panel displays the band and radio station
frequency. If the station transmits music information this will also be
displayed. This information usually consists of song title and artist. Also the
radio can display PTY categories such as news, sports, talk etc.
5. (Release Panel) Button
Press this button to release the faceplate from the chassis.
6. USB Input Cover
Front panel cover which when open allows the connection of a USB device
device for playback of music files.
7. Aux Input Jack
Accepts a 3.5 mm jack which can accept signals from various
audio/video devices.
8. 6 /
(Folder Up) Button
Press this button once to advance one folder.
9. 5 /
(Folder Down) Button
Press this button once to go back one folder.
10. 4 / RDM (Random) Button
Press this button to play all the tracks in random order. Press this button again
to stop random play.
11. 3 / RPT (Repeat) Button
Press this button to repeat the current track. Press this button again to cancel
the repeat function.
12. 2 / INTRO (Introduction) Button
Press this button to play the first 10 seconds of each track. Press this button
again to resume playback.
13. 1 / (Play / Pause) Button
Press this button to pause playback. Press this button again to resume
playback.
18
DMR2116i
14. AS (Auto Store) / MENU Button
Press to scan through a 5 second preview of each station preset.
Press and hold to access the Auto-Store Tuning feature which will
automatically scan and enter up to eighteen strong stations into the six
preset memory locations for FM1, FM2 and FM3. If the radio is in AM mode,
it will scan and store up to twelve strong stations into the six preset memory
locations for AM1 and AM2. If you have already set the preset memories
to your favorite stations, activating the Auto-Store feature will erase those
stations and enter the new strong stations. After completing an Auto-Store
Tuning function, the radio automatically performs an 5 second preview of
each stored preset.
In iPod/iPhone mode, press this button to enter the category menu.
15. (Next Track / Fast Forward) Button
Press the
button once to advance to the next track.
Press and hold the
button to fast forward.
16. Band / PTY (Program Type) Button
Press this button to select or change the radio band (FM1, FM2, FM3, AM1 or
AM2
In FM radio mode, press and hold this button to show the program type.
In iPod/iPhone mode, press this button to display data for the selected track.
17. (Previous Track / Fast Reverse) Button
Press the
button once to go to the previous track.
Press and hold the
button to fast reverse.
18. Reset Button
The reset button is accessed when the front panel is removed. Press this
button to reset the system settings to the factory default settings.
19. SD Memory Card Slot
The memory card slot is located behind the front panel and is used to insert
an SD card for playback of music files.
19
BASIC OPERATION
Turning the Unit On or Off
Press the (Power On/Off ) button to turn the unit on. The message “JENSEN”
appears on the display panel, indicating the unit is ready for use.
When the unit is on, press and hold the (Power On/Off ) button to turn the unit
off.
Selecting an Audio Source
Press the SRC button on the faceplate to select radio, auxiliary device, USB, SD or
iPod/iPhone play.
Note: U
SB or SD mode can only be selected when an USB flash memory or SD card is
inserted into the USB port or SD port, respectively. iPod/iPhone mode can only
be selected when an iPod/iPhone is inserted into the USB port.
Volume
Rotate the volume knob on the faceplate to adjust the volume level. The larger the
number, the higher the volume level.
Mute Control
Press the MUTE button briefly to mute the sound instantly. “MUTE” appears on the
display panel. Press it again to restore the sound. Adjusting the volume knob also
cancels the mute function.
System Settings
When using the mobile audio system for the first time, it is recommended that you
customize the system settings to suit your preferences.
Sound Adjustment Mode
The sound adjustment mode allows you to easily adjust your mobile audio system
to meet the acoustical characteristics of your vehicle.
To adjust the bass:
1. Press the volume knob repeatedly until “BAS” appears on the display panel.
2. Rotate the volume knob to adjust. When an equalizer preset is ON, bass
control is not available.
To adjust the treble:
1. Press the volume knob repeatedly until “TRE” appears on the display panel.
2. Rotate the volume knob to adjust. When an equalizer preset is ON, treble
control is not available.
20
DMR2116i
To adjust the balance:
1. Press the volume knob repeatedly until “BAL” appears on the display panel.
2. Rotate the volume knob to adjust the balance between the left and right
speakers.
To adjust the fader
1. Press the volume knob repeatedly until “FAD” appears on the display panel.
2. Rotate the volume knob to adjust the balance between the front and rear
speakers.
Loudness Control
Loudness automatically alters the frequency response curve of audio to make it
sound more natural when played at a lower volume level.
1. Press the volume knob repeatedly until “LOUD OFF” appears on the display
panel. This indicates that the loudness function is OFF.
2. Rotate the volume knob to select ON or OFF.
Preset Equalizer Function
The Preset Equalizer function applies a preset sound level to the unit’s audio
output signal in accordance to the type of music being played.
To select an equalizer preset:
1. Press the volume knob repeatedly until “EQ” appears in the display panel.
2. Rotate the volume knob to choose the equalizer sound effects. The sequence
of equalizer settings will be as follows:
POP
JAZZ
ROCK
CLASSIC
OFF
Turning the Preset Beep Sound On or Off
An audible beep tone confirms each function selection.
1. Press the volume knob repeatedly until “BEEP ON” appears on the display
panel.
2. Rotate the volume knob to select “BEEP OFF” or “BEEP ON”.
3. Leave the unit idle for the setting to take effect.
21
Selecting an Area - AM/EUR
1. P
ress and hold the volume knob until the clock displays. Press the volume
knob until “AREA AM” appears on the display panel.
2. Rotate the volume knob to select the tuner region: AM (Americas) or EUR
(Europe).
3. Leave the unit idle for the setting to take effect.
Setting the Clock
The time clock can be set anytime when the power is on.
1. Press and hold the volume knob. The time appears on the display panel.
2. Press and hold the volume knob until the hour blinks on the display panel.
Rotate the volume knob to set the hours.
3. Press the volume knob for the minutes to blink. Rotate the volume knob to set
the minutes.
4. Press and hold the volume knob once to confirm the time clock setting.
22
DMR2116i
RADIO OPERATION
Choosing a Radio Band
Press the SRC button on the faceplate to select radio mode. The radio frequency
appears in the display panel together with the frequency memory band (FM1,
FM2, FM3, AM1 or AM2).
The unit has five preset memory bands - three FM Bands (FM1, FM2, and FM3) and
two AM Bands (AM1 and AM2). Each of the five bands can store up to six preset
stations, for a total of 30 preset memory stations.
Selecting the Frequency Band
In radio mode, press the BAND button on the faceplate to select the desired band.
The reception band will change in the following order:
FM2
FM3
AM1
AM2
FM1
Radio Tune / Seek Function
In radio mode, press and hold the
or
appears on the display panel. Press the
adjust the radio frequency.
button for 2 seconds. ”MANUAL”
or
button once to manually
Tuning
Press the
or
button once. The radio will seek the next strong and clear
frequency station. Repeat to seek more stations with a strong signal in your
listening area.
Mono/Stereo Reception Control
The reception of distant stations may be improved by selecting “MONO” operation.
“MONO” operation may cut down some reception noise.
1. In FM radio mode, press the volume knob until “STEREO” appears on the
display panel.
2. Rotate the volume knob to select “STEREO” or “MONO”.
Local / Distance Control
The local and distance reception setting can improve radio reception, depending
on the location where the radio is being used.
1. In FM radio mode, press the volume knob until “LOC ON” appears on the
display panel.
2. Rotate the volume knob to select “LOC ON” or “LOC OFF”.
23
Saving Your Preset Stations
There are six numbered preset buttons which can store and recall stations for each
band. While listening to a radio station you would like to save as a pre-set, press
and hold one of the buttons numbered 1-6 until you hear a beep. The button you
pressed is now the preset button for that station.
Automatic Scan and Store
The Automatic Memory Storing feature is most useful when travelling in an area
where you are not familiar with the local stations. The Auto-Store Tuning feature
will automatically scan and enter up to eighteen FM strong stations into the preset
memory locations for the FM1, FM2 and FM3 bands or twelve strong AM stations
into the preset memory locations for the AM1 and AM2 bands. Each band stores
up to six preset stations.
While listening to the FM radio, press and hold the AS button on the faceplate. The
receiver will automatically scan and save stations of the 3 FM bands.
While listening to the AM radio, press and hold the AS button on the faceplate.
The receiver will automatically scan and save stations of the 2 AM bands.
Note: I f you have already set the preset memories to your favorite stations,
activating the Auto-Store feature will erase those stations and enter the new
strong stations.
24
DMR2116i
Radio Data System (RDS) Operation
The Radio Data System (RDS) simultaneously transmits digital data along with the
audio signal on FM radio. Although RDS is a European standard, it is also used in
the USA, where it is called Radio Broadcast Data System (RBDS). RDS enables traffic
reports to be received and provides many facilities, including enabling the radio
station name and program information to be displayed on the display panel.
RDS service availability varies with areas. If RDS service is not available in your
area, the following services are not available, either.
Listening to Traffic Announcements (TA)
Press the TA button to turn Traffic Announcement function on or off. “TA” appears
on the display panel when Traffic Announcement is on.
In TA mode, traffic programs are automatically searched until the program is
received. When a traffic announcement is received, the unit will temporarily switch
to the tuner mode (regardless of the current mode) and begin broadcasting
the announcement. After the traffic announcement is over, it will return to the
previous mode and volume level.
To interrupt a traffic announcement, briefly press the TA button; it will not switch
off the TA mode.
Traffic Announcement Settings
Traffic Announcements Seek/Alarm
This setting selects the TA Seek or TA Alarm function:
• TA Seek - When the TA function is activated, the radio searches for a station with
traffic announcements
• TA Alarm - No automatic station search. The radio sounds a beep tone if no
traffic information is received. “NO TP/TA” appears on the display panel.
1. Press and hold the volume knob repeatedly until “AREA AM” appears on the
display panel.
2. Immediately press the volume knob. “TA SEEK” appears in the display panel.
3. Rotate the volume knob to select “TA SEEK” or “TA ALARM”.
4. Leave the unit idle for the setting to take effect.
25
Selecting an FM Station by Program Type (PTY)
This radio will allow you to select the type of program required, and will search for
a station broadcasting that type of program.
1. Press and hold the BAND/PTY button until the program type and “PTY”
appears on the display panel.
2. Immediately press the 1 - 6 button to choose the type of program. Press the
number button repeatedly to choose a program type category 1 as shown in
the table below.
Press and hold the PTY button and then immediately press it again to choose
a program type category 1 as shown in the table below.
Button
1
2
3
4
5
6
Program Type Category 1
Program Type Category 2
Oldies, Country
News, Info, Sport
Soft, Nostalgia
Rock, Classic Rock, Talk
Jazz, Classic
Adult, Soft Rock, Top 40
Rhythm, Soft Rock
Foreign
Religious Music, Religious
Talk
Personality
Public, College
Weather
When a program type is selected, the radio starts to search corresponding
PTY information. “SEEK PTY” appears on the display panel. The radio stops
searching if the corresponding PTY information is detected. If no buttons
are pressed within several seconds, the previously selected PTY is searched.
During one loop, if desired the PTY is not found, “PTY NONE” appears on the
display panel and the radio will return to the previous mode.
3. Press the BAND/PTY button on the faceplate to switch the PTY function off.
26
DMR2116i
USB OPERATION
The unit contains a USB port. The USB port is located on the faceplate beneath the
protective cover. You can connect an USB memory device using this port.
1. Locate the USB Input Cover on the faceplate.
USB Input Cover
2. Lift the USB Input Cover to reveal the USB port.
3. Insert the USB device into the USB port. The unit will read the audio files on
the USB device automatically. “USB” appears on the display panel and MP3/
WMA file playback begins.
4. If the unit is in another mode of operation press the SRC button on the
faceplate.
Note: W
hen in USB play mode, be sure not to remove the USB device from the USB
port.
Note: T he unit can only support a standard USB memory device. When connecting
an MP3 player that uses normal batteries (non rechargeable batteries), the
batteries should be removed from the MP3 player first and then connected to
the USB port. Otherwise, damage to the batteries may result.
Note: T his unit supports a USB device with up to 8GB storage size. If there is any
compatibility problems, we recommend you to format your USB device in
FAT32 mode before using it. If the problem persists, consult your dealer for
assistance.
27
MP3/WMA Playback
To play MP3/WMA files from a USB flash memory, insert a USB flash memory into
the USB port on the left side of the unit. The unit will start playing MP3/WMA
files on the USB flash memory automatically. ID3 information will be displayed
automatically on the display panel.
If the MP3/WMA files are stored in folders on the USB drive, the unit will start by
playing the first song in the first folder. After playing all the files sequentially in the
first folder, the unit will play sequentially all of the files in the next folder. The unit
will continue playing through all of the folders on the USB drive in this manner.
If the USB drive has loose files and folders containing files, it will play the loose
files sequentially, then it will play the files in the folders sequentially.
Pausing or Resuming Playback
Press the 1 / (Play / Pause) button to pause playback. “PAUSE” appears on the
display panel. Press the 1 / (Play / Pause) button again to resume playback.
Fast Forward or Fast Reverse
Press and hold the
Press and hold the
button to fast forward.
button to fast reverse.
Selecting a Track
To select the next or previous track:
Press the
button once to advance to the next track.
Press the
button once to go to the previous track.
To select a track directly:
1. Press AS/MENU button. The track number appears on the display panel.
2. Rotate the volume knob to select the track number in this folder.
3. Press volume knob to play back the track.
Scanning Tracks/Introduction Mode
Press the 2 INTRO (Introduction) button to play the first ten seconds of each
track. “INT” and the track number appears on the display panel. Press the 2 INTRO
button again to cancel the function.
28
DMR2116i
Repeating a Track
Press the 3 RPT (Repeat) button to repeat the current track. “RPT” and the track
number appears on the display panel. Press the 3 RPT button again to cancel the
function.
Playing Tracks in a Random Order
Press the 4 RDM (Random) button to play all the tracks in random order. “RDM”
and the track number appears on the display panel. Press the 4 RDM button again
to cancel the function.
Selecting a Folder
Folder Down
Press the 5 /
Folder Up
Press the 6 /
button once to go back one folder.
button once to advance one folder.
29
MEMORY CARD OPERATION
There is an SD Memory Card Slot on the housing of the unit. The housing is
accessed by removing the faceplate.
1. Press the release button on the faceplate.
Release Button
Release Button
2. PullFaceplate
off the faceplate to reveal the Memory Card slot.
Faceplate
3. Insert an SD card into the Memory Card slot.
Memory Card Slot
4. I nstall the faceplate. The unit will search the MP3/WMA files in the card and
start to play MP3/WMA files automatically. “CARD” appears on the display
panel.
5. I f the unit is in another mode of operation press the SRC button on the
faceplate to select SD play mode.
Note: T his unit supports a SD/MMC card with up to 8GB storage size. If there is any
compatibility problems, we recommend you to format your SD/MMC card in
FAT32 mode before using it. If the problem persists, consult your dealer for
assistance.
30
DMR2116i
MP3/WMA Playback
To play MP3/WMA files from a SD card, remove the faceplate and insert a SD card
into the SD Memory Card Slot on the housing. The unit will start playing MP3/
WMA files on the SD card memory automatically when the faceplate is installed.
ID3 information will be displayed automatically on the display panel.
If the MP3/WMA files are stored in folders on the SD card, the unit will start by
playing the first song in the first folder. After playing all the files sequentially in the
first folder, the unit will play sequentially all of the files in the next folder. The unit
will continue playing through all of the folders on the SD card in this manner.
If the SD card has loose files and folders containing files, it will play the loose files
sequentially, then it will play the files in the folders sequentially.
Pausing or Resuming Playback
Press the 1 / (Play / Pause) button to pause playback. “PAUSE” appears on the
display panel. Press the 1 / (Play / Pause) button again to resume playback.
Fast Forward or Fast Reverse
Press and hold the
Press and hold the
button to fast forward.
button to fast reverse.
Selecting a Track
To select the next or previous track:
Press the
button once to advance to the next track.
Press the
button once to go to the previous track.
To select a track directly:
1. Press AS/MENU button. The track number appears on the display panel.
2. Rotate the volume knob to select the track number in this folder.
3. Press volume knob to play back the track.
31
Scanning Tracks/Introduction Mode
Press the 2 INTRO (Introduction) button to play the first ten seconds of each
track. “INT” and the track number appears on the display panel. Press the 2 INTRO
button again to cancel the function.
Repeating a Track
Press the 3 RPT (Repeat) button to repeat the current track. “RPT” and the track
number appears on the display panel. Press the 3 RPT button again to cancel the
function.
Playing Tracks in a Random Order
Press the 4 RDM (Random) button to play all the tracks in random order. “RDM”
and the track number appears on the display panel. Press the 4 RDM button again
to cancel the function.
Selecting a Folder
Folder Down
Press the 5 /
Folder Up
Press the 6 /
32
button once to go back one folder.
button once to advance one folder.
DMR2116i
iPOD®/iPHONE® OPERATION
An iPod or iPhone device can be connected to the unit through the USB interface
on the faceplate. The unit will automatically switch to iPod mode when an iPod,
iPod touch or iPhone is plugged into the USB connector.
Note: F or iPod/iPhone connectivity, you can use the white 30-pin to USB iPod® cable
that came with your Apple device .
Once connected, press the SRC button to select another mode of operation. To
return to the iPod mode from any other source, press the SRC button until iPod
appears on the display panel.
Selecting a Category
1. W
hen iPod or iPhone is playing, press the MENU button. The category will
appear on the display.
2. Rotate the volume knob to change the category as follows:
PLAY LIST
ARTIST
ALBUM
GENRE
SONGS
COMPOSER
AUDIO BOOK
PODCAST.
3. Press the volume knob to confirm the selected category.
Selecting a Track
1. S elect a category as described above. When pressing the volume button
to confirm the selected category, the display will show the current catalog
stored in the iPod or iPhone.
2. Rotate the volume knob to change the track title to the next track or the
previous track.
3. Press the volume knob to play the selected track.
Pausing Playing
When playing a track, press the 1 / button to pause playing. “PAUSE” appears on
the display panel.
Press the 1 / button again to resume playing.
Repeating Tracks
When playing a track, press the 3 RPT button briefly to repeat the current track.
Press the 3 RPT button again to cancel the repeat function.
Playing Tracks In Random Order
When playing a track, press the 4 RDM button to play all tracks in the current
category in random order. “RDM” will appear on the display panel. Press 4 RDM
again to cancel the function. In the Song or Album mode, press the 4 RDM button
for 2 seconds to randomly play all tracks in an album. In the Song or Album shuffle
mode, press the 4 RDM button again to exit shuffle mode.
33
Selecting a Track Up/Down
When playing a track, press the
button or
button to play the previous or
next track in the current category. You can not enter the next category.
When playing a track for more than 1 second, press the
button to play the
current track from the start of that track.
button to play the
When playing a track for less than 1 second, press the
previous track.
When playing a track, press and hold the
button or
button for several
seconds to play in fast reverse or fast forward. Release the button to resume
normal playback.
34
DMR2116i
SPECIFICATIONS
CEA Power Ratings
Power output: 13 watts RMS X 4 channels
into 4-ohms @ < 1% THD+N
Signal to noise ratio: 7
0dBA below reference
(Reference: 1 watt, 4-ohms)
Frequency response: 2
0Hz to 20kHz (-3dB)
(Auxiliary input used as source
reference)
Reference supply voltage: 14.4VDC
FM Tuner
Tuning range (AM): 87.5MHz - 108.00MHz
Tuning range (Europe): 87.50MHz-108.00MHz
Mono sensitivity: 12dBf
50dB quieting sensitivity (stereo): 16dBf
Stereo separation @ 1kHz: >35dB
Frequency response: 30Hz-17kHz. -3dB
AM Tuner
Tuning range (AM): 530 kHz - 1710kHz
Tuning range (Europe): 522kHz-1620kHz
Sensitivity @ 20dB signal to noise: 30uV
Frequency response: 50Hz-2kHz, -3dB
Auxiliary Input
Input sensitivity: 400mV RMS for 1 watt RMS into 4-ohms
Frequency response: 20Hz to 20kHz, -3dB
Input impedance: 10 k-ohms
General
Power supply: 11-16 VDC, negative ground
Power Antenna (Blue): 500mAmp Max, current limited protection.
Operating Temp: -10°C~60°C
Fuses: 10 amp fast blow ATO
DIN chassis dimensions: 2”H x 7”W x 6.7”D
(51mm x 178mm x 170mm)
Specifications are subject to change without notice.
35
TROUBLESHOOTING
Before going through the checklist, the check wiring connections. If any of the
problems persist after checking the list, contact your nearest service dealer.
Problem
Cause
Solution
No power.
• The car ignition switch is
not on.
• If the power supply is
connected to the car
accessory circuits, but the
engine is not running, switch
the ignition key to “ACC”.
• Replace the fuse. Make sure
the amperage matches the
specified value.
• The fuse is blown.
No sound.
• The volume is at minimum.
• The wiring is not properly
connected.
• Adjust the volume to a desired
level.
• Check the wiring connection.
The
operation
keys do not
work.
• The built-in microcomputer
is not operating properly
due to noise.
• Press the RESET button.
• The faceplate is not properly
installed.
The radio
does not
work.
• The antenna cable is not
connected.
• Insert the antenna cable
firmly.
The radio
station
automatic
selection
does not
work.
• The signals are too weak.
• Select a station manually.
File
You have files with Digital
information Rights Management( DRM).
shows in
display
panel but
will not play.
36
Contact the vendor for proper
use.
DMR2116i
CARE AND MAINTENANCE
1. U
se only a clean silicon cloth and neutral detergent to clean the front panel.
A rough cloth and non-neutral detergent (such as alcohol) may result in
scratching or discoloration.
2. Do not get water or cleaning fluids on the unit.
3. Do not use petroleum distillates to clean this unit.
4. When the vehicle warms up during cold weather or under damp conditions,
condensation may appear on the display panel. Should this occur, the screen
will not operate properly until the moisture has evaporated.
Replacing the Fuse
Make sure the amperage matches the specified value when replacing the fuse(s). If
the fuse is bad, check the power connection and replace the fuse with a new one.
If the same problem occurs, this might indicate a malfunction within the unit.
Warning! W
hen replacing a fuse, the replacement must be the same amperage as
shown on the fuse holder. Never replace a fuse with another fuse of a
different value. Do not use a fuse with a higher amperage rating than
the fuse originally supplied with your unit, otherwise damage to the
unit or a fire will result.
37
COMMON REPLACEMENT PARTS
Detachable Faceplate
30213890
Owner’s Manual Kit
30613860
Wire Harness
30313840
Trim Ring
30413840
Main Sleeve
30113840
Hardware Bag
30513840
38
DMR2116i
NOTES
39
Audiovox Electronics Corporation
Hauppauge, NY 11788
Technical Assistance: 1-800-323-4815
www.mobile.jensen.com
© 2013 Audiovox
Printed in China
128-9240
DMR2116i
Owner’sdel
Manual
Manual
propietario
160
vatios
de peak
potencia máxima
watts
40W xx 44
Gracias por elegir un producto Jensen. Esperamos que las instrucciones de
este manual del propietario le resulten claras y fáciles de seguir. Si dedica unos
minutos a su lectura, aprenderá a utilizar todas las funciones de su nuevo sistema
de audio móvil Jensen DMR2116i, lo cual le permitirá disfrutar de él al máximo.
Diseñado para iPod
"Diseñado para iPod" y "Diseñado para iPhone" significa que el accesorio
electrónico fue diseñado para conectarlo especialmente a iPod o iPhone,
respectivamente, y que los desarrolladores obtuvieron la certificación de
adecuación a las normas de rendimiento de Apple. Apple no se responsabiliza
por el funcionamiento de este dispositivo o su cumplimiento con las normas de
seguridad y reguladoras. Tenga en cuenta que el uso de este accesorio con un
iPod o iPhone puede afectar el rendimiento inalámbrico.
iPod y iPhone son marcas de Apple Inc., registradas en EE.UU. y otros países.
Diseñado para:
• iPod touch (1.a, 2.a, 3.a y 4.a generación)
• iPod nano (3.a, 4.a, 5.a y 6.a generación)
• iPod Classic
• iPhone 4 S
• iPhone 4
• iPhone 3GS
• iPhone 3
• iPhone
¡ADVERTENCIA! Detenga su vehículo antes de realizar alguna actividad que pueda
interferir con la conducción.
¡ADVERTENCIA! Nunca desarme o haga ajustes en la unidad. No trate de modificar la
unidad. Si la modifica, puede causar un accidente.
¡ADVERTENCIA! Para evitar lesiones por descarga eléctrica o incendio, nunca exponga
este aparato a la humedad o al agua.
¡ADVERTENCIA! No encienda la unidad si la temperatura en el interior del vehículo es
inferior a -20 ˚C (-4 ˚F) o superior a 60 ˚C (140 ˚F).
¡ADVERTENCIA! Al reemplazar un fusible, utilice otro con el mismo amperaje que se indica
en el portafusibles. Nunca reemplace un fusible por otro de diferente
valor. No utilice un fusible con una clasificación de amperaje mayor que el
fusible original provisto en la unidad; si lo hace, la unidad se podrá dañar
o incendiar.
2
DMR2116i
CONTENIDO
CARACTERÍSTICAS������������������������������������������������������������������������������������������������ 4
ADVERTENCIAS ANTES DE LA INSTALACIÓN������������������������������������������������������ 5
HERRAMIENTAS PARA LA INSTALACIÓN������������������������������������������������������������� 7
ANTES DE LA INSTALACIÓN��������������������������������������������������������������������������������� 7
Desmontaje de la unidad antigua del tablero������������������������������������������������ 8
Marcado de la polaridad de los cables del altavoz����������������������������������������� 8
INSTALACIÓN�������������������������������������������������������������������������������������������������������� 9
Montaje frontal según la norma DIN������������������������������������������������������������� 10
Montaje posterior según la norma DIN��������������������������������������������������������� 12
USO DEL PANEL FRONTAL DESMONTABLE ...................................................... 13
Desmontaje del panel frontal������������������������������������������������������������������������ 13
Instalación del panel frontal�������������������������������������������������������������������������� 14
CABLEADO���������������������������������������������������������������������������������������������������������� 15
CONTROLES E INDICADORES����������������������������������������������������������������������������� 17
OPERACIÓN BÁSICA������������������������������������������������������������������������������������������� 20
Encendido y apagado de la unidad��������������������������������������������������������������� 20
Selección de una entrada de audio���������������������������������������������������������������� 20
Volumen����������������������������������������������������������������������������������������������������������� 20
Control de silencio������������������������������������������������������������������������������������������ 20
Configuración del sistema������������������������������������������������������������������������������ 20
Configuración del reloj����������������������������������������������������������������������������������� 22
OPERACIÓN DE LA RADIO���������������������������������������������������������������������������������� 23
Selección de una banda de radio������������������������������������������������������������������� 23
Selección de una banda de frecuencia���������������������������������������������������������� 23
Funciones de sintonización y búsqueda de la radio������������������������������������ 23
Mando para recepción monofónica y estéreo���������������������������������������������� 23
Mando para recepción local o distante��������������������������������������������������������� 23
Cómo guardar las emisoras preseleccionadas���������������������������������������������� 24
Exploración y almacenamiento automáticos����������������������������������������������� 24
Operación del Sistema de radiodifusión de datos (RDS)����������������������������� 25
3
OPERACIÓN DEL USB�������������������������������������������������������������������������������������������27
Reproducción de archivos MP3/WMA������������������������������������������������������������28
OPERACIÓN CON TARJETA DE MEMORIA�����������������������������������������������������������30
Reproducción de archivos MP3/WMA������������������������������������������������������������31
OPERACIÓN CON iPOD®/iPHONE®����������������������������������������������������������������������33
ESPECIFICACIONES����������������������������������������������������������������������������������������������35
RESOLUCIÓN DE PROBLEMAS����������������������������������������������������������������������������36
CUIDADO Y MANTENIMIENTO����������������������������������������������������������������������������37
PIEZAS DE REPUESTO COMUNES������������������������������������������������������������������������38
NOTAS�������������������������������������������������������������������������������������������������������������������39
CARACTERÍSTICAS
•
•
•
•
•
•
•
•
4
Radio AM/FM
Operación RDS/EON
Almacenamiento automático en memoria
Panel frontal totalmente desmontable
Ecualización preconfigurada
Interfaz de USB y tarjeta SD
iPod/iPhone vía USB
Función de entrada auxiliar
DMR2116i
ADVERTENCIAS ANTES DE LA INSTALACIÓN
Advertencias importantes que debe tener en cuenta ANTES de
instalar la unidad:
El daño causado por instalaciones o utilización incorrectas NO
está amparado por la garantía. Lea las instrucciones de instalación atentamente.
Para convalidar la garantía, asegúrese de hacer instalar la unidad
por una empresa de profesionales en instalaciones de audio en
vehículos que le entregue una factura con IVA.
• Para evitar cortocircuitos en el sistema eléctrico de su vehículo, desconecte el
cable de la batería antes de comenzar la instalación.
• Esta unidad está diseñada para vehículos con baterías de 12 voltios y puesta
a tierra negativa. Antes de instalar la unidad en un vehículo de uso recreativo,
camión u ómnibus, asegúrese de que la tensión de la batería sea de 12 voltios.
• Quite los dos tornillos de transporte de la parte superior de la unidad antes de
instalarla.
• El cable negro es de puesta a tierra. Una correcta puesta a tierra del chasis
exige conexión firme de puesta a tierra. La superficie no debe tener óxido,
pintura o suciedad. Conecte este cable a tierra independientemente de la
puesta a tierra de productos de corriente intensa, como amplificadores de
potencia. Si conecta los productos juntos y la puesta a tierra se separa, existe
riesgo de daños a los productos o incendio.
• Asegúrese de conectar los cables de colores según el diagrama de cableado.
Las conexiones incorrectas pueden causar anomalías en la unidad o dañar
el sistema eléctrico del vehículo. Los cables de este producto y los de otros
productos pueden tener diferentes colores aun cuando su función sea la
misma. Cuando conecte este producto a otro, consulte los manuales de
instalación de ambos productos y conecte cables que cumplan la misma
función.
• Asegúrese de conectar los cables negativos (-) del altavoz con el terminal
negativo (-) del altavoz. Nunca conecte los cables negativos (-) del altavoz a la
puesta a tierra del chasis.
• La unidad está diseñada sólo para usarse con 4 altavoces. No combine las
salidas para usarlo con 2 altavoces. No conecte los cables negativos del altavoz
a la puesta a tierra del chasis.
• Los altavoces conectados a esta unidad deben ser unidades de alta potencia,
con potencia mínima nominal de 45W e impedancia de 4 a 8 ohmios. La
conexión de altavoces con valores de salida o impedancia diferentes a los
indicados causará daño a la unidad principal y los altavoces. Verifique el estado
de los altavoces detenidamente. La conexión de esta unidad a altavoces
antiguos o deteriorados puede resultar en anomalías que dañarán los circuitos
integrados del audio y anularán la garantía.
5
• Si esta unidad se instala en un vehículo que no tiene una posición ACC
(accesorios) en el interruptor de encendido, el cable rojo de la unidad debe
conectarse a un terminal acoplado a las funciones ON/Off (encendido/apagado)
del interruptor de encendido. Si no se realiza esto, la batería del vehículo podría
agotarse si usted se ausenta durante varias horas.
• Inmovilice el cableado con abrazaderas para cables o cinta adhesiva. Proteja
los cables envolviéndolos con cinta adhesiva en los lugares donde hacen
contacto con piezas metálicas. Para evitar cortocircuitos, cubra todos los cables
desconectados con cinta aisladora. Existe la posibilidad de cortocircuitos si los
cables no se aíslan.
• Tienda e inmovilice todos los cables de modo que no hagan contacto con
piezas móviles, como la palanca de cambios y el freno de mano. No pase cables
por lugares que puedan tener temperatura, como cerca de la salida de la
calefacción. Si el material de aislamiento de los cables se derrite o rasga, existe
el peligro de que se produzca un cortocircuito con la carrocería del vehículo.
• No pase el cable amarillo por un orificio del compartimento del motor para
conectarlo a la batería. Esto dañará el aislamiento del cable y causará un
cortocircuito muy peligroso.
• No ponga ninguno de los cables en cortocircuito. El circuito de protección
podría no funcionar cuando debería hacerlo.
• Nunca corte el aislamiento del cable de alimentación de la unidad para acoplar
otro cable y así alimentar otro equipo. Excederá la capacidad de corriente del
cable y éste se recalentará.
• Como se utiliza un circuito integrado de audio exclusivo, nunca cablee la unidad
de modo de poner a tierra los cables del altavoz directamente o para compartir
los cables izquierdo (-) y derecho (-) del altavoz.
• Cuando la fuente de este producto se lleva a la posición ON (encendido), se
emite una señal de control por el cable azul. Conéctelo a un control remoto
externo del sistema del amplificador de potencia o al terminal de control de
relé de la antena automática del vehículo (máx. 300 mA 12 V CC). Si el automóvil
tiene la antena en el cristal, conéctelo al terminal de la fuente de alimentación
del reforzador de la antena.
• Cuando este sistema se utiliza con un amplificador de potencia externo, no
conecte el cable azul al terminal de alimentación del amplificador. Del mismo
modo, no conecte el cable azul al terminal de alimentación de la antena
automática. Esta conexión podría causar excesivo consumo de corriente y un
desperfecto importante. Consulte el manual del propietario que corresponda
para saber cómo conectar el amplificador de potencia y otras unidades; luego
realice las conexiones correctamente.
• No obstruya respiraderos o paneles de calefacción. Si lo hace, la temperatura
aumentará y podría causar un incendio.
• Asegúrese de que la unidad tenga una correcta puesta a tierra en el chasis.
La puesta a tierra adecuada eliminará la mayoría de los ruidos eléctricos. Una
correcta puesta a tierra del chasis exige una conexión firme al chasis metálico
6
DMR2116i
•
•
•
•
del vehículo. La zona alrededor de la conexión de puesta a tierra debe estar
limpia y el metal expuesto no debe tener óxido, pintura, plástico o suciedad.
Si oye ruido cuando acelera el motor del vehículo, debe instalar un cebador en
serie con la alimentación de la unidad. La empresa que realiza la instalación
sabe qué se necesita.
Al reemplazar los fusibles, los fusibles de repuesto deben ser del mismo
amperaje que se indica en el portafusibles. Nunca reemplace un fusible por otro
de diferente valor. Si el fusible se quema otra vez, comuníquese con la empresa
que instaló el equipo.
Verifique dos veces que todo el cableado y las conexiones estén bien instalados
antes de conectar de nuevo la batería y encender la unidad.
Después de terminar la instalación y antes de hacer funcionar la unidad, vuelva
a conectar la batería y luego presione el botón RESET (restablecer) con un
objeto punzante, como un bolígrafo, para configurar la unidad en su estado
inicial.
HERRAMIENTAS PARA LA INSTALACIÓN
Con esta radio de marca para automóviles se entregan dos llaves para extraer la
unidad antigua y colocar la nueva. Tal vez necesite las siguientes herramientas y
materiales para la instalación, pero no se incluyen:
Herramientas para la instalación:
• Destornilladores Phillips
• Pelacables
• Alicate
• Martillo
• Lápiz
• Cinta aislante
• Taladro eléctrico
Materiales para la instalación:
• Tornillos para metales
• Conectores para uniones
• Cable calibre 14 para las conexiones de alimentación
• Cables calibre 14-16 para el altavoz
ANTES DE LA INSTALACIÓN
Las instalaciones de equipos de audio en automóviles a veces pueden ser
problemáticas, incluso para los técnicos en instalación con más experiencia. Si no
se siente seguro para trabajar con cables de electricidad, desmontar e instalar de
nuevo paneles interiores, alfombrado, tableros u otros componentes del vehículo,
comuníquese con su distribuidor para que un profesional instale la unidad.
7
Desmontaje de la unidad antigua del tablero
1. Quite el marco del perfil de guarnición exterior.

Montaje frontal según
la norma DIN
2. I ntroduzca las llaves provistas con la unidad antigua en ambos lados de la
unidad, como se ilustra en la figura de abajo, hasta oír un chasquido. Separe la
unidad antigua del tablero.

¡No desconecte los
cables ahora!
Marcado de la polaridad de los cables del altavoz
Si marca la polaridad de los cables del altavoz, le resultará más fácil conectar los
altavoces existentes a la radio del automóvil. Consulte el diagrama de cableado
de la unidad principal existente antes de desconectar cables. Si no está seguro de
la polaridad de los cables existentes entre el altavoz y la unidad principal, instale
cables nuevos.
1. Desconecte los cables de uno de los altavoces mientras la unidad antigua esté
reproduciendo.
2. Tome un trozo de cinta de carpintero y pliéguela alrededor del cable para
formar una bandera.
3. Marque en la cinta de carpintero la polaridad de los cables del altavoz (+ y - ),
así como si se trata de la unidad izquierda o derecha y frontal o posterior.
4. Confirme nuevamente si marcó el primer altavoz correctamente. Para ello,
asegúrese de que los cables del altavoz sean los mismos que en la unidad
principal.
5. Repita este procedimiento para todos los altavoces.
6. Marque los cables de alimentación, puesta a tierra y el resto de los cables.
8
DMR2116i
INSTALACIÓN
Conviene que lea todas las instrucciones antes de comenzar la instalación.
Recomendamos que encargue la instalación del sistema de audio móvil Jensen
DMR2116 a un taller de renombre.
¡ADVERTENCIA! Desconecte el terminal negativo de la batería antes de
comenzar la instalación. Consulte las instrucciones correctas en
el manual del propietario del vehículo.
NOTA: M
arque la polaridad de los cables existentes del altavoz antes de
desconectar la batería.
Notas:
• Elija una ubicación de montaje donde la unidad no interfiera con la función
normal de conducción del conductor.
• Conecte temporariamente los cables antes de instalar la unidad. Asegúrese de
que la unidad esté correctamente conectada y que tanto ésta como el sistema
funcionen adecuadamente.
• Utilice únicamente las piezas que se incluyen con la unidad para garantizar una
instalación correcta. El uso de piezas no autorizadas puede provocar fallos de
funcionamiento.
• Consulte con su distribuidor más cercano en el caso de que la instalación
requiera la realización de orificios u otras modificaciones del vehículo.
• Instale la unidad donde no moleste al conductor y no pueda causar lesiones al
pasajero en caso de una parada repentina, como ser una parada de emergencia.
• Si el ángulo de instalación se excede 30° con respecto a la línea la horizontal, es
posible que la unidad no funcione de forma óptima.
30
• Evite instalar la unidad donde pueda estar expuesta a altas temperaturas tales
como la luz solar directa o el aire caliente de la calefacción, o donde pueda estar
expuesta cantidades excesivas de polvo, suciedad o vibraciones.
9
Montaje frontal/posterior según la norma DIN
Esta unidad puede instalarse correctamente tanto desde la parte delantera
(montaje convencional frontal según la norma DIN) o desde la parte trasera
(montaje convencional posterior según la norma DIN), utilizando los orificios de
los tornillos roscados en los laterales del chasis de la unidad). Para obtener más
información, consulte los métodos de instalación ilustrados a continuación.
Montaje frontal según la norma DIN (Método A)
Abertura para instalación
Esta unidad puede instalarse en cualquier tablero que tenga una abertura como la
que se muestra a continuación:
Instalación de la unidad
Asegúrese de probar todas las conexiones, y luego siga estos pasos para instalar la
unidad.
1. Después de desmontar la radio antigua y la funda de montaje, introduzca en
la abertura la funda de montaje provista.
10
DMR2116i
2. Pliegue las lengüetas en la funda de montaje para inmovilizarla.
3. C
onecte los cables de la unidad a los cables existentes. Consulte el diagrama
de conexiones de los cables. Introduzca la radio en el tablero. Luego, coloque
el marco de guarnición en la parte exterior de la radio.
4. S ostenga la radio con el tornillo de montaje posterior y la barra de acero
provistas. Vea la lista de piezas.
Pared cortafuego
Para sostener la unidad
11
Montaje posterior según la norma DIN (Método B)
Para este método de instalación se utilizan los orificios de los tornillos a los lados
de la unidad y los orificios en el soporte de montaje existente del vehículo. Esta
es sólo una guía general; comuníquese con el fabricante del vehículo si necesita
instrucciones específicas.
NOTA: En esta instalación no se utiliza el marco de guarnición exterior, el gancho y
la funda de montaje.
1. Quite los ganchos de ambos lados.
2. Alinee los orificios para los tornillos del soporte de montaje suministrado con
el vehículo con los orificios para los tornillos de la unidad principal. Apriete los
dos tornillos a cada lado de la unidad. Luego, fije los soportes al automóvil.
Soporte suministrado a su automóvil
o
nch
Ga
Tablero o
consola
3. C
onecte los cables de la unidad a los cables existentes del altavoz. Consulte el
diagrama de cableado.
12
DMR2116i
USO DEL PANEL FRONTAL DESMONTABLE
Extracción del panel frontal
1. Presione el botón
(extraer) en el panel frontal y retire el panel frontal .
Botón
de extracción
Release
Button
Panel
frontal
Faceplate
2. Guarde el panel frontal en el estuche de protección.
Estuche
de protección
Protective
Case
Panel
frontal
Faceplate
13
Instalación del panel frontal
Para instalar el panel frontal, introdúzcalo en la carcasa y asegúrese de que quede
correctamente instalado. En caso contrario, la pantalla podría mostrar información
anormal o algunos botones no funcionarán bien.
Precauciones en cuanto a la manipulación de la unidad
1. No deje caer el panel frontal.
2. No ejerza presión sobre la pantalla ni sobre los botones de control al extraer o
al volver a instalar el panel frontal.
3. No toque los contactos del panel frontal ni el cuerpo principal de la unidad. Se
puede causar un contacto eléctrico defectuoso.
4. Si hay suciedad o sustancias extrañas adheridas a los contactos, límpielos con
un paño limpio y seco.
5. No exponga el panel frontal a altas temperaturas ni a la luz solar directa.
6. Mantenga los agentes volátiles (por ejemplo, benceno, diluyente o
insecticidas) lejos de la superficie del panel frontal.
7. No intente desarmar el panel frontal.
14
DMR2116i
CABLEADO
Conector
ISO
ISO Connector
RCA DE SALIDA
A
RCA OUT
Left = White
Derecha = Rojo
Right = Red
Izquierda = Blanco
Fusible de 10 A
Fuse 10 A
Receptáculo
antena
Antenna de
Socket
B
Conector A
Conector B
1. Altavoz trasero derecho (+) / púrpura
1.1.
SinNo
conexión
connection
Connector A
1. Rear right speaker (+) / Purple
2.
(-) /(-)
púrpura
- negro
2.Altavoz
Rear trasero
right derecho
speaker
/ Purple
- Black
3.
Altavoz
delantero
derecho
(+)
/
gris
3. Front right speaker (+) / Grey
4.
derecho (-)(-)
/ gris
- negro
4.Altavoz
Frontdelantero
right speaker
/ Grey
- Black
5.Altavoz
Frontdelantero
left speaker
(+)
5.
izquierdo
(+)// White
blanco
6.Altavoz
Frontdelantero
left speaker
(-)(-)//White
Black
6.
izquierdo
blanco - -negro
7.
Rear
left
speaker
(+)
/Green
7. Altavoz trasero izquierdo (+) / verde
8.Altavoz
Rear trasero
left speaker
Green
-Black
8.
izquierdo(-)
(-) //verde
- negro
Connector B
2.2.
SinNo
conexión
connection
3.3.
SinNo
conexión
connection
Battery
V/(+)
/ Yellow
4.4.
Batería
de 1212
V (+)
amarillo
Antennade
power
/ Blue
5.5.
Alimentación
la antena
/ azul
Panel light
/ White
6.6.
Iluminación
del panel
/ blanco
7. ACC+ / Red
8. Ground / Black
7. ACC+ / rojo
8. Toma de tierra (negro)
Notas sobre el cableado del altavoz
Respete el diagrama de cableado de más arriba para instalar la unidad principal a
los altavoces nuevos o existentes.
• Esta unidad está diseñada para usarse con cuatro (4) altavoces con una
impedancia de entre 4 y 8 ohmios.
• Una carga de impedancia inferior a 4 ohmios puede dañar la unidad.
• Nunca haga un puente o combine las salidas de los cables del altavoz. Cuando
no utilice cuatro altavoces, coloque cinta aislante en los extremos de las salidas
no utilizadas del altavoz para evitar cortocircuitos.
• Nunca conecte los terminales negativos del altavoz con la puesta a tierra del
chasis.
15
Cable negro de puesta a tierra
Conecte el cable negro de puesta a tierra a la carrocería o el chasis del vehículo.
Asegúrese de que la puesta a tierra en el chasis esté correctamente instalada. Las
conexiones de puesta a tierra bien instaladas eliminarán la mayoría de los ruidos
eléctricos del motor y el alternador. Una correcta puesta a tierra en el chasis
exige conexión firme al chasis metálico del vehículo. La superficie alrededor de la
puesta a tierra debe estar limpia y el metal expuesto no debe tener óxido, pintura,
plástico, polvo o suciedad.
Cable rojo para accesorios o de encendido
Conecte el cable rojo para accesorios o de encendido a un terminal acoplado a la
posición ACC (accesorios) del interruptor de encendido.
Nota: S i esta unidad se instala en un vehículo que no tiene una posición ACC
(accesorios) en el interruptor de encendido, el cable rojo de la unidad debe
conectarse a un terminal acoplado a las funciones ON/Off (encendido/
apagado) del interruptor de encendido.
Cable amarillo de copia de seguridad de la memoria
Conecte el cable amarillo de copia de seguridad de la memoria a un terminal
eléctrico que siempre reciba alimentación, independientemente de la posición del
interruptor de encendido.
Cable blanco de iluminación del panel
Conecte el cable blanco de iluminación del panel al circuito de iluminación del
vehículo. Esto iluminará los botones de la pantalla para verlos por la noche. Este
cable también se puede conectar al cable azul del control remoto para activar
los botones cuando la unidad se enciende. NO CONECTE EL CABLE BLANCO AL
CIRCUITO DE ILUMINACIÓN DEL VEHÍCULO SI ESTÁ CONECTADO AL CABLE AZUL
DEL CONTROL REMOTO.
Cable azul de alimentación de la antena
Conecte el cable azul de alimentación de la antena a un cable de control de la
antena automática. Corriente máxima de 300Ma 12 V CC. (Baja corriente)
Conectores RCA de salida
Los conectores RCA de salida se utilizan para conectar el amplificador, el
ecualizador u otros componentes de audio que necesiten una conexión
de preamplificación de salida (rojo = derecho, blanco = izquierdo). Siga las
instrucciones del fabricante del componente de audio que desee conectar.
16
DMR2116i
CONTROLES E INDICADORES
1
2
3
4
5
i
MENU
17 16
15 14
13
12
19
11
10
9
8
7 6
18
1. B
otón MUTE (silencio) / Power On/Off (encendido/apagado)
Presione este botón para encender la unidad. Mantenga presionado este
botón para apagar la unidad.
Cuando la unidad está encendida, presione este botón para silenciar el audio.
Presione otra vez este botón, para escuchar el audio de nuevo.
2. Botón SRC (modo selección) / TA (anuncios sobre el tránsito)
Presione este botón para seleccionar la radio, el equipo auxiliar o
reproducción por USB, SD o iPod/iPhone. Solo puede seleccionarse el modo
USB o SD cuando se introduce una memoria "flash" USB o una tarjeta SD en el
conector USB o SD, respectivamente. Solo puede seleccionarse el modo iPod/
iPhone cuando se introduce un iPod o iPhone en el conector USB.
En la modalidad de radio, mantenga presionado este botón para encender o
apagar la función de anuncios sobre el tránsito.
17
3. P
erilla de volumen (cuando se gira) / Botón Selección de sonido (cuando
se presiona)Gire la perilla para aumentar o reducir el volumen. En la pantalla aparecerá
VOL, seguido del número de configuración.
Cuando se presiona, el botón selecciona la función. Este botón se usa para
seleccionar la función de audio que desea ajustar [bass (graves), treble
(agudos), balance (balance), fade (balance delantero-trasero) o loudness
(intensidad sonora)].
4. Pantalla de cristal líquido
La pantalla de cristal líquido (LCD) muestra la banda y la frecuencia de la
emisora de radio. Si la emisora transmite información sobre la música, esta
también se mostrará. Esta información generalmente consiste en el título de la
canción y el nombre del artista. Además, la radio puede mostrar categorías de
tipos de programa (PTY), como noticias, deportes, charlas, etc.
5. Botón
(liberación del panel)
Presione este botón para liberar el panel frontal del chasis.
6. Cubierta de entrada de USB
Cubierta del panel frontal que se abre para conectar un dispositivo USB para
reproducir archivos de música.
7. Conector de entrada auxiliar
Compatible con conectores de 3.5 mm que acepten señales de diversos
dispositivos de audio y video.
8. Botón 6 /
(carpeta hacia arriba)
Presione este botón una vez para avanzar a la siguiente carpeta.
9. Botón 5 /
(carpeta hacia abajo)
Presione este botón una vez para retroceder a la carpeta anterior.
10. Botón 4 / RDM (al azar)
Presione este botón para reproducir todas las pistas en orden aleatorio.
Presione otra vez este botón para detener la reproducción aleatoria.
11. Botón 3 / RPT (repetir)
Presione este botón para repetir la pista actual. Presione otra vez este botón
para cancelar la función de repetición.
12. Botón 2 / INTRO (introducción)
Presione este botón para reproducir los primeros 10 segundos de cada pista.
Vuelva a presionarlo para reanudar la reproducción.
13. Botón 1 / (reproducción / pausa)
Presione este botón para detener la reproducción. Vuelva a presionarlo para
reanudar la reproducción.
18
DMR2116i
14. Botón AS (almacenamiento automático en memoria) / MENÚ
Presione este botón para obtener una presentación preliminar de 5 segundos
de cada emisora preseleccionada.
Mantenga presionado este botón para acceder a la función de Sintonización
con almacenamiento automático en memoria, que explorará y ingresará
automáticamente hasta dieciocho emisoras con señales potentes en las seis
posiciones de memoria preseleccionadas para FM1, FM2 y FM3. Si la radio se
encuentra en la modalidad AM, explorará y almacenará hasta doce emisoras
con señales potentes en las seis posiciones de memoria preseleccionadas
para AM1 y AM2. Si usted ya ha configurado las memorias preseleccionadas
con sus emisoras de radio favoritas, al activar la función de almacenamiento
automático en memoria, estas emisoras se borrarán y se almacenarán las
nuevas emisoras de radio con buena señal. Después de completar la función
de Sintonización con almacenamiento automático en memoria, la radio realiza
automáticamente una presentación preliminar de 5 segundos de duración de
cada preselección almacenada.
En la modalidad iPod®/iPhone®, presione este botón para ingresar en el menú
del iPod®/iPhone®.
15. Botón
(pista siguiente / avance rápido)
Presione el botón
una vez para avanzar a la pista siguiente.
Mantenga presionado el botón
para avanzar con rapidez.
16. Botón Band / PTY (tipo de programa)
Presione este botón para seleccionar o cambiar la banda de radio (FM1, FM2,
FM3, AM1 o AM2).
En la modalidad de radio FM, mantenga presionado este botón para ver el
tipo de programa.
En la modalidad iPod/iPhone, presione este botón para ver los datos de la
pista seleccionada.
Botón
(pista siguiente / avance rápido)
Presione el botón
una vez para avanzar a la pista siguiente.
Mantenga presionado el botón
para avanzar con rapidez.
17. Botón Reset (restablecer)
Puede acceder a este botón cuando quita el panel frontal. Presione este botón
para restablecer las configuraciones del sistema a los parámetros establecidos
en fábrica.
18. Ranura para tarjeta de memoria SD
La ranura para la tarjeta de memoria se encuentra detrás del panel frontal y se
utiliza para introducir una tarjeta SD y reproducir archivos de música.
19
OPERACIÓN BÁSICA
Encendido y apagado de la unidad
Presione el botón
encendido/apagado para encender la unidad. Se muestra
el mensaje “JENSEN” en la pantalla para indicar que la unidad está lista para ser
usada.
Cuando la unidad esté encendida, mantenga presionado el botón
encendido/
apagado para apagarla.
Selección de una entrada de audio
Presione el botón SRC en el panel frontal para seleccionar la reproducción por
radio, equipo auxiliar, USB, SD o iPod/iPhone.
Note: S olo puede seleccionarse el modo USB o SD cuando se introduce una
memoria "flash" USB o una tarjeta SD en el conector USB o SD,
respectivamente. Solo puede seleccionarse el modo iPod/iPhone cuando se
introduce un iPod/iPhone en el conector USB.
Volumen
Gire la perilla de volumen en el panel frontal para regular la intensidad del
volumen. Cuanto mayor sea el número, tanta más intensidad tendrá el volumen.
Control de silencio
Presione brevemente el botón MUTE (silencio) para silenciar el sonido de
inmediato. Se muestra “MUTE” en la pantalla. Vuélvalo a presionar para reanudar el
sonido. También se cancela la función de silencio al ajustar la perilla de volumen.
Configuración del sistema
Si utiliza un sistema de audio móvil por primera vez, le recomendamos que
configure el sistema de acuerdo a sus preferencias personales.
Modo ajuste de sonido
El modo de ajuste de sonido le permite ajustar fácilmente el sistema de audio
móvil para adaptarlo a las características acústicas de su vehículo.
Para ajustar los graves:
1. Presione varias veces la perilla de volumen hasta que se muestre “BAS” en la
pantalla.
2. Gire la perilla para regular el volumen. Cuando se preseleccionó un
ecualizador, el control de bajos no está disponible.
20
DMR2116i
Para ajustar los agudos:
1. Presione varias veces la perilla de volumen hasta que se muestre “TRE” en la
pantalla.
2. Gire la perilla para regular el volumen. Cuando se preseleccionó un
ecualizador, el control de agudos no está disponible.
Para ajustar el balance:
1. Presione varias veces la perilla de volumen hasta que se muestre “BAL” en la
pantalla.
2. Gire la perilla de volumen para ajustar el balance entre los altavoces izquierdo
y derecho.
Para ajustar el atenuador:
1. Presione varias veces la perilla de volumen hasta que se muestre “FAD” en la
pantalla.
2. Gire la perilla de volumen para ajustar el balance entre los altavoces frontal y
posterior.
Control de sonoridad
La intensidad sonora modifica automáticamente la curva de respuesta de
frecuencia del audio para que el sonido se escuche más natural cuando el
volumen es menor.
1. Presione varias veces la perilla de volumen hasta que se muestre “LOUD
OFF” (sonoridad desactivada) en la pantalla. Esto indica que la función de
sonoridad está desactivada.
2. Gire la perilla de volumen para activar o desactivar esta función.
Función de ecualización preconfigurada
La función de ecualización preconfigurada se refiere a un nivel de sonido
prestablecido en la señal de salida de audio de la unidad según el tipo de música
que se reproduce.
Para seleccionar una configuración preseleccionada del ecualizador:
1. Presione varias veces la perilla de volumen hasta que se muestre “EQ” en la
pantalla.
2. Gire la perilla de volumen para elegir los efectos de sonido del ecualizador. La
secuencia de configuración del ecualizador es la siguiente:
POP
POP
JAZZ
JAZZ
ROCK
(CLÁSICA)
ROCK CLASSIC
CLASSIC
OFF
OFF(APAGADO)
21
Activado y desactivado de la señal acústica prestablecida
Cada función seleccionada se confirma con una señal acústica.
1. Presione varias veces la perilla de volumen hasta que se muestre “BEEP ON”
(señal acústica activada) en la pantalla.
2. Gire la perilla de volumen para seleccionar “BEEP OFF” (señal acústica
desactivada) o “BEEP ON”.
3. Deje la unidad en espera para que la configuración surta efecto.
Selección de zona: AM/EUR
1. M
antenga presionada la perilla de volumen hasta que aparezca el reloj.
Presione la perilla de volumen hasta que aparezca “AREA AM” en la pantalla.
2. Gire la perilla de volumen para seleccionar la región del sintonizador: AM
(Américas) o EUR (Europa).
3. Deje la unidad en espera para que la configuración surta efecto.
Configuración del reloj
El reloj puede configurarse en cualquier momento mientras la unidad esté
encendida.
1. Mantenga presionada la perilla de volumen. Se muestra la hora en la pantalla.
2. Mantenga presionada la perilla de volumen hasta que comience a destellar la
hora en la pantalla. Gire la perilla de volumen para configurar las horas.
3. Presione la perilla de volumen para que comiencen a destellar los minutos.
Gire la perilla de volumen para configurar los minutos.
4. Mantenga presionada una vez la perilla de volumen para confirmar la
configuración del reloj.
22
DMR2116i
OPERACIÓN DE LA RADIO
Selección de una banda de radio
Presione el botón SRC en el panel frontal para seleccionar la modalidad de
reproducción de radio. La frecuencia de la radio se muestra en la pantalla junto
con la banda de la memoria de frecuencia (FM1, FM2, FM3, AM1 o AM2).
Esta unidad tiene cinco bandas de memoria prestablecidas: tres bandas de FM
(FM1, FM2 y FM3) y dos bandas de AM (AM1 y AM2). Cada una de las cinco bandas
tiene capacidad para almacenar hasta seis emisoras prestablecidas, con una
memoria total para 30 emisoras prestablecidas.
Selección de la banda de frecuencias
En la modalidad de radio, presione brevemente el botón BAND en el panel
frontal para seleccionar la banda deseada. La banda de recepción cambiará en el
siguiente orden:
FM1
FM2
FM3
AM1
AM2
Funciones de sintonización y búsqueda de la radio
En la modalidad de radio, mantenga presionado el botón
o
durante 2
segundos. En la pantalla se mostrará el mensaje ”MANUAL”. Presione el botón
o
una vez para ajustar manualmente la frecuencia de radio.
Sintonización
Presione una vez el botón
o
. La radio buscará la emisora siguiente con
frecuencia potente y clara. Repita la búsqueda de más emisoras con señal potente
en su zona de audición.
Mando para recepción monofónica y estéreo
La recepción de emisoras distantes puede mejorarse si selecciona la función
“MONO” (monofónica). De esta manera tal vez pueda eliminar un poco de ruido
en la recepción.
1. En la modalidad de radio FM, presione la perilla de volumen hasta que se
muestre “STEREO” (estéreo) en la pantalla.
2. Gire la perilla de volumen para seleccionar “STEREO” o “MONO”.
Mando para recepción local o distante
La configuración de recepción local o distante podría mejorar la recepción de las
señales de radio según dónde se utilice el equipo.
1. En la modalidad de radio FM, presione la perilla de volumen hasta que se
muestre “LOC ON” en la pantalla.
2. Gire la perilla de volumen para seleccionar “LOC ON” o “LOC OFF”.
23
Cómo guardar las emisoras preseleccionadas
Hay seis botones numerados para preselecciones que permiten almacenar y
recuperar emisoras para cada banda. Mientras escucha una emisora de radio
que le gustaría guardar como preseleccionada, mantenga presionado uno de los
botones numerados entre 1 y 6 hasta oír una señal acústica. El botón que presionó
ahora es el botón prestablecido para esa emisora.
Exploración y almacenamiento automáticos
La función de almacenamiento automático en memoria es más útil cuando viaja
por una zona en la que no se conocen las emisoras de radio locales. La función
de sintonización con almacenamiento automático en memoria automáticamente
explorará y almacenará hasta dieciocho emisoras de radio de FM con señal
potente en las posiciones prestablecidas de la memoria para las bandas FM1,
FM2 y FM3 o doce emisoras de radio de AM con señal potente en las posiciones
prestablecidas de la memoria para las bandas AM1 y AM2. Cada banda almacena
hasta seis emisoras preseleccionadas.
Mientras escucha una emisora de radio FM, mantenga presionado el botón AS en
el panel frontal. La unidad automáticamente explora y guarda emisoras de las
3 bandas de FM.
Mientras escucha una emisora de radio AM, mantenga presionado el botón AS en
el panel frontal. La unidad automáticamente explora y guarda emisoras de las
2 bandas de AM.
Nota: S i usted ya ha configurado las memorias preseleccionadas con sus emisoras
de radio favoritas, al activar la función de almacenamiento automático, estas
emisoras se borrarán y se almacenarán las nuevas emisoras de radio con
buena señal.
24
DMR2116i
Operación del sistema Radio Data System (RDS)
El sistema Radio Data System (RDS) transmite datos digitales en simultáneo con
la señal de audio de la radio FM. Si bien RDS es una norma europea, también se
utiliza en EE.UU., donde se denomina Radio Broadcast Data System (RBDS). La
norma RDS permite recibir informes de tránsito y ofrece muchas prestaciones,
entre ellas, la visualización en la pantalla del nombre de la emisora de radio y la
información del programa.
La disponibilidad del servicio RDS depende de las regiones. Si no hay servicio RDS
en su región, tampoco estarán disponibles los siguientes servicios.
Cómo escuchar Anuncios sobre el tránsito (TA)
Presione el botón TA para activar o desactivar la funcion de anuncios sobre el
tránsito. “TA” aparece en la pantalla cuando está activado la función de Anuncios
sobre el tránsito.
En la modalidad TA, se realiza la búsqueda automática de los programas sobre
el tránsito hasta que se recibe un mensaje. Cuando se recibe un mensaje
sobre el tránsito, la unidad pasará temporalmente a la modalidad de radio
(independientemente de la modalidad actual) y comenzará a transmitir el
anuncio. Al finalizar el anuncio, la transmisión regresará a la modalidad y a la
intensidad de volumen anteriores.
Para interrumpir un anuncio sobre el tránsito, presione brevemente el botón TA;
esto no desactivará el modo TA.
Configuración de los Anuncios sobre el tránsito
Búsqueda y alarma de Anuncios sobre el tránsito
Esta configuración selecciona la función de búsqueda TA o alarma TA:
• TA Seek (búsqueda de anuncios sobre el tránsito) - Cuando la función TA está
activada, la radio busca una emisora que transmita anuncios sobre el tránsito
• TA Alarm (alarma de anuncios sobre el tráfico) - No se realiza una búsqueda
automática de emisoras. La radio emite una señal acústica si no recibe
información sobre el tránsito. Se muestra “NO TP/TA” en la pantalla.
1. Mantenga presionada la perilla de volumen hasta que se muestre “AREA AM”
en la pantalla.
2. Inmediatamente presione la perilla de volumen. Aparece “TA SEEK” en la
pantalla.
3. Gire la perilla de volumen para seleccionar “TA SEEK” o “TA ALARM”.
4. Deje la unidad en espera para que la configuración surta efecto.
25
Cómo seleccionar una emisora de radio FM por Tipo de programa
(PTY)
Esta radio le permite seleccionar el tipo de programa requerido y realizará la
búsqueda de una emisora que transmite ese tipo de programa.
1. Mantenga presionado el botón BAND/PTY hasta que se muestre en la
pantalla el tipo de programa y “PTY”.
2. Inmediatamente presione el botón 1-6 para elegir el tipo de programa.
Presione el botón numérico repetidas veces para elegir un tipo de programa
en la categoría 1 como se observa en la tabla a continuación.
Mantenga presionado el botón PTY y vuelva a presionarlo de inmediato para
elegir un tipo de programa en la categoría 1 como se observa en la tabla a
continuación.
Botón
1
2
3
4
5
6
Tipo de programa
categoría 1
Tipo de programa categoría 2
De ayer, música country
Noticias, Información, Deportes
Música suave, melancólica
Rock, Rock clásico, Charlas
Jazz, Clásica
Adultos, Rock suave, Mejores 40
Rítmica, Rock suave
Extranjera
Música religiosa, Charlas
religiosas
Personalidad
Público, Universitario
Clima
Cuando se selecciona un tipo de programa, la radio comienza a buscar la
información PTY correspondiente. Se muestra “SEEK PTY” (búsqueda de tipo
de programa) en la pantalla. La radio deja de realizar la búsqueda si detecta
la información PTY correspondiente. Si no se presionan botones antes de que
transcurran algunos segundos, se realiza la búsqueda del PTY seleccionado
anteriormente. Si no se encuentra el PTY deseado durante un ciclo, se
muestra “PTY NONE” (sin tipo de programa) en la pantalla y la radio regresará
a la modalidad anterior.
3. Presione el botón BAND/PTY en el panel frontal para desactivar la función
PTY.
26
DMR2116i
OPERACIÓN DEL USB
La unidad tiene un conector USB. Este conector se encuentra en el panel frontal,
debajo de la cubierta de protección. Puede enchufar un dispositivo de memoria
USB en este conector.
1. Identifique la cubierta de entrada USB en el panel frontal.
USB Input Cover
Cubierta
para entrada USB
2. Quite la cubierta de entrada USB para acceder al conector USB.
3. Introduzca el dispositivo USB en el conector USB. La unidad leerá los archivos
de audio del dispositivo USB automáticamente. Se muestra “USB” en la
pantalla y comienza a reproducirse el archivo MP3/WMA.
4. Si la unidad está funcionando en otra modalidad, presione el botón SRC en el
panel frontal.
Nota: C
uando está activada la modalidad de reproducción USB, no quite el
dispositivo USB del conector USB.
Nota: L a unidad sólo es compatible con un dispositivo de memoria USB estándar. Si
conecta un reproductor de archivos MP3 alimentado con baterías corrientes
(baterías no recargables), en primer lugar debe quitar las baterías del
reproductor de MP3 y luego enchufar el equipo en el conector USB. De lo
contrario, las pilas podrían resultar dañadas.
Nota: E sta unidad es compatible con unidades USB de hasta 8 GB de capacidad de
almacenamiento. Si surgen problemas de compatibilidad, recomendamos
dar formato a la unidad USB en el modo FAT32 antes de utilizarlo. Si el
problema continúa, consulte al distribuidor.
27
Reproducción de archivos MP3/WMA
Para reproducir archivos MP3/WMA desde una memoria “flash” USB, introduzca la
memoria “flash” USB en el conector USB del lado izquierdo de la unidad. La unidad
comenzará a reproducir automáticamente los archivos MP3/WMA de la memoria
“flash” USB. Automáticamente se mostrará en la pantalla información ID3.
Si los archivos MP3/WMA están almacenados en carpetas en la unidad USB,
se comenzará a reproducir el primer tema de la primera carpeta. Después de
reproducir todos los archivos de la primera carpeta secuencialmente, la unidad
reproducirá secuencialmente el resto de los archivos de la siguiente carpeta. La
unidad continuará reproduciendo de este modo todas las carpetas de la unidad
USB.
Si la unidad USB tiene archivos sueltos y carpetas que contienen archivos,
reproducirá secuencialmente los archivos sueltos y luego reproducirá
secuencialmente los archivos en las carpetas.
Pausa o reinicio de la reproducción
Presione el botón 1 / (reproducción / pausa) para detener la reproducción.
Siempre se muestra “PAUSE” (pausa) en la pantalla. Vuelva a presionar el botón
1 / (reproducción / pausa) para reanudar la reproducción.
Avance rápido o retroceso rápido
Mantenga presionado el botón
Mantenga presionado el botón
para avanzar con rapidez.
para retroceder con rapidez.
Selección de una pista
Para seleccionar la pista siguiente o anterior:
Presione una vez el botón
para avanzar a la pista siguiente.
Presione una vez el botón
para ir a la pista anterior.
Para seleccionar una pista directamente:
1. Presione el botón AS/MENU. El número de pista se muestra en la pantalla.
2. Gire la perilla de volumen para seleccionar un número de pista en esta
carpeta.
3. Presione la perilla de volumen para reproducir la pista.
Exploración de pistas y modalidad Introducción
Presione el botón 2 INTRO (introducción) para reproducir los primeros diez
segundos de cada pista. Se muestra “INT” y el número de pista en la pantalla.
Presione otra vez el botón 2 INTRO para cancelar la función.
28
DMR2116i
Repetición de una pista
Presione el botón 3 RPT (repetir) para repetir la pista actual. Se muestra “RPT” y el
número de pista en la pantalla. Presione otra vez el botón 3 RPT para cancelar la
función.
Reproducción aleatoria de pistas
Presione el botón 4 RDM (Al azar) para reproducir todas las pistas en orden
aleatorio. Se muestra “RDM” y el número de pista en la pantalla. Presione otra vez
el botón 4 RDM para cancelar la función.
Selección de una carpeta
Carpeta hacia abajo
Presione el botón 5 /
Carpeta hacia arriba
Presione el botón 6/
una vez para retroceder a la carpeta anterior.
una vez para avanzar una carpeta.
29
OPERACIÓN CON TARJETA DE MEMORIA
La unidad tiene una ranura para tarjetas de memoria SD en su carcasa, a la cual
se accede cuando se extrae el panel frontal. Para acceder a la carcasa es necesario
quitar el panel frontal.
1. Presione el botón de extracción del panel frontal.
Botón
extracción
Releasede
Button
Release Button
Faceplate
2. Retire
el panel frontal para ver la ranura para tarjetas de memoria.
Panel
frontal
Faceplate
3. Inserte una tarjeta SD en la ranura para tarjetas de memoria.
Ranura para
tarjeta
Memory
Cardde
Slotmemoria
4. C
oloque el panel frontal. La unidad buscará los archivos MP3/WMA en la
tarjeta y automáticamente comenzará a reproducir los archivos MP3/WMA. Se
muestra “CARD” (tarjeta) en la pantalla.
.
5. S i la unidad está funcionando en otra modalidad, presione el botón SRC en el
panel frontal para seleccionar el modo de reproducción SD.
Nota: E sta unidad es compatible con tarjetas SD/MMC de hasta 8 GB de capacidad
de almacenamiento. Si surgen problemas de compatibilidad, recomendamos
dar formato a la tarjeta SD/MMC en el modo FAT32 antes de utilizarla. Si el
problema continúa, consulte al distribuidor.
30
DMR2116i
Reproducción de archivos MP3/WMA
Para reproducir archivos MP3/WMA desde una tarjeta SD, primero quite el panel
frontal e introduzca una tarjeta SD en la ranura para tarjetas de memoria SD
de la carcasa. La unidad comenzará a reproducir automáticamente los archivos
MP3/WMA de la tarjeta de memoria SD cuando coloque el panel frontal.
Automáticamente se mostrará en la pantalla información ID3.
Si los archivos MP3/WMA están almacenados en carpetas en la tarjeta SD, se
comenzará a reproducir el primer tema de la primera carpeta. Después de
reproducir todos los archivos de la primera carpeta secuencialmente, la unidad
reproducirá de la misma manera el resto de los archivos de la siguiente carpeta.
La unidad continuará reproduciendo de este modo todas las carpetas de la tarjeta
SD.
Si la tarjeta SD tiene archivos sueltos y carpetas que contienen archivos,
reproducirá secuencialmente los archivos sueltos y luego reproducirá de la misma
manera los archivos en las carpetas.
Pausa o reinicio de la reproducción
Presione el botón 1 /
(reproducción / pausa) para detener la reproducción. Se
muestra “PAUSE” (pausa) en la pantalla. Vuelva a presionar el botón
1 / (reproducción / pausa) para reanudar la reproducción.
Avance rápido o retroceso rápido
Mantenga presionado el botón
Mantenga presionado el botón
para avanzar con rapidez.
para retroceder con rapidez.
Selección de una pista
Para seleccionar la pista siguiente o anterior:
Presione una vez el botón
para avanzar a la pista siguiente.
Presione una vez el botón
para ir a la pista anterior.
Para seleccionar una pista directamente:
1. Presione el botón AS/MENU. El número de pista se muestra en la pantalla.
2. Gire la perilla de volumen para seleccionar un número de pista en esta
carpeta.
3. Presione la perilla de volumen para reproducir la pista.
31
Exploración de pistas y modalidad Introducción
Presione el botón 2 INTRO (introducción) para reproducir los primeros diez
segundos de cada pista. Se muestra “INT” y el número de pista en la pantalla.
Presione otra vez el botón 2 INTRO para cancelar la función.
Repetición de una pista
Presione el botón 3 RPT (repetir) para repetir la pista actual. Se muestra “RPT” y el
número de pista en la pantalla. Presione otra vez el botón 3 RPT para cancelar la
función.
Reproducción aleatoria de pistas
Presione el botón 4 RDM (Al azar) para reproducir todas las pistas en orden
aleatorio. Se muestra “RDM” y el número de pista en la pantalla. Presione otra vez
el botón 4 RDM para cancelar la función.
Selección de una carpeta
Carpeta hacia abajo
Presione el botón 5 /
Carpeta hacia arriba
Presione el botón 6 /
32
una vez para retroceder a la carpeta anterior.
una vez para avanzar una carpeta.
DMR2116i
OPERACIÓN CON iPod®/iPhone®
Se puede conectar un iPod® o iPhone® a la unidad a través de la interfaz USB en
el panel frontal. La unidad cambiará automáticamente al modo iPod cuando se
conecte un iPod, iPod touch o iPhone en el conector USB.
Nota: P
ara tener conectividad iPod/iPhone, puede utilizar el cable iPod® blanco de
30 clavijas a USB que vino con su equipo Apple.
Una vez conectado, presione el botón SRC para seleccionar otra modalidad de
operación. Para volver al modo iPod desde cualquier otra fuente, presione el
botón SRC hasta que aparezca iPod en la pantalla.
Selección de una categoría
1. A
l visualizar iPod o iPhone en la pantalla, presione el botón MENU (Menú de
iPod). La pantalla mostrará la categoría.
2. Gire la perilla de volumen para cambiar la categoría de esta manera:
LISTA DE REPRODUCCIÓN
ARTISTA
ÁLBUM
GÉNERO
CANCIONES
COMPOSITOR
AUDIOLIBRO
PODCAST.
3. Presione el botón del volumen para confirmar la categoría seleccionada.
Selección de una pista
1. S eleccione una categoría como se describe anteriormente. Al presionar
el botón de volumen para confirmar la categoría seleccionada, la pantalla
mostrará el catálogo actual almacenado en el iPod o iPhone.
2. Gire la perilla de volumen para cambiar el título de la pista a la pista siguiente
o anterior.
3. Presione la perilla de volumen para reproducir la pista seleccionada.
Pausa de la reproducción
Al reproducir una pista, pulse el botón 1 /
para poner en pausa la
reproducción. Siempre se muestra “PAUSE” (pausa) en la pantalla.
Vuelva a presionar el botón 1 /
para reanudar la reproducción.
Repetición de pistas
Al reproducir una pista, presione el botón 3 RPT brevemente para repetir la pista
actual. Presione otra vez el botón 3 RPT para cancelar la función.
Reproducción de pistas en orden aleatorio
Cuando reproduzca una pista, presione el botón 4 RDM para reproducir todas las
pistas pertenecientes a la categoría actual en orden aleatorio. Se muestra "RDM"
en la pantalla. Vuelva a presionar el botón 4 RDM para cancelar la función. En
el modo Canción o Álbum, presione el botón 4 RDM durante 2 segundos para
reproducir todas las pistas de un álbum en orden aleatorio. En el modo Canción o
álbum al azar, vuelva a presionar el botón 4 RDM para salir del modo al azar.
33
Selección de una pista hacia arriba/abajo
Al reproducir una pista, presione el botón
o el botón
para reproducir
la pista anterior o siguiente en la categoría actual. No se puede ingresar en la
siguiente categoría.
Al reproducir una pista durante más de 1 segundo, presione el botón
para
reproducir la pista actual desde el comienzo de la pista.
Al reproducir una pista durante menos de 1 segundo, presione el botón
para
reproducir la pista anterior.
Al reproducir una pista, mantenga presionado el botón
o el botón
durante varios segundos para reproducir la pista avanzando o retrocediendo
rápidamente. Suelte el botón para reanudar la reproducción normal.
34
DMR2116i
ESPECIFICACIONES
Niveles de potencia CEA
Salida de Potencia: 13 vatios RMS X 4 canales
en 4-ohmios a < 1% THD+N
Relación señal-ruido: r eferencia bajo 70dBA.
(Referencia: 1 vatio, 4-ohmios)
Frecuencia de respuesta: 20Hz a 20kHz (-3dB)
(Se utilizó la entrada auxiliar
como referencia de origen)
Voltaje de suministro de referencia: 14.4 VCC
Sintonizador de FM
Rango de sintonización (AM): 87.5MHz - 108.00MHz
Rango de sintonización (Europa): 87.5MHz - 108.00MHz
Sensibilidad mono: 12dBf
50dB Sensibilidad de silenciamiento (estéreo): 16dBf
Separación en estéreo @ 1kHz: >35dB
Frecuencia de respuesta: 30Hz-17kHz. -3dB
Sintonizador de AM
Rango de sintonización (AM): 530 kHz - 1,710kHz
Rango de sintonización (Europa): 522kHz-1620kHz
Sensibilidad a 20 dB de relación señal-ruido: 30uV
Frecuencia de respuesta: 50Hz-2kHz, -3dB
Entrada auxiliar
Sensibilidad de entrada: 400mV RMS para 1 vatio RMS a 4 ohmios
Frecuencia de respuesta: 20Hz a 20kHz, -3dB
Impedancia de entrada: 10 k-ohmios
Información general
Fuente de alimentación: 11-16 VCC, negativo a tierra
Antena eléctrica (Azul): 500mAmp Máx, protección de corriente limitada.
Temperatura de operación: -10°C~60°C
Fusibles: 10 A ATO de acción rápida
Dimensiones del chasis DIN: 5
1mm x 178mm x 170mm
(2”H x 7”W x 6.7”D)
Las especificaciones están sujetas a cambios sin previo aviso.
35
RESOLUCIÓN DE PROBLEMAS
Antes de consultar la lista de problemas, compruebe las conexiones de los cables.
Si el problema persiste después de haber consultado la lista, póngase en contacto
con el distribuidor de servicio más cercano.
Problema
Causa
Solución
No hay
alimentación
eléctrica.
• El contacto del vehículo
no está encendido.
• Si el suministro de
alimentación eléctrica está
conectado a los circuitos
para accesorios del
vehículo, pero el motor no
está encendido, gire la llave
de contacto a la posición
“ACC”.
• Reemplace el fusible.
Asegúrese de que el
amperaje coincida con el
valor especificado.
• El fusible está fundido.
No hay sonido.
• El volumen está al nivel
mínimo.
• Los cables no están
correctamente
conectados.
• Ajuste el volumen al nivel
deseado.
• Compruebe la conexión de
los cables.
Los botones de
operación no
funcionan.
• La microcomputadora
integrada no funciona
correctamente debido
al ruido.
• Pulse el botón RESET
(Reinicio).
• El panel frontal no está
colocado correctamente.
La radio no
funciona.
• El cable de la antena no
está conectado.
• Inserte el cable de la
antena firmemente.
La función
de selección
automática de
emisoras de radio
no funciona.
• Las señales de radio son
demasiado débiles.
• Seleccione una emisora
manualmente.
La información del
archivo se muestra
en la pantalla, pero
no se reproduce.
Los archivos tienen
tecnología de Gestión de
derechos digitales (DRM).
Comuníquese con el
proveedor para saber cómo
utilizarlos correctamente.
36
DMR2116i
CUIDADO Y MANTENIMIENTO
1. U
tilice únicamente un paño siliconado limpio y detergente neutro para
limpiar el panel frontal. Los paños ásperos y detergente no neutro (como por
ejemplo, alcohol) pueden raspar o decolorar la unidad.
2. No utilice agua o líquidos limpiadores en la unidad.
3. No utilice productos destilados del petróleo para limpiar esta unidad.
4. Es posible que la pantalla se condense al calentar el vehículo cuando hace frío
o hay humedad. En tal caso, la pantalla no funcionará correctamente hasta
que la humedad se evapore.
Reemplazo del fusible
Cuando cambie los fusibles, asegúrese de que el amperaje coincida con el valor
especificado. Si el fusible está quemado, revise la conexión de alimentación y
reemplácelo con un fusible nuevo. Si el problema se repite, la unidad podría tener
una anomalía.
¡Advertencia! Al reemplazar un fusible, utilice otro con el mismo amperaje que se
indica en el porta fusibles. Nunca reemplace un fusible por otro
de diferente valor. No utilice un fusible con una clasificación de
amperaje mayor que el fusible original provisto en la unidad; si lo
hace, la unidad se podrá dañar o incendiar.
37
PIEZAS DE REPUESTO COMUNES
Panel frontal desmontable
30213890
Kit del Manual del propietario
30613860
Mazo de cables
30313840
Perfil embellecedor exterior
30413840
Abrazadera principal
30113840
Bolsa de tornillería
30513840
38
DMR2116i
NOTAS
39
Audiovox Electronics Corporation
Hauppauge, NY 11788
Technical Assistance: 1-800-323-4815
www.mobile.jensen.com
© 2013 Audiovox
Imprimido en China
128-9240