1
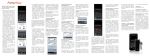
Model PA-420C Owner’s Manual REMOTE STARTING THE VEHICLE This unit will not start the vehicle if any one of the following situations exists: The vehicle's hood lid is opened. The gear shift selector is not in Park. The brake pedal is depressed. The system is placed in the override position. 1. To start the vehicle, press and release the Key button two times within 2 seconds. The vehicle will start and remain running for the pre-programmed 5,10,15 or 20 minute run cycle. As a visual indication, the parking lights will flash or remain on depending on the setting by your installation center. 2. When you arrive at the vehicle, unlock by pressing the transmitter button for 3 seconds until the doors unlock. Turn the ignition key to the ON position (not the spring loaded start position), then step on the brake pedal to disengage the remote starter. The vehicle will continue to run, but now on it's own power. NOTE: The engine will stop running before the pre-programmed run cycle has expired if you perform any one of the following functions: Press and release Key button on the keychain transmitter two times within 2 seconds. - Depress the brake pedal. - Open the vehicle's hood. - Place the unit in the safety control disabled mode. PUSH-BUTTON SAFETY CONTROL/PROGRAM SWITCH The Push-Button safety control switch allows you to temporarily disable the remote starting function of the system. This is recommended whenever the vehicle is being serviced. To place the system in the service/ temporary disabled mode: 1. With the vehicle unlocked, and the ignition switch off Press and Hold the override/program Push-Button Switch on. 2. Turn the ignition switch on, off, on, off, on, off. 3. The LED begins to flash two short flashes followed by one long flashes and continues this pattern until returned to normal mode of operation. This puts the unit into the R/S Override mode indicating that the remote start system is in the service/ temporary disabled mode and will not start from RF or any other input Telematic input or otherwise. To Exit R/S Override Mode: 1. With the vehcile unlocked and the ignition switch off, press and hold the override/program Push-Button Switch on. 2. Turn the ignition switch on, off, on, off, on, off. 3. The LED turns off indicating that the R/S unit is fully functional once again. OPERATING ON AUTOMATIC START UP TIMER MODE Your system has the ability to automatically start the vehicle every 2 or 4 hours over a 48 hour period. This feature is especially useful in cold climates where the only means to keep the engine and engine fluids warm is to periodically start the engine. WARNING! Be certain that the vehicle is outdoors before using this or any remote vehicle starting device. A running engine produces dangerous carbon monoxide fumes which can be harmful or fatal if prolonged exposure occurs. DO NOT remote start the vehicle if it is garaged. TO BEGIN THE AUTOMATIC START UP TIMER 1. Turn the ignition key on then off. 2. Within 10 seconds, activate the RF start command two times. (Press the programmed channel button of your keychain transmitter 4 times). The parking lights will flash and or the horn will chirp 2 or 4 times indicating the timed start mode is activated. The vehicle, on a 2 or 4 hour interval basis, dependent on the number of chirps heard when activated as described above will automatically start, run for the pre-programmed time (5,10,15 or 20 minutes), and then shut off. This will continue for 48 hours. PATENTED: www.voxxintl.com/company/patents 1 128-9238 1 of 8 NOTE: The automatic start up timer can also be initiated from the keychain transmitter. To do this: 1. Start the vehicle using the keychain transmitter by pressing and releasing the second channel transmitter button 2 times. 2. Shut off the vehicle using the keychain transmitter by pressing and releasing the second channel transmitter button 2 times. 3. Within 10 seconds of step 2, activate the RF start command two times. (Push the Key button of your keychain transmitter 4 times). The parking lights will flash and the horn will chirp 2 times to indicate a 2 hour start interval, or 4 times to indicate a 4 hour start interval. The 2 or 4 hour start sequence is selected at time of installation during the feature setting mode. Please consult with your installation center if you wish to have this interval changed. CANCELING THE AUTOMATIC START UP TIMER To cancel the automatic start up timer do one of the following: 1. Start the vehicle manually with the use of the ignition key and depress the brake pedal. 2. Remote start the vehicle using your RF keychain transmitter. PROGRAMMING TRANSMITTERS: At times it may become necessary to program replacement or additional transmitters for use with your system. To do this: 1. Enter the vehicle and turn the ignition key to the on position. 2. Press and release the Program/Override push-button switch three times. The unit will flash the parking lights and or beep the horn once to indicate that the system is in the transmitter program mode. The LED will also flash one time pause, one time pause, etc... indicating that you are in the transmitter program mode of the unit’s channel 1 or single button program mode. 3. Press and hold the key button of the transmitter you wish to operate your system until the parking lights flash or a beep tone is heard. Repeat this for each additional transmitter you wish to program. NOTE: The unit is capable of storing up to 4 transmitters. If a fifth transmitter is added, the first transmitter programmed will be bumped out. Once all transmitter have been programmed, turn the ignition switch off to exit the program mode. By completing the above, the key button of the transmitter will allow you to start the vehicle from the maximum operating range and also activate the car finder mode. CAR FINDER MODE: To activate the car finder mode, press and hold the transmitter button for about 3 seconds. The parking lights will begin to flash, and horn, if connected, will begin to beep. this will continue for 30 seconds or until you press and hold the transmitter button for 3 seconds again. DELETING TRANSMITTERS FROM YOUR SYSTEM: It may be necessary to delete a lost transmitter or to reprioritize a transmitter that is programmed to your system. To remove a transmitter that has been programmed in your system: 1. Enter the transmitter program mode of channel 1 as indicated above. 2. Alternately press and hold the transmitter button of each transmitter you wish to remain in the system’s memory until all 4 transmitter slots are full. NOTE: For this procedure, you must have all transmitters you wish to remain programmed in your system available. If you are uncomfortable about the programming of additional transmitters as outlined in the processes above please contact your installation center or call the technical service number listed on the back of the transmitter for help. 2 128-9238 2 of 8 BATTERY REPLACEMENT The transmitter incorporates a small LED visible through the case which is used to indicate battery condition. You will notice a decrease in transmitter range as the battery condition deteriorates. Transmitter battery replacement is recommended at least every 10 to 12 months, depending upon how frequently the transmitter is used. To replace the battery in the PN1 Transmitter: 1. Carefully Separate the transmitter case using the edge of a coin as shown. 2. Remove the rear cover to access the discharged battery paying attention to the proper polarity orientation. 3. Carefully remove and properly dispose of the discharged battery. 4. Insert the new battery, than carefully snap closed the transmitter case. 5. If you accidently dislodge the circuit board from the transmitter housing, be certain that the rubber membrane is seated properly, and the buttons are properly exposed from the front view of the case, then insert the circuit board, and return to step #4. PN1 Uses 2 x CR2016 Lithium Battery 3 128-9238 3 of 8 To purchase replacement transmitters or to get additional product information go to: www.prestigecarsecurity.com CAUTION: CARBON MONOXIDE GAS CAN CAUSE SERIOUS INJURY AND EVEN DEATH. It is the sole responsibility of the user to operate the vehicle this system was installed in a safe manner. This device must not be used in an enclosed space like a garage, attached or detached car port or any partially enclosed areas. Also, this device must be placed in the service mode when dropping the vehicle off for service to prevent injury to the service technician. This device complies with FCC Rules Part 15 Operation is subject to the following two conditions: (1) This device may not cause harmful interference and (2) This device must accept any interference that may be received, including interference that may cause undesired operation. NOTE: The manufacturer is not responsible for any radio or TV interference caused by unauthorized modifications to this equipment. Such modifications could void the user’s authority to operate the equipment. PATENTED: www.voxxintl.com/company/patents © 2013 Audiovox Electronic Corporation 150 Marcus Blvd, Hauppauge NY 11788 128-9238 4 128-9238 4 of 8 Modelo PA-420C Manual del propietario ARRANQUE REMOTO DEL VEHÍCULO: Esta unidad no arranca el vehículo si alguno de las siguientes situaciones existe: Se abre el capó del vehículo. El selector de cambio de velocidades no es en el parque. El pedal del freno se presionar. El sistema de arranque remoto está en el modo de anulación. 1. Para arrancar el vehículo, presione y suelte el boton de llave dos veces dentro de 2 segundos. El vehículo comenzará y continuará funcionando el operar la preprogramado 5,10,15 o 20 minutos. Como indicación visual, las luces de estacionamiento destellará o permanecer encendida fija dependiendo de la configuración su centro de instalación. 2. Cuando llegue al vehículo, gire la llave a la posición ON, (no la posición de inicio de resorte), a continuación, pise el pedal de freno para desenganchar el arrancador remoto. El vehículo seguirá funcionando, pero ahora en su propio poder. Nota: El motor dejará de funcionar antes de de que el ciclo de ejecución preprogramado ha caducado si realiza alguna de las siguientes funciones; Oprima y suelte la llave del transmisor de llavero dos veces en 2 segundos. Presione el pedal de freno. Abra el capó del vehículo. Coloque la unidad en el modo de seguridad control deshabilitado. PULSADOR SEGURIDAD CONTROL/PROGRAMA INTERRUPTOR: El interruptor de control de seguridad pulsador permite desactivar temporalmente la función de arranque remota del sistema. Esto se recomienda siempre que el vehículo esté en servicio. Para colocar el sistema en el modo desactivado servicio / temporal: 1. Con el sistema desarmado / desbloqueado y el interruptor se encendido apagado, presione y mantenga presionado el botón de programa es en. 2. Gire el interruptor de encendido en, apagado, 3 veces. 3. El LED empieza a parpadear dos destellos cortos, seguidos por un destellos prolongados y sigue este patrón hasta que vuelve al modo normal de operación. Para volver al modo de funcionamiento normal: 1. Con el sistema desarmado / desbloqueado y el interruptor se encendido apagado, presione y mantenga presionado el botón de programa es en. 2. Gire el interruptor de encendido en, apagado, 3 veces. 3. El LED se apaga indicando que la unidad R/S está totalmente funcional una vez más. FUNCIONAMIENTO EN MODO DE ARRANQUE DE TEMPORIZADOR AUTOMÁTICO: El sistema tiene la capacidad para iniciar automáticamente el vehículo cada 2 o 4 horas por un período de 48 horas. Esta característica es especialmente útil en climas fríos donde es el único medio para mantener caliente el motor y fluidos del motor periódicamente, arrancar la el motor. Advertencia! Asegúrese de que el vehículo está al aire libre antes de usar este o cualquier arranque remoto del vehículo. Un motor en funcionamiento produce humos peligrosos de monóxido de carbono que pueden ser dañino o fatal si se produce una exposición prolongada. No arranque el vehículo si es en un garaje cerrado. PARA INICIAR EL TEMPORIZADOR DE ARRANQUE AUTOMÁTICO: 1. Gire la llave de ignición en luego apagado 2. Dentro de 10 segundos, activar el comando de la arranque RF dos veces. 5 128-9238 5 of 8 (Pulse la llave boton de su transmisor 4 veces). Las luces de estacionamiento destellarán y la bocina sonará 2 o 4 veces para indicar que el modo de inicio programado se activa. el vehículo arrancará en un intervalo de 2 o 4 horas basen sobre el número de chirridos escuchado como se describió anteriormente. El vehículo seguirá ejecutar el tiempo predeterminado de 5, 10, 15, o 20 minutos y luego se apagará. Esto continuará durante 48 horas. NOTA: El temporizador de arranque automático también puede iniciarse desde el transmisor de llavero Para hacer esto: 1. Arranque el vehículo usando el transmisor de llavero apretando y soltando el botón del transmisor de llave 2 veces. 2. Apague el vehículo usando el transmisor de llavero apretando y soltando el botón del transmisor de llave 2 veces. 3. Dentro de 10 segundos del paso 2 control remoto de arranque el vehículo pulsando de el botón llave del transmisor 4 veces. Las luces de estacionamiento destellarán y la bocina sonará dos veces para indicar una secuencia de inicio de dos horas o cuatro veces para indicar una secuencia de inicio de cuatro horas. La secuencia el arranque de dos o cuatro horas está seleccionada en el momento de la instalación durante el modo de ajuste de la función. Por favor consulte a su centro de instalación si desea que la secuencia de 2 o 4 horas cambió. CANCELAR EL TEMPORIZADOR DE ARRANQUE AUTOMÁTICO: para cancelar el temporizador de arranque automático, realice uno de los siguientes. 1. Arranque el vehículo por el uso de la llave y luego pise el pedal del freno. 2. Control remoto arranque el vehículo usando el transmisor de llavero. PROGRAMACIÓN DE LOS TRANSMISORES: A veces puede ser necesario a cambio de programa de la transmisores adicionales para su uso con el sistema. Para hacer esto: 1. Gire la llave a la posición de encendido. 2. Presione y suelte el interruptor pulsador de programa/anulación tres veces. La unidad de alarma destellar las luces de estacionamiento y o un pitido la bocina una vez para indicar que el sistema está en el modo de programación de transmisor. El LED parpadeará también, pausa, flash, pausa, etc.,,, indicando el modo de transmisor entrado exitosamente. 3. Presione y mantenga presionado el botón de cada transmisor que desee operar su sistema hasta que se escuche un pitido de la bocina. NOTA: La unidad es capaz de almacenar hasta cuatro transmisores. Si se agrega un quinto transmisor, el primer transmisor programado se moverán fuera de la memoria del sistema. Una vez que el transmisor todas han sido programados, apague el interruptor de encendido para salir del modo de programa. MODO DE BUSCADOR DE COCHE: Para activar el modo de buscador de coche, presione y sostenga el botón del transmisor durante unos 3 segundos. Las luces de estacionamiento comenzará a parpadear, y bocina, si conectado, empezará a pitar. Esto continuará durante 30 segundos o hasta que usted presione y mantenga presionado el botón del transmisor durante 3 segundos. ELIMINACIÓN DE TRANSMISORES DEL SISTEMA: Puede ser necesario para eliminar un transmisor perdido o para priorizar un transmisor que está programado para su sistema. Para quitar un transmisor que se ha programado en su sistema: 1. Entrar en el modo de programa del transmisor del canal 1 como se indicó anteriormente. 2. Pulse y mantenga pulsado el botón del transmisor de cada transmisor que desea permanecer en la memoria del sistema hasta que todas las ranuras del transmisor 4 están llenos. 6 128-9238 6 of 8 NOTA: Para este procedimiento, debe tener todos los transmisores que desea permanecer programada en su sistema. Si estás incómodo respecto a la programación de los transmisores adicionales como se indica en los procesos anteriores comuníquese con su centro de instalación o llamar al número de servicio técnico que aparece en la parte posterior del transmisor para ayuda. REEMPLAZO DE LA BATERÍA El transmisor incorpora un pequeño LED visible a través del caso que se utiliza para indicar el estado de la batería. Usted notará una disminución en el transmisor, rango de funcionamiento como se deteriora el estado de la batería. Reemplazo de batería del transmisor se recomienda al menos cada 10 a 12 meses, dependiendo de con qué frecuencia se utiliza el transmisor. PN1 Uses 2 x CR2016 Baterías de litio Para reemplazar la batería en el transmisor PN1 1. Separar cuidadosamente la caso del la transmisor con el borde de una moneda, como se muestra. 2. Retire la cubierta trasera para acceder a la batería descargada, prestando atención a la orientación de polaridad apropiada de la batería. 3. Cuidadosamente retire y deseche el a descargada la batería. 4. Inserte las dos nuevas baterías, de CR2016, y entonces cuidadosamente se cierre la caso del transmisor. 5. Si usted accidentalmente desalojar la placa de circuito de la caso del transmisor, asegúrese de que la membrana de goma esté bien asentada, y los botones están expuestos correctamente desde la vista frontal de la caso, y luego introduzca la placa de circuito y vuelva al paso # 4. 7 128-9238 7 of 8 PRECAUCIÓN: GAS DE MONÓXIDO DE CARBONO PUEDE PROVOCAR LESIONES GRAVES E INCLUSO LA MUERTE Es responsabilidad exclusiva del usuario para operar el vehículo que este sistema fue instalado de forma segura. Este dispositivo no debe utilizarse en un espacio cerrado como un garaje, conectada o desconectada, puerto de coche o cualquier áreas parcialmente cerradas. También, para evitar lesiones al técnico de servicio, este dispositivo debe colocarse en el modo de servicio cuando salga del vehículo para servicio de reparación. Comprar transmisores de reemplazo, o para obtener más información sobre el producto vaya a: w w w.prestigecarsecurity.com Este dispositivo cumple con la reglas de FCC parte 15 funcionamiento está sujeto a las dos condiciones siguientes: (1) Este dispositivo no puede causar interferencias dañinas y (2) Este dispositivo debe aceptar cualquier interferencia que puede ser recibida, incluyendo interferencia que pueda causar un funcionamiento no deseado. NOTA: el fabricante no es responsable de cualquier interferencia de radio o TV causada por modificaciones no autorizadas en este equipo. Estas modificaciones podrían anular la autoridad del usuario para operar el equipo. © 2013 Audiovox Electronic Corporation 150 Marcus Blvd, Hauppauge NY 11788 128-9238 8 128-9238 8 of 8