1
• Unload the paintball marker (See Step 5B).
• Put the paintball marker “On Safe” (See Step 2A).
• If the CO2 source you are using has an on/off valve, turn it to the “Off Position”. Otherwise, with the paintball marker
pointed in a SAFE DIRECTION, slowly unscrew the CO2 source. NOTE: You will experience a slight discharge of CO2 gas
upon removal of the CO2 source: this is normal.
Step 4. Cocking the Paintball Marker
• Put the paintball marker “On Safe” (See Step 2A).
• Point the paintball marker in a SAFE DIRECTION.
• Pull the COCKING KNOB all the way back until you hear a click and the HAMMER is locked into position.
BONE DADDY (DMS01)
BONE DADDY GT (DMS02)
BONE DADDY RG (DMS03)
WARNING: Make sure the HAMMER ASSEMBLY is completely locked into position. If
you release the COCKING KNOB without the HAMMER first being locked into position, the
paintball marker can fire.
Step 5. Loading and Unloading Paintballs
.68 Caliber CO2 Paintball Markers
WARNING: Use .68 caliber paintballs only. Never reuse ammunition. Use of any other
ammunition can cause injury to you and/or others, or damage to the paintball marker.
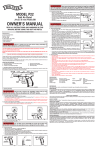
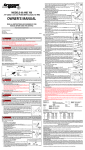
OWNER’S MANUAL
READ ALL INSTRUCTIONS AND WARNINGS IN THIS
MANUAL BEFORE USING THIS PAINTBALL MARKER
Incluye instrucciones en español al reverso
Diablo Marketing LLC
Rts. 5 & 20, P.O. Box 308
East Bloomfield, NY 14443
DMS01-515
WARNING: This is not a toy. Misuse may cause serious injury or death. Eye protection designed
specifically for paintball must be worn by the user and any person within range. Recommend 18 years or
older to purchase. Users under 18 must have adult supervision. Read all instructions before using.
BUYER AND USER HAVE THE DUTY TO OBEY ALL LAWS ABOUT THE USE AND OWNERSHIP OF THIS PAINTBALL MARKER.
Please read this owner’s manual completely. And remember, this paintball marker is not a toy. Always carefully follow
the safety instructions found in this owner’s manual and keep this manual in a safe place for future use.
If you have any questions regarding your new paintball marker, please contact Diablo Marketing LLC, Customer Service
at 1-800-724-7486 or 585-657-6161.
STEPS FOR SAFE SHOOTING
Step 1. Learning the Parts of Your New Paintball Marker
Step 2. Operating the Safety
Step 3. Installing and Removing the CO2 Source
Step 4. Cocking the Paintball Marker
Step 5. Loading and Unloading Paintballs
Step 6. Velocity Adjustment
Step 7. Regulator Adjustment (not all models)
Step 8. Aiming and Firing Safely
Step 9. Maintaining Your Paintball Marker
Step 10. Reviewing Safety
Step 1. Learning the Parts of Your New Paintball Marker
Learning the names of the parts of your new paintball marker will help you to understand your owner’s manual (Fig. 1A, 1B & 1C).
Use this manual to increase your enjoyment of this paintball marker.
POWER FEED
PORT CONNECTION
BALL LOCK
RECEIVER
BARREL
COCKING KNOB
MUZZLE
VELOCITY KNOB
VOLUMIZER
SAFETY
GRIP FRAME
GAS ADAPTER
TRIGGER
MODEL DMS01
TRIGGER GUARD
Fig. 1A
POWER FEED PORT
CONNECTION
RAISED SIGHT RAIL
RECEIVER
BARREL
COCKING KNOB
MUZZLE
VELOCITY KNOB
VOLUMIZER
GRIP FRAME
FOREGRIP
SAFETY
GAS ADAPTER
HOSE
MODEL DMS02
TRIGGER
TRIGGER GUARD
Fig. 1B
POWER FEED
PORT CONNECTION
RAISED SIGHT RAIL
BARREL
RECEIVER
COCKING KNOB
MUZZLE
VELOCITY KNOB
VOLUMIZER
GRIP FRAME
SAFETY
EXPANSION
CHAMBER
TRIGGER
TRIGGER
GUARD
GAS ADAPTER
WITH REGULATOR
HOSE
MODEL DMS03
Fig. 1C
Step 2. Operating the Safety
WARNING: Keep the paintball marker in the “ON SAFE” position until you are actually
ready to shoot. Then push the SAFETY to the “OFF SAFE” position.
A. To Put the Paintball Marker “ON SAFE:”
• Locate the SAFETY above the TRIGGER.
• Push the SAFETY from the left side all the way in. (Fig. 2) The SAFETY is not on
unless it is pushed all the way in and the red circle around the SAFETY is not
showing. The paintball marker will not fire when “On Safe”.
Even when the SAFETY is “On Safe”, you should continue to handle the paintball marker safely. Do not ever point the paintball marker at anything you do not intend to shoot.
• Place the BARREL GLOVE over the barrel (Fig. 3)
B. To Take the Paintball Marker “OFF SAFE”:
• Remove the BARREL GLOVE.
• Push the SAFETY from the right side all the way in. (Fig. 2)
• The paintball marker is ready to fire when “Off Safe”. When you can see the red
circle around the SAFETY, the paintball marker is “Off Safe” and can be fired.
Step 3. Installing and Removing the CO2 Source
PUSH IN FROM LEFT FOR
“ON SAFE”
PUSH IN
FROM
RIGHT FOR
“OFF SAFE”
Fig. 2
WARNING: Keep hands away from escaping CO2 gas. It can cause frostbite if allowed to
come in contact with skin. If the CO2 source you are using has an on/off valve, make sure it is in
the “OFF POSITION” before attempting to remove it from the paintball marker. Do not expose the
CO2 source to heat or store the CO2 source at temperatures above 130°F (54°C). Always follow the
manufacturer’s warnings listed on the CO2 source for handling and storage.
A. Installing the CO2 Source
• Make sure the BARREL GLOVE is placed over the barrel (See Fig. 3)
• Put the paintball marker “On Safe” (See Step 2A).
• Screw the CO2 source into the GAS ADAPTER.
• Tighten the CO2 source onto the GAS ADAPTER until you feel a
solid stop.
• If the CO2 source you are using has an on/off valve, turn the valve
to the “On Position”. The paintball marker is now fully charged.
NOTE: Do not store your paintball marker with the CO2 source
attached.
B. Removing the CO2 Source
NOTE: Always remove the CO2 source before disassembling your
paintball marker.
PULL TIGHT
BARREL GLOVE
SQUEEZE
Fig. 3
A. Loading Paintballs
• Make sure the BARREL GLOVE is placed over the BARREL (See Fig. 3)
• Put the paintball marker “On Safe.” (See Step 2A)
• Point the paintball marker in a SAFE DIRECTION.
• Attach a PAINTBALL HOPPER onto the POWER FEED PORT.
• Fill the PAINTBALL HOPPER with paintballs.
• Rotate the BALL LOCK to allow paintballs to feed into the RECEIVER.
B. Unloading the Paintballs
VELOCITY KNOB
• Put the paintball marker “On Safe”. (See Step 2A)
DECREASE VELOCITY
• Empty or remove the PAINTBALL HOPPER.
(TURN KNOB COUNTER
• Unscrew the BARREL and remove any paintballs from the BARREL, RECEIVER CLOCKWISE)
and POWER FEED PORT CONNECTION.
INCREASE VELOCITY
(TURN KNOB CLOCKWISE)
Step 6. Velocity Adjustment
• To increase velocity, loosen the VELOCITY LOCKING SETSCREW 1/2 turn with
VELOCITY
a hex wrench, and turn the VELOCITY KNOB clockwise. (Fig. 4)
LOCKING SET SCREW
• To decrease velocity, turn the VELOCITY KNOB counterclockwise.
Fig. 4
• When desired velocity is obtained, tighten the VELOCITY LOCKING SETSCREW.
NOTE: Velocity may vary depending upon altitude and climate conditions.
BEFORE using your paintball marker you must always perform a “SAFE VELOCITY TEST” by using a chronograph to verify that the velocity is below 300 fps.
INCREASE PRESSURE
(TURN COUNTER
Step 7. Regulator Adjustment (does not apply to all models)
• To increase pressure into your marker, turn the REGULATOR ADJUSTMENT CLOCKWISE)
SCREW counterclockwise using a hex wrench.(Fig. 5)
DECREASE PRESSURE
• To decrease pressure into your marker, turn the REGULATOR ADJUSTMENT (TURN CLOCKWISE)
SCREW clockwise and fire the marker twice (See Step 8).
• When desired pressure is obtained, tighten the REGULATOR LOCKING
REGULATOR ADJUSTMENT SCREW
SETSCREW.
(For
Models equipped with regulators)
Step 8. Aiming and Firing Safely
• Eye protection designed specifically for paintball must be worn by the user and
Fig. 5
any person within range.
• Always aim your paintball marker in a SAFE DIRECTION.
• When you are sure of your target, and the area around the target is clear, remove the BARREL GLOVE, cock the marker
(See Step 4), take the paintball marker “Off Safe” (See Step 2B) and squeeze the TRIGGER to fire.
• Do not shoot at fragile objects such as windows.
• Paintballs may cause staining of some porous surfaces such as brick, stucco and wood.
Step 9. Maintaining Your Paintball Marker
BOLT
RECEIVER
A. Disassembling and Cleaning Your Paintball Marker
LUG
• Always remove the CO2 source before disassembling
your paintball marker (See Step 3B).
• With the paintball marker “On Safe” (See Step 2A), and
the CO2 source removed (See Step 3B), unscrew the
LUG. (Fig. 6)
PIN
SPRING
STRIKER
BUMPER
• Pull the BOLT out and the STRIKER, BUMPER, SPRING
and PIN will easily come out of the marker.
• Rinse the parts you just removed with warm tap
OIL: BOLT, STRIKER, SPRING, PIN
water. After you have cleaned those parts make sure
they are dried thoroughly.
Fig. 6
• After drying, IMMEDIATELY oil the parts with paintball
marker oil as indicated in Fig. 6. DO NOT use a petroleum distillate based oil or solvent as they can cause damage to
your paintball marker.
NOTE: Failure to properly oil the parts where indicated in Fig. 6 can result in rust.
B. Assembling Your Paintball Marker
• Assemble the BOLT and STRIKER together and push them back into the RECEIVER as shown in Fig. 6. IMPORTANT: You
must be pulling the trigger at the same time in order for the parts to fit completely back into the RECEIVER.
• Put the BUMPER, SPRING AND PIN together and insert them all the way into the RECEIVER.
• Screw the LUG into the RECEIVER until hand tight.
• Avoid dry firing if the paintball marker is not properly lubricated because it may cause damage to your marker.
• If an air leak should occur in the area of the valve, DO NOT attempt to repair it yourself. Tampering with the paintball
marker or attempts to change the paintball marker in any way may make it unsafe to use and will void the warranty.
• If you drop your paintball marker, check to see that it works properly before you use it again. If anything seems changed,
like a shorter or weaker trigger pull, this may mean worn out or broken parts. Call Customer Service for assistance before
using your paintball marker again.
Step 10. Reviewing Safety
• Always treat the paintball marker as though it were loaded.
• Always aim in a SAFE DIRECTION. Always keep the MUZZLE of the paintball marker pointed in a SAFE DIRECTION.
• Always keep the paintball marker “On Safe” until you are ready to shoot in a SAFE DIRECTION.
• Always check to see if the paintball marker is “On Safe” and unloaded when getting it from another person or from
storage.
• Always keep your finger off the TRIGGER and out of the TRIGGER GUARD until ready to shoot.
• Eye protection designed specifically for paintball must be worn by the user and any person within range.
• Never look down the BARREL or BREACH of a paintball marker.
• Never shoot at a person who is not wearing eye protection designed specifically for paintball.
• Never disassemble the paintball marker before removing the CO2 source (See Step 3B) and making sure your marker is
in the “On Safe” position (See Step 2A)
• Keep hands away from escaping CO2 gas. It can cause frostbite if allowed to come in contact with skin.
• Always follow the manufacturer’s warnings listed on the CO2 source for handling and storage.
• Use .68 caliber paintballs only. Never reuse ammunition.
• Always measure your marker’s velocity before playing paintball.
• Never shoot at velocities in excess of 300 feet per second.
• Do not attempt to disassemble or tamper with your paintball marker other than what is instructed in this manual for
removing paintballs, cleaning or oiling. Use an Authorized Service Station or return it to the factory for repair.
• Always store your paintball marker unloaded and de-gassed in a secure location. Make sure ALL of the paintballs are
unloaded from the paintball marker (See Step 3B and 5B).
• Always keep the barrel blocking device (BARREL GLOVE) in/on the marker's MUZZLE when not actually shooting.
SPECIFICATIONS
Action:
Semi-automatic, 7 shots per second
Length:
DMS01 17.7 in. (45 cm)
Caliber/Ammunition: .68 cal. paintballs
DMS02 17.7 in. (45 cm)
Weight:
DMS01 4 lbs. (1.8 kg)
DMS03 20.4 in. (52 cm)
DMS02 3.08 lbs. (1.4 kg)
Barrel:
Removable, precision extruded aluminum
DMS03 3.6 lbs. (1.65 kg)
Power Source: CO2
Safety:
Cross bolt
PERFORMANCE
Operating paintball marker below 70°F (21°C) will decrease the number of effective shots. The reverse is true for operating
above 70°F (21°C). Many factors affect velocity, including brand of paintball, type of paintball, amount of CO2 in source, lubrication, barrel condition and temperature.
REPAIR SERVICE
If your paintball marker needs repair, we recommend that you take or send it to an Authorized Service Station or send it to
Diablo Marketing LLC. For an Authorized Service Station near you, call Customer Service at 1-800-724-7486 or 585-657-6161.
(International customers should contact their distributor.) DO NOT ATTEMPT TO DISASSEMBLE IT OTHER THAN AS
INSTRUCTED IN THE MANUAL FOR REMOVING PAINTBALLS, CLEANING OR OILING! Your paintball marker requires special
tools and fixtures to repair it. If you take it apart, you probably will not be able to reassemble it correctly. Diablo Marketing
LLC assumes no warranty responsibility under such circumstances.
LIMITED ONE YEAR WARRANTY
This product is warranted to the retail consumer for one year from date of retail purchase against defects in material and workmanship and is transferable. To register the serial number of your paintball marker, please return the Product Registration form
found in your owner’s manual packet. The warranty is not conditioned on the return of the card.
WHAT IS COVERED
Replacement parts and labor. Transportation charges to consumer for repaired product.
WHAT IS NOT COVERED
Transportation charges to Diablo Marketing LLC for defective product. Damages caused by abuse or failure to perform normal
maintenance. (See Step 9) Any other expense. CONSEQUENTIAL DAMAGES, INCIDENTAL DAMAGES, OR INCIDENTAL
EXPENSES, INCLUDING DAMAGE TO PROPERTY. SOME STATES DO NOT ALLOW THE EXCLUSION OR LIMITATION OF INCIDENTAL OR CONSEQUENTIAL DAMAGES, SO THE ABOVE LIMITATION OR EXCLUSION MAY NOT APPLY TO YOU.
WARRANTY CLAIMS
USA Customers: Attach your name, address, description of problem, phone number and copy of sales receipt to product.
Package and return to Diablo Marketing LLC, Rts. 5&20, P.O. Box 308, E. Bloomfield, NY 14443.
Canadian Customers: Follow packaging procedures above and send to Crosman Parts & Service Depot, 611 Neal Drive,
Peterborough, Ontario K9J 6X7 Canada.
International Customers: Please return product to your nearest distributor. If you do not know your distributor, please call
585-657-6161 and ask for our International Department for assistance.
IMPLIED WARRANTIES
ANY IMPLIED WARRANTIES, INCLUDING THE IMPLIED WARRANTIES OF MERCHANTABILITY AND FITNESS FOR A
PARTICULAR PURPOSE, ARE LIMITED IN DURATION TO ONE YEAR FROM DATE OF RETAIL PURCHASE. SOME STATES
DO NOT ALLOW LIMITATIONS ON HOW LONG AN IMPLIED WARRANTY LASTS, SO THE ABOVE LIMITATIONS MAY
NOT APPLY TO YOU.
To the extent any provision of this warranty is prohibited by federal, state, or municipal law which cannot be preempted, it
shall not be applicable. This warranty gives you specific legal rights, and you may also have other rights which vary from
state to state and country to country.
B. Retiro de la fuente de CO2
NOTA: Siempre retire la fuente de CO2 antes de desarmar la pistola.
• Descargue la pistola (Ver el Paso 5B).
• Ponga el seguro (On Safe) a la pistola (Ver el Paso 2A).
• Si la fuente de CO2 que está usando tiene una válvula de encendido/ apagado, colóquela en la “Posición de apagado”. De
lo contrario, con la pistola apuntando en una DIRECCIÓN SEGURA, destornille lentamente la fuente de CO2. NOTA: Notará
que sale un poco de gas de CO2 al retirar la fuente; esto es normal.
Paso 4. Montaje de la pistola
• Ponga el seguro (On Safe) a la pistola (Ver el Paso 2A).
• Apunte la pistola en una DIRECCIÓN SEGURA.
• Hale la PERILLA DE MONTAJE completamente hacia atrás hasta que escuche un chasquido y el MARTILLO esté bloqueado
en posición.
BONE DADDY (DMS01)
BONE DADDY GT (DMS02)
BONE DADDY RG (DMS03)
Pistola de proyectiles de pintura, calibre 0.68 con CO2
MANUAL DEL PROPIETARIO
LEA TODAS LAS INSTRUCCIONES Y ADVERTENCIAS EN ESTE MANUAL
ANTES DE USAR ESTA PISTOLA DE PROYECTILES DE PINTURA
Diablo Marketing LLC
Rts. 5 & 20, P.O. Box 308
East Bloomfield, NY 14443
DMS01-515
ADVERTENCIA: Éste no es un juguete. El uso incorrecto puede causar lesiones graves
o aún la muerte. El usuario y cualquier otra persona dentro del rango deben usar protección para
los ojos especialmente diseñada para los proyectiles de pintura. Se recomienda que este artículo
sea comprado por personas de 18 años de edad o mayores. Los usuarios menores de 18 años de
edad deben ser supervisados por un adulto. Lea el manual de propietario antes de usar.
EL COMPRADOR Y EL USUARIO TIENEN EL DEBER DE OBEDECER TODAS LAS LEYES CON RESPECTO AL USO Y POSESIÓN
DE ESTA PISTOLA DE PROYECTILES DE PINTURA.
Por favor lea todo este manual del propietario. Y recuerde, esta pistola de proyectiles de pintura no es un juguete. Siempre
siga cuidadosamente las instrucciones de seguridad descritas en este manual del propietario y guarde el manual en un lugar
seguro para referencia futura.
Si tiene alguna pregunta con respecto a su nueva pistola de proyectiles de pintura, sírvase comunicarse con Diablo Marketing
LLC, Servicio a los Clientes al 1-800-724-7486 ó 585-657-6161.
PASOS PARA DISPARAR SIN PELIGRO
Paso 1. Aprendizaje de los componentes de su nueva pistola
Paso 6. Ajuste de velocidad
Paso 2. Funcionamiento del seguro
Paso 7. Ajuste del regulador (no todos los modelos)
Paso 3. Instalación y retiro de la fuente de CO2
Paso 8. Cómo apuntar y disparar sin peligro
Paso 4. Montaje de la pistola
Paso 9. Mantenimiento de su pistola
Paso 5. Cómo cargar y descargar los proyectiles de pintura
Paso 10. Consideraciones de seguridad
Paso 1. Aprendizaje de los componentes de su nueva pistola
El aprendizaje de los nombres de los componentes de su nueva pistola de proyectiles de pintura le ayudará a entender el manual del propietario (Fig. 1A, 1B & 1C) (Fig. 1A, 1B & 1C). Utilice este manual para que esta pistola de proyectiles de pintura le sea aún más placentera.
CONEXIÓN DEL ORIFICIO
DEL AVANCE MECÁNICO
RETÉN ESFÉRICO
CAÑÓN
CAJA DE
MECANISMOS
PERILLA DE MONTAJE
BOCA
PERILLA DE
VELOCIDAD
CONTROLADOR
DE VOLUMEN
SEGURO
BASTIDOR DE LA
EMPUÑADURA
ADAPTADOR
PARA GAS
GATILLO
MODELO DMS01
GUARDAMONTE
Fig. 1A
CONEXIÓN DEL ORIFICIO
DEL AVANCE MECÁNICO
RIEL DE MIRA ELEVADO
CAJA DE
MECANISMOS
CAÑÓN
PERILLA DE MONTAJE
BOCA
PERILLA DE
VELOCIDAD
CONTROLADOR DE
VOLUMEN
BASTIDOR DE LA
EMPUÑADURA
EMPUÑADURA
DELANTERA
SEGURO
ADAPTADOR
PARA GAS
MANGUERA
MODELO DMS02
GATILLO
GUARDAMONTE
Fig. 1B
CONEXIÓN DEL ORIFICIO
DEL AVANCE MECÁNICO
RIEL DE MIRA ELEVADO
CAJA DE MECANISMOS
CAÑÓN
PERILLA DE MONTAJE
BOCA
PERILLA DE
VELOCIDAD
BASTIDOR DE LA
EMPUÑADURA
SEGURO
CÁMARA DE
EXPANSIÓN
CONTROLADOR
DE VOLUMEN
GATILLO
GUARDAMONTE
ADAPTADOR PARA GAS
CON REGULADOR
MANGUERA
MODELO DMS03
Fig. 1C
Paso 2. Funcionamiento del seguro
ADVERTENCIA: Mantenga esta pistola de proyectiles de pintura “CON EL SEGURO PUESTO”
(ON SAFE) hasta que esté listo para disparar. Entonces “SÁQUELE EL SEGURO” (OFF SAFE).
A. Para colocar el seguro (ON SAFE) a la pistola de proyectiles de pintura:
EMPUJE HACIA ADENTRO DESDE LA IZQUIERDA PARA PONER EL SEGURO (ON SAFE)
• Encuentre el SEGURO sobre el GATILLO.
• Empuje el SEGURO desde el lado izquierdo completamente hacia adentro. (Fig. 2)
El SEGURO no está puesto a menos que esté empujado completamente hacia
adentro y que el círculo rojo alrededor del SEGURO no se vea. La pistola de
proyectiles de pintura no disparará con el seguro puesto (On Safe).
Aún con el SEGURO puesto (On Safe), usted debe continuar manejando la pistola en
forma segura. Nunca apunte la pistola a algo que no tenga la intención de dispararle.
EMPUJE
• Coloque la CUBIERTA DEL CAÑÓN sobre el cañón (Fig. 3)
HACIA
ADENTRO
B. Para quitarle el seguro (OFF SAFE) a la pistola:
DESDE LA DERECHA PARA
• Quite la CUBIERTA DEL CAÑÓN.
SACAR EL SEGURO (OFF SAFE)
Fig. 2
• Empuje el SEGURO desde el lado derecho completamente hacia adentro. (Fig. 2)
• La pistola de proyectiles de pintura está lista para disparar cuando se le haya quitado el seguro (Off Safe).
Cuando usted pueda ver el círculo rojo alrededor del SEGURO, significa que el seguro no está puesto y la pistola se puede disparar.
Paso 3. Instalación y retiro de la fuente de CO2
ADVERTENCIA: Mantenga las manos alejadas del gas de CO2 que se escapa. Puede producir congelación
si se permite que haga contacto con la piel. Si la fuente de CO2 que está usando tiene una válvula de encendido/apagado,
asegúrese de que dicha válvula esté en la “POSICIÓN DE APAGADO” antes de intentar instalar o retirar el tanque de la pistola de proyectiles de pintura. No exponga la fuente de CO2 al calor ni la almacene a temperaturas de más de 130°F. Siempre
respete las advertencias del fabricante que aparecen en la fuente de CO2 con respecto al manejo y almacenaje.
A. Instalación de la fuente de CO2
• Asegúrese de que la CUBIERTA DEL CAÑÓN esté colocada sobre el
cañón (Ver la Fig. 3)
• Ponga el seguro (On Safe) a la pistola (Ver el Paso 2A).
• Atornille la fuente de CO2 en el ADAPTADOR PARA GAS.
• Apriete la fuente sobre el ADAPTADOR PARA GAS hasta que sienta un
tope sólido.
• Si la fuente que está usando tiene una válvula de encendido/apagado,
colóquela en la “Posición de encendido”. Ahora la pistola de proyectiles de pintura está completamente cargada.
NOTA: No guarde la pistola con una fuente de CO2 instalada.
AJUSTE
CUBIERTA DEL CAÑÓN
APRIETE
Fig. 3
ADVERTENCIA: Asegúrese de que el CONJUNTO DEL MARTILLO esté completamente bloqueado en posición. Si suelta la PERILLA DE MONTAJE sin primero haber bloqueado
el MARTILLO en posición, la pistola puede disparar.
Paso 5. Cómo cargar y descargar los proyectiles de pintura
ADVERTENCIA: Use proyectiles de pintura de calibre 0.68 únicamente. Nunca use nuevamente la munición. El uso de cualquier otro tipo de munición puede causar lesiones a usted y/o a
otras personas o dañar la pistola de proyectiles de pintura.
A. Cómo cargar los proyectiles de pintura
• Asegúrese de que la CUBIERTA DEL CAÑÓN esté colocada sobre el CAÑÓN (Ver la Fig. 3)
• Ponga el seguro (On Safe) a la pistola. (Ver el Paso 2A)
• Apunte la pistola en una DIRECCIÓN SEGURA.
• Conecte una TOLVA PARA PROYECTILES DE PINTURA al ORIFICIO DE AVANCE MECÁNICO.
• Llene la TOLVA con proyectiles de pintura.
• Gire el RETÉN ESFÉRICO para alimentar los proyectiles de pintura a LA CAJA DE
MECANISMOS.
PERILLA DE VELOCIDAD
B. Cómo descargar los proyectiles de pintura
PARA REDUCIR LA VELOCIDAD
• Ponga el seguro (On Safe) a la pistola. (Ver el Paso 2A)
(GIRE LA PERILLA EN SENTIDO
CONTRAHORARIO)
• Vacíe o retire la TOLVA PARA PROYECTILES DE PINTURA.
• Destornille el CAÑÓN y saque los proyectiles de pintura del CAÑÓN, CAJA DE PARA AUMENTAR LA
MECANISMOS y de la CONEXIÓN DEL ORIFICIO DEL AVANCE MECÁNICO.
VELOCIDAD (GIRE LA PERILLA
EN SENTIDO HORARIO)
Paso 6. Ajuste de velocidad
• Para aumentar la velocidad, afloje el TORNILLO DE FIJACIÓN DE VELOCIDAD TORNILLO DE FIJACIÓN DE VELOCIDAD
1/2 vuelta con una llave hexagonal y gire la PERILLA DE VELOCIDAD en sentiFig. 4
do horario. (Fig. 4)
• Para disminuir la velocidad, gire la PERILLA DE VELOCIDAD en sentido contrahorario.
Una vez que obtenga la velocidad deseada, apriete el TORNILLO DE FIJACIÓN PARA AUMENTAR LA
PRESIÓN (GIRE EN
DE VELOCIDAD.
NOTA: La velocidad puede variar dependiendo de la altitud y las condiciones SENTIDO
CONTRAHORARIO)
climáticas. ANTES de usar la pistola de proyectiles de pintura, siempre debe
realizar una “PRUEBA DE VELOCIDAD SEGURA” empleando una cronógrafo PARA REDUCIR LA
PRESIÓN (GIRE EN
para verificar que la velocidad sea inferior a 300 pies por segundo.
SENTIDO HORARIO)
Paso 7. Ajuste del regulador (no corresponde a todos los modelos)
• Para aumentar la presión a su pistola, gire el TORNILLO DE AJUSTE DEL REGU- TORNILLO DE AJUSTE DEL REGULADOR
LADOR en sentido contrahorario con una llave hexagonal (Fig. 5)
• Para reducir la presión a la pistola, gire el TORNILLO DE AJUSTE DEL REGU- (Para modelos equipados con reguladores)
LADOR en sentido horario y dispárela dos veces (Ver el Paso 8).
Fig. 5
• Una vez que obtenga la presión deseada, apriete el TORNILLO DE FIJACIÓN
DEL REGULADOR.
Paso 8. Cómo apuntar y disparar sin peligro
• El usuario y cualquier otra persona dentro del rango
deben usar protección para los ojos especialmente
CIERRE
CAJA DE MECANISMOS
diseñada para los proyectiles de pintura.
OREJA
• Siempre apunte su pistola en una DIRECCIÓN SEGURA.
• Una vez que esté seguro de su blanco y que el área alrededor
del blanco esté despejada, retire la CUBIERTA DEL CAÑÓN,
monte la pistola (Ver el Paso 4), quite el seguro (Off Safe) de
la pistola (Ver el Paso 2B) y apriete el GATILLO para disparar.
PASADOR
PERCUTOR AMORTIGUADOR RESORTE
• No dispare a objetos frágiles como las ventanas.
• Los proyectiles de pintura podrían manchar algunas superficies porosas como los ladrillos, el estuco y la madera.
LUBRICAR: CIERRE, PERCUTOR, RESORTE, PASADOR
Paso 9. Mantenimiento de su pistola
Fig. 6
A. Desarmado y limpieza de su pistola
• Siempre retire la fuente de CO2 antes de desarmar la pistola (Ver el Paso 3B).
• Con el seguro puesto (On Safe) (Ver el Paso 2A) y después de haber retirado la fuente de CO2 (Ver el Paso 3B), destornille
la OREJA. (Fig. 6)
• Retire el CIERRE, con lo cual el PERCUTOR, AMORTI-GUADOR, RESORTE y PASADOR y saldrán fácilmente de la pistola.
• Enjuague las partes que acaba de retirar con agua tibia del grifo. Después de haber limpiado dichas partes, asegúrese
de secarlas bien.
• NO utilice aceite ni solvente con base de destilado de petróleo ya que pueden dañar la pistola.
NOTA: Si las partes no se lubrican bien en los lugares indicados en la Fig. 6, podrían oxidarse.
B. Armado de su pistola de proyectiles de pintura:
• Arme el CIERRE y el PERCUTOR e introdúzcalos en la CAJA DE MECANISMOS, tal como se muestra en la Fig. 6.
IMPORTANTE: Debe apretar el gatillo al mismo tiempo para que las partes calcen bien en la CAJA DE MECANISMOS.
• Arme el AMORTIGUADOR, RESORTE Y PASADOR e introdúzcalos por completo en la CAJA DE MECANISMOS.
• Atornille la OREJA en la CAJA DE MECANISMOS apretándola con la mano.
• Evite disparar si la pistola no está correctamente lubricada ya que podría dañarla.
• Si hay una fuga de aire en el área de la válvula, NO trate de repararla. La manipulación inapropiada de la pistola de proyectiles
de pintura o los intentos de modificarla de cualquier manera hacen que sea poco seguro usarla y anularán la garantía.
• Si deja caer la pistola, inspecciónela para asegurarse que funcione correctamente antes de usarla nuevamente. Si algo
parece haber cambiado, tal como un apriete más corto o más débil del gatillo, podría significar que hay piezas gastadas
o rotas. Llame al departamento de Servicio a los clientes y solicite ayuda antes de usar la pistola nuevamente.
Paso 10. Consideraciones de seguridad
• Siempre trate la pistola como si estuviese cargada.
• Siempre apunte en una DIRECCIÓN SEGURA. Siempre mantenga la BOCA de la pistola apuntada a una DIRECCIÓN SEGURA.
• Siempre mantenga el seguro puesto (On Safe) en la pistola hasta que esté listo para disparar en una DIRECCIÓN SEGURA.
• Siempre verifique que la pistola tenga el seguro puesto (On Safe) y que esté descargada cuando la reciba de otra
persona o la saque del lugar donde la estaba guardando.
• Siempre mantenga su dedo fuera del GATILLO y fuera del GUARDAMONTE hasta que esté listo para disparar.
• El usuario y cualquier otra persona dentro del rango deben usar protección para los ojos especialmente diseñada para
los proyectiles de pintura.
• Nunca mire hacia abajo por el CAÑÓN o ORIFICIO de una pistola de proyectiles de pintura.
• Nunca dispare a una persona que no está usando protección para los ojos especialmente diseñada para los proyectiles de pintura.
• Nunca desarme la pistola antes de retirar la fuente de CO2 (Ver el Paso 3B) y de asegurarse que la pistola tenga el seguro
puesto (On Safe) (Ver el Paso 2A).
• Mantenga las manos alejadas del gas de CO2 que se escapa. Puede producir congelación si se permite que haga contacto con la piel.
• Siempre respete las advertencias del fabricante que aparecen en la fuente de CO2 con respecto al manejo y almacenaje.
• Use proyectiles de pintura de calibre 0.68 únicamente. Nunca use nuevamente la munición.
• Siempre mida la velocidad de la pistola antes de comenzar el juego con proyectiles de pintura.
• Nunca dispare con velocidades de más de 300 pies por segundo.
• No intente desarmar o manipular indebidamente su pistola de proyectiles de pintura, excepto en la forma indicada en este manual para
retirar proyectiles de pintura, limpiar o aceitar. Utilice una Estación de servicio autorizada o envíe el arma a la fábrica para su reparación.
• Siempre guarde la pistola descargada y sin gas, en un lugar seguro. Asegúrese de haber descargado TODOS los proyectiles de pintura de la pistola (Ver los Pasos 3B y 5B).
• Siempre mantenga el dispositivo de bloqueo del cañón (CUBIERTA DEL CAÑÓN) en la BOCA de la pistola cuando no esté disparando.
ESPECIFICACIONES
Mecanismo:
Semiautomático, 7 tiros por segundo
Largo:
DMS01 17.7 pulg. (45 cm)
Calibre/Munición:
Proyectiles de pintura de calibre 0.68
DMS02 17.7 pulg. (45 cm)
Peso:
DMS01 4 lbs. (1.8 kg)
DMS03 20.4 pulg. (52 cm)
DMS02 3.08 lbs. (1.4 kg)
Cañón:
Removible, aluminio extruido a precisión
DMS03 3.6 lbs. (1.65 kg)
Fuente de energía: CO2
Seguro:
Cierre transversal
RENDIMIENTO
El funcionamiento de la pistola de proyectiles de pintura a una temperatura inferior a los 70°F (21°C) reducirá el número de
tiros efectivos. Lo contrario corresponde al funcionamiento de la pistola a una temperatura superior a los 70°F (21°C). Son
muchos los factores que afectan la velocidad, incluyendo la marca del proyectil de pintura, el tipo de proyectil de pintura, la
cantidad de CO2 en el cartucho, la lubricación, la condición del cañón y la temperatura.
SERVICIO DE REPARACIÓN
Si su pistola de proyectiles de pintura necesita ser reparada, recomendamos que la lleve o la envíe a una Estación de servicio autorizada o que la envíe a Diablo Marketing LLC. Para obtener información sobre una Estación de servicio autorizada cerca suyo, llame
a Servicio a los clientes al 1-800-724-7486 o al 716-657-6161. (Los clientes internacionales deben contactar a su distribuidor.) ¡NO
INTENTE DESARMAR LA PISTOLA EXCEPTO EN LA FORMA INDICADA EN EL MANUAL PARA RETIRAR PROYECTILES DE PINTURA, LIMPIAR O ACEITAR! Su pistola requiere herramientas y accesorios especiales para repararla. Si lo desarma, probablemente no
podrá rearmarlo correctamente. Diablo Marketing LLC no asume ninguna responsabilidad de garantía bajo dichas circunstancias.
UN AÑO DE GARANTÍA LIMITADA
Para el consumidor minorista, este producto se garantiza por un año a partir de la fecha de compra minorista contra defectos de materiales y mano de obra y dicha garantía es transferible. Para registrar el número de serie de su rifle, envíe de regreso el formulario de Registro
del Producto incluido en el paquete del manual del propietario. La garantía no está condicionada al regreso de dicho formulario.
QUÉ ESTÁ CUBIERTO POR LA GARANTÍA
Las piezas y la mano de obra de reemplazo. Los cargos de transporte del producto reparado al consumidor.
QUÉ NO ESTÁ CUBIERTO POR LA GARANTÍA
Los cargos de transporte del producto defectuoso a Diablo Marketing LLC. Los daños causados por abuso o falta de mantenimiento
normal (Ver el Paso 9). Cualquier otro gasto. LOS DAÑOS CONSECUENCIALES, DAÑOS INCIDENTALES O GASTOS INCIDENTALES, INCLUYENDO DAÑOS MATERIALES. ALGUNOS ESTADOS NO PERMITEN EXCLUIR O LIMITAR LOS DAÑOS INCIDENTALES O CONSECUENCIALES, DE MODO QUE LA LIMITACIÓN O EXCLUSIÓN ANTERIOR PODRÍA NO SER APLICABLE A USTED.
RECLAMACIONES BAJO GARANTÍA
Clientes en EE.UU.: Adjunte su nombre, dirección, descripción del problema, número de teléfono y una copia de la boleta de
compra al producto. Empáquelo y devuélvalo a Diablo Marketing LLC, Rts. 5&20, P.O. Box 308, E. Bloomfield, NY 14443.
Clientes canadienses: Siga los procedimientos de empaque anteriores y envíe el paquete a Crosman Parts & Service Depot,
427 Pido Road, P.O. Box 2421, Peterborough, Ontario K9J 6X7 Canadá.
Clientes internacionales: Por favor devuelva el producto a su distribuidor más cercano. Si no sabe quién es su distribuidor,
llame al 585-657-6161 y solicite asistencia a nuestro Departamento Internacional.
GARANTÍAS IMPLÍCITAS
CUALQUIER GARANTÍA IMPLÍCITA, INCLUSIVE LAS GARANTÍAS IMPLÍCITAS DE COMERCIALIZACIÓN Y ADECUACIÓN CON UN FIN EN PARTICULAR, ESTÁ LIMITADA A UN AÑO A PARTIR DE LA FECHA DE COMPRA MINORISTA. ALGUNOS ESTADOS NO PERMITEN LIMITACIONES
EN LA DURACIÓN DE UNA GARANTÍA IMPLÍCITA, DE MODO QUE LAS LIMITACIONES ANTERIORES PODRÍAN NO SER APLICABLES A USTED.
En la medida que cualquier disposición de esta garantía esté prohibida por las leyes federales, estatales o municipales que no
puedan prevenirse, dicha disposición no será aplicable. Esta garantía le da derechos legales específicos y también podría tener otros
derechos que varían de estado a estado y de país a país.