1
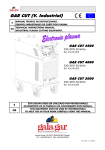
GAR CUT (V. Industrial)
MANUAL TÉCNICO DE INSTRUCCIONES.
EQUIPOS INDUSTRIALES DE CORTE POR PLASMA.
TECHNICAL INSTRUCTIONS MANUAL.
GB
INDUSTRIAL PLASMA CUTTING EQUIPMENT.
E
GAR CUT 1050
Ref. 458.00.000
GAR CUT 1350
Ref. 459.00.000
E
GB
ESTE EQUIPO DEBE SER UTILIZADO POR PROFESIONALES.
EN BENEFICIO DE SU TRABAJO LEA ATENTAMENTE ESTE MANUAL.
THIS EQUIPMENT MUST BE USED BY PROFESSIONALS.
TO HELP YOU IN YOUR WORK CAREFULLY READ THIS MANUAL.
Jaime Ferrán 19 50014 ZARAGOZA (Spain)
TLF.-34/976473410 FAX.-34/976472450
Ref. 459.17.147/Ed.2
GAR CUT (V. INDUSTRIAL)
E ÍNDICE DE TEMAS.
CAPITULO 1.
DESCRIPCIÓN GENERAL. CARACTERÍSTICAS TÉCNICAS ............................. Pág. 3
CAPITULO 2.
TRANSPORTE E INSTALACIÓN ................................................................... Pág. 4
CAPITULO 3.
PUESTA EN MARCHA. FUNCIONAMIENTO Y REGLAJES .............................. Pág. 5
CAPITULO 4.
OPERACIONES DE MANTENIMIENTO. RECOMENDACIONES ..................... Pág. 8
CAPITULO 5.
ANOMALÍAS. CAUSAS PROBABLES. SOLUCIONES POSIBLES ...................... Pág. 9
CAPITULO 6.
MEDIDAS DE SEGURIDAD .......................................................................... Pág. 11
ANEXOS.
.................................................................................................................. Pág. 23
- DECLARACIÓN DE CONFORMIDAD MARCADO CE.
- PLANOS ELÉCTRICOS.
- PLANOS DE DESPIECE Y LISTAS DE REFERENCIAS.
FORMULACIÓN PARA REALIZAR PEDIDOS DE PIEZAS DE REPUESTO:
Indique:
1º Maquina, Referencia y Nº de serie.
2º Tensión de Alimentación/Frecuencia.
3º Nº de piezas, descripción y referencia de las mismas.
EJEMPLO:
GAR CUT 1350, Ref. 459.00.000 (230/400V-Mohs)
lid MANÓMETRO. Ref.457.16.220
GB CONTENTS.
CHAPTER 1.
GENERAL DESCRIPTION. TECHNICAL CHARACTERISTICS. ......................... Page 13
CHAPTER 2.
TRANSPORT AND INSTALLATION ............................................................... Page 14
CHAPTER 3.
START-UP. ADJUSTMENT AND OPERATION CONTROLS. ............................ Page 15
CHAPTER 4.
MAINTENANCE OPERATIONS. RECOMMENDATIONS. .............................. Page 18
CHAPTER 5.
ANOMALIES. PROBABLE CAUSES. POSSIBLE SOLUTIONS. .......................... Page 19
CHAPTER 6.
SAFETY MEASURES ..................................................................................... Page 21
APPENDICES.
.................................................................................................................. Page 23
- DECLARATION OF CONFORMITY & EC MARKING
- ELECTRICAL DRAWINGS.
- DETAIL DRAWINGS AND REFERENCE LISTS.
FORMULA FOR MAKING ORDERS FOR SPARE PARTS:
Indicate:
1º. Machine, Reference and Serial no.
2º. Supply Voltage / Frequency.
3 - No. of parts, description and reference of it.
EXAMPLE:
GAR CUT 1350, Ref. 459.00.000 (230/400V-Mohs)
Lid PRESSURE GAUGE. Ref. 457.16.220
2
GAR CUT (V. INDUSTRIAL). Manual de Instrucciones.
3
CAPITULO 1. DESCRIPCIÓN GENERAL. CARACTERÍSTICAS TÉCNICAS.
En el frontal del equipo se encuentra situado un
Euro-conector que permite la conexión rápida de
la antorcha suministrada con el aparato. Con el
equipo se suministran:
Las máquinas GAR CUT (V. Industrial) realizan la
función de corte por plasma eléctrico soplado con
aire comprimido. Pueden cortar todo tipo de
materiales conductores de la electricidad: Acero,
acero inoxidable, aluminio, latón, etc.
- Antorcha de corte P-150.
- Sistema de seguridad CE.
- Gafas de protección.
- Cable de masa de conexión rápida.
Tabla Nº 1. Espesores máximos de corte.
GAR CUT (V. INDUSTRIAL)
MATERIAL
ACERO
DULCE
ACERO
INOXIDABLE
ALUMINIO
ESPESOR MÁXIMO
ACONSEJADO
GAR CUT GAR CUT
1050
1350
Para la utilización de cualquier otro accesorio
consulte con el fabricante.
ESPESOR LIMITE
GAR CUT
1050
GAR CUT
1350
20 mm
25 mm
25 mm
30 mm
20 mm
25 mm
25 mm
30 mm
16 mm
20 mm
19 mm
28 mm
Estos equipos disponen de protección contra:
sobrecalentamientos, falta de presión en el circuito
neumático, sobrecargas en el circuito de control,
contactos con tensiones peligrosas durante la
sustitución de componentes de la cabeza de la
antorcha y protección ante el corte sin masa de
retorno.
El equipo GAR CUT (V. Industrial) ésta concebido
para un uso industrial, ofrece un factor de marcha
para la potencia de corte máxima del 60%.
Tabla Nº 2 . Características Técnicas principales del equipo GAR CUT (V. Industrial).
CARACTERÍSTICAS TÉCNICAS
Tensión alimentación (U1–3Ph 50 Hz)
Intensidad primaria máxima (I1max )
Intensidad primaria efectiva (I1eff)
Tipo de gas de entrada.
Presión de trabajo
Caudal nominal de entrada
Posiciones de regulación
I
II
GAR CUT 1050
Ref. 458.00.000
GAR CUT 1350
Ref. 459.00.000
230/400 V
230/400 V
61/36 A
73/42 A
48/28 A
57/33 A
AIRE
AIRE
5,5-6 bar
5,5-6 bar
175-210 l/min
175-210 l/min
50 A (100%)
58 A (100%)
90 A (60%)
110 A (60%)
25 mm
30 mm
H (180ºC)
H (180ºC)
FORZADA
FORZADA
IP 21
IP 21
143 KG.
157 KG.
EN 60974
EN 60974
Espesor máximo de corte
Aislamiento térmico
Ventilación
Grado de protección.
Peso
Norma de aplicación
Fig. 1 – Dimensiones equipo GAR CUT (vid).
RUEDA MOVIL
RUEDA FIJA
GAR CUT (V. INDUSTRIAL). Manual de Instrucciones.
4
CAPITULO 2. TRANSPORTE E INSTALACIÓN.
En el transporte del equipo deben evitarse los
golpes y los movimientos bruscos. La posición de
transporte será siempre vertical. Debe protegerse
al embalaje de la caída de agua.
El equipo GAR CUT (V. Industrial) dispone de
cáncamos de elevación. Utilice este sistema
preferentemente.
NO OLVIDE CONECTAR LA TOMA DE TIERRA
EN LA CLAVIJA.
Los equipos standard salen de fábrica con el
selector de tensión a 400 V con el fin de proteger
a los mismos frente a descuidos en la conexión.
Fig. 2 - Cambio de tensión. Interruptor I1.
EN CASO DE UTILIZAR UNA
TRANSPALETA PARA LA ELEVACIÓN VIGILE LA
ESTABILIDAD DEL EQUIPO.
2.1 INSTALACIÓN ELÉCTRICA Y NEUMÁTICA.
El emplazamiento deberá cumplir los siguientes
requisitos:
- Lugar: Seco y ventilado. alejado suficientemente
del puesto de corte con el fin de evitar que el
polvo metálico originado en el proceso de corte
pueda introducirse en el equipo.
-Instalación eléctrica. Interruptor magnetotérmico.
GAR CUT 1050
50 A -230V 32 A -400V
GAR CUT 1350
63 A -230V 35 A-400V
Manguera de alimentación:
Longitud
10 m
>15 m
GAR CUT 1050
230 V
400 V
2
6 mm
6 mm2
2
10 mm
6 mm2
GAR CUT 1350
230 V
400 V
2
10 mm 10 mm2
16 mm2 10 mm2
Pos. 1
Pos. 2
T
1º. Colocar el tornillo T en la posición 2.
2º. Para conectar el equipo accionar la maneta a
la posición 230 V.
-Instalación neumática: Capacidad mínima de la
instalación 250 l/mín - 6 bar.
La
toma
neumática
puede
realizarse
directamente del circuito de aire comprimido,
aunque es recomendable que si el aire contiene
un porcentaje considerable de humedad o aceite,
se coloque un precalentador de gases en la
entrada, de esta forma evitaremos fallos de
encendido de arco así como un desgaste
prematuro de los elementos consumibles
(electrodo y tobera).
CAPITULO 3. PUESTA EN MARCHA. FUNCIONAMIENTO Y REGLAJES.
3.1 MANDOS DE OPERACIÓN.
Fig. 3 - Frontal equipo GAR CUT (V. Industrial).
Mando y regulación.
L2
I2
L4
L5
I1
L1
F1
F2
L3
M
I1 - Interruptor General 230/400V.
CN3
L1- Lamparita verde indicadora de conexión "ON".
I2- Conmutador selector de la potencia de corte.
Pos 1. Corte de acero normal hasta 10 mm.
(Tobera 1.1 ó 1.3 mm).
Pos 2. Corte de acero normal hasta 25 mm
(Tobera 1.3 ó 1.6 mm).
F1,F2- Fusibles de protección .
L2- Lamparita roja indicadora de desconexión del
equipo por falta de presión.
L3- Lamparita ámbar indicadora de desconexión de
equipo por sobrecalentamiento.
L4- Lamparita verde indicadora de proceso de
corte.
L5- Lamparita verde indicadora de proceso de arco
piloto (temporizada dos segundos).
CN3- Conector de salida para la conexión rápida de
la antorcha de corte. Caperuza de seguridad.
CN4- Conector rápido para el cable de masa.
M- Manómetro.
GAR CUT (V. INDUSTRIAL). Manual de Instrucciones.
3.2 PROCESO DE PUESTA EN MARCHA.
La utilización de la máquina debe quedar
restringida al menor número de personas. Debe
evitarse el empleo del equipo por personal no
adiestrado.
La secuencia para realizar la puesta en marcha
del equipo es la siguiente:
&
"Saque brillo al electrodo".
Realice esta operación siempre que observe
problemas en la ignición de arco
)
Forme el arco piloto fuera de la pieza.
Previamente a la formación del arco oprima
brevemente el pulsador con el fin de tener
caudal de aire previo. El arco piloto se apaga
automáticamente si tras dos segundos no se
ha procedido a cortar.
)
Si tras la realización de un proceso de corte
de duración considerable, observamos un
cierto calentamiento en la antorcha de corte,
aconsejamos dejar que el post-flujo de aire
refrigere la antorcha.
)
Determine la velocidad de corte adecuada.
La penetración así como la rebaba de corte
dependen directamente de la velocidad
imprimida en el proceso. Se considera como
velocidad correcta aquella que provoca una
inclinación máxima del arco proyectado con
respecto a la perpendicular de la pieza de 7
a 15º.
)
No toque con la tobera la pieza de corte.
Mantenga ( especialmente en la posición de
regulación 2 ) una distancia mínima de 5
mm. Utilice el separador de corte.
)
Cuando vaya a finalizar la operación de
corte, (sin dejar de oprimir el pulsador)
separe la antorcha de la pieza, el arco se
extinguirá automáticamente. Con esta acción
aumentamos la vida del contactor principal
del equipo.
,
No realizar ninguna acción sobre los
conmutadores de mando durante la
realización del proceso de corte.
,
Cualquier elemento accesorio o Instalación
que se añada al equipo deberá permitir
mantener las condiciones de seguridad de
partida del equipo. Todos los equipos
añadidos deberán cumplir las Normas y
Reglamentaciones vigentes.
⇒ Conectar la antorcha a CN3. comprobar
perfecta conexión.
⇒ Fijar caperuza de seguridad de antorcha.
⇒ Conectar la masa a CN2 y colocarla en la
pieza de corte. Debe existir una perfecta
conexión eléctrica.
⇒ Conectar el interruptor general I1 en la
posición 1. La lámpara L1 se ilumina
⇒ Comprobar que las lámparas roja y ámbar no
están iluminadas
⇒ Determinar mediante I2 la potencia de corte
adecuada.
⇒ Oprimir brevemente el pulsador de la
antorcha. Comenzara a existir flujo de aire.
⇒ Comprobar que la presión del manómetro M
es de 5,5 - 6 bar. Debe existir flujo de aire.
⇒ Oprima el pulsador de la antorcha. Se formará
el arco. La lámpara L5 se ilumina.
⇒ El arco piloto formado esta temporizado a 2
sg. En caso de no comenzar la operación de
corte el arco se extinguirá automáticamente.
⇒ Comience a cortar. no toque la pieza con la
tobera. Utilice separador. La lámpara l4 se
ilumina.
3.3 PROCESO DE CORTE. RECOMENDACIONES
GENERALES.
)
Antes de proceder a realizar el corte debe
determinarse la intensidad de corte
adecuada en función del trabajo a ejecutar.
)
Cuando los espesores sean inferiores a 8 10 mm aconsejamos el trabajo en la
posición 1 del interruptor I2 utilizando una
tobera de 1.1 mm de diámetro.
)
Al insertar un electrodo nuevo en la antorcha
de corte proceda a un cepillado que elimine
posibles capas aislantes superficiales.
, Utilizando tobera y electrodos largos debe
incorporarse, por motivos de seguridad, la
caperuza de protección Ref. 51957/G.
5
¡ ATENCIÓN ¡
SI NO ESTA INSERTADA LA CAPERUZA DE
PROTECCIÓN Y SEGURIDAD DE LA
ANTORCHA, LA MAQUINA NO SERÁ
OPERATIVA
GAR CUT (V. INDUSTRIAL). Manual de Instrucciones.
6
3.4 CICLO DE CORTE REALIZADO POR EL EQUIPO GAR CUT (V. Industrial).
REGLAJE DE PARÁMETROS. AJUSTES EN LA PLACA ELECTRÓNICA.
SOLO REALIZABLE POR PERSONAL ESPECIALIZADO. SERVICIO DE ASISTENCIA TÉCNICA.
Una vez se oprime el pulsador de la antorcha el sistema de control electrónico del equipo GAR CUT
comienza la realización de lo que denominamos ciclo de corte. La acción del control electrónico puede
chequearse mediante los diodos luminosos que incorpora la placa electrónica. La secuencia y tiempos de
iluminación de éstos corresponde con lo señalado en la tabla Nº 4 (Obsérvese Fig. Nº 4.
Fig. 4 - Aspecto de la placa electrónica SCP-2. Diodos luminiscentes y trimmers de regulación.
Tabla Nº 4 - Análisis secuencial del ciclo de corte en el equipo GAR CUT (V. Industrial).
O (LED
APAGADO)
TIEMPO
--0 sg.
0.3 sg.
1.8 sg.
2 sg.
2 .2 sg.
62 .2 sg.
O (LED
APAGADO)
TIEMPO
--0 sg.
0.3 sg.
1.8 sg.
2 sg.
2+ Tc sg.
2.2+Tc sg.
62.2+Tc sg.
I (LED ILUMINADO)
ACCIÓN USUARIO
INTERRUPTOR "ON"
OPRIME PULSADOR
PULSADOR OPRIMIDO
PULSADOR OPRIMIDO
FINALIZA DE PULSAR
--FINAL
ACCIÓN: CONTROL ELECTRÓNICO :
FASE ARCO PILOTO ( SIN CORTAR).
EV2
O
O
O
O
O
O
O
EV1
O
I
I
I
I
I
O
I (LED ILUMINADO)
ACCIÓN USUARIO
INTERRUPTOR "ON"
OPRIME PULSADOR
PULSADOR OPRIMIDO
PULSADOR OPRIMIDO
COMIENZA A CORTAR
FINALIZA DE PULSAR
--FINAL
K1
O
I
I
I
I
O
O
A.P
O
I
I
I
O
O
O
H.F
O
O
I
O
O
O
O
FASE
--PREFLUJO
IGNICIÓN ( H.F )
FINAL ARCO PILOTO
RETARDO K1
POST-FLUJO
---
DURACIÓN
FASE
0.3 sg.
1.5 sg.
0.2 sg.
0.2 sg.
60 sg.
ACCIÓN CONTROL ELECTRÓNICO: CICLO DE CORTE TOTAL
EV2
O
O
O
O
I
O
O
O
EV1
O
I
I
I
I
I
I
O
K1
O
I
I
I
I
I
O
O
A.P
O
I
I
I
O
O
O
O
H.F
O
O
I
O
O
O
O
O
FASE
--PREFLUJO
IGNICIÓN ( H.F )
FINAL ARCO PILOTO
CORTE
RETARDO K1
POST-FLUJO
---
DURACIÓN
FASE
0.3 sg.
1.5 sg.
0.2 sg.
Tc sg.
0.2 sg.
60 sg.
---
- INDICADORES LUMINOSOS DE SCP-2
- TRÍMERA DE REGULACIÓN.
- EV2 : Indicador de la acción de la electroválvula
de corte. Actúa K2 y se ilumina L4.
En la placa electrónica existen unos trimmers
de regulación.:
- EV1 : Indicador de la acción de la electroválvula
de caudal piloto y post-flujo.
- K1 : Indicador de la acción del contactor K1.
- A.P: Indicador de la habilitación del arco piloto.
Actúa K3 y se ilumina L5 (ver fig. 3.).
- H.F: Indicador de la actuación del sistema de
Alta frecuencia. Ignición de arco.
- Tpsf : Trimmer de regulación del tiempo de la
fase de post-flujo (Tpsf=60 sg.).
- Tpsk : Trimmer de regulación del retardo de k1
(Tpsk=0.2 sg.).
- Ta.p.: Trimmer de regulación del tiempo total de
la fase de arco piloto (Ta.p.=2 sg.).
- Tprf : Trimmer de regulación del tiempo de la
fase de preflujo (tprf=0.3 sg.).
- Th.f : Trimmer de regulación del tiempo de
actuación del sistema de ignición con H.F.
(Thf=1.5 sg.).
GAR CUT (V. INDUSTRIAL). Manual de Instrucciones.
7
3.5 RECOMENDACIONES RELATIVAS AL CICLO DE CORTE.
)
Los reglajes correctos de los tiempos
señalados son fundamentales para un
perfecto funcionamiento del equipo. Debe
existir aire antes de que se produzca la
ignición de arco, en caso contrario se
produciría un grave deterioro de la cabeza
de la antorcha a causa de la formación
interior del arco eléctrico. El tiempo que
transcurre entre la aparición de aire y la
ignición del arco es lo que hemos
denominado preflujo. Proponemos la rutina
de pulsar brevemente el pulsador con el fin
de provocar la salida de aire sin producir la
ignición. Una vez comprobada la existencia
de aire ya podemos provocar la ignición del
arco pulsando continuadamente.
)
Así mismo el tiempo de post-flujo tiene gran
importancia de cara a la vida útil de la
antorcha de corte. Este tiempo delimita el
grado de refrigeración de la antorcha
después de haber realizado un proceso de
corte. No aconsejamos la reducción del valor
de este tiempo a no ser
que se esté
trabajando exclusivamente en la posición de
corte mínima en la que puede trabajarse con
40 sg. de post-flujo.
)
La regulación del tiempo de arco piloto
puede modificarse alargándola. No es
apropiado un tiempo de arco piloto
excesivamente largo dado que la vida de los
elementos consumibles disminuye. No
obstante puede adaptar este tiempo a sus
necesidades.
3.6 ELEMENTOS DE PROTECCIÓN INTERNA.
Los equipos de corte por Plasma GAR CUT (V.
Industrial) disponen de los siguientes elementos de
protección interna:
- PROTECCIÓN FUSIBLE:
Se dispone de dos fusibles de protección F1:
2A/250V y F2 0.5A/250V.
F1: Protege al circuito de control de sobrecargas.
F2: Protege al circuito generador de alta
frecuencia de sobrecargas.
- PROTECCIÓN GENERAL DE SEGURIDAD:
Obliga a la utilización de una herramienta para
la conexión y desconexión de la antorcha de
plasma (caperuza de seguridad).
- PROTECCIÓN CONTRA
SOBRECALENTAMIENTOS EN EL
TRANSFORMADOR.(L2).
En el momento que el transformador alcanza
una temperatura elevada, se activa un mecanismo
de protección que impide la continuación de la
operación de corte, esto queda indicado mediante
la lamparita ámbar L2 situada en el frontal de la
máquina, que quedará iluminada al oprimir el
pulsador de la antorcha no existiendo ciclo de
corte.
- PROTECCIÓN CONTRA LA AUSENCIA DE
PRESIÓN EN CIRCUITO NEUMÁTICO.
Es importante que el caudal de aire en la salida
de la antorcha corresponda al marcado en la
tabla Nº 2 , con el fin de evitar un deterioro por
sobrecalentamiento de la antorcha. La máquina
dispone de un presostato que impide la operación
de corte si la presión de entrada no se encuentra
por encima de un valor límite. Esto queda
indicado por una lamparita testigo roja L2 que
permanecerá encendida si la presión no es la
correcta. El presostato del equipo se encuentra en
el interior del equipo adyacente al filtro regulador.
Este presostato dispone de un tornillo de
regulación que permite fijar el valor de la presión
mínima ( alrededor de 4.6 bar).
- PROTECCIÓN CONTRA CONTACTOS
DIRECTOS EN EL CUERPO DE LA PISTOLA.
Con el fin de evitar que en la operación sobre el
cuerpo de la antorcha (sustitución de componentes
consumibles, por ejemplo.), puedan existir
tensiones peligrosas, la antorcha dispone de un
sistema de seguridad
(accionado por la
portatobera) que anula la acción del pulsador. No
obstante debe tenerse muy presente que la
operación sobre el cuerpo de la antorcha debe
realizarse
siempre
con
la
MAQUINA
DESCONECTADA .
- PROTECCIÓN ANTE EL CORTE
EXISTENCIA DE MASA ELÉCTRICA.
SIN
LA
Con el fin de prevenir un corte sin la existencia
de masa eléctrica (corte con el arco piloto) el
equipo dispone de un sistema de detección de la
corriente de corte temporizando el arco piloto.
¡ ATENCIÓN ¡
SI NO ESTA INSERTADA LA CAPERUZA DE
PROTECCIÓN Y SEGURIDAD DE LA ANTORCHA,
LA MAQUINA NO SERÁ OPERATIVA
GAR CUT (V. INDUSTRIAL). Manual de Instrucciones.
8
CAPITULO 4.OPERACIONES DE MANTENIMIENTO. RECOMENDACIONES.
Con el fin de proporcionar una larga vida al
equipo
deberemos
seguir
unas
normas
fundamentales de mantenimiento y utilización.
Atienda estas recomendaciones.
UN BUEN MANTENIMIENTO DEL EQUIPO
EVITARA UN GRAN PORCENTAJE DE AVERÍAS.
4.1 MANTENIMIENTO DE LA MAQUINA.
RECOMENDACIONES GENERALES.
Antes de realizar cualquier operación sobre la
máquina o la antorcha, debemos colocar el
interruptor I1 del equipo en la posición "O" de
máquina desconectada.
La intervención sobre la máquina para la
realización de operaciones de mantenimiento y
reparación, debe realizarse por personal
especializado.
) SOPLE PERIÓDICAMENTE CON AIRE
COMPRIMIDO EL INTERIOR DE LA MAQUINA
La acumulación interior de polvo metálico es una
de las principales causas de averías en este tipo de
equipos ya que están sometidos a una gran
polución originada en el proceso de corte. Como
medida fundamental debe separarse el equipo del
lugar de corte, evitando una colocación a corta
distancia. Mantener la máquina limpia y seca es
fundamental. Debe soplarse el interior con la
frecuencia que sea necesaria. Debemos evitar
cualquier anomalía o deterioro por la acumulación
de polvo. Sople con aire comprimido limpio y seco
los dos volúmenes interiores del equipo.
- Volumen de control (superior) : Placas
electrónicas, contactores, transformador auxiliar
- Volumen de potencia (inferior): Rectificador,
transformador principal, interruptores.
) DESCARGUE PERIÓDICAMENTE
EL AGUA
CONDENSADA EN EL FILTRO-REGULADOR
Vigile la no existencia de líquido en el vaso del
filtro F situado en la parte posterior del aparato. Al
desconectar la toma de aire se produce una
descarga automática La descarga puede
realizarse manualmente presionando la válvula
existente en la parte inferior del vaso.
) UBIQUE EL EQUIPO EN UN LUGAR CON
RENOVACIÓN DE AIRE LIMPIO.
Las ventilaciones de la máquina deben
mantenerse libres. Esta debe ubicarse en un
emplazamiento donde exista renovación de aire.
) MANTENER CERRADOS LOS PANELES DE LA
MAQUINA.
) NO DESCONECTE LA MAQUINA SI ESTA SE
ENCUENTRA CALIENTE.
Si ha acabado el trabajo de corte no desconecte
inmediatamente la máquina, espere a que el
sistema de refrigeración interior la enfríe
totalmente.
4.2 MANTENIMIENTO DE LA ANTORCHA DE
PLASMA. RECOMENDACIONES GENERALES.
La antorcha de plasma es el elemento principal
del sistema. Una antorcha mal mantenida dificulta
la operación de corte, así como aumenta la
velocidad de desgaste de los elementos
consumibles.
La antorcha de plasma dispone de un sistema
de seguridad que evita la existencia de tensiones
peligrosas cuando se procede al cambio o
reparación de los elementos consumibles. No
obstante debe recordarse siempre que :
DESCONECTE SIEMPRE LA MAQUINA
CUANDO SE PROCEDA A OPERAR SOBRE EL
CUERPO DE LA ANTORCHA.
Fig. 5- Secuencia de montaje de la cabeza de la
antorcha P 150.
GAR CUT (V. INDUSTRIAL). Manual de Instrucciones.
)MANTENER EL ESTADO Y EFICIENCIA DEL
DIFUSOR DE AIRE, PORTATOBERAS Y SWIRLRING.
Estos componentes deben presentar los
orificios de salida de aire libres de oclusiones. Una
difusión de aire defectuosa causa un excesivo
recalentamiento de la antorcha, con el
consiguiente deterioro del cabezal de ésta.
)
MANTENER LIMPIA DE OCLUSIONES Y
ESCORIAS LA TOBERA .
Limpiar la tobera periódicamente. Si
existen escorias en la base superficial pueden
existir problemas de encendido de arco. Utilizar un
cepillo limpiador, nunca elementos punzantes, ya
que puede deformar el orificio de la tobera.
9
)CAMBIE INMEDIATAMENTE UN ELECTRODO
O UNA TOBERA DESGASTADA
Podemos decir que hay desgaste:
- Si el orificio central del electrodo es de 2mm.
- Si la tobera tiene un orificio irregular o de
diámetro aumentado.(en este caso
no
existirá perpendicularidad en la sección de corte).
)
NO CORTE CON LA ANTORCHA MUY
CALIENTE.
(Espere a que el aire la enfríe totalmente.)
)
CEPILLE LOS ELECTRODOS NUEVOS.
(Saque brillo al electrodo).
CAPITULO 5. ANOMALÍAS. CAUSAS PROBABLES. SOLUCIONES POSIBLES.
SÍNTOMA. ANOMALÍA
PROBLEMA GENERAL.
NO FUNCIONA NADA.
SALTA LIMITADOR.
SI BIEN LA MAQUINA SE
ENCUENTRA CONECTADA Y
CON EL PILOTO L1
ILUMINADO,
AL PULSAR NO EXISTE NINGÚN
TIPO DE REACCIÓN
AL PULSAR, SI BIEN SALE AIRE,
NO SE PRODUCE LA IGNICIÓN
DEL ARCO. O EL ARCO "
PETARDEA".
CAUSA PROBABLE.
SOLUCIÓN POSIBLE.
La máquina carece de tensión en alguno o 1.Observar que la tensión en la entrada de la
máquina existe; de no ser así hay que proceder a
todos sus elementos vitales.
cambiar la toma. Es conveniente observar si hay
algún magnetotérmico "saltado".
2. Comprobar que el fusible F1 no este abierto.
3. Deben desmontarse los paneles de la maquina
testeando los puntos del esquema eléctrico lógicos
para el caso.
Calibre del interruptor magnetotérmico
Cambie el magnetotérmico por otro de mayor
bajo para el caso (sí es el principal la calibre. Es importante que el interruptor
Instalación puede tener una potencia instalada magnetotérmico sea de una curva característica tipo
inferior a los 25 Kw. mínimos). Puede existir lenta. En el caso de que la instalación eléctrica sea
un cortocircuito que es el que provoca que de potencia limitada debe probar la realización del
dispare el limitador.
corte a la intensidad mínima (Pos. 1 del interruptor
I2).
Baja presión de aire. Máquina no operativa. Aumentar la presión de entrada mediante el
Lamparita roja iluminada.
regulador de presión situado en la parte posterior
del aparato.
Transformador sobrecalentado. Máquina no
Lamparita ámbar iluminada. Esperar a que la
operativa.
máquina enfríe.
Fallo en el sistema de seguridad de la Insertar protección frontal de seguridad.
antorcha. No se ha insertado la protección Roscar perfectamente la portatobera.
frontal de seguridad o bien la portatobera de
la pistola puede no encontrarse perfectamente
apretada
Fallo del interruptor de la pistola que no Cambiar microinterruptor de la antorcha.
realiza perfectamente el contacto.
Placa electrónica central SCP-2 averiada.
Sustituir placa electrónica SCP-2
Presión de aire regulada a un valor elevado.
Mediante el regulador de presión R disminuirla a
un valor de 5,5 Bar.
Electrodo nuevo con capa superficial aislante. Cepillar electrodo. "Sacar brillo al electrodo".
Escorias en la parte plana de la tobera.
Limpiar adecuadamente la tobera.
No se completa el ciclo de preflujo al dejar de Mantenga oprimido el pulsador más de un segundo.
oprimir el pulsador rápidamente
Excesivo desgaste del electrodo.
Sustituir electrodo.
Diámetro de tobera muy elevado, bien por Sustituir tobera.
desgaste o por tratarse de una tobera nueva
de 1.8 mm de diámetro.
Electrodo o tobera de baja calidad.
Utilice repuestos originales.
La placa electrónica de alta frecuencia GHF Sustituya placa electrónica de control. Supervise
no queda excitada con 220 V en la fase de conexiones y cableado.
ignición.
La avería de la placa central de control es Comprobar el grado de aislamiento del equipo.
reiterativa.
Soplar con aire comprimido el interior.
GAR CUT (V. INDUSTRIAL). Manual de Instrucciones.
SÍNTOMA. ANOMALÍA
CAUSA PROBABLE.
Si bien la placa generadora de alta frecuencia
PROBLEMA GENERAL.
queda excitada no se produce la ignición del
NO FUNCIONA NADA.
arco.
No existe una tensión de vacío correcta de
270 V.
Se tiene seleccionado el Interruptor I2 en la
posición mínima.
La pieza es de un espesor elevado.
La velocidad de corte adquirida es muy
elevada.
NO EXISTE PENETRACIÓN EN EL
Elementos consumibles desgastados.
CORTE.
Tensión de la instalación baja.
Mal contacto de la masa eléctrica.
Caudal de aire incorrecto.
EL AIRE FLUYE
PERMANENTEMENTE.
NO EXISTE DESCONEXIÓN
NEUMÁTICA.
EXISTE UN DESGASTE
PREMATURO
DE LOS ELEMENTOS
CONSUMIBLES
10
SOLUCIÓN POSIBLE.
Sustituya placa generadora de alta frecuencia.
Comprobar Rectificador, contactor, transformador
principal e interruptores.
Posicione I2 en el punto 2.
Disminuir la velocidad de corte.
Sustituya electrodo y/o tobera.
Consulte a la compañía eléctrica.
Realice un buen contacto de masa.
Observe si la presión con el aire fluyendo es de 5.5
bar. Sople el interior de la antorcha de corte.
Limpie las electroválvulas.
En una de las electroválvulas existe una Desmonte y limpie la electroválvula.
impureza que impide que cierre el embolo el
caudal de aire.
La placa electrónica de control SCP-2 esta
Sustituya la placa electrónica SCP-2.
averiada.
Bajo caudal de aire.
Aumente la presión. Compruebe que no exista un
freno en la antorcha o las electroválvulas a la salida
del aire.
No existe preflujo de aire suficiente.
Regule la placa electrónica SCP-2 adecuadamente.
Aumente Tprf.
Se está tocando con la tobera la pieza en el Utilice separador.
proceso de corte.
LA INTERVENCIÓN SOBRE EL EQUIPO DEBE REALIZARLA PERSONAL ESPECIALIZADO.
TANTO AL COMIENZO COMO AL FINAL DE UNA REPARACIÓN COMPRUEBE LOS
NIVELES DE AISLAMIENTO DEL EQUIPO. DESCONECTE LAS PLACAS ELECTRÓNICAS
AL MEDIR EL AISLAMIENTO.
El medidor de aislamiento será de una tensión de 500 V DC y será aplicado en los siguientes puntos
del circuito:
- Entrada rectificador-Tierra: Ra>50 Mohms.
- Salida rectificador-Tierra: Ra>50 Mohms.
- Interruptor I2- Salida rectificador: Ra>50 Mohms.
- Circuito de control-Tierra: Ra>50 Mohms.
En el caso de que observe falta de aislamiento es probable que ésta se deba a la acumulación de
polvo metálico en el interior del equipo:
TANTO AL COMIENZO COMO AL FINAL DE UNA REPARACIÓN, SOPLE CON AIRE
COMPRIMIDO EL INTERIOR DEL EQUIPO.
GAR CUT (V. INDUSTRIAL). Manual de Instrucciones.
11
CAPITULO 6 . MEDIDAS DE SEGURIDAD.
La utilización de los equipos de corte por plasma eléctrico exige en su utilización y mantenimiento un grado
máximo de responsabilidad. Aconsejamos leer atentamente este manual, de ello dependerá que el uso que
haga del equipo sea el correcto.
En beneficio de su seguridad y la de los demás recuerde que:
¡ CUALQUIER PRECAUCIÓN PUEDE SER INSUFICIENTE !
Los equipos de corte a los que se refiere este manual son de carácter eléctrico, es
importante, por lo tanto, observar las siguientes medidas de seguridad:
• La intervención sobre el equipo debe realizarla exclusivamente personal
especializado.
• El equipo debe quedar conectado a la toma de tierra siendo esta siempre eficaz.
• El emplazamiento del equipo no debe ser una zona húmeda.
• No utilizar el equipo si los cables de masa o antorcha de corte se encuentran
dañados. Utilizar recambios originales.
• Asegúrese de que la pieza a cortar hace un perfecto contacto eléctrico con la masa del equipo.
• En cualquier intervención de mantenimiento o desmontaje de algún elemento interior de la máquina debe
desconectarse esta de la alimentación eléctrica.
• Evitar la acción sobre los conmutadores del equipo cuando se está realizando la operación de corte.
• Evitar apoyarse directamente sobre la pieza de trabajo. Trabajaremos siempre con guantes de protección.
• La manipulación sobre las antorchas de corte por plasma se realizara con el equipo desconectado
(Posición OFF (O) del interruptor general). Evitar tocar con la mano desnuda las partes eléctricamente
activas (antorcha, masa, etc.).
Es conveniente limpiar la pieza de trabajo de la posible existencia de grasas y
disolventes dado que estas pueden descomponerse en el proceso de corte
desprendiendo un humo que puede ser muy tóxico. Esto mismo puede suceder con
aquellos materiales que incorporen algún tipo de tratamiento superficial (cincado,
galvanizado etc.). Evítese en todo momento la inhalación de los humos
desprendidos en el proceso. Protéjase del humo y polvo metálico que pueda
originarse. Utilice máscaras anti-humo homologadas . El trabajo con estos equipos
debe realizarse en locales o puestos de trabajo donde exista una adecuada
renovación de aire. La realización de procesos de corte en lugares cerrados
aconseja la utilización de aspiradores de humo adecuados.
En el proceso de corte el arco eléctrico formado emite unas radiaciones de tipo
infrarrojo y ultravioleta, estas son perjudiciales para los ojos y para la piel, por lo
tanto debe proteger convenientemente estas zonas descubiertas con guantes y
prendas adecuadas. La vista debe quedar protegida con un sistema de protección
homologado de un índice de protección mínimo de 11. Con máquinas de corte
eléctrico utilice gafas de protección. Utilice siempre elementos de protección
homologados. Nunca utilizar lentes de contacto, pueden quedar adheridas a la
cornea a causa del fuerte calor emanado en el proceso. Tenga en cuenta que el
arco se considera peligroso en un radio de 15 metros.
Durante el proceso de corte saltan proyecciones de material fundido, deben
tomarse las debidas precauciones. En las proximidades del puesto de trabajo debe
existir un extintor. Evitar la existencia de materiales inflamables o explosivos en las
proximidades del puesto de trabajo. Evitar que se produzca fuego a causa de las
chispas o escorias. Utilice calzado homologado para este tipo de operaciones. En
los procesos de corte por plasma eléctrico se produce un alto nivel de ruido. Se
recomienda utilizar medios de protección auditiva homologados.
No dirigir nunca el trazado de la una antorcha de corte por plasma hacia las
personas. Existe el peligro de una activación del sistema.
GAR CUT (V. INDUSTRIAL). Manual de Instrucciones.
12
COMPATIBILIDAD ELECTROMAGNÉTICA (CEM).
El usuario es responsable de la instalación y utilización del material de soldadura siguiendo las instrucciones
de este manual y las siguientes recomendaciones:
Antes de instalar el material de soldadura debe tener en cuenta la presencia en los alrededores de:
• Cables de potencia, control, señalización y teléfono.
• Receptores y transmisores de radio y televisión.
• Ordenadores y otros equipos de control.
• Equipo crítico de seguridad.
• Personas con estimuladores cardíacos o aparatos para la sordera.
• Material de medida y calibración.
Para reducir las molestias por CEM tenga en cuenta la hora del día en que la soldadura u otras actividades se
llevarán a cabo. Aleje las posibles víctimas de interferencias de la instalación de soldadura.
CONECTE SIEMPRE LA MÁQUINA A LA ALIMENTACIÓN CON UNA TOMA DE TIERRA EFICAZ.
EN CASO DE PRECISAR BLINDAJES O FILTRADO DE RED SUPLEMENTARIO CONSULTE CON NUESTRO
SERVICIO TÉCNICO.
REALICE LAS OPERACIONES DE MANTENIMIENTO DEL EQUIPO DESCRITAS EN ESTE MANUAL.
UTILICE CABLES DE SOLDADURA TAN CORTOS COMO SEA POSIBLE Y COLOCADOS UNO JUNTO A
OTRO CERCA DEL SUELO.
EN CASO DE PUESTA A TIERRA DE LA PIEZA A SOLDAR TENGA EN CUENTA LA SEGURIDAD DEL
OPERARIO Y LAS REGLAMENTACIONES NACIONALES.
GAR CUT (V. INDUSTRIAL). Instructions Manual.
CHAPTER 1.
GENERAL DESCRIPTION. TECHNICAL CHARACTERISTICS.
A Euro-connector is located on the front of the
equipment which enable you a quick connection of
welding torch supplied.
The following are
supplied with the equipment:
The cutting function of the GAR CUT (V.
Industrial) machines is carried out by electric
plasma blown with compressed air. They can cut
all kinds of electricity conductor material: Steel,
stainless steel, aluminium, brass, etc.
- Cutting torch P-150.
- Safety protection CE.
- Protection goggles.
- Quick connection earth cable.
Table nº 1 – Maximum cutting thicknesses.
GAR CUT (V. Industrial)
MATERIAL
SOFT STEEL
STAINLESS
STEEL
ALUMINIUM
13
MAXIMUM
RECOMMENDED
THICKNESS
GAR CUT GAR CUT
1050
1350
20 mm
25 mm
For use of any other accessory check with the
manufacturer.
LIMIT THICKNESS
GAR CUT
1050
25 mm
GAR CUT
1350
30 mm
20 mm
25 mm
25 mm
30 mm
16 mm
20 mm
19 mm
28 mm
This equipment has protection against:
overheating, lack of pressure in pneumatic circuit,
overloads in the control circuit, contacts with
dangerous voltages during the replacement of
torch head components and protection against
cutting without earth return.
The GAR CUT (V. Industrial) equipment is
designed for industrial use and offers an duty cycle
of 60% for the maximum cutting power.
Table no. 2 - Main technical characteristics of GAR CUT (V. Industrial) equipment.
TECHNICAL CHARACTERISTICS.
Supply voltage (U1–3Ph 50Hz)
Maximum primary intensity (I1max )
Primary effective intensity (I1eff)
Plasmagen gas
Operating air pressure
Flowrate
Adjustment positions
I
II
GAR CUT 1050
Ref. 458.00.000
GAR CUT 1350
Ref. 459.00.000
230/400 V
230/400 V
61/36 A
73/42 A
48/28 A
57/33 A
AIR
AIR
5,5-6 bar
5,5-6 bar
175-210 l/min
175-210 l/min
50 A (100%)
58 A (100%)
90 A (60%)
110 A (60%)
25 mm
30 mm
H (180ºC)
H (180ºC)
FORCED
FORCED
IP21
IP21
Cutting thicknesses up to
Thermal insulation
Ventilation
Protection index.
Weight
Application standards
143 KG.
157 KG.
EN 60974
EN 60974
Fig. 1 – Dimensions of GAR CUT (V. Industrial) equipment.
RUEDA MOVIL
RUEDA FIJA
GAR CUT (V. INDUSTRIAL). Instructions Manual.
CHAPTER 2.
14
TRANSPORT AND INSTALLATION.
Knocks and sudden movements must be avoided
when transporting the equipment. The equipment
will always be transported vertically. The
packaging must be protected from water.
The GAR CUT (V. Industrial) equipment has lifting
eyes. Preferably use this system.
IF A TRANSPALLET IS USED FOR LIFTING, MAKE
SURE THE EQUIPMENT IS STABLE.
DO NOT FORGET TO FIT THE EARTH
CONNECTION INTO THE PLUG.
The standard equipment leave the factory with
the voltage selector at 400 V, in order to protect it
against negligence in the connection.
Fig. 2. Change of Voltage. Switch l1.
2.1 ELECTRICAL AND PNEUMATIC INSTALLATION.
The location
requirements:
must
meet
the
following
- Place: Dry and ventilated, far enough away from
the cutting area in order to prevent the metal dust
caused by the cutting process from getting into the
equipment.
- Electrical installation. Magnetothermal switch.
GAR CUT 1050
50 A -230V 32 A -400V
GAR CUT 1350
63 A -230V 35 A-400V
- Supply hose:
Length
10 m
>15 m
GAR CUT 1050
230 V
400 V
2
6 mm
6 mm2
2
10 mm
6 mm2
GAR CUT 1350
230 V
400 V
2
10 mm 10 mm2
16 mm2 10 mm2
Pos. 1
Pos. 2
T
1º. Place screw T in position 2.
2º. To connect the equipment place handle in 230
V. position
- Pneumatic installation: Minimum capacity of the
installation 250 l/min - 6 bar.
The pneumatic intake can be carried out directly
from the compressed air circuit, although it is
recommendable, if the air contains a considerable
amount of humidity or oil, for a gas pre-heater to
be fitted in the input. Thus we will avoid arc
ignition failures as well as premature wear of the
consumable elements (electrode and nozzle).
CHAPTER 3. START-UP. ADJUSTMENT AND OPERATION CONTROLS.
3.1 OPERATION CONTROLS.
Fig. 3 – Front GAR CUT (V. Industrial) equipment.
Control and adjustment.
-{}L2
I2
L4
L5
I1
L1
F1
F2
3.2 START-UP PROCESS.
L3
M
CN3
l1 - ON/OFF switch 230/400V.
L1 - Green light indicating "ON" status.
l2 - Cutting power selector switch.
Pos 1. Ordinary steel cutting up to 10 mm.
(Nozzle 1.1 or 1.3 mm).
Pos 2. Ordinary steel cutting up to 25 mm.
(Nozzle 1.3 or 1.6 mm).
F1, F2 - Protection fuses.
L2 - Red light indicating equipment disconnected due
to lack of pressure.
L3- Amber light indicating equipment disconnected
due to overheating.
L4 - Green light indicating cutting process.
L5 - Green light indicating pilot arc process (timed
two seconds).
CN3 - Output euroconnector for quick connection of
cutting torch. Safety cap.
CN4 - Quick connector for earth cable.
M- Pressure gauge.
GAR CUT (V. INDUSTRIAL). Instructions Manual.
The machine must be used by as few people as
possible. The equipment must never be used by
untrained operators.
The sequence to carry out the equipment start-up
is described below:
, When using nozzle and long electrodes, for
security reasons, shield cup Ref. 51957/G
should be incorporated.
&
"Polish the electrode"
Carry out this operation whenever there are
problems in igniting the arc.
⇒ Connect the torch to CN3. Check it is
connected properly.
⇒ Secure the safety cap of the torch.
15
)
Form the pilot arc outside the part. Before
forming the arc we recommend pressing the
pushbutton slightly in order to have a prior
airflow. The pilot arc goes out automatically
after two seconds if no cutting is done.
)
If, after quite a long cutting process, we see
that the cutting torch is heating up, we advise
letting the post-flow of air cool down the
torch.
)
Determine the correct cutting speed. The
penetration as well as the cutting flash
depend directly on the speed used in the
process. The correct speed is considered to
be that which causes a maximum inclination
of the arc projected of 7 to 15º with respect
to the perpendicular of the part.
⇒ The pilot arc which has formed is timed at 2
)
Do not touch the cutting part with the nozzle.
Keep (especially in point 2) a minimum
distance of 5 mm. Use an cutting guide shoe.
⇒ Begin to cut. Do not touch the part with the
)
When you are going to finish the cutting
operation (keeping the pushbutton pressed
down) separate the torch from the part, the
arc will automatically go out. With this action
we increase the life of the main contactor of
the equipment.
,
Do not activate the control switches during
the cutting process.
⇒ Connect the earth cable to CN2 and place it in
the cutting piece. The electrical connection must
be perfect.
⇒ Place ON/OFF switch l1 in position 1. Light l1
comes on.
⇒ Check that the red and amber lights are not
on.
⇒ Determine suitable cutting power through l2.
⇒ Hightly press the torch pushbutton. Air will start
to flow.
⇒ Check that the pressure gauge M mark 5.5-6
bar. There must be airflow.
⇒ Press the torch pushbutton. Formation of arc.
Light L5 comes on.
sec. In the event that the cutting operation is not
started the arc will automatically go out.
nozzle. Use a guide shoe or separator. Light l4
comes on.
3.3 CUTTING PROCESS. GENERAL
RECOMMENDATIONS.
)
Before proceeding to carry out the cut, the
correct cutting intensity must be determined
depending on the work to be carried out.
)
When the thicknesses are under 8 - 10 mm
we recommend working with switch l2 in
position 1 using a 1.1 mm diameter nozzle.
)
When inserting a new electrode in the cutting
torch proceed to brush it to eliminate possible
surface insulating layers.
, Any elements, accessory or instrument which
is added to the equipment must maintain the
basic safety conditions of the equipment. All
added equipment will comply with the
Standards and Regulations in force.
WARNING !
IF THE SAFETY CAP OF THE TORCH HAS
NOT BEEN INSERTED, THE MACHINE WILL
NOT BE OPERATIVE.
GAR CUT (V. INDUSTRIAL). Instructions Manual.
16
3.4 CUTTING CYCLE CARRIED OUT BY THE GAR CUT (V. Industrial) EQUIPMENT.
PARAMETER ADJUSTMENT. ADJUSTMENTS IN ELECTRONIC PLATE.
ONLY TO BE CARRIED OUT BY SPECIALISTS. TECHNICAL ASSISTANCE SERVICE
When the pushbutton of the torch is pressed, the electronic control system of the GAR CUT equipment begins
to carry out what we call cutting cycles. The electronic control action can be checked by means of luminous
diodes which are built into the electronic plate. The sequence and lighting times are given in table no. 4 (See
Fig. no. 4).
Fig. 4 - View of the electronic plate SCP-2. Luminous diodes and adjustment trimmers.
Table nº 4 - Sequential analysis of the cutting cycle in GAR CUT (V. Industrial V) equipment.
O (LED OFF)
TIME
--0 s.
0.3 s.
1.8 s.
2 s.
2 .2 s.
62 .2 s.
O (LED OFF)
TIME
--0 s.
0.3 s.
1.8 s.
2 s.
2+ Tc s.
2.2+Tc s.
62.2+Tc s.
I (LED ON)
USER ACTION
"ON" SWITCH
PRESS BUTTON
BUTTON PRESSED
BUTTON PRESSED
STOP PRESSING
--END
ELECTRONIC CONTROL ACTION:
PILOT ARC PHASE (WITHOUT CUTTING).
EV2
O
O
O
O
O
O
O
EV1
O
I
I
I
I
I
O
I (LED ON)
USER ACTION
"ON" SWITCH
PRESS BUTTON
BUTTON PRESSED
BUTTON PRESSED
BEGINS TO CUT
STOP PRESSING
--END
K1
O
I
I
I
I
O
O
A.P
O
I
I
I
O
O
O
H.F
O
O
I
O
O
O
O
PHASE
--PREFLOW
IGNITION (H.F)
PILOT ARC END
K1 DELAY
POST-FLOW
---
PHASETIME
0.3 s.
1.5 s.
0.2 s.
0.2 s.
60 s.
ELECTRONIC CONTROL ACTION: TOTAL CUTTING CYCLE
EV2
O
O
O
O
I
O
O
O
EV1
O
I
I
I
I
I
I
O
K1
O
I
I
I
I
I
O
O
A.P
O
I
I
I
O
O
O
O
H.F
O
O
I
O
O
O
O
O
PHASE
--PREFLOW
IGNITION (H.F)
PILOT ARC END
CUTTING
K1 DELAY
POST-FLOW
---
PHASETIME
0.3 s.
1.5 s.
0.2 s.
Tc s.
0.2 s.
60 s.
---
- LUMINOUS INDICATORS OF SCP-2
- ADJUSTMENT TRIMMERS.
- EV2 : Indicates the action of the cutting
electrovalve. K2 acts and L4 comes on.
There are some adjustment trimmers on
the electronic plate:
- EV1 : Indicates the action of the pilot flow and
post-flow electrovalve.
- K1 : Indicates the actions of the main contactor
K1.
- A.P: Indicates the adaptation of the pilot arc. K3
acts and L5 comes on (see fig 3).
- H.F : Indicates the action of the High frequency
system. Arc ignition.
- Tpsf : Time adjustment trimmer of the post-flow
phase (Tpsf=60 sec).
- Tpsk : Adjustment trimmer of the delay of K1
(Tpsk=0.2 sec).
- Ta.p : Adjustment trimmer of the total time of
pilot arc phase (ta.p.=2 sec).
- Tprf : Time adjustment trimmer of the preflow
phase (tprf=0.3 sec).
- Th.f : Adjustment trimmer of the action time of
the ignition system with H.F. (Thf=1.5 sec.).
GAR CUT (V. INDUSTRIAL). Instructions Manual.
17
3.5 RECOMMENDATIONS RESPECT TO CUTTING CYCLE.
)
The correct settings of the times indicated are
essential for the equipment to work perfectly.
Air must exist before the arc is ignited, as if
this does not exist, the torch head would be
seriously deteriorated due to the formation of
the electric arc inside. The time that elapses
between the appearance of air and the
ignition of the arc is what we have called
preflow. We suggest the routine of slightly
pressing the pushbutton in order to get the air
to come out without producing ignition. After
checking the existence of air we can now
ignite the arc by pressing the pushbutton
continuously.
)
The post-flow time is also very important with
respect to the working life of the cutting torch.
This time delimits the degree of cooling of the
torch after having carried out a cutting
process. We do not recommend reducing the
value of this time unless work is only being
carried out in the minimum cutting position
where 40 sec. postflow can be used.
)
The pilot arc time adjustment can be
modified by prolonging it. Too long a pilot
arc time is not suitable as the life of the
consumable elements decreases. However
this time can be adapted to your needs.
- PROTECTION AGAINST OVERHEATING IN THE
TRANSFORMER (L2).
As soon as the transformer reaches a high
temperature, a protection mechanism is activated
which prevents the cutting operation from being
continued. This is indicated by means of the amber
light L2 situated on the front of the machine which
will stay on when the torch pushbutton is pressed,
as there is no cutting cycle.
- PROTECTION AGAINST ABSENCE OF PRESSURE
IN PNEUMATIC CIRCUIT.
It is important for the air flow in the torch outlet
to correspond to that given in table nº 2, in order
to prevent deterioration caused by overheating of
the torch. The machine has a pressurestat which
prevents the cutting operation if the intake pressure
is above a limit value. This is indicated by a red
pilot light L2 which will stay on if the pressure is
not correct. The pressurestat is on the inside of the
equipment next to the regulating filter. This
pressurestat has an adjustment screw which
enables the value of the minimum pressure to be
established (around 4.6 bar).
- PROTECTION AGAINST DIRECT CONTACTS IN
THE PISTOL BODY.
- FUSE PROTECTION:
In order to prevent dangerous voltages when
carrying out work on the torch body (replacement
of consumable components, for example), the
torch has a safety system (activated by the nozzleholder) which cancels the action of the pushbutton.
However it must be borne in mind that the body of
the torch must always be handled with the
MACHINE DISCONNECTED.
They have two protection fuses, F1: 2A/250V
and F2 0.5A/250V.
- PROTECTION AGAINST CUTTING WITHOUT
THE EXISTENCE OF ELECTRICAL EARTH.
3.6 INTERNAL PROTECTION ELEMENTS
The GAR CUT (V. Industrial) Plasma cutting
equipment have the following internal protection
elements:
F1: Protects the control circuit from overloads.
F2: Protects the high frequency generator circuit
from overloads.
- GENERAL SAFETY PROTECTION:
It forces the use of a tool to connect and
disconnect the plasma torch (safety cap).
In order to prevent cutting without the existence
of an electrical earth (cutting with the pilot arc) the
equipment has a cutting current detection system
which times the pilot arc.
WARNING !
IF THE SAFETY CAP OF THE TORCH HAS
NOT BEEN INSERTED, THE MACHINE WILL
NOT BE OPERATIVE.
GAR CUT (V. INDUSTRIAL). Instructions Manual.
18
CHAPTER 4. MAINTENANCE OPERATIONS. RECOMMENDATIONS.
In order for the equipment to have a long life we
must follow some essential rules for maintenance
and use. Abide by these recommendations.
)
DO NOT DISCONNECT THE MACHINE IF
IT IS HOT.
CORRECT MAINTENANCE OF THE EQUIPMENT
WILL AVOID A GREAT PERCENTAGE OF FAULTS.
If you have finished the cutting work do not
disconnect the machine immediately, wait until the
inner cooling system has totally cooled it.
4.1 MACHINE MAINTENANCE. GENERAL
RECOMMENDATIONS.
4.2 MAINTENANCE OF THE PLASMA TORCH.
GENERAL RECOMMENDATIONS.
Before carrying out any operation on the machine
or torch, we must place switch l1 of the equipment
in "O" position of machine disconnected.
Specialized personnel must handle the machine
to carry out maintenance and repair operations.
The plasma torch is the main element of the
system. A badly maintained torch makes the
cutting operation difficult, speeding up the wear of
the consumable elements.
The plasma torch has a safety system which
prevents the existence of dangerous voltages when
the consumable elements are changed or
repaired. However always remember to:
)
BLOW THE INSIDE OF THE MACHINE
WITH COMPRESSED AIR FROM TIME TO TIME.
The accumulation on the inside of metal dust is
one of the main causes of breakdowns in this type
of equipment as they are subject to the great
amount of pollution caused by the cutting process.
The equipment must be kept separate from the
cutting place, not placing it a short distance away.
Keeping the machine clean and dry is essential.
The inside must be blown as required. We must
avoid any anomaly or deterioration due to the
accumulation of dust. Blow the two inside volumes
of the equipment with clean dry compressed air.
- Control volume (upper): Electronic plates,
contactors, auxiliary transformer.
- Power volume (lower): Rectifier, main transformer,
switches.
)
FROM TIME TO TIME DISCHARGE THE
WATER WHICH HAS CONDENSATED ON THE
FILTER-REGULATOR
Control the non-existence of liquid in the glass of
filter F situated on the rear of the apparatus. When
the air intake is disconnected an automatic
discharge takes place. The discharge can be done
manually by pressing the valve that exists on the
lower part of the glass.
)
PLACE THE EQUIPMENT SOMEWHERE
WHERE CLEAN AIR IS RENEWED.
The machine ventilations must be kept free. It
must be located in a place where clean air is
renewed.
)
KEEP THE MACHINE PANELS CLOSED.
DISCONNECT THE MACHINE WHEN
HANDLING THE TORCH BODY.
Fig. 5 - Assembly sequence of torch head P150.
GAR CUT (V. INDUSTRIAL). Instructions Manual.
)
MAINTAIN THE STATE AND EFFICIENCY
OF THE AIR DIFFUSER, NOZZLE-HOLDER AND
SWIRL-RING.
The air outlet holes of these components
must be free from occlusions. Faulty air diffusion
causes the torch to heat up too much, with the
subsequent deterioration of the torch head.
)
KEEP THE NOZZLE
OCCLUSIONS AND SLAG.
CLEAN
OF
Clean the nozzle from time to time. If
there is slag on the surface base there could be arc
ignition problems. Use a cleaning brush, never
sharp elements, as the nozzle hole could be
deformed.
CHAPTER 5.
19
)
IMMEDIATELY CHANGE A WORN
ELECTRODE OR A NOZZLE.
We can say that there is wear:
- If the middle hole of the electrode is 2 mm.
- If the nozzle has an irregular hole or increased
diameter.
(In this case there will be no
perpendicularity in the cutting section).
)
DO NOT CUT WITH THE TORCH VERY
HOT.
(Wait until the air cools it totally).
)
BRUSH THE NEW ELECTRODES.
(Polish the electrode.)
ANOMALIES. PROBABLE CAUSES. POSSIBLE SOLUTIONS.
SYMPTOM. ANOMALY.
PROBABLE CAUSE.
POSSIBLE SOLUTION.
The machine has no voltage in one or all its 1. Make sure there is voltage at the entry to the
machine, if not the tapping must be changed. It is
vital elements.
advisable to see if any magnetothermal has "blown".
GENERAL PROBLEM.
2. Check that fuse F1 is not open.
NOTHING WORKS.
3. The machine panels must be removed testing the
logical points of the electrical diagram.
Magnetothermal switch has low gauge for the
Change the magnetothermal for another larger
case (if it is the main one the installation may gauge one. It is important for the magnetothermal
LIMITER TRIPS
have an installed power of under 25 kw switch to have a characteristic slow type curve. In the
minimum). There may be a short circuit, which event that the electrical installation has limited power
is what causes the limiter to trip.
the cutting work must be tested at lower current
levels. (Pos. 1 of switch l2).
Low air pressure. Machine not operative. Red Increase the intake pressure by means of pressure
light on.
reducing valve situated on the rear of the apparatus.
Transformer overheated. Machine not
Amber light on. Wait until the machine cools down.
operative.
ALTHOUGH THE MACHINE IS
CONNECTED AND WITH LIGHT Failure in the torch safety system. The nozzle- Secure safety cap of the torch.
C ON, THERE IS NO REACTION holder of the pistol may not be perfectly Screw in the nozzle-holder well.
tightened.
WHEN PRESSED
Failure of the pistol switch which does not Change torch microswitch.
make perfect contact.
Main electronic plate SCP-2 faulty.
Replace electronic plate SCP-2
Air pressure set at a high value.
Decrease it to a value of 5.5 bar with pressure
reducing valve R.
New electrode with insulating surface layer.
Brush electrode. "Polish the electrode".
Slag on flat part of the nozzle.
Clean the nozzle properly.
The preflow cycle is not completed as the Keep the pushbutton pressed for more than one
pushbutton is released quickly.
second.
WHEN PRESSED, EVEN
Replace the electrode.
THOUGH AIR COMES OUT, THE Excessive wear of the electrode.
ARC DOES NOT IGNITE OR THE Nozzle diameter very big, either due to wear Replace nozzle.
ARC "BACKFIRES".
or it is a new nozzle 1.8 mm in diameter.
Low quality electrode or nozzle.
Use original spares.
The high frequency electronic plate GHF is not Replace
electronic
control
plate.
Supervise
excited with 220 V in ignition phase.
connections and wiring.
The breakdown of the central control plate is Check the degree of insulation of the equipment.
reiterative.
Blow the inside with compressed air.
GAR CUT (V. INDUSTRIAL). Instructions Manual.
SYMPTOM. ANOMALY.
GENERAL PROBLEM.
NOTHING WORKS.
THERE IS NO PENETRATION IN
THE CUT.
THE AIR FLOWS ALL THE TIME.
THERE IS NO PNEUMATIC
DISCONNECTION.
THERE IS PREMATURE WEAR OF
THE CONSUMABLE ELEMENTS.
PROBABLE CAUSE.
POSSIBLE SOLUTION.
Although the high frequency generating plate
is excited the arc does not ignite.
There is not a correct no-load voltage of 270
V.
Switch l2 is selected in minimum position.
The part is very thick.
The cutting speed acquired is very high.
Consumable elements worn.
Low voltage in the installation.
Bad contact of the electric earth.
Air flow incorrect.
Replace high frequency generating plate.
20
Check rectifier, contactor, main transformer and
switches.
Place l2 at point 2.
Decrease cutting speed.
Replace electrode and/or nozzle.
Check with electricity company.
Make good contact of earth.
Observe if the pressure with the air flowing is 5.5
bar. Blow the inside of the cutting torch. Clean the
electrovalves.
There is an impurity in one of the electrovalves Dismantle and clean the electrovalve.
which prevents the piston closing the air flow.
Electronic control plate SCP-2 is faulty.
Replace electronic plate SCP-2.
Low air flow.
Increase the pressure. Check there is no brake in the
torch or the electrovalves where the air comes out.
There is not sufficient preflow of air.
Adjust the electronic plate SCP-2 suitably. Increase
Tprf.
The part is being touched with the nozzle in Use a guide shoe or separator.
the cutting process.
SPECIALIZED PERSONNEL MUST CARRY OUT ANY WORK ON THE EQUIPMENT.
BOTH AT THE BEGINNING AND END OF A REPAIR CHECK THE EQUIPMENT
INSULATION LEVELS. DISCONNECT THE ELECTRONIC BOARDS WHEN MEASURING
THE INSULATION.
The insulation-measuring device will have 500 V DC and will be applied to the following points of the
circuit:
- Intake rectifier-Earth: Ra> 50 Mohms
- Outlet rectifier-Earth: Ra> 50 Mohms
- Switch l2 - Outlet rectifier: Ra> 50 Mohms
- Control circuit-Earth: Ra> 50 Mohms
In the event that lack of insulation is observed it is likely that this is due to the accumulation of metal
dust on the inside of the equipment.
BOTH AT THE BEGINNING AND END OF A REPAIR, BLOW THE INSIDE OF THE
EQUIPMENT WITH COMPRESSED AIR.
GAR CUT (V. INDUSTRIAL). Instructions Manual.
21
CHAPTER 6. SAFETY MEASURES.
The use of electrical plasma cutting equipment requires a maximum amount of responsibility with respect to
their use and maintenance. Carefully read this safety manual. The correct use of the equipment will depend on
this.
In benefit of your safety and that of others, remember that:
ANY PRECAUTION MAY BE INSUFFICIENT!
The cutting equipment referred to in this manual are electrical. It is important
therefore to observe the following safety measures.
• Any work on the equipment must only be carried out by specialists.
• The equipment must be connected to the earth connection and this must always
be effective.
• The equipment must not be located in a damp place.
• Do not use the equipment if the earth cables or cutting torch are damaged. Use
original spares.
• Make sure that the part to be cut makes perfect electrical contact with the equipment earth.
• During any maintenance operations or when dismantling any element from the inside of the machine, this
must be disconnected from the electricity supply.
• Do not touch the equipment switches when carrying out a cutting operation.
• Never lean directly on the work part. We will always work with protection gloves.
• Any work on the plasma cutting torches will be done with the equipment disconnected (OFF Position (O) on
the ON/OFF switch). Do not touch the electrically active parts (torch, earth clamp, etc.) with your bare
hand.
The part to be cut should be cleaned from possible grease or solvents as these
may decompose during the cutting process giving off fumes which could be very
toxic. This can also occur with those materials which have some kind of surface
coating (zinc-plated, galvanised, etc.). Avoid inhaling the fumes given off in the
process at all times. Protect yourself from the fumes and metal dust which can be
given off. Use quality approved anti-fume goggles. Work with this equipment must
be carried out in places or working posts where there is suitable air renewal. If
cutting processes are carried out in closed places the use of suitable fume extractors
is recommended.
In cutting processes, the electric arc formed gives off infrared and ultraviolet type
radiations, which are harmful for the eyes and skin, so these areas must be suitably
protected with gloves and suitable clothing. The eyes must be protected with a
quality approved protection system with a protection index of at least 11. With
electric arc cutting machines use protection goggles. Always use quality approved
protection elements. Never use contact lenses. They may adhere to the cornea due
to the great heat given off during the process. Bear in mind that the arc is
considered to be dangerous within a 15-metre radius.
Cast material projections are given off during the cutting process so due
precautions must be taken. There must be a fire-extinguisher near to the working
area. Do not keep inflammable material or explosives near to the working post.
Prevent fire caused by sparks or slag. Use quality approved footwear for this type of
operations. A high noise level occurs in the electric plasma cutting processes. Thus,
the use of officially approved acoustic protection means is recommended.
Never direct the path of the plasma cutting torch towards people. The danger
exists of activating the system.
GAR CUT (V. INDUSTRIAL). Instructions Manual.
22
ELECTROMAGNETIC COMPATIBILITY (CEM).
The user is responsible for the installation and use of the welding material according to the instructions in this
manual and the following recommendations.
Before installing the welding material, the presence of the following in the surrounding area must be kept in
mind:
• Wiring for power, control, signalling, and telephones.
• Radio and television receivers and transmitters.
• Computers and other control equipment.
• Critical security equipment.
• People with pace makers or hearing aids.
• Measurement and calibration equipment.
In order to reduce EMC problems, keep in mind the time of day when welding or other activities will be carried
out. Move possible interference victims away from the welding installation.
ALWAYS CONNECT THE MACHINE TO POWER USING AN EFFICIENT EARTH TAP.
IF PROTECTIVE DEVICES OR SUPPLEMENTARY ELECTRICAL SYSTEM FILTERS ARE NEEDED, CONSULT OUR
TECHNICAL SERVICE.
PERFORM THE MAINTENANCE OPERATIONS DESCRIBED IN THIS MANUAL.
USE THE SHORTEST WELDING WIRES POSSIBLE AND KEEP THEM PLACED NEXT TO EACH OTHER NEAR THE
FLOOR.
IF THE WELDING PIECE IS GROUNDED, KEEP IN MIND OPERATOR SAFETY AND NATIONAL
REGULATIONS.
GAR CUT (V. INDUSTRIAL).
E
23
ANEXOS. PLANOS ELÉCTRICOS Y DESPIECES.
•
•
•
DECLARACIÓN DE CONFORMIDAD PARA EL MARCADO CE.
ESQUEMAS ELÉCTRICOS.
PLANOS DE DESPIECE Y LISTA DE REFERENCIAS.
CONDICIONES GENERALES DE LA GARANTÍA
GALA GAR garantiza el buen funcionamiento contra todo defecto de fabricación del producto GAR
CUT 1050 y GAR CUT 1350 a partir de la fecha de compra (periodo de garantía) de:
•
12 MESES
Esta garantía no se aplicará a los componentes con vida útil inferior al periodo de garantía, tales como
repuestos y consumibles en general.
Asimismo no incluye la instalación ni la puesta en marcha, ni la limpieza o sustitución de filtros, fusibles
y las cargas de refrigerante o aceite.
En caso de que el producto presentase algún defecto en el periodo de garantía, GALA GAR se
compromete a repararlo sin cargo adicional alguno, excepto en daños sufridos por el producto resultantes
de accidentes, uso inadecuado, mal trato, accesorios inapropiados, servicio no autorizado o
modificaciones al producto no realizadas por GALA GAR.
La decisión de reparar, sustituir piezas o facilitar un aparato nuevo será según criterio de GALA GAR.
Todas las piezas y productos sustituidos serán propiedad de GALA GAR.
Para hacer efectiva la garantía deberá entregarse el producto y la factura de compra debidamente
cumplimentada y sellado por un Servicio Técnico autorizado. Los gastos de envío y transporte serán a
cargo del usuario.
Los daños o gastos imprevistos o indirectos resultantes de un uso incorrecto no serán responsabilidad
de GALA GAR.
GB APPENDICES. ELECTRICAL DRAWINGS AND REFERENCE PART LISTS.
•
•
•
DECLARATION OF CONFORMITY & EC MARKING
ELECTRICAL DIAGRAMS.
DETAIL DRAWINGS AND REFERENCE LISTS.
GENERAL GUARANTEE CONDITIONS
GALA GAR guarantees correct operation against all manufacturing defects of the GAR CUT 1050 y
GAR CUT 1350 products, as from the purchase date (guarantee period) of:
• 12 MONTHS
This guarantee will not be applied to components with a working life that is less than the guarantee
period, such as spares and consumables in general.
In addition, the guarantee does not include the installation, start-up, cleaning or replacement of filters,
fuses and cooling or oil refills.
If the product should present any defect during the guarantee period, GALA GAR undertakes to repair it
without any additional charge, unless the damage caused to the product is the result of accidents,
improper use, negligence, inappropriate accessories, unauthorized servicing or modifications to product
not carried out by GALA GAR.
The decision to repair or replace parts or supply a new appliance will depend on the criterion of GALA
GAR. All replaced parts and products will be the property of GALA GAR.
In order for the guarantee to become effective the product and the purchase invoice must be handed
over, duly completed and stamped by an authorized Technical Service. Shipping and transport expenses
will be on the user’s account.
Damage or unforeseen or indirect expenses resulting from an incorrect use will not be the responsibility
of GALA GAR.
FABRICACIÓN Y VENTA DE APARATOS DE SOLDADURA AUTÓGENA, ELÉCTRICA Y
CONSTRUCCIONES ELECTROMECÁNICAS.
MANUFACTURE AND SALE OF AUTOGENOUS, AND ELECTRIC WELDING APPLIANCES,
AND ELECTROMECHANICAL CONSTRUCTIONS.
CENTRAL:
Jaime Ferrán, 19, nave 30
Apartado de Correos 5058
50080 ZARAGOZA
Teléfono 976 47 34 10
Telefax 976 47 24 50
E-mail: [email protected]
Internet: http://www.galagar.com