1
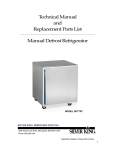
Technical Manual
and
Replacement Parts List
Mobile Freezer
MODEL
SKFS2
1600 Xenium Lane North, Minneapolis, MN 55441-3787
Phone (763) 923-2441
FORM 31451
REV K
1
Specifications Subject to Change Without Notice.
TECHNICAL MANUAL
SILVER KING MOBILE FREEZER
MODEL SKFS2
Thank you for purchasing Silver King food service equipment. Our goal is to provide our customers with the most reliable
equipment in the industry today. Please read this manual and the accompanying warranty information before operating your new
Silver King unit. Be sure to complete and mail the warranty card within 10 days of purchase to validate your warranty.
UNCRATE AND INSPECT FOR DAMAGE
Upon delivery of your new Silver King unit, uncrate at once to inspect for possible freight damage following the instructions printed
on the exterior of the container. Report any damages to the carrier responsible for transportation and promptly present a written
claim for any evidence of mishandling. Be sure to save all packaging materials if a claim is to be filed.
INSTALLATION
The stainless steel exterior of the cabinet has been protected by a plastic covering during manufacturing and shipping. The
covering can be readily stripped from the unit before installation. After removing the covering, wash the interior and exterior
surfaces using a warm, mild soapy water solution and a sponge or cloth, rinse with clean water and dry thoroughly.
Casters
To install the included casters, tilt the unit and thread the Legs or Casters into the four Rivnuts in the bottom of the cabinet. Make
sure that they are installed tightly to prevent future thread wear.
Location
When locating the freezer, convenience and accessibility are important considerations, but the following factors must be observed:
• The unit must be level.
• Allow at least 6 inches of space at both ends to allow for proper air flow through the louvered panels. The space above the unit
should be open to allow access to the product.
• Avoid placing the freezer next to ovens, heating elements or hot air sources that would affect the performance of the unit.
Electrical Considerations
Be sure to check the data plate, located on the liner of the cabinet, for required voltage prior to connecting the unit to power. The
specifications on the data plate supersede any future discussion.
The standard freezer is equipped with an eight (8) foot power cord that requires a 115 Volt, 60 Cycle, 1 Phase properly grounded
electrical receptacle. The power cord comes with a 3 prong plug for grounding purposes. Any attempt to cut off the grounding
spike or to connect to an ungrounded adapter plug will void the warranty, terminate the manufactures responsibility and could result
in serious injury.
The circuit must be protected with a 15 or 20 amp fuse or breaker. The use of extension cords is not recommended with this unit.
1
OPERATION
Initial Start Up
After satisfying the installation requirements, the freezer is ready to operate. The unit will start when the power cord is connected to
a live electrical receptacle. If the Compressor and Condenser Fan are not running when the unit is initially connected to power,
check to make sure that the Temperature Control is not set to the ‘off’ position. Allow the unit to run a minimum of two (2) hours
before loading it with product.
Temperature Control
The Temperature Control, located behind the service panel in the rear of the cabinet, comes set at the midpoint position, #4, which
will maintain an average cabinet temperature of about 0 Deg F. To obtain cooler temperatures turn the Temperature Control
clockwise and vice versa. Allow the unit a minimum of six hours to fully respond to a control setting adjustment if the product is in
the cabinet.
Defrost
The Silver King freezer is a manual defrost unit. The unit should be defrosted whenever the walls accumulate a frost layer that is
1/4 inch thick. To defrost the unit, either turn the Temperature Control stem to the ‘off’ position (fully counterclockwise) or disconnect
the Power Cord from the electrical receptacle, and remove or open the Lid Assembly. After the frost has melted or come loose from
the walls, wipe out the cabinet interior. Do not attempt to scrape or chisel off the frost as you could do irreparable damage to the
unit.
MAINTENANCE
Preventative maintenance is minimal although these few steps are very important to continued operation and maximizing the life of
the appliance.
Cabinet Surfaces
The interior and exterior surfaces are stainless steel and should be cleaned periodically with a solution of warm water and a mild
soap, rinsed with clean water and wiped dry. A good stainless steel cleaner can also be used. Should a surface become stained or
discolored, do not attempt to clean with an abrasive cleaner or scouring pad. Use a soft cleaner and rub with the grain of the metal
to avoid scratching the surface. Always rinse and dry afterwards. Do not use chlorinated cleaners on the stainless steel.
Condenser
Periodically, dust accumulated on the Condenser should be removed. First, disconnect the unit from the power supply. Remove
the service panel to expose the Condenser. Remove the accumulated dust by vacuuming or blowing air through the coil. This
procedure will save on Compressor running time (electrical costs) and also extend the life of the Compressor.
Casters
Retighten the Casters to the base of the unit regularly to prevent damage to the base of the cabinet.
MODEL
SERIAL NO.
DATE INSTALLED
2
MANUAL TECNICO
CONGELADOR PORTATIL SILVER KING
MODELO SKFS2
Gracias por comprar la maquinaria de servicios de alimentación Silver King. Nuestro objetivo es otorgar a nuestros clientes la
mejor maquinaria de la industria actual. Sírvase leer este manual y la información acerca de la garantía que lo acompaña antes de
poner en funcionamiento su nueva unidad Silver King. Asegúrese de completar y enviar por correo la tarjeta de garantía dentro de
los 10 días posteriores a la compra a fin de ratificar su garantía.
INSPECCIONE LA UNIDAD EN BUSCA DE DAÑOS Y DESEMBALE
Cuando reciba su nueva unidad Silver King, desembálela inmediatamente y controle que no haya sufrido daños durante el
transporte siguiendo las instrucciones impresas en la parte externa del envase. Si encuentra daños, infórmelo a la empresa
responsable del transporte y presente inmediatamente un reclamo ante cualquier prueba de maltrato. Si presenta un reclamo,
conserve todo el material de embalaje.
INSTALACION
El exterior del gabinete de acero inoxidable ha sido protegido por una cubierta de plástico en la fabricación y envío. Esta cubierta
puede ser retirada antes de la instalación. Una vez retirada la cubierta, lave las superficies internas y externas utilizando una
solución de agua jabonosa y tibia y una esponja o paño, enjuague con agua limpia y seque.
Rueditas
La unidad trae rueditas instaladas. Asegúrese que las rueditas estén instaladas firmemente en la base del gabinete para evitar
daños en la base.
Ubicación
Al elegir una ubicación para su nuevo congelador, debe tener en cuenta la conveniencia y facilidad de acceso, pero debe seguir las
siguientes pautas de instalación;
• La unidad debe estar instalada derecha.
• Deje un espacio de al menos 15 centímetros (6 pulgadas) en ambos extremos para permitir una circulación de aire adecuada a
través de los paneles de ventilación. La unidad debe tener un espacio abierto en la parte superior para permitir el acceso a los
productos.
• Evite colocar el refrigerador cerca de un horno, elemento calefactor o fuente de aire caliente, que pueda afectar el
funcionamiento de la unidad.
Conexiones Eléctricas
Asegúrese de revisar la placa de datos ubicada en el revestimiento del gabinete para ver el voltaje requerido antes de conectar la
unidad a una fuente eléctrica. Las especificaciones en la placa de datos sustituyen cualquier discusión posterior.
El congelador estándar está equipado con un cable de transmisión de energía de 2,43 metros (8 pies) que requiere un receptor
eléctrico con descarga a tierra de 230 Voltios, 50 Ciclos, 1 Fase. El cable de transmisión de energía incluye un enchufe de tres
patas para la descarga a tierra. Cualquier intento de cortar la pata de descarga a tierra o de conectar el enchufe a un adaptador
que no posea descarga a tierra anulará la garantía, eximirá a los fabricantes de responsabilidad y podría resultar en un serio daño.
El circuito debe estar protegido con un fusible o interruptor de 15 o 20 amperios. La unidad debe estar aislada en un circuito y no
debe conectarse a una prolongación del cable.
3
OPERACION
Arranque inicial
Una vez cumplidos los requisitos de instalación, el congelador está listo para comenzar a funcionar. La unidad comenzará a
funcionar cuando se conecte el cable de transmisión de energía a una fuente de energía cargada. Si el Compresor y el Ventilador
del Compresor no arrancan cuando enchufa la unidad, asegúrese que el Control de Temperatura no está en la posición de
“apagado”. Deje la unidad funcionando por (2) dos horas como mínimo antes de colocar productos en ella.
Control de Temperatura
El Control de Temperatura está ubicado en el trasera de la unidad en la esquina inferior a la derecha. Para obtener
temperaturas más bajas gire la aguja de Control de temperatura en el sentido de las agujas del reloj y viceversa.
Espere un mínimo de dos horas para que la unidad responda a un ajuste de control.
Descongelamiento
El expendedor de mercaderías para mostrador Silver King es una unidad de descongelamiento manual. La unidad
debe ser descongelada cada vez que las paredes acumulen una capa de escarcha de un grosor de 0,63 centímetros
(1/4 pulgada). Para descongelar la unidad, lleve el Control de Temperatura a la posición de .apagado. (en sentido
contrario a las agujas del reloj) o desconecte el cable de transmisión de energía del receptor eléctrico, y retire la Tapa.
Una vez que la escarcha se haya derretido o aflojado de las paredes del gabinete, limpie el interior del gabinete. No
intente raspar o tratar de retirar la escarcha con un cincel ya que podría producir un daño irreparable al gabinete.
.
MANTENIMIENTO
El mantenimiento preventivo es mínimo, aunque estos pocos pasos son muy importantes para que la unidad siga funcionando y
para maximizar la vida útil del artefacto.
Superficies del Gabinete
El interior del gabinete es de aluminio y acero inoxidable y el exterior es de acero inoxidable. Debe limpiar las superficies en forma
periódica con una solución de agua tibia y jabón suave, luego enjuagar y secar con un paño suave. También puede utilizar un
buen limpiador de acero inoxidable. Si alguna superficie se oxidara o manchara, no intente limpiarla con un limpiador abrasivo o
una esponja áspera. Utilice un limpiador suave y frótelo con el granulado del metal para evitar rayar la superficie. Siempre
enjuague y seque las superficies después de limpiarlas. No utilice limpiadores clorinados sobre el acero inoxidable..
Condensador
El polvo acumulado en el condensador debe ser retirado en forma periódica. En primer lugar, desconecte la unidad de la fuente de
energía. Retire el panel de servcio para exponer el Condensador. Retire el polvo acumulado aspirando o soplando aire a través
de la bobina. Este procedimiento ahorrará Tiempo de Funcionamiento del Compresor (costos eléctricos) y extenderá la vida útil del
Compresor.
Rueditas
Ajuste las Rueditas en la base de la unidad en forma regular para evitar daños en la base del gabinete.
MODELO
NUMERO DE SERIE
FECHA DE INSTALACION
4
5
WHEN ORDERING REPLACEMENT PARTS, PLEASE PROVIDE MODEL AND SERIAL NUMBERS.
6
7